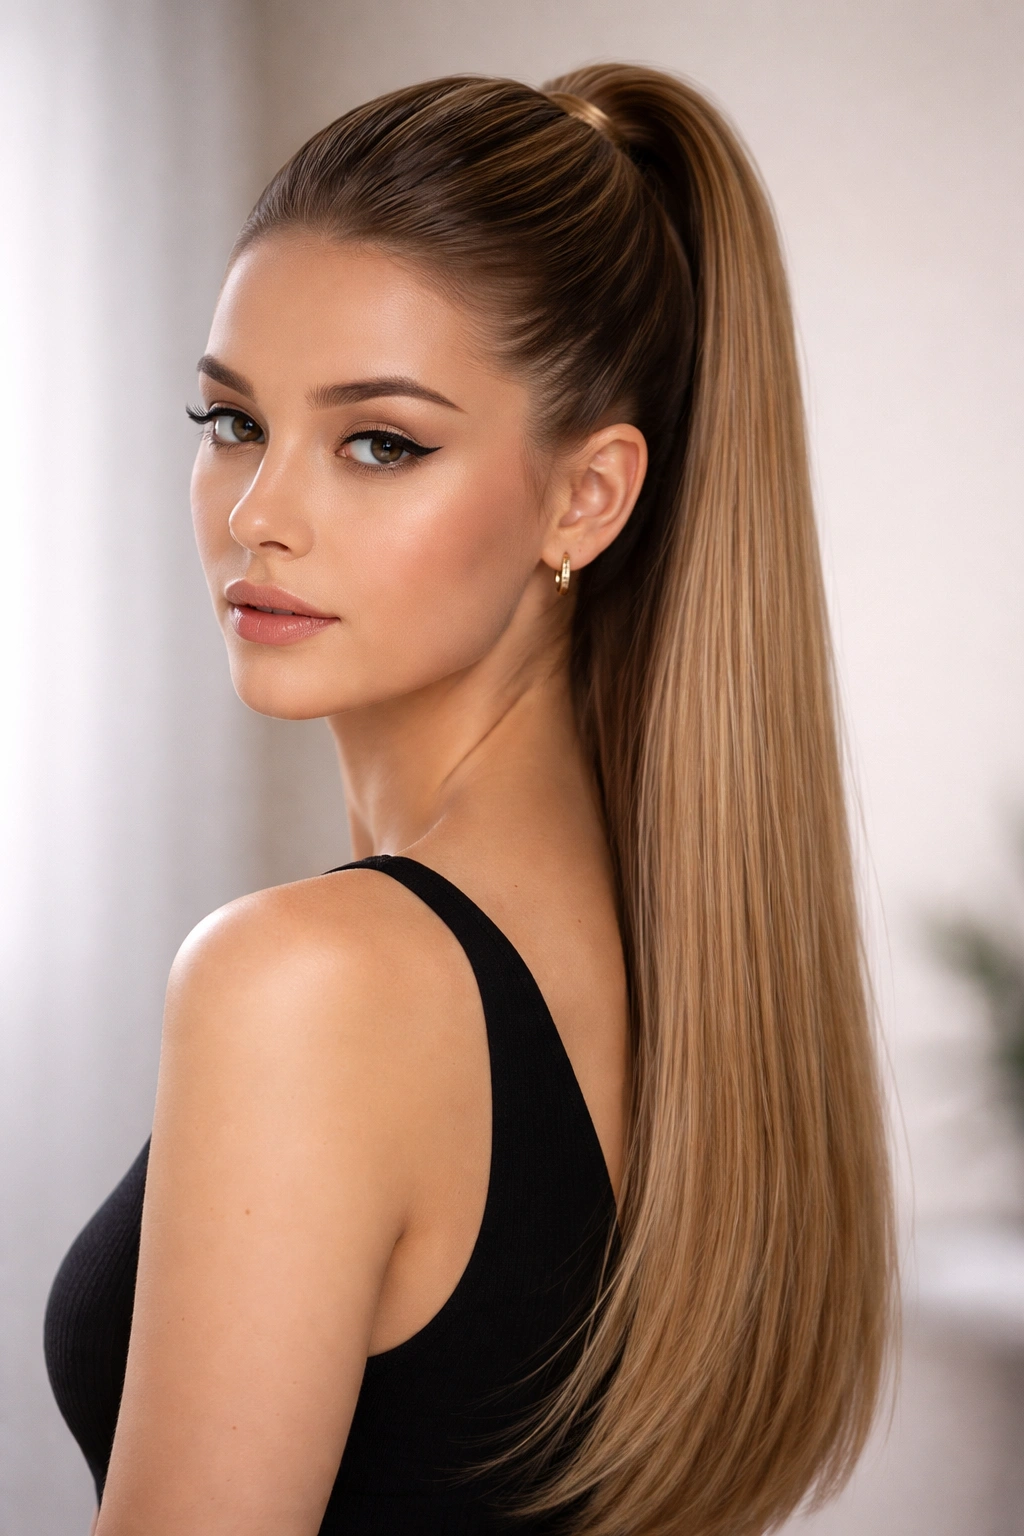
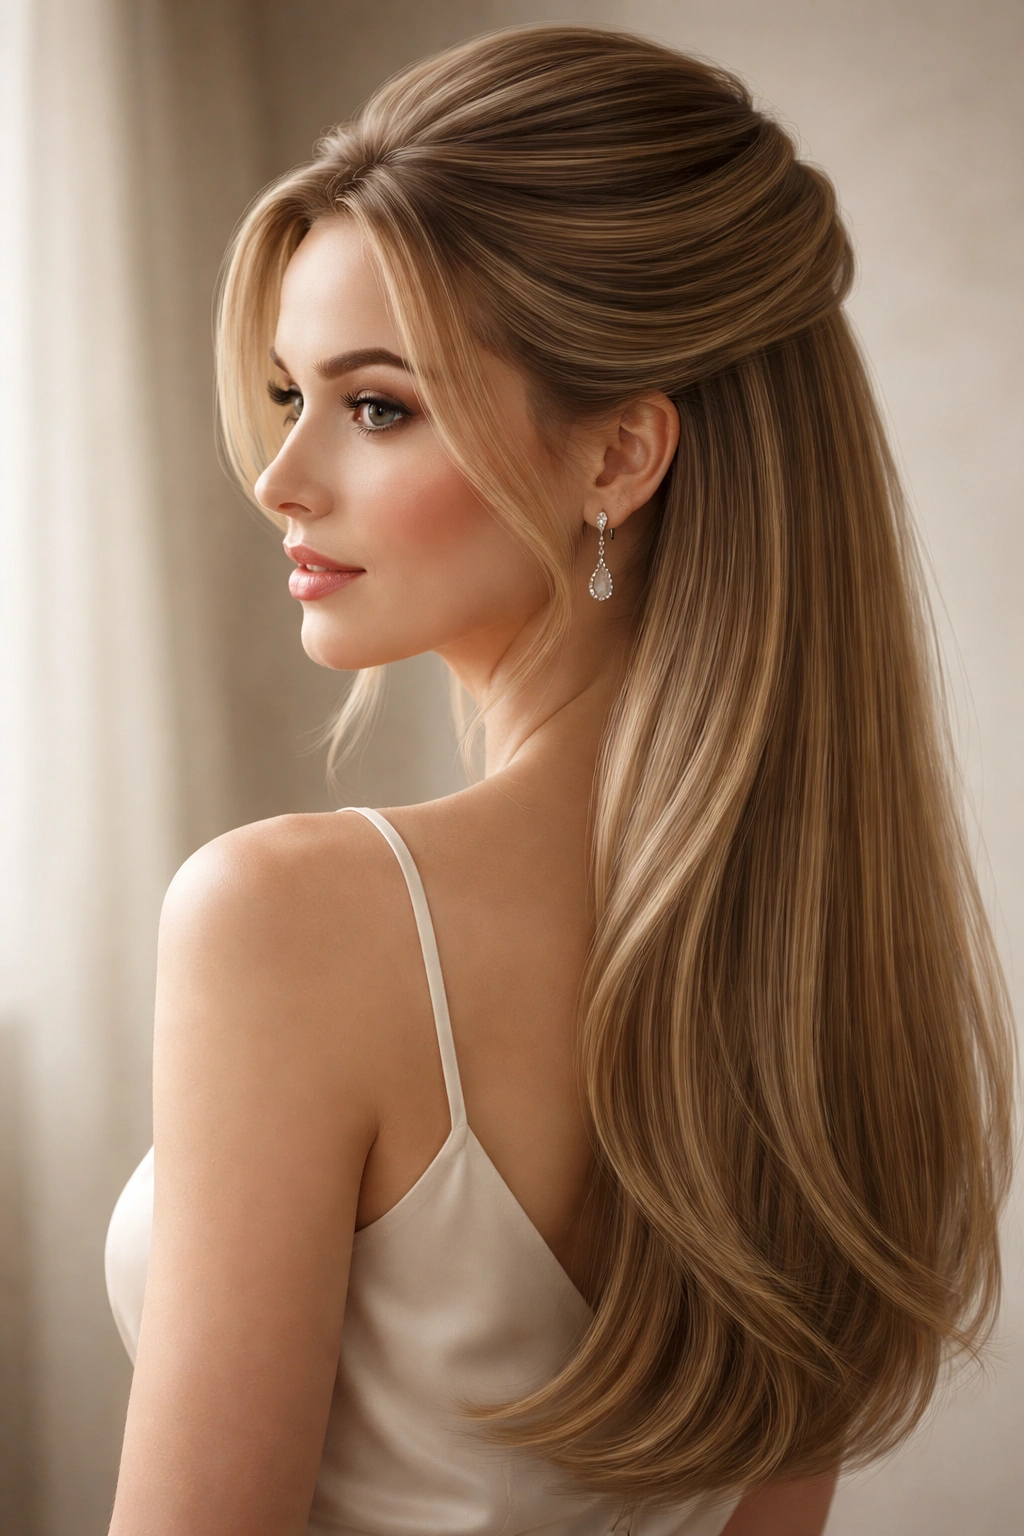
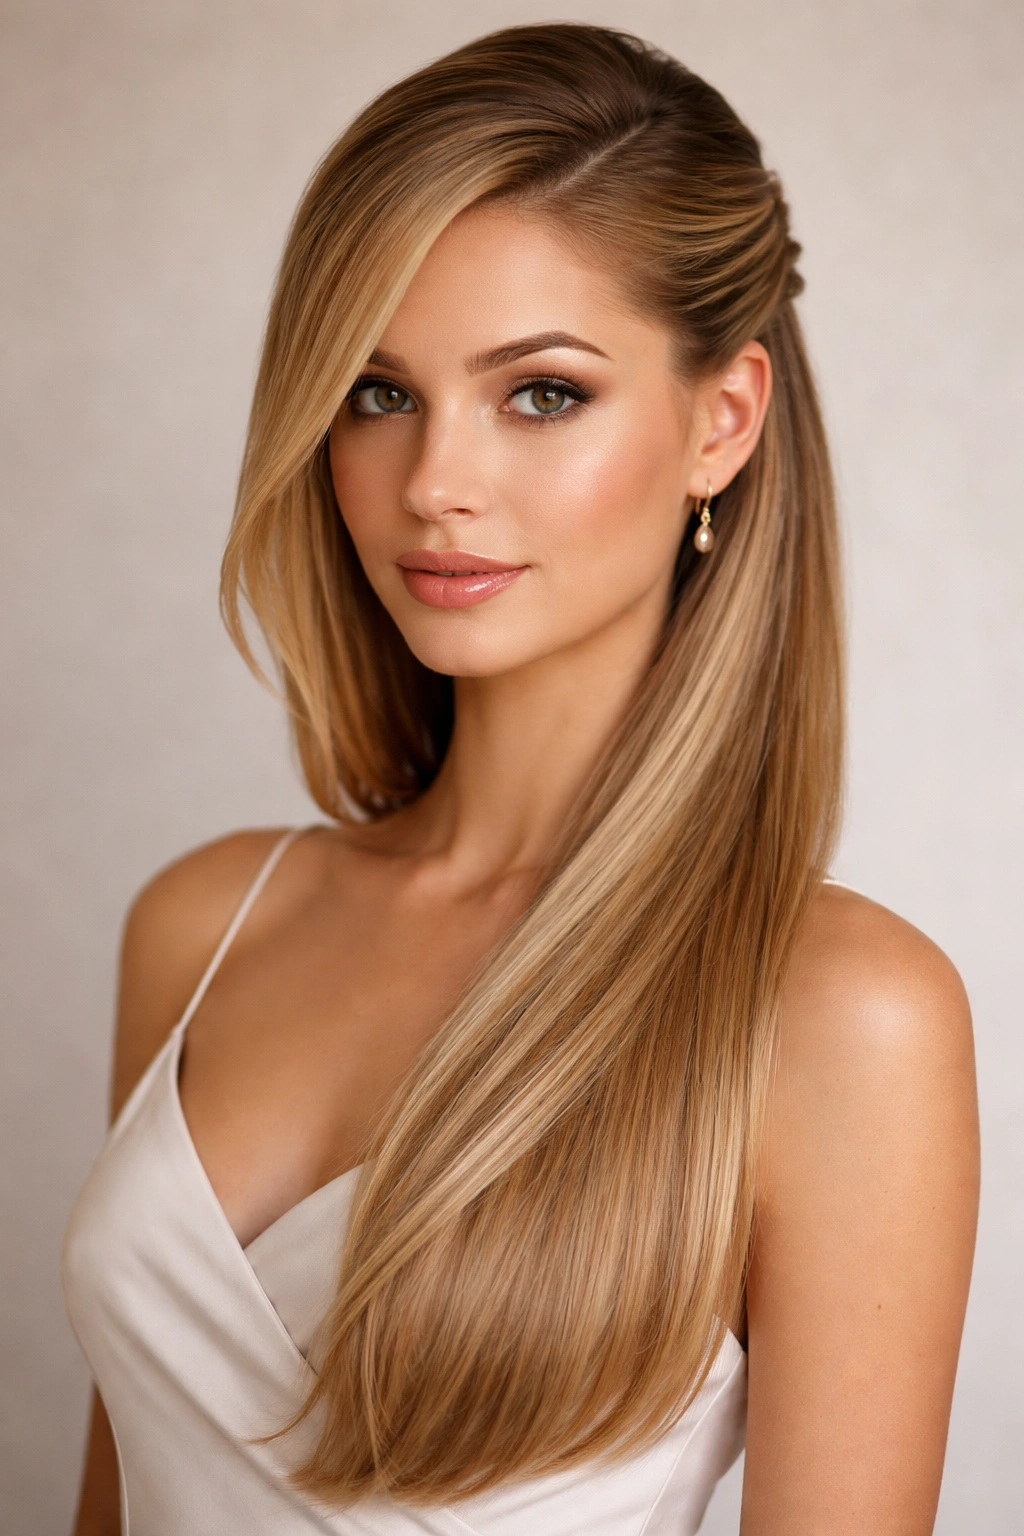
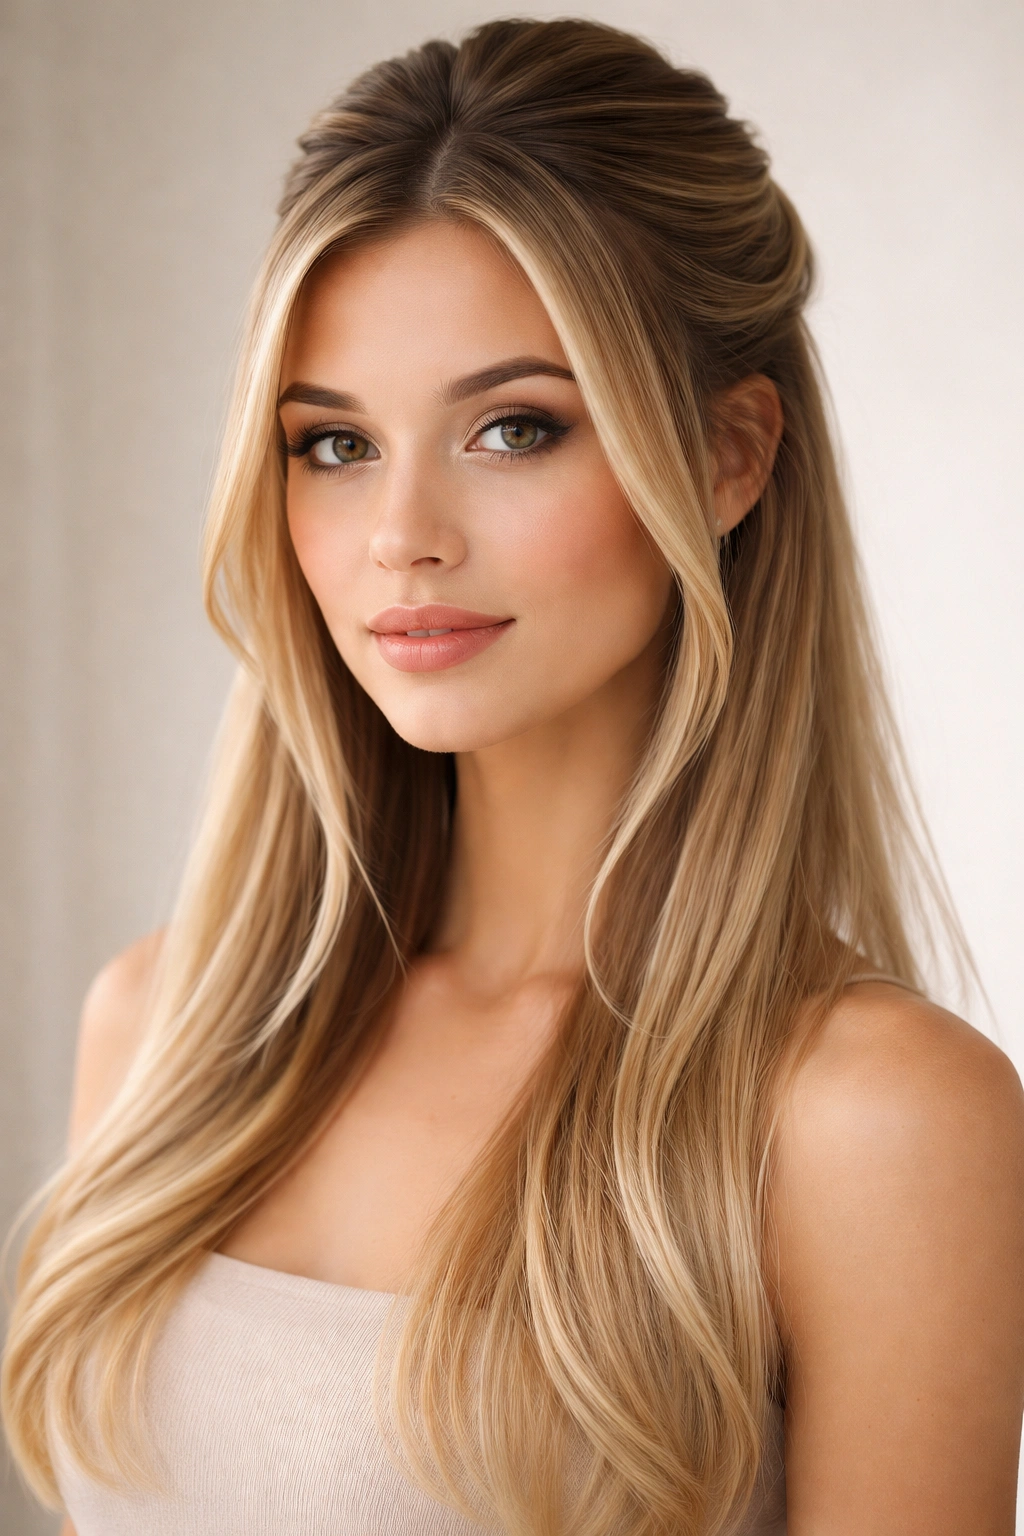
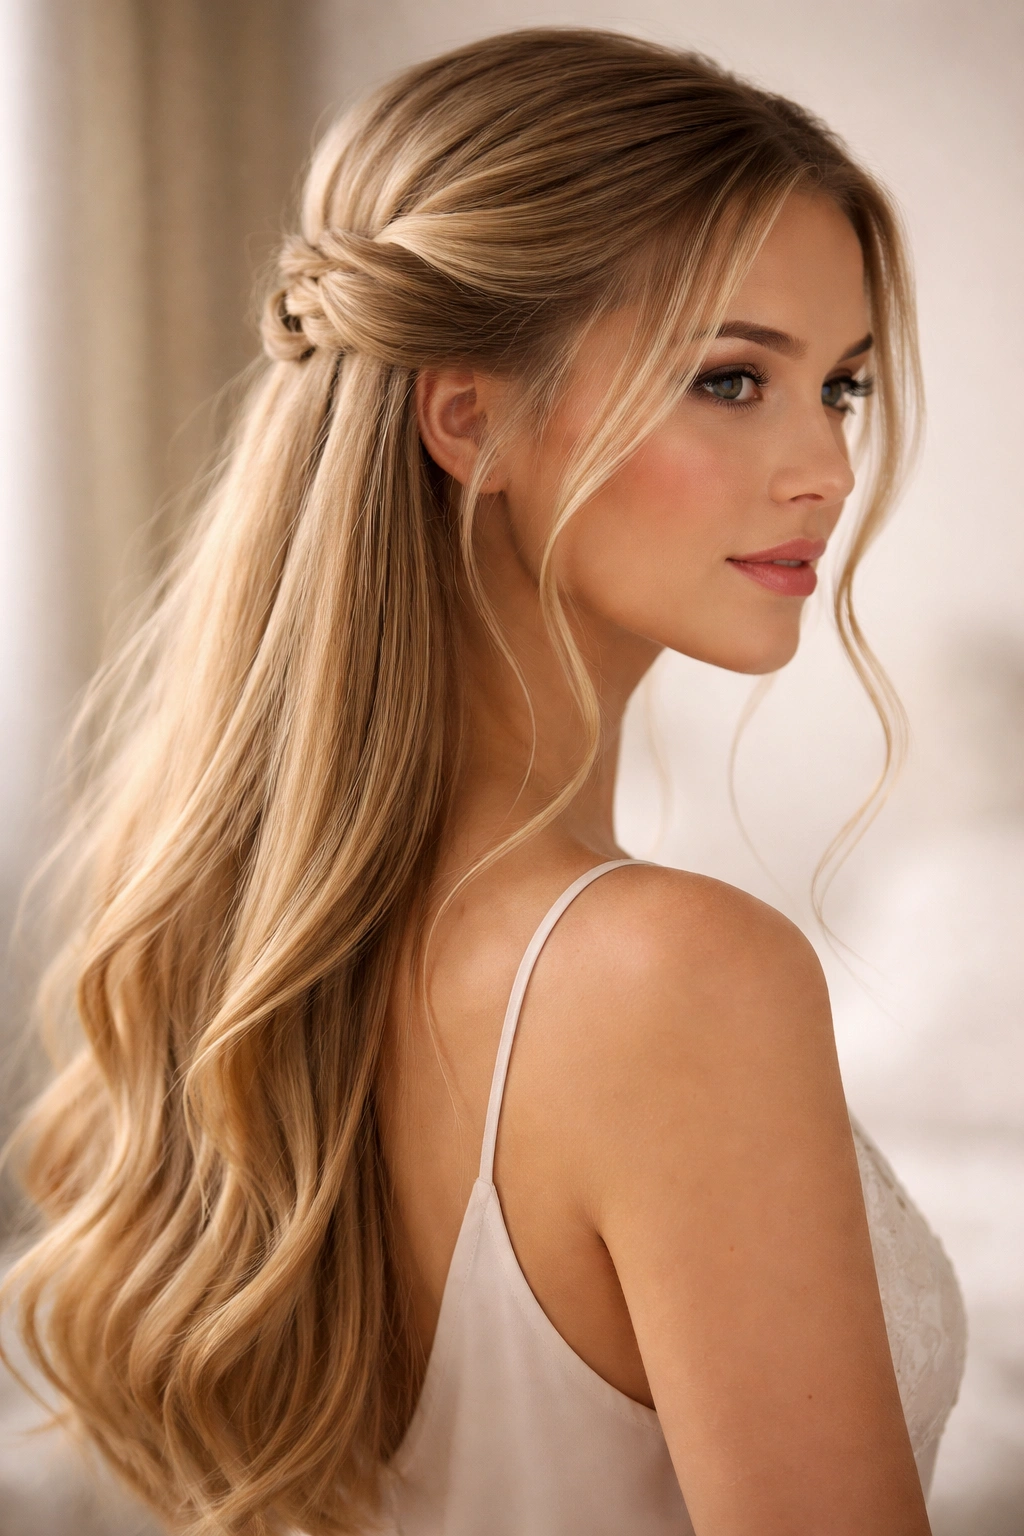
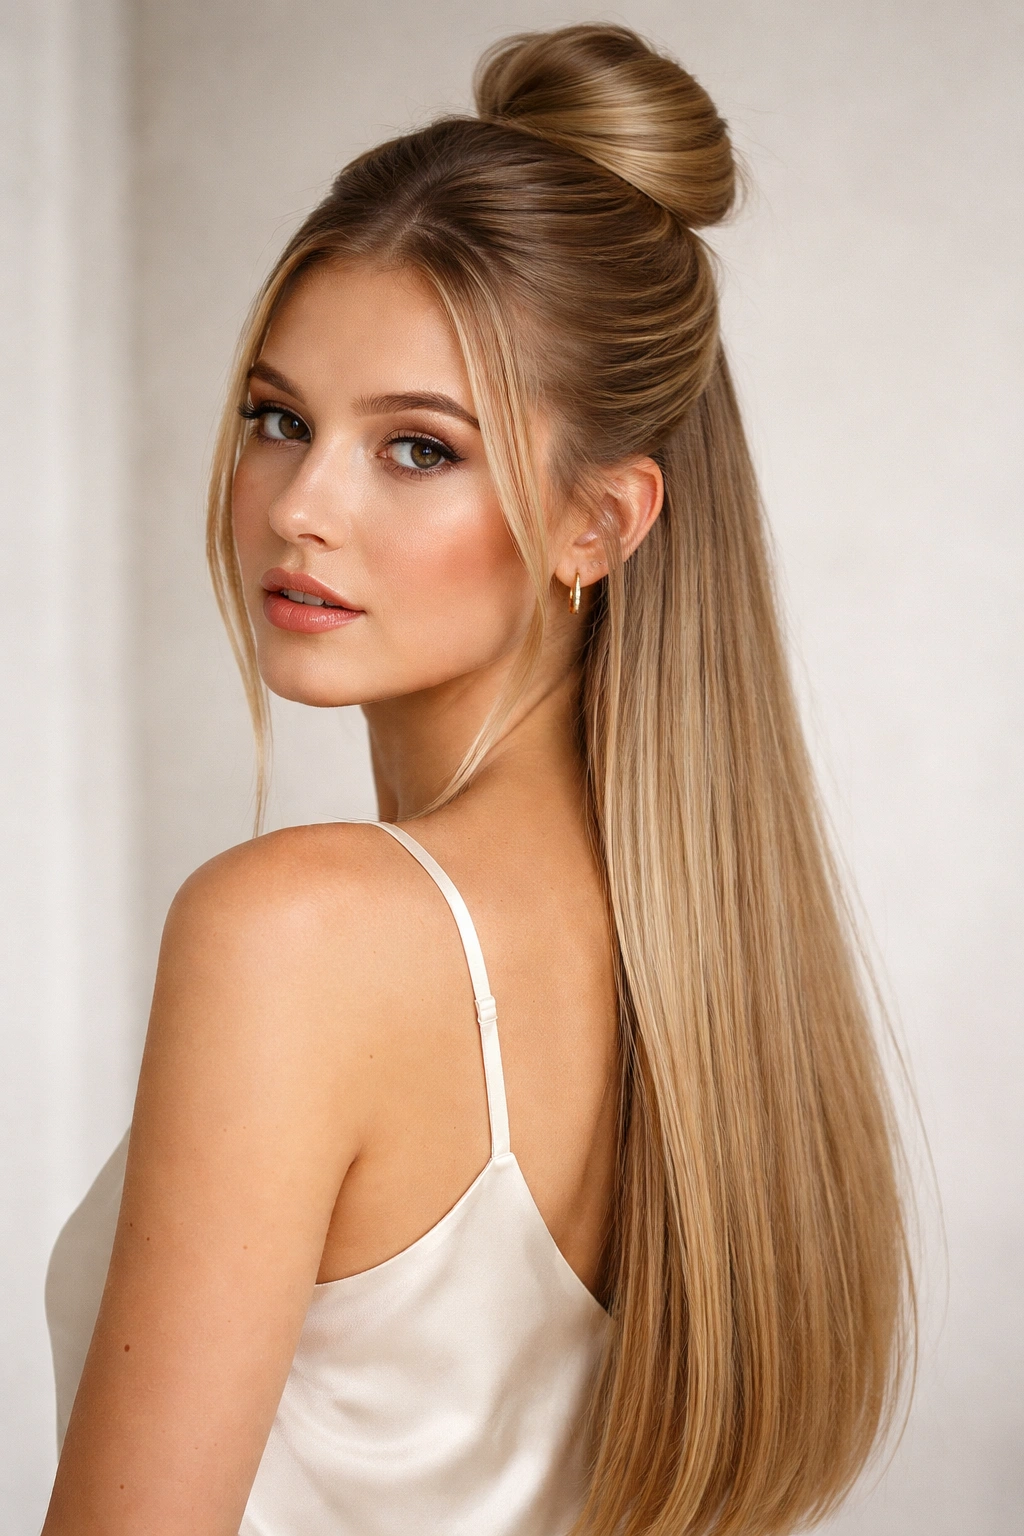
For those days when you want a polished, put-together look without committing to a full updo, the half up half down style strikes the perfect balance—and it’s especially stunning on straight hair. The geometry of straight strands gives you a clean canvas to work with, creating crisp lines, sharp angles, and a polished finish that can go from office-appropriate to evening-ready in seconds.
What makes the half up half down style so versatile is its refusal to choose a side. You get the sophistication of an updo with the romance of down hair. It can be as simple as a quick twist or as intricate as a woven braid, and straight hair’s natural smoothness means you can achieve these looks with minimal fussing. Whether you’re aiming for understated elegance or dramatic flair, there’s a half up half down variation that fits your vibe.
The styles below range from classic twisted versions to modern interpretations with braids, loops, and textured details. Each one works beautifully on straight hair, and most can be styled in 10 minutes or less once you understand the technique. You’ll learn the specific steps, the best occasions for each style, and the tweaks that make them work for different hair lengths and thicknesses.
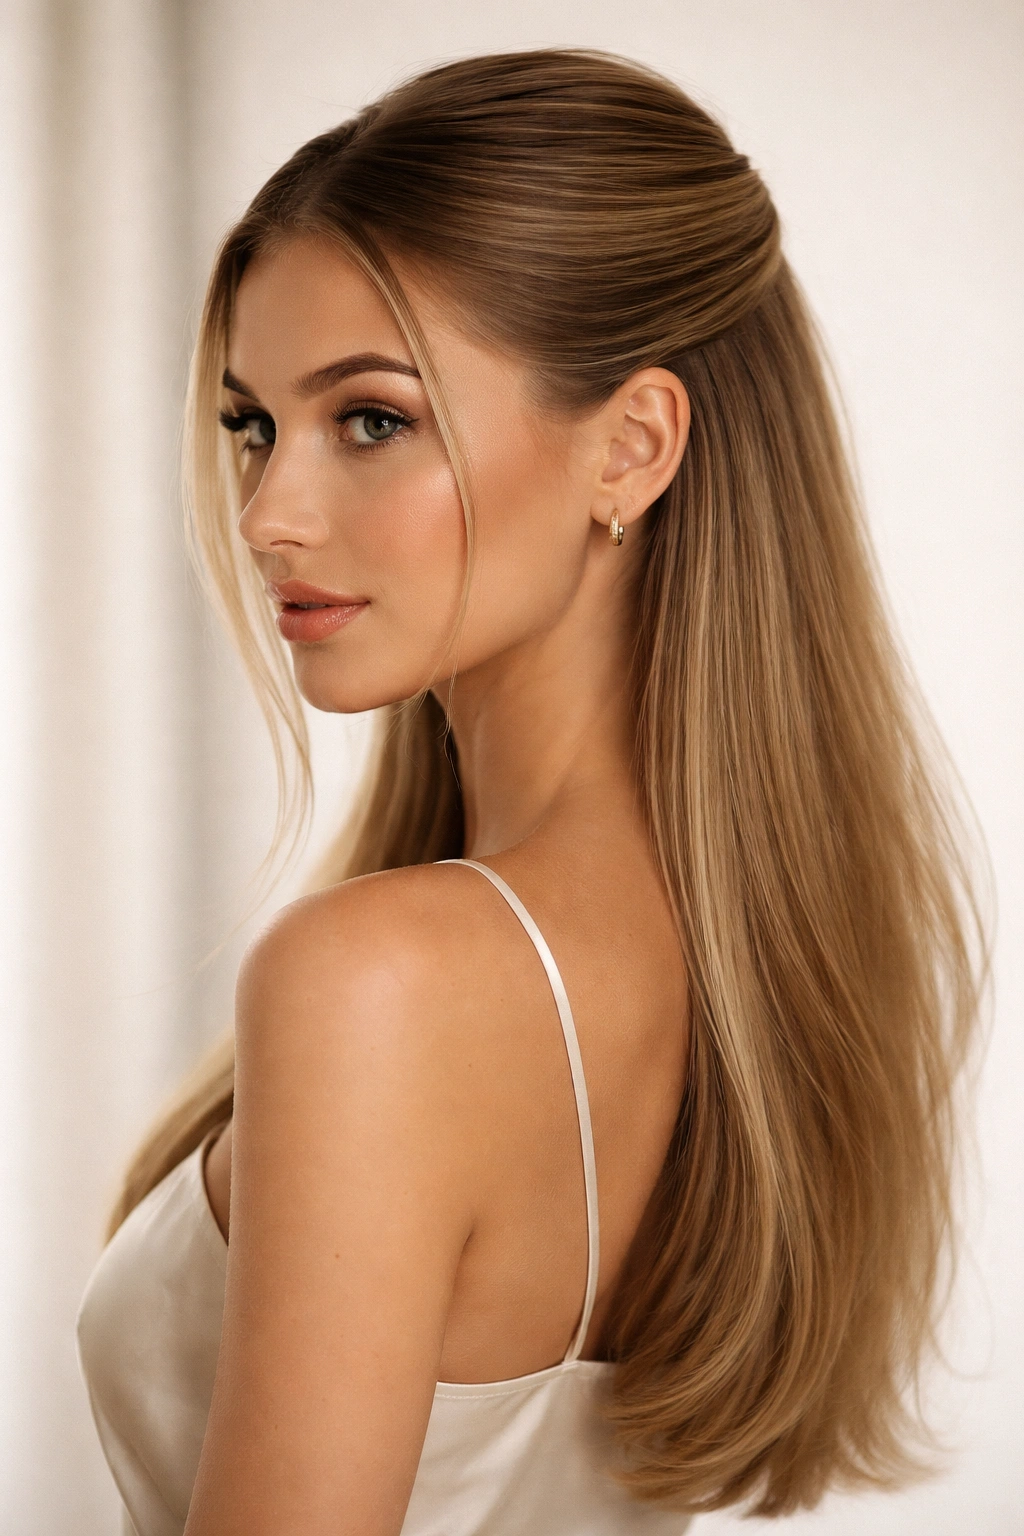
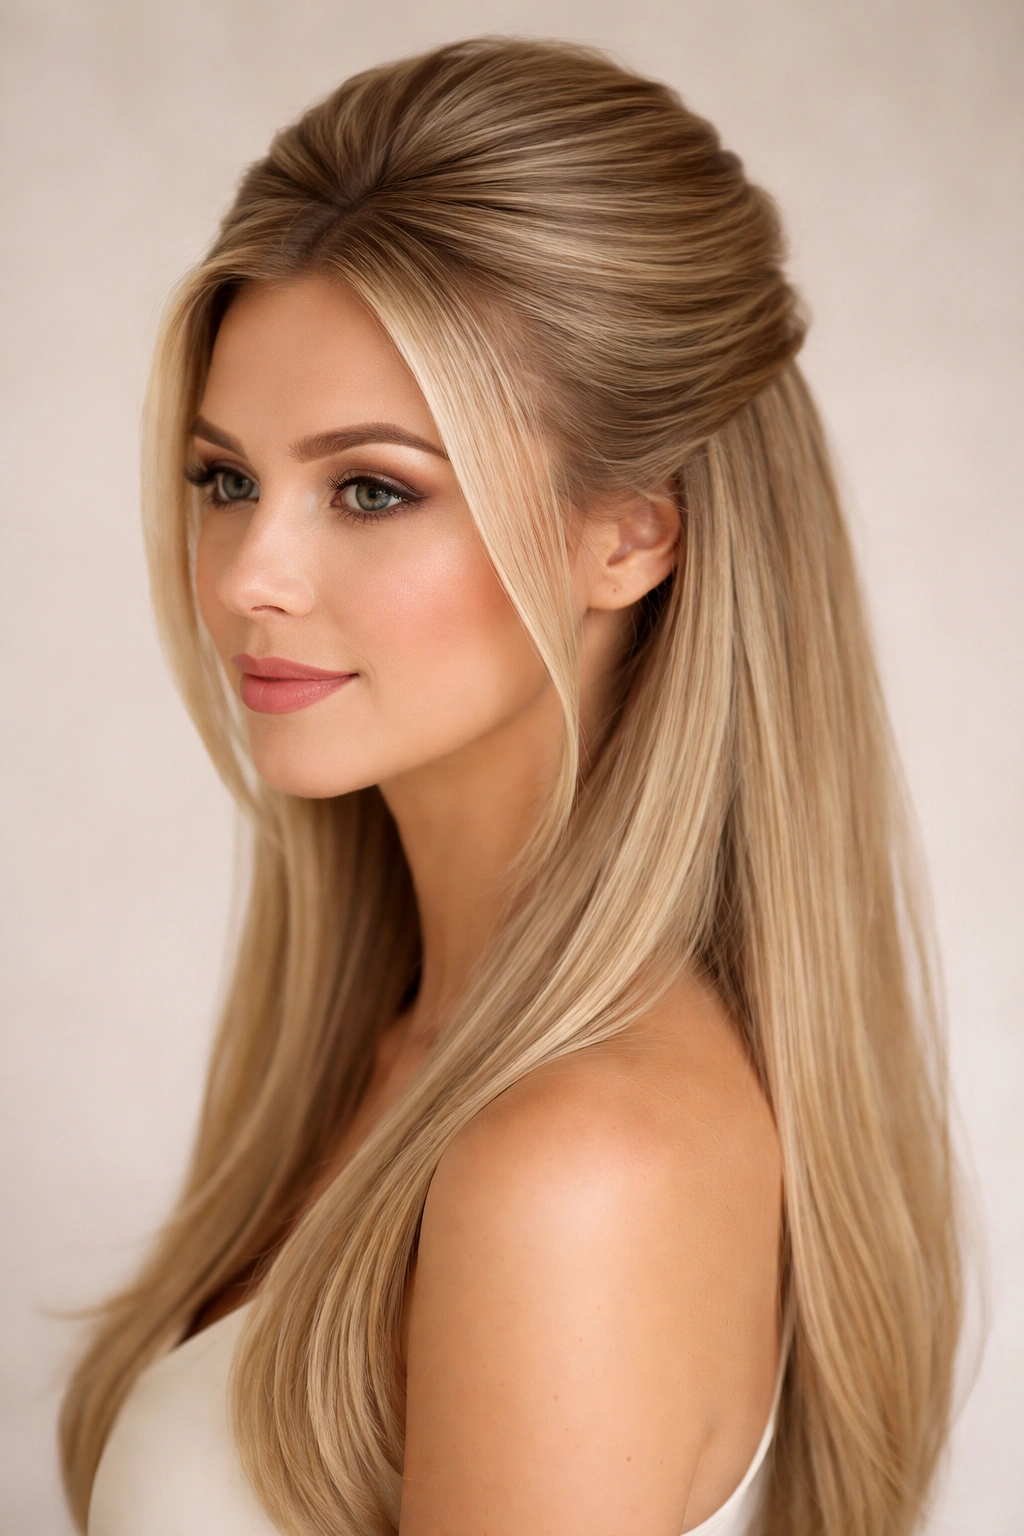
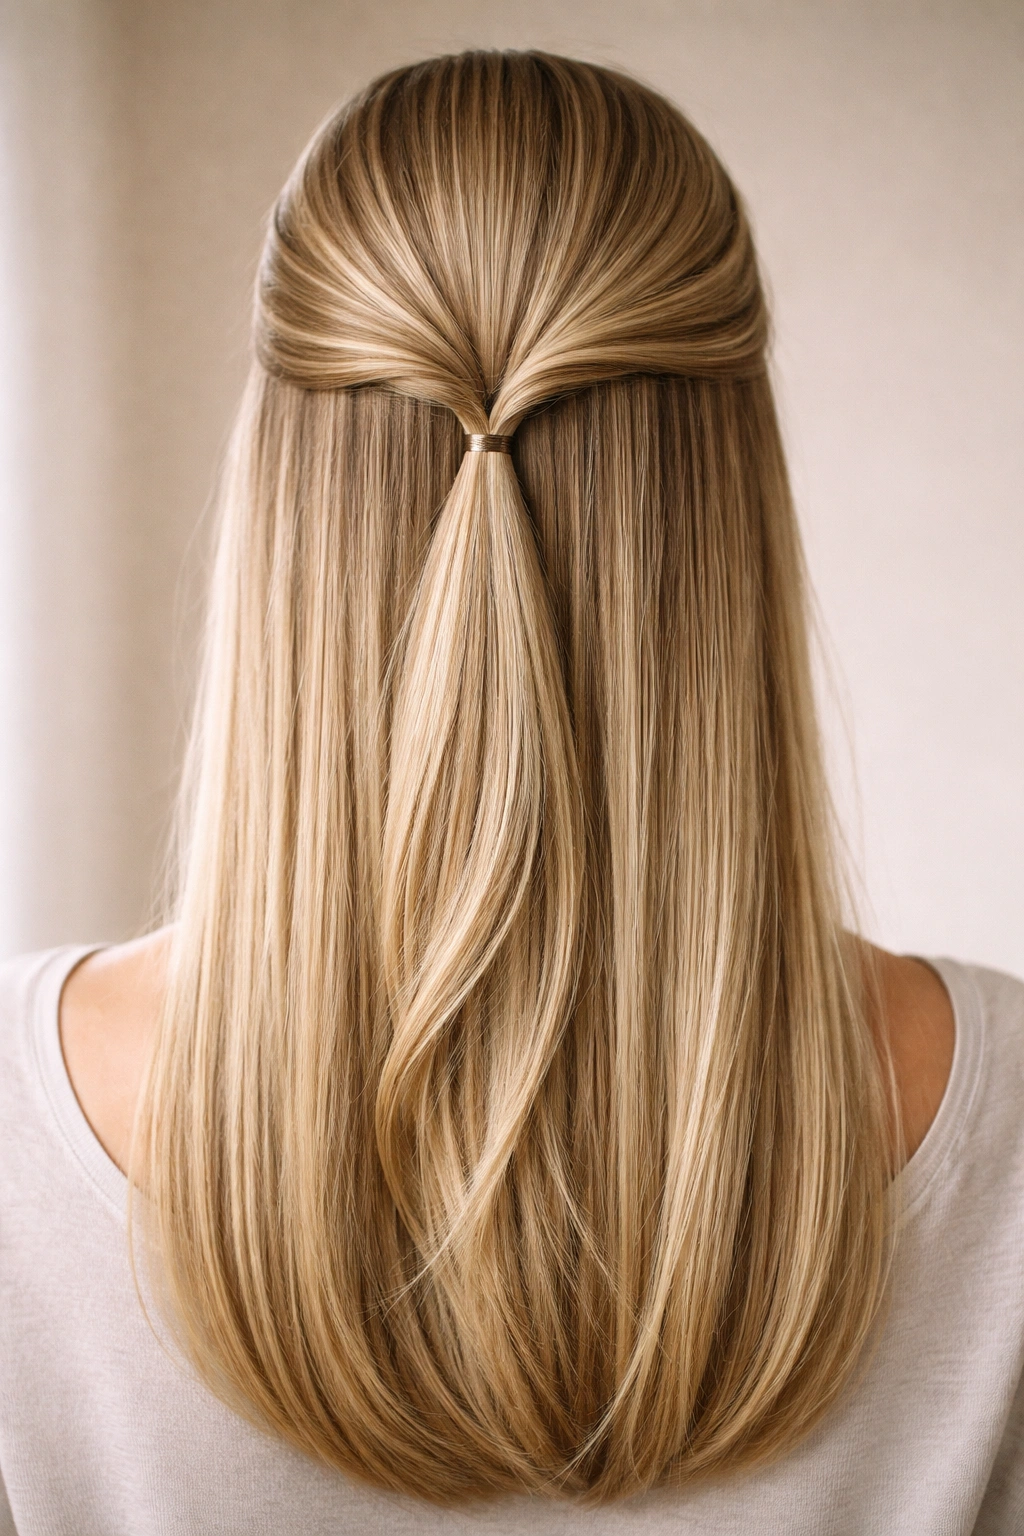
1. Classic Twisted Half Up
This is the foundation style that works for absolutely everyone with straight hair. You’re taking a section from each side of your head at temple level, twisting each section loosely, and securing them together at the back of your crown with a small elastic or bobby pins.
Why It’s Endlessly Elegant
The beauty of the classic twisted half up lies in its simplicity and sophistication. Because straight hair naturally falls in smooth lines, your twists will have a clean, intentional appearance that reads as polished rather than casual. The style frames your face without any fullness, creating a refined silhouette that works for both professional settings and casual outings.
How to Perfect the Classic Twist
- Brush your hair thoroughly to create a smooth base—straight hair shows every bump and inconsistency
- Section off hair from each temple, about 1 to 1.5 inches wide from the scalp line
- Twist each section loosely away from your face, holding tension as you twist down toward the back
- Meet the two twists at the center back of your crown, just above where you’d normally tie a full ponytail
- Secure with a thin elastic, silk bobby pins, or a decorative clip for a finished look
- Leave the bottom half of your hair completely straight and smooth
Pro tip: Let your twists sit for a minute before securing them. The slight bend will hold better and look more intentional than freshly twisted hair.
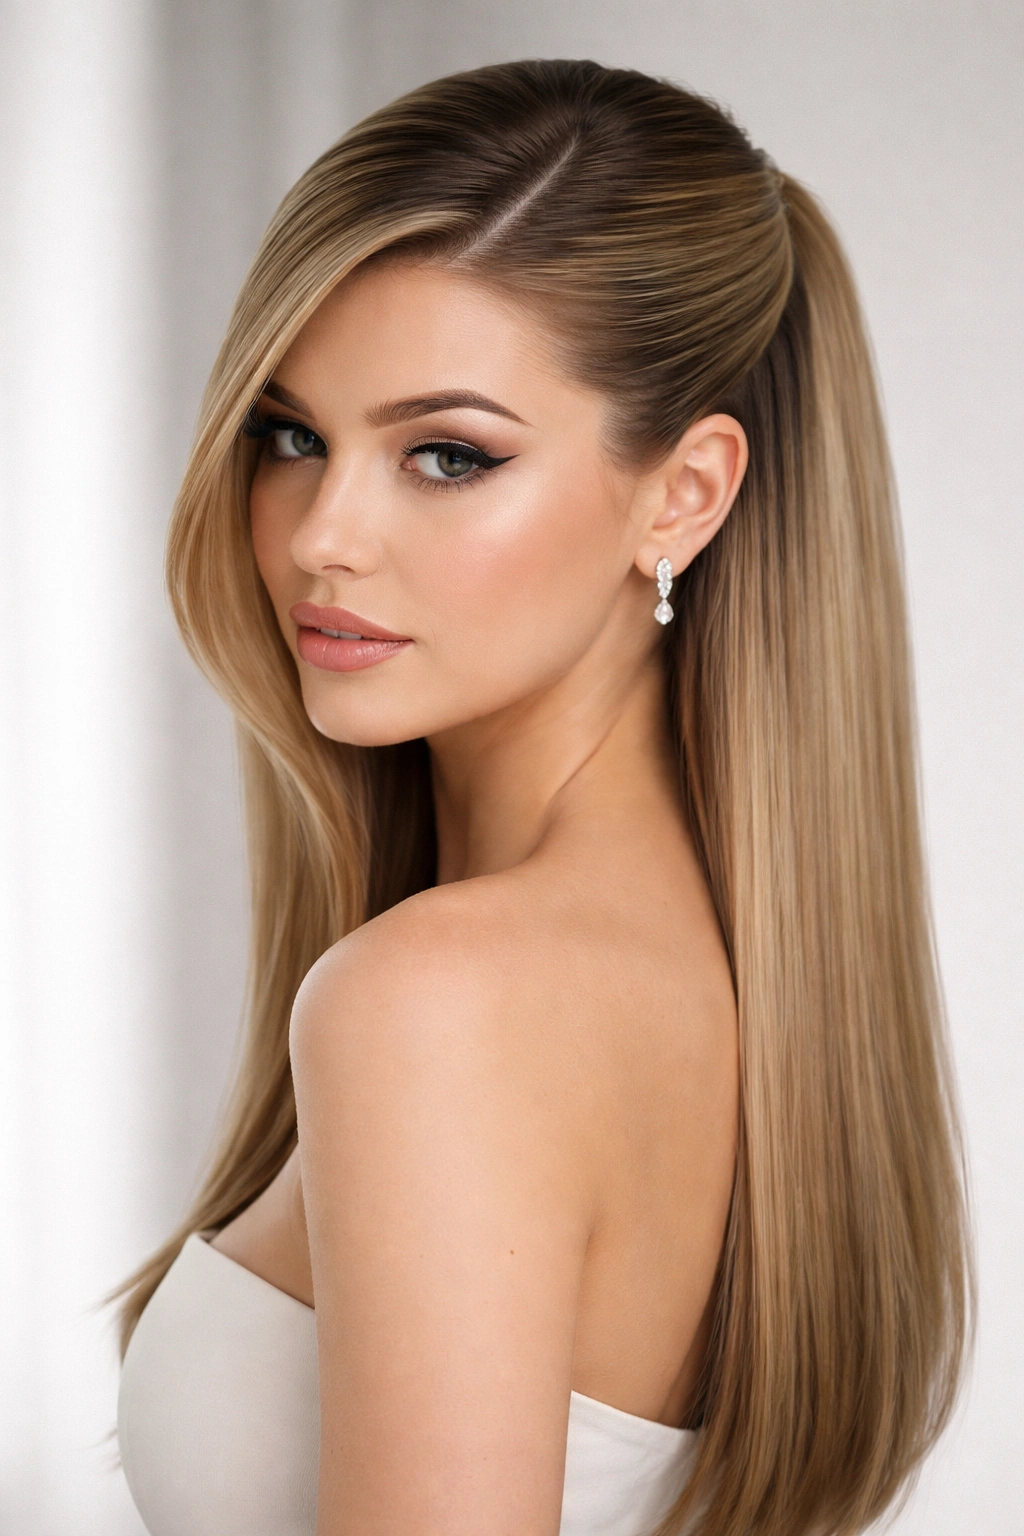
2. Sleek Ponytail Half Up
Transform the classic half up by securing the top section into a small, tight ponytail rather than just twisting it. This version gives you definition and creates a distinct visual separation between the half-up section and the flowing hair below.
The Modern Edge of a Half-Up Pony
This style reads as contemporary and intentional. Instead of a soft, romantic twist, you’re creating a sharper, more geometric look that photographs beautifully and holds up all day. On straight hair, the contrast between the smooth ponytail and the cascading length below creates striking visual interest.
Building a Picture-Perfect Half-Up Ponytail
- Section the hair from one temple to the other, separating about the top third of your head
- Brush this section back smoothly, eliminating any bumps or flyaways
- Gather it into a tight, secure ponytail at the crown with a thin elastic
- Use a fine-tooth comb to smooth any loose hairs and polish the appearance
- You can leave the ponytail as is, or twist it, braid it, or wrap a strand of hair around the elastic
- The hair below hangs completely straight, creating a clean break between the two sections
Worth knowing: Use a hair serum or smoothing cream on the top section to eliminate frizz and create that high-gloss finish that makes this style special.
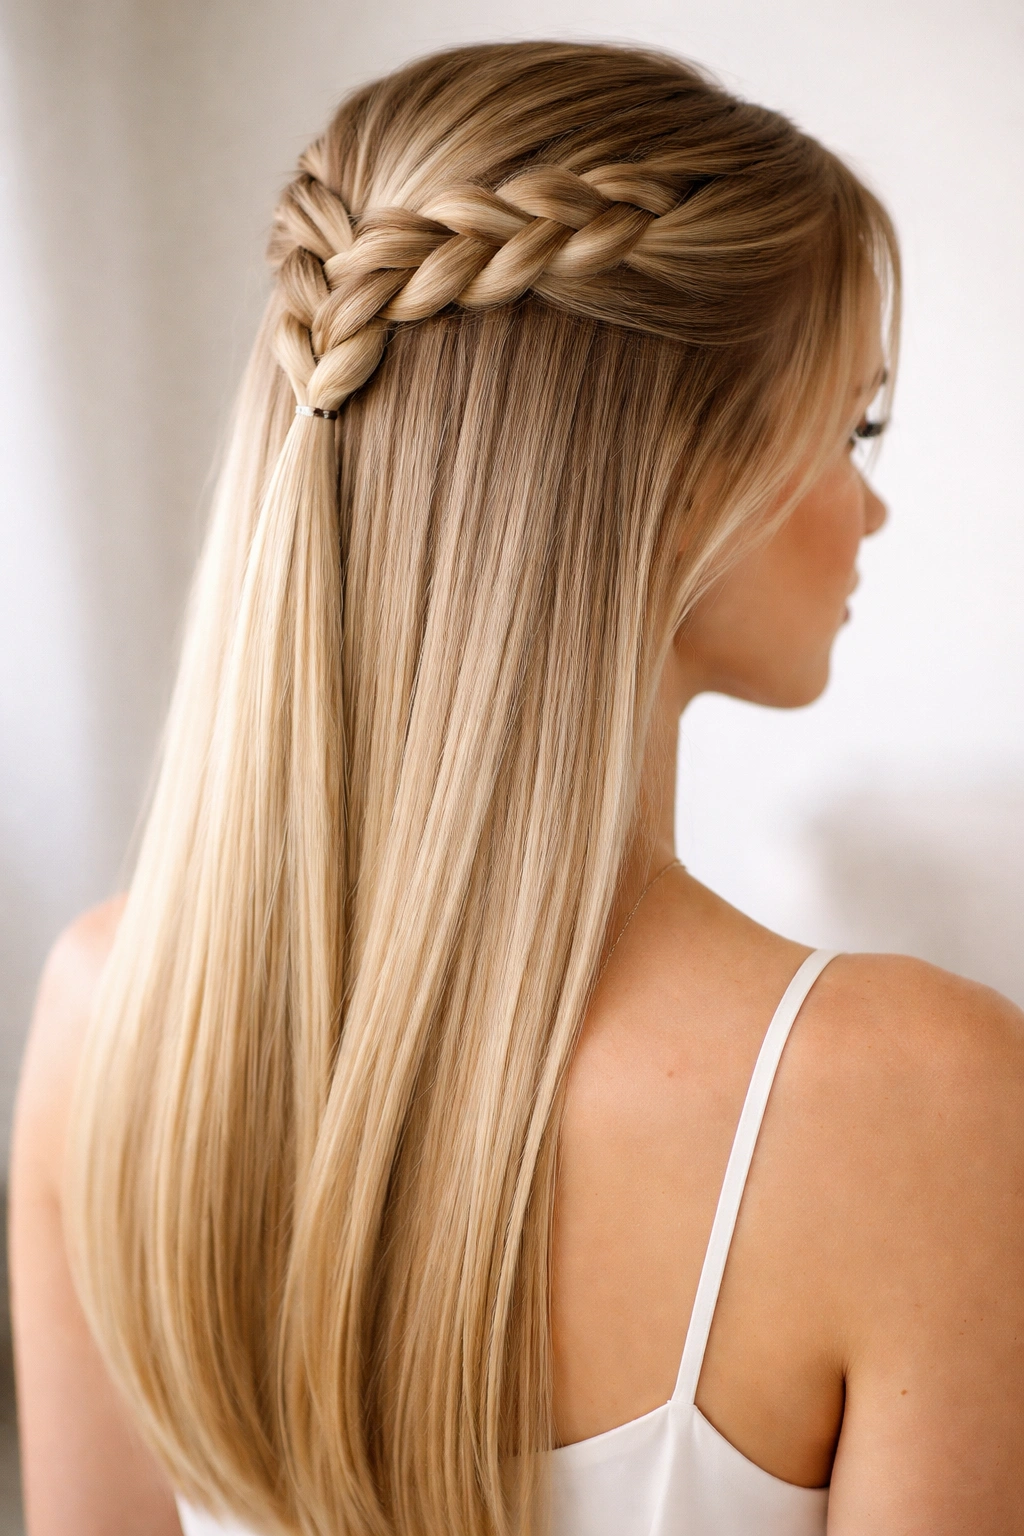
3. Braided Crown Half Up
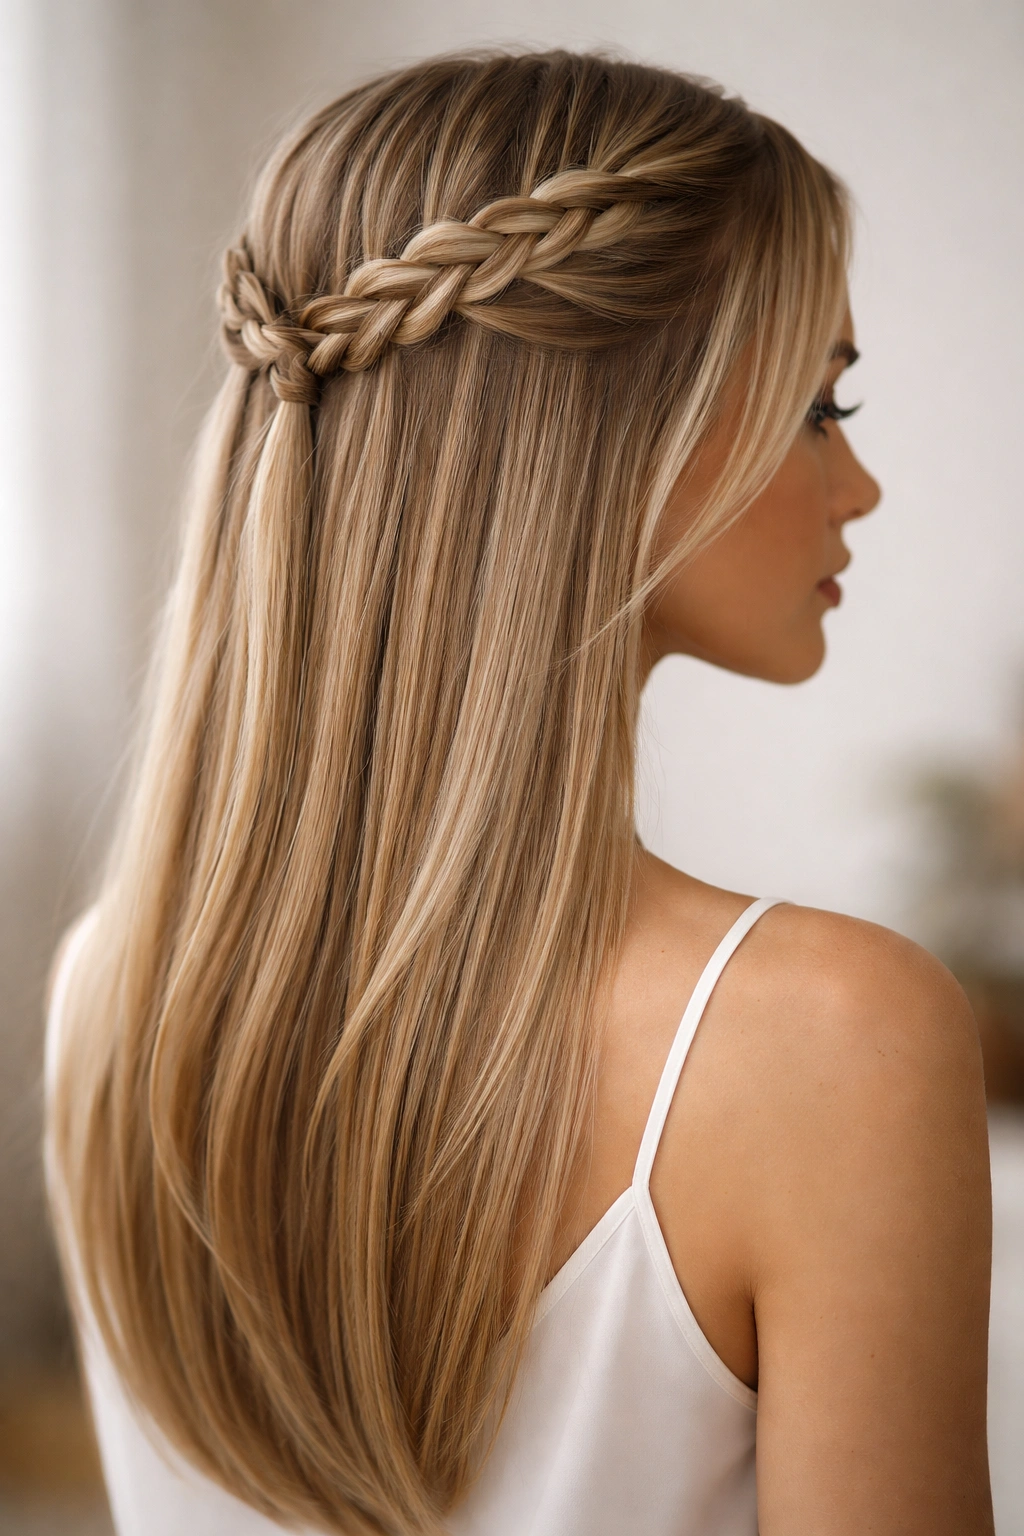
Instead of twisting, you’re incorporating a braid into the upper section. This can be a simple three-strand braid on each side, or a more intricate Dutch or French braid that weaves through the hair as it moves toward the back of the head.
Why Braids Elevate Straight Hair
Braiding on straight hair is deceptively effective because the smooth base makes every stitch of the braid visible and precise. You’re not fighting texture or trying to disguise flyaways—instead, your braiding technique becomes a focal point. The geometric precision of a braid on straight hair signals care and intention, making it feel elevated and intentional even when it’s quick to execute.
Executing the Braided Half-Up Look
- Section hair from temple to temple across the top of your head
- On one side, begin a three-strand braid at the temple, incorporating small sections as you braid back
- Braid the other side to match, aiming for symmetry and even tension
- Bring both braids together at the crown and secure with a small elastic
- Leave the braids slightly loose (not tight) so they have texture and dimension
- Pin any loose face-framing pieces and smooth the bottom half with a straightening product
Insider note: Braid slightly looser than you think necessary. Straight hair can look severe when braids are super tight, but a relaxed braid reads as effortless and elegant.
4. Textured Knot Half Up
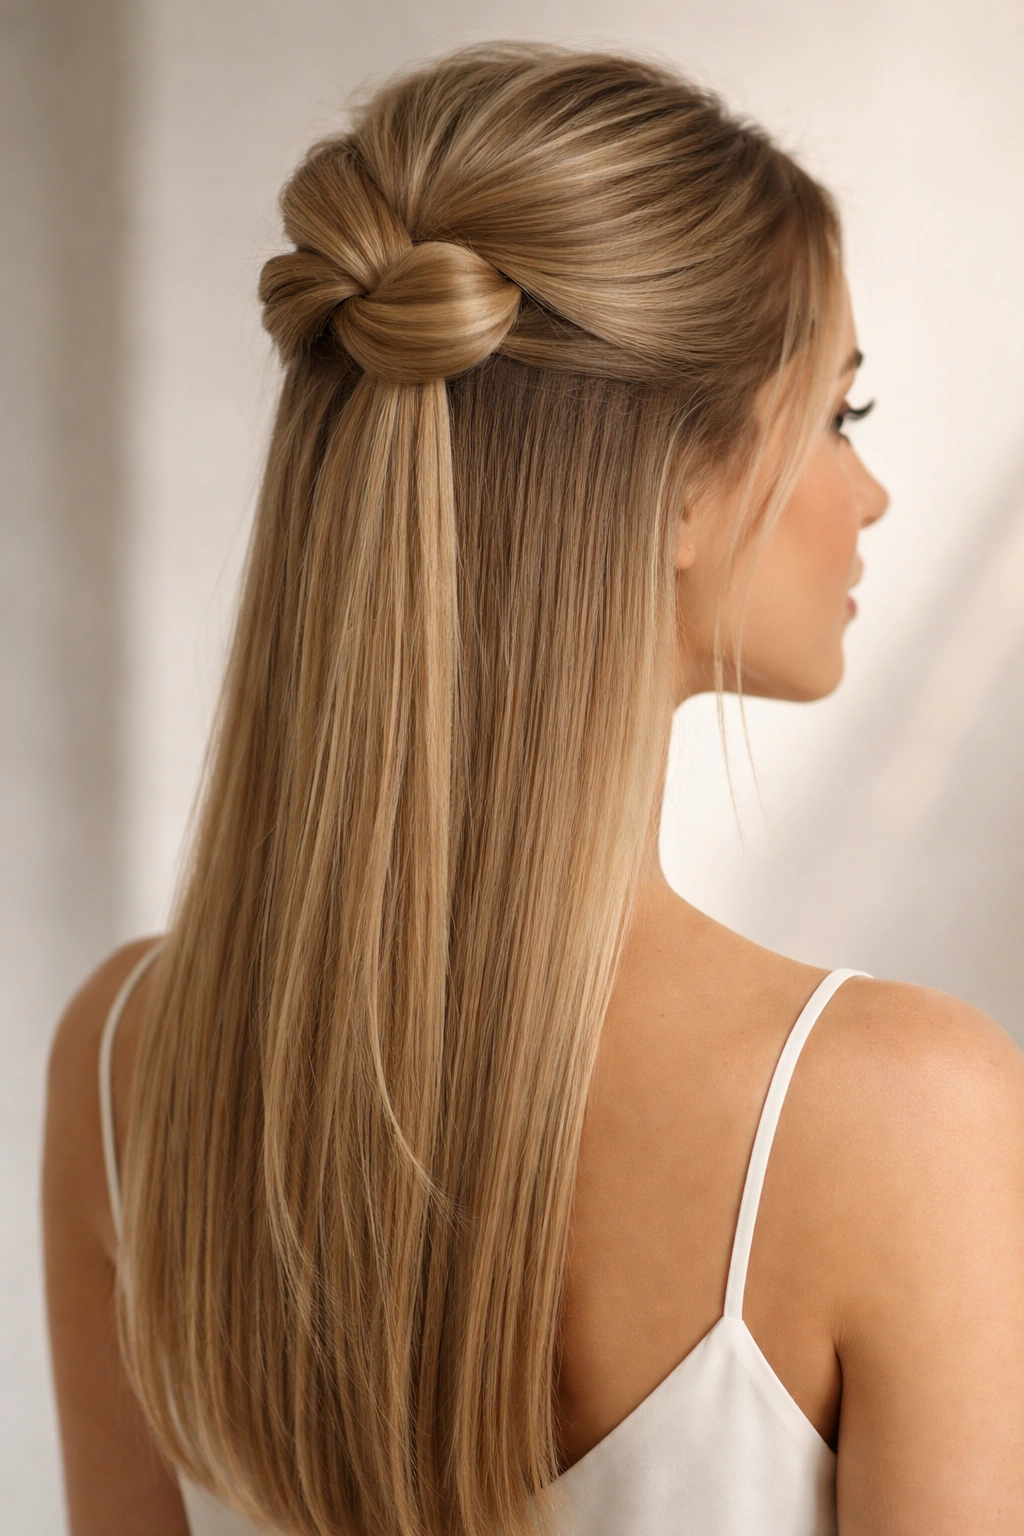
Create a half-up style by tying the upper section into an actual knot instead of a twist or braid. This surprisingly sophisticated option looks modern and intentional on straight hair, creating an unexpected focal point at the crown.
The Modern Appeal of a Knotted Half-Up
This style bridges casual and elevated—it’s playful enough for everyday wear but polished enough for special occasions. The knot creates a three-dimensional shape that adds visual interest to an otherwise smooth, linear hairstyle. On straight hair, the knot stands out as a sculptural element, which is exactly the point.
Tying the Perfect Half-Up Knot
- Section the top third or half of your hair, brushing it back smoothly
- Divide this section into two equal parts
- Tie these two sections together in a single, basic knot (right over left, or left over right)
- Tighten the knot gently, pulling it up toward the crown so it sits high and visible
- Secure the knot with bobby pins hidden underneath, ensuring it doesn’t slip down
- Pin any loose pieces and leave the bottom half completely straight
- You can leave the knot as is, or let the tail of the knot fall into the bottom section for a softer look
Pro tip: Keep the knot a little loose and playful rather than pulling it super tight. A slightly relaxed knot looks intentional and romantic.
5. Double Twisted Half Up
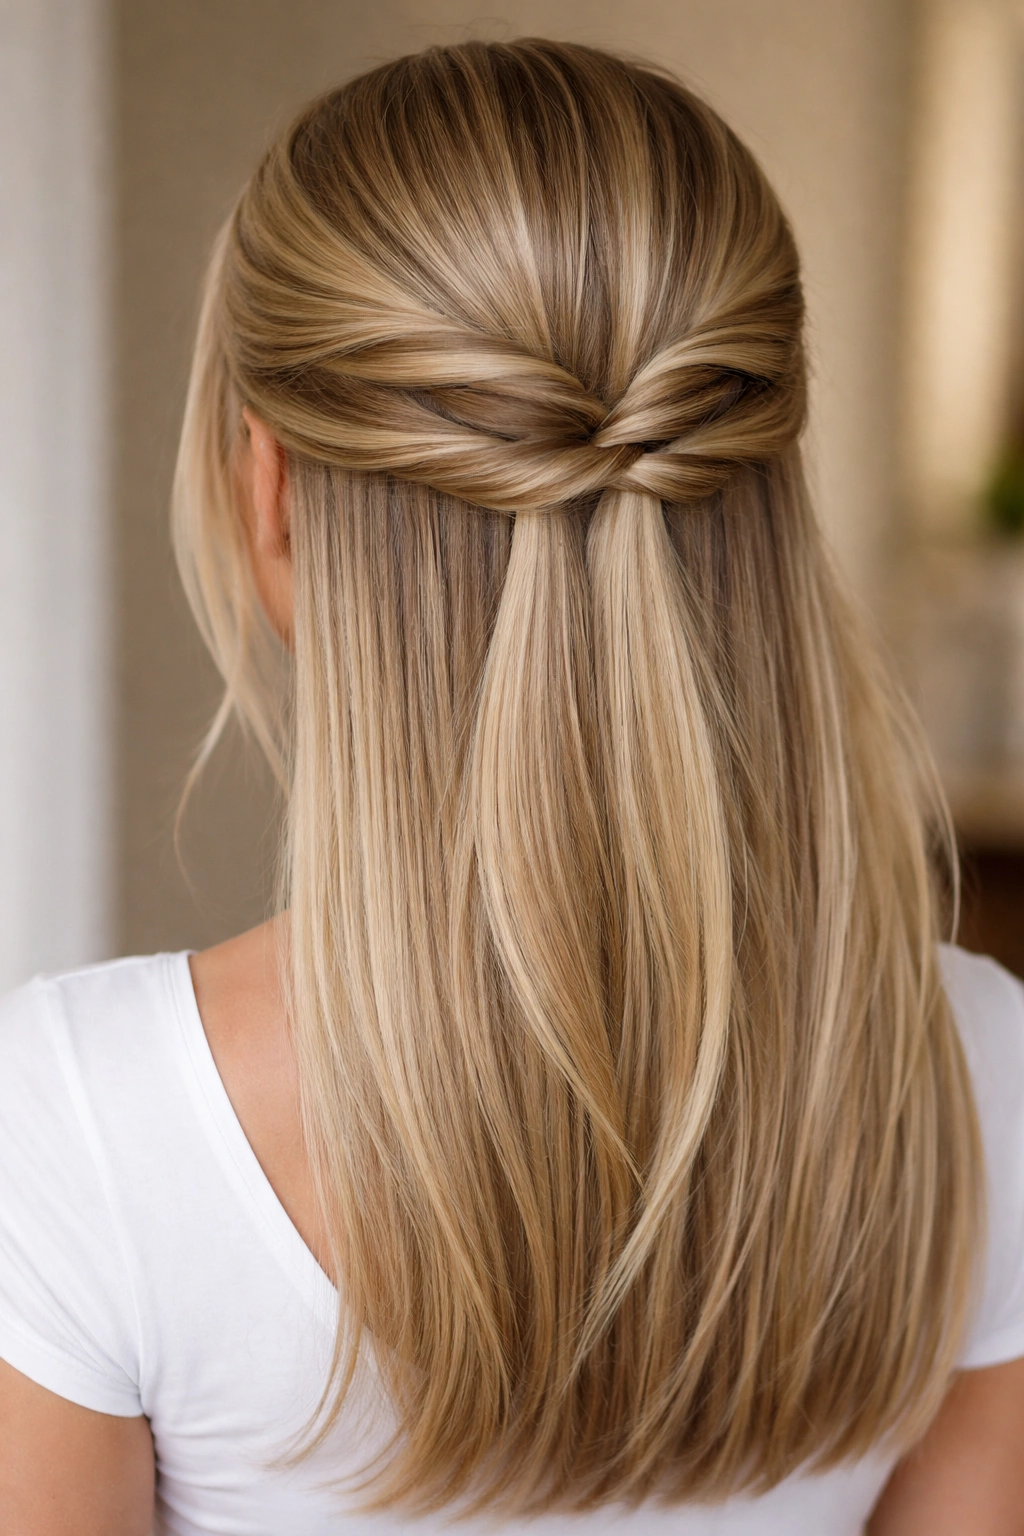
Take the classic twist and amplify it. You’re creating two separate twists on each side of your head instead of just one, bringing them together at the back for a more complex, layered effect.
Why Double Twists Create Visual Impact
Two twists immediately read as more styled and deliberate than a single twist. Even though you’re using the same basic technique, the repetition and layering create a more intricate silhouette. On straight hair, these multiple twists create dimension and visual movement without requiring any texture or waves.
Building the Double Twist Effect
- Section your hair from the temple area, taking a thinner section for the first twist
- Twist this first section and pin it temporarily to the side of your head with bobby pins
- Below that, take a slightly thicker section and create a second twist on the same side
- Bring both twists to the center back and secure together with a small elastic
- Repeat on the opposite side—first a thinner twist above, then a thicker twist below
- Bring all four twists (two from each side) together at the crown and secure
- This creates a gathered, complex look that’s elegant without being overdone
Worth knowing: The twists don’t need to be identical. In fact, varying the width slightly creates a more organic, intentional appearance.
6. Curved Half Up with Volume
Instead of twisting or braiding straight back, you’re creating a curved or angled path as you move the upper section back. This adds movement and prevents the style from looking too severe or geometric on straight hair.
How Curves Add Sophistication
Straight hair can sometimes look flat or austere if every element is perfectly linear. By introducing a subtle curve, you add motion and femininity. This curved approach maintains elegance while avoiding a stark, severe look. It’s especially flattering if you have a longer face or want to soften sharp features.
Creating the Curved Half-Up Movement
- Section hair from one temple area, creating a slightly thicker section than you would for a simple twist
- Begin twisting or braiding, but instead of moving straight back toward the crown, angle slightly upward and sideways
- Continue this curved path rather than a straight line, creating a soft arc across the back of your head
- Secure at the crown or slightly off to the side depending on the curve you created
- The path of the twist or braid now creates a curved frame around the back of your head
- Leave the bottom section smooth and straight as contrast
- Use bobby pins to hide and secure the curved section, ensuring it holds throughout the day
Pro tip: Photograph yourself from the side to check your curves. They should look natural and flowing, not forced or awkward.
7. Half Up with Sleek Sides
This style keeps the sides of your hair absolutely smooth and pinned back, while the crown and back remain full and loose. It’s about creating contrast between ultra-polished sides and soft volume elsewhere.
The High-Impact Appeal of Sleek Sides
Sleek sides immediately elevate a hairstyle and make it look intentional and coordinated. By contrasting smooth, pulled-back sides with loose hair at the crown and back, you create visual interest and dimension. This works particularly well on straight hair because the sleekness on the sides becomes a dramatic statement.
Achieving the Sleek-Sides Half-Up Look
- Apply a smoothing serum or gel to the hair at your temples and along the sides of your head
- Using a fine-tooth comb, brush this hair back and secure it with bobby pins behind your ears
- You’re aiming for skin to show slightly on the sides—a truly sleek effect
- At the crown, gather the hair from the center and create a small ponytail or twisted knot
- The back remains completely loose and smooth, creating fullness below the waist
- Smooth any flyaways on the sides with extra product and make sure bobby pins are completely hidden
Insider note: The sleeker you can make the sides, the more elevated and expensive this style looks. It’s worth taking an extra minute to perfect this element.
8. Looped Half Up Bun

Create a small bun at the crown by looping a ponytail through itself, but leave the bottom section of hair down. This hybrid between a half-up and a small bun is perfect for keeping hair partly off your neck without committing to a full updo.
Why Looped Buns Read as Effortlessly Chic
A looped bun immediately signals style and intention. It’s not quite a full updo and not quite a simple half-up, putting it in a sweet spot that feels modern and sophisticated. On straight hair, the clean lines of a looped bun are especially striking, and the half-down portion adds romantic softness.
Creating a Perfect Looped Half-Up Bun
- Gather the top half of your hair into a high ponytail at the crown
- Secure it tightly with a small elastic
- Instead of letting the ponytail hang, loop it up and tuck the tail back through the elastic
- Pull the loop so it sits high and visible, creating a small bun shape
- Secure with bobby pins hidden underneath, and smooth any flyaways
- The bottom half of your hair cascades down freely and straight
- You can make the bun as tight and neat or as relaxed and textured as you prefer
Pro tip: For a more relaxed bun, loosen it slightly and pull a few strands out. For evening, keep it tight and neat.
9. Side-Swept Half Up
Take the half-up concept and sweep everything dramatically to one side of your head, creating an asymmetrical, fashion-forward look that feels polished and intentional.
The Drama of Asymmetry
An asymmetrical side-swept style immediately reads as more styled than a centered half-up. There’s something undeniably elegant about sweeping everything to one side—it photographs beautifully and feels like a statement. On straight hair, the clean lines of the swept section are especially striking.
Executing the Side-Swept Half-Up
- Create a deep side part, sweeping most of your hair to one side
- From the smaller side of the part, take a section of hair from behind your ear
- Twist or braid this section and sweep it across the back of your head toward the larger side
- Secure it on the side where you’ve already swept most of your hair
- This creates a diagonal line from one side of your head to the other
- The bulk of the bottom hair falls on one side, creating dramatic asymmetry
- Use bobby pins to anchor everything securely and prevent it from shifting
Worth knowing: This style works best if you’re willing to keep it somewhat loosely twisted or braided. Too tight, and it looks severe.
10. Twisted Halo Half Up

Create the appearance of a halo by twisting sections from the front of your hair and bringing them around to the back, pinning them in place to create a frame around the crown and sides of your head.
Why Halos Flatter Every Face Shape
A halo style creates a soft frame around your face and head without the severity of a pulled-back look. It adds dimension and draws attention upward, making it universally flattering. On straight hair, the clean lines of the halo are especially elegant and graphic.
Building the Twisted Halo
- Take a section from one side of your head at temple level, about 2 inches wide
- Twist this section loosely, maintaining consistent tension
- Pin it to the back of your head, letting it curve naturally around your head’s shape
- Repeat on the opposite side, twisting and pinning to match the first side
- The two twists should meet at the back center, creating a continuous halo around your crown
- Smooth the top of your head and ensure all pins are hidden
- Leave all the bottom hair down and smooth, so the halo frames everything
Pro tip: Let your twists be slightly loose and relaxed. A too-tight halo can look severe on straight hair.
11. Half Up with Face-Framing Layers
Keep small, delicate sections out around your face while securing the bulk of the top hair back. This creates a softer, more romantic look that avoids the severe appearance some find unflattering.
How Face-Framing Softens a Style
Not everyone loves the pulled-back look, and face-framing pieces solve this elegantly. By leaving soft pieces out around the face, you maintain the half-up style while adding warmth and softness. On straight hair, these pieces create gentle lines that soften sharp features without adding actual texture.
Creating Strategic Face-Framing
- Brush your hair back smoothly, but before securing the top half, select small sections at your temples and cheekbones
- Pin these sections aside temporarily, or hold them out of the way
- Secure the main half-up section (the bulk of the top and back) with a twist, braid, or ponytail
- Release the face-framing pieces and smooth them into place
- These pieces should frame your face in soft lines, falling naturally along your cheekbones and jawline
- Use a smoothing product to keep them sleek and intentional
- Make sure the transition between the framing pieces and the half-up section looks polished
Insider note: The face-framing pieces should look intentional, not like hair you forgot to secure. Smooth them with product and ensure they’re shaped to complement your face.
12. Half Up with Sleek Accessories
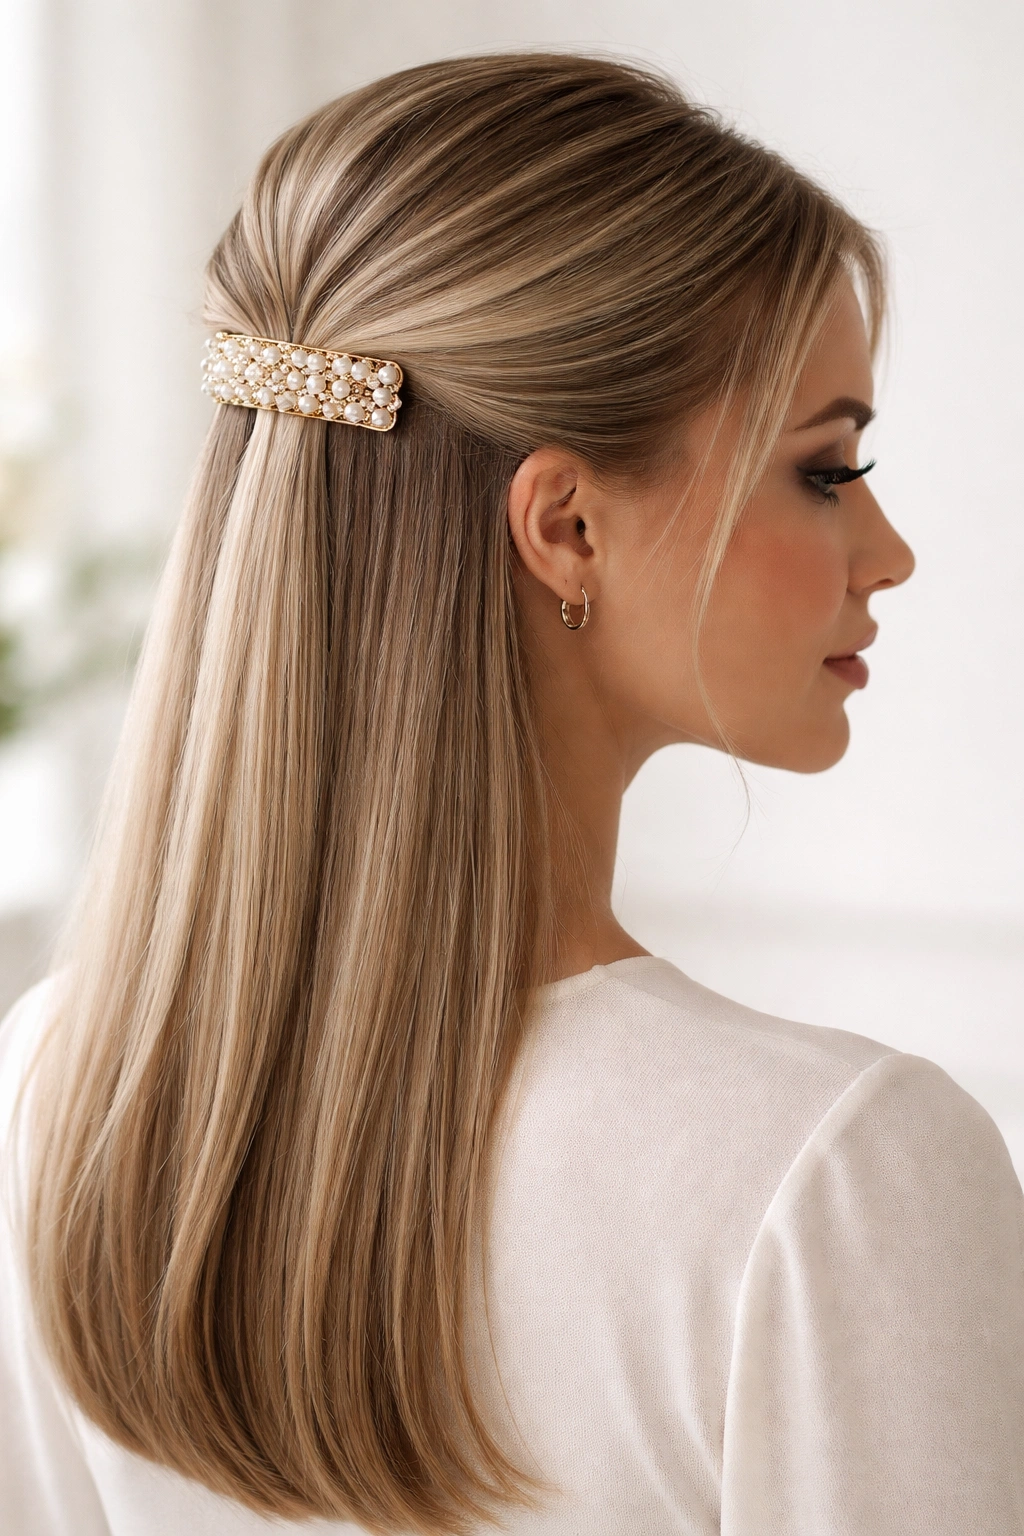
Keep the hair styling itself simple—a basic twist, ponytail, or braid—but elevate it dramatically with a decorative clip, claw, decorative elastic, or embellished bobby pin.
How the Right Accessory Transforms a Style
A great accessory can transform a basic half-up from ordinary to special in seconds. On straight hair, where details are visible and graphic, an accessory becomes a focal point rather than an afterthought. This is a quick way to take a simple style and make it feel intentional and elevated.
Elevating with Smart Accessory Choices
- Secure your half-up section with a basic twist, braid, or ponytail
- Choose an accessory that complements your coloring and personal style: metal claw clips, decorative elastics, vintage barrettes, or statement bobby pins
- Position the accessory at the securing point, making sure it’s visible and functions as a design element
- Ensure the accessory is secure enough to hold throughout the day
- If using a decorative elastic, make sure the twist or braid sits high enough that the elastic is completely visible
- Smooth your hair around the accessory so everything looks intentional and polished
Pro tip: Choose accessories that complement your outfit or personal style. A gold claw clip reads completely differently than a tortoiseshell one or a jeweled barrette.
13. Teased Half Up Style
Create subtle volume in the crown area by gently teasing (or backcombing) the top section before securing it into a half-up style. This adds dimension and prevents the look from appearing flat or slicked down.
Why Teasing Adds Sophistication
Teasing might sound counterintuitive on straight hair, but subtle teasing at the roots creates lift and dimension without creating actual texture or frizz. This prevents your straight hair from looking too smooth or severe, adding a touch of dimension that reads as polished rather than tousled.
Creating Subtle Crown Teasing
- Before creating your half-up, identify the area at your crown where you want volume
- Using a teasing brush or fine-tooth comb, gently backcomb small sections at the roots in this area
- You’re not trying to create visible texture, just microscopic volume at the roots
- Brush over the teased area gently with a smoothing brush to seal it, creating a smooth surface while keeping the volume underneath
- Secure your half-up (twist, braid, or ponytail) over this teased area
- The teasing creates subtle lift without being visible—the style just looks more dimensional
- Smooth the exterior thoroughly so no teasing is visible from the front
Worth knowing: The goal with teasing on straight hair is invisible volume, not visible texture. If you can see the teasing, you’ve overdone it.
14. Twisted Half Up with Tendrils
Create a romantic, just-slightly-undone look by securing a half-up with twists or a braid, but deliberately leaving small, soft tendrils out around your face and nape.
The Romance of Strategic Tendrils
Tendrils soften any hairstyle and add a touch of romantic softness. On straight hair, intentional tendrils read as deliberate styling rather than pieces that escaped. This style walks the line between polished and effortlessly romantic.
Placing Tendrils Intentionally
- Create your half-up using twists or a braid as your base
- Before securing, identify small sections you want to leave out: around temples, near cheekbones, at the nape
- Secure the main half-up, then release these tendril sections carefully
- Lightly curl or wave these tendrils with a curling iron for a softer look, or leave them straight for a more graphic effect
- Smooth the rest of your hair with product to enhance the contrast between the polished half-up and the soft tendrils
- Make sure the tendrils look placed, not like you missed them when securing the rest
Pro tip: If you want to add waves to the tendrils, curl them away from your face for a flattering direction.
15. Sleek Half Up with Deep Side Part
Create a dramatic deep side part, and secure the smaller side of the part into a half-up, leaving the larger side completely down and smooth. This creates asymmetrical interest while maintaining the half-up silhouette.
How a Deep Part Adds Dimension
A deep side part adds instant visual interest and dimension to straight hair. When combined with a half-up on the smaller side, you create an intentional, fashion-forward look that photographs beautifully. The asymmetry feels modern and sophisticated.
Building the Deep-Part Half-Up
- Create a part that starts at one temple and angles back to your crown, making it very deep and dramatic
- The smaller side of the part becomes your half-up section
- Twist, braid, or secure this smaller section into a ponytail
- The larger side of the part remains completely down and smooth
- Smooth both sections with product to enhance the sleekness and graphic quality
- Make sure the part is clean and visible—it’s a design element, not an afterthought
- Ensure all securing pins are hidden, and the overall look appears intentional
Insider note: The deeper your part, the more dramatic and modern this style becomes. A subtle side part reads differently than a truly deep one.
16. Half Up Dutch Braid
Instead of a simple three-strand braid, use a Dutch braid (where you weave the hair underneath instead of over) for the half-up section. This creates more visual texture and dimension while maintaining a polished appearance.
Why Dutch Braids Look More Complex
A Dutch braid creates a thicker, more dimensional appearance than a traditional braid because the weaving direction creates shadow and depth. On straight hair, this shadow and texture read as intentionally styled without requiring actual waves or curls.
Creating a Half-Up Dutch Braid
- Section the hair from one temple to the other, separating about the top third or half
- Divide this section into three strands at the center of your crown
- Begin the Dutch braid by crossing the right strand underneath the center strand
- Then cross the left strand underneath the center strand
- Continue this underweaving motion, incorporating small pieces from the sides as you move back
- The braid will sit on top of your head rather than laying flat, creating a raised, dimensional appearance
- Bring the braid down to the back center and secure with an elastic
- Leave the bottom half completely straight to contrast with the braided section
Pro tip: Dutch braids look best when they’re slightly loose and relaxed. Pulling too tight can make them look severe.
17. Wrapped Half Up Bun
Create a half-up ponytail and then wrap a separate strand of hair around the elastic to conceal it and add a finished, polished appearance.
Why Wrapped Buns Look Expensive
Wrapping the elastic creates a seamless, finished appearance that immediately elevates a simple bun. Instead of a visible elastic, you’re covering it with hair, creating a polished, salon-quality look. This small detail makes a significant visual difference.
Executing the Wrapped Half-Up Bun
- Gather the top half or top third of your hair into a ponytail at the crown
- Secure with a small elastic, making sure the ponytail is tight and secure
- Take a thin strand of hair from underneath the ponytail (or use an extension if needed for length)
- Wrap this strand around the elastic tightly, spiraling around and covering it completely
- Secure the wrapped strand with a bobby pin hidden underneath the ponytail
- Smooth the entire ponytail and wrapped section with a fine-tooth comb and smoothing product
- The bottom section hangs completely loose and straight
- The wrapped detail is what makes this style look polished and intentional
Worth knowing: The wrapped strand doesn’t need to be visible or obvious—it just needs to cover the elastic. The effect should look seamless.
18. Minimalist Half Up with Straight Ends
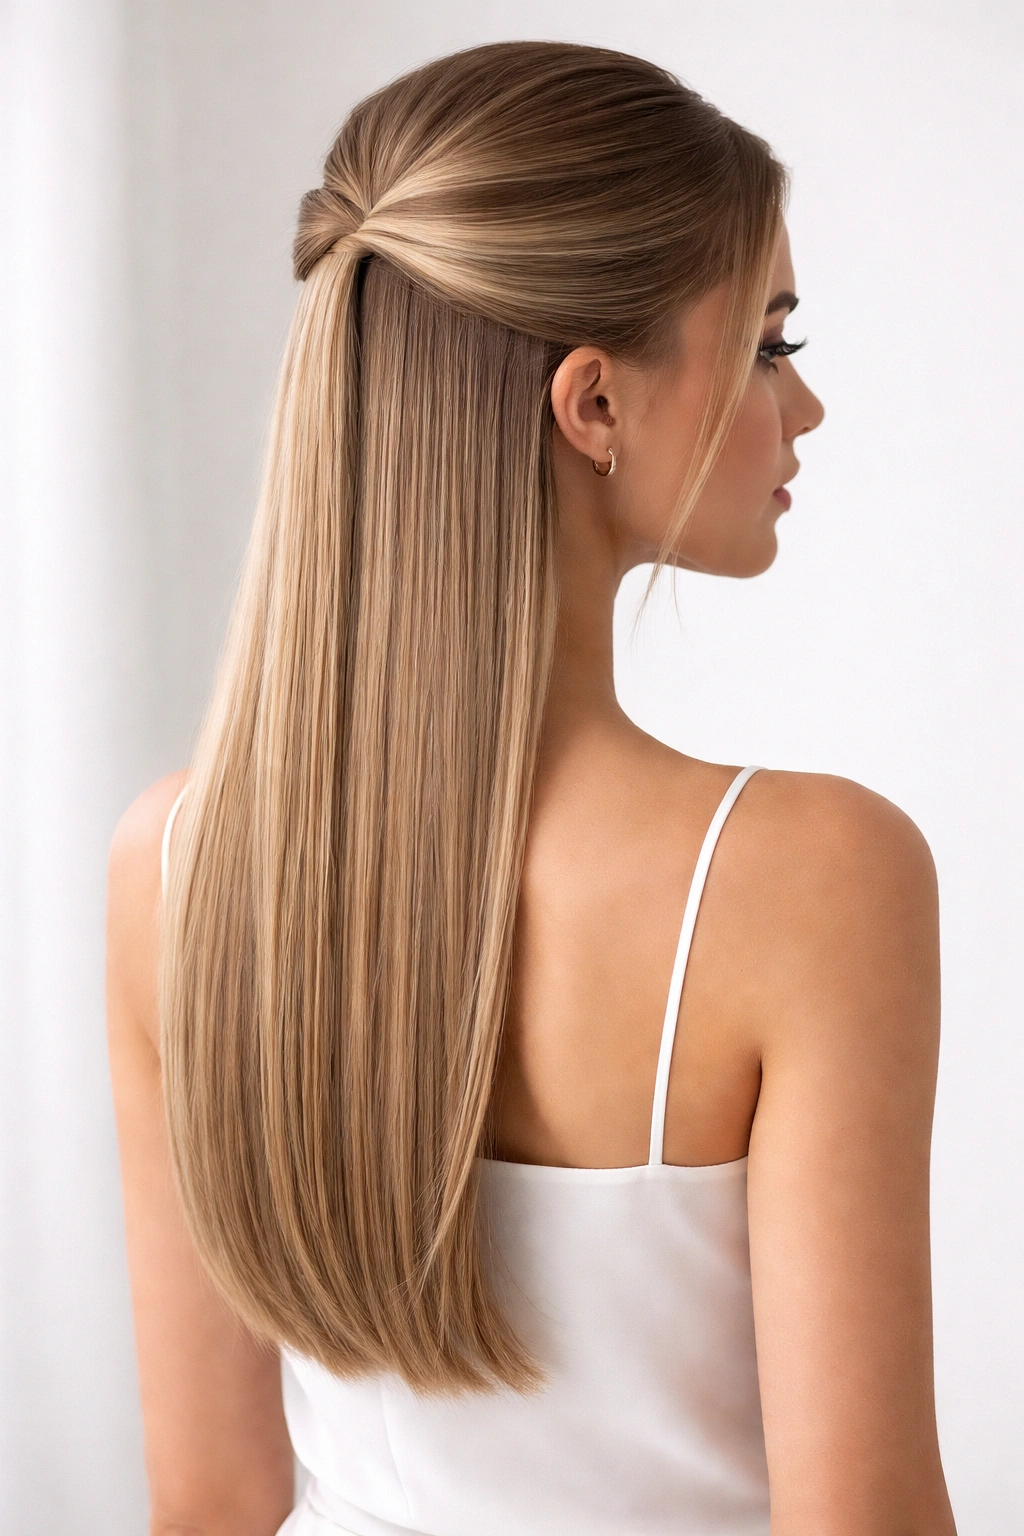
Keep everything extremely simple and polished: a small, basic half-up (twist or small ponytail) secured at the crown, with the rest of your hair falling completely straight and smooth. Sometimes less is more.
The Elegance of Simplicity
The most sophisticated styles are often the simplest ones. A minimalist half-up with perfectly straight ends reads as intentional, elegant, and effortless. On straight hair, this understated approach is especially effective because it relies on the beauty of your natural straight texture rather than covering it with braids or twists.
Creating the Perfect Minimalist Half-Up
- Brush your entire head back smoothly, using a straightening serum or smoothing cream
- Take a small section from each temple, about 1 inch wide
- Twist each section loosely and bring to the center back of your crown
- Secure both twists together with a tiny clear elastic or small clip
- Make absolutely sure both sides are smooth and sleek—there should be no bumps or flyaways
- The rest of your hair should fall completely straight and smooth to the ends
- Use a straightening iron if needed to ensure the bottom section is perfectly straight
- The entire style reads as polished and intentional through sheer smoothness and simplicity
Pro tip: Invest in a good straightening serum for this style. The entire look depends on your hair being as smooth and sleek as possible.
Final Thoughts
The beauty of half up half down styles on straight hair is that they work across every context—casual Fridays, professional meetings, date nights, and special occasions. Your naturally straight texture is an asset that makes every variation of these styles look crisp, polished, and intentional.
The key to mastering any of these styles is understanding that straight hair forgives nothing, but it also makes everything look intentional. A twist that sits perfectly is elegant; a braid without a single flyaway is striking; sleek sides are undeniably polished. Take an extra moment to smooth and perfect the details, and your half-up half down style will look like you’ve just left a salon.
Pick one or two styles to master first, then expand your rotation as you grow comfortable with the techniques. Once you understand how to twist, braid, and secure hair at the crown, you can mix and match elements from different styles to create variations that feel uniquely yours. Straight hair makes this experimentation easy—what you see is what you get, so you’ll know immediately what works for your face shape, hair thickness, and personal style.