Half up half down styles occupy a special place in the styling world—they’re elegant enough for formal occasions yet casual enough for everyday wear, striking the perfect balance between putting your hair up and letting it flow freely. If you have medium-length hair, you’re sitting in the sweet spot where these styles truly shine. Medium hair has enough length to create visual interest in the down portion while holding volume and texture in the secured top, giving you endless possibilities for experimentation. The beauty of this style lies in its versatility: you can dress it up with intricate braiding and delicate pins for a wedding or dress it down with loose waves and a simple tie for a coffee date.
What makes half up half down styling so appealing is that it solves real problems most people face with their hair. You get the polished, intentional look of a pulled-together style without the commitment of a full updo or the formality of slicked-back edges. It keeps hair off your face and neck when you need that breathing room, but maintains movement and texture that make you feel like yourself. For medium-length hair specifically, this style sits at the exact length where the secured portion has enough substance to hold throughout the day without feeling too tight, and the down portion has enough length to create beautiful waves, curls, or texture that doesn’t look stringy or thin.
The styles you’ll find here aren’t one-size-fits-all—they range from romantic and loose to sleek and structured, from everyday achievable to special-occasion worthy. Some rely on braiding skills, others on your styling tools and texture, and many on simple twisting techniques that take just a few minutes to master. Whether you have naturally wavy hair, perfectly straight strands, or curls that need taming, there’s a half up half down style in this collection that will work with your hair’s natural tendencies rather than against them.
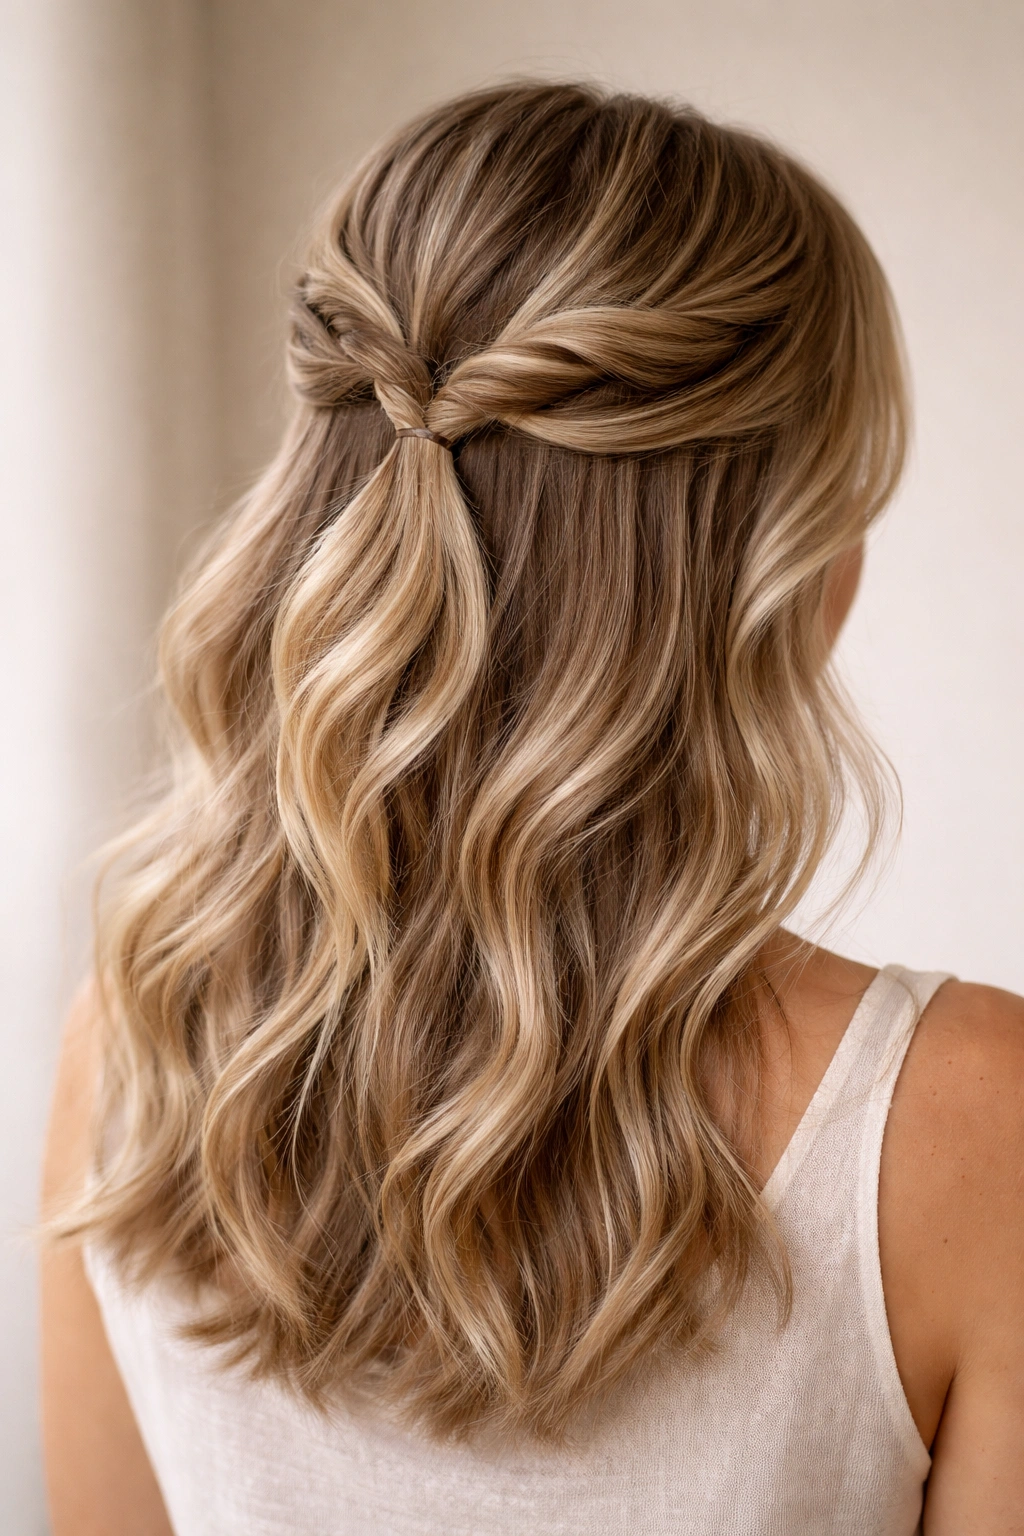
1. Classic Twisted Half Up
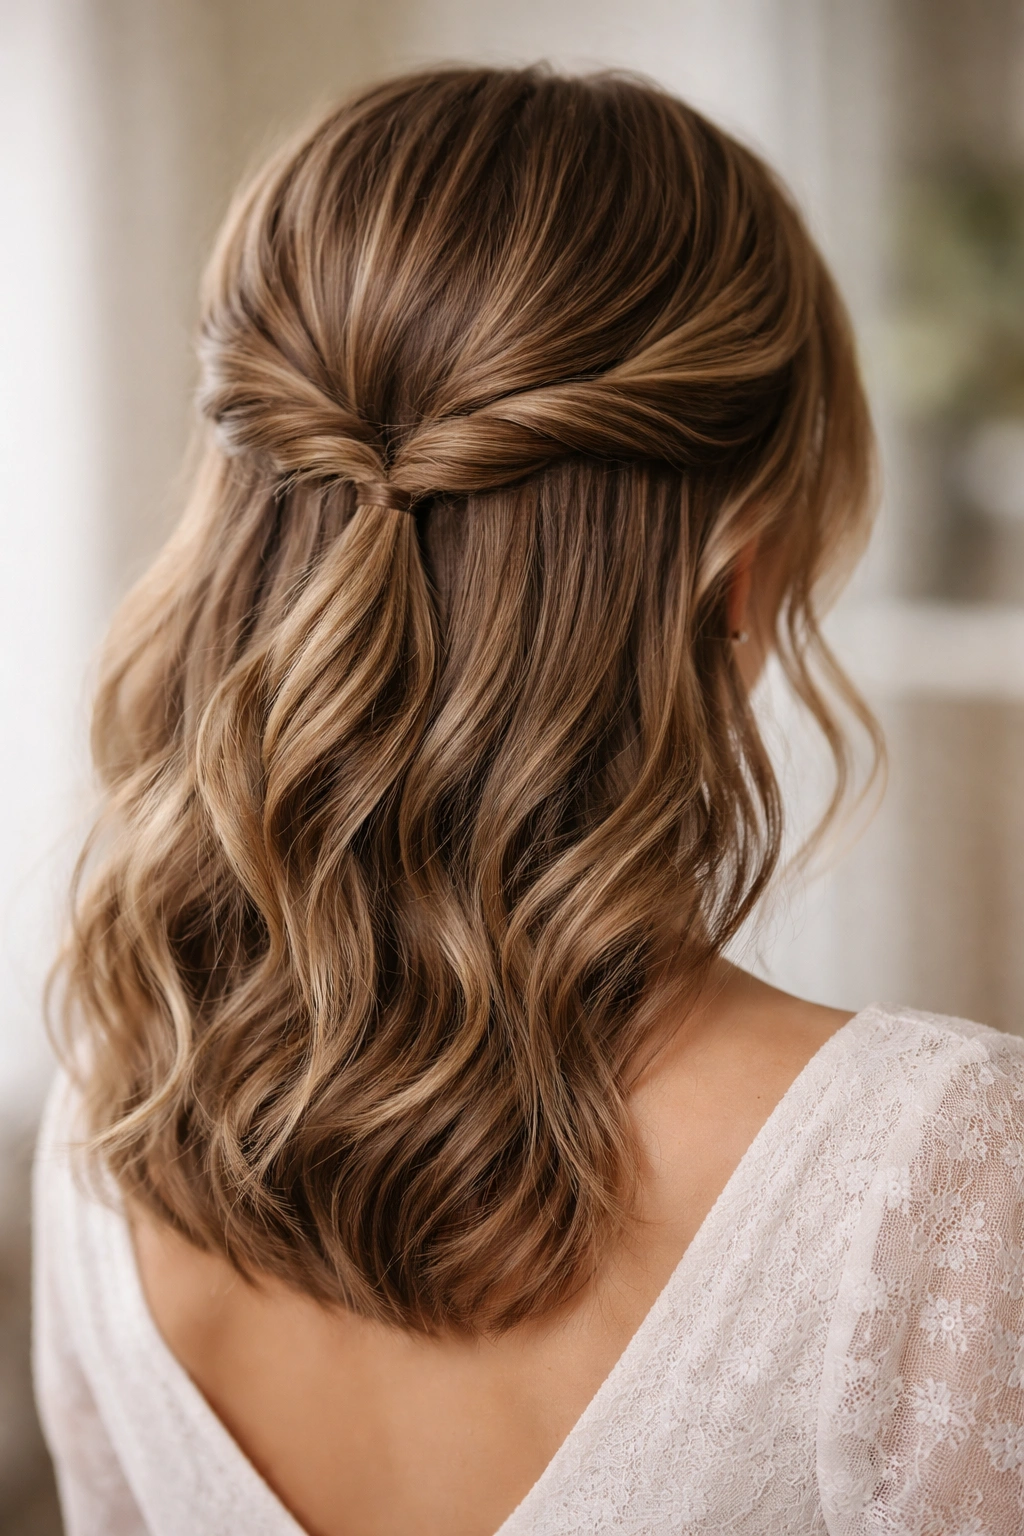
This timeless style deserves a permanent spot in your styling rotation because it’s virtually foolproof and works with every hair texture imaginable. The classic twisted half up works by taking a section of hair from each side of your head at about ear level, twisting each section loosely, and securing them together at the back with a bobby pin or elastic. What makes this style endure is its simplicity—it requires no special tools, no braiding skills, and takes less than five minutes to execute, yet it looks intentional and polished every single time.
Why This Works for Any Hair Type
The twisted technique creates natural-looking texture without relying on your hair being wavy or curly to begin with. Even if you have very straight hair, the twisting action adds a subtle movement that looks modern and deliberately styled. The loose twist also accommodates different hair densities—fine hair won’t look skimpy because twisting creates the illusion of fullness, while thick hair doesn’t bunch up awkwardly because you’re distributing the volume along the twist itself rather than creating a tight knot.
How to Perfect the Technique
- Start with hair that has some texture—if yours is freshly washed and sleek, apply a texturizing spray or dry shampoo 15 minutes before styling to give the twist something to grip
- Take sections from just above your ears and twist away from your face for a flattering effect that opens up your features
- Twist loosely enough that wisps of hair can escape, creating a romantic, undone quality rather than a severe look
- Secure at the nape of your neck or slightly higher depending on how much volume you want in the twisted portion
- Leave the ends loose and either curl them with a wand or let them fall naturally
Pro tip: If your twists slip out by mid-afternoon, use clear bobby pins that match your hair color inserted horizontally through the twist base—this anchor point is invisible but incredibly effective at keeping everything in place.
2. Romantic Braided Half Up Half Down
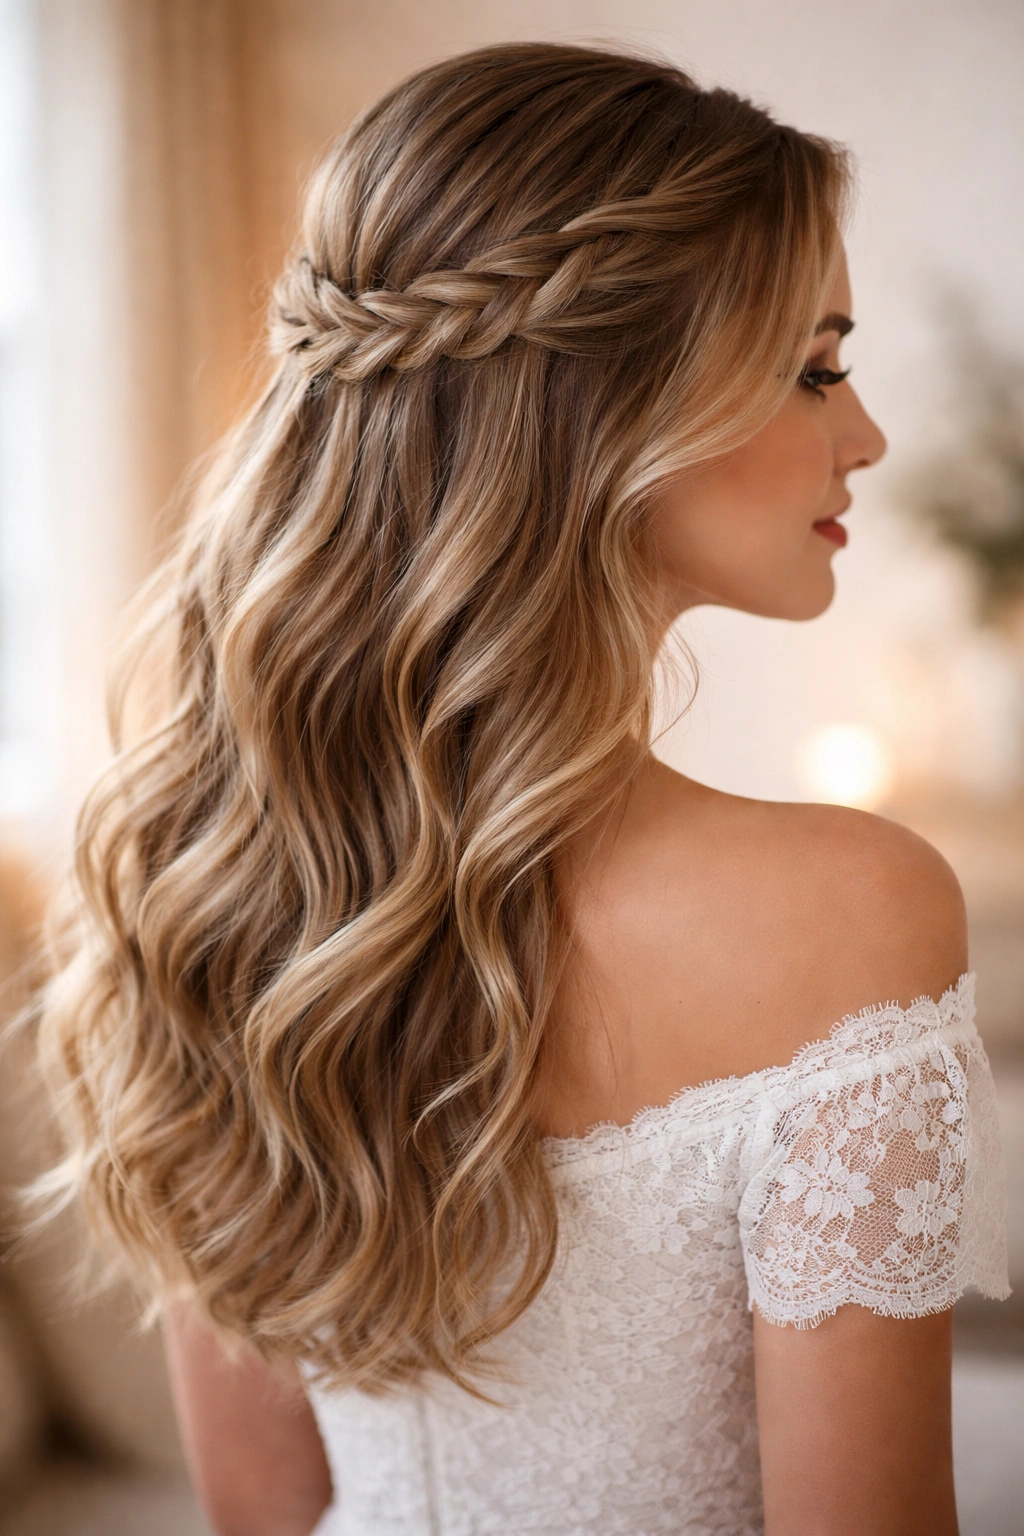
Braiding takes the half up half down concept and elevates it to something that feels special enough for date night or celebrations while remaining simple enough to do on a regular Tuesday. The romantic braided version uses a single braid or sometimes two smaller braids taken from the sides, gathering them together at the back and allowing the rest of your hair to flow freely with soft waves or curls. This style is particularly stunning on medium hair because the braid has enough substance to show detail without overwhelming your face, and the free-flowing portion maintains its texture and movement.
The Braid Style That Frames Your Face Best
French braids starting at the temple and gathering back toward the crown work beautifully, as do more casual three-strand braids twisted loosely away from your part. The key difference between a romantic braided half up and a pulled-back braided style is the looseness of the braid—you want sections of hair intentionally pulled out to soften the lines and create a lived-in, glamorous feel rather than a competition-ready appearance. This pulling-out technique, called pancaking the braid, takes what could look severe and makes it dreamy.
Building the Perfect Braided Half Up
- Start braiding from near your temple, working back toward the crown for the most flattering frame
- Make your braid looser than you think it should be—you’ll be pulling it out further as you go
- Pancake the braid by gently tugging on the outer loops, starting from the bottom and working upward
- Consider adding a thin ribbon, small flowers, or delicate gold thread through the braid for special occasions
- Secure both braids (if using two) with bobby pins at the back, then tie the entire section with a clear elastic or delicate hair tie
- Create waves or curls in the down portion before starting the braid for best texture retention
Insider note: If your braids always look too perfect and polished, that’s actually working against the romantic aesthetic—spend 30 seconds subtly loosening and pulling the braid after securing it, and you’ll instantly achieve that effortless, just-right look.
3. Sleek High Half Ponytail
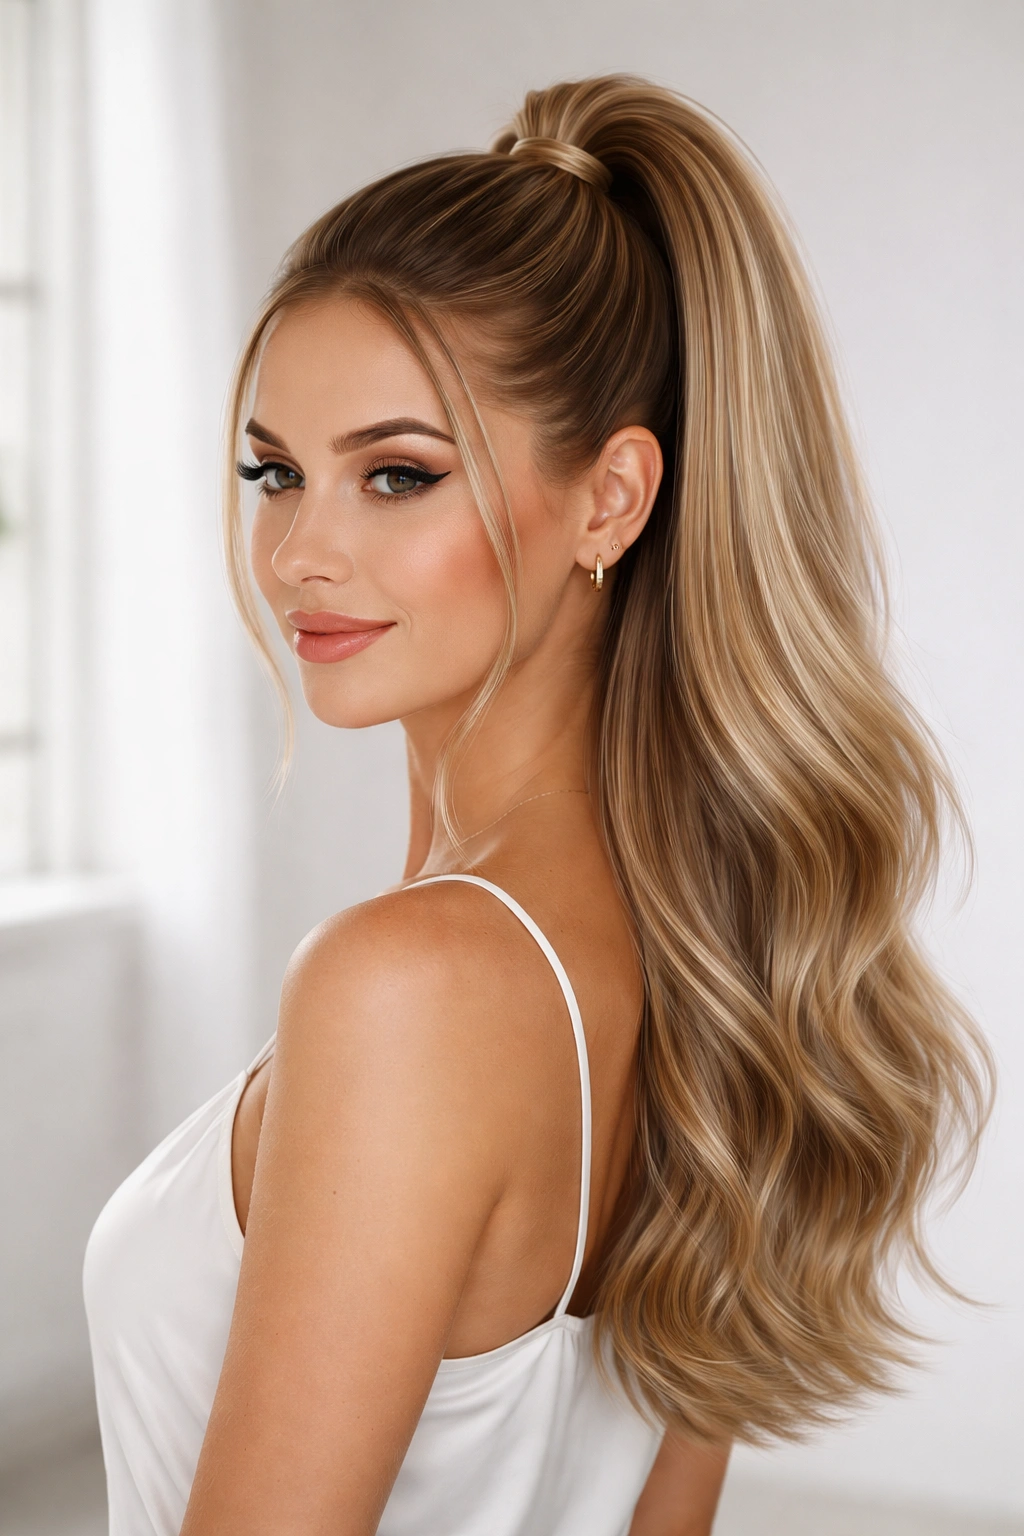
This style is the power move of half up half down options—it’s polished, intentional, and reads as put-together without being overly dressy. The sleek high half ponytail gathers the top portion of your hair into a smooth, tight ponytail positioned high on your head while leaving the bottom portion free. What distinguishes this from a regular half ponytail is the sleekness—every hair in the top section is smoothed back with no flyaways or softness, creating a sharp, architectural line that works beautifully with a sharp outfit or for a professional setting.
Achieving the Sleek, Polished Look
The sleekness requires two things: a smoothing product and technique that doesn’t leave bumps or ridges. Start by applying a smoothing serum or gel to the roots of your hair, then brush the top section back using a fine-tooth comb rather than a regular brush. Brush in the direction you want the hair to go, creating tension as you bring everything together toward your high ponytail point. The smoother you can make this gathering, the more polished the final look will be. Many people make the mistake of gathering loosely and then trying to smooth flyaways after securing, but the technique works better in reverse—smooth first, then secure.
Step-by-Step Sleek Application
- Use a lightweight smoothing serum on damp or dry hair, working from roots to mid-shaft of the top section
- Blow-dry the top section straight if you have natural texture that resists smoothing
- Part your hair where you want it and brush the top section straight back with a fine-tooth comb
- Gather at a high point on your head—imagine a line between your ears would run just behind where your ponytail sits
- Use a small elastic first to gather roughly, then refine the position and tightness
- Smooth flyaways with a fine comb and small amount of gel applied to the comb
- Wrap a small section of hair around the base of the ponytail to hide the elastic
Worth knowing: This style looks fresh for 24 hours and then starts to look a bit severe on the second day because of how smooth it is—it’s not your best style for multiple-day wear, but it’s perfect when you want to look sharp and intentional.
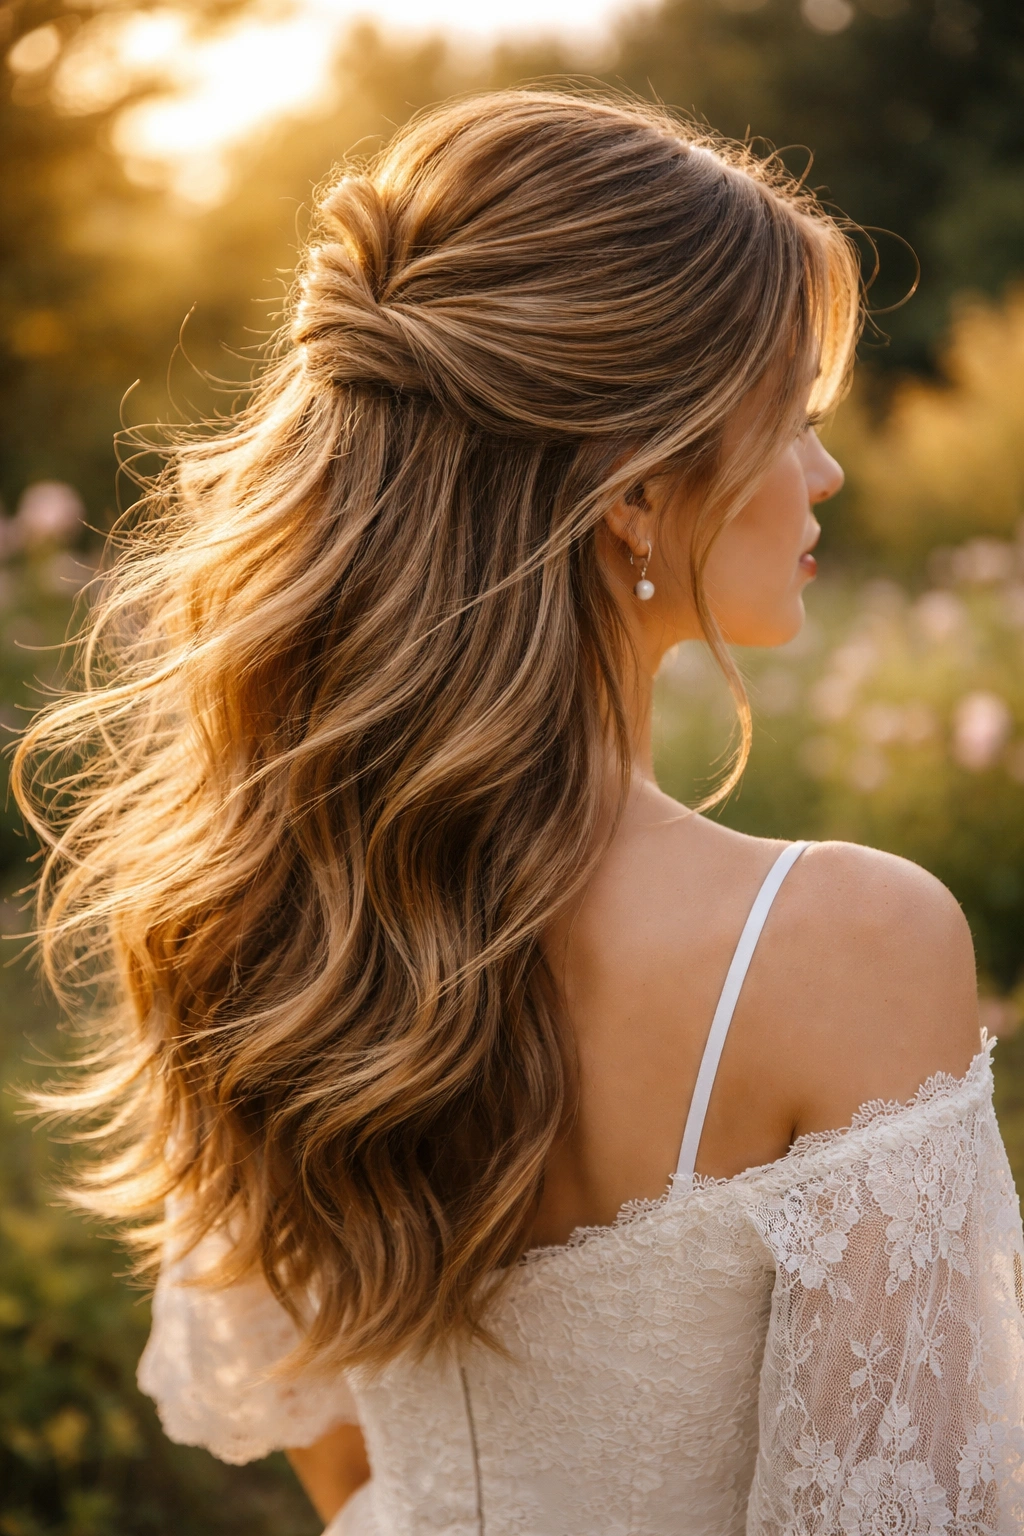
4. Soft Waves Half Up
If you love the half up concept but want something that feels softer and more approachable than structured styles, soft waves half up delivers romance without requiring any braiding skills. This style features loose, flowing waves throughout all of your hair with the top section gathered into a low, soft ponytail or twisted section. The waves are the star here—they should look natural and relaxed rather than tight and uniform. Many people assume that because the waves are loose and soft, they’re easier to create, but actually achieving that effortless, undefined wave texture requires either heat styling with intention or developing your natural wave pattern.
Creating Waves That Look Intentional, Not Accidental
Soft waves succeed when they’re chunky and defined rather than frizzy or undefined. If you’re using a wand or curling iron, take thick sections and wrap them loosely—one-inch sections are too thin and create stringy curls that don’t read as waves. Work with three-to-four-inch sections for a relaxed wave pattern. Let each curl cool before running your fingers through it, which helps the wave set but disrupts the curl shape, creating that broken-in wave texture rather than pronounced ringlets. For those with naturally wavy hair, enhance your waves with a wave cream or texture spray applied to damp hair, scrunching gently and allowing to air-dry or diffuser-dry.
Building Your Soft Wave Foundation
- Start with texture-building product applied to damp hair—texture spray, salt spray, or wave cream depending on your hair type
- Blow-dry with a diffuser if you have waves to enhance, or blow-dry with your fingers to encourage wave formation in straighter hair
- If heat-styling, use a 1.5-inch curling wand and wrap sections loosely, holding for 8-10 seconds
- Cool each curl before releasing it, then gently finger-comb through when completely cool
- Gather the top section into a low ponytail or soft twist, securing low enough that you still see beautiful waves in the free portion
- Finish with a texture spray or lightweight spray to set the waves without making them feel stiff
Pro tip: The secret to soft waves that don’t fall completely flat by evening is using a flexible hold product—spray hold is better than mousse for this because mousse can weigh down and define waves when you want them undefined.
5. Braided Crown Half Up
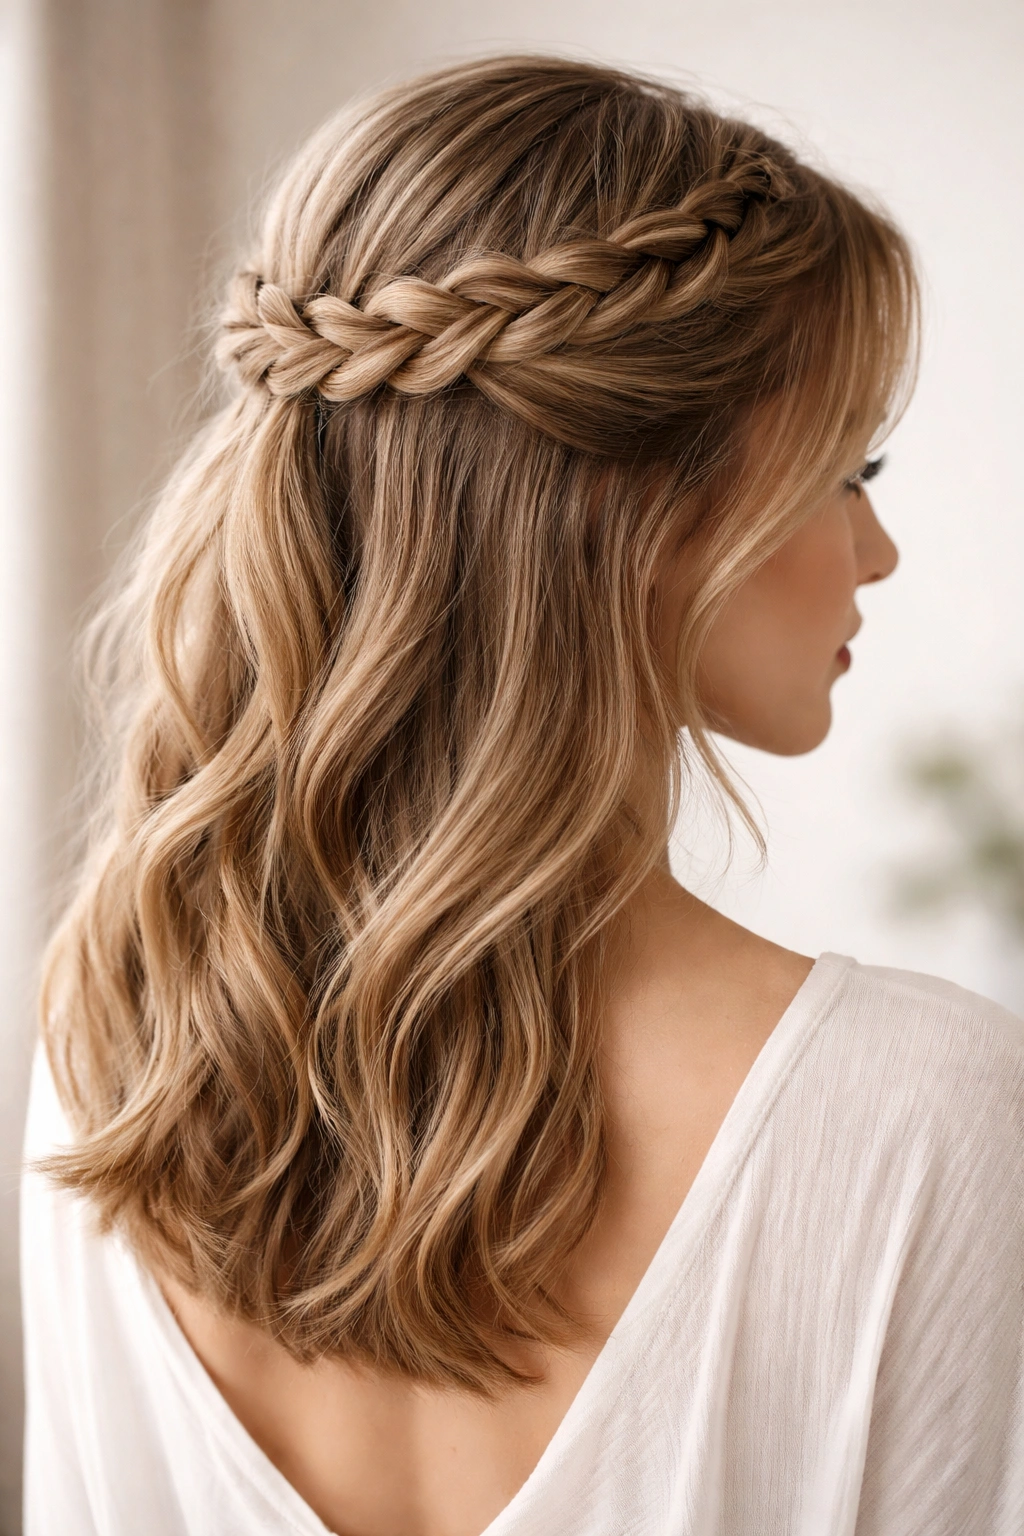
This style creates the illusion that you have a braid woven across the crown of your head while still maintaining the half up half down length and flow. A braided crown half up accomplishes this by starting a braid at one side of your head near your temple, weaving it across the back to the opposite side, and then either releasing it or continuing it into a half ponytail. The effect is instantly romantic and special-occasion-worthy, yet many people are surprised to learn it’s actually faster and easier than more traditional braids because you only need to create a short braid section rather than working from root to end.
Why Crown Braids Work as a Half Up Style
Crown braids serve a dual purpose—they’re beautiful to look at and they actually secure your hair better than a simple twist or ponytail because the braid itself is an anchor point. This is particularly helpful if you have medium hair that doesn’t naturally stay put, because the braid running across the back of your head helps keep everything secure without any additional products or pins. The style also photograph beautifully from behind, which makes it popular for events, weddings, and celebrations where you want to look intentional.
Creating Your Crown Braid
- Start on one side near your temple and create a standard three-strand braid
- As you braid, incorporate small sections of hair from the top of your head, continuing across the back like a crown
- Aim for a loose, relaxed braid that follows the natural curve of your skull—don’t try to make it perfectly centered or perfectly straight
- When you reach the opposite side near the opposite temple, you have options: release the braid and secure both loose ends with bobby pins, or continue braiding the loose end down and incorporate it into a half ponytail
- Pancake the braid to loosen and soften it
- Leave the rest of your hair down in waves or curls
Insider note: If your braid starts to slip or feel unstable as you’re creating it, use a textured spray on that section while braiding—the grip makes a huge difference, especially if you have very sleek hair.
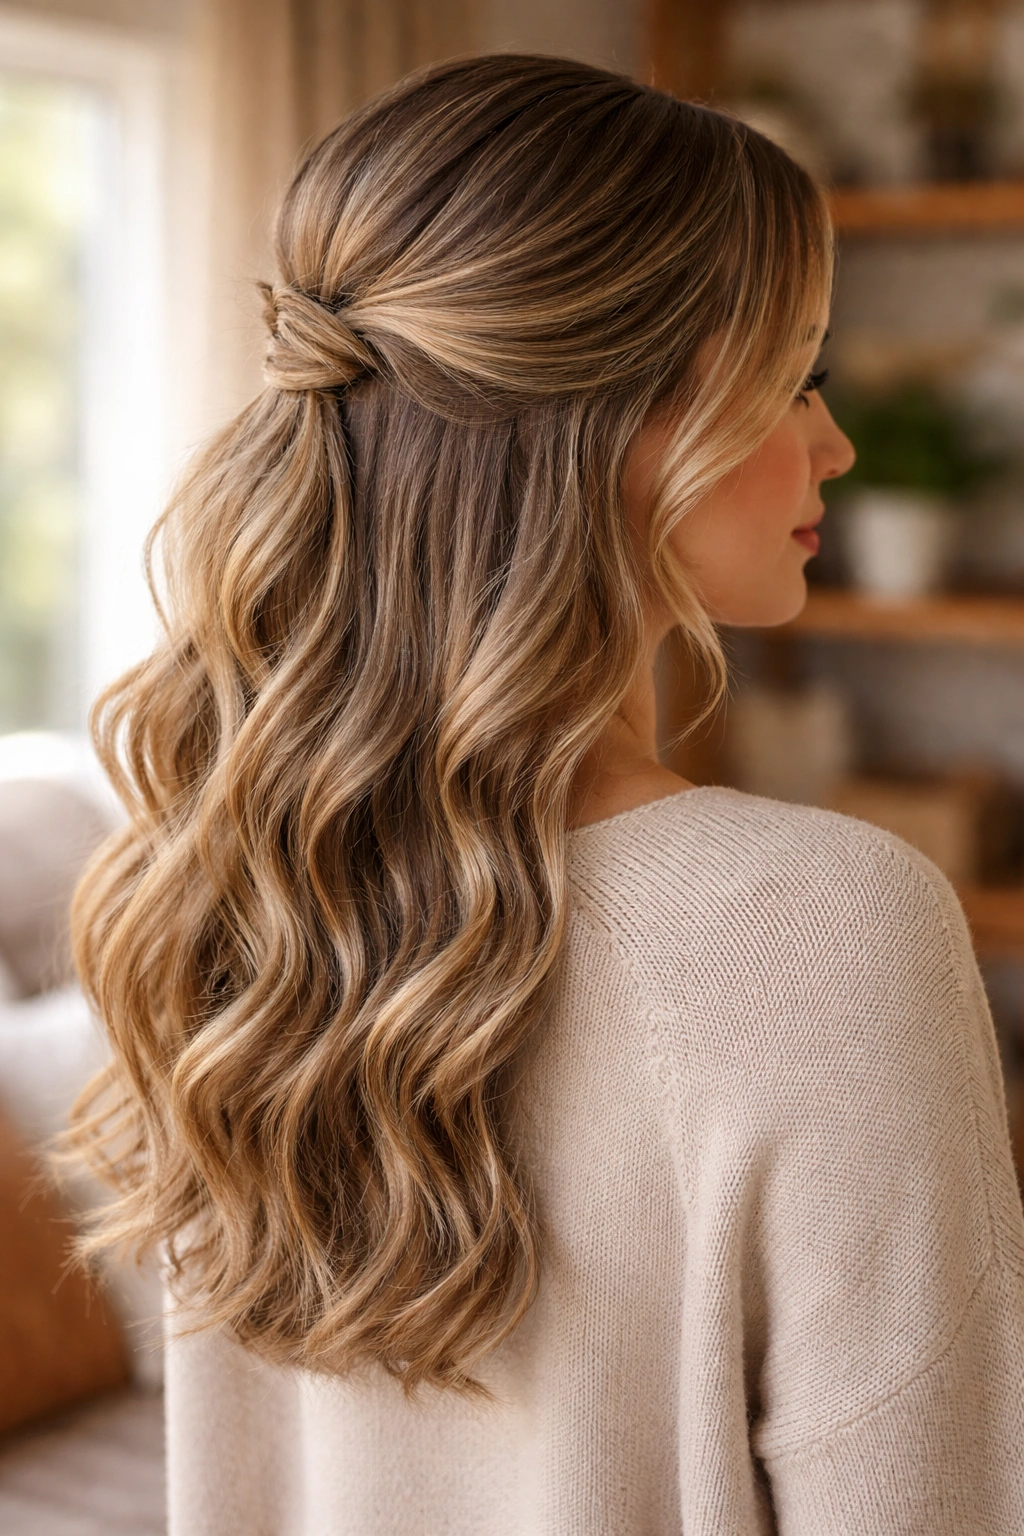
6. Low Twisted Half Up Half Down
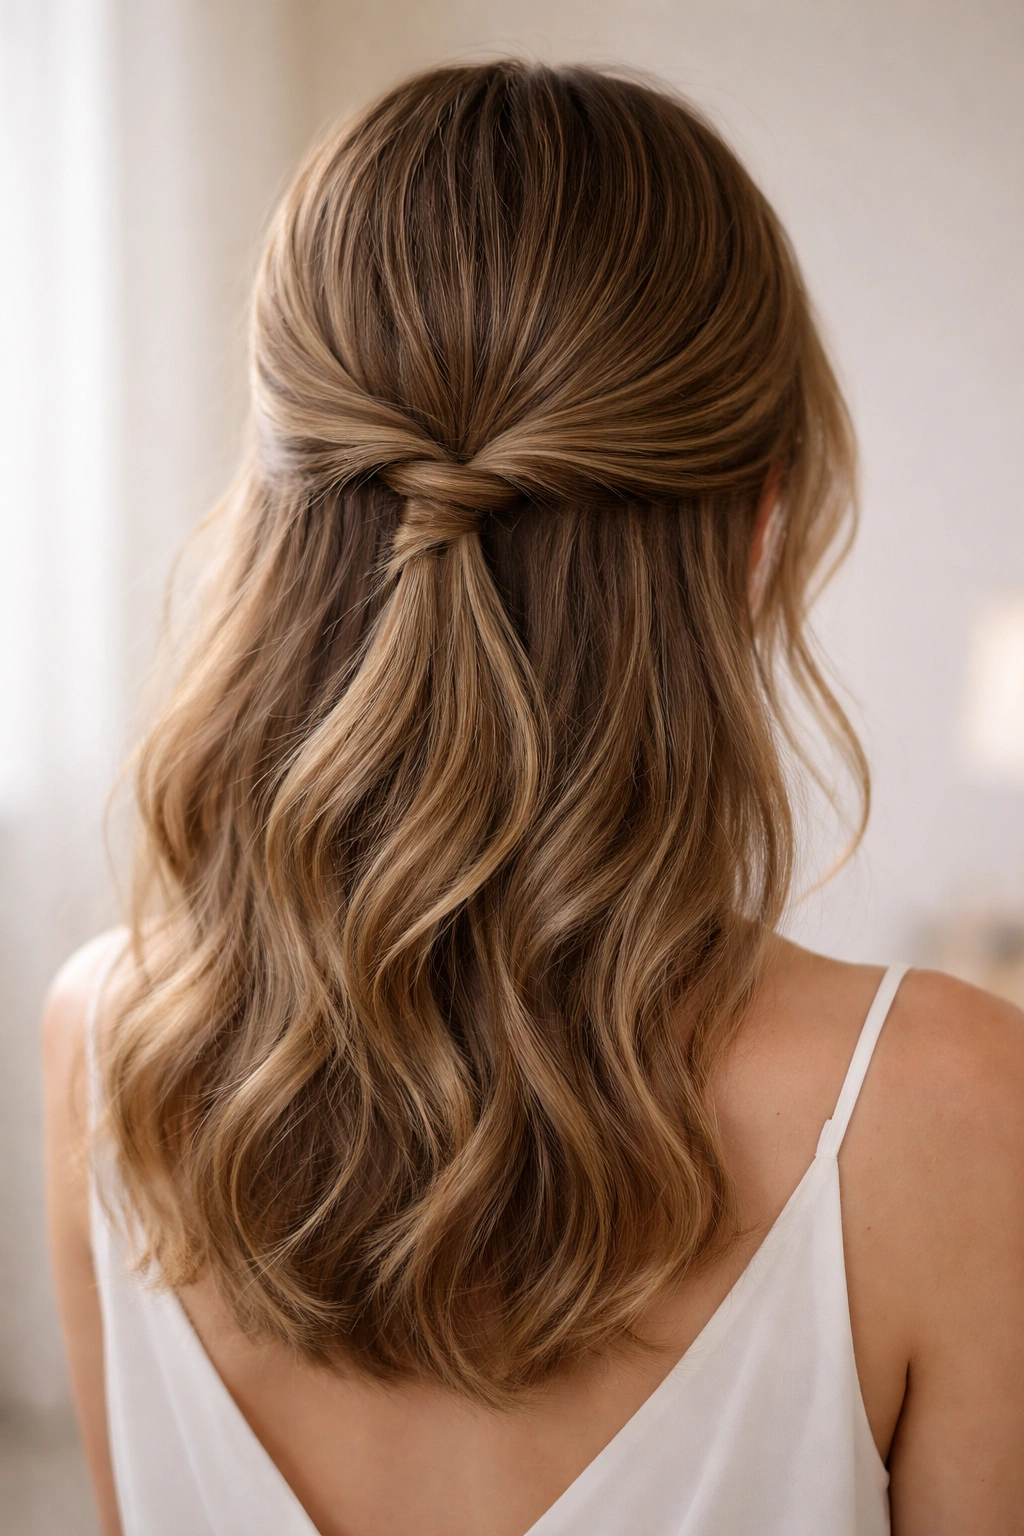
Sometimes the most elegant choice is the simplest one, and the low twisted half up exemplifies this philosophy. This style is basically a grown-up version of what you might have done with your hair at age seven—a simple twist from each side, gathered low at the nape of your neck—yet on medium hair with the right texturing and the right styling approach, it reads as entirely sophisticated. The low position keeps the focus on your face and neck rather than the crown of your head, which is flattering for most face shapes and creates an elegant, understated vibe that works for both casual and formal settings.
Why Low Positioning Changes Everything
The placement of a style dramatically impacts how formal or casual it reads. A high ponytail or secured section reads as sporty or polished, while a low placement reads as relaxed and elegant. When you twist hair low at the nape of your neck, you’re creating a style that mimics the silhouette of a more formal updo while maintaining the movement and freedom of having your hair down. This is particularly beautiful on medium-length hair because the low twist doesn’t look skimpy or like you’re struggling to reach down far enough—there’s enough hair to create substantial twists while still leaving a generous amount flowing free.
Perfecting the Low Twist Placement
- Take sections from just behind your ears at about ear level
- Twist loosely away from your face, working each section down toward the nape of your neck
- Secure both twists together with bobby pins at the very base of your skull—below where you’d typically wear a hair tie
- Leave some face-framing pieces untwisted for softness, especially around your temples
- Pancake the twists slightly to widen them and create a fuller appearance
- Curl or wave the free portion for contrast against the structured twists
- Consider wrapping a small section of loose hair around the base to hide the bobby pins and add a finishing touch
Pro tip: If you’re twisting thicker or longer sections of hair, use two bobby pins inserted in an X-pattern rather than one pin—this creates a secure anchor that won’t slip even with movement or humidity.
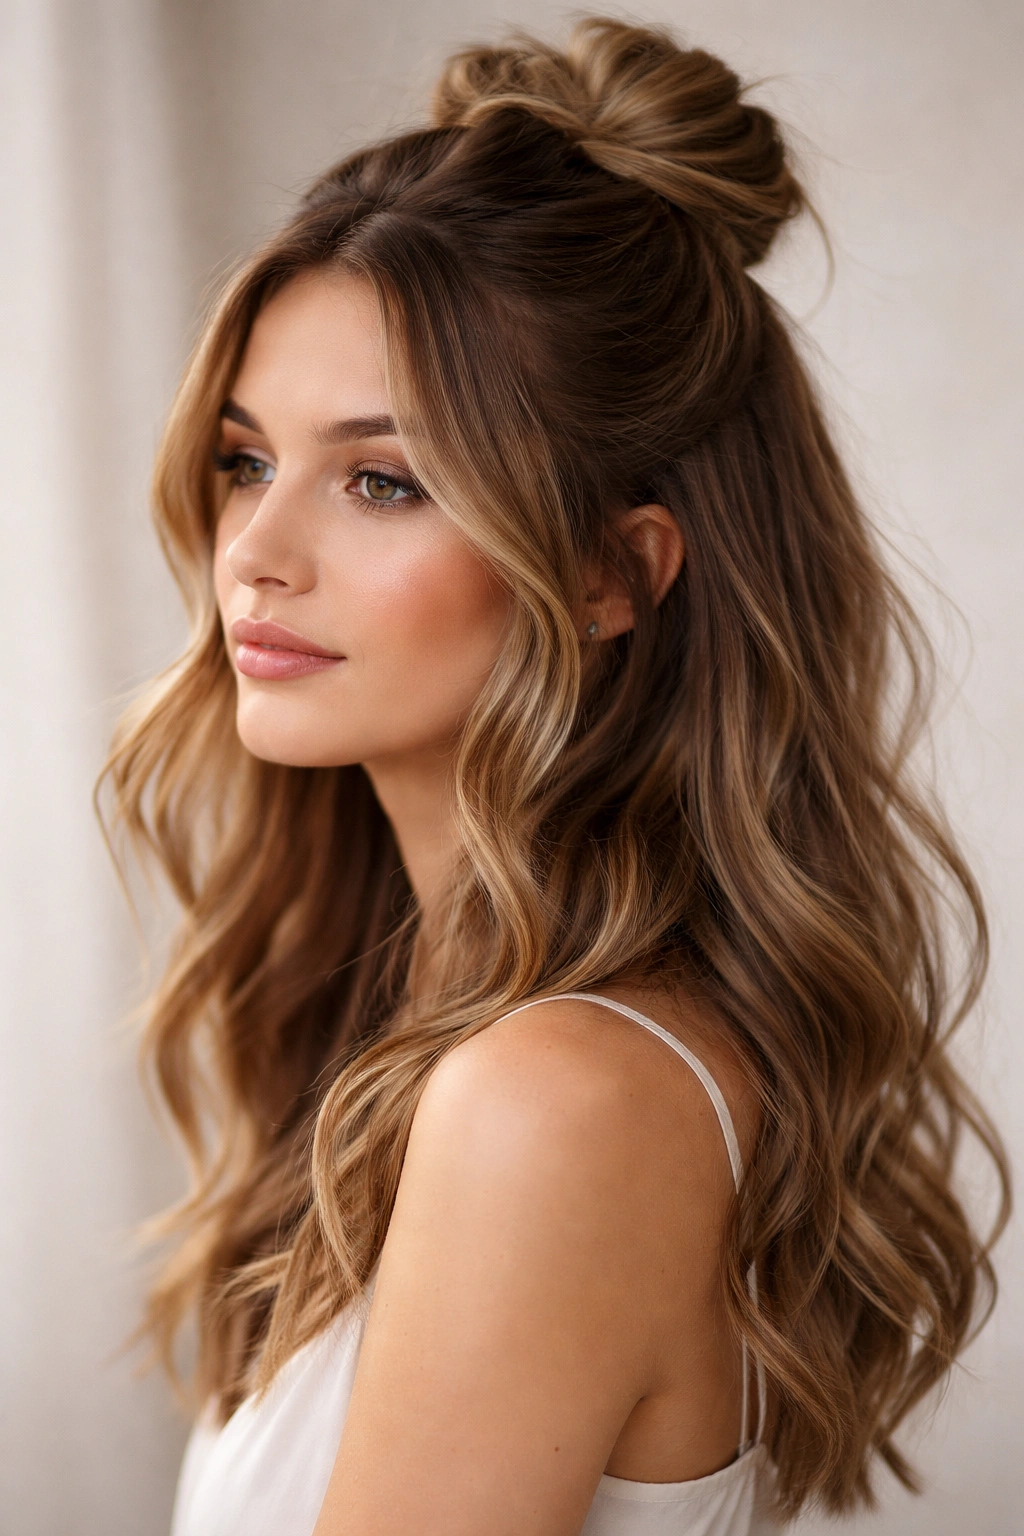
7. Half Up Bun with Loose Waves
A half up bun combines the polish and intentionality of a bun style with the softness and length of wearing your hair down, creating a look that feels put-together without being too formal. The bun sits at the crown or slightly back from the crown depending on your preference, while loose waves flow freely down your back and sides. This style is particular gorgeous on medium hair because the bun has enough substance to look intentional, and the loose waves in the lower section are long enough to show beautiful texture and movement without looking thin or sparse.
Creating a Bun That Looks Intentional, Not Tight
Many people create buns that are pulled too tight, which often reads as severe rather than pretty. The most beautiful half-up buns have some softness and looseness built in—they’re not geometric or perfectly round, but rather slightly undone and relaxed. To achieve this, gather your top section into a low ponytail first, then loosely coil the ends around the base of the ponytail and secure with bobby pins rather than smoothing everything into a tight knot. You want the bun to have some wisps escaping and some irregularity to its shape—this is what makes it look elegant rather than overly controlled.
Building Your Half Bun Style
- Gather the top portion of your hair into a ponytail positioned at your crown or slightly back from center
- Create a few soft curls or waves in the free portion of your hair before securing the top section for longer-lasting texture
- Coil the ponytail loosely around its base, securing with bobby pins as you wind
- Don’t pull the coil tight—you want some softness and some pieces escaping
- Pancake sections of the bun by gently pulling on the outer edges to make it look fuller and looser
- Allow face-framing pieces to escape and curl naturally
- Use a flexible hold spray rather than a strong-hold product so the bun looks soft rather than shellacked
Worth knowing: A half bun looks best for about 8 hours before gravity and movement cause it to shift and start looking slightly unstable—it’s not an all-day style, but it’s perfect for a specific event or occasion.
8. Voluminous Teased Half Up
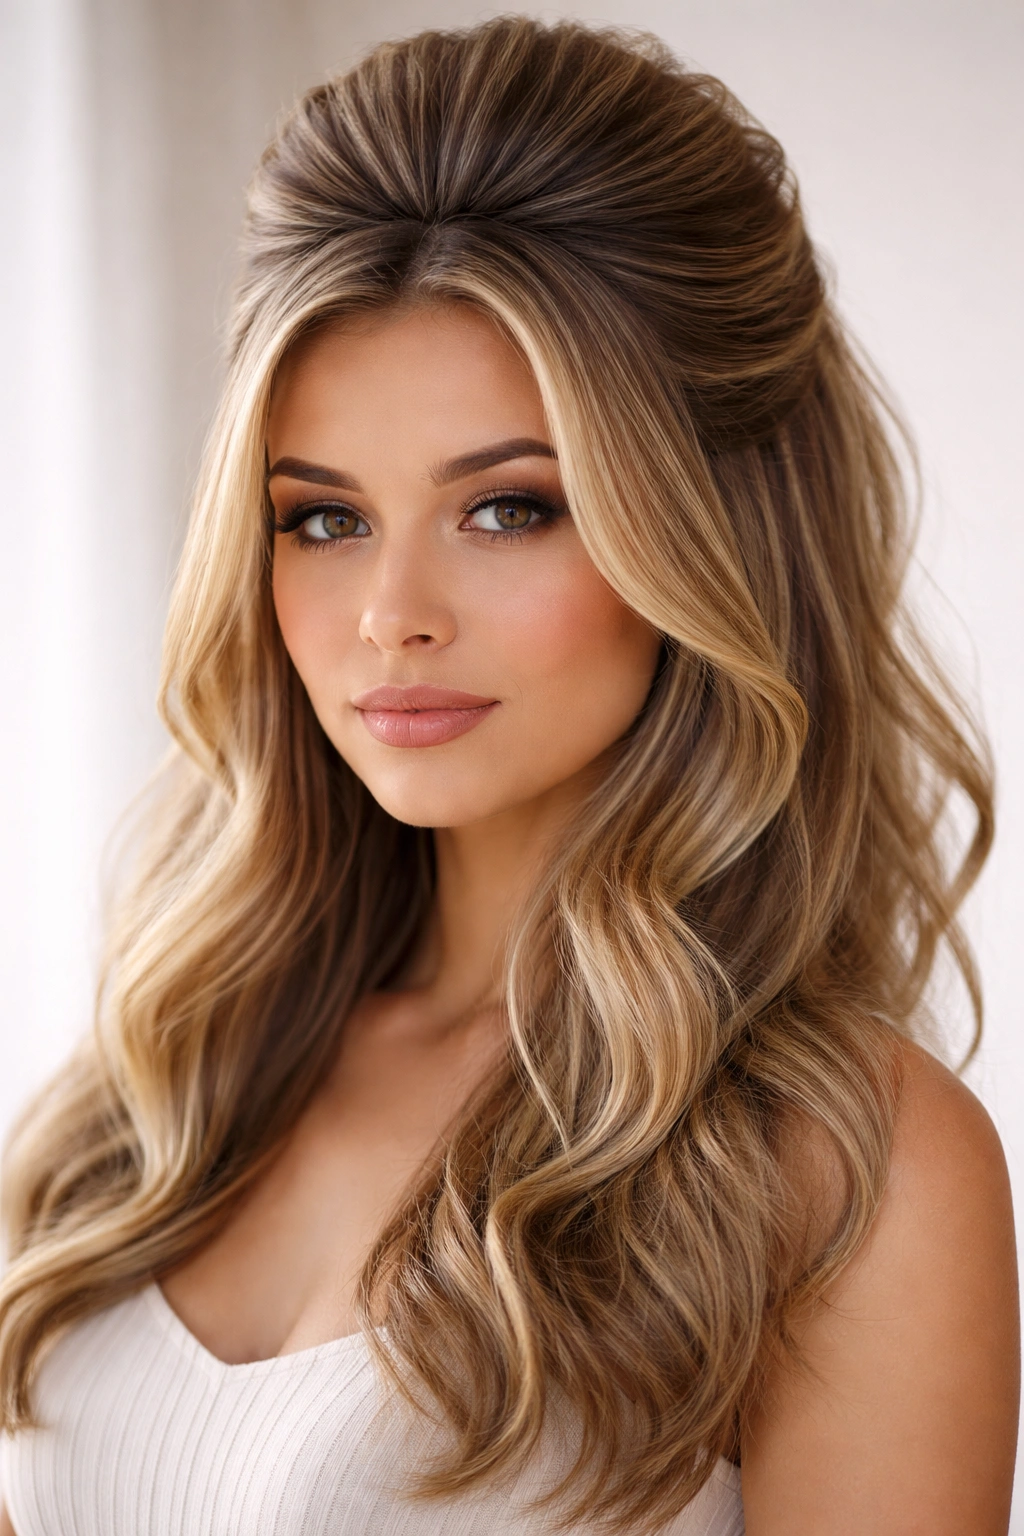
If you want maximum impact and maximum volume, the teased half up delivers that drama while remaining wearable and not cartoonish. This style takes the top portion of your hair and teases it at the roots for volume, then gathers it back while leaving some of that teased fullness visible. The technique of backcombing or teasing creates texture at the root that locks in height and fullness—this is particularly useful if you have fine hair that struggles to hold volume, or if you have thick hair that looks flat without some strategic teasing. The result is a style that looks voluminous and intentional rather than accidentally messy.
Teasing Technique That Creates Volume Without Damage
The difference between teasing that looks good and teasing that damages your hair is pressure and direction. Use a fine-tooth comb or teasing brush specifically designed for this purpose, and work in small sections at the roots of the hair you’re going to secure. Tease gently in downward strokes using a light hand—aggressive teasing damages the hair cuticle and creates breakage. You’re looking for enough texture to create grip and fullness, not to create a matted tangle at the roots. After teasing, smooth the outer surface of each section with your comb or brush, which flattens the top layer while maintaining the textured volume underneath.
Creating Texture for Lasting Volume
- Start with dry hair—wet or damp hair doesn’t hold backcombing well
- Apply a volumizing spray or dry shampoo to the roots of the section you’re going to tease
- Use a fine-tooth comb or teasing brush and gently backcomb at the roots in small sections
- Smooth the outer layer of each combed section with your comb
- Gather the teased section back and secure with a sturdy elastic—the teasing holds better with a bit of tension
- Don’t fully smooth the gathered section—you want to see the texture and fullness
- Wrap a small piece of hair around the elastic to hide it and create a more finished look
Pro tip: If you tease every time you wear a half-up style, you’ll eventually damage your hair, so reserve teasing for special occasions and use other volume-building techniques like curling, layering products, or root-lifting sprays on regular days.
9. Half Up with Face-Framing Layers
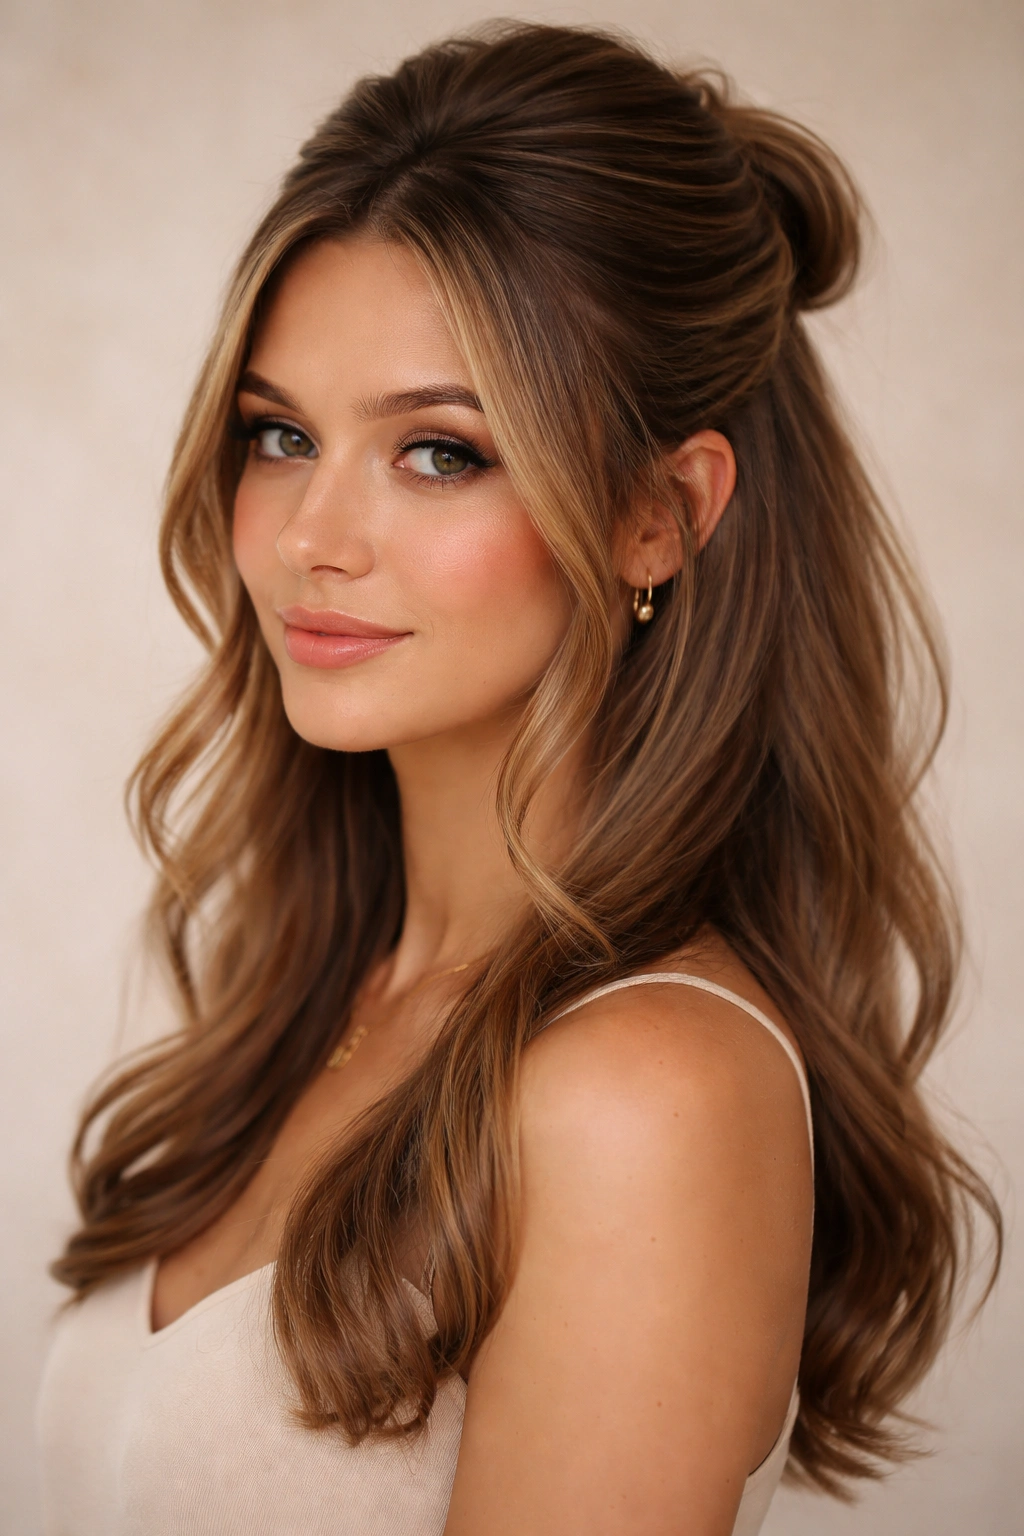
This style acknowledges that not all of the hair you pull back has to stay pulled back—creating intentional face-framing pieces around your temples and cheekbones adds softness and flatters your features in a way that a fully secured half-up sometimes doesn’t. By leaving two-to-three-inch-wide sections of hair on each side completely free and unsecured, you create a frame for your face while still managing the bulk of your hair with the half-up technique. This works beautifully on medium hair because you have enough length for the framing pieces to be substantial and create actual softness around the face, rather than just thin wisps.
Identifying Your Best Face-Framing Placement
Not every face shape is flattered by the same placement of face-framing pieces, but most people look best when those pieces start somewhere near the temple and are wide enough to create a visible frame rather than looking accidental. If you have a wider face, fuller face-framing pieces that start closer to the hairline and angle back help balance your features. If you have a narrower face, thinner or fewer pieces that create just a hint of softness work better. The key is intentionality—these pieces should look like a deliberate styling choice, not like the front section of your hair escaped from the secured portion.
Styling Face-Framing Pieces Effectively
- Before securing your half-up section, identify which pieces will frame your face and separate them out
- These pieces should be 2-3 inches wide at minimum and should start near your temple or slightly closer to your center part
- Secure the rest of your hair into your chosen half-up style (ponytail, bun, twist, whatever you prefer)
- Curl the face-framing pieces away from your face using a curling wand or by wrapping them around a brush while blow-drying
- The curl should enhance and soften the pieces—these don’t need to match exactly with any curls in the down portion
- Use a flexible hold spray so the frame looks soft and natural rather than sculpted
- Consider adding a small sparkle clip or decorative bobby pin to one or both face-framing pieces for a subtle glamorous touch
Insider note: Face-framing pieces work best when they’re slightly shorter than the rest of your hair—if your hair is all one length, you may want to ask your stylist about adding subtle layers to create natural face-framing dimensions.
10. Twisted Half Up with Curls
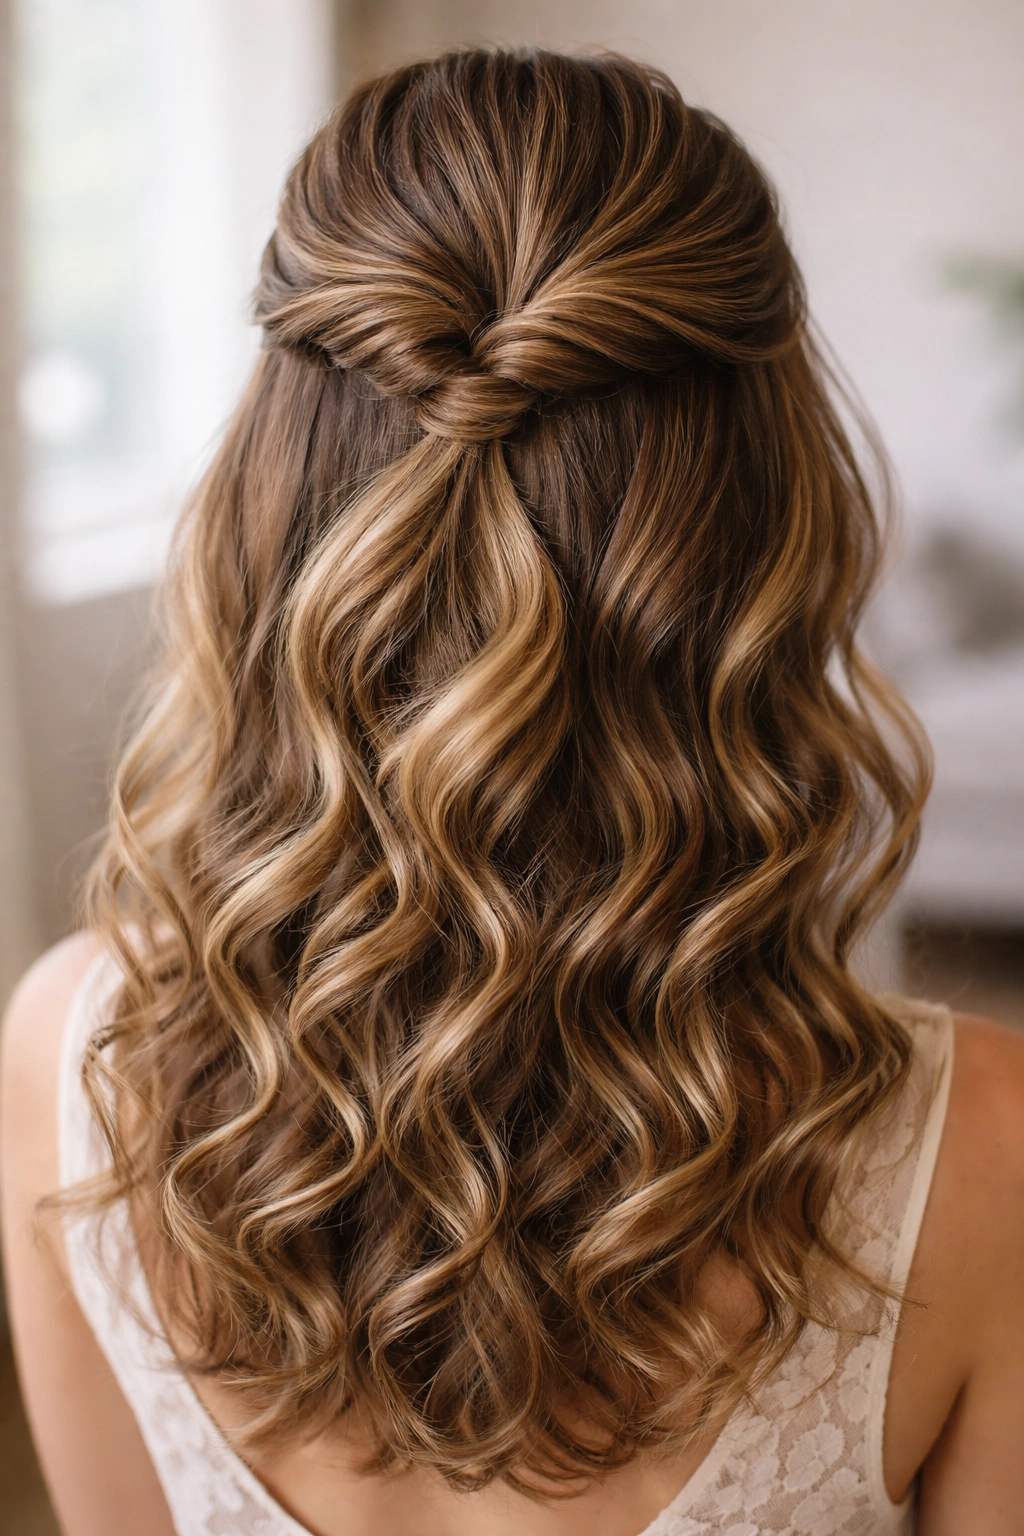
Combining the structured elegance of twisting with the romantic texture of curls creates a style that works for almost any occasion from casual to dressy. This version uses the classic twisted technique to gather the top portion, but intentionally creates defined curls in the lower portion, creating visual contrast and interest. The twists look sleek and controlled while the curls look soft and romantic—this contrast is what makes the style feel complete and intentional rather than like two different styling ideas randomly combined. Medium hair shows both elements beautifully because the twists have enough substance to be visible and defined, while the curled portion has enough length to show dimension and movement.
Creating Curls That Complement Twists
The best curls to pair with twists are those with some definition and separation rather than waves or loose texture. You’re aiming for actual curl ringlets or spiral texture that creates visual interest and contrast with the sleek twists. This might mean using a smaller barrel curling wand than you’d normally use, or spending a bit more time on each curl to make sure it sets properly. The curls should be intentional and visible from more than one angle—from the back, the side, and the front.
Building the Twisted and Curled Look
- Start by twisting the top section and securing it low or at your preferred height
- Create curls in the free portion using a 1.25-inch curling wand for defined spirals
- Curl sections away from your face for the most flattering effect
- Allow each curl to cool completely before releasing it—this sets the curl shape better
- Once cooled, gently separate and loosen each curl slightly to avoid a too-tight appearance
- Use a curl-defining spray or cream to enhance the curl separation and prevent them from blending together
- Consider wrapping a small section of loose hair around the twisted base as a finishing detail
Pro tip: If you’re curling multiple sections and running short on time, curl just the bottom two-thirds of the hair and leave the top portion (that will be near the twists) wavy or straight—this actually creates a more modern, less “done” appearance while still showing beautiful texture variation.
11. Romantic Braided Halo
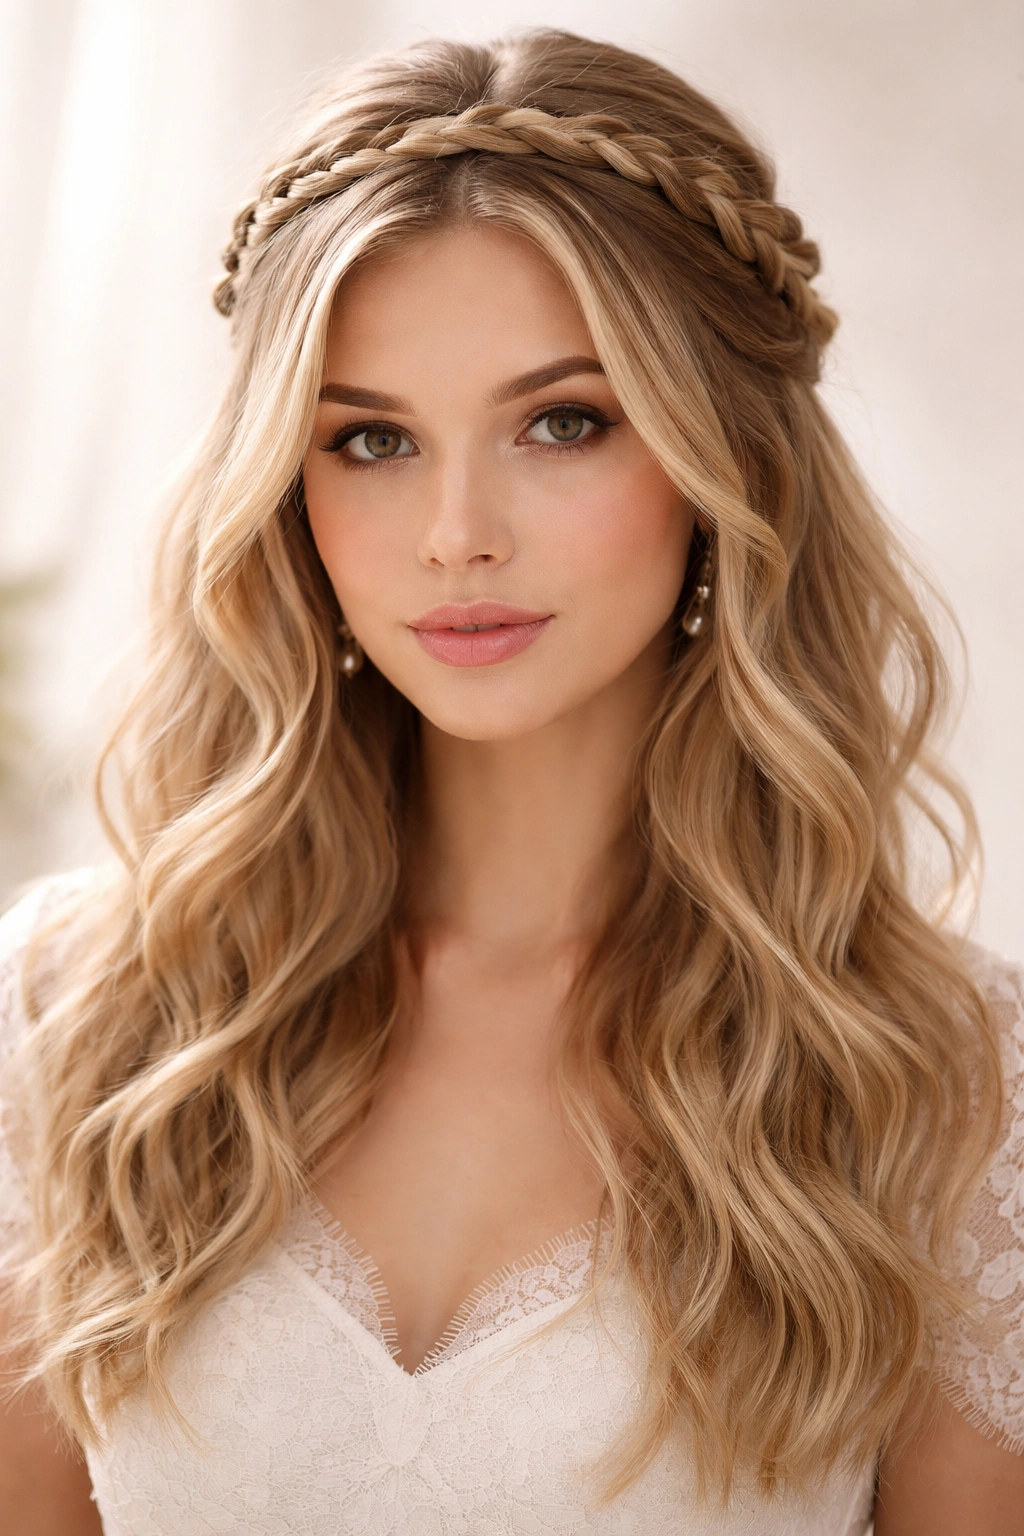
A braided halo creates the impression that your entire hairline is framed by a delicate braid, while the braid itself is actually only in the back half of your head, making this style look more complex than it actually is. The effect is ethereal and special-occasion-perfect, yet surprisingly wearable for everyday looks if you make the braid loose and undone enough. Medium hair is ideal for this style because the braid has enough substance to show the technique and detail, while the loose portion flowing down maintains that romantic, flowing sensibility. The name “halo” refers to the way the braid creates a crown-like effect that frames your face from above rather than from the sides.
Creating a Braid That Looks Like a Halo
True halo braids typically involve starting at one temple, braiding toward the back of the head, and ending at the opposite temple—creating that crown-like effect. However, a variation that works particularly well with half-up styling is creating a braid in the back section that you secure as your half-up element, then allowing the top front portion to flow loose with face-framing pieces. This version is easier to execute and holds better throughout the day than a true halo that starts at the temple. You’re essentially creating a braided crown base for your half-up style.
Executing the Halo Base
- Start a Dutch braid (braiding underneath instead of over the top) at one side of the back of your head
- Work the braid toward the opposite side, incorporating sections as you go
- Aim for the braid to sit roughly where a hat brim would sit—this is the “halo” line
- When you reach the opposite side, secure both ends together with bobby pins, or finish the braid and wrap it into your half-up point
- Pancake the braid generously to loosen and widen it
- Allow the top portion and face-framing sections to fall loose in waves or curls
- The contrast between the structured braid line and the loose top portion is what creates the “halo” effect
Worth knowing: This style requires either very good spatial awareness or a mirror positioned so you can see the back of your head, or help from someone who can guide the braid placement—it’s trickier to visualize than styles you can see as you’re creating them.
12. Sleek and Polished Half Up Knot
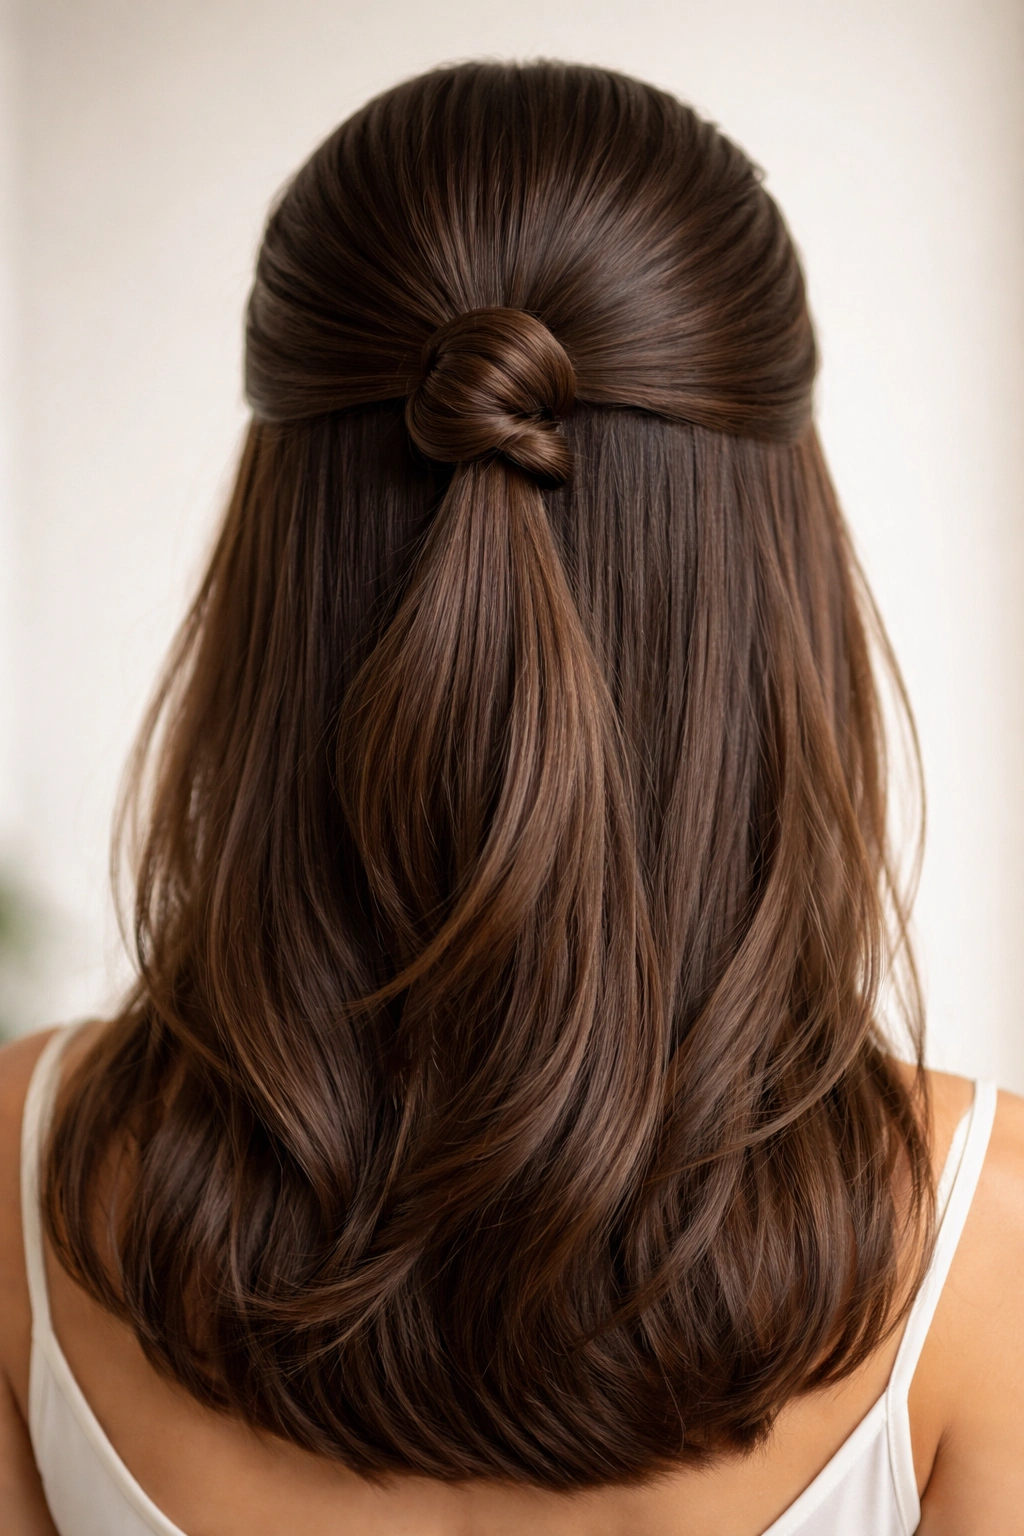
For those moments when you want something more visually interesting than a simple ponytail but less structured than a full bun, the half-up knot delivers understated elegance. Rather than gathering hair into a elastic and creating a ponytail, you’re tying the gathered section into an actual knot—the way you might tie a rope into a knot. This creates a visual focal point that’s more dynamic than a smooth ponytail while remaining polished and intentional. The knot works particularly well on medium hair because it has enough length to tie a secure knot that holds all day without coming undone, yet the style isn’t so stiff or controlled that it looks severe.
Why a Knot Works Better Than You’d Expect
A hair knot might sound like it would look messy or childish, but actually, when executed with smooth, sleek hair and positioned thoughtfully, it looks modern and intentional. The knot creates a sculptural element that’s different from the standard ponytail or bun—it’s geometric and interesting without being experimental or fashion-forward to the point of not being practical. Because the knot is secured with the hair itself rather than with a hair tie, it can hold all day even in medium hair, whereas a similar style created with an elastic might slip or loosen.
Creating a Secure and Polished Knot
- Gather the top portion of your hair as you would for a ponytail, but use your hands instead of an elastic
- Divide the gathered section into two thick strands
- Tie these two strands into a simple knot, the same way you’d tie any rope
- Pull the knot tight so it sits securely against your head
- Tuck the loose ends under or around the knot and secure with bobby pins
- For extra polish, wrap a thin section of hair around the base of the knot to hide bobby pins
- Smooth flyaways with a fine comb and minimal product
- Create waves or curls in the loose portion to offset the geometric shape of the knot
Pro tip: If your knot tends to slip or come partially untied during the day, you can use bobby pins threaded through the knot itself as extra anchors—position them to disappear into the knot structure where they won’t be visible.
13. Messy Textured Half Up

Not every style needs to look polished and intentional—sometimes the most compelling look is intentionally imperfect. The messy textured half-up celebrates movement, texture, and a “just rolled out of bed but make it fashion” aesthetic. This style starts with textured, slightly undone hair throughout, then gathers the top section loosely with pieces escaping everywhere. The secret to making messy look intentional rather than accidental is ensuring the texture and looseness are consistent throughout—your gathered section should be similarly loose and textured to your down section, not polished while your ends are wild.
Building Texture From the Start
Messy styling begins before you gather any hair—it begins with the base texture you create. This might involve using a texturizing spray on damp hair, scrunching in a texture cream, using a salt spray, or creating undone waves with heat tools. The texture should look organic and undefined rather than uniform curls or waves. Once you have that foundation texture throughout your hair, the gathering process is literally just bringing together a loose section from the top and securing it in the most relaxed way possible—think twisted loosely, or gathered with an elastic but not smoothed or refined in any way.
Creating Intentional Messiness
- Start with texture-building products applied to damp hair
- Blow-dry with your fingers to encourage texture rather than using a smooth blow-dry technique
- Use a sea salt spray or texture spray for grip and hold
- Create loose waves or texture with a curling wand if you have straight hair, or enhance natural texture with product
- Gather the top section by twisting loosely or using your fingers to loosely gather, not a comb
- Secure with a clear elastic but don’t tighten it—let it sit loosely where you gathered
- Leave pieces escaping around your face and sides
- Use a flexible hold spray, not a strong-hold product, so everything maintains its movement
Insider note: The messy texture style actually requires more intentional styling technique than polished styles—the looseness and texture won’t happen naturally; you have to create it deliberately and then resist the urge to tighten and refine everything.
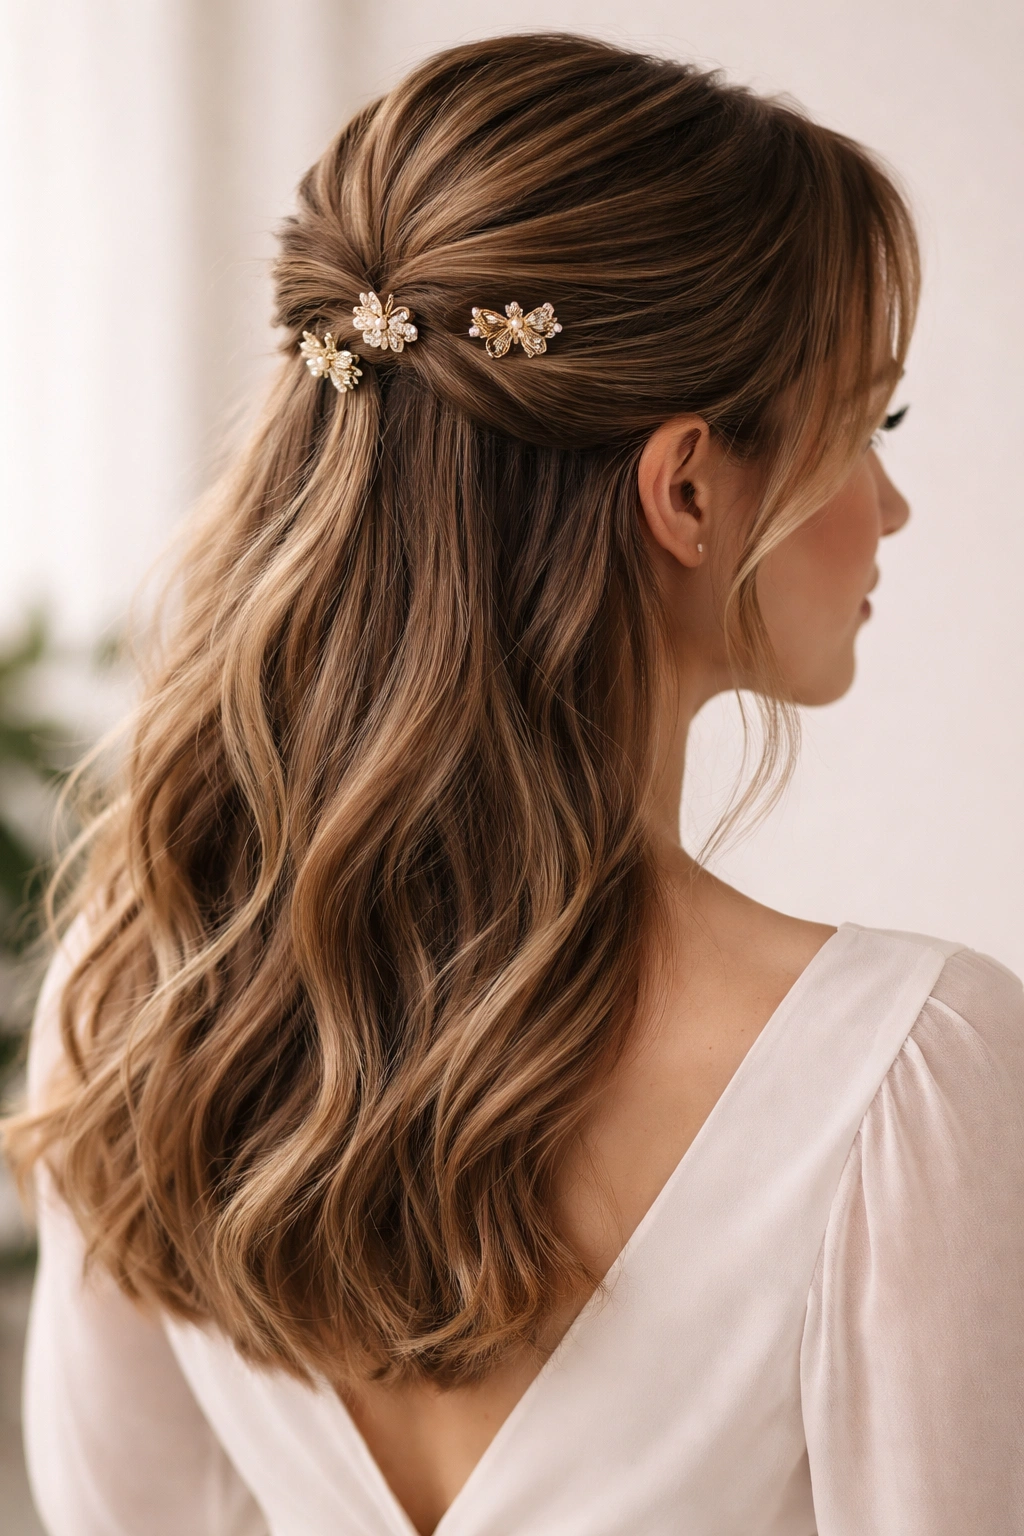
14. Half Up with Pearl Pins
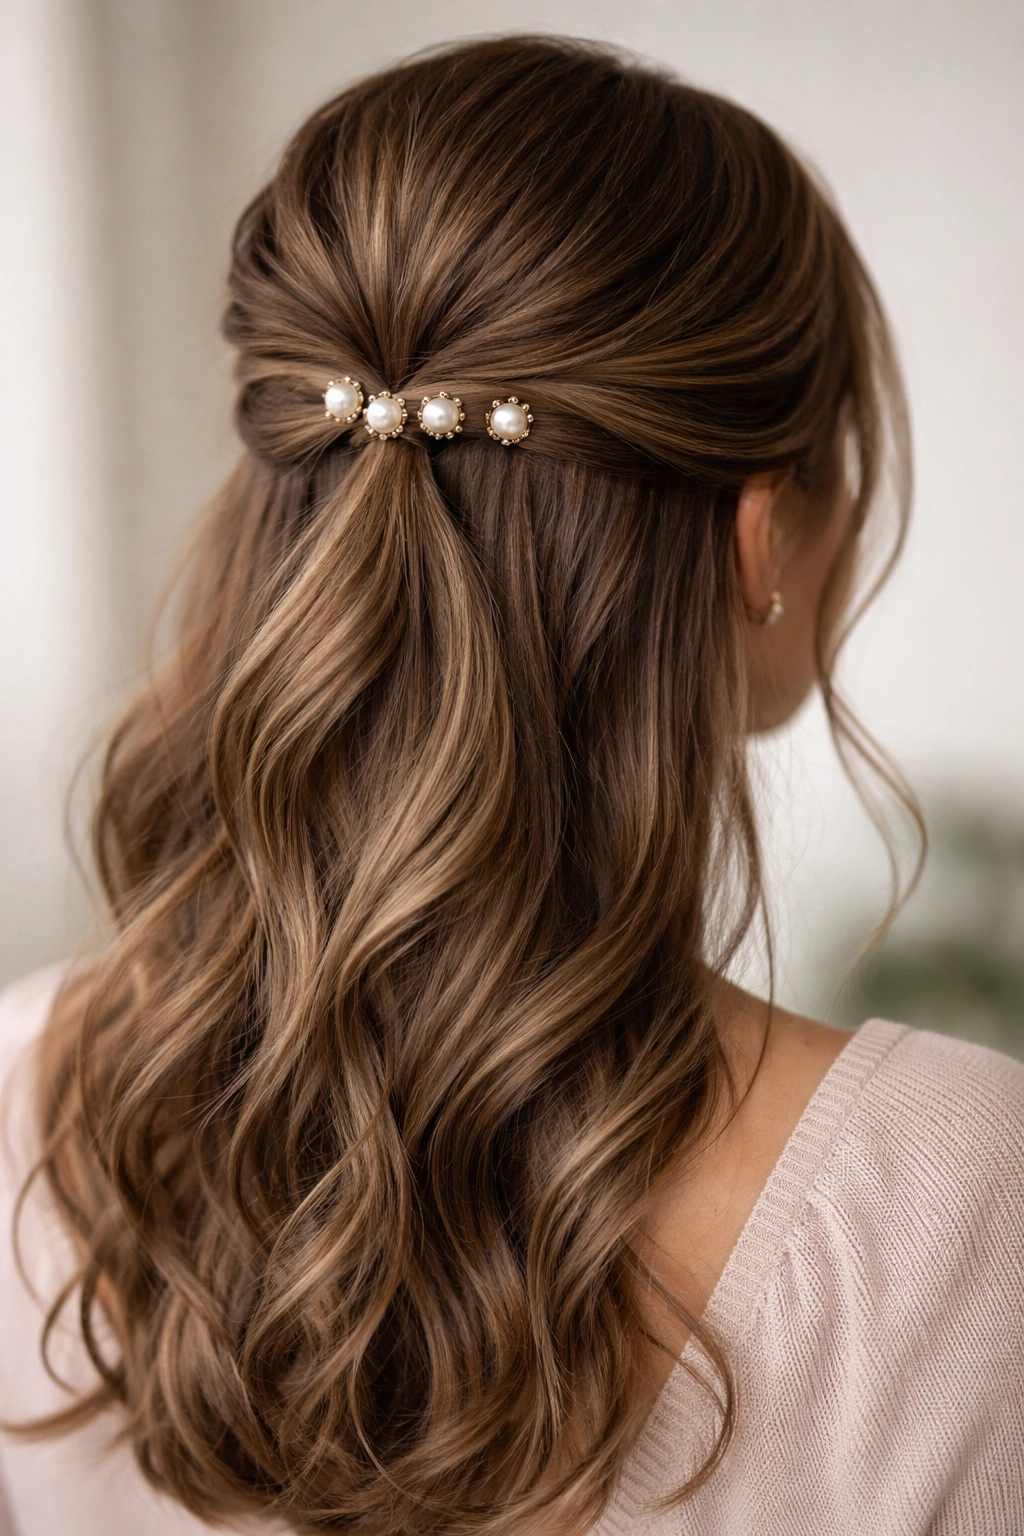
Sometimes a half-up style needs just one special detail to feel elevated and intentional, and pearl pins provide exactly that. Rather than using standard bobby pins or a simple elastic, you’re anchoring your half-up style with decorative pearl pins, which catch the light and add a subtle touch of glamour. Pearls are timeless and work with almost any aesthetic from vintage to modern, making them far more versatile than many other decorative hair accessories. A couple of pearl pins scattered through your secured section adds sophistication without looking costume-like or overly accessorized.
Selecting and Placing Pearl Pins Effectively
Pearl pins come in various sizes and styles, from tiny delicate pearls to larger statement pieces. For a half-up style, you typically want smaller to medium-sized pearl pins that echo the scale of your gathered hair rather than completely dominating it. Position them strategically—perhaps one or two visible at the base of your twist or ponytail, or scattered through the secured section if you’re creating a bun or braided style. The pins should feel like a natural part of the overall aesthetic rather than an afterthought or decoration that doesn’t fit with the rest of your styling.
Building the Pearl Pin Detail
- Gather your half-up style using your preferred technique—twist, braid, ponytail, etc.
- Before fully securing with bobby pins, consider where pearl pins would look best
- Insert pearl pins through the gathered section, positioning them where they’ll catch light
- Use pearl pins as your primary securing method if you want them prominently visible
- Alternatively, use bobby pins first to secure, then add pearl pins as a decorative finishing layer
- Choose pearl colors that either match your hair or coordinate with your outfit
- One or two pearl pins is often more elegant than scattering many throughout
Pro tip: If you’re using pearl pins as your primary security method, you may need more of them than you’d use standard bobby pins because they don’t grip quite as firmly—position them in an X-pattern for better hold.
15. Double Twisted Half Up
This style takes the simplicity of twisting and amplifies it by creating two separate twisted sections rather than one. The double twist creates more visual interest and can actually hold better throughout the day because you’re distributing the hair weight across two anchor points rather than one. You can position the two twists at different heights, cross them over each other, or let them sit side-by-side—the variation in positioning creates entirely different aesthetics from the same basic technique. Medium hair works beautifully for double twists because you have enough hair to create two substantial, visible twists without the style looking too heavy or the twists looking thin.
Positioning Double Twists for Maximum Impact
The positioning of your two twists dramatically affects how the style reads. Two twists positioned at the same height and secured together create symmetry and balance—this works well for formal occasions. Two twists positioned at slightly different heights and secured slightly off-center create visual interest and asymmetry—this works beautifully for everyday wear. Twists that cross over each other or intertwine create complexity and movement. You can even position one twist higher and one lower, creating a cascading effect that’s particularly pretty from the back.
Creating Your Double Twisted Style
- Take a section from behind one ear and begin twisting away from your face
- Work this twist to your preferred height and secure temporarily with a clip
- Take a second section from behind the opposite ear and twist it toward the center
- Position the second twist either parallel to the first, at a different height, or crossing over it
- Secure both twists together with bobby pins, or secure each separately depending on your positioning choice
- Pancake both twists to loosen and widen them for a fuller appearance
- Vary which twists are tighter versus looser to create visual interest
- Consider adding decorative pins or a subtle sparkle clip where the twists meet
Worth knowing: Double twists require a bit more skill to keep balanced visually—if you’re new to half-up styling, master the single twist first and then experiment with doubling up once you understand the mechanics.
16. Windswept Half Up Style
This style captures the romantic, slightly tousled look of hair that’s been gently moved by wind—a sensibility that’s flattering and feels effortless rather than overly styled. The windswept half-up combines movement and texture in the gathered section with flowing, directional waves in the down portion, creating the impression that your entire look has a natural, unforced quality. It requires a bit more styling effort than a casual style, but significantly less than fully controlled styles like sleek ponytails or tight braids. Medium hair is ideal for windswept styling because you have enough length for movement to be visible and impactful.
Creating the Windswept Effect
Windswept styling is all about directional movement rather than uniform texture. Create waves that move in one direction rather than ringlet curls that sit in place. Use a large-barrel wand and wrap hair loosely around it rather than creating defined spirals. Brush through waves once they’ve cooled to break them up and create movement. Style the gathered portion to have some movement too—a loose, slightly messy twist has more windswept quality than a tight, polished ponytail.
Building Your Windswept Half-Up
- Start with waves created using a 1.5-inch wand, wrapping sections loosely and brushing through when cool
- Waves should move in one general direction rather than springing up from all angles
- Gather the top section using a loose twist or loosely gathered ponytail
- Don’t fully smooth the gathered section—you want some texture and movement visible
- Leave face-framing pieces longer and allow them to fall naturally rather than tucking them neatly away
- Use a flexible hold product rather than strong hold so waves maintain their movement throughout the day
- Consider applying product to the gathered section to enhance texture and movement there too
Pro tip: Windswept styling looks best when you’ve applied product and textured your hair, then let it rest for 10-15 minutes before gathering it—this allows the waves and texture to set so they maintain movement rather than immediately softening to smoothness.
17. Half Up with Decorative Clips
Decorative clips have experienced a major resurgence in styling, and for good reason—they add instant personality and interest to any half-up style. Whether you’re using tiny pearl clips, colorful claw clips, ornate metal clips, or modern geometric styles, clips can either subtly enhance your half-up or become a bold statement depending on which clips you choose and how you position them. Medium hair shows off decorative clips beautifully because your hair has enough volume to show off the clip’s design without the clip looking oversized or overpowering. Clips work as both functional security and decorative statement.
Selecting Clips That Match Your Aesthetic
The clip’s style should coordinate with your overall look—delicate pearl or gold clips work for formal occasions, colorful or tortoiseshell clips work for casual or fashion-forward looks, and vintage-inspired clips work for romantic or retro aesthetics. Size matters too; very small clips look delicate and refined, while larger clips make a bolder statement. You can use one statement clip as your primary securing element, or use several small matching clips scattered through your half-up. The positioning should feel intentional rather than like you just happened to have clips available.
Positioning Clips Effectively
- Gather your half-up section using your preferred technique (twist, braid, ponytail)
- Use bobby pins as your base security if you’re using clips primarily for decoration
- Position clips where they’ll be visible and catch light—at the base of your twist, along a braid, or scattered through a gathered section
- Consider using clips to secure face-framing pieces in place while leaving them loose
- Stagger clip placement for visual interest—don’t line them up in a perfectly straight row unless that’s intentional
- Choose clip colors that either match your hair or coordinate with your outfit and skin tone
- Mix clip sizes and styles for a more curated, intentional aesthetic
Insider note: Claw clips are particularly effective for securing half-up styles because their grip is strong enough to hold even thicker hair all day, making them both functional and beautiful.
18. Elegant Half Up Half Down for Formal Events
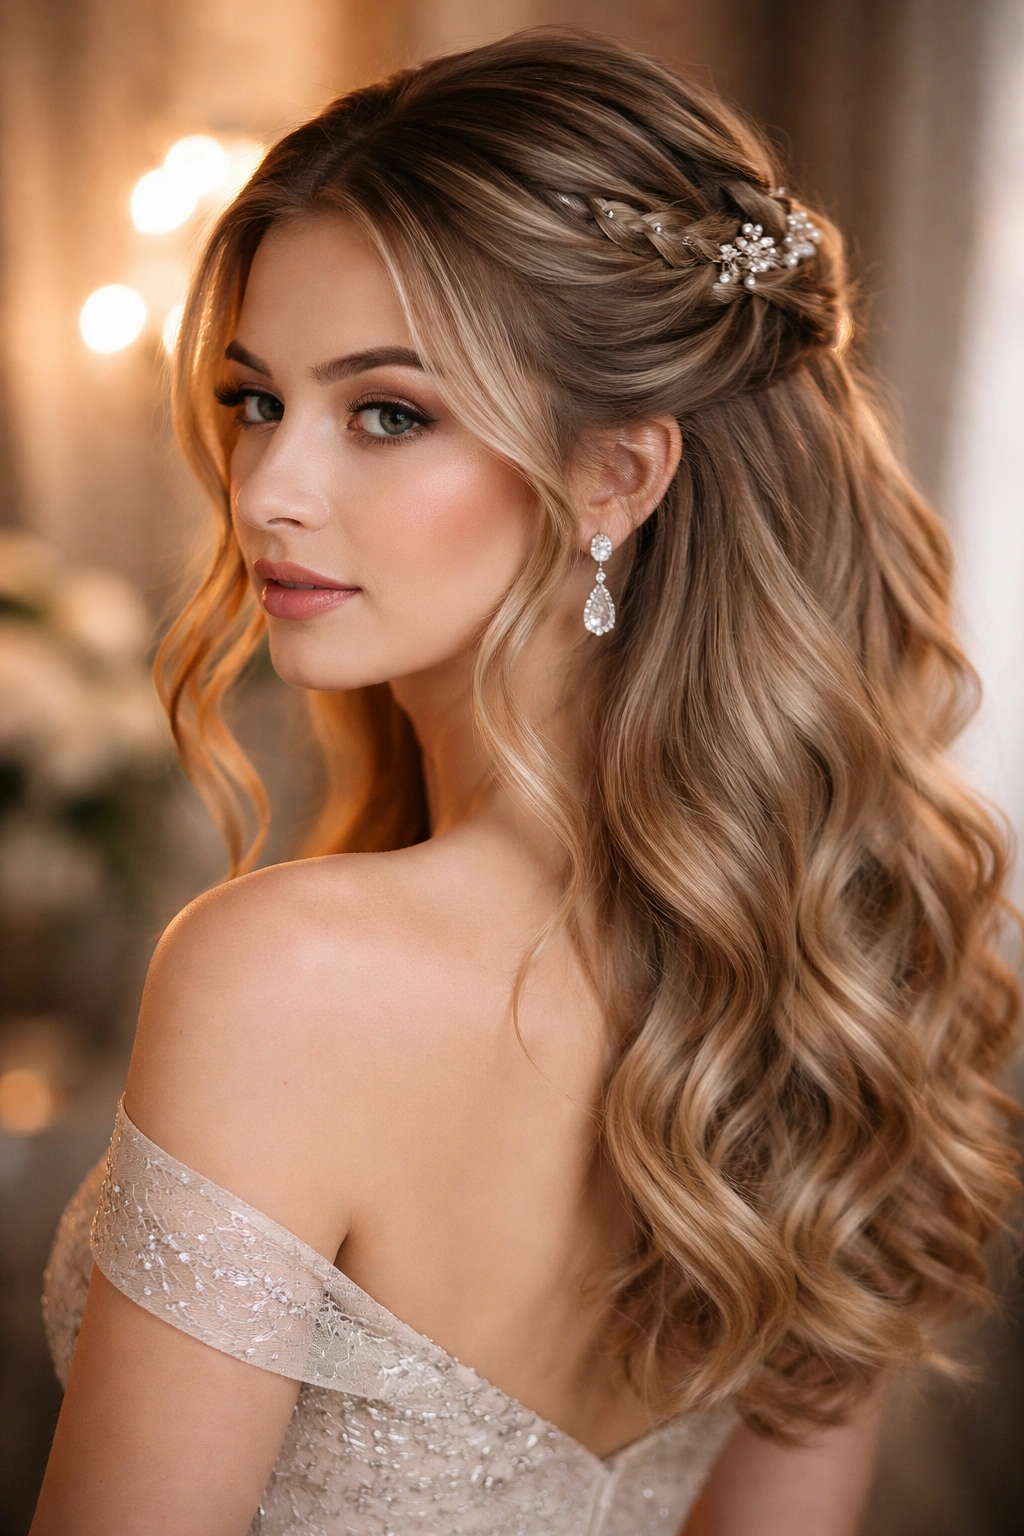
When you need a style that feels special-occasion-worthy and elegant enough for weddings, galas, formal dinners, or other significant events, the elegant formal half-up elevates the basic concept to something genuinely glamorous. This version combines several elements: intricate or romantic detailing in the gathered portion (braiding, twisting, decorative elements), polished, defined waves or curls in the down portion, and intentional face-framing that opens up your features. Everything is refined and intentional—there are no accidental wisps or casual elements. Medium hair shows off formal styling beautifully because you have enough substance to create impressive braiding or styling details while maintaining beautiful flow and movement in the down portion.
Building Formal-Event-Ready Styling
Formal styling requires more preparation and more attention to detail than everyday looks. Start the night before by considering your overall aesthetic—are you going for romantic and soft, sleek and modern, or classic and timeless? Choose your gathering technique (elaborate braid, multiple twists, decorative elements) based on this aesthetic and based on what will work with your dress or outfit. Plan your waves or curls to complement your chosen gathering style. If the gathering is intricate, keep the down portion smooth and flowing; if the gathering is sleek, you can create more dramatic waves or curls. Consider professional styling if you want absolutely flawless execution—formal occasions justify the investment.
Creating Your Formal Half-Up
- Plan your styling at least one day in advance so you’re not rushing the morning of the event
- Start with a consultation about your dress, overall aesthetic, and how formal the event is
- Practice your chosen style once or twice before the actual event so you understand the technique
- Prepare your hair the day before with a deep conditioning treatment for extra shine and smoothness
- Blow-dry your hair the day of the event if you have time, or use texturizing products if you’re styling damp hair
- Create your chosen formal gathering detail (elaborate braid, multiple twists, etc.) first
- Secure with bobby pins, decorative clips, or small hairpieces depending on your aesthetic
- Create formal waves or curls in the down portion, making sure they’re uniform and intentional
- Add any finishing touches: sparkle clips, hairpieces, flowers, or delicate accessories that coordinate with your outfit
- Use a medium to strong hold spray that will keep your style secure through the entire event
Worth knowing: Formal styling for events often looks its absolute best in photographs and under professional lighting, and may look slightly more styled and “done” than your everyday aesthetic—this is exactly right for formal occasions, where a polished, intentional appearance is appropriate and expected.
Final Thoughts
Half up half down styling offers the perfect balance of polish and ease, allowing you to manage your hair while maintaining the length and movement that make you feel like yourself. Medium hair is uniquely positioned to show off these styles beautifully—you have enough length for romantic flow and movement, enough substance for detailed braiding and gathering techniques, and enough versatility to work with any texture from straight to curly. The eighteen styles here represent the range of possibilities, from casual everyday twists to formal event elegance, from romantic braiding to modern minimalism.
What makes these styles work across so many different preferences is their fundamental flexibility. Most of them can be dressed up or down depending on what products you use, what details you add, and where you position the gathered section. The same basic twist can be casual and loose for a weekend coffee date or sleek and refined for a professional setting. Once you understand the basic mechanics of a few core techniques—twisting, gathering, braiding, knotting—you can experiment with variations and positioning to create endless looks from the same foundation.
The real skill in mastering half up styling isn’t about memorizing exactly how each style goes in your hair, but rather understanding the principles that make these styles work. Understand where placement sits and how that affects the overall vibe. Know the difference between loose texture and tight polish, and how to adjust those qualities based on your setting and preference. Learn your hair’s natural tendencies and how to work with them rather than against them—whether that means enhancing natural waves, accepting that your hair will escape slightly from tight styles, or using texture products to create the grip you need for the look you want. With these principles in place, you can adapt these styles to your hair’s unique characteristics and create versions that feel authentically yours.