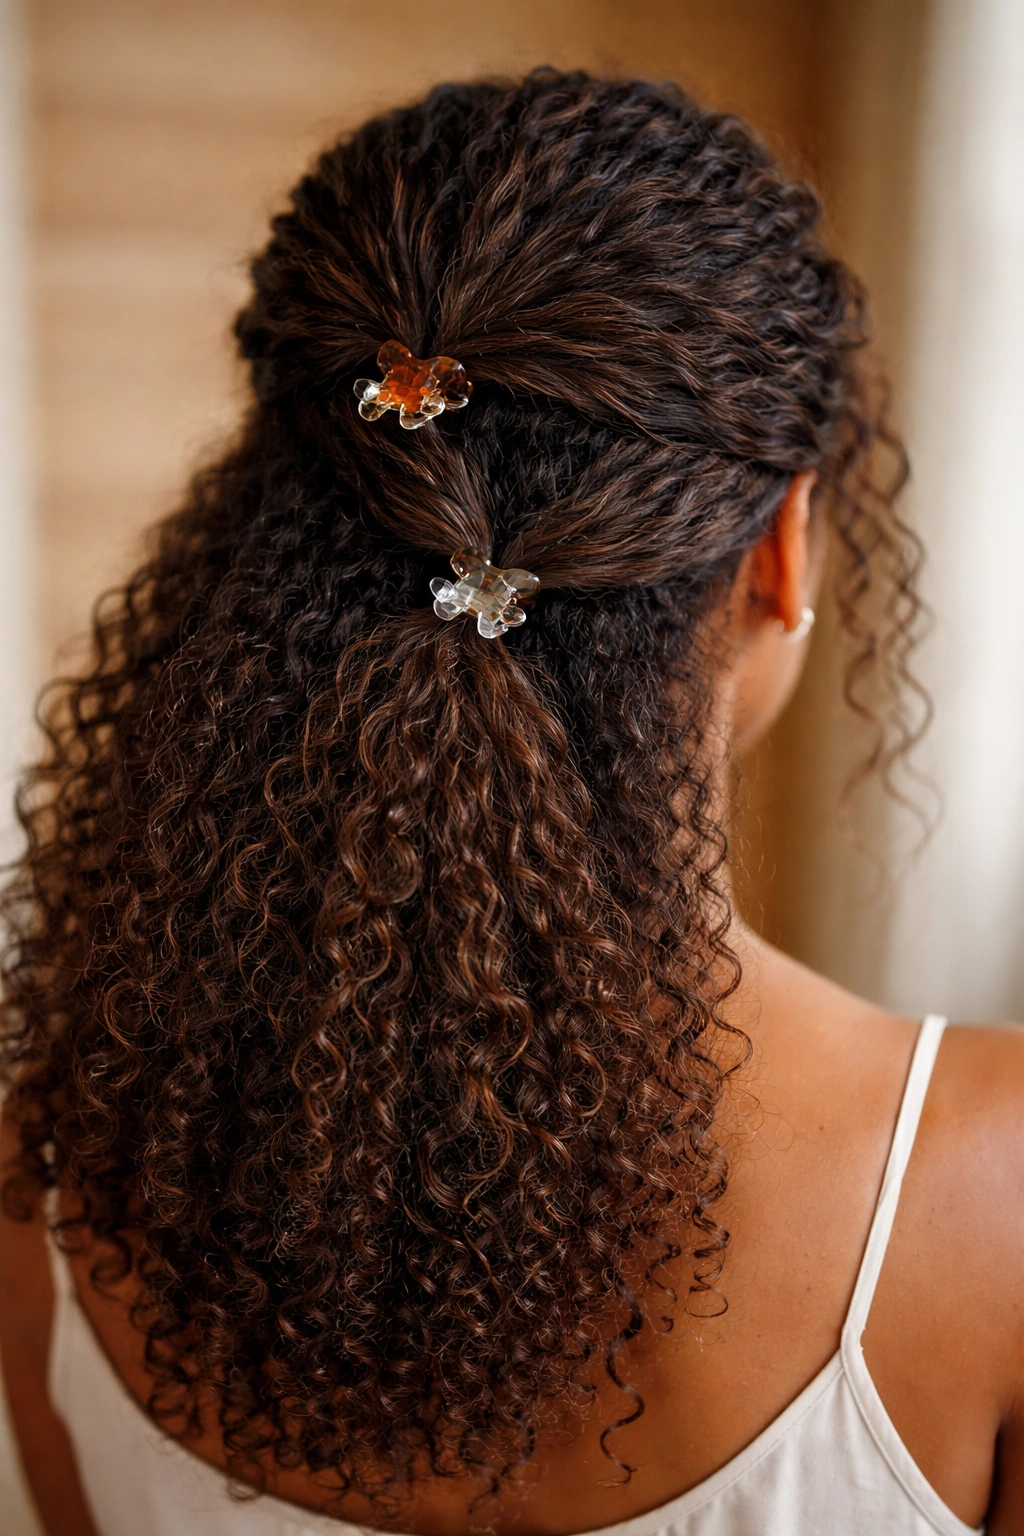
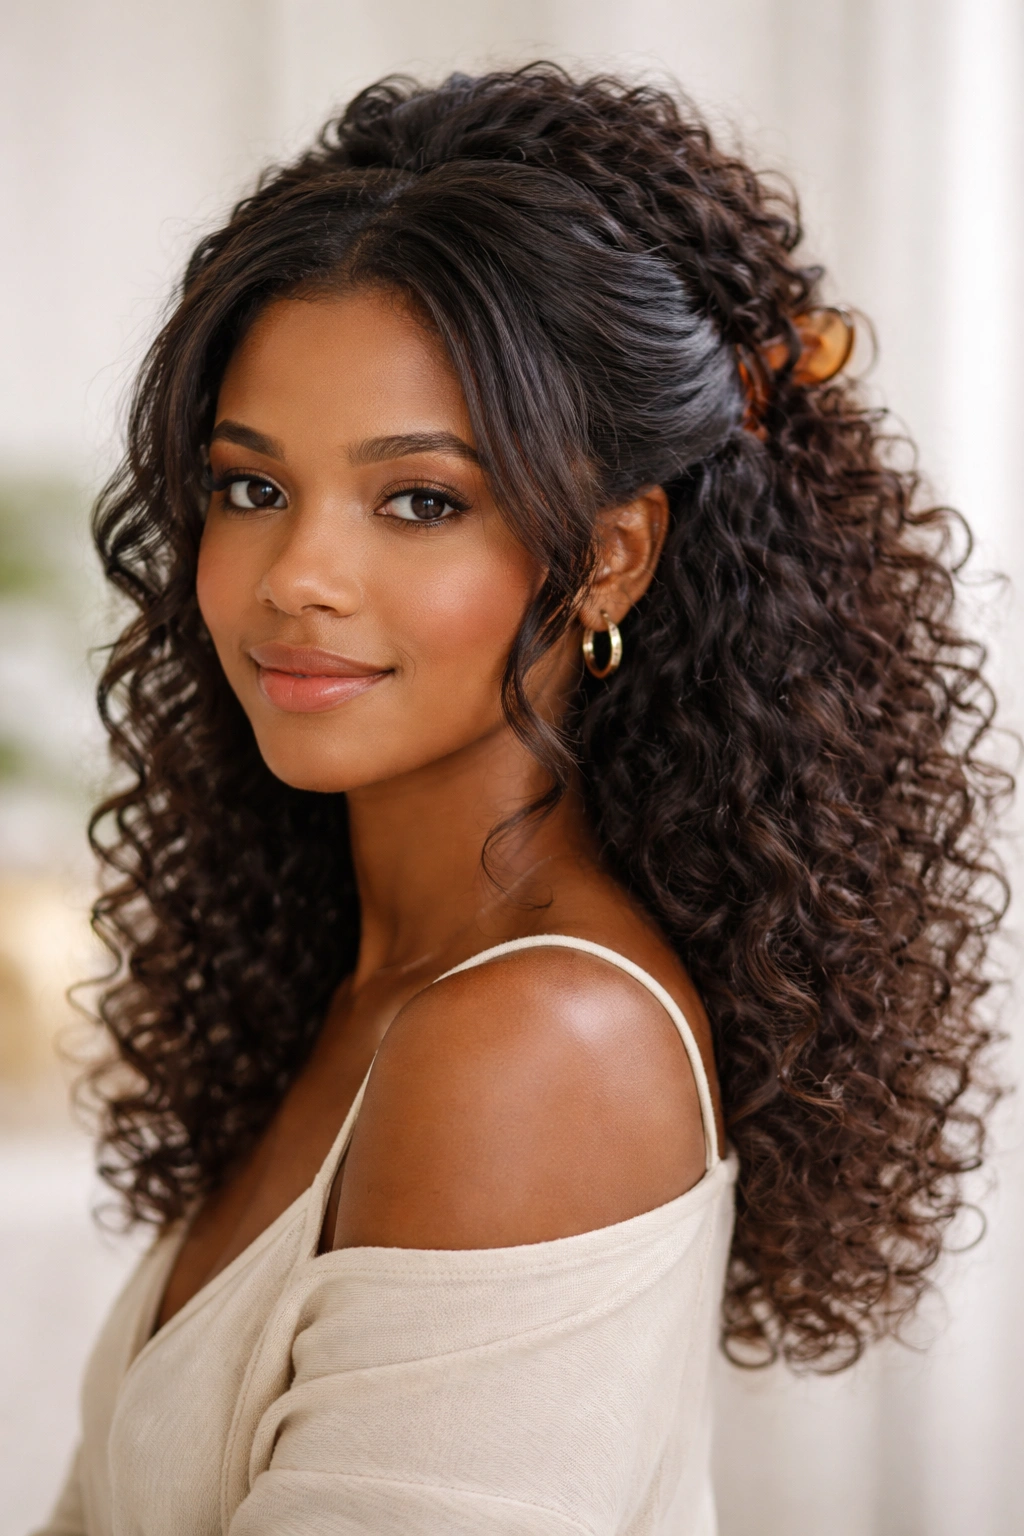
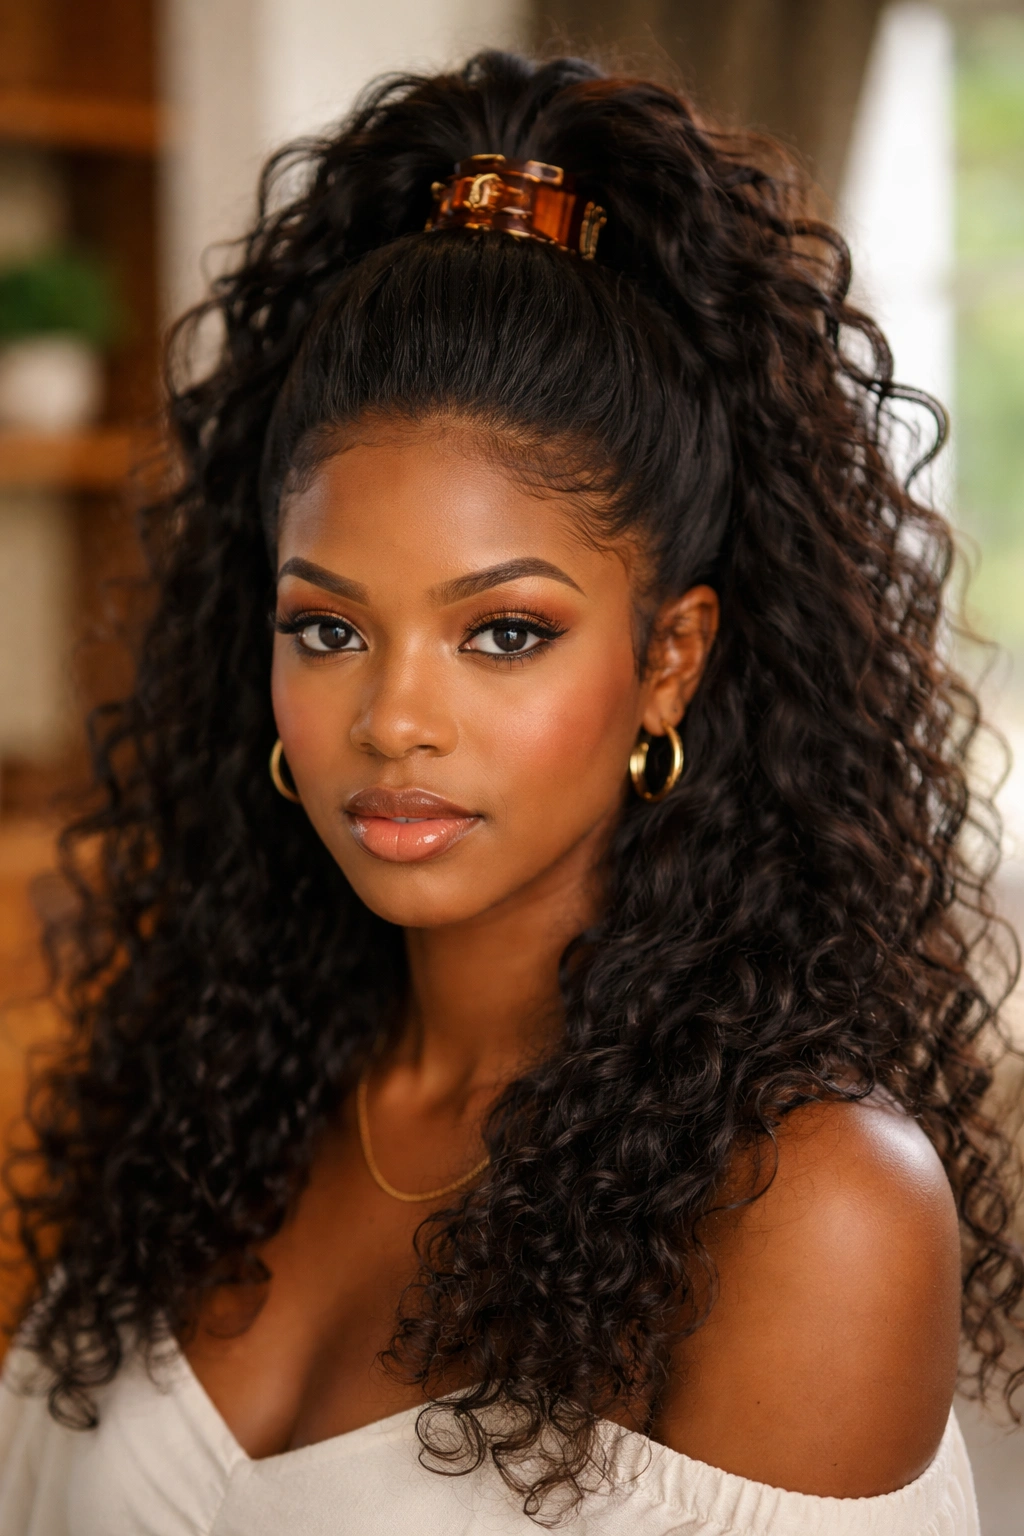
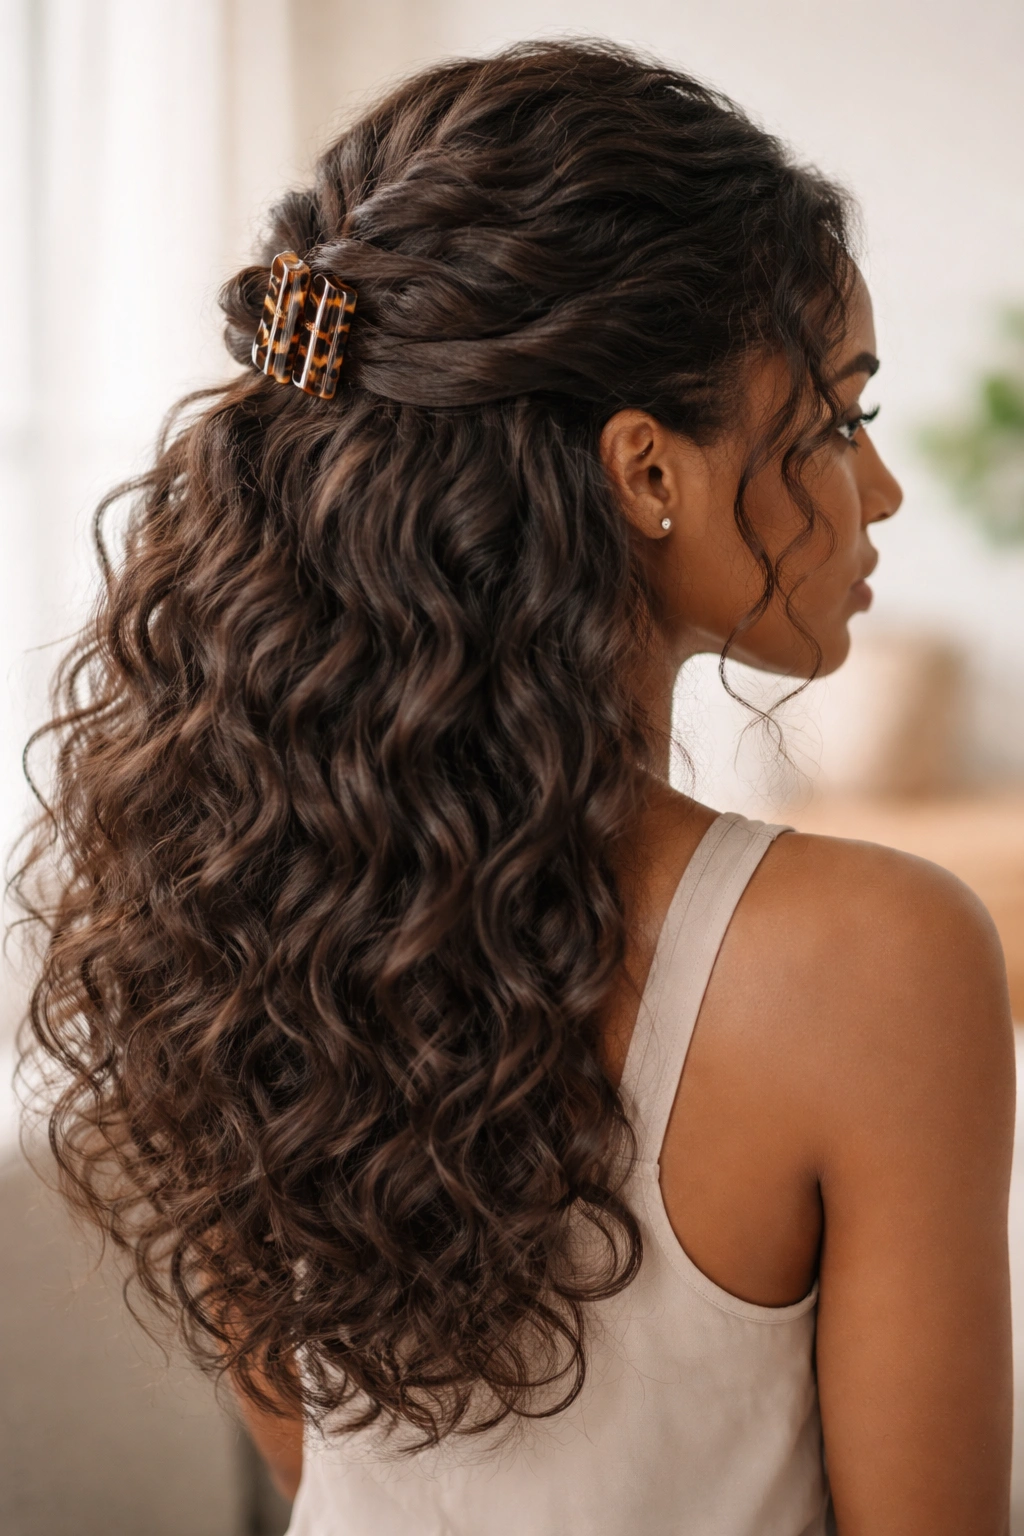
Natural hair and claw clips are basically a match made in heaven. If you’ve been scrolling through styling tutorials and wondering how to make claw clips work with your texture—without damaging your strands or creating that flat, lifeless look that comes with tight styling—you’re about to discover something that changes everything. The beauty of the half-up half-down style with claw clips is that it celebrates your hair’s natural volume and movement while keeping the top section secure and polished. It’s practical enough for a regular Tuesday at work, but elevated enough to wear to brunches, date nights, or anywhere you want to feel put-together without the commitment of a full updo.
Here’s the thing that most natural hair tutorials miss: claw clips work on natural hair because they grip texture differently than they grip straight hair. Your curls, coils, and waves actually provide the tension a claw clip needs to stay put all day. You don’t need to be a professional hairstylist to make these styles work—you just need the right technique and an understanding of what your specific hair texture needs. What follows are fifteen distinct claw clip half-up half-down styles, each designed with natural hair in mind, from loose waves to tight coils, with specific instructions for making each one look intentional and beautifully balanced.
Whether you’re working with 2c waves, 3b curls, 4a coils, or anything in between, you’ll find styles here that won’t require hours of styling, won’t flatten your hair, and actually look better the longer you wear them. Let’s dive into each one.
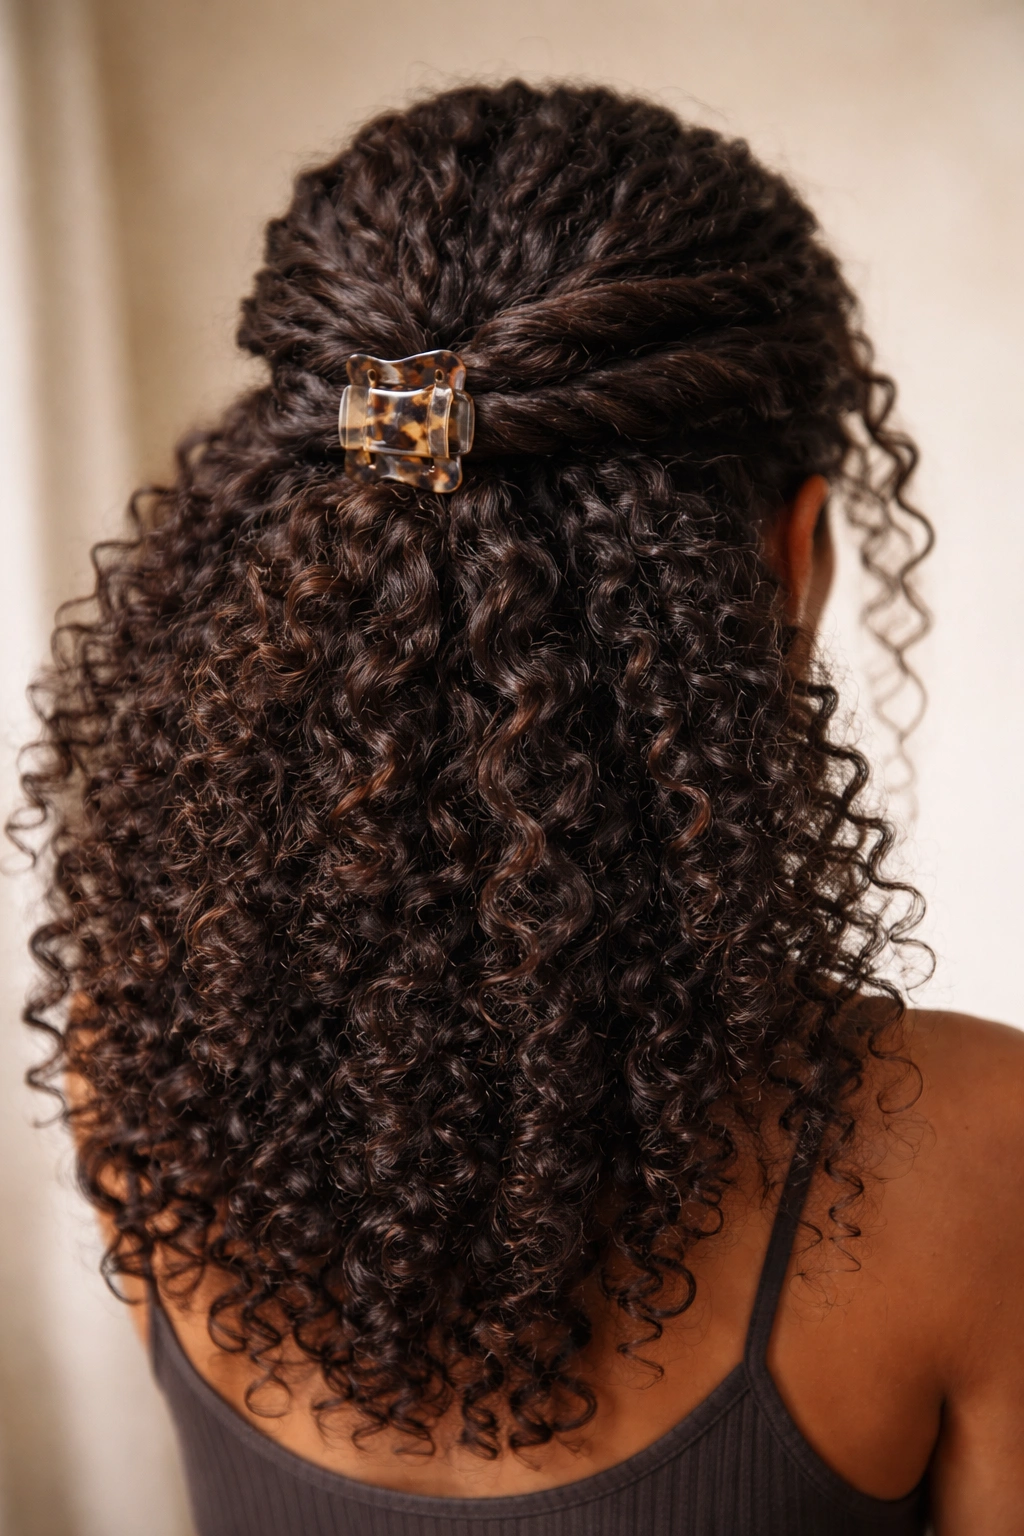
1. The Classic Half-Up Gather With Textured Volume
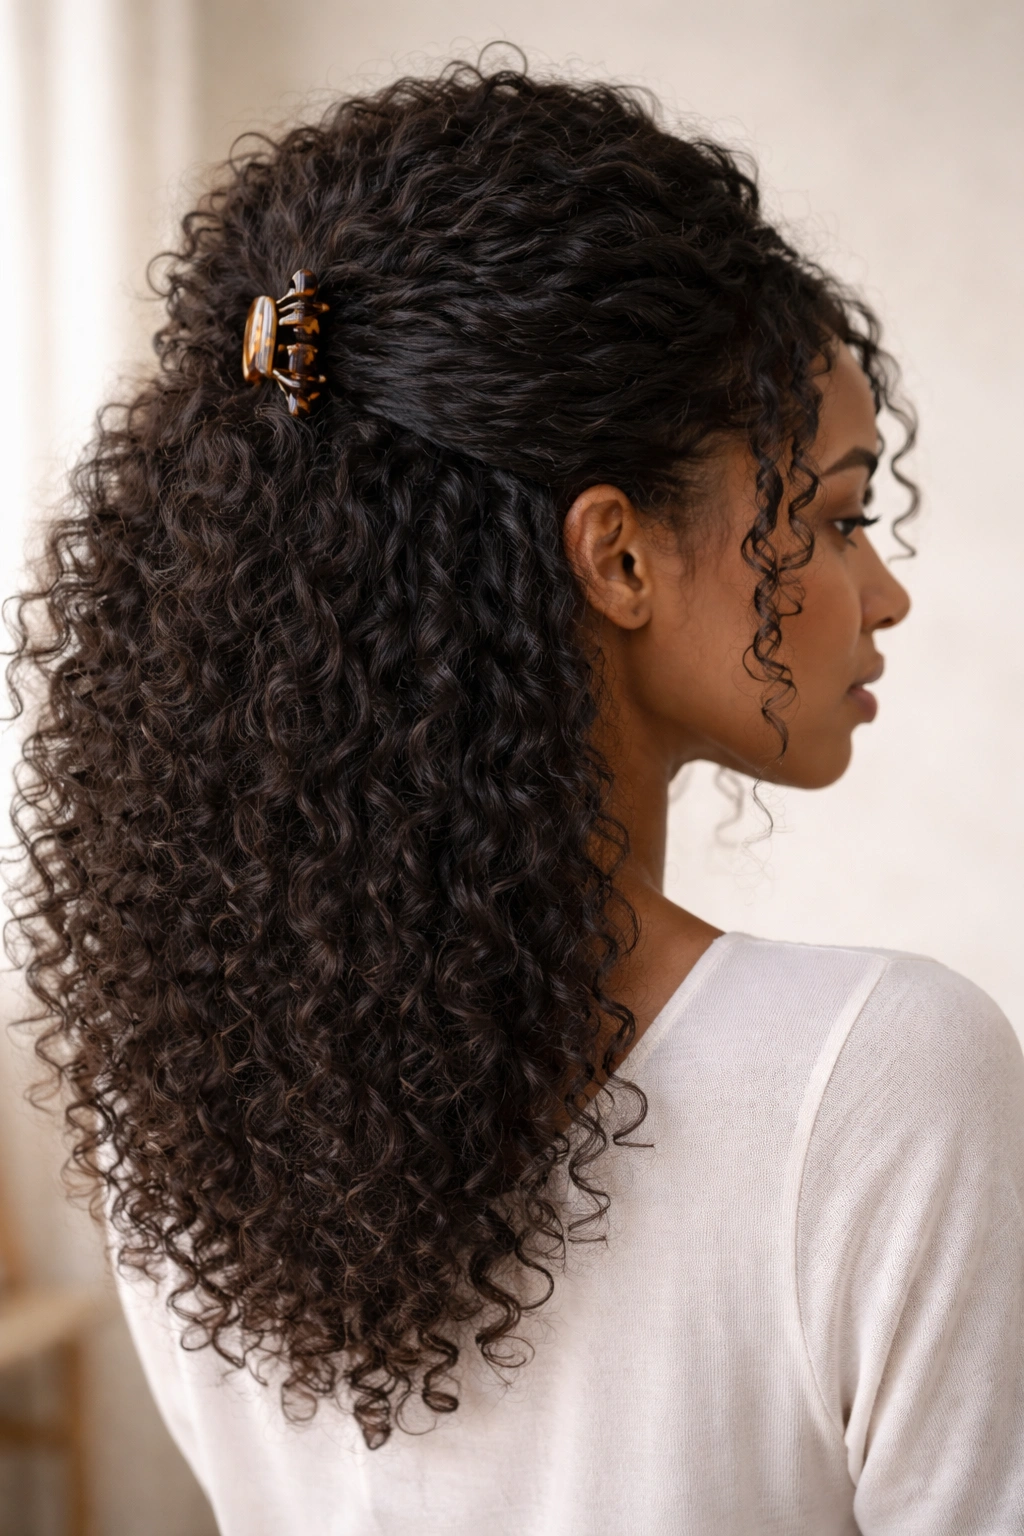
This is the foundation style that everything else builds from—a simple, no-fuss half-up that showcases your natural texture in its fullest form. You’re taking a section from each temple area, twisting or braiding each side loosely, then gathering both sections at the back crown with a claw clip. The magic happens because you’re not pulling the hair tight. Instead, you’re creating soft, tactile lines that frame your face while letting your natural curl pattern stay completely visible and three-dimensional.
Why This Works for Natural Hair
The loose gathering allows your curls and coils to breathe and maintain their shape throughout the day. Unlike tight rubber bands or structured clips, a well-positioned claw clip creates gentle tension that holds without compressing your curl pattern. Your hair actually looks fuller and more voluminous because you’re not flattening the texture at the crown, and the style works whether you’re wearing day-two curls with natural shine or freshly washed, blown-out waves with dramatic volume.
Steps to Perfect This Style
- Section your hair from temple to temple across the top of your head, creating a clean horizontal line
- Lightly mist the section with water or styling spray to add grip without weighing it down
- Twist each side section loosely (about 2-3 rotations) and bring both twists to meet at the back crown, just above where your hair naturally gathers
- Secure with a medium-sized claw clip, positioning it parallel to the back of your head rather than perpendicular
- Gently pull loose a few pieces around your face for a softer, less structured appearance
Pro tip: Position the claw clip slightly lower than you think—closer to the nape area than the very top of your head—for a more balanced, flattering proportion that doesn’t look top-heavy.
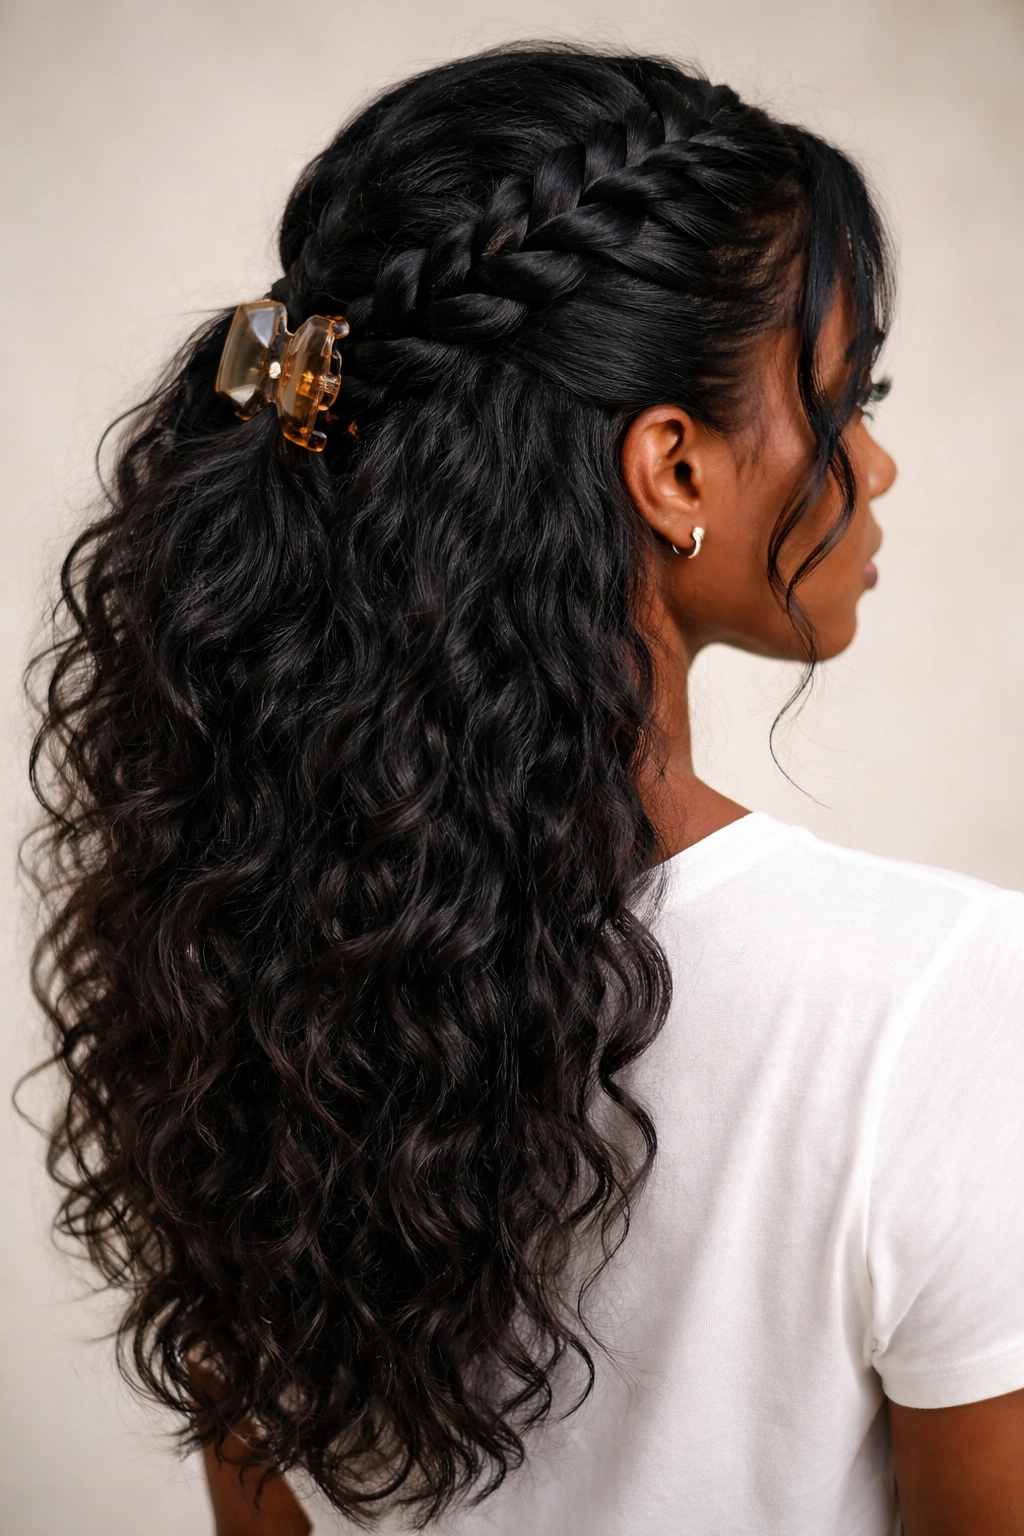
2. The Braided Crown With Sculptural Definition
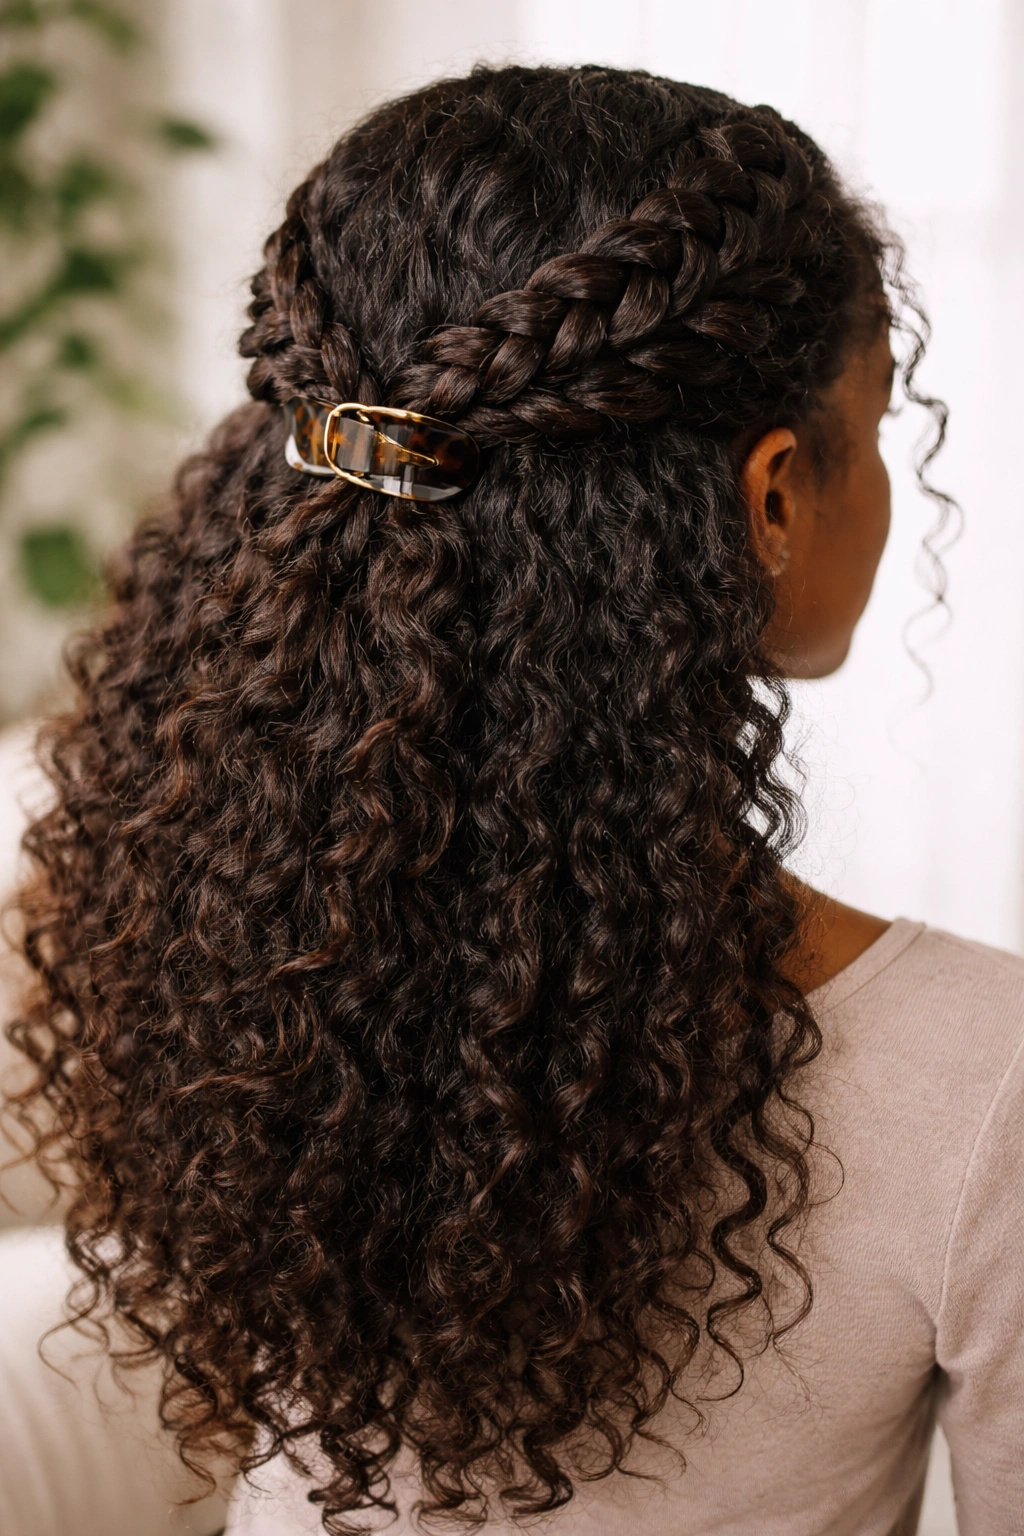
This style takes the half-up concept and adds intentional structure through two Dutch or French braids that run from your temples toward the back of your head. The braids create a gorgeous sculptural frame for your face and add visual interest, while everything below stays loose and wild. The claw clip sits at the back where both braids meet, anchoring them together and creating a finished look that feels both polished and relaxed.
How Braiding Changes Your Natural Hair Game
Braiding natural hair creates defined lines and movement that look particularly striking against a background of loose texture. The braid sections are controlled and neat, which creates visual contrast with the voluminous curls or coils underneath. This style is especially effective for 3c and 4-type hair because the braids add architectural interest without requiring you to straighten or flatten your natural pattern.
How to Execute the Braided Crown
- Start a Dutch braid (braid that sits on top of the scalp) at one temple, braiding toward the back of your head
- Repeat on the other side, so both braids are moving toward the center-back of your head
- Leave the bottom 2-3 inches of each braid loose and unfinished—this softens the look and prepares for the clip
- Bring both braids to meet at the back crown and secure with a claw clip, positioning it so it holds both braids firmly in place
- Leave your hair completely loose and unmanipulated below the clip for maximum volume contrast
Worth knowing: Braid your hair when it’s slightly damp and apply a lightweight styling cream to your braiding section first—this makes the braid smoother and more defined without adding weight.
3. The Zigzag Part Half-Up With Textural Surprise
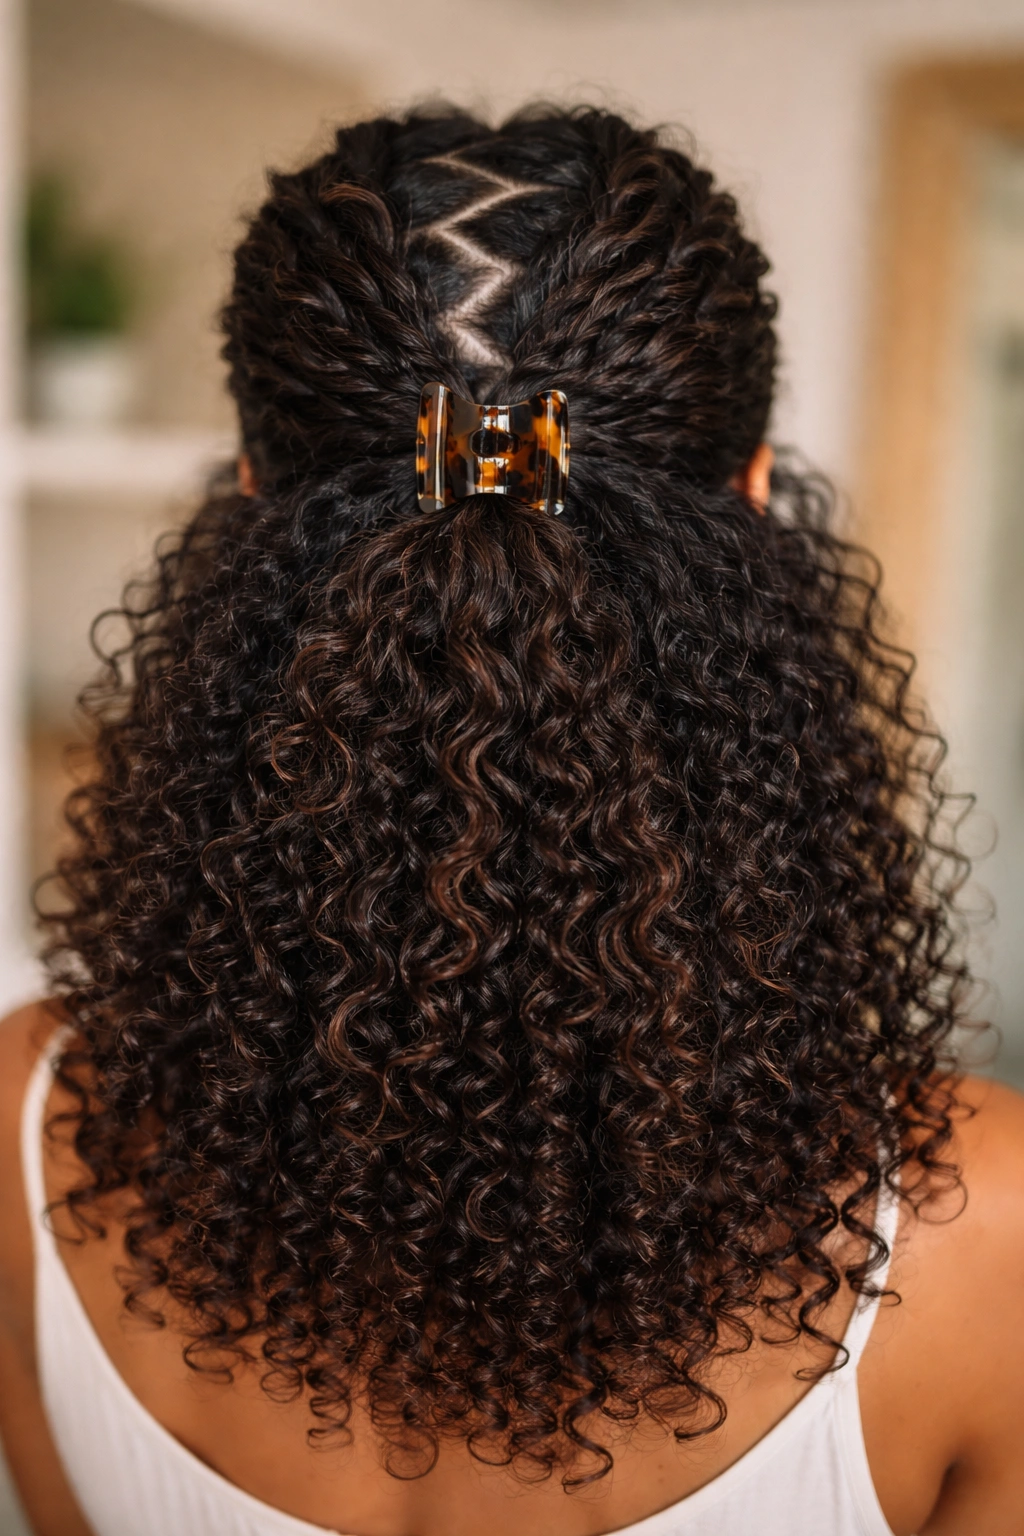
Instead of a straight center or side part, this style uses a dramatic zigzag part across the crown to create visual movement before the hair even gets to the claw clip. The zigzag guides where you’ll gather the half-up section, and because of the angular part line, the style looks dynamic and intentional rather than basic. Everything about this look signals that you styled your hair on purpose, even though the technique is incredibly simple.
Why the Zigzag Part Elevates Your Whole Look
A zigzag part immediately transforms a standard half-up into something visually interesting. It breaks up the monotony of a straight part, creates dimension through the shadows and highlights of the angular line, and gives your natural hair an almost sculptural quality. For textured hair especially, a zigzag part looks absolutely stunning because your curls and waves follow and emphasize that directional line.
Creating the Zigzag and Clip Section
- Using a rattail comb or edge brush, map out a zigzag pattern across the crown of your head from one side to the other
- Make the zigzag pattern fairly pronounced—small, tight zigzags don’t translate well, but larger, sweeping angles create real visual impact
- Use the zigzag line as your guide for where to gather your half-up section
- Gather everything above the zigzag line toward the back crown and secure with a claw clip
- Leave the lower section completely loose for maximum contrast between the structured top and the wild bottom
Insider note: Video yourself from the side before you commit to the full style—sometimes a zigzag looks better when it’s on one half of your head rather than stretching all the way across.
4. The Twisted Double Clip With Asymmetrical Balance
This style uses two smaller claw clips instead of one, positioning them asymmetrically at the back of your head for a look that feels modern and intentional. You’re taking your half-up section and dividing it into two separate twists, securing each with its own clip at slightly different heights. This approach distributes the tension across two points instead of one, which is particularly smart if you have very thick natural hair that might slip out of a single clip.
The Mechanics of Double Clipping
Two clips hold the hair more securely than one, and they create a more interesting visual composition at the back of your head. By positioning them at different heights—one slightly higher and one slightly lower—you create asymmetrical balance that looks more modern than a single centered clip. The technique also allows you to use smaller clips, which means less surface area in contact with your hair and less potential for breakage or damage.
Steps for the Asymmetrical Double Clip
- Section your hair from temple to temple, creating your half-up area
- Divide this section down the middle with a comb or your fingers, creating two separate subsections
- Twist the first subsection loosely and bring it to the back of your head, securing it with a clip positioned slightly to the right of center and toward the crown
- Twist the second subsection and bring it to the back of your head, securing it with a second clip positioned slightly to the left of center and lower than the first clip
- The two clips should be roughly 1-2 inches apart, creating a subtle asymmetrical composition
- Pull loose a few pieces around your face and leave the bottom section completely full and untouched
Real talk: This style looks best when your two clips match in color and size but are positioned differently—the intentional variation is key to the whole aesthetic.
5. The Curved Bangs Halo With Soft Face-Framing
This style creates a half-up that curves around your face like a soft halo, with the claw clip positioned at the lower back of your head rather than at the crown. You’re sectioning and twisting the top and sides, but instead of pulling everything straight back, you’re keeping the twists on the outer edges of your face and following the natural curve of your hairline. The result feels romantic, soft, and incredibly flattering on circular or oval face shapes.
Why Curved Half-Ups Flatter Every Face Shape
By following the curve of your face rather than pulling everything straight back, you create lines that complement your face shape instead of competing with it. The claw clip sits lower on your head, which automatically makes your face appear longer and more balanced. For natural hair, this technique is particularly effective because you’re allowing the texture to frame your face softly rather than tucking it away, which would diminish your hair’s beautiful volume and dimension.
Creating the Curved Halo Effect
- Start on one side of your head, taking a section of hair from above your ear
- Twist this section loosely, but instead of bringing it straight back, curve it around toward the back of your head while maintaining the curve of your face
- Repeat on the other side, creating a second curved twist that mirrors the first
- Bring both twists to meet at the lower back of your head (not at the crown) and secure with a claw clip
- Allow several pieces to fall loose around your face and temples for a soft, undone appearance
- Your bottom section should be full, loose, and voluminous, contrasting with the structured curves at the top
Pro tip: This style looks best when the curved twists are kept relatively loose and soft—tight, controlled twists will fight against the romantic intention of the style.
6. The Elevated Front Section With Crown Placement
Instead of taking your half-up from the temple area, this style starts further forward, creating a more elevated, almost sculptural look at the front of your head. You’re gathering a section that starts at your forehead and curves back toward your crown, creating a dramatic frame for your face. The claw clip sits at the very crown of your head, positioned high and centered, making a bold statement about where you want the eye to focus.
The Visual Impact of Elevated Placement
By positioning the clip at the crown instead of lower on the head, you’re drawing attention upward, which creates an elongating effect on your overall silhouette. For natural hair with significant volume, this placement creates stunning visual balance—the clip is showcasing the most voluminous part of your hair rather than trying to tame it. This style works particularly well for taller individuals or anyone who wants to emphasize the texture and dimension at the crown of their head.
Executing the Elevated Crown Placement
- Section a rectangular area of hair from your forehead back toward your crown, roughly 3-4 inches wide
- This front section should encompass the area above your eyebrows and extend straight back
- Lightly twist this front section as it moves backward, or leave it untwisted for a sleeker appearance
- Bring the twisted or straight section to the exact crown of your head and secure with a claw clip positioned horizontally
- Ensure the clip is centered and positioned at the highest point of your head for maximum visual impact
- Leave all other hair loose and voluminous, particularly the sides and back
Worth knowing: This style photographs beautifully because the elevated clip placement creates strong, directional lines in photos that read clearly even at a distance.
7. The Reverse Twist Half-Up With Unexpected Texture
This style uses reverse twisting (where you twist the hair away from your face instead of toward it) to create a completely different energy than the standard half-up. Reverse twists have a unique quality when applied to natural hair—they catch the light differently and create visual interest through the way your curl pattern interacts with the twist direction. The claw clip secures the reverse twists at the back, but the whole effect looks more modern and unexpected than traditional twisting.
Why Reverse Twists Change Everything
A reverse twist creates the illusion of texture and movement that’s different from a standard twist. Because you’re twisting away from your face rather than toward it, the individual strands and curls catch the light in unexpected ways, creating more visual dimension. On natural hair, this technique is particularly striking because your texture already has movement and dimension—the reverse twist amplifies rather than controls that quality.
The Reverse Twist Technique
- Section your hair from temple to temple, creating your half-up area
- Starting on one side at the temple, take a small section of hair and begin twisting it away from your face (toward the back of your head and slightly away from your face line)
- As you twist, pick up small subsections from below the initial twist, incorporating them into the reverse twist as you move backward
- Repeat on the other side with a reverse twist that mirrors the first
- Bring both reverse twists to the back of your head and secure with a claw clip
- The bottom section should be completely loose and full, with no manipulation
- Pull a few pieces loose around your face for softness
Insider note: Reverse twists work best on hair that has some natural curl or wave pattern—the texture will be more visible and the visual impact more striking.
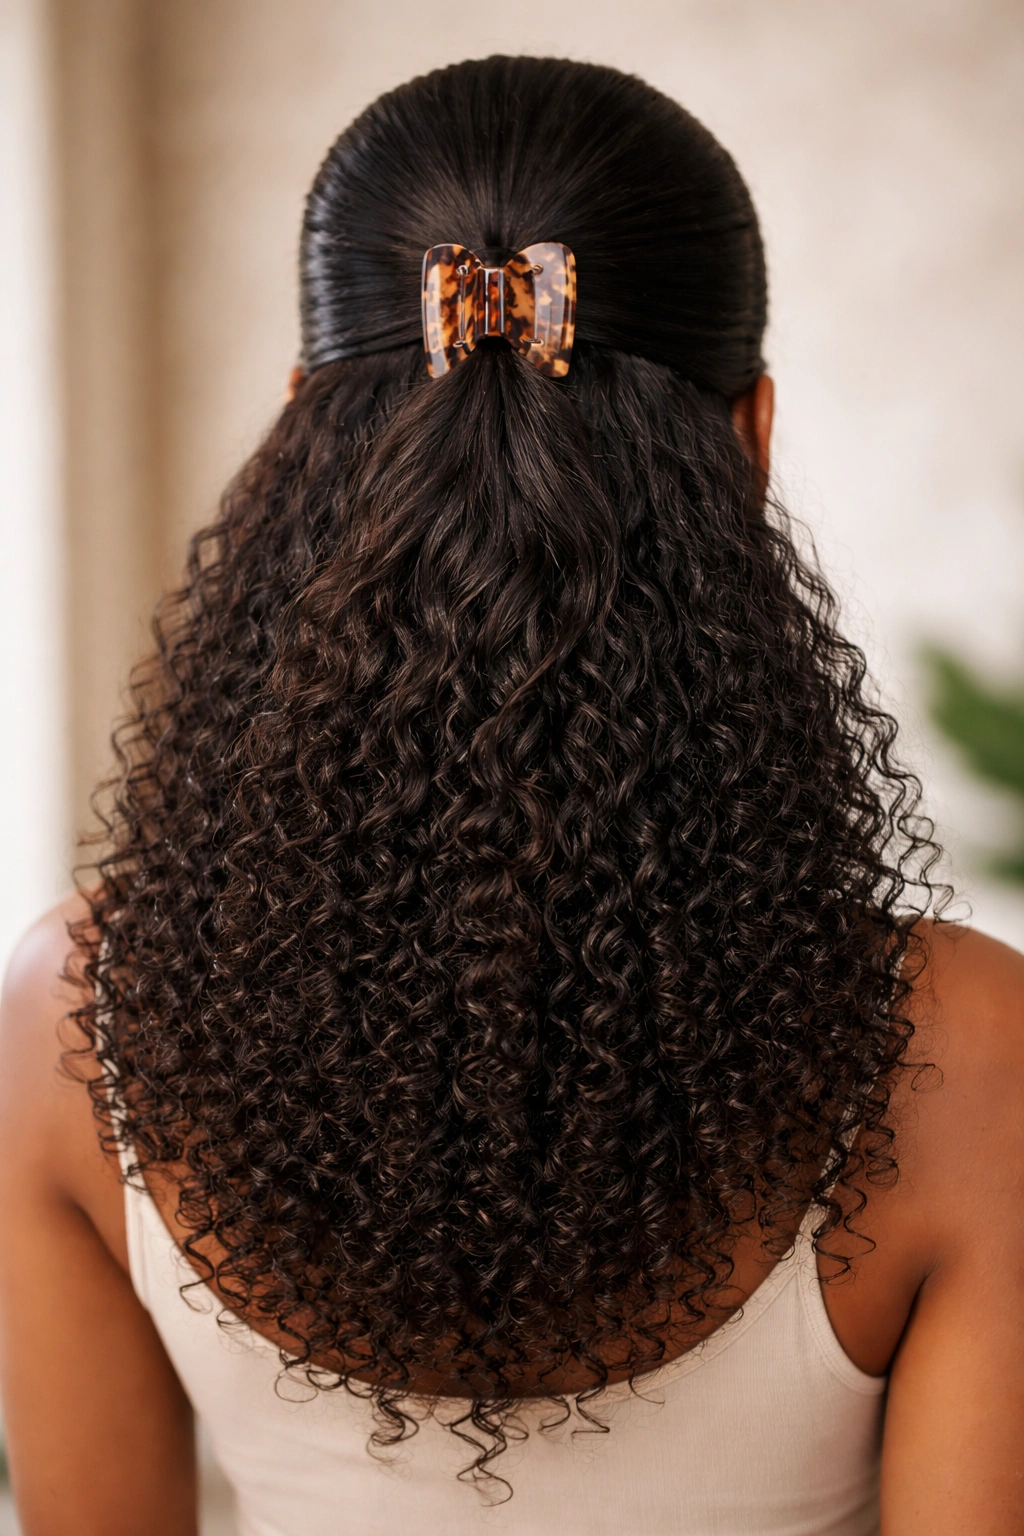
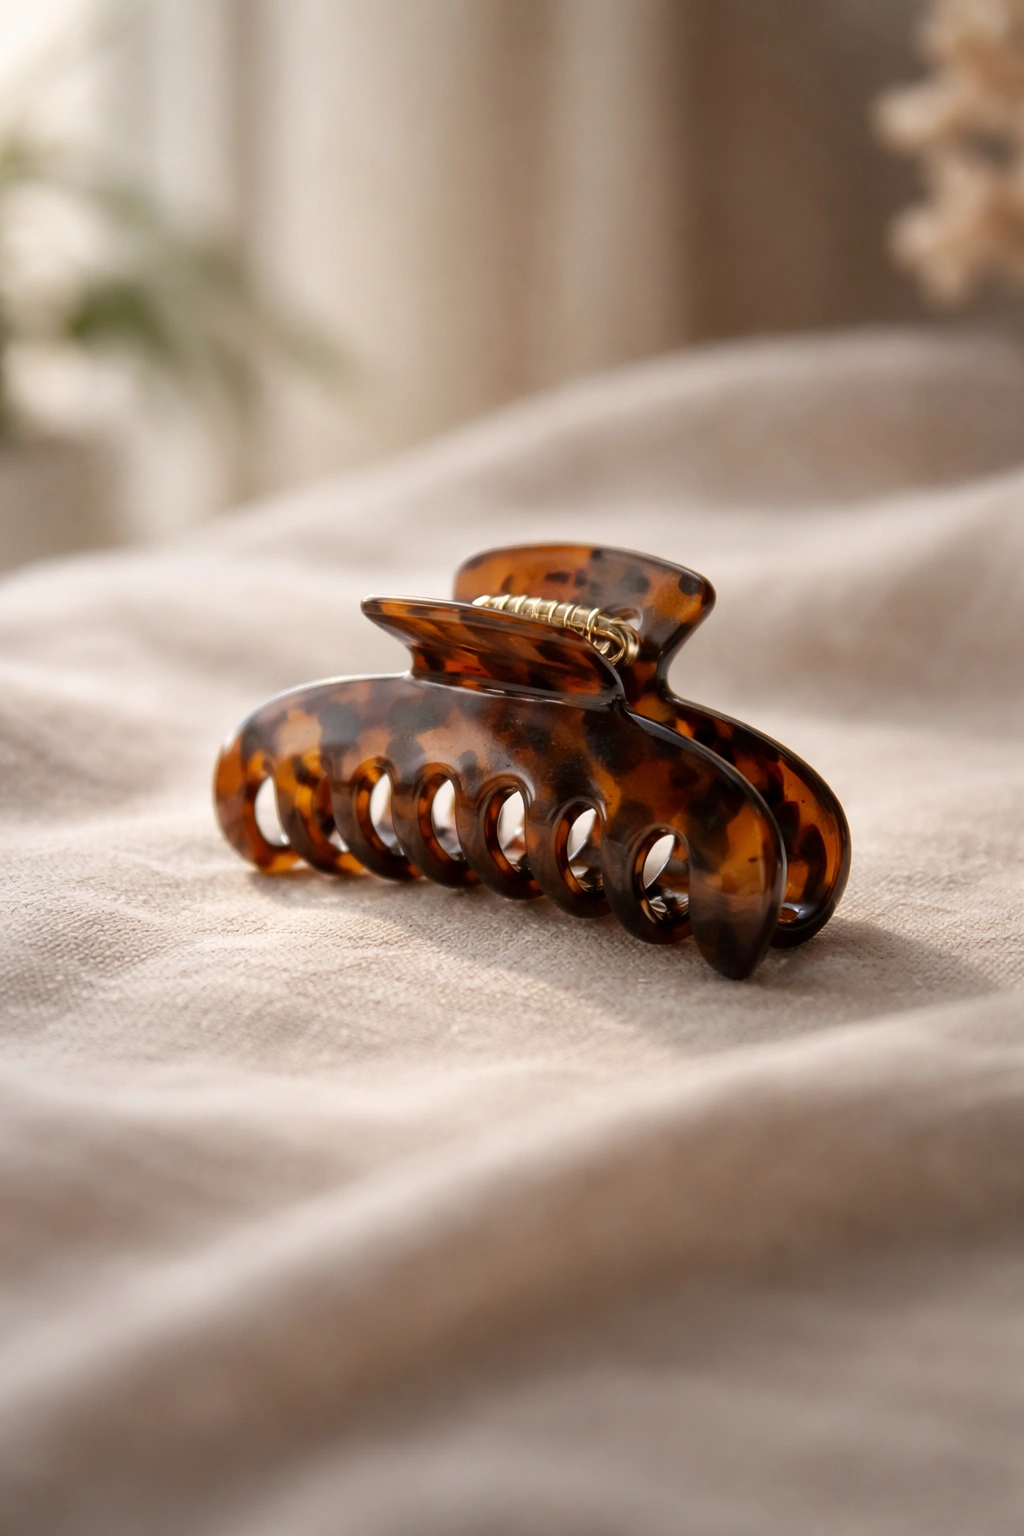
8. The Low Ponytail Half-Up With Clip Visible

This style intentionally showcases the claw clip as a design element rather than trying to hide it. You’re gathering a clean half-up section and securing it low on the back of your head with a decorative or contrasting clip that becomes part of the aesthetic. This works particularly well if you choose a clip in a jewel tone, metallic finish, or even a patterned design that coordinates with your outfit. The clip becomes a visible accessory rather than a fastener, which feels intentional and fashion-forward.
Making Your Clip a Style Statement
When you embrace the visibility of your claw clip instead of trying to hide it under layers of hair, it transforms the entire vibe of the style. A tortoiseshell clip adds warmth and texture, a metallic clip adds shine and modernity, and a colored clip becomes a jewelry-like accent that ties your whole look together. For natural hair, this approach is particularly stunning because the texture and dimension of your curls creates a beautiful backdrop that lets a decorative clip really shine.
Creating the Visible Clip Look
- Take your half-up section from temple to temple, keeping it relatively neat and defined
- Gather this section at the lower back of your head, roughly at the level where you’d typically wear a low ponytail
- Rather than twisting or braiding, keep the gathered section relatively smooth and polished so the clip is clearly visible
- Secure with a claw clip in a color or finish that contrasts with or complements your hair color
- Smooth down any flyaways around the clip area so the clip itself is the focus
- Leave your entire bottom section loose and full, creating a beautiful contrast between the polished gathered section and the wild, textured bottom
Pro tip: If your clip matches your hair color, add a subtle headscarf or hair accessory above or below it to create definition and make the clip more visible as an intentional design choice.
9. The Zigzag Braid Half-Up With Dimensional Layers
This style combines multiple techniques—zigzag parting, braiding, and textural layering—to create something visually complex that somehow still feels effortless. You’re creating a zigzag part, then braiding along one side of that zigzag, and securing everything with a claw clip at the back. The technique adds multiple layers of visual interest: the zigzag part, the defined braid, and the loose texture below all work together to create dimension.
Why Combining Multiple Techniques Creates Visual Depth
When you layer different styling techniques in one look, you create visual interest that reads as intentional and editorial. The eye moves from the zigzag part, to the braid, to the loose texture below, and back again—there’s always something new to notice. For natural hair, this multi-technique approach is particularly effective because your texture is already providing baseline interest and dimension; adding structural elements like braids and parted lines creates stunning contrast.
Building the Zigzag Braid Half-Up
- Create a pronounced zigzag part from one side of your head toward the back
- Along one side of the zigzag line, create a Dutch or French braid that runs from temple toward the back of your head
- The braid should follow the directional line of your zigzag, not cut across it
- Gather the braided section along with the surrounding hair from the top of your head and secure at the back with a claw clip
- Leave your entire bottom section completely loose and unmanipulated
- You should be able to see the zigzag part and the braid structure when someone looks at you from the side
Worth knowing: This style works best if you keep the braid relatively loose and soft—tight, controlled braids will make the style feel too structured and won’t showcase your natural texture as beautifully.
10. The Asymmetrical Face-Framing Half-Up With Texture Emphasis

This style takes an unequal amount of hair from each side—more from one side than the other—to create an asymmetrical look that’s both modern and flattering. Instead of the standard temple-to-temple gathering, you’re taking significantly more hair from one side and less from the other, creating a style that feels intentionally off-balance. The claw clip secures everything at the back, but the asymmetry is the key visual element that makes this style distinctive.
The Psychology of Asymmetrical Styling
Asymmetrical styles feel more modern and less “perfect” than symmetrical ones, which is exactly why they appeal to people who want to look effortlessly stylish. By taking more hair from one side, you’re creating movement and direction that draws the eye across your face in an interesting way. For natural hair, asymmetry is particularly striking because your texture is already naturally dimensional—adding asymmetrical structure plays beautifully with that existing quality.
Creating Intentional Asymmetry
- On one side of your head (typically your left, though you can choose either), take a generous section from your temple area extending toward your ear
- On the other side, take a much smaller section—maybe only a few inches wide—from the temple area
- These asymmetrical sections should feel deliberately unequal, not like you made a mistake
- Twist or braid each section loosely, then bring them both to the back of your head
- Secure with a claw clip positioned slightly toward the side where you took more hair
- Leave your bottom section completely loose and allow several pieces to fall loose around your face, particularly on the side where you took less hair
- This creates a framing effect that’s unequal but deliberately so
Real talk: Asymmetrical styles look best when you commit fully to the asymmetry—if it looks like you meant to make it unequal, it’s a style; if it looks accidental, it’s a mistake.
11. The Spiral Twist Half-Up With Dimensional Shine
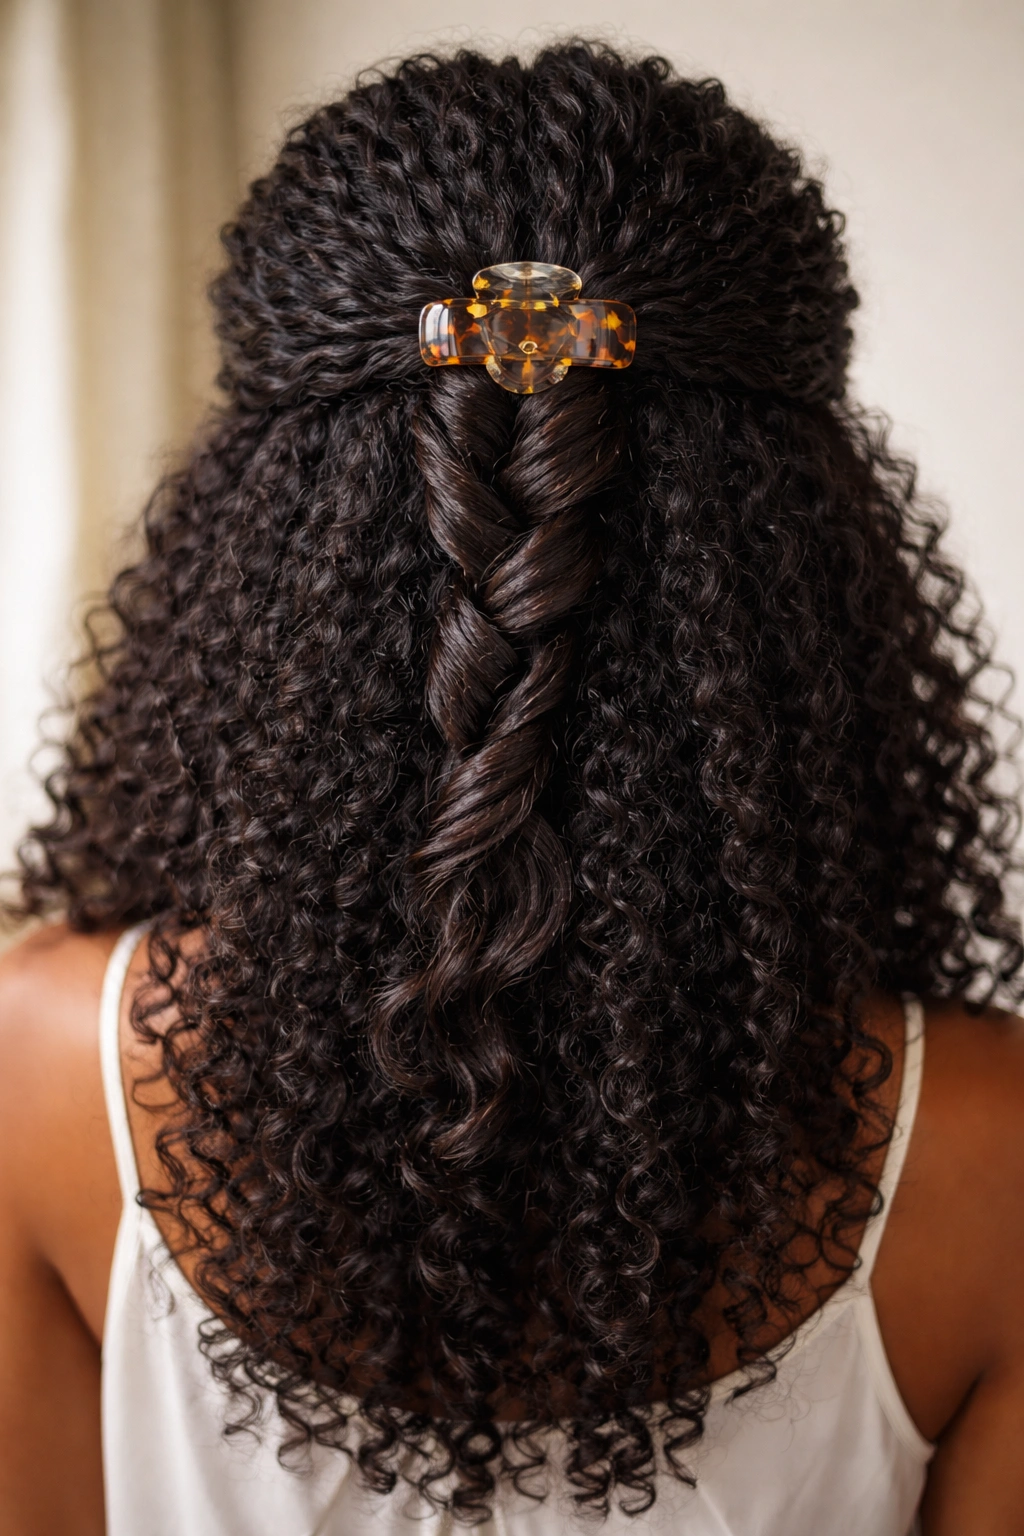
This style uses a spiral twist technique where you’re twisting two sections of hair together rather than twisting a single section. You take two pieces of hair and twist them around each other, creating a thicker, more dimensional rope that catches the light beautifully. When this spiral twist is used for a half-up style and secured with a claw clip, it creates an aesthetic that feels both modern and intricate without requiring complicated technique.
How Spiral Twisting Amplifies Shine and Texture
When you twist two sections together rather than twisting one section on itself, you create a thicker, more voluminous rope that has more surface area to catch light and show off shine. For natural hair, this technique is particularly effective because it showcases the dimension and light-reflection qualities of your curls or waves. The spiral creates a visual pattern that’s immediately eye-catching and adds movement even when the rest of your hair is still and relaxed.
Executing the Spiral Twist
- Section your half-up area from temple to temple
- Divide this section into two equal halves
- Take the first half and the second half and hold them parallel to each other
- Begin spiraling them around each other, maintaining tension so they create a thick, cohesive rope rather than loose, separate twists
- As you spiral, you can pick up additional hair if you want a fuller spiral, or keep it to just the two original sections for a sleeker look
- Bring the completed spiral to the back of your head and secure with a claw clip
- Leave your entire bottom section loose and full, which will create beautiful contrast with the defined, textured spiral at the top
Pro tip: Spiral twists look best when they’re kept relatively thick and substantial—thin, wispy spirals can look unfinished or accidental.
12. The Sleek Top With Textured Bottom Half-Up
This style creates contrast between the top and bottom by making the gathered section smooth and controlled while leaving the bottom section with all its natural texture fully exposed and celebrated. You’re smoothing the half-up section with a lightweight styling cream or gel, creating clean lines and definition, then securing it with a claw clip. The bottom section is left completely untouched and unmanipulated, so every curl and coil is visible and full of dimension.
Why Contrast Makes Natural Hair Look Its Best
When you create a clear visual distinction between different sections of your hair—smooth versus textured, controlled versus wild, polished versus natural—it actually makes both sections look better. The smoothness of the top makes your texture more noticeable, and the texture of the bottom makes the sleekness of the top feel more intentional and chic. This technique is particularly effective for people who sometimes feel insecure about their natural texture because it reframes the texture as a feature to celebrate, not something to hide.
Creating the Sleek-to-Textured Transition
- Apply a lightweight styling cream or edge control to your hands
- Smooth this product through your half-up section, working from the crown toward the gathering point at the back
- Create clean, defined lines along the edges of your gathered section
- Secure the smoothed section with a claw clip at the back of your head, positioned lower rather than high for maximum contrast
- Absolutely do not touch, manipulate, or smooth the bottom section—leave it exactly as it naturally falls
- The visual impact comes from the stark contrast between the controlled top and the wild bottom, so commit to that distinction fully
Worth knowing: You can add shine spray to the smoothed top section to make the contrast even more pronounced—the glossy top will look even sleeker against the matte texture of your natural curls.
13. The Faux Hawk Half-Up With Sculptural Drama
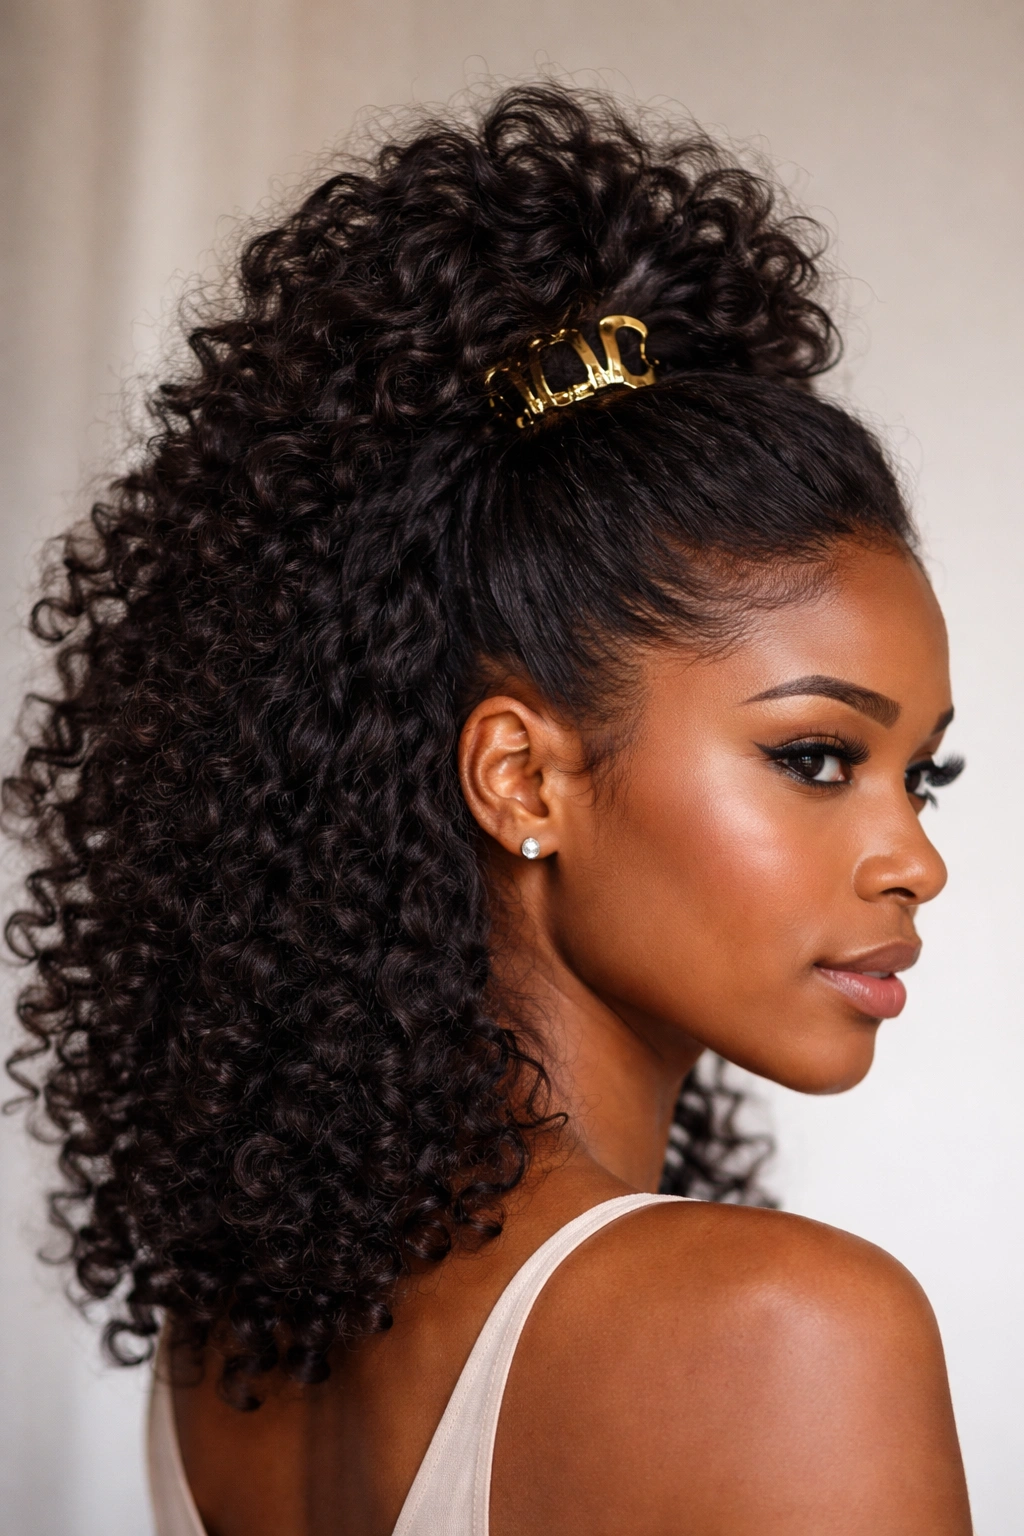
This style takes the half-up concept and pushes it toward more sculptural territory by gathering a narrower, more defined section from the crown and securing it prominently with a claw clip. The result looks like a hybrid between a half-up and a faux hawk—you’re creating height and drama at the crown while leaving the sides completely full and textured. The claw clip is positioned at the highest point of your head, making a bold statement about volume and structure.
The Drama of Sculptural Hair
A faux hawk half-up works because it’s bold without being impractical—you’re creating visual interest and height without pulling all your hair back into a tight style. For natural hair, especially textured or voluminous natural hair, this approach is absolutely stunning because your natural texture provides the bulk and dimension that makes the faux hawk look full and striking. The technique celebrates your hair’s size and texture rather than trying to minimize it.
Building Your Faux Hawk Half-Up
- Create a narrower section from your forehead straight back to your crown, roughly 2-3 inches wide at the widest point
- Gather this section at the crown of your head, leaving the sides completely full and untouched
- You can twist this gathered section or leave it relatively smooth—both work beautifully
- Secure with a claw clip positioned directly at the crown, pointing upward or slightly back
- The claw clip becomes a sculptural element, so you might choose one that matches your hair color or one that provides contrast
- Your sides should remain completely full and voluminous, creating a dramatic contrast with the gathered center section
Insider note: This style photographs beautifully from the side because you can see both the sculptural clip placement and the full volume of your sides in one view.
14. The Multi-Clip Waterfall With Dimensional Cascade
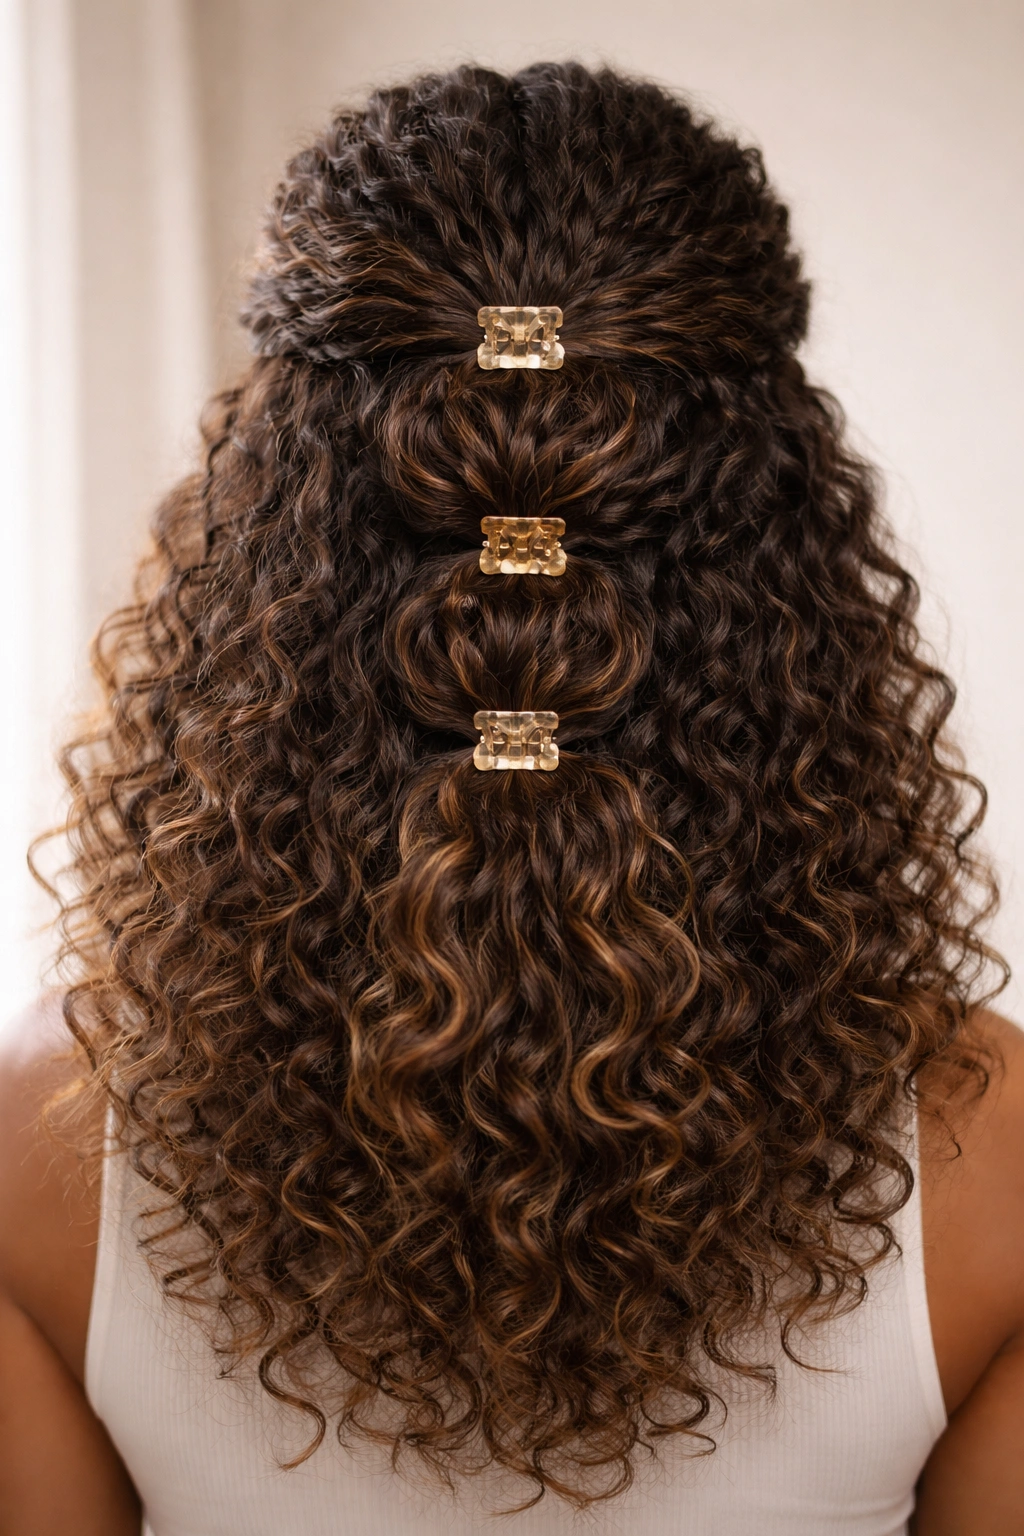
This style uses three or more small claw clips positioned vertically down the back of your head, creating a waterfall effect where your natural texture cascades over and between the clips. Each clip is positioned slightly lower than the one above it, creating a staggered composition that’s both structured and visually dynamic. The technique works because the clips are small enough that they hold sections of your hair without creating an obvious separation—instead, you see flowing texture with intentional anchor points.
Why Multiple Clips Create Elegant Complexity
A single clip is functional; multiple clips become a design statement. By spacing smaller clips vertically down the back of your head, you’re creating a composition that has visual interest from multiple angles. The clips catch light differently, the texture between clips flows differently, and the whole effect is more sophisticated than a single gathered section. For natural hair, this technique is particularly effective because your curl pattern will drape and flow beautifully over and between the clips, creating layers of visual depth.
The Multi-Clip Waterfall Technique
- Gather your initial half-up section from temple to temple and secure it at the crown with a claw clip (clip #1)
- Leave a section of hair flowing free directly below clip #1
- Gather another section of hair below that flow section, roughly 2 inches lower, and secure it with a second clip (clip #2) positioned slightly to the side
- Continue this pattern down the back of your head, positioning each new clip slightly lower and alternating the side positioning so they don’t sit in a perfectly straight line
- You should have 3-4 clips total, creating a cascading vertical composition
- The space between clips should be filled with loose, flowing texture that connects all the clipped sections
Pro tip: Use clips in the same color or finish so they look intentional rather than like you’re fixing a broken style—the waterfall effect only works if the clips look like a deliberate design choice.
15. The Romantic Wave Half-Up With Integrated Curl Pattern
This final style celebrates your natural wave or curl pattern by creating waves in your half-up section that coordinate and integrate with the waves or curls in your bottom section. Instead of trying to control or smooth your texture, you’re enhancing and amplifying it by creating intentional waves in the gathered section that echo the pattern of your natural texture below. The claw clip sits at the back, but the focus is on how beautifully the wave pattern flows from top to bottom.
Celebrating Your Natural Wave Pattern
When you work with your natural texture instead of against it, you create styles that look effortlessly beautiful and deeply personal to your hair. A romantic wave half-up respects and emphasizes your hair’s natural pattern, which is always more visually interesting than trying to override that pattern with a different texture. For natural hair, this technique is particularly stunning because wave patterns in natural hair have depth, dimension, and individual character—highlighting those qualities is always the right call.
Creating the Integrated Wave Effect
- Create loose waves throughout your half-up section using a curling iron, braiding method, or your natural wave pattern if your hair dries with natural waves
- These waves should be soft and romantic rather than tight and structured
- Gather the waved section loosely at the back of your head, allowing the wave pattern to stay visible and defined
- Secure with a claw clip positioned low on the back of your head to maintain the wave structure
- Enhance the natural waves in your bottom section with the same technique if desired, or leave them as they naturally fall
- The overall effect should be waves flowing from top to bottom, with the claw clip sitting subtly within the overall wave composition rather than creating an obvious division
Real talk: This style looks best when you use a lightweight styling product that enhances texture without adding weight or stiffness—your waves should move and flow, not feel locked in place.
Final Thoughts
The beauty of claw clips and natural hair is that they’re actually meant for each other. Your texture provides the grip and tension that makes clips stay put all day, which means you can create sophisticated, polished styles without the damage that comes with tight rubber bands or restrictive styling. Whether you’re drawn to the classic simplicity of a basic half-up, the sculptural drama of a faux hawk style, or the romantic flow of integrated waves, these fifteen approaches give you endless options for styling that celebrates your natural texture while creating visual interest and polish.
The key to making any of these styles work for you is to keep them loose enough that your curls and coils can breathe, to position your clips with intention rather than desperation, and to remember that your hair’s natural texture is a feature, not a flaw. When you work with what you have rather than against it, you end up with styles that look beautiful, feel comfortable, and actually make your hair healthier because you’re not fighting your natural pattern. Pick the styles that resonate most with you, experiment with the techniques, and trust that the combination of your natural hair and a well-placed claw clip is really all you need to look polished and put-together.