Long hair and claw clips are basically a match made in heaven, and half up half down styles might be the most versatile way to wear them both. Unlike traditional bobby pins that can slip out or damage strands, a quality claw clip grips your hair securely while creating that effortless, undone vibe that somehow looks intentional and polished at the same time. Whether you’re heading to work, a casual brunch, or just tired of your hair in your face, the half up half down style with a claw clip offers the best of both worlds—part of your length stays down to frame your face, while the top section gets swept up and secured without heat, chemicals, or a complicated technique.
The beauty of claw clips for this particular style lies in their versatility. A single claw clip can transform your entire look depending on how you position it, how much hair you gather, what sections you twist or braid, and even which direction you clip it. With long hair, you have the luxury of playing with volume, texture, and dimension in ways that shorter hair simply can’t achieve. You can create a sleek, polished version for professional settings, a romantic braided variation for dates or special occasions, or a tousled, undone version for casual days when you want to look effortlessly cool without trying.
What makes these styles so practical is that you can create them in under five minutes once you understand the basic technique, and they work on virtually any hair texture—straight, wavy, curly, or coily. Whether your hair is freshly washed or a day (or three) old, whether you have thick, fine, or medium density hair, there’s a claw clip half up half down style that will work for you. Let’s explore 18 distinct variations that showcase the range of what’s possible with just one simple hair tool and some long locks.
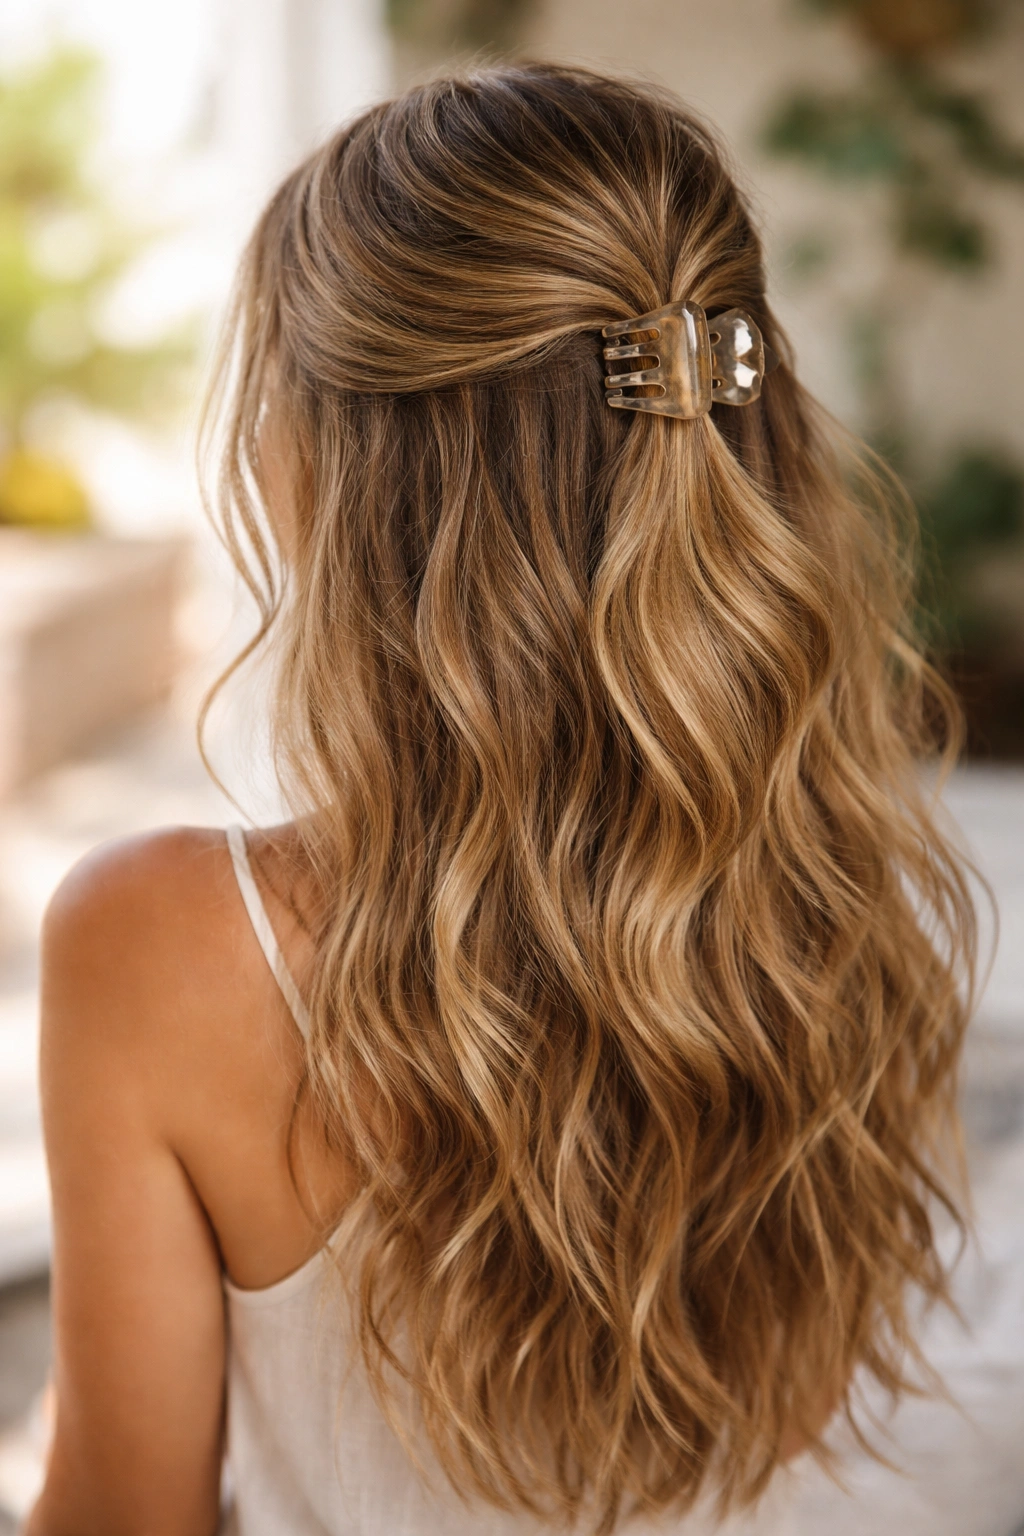
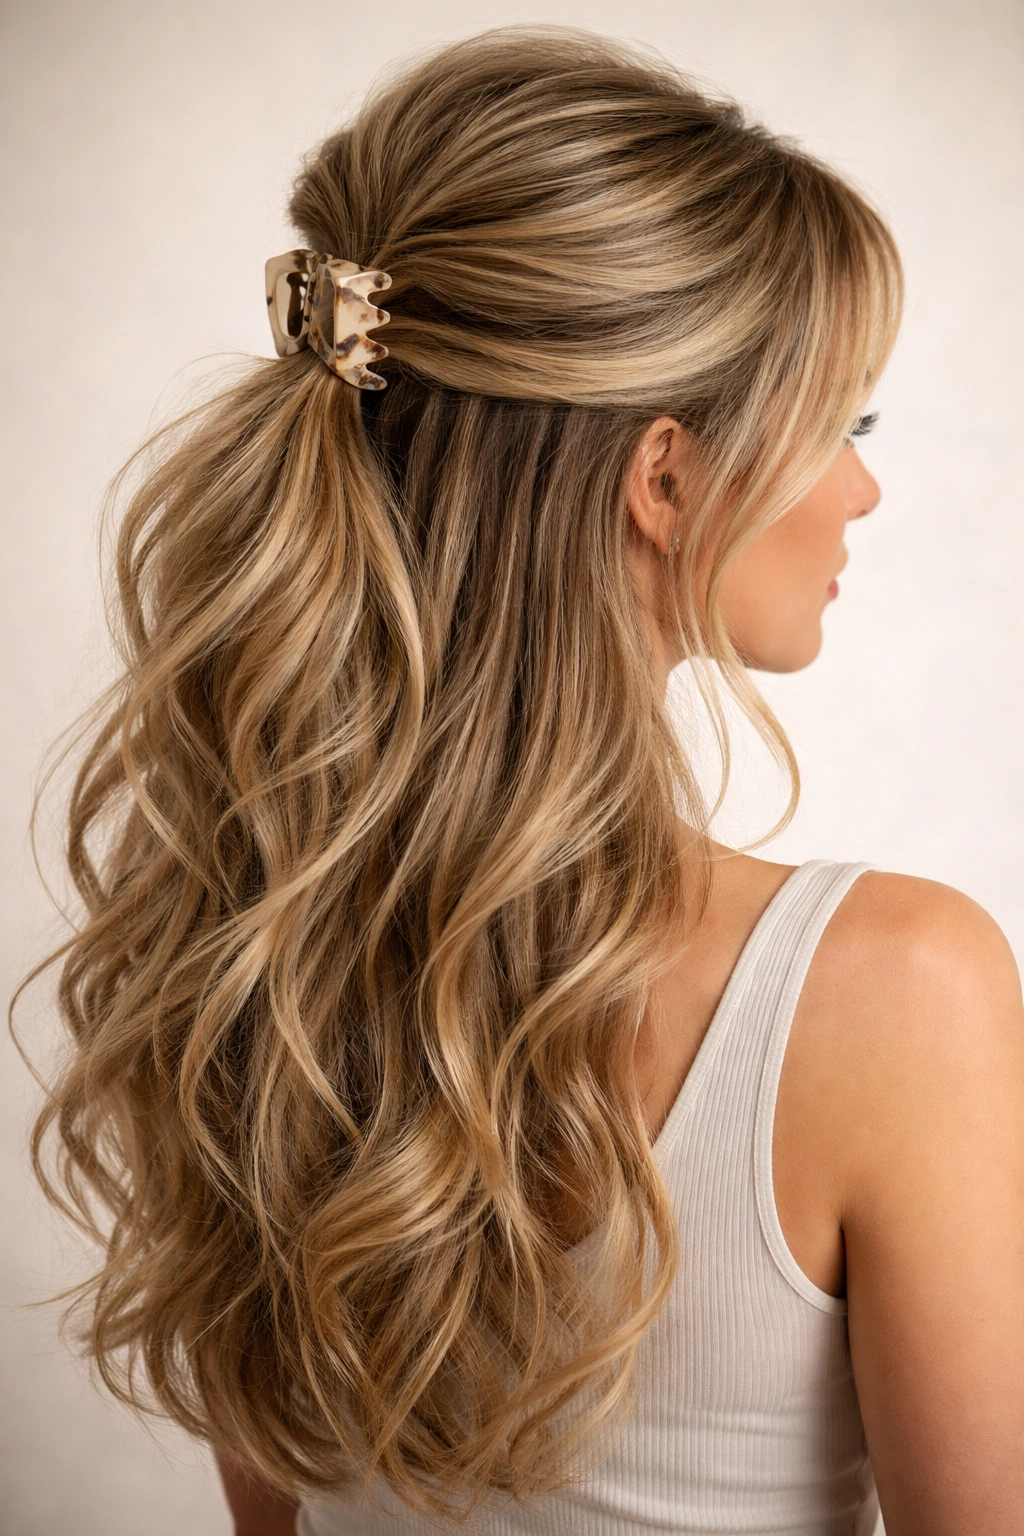
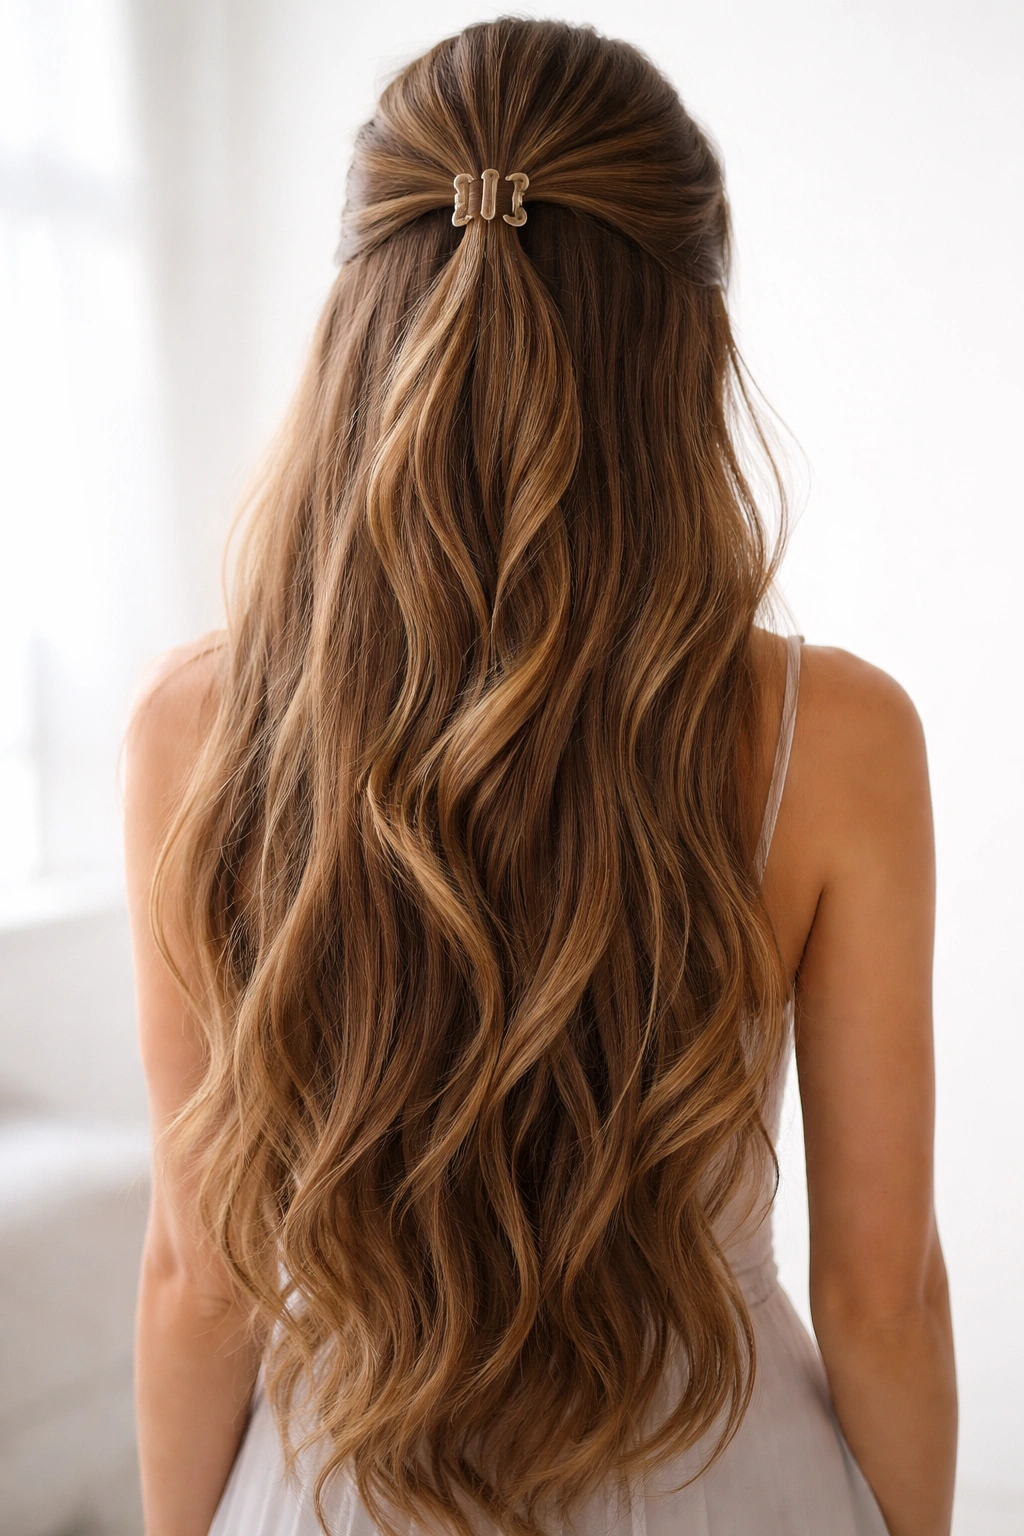
1. The Classic High Half Up
This is the foundation style that works for literally everyone, and it’s the easiest way to get comfortable with claw clips if you’ve never used one before. Gather roughly the top third of your hair—section from one temple, across the crown, and down to the other temple—and pull it straight up toward the crown of your head, creating height and definition. Secure it with a claw clip positioned horizontally (the claw opening facing downward) so it grips both the gathered hair and some of the shorter hairs around your face.
Why This Version Stands Out
This style creates an instant face-framing effect because the upper portion of your face isn’t covered by hair, which visually lifts your features and opens up your face. The volume at the crown adds proportion and balance, especially if you have a longer face shape or want to add dimension to finer hair. Since you’re only securing the very top section, the bulk of your long hair flows freely below, so you get all the length you’re meant to show off without the weight pulling everything down.
Key Details to Perfect It
- Start with hair that’s been lightly textured (either naturally wavy or curled with a wand) rather than completely straight, as texture helps the claw grip without slipping
- The clip should sit about 2 inches back from your crown, not directly on top, for a more natural, intentional look
- Gently tease the section you’re clipping just before securing it—this creates micro-grip and prevents the clip from sliding down throughout the day
- Leave a few face-framing pieces loose around your temples for softness
Pro tip: If your hair is very thick or heavy, use a larger claw clip (like a 4-inch or jumbo clip) rather than fighting with a small one—the larger surface area distributes the weight better.
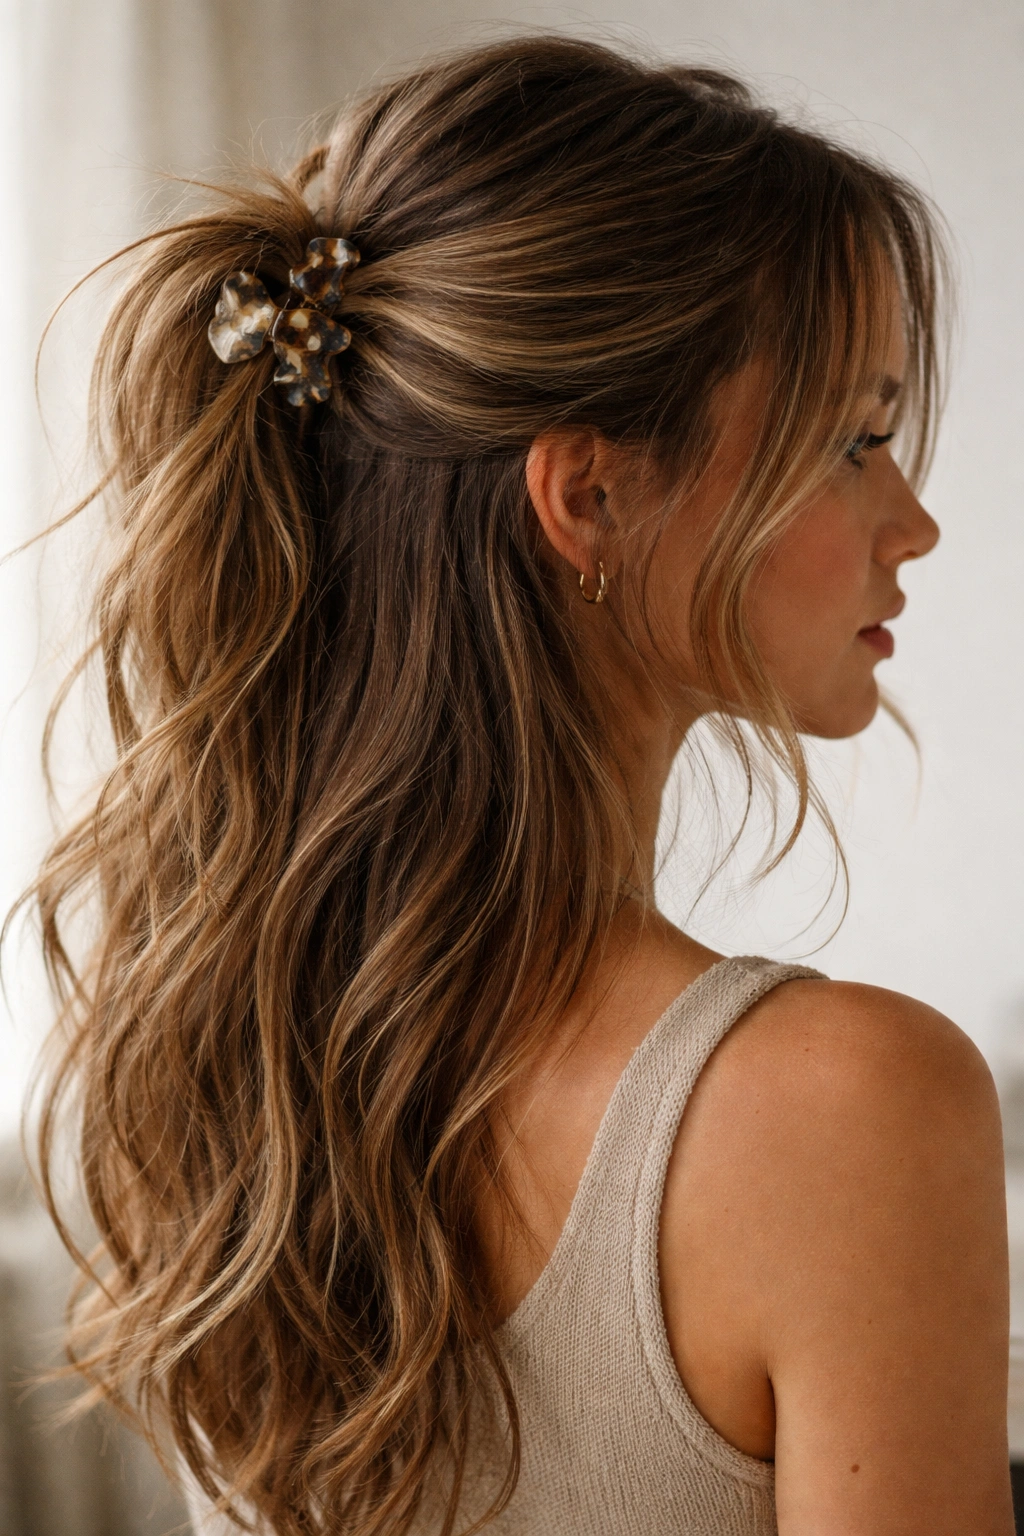
2. The Twisted Crown Half Up
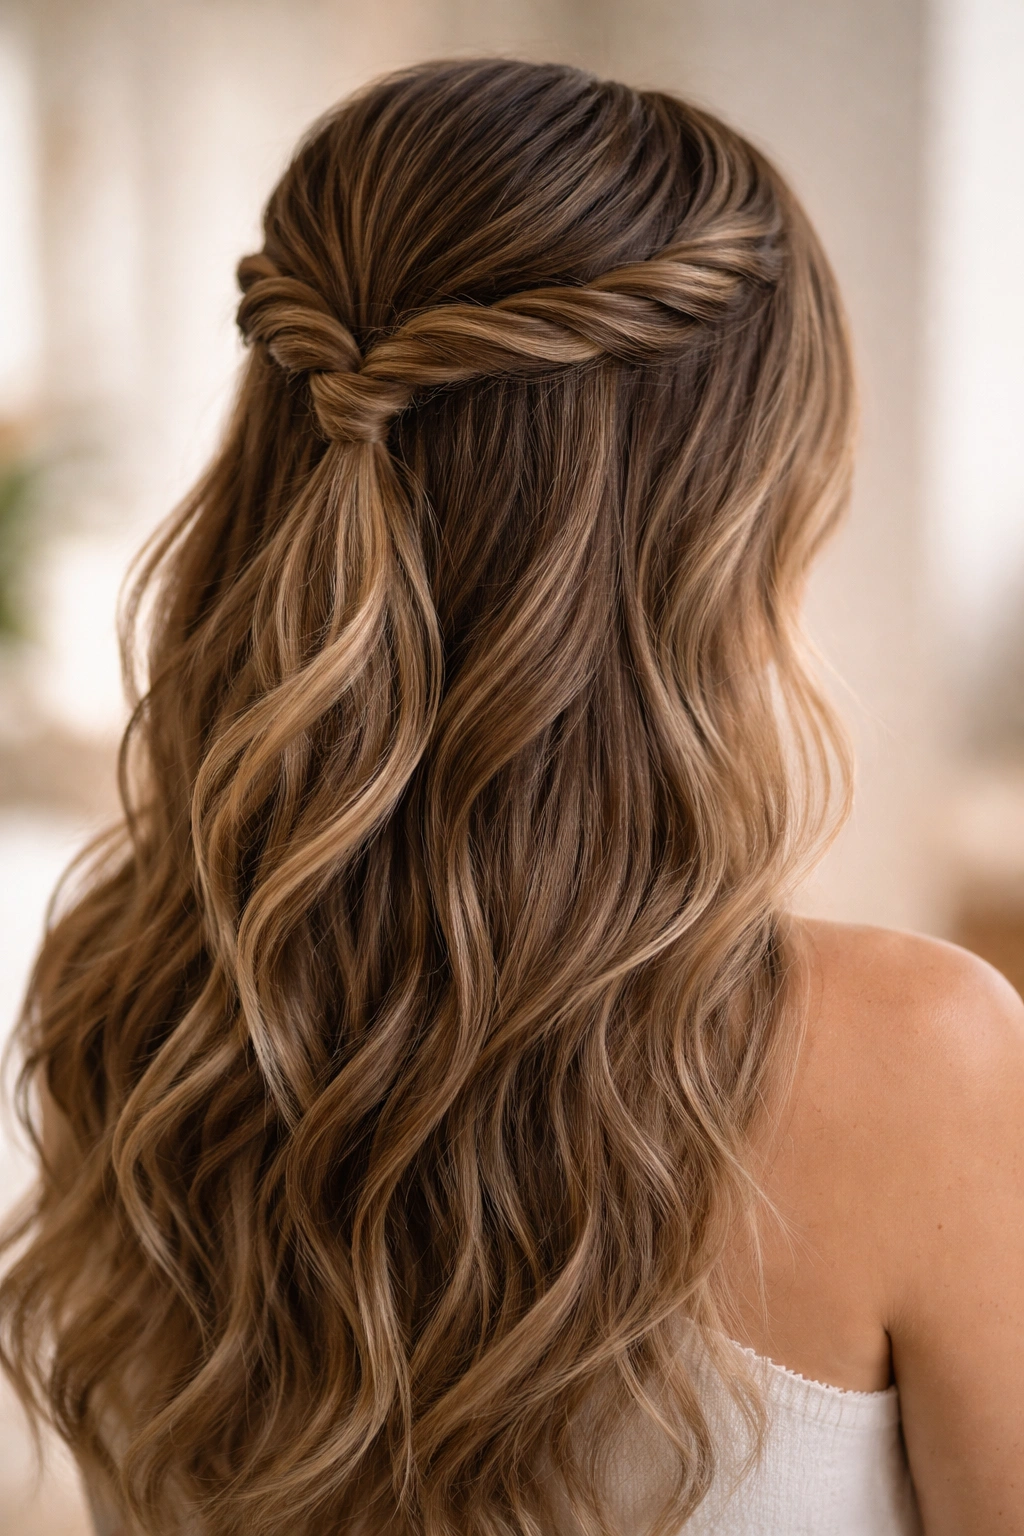
Instead of simply gathering and clipping, twist the top section as you pull it upward, creating a subtle rope effect that adds visual interest and actually helps secure the hair better. Start at one temple, section a piece about 2 inches wide, then twist that piece across the top of your head toward the opposite side. As you twist, gradually add small sections of hair from the crown area, incorporating them into the twist as you go.
What Makes This Approach Different
The twisting motion does two things simultaneously: it creates a decorative element that looks intentionally styled rather than thrown together, and it naturally builds grip within the claw clip since the twisted hair is much less slippery than straight-sectioned hair. This variation looks dressy enough for events but casual enough for everyday wear, which makes it incredibly practical.
How to Execute It Successfully
- Use a fine-tooth comb to section your hair cleanly; messy sections create messy twists
- Twist firmly but not so tightly that you’re uncomfortable or risk breakage
- As you twist toward the opposite temple, keep the twists relaxed at the very front for a softer frame
- Finish the twist at the side or back of your head, then clip horizontally with the claw’s teeth facing inward
- Pull gently on the twisted sections after clipping to loosen them slightly—this creates a more romantic, undone vibe
Worth knowing: This style holds particularly well throughout the day because the twist itself acts as a lock, meaning even if the claw clip loosens slightly, the hair doesn’t immediately fall.
3. The Double Twist Half Up
For those with very thick hair or anyone who wants extra visual drama, create two separate twists—one from each temple—and secure both with a single claw clip positioned in the center back of your head, or use two smaller clips on either side. The twists spiral toward each other and meet in the middle, creating a crown-like effect that’s romantic and intentional.
The Visual Impact
Double twists create symmetry and balance, which your eye naturally reads as “intentional and styled” rather than a quick fix. This style has major date-night potential, and it’s also sophisticated enough for professional settings like presentations or client meetings. The dual twists add dimension and depth that reads from every angle—not just the front.
Pro Execution Tips
- Start the first twist from one temple at your ear level, twisting upward and back
- Start the second twist from the opposite temple, twisting upward and back in a matching trajectory
- These twists should meet somewhere around the center back of your head, roughly at ear height
- Clip both twists together with a single larger claw clip for a unified look, or use two clips positioned on either side for a more graphic appearance
- Make sure both twists are equally snug to avoid a lopsided appearance
Insider note: If your hair is finer or shorter, twist more loosely and position the clip slightly lower (at the nape) rather than high on the crown, as this distributes the weight more effectively.
4. The Braided Half Up
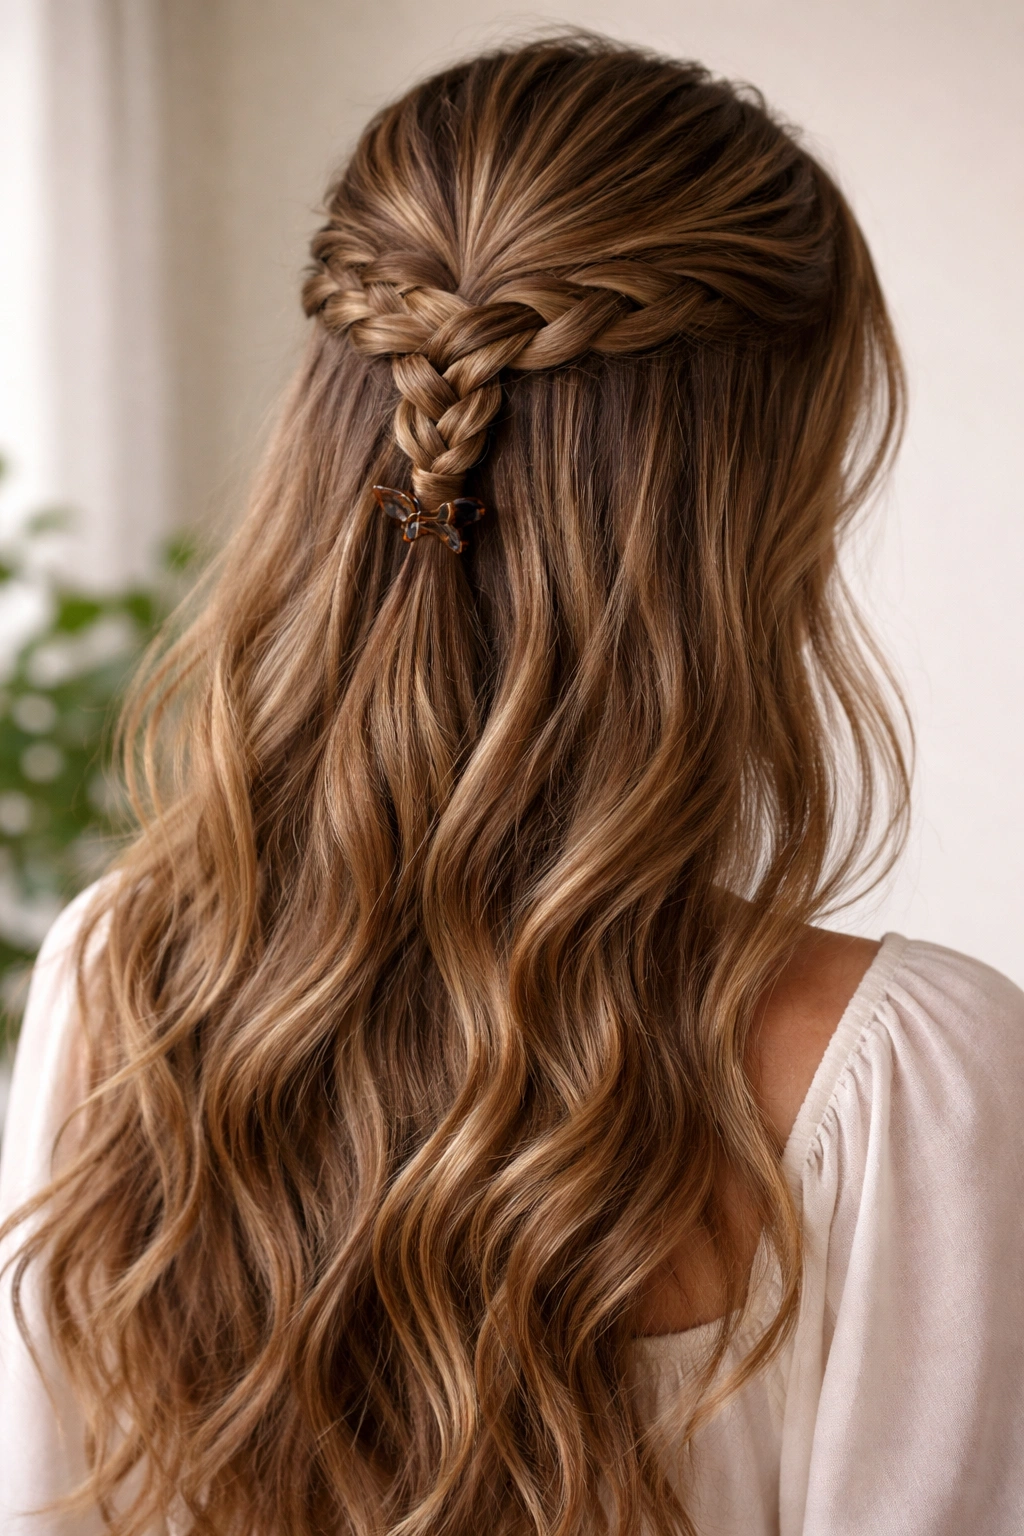
For a more textured, intricate look that feels special but isn’t complicated, braid the top section rather than twisting it. A three-strand braid works beautifully—section the top third of your hair, divide it into three strands, and create a classic braid that runs from your crown area toward the back of your head. Secure the braid end with a small claw clip positioned horizontally so the clip is hidden underneath the finished braid.
Why the Braided Version Works
Braids have natural texture and visual interest that reads as more polished than a twist, even though the actual technique takes only slightly longer to master. The braid also grips itself, meaning the claw clip really only needs to hold the bottom of the braid—it doesn’t have to support all the weight of loose, gathered hair. This makes braided versions exceptionally secure and comfortable to wear for extended periods.
Braiding Technique for Maximum Impact
- Section hair cleanly from temple to temple across the crown
- Start the braid at the crown and braid downward toward the nape, not upward (this feels more natural and creates a flatter, more elegant finish)
- Keep tension even throughout the braid; if one strand is looser than the others, the whole braid looks sloppy
- After braiding, gently pull on the edges of each braid section to loosen it slightly and create a fuller, more romantic texture
- Clip the braid end where it naturally finishes, usually around the middle back of your head
Real talk: If you’re new to braiding, practice on a friend first or record yourself from behind so you can see what you’re doing—the back of your own head is surprisingly hard to braid by feel alone.
5. The Sleek Ponytail Half Up
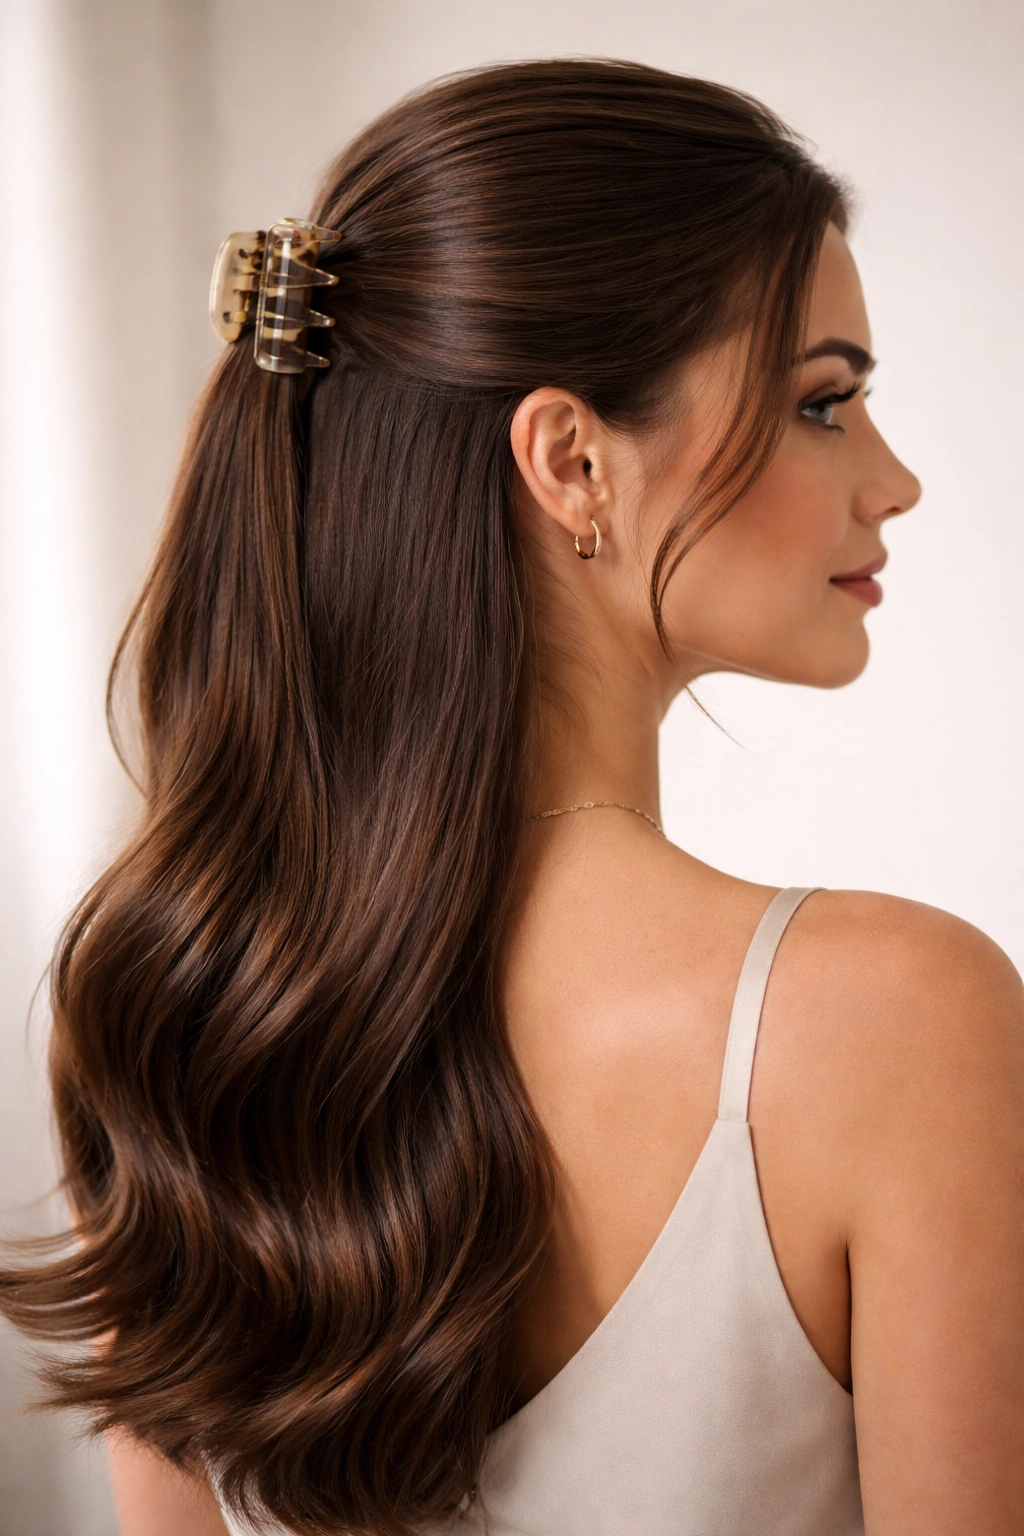
Smooth and polished, this variation takes the classic half up style and makes it completely sleek with no texture, waves, or flyaways. Use a fine-tooth comb and a smoothing product (gel, cream, or smoothing serum depending on your hair type) to brush the top section straight back without any texture, tease, or volume, creating a flat, glossy finish before securing it with the claw clip.
The Purpose of This Refined Take
This is your power look, your professional look, and your “I have my life together” look—even if you’re styling it in 90 seconds before a meeting. The sleekness reads as intentional and controlled, which translates to confidence visually. This version is particularly effective if you want to show off hair texture or color on the bottom half, since there’s zero visual competition from the top.
Creating That Sleek Finish
- Apply a smoothing product to slightly damp hair for the smoothest possible finish
- Use a fine-tooth comb or paddle brush to smooth the section straight back; the comb creates a sleeker result than fingers alone
- Direct the hair straight back toward the crown, not upward, for a more elegant proportion
- Position the claw clip lower on the back of the head (around ear height or slightly lower) rather than high on the crown, as this is more sophisticated
- Use a larger clip rather than a small one; the weight distribution of a larger clip actually helps it grip smoother hair more securely
Worth knowing: Apply a tiny bit of clear gel to the very front hairline if you have baby hairs or short pieces that won’t smooth back—this keeps them controlled without looking overdone.
6. The Textured Beach Wave Half Up
Take the opposite approach of the sleek version and intentionally create loose waves throughout your entire head before doing the half up style. You can create these waves with a curling iron, by sleeping in braids, or by using a sea salt spray and scrunching damp hair. Once you have the texture, gather the top section loosely and secure it, letting the waves fall messily out of the clip.
What Makes This Feel Effortless
Beach waves paired with a half up claw clip create that “I woke up like this” aesthetic that actually requires some intention but looks completely undone. This style is perfect for casual settings, weekend outings, or any time you want to look put-together without appearing to have tried hard. The texture also helps the claw clip grip without any teasing or product, since waves are naturally grippier than straight hair.
Building the Wave Texture
- Use a 1.25-inch curling iron to create loose waves; wrap larger sections for relaxed waves rather than tight curls
- Alternatively, create waves by sleeping in a loose braid or using a sea salt texturizing spray on damp hair
- Once you have the waves, run your fingers through them gently to separate and relax them
- Gather the top section but don’t smooth it back—keep the waves loose and tousled
- Position the clip slightly to one side rather than directly in the center for a more casual, asymmetrical feel
Pro tip: Apply the sea salt spray to damp hair, scrunch gently, and let it air dry for the most natural-looking waves; this requires zero hot tools and actually improves texture and grip over time.
7. The Half Up High Pony with Texture

This hybrid combines aspects of a half up style with the gathered-together feeling of a ponytail. Gather the top section like you’re doing a standard half up, but instead of stopping there, gather the rest of your hair into a low ponytail behind it, so you have a high ponytail with a lower pony stacked beneath it. Secure the upper section with a claw clip and the lower section with another claw clip or elastic, creating a defined, separated look.
Why Stacked Ponytails Are Interesting
This creates the illusion of more volume and dimension than a regular half up, and it’s particularly effective on thinner hair since the layering makes density appear greater. The separation between the two sections also creates visual interest and a more intentional, styled appearance. It’s sophisticated enough for events but casual enough for everyday wear.
Creating Proper Separation
- Gather your top section at the crown and clip it with a claw clip
- From directly below where that clip sits, gather the remaining hair into a low ponytail, leaving about an inch of space between the claw clip and the elastic
- Keep the lower ponytail looser than the upper section so they read as distinct elements rather than one mashed-together mass
- You can tease the lower ponytail section for extra volume, or keep it smooth depending on your vibe
- Consider curling or waving the lower ponytail for extra texture and dimension
Insider note: This style works brilliantly when your top section is sleek and smooth but your bottom ponytail is textured and voluminous—the contrast makes both sections more visually interesting.
8. The Romantic Side Sweep Half Up
Instead of gathering hair toward the center crown, sweep the top section to one side of your head, creating an asymmetrical, romantic silhouette. Start gathering from the opposite temple, twist or braid as you sweep across the crown, and secure the clip on the opposite side of your head (the back-side temple area). This creates a beautiful diagonal line and a softer, more feminine aesthetic.
The Elegant Quality of Asymmetry
Asymmetrical styles read as more intentional and sophisticated than perfectly centered styles, and the diagonal sweep created by this technique flatters most face shapes by directing the eye along the diagonal rather than straight down the center. This is an excellent choice if you’re going for romantic, feminine energy or if you want a hairstyle that creates visual movement.
Executing the Side Sweep
- Determine which side you want to sweep toward (most people feel most flattering with hair swept toward their non-dominant side)
- Begin gathering hair from the opposite temple, working across the crown
- As you gather, twist the section or incorporate it into a braid for added texture
- Direct the twist or braid across the crown diagonally toward the back of your head
- Secure the clip on the opposite side, around the temple or ear area, so the gathered section sweeps visibly across your head
- Leave a few pieces loose around both temples for softness
Worth knowing: The side sweep works especially well with longer face shapes, as the diagonal line creates visual balance and proportion.
9. The Bohemian Braided Crown
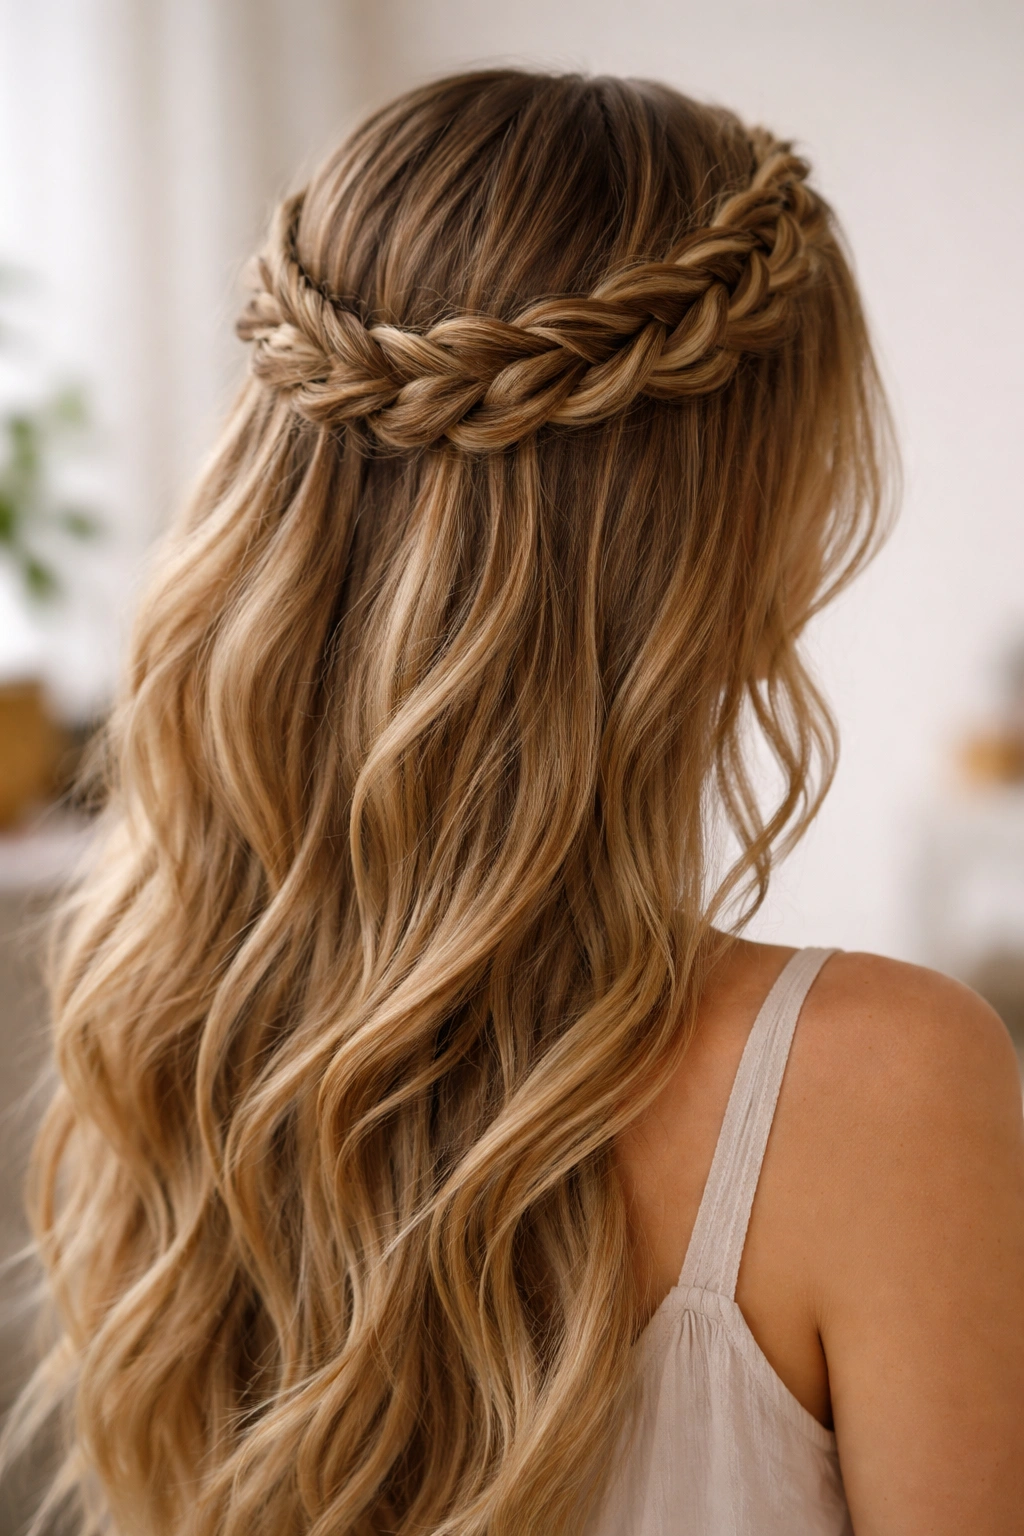
Create an actual crown braid—a braid that encircles the crown of your head—then secure the loose ends of the braid with a claw clip hidden underneath at the back of your head. This is more intricate than some other options but absolutely worth the effort for special occasions or any time you want to look romantic and intentional.
The Elevated Appeal
A braided crown reads as intentional styling while still maintaining the effortless-chic aesthetic of a claw clip. It feels special and elevated without being stiff or formal, making it perfect for dates, events, or any situation where you want to look genuinely polished. The crown braid also creates the effect of adding height and dimension to your entire head, which is particularly flattering.
Creating a Crown Braid
- Start on one side of your head at ear level
- Create a three-strand braid that runs horizontally across the back of your head from one ear to the other
- As you braid, incorporate small sections from above the braid line (working upward toward the crown) and small sections from below the braid line (working downward toward the nape)
- This creates a woven, braided band that circles around the back of your head
- When you reach the opposite ear, secure the braid end with a claw clip positioned at the back, hidden beneath the braid
- Leave the bottom half of your hair completely down for a romantic, ethereal look
Pro tip: Do this with slightly textured hair rather than freshly washed straight hair, as texture helps the small sections stay incorporated in the braid as you work.
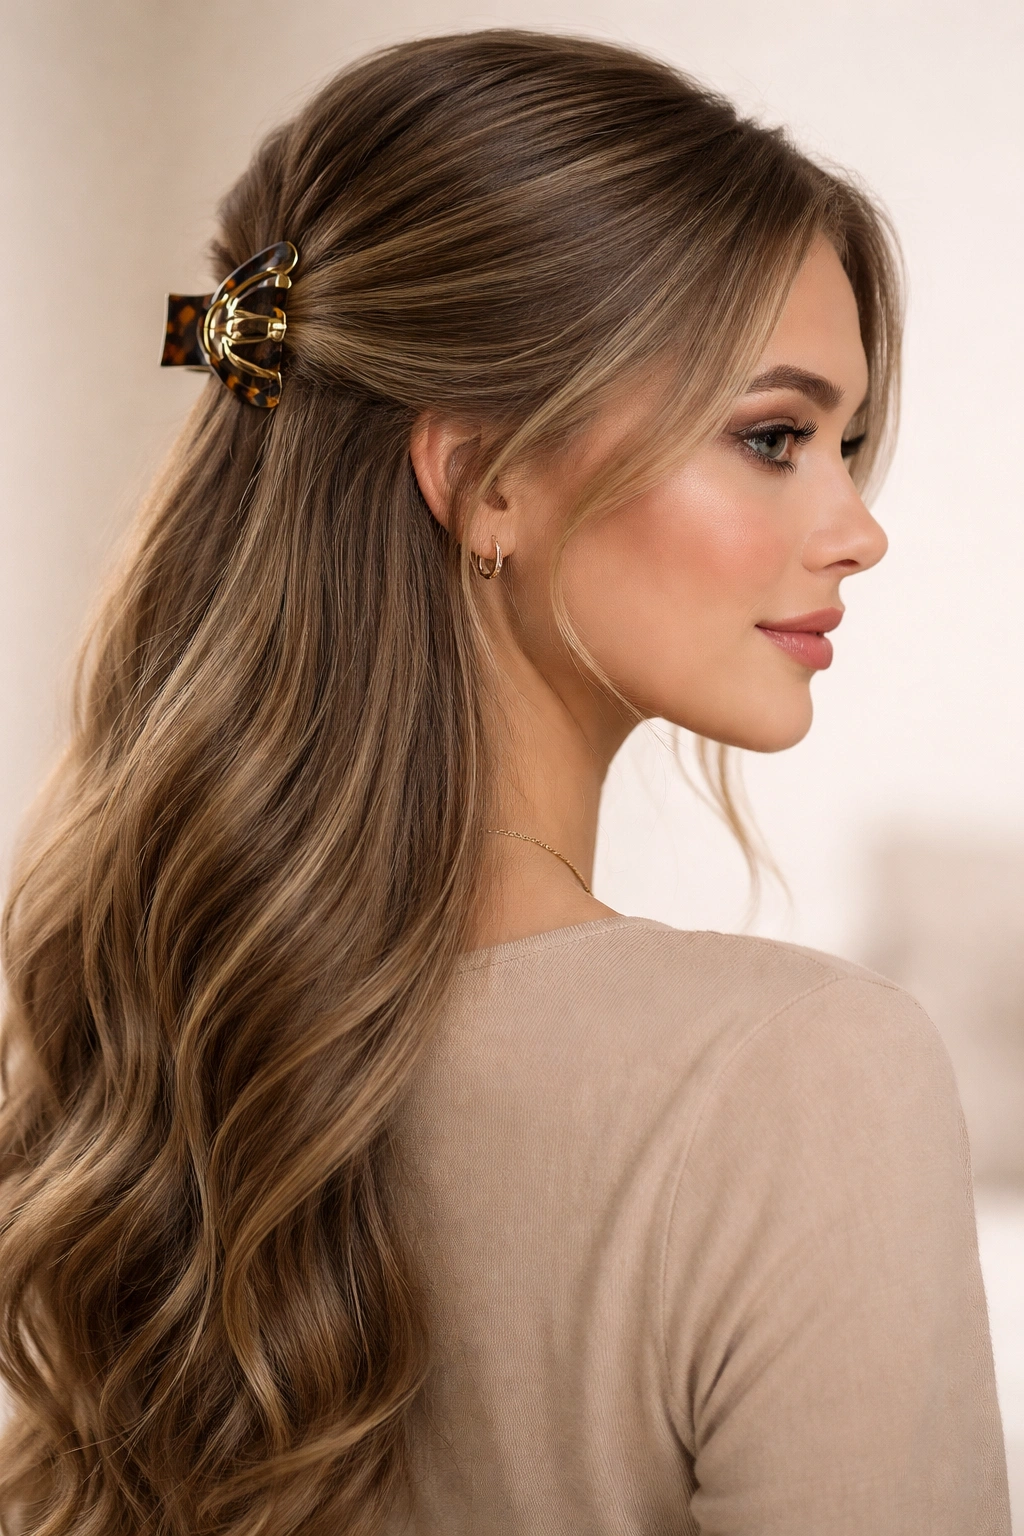
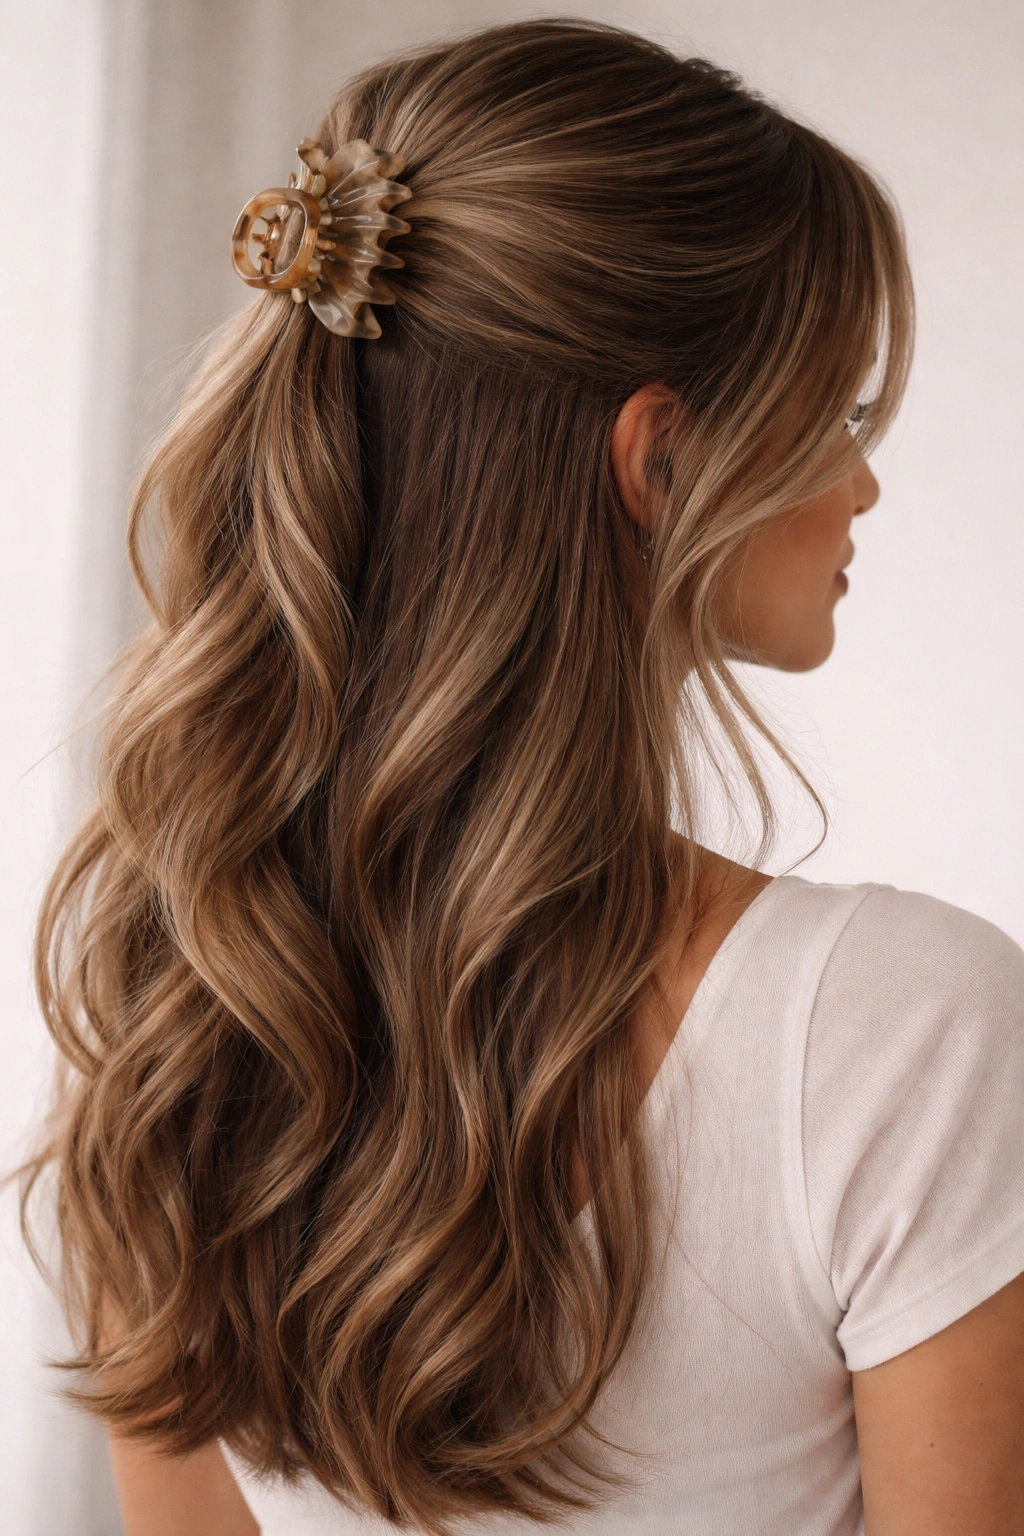
10. The Accessorized Half Up with Pearl or Metal Clip
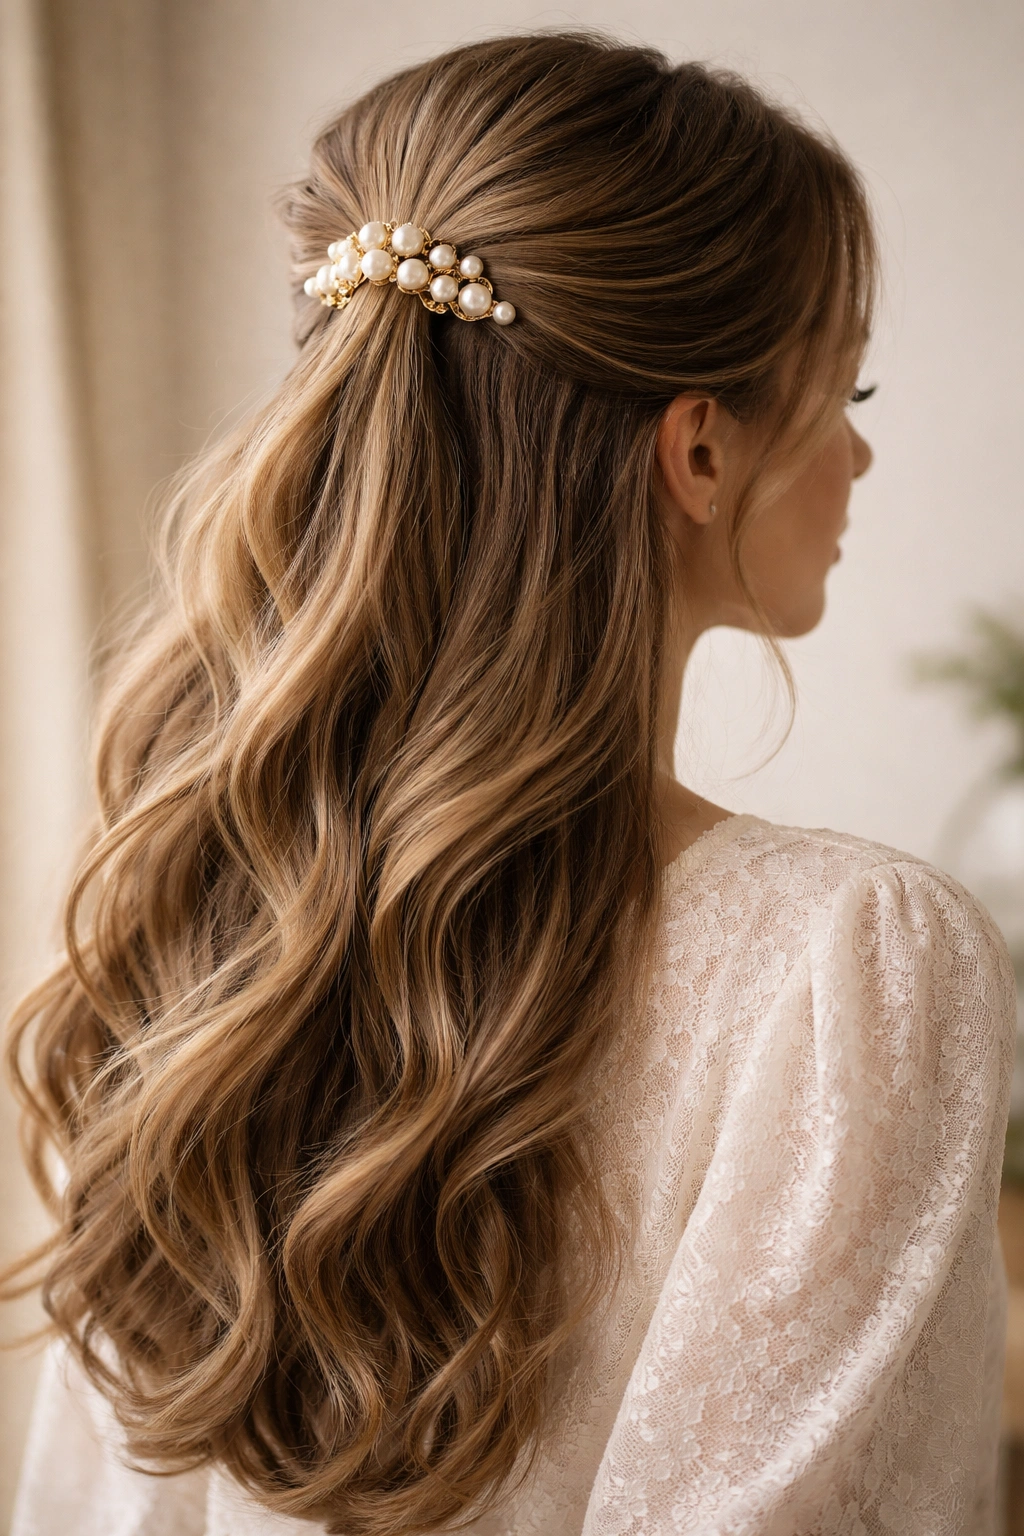
Any half up claw clip style becomes instantly elevated when you choose a decorative claw clip rather than a basic tortoiseshell or black one. Pearl claw clips, metal claw clips, or even colorful jeweled clips transform the entire aesthetic from casual to intentional-dressy. The styling itself remains identical to a classic half up, but the accessory choice changes the entire energy.
Why the Accessory Matters
A decorative clip signals that you’ve thought about your look and made intentional choices about how you’re presenting yourself. This works beautifully for events, dates, professional meetings where you want extra polish, or any time you want a hairstyle that reads as “I styled myself” rather than “I threw my hair up.” The clip becomes a piece of jewelry that draws the eye and adds visual interest.
Choosing the Right Decorative Clip
- Match metal tones to other jewelry you’re wearing; rose gold clips look softer and romantic, while silver or gunmetal clips read as more modern and cool-toned
- Pearl clips work with nearly every aesthetic but are particularly beautiful with romantic, vintage, or feminine looks
- Larger, more decorative clips work best with sleeker hair, since they’re visible; textured hair hides the clip, so go simpler with texture
- Consider your outfit and the occasion when choosing a clip—delicate clips for dressier events, bolder clips for statement-making casual looks
- Tortoiseshell clips are endlessly versatile and work with nearly every aesthetic
Insider note: A high-quality claw clip in a beautiful material (real pearl, quality metal) will hold much better than a cheap plastic clip, so it’s worth the investment if you wear these styles frequently.
11. The Voluminous Teased Half Up
Create significant height and volume at the crown by teasing (or backcombing) the top section of your hair before clipping. Use a fine-tooth comb or teasing brush to backcomb the gathered section, creating texture and grip, then smooth the outer layer to hide the backcombing. Secure with a claw clip positioned slightly lower to support the weight of the teased section.
Why Teasing Adds Dimension
Teasing creates both visual and actual volume, making your half up hairstyle appear fuller, thicker, and more textured. If you have fine hair, teasing is your secret weapon for making half up styles look intentionally styled rather than flat and sparse. Even if you have naturally thick hair, teasing adds dimension and movement that reads as more interesting than smooth styles.
Teasing Without Damage
- Teasing works best on hair that’s 1-2 days old, not freshly washed (freshly washed hair won’t hold a tease)
- Use a fine-tooth comb or actual teasing brush rather than a regular brush; the finer teeth grip hair better
- Work in small sections; backcombing your entire top section takes time but creates a much more secure result
- Hold the section upright and backcomb from the mid-length toward the roots, not the other way around
- Smooth the outer layer gently with your regular brush once you’ve teased, so it looks polished rather than frizzy
- Position your claw clip lower (around ear height) to support the weight of the teased section
Real talk: Avoid teasing if you have very delicate, fragile, or textured hair that’s prone to breakage; the rough handling can cause damage even with careful technique.
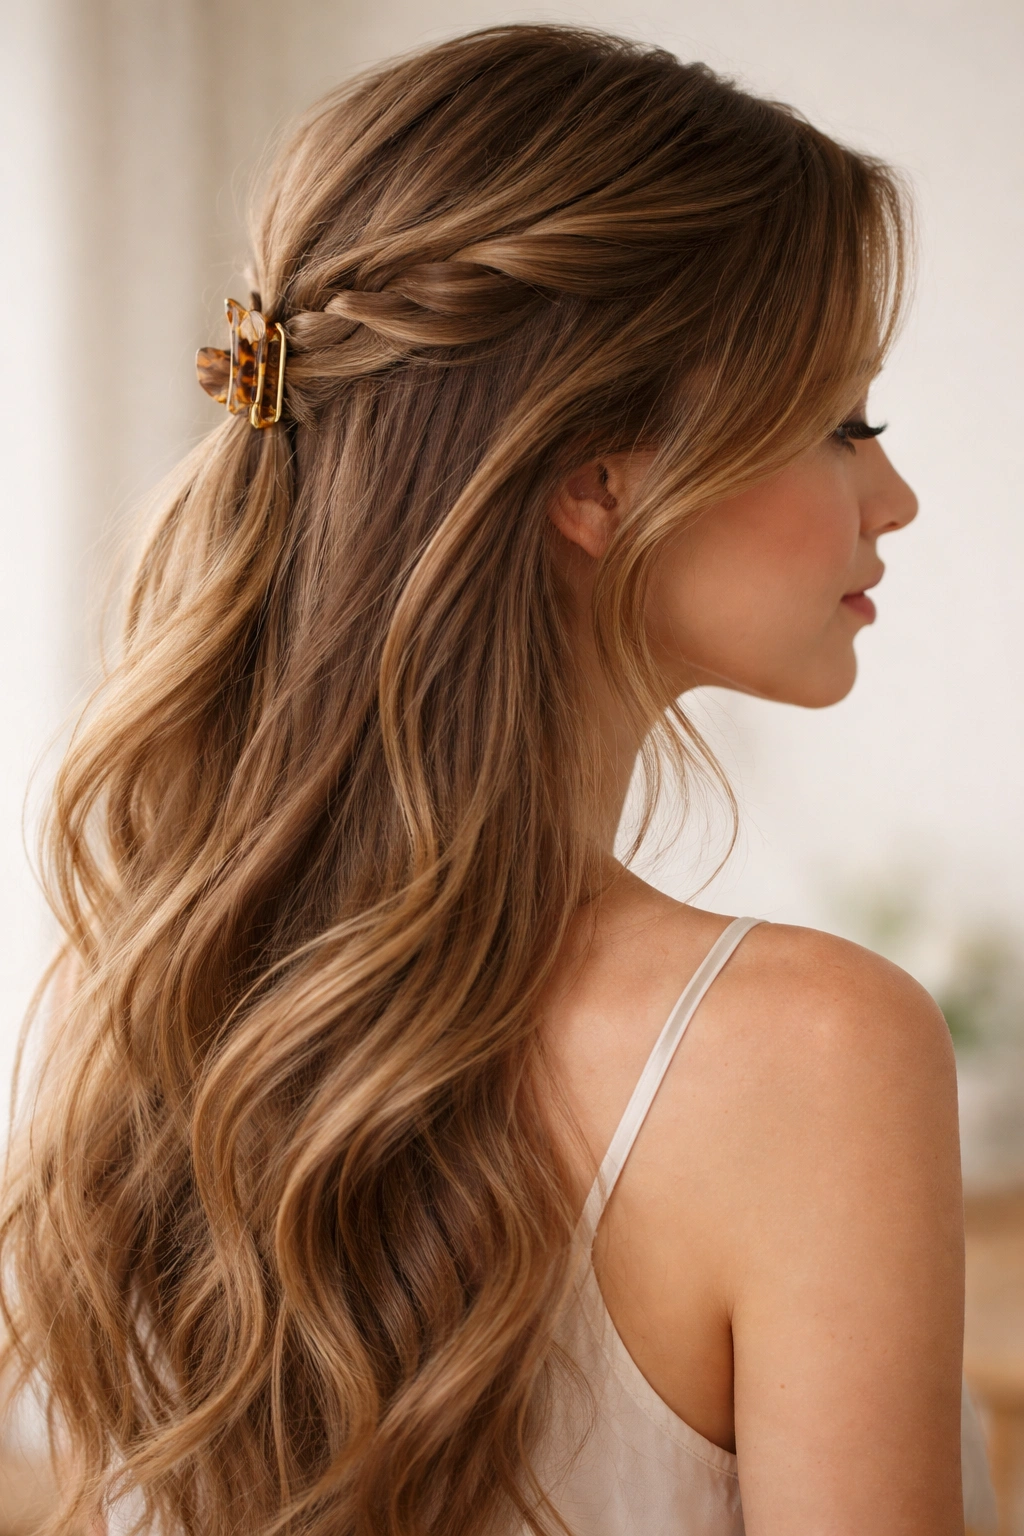
12. The Sleek Twisted Side Clip
Create a sleek appearance by smoothing the top section back toward the crown, adding a subtle twist as you secure it, then position the clip not directly in the center back but off to one side. This creates an asymmetrical, modern look that feels polished and intentional. The twist adds a decorative element without the time commitment of a full braid.
The Modern Appeal
This variation works beautifully on straight or slightly wavy hair and reads as current and intentional without being trendy or dateable. The asymmetrical clip placement creates visual interest and breaks up what could otherwise be a very centered, predictable style. This is perfect for professional settings where you want to look polished and intentional but not overly styled.
Executing the Asymmetrical Twist
- Smooth the top section straight back toward the crown (use a smoothing product for sleekness)
- Create a small twist in the gathered section just before the clip
- Position the claw clip off-center—slightly to the left or right of the center back
- This asymmetry makes the style feel intentional and modern rather than accidental or lazy
- Ensure the twist is smooth and the hair is sleek for maximum polish
- Consider using a metallic or decorative clip when you position it off-center, as the clip becomes more visible and should be intentional
Worth knowing: The more you offset the clip, the more modern and editorial the look becomes; a small offset (about an inch from center) looks elegant, while a large offset (several inches) becomes a statement.
13. The Multi-Texture Half Up with Waves and Braids

Combine multiple textures in one style by creating a braided section on one side, a twisted section on the other side, and then securing both together with a single claw clip in the center back. Your bottom hair can feature waves or curls, creating a multi-dimensional, totally-intentional look that’s eye-catching and sophisticated.
The Complexity You Can Handle
This style looks intricate and complicated, but it’s actually manageable once you break it into steps. The combination of braids, twists, and waves creates visual interest from every angle and reads as intentionally styled without being stiff or formal. This is perfect for events, special occasions, or any time you want to look polished and creative.
Building the Multi-Texture Look
- Create loose waves throughout your entire head (with a curling iron, braids, or sea salt spray)
- On one side of your crown, create a three-strand braid starting from the temple
- On the opposite side, create a twist starting from the opposite temple
- Direct both the braid and twist toward the back-center of your head
- Secure both with a single larger claw clip positioned in the center back
- Let the waves fall loosely throughout, with plenty of texture and movement
- Pull gently on the braid and twist sections to loosen them and create a romantic, undone aesthetic
Pro tip: This style is easiest to execute if you do the wave texture the night before, allowing you to focus purely on the braiding and twisting on the day you’re wearing it.
14. The Twisted Half Up with Ribbon or Accessory Threaded Through
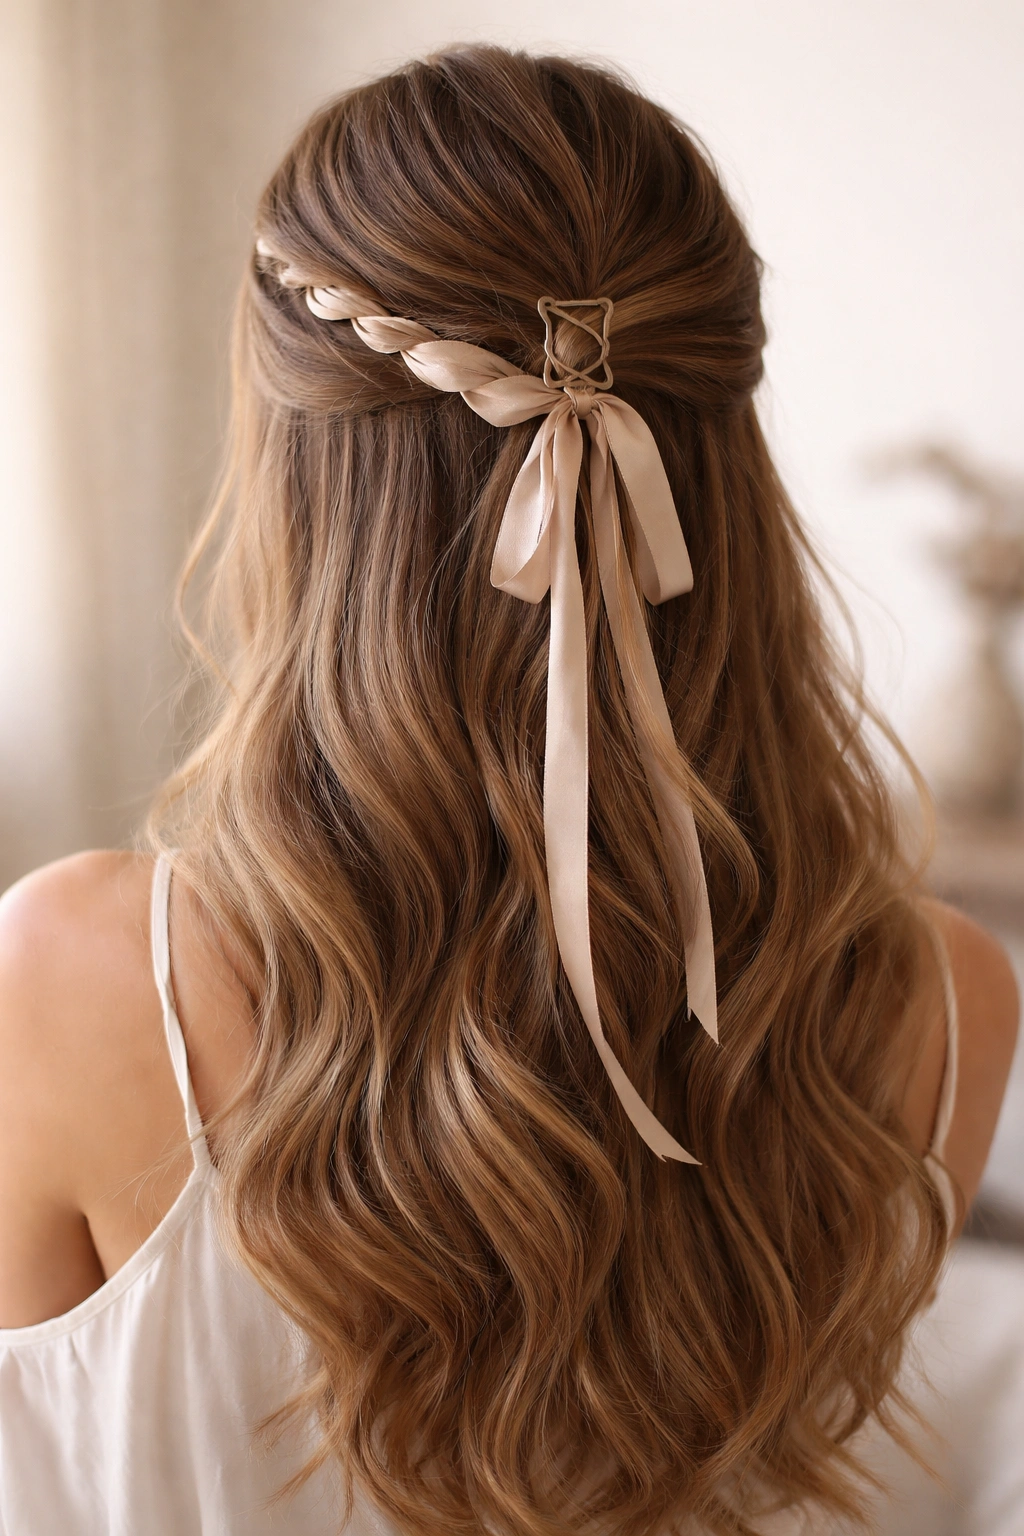
For a romantic, elevated twist on the classic style, thread a ribbon, faux hair extension, or decorative strand through your twisted section as you twist it, creating a colorful or metallic accent. Secure everything with a claw clip, and the ribbon creates visual interest and a custom, boutique-salon feeling.
Why Threading Adds Special Details
Threading an accessory through a twist is a tiny detail that makes your hairstyle feel custom and intentional, like you’ve had it done professionally. The ribbon or accessory adds color, shine, or texture that you might not have in your natural hair, allowing you to customize your look to match an outfit or create a specific aesthetic. This is perfect for events, special occasions, or any time you want a hairstyle that feels especially elevated.
Threading Accessories Successfully
- Choose a ribbon, faux hair extension, or decorative strand that complements your hair color or outfit
- For ribbons, use something with some weight and structure so it doesn’t slip out; satin ribbons work beautifully
- Begin your twist with the ribbon held alongside the first section of hair
- As you twist, incorporate the ribbon so it weaves through the twist, visible between the hair sections
- Secure everything with a claw clip that covers the end of the ribbon
- The ribbon should be visible throughout the twist, creating a colored or metallic line through your hair
Insider note: Metallic or pearl-toned ribbons work with nearly any hair color and outfit, while colored ribbons should complement either your hair color or your outfit (or both) to look intentional rather than random.
15. The Messy Undone Half Up
Contrary to some of the more polished options, create intentionally “undone” texture by not smoothing, teasing, or perfecting anything. Gather the top section roughly, don’t twist or braid it—just gather it and clip it with visible flyaways and loose pieces. Use a slightly worn-in claw clip (maybe one that’s seen some action) and position it in a slightly imperfect way. This reads as deliberately undone and effortlessly cool.
The Appeal of Intentional Imperfection
This style is perfect for casual settings and anyone who wants to look like they didn’t try—even though you actually did, just in a different way. The “undone” aesthetic is incredibly appealing because it suggests confidence and ease. You don’t need perfect execution; in fact, perfect execution ruins the vibe. Some visible flyaways and slightly loose sections are features, not bugs.
Creating Undone-ness Intentionally
- Use hair that’s been worn for a day or two, not freshly washed
- Gather the top section with your fingers rather than a comb for a messier, less precise section
- Don’t create any twists or braids; just gather and clip
- Leave multiple pieces loose around your face and temples, even if they fall out slightly
- Position the clip slightly off-center or at an unusual angle rather than perfectly centered
- Use a claw clip that’s not brand-new and shiny; a slightly worn tortoiseshell clip looks more intentionally casual
- Gently pull at the gathered section to loosen it and create a less-structured appearance
Real talk: The undone style is harder to execute than it looks because you need to balance “undone” with “intentional”—the goal is for it to look like you’re cool enough not to try hard, not like you actually messed up your hair.
16. The Extra-Long Half Up with Extended Length Focus
Emphasize the length of your hair by creating a half up style that shows off as much of your hair length as possible. Use a smaller claw clip and gather less hair than you might normally, clipping closer to the crown so more of your length hangs free below. This is the choice when you want your hair length to be the statement, not the styling.
Showcasing Maximum Length
If you’ve worked hard to grow your hair long, a style that emphasizes length rather than hiding it is the way to go. By clipping a minimal amount of hair, you create a less-cluttered look that lets your length be the focal point. This also works well if you have very thick hair, since less clipping means less bulk at the crown.
Positioning for Maximum Length Display
- Gather only the very top section of your hair, starting maybe 2-3 inches above your crown
- Use a smaller claw clip (2-3 inches rather than 4+ inches)
- Position the clip high on your head, close to where you gathered
- This leaves an enormous amount of hair hanging loose below the clip
- The gathered section should appear almost like a small decorative knot at the very top, with the bulk of your length emphasized below
- Consider using a decorative or metallic clip in this style, since the clip is visible and should be attractive
Worth knowing: This style works beautifully with long, thick hair that has its own texture and shine; the less styling you do to the bottom section, the more your hair’s natural qualities get to shine.
17. The Half Up with Hidden Clip
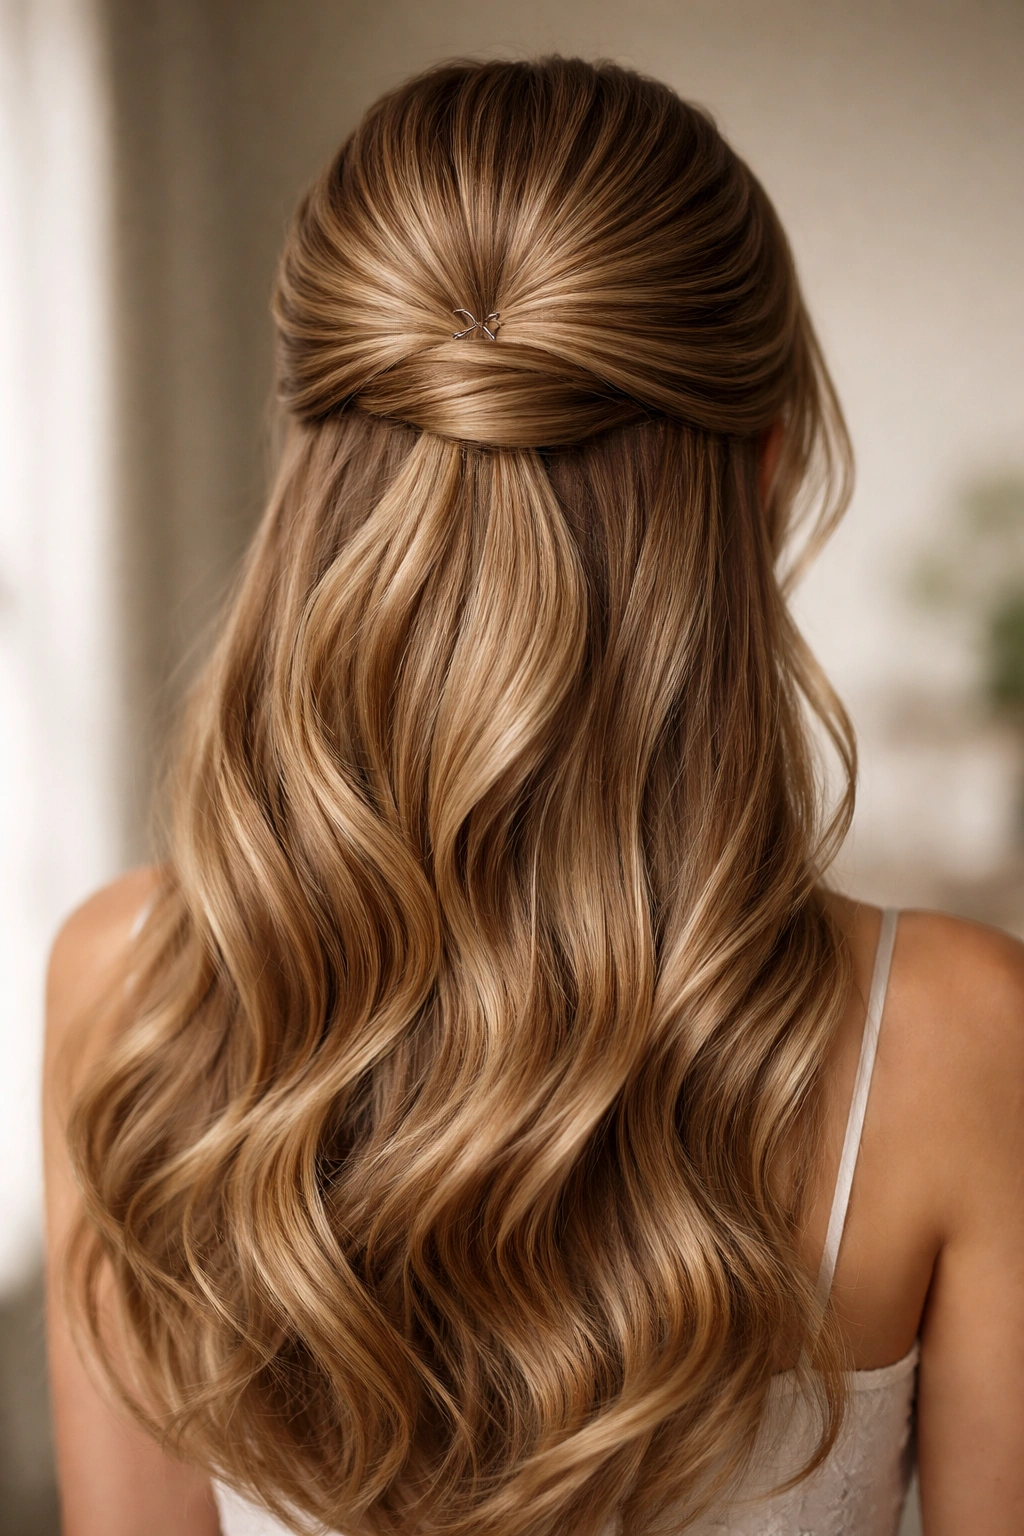
For maximum elegance, execute the half up style but position the claw clip so it’s completely hidden beneath the gathered hair section, with no clip visible at all. This requires more hair in the gathered section and careful positioning, but the result looks like magic—hair is floating at the crown with no visible means of support.
The Invisible-Support Illusion
This is the most polished, elegant version because there’s no visible clip, no hardware, no reminder of how the style is actually being held. It reads as somehow more intentional and elevated than a visible clip. This is perfect for formal events, photography, or any situation where you want maximum elegance.
Hiding the Clip Completely
- Gather a larger-than-normal section of hair (at least a quarter of your head)
- Position the clip in the center of the gathered section, not at the edge
- Smooth hair over and around the clip so it’s completely enclosed by gathered hair
- Ensure the smoothed-over hair is secure so it doesn’t slip and reveal the clip
- Use a matte or tortoiseshell clip that blends with hair rather than a shiny metallic clip that would be obvious if revealed
- This works best with sleek, smooth gathered hair rather than textured or braided sections
Pro tip: If the clip feels like it might slip and reveal itself, secure it with a small bobby pin inserted through one of the clip’s grooves—this anchors it and makes it impossible to shift.
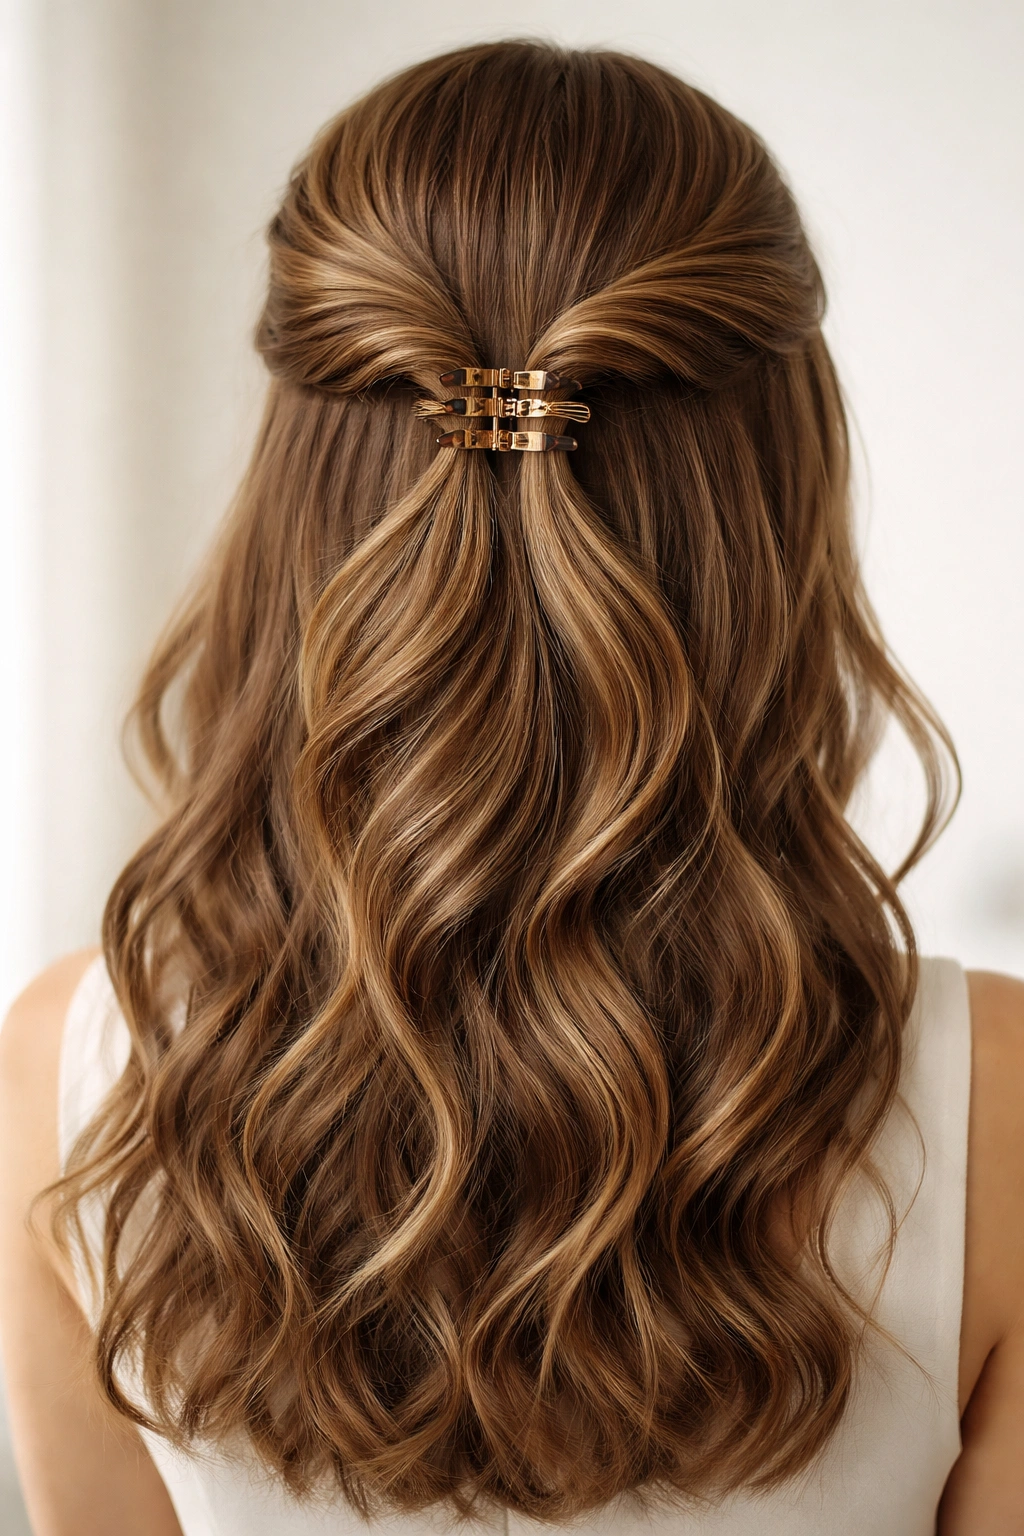
18. The Bubble Half Up
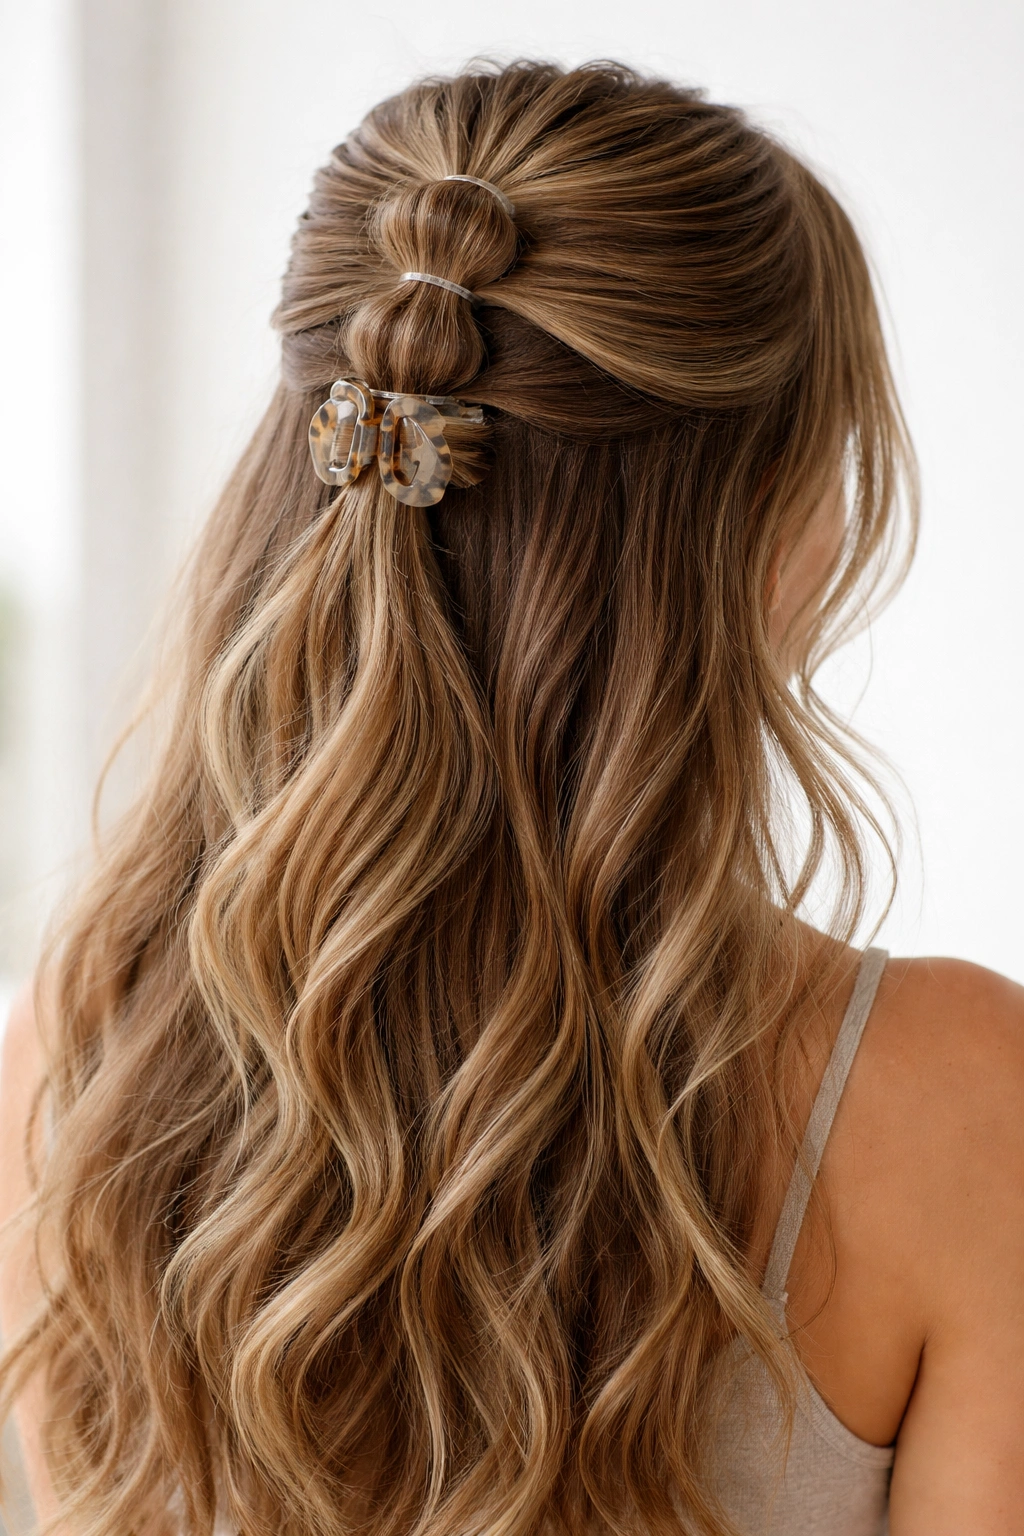
Create a series of small sections above your initial half up clip, securing each with a tiny elastic or additional claw clip, creating a “bubble” or “popcorn” effect from the crown down to the main half up clip. This creates visual texture and dimension while keeping the main half-up concept intact. This style is playful and creative, perfect for fun occasions or if you want to stand out.
The Playful Creative Element
Bubble styles are trendy-adjacent (they come in and out of fashion) but they’re so visually interesting that they work well for special occasions, fun events, or any time you want a hairstyle that’s conversation-starting. The multiple clips and gathered sections create lots of movement and dimension, making the style feel dynamic and intentional.
Creating the Bubble Effect
- Create your base half up style with a claw clip in the normal position
- Above that clip, create a small section of hair and secure it with a tiny elastic or another small claw clip, creating a “bubble” of gathered hair
- Above that bubble, create another section and secure it similarly, creating another bubble
- Continue creating 3-4 bubbles working upward toward the very crown
- Make sure each bubble is roughly the same size for a balanced appearance
- You can keep the bubbles smooth or tease them for texture
- The bubbles should be clearly separated from each other, not blended together
Insider note: This style works best with medium-to-thick hair; if your hair is very fine, the bubbles can look sparse and won’t create the visual impact that makes this style worth the effort.
Final Thoughts
The magic of claw clips for half up half down hairstyles isn’t just that they’re functional—it’s that they’re endlessly adaptable. You can transform your entire look by changing where you position the clip, how much hair you gather, what texture you create, or what accessories you add. The same basic technique becomes dramatically different depending on these choices, which means you can wear a claw clip half up style almost every single day without it ever looking repetitive or boring.
What makes these 18 variations worth exploring is that each one communicates something different about how you’re feeling that day. The sleek version says professional and intentional. The undone version says casual and confident. The braided versions say romantic and creative. The decorated versions say elegant and thoughtful. The half up style with claw clips is genuinely versatile enough to be your go-to for nearly every occasion, and once you’ve practiced a few variations, you’ll find yourself reaching for your claw clip automatically, knowing you can create exactly the vibe you want in about five minutes.