Starting with a half-up half-down hairstyle already gives you the perfect canvas for something special—you get the best of both worlds, with volume and movement combined with a polished, intentional look. Add a ribbon to a braided half-up style, and suddenly you’re not just wearing your hair down; you’re creating a statement that works whether you’re heading to a wedding, a casual date, or just want to feel put-together on an ordinary Tuesday.
The magic of braided half-up half-down with ribbon comes down to layering texture and detail. A ribbon woven through a braid catches light differently than the hair alone, draws attention to the craftsmanship of your braiding work, and adds a whimsical or elegant touch depending on your ribbon choice. The half-up structure keeps hair off your face and neck while the bottom layers flow free, creating volume and movement that a full updo can’t quite achieve. Whether you’re working with thick waves, fine strands, curls, or straight hair, there’s a braided ribbon style that’ll work for your texture and hair length.
What makes these styles so versatile is how much the ribbon choice itself matters. A velvet ribbon reads romantic and vintage. A metallic or glittery ribbon adds celebration and shine. A simple grosgrain ribbon in a matching or contrasting color creates a clean, modern aesthetic. You can use one ribbon, two ribbons in different colors, or even weave a ribbon that coordinates with your outfit. The braiding technique is just the frame—the ribbon is what personalizes the look and makes it unmistakably yours.
1. Classic Three-Strand Braid with Satin Ribbon Weave
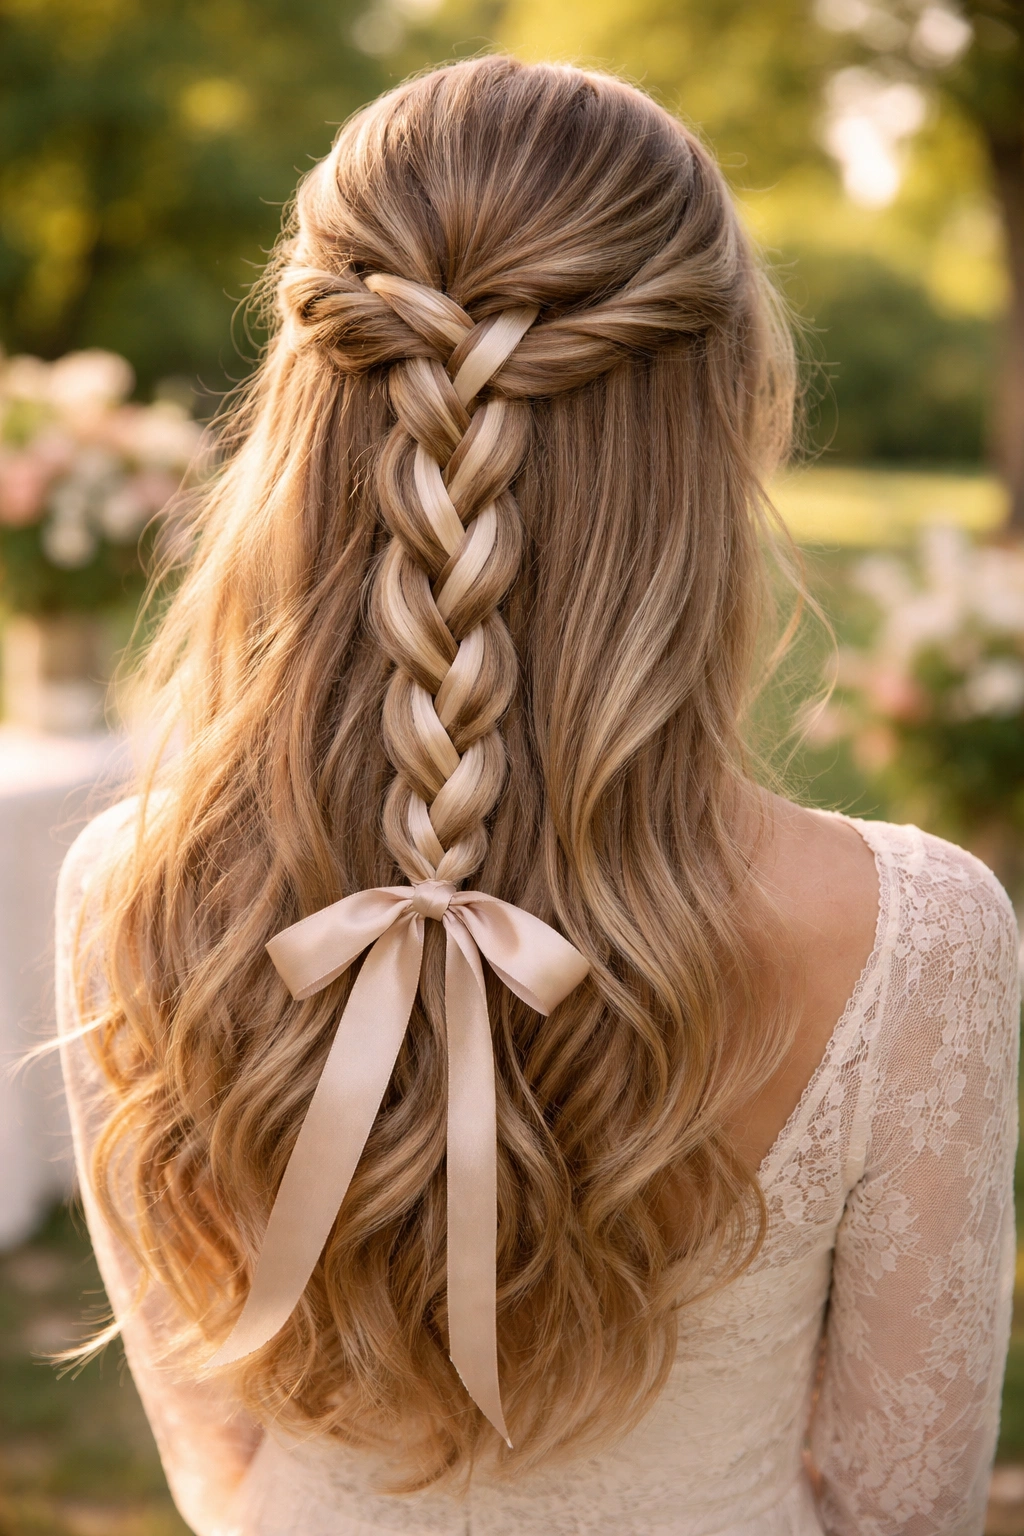
The simplest braided half-up style becomes surprisingly elegant when you thread a satin ribbon directly through the braid structure. This is the hairstyle that works at a garden party, a professional event, or anywhere you want understated polish without looking like you spent three hours on your hair.
Why This Style Works for Everyone
This braid style is genuinely forgiving. You don’t need advanced braiding skills—just the ability to do a basic three-strand braid that most people learn in childhood. The ribbon does the visual heavy lifting, so even if your braid isn’t perfectly tight or symmetrical, the ribbon’s sheen and color draw the eye exactly where you want it. The half-up structure means your full length stays visible and flowing, which flatters all hair textures and lengths from shoulder-length to very long.
How to Create It
- Start by taking a horizontal section from ear to ear across the crown of your head, about 2 inches below where your natural part sits
- Divide this section into three equal strands and begin a basic three-strand braid, working down the back of your head for about 3 to 4 inches
- As you braid, thread a satin ribbon (about ¼ inch wide works perfectly) through the braid by feeding it under and over the strands as you work, starting from the top—the ribbon weaves through the same pattern as your braiding motions
- Secure the braid at the nape of your neck with a clear elastic or a small hair tie that matches your ribbon
- Leave the remaining hair down and brush it out into soft waves or curls for contrast against the structured braid
Pro tip: Use a ribbon in a metallic shade or a jewel tone that contrasts with your hair color—the contrast makes the ribbon pop and prevents the whole look from flattening into one monochromatic mass.
2. Dutch Braid Half-Up with Cascading Ribbon
A dutch braid (which sits on top of the hair rather than nestled into it) creates a more sculptural, dimensional effect than a regular braid, and when you add a ribbon that cascades from the braid down the side of your head, you get a look that photographs beautifully and feels noticeably more intricate than the time it takes to create it.
What Makes This Different
Dutch braids have a visual depth that catches light from different angles, making them appear thicker and more textured. The cascading ribbon element—where the ribbon hangs loose and flows down past your shoulder—adds movement and whimsy. This style works particularly well if you have finer hair, because the dutch braid technique actually makes the braid appear fuller than a standard three-strand would, and the ribbon adds extra visual volume.
Step-by-Step Creation
- Section off the top half of your hair from ear to ear, creating a clear divide between the half you’re braiding and the half you’re leaving down
- Starting at the crown, create a dutch braid by taking three strands and crossing each outer strand under the center strand (this is the opposite motion of a regular braid, which is why it sits on top)
- Work the braid down about 3 to 4 inches toward the nape
- Before securing the braid, thread your ribbon through it, but instead of weaving it all the way, let one end of the ribbon hang loose after the last few braiding motions
- Secure the braid with an elastic, and use bobby pins to anchor the cascading ribbon in place so it hangs along one side of your head, creating a flowing accent line
- Leave your bottom hair completely down and tousled for maximum contrast
Worth knowing: This style works best if you have enough hair to support a visible dutch braid—very fine or thin hair might make the braid look sparse. If that’s your case, try curling your entire bottom half first to add texture and volume, which makes the braid appear more substantial by comparison.
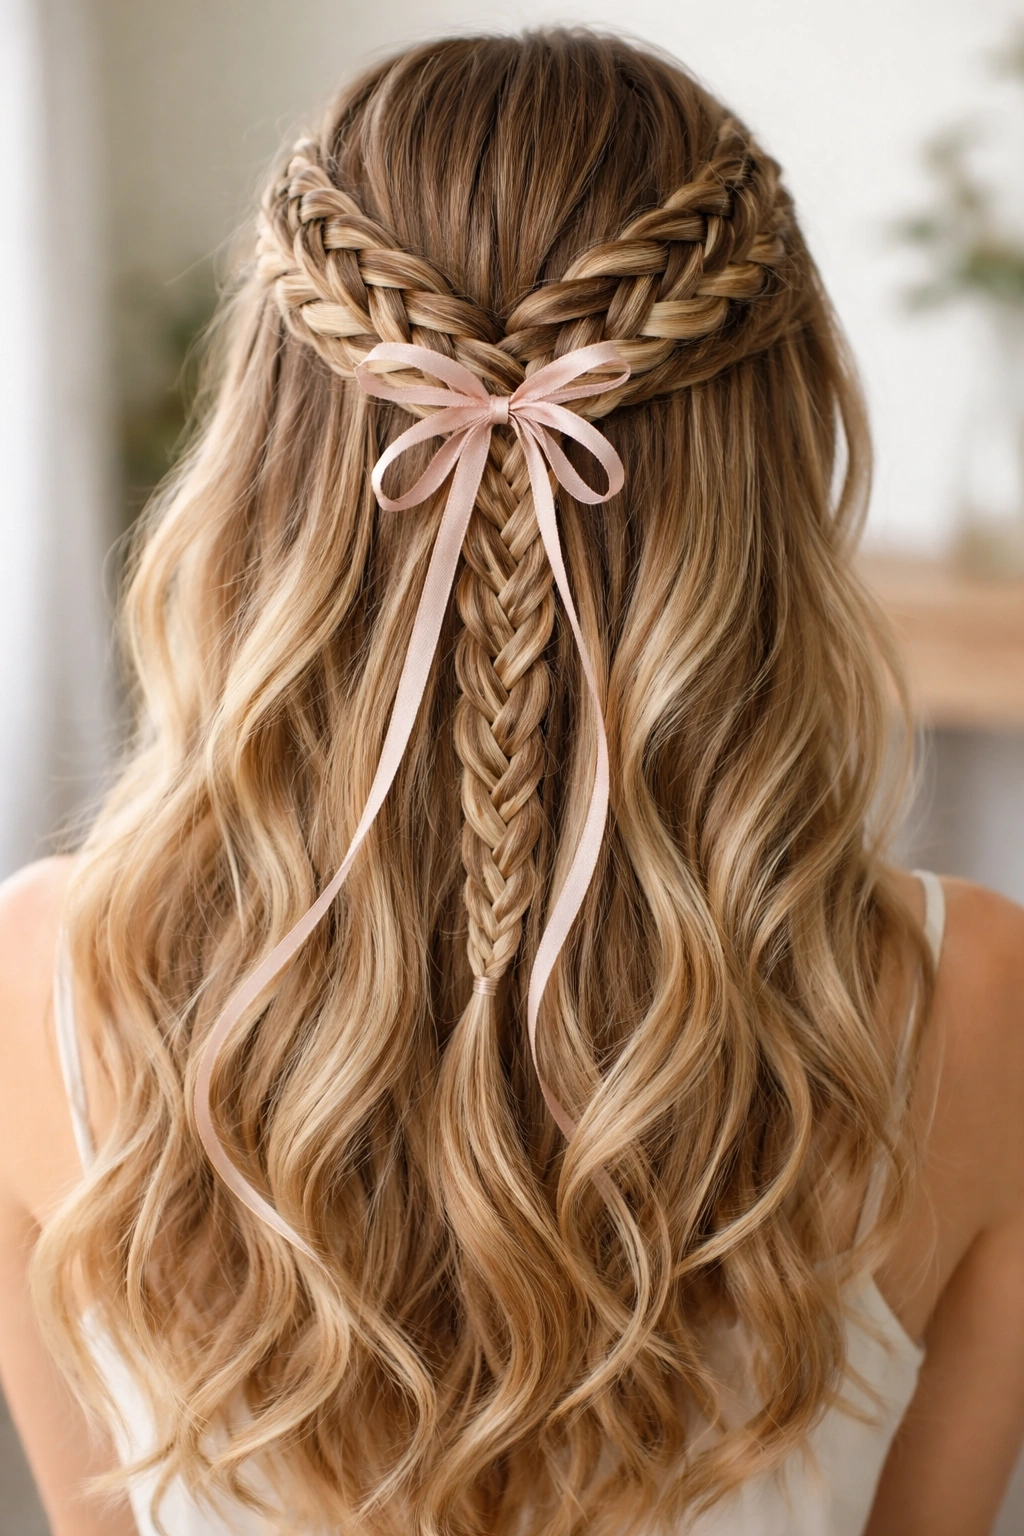
3. Fishtail Braid and Ribbon Hybrid
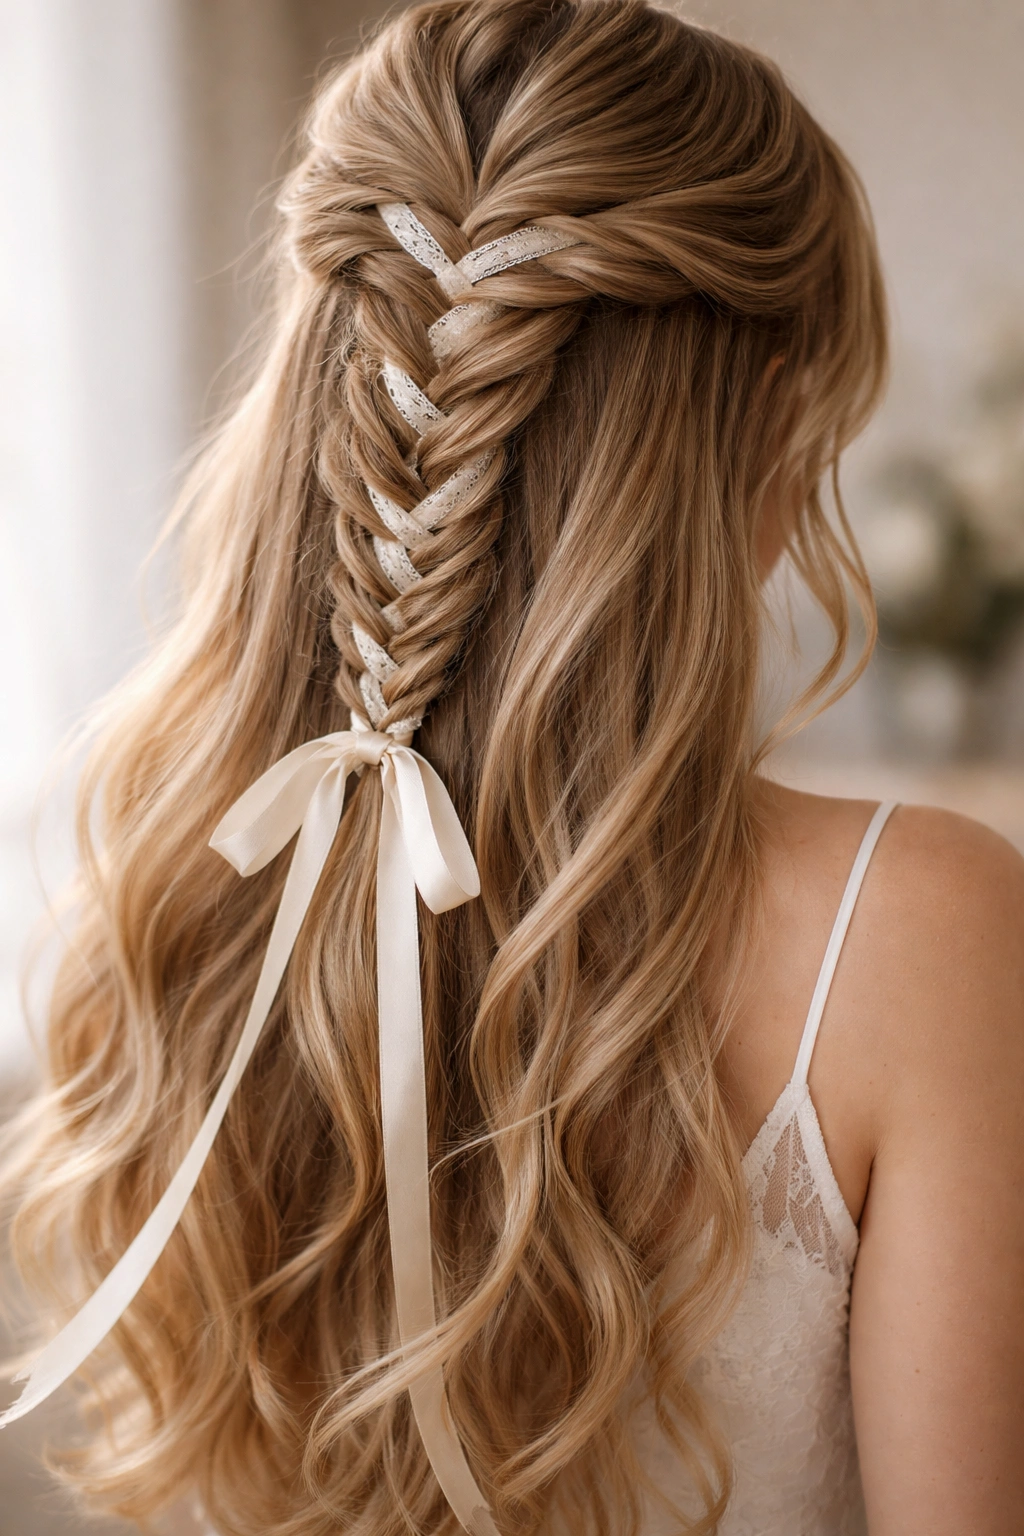
The fishtail braid has a naturally lacy, intricate appearance that makes you look like you’ve mastered advanced braiding when you actually just know one simple (though slightly different) technique. Combining a fishtail with a ribbon creates a genuinely eye-catching half-up style that feels special and modern.
Why Fishtail Works with Ribbon
A fishtail braid is technically trickier than a three-strand braid, but once you understand the two-strand alternating motion, it becomes almost meditative to create. The braid itself has so much visual texture that adding a ribbon doesn’t overwhelm the style—instead, the ribbon acts as a complementary accent that highlights the detailed work you’ve already done. The fishtail’s delicate appearance reads feminine and romantic, which pairs beautifully with most ribbon choices.
Executing the Fishtail Braid with Ribbon
- Take your half-up section from temple to temple across the crown, dividing it into two main strands
- Take a thin section from the outer edge of the right strand and cross it over to the left strand, weaving it into the left side of the braid
- Take a thin section from the outer edge of the left strand and cross it over to the right strand, weaving it into the right side
- Continue this alternating pattern (right section to left, left section to right) all the way down, creating the characteristic lacy fishtail pattern
- As you near the bottom of the braid, start threading your ribbon through the braid structure—with a fishtail, the ribbon naturally sits in the crisscross pattern created by the braid, so it appears to be part of the braid itself rather than just threaded through it
- Secure everything with an elastic and leave your bottom half flowing free
Pro tip: Use a thinner ribbon (about ⅛ inch wide) with a fishtail braid rather than a chunky one—the delicate ribbon matches the delicate appearance of the fishtail and prevents the braid from looking overcrowded.
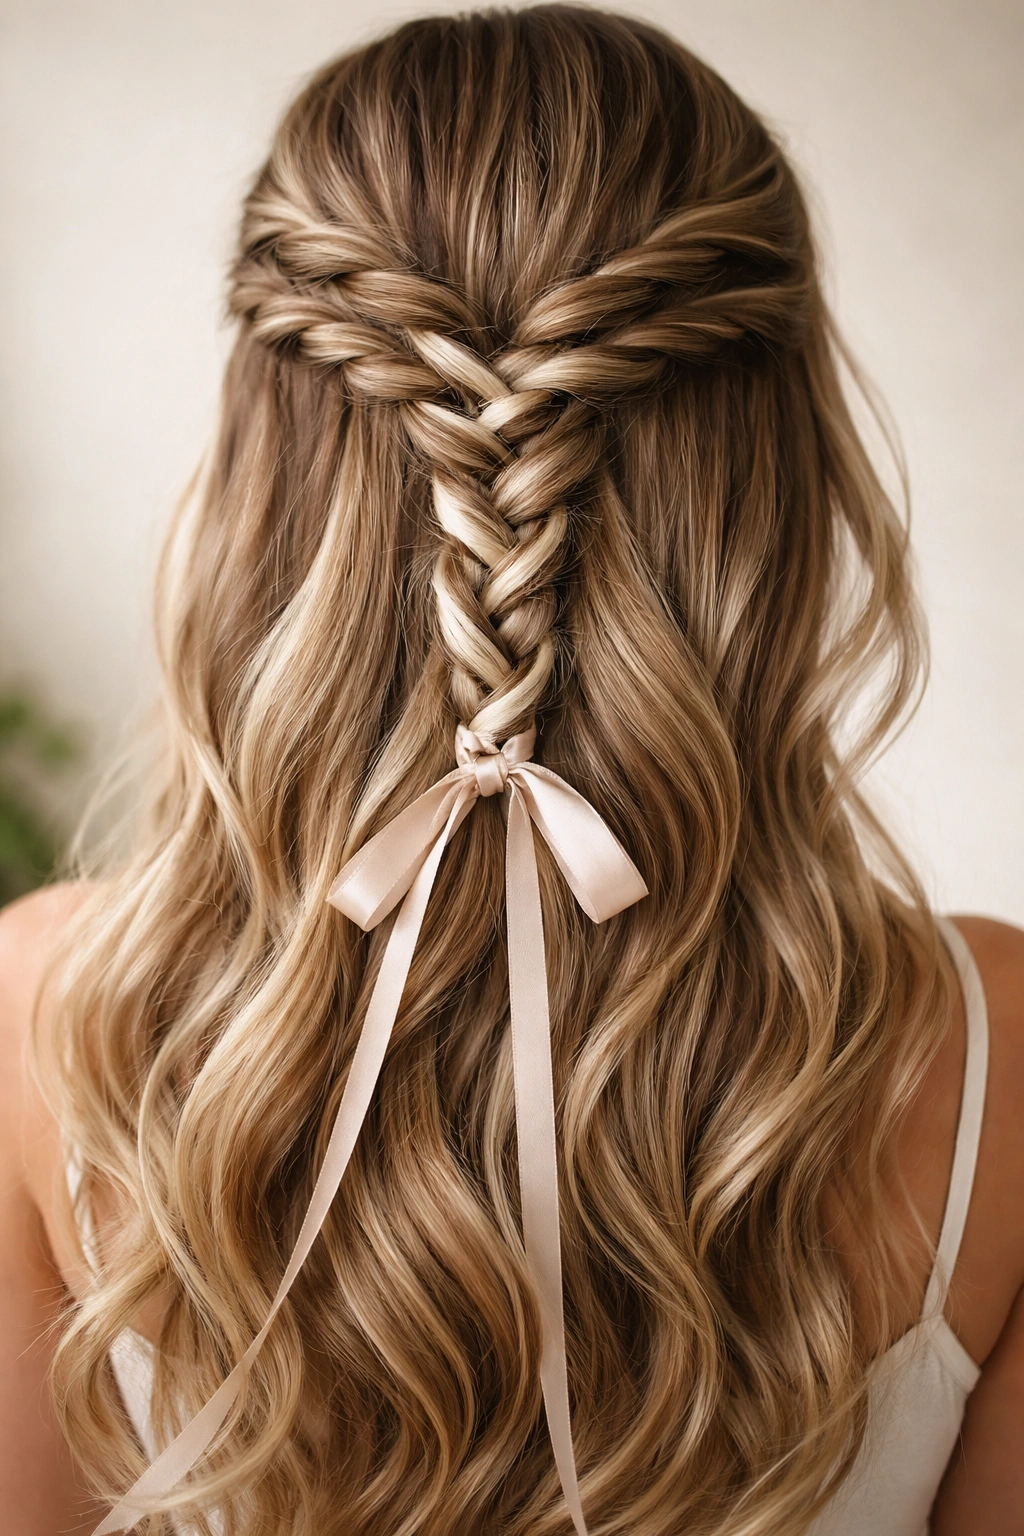
4. French Braid Half-Up with Woven Ribbon Detail

A French braid starts at the crown and incorporates hair as it travels down, which means you can start your French braid right where your half-up section begins and create a seamless, integrated look. When you add a ribbon that weaves through this braid, you get a style that looks intentional and sophisticated.
The Advantage of French Braiding for Half-Up Styles
French braiding automatically creates the structure for your half-up look—the top section is contained and polished, while you naturally leave the lower portion free. The braid itself gets progressively thicker as you add more hair, so you create an anchored, secure look that holds throughout the day without needing multiple hair ties or bobby pins. Adding a ribbon to a French braid means the ribbon travels the entire journey of the braid, creating a continuous line of color or shine down the back of your head.
French Braid with Ribbon Technique
- Start at your crown with a small three-strand section, dividing your hair into three strands
- Begin a regular three-strand braid, but as you complete the first few crossing motions, start picking up a small section of loose hair from the side each time you bring a strand to the center
- Continue this alternating pickup pattern (right strand over with added hair, left strand over with added hair) all the way down to the nape of your neck
- Start threading your ribbon from the very top of the braid, weaving it through the same pattern as your braiding motion, so the ribbon and braid move together
- Once you reach the nape, secure the braid with an elastic that also secures the ribbon at the end
- Let your remaining hair cascade down in waves or curls
What to watch for: If your ribbon isn’t secured well, it can slip out of the braid as you move throughout the day. Try tucking a small piece of the ribbon under your final elastic, or use a bobby pin to catch the ribbon end and secure it to the base of your braid.
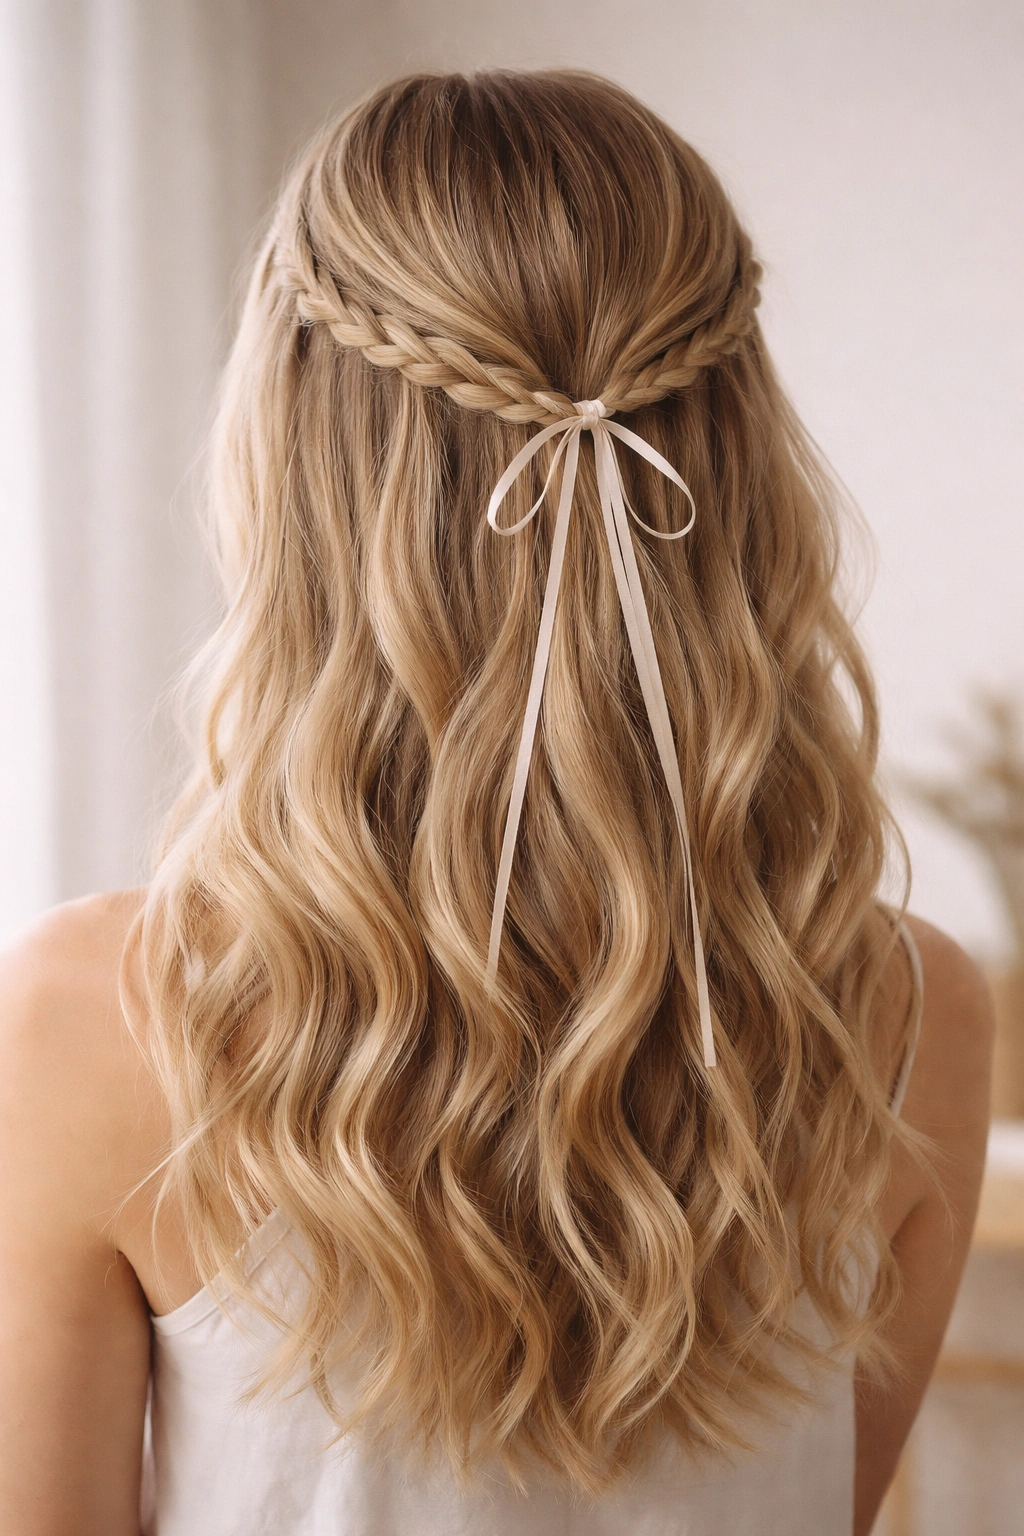
5. Rope Twist Half-Up with Ribbon Accent
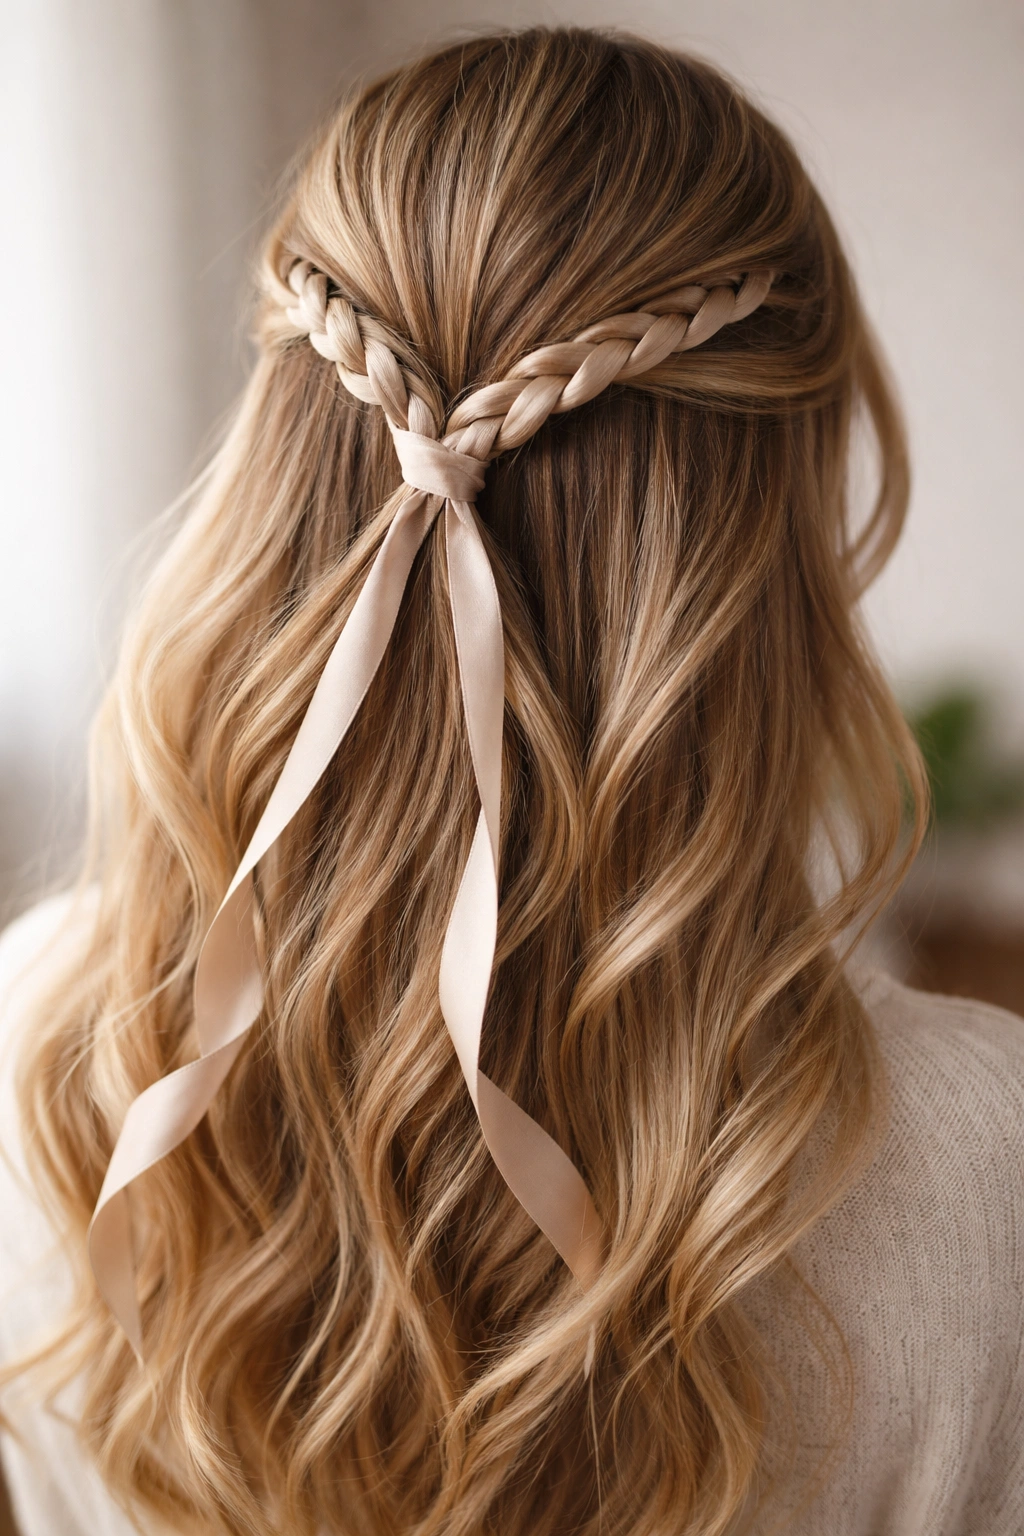
A rope twist is technically not a braid at all—it’s two sections of hair twisted around each other, which makes it faster to create than a braid and creates a completely different visual texture. This style works beautifully with ribbon because the twisted sections create natural channels where ribbon can sit prominently.
Why Rope Twists Look More Intricate Than They Are
A rope twist takes about half the time of a braid because you’re only working with two strands instead of three, yet it creates a distinctly different appearance that reads as intentional and stylish. The twisted sections create a rope-like column of texture that photography and good lighting really showcase. When you wrap a ribbon around these twisted sections or thread it through them, the ribbon becomes a primary visual element rather than a secondary detail.
Creating the Rope Twist with Ribbon
- Section off your half-up area from temple to temple, creating a clean divide at the crown
- Split this section into two equal parts
- Twist each section tightly, rolling them in the same direction (both clockwise or both counterclockwise) for about 3 to 4 inches down the back of your head
- Wrap your ribbon around the outside of both twisted sections, creating a binding effect that holds the twists together while adding color and texture
- Secure the ends of the twists and ribbon with a single elastic at the nape
- Leave your bottom half down and either straight, wavy, or curled depending on the occasion and your preference
Insider note: If you want maximum ribbon visibility, use a wider ribbon (½ inch or more) and wrap it around the rope twists rather than threading it through them. The wrapped technique means the ribbon is the most visible element of the style, which works beautifully if you’ve chosen a special or Statement ribbon.
6. Multi-Strand Braids with Ribbon Intertwine
Instead of a single braid, imagine creating two or three smaller braids within your half-up section, then weaving a ribbon through all of them together. This creates a complex, layered appearance that actually uses a simpler braiding technique repeated multiple times.
Building Complexity Through Repetition
Multiple smaller braids create more visual interest than one large braid, and they allow you to play with ribbon placement and color in new ways. You could use a single ribbon that connects all the braids, or multiple ribbons in complementary colors, each threaded through a different braid. The key is that each individual braid is simple, but the combination and ribbon intertwining creates a look that feels significantly more advanced than the work involved.
How to Execute Multi-Strand Braids
- Divide your half-up section into 2 or 3 subsections, depending on how full you want the style to look (thicker hair can handle 3 sections; finer hair looks better with 2)
- Create a simple three-strand braid in each subsection, working each braid from the crown toward the nape, about 3 to 4 inches in length
- Take your ribbon (or ribbons, if you’re using multiple) and weave it through all the braids in a pattern—you could thread one ribbon through all three braids in a diagonal line, or use separate ribbons in each braid, or create a weaving pattern where the ribbon goes over one braid, under the next, creating a visual rhythm
- Secure each braid separately with small elastics, or secure them all together at a central point at the nape with one larger elastic
- Leave your bottom hair completely down and add waves or curls for texture and volume
Real-world advantage: This style is excellent if you want to add extra hold and structure without the weight of one thick braid. Multiple smaller braids distribute the pull across your scalp more evenly, which means less tension and potential breakage, especially if you have delicate hair or a sensitive scalp.
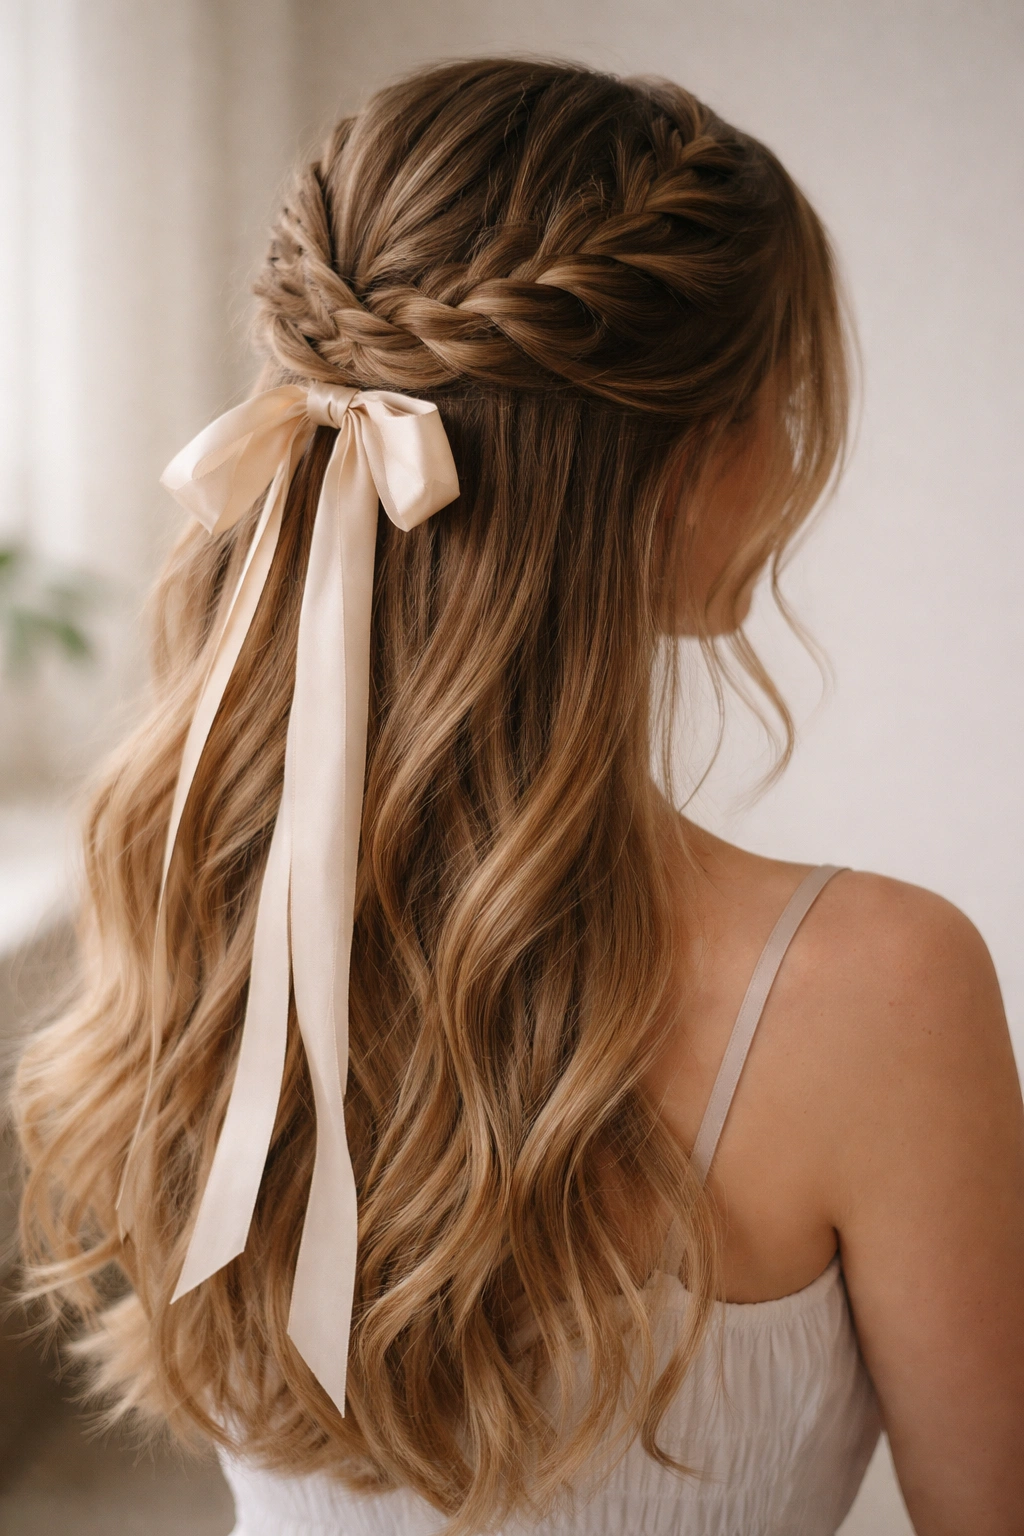
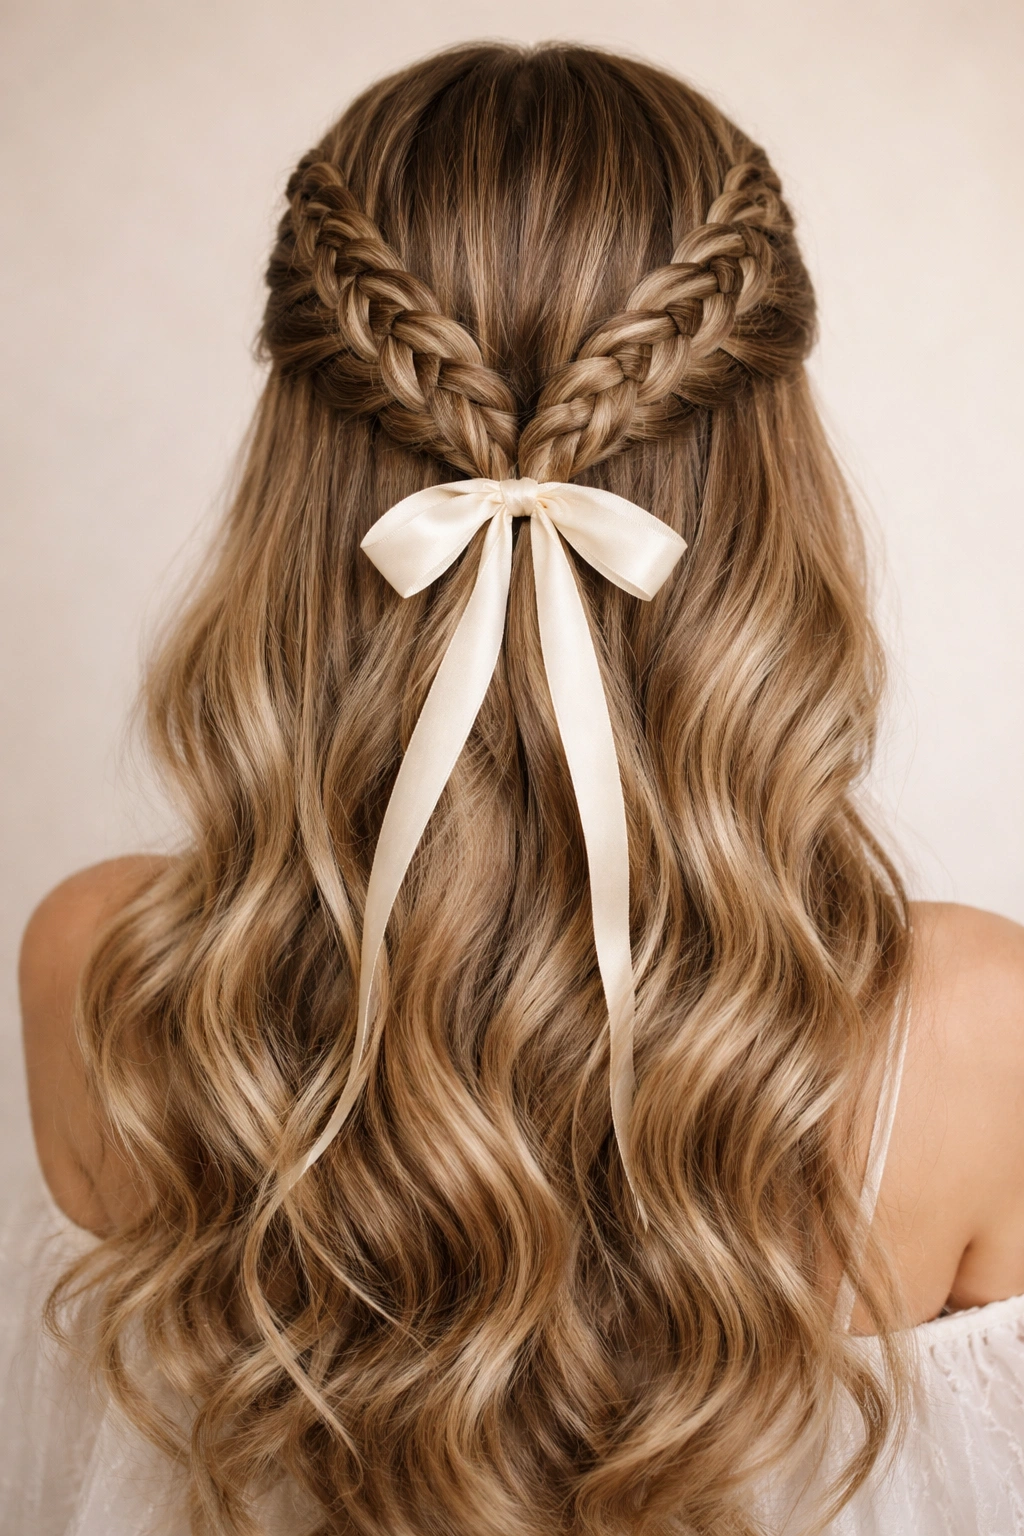
7. Braided Crown with Ribbon Tie
A braided crown is a half-up style where you braid a section of hair and wrap it around the back of your head like a crown, meeting in the middle at the nape. Tying this crown together with a ribbon instead of a standard elastic creates a romantic, princess-like effect.
The Visual Impact of a Braided Crown
A braided crown uses your half-up section to create an halo effect around your head—it’s one of the most photogenic hairstyles because it frames your face while showing off texture and dimension from every angle. When you tie the crown together with a ribbon rather than securing it with an invisible elastic, the ribbon becomes a focal point at the back of your head, creating a finished, intentional look that reads as elevated and special.
Creating the Braided Crown
- Take a section of hair from one temple, starting at about ear level
- Create a braid that travels horizontally around the back of your head toward the opposite side, braiding as you go (this is similar to a French braid but moving sideways rather than down)
- Continue the braid all the way to the opposite temple, matching the height where you started
- Once your braid reaches the other side, you should have two loose ends—one from the initial braid and one from the new hair you’re adding as you wrap around
- Take these two ends and tie them together with a ribbon instead of a hair elastic—you can tie a bow, a knot, or simply wrap the ribbon around both ends to secure them
- Let your bottom half stay completely down, cascading from beneath the braided crown
- This style naturally creates a romantic silhouette, especially with loose waves or soft curls on your bottom half
Pro tip: Anchor the ribbon tie with a bobby pin or two underneath, hidden by your flowing hair, so the ribbon stays tied securely throughout the day and doesn’t slip.
8. Twisted Sections with Ribbon Threading
Twists are simpler than braids and work beautifully with ribbon—you can create multiple twisted sections within your half-up area and thread a single ribbon through all of them, creating a cohesive, patterned look that feels more intricate than it actually is.
Why Twists Are Underrated
Twists create a completely different texture than braids, and they’re significantly faster to execute, which makes this an excellent style if you’re pressed for time but still want something special. The twisted sections create natural spirals where ribbon can sit and weave, and if you use a metallic or contrasting-color ribbon, the visual effect is striking. Twists also work beautifully on all hair types—they hold well in thick hair and create definition in finer hair that might not show off a braid as clearly.
Building Twisted Sections with Ribbon
- Divide your half-up section into 3 or 4 vertical subsections
- Take the first subsection and twist it tightly, rolling the hair in one direction
- Repeat with each subsection, making sure all twists turn in the same direction (all clockwise or all counterclockwise) so they look intentional and coordinated
- Secure each twist individually with a small clear elastic
- Take your ribbon and thread it through all the twisted sections in a weaving pattern—over one twist, under the next, over the third, creating a visual rhythm that connects all the twists
- Secure the end of the ribbon with a bobby pin at the nape, hidden beneath your bottom layer of hair
- Leave your bottom half in natural waves, curls, or straight depending on your preference
Worth knowing: This style works particularly well if you have hair that’s naturally wavy or curly, because the twists blend with natural texture rather than looking like a stark contrast to the rest of your hair. If you have very straight hair, consider curling your entire head first, then creating the twists—the overall texture will look more cohesive.
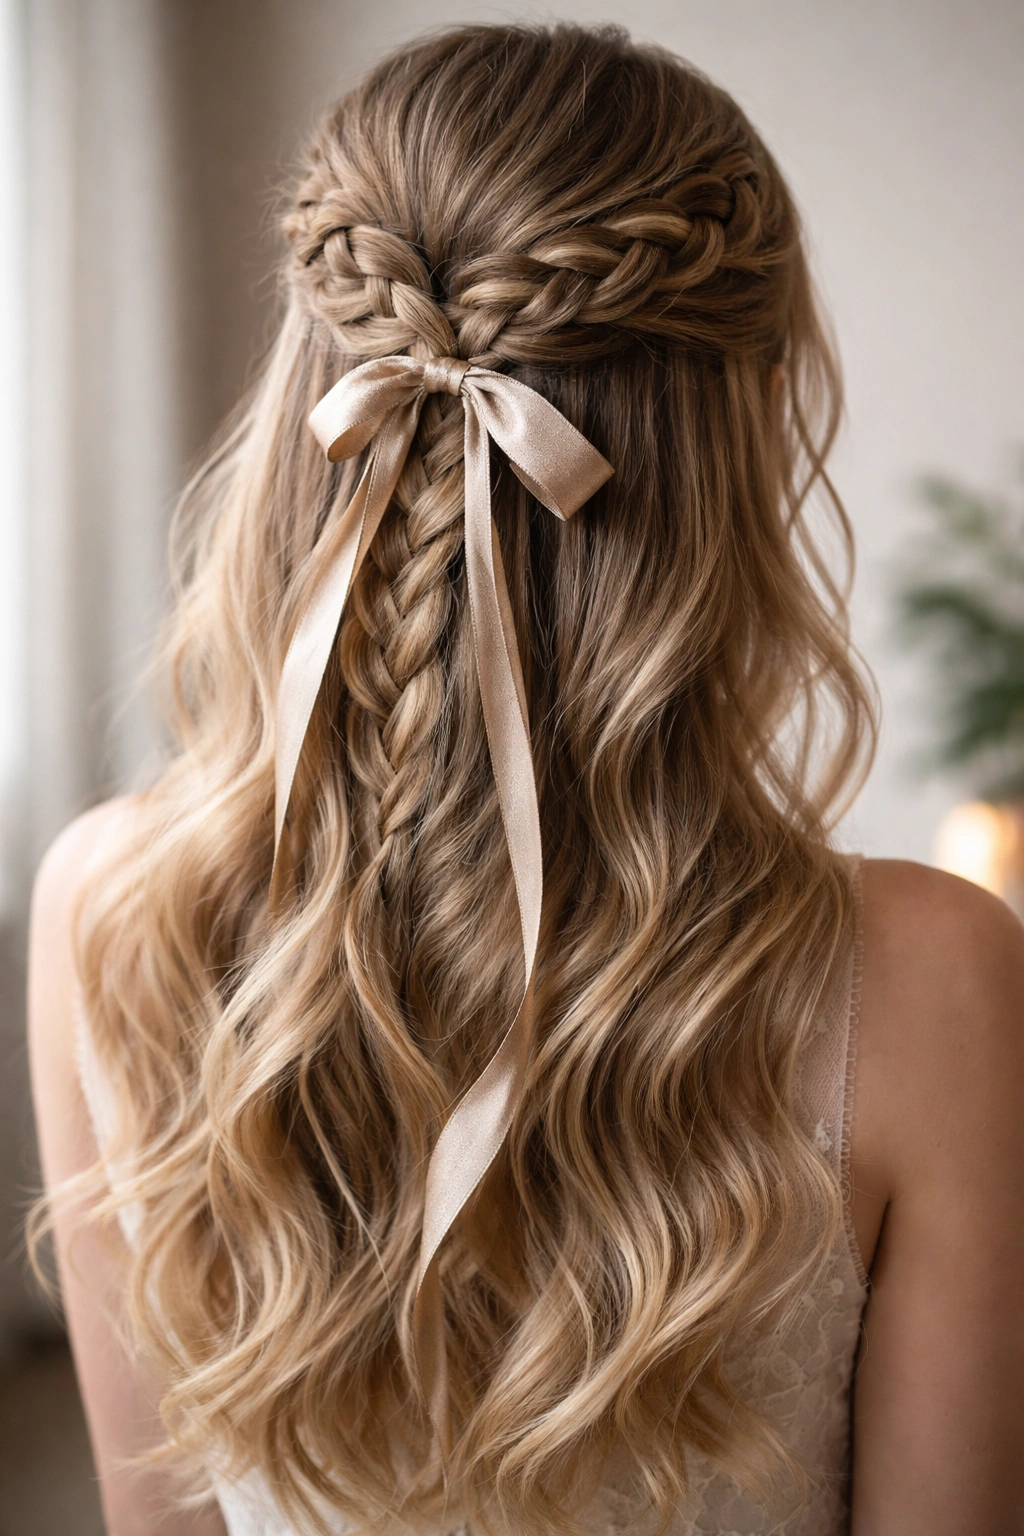
9. Half-Up Ponytail with Braided Ribbon Wrap

This is a hybrid style that combines the simplicity of a half-up ponytail with the detail of a braided ribbon accent. Instead of gathering your half-up section into a simple ponytail, you create a small braid at the point where your half-up section meets your full ponytail, and you wrap a ribbon around this braided section, creating a focal point and visual interest.
The Elegance of Simplification
This style strips away complexity from the braiding itself—you’re not attempting an intricate braid that takes twenty minutes. Instead, you’re creating a simple three-strand braid at a single strategic point, which takes about five minutes, and letting the ribbon do the visual work. The result feels polished and intentional, perfect for work, dates, or casual events where you want to look put-together without appearing like you spent an hour getting ready.
Step-by-Step Execution
- Take a horizontal section of hair from temple to temple at your crown, about 2 inches wide
- Create a simple ponytail with this section at the nape of your neck, securing it with a clear elastic
- Below the elastic, take a small section of hair from the ponytail (about 1 inch wide) and create a short braid, just 2 to 3 inches long
- Wrap your ribbon around the base of the ponytail, covering the elastic, and then weave it through your small braid section, creating a binding effect
- Secure the ribbon end with a bobby pin underneath
- Leave the rest of your ponytail completely down or loosely curled, depending on the occasion
Insider note: This style is perfect for days when your hair isn’t cooperating or you don’t have time for an elaborate braid. The small braid detail makes people think you’ve put in way more effort than you actually have, and the ribbon covers the hair elastic so everything looks intentional and designed.
10. Side-Swept Braid with Ribbon Bow
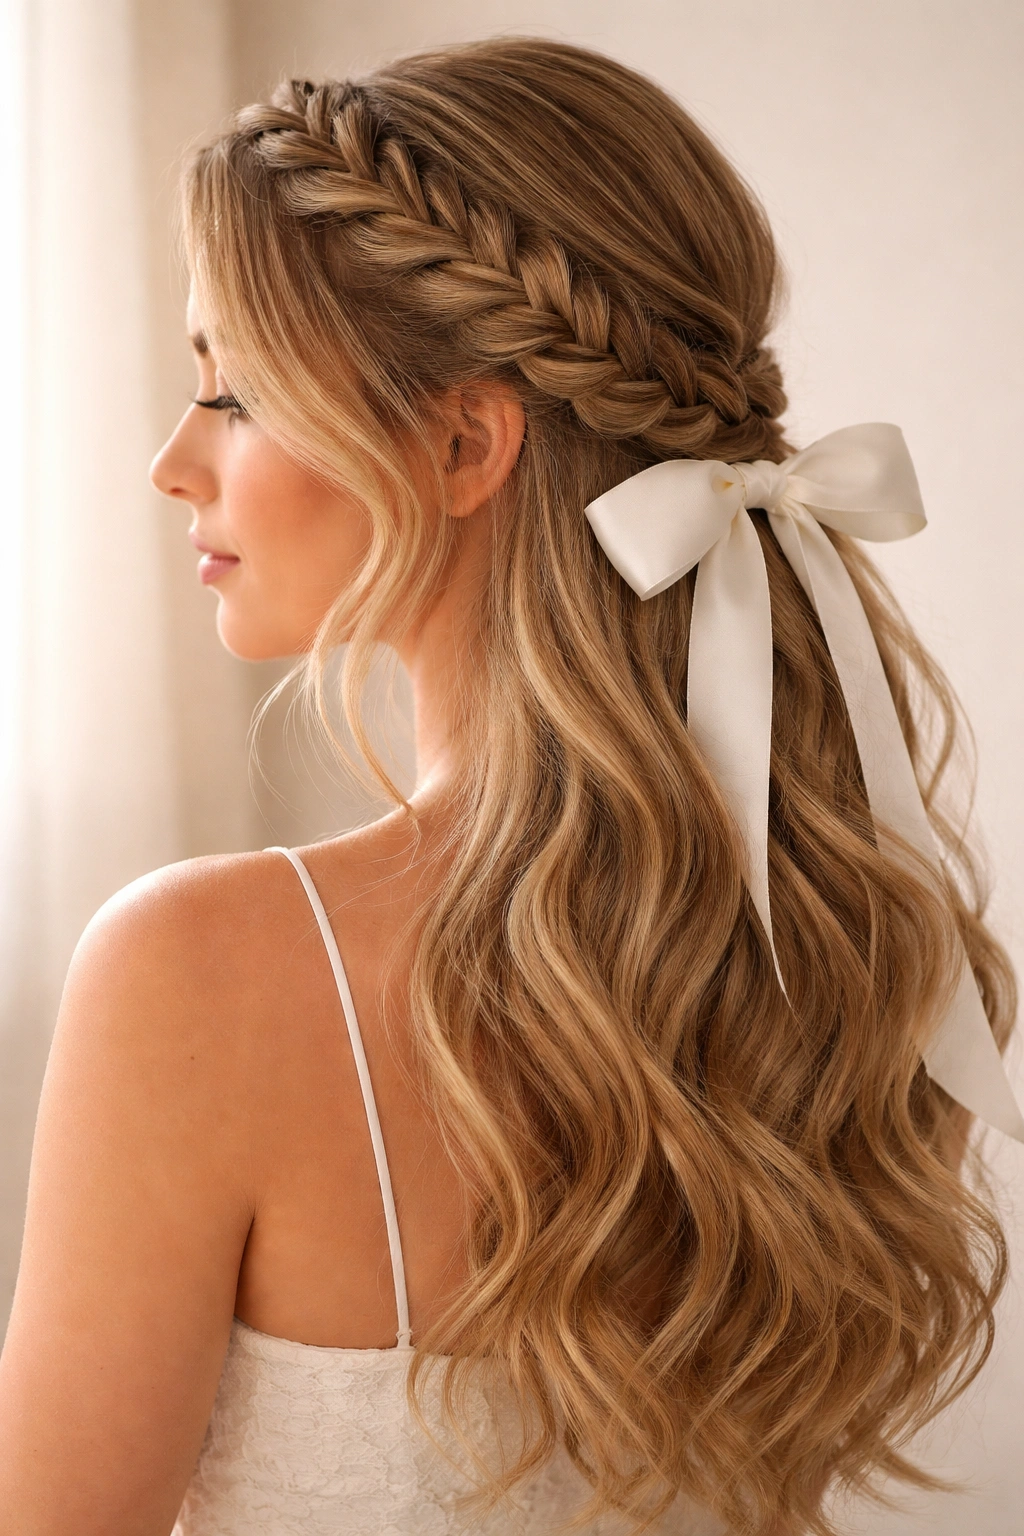
A side-swept braid travels diagonally across your head from one side to the other, creating an asymmetrical, romantic look. When you tie this braid off with a ribbon bow instead of a standard elastic, you get a style that’s perfect for special occasions or whenever you want to feel a little extra.
Why Asymmetry Feels Special
An asymmetrical hairstyle automatically reads as more intentional and styled than a centered style. A side-swept braid moves your hair to one side of your head, creating visual interest and framing your face in an unexpected way. Finishing the braid with a ribbon bow—rather than just securing it with an elastic—adds a playful, feminine touch that elevates the whole look.
Creating the Side-Swept Braid
- Start your braid at one temple, taking your initial section from near your ear on that side
- Create a braid that travels diagonally toward the opposite side of your head, braiding as you go and incorporating sections of hair as you work (similar to a side-French braid)
- Travel the braid all the way across the back of your head, ending at the opposite temple or just behind your opposite ear, depending on how dramatic you want the effect
- Instead of securing the braid with an elastic, use a ribbon to tie the braid together—you can do a full bow, a half-bow, or simply tie the ribbon around the braid end and let the ribbon tails hang
- Leave your entire bottom half completely down and wavy or curled
- This creates a dramatic asymmetrical look with all your hair on one side of your head and a ribbon accent as the focal point
Pro tip: Use a wider ribbon (½ inch or more) and tie a full, prominent bow at the braid’s end. The bow becomes the statement piece of the style, so choose a ribbon in a jewel tone, metallic, or patterned color that complements your outfit or skin tone.
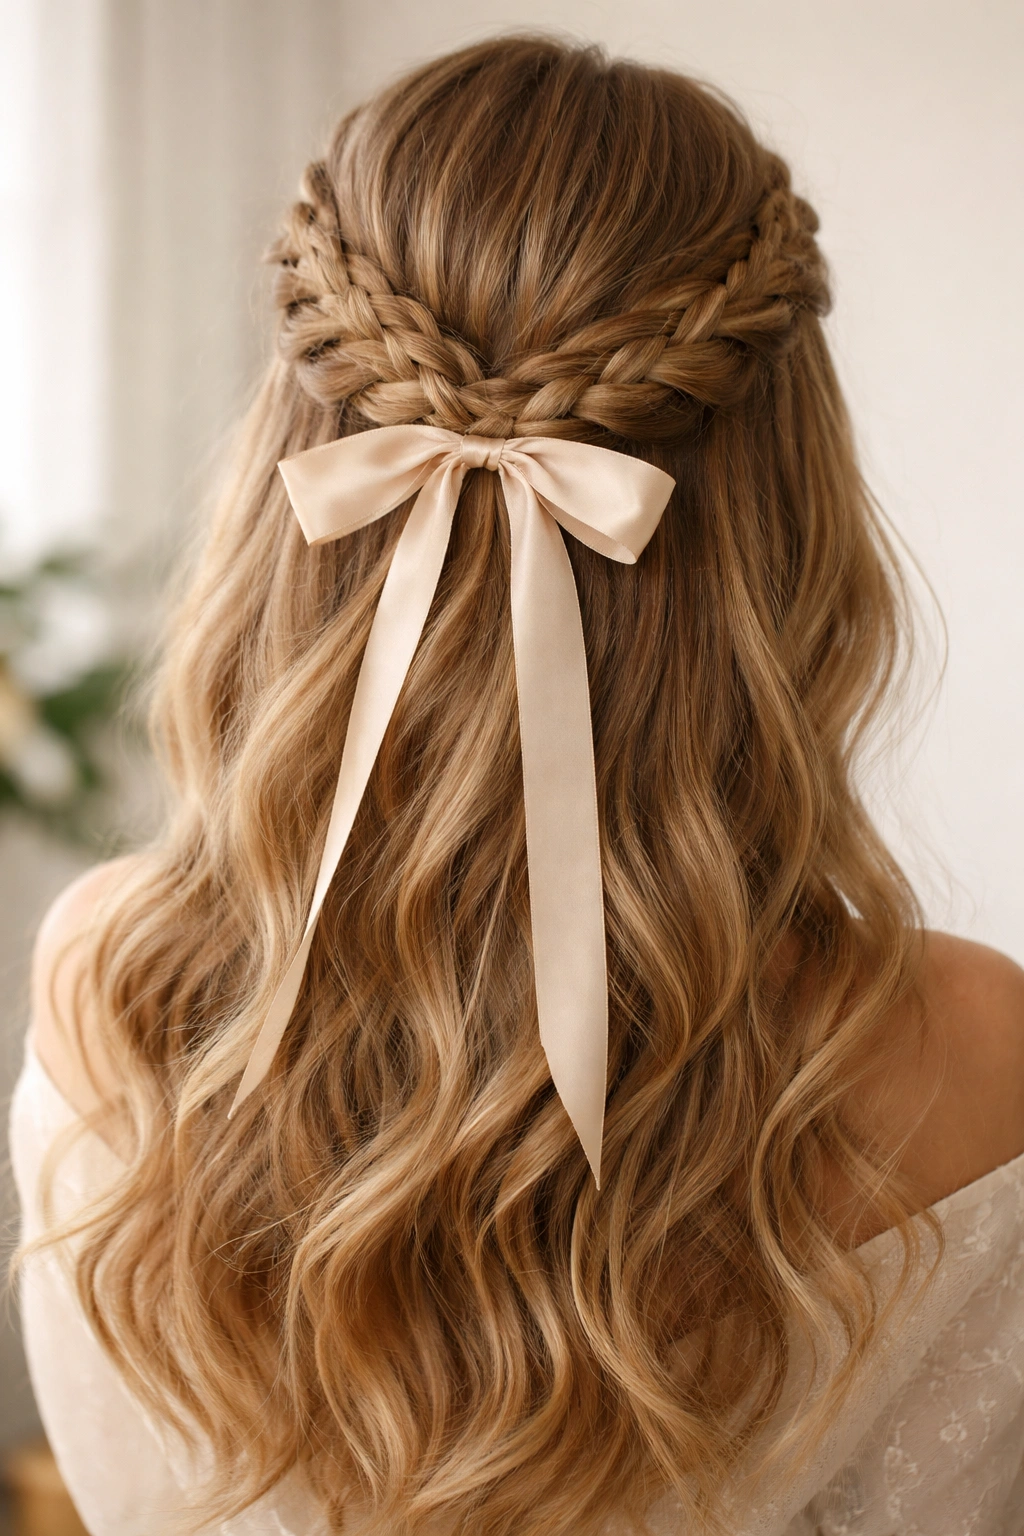
11. Double Braids Meeting in the Back with Ribbon
Instead of creating one braid from your half-up section, create two braids starting from opposite sides of your head and have them meet at the back of your head at the nape. The meeting point is where you tie them together with ribbon, creating a romantic, balanced, symmetrical look.
The Symmetry of Double Braids
Double braids create natural balance and are easier on your scalp than a single large braid because the tension is distributed across two sides of your head. This style is also excellent because it looks complex—two braids always appear more intricate than one—but it’s not actually harder to execute. The meeting point at the back becomes a focal point where you can create a ribbon bow or knot, giving the style a finished, intentional appearance.
Executing Double Braids with a Ribbon Tie
- Take a section from above one ear, about temple-width, and create a braid that travels backward toward the nape of your neck (this braid can go straight back or angle slightly toward the center of the back)
- Repeat on the opposite side—take a section from above the opposite ear and create a matching braid that travels backward
- Bring both braids together at the center of the nape, where they should meet naturally if both braids are the same length and start from the same relative position on each side of your head
- Tie both braids together at the meeting point with a ribbon—you can create a bow, a knot, or wrap the ribbon around both braid ends to bind them together
- Anchor the ribbon with bobby pins if needed, hidden beneath your falling hair
- Leave your entire bottom half completely down, creating a beautiful contrast between the structured braids on top and flowing hair below
- Curl or wave your bottom section for extra dimension and romance
What to watch for: If one braid ends up longer or shorter than the other, the meeting point won’t be centered at the nape—it’ll be off to one side. This isn’t a mistake; it’s actually a beautiful asymmetrical variation. Just embrace the offset look and tie your ribbon bow off-center as well, which actually reads as more modern and intentional.
12. Loose Waves with Thin Ribbon Braid Accent
Not every braided half-up style needs to be complex. Sometimes the most beautiful effect comes from combining loose, romantic waves with a single thin ribbon braid that weaves through your half-up section, creating a delicate, ethereal look that works for weddings, date nights, or any time you want subtle sophistication.
The Power of Understatement
This style proves that braided half-up with ribbon doesn’t have to mean massive, intricate braids. A thin ribbon braid—just ⅛ or ¼ inch wide—weaving through your loosely waved hair creates movement and texture without overwhelming your face. The ribbon acts as a delicate accent rather than a bold statement, which works beautifully if you prefer understated elegance or if your hair is on the finer side.
Creating Loose Waves with Ribbon Braid Accent
- Start by creating soft waves in your entire head, either by curling with a curling iron, braiding while damp and leaving overnight, or using a crimping tool for texture
- Take a thin horizontal section from one temple, about 1 inch deep, and create a very thin three-strand braid with just a small amount of hair
- Instead of securing this braid tightly, keep it loose and relaxed, allowing it to blend with your wavy hair around it
- Wrap your thin ribbon around this loose braid, or thread it through very loosely so it sits on top of the waves rather than disappearing into them
- Bring this thin braided section toward the back of your head and secure everything with bobby pins at the nape, hidden beneath your waves
- Leave your entire bottom half in loose waves, with no structure or effort beyond the texture
- The overall effect is ethereal and romantic, with just a hint of intentional styling visible when people look closely
Pro tip: If your ribbon matches your hair color, the effect is subtle and sophisticated. If you want more visibility, choose a ribbon that contrasts with your hair—a metallic ribbon is excellent for this style because it catches light but doesn’t add weight the way a solid contrasting-color ribbon might.
Final Thoughts
Braided half-up half-down hairstyles with ribbon work because they give you multiple layers of visual interest—the structure of the braid, the flow of your loose hair, the shine and color of the ribbon, and the overall silhouette that frames your face while showing off your hair length. Whether you go for a simple rope twist with cascading ribbon or an elaborate double-braid crown, the formula remains the same: combine texture (the braid), movement (the loose bottom half), and accent (the ribbon) to create a style that looks intentional and special.
The real advantage of learning these techniques is that you can adapt them based on your hair type, the time you have available, the occasion, and the ribbon you choose. A simple three-strand braid becomes completely different depending on whether you use a metallic ribbon, a velvet ribbon in a jewel tone, or a delicate satin ribbon in white. The braiding technique might take the same ten minutes regardless, but the final look changes dramatically based on these choices.
Start with one style that feels achievable and practice it until your hands remember the motions. Once you’re comfortable, experiment with different ribbons, different braid placements, and different ways of securing and finishing your braids. Hair grows back, ribbons are inexpensive, and the skills you develop—understanding how to section hair, how to braid with tension and consistency, how to work with ribbon—are skills you’ll use forever. Soon enough, you’ll be creating braided half-up styles that look entirely your own, tailored to your hair, your style, and the occasions that matter to you.