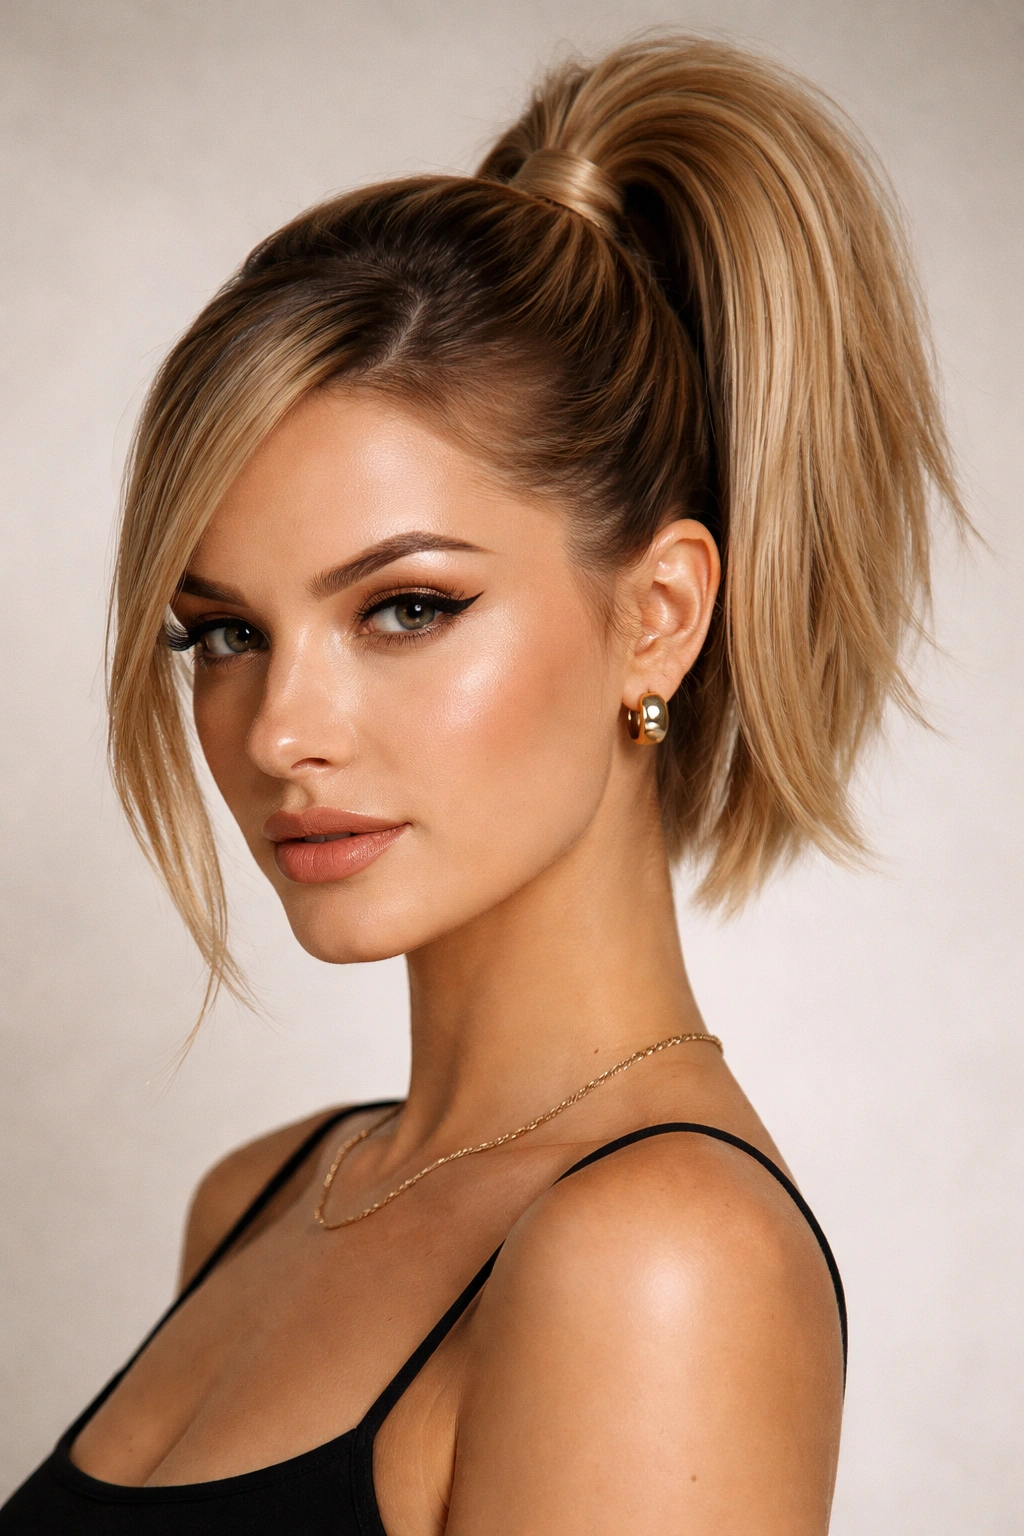
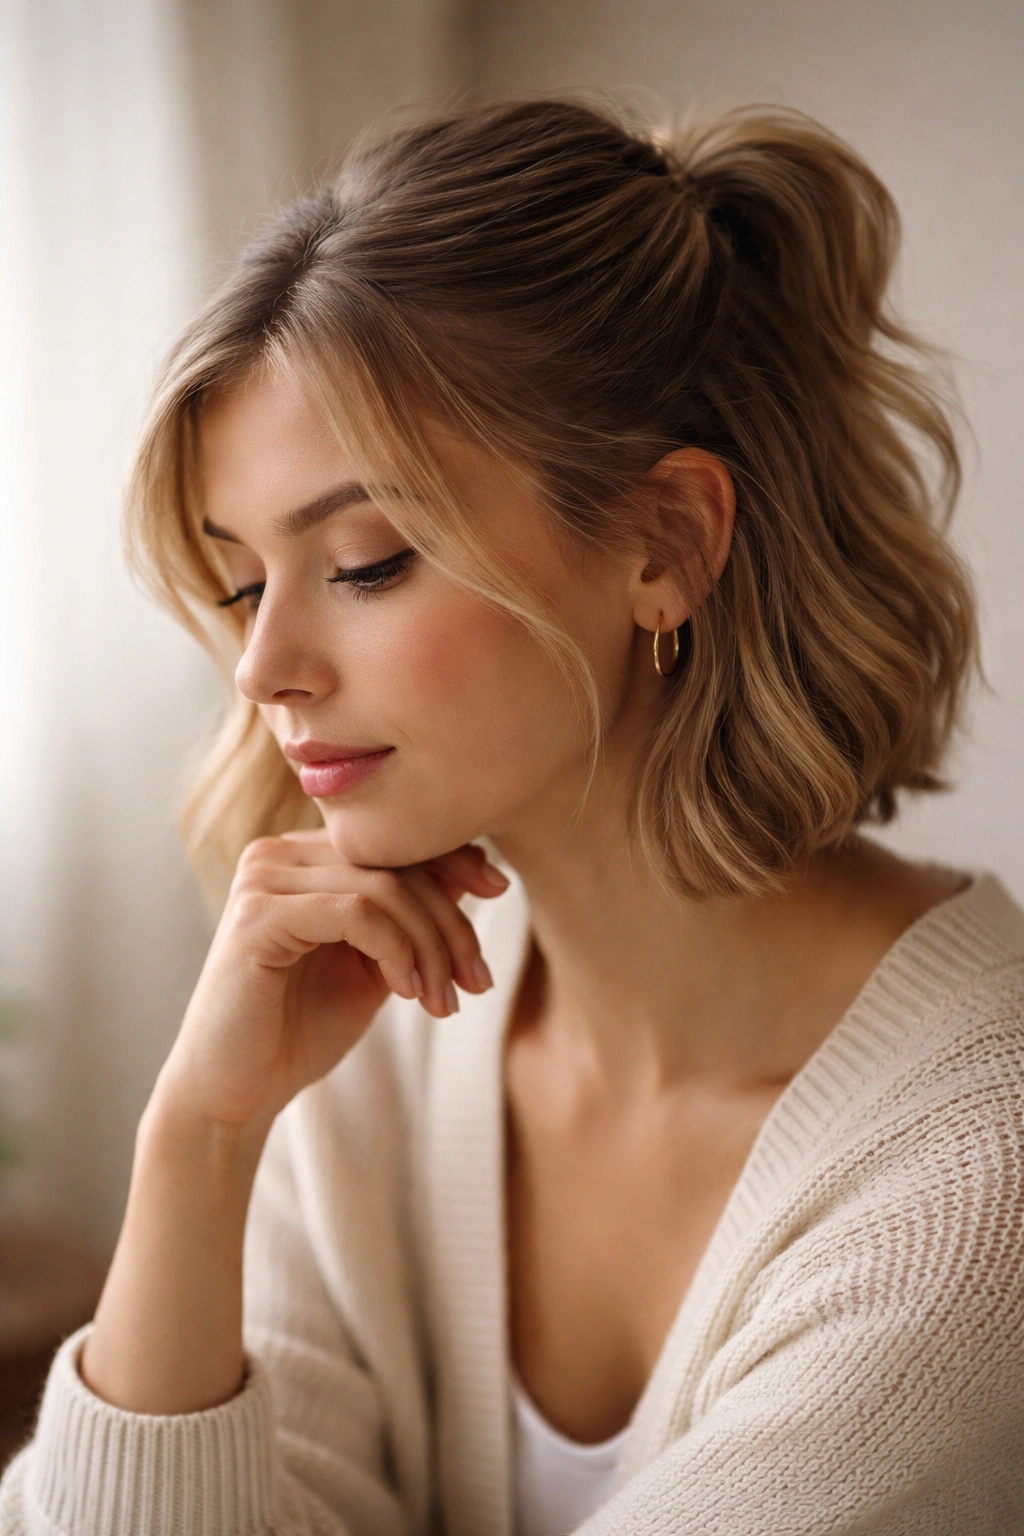
Short hair and half-up styles were practically made for each other. There’s something about the balance of this look—the way it keeps hair off your face while still showcasing length and texture—that flatters nearly every face shape and hair type. The challenge, though, is that shorter lengths require a slightly different approach than their long-haired counterparts. You need techniques that create visual fullness, sections that sit just right against your head, and styling tricks that make even minimal length feel intentional and polished.
The real magic of half-up half-down ponytails on short hair isn’t just that they look good—it’s that they solve real problems. You get the practical benefit of keeping hair back from your face, the style versatility that comes with half-up styling, and the softness of texture that flows below. Whether your hair is naturally wavy, stick-straight, or curly, whether you’re dealing with layers, bangs, or a blunt cut, there’s a half-up style that’ll work with what you’ve got. The trick is knowing which techniques play best with shorter lengths and how to adapt traditional styles so they look intentional rather than like you’re trying to fake having longer hair.
What follows are fifteen distinct half-up half-down ponytail variations specifically designed to flatter and work with short hair. Each one comes with the exact techniques, styling tips, and real-world details you’ll need to recreate them with confidence—whether you’re styling for a casual day or a special occasion.
1. The Classic Half-Pony with Textured Waves
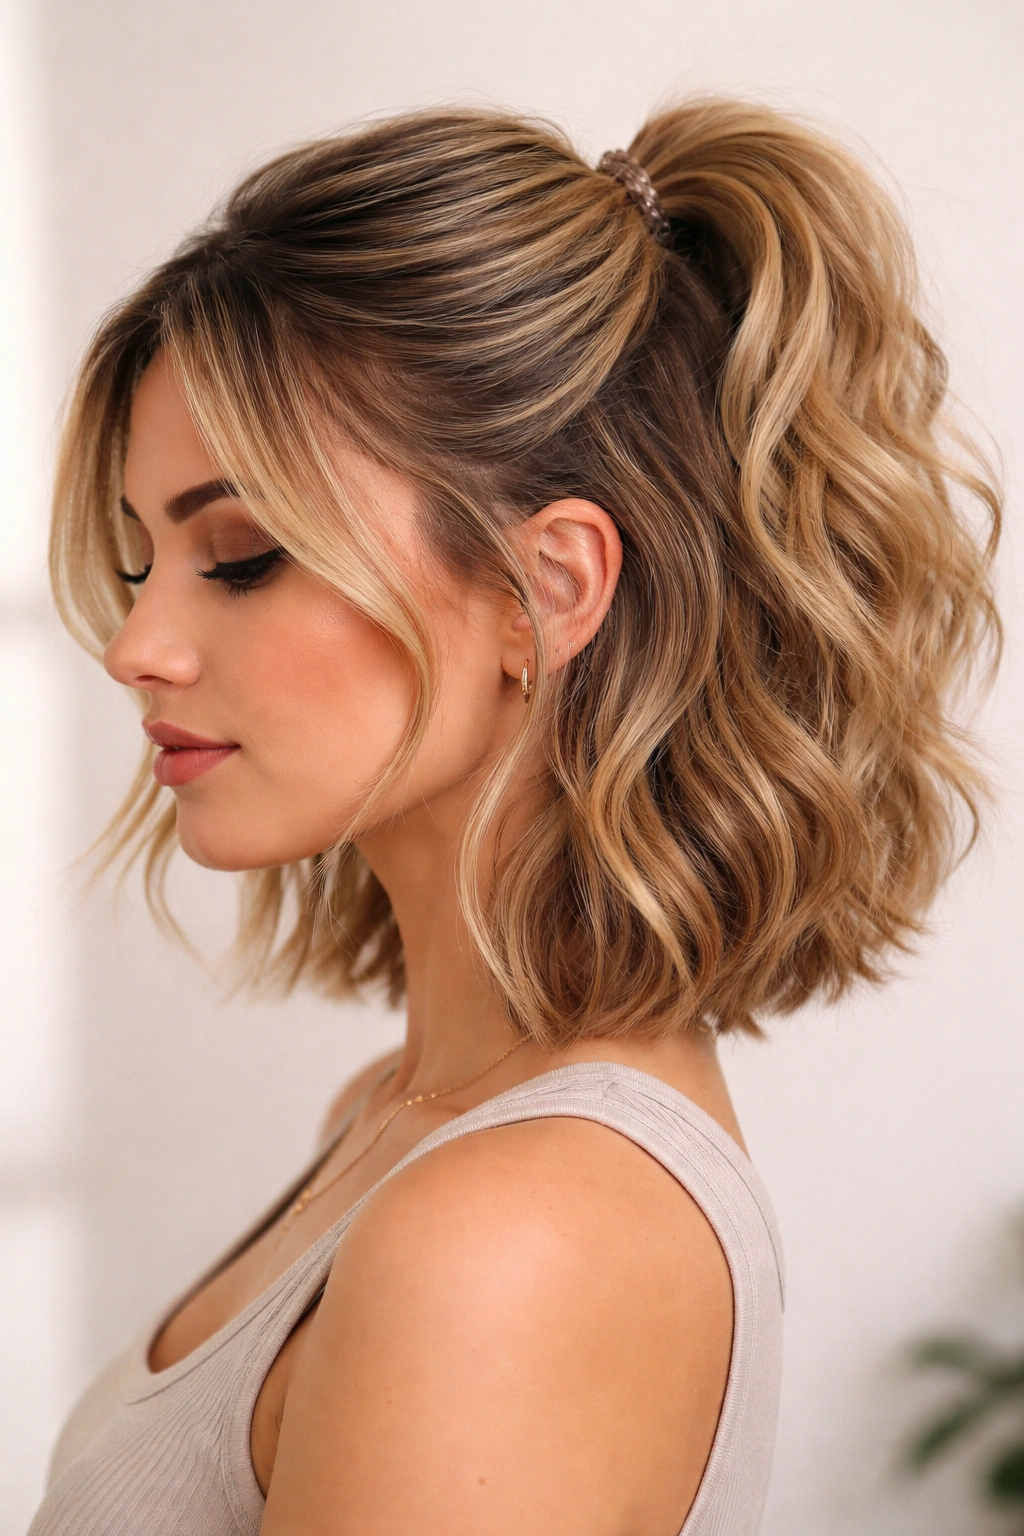
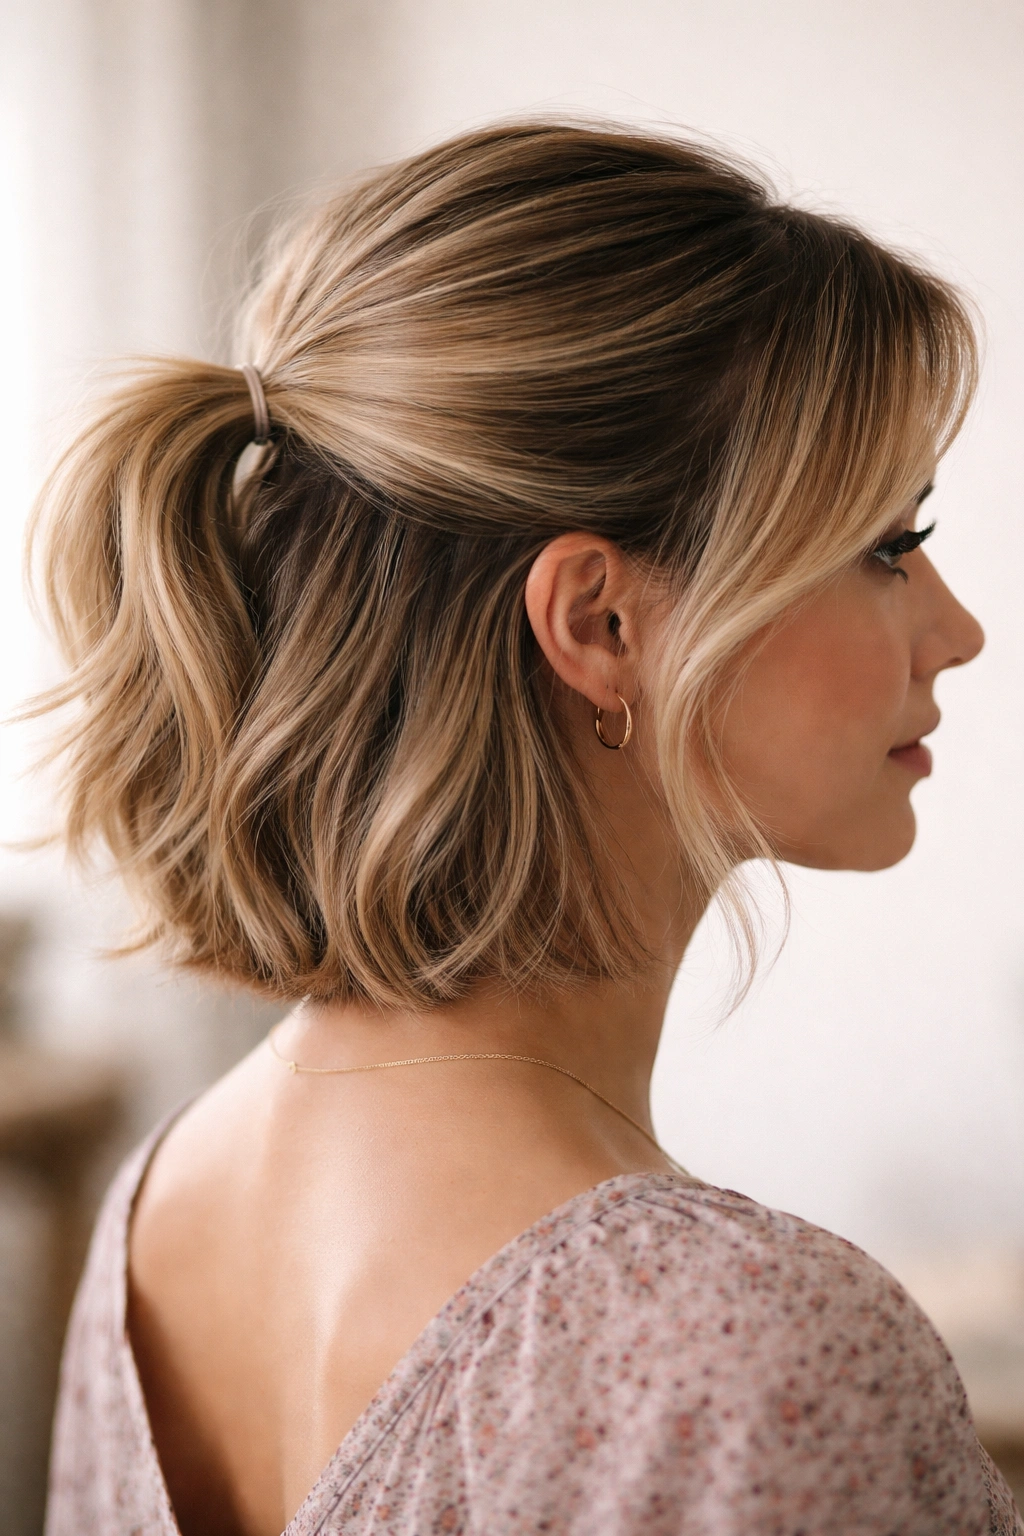
This is the foundation everyone should master: a clean, simple half-up section paired with soft waves throughout the rest of your hair. For short hair, the power lies in the texture—without it, a basic half-pony can look thin or underdone. Start with damp hair and apply a sea salt spray to the entire head to encourage grip and movement. Blow-dry your hair with a round brush, curling the ends away from your face as you work down. Once dry, take a section from ear to ear across the crown and secure it with a small elastic, leaving the bottom half completely loose.
Why It Works So Well
The beauty of this style is its forgiveness. Textured waves hide flyaways, add volume, and make shorter lengths feel fuller and more intentional. The half-up section prevents the style from feeling too casual, while loose waves below keep it soft and romantic. It’s the kind of style you can wear to work, out for coffee, or to a casual dinner—it fits everywhere.
How to Get Waves That Actually Last
- Spray damp hair with texturizing spray before blow-drying to create a foundation for waves
- Use a 1.25-inch curling iron on the loose section, curling away from your face in chunks
- Don’t curl too close to the roots of the bottom section—let those stay wavy and loose
- Finish with a flexible-hold hairspray that doesn’t feel stiff or crunchy
Pro tip: Skip the elastic for the first few wears and use a small claw clip instead—it holds just as well but looks more intentional on short hair, and you can adjust it throughout the day without creating a crease.
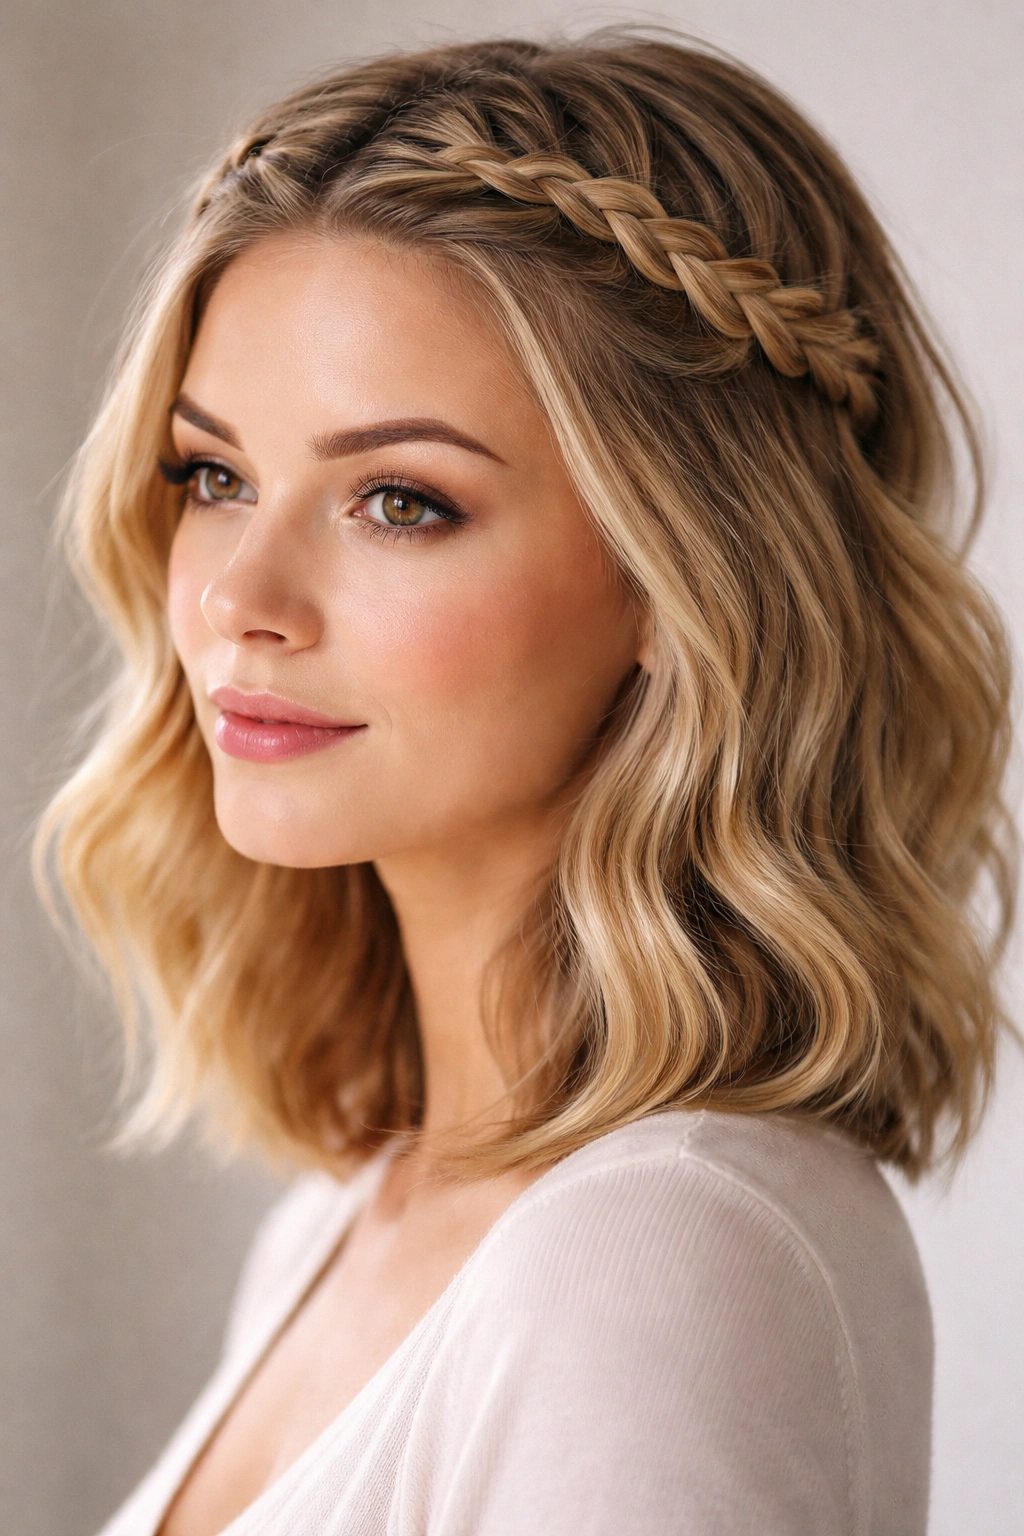
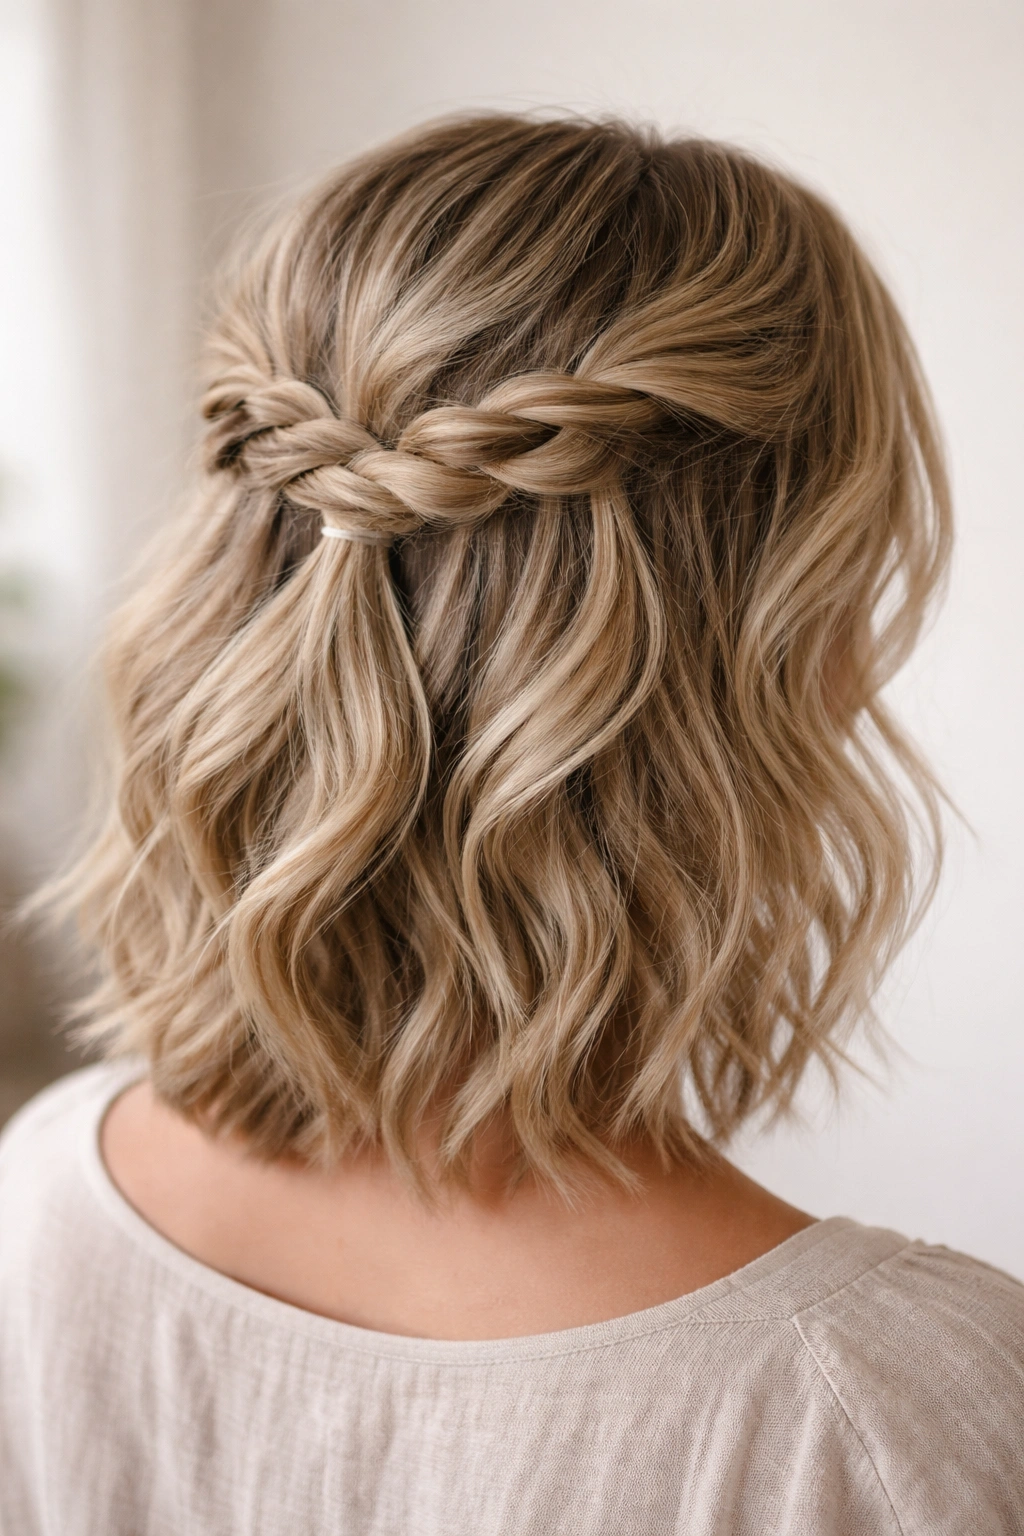
2. The Braided Half-Up with Face-Framing Pieces
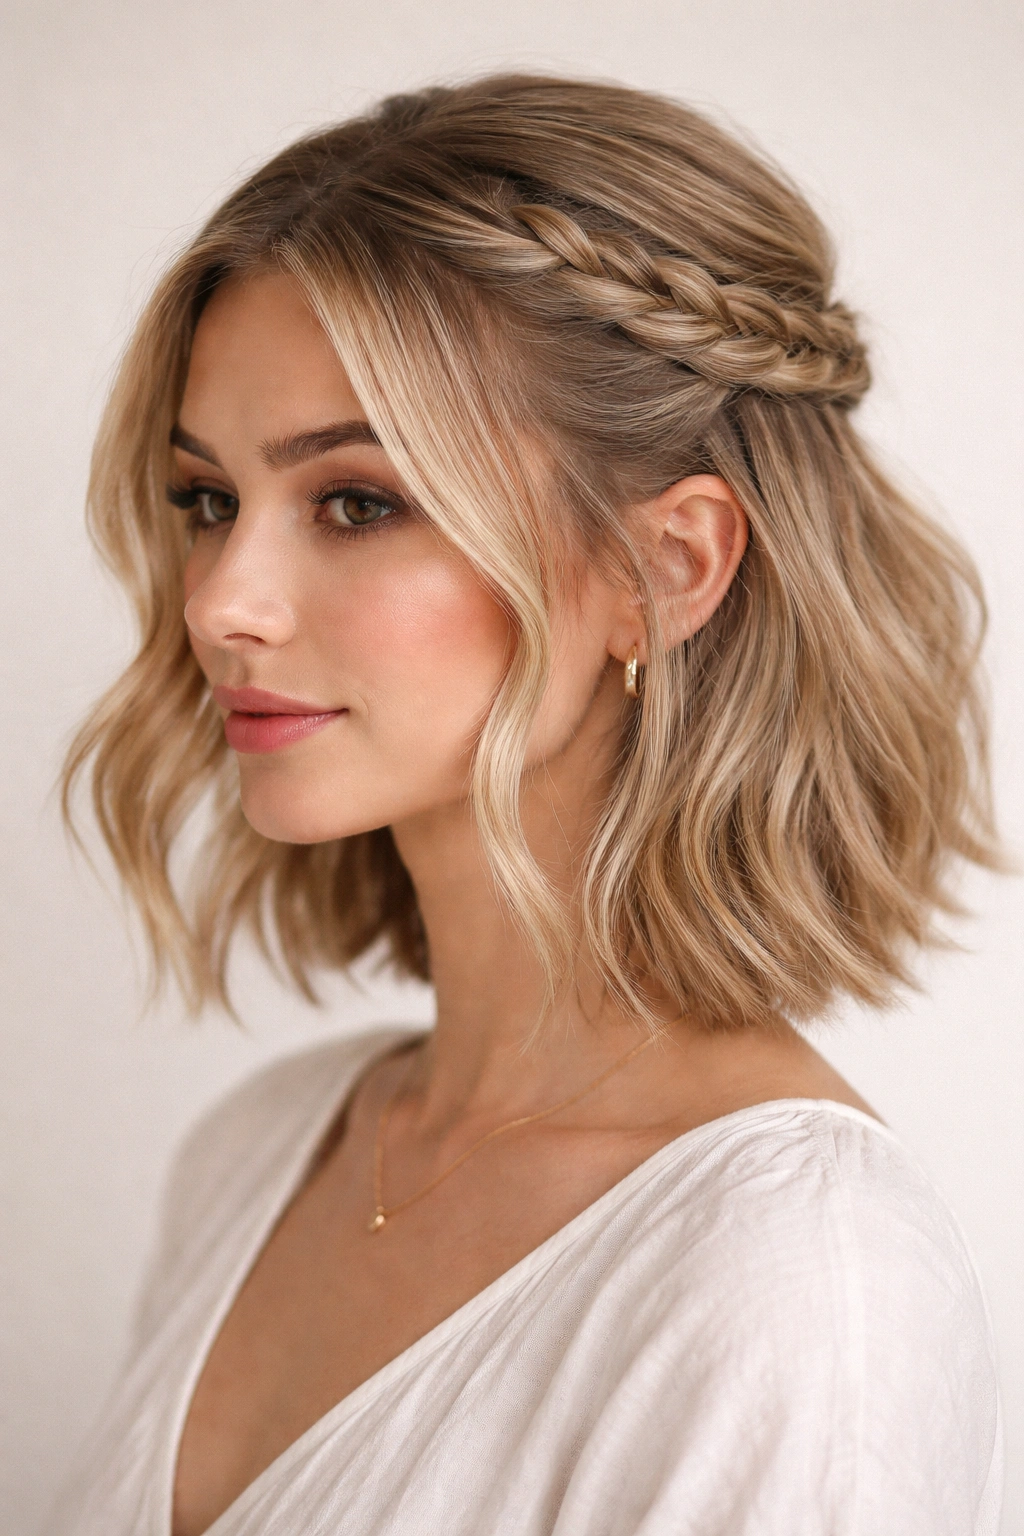
Adding a braid elevates a half-up style from everyday to special occasion, and it’s easier than you’d think on shorter lengths. The key is working with your natural hairline instead of fighting it. Start by creating the braid from one side of your head—begin at the temple and braid loosely toward the back, incorporating small sections as you go. This creates that coveted face-frame effect that makes cheekbones pop and draws attention upward.
Making the Braid Work on Short Hair
Shorter hair means your braid won’t be thick or rope-like, which is actually the look you want here. A delicate, slightly loose braid looks more intentional on short lengths than a chunky one. Leave a few pieces out around your hairline before you start braiding—these fall naturally and create softness. As you braid, pull gently on each section to loosen it and make it look fuller.
Styling Steps for Success
- Braid loosely from one temple to the opposite ear, leaving small sections loose around the hairline
- At the ear, secure the braid with a tiny elastic or bobby pin, then gather the full half-up section and secure it with a second elastic
- Loosen the braid by gently pulling each section—do this right before wearing, not hours before
- Pin any loose strands with bobby pins that match your hair color, hidden underneath the top layer
This style works especially well on wavy or textured hair, where the braid naturally blends into the texture rather than standing out too dramatically.
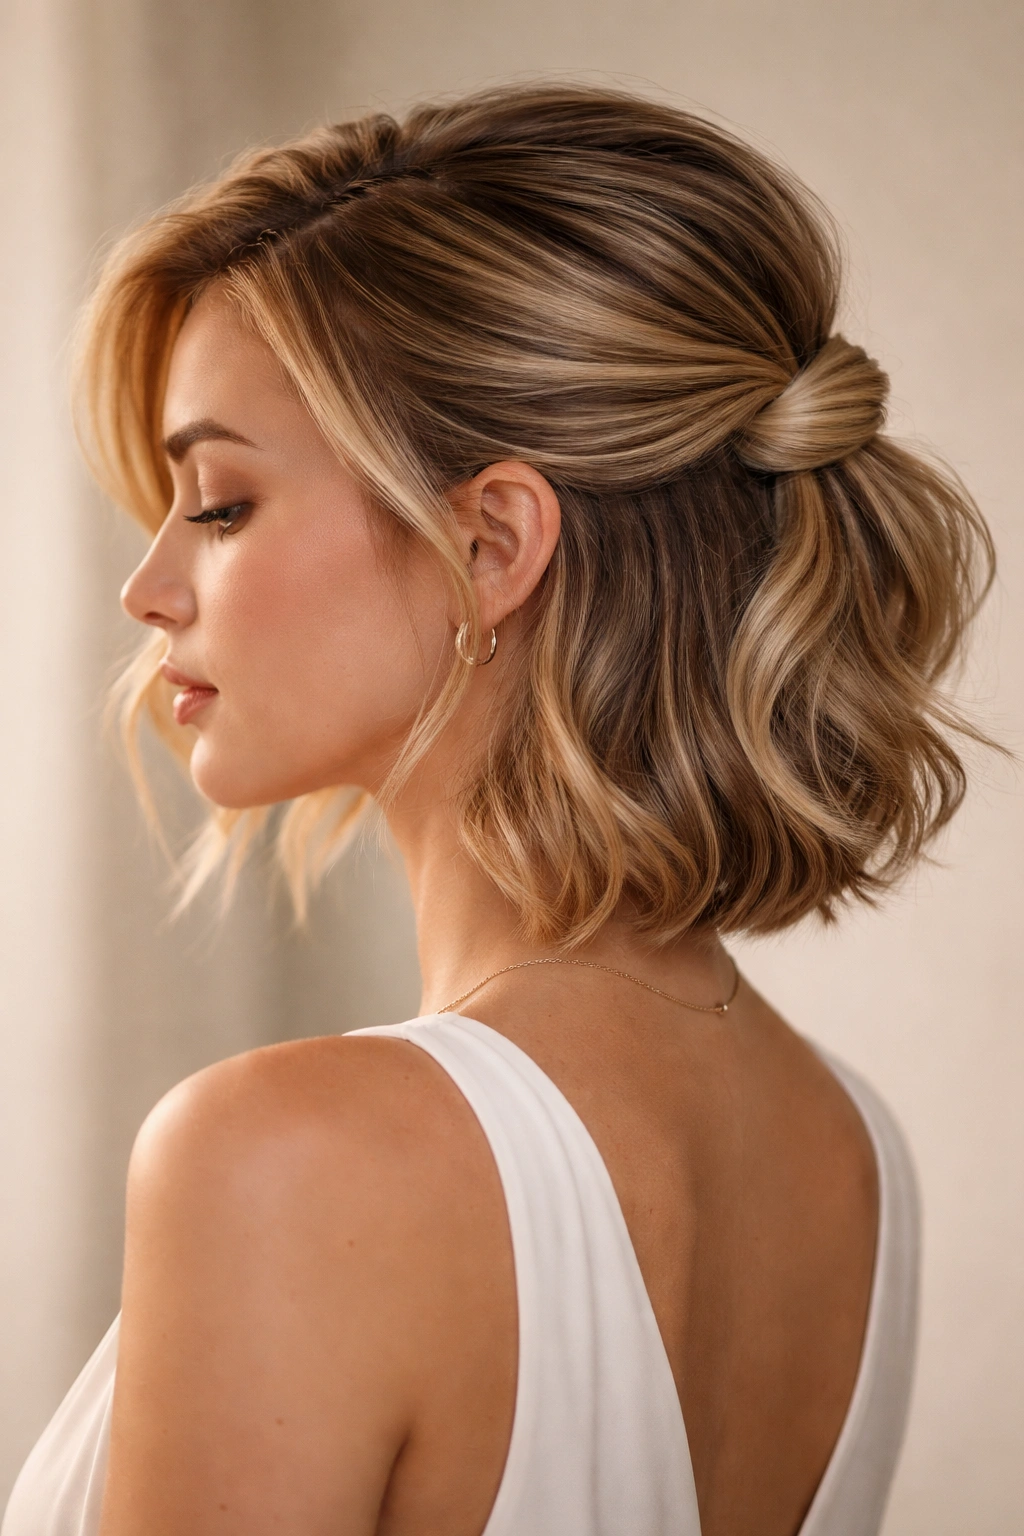
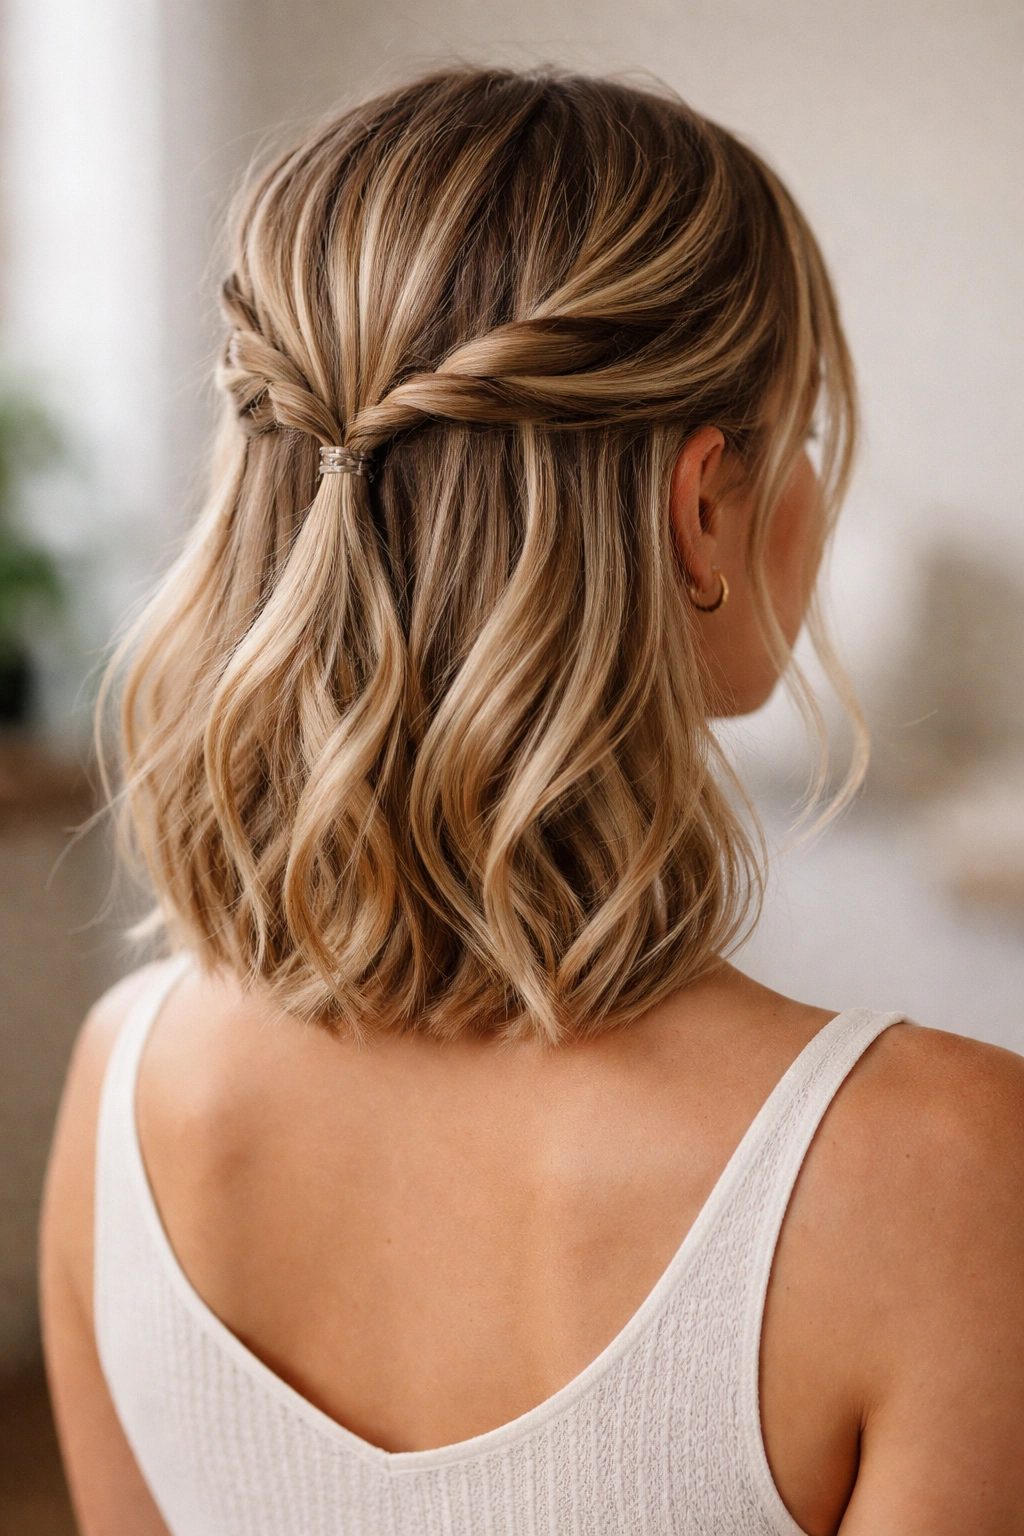
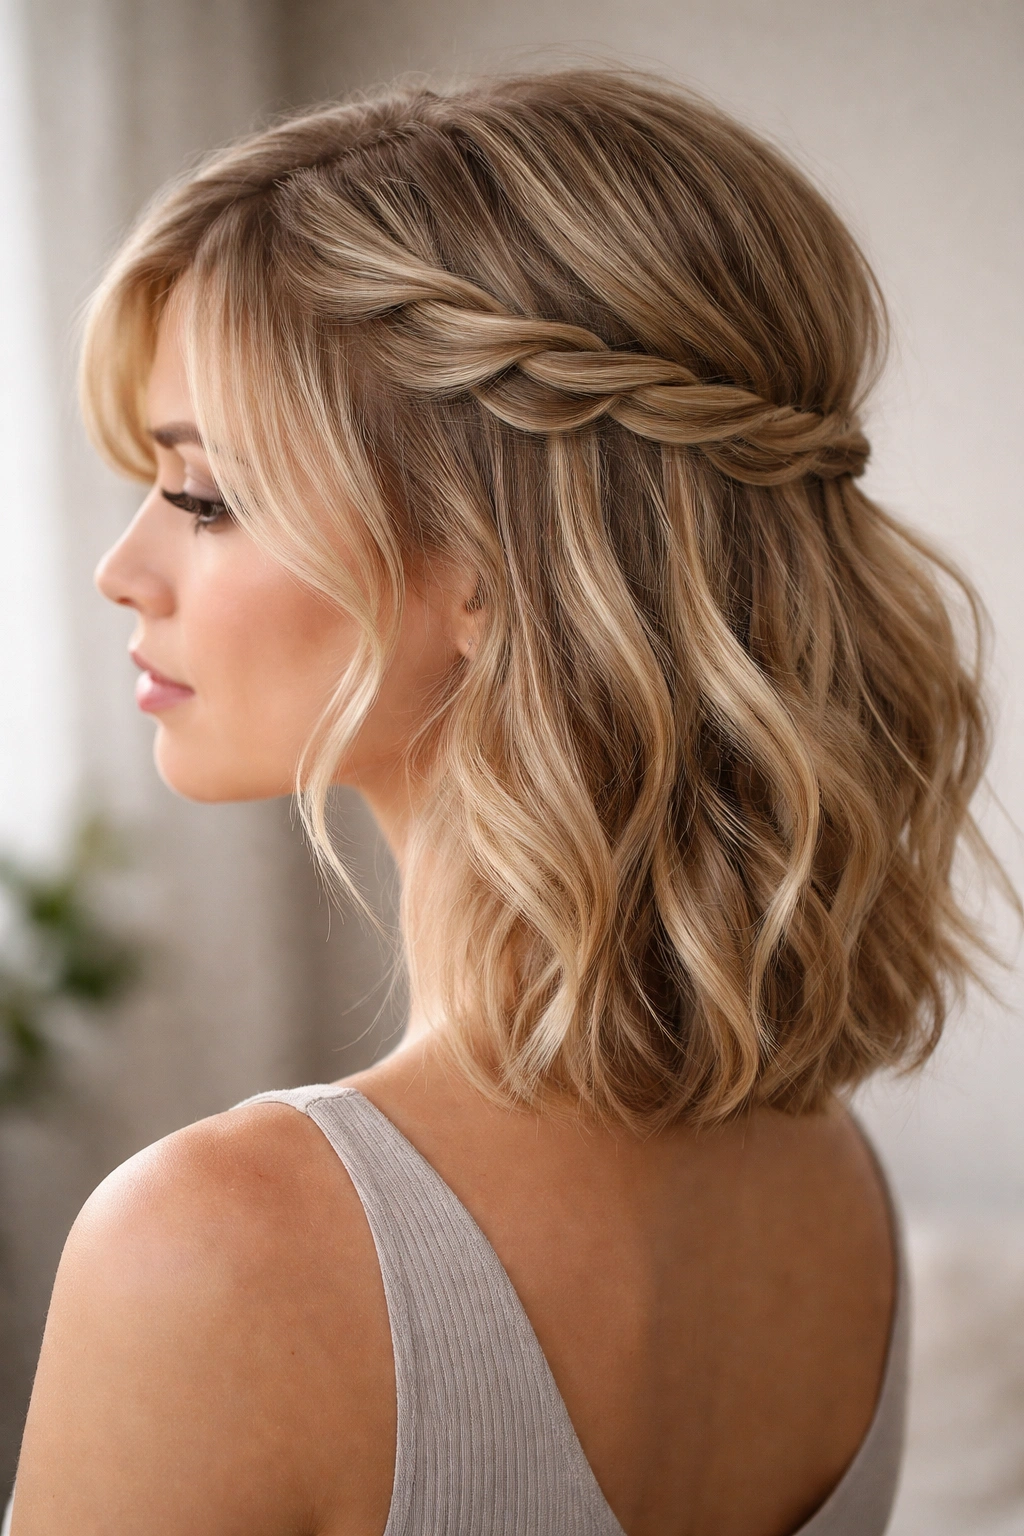
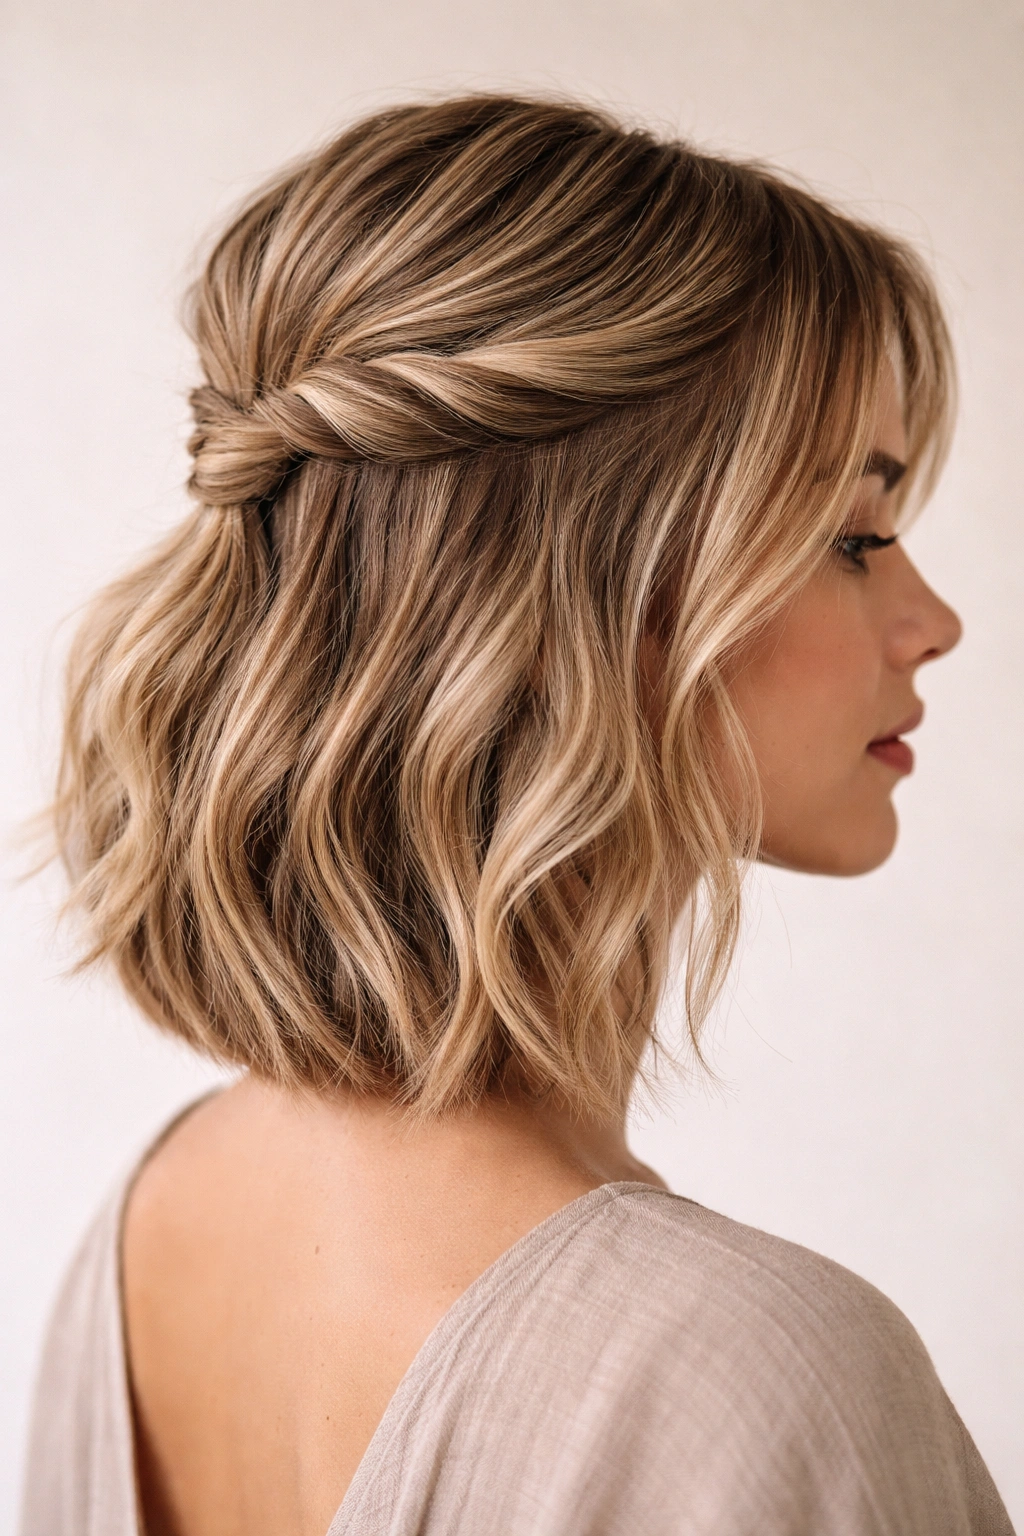
3. The Twisted Half-Pony (No Braiding Required)
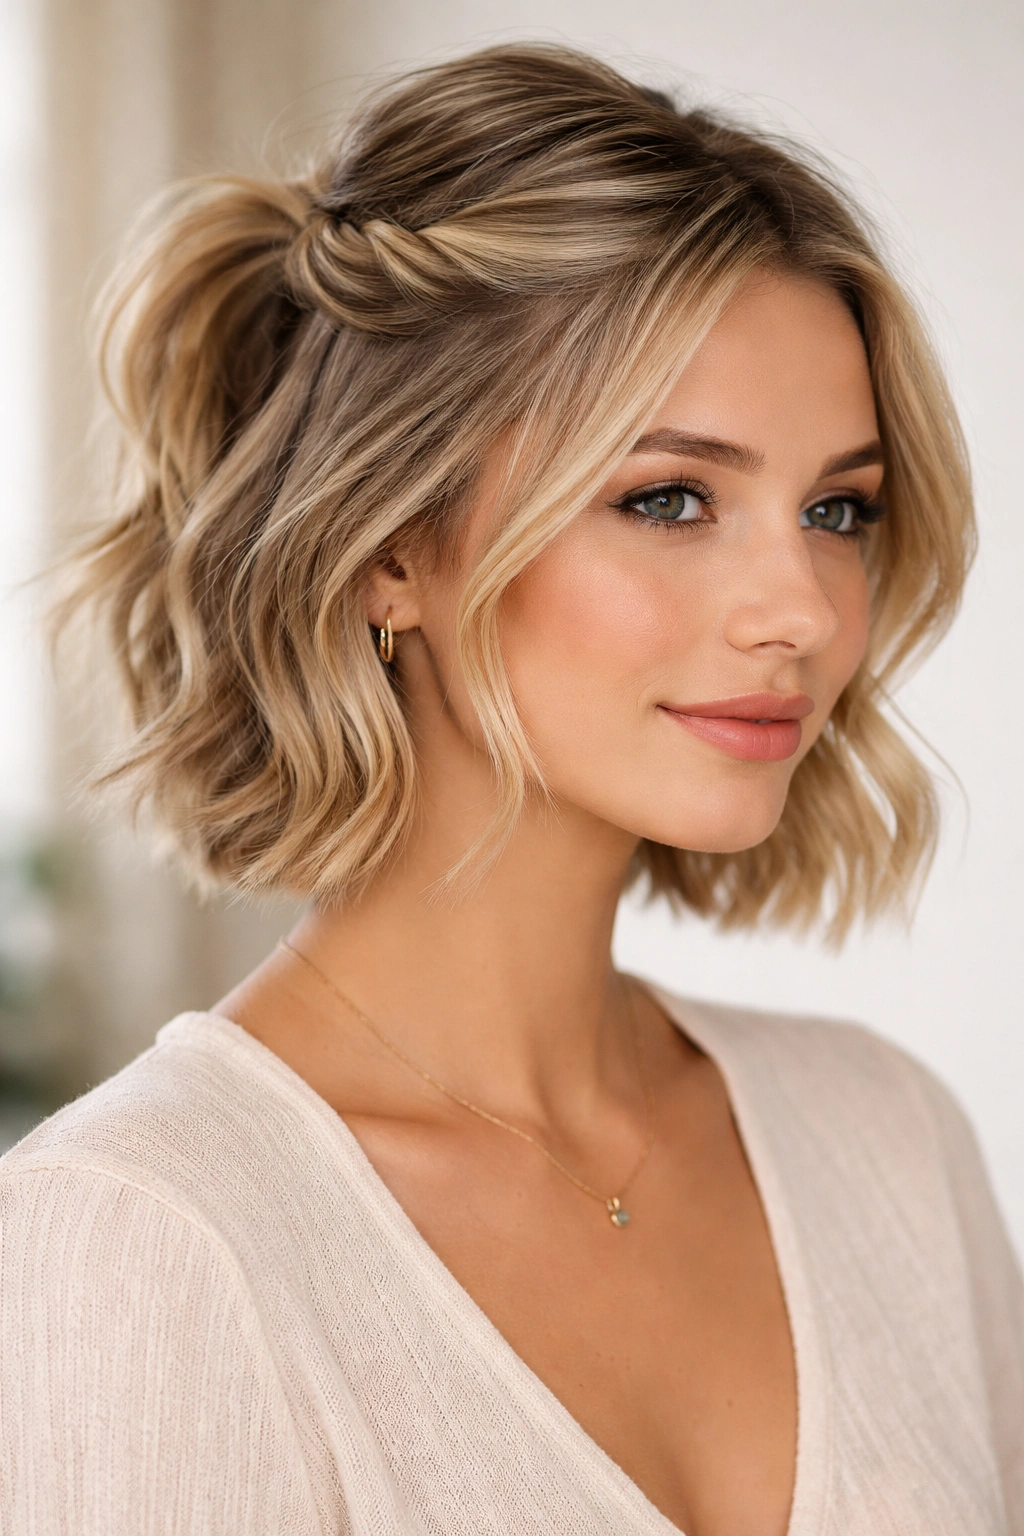
If braiding intimidates you, twists are your answer. They’re faster, more forgiving, and create a similarly polished look with half the effort. Section your hair at the crown from ear to ear, then twist that top section loosely as you bring it toward the center back of your head. The twist should feel loose and relaxed, not tight and controlled—tension actually works against you on short hair. Secure the twisted section with a small elastic at the base of the crown.
Why Twists Flatter Short Hair Differently Than Braids
Twists have a softer, less structured appearance, which plays beautifully with shorter lengths. They also hold just as well, but with a more casual, undone vibe. The texture of the twist catches light differently than a braid, creating dimension even with finer hair.
Pro Moves for Polished Results
- Blow-dry your hair smooth before twisting so the twist itself becomes the texture
- Use a lightweight texturizing spray on just the twist section to help it grip without looking sticky
- Wrap the elastic with a small piece of hair to hide it—take a thin section from the ponytail, wrap it around the elastic, and pin the end underneath
- Leave the bottom section completely loose with soft waves or straight—let the twist be the detail
4. The Slicked-Back Half-Up with Graphic Clip
For a more modern, editorial take on the half-up style, try a sleek, controlled half-section paired with a statement clip. This works beautifully on very short hair or pixie cuts with slightly longer top sections. Apply a light gel or edge control to the top section, then brush it back smoothly from the front. Gather the back section into a small, tight ponytail—short hair means the ponytail itself will be compact, which works in your favor here. Secure it with a small elastic, then slide a decorative hair clip over the elastic to make it a design feature rather than hiding it.
Choosing the Right Clip for Short Hair
The clip becomes the focal point here, so choose thoughtfully. A tortoiseshell claw clip, a sleek metal barrette, or a geometric hair pin all work. Keep the clip relatively small—oversized clips can overwhelm short hair and make the style look like you’re trying to stretch the length.
Creating Smoothness That Actually Lasts
- Start with damp hair and blow-dry it completely straight or with minimal texture
- Apply gel or mousse to the roots of the top section and brush backward against the natural hairline
- Use a fine-tooth comb to smooth the surface
- Finish with a light hairspray—too much will look sticky and obvious
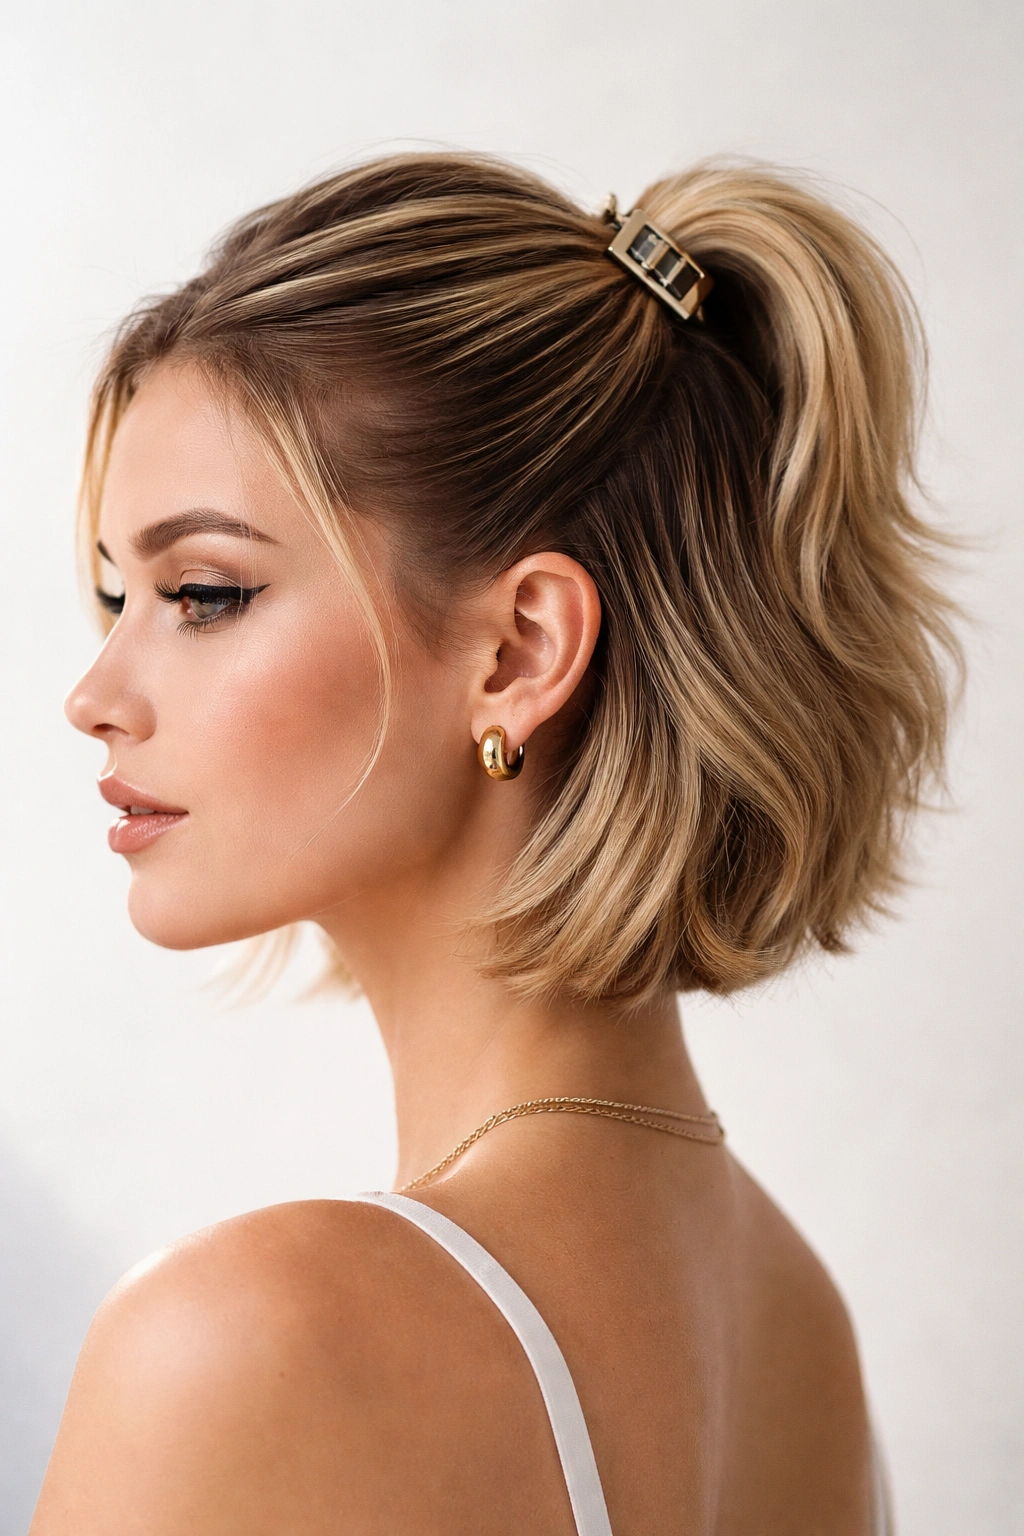
5. The Low Half-Up with Volume at the Crown
This variation flips the traditional positioning: instead of pulling up at the crown, you create the half-section lower, at about ear level. This works especially well on short, fine hair that can’t support heavy styling at the crown. The payoff is maximum style with minimal weight. Section your hair from temple to temple at ear level, twist or braid loosely, and secure at the nape with a small elastic. The trick is creating volume where the top section would normally sit—this tricks the eye into seeing more fullness.
Building Volume Where It Counts
- Use a volumizing mousse on damp roots before blow-drying
- Blow-dry the top section with your head tilted slightly forward, directing the blow-dryer toward the roots
- Once dry, gently backcomb just the crown area, smoothing the surface layer lightly—this adds lift without obvious texture
- The half-up section should sit at or slightly below ear level, creating balance with the volume above
Why This Position Works on Shorter Lengths
Short hair already sits closer to the head, so pulling from the crown can sometimes look too tight or make the style feel heavy. Positioning the half-up section lower creates visual proportion—the fuller crown balances a more delicate half-up section.
6. The Bubble Ponytail Half-Up
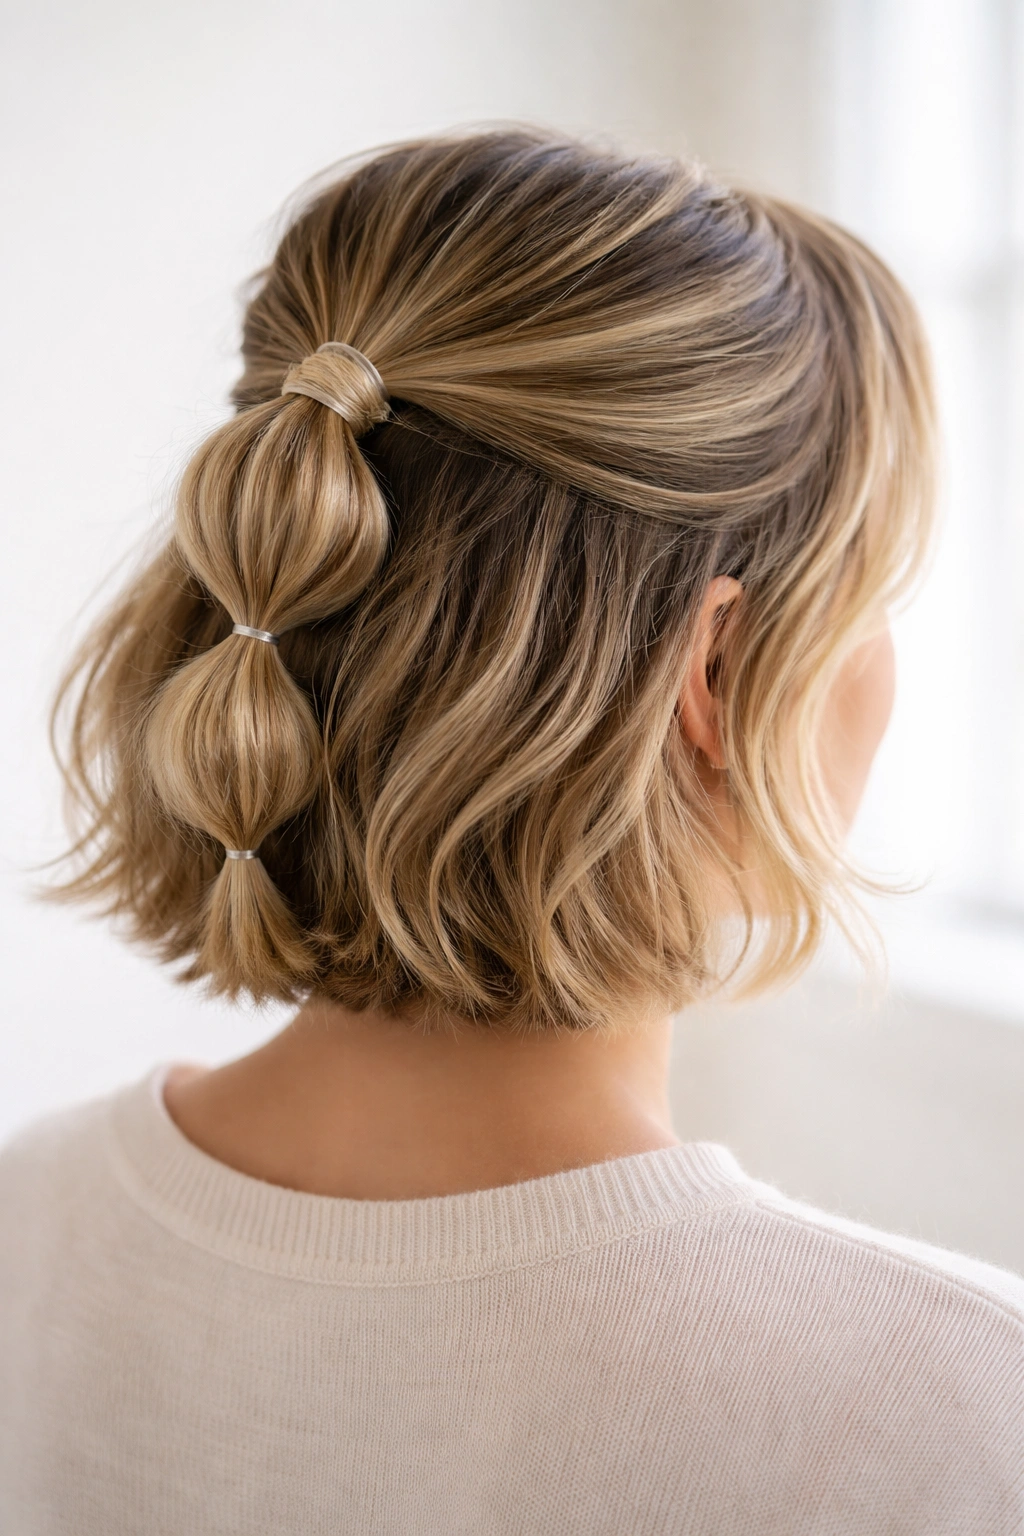
This playful style adds instant dimension and a hint of fun to short hair. Section the top half from ear to ear and secure with a small elastic. Then, create two or three small ponytails below it, each secured with its own tiny elastic, stacking them vertically down the back of the head. The key to making this work on short hair is using very small elastics and keeping each bubble section tight and defined. Space them about an inch apart.
Getting Those Bubble Sections Just Right
- After creating the first half-up ponytail, divide the hair below into two or three vertical sections
- Secure each section with a clear or colored elastic, creating “bubbles” between each elastic
- Gently pull each bubble out from the sides—don’t overdo it on short hair, or it’ll look messy rather than intentional
- This style works best on wavy or naturally textured hair, where the bubbles blend into existing texture
Best Hair Types for Bubble Ponytails
This style truly shines on hair with some natural wave, curl, or texture. On very straight hair, bubbles can look costume-like rather than chic. If your hair is stick-straight, apply a texturizing spray first and lightly curl the bubble sections with a small curling iron to add dimension.
7. The Sleek Low Bun with Face-Framing Strands
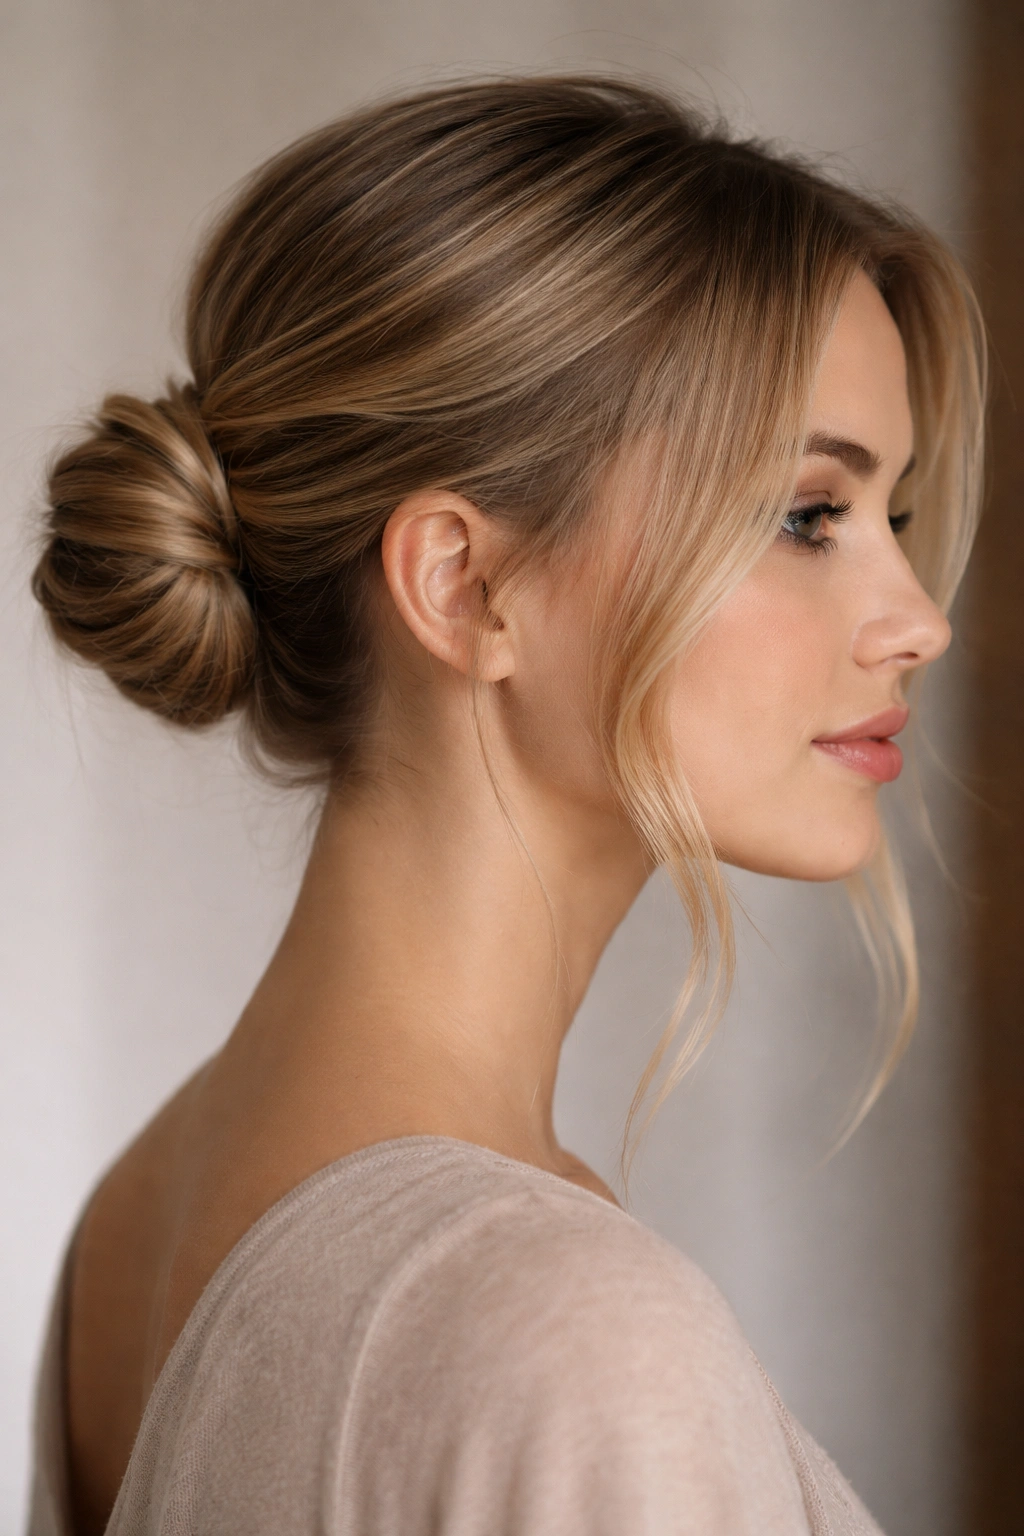
Combine the polish of a low bun with the softness of a half-up style by creating a small, compact bun at the nape and leaving strategic face-framing pieces loose. This is wedding-guest approved and works on every hair length. Create the half-up section at the crown, twist it loosely, and guide it toward the nape. Wrap it around itself to form a small bun, then secure with bobby pins. Pull out two thin pieces from near your temples to frame the face—these should be loose and soft, curled slightly if your hair type allows.
Making a Bun Work on Short Hair
Short hair means your bun will be small, which is actually ideal for this style. Avoid making it too tight—a slightly relaxed bun looks more sophisticated and modern. Secure it with bobby pins rather than a hair tie, which will be more visible and potentially bulky.
Creating Balance with Face-Framing Pieces
- These pieces should be delicate, not chunky—thin enough to feel soft but visible enough to frame the face
- Curl them gently away from the face with a small curling iron
- Secure them loosely with bobby pins hidden underneath, or use a light spritz of hairspray to hold them in place without pins
- They should move slightly as you move, not be completely frozen in place
8. The Side-Swept Half-Up with Tucked Ends
Create asymmetry and visual interest by sweeping the half-up section dramatically to one side. Start at the crown on one side of your head and gather hair as you sweep it across toward the opposite ear. Secure it with a small elastic, then take the end of the ponytail and tuck it under the base of the elastic, creating a looped effect. Secure the loop with a bobby pin. The remaining hair flows loosely on one side, creating movement and drama.
Why Asymmetry Flatters Short Hair
Asymmetrical styling creates visual movement and draws the eye across the face, which is particularly flattering on shorter lengths. It also prevents the style from feeling too structured or severe. Pairing it with soft waves in the loose section amplifies this effect.
Steps for a Polished Asymmetrical Look
- Blow-dry your hair with more volume on the side where the loose section will fall
- Gather the half-up section smoothly—no loose pieces yet
- Create the ponytail about 1-2 inches to one side of center, not directly at the back
- Loop the ponytail end under and pin securely, so it sits cleanly
- Curl the loose side loosely away from your face for softness
9. The Double-Twisted Half-Up
Double the twists for double the visual interest. Instead of one twist, create two thin twists on either side of the crown and bring both toward the center back. This style is more dimensional and interesting than a single half-up section, and the two twists together create a fuller appearance. Secure both twists with a single elastic at the back, wrapping a small piece of hair around the elastic to hide it.
Making Two Thin Twists Look Balanced
The key is starting each twist at the same height on each side and making them roughly equal in thickness. They should meet at center back and combine into one secured section. This creates visual symmetry while still feeling modern and intentional.
Styling for Maximum Impact
- Apply a light texturizing spray to the hair before twisting to help each twist grip and stay in place
- Make the twists slightly loose and deliberately pull them to add dimension
- Combine them at the back with the elastic sitting just below where they meet
- Wrap the elastic with hair to create a seamless finish
- Leave the bottom section completely loose and wavy
10. The Waterfall Twist Half-Up
A waterfall twist combines elements of traditional waterfall braiding with the ease of a twist. Create a twist at the temple and, as you twist toward the back, occasionally drop a small section from the twist and let it fall. Replace it by incorporating a new small section from above. This creates a cascading effect that works beautifully on short hair. Secure the twist at the back with a small elastic, leaving the waterfall pieces loose.
Understanding the Waterfall Mechanism
Unlike a full waterfall braid, this simpler version uses just a basic twist. Every half-inch or so, release a small section from the twist, and simultaneously pick up a small section from above to continue. The released pieces fall freely, creating that cascading effect. It looks complicated but is actually quite simple once you’ve done it once.
Making It Look Intentional on Short Hair
- Start the twist slightly off-center to avoid it sitting too formally at the crown
- The waterfall pieces should be thin and delicate—they’re details, not major sections
- Curl the loose section below gently to add texture and make the waterfall pieces more visible
- This style looks best on slightly wavy or textured hair where the pieces blend naturally
11. The Spiral Half-Up with Wrapped Elastic
Add unexpected detail by spiraling the hair as you bring the half-up section toward the back. Gather the top section from ear to ear, then instead of twisting or braiding, spiral the hair loosely around itself as you guide it back. Secure it, then hide the elastic by wrapping a small piece of hair around it. The spiral creates texture and dimension that reads as much more complex than it actually is.
Creating a Spiral That Looks Intentional
The spiral should be loose and relaxed, almost like you’re casually twirling the section as you move it back. If it’s too tight or structured, it can look costume-like. Aim for a spiral that feels organic and soft, not mechanically perfect.
Hiding the Elastic Like a Pro
- Take a thin piece of hair from the ponytail itself and wrap it around the elastic several times
- Secure the wrapped piece with a bobby pin tucked underneath—use a color that matches your hair
- This detail makes the entire style look more intentional and finished
- It also prevents the elastic from showing if the style shifts throughout the day
12. The Braided Crown with Loose Waves
Create a single braid that follows the hairline from one side of the head to the other, then secure both ends with a small elastic at the base of the bun or nape. This is different from a traditional half-up because the braid sits higher and follows the crown naturally. Leave the bottom section completely loose with soft waves. This style works especially well on oval or heart-shaped faces where a crown detail flatters the proportions.
Positioning the Crown Braid Correctly
The braid should sit about 1-2 inches back from your hairline, not at the very front. Start the braid at one temple, braid loosely across the crown, and end at the opposite temple. The loose section below creates balance, preventing the style from looking too structured.
Making the Braid Feel Special
- Loosen the braid generously before wearing—pull each strand to create dimension and fullness
- The braid should look effortless and soft, not tight and controlled
- Pair it with very loose, relaxed waves in the bottom section for contrast
- This style benefits from a light spritz of texturizing spray throughout to add movement
13. The High Side-Pony with Sleek Detail
For a more dramatic look, create a high half-up ponytail positioned toward one side, and smooth the rest of the hair sleek and straight. Apply a light gel or edge control to create a smooth, graphic appearance in the loose section. This contrast between the textured ponytail and sleek loose hair creates visual interest and feels very current. The high positioning works well on short hair because it balances the length with height at the crown.
Achieving Sleekness Without That Helmet Look
The key is using very light product and smoothing gently. You want a refined, polished appearance, not a slicked-back extreme. Use a paddle brush or your fingers with a small amount of gel, smoothing in the direction of your hair growth.
Creating Visual Drama Through Contrast
- The ponytail can be slightly textured or wavy—the contrast with the sleek loose section is what makes this style work
- Secure the ponytail with a small elastic and wrap it with hair for a finished look
- Consider a small decorative pin or clip where the ponytail sits—it becomes a focal point
- Keep the rest of your styling minimal to let the hair contrast be the focus
14. The Soft Half-Up Braid with Texture
This style falls between a braid and a twist in terms of structure. Start with a very loose, three-strand braid at the crown, making each pull of the braid generous and relaxed. The braid should feel almost floppy, which is the entire point—it looks soft and romantic rather than formal. Secure it at the back and leave the bottom section wavy. This is the half-up style for those who want something special but not overly structured.
Mastering the Intentionally Loose Braid
Begin the braid at the crown and braid very loosely, using thick sections. After securing, pull each strand of the braid outward gently but deliberately—you’re aiming for a braid that looks lived-in and relaxed. The result should be delicate and dimensional, not tight and perfect.
Pairing Braids with Short Hair Texture
- This style looks best on wavy, curly, or naturally textured hair
- On straight hair, apply a sea salt spray before braiding to encourage grip and movement
- The loose braid blends with natural texture rather than standing out as a formal style
- Finish with a flexible-hold hairspray that allows movement
15. The Reverse Half-Up Braid
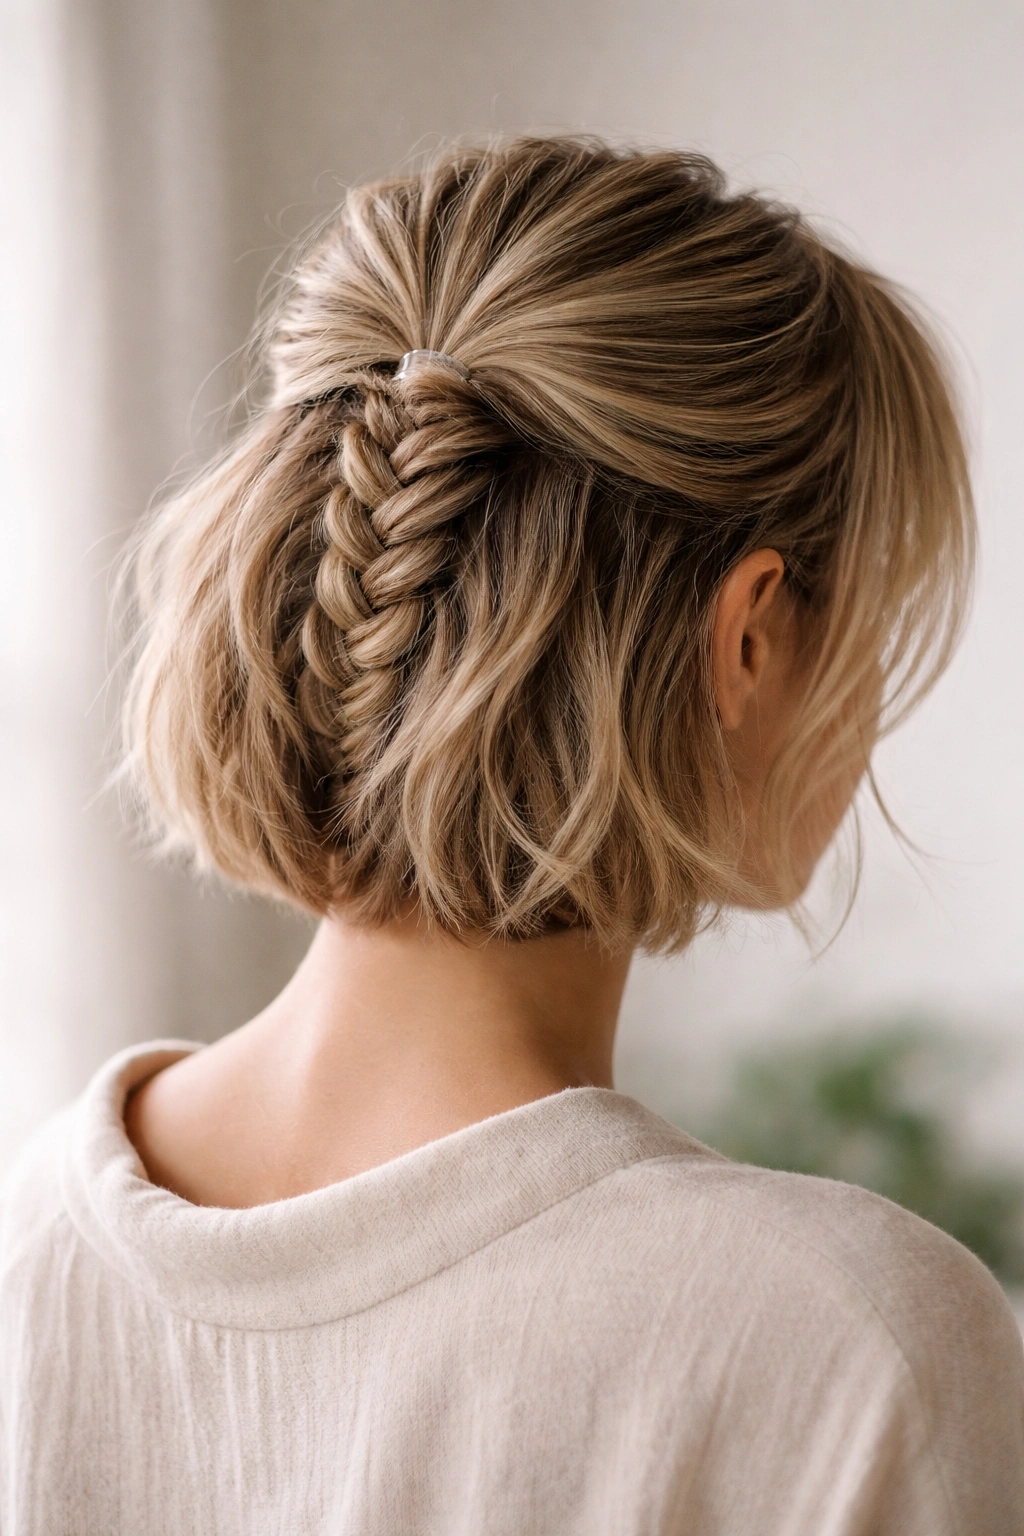
End with this modern twist on the traditional half-up: create a reverse braid (braiding upward from the nape of the neck toward the crown) using the bottom section of hair, then bring the braid toward the back and secure it with the remaining top section. This creates an unexpected, inverted effect that looks contemporary and editorial. It works best on hair with at least a little length in the back and some natural texture to grip.
Understanding the Reverse Braid Technique
A reverse braid uses the same three-strand method as a regular braid, but instead of braiding away from you, you’re braiding toward yourself—it’s the opposite direction. This creates a braid that stands out from the head rather than lying flat. Start at the nape, braid upward loosely toward the crown, then secure the braid with the top section of hair.
Executing This Style with Confidence
- Start the reverse braid at the nape and make it loose and relaxed from the beginning
- Braid upward at a slight angle toward one side of the crown rather than straight up the center
- Once you reach the crown, secure the braid and gather the top section around it
- Secure both sections together with a single elastic
- This style creates a bold focal point, so keep the rest of your styling simple and let the braid be the focus
Final Thoughts
The beauty of half-up half-down styling on short hair is that it gives you options that feel special without requiring hours of styling time or extensive techniques. Each style works with what you’ve got rather than against it—whether your hair is fine, thick, straight, wavy, or curly. The key to all of these styles is embracing the shorter length rather than fighting it. Short hair has a natural lift and movement that longer hair sometimes lacks, and half-up styling capitalizes on that advantage.
Start with whichever style resonates most with how you like to style your hair. If you love braids, explore the braided options. If you prefer simpler twists, master those first. The real magic happens once you’ve done a style a few times and you understand how it sits on your specific hair type and face shape. Then you can adjust and personalize—loosen things more, add texture, adjust the positioning. That’s when half-up styling becomes less about following steps and more about creating looks that feel distinctly yours.