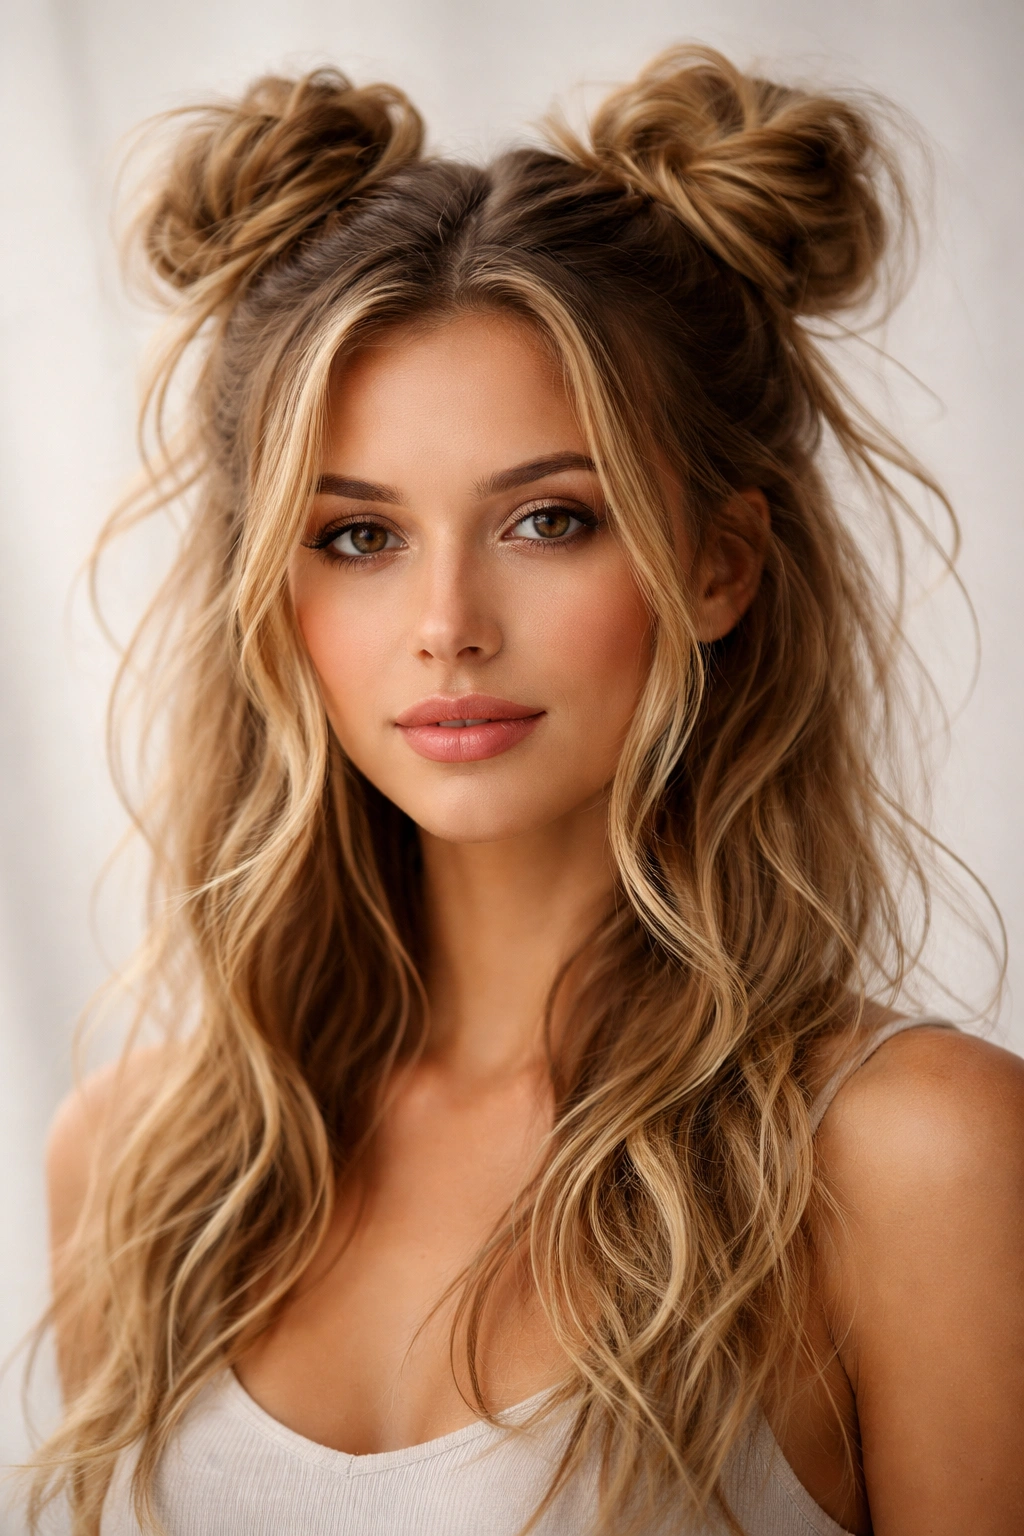
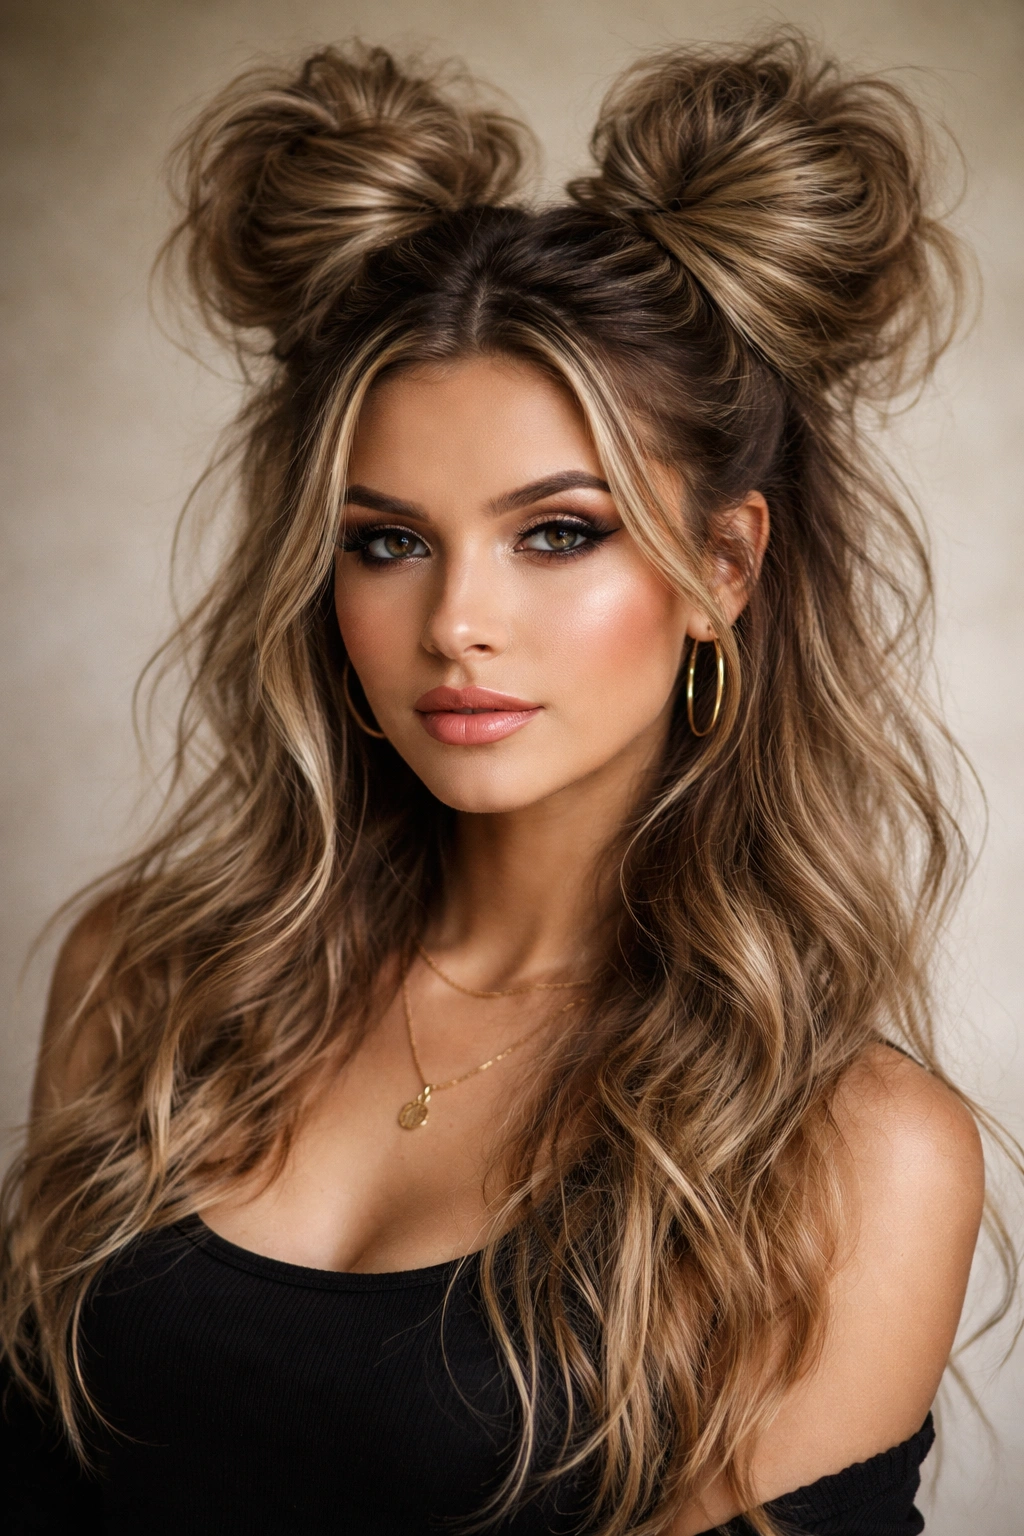
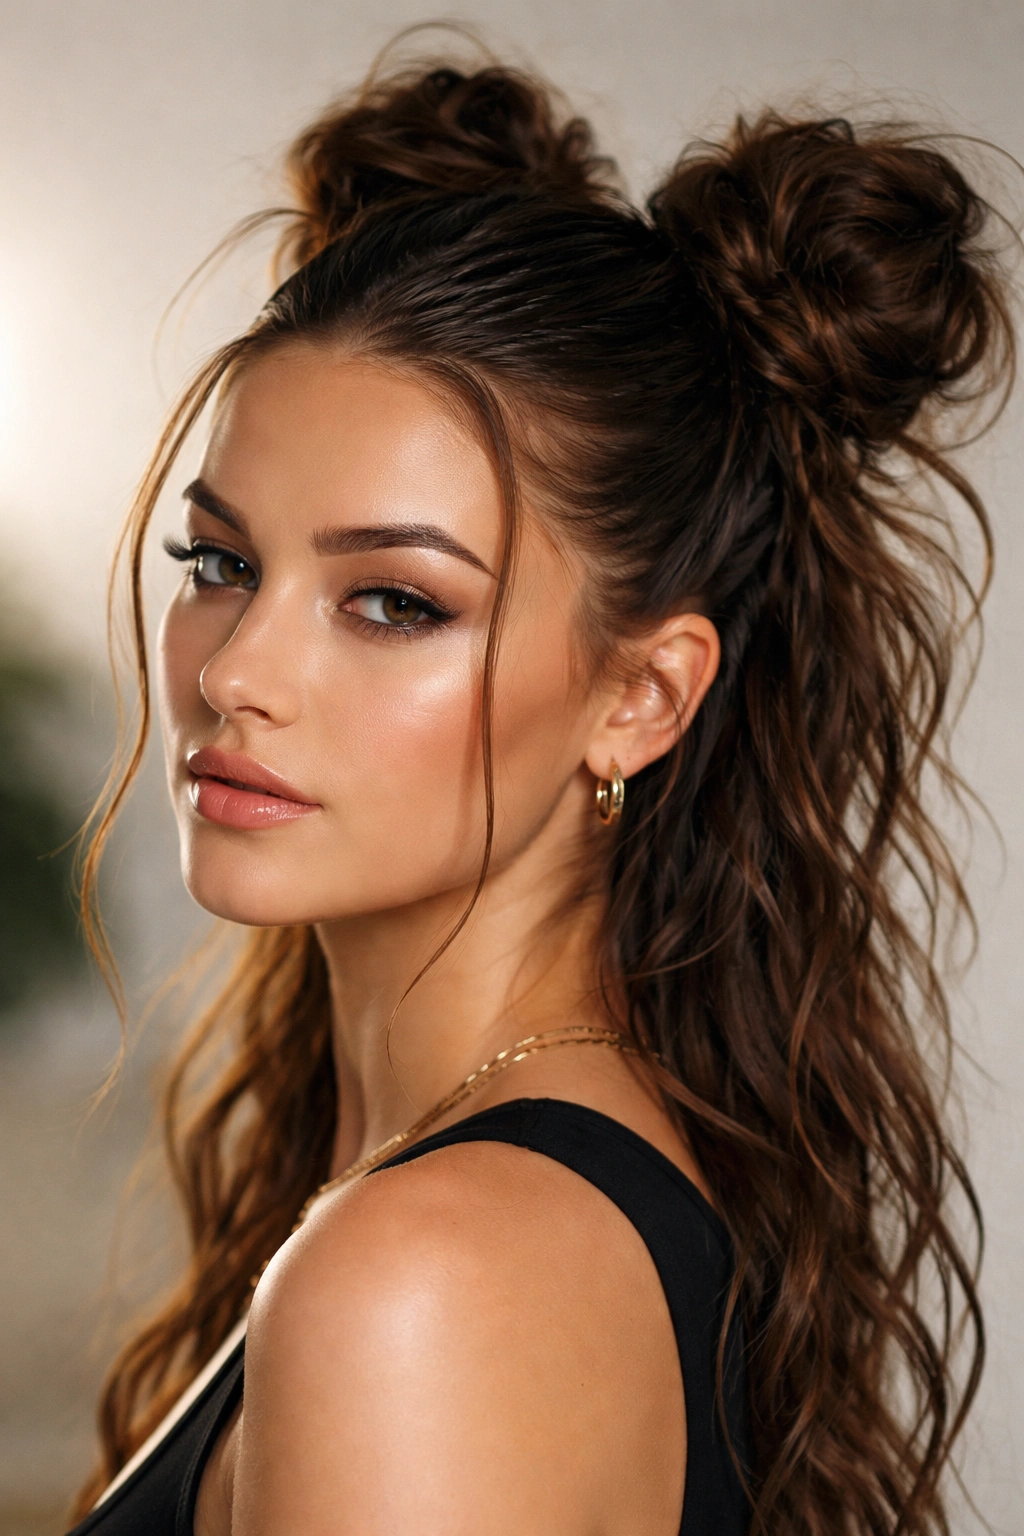
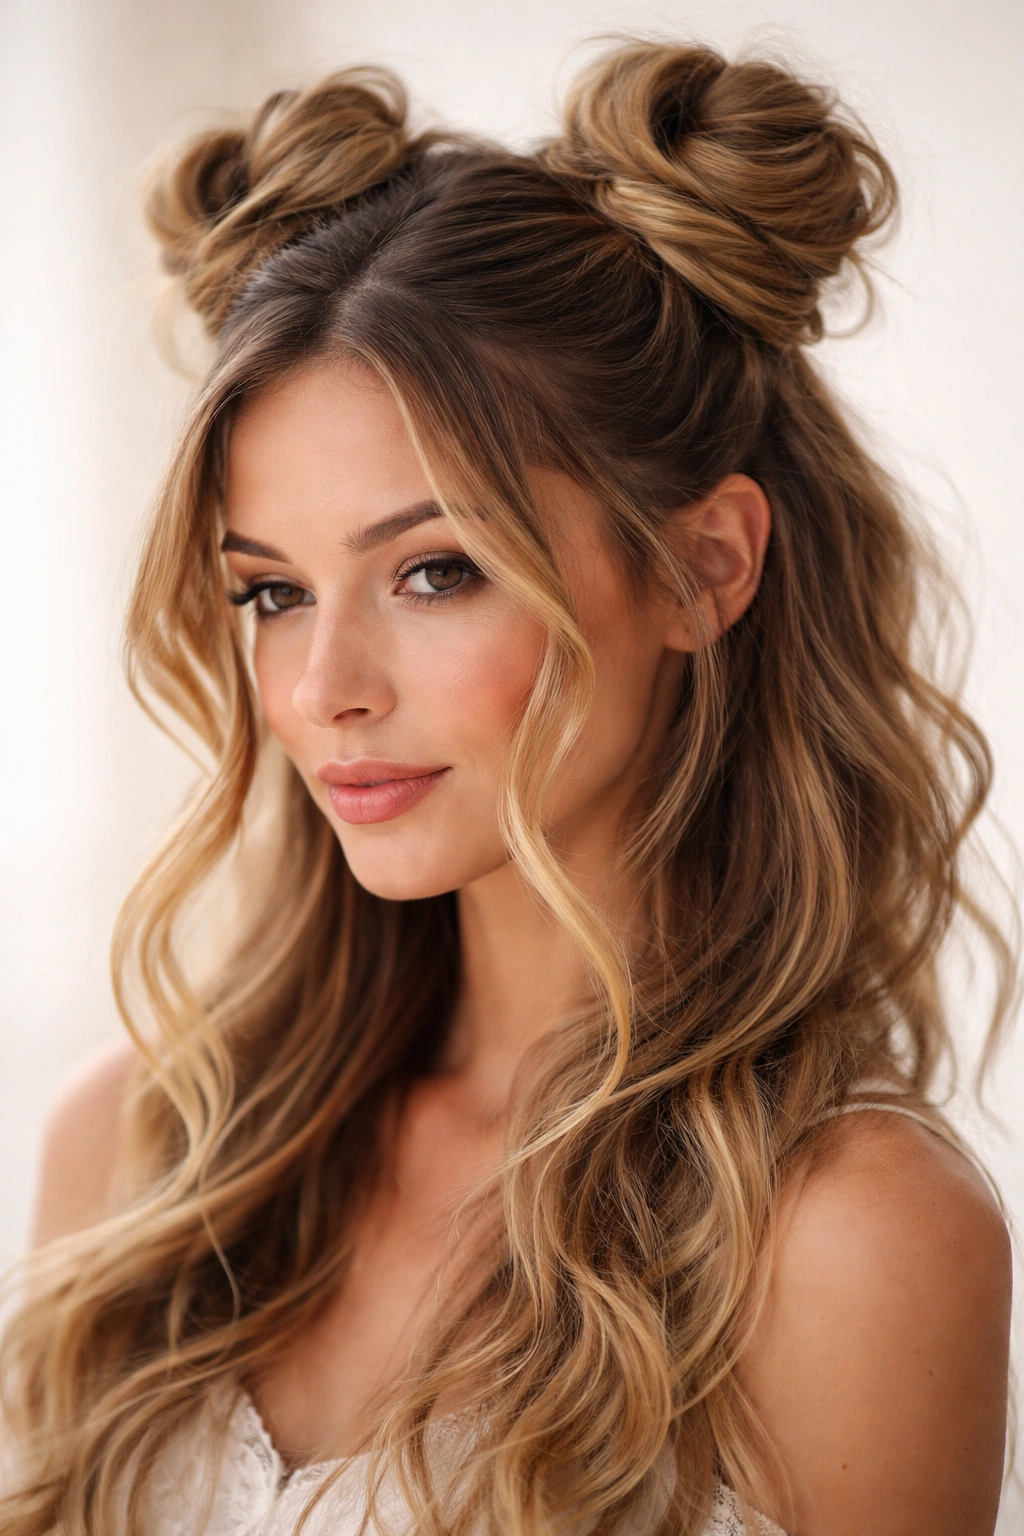
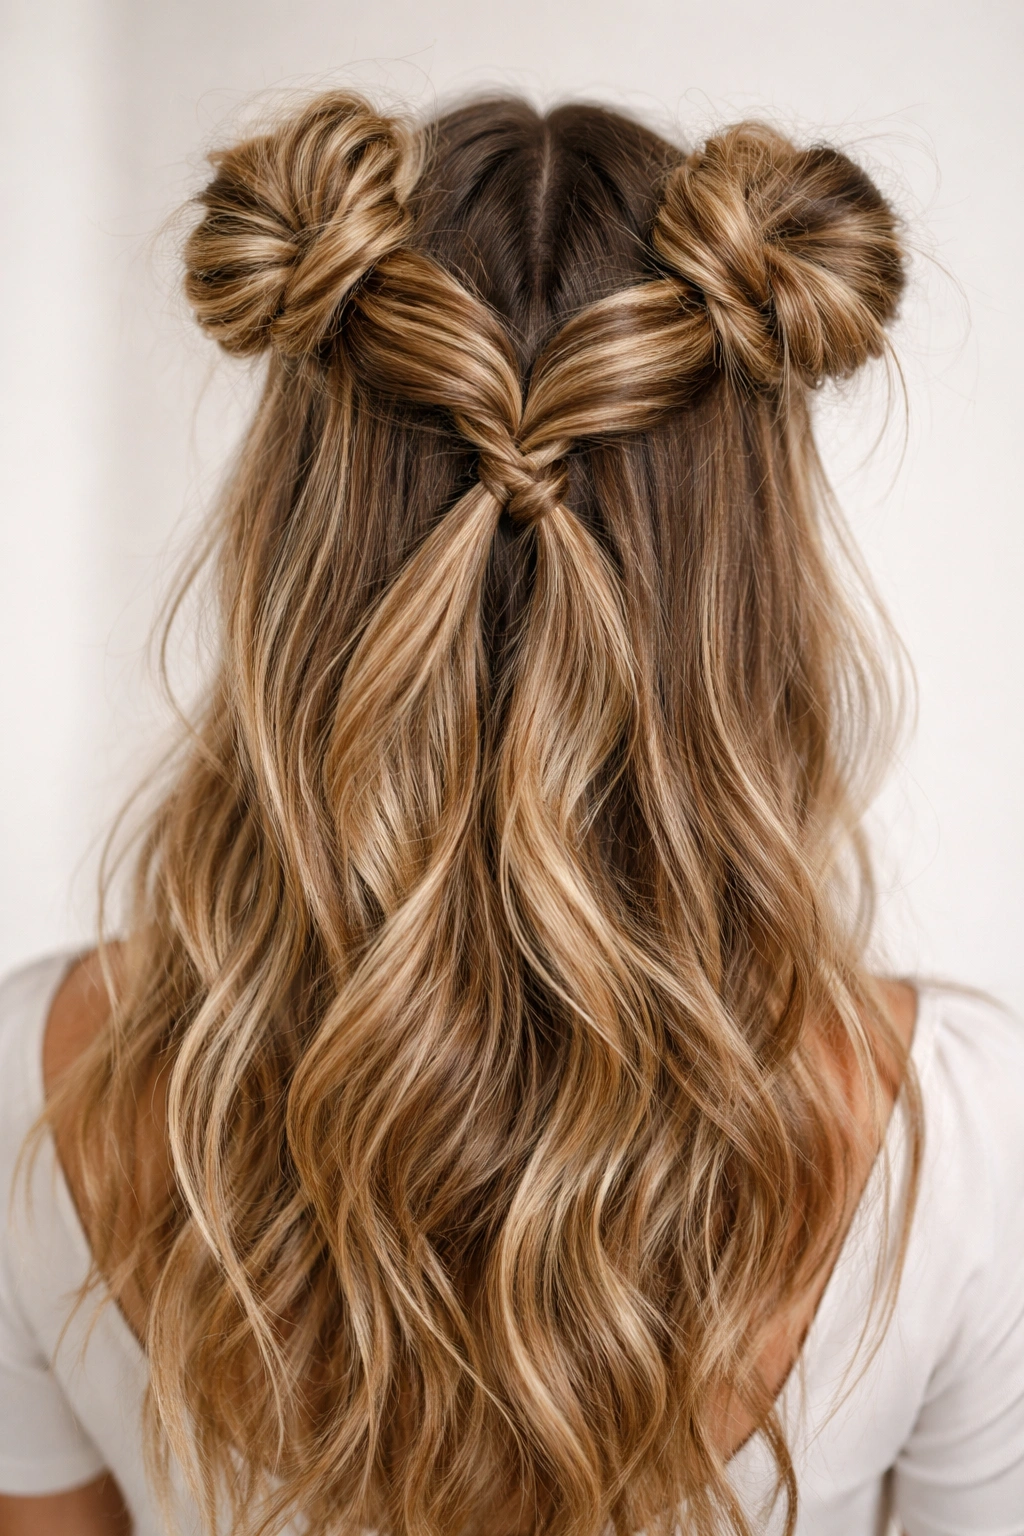
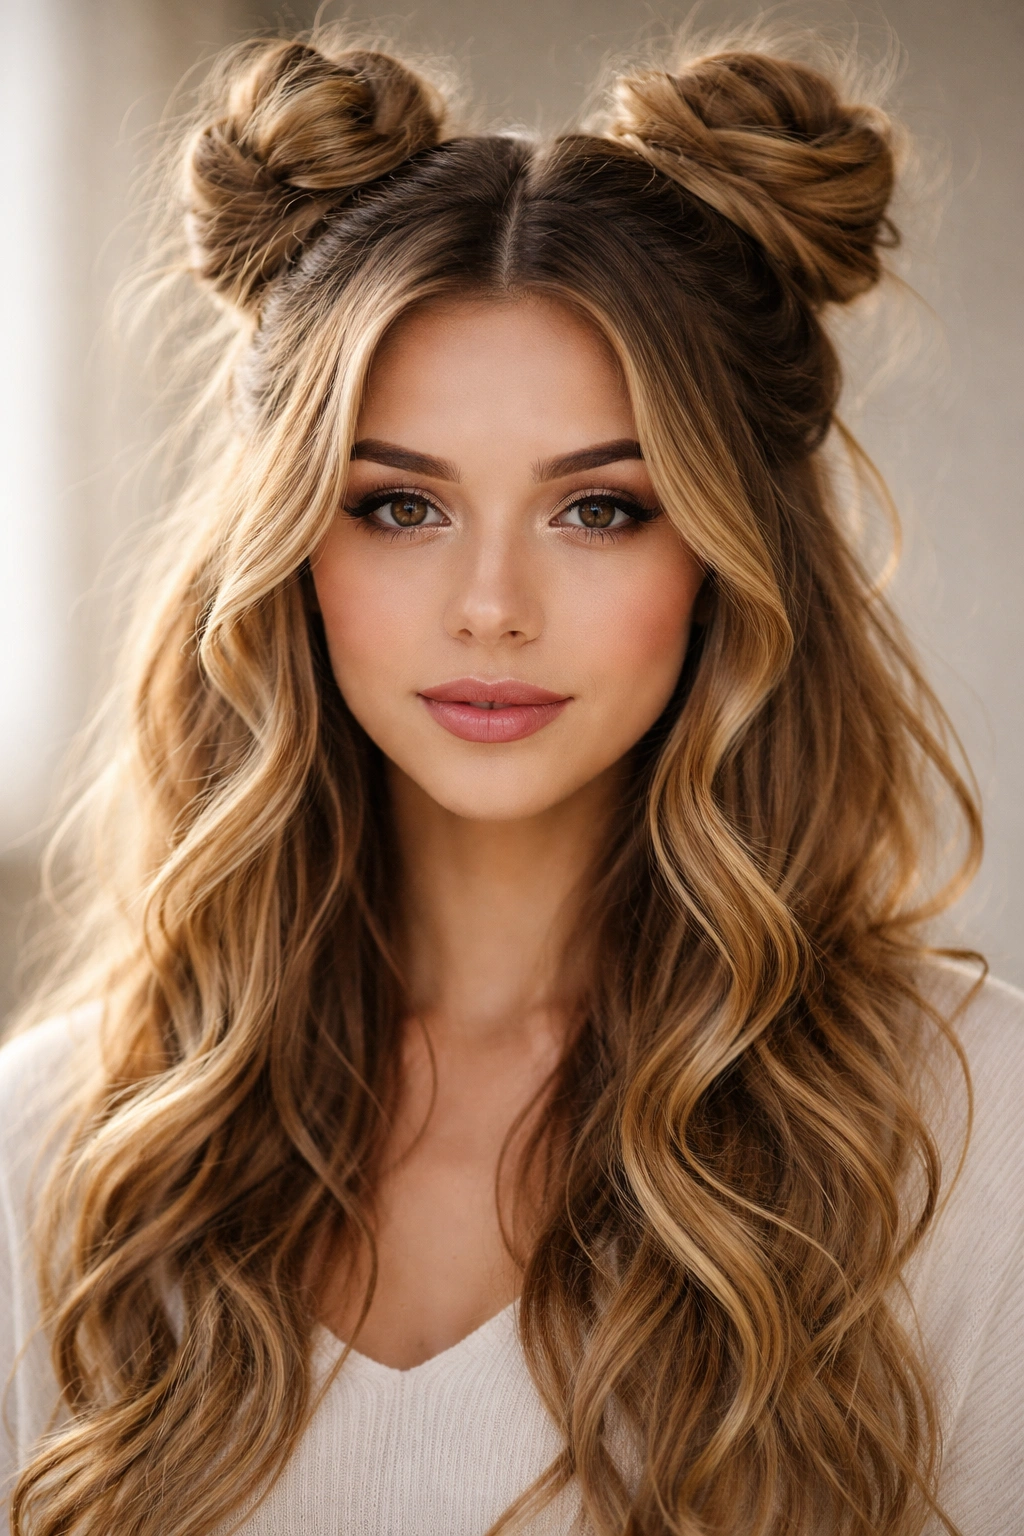
The half-up half-down space bun has become a go-to style for anyone who wants an edgy, playful look that walks the line between polished and effortlessly rebellious. Unlike traditional space buns that require everything on top of your head, this hybrid approach keeps the bottom layers down while the upper sections twist into those signature buns—giving you movement, dimension, and way more styling flexibility than you’d expect. The magic is in how messy they can be. These aren’t the rigid, perfectly geometric buns you might see in editorial spreads. Real half-up half-down space bun styles thrive on a little texture, a few intentional strays, and the kind of imperfection that actually makes them look intentional and cool.
What makes this style so versatile is that it works across different hair types, lengths, and occasions. Whether you’re aiming for festival-ready cool, a playful everyday vibe, or something dramatic enough to turn heads, there’s a variation that fits. You can make them tighter for a more structured look, loosen them for an undone aesthetic, or experiment with placement, size, and how much hair you pull up. The best part? They’re easier to execute than they look once you understand the foundational techniques. Most of these styles rely on the same core mechanics—sectioning, teasing for texture, twisting or braiding, and securing—but the styling choices you make in each step create wildly different finished looks.
The styles ahead run the full spectrum from ultra-messy and romantic to sleek and architectural. Some incorporate braids, some stick with simple twisted sections, and others use texture and placement to completely transform the vibe. Real talk: the “messier” these styles are, the more intentional they actually need to be. You’re not aiming for bedhead—you’re crafting a textured, dimensional look that reads as deliberate and designed. Let’s walk through each variation so you can pick the ones that match your skill level, your hair texture, and the aesthetic you’re chasing.
1. The Loose Tousled Space Bun
This is the one that looks like you spent exactly zero effort, even though you definitely did. The goal here is maximum texture and movement, with the buns sitting slightly loose on top of your head while strands escape all around them. It’s the style that makes people ask if you literally just woke up and twisted two sections together—which, by the way, kind of becomes a superpower once you nail it.
Why This Version Stands Out
The tousled space bun works because it relies on texture rather than structure. Instead of pulling your hair tight into neat sections, you’re teasing sections at the roots and throughout to create immediate volume and movement. The buns themselves are loosely twisted or even braided, then loosened up even more after securing. This creates a softness that reads as romantic and approachable, not severe.
How to Get This Look
- Start with second-day hair or spray dry shampoo on clean hair for grip and texture
- Divide the top portion into two sections, roughly from your ears upward (not perfectly symmetrical—that’s the point)
- Backcomb or tease each section generously at the roots and throughout
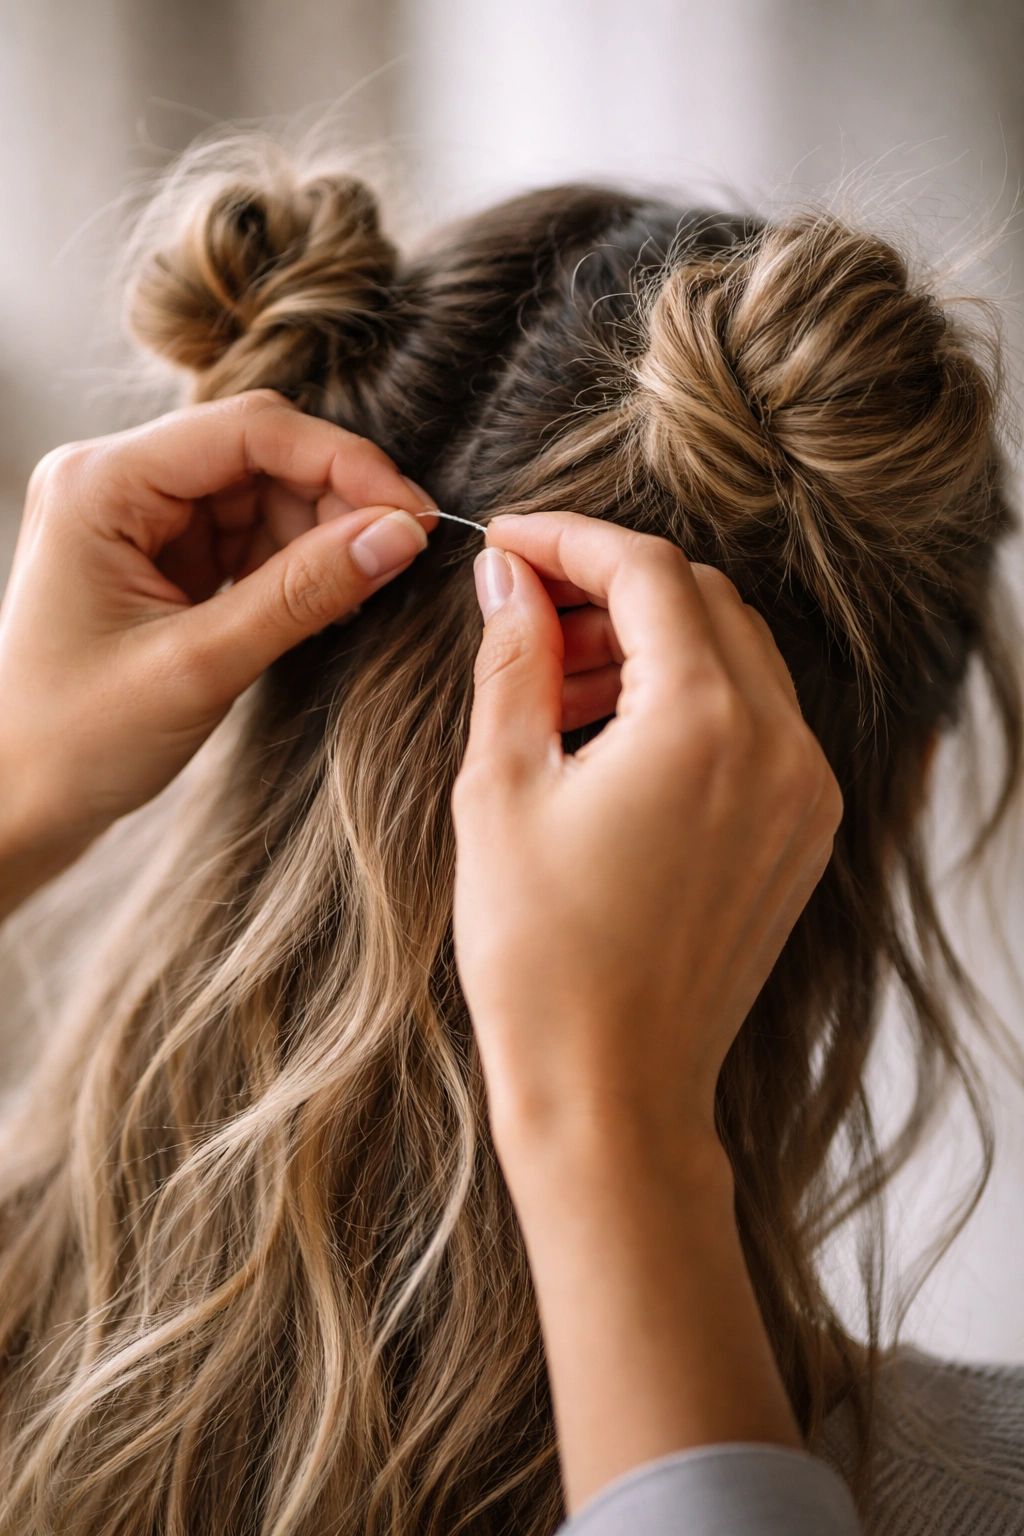
- Loosely twist each section and wrap it into a bun, securing with bobby pins positioned loosely
- Pull at the buns and surrounding hair to loosen everything up—you’re aiming for a shape that’s lost some definition
- Let flyaways live; they’re part of the aesthetic here
- Light hairspray on the overall shape, but avoid spraying so much that you kill the movement
Pro tip: The key to this looking intentional rather than sloppy is making sure your flyaways are clustered around the face and buns, not scattered across the back of your head. Those strategic strays frame your face and add to the deliberate undone effect.
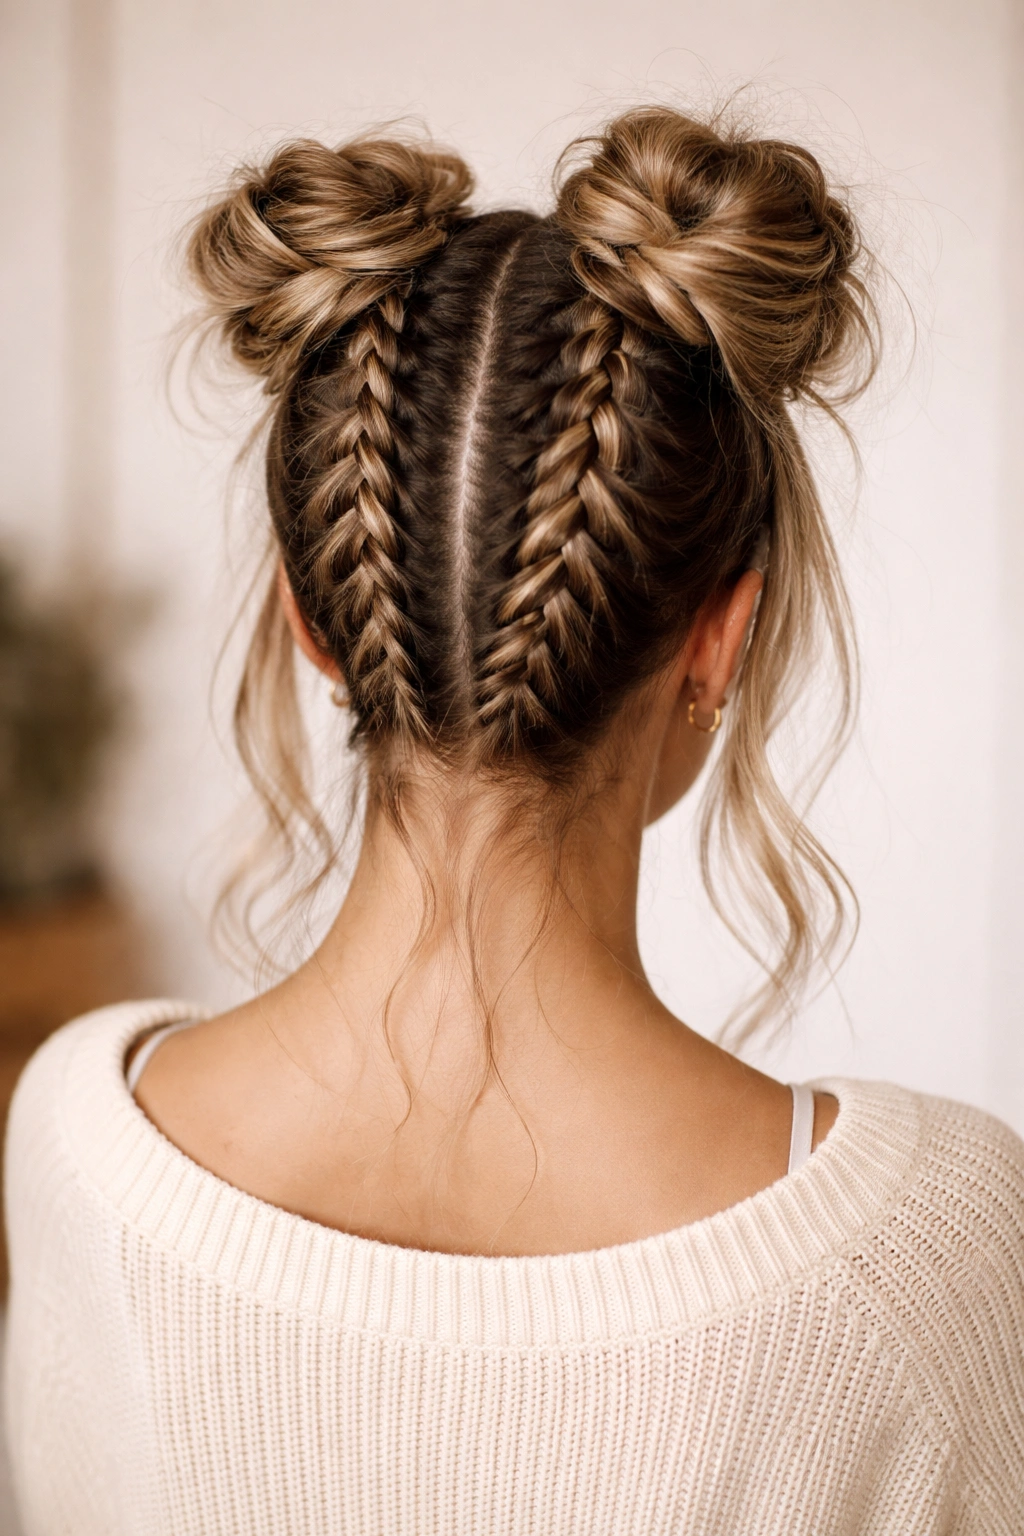
2. The Braided Half-Up Space Bun
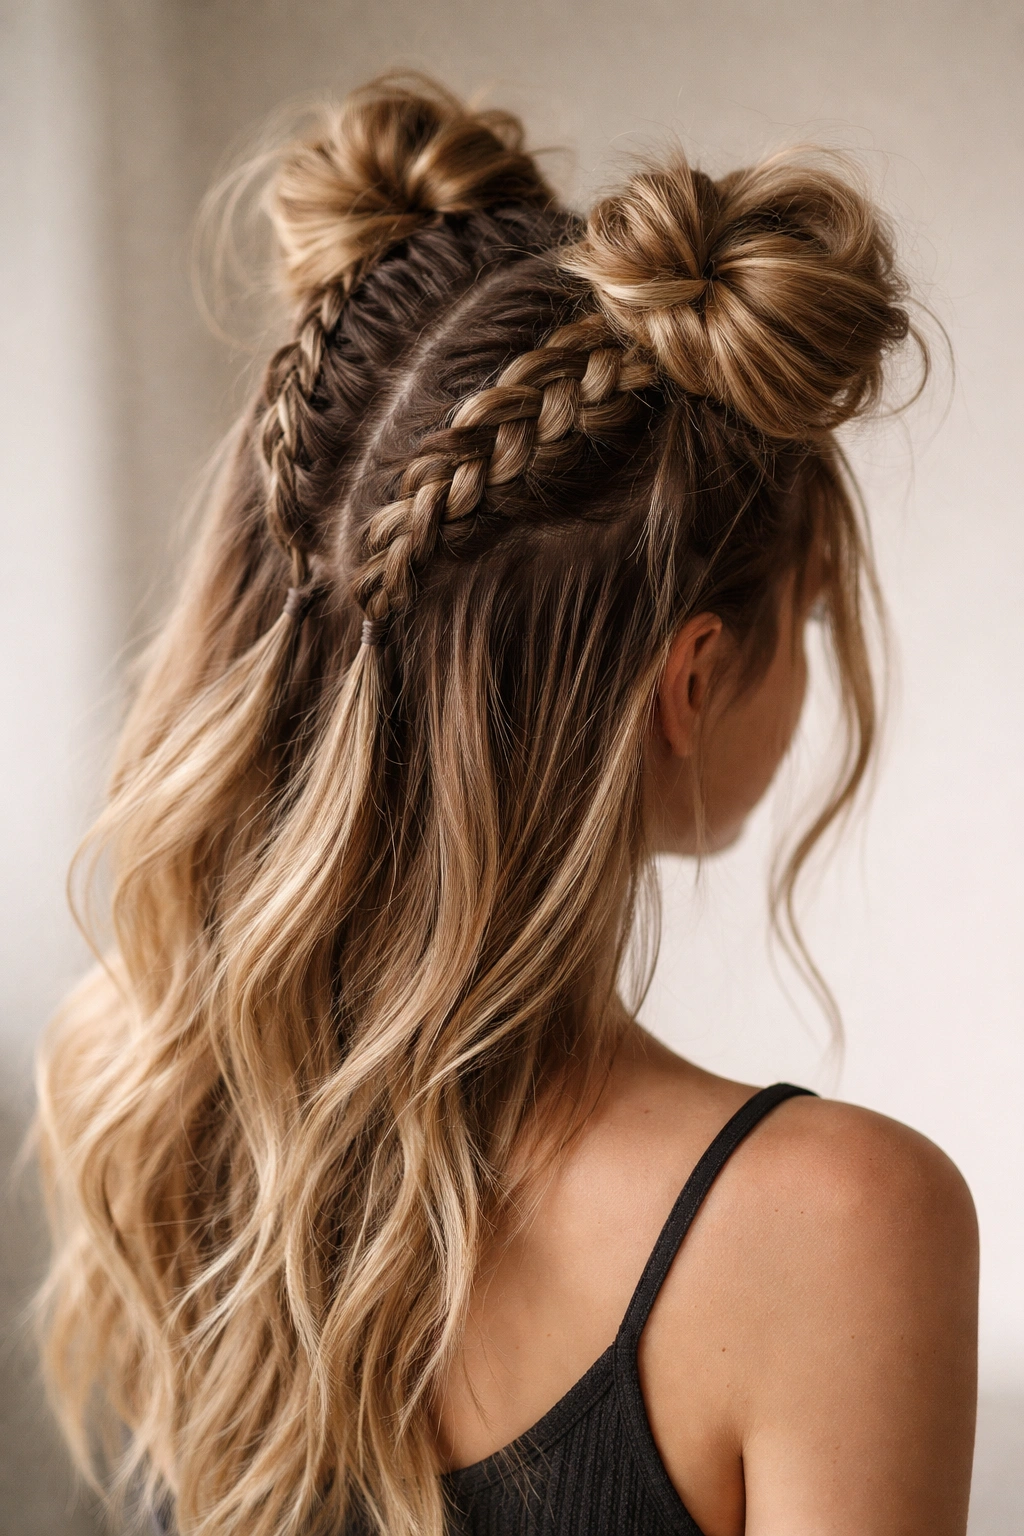
Incorporating a braid into at least one or both buns adds a dimension and sophistication that simple twisted versions can’t touch. This style reads more polished while still maintaining that messy, lived-in aesthetic. The braid becomes the hero element—a detail people actually notice and compliment.
What Makes It Different
Braiding forces your hair to lock into a structured pattern before it wraps into the bun, which creates a built-in visual interest. Even if the bun itself gets mussed up, the braid backbone keeps things from looking completely formless. You’re essentially combining two techniques in one, which sounds complicated but actually simplifies the styling because the braid does half the work for you.
Building the Look Step by Step
- Create two upper sections and tease them lightly for texture
- French braid or Dutch braid each section from where you start down toward where the bun will sit (aim for about 4-6 inches of braid)
- Gather the remaining loose hair at the end of each braid and twist it
- Wrap the twisted hair around the braid’s base to form the bun
- Secure with bobby pins hidden inside the bun structure
- Pull at strategic points to loosen the braid slightly and the bun shape
- Leave the very tips of the braid loose if there’s enough length—this breaks up the formality
Worth knowing: A Dutch braid (braiding underneath instead of over) photographs incredibly well and catches light differently than a regular braid, making the texture more dramatic.
3. The Asymmetrical Uneven Space Bun
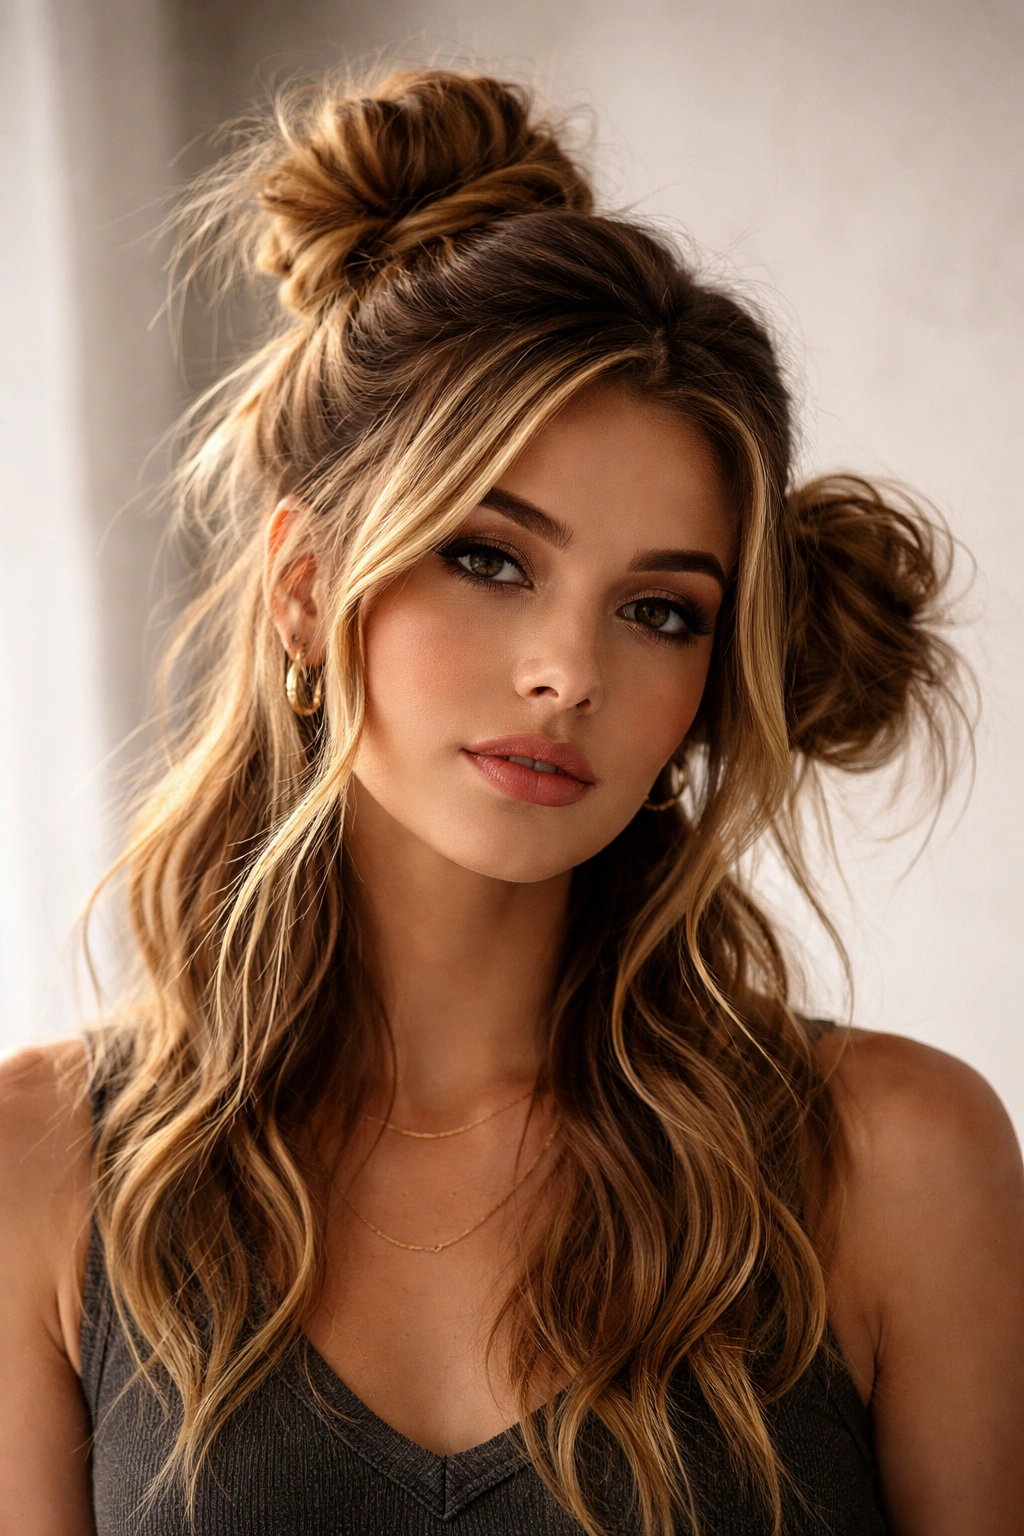
This one breaks the cardinal rule of traditional space buns—they’re never the same size, never positioned at the same height, and that’s exactly the point. The asymmetry is what makes this style feel modern, confident, and intentionally cool. It works especially well if you’re naturally drawn to off-kilter, non-traditional aesthetics.
Why Asymmetry Works Here
Matching buns feel balanced and symmetrical, which reads as more “styled.” Unmatched buns read as creative, playful, and deliberately artistic. One bun can be positioned higher and tighter while the other sits lower and looser. One can be significantly larger than the other. This disparity creates visual interest and immediately signals that you chose this intentionally, not that you’re just following a formula.
Executing the Asymmetrical Look
- Start by dividing the top section into two parts, but make them genuinely different sizes (maybe 60/40 instead of 50/50)
- Tease both sections for texture, but tease the larger section more aggressively
- Twist the larger section and create a bigger, looser bun positioned slightly higher
- Twist the smaller section and create a tighter, smaller bun positioned lower
- Don’t worry about them matching—that’s the whole point
- Secure everything with bobby pins, leaving more strays around the larger bun
- Smooth the smaller bun slightly more, so the contrast is actually visible
Insider note: The best asymmetrical space buns often look intentional because the hair around them is intentionally styled differently too—one side smoother, one side with more visible texture.
4. The Double Braid Bun Hybrid
This style weaves two thin Dutch braids down the back that feed into larger buns on top, creating an almost crown-like effect. It’s more involved than other variations, but if you can braid, you can absolutely execute this. The payoff is a style that looks genuinely intricate and thought-out.
The Structural Appeal
Instead of one section becoming one bun, you’re creating a mini double-braid situation that eventually feeds into the bun structure. This gives you control over how much of your hair goes into the bun (more hair can braid down) and creates built-in texture that’s harder to mess up. The braids add elegance while the buns keep things playful.
How to Build This Layered Style
- Section off the top third of your hair and divide it into two parts
- Create two Dutch braids, one on each side, braiding down toward where your buns will sit
- Gather the remaining loose hair at the end of each braid (you’ve now got four sections: two braids and two loose pieces)
- Combine each braid with its adjacent loose hair section
- Twist the combined hair and wrap it into a bun
- Secure well with bobby pins woven through the structure
- Gently pull the braids to loosen them and create texture
- Leave a few strays falling from each bun
Worth knowing: This style takes longer to create than simple twisted buns, but it’s incredibly sturdy and works well for events where you need something that’ll last through dancing or activity.
5. The Teased-and-Twisted High-Volume Space Bun
If you love the idea of space buns but feel like yours always look too sleek or small, this is where aggressive teasing becomes your secret weapon. The goal is maximum volume and presence—buns that take up space and announce themselves the moment someone looks at you.
Building the Volume
Volume comes from backcomb. Lots of it. You’re not just teasing the roots; you’re teasing sections all the way through to create a base that’s fluffy and full. Then you’re loosely twisting these puffy sections and barely containing them in a bun shape. The result is buns that are almost too big for the bobby pins holding them, which is exactly the vibe.
Creating Maximum-Volume Buns
- Work with damp or textured hair; volume is easier to create than on freshly washed, smooth hair
- Divide the top section into two clear parts
- Backcomb each section starting at the roots, working down through the mid-lengths
- Tease generously—you’re building a cushion of texture
- Loosely twist the teased section (don’t try to smooth it out; the bumps and texture are the point)
- Wrap it into a loose bun and secure with multiple bobby pins
- Don’t try to perfect the shape; let it be puffy and slightly wild
- Mist with light hairspray to set the texture without flattening
Pro tip: Teasing works best on hair that’s at least 24 hours unwashed. If you’re working with clean hair, spraying dry shampoo on the roots first gives you the grip teasing needs.
6. The Slicked-Front-Messy-Back Space Bun
This variation creates a striking contrast: the front and sides of your head are slicked back smooth (think wet look, gel, or sleek styling), while the buns themselves are completely undone and textured. The contrast makes both elements more impactful.
The Visual Contrast Effect
Slicked hair reads as intentional and controlled. Messy buns read as relaxed and playful. Put them together and you get a look that’s simultaneously polished and effortless, structured and soft. It’s the kind of style that works for everything from casual hangouts to actual performances or shoots.
Executing the Contrast
- Apply gel or mousse to damp hair and brush everything back smoothly
- Create a deep side part if you want asymmetry, or center the hair straight back
- Smooth the front section, sides, and nape area until they’re slick
- Gather the top section into two parts and tease them aggressively
- Create loose, undone buns with all that texture on display
- Secure with bobby pins, not worried about the shape
- Keep the front slicked throughout styling
- Finish with strong-hold hairspray on the slicked sections only, leaving the buns to move
Worth knowing: This look works better with textured or slightly damp buns against a slicked base. The contrast is what makes it work, so don’t let the bun part get too neat.
7. The Micro Space Bun With Scattered Bun Details
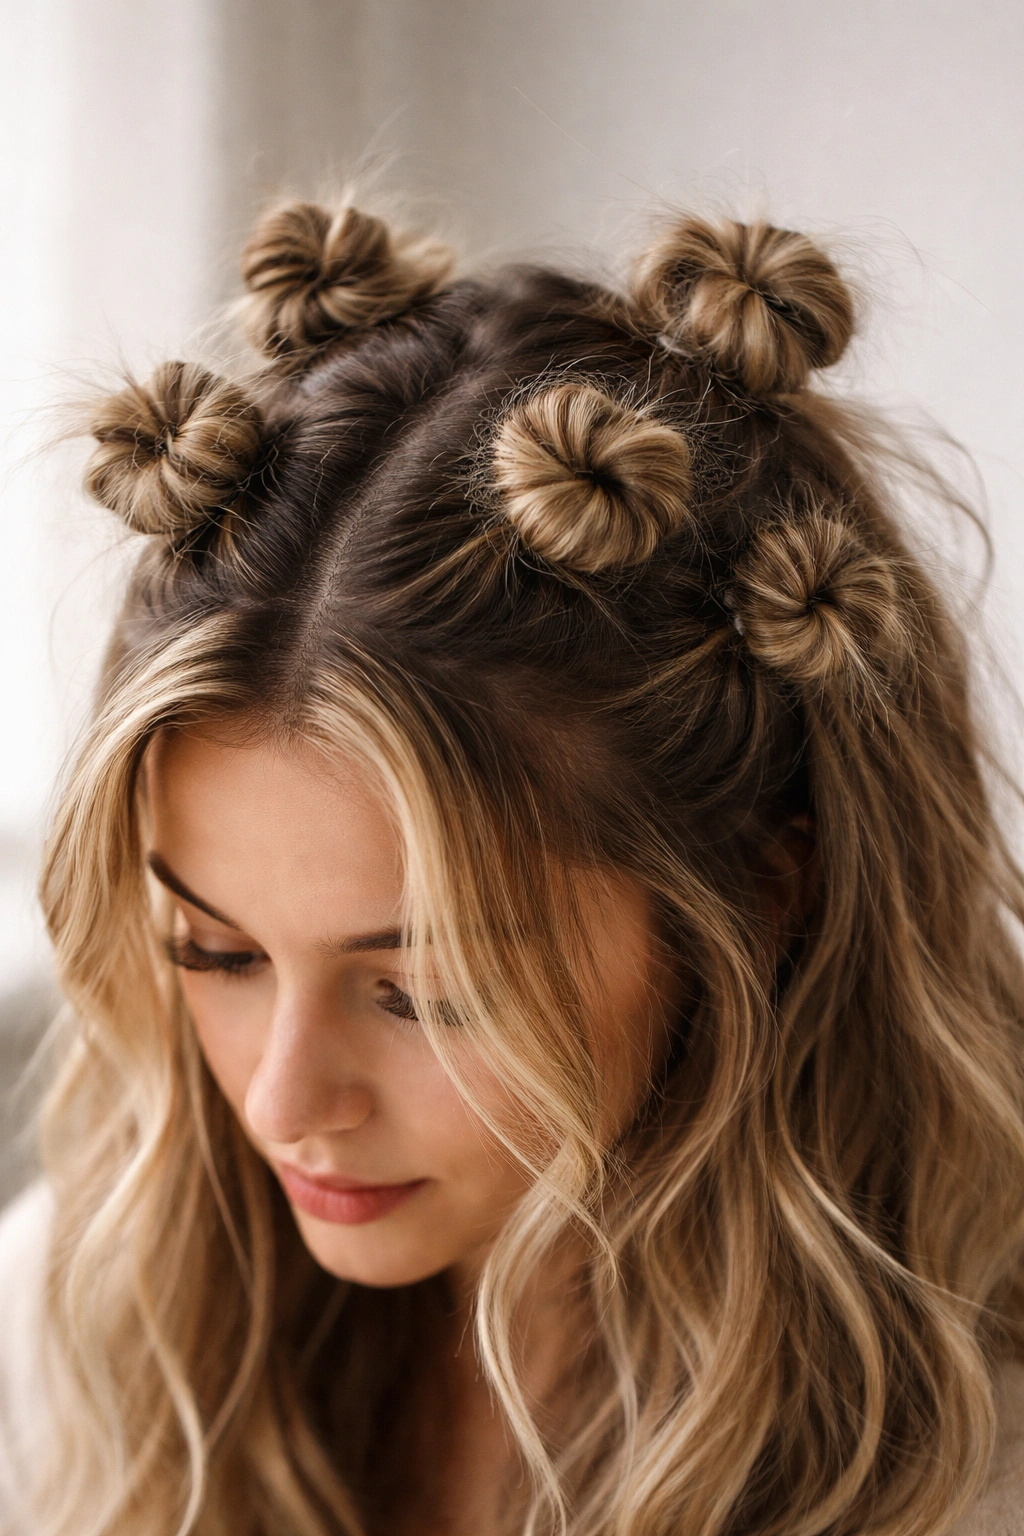
Instead of two large buns, you’re creating multiple smaller buns scattered across the crown. Think 4-6 smaller buns instead of the traditional 2 larger ones. This takes the space bun concept and makes it architectural and modern.
Why Multiple Smaller Buns Change Everything
One large bun reads one way. Two giant buns read another. But 4-6 smaller buns scattered strategically across the crown? That reads as intentional, artistic, almost sculptural. It’s a move that feels fresh and unexpected, especially since most people associate space buns with just two large ones.
Creating the Multi-Bun Situation
- Divide the top half of your head into 4-6 sections (experiment with placement—not all in a neat grid)
- Tease each section for texture
- Twist each section and secure it into a small, loose bun
- Don’t worry about them being the same size—variation makes it more interesting
- Leave plenty of hair down, especially longer pieces that can flow around and between the buns
- Secure each bun independently with bobby pins
- Pull at all the buns to loosen them slightly
- Consider adding small accessories like bobby pins, gems, or wire wraps to a few of the buns for visual interest
Pro tip: This style works best with longer hair (at least shoulder-length) because you need enough hair hanging down to frame the smaller buns and create dimension.
8. The Romantic Half-Up With Loose Spiral Buns
This version takes the messiness and adds a romantic, almost ethereal quality. Instead of twisting sections tightly, you’re loosely spiraling hair, letting it wrap around itself in a more organic way. The result feels softer and more whimsical than other variations.
The Romantic Element
Spiraling instead of twisting creates a different visual texture. Where a twisted bun has a defined spiral pattern, a loosely spiraled version feels more like hair that naturally wound itself up. You’re not fighting for control; you’re working with the hair’s natural tendency to coil and wrap.
Building the Romantic Look
- Work with textured hair—waves or curls are ideal, but you can create texture on straight hair
- Create two upper sections and gently backcomb them
- Instead of twisting tightly, loosely spiral each section around your fingers
- Wrap the spiraled hair into a bun shape, letting it naturally coil
- Secure loosely with bobby pins, allowing some of the spiral structure to stay visible
- Don’t pull the buns tight; let them breathe and maintain some of their spiral shape
- Leave longer pieces down to frame the face and create softness
- Finish with a flexible hold hairspray so movement is possible
Worth knowing: This works best if you don’t try to tighten or perfect it. The more you leave it alone after creating the spiral, the more romantic and organic it looks.
9. The Spiky Textured Space Bun

This one leans hard into texture and visual interest. Rather than smooth, rounded buns, you’re deliberately pulling pieces out from the bun structure to create spike-like texture that catches light and creates movement. It’s edgier and more visually complex than traditional buns.
Creating the Spike Texture
You’re using bobby pins not just for security, but to actually shape the bun by pulling small sections out and securing them at angles. This creates a crown of texture around each bun. It’s more involved than letting a bun naturally loosen, but the result is much more dramatic and interesting.
How to Build Spiky Texture
- Tease each section generously to create volume
- Twist or braid the section and wrap it into a bun
- Secure the base of the bun with bobby pins
- Pull small 1-2 inch sections out from the bun structure
- Use bobby pins to secure each pulled-out section at an angle away from the bun
- Continue around the entire bun, pulling out sections and securing them
- Repeat on the second bun
- The result should look like a textured crown around each bun
- Light hairspray to set the shape and texture
- Let these styled pieces catch the light—that’s the whole point
Pro tip: This look photographs incredibly well because the texture catches light and creates dimensional shadows. It’s especially striking in photos or under stage lighting.
10. The Half-Up With Interlocking Double Twist
Instead of two separate twists that form individual buns, you’re creating one continuous motion where the twists interlock or feed into each other before splitting into two distinct bun shapes. It’s more intricate and feels more elevated than simple separate twists.
The Interlocking Advantage
Creating movement between the two sections before they separate into buns adds visual interest and a sense of intention. You’re not just splitting your hair in half and twisting each side—you’re creating a unified look that eventually becomes two distinct shapes. It’s the difference between two separate things and one cohesive design.
Building the Interlocking Twist
- Create two upper sections
- Start twisting each section, but twist them toward each other rather than away
- Let them cross over in the middle of the back of your head
- Continue the twists for a few inches into the crossing area
- Then separate them and direct each twist upward into its own bun shape
- Secure each bun with bobby pins woven through the twist and bun structure
- Pull at the twists gently to loosen them and reveal the interlocking pattern
- Leave strays falling from where the twists crossed
- The interlocking section should be visible and striking
Worth knowing: This takes practice to execute smoothly, but once you nail it, it becomes a signature look that reads as incredibly intentional and skillful.
11. The Textured Bubble Half-Up Space Bun
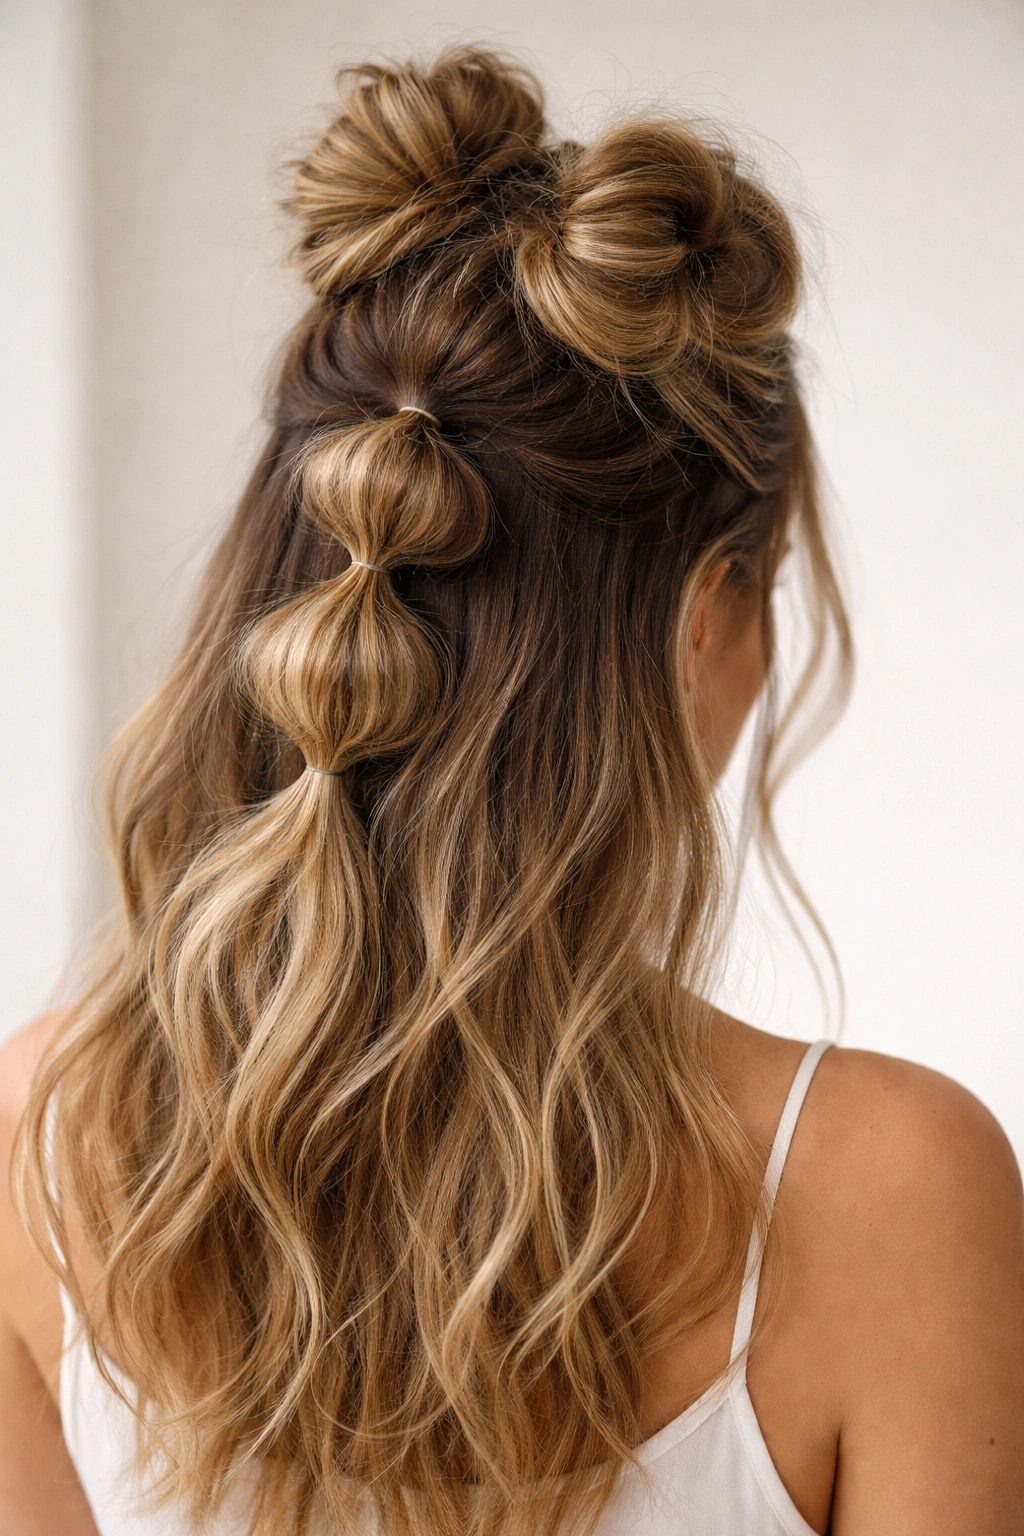
This variation borrows from the bubble braid trend, creating a segmented look where you’re basically creating multiple small bubble sections that feed into the larger bun. It’s playful, intricate, and creates a different visual texture than straight twists or braids.
The Bubble Aesthetic
Instead of one continuous twisted or braided section, you’re creating distinct segments (bubbles) that are defined by bobby pins. Each segment is loosened and textured individually. When these segments feed into the bun, they create a layered, dimensional appearance that’s visually more interesting than a simple twist.
Creating the Bubble Sections
- Divide the top into two sections
- In one section, create a bubble braid: take a small hair tie and create a section, secure it, then take another section below it, secure that, and continue down
- Create 3-4 bubbles before you reach where the bun will sit
- Loosen each bubble by gently pulling it out
- Gather all the remaining hair (all the bubble sections plus the loose hair below) and twist it together
- Wrap the twisted mass into a loose bun
- Secure with bobby pins
- The bubbles will be visible leading into the bun, creating a segmented look
Pro tip: This look takes longer but holds incredibly well. The bobby pins securing each bubble help keep everything in place all day.
12. The Romantic Curtain-Framed Space Bun
This final style keeps the space buns on top but intentionally pulls out longer sections on either side of your face to create a curtain-like framing. Instead of space buns being the sole focus, they sit on top while you have flowing pieces creating softness and movement below.
The Softness Factor
Space buns can feel a bit stark or severe when they’re the only happening at the top of your head. Adding face-framing pieces that are curled, textured, or simply left long and loose softens the whole look. You’re getting the playful space bun element with a feminine, romantic edge from the framing.
Styling the Curtain-Frame Look
- Leave longer face-framing pieces (roughly ear-length or longer) completely out of the bun sections
- Tease the top sections and create two loose, textured buns as usual
- Take the face-framing pieces and gently curl them (with a curling iron or by wrapping them around your fingers)
- Position the curls to frame your face, loosening them slightly so they look natural
- Make sure the curls fall in front of or beside the space buns, not behind them
- Secure the buns, then tousle the curls to increase their softness and movement
- Leave wispy pieces around the face and throughout the back
- Flexible hold hairspray so everything moves together
Worth knowing: This style works best with layers or longer overall hair length. If you have one length throughout, the face-framing effect isn’t as dramatic.
Wrapping Up
The real magic of half-up half-down space buns comes down to understanding that “messy” doesn’t mean careless—it means intentional texture, strategic placement, and the confidence to leave things slightly undone. Each variation here offers a different vibe, from romantic and soft to edgy and architectural, but they all operate on the same principle: texture creates impact, asymmetry reads as intentional, and a little bit of looseness looks more sophisticated than perfection ever could.
The style you choose depends on your hair type, the occasion, and which aesthetic speaks to you. Straight hair pulls off the slicked-front contrast beautifully. Textured and curly hair shines in the romantic and loose variations. If you love statement hair, the spiky textured or micro-bun versions are your lane. Start with whichever style feels closest to your natural aesthetic, practice it a few times (because these do take some repetition to nail), and then branch out from there.
The learning curve is real, but here’s what makes it worth it: space buns are conversation starters. They’re playful enough for casual situations but intentional enough for actual styling moments. Once you get comfortable with the basic techniques—teasing, twisting, securing—you can mix and match elements from different variations to create your own signature version. That’s when the real fun starts.