Straight hair has a clean canvas quality that makes claw clip half-up-half-down styles look effortlessly polished, and there’s honestly something deeply satisfying about how well this combination works. The sleek texture lets the clip become a design element rather than just a functional tool, while the half-up style creates visual interest and keeps hair off your face without committing to a full updo. Whether you’re styling for casual comfort, professional settings, or special occasions, claw clips offer the perfect balance of hold and ease—and the right technique transforms them from basic to genuinely editorial.
The beauty of claw clips with straight hair is their versatility. You can keep things minimalist and chic, or add texture, twists, and intentional styling details that elevate the look instantly. The clip itself becomes part of your aesthetic, which means color, size, and finish all matter. What works for one look might feel completely different in another context, so understanding the mechanics of each style—where sections start, how to manipulate the clip, what prep work actually changes the outcome—makes all the difference between a half-up that looks rushed and one that stops people mid-conversation.
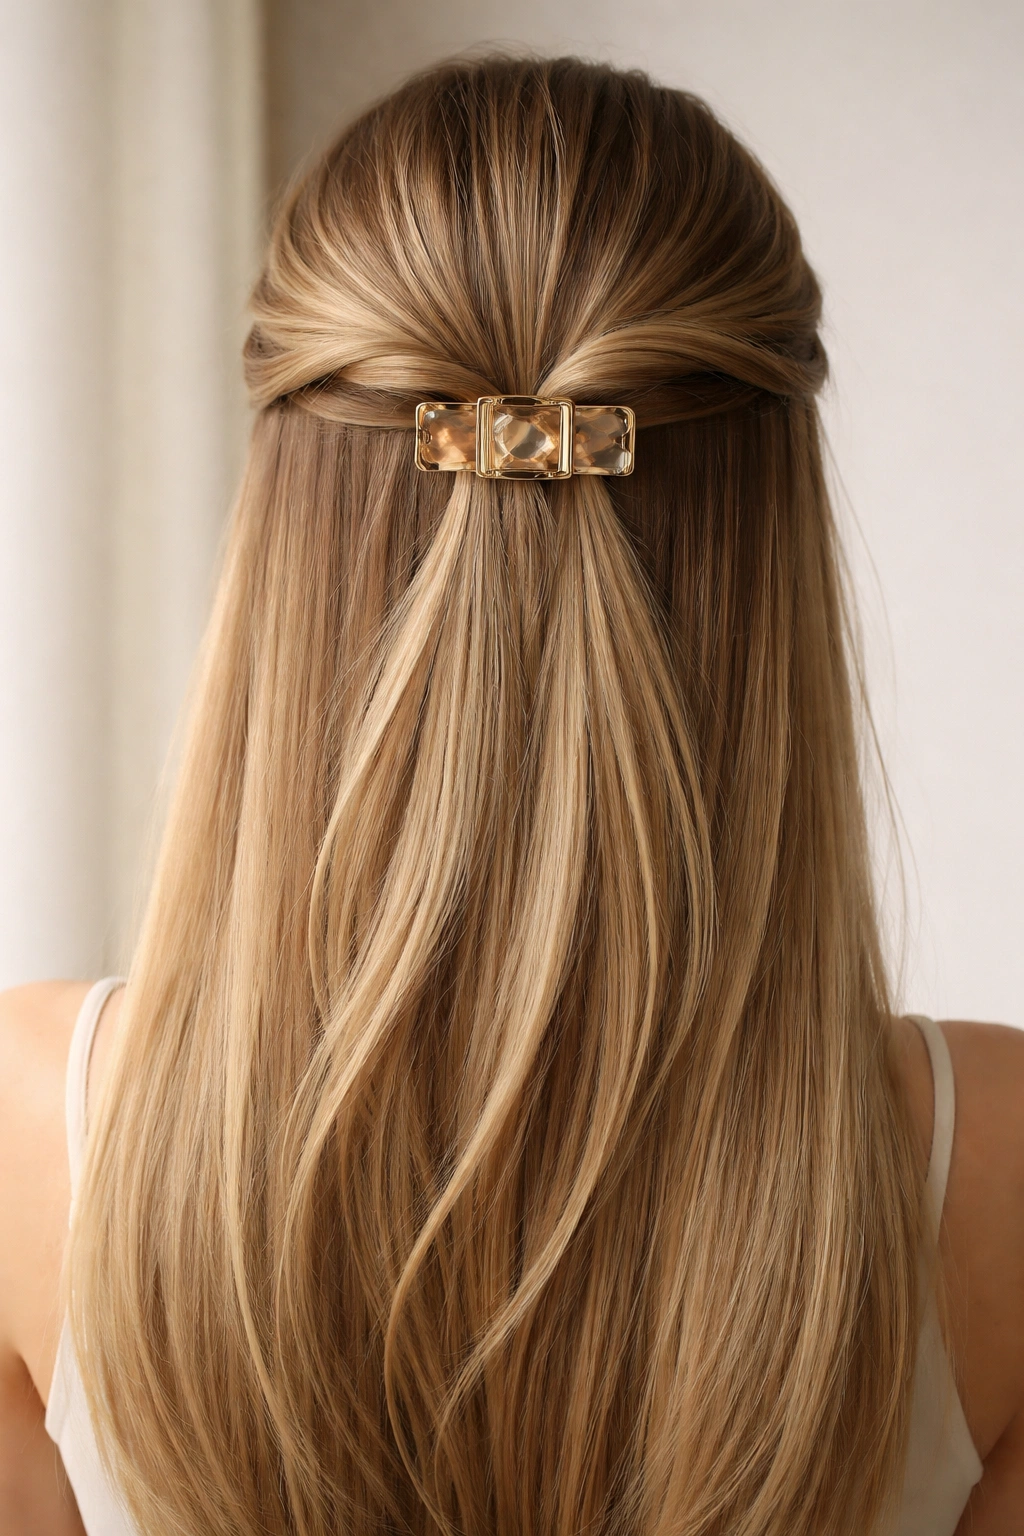
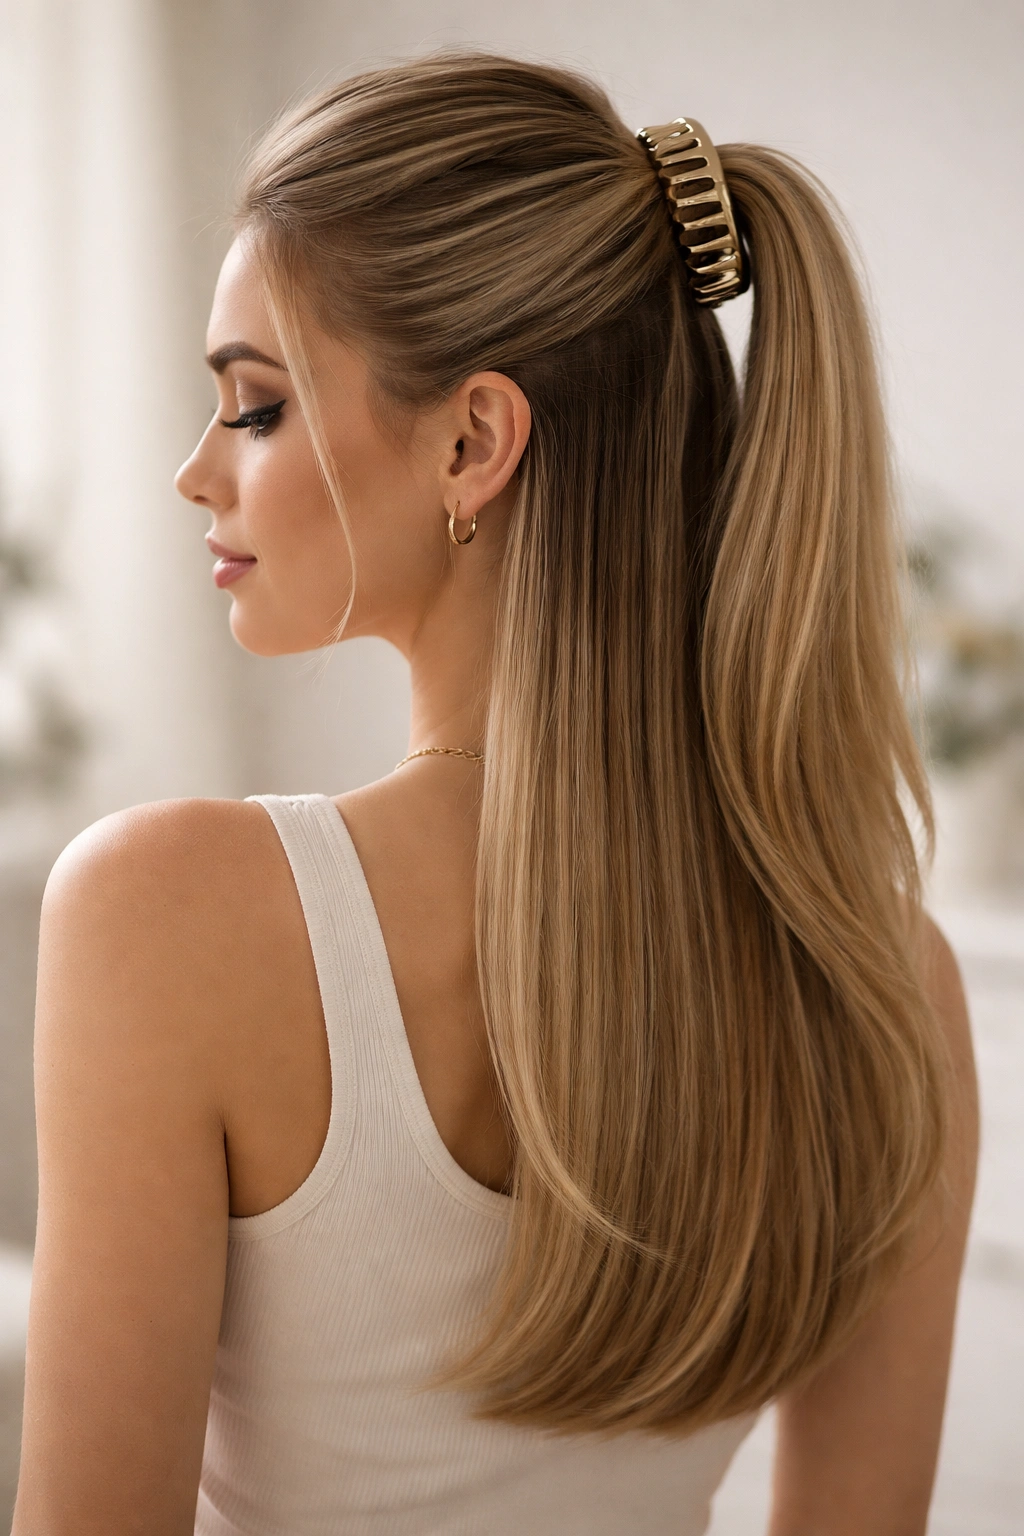
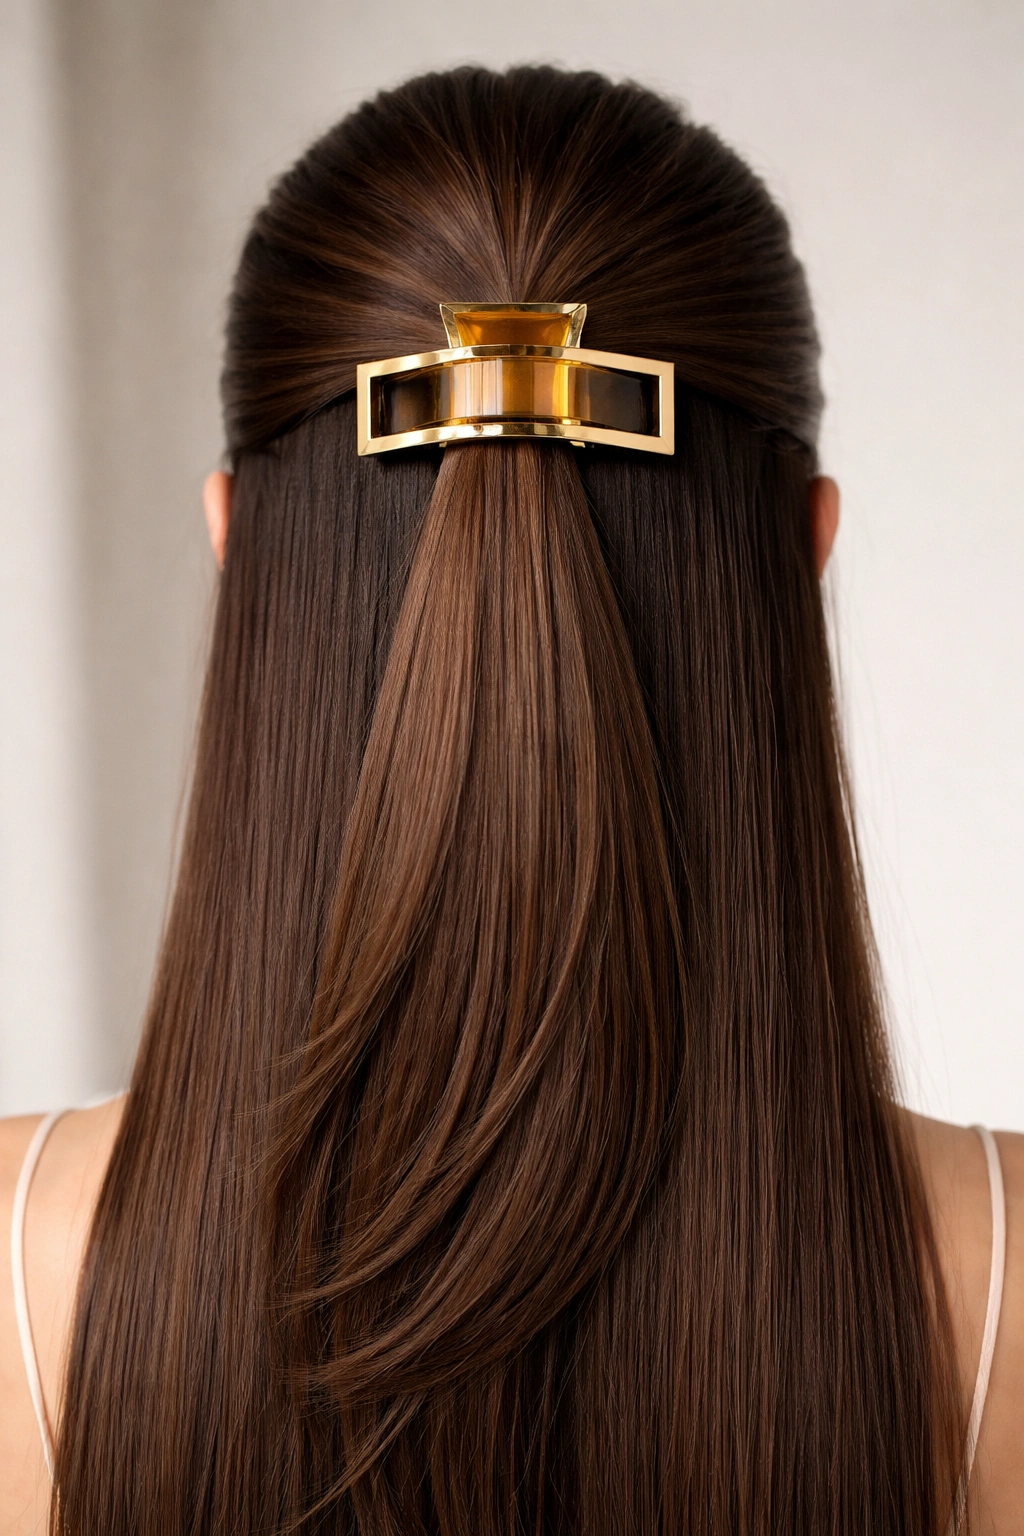
1. The Sleek & Sophisticated Half Up
This is the foundation style that works in literally every setting, and it’s deceptive in its simplicity. Start with completely dry or freshly brushed straight hair, section it cleanly from temple to temple across the crown, and clip it with precision. The key isn’t the clip itself—it’s the tension and placement of that section. Brush your face-framing pieces forward slightly so they fall with intention rather than accident, then secure the clip at the exact crown point where it sits weightless and permanent.
Why It Works for Straight Hair
The sleek texture means your section holds its shape immediately without needing waves or texture to “grip” the clip. Straight hair reflects light in a way that makes the geometry of a half-up feel architectural—every angle reads cleanly. Your clip becomes a sculptural accent rather than a hair utility, so choose one in tortoiseshell, matte metal, or a bold color that complements your overall look. The contrast between the slicked-back section and your flowing lengths creates visual height without trying too hard.
Quick Execution Details
- Start your section at the outermost edge of each eyebrow arch, not at the temples—this frame sits closer to where eye-catching happens
- Brush the section backward with one hand while gathering slightly upward to create lift at the roots
- Clip horizontally with the wide part of the clip facing backward—this distributes tension across more hair
- Smooth any flyaways with a fine-tooth comb and a tiny drop of smoothing serum
Pro tip: The tighter your initial brush-back, the longer this style holds. Spend an extra 20 seconds really securing that tension before clipping.
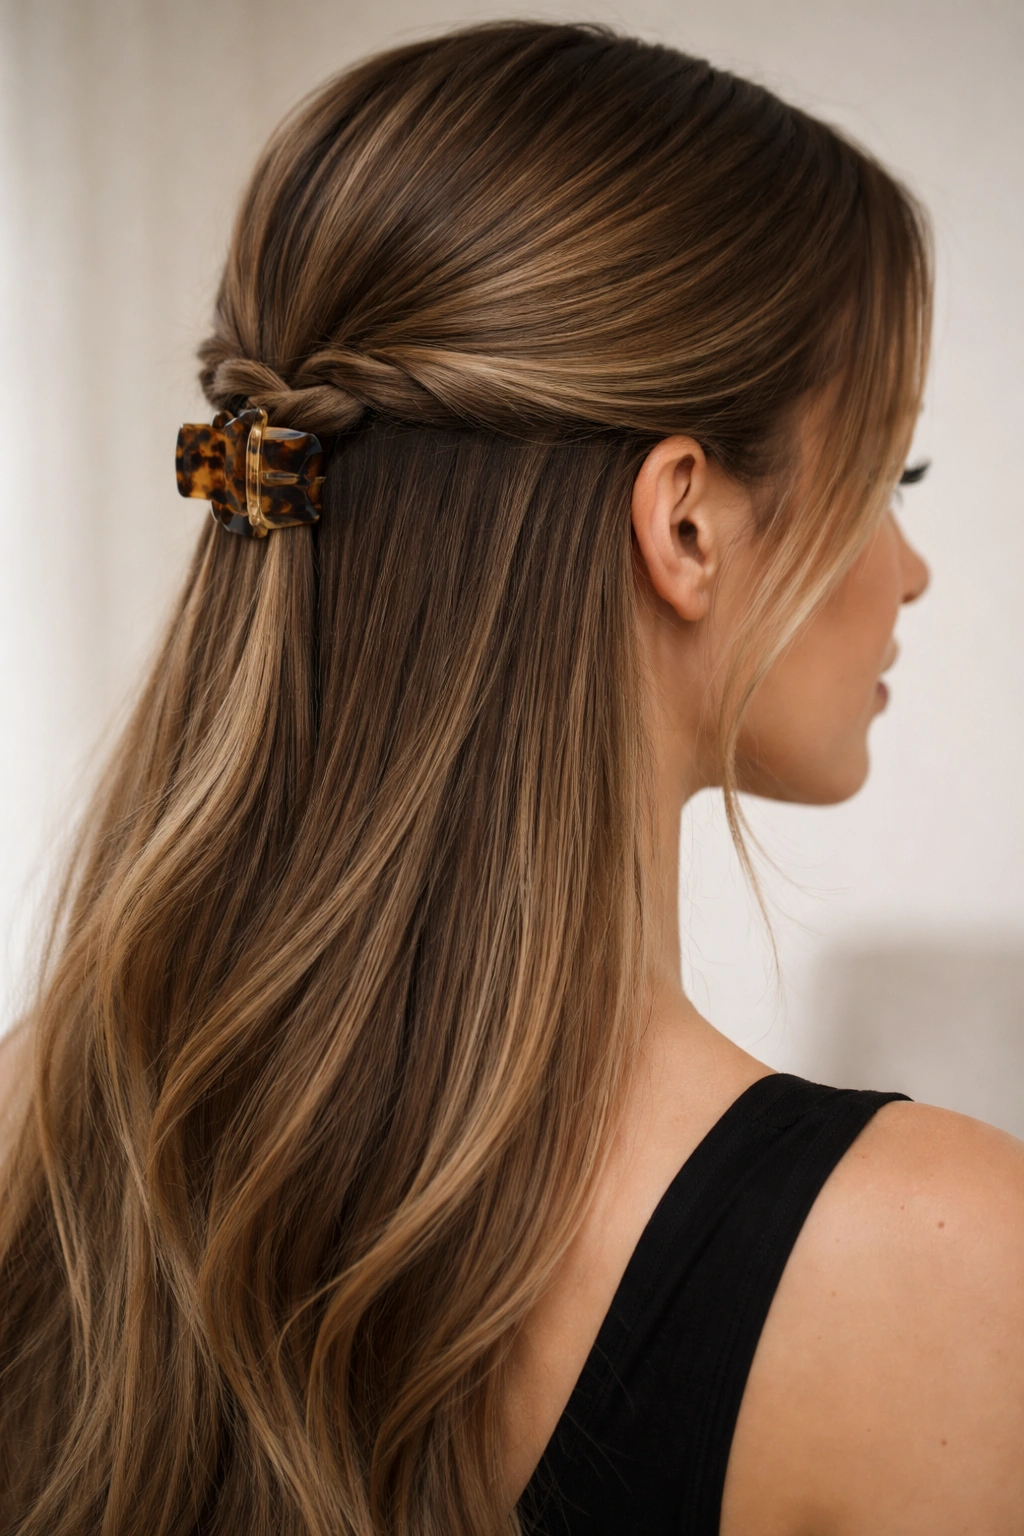
2. The Twisted Crown Effect
Add a single twist through your upper section and you’ve transformed the basic half-up into something with genuine visual interest. Start with a section from temple to temple, but this time divide it in half vertically—left and right sides of the crown. Twist each side loosely around itself (not tight, just a gentle rope), then bring both twisted pieces to the back and secure them together with one clip, letting the twisted texture show from behind.
What Makes This Style Stand Out
The twist creates dimension that your straight hair will showcase beautifully. Because there’s no wave texture to hide the mechanics, the twist reads as intentional artistry rather than accident. The two-piece twisted crown has a slight Scandinavian or editorial quality—it looks like you’ve spent time on it, even though it genuinely takes under two minutes. The visual flow downward from twisted crown to straight lengths creates elegant contrast.
Pro Execution Steps
- Separate your upper section into a left piece and right piece at the center of your crown
- Twist the left piece away from your face (counterclockwise if it’s your left side), keeping tension even throughout
- Twist the right piece the opposite direction to create balanced visual symmetry
- Bring both twisted pieces to the center back and secure with a single clip, adjusting so the twists stack visibly above where the clip sits
- Let 2-3 inches of the twisted tails hang below the clip for movement
Worth knowing: Slightly damp hair holds a twist longer. If your style is dropping by mid-afternoon, dampen that section, re-twist, and clip again—the entire process takes 30 seconds.
3. The Braided Half Up Twist
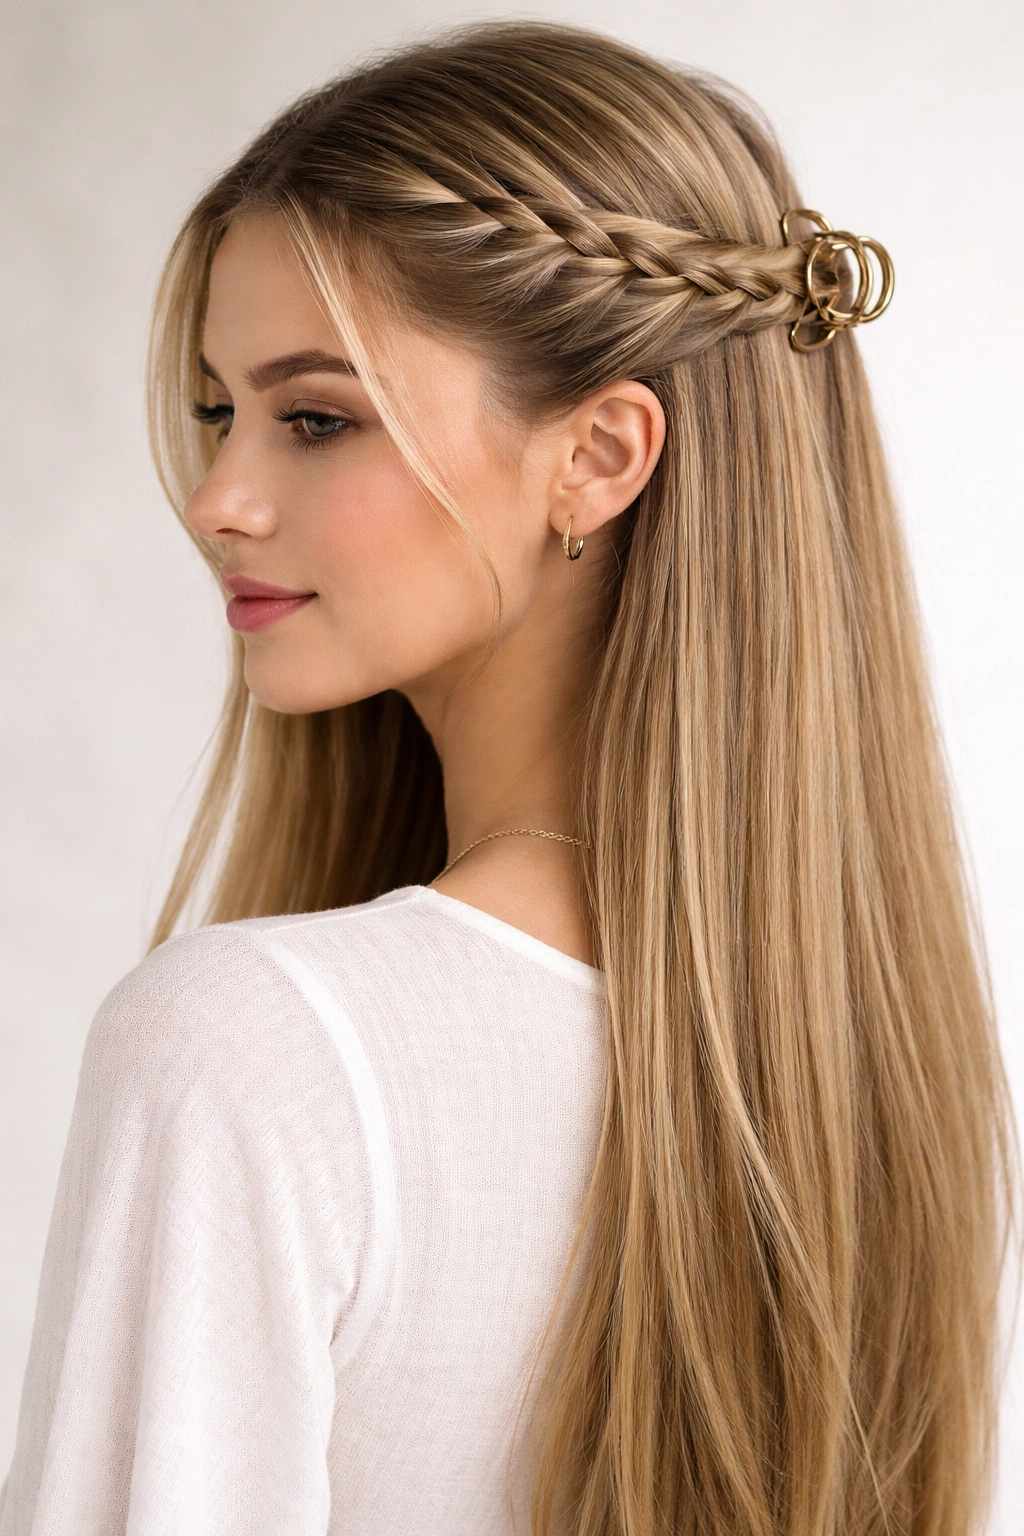
A half-up braid is technically different from a half-up twist, and straight hair displays the braid structure with exceptional clarity. Start your section from temple to temple, divide it into three strands, and braid downward from the crown. The braid should travel to about ear-length, where you gather everything—the braid plus the remaining unbrained section—and secure with a single clip. This creates a finished, intentional look that reads as “I know how to braid.”
The Science Behind the Visual
Braids create their own structural interest independent of your hair’s natural texture. On straight hair, every loop and cross-over reads clearly and sharply, making even a loose braid look polished. The braid adds volume perception at the crown (because you’re interweaving strands rather than just securing them flat), while still keeping your face clear. The clip sits where the braid ends, and you have that beautiful transition from braid structure to flowing straight lengths.
Exact Steps for This Style
- Create your temple-to-temple section and divide into three equal strands at the crown
- Braid downward with medium tension—too tight looks harsh, too loose looks undone on straight hair
- Braid down to approximately ear level, then gather the braid plus all remaining hair beneath it
- Clip everything together at that gathering point, using a clip large enough to hold both braid and regular hair
- Gently pull each loop of the braid slightly wider to add fullness—this is called “plopping” the braid
Insider note: If your braid feels flat against your scalp, you’re pulling too tightly on the outer strands. The braid should have visible dimension and air between each layer.
4. The Voluminous Bubble Half Up
This is the style that transforms straight-haired flatness into bounciness. Section from temple to temple, clip as normal, then use a teasing brush or fine-tooth comb to create intentional texture throughout that upper section—both before and after clipping. The key is strategic teasing: target the roots, the middle section, and even the underside of the clipped area where nobody will see it but you’ll feel the grip and hold.
How Texture Changes Everything
Straight hair can sometimes feel slick or under-textured, but deliberate teasing creates grip and fullness. When you tease an upper section that’s about to be clipped, you’re increasing the surface area and giving the clip more hair to hold onto. The visual effect is a lifted, voluminous crown section that catches light differently than the flat, straight lengths below. It’s theatrical without being overdone, and it works for both casual and dressed-up occasions.
Building the Bubble Effect
- Section temple-to-temple and pull it up into your gathering hand, not yet clipped
- Using a fine-tooth comb, tease the underside of this section at the crown (the part that will be hidden)—this is your grip layer
- Tease the middle of your section lightly in several spots to create texture throughout
- Smooth the very outer layer with a fine comb so it looks polished on top, while the underneath has structure
- Clip into position, then gently pull outward on the clip to create a slightly blown-out, lifted effect
Worth knowing: Teasing and then clipping works better than clipping first and teasing after. You want the texture to support the clip, not be pulled tight against your scalp.
5. The Side-Swept Half Up
Instead of gathering directly at the crown, sweep your upper section to one side—left or right depending on your face shape and hair part—and clip it there. This creates an asymmetrical, intentionally off-balance look that reads as more sophisticated and less “girl with hair clipped back.” Start your section at the temple on your favored side, sweep it across the back of your head, and clip at the opposite side where it naturally lands.
Why Asymmetry Feels More Polished
The human eye finds asymmetry more interesting than perfect symmetry, even subconsciously. A side-swept half-up feels modern and intentional in a way that dead-center doesn’t. On straight hair, the asymmetrical placement is incredibly clean—there’s no texture to soften or blend the off-center clip, so it reads as a design choice rather than accident. This style works especially well if you have a side part naturally; it becomes a continuation of that line.
Mechanics of the Sweep
- If sweeping to the right, start your section at your left temple and gather as you sweep backward
- The clip should sit roughly where your right ear is, maybe slightly lower—this is where gravity and visual balance converge
- Let face-framing pieces fall naturally on the side you’re sweeping away from
- Brush the swept section so it has a smooth, deliberate quality—no frizz or escaped pieces
Pro tip: A slightly smaller or more delicate clip works better for side-swept styles. A massive clip on one side can feel heavy; a proportional one feels intentional.
6. The Double Claw Clip Half Up
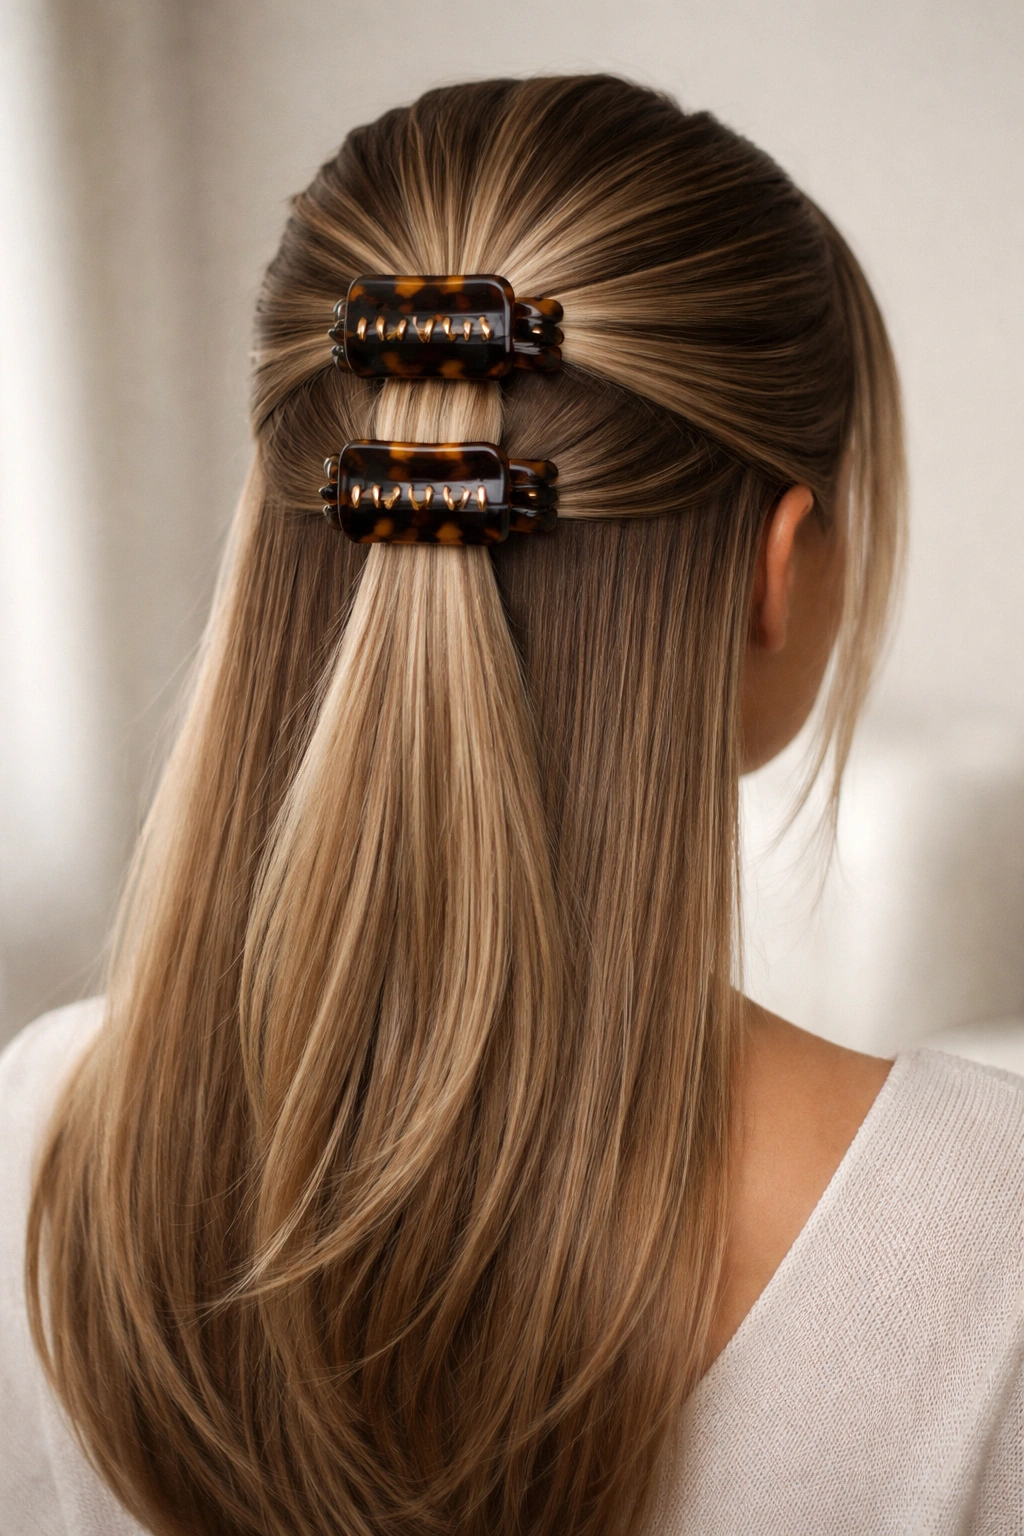
Use two clips instead of one, positioning them vertically (one slightly higher, one slightly lower) within the same section. This creates visual interest, distributes the weight of your section across two points, and honestly just looks cooler. The trick is making sure both clips are facing the same direction and that the lower clip overlaps slightly with the upper one so they feel intentional rather than accidental.
The Styling Benefit of Doubling Up
Two clips hold significantly more hair securely than one, which means you can clip a thicker or longer section without worrying about it sliding down. But beyond function, two clips create a visual statement. They look editorial, fashion-forward, and deliberately styled. On straight hair, the clips themselves—especially if they’re different colors or finishes—become design elements. The gaps between clips create line and rhythm.
How to Position Two Clips Successfully
- Gather your upper section and clip the top clip at the crown, facing backward
- Directly below it, clip a second clip so it slightly overlaps with the first (maybe ½ inch down)
- Make sure both clips are parallel and facing the same direction
- Choose clips that either match (clean, intentional look) or deliberately contrast (statement look)
- Test the hold by gently tugging on your hair—if it slides, you need thicker clips or you’re not securing enough hair
Worth knowing: Two smaller clips often hold better than trying to use two large ones. The pressure distributes better and the hair is less likely to slip.
7. The Sleek Low Half Up with Texture
Keep your clip placement lower than traditional half-up—roughly at the nape of your neck where a low ponytail would sit—while maintaining the temple-to-temple section. The lower placement creates a different visual rhythm, makes your face feel more open, and adds sophistication because it’s less obviously “young.” Add subtle texture (a single loose braid, soft twists, or gentle waves) to the clipped section to contrast with the straight lengths flowing below.
Why Lower Placement Changes the Entire Look
Higher clips feel youthful and playful; lower clips feel elegant and deliberate. A low half-up with texture in the clipped section creates a look that works equally well for professional settings, special events, or just everyday sophistication. The lower position means the clip doesn’t interrupt your crown line, so you maintain visual height while still pulling hair off your face. On straight hair, this creates a beautiful vertical line from top to bottom.
Building a Low Half Up With Texture
- Create your temple-to-temple section, but gather it lower (toward the nape)
- Within that section, add texture through loose braiding, light twisting, or wave-making
- The straight lengths below the clip remain pristine and sleek—zero manipulation
- Clip at your gathered point, using a clip that sits neatly without catching flyaways
- Brush the straight lengths below until they’re mirror-smooth, allowing beautiful contrast
Pro tip: This style benefits from starting with very freshly washed hair that’s completely dried. Straight hair shows product buildup, and a low style brings attention to the nape—you want that area completely clean.
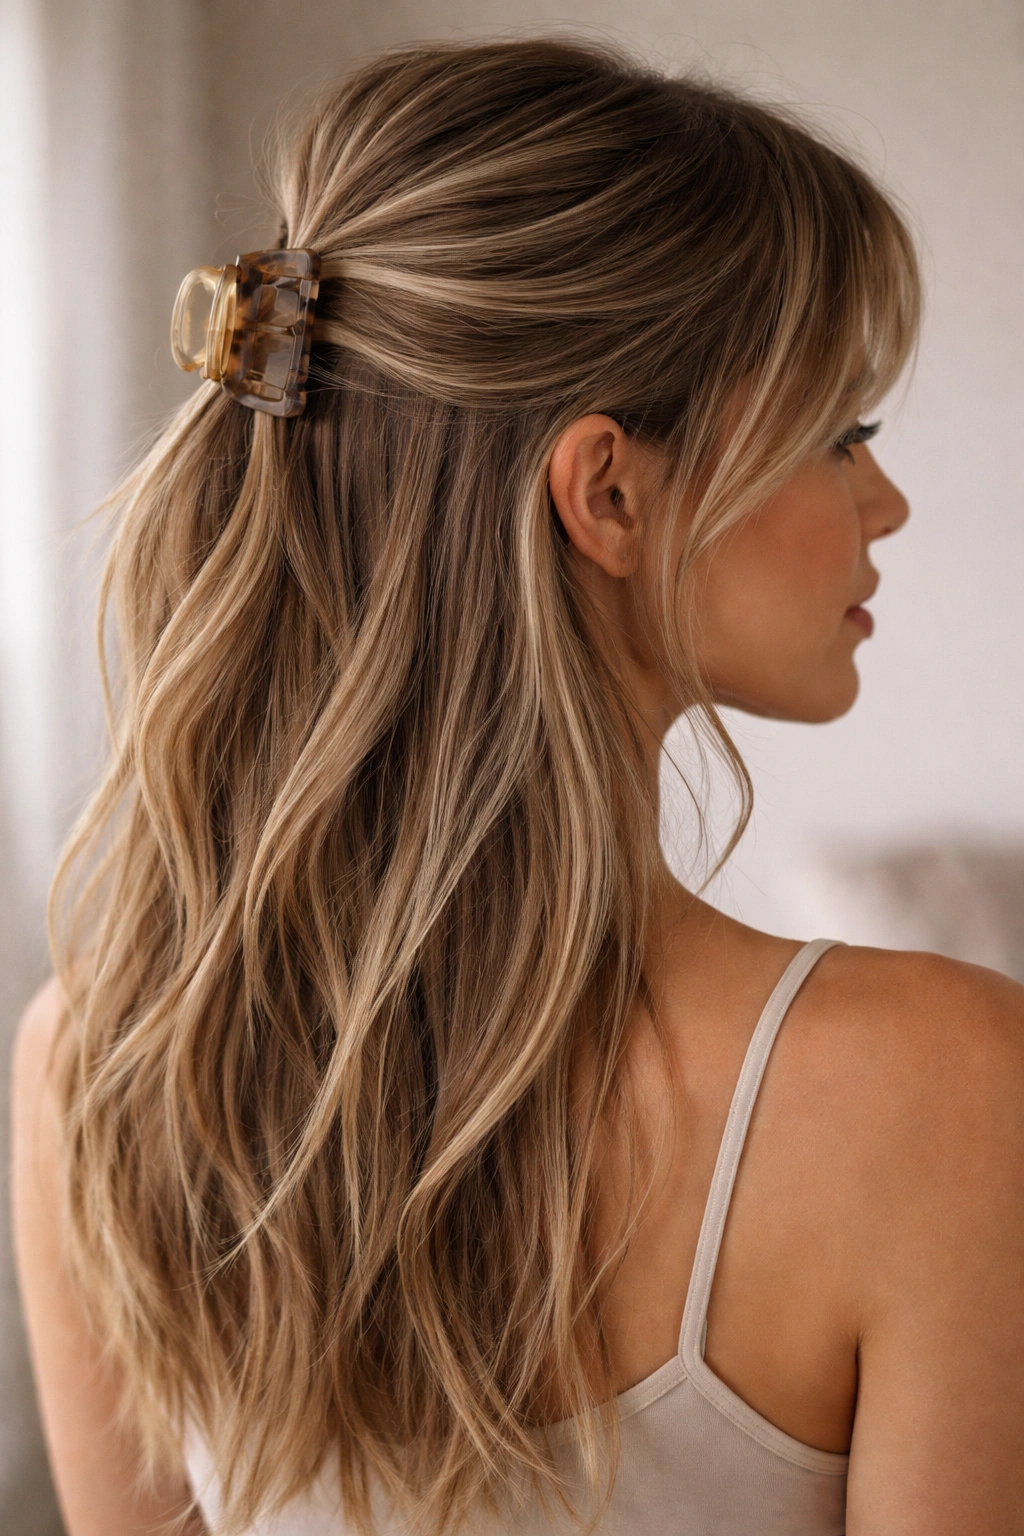
8. The Fluffed Half Up with Face Frame
This style keeps the sides of your hair completely out of the upper section—your face-framing pieces stay down and loose throughout the entire style. Gather only the hair at your crown and back, clip it, then tease and fluff that clipped section upward for volume. The result is a lifted crown with soft, straight pieces framing your face. It’s romantic and deliberate, with none of the sleekness of a traditional half-up.
The Face-Framing Advantage
By keeping substantial pieces of hair down around your face, you create a softer, less severe look than a traditional half-up. The straight texture of those face-framing pieces falls in clean lines, which works beautifully whether you have a round face, angular face, or anything in between. The height at the crown contrasts with the soft sides, creating dimensional visual interest. This is the style that makes straight hair feel effortless rather than controlled.
How to Achieve the Fluff Without Mess
- Leave at least 2-3 inches of hair on each side of your face completely out of your gathering section
- Your section should be roughly from ear to ear across the back/crown, leaving the entire front and sides free
- Clip this back section, then gently tease the crown area above the clip
- Use your fingers to fluff and lift the clipped section, creating what looks like casual volume
- Smooth your face-framing pieces so they’re sleek and intentional, creating contrast with the fluffed crown
Worth knowing: The fluff works because of the tease underneath. Without the understructure, you’re just creating a messy situation. Tease strategically, then fluff on top of that foundation.
9. The Fishtail Braid Half Up Half Down
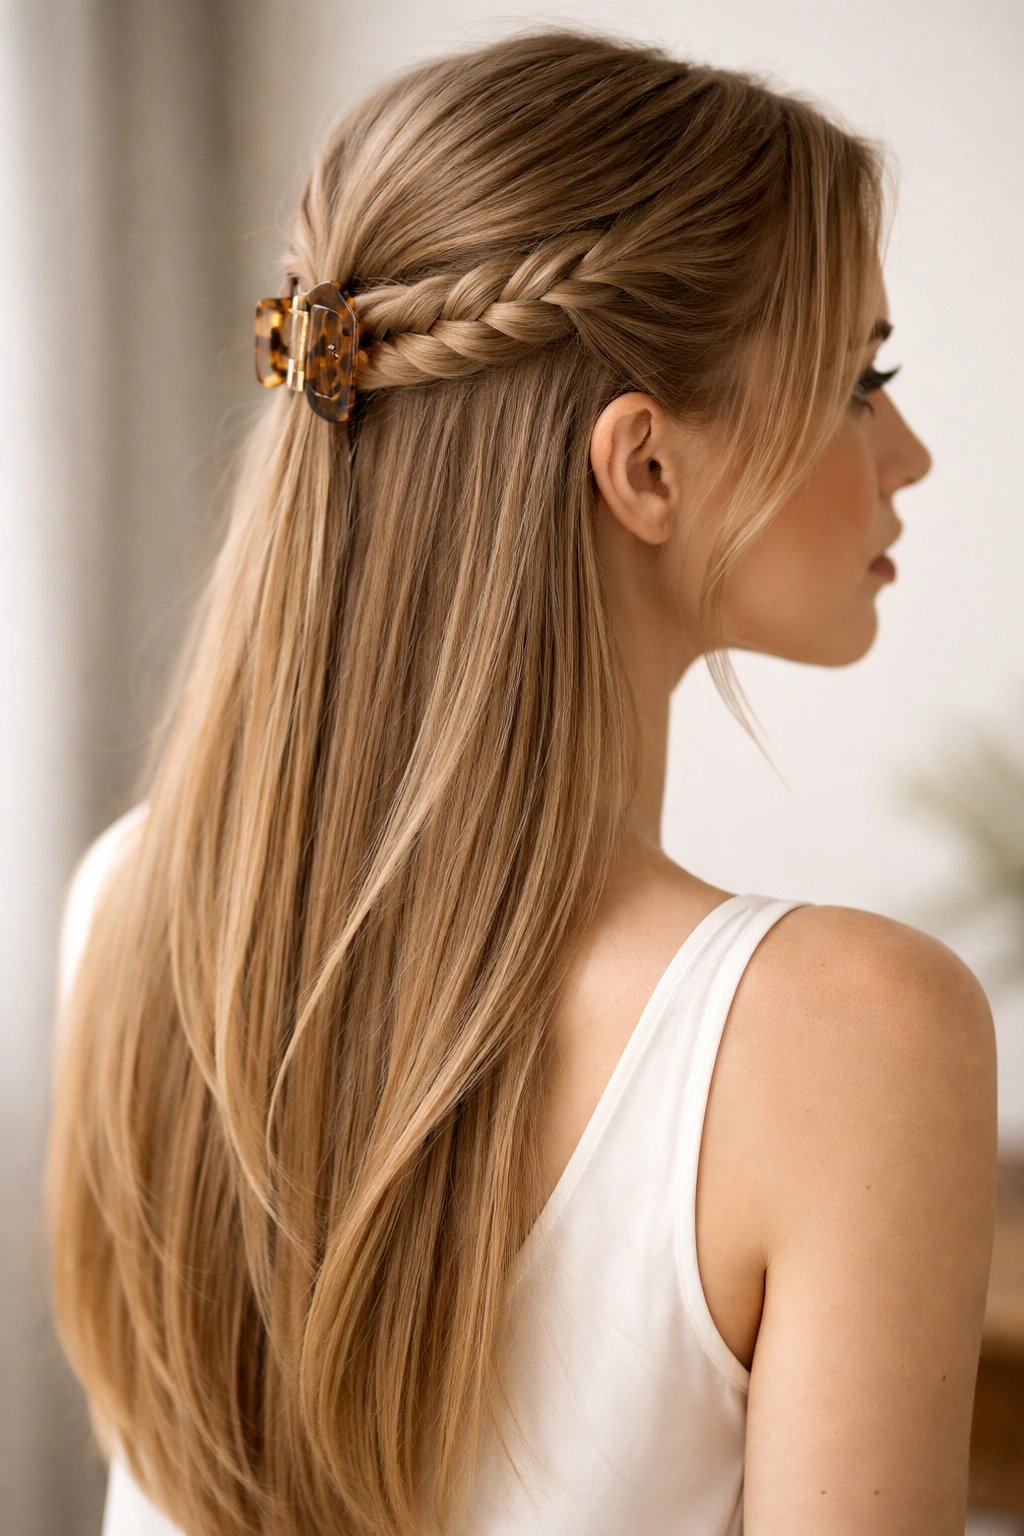
Replace the basic braid with a fishtail braid for more visual interest and a more sophisticated appearance. Fishtail braids look complicated but are actually easier than traditional three-strand braids, and they photograph beautifully. Start your temple-to-temple section, create a fishtail braid down to ear-level, then gather and clip everything together. The fishtail creates lacy, woven detail that’s absolutely stunning on straight hair.
Why Fishtail Braids Elevate the Style
A fishtail braid is wider and airier than a traditional braid, creating more visual surface area. The interlocking pattern reads as more intricate and intentional, even though it’s technically less technical than a three-strand. On straight hair, every detail of the fishtail pattern shows clearly—the woven texture, the dimension, the slight flair at the bottom where it widens. This style feels elevated without requiring any special skills beyond basic braiding.
Executing the Fishtail Half Up
- Create your temple-to-temple section and divide it into two equal sections (not three—that’s the key difference from traditional braiding)
- Take a small piece from the outside of the left section and cross it over to the right section
- Take a small piece from the outside of the right section and cross it over to the left section
- Continue alternating—small outside pieces crossing over—until you reach ear level
- Gather the fishtail braid plus remaining hair and clip everything together
- Gently pull the loops of the fishtail to make it slightly wider and airier
Insider note: Don’t make your fishtail too tight. The beauty of this braid is its slight looseness and the way it has dimension. Medium-loose tension is exactly right.
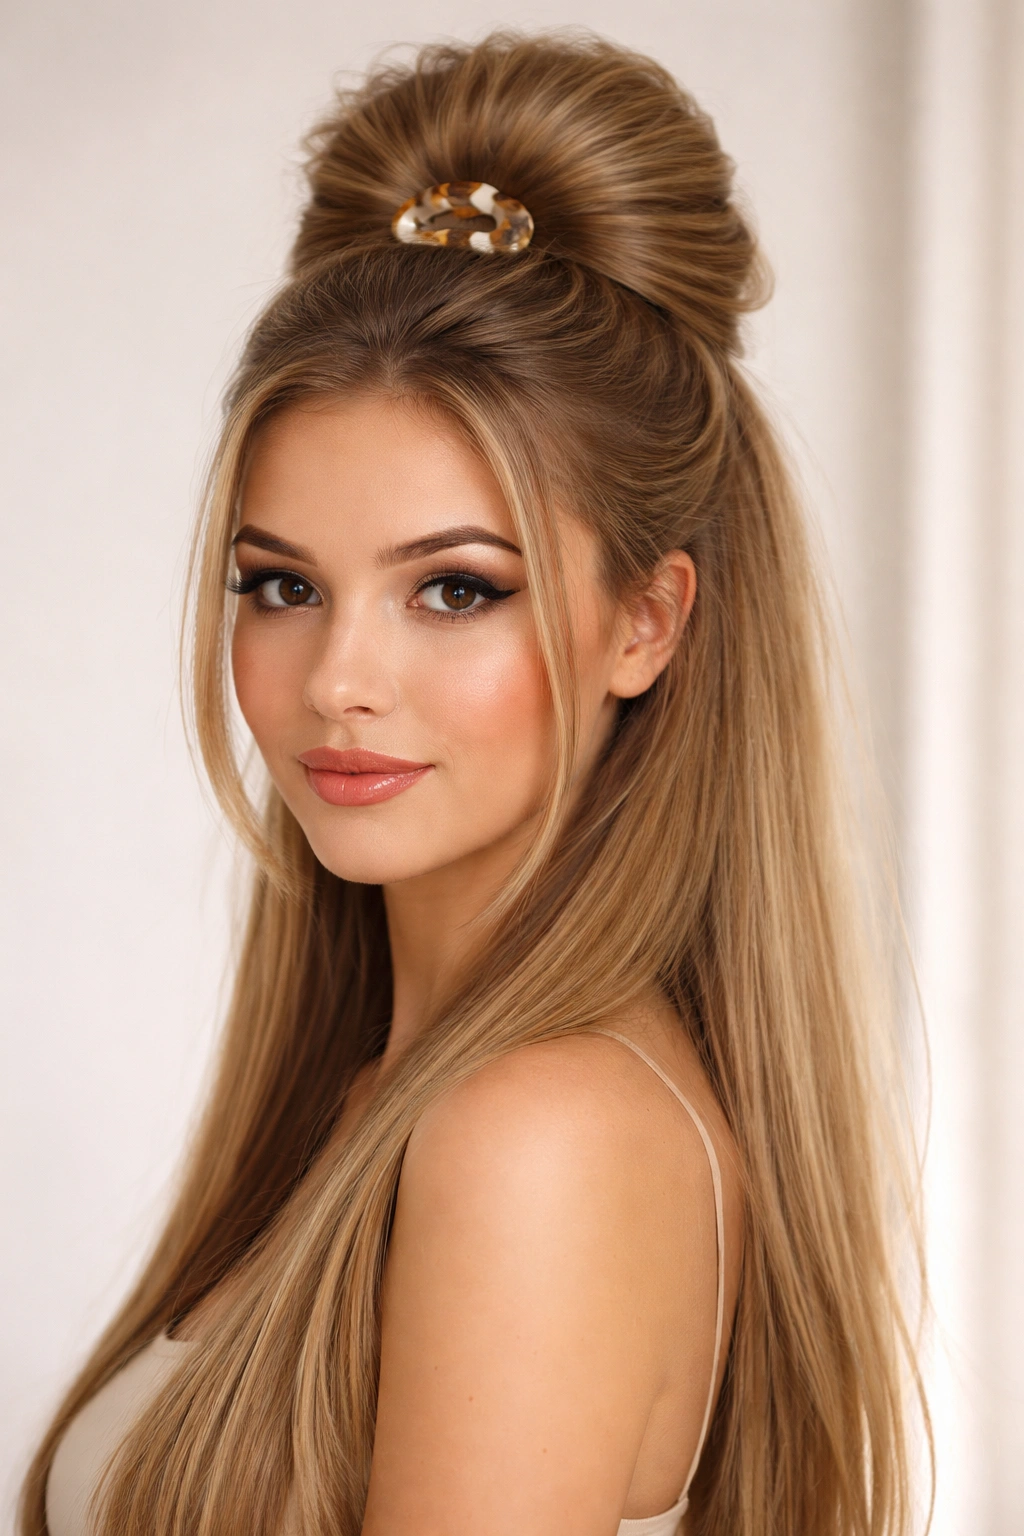
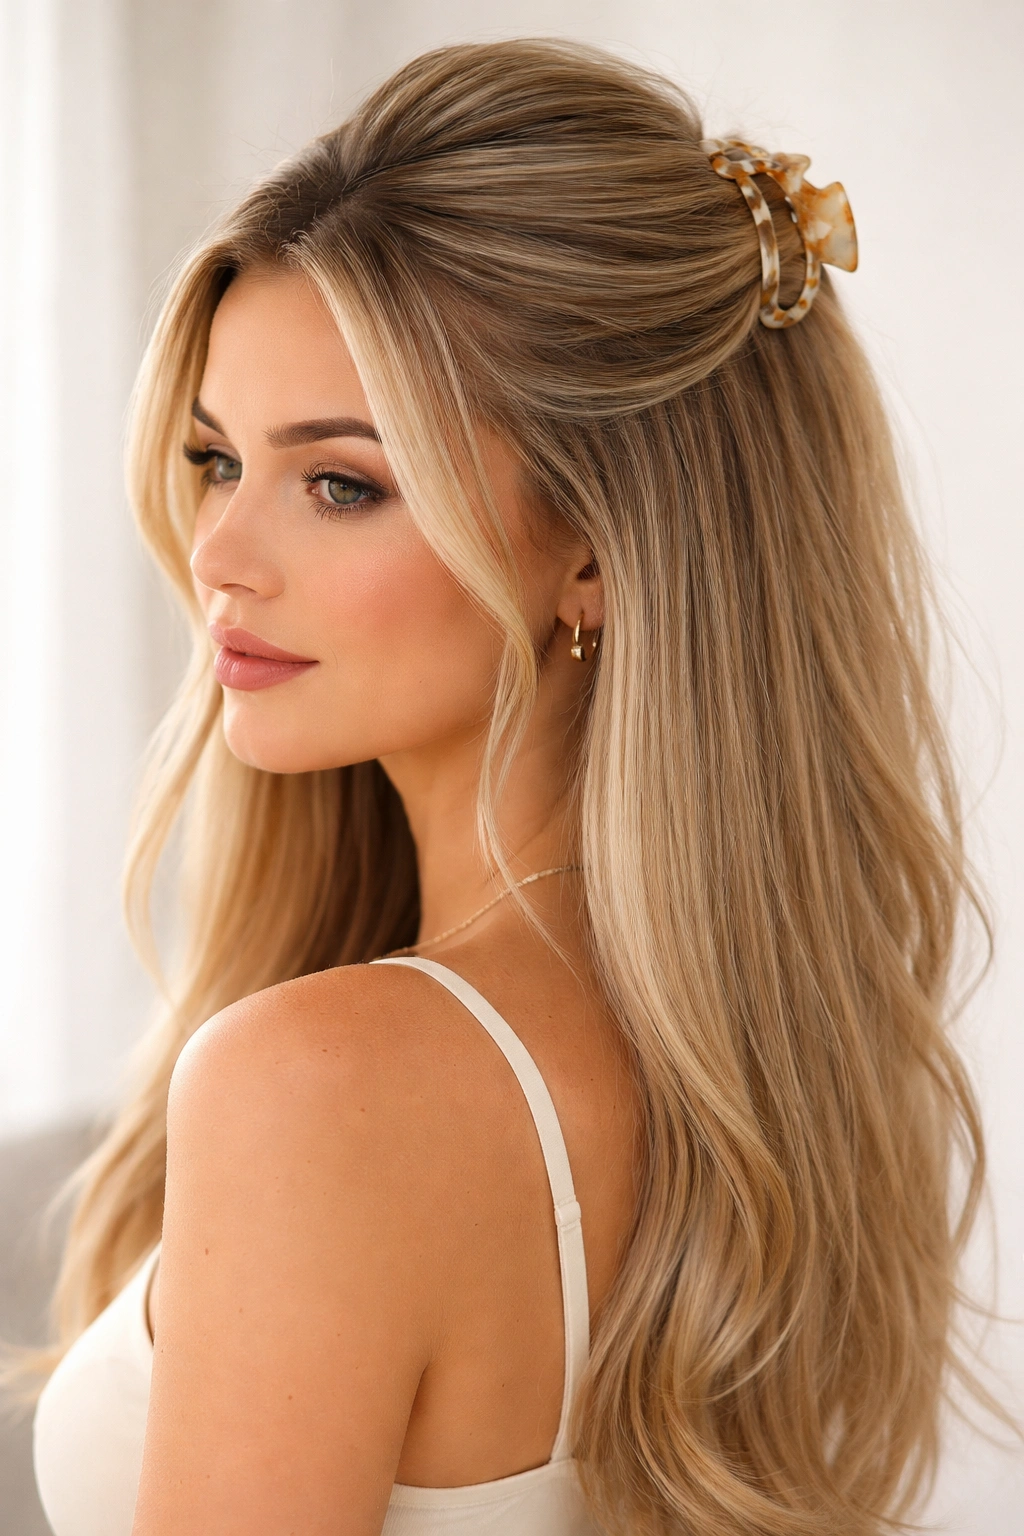
10. The Clipped Ponytail Hybrid
This is technically not a traditional half-up because you’re clipping almost all of your hair, but it’s styled to feel like a half-up. Gather a higher, fuller section (from your part line down to your lower crown area), clip it, then gently brush and flip your lengths to create a soft, flowing effect that reads like your hair is mostly down. The clip is visible as a statement piece, but the overall effect is still half-up energy.
The Visual Magic of the Hybrid
Most people think of half-ups as having exactly 50% clipped and 50% down, but a hybrid version can shift that ratio while still feeling like a half-up. This style gives you the versatility of a ponytail (everything secured and neat) with the softness of a half-up (visible length, flowing quality). On straight hair, the geometric cleanliness of a full clip contrasts beautifully with the soft, straight lengths below. The clip becomes a sculptural accent rather than purely functional.
Building the Hybrid Look
- Gather a section that feels bigger than a traditional half-up—from your front hairline to your lower crown
- Clip this section firmly so it’s completely secure and won’t slip
- Gently brush out the lengths below the clip until they’re completely smooth and flowing
- Flip your head upside down and run your fingers through the clipped section to create softness and volume
- Flip back, adjust any flyaways, and check that the clip sits at a flattering angle
Worth knowing: The clip needs to be completely secure because you’re trusting it with a heavier load than a traditional half-up. Choose a clip with strong, gripping teeth.
11. The Curved Front Section Half Up
Instead of gathering your section straight back to the crown, gather it on a slight curve—starting lower on one side, traveling diagonally backward, and ending higher on the opposite side. This creates an asymmetrical, fashion-forward line that’s more interesting than a straight horizontal section. The curve follows the natural line of your head shape and can be customized based on your bone structure.
Why Curves Feel More Sophisticated
A straight line is basic; a curve is intentional design. By gathering your section on a diagonal curve, you’re creating visual movement and sophistication. The curve can follow your face shape (higher on one side to balance a wider jaw, lower on the other side for a rounder face), making this a genuinely flattering styling choice. On straight hair, the curve reads as geometric precision—it looks like you planned this, which you did.
Mapping Your Curve
- Decide which side will be higher: if you have a wide jaw, go higher on your wider side; if your face is round, go higher on the narrower side
- Start your section low on the side that will be lower—roughly temple height
- Gather diagonally backward and across your crown, traveling upward slightly as you move toward the opposite side
- End your section higher on the side that will be higher—maybe 2-3 inches higher than where you started
- Clip at the highest point of your curve for a clean, intentional look
Pro tip: Practice this in front of a mirror before committing. The curve should follow a line you’re genuinely happy with, not just be random.
12. The Wet-Look Half Up Half Down
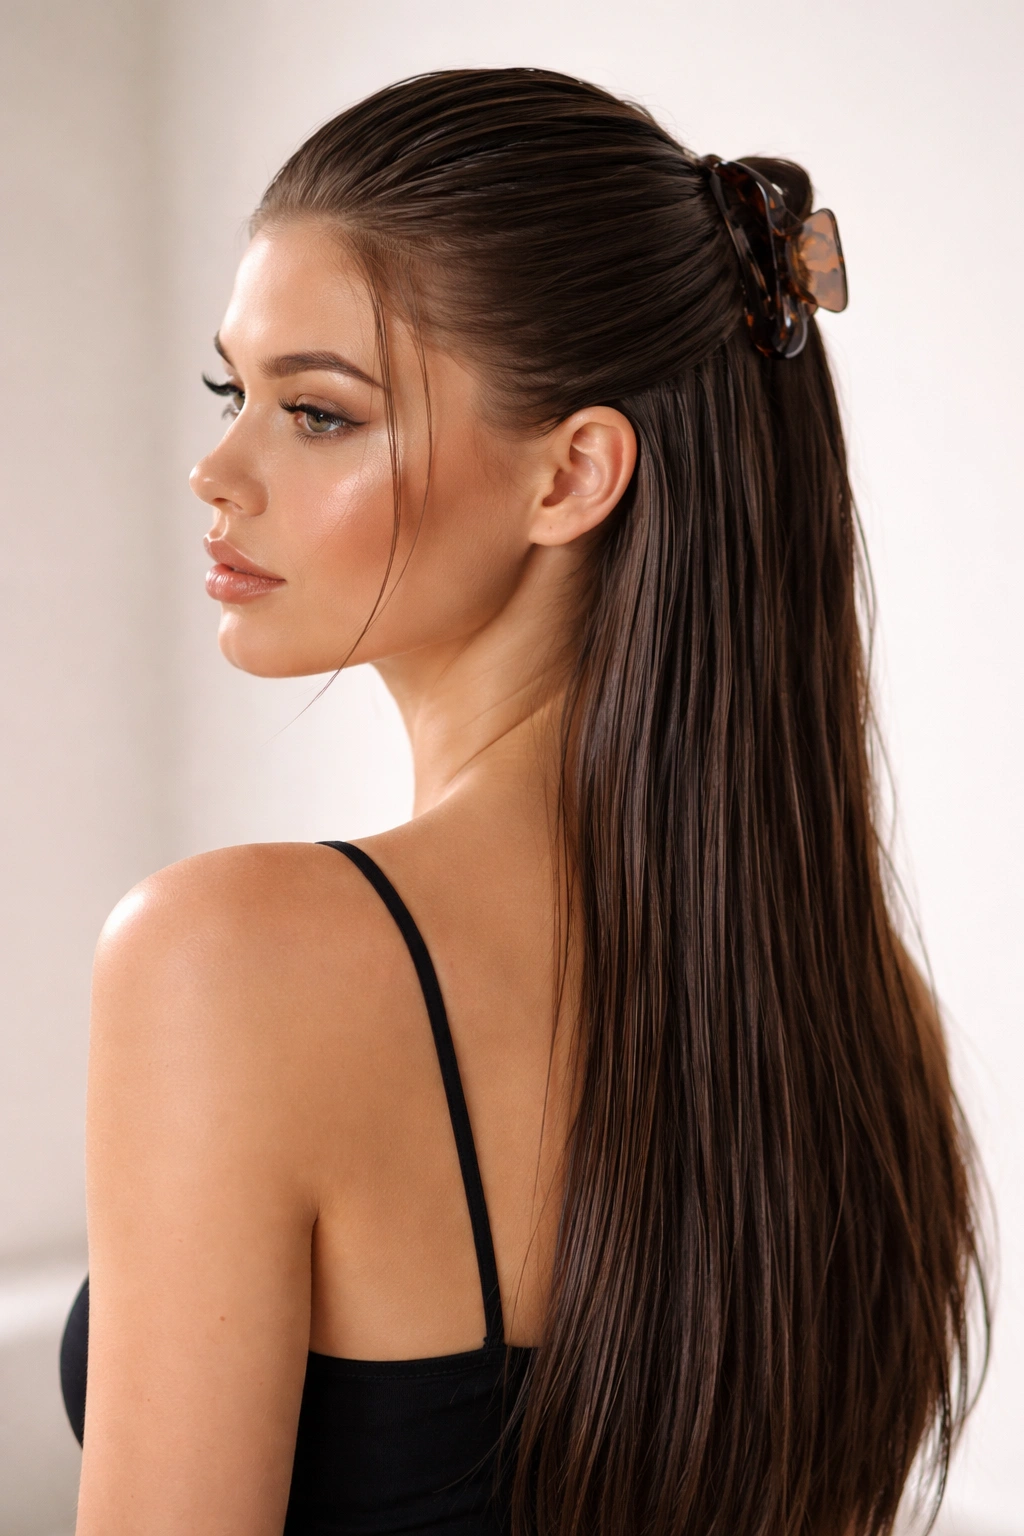
Start with damp hair and apply a lightweight gel or wet-look product throughout your lengths before styling. Then create a standard or slightly elevated half-up, keeping the clipped section slicked and smooth with product. The wet-look aesthetic is contemporary, editorial, and incredibly striking on straight hair. The contrast between the glossy, product-defined upper section and the clean, straight lengths below is pure style.
The Modern Edge of Wet-Look
Wet-look styling feels current and intentional—it says you’re aware of contemporary trends and executing them with confidence. On straight hair, the product definition reads as intentional artistry rather than accident. The glossy finish reflects light and adds dimension without relying on natural texture. This look works for both artistic, editorial vibes and sleek, professional polish, depending on your overall styling choices.
Creating the Wet-Look Effect
- Start with damp hair (not soaking, not dry—that in-between state after a shower)
- Apply a lightweight gel or wet-look defining product to your lengths while hair is still damp
- Rough-dry or air-dry until your hair has that wet-look shine but is mostly dry to the touch
- Create your half-up, using a smoothing gel or edge control on the clipped section for maximum definition
- Keep the clipped section slicked and precise; let the lengths below have that glossy, product-forward look
Worth knowing: Wet-look products can feel heavy, so choose formulas specifically designed for the aesthetic. Cheap gel will flake; proper wet-look products have a staying power that lasts all day.
13. The Tousled Half Up with Piece-y Layers
Create subtle, intentional texture throughout your hair before clipping—not waves or curls, but piece-y, separated texture that breaks up the solid line of straight hair. Use a flat iron to create soft bends and irregular shapes, or work a texturizing spray through damp hair before blow-drying. Then clip a half-up section, letting the piece-y texture show in both the clipped section and the lengths below.
How Texture Softens Straight Hair
Pure straight hair can sometimes feel one-dimensional; adding intentional texture creates depth and visual interest. Piece-y layers break up the solid shapes that straight hair creates, making the overall style feel less severe and more effortless. When you combine piece-y texture with a claw clip, the clip becomes even more of a statement because it sits on textured hair rather than sleek strands. This creates a look that’s both polished and relaxed.
Building Piece-y Texture Without Full Waves
- Use a flat iron to create soft, irregular bends throughout your hair—not consistent waves, but random directional changes
- Gently pull sections through a texturizing spray while hair is damp to break up the sleekness
- Run your fingers through finished hair to separate and define the piece-y quality
- Create your half-up on top of this textured foundation—the clip will hold better and look more intentional
- Let the piece-y texture show in both your clipped section and your flowing lengths for cohesion
Pro tip: The difference between piece-y texture and messy is intention and cleanliness. You want deliberate separation, not product buildup or actual tangles. Less product is better.
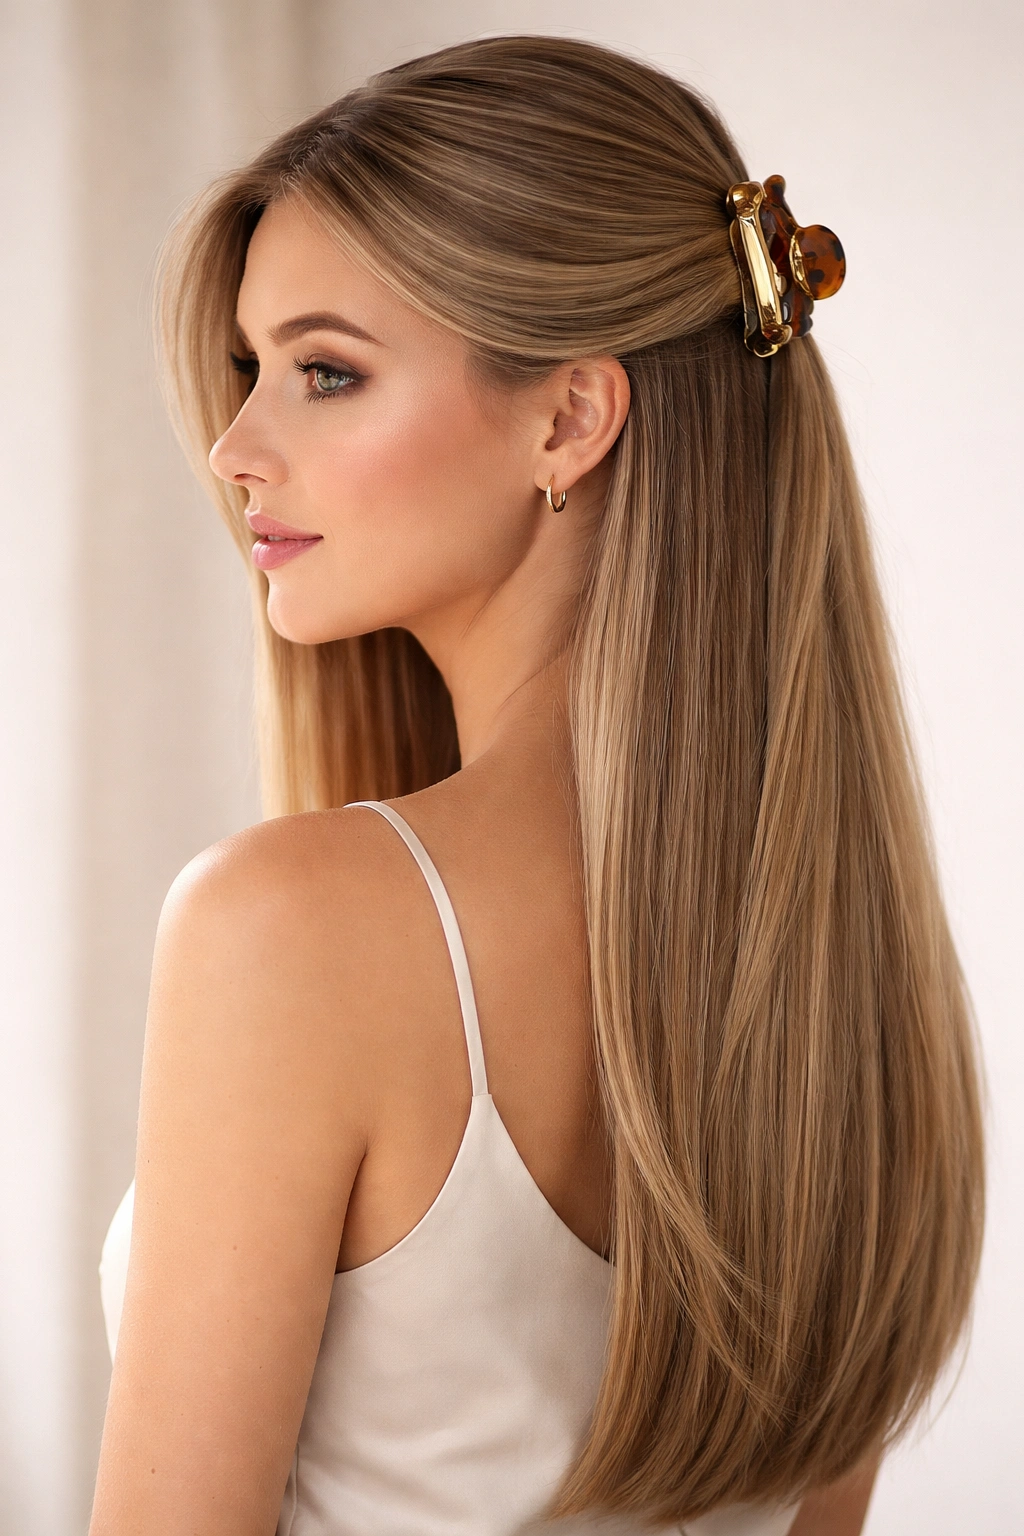
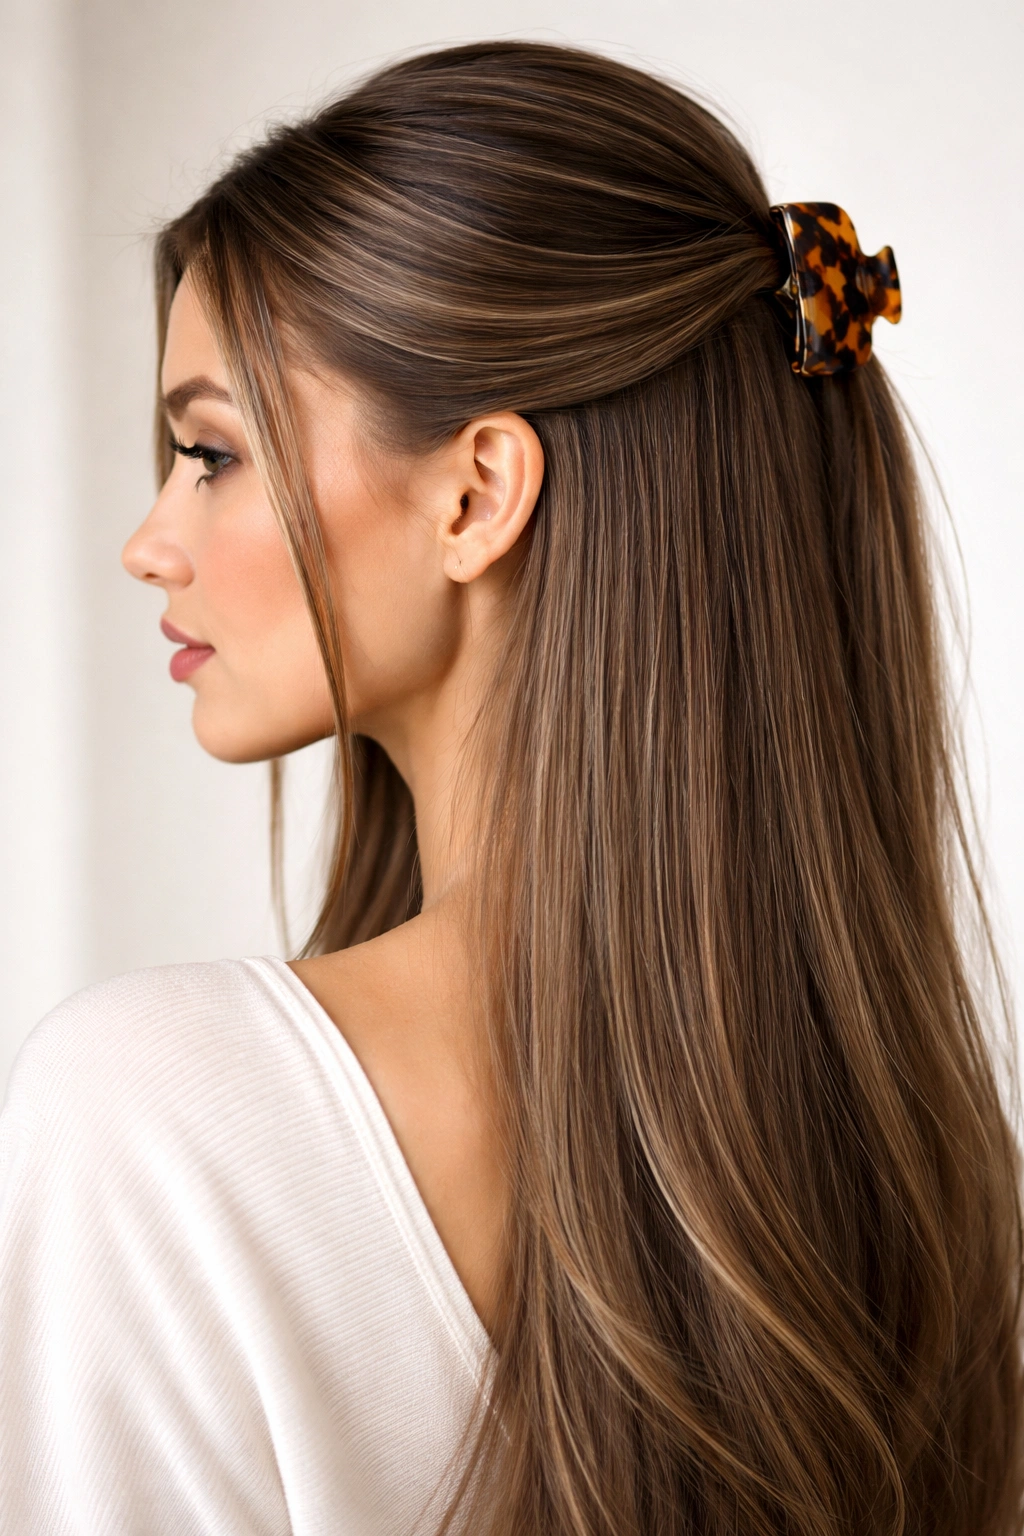
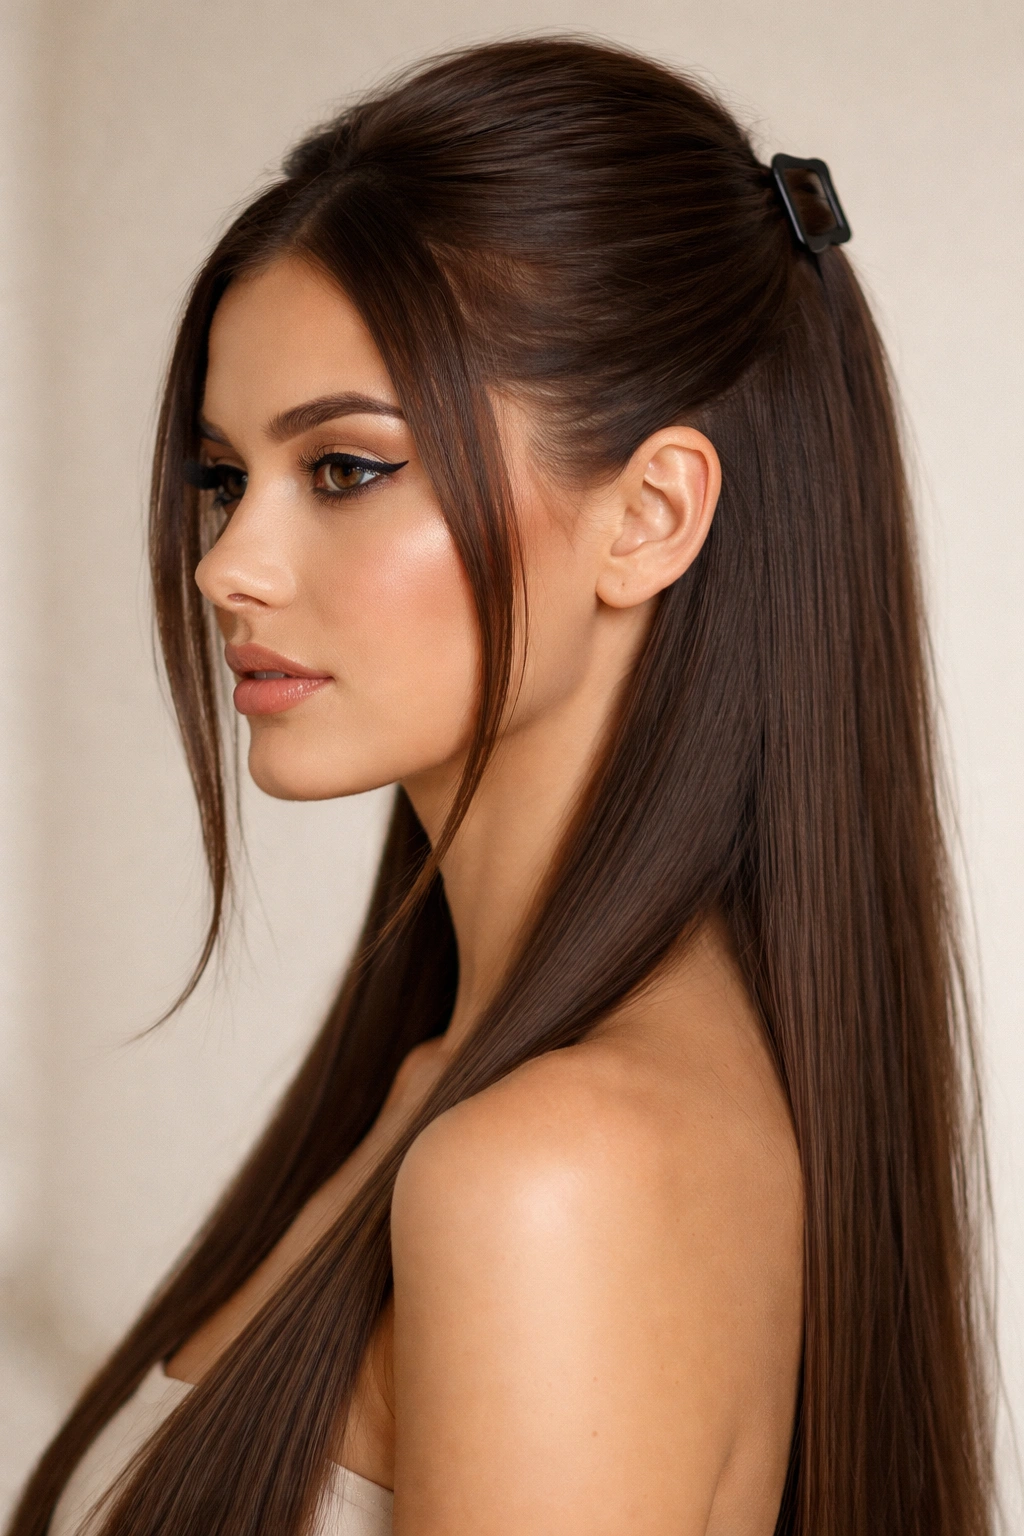
14. The Geometric Claw Clip Half Up
Make the claw clip itself the star of the look by choosing one in a bold color, interesting finish, or eye-catching shape. Position it dead-center at your crown for maximum visibility, keep your hair completely sleek and straight (zero texture), and let that clip become a sculptural accent. This is the style where your clip choice matters as much as your styling choice—tortoiseshell, metallic, neon, marble, or oversized shapes all work beautifully.
When the Accessory Becomes the Focal Point
Not every style puts the clip front and center, but this one does. By keeping your hair perfectly sleek and positioning the clip at the highest, most visible point, you’re making it a design statement. Choose a clip that complements your overall aesthetic—does your color palette run warm or cool? Do you prefer maximalism or minimalism? Does your personal style skew classic, contemporary, or experimental? Let those answers guide your clip choice.
Styling for Maximum Clip Visibility
- Section temple-to-temple, gather directly at the crown center
- Clip with absolute precision—the placement matters because this is a focal point
- Keep your entire hair completely smooth and straight—no texture to distract from the clip
- Choose a clip finish that complements your skin tone and outfit (warm golds for warm skin, silver for cool skin, etc.)
- Let your face-framing pieces fall in perfectly straight lines on either side of the clip
Worth knowing: The better quality your clip, the more impactful this style. A flimsy clip looks cheap; a substantial, well-made clip looks like intentional fashion.
15. The Minimalist High Half Up
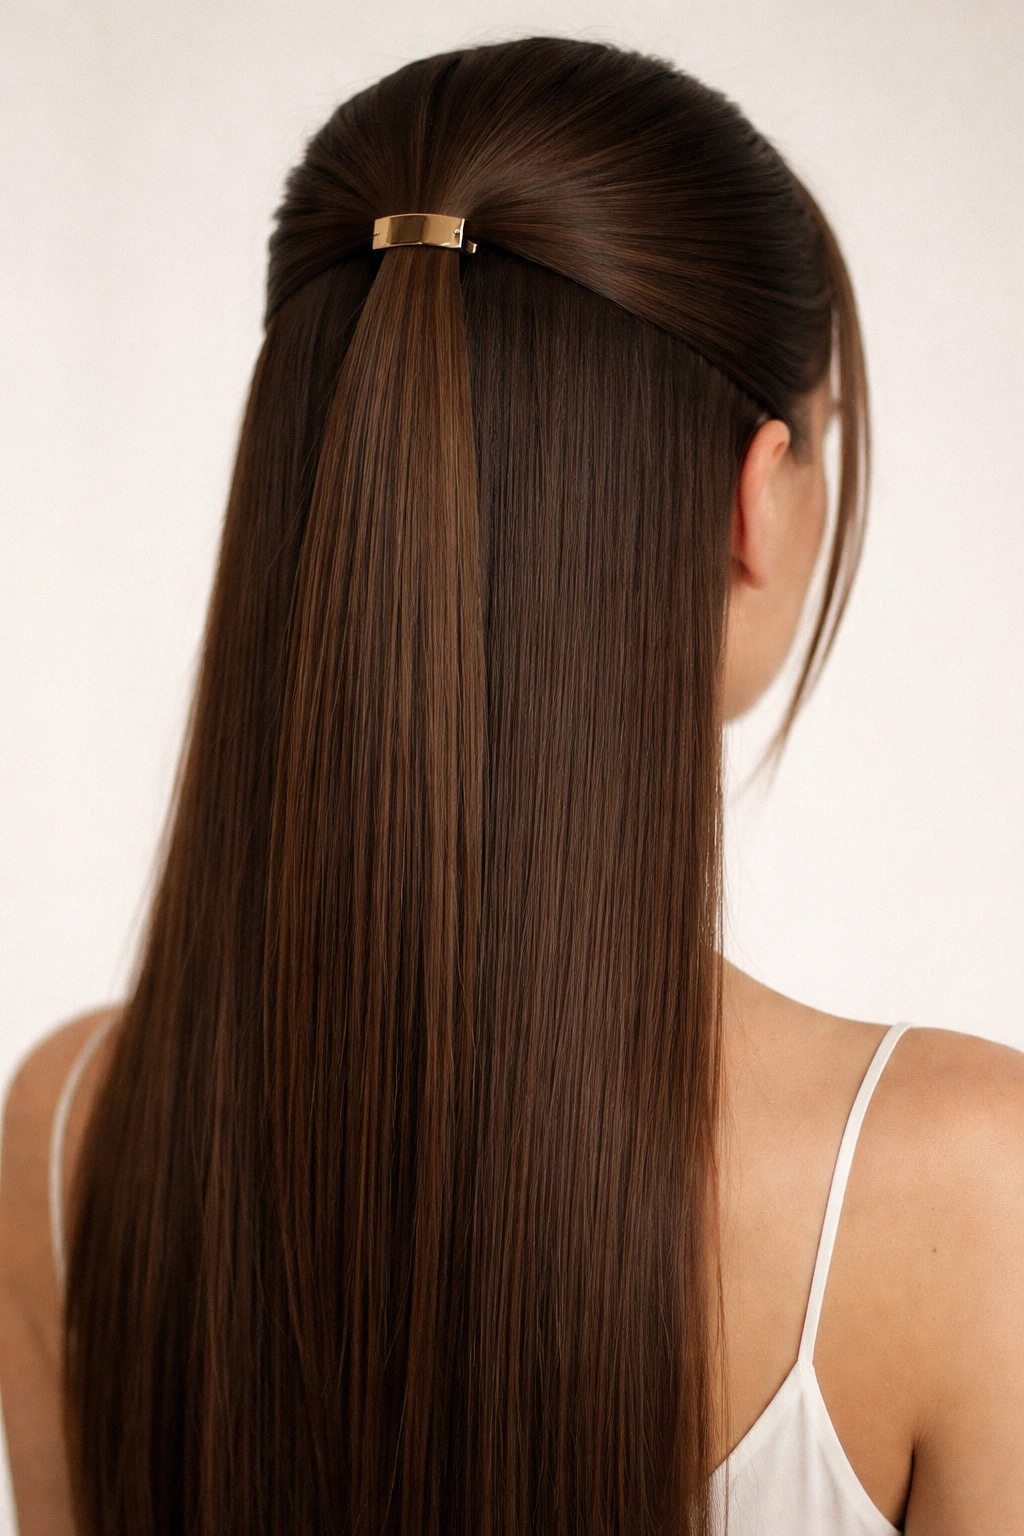
Strip everything away and go purely minimal: gather a small, precise section at the very crown, clip it with a refined, understated clip, and let everything else fall completely straight. No texture, no extra pieces, no product shine or styling flourishes—just clean geometry and the intersection of clip and hair. This is the style that works for minimalist fashion, professional settings, and anyone who values restraint over elaboration.
The Elegance of Restraint
Minimalism isn’t boring—it’s the opposite. When you choose restraint, every element that remains becomes more important. A minimal half-up on straight hair reads as sophisticated, intentional, and understated. You’re not trying to impress with multiple details; you’re relying on the quality of each element and the precision of your execution. The clip becomes pure form rather than decorated object, and your straight hair becomes a study in clean lines.
Executing True Minimalism
- Gather a relatively small section (roughly 2-3 inches width from temple to temple) at your very crown
- Clip it with a clean, unadorned clip—a tortoiseshell or simple metal finish works beautifully
- Ensure your section is pulled taut and smooth—no flyaways, no wisps, complete precision
- Keep the rest of your hair completely unstyled straight, with zero texture or product shine
- Let this be your entire styling statement—no additional accessories, no product visible
Insider note: Minimalism is harder than it looks because you have nowhere to hide imperfection. Your hair needs to be genuinely clean and healthy for this style to work. Product buildup, dryness, or damage will show immediately.
Final Thoughts
Claw clips and straight hair are a match made in styling heaven, and these fifteen looks prove that you’re not limited to one boring option. From the geometric precision of minimalist styles to the textured, dimensional chaos of tousled half-ups, the range is genuinely wide. The real secret is understanding how your straight hair interacts with the clip itself—how texture affects grip, how placement changes proportions, how the clip’s finish and color become part of your overall aesthetic.
The best part about these styles is that most of them take under five minutes once you’ve done them a couple times. A half-up is functional, practical, and solves the problem of hair in your face without committing to a full ponytail. But when you combine it with intention, understanding, and a clip that actually matches your personal style, it becomes something that people notice and remember. That’s the difference between a random half-up and a genuinely stylish one—and it’s not about expensive tools or products, just about understanding the mechanics and committing to clean execution.
Pick one of these styles and practice it three times in a row. By the third repetition, your hands will remember the exact motion, the placement will feel natural, and the whole thing will take about as much mental effort as brushing your teeth. Then you’ll have a go-to style in your back pocket for literally any occasion—and honestly, that’s worth more than a dozen hair tools or products that promise the world.