Claw clips have become the go-to accessory for anyone with wavy hair who wants to style it without damaging the texture or losing the natural movement. There’s something genuinely satisfying about the way a half-up half-down look works with waves—you get to show off the length and volume while keeping hair off your face and neck. The versatility is almost endless, too. You can wear the same style polished for work, tousled for brunch, or completely undone for a casual weekend look.
What makes claw clips so perfect for wavy hair specifically is how they grip without creating kinks or harsh creases. Unlike traditional bobby pins or tight elastics that can break your waves or leave them looking flat, a well-positioned claw clip works with your texture rather than against it. You’re holding back enough hair to be practical, but leaving enough down to let those waves do what they do best—frame your face and create movement.
The real magic happens when you understand the different ways to section, twist, or layer your hair within the half-up half-down framework. Subtle changes in where you clip, how much hair you grab, and what you do to the top section before securing it completely transform the vibe. We’re talking about styles that work for everything from a Monday morning to a Friday night out, all without needing heat tools or extensive styling time.
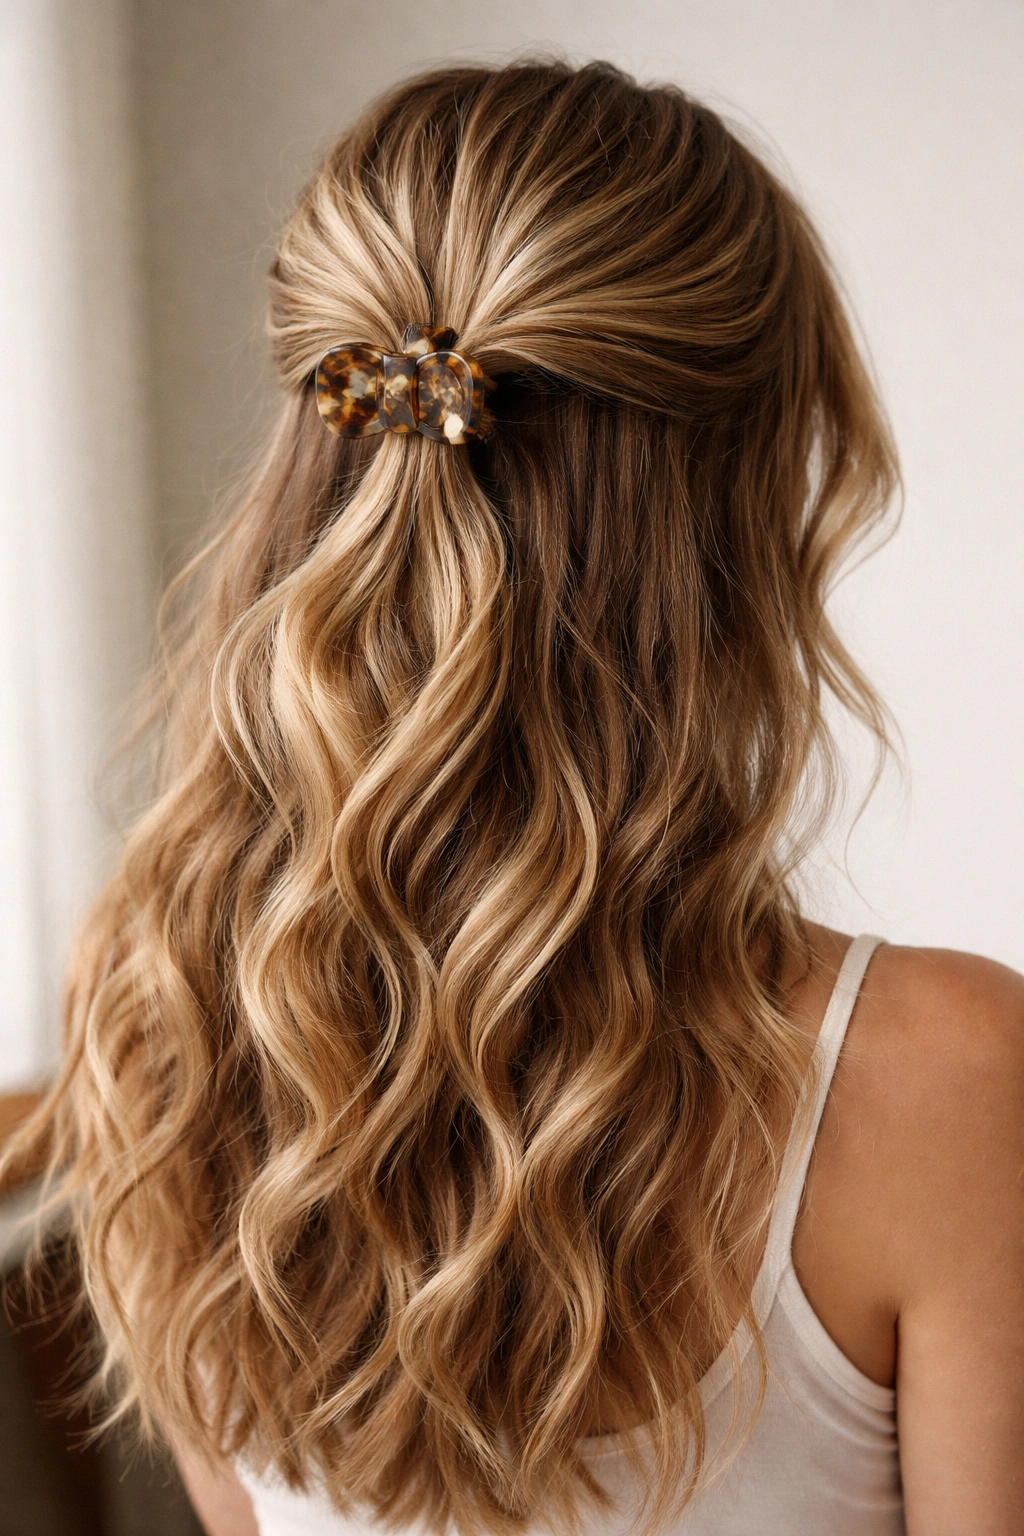
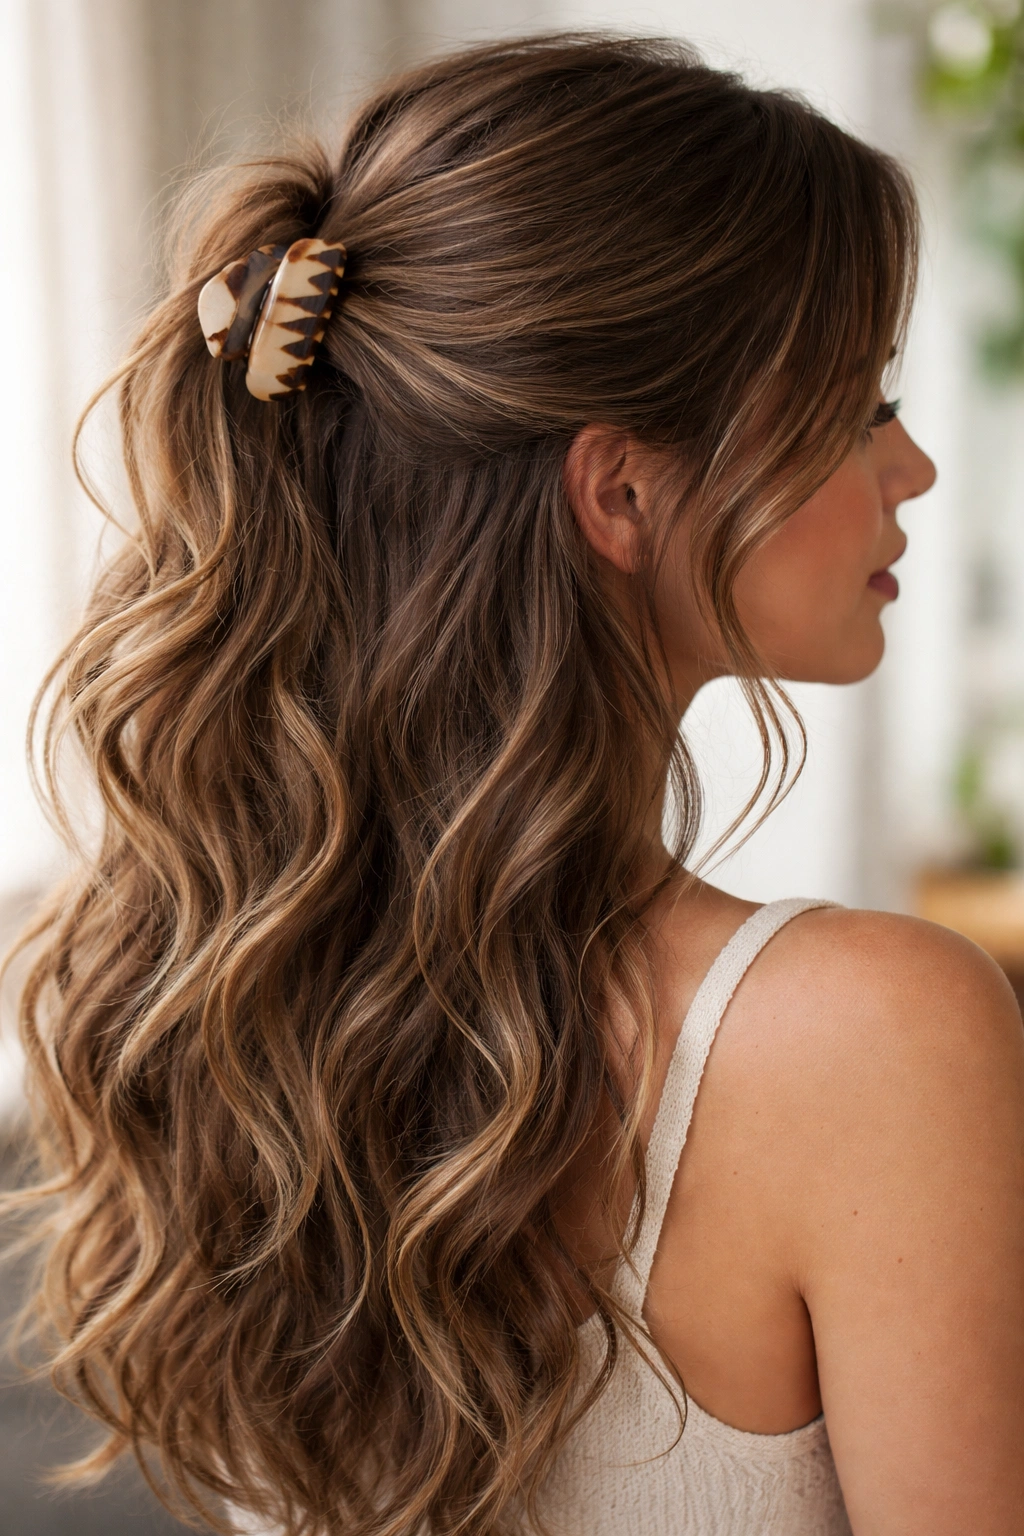
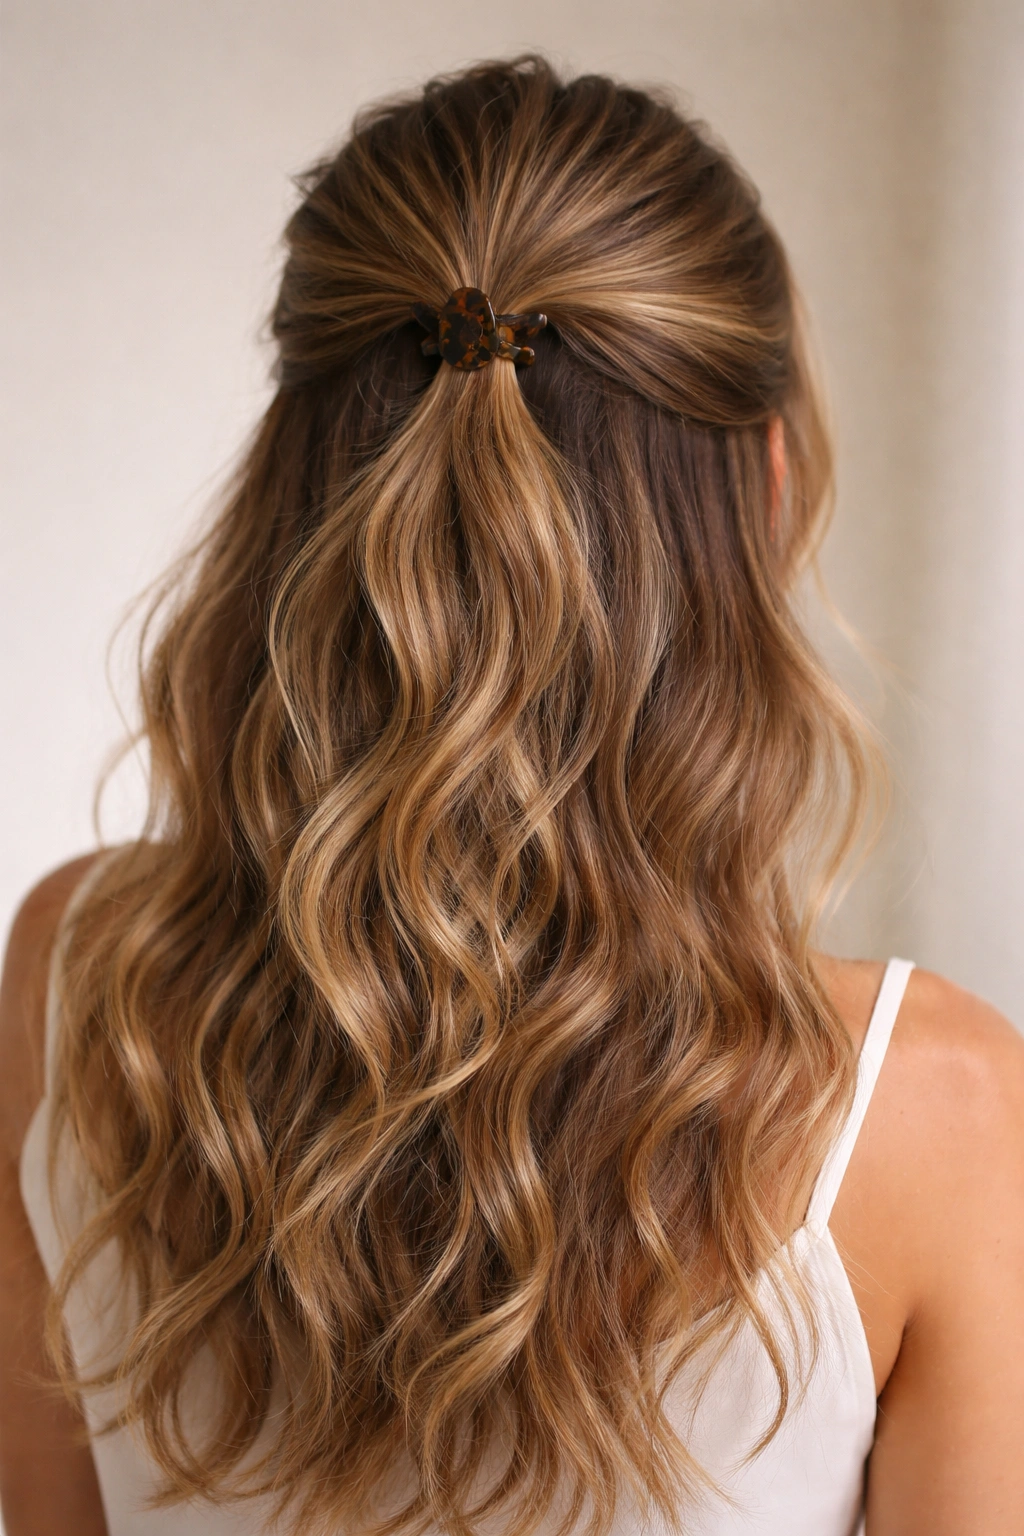
1. The Classic High Claw
The classic high claw is the foundation every wavy-haired person should master. You’re gathering the top third of your hair—roughly from ear to ear across the crown—and securing it with a claw clip positioned right at the back of your head. This style lets your waves flow completely free below while the clip sits hidden under the top layer of hair.
Why This Works for Wavy Hair
The high placement is key here. Because you’re clipping at the crown rather than trying to hold everything smoothly, the clip sits naturally among the waves without flattening them. Your bottom waves stay completely untouched and get to show off their natural pattern, while the top section creates a subtle lift and volume that makes you look awake and put-together instantly.
How to Perfect It
- Section horizontally from one temple, across the back of the head, to the opposite temple
- Flip your head back and create a small amount of texture in the gathered section by very gently scrunching it—this helps the clip grip better and keeps waves looking organic
- Position the claw clip at the exact back of your crown, slightly to one side rather than centered (this creates a more natural, less structured appearance)
- Leave a few face-frame pieces loose on each side, even if you didn’t specifically pull them out—they anchor the whole look
- Choose a clip that matches your hair color for a seamless, delicate appearance
Pro tip: Don’t pull the top section tight. Loose and slightly messy tension always photographs better and feels more comfortable.
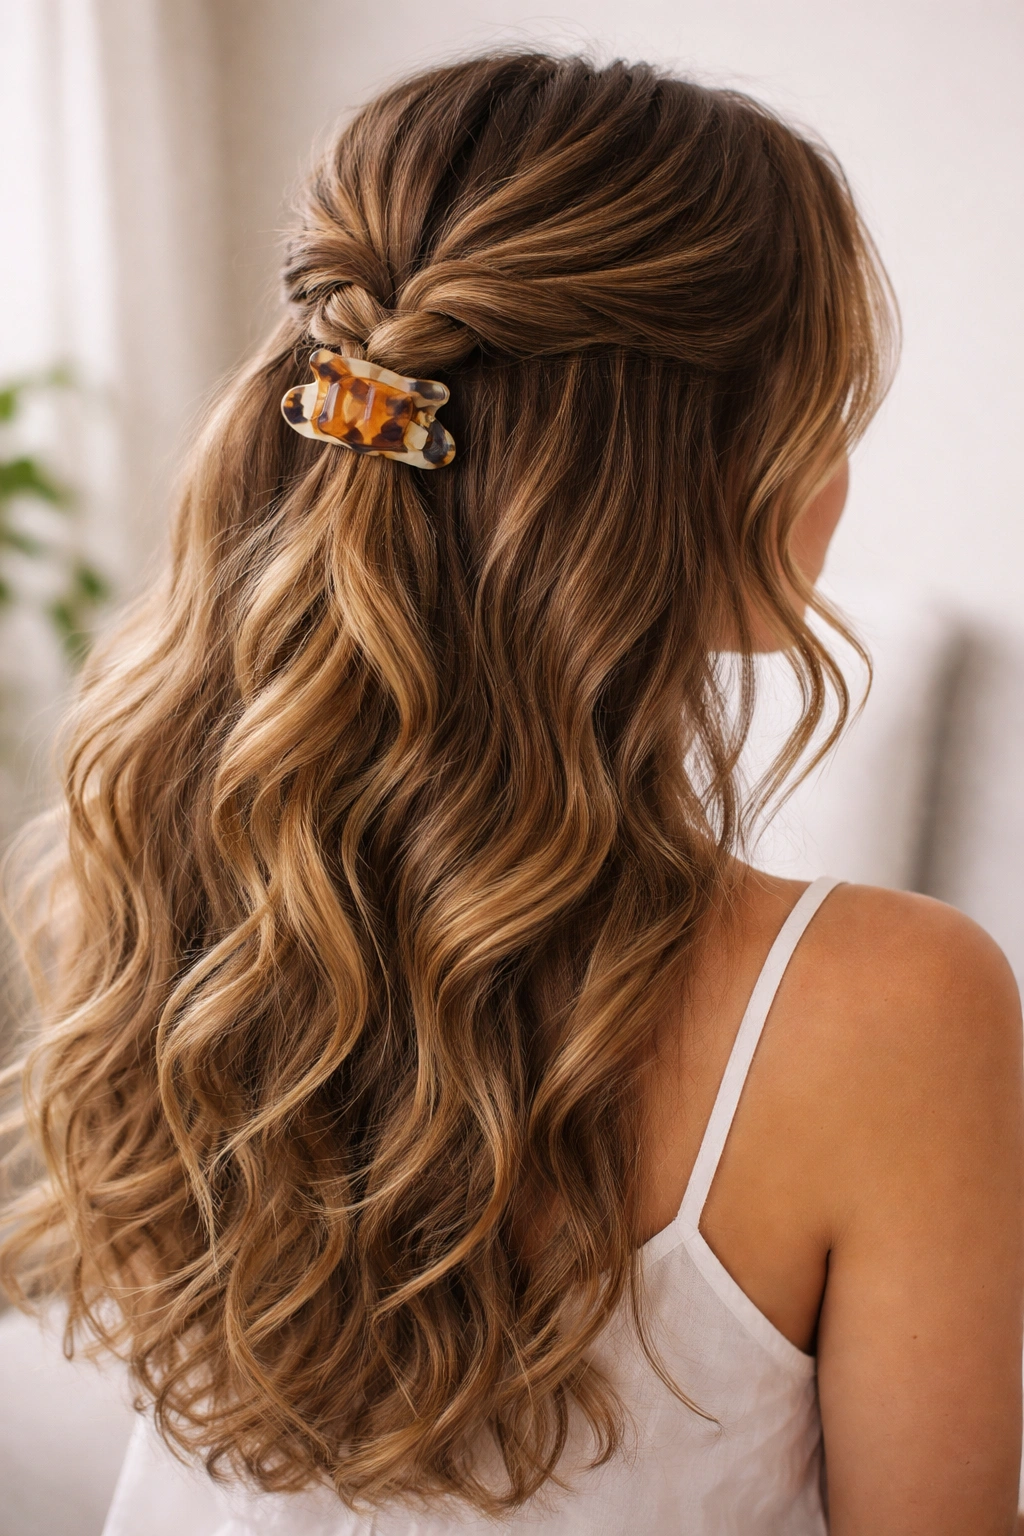
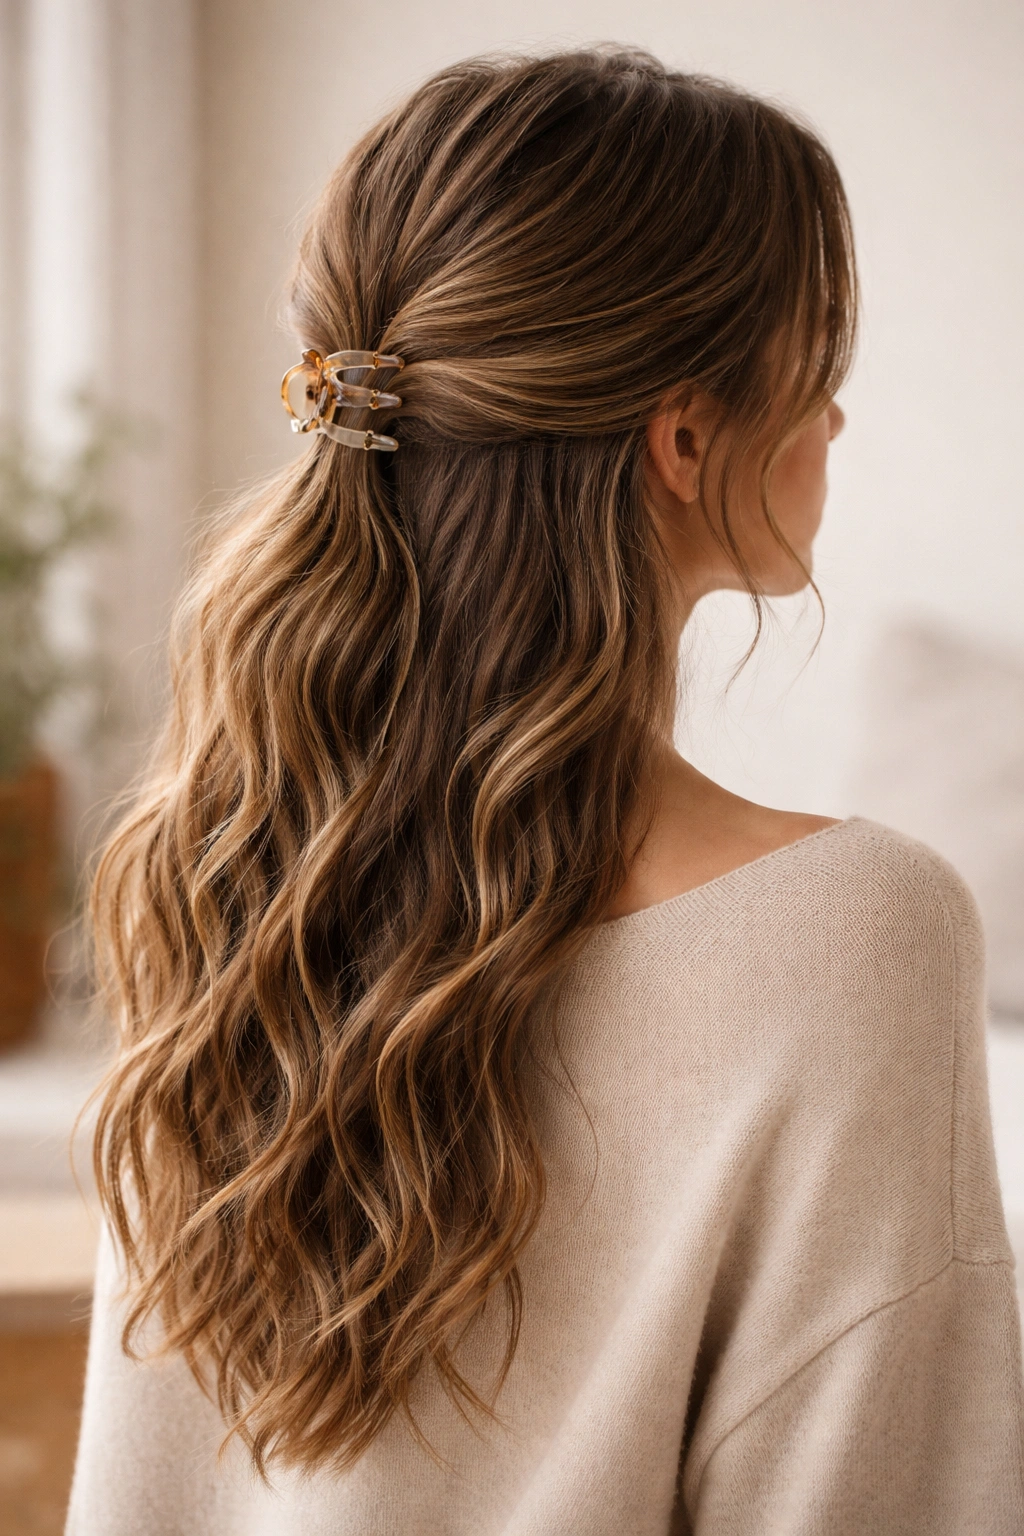
2. The Twisted Half-Up
The twisted half-up takes the basic claw clip concept and adds a rotation through the gathered section that creates immediate visual interest. Instead of clipping flat, you’re twisting the top portion gently as you gather it upward, then securing with the claw clip. This one twist completely changes how the style photographs and how it reads—from basic to intentional.
The Mechanics of the Twist
The twist doesn’t need to be tight or perfect. In fact, slightly loose, airy twists look way more modern than ribbon-tight ones. You’re doing a gentle two-strand twist (or even just rotating the section as one thick piece) that catches and plays with your waves rather than flattening them. The twist adds dimension and shows that you put thought into the style without looking like you spent an hour getting ready.
Steps for Success
- Gather the same top-third section as the classic style, but this time use both hands to gently rotate it clockwise as you gather upward
- Continue twisting loosely until you’re about 2 inches from the clip placement area
- Stop twisting and hold the section at the crown where you want to clip it
- Secure with a slightly larger claw clip that can accommodate the twisted thickness without creating a visible pinch
- Pull a few small pieces loose from the twisted section once clipped—this softens the look and makes it feel less formal
- Leave face-framing pieces down on both sides
Worth knowing: Slightly damp or sea-salt-sprayed hair twists more easily and holds the texture longer than completely dry hair.
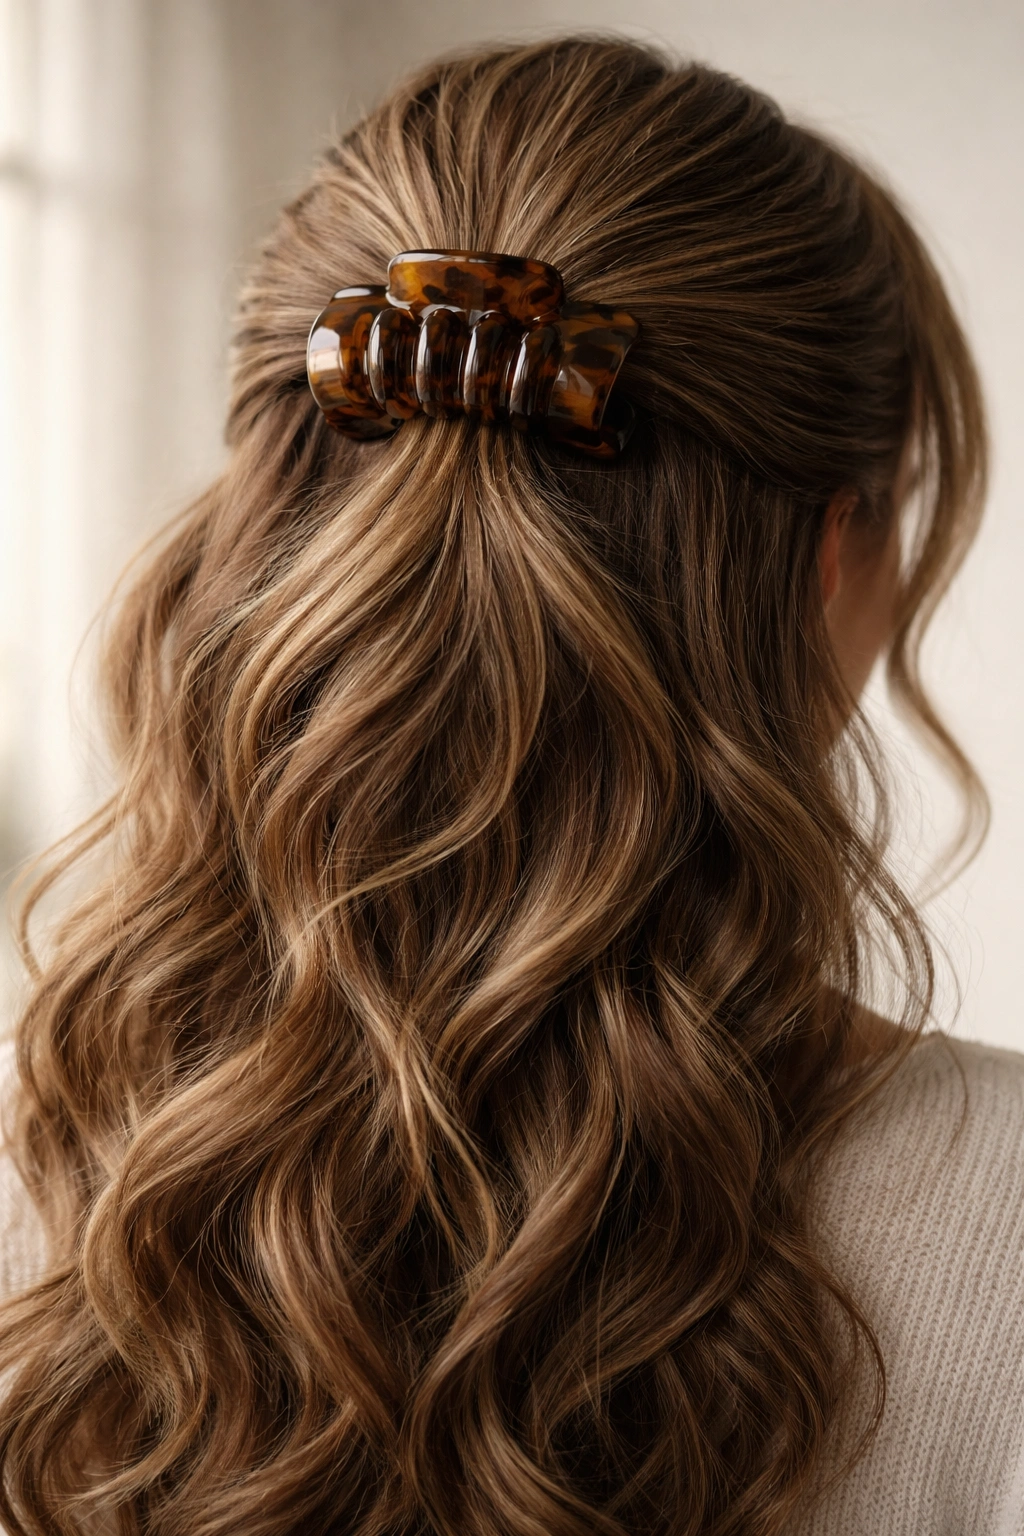
3. The Messy Textured Claw
This style is the one you’re going for when you want everyone to think you just woke up looking effortlessly beautiful. You’re gathering hair in that same half-up framework, but you’re deliberately creating texture and separation throughout both the clipped section and the waves below. The key is accepting that “messy” actually requires intention—you’re choosing which pieces to pull loose and where to add texture.
Creating Intentional Messiness
Real messy texture comes from breaking up the waves with your fingers before and after clipping. You want some pieces sticking out at slightly different angles, some sections of wave showing more definition than others, and an overall sense that this happened organically rather than through precise technique. This style actually shows off wavy hair better than a polished version because the texture is the whole point.
Building the Textured Look
- Start with hair that’s had at least a few hours to settle into natural waves (not fresh from showering)
- Gather your top section loosely—don’t aim for a neat, contained bundle
- Before clipping, use your fingers to separate and fluff the gathered hair, pulling some strands slightly loose
- Clip in place, then go back and deliberately pull out 4-5 individual pieces around your face and behind your ears
- Take 3-4 pieces from the back clipped section and gently pull them to create small face-framing wisps
- Scrunch the waves in the bottom half very lightly with your hands to emphasize texture and separation
Pro tip: A little texture spray or sea salt spray applied before you style makes this look last longer and makes the waves hold their shape throughout the day.
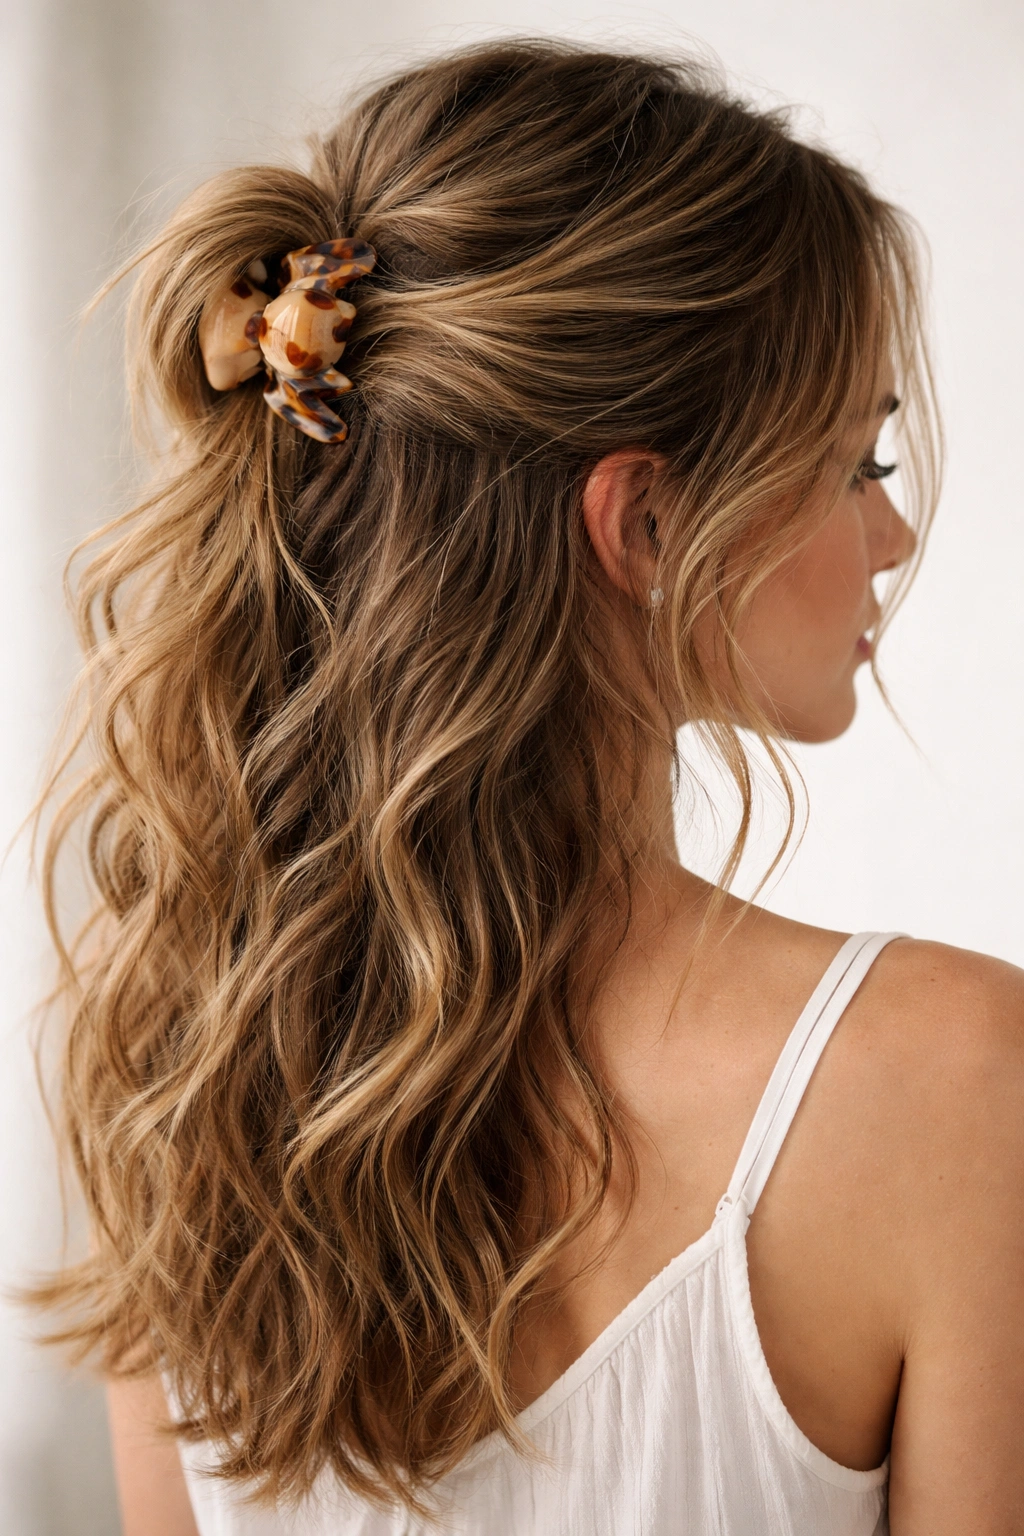
4. The Side-Swept Half-Up
Instead of gathering your half-up section horizontally across the crown, you’re pulling it from one side of your head to the opposite side in a diagonal sweep. This creates an asymmetrical, romantic vibe that’s particularly flattering for wavy hair because it emphasizes the dimension in your waves. The side-swept clip is the style when you want a bit more polish than casual but not quite formal.
Why the Diagonal Works
The diagonal pull naturally creates more movement and flow than a straight-across section. Because you’re pulling from one side toward the back, you’re not fighting your wave pattern—you’re working with it. The bottom waves fall at a slightly different angle than they would in a classic style, which adds visual interest and makes the whole look feel more sophisticated.
Executing the Side Sweep
- Start by taking a section from one temple, gathering it back and across toward the opposite side of the back of your head
- The endpoint should be slightly past center, toward the back—not at the very back center like the classic style
- You can twist this section as you gather it, or leave it straight and loose for a softer appearance
- Clip it in place on the angle, allowing the clip to sit at a slight diagonal rather than perpendicular to the back of your head
- The side you’re pulling from will have volume created from the pull, while the other side falls more naturally—this asymmetry is the whole point
- Leave face-frame pieces down on the side you pulled from (the fuller side) and one or two pieces on the other side
Worth knowing: This style is especially flattering if you have a side part already, as it complements rather than fights your natural styling direction.
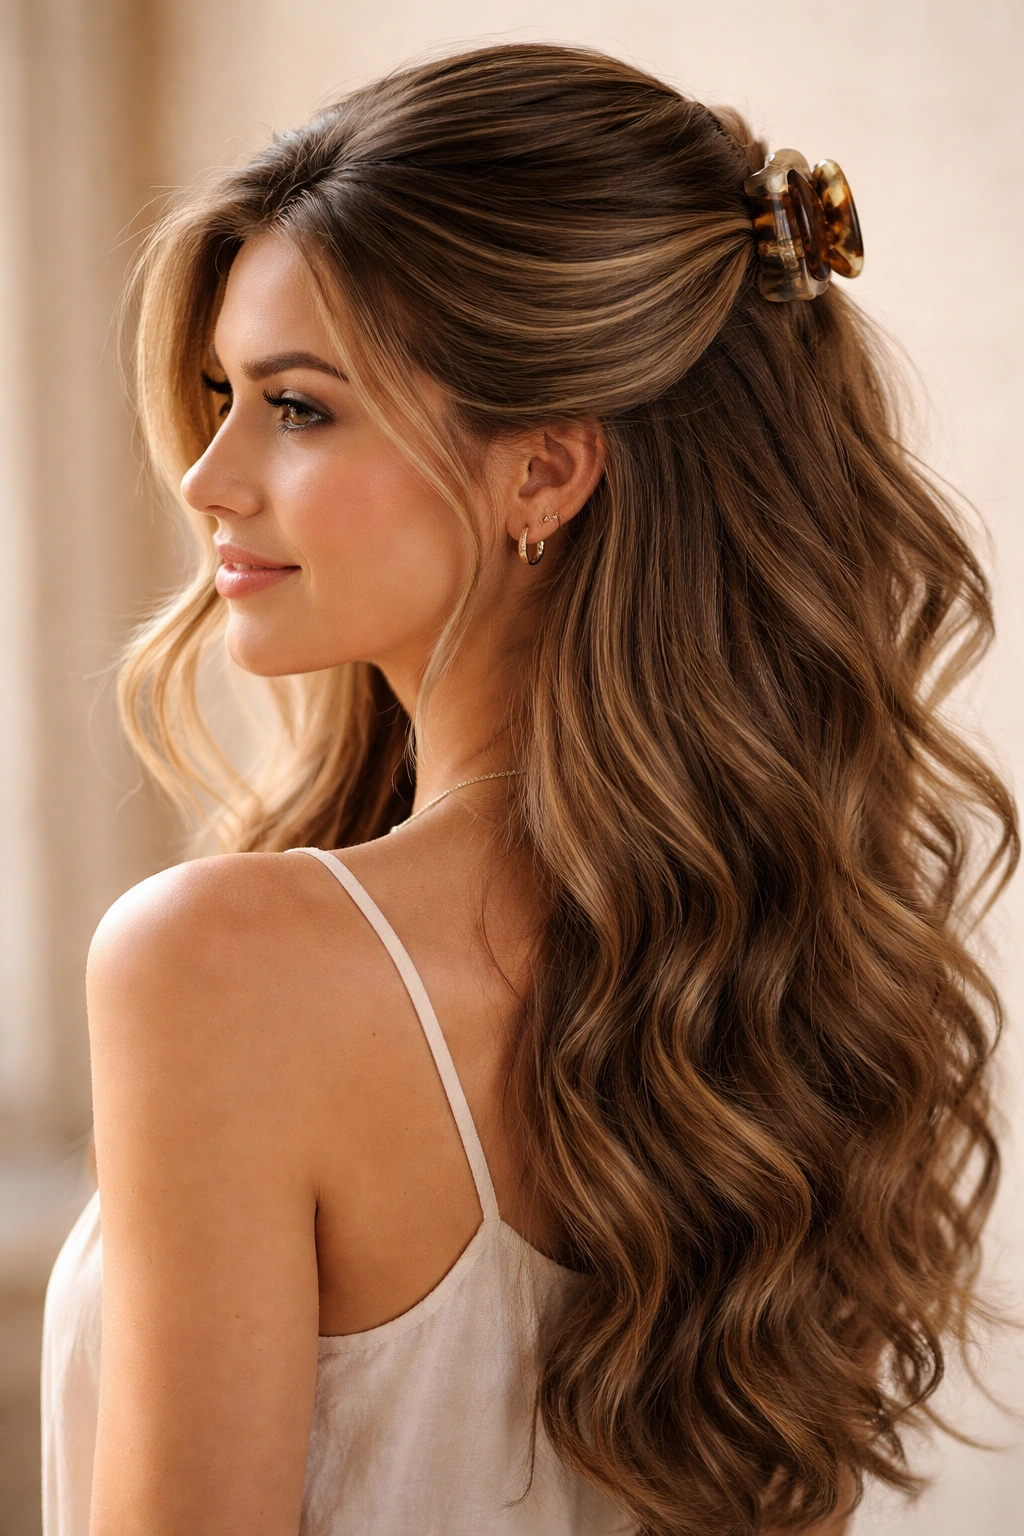
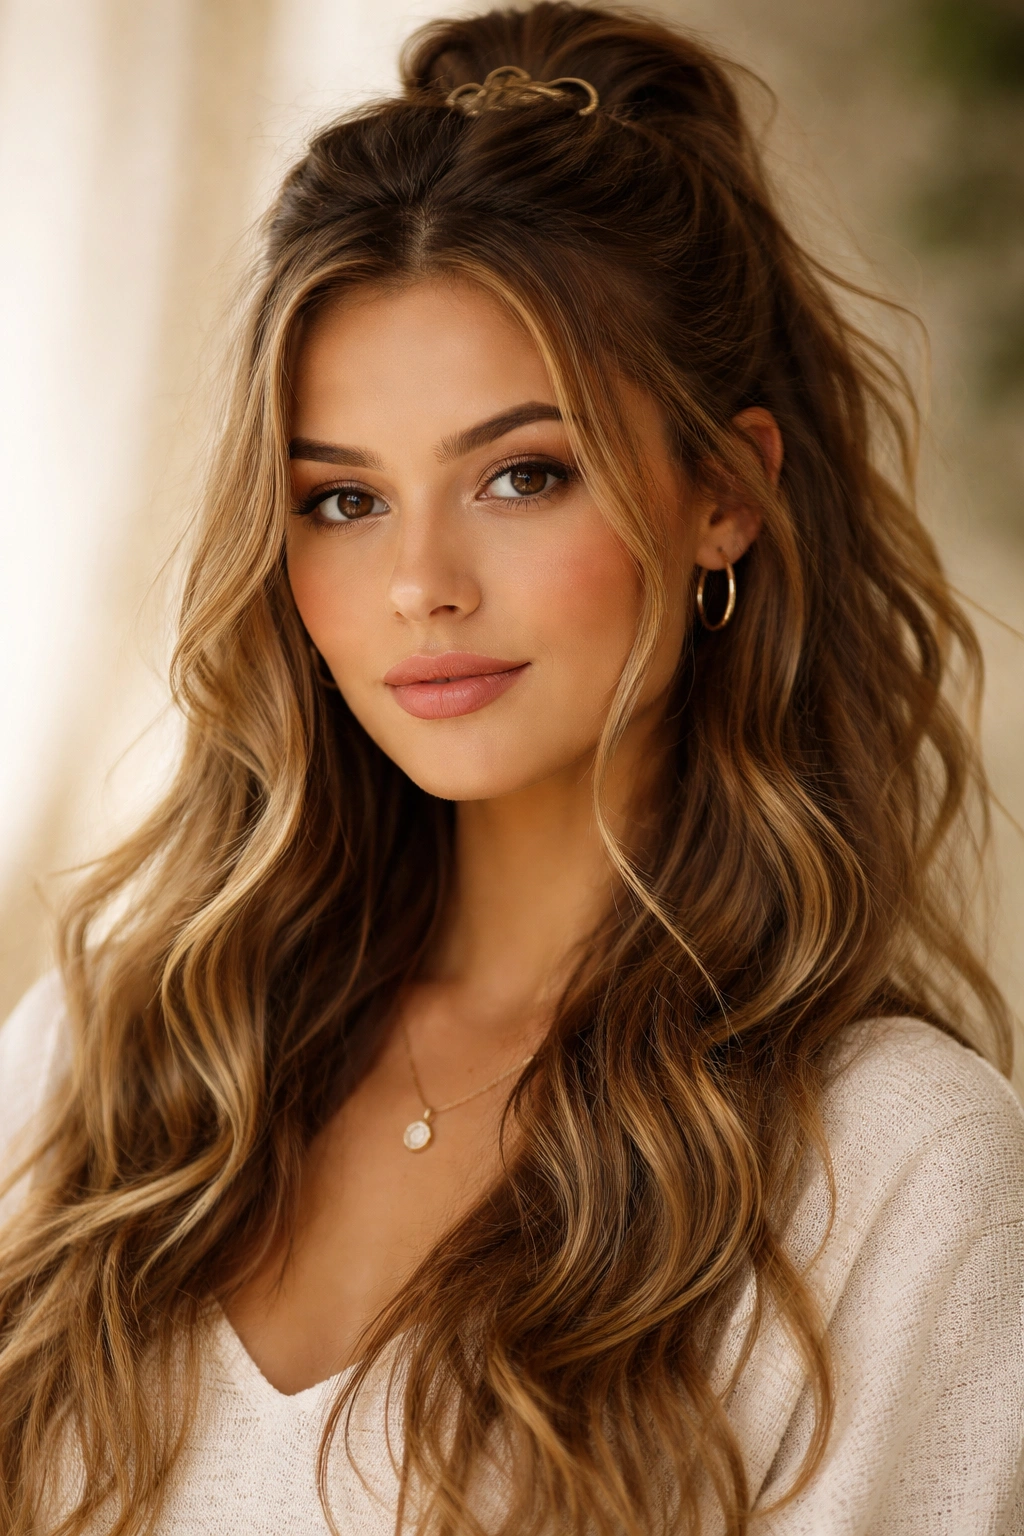
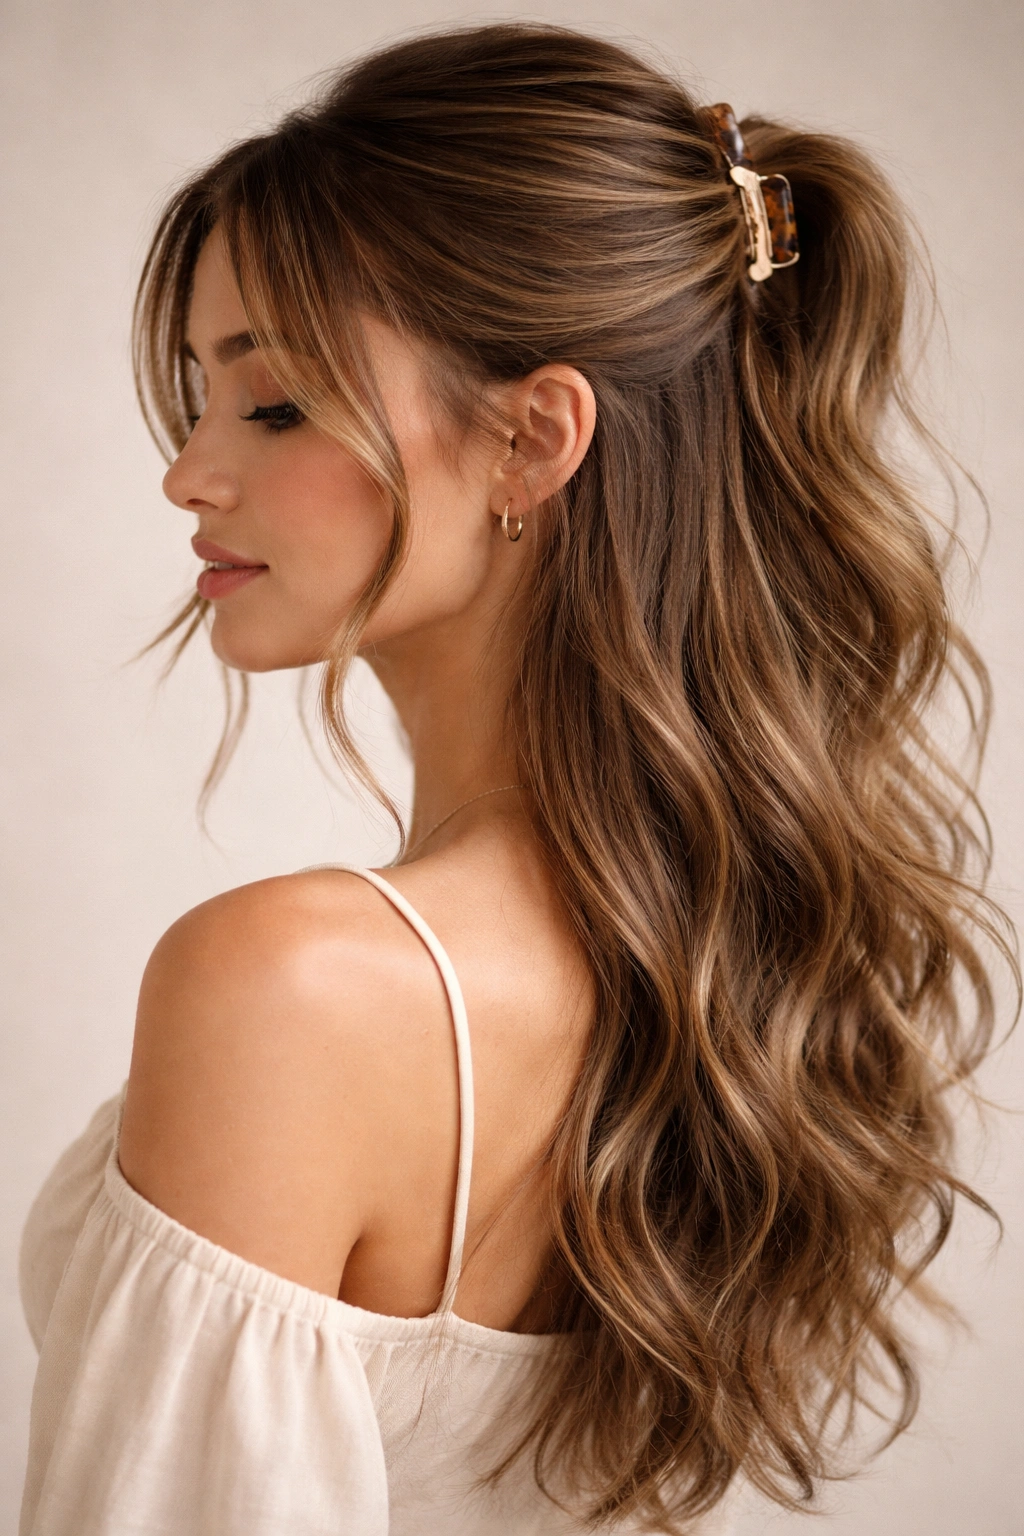
5. The Voluminous Crown
This style is built on the principle of creating maximum height and fullness at the crown while keeping the lengths free. You’re gathering more hair than the classic half-up (closer to two-thirds rather than one-third) and then deliberately teasing and fluffing the clipped section to create genuine volume. This is the style for days when you want your hair to look visibly thicker and fuller.
Building Crown Volume with Waves
The trick with wavy hair is that you already have texture, so you don’t need to tease harshly. You’re just strategically separating and lifting the waves that are already there. Instead of traditional backcombing, you’re using your fingers and a wide-tooth comb to separate the wave pattern and create air between the strands. This works better on wavy hair than trying to create smooth volume like you would on straight hair.
Creating the Voluminous Effect
- Take a slightly larger section than usual, from just above your ears across the back of your head
- Gather this section loosely at the crown
- Before clipping, use a wide-tooth comb or your fingers to gently separate and lift the waves within this gathered section
- Flip your head upside down and gently tease at the base of this section where you’ll clip—just enough to create a cushion of volume, not a matted clump
- Flip back upright and clip in place at the crown
- Carefully pull 3-4 pieces loose from around the clipped area to frame your face
- The bottom half of your hair cascades free with all its natural wave definition showing
Pro tip: Clip your claw slightly lower than you think—the volume you’ve created will push it up visually, making it look like you have even more height.
6. The Soft Romantic Style
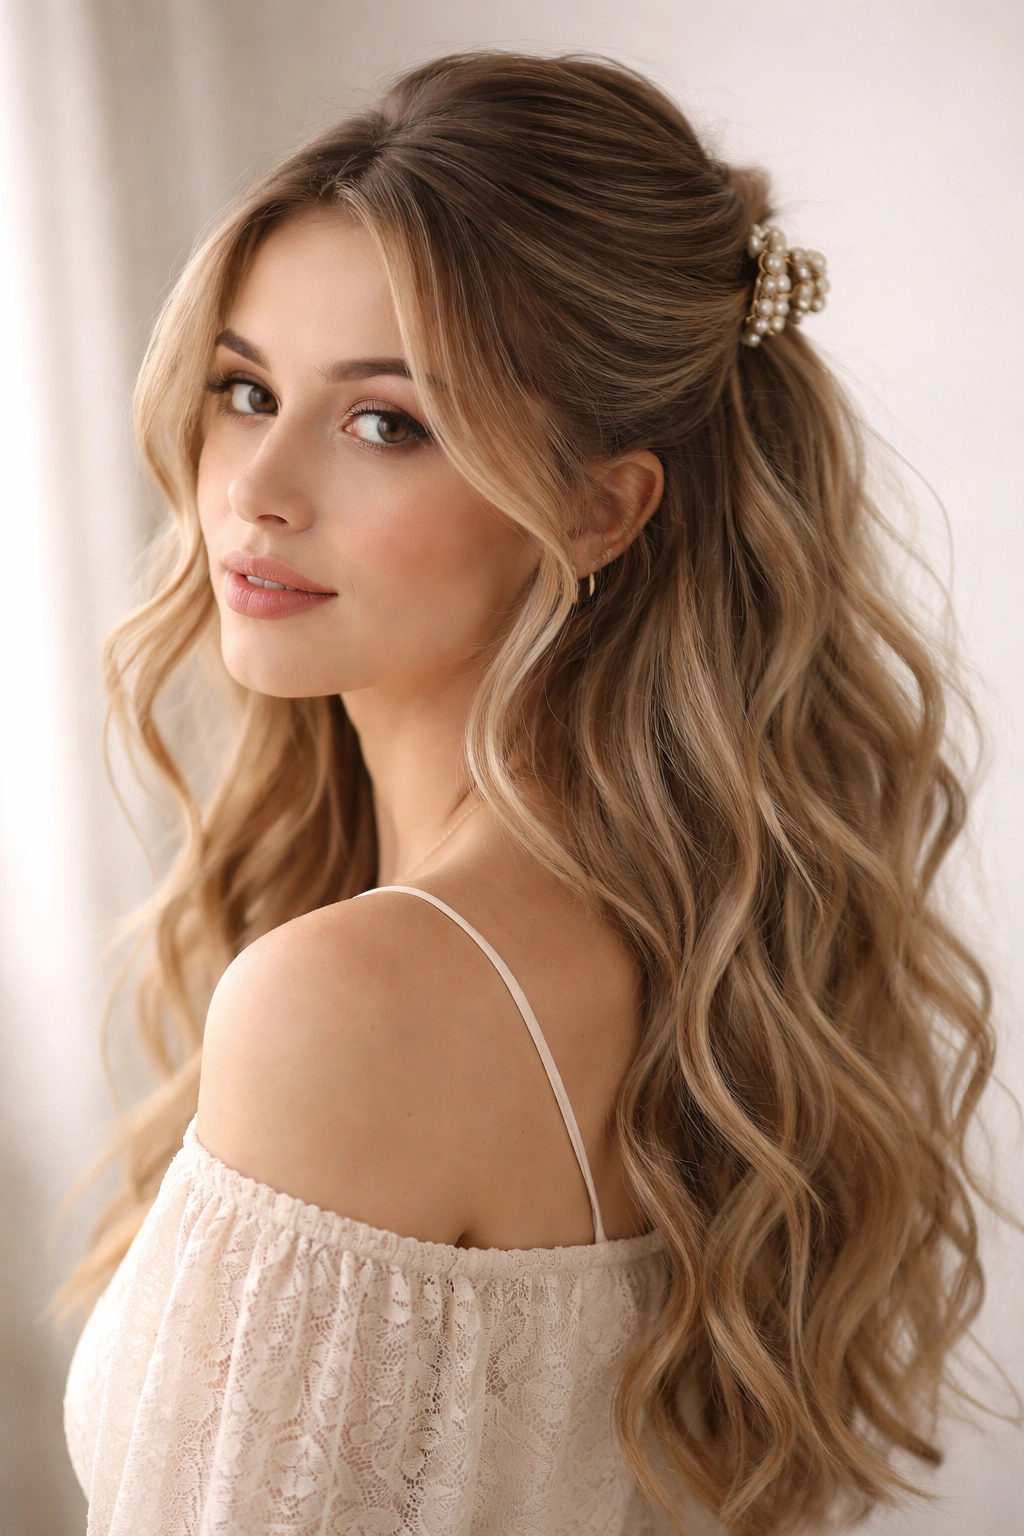
This is the half-up style you’re choosing when you want to feel beautiful and a bit ethereal. Everything is soft, loose, and gently pulled together rather than firmly secured. You’re keeping the gathered section relaxed, adding subtle waves or curls if your natural texture allows, and creating an overall appearance that’s effortlessly romantic rather than intentionally styled.
The Aesthetic of Softness
Soft romantic styling is about loose, flowing lines rather than defined sections. You’re not aiming for dramatic texture or obvious styling—instead, you want the impression that your hair just naturally fell into this pretty arrangement. With wavy hair, this actually comes more naturally than you might think. Your waves are already doing half the work; you’re just gently guiding them.
Crafting the Romantic Look
- Gather your top section with a very light hand—imagine you’re gathering clouds rather than holding hair firmly
- Don’t twist, braid, or otherwise manipulate the gathered section; let it stay as loose waves
- Use a softer, more delicate-looking clip in a lighter color (blonde tortoiseshell, pearl, silver, or even rose gold works beautifully)
- Clip gently at the crown without pulling tight—you want the clip to hold without creating tension that you can visibly see
- Deliberately pull out 4-5 face-framing pieces on each side, curving them gently around your face
- If possible, leave a few smaller random pieces loose throughout the clipped section—these create softness and catch the light
- The bottom waves should flow without any visible separation or texture spray—just natural, flowing movement
Worth knowing: This style looks extra romantic if you prepare your hair the night before by doing loose braids or waves, which sets a gentle pattern that unfolds beautifully the next day.
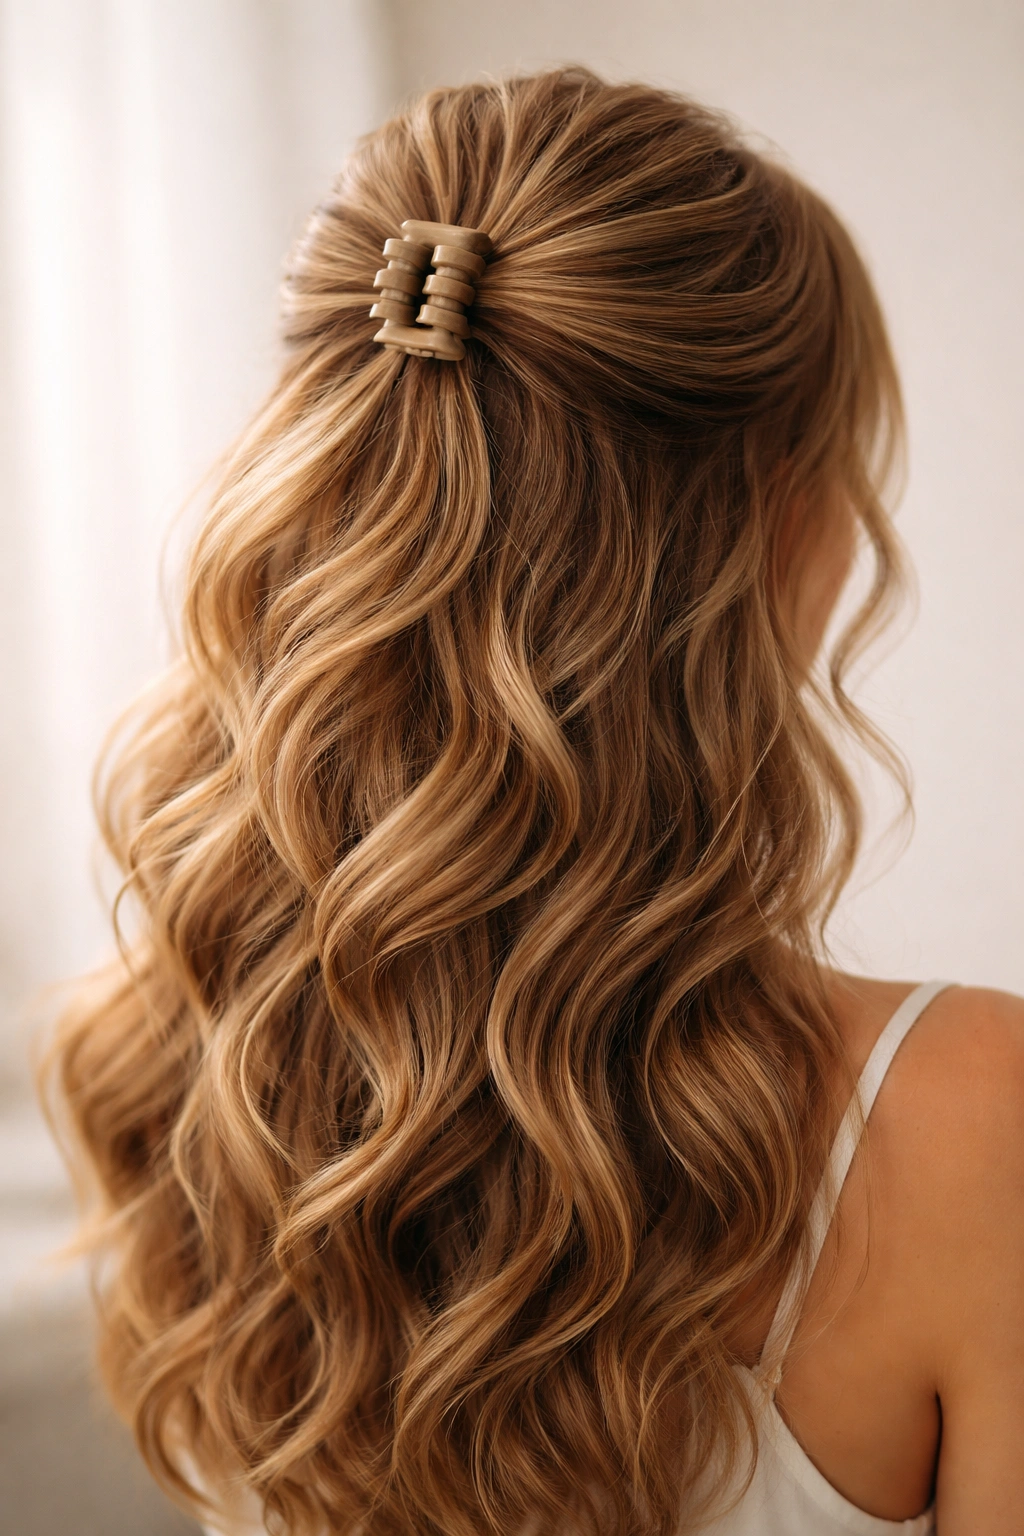
7. The Double-Section Claw

Instead of doing one half-up clip, you’re using two claw clips to create two separate gathered sections stacked vertically on your head. The top clip holds the very crown area, and the lower clip sits several inches beneath it, holding a second section. This creates height, visual interest, and genuine styling impact without looking overdone—it’s more polished than single-clip styles but still easy enough for everyday wear.
Stacking Clips for Dimension
The magic of this style is how the two-clip system creates dimension from multiple angles. When someone looks at you from behind, they see obvious styling intention. From the front or side, it reads as naturally voluminous waves. The two clips also mean you’re distributing the weight across two hold points, which can actually feel more comfortable than one clip holding a heavy section.
The Two-Clip Technique
- Take a small section from the crown area (roughly 2 inches square) and clip it right at the top with your first claw clip—keep this section fairly smooth and controlled
- Below that clipped section, gather a larger portion from approximately ear-level across the back, and clip it several inches below the first clip
- The space between the two clips becomes very voluminous and visible—style this intentionally by gently fluffing and separating the waves
- Pull out face-frame pieces from both the top and bottom clipped sections so the style doesn’t look overly structured
- Leave the lower half of your hair completely free and textured
- Consider using two clips in the same color family for cohesion, or two different colors if you’re going for a more editorial vibe
Pro tip: Make sure the lower clip is positioned off-center slightly—directly centered clips can look unintentionally costume-like, while off-center placement feels more modern.
8. The Half-Up with Face-Frame Pieces
This style is fundamentally about strategically using loose face-frame pieces to create shape and flattery around your face while using the claw clip to manage the bulk of your hair. You’re gathering your half-up section in the standard way, but then you’re very intentionally choosing and positioning individual pieces to frame your face in a flattering manner.
Face-Framing Strategy
With wavy hair, face-frame pieces can do heavy lifting for your overall appearance. Loose waves on either side of your face create softness, add dimension, and help balance your features. The trick is not pulling these pieces too tight or treating them as an afterthought—they’re actually the focal point of this style. You’re deliberately choosing pieces that catch light, show your best waves, and frame your face intentionally.
Positioning Frame Pieces
- Create your standard half-up section and clip it in place
- Now deliberately release pieces: one larger section from near each temple, and 2-3 smaller pieces around each side of your face
- Curve these pieces gently around your face by running them between your finger and thumb, creating a soft spiral
- Position the larger pieces to sit right at your cheekbone level when you face forward
- Let the smaller pieces fall more loosely, creating a slightly wispy, romantic effect
- Make sure at least 2-3 pieces are noticeably longer than others, creating visual depth and movement
- If your waves are tight, you can very gently curl the face-frame pieces away from your face with your fingertips or a small curling iron for extra dimension
Worth knowing: The shade of your claw clip becomes very visible when you have strategic face-frame pieces, so choose one that complements your skin tone.
9. The Sleek Top Section
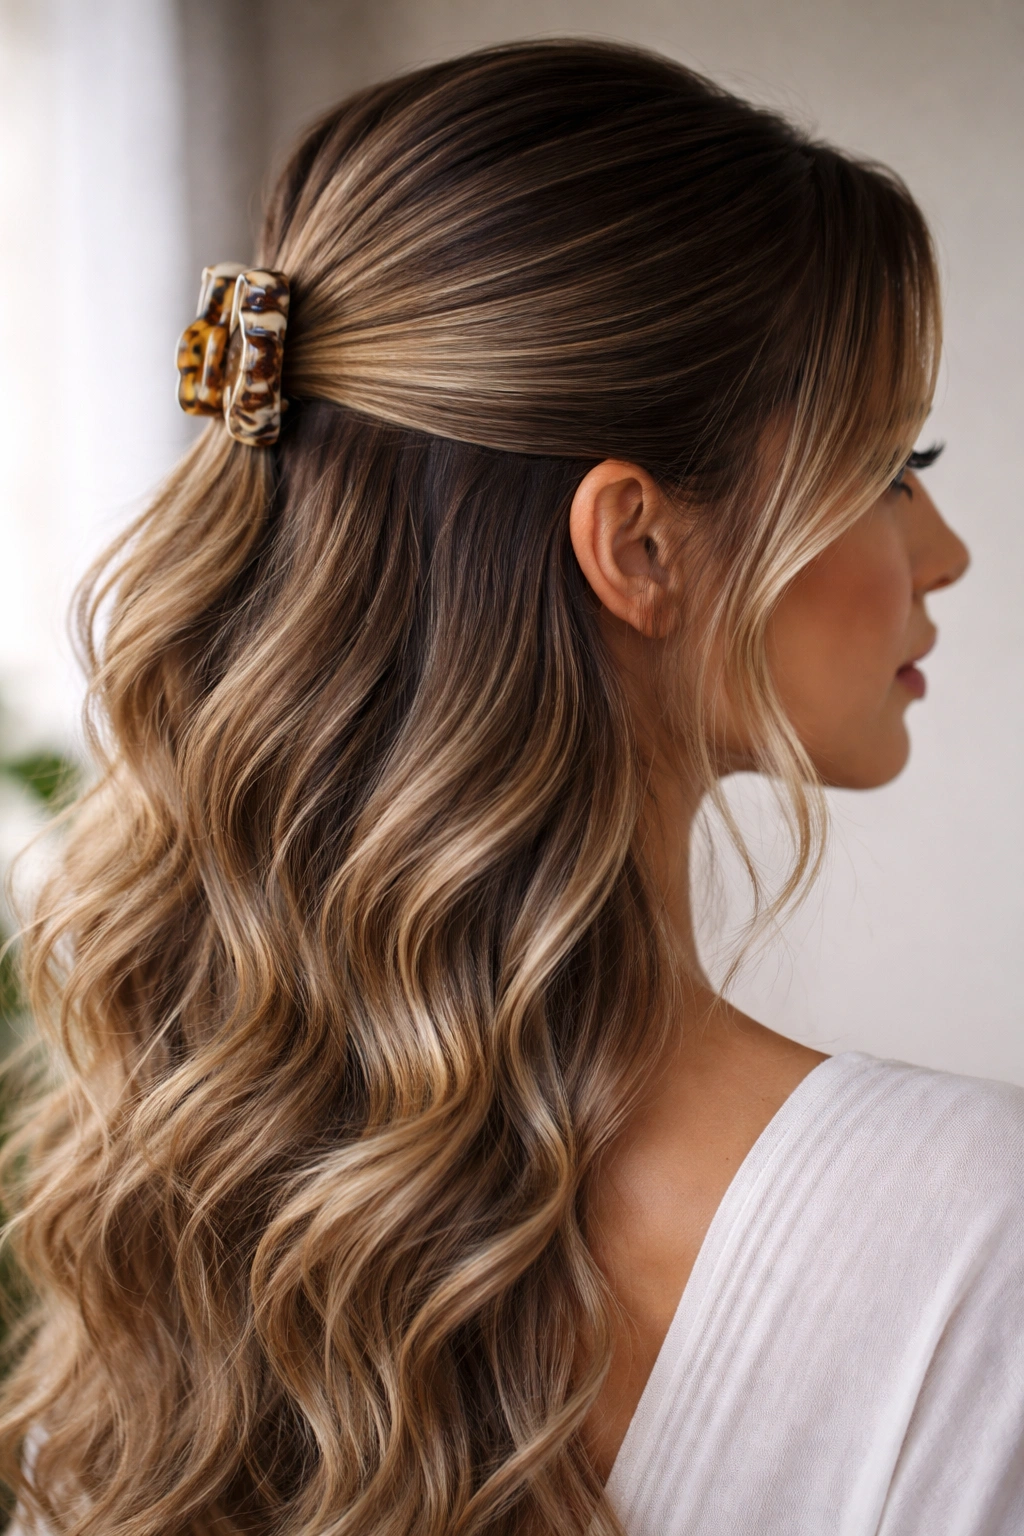
This style takes the half-up concept and deliberately makes the clipped portion smooth and controlled, creating stark contrast with the wavy texture of the bottom half. You’re using techniques like smoothing cream, a fine-tooth comb, and possibly a touch of gel or lightweight pomade to create a polished top while letting your natural waves shine dramatically below.
The Sleek-Versus-Textured Contrast
The visual impact of this style comes entirely from the contrast between the sleek, controlled top and the loose, textured waves below. It’s sophisticated and a bit editorial—this is the half-up style you’re choosing when you want to look intentional and put-together without spending time on heat styling. The sleekness actually makes your waves look more defined and wild by comparison.
Creating a Sleek Top Section
- Apply a lightweight smoothing cream or serum to your hands
- Gather your top section, smoothing it as you go with the product
- Use a fine-tooth comb or your hands to smooth any flyaways or texture out of the gathered section
- You can apply a tiny amount of lightweight gel to stubborn pieces, but be careful not to overdo it—you want sleek, not wet-looking
- Clip your section in place, making sure it sits smoothly and the clip is secure
- The goal is for the clip to sit against smooth hair without bumps or texture underneath it
- Let the bottom half of your hair be completely free and textured—scrunch it gently with your hands or spray it with a texture spray to emphasize the waves
- Pull face-frame pieces loose: these should contrast with the sleek top, so let them be textured and full
Pro tip: This style reads especially polished if you work a tiny bit of shine serum into just the clipped section after you clip it—the reflected light emphasizes the sleekness.
10. The Braided Half-Up
Instead of using a simple twist or leaving the gathered section straight, you’re braiding the top portion before clipping it. This can be a standard three-strand braid, a looser French braid that starts at the crown, or even a fishtail braid if you’re feeling ambitious. The braid adds texture, visual interest, and a genuinely intentional styling element while keeping everything manageable and practical.
Braiding Works With Wavy Hair
Braids look better on wavy hair than on straight hair because the texture provides grip and the waves catch light differently throughout the braid, creating dimension. You don’t need smooth, slippery hair for a braid to work—in fact, slightly textured or even slightly damp hair grips better and holds a braid more securely than freshly-dried straight hair.
Executing the Braided Version
- Gather your top section as you normally would for a half-up style
- Divide this gathered section into three equal strands
- Begin a loose three-strand braid: over, under, over, under, working gently and allowing the waves to show within the braid rather than trying to make it perfectly smooth
- Braid for about 3-4 inches (not all the way down, just partway through the gathered section)
- Stop braiding, secure the end of the braid with a small elastic or bobby pin, then clip the gathered section in place with your claw clip below the braid
- Gently pull the edges of the braid slightly to make it look looser and more textured
- Pull face-frame pieces loose: you can pull them from above the braid, from the bottom clipped section, or both
- The bottom half flows completely free in waves
Worth knowing: Three-strand braids look fuller and softer on wavy hair if you deliberately loosen them slightly after they’re done—gently pull the edges outward to increase the apparent width of the braid by about 25%.
11. The Undone Wavy Claw
This style is the intentionally undone version—you’re going for maximum “I didn’t try” while still clearly having done something intentional with your hair. The difference between this and the messy textured claw is that here, you’re aiming for a more specific kind of undone: pieces are out in strategic places, the clip is visible and styled rather than hidden, and the whole look reads as deliberately effortless.
The Aesthetic of Intentional Undone
Undone styling with wavy hair is actually a high-wire act. You need your waves to be textured and separated without looking fried or damaged. You need pieces to be loose without looking like you just forgot to finish styling. The clip should be positioned and visible in a way that looks editorial rather than accidental. It’s more thought-out than it appears.
Building the Undone Look
- Start with hair that already has good wave texture and separation (day-two or day-three hair works beautifully)
- Gather a loose section from one side of your head to the other, somewhere around your crown, but don’t aim for precision
- Clip it in place with a claw that complements your aesthetic (tortoiseshell, pastel, metallic—whatever feels on-brand for you)
- Now deliberately undo it slightly: pull 3-4 larger pieces from the clipped section loose
- Pull out 4-5 pieces from the bottom half as well, creating an overall sense of slightly undone-ness
- Add texture spray or sea-salt spray to both the clipped section and the loose waves to enhance separation and definition
- Scrunch the bottom waves gently with your hands to emphasize texture
- The clip should be somewhat visible; don’t try to hide it under layers the way you would in other styles
Pro tip: This style actually looks better if you don’t wash your hair the day you plan to wear it—the oils and texture buildup create the exact undone aesthetic you’re going for.
12. The Low Textured Half-Up
Instead of gathering at your crown, you’re bringing your half-up clip much lower—closer to your ears and the nape of your neck. This creates a different silhouette and works beautifully for wavy hair because it keeps almost all your waves visible and free. The low placement also tends to feel less formal and more casual than crown-height clips.
Low Placement and Visual Impact
A low half-up changes the proportions of your look entirely. Instead of emphasizing height and crown volume, you’re emphasizing length and the continuous flow of your waves. This style works especially well if you have shoulder-length or longer hair, because the gathered section at the nape becomes a focal point rather than seeming small or insufficient.
Creating the Low Placement Style
- Identify where your ear naturally sits on your head, roughly at ear-level
- Gather hair from one ear, across the back of your head, to the opposite ear
- This gathers the hair from roughly the lower half of your head
- Pull this section gently upward and secure it at the nape of your neck with a claw clip
- The clip sits low, almost where a ponytail would sit, but you’re not bringing all the hair up—just this lower section
- The top half of your head remains completely free, allowing waves to flow and frame your face
- You can twist, braid, or keep the gathered section smooth—any approach works with the low placement
- Pull 3-4 face-frame pieces loose from the top of your head to create softness around your face
Worth knowing: This style is particularly flattering if you have a longer face shape, as the low placement balances proportions beautifully.
13. The Thick Full Claw
This style is about using a larger, chunkier claw clip to gather and hold a substantial section of hair—more than typical half-up styles. You’re grabbing closer to two-thirds of your hair or even more, creating a genuinely substantial gathered section. This works perfectly with wavy hair because there’s enough volume to fill the clip and look intentional, and your waves provide natural grip.
Embracing Volume and Fullness
The thick full claw is the style when you want maximum visual impact and genuine styling intention. You’re not going for delicate or subtle—you’re going for “I have a lot of beautiful hair and I’m showing it off.” With wavy texture, this reads as naturally voluminous rather than overdone, because waves already have built-in texture and movement.
Building the Thick Full Version
- Choose a larger claw clip, ideally one with more surface area and a stronger grip
- Gather a substantial section—from temples and sides, across the crown, taking much more hair than a standard half-up
- Create volume in the gathered section by gently teasing or fluffing it before you clip
- Position the clip at the crown, making sure it’s secure and gripping well
- The gathered section should look noticeably full and present—not dainty, but substantial
- The bottom section should still be sizable and visible, flowing in waves
- Pull out 4-5 face-frame pieces from the clipped section to soften the appearance
- Consider using a statement clip in a bold color or finish—with this much volume, your clip becomes a visible accessory
Pro tip: Thicker, fuller sections actually stay in place better in a claw clip than thinner sections, so this style is more secure than it appears.
14. The Half-Up with Wispy Layers
This style emphasizes creating multiple layers of loose pieces, with the claw clip holding back the bulk of your hair while individual wispy pieces frame your face at different lengths. You’re deliberately creating a multi-level, romantic look where pieces interact at various heights rather than your hair reading as one simple gathered section plus loose waves below.
Layering Creates Romance and Dimension
When you create wispy layers with half-up styling, you’re essentially adding movement and visual complexity that photographs beautifully and frames your face flatteringly. Each layer of loose pieces catches light differently, creates shadow, and adds dimension to your face shape. With wavy hair, layers look natural and effortless rather than requiring precision styling.
Creating Intentional Wispy Layers
- Create your half-up clip as a base—gather and clip the bulk of your hair at the crown
- Now pull out pieces strategically at different levels: some from right at your temples (these will sit at cheekbone level), some from slightly lower (around your jawline), and some from even lower (along your neck and shoulders)
- Make sure you have pieces at minimum 3 different height levels for genuine layering effect
- Run each loose piece through your fingers gently to create soft waves or slight curves
- The pieces closer to your face should curve gently away from your face, while lower pieces can curve toward it or stay neutral
- For extra dimension, deliberately choose pieces of different thicknesses—some thicker pieces and some very delicate, thin wisps
- Let the bottom-most waves cascade freely, unpulled, to create the base of your layered effect
Worth knowing: This style is enhanced by any gentle texture spray or sea-salt spray, which helps pieces hold their individual position throughout the day.
15. The Multi-Claw Layered Style
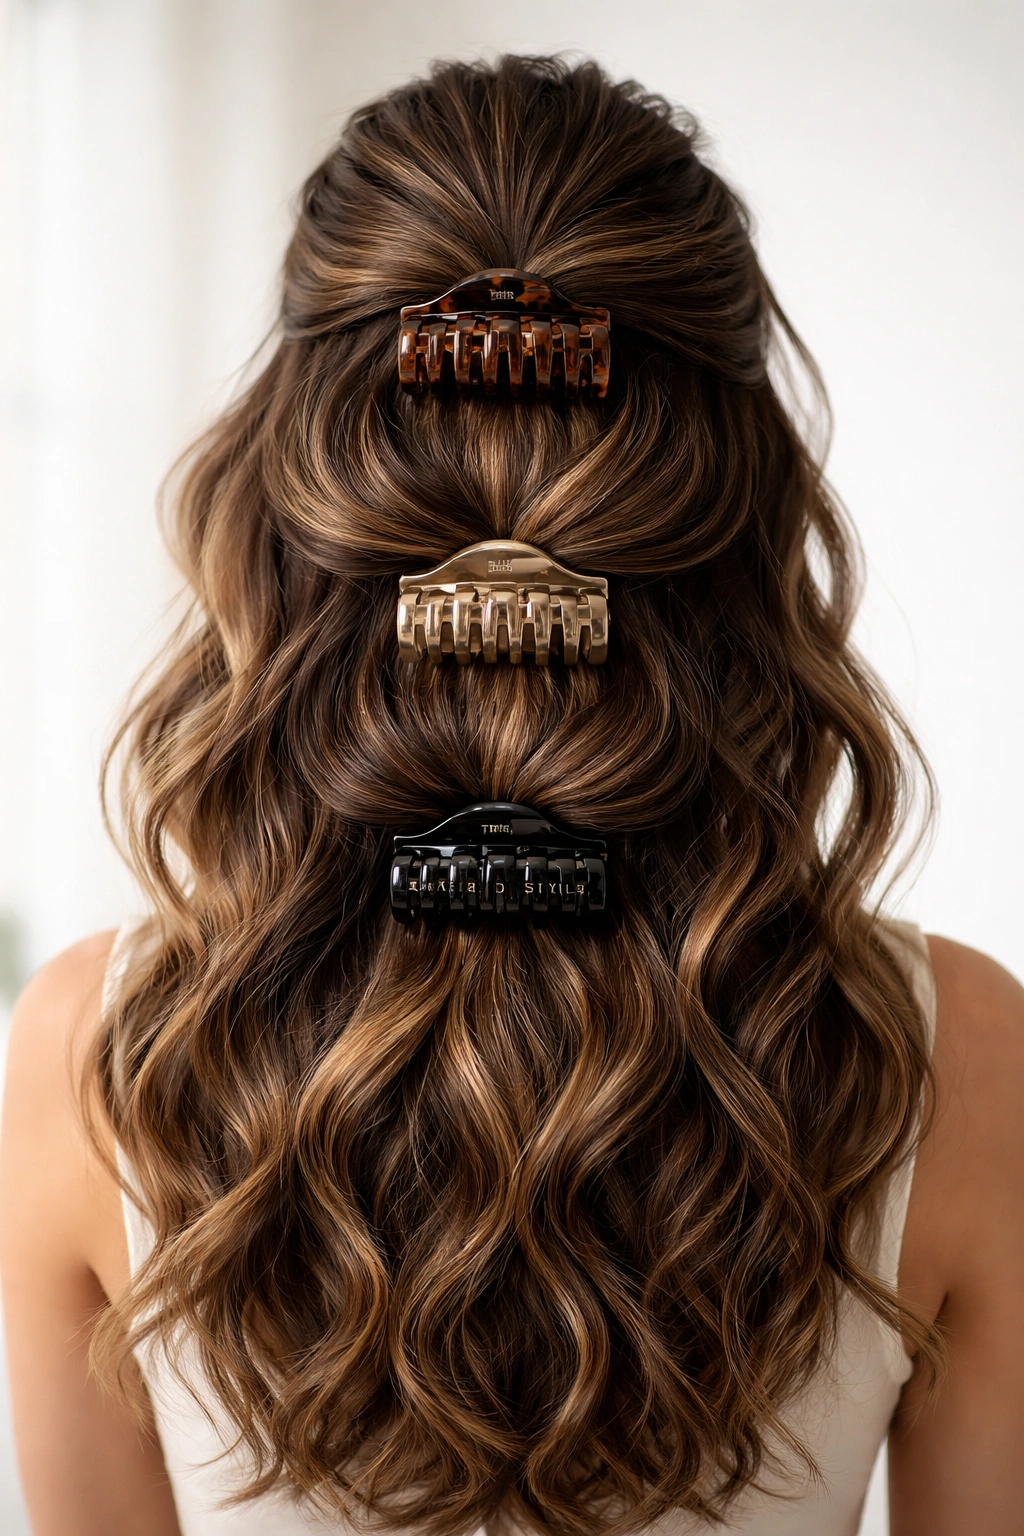
This is the ultimate statement version: you’re using three or more claw clips positioned vertically down the back of your head, each holding a separate section of hair. This creates an intentionally styled, editorial look with multiple visual interest points. It’s more complex than the double-clip style, but not difficult to execute once you understand the concept.
Stacking Multiple Clips for Maximum Impact
The multi-claw approach is bold and fun—it reads as clearly intentional styling while still allowing your waves to show beautifully throughout. Each clip creates its own section of gathered hair, and the spaces between clips become visibly voluminous and dimensional. This is the look for days when you want your hair to be the statement, and you’re confident in that.
Building the Multi-Claw Style
- Decide how many clips you want to use (three is a good starting point, but four or five can work)
- Take a small section at your crown and clip it with your first claw
- Several inches below that, gather a slightly larger section and clip it with your second claw
- Continue downward, gathering increasingly larger sections at the nape level with your third clip (and fourth if using one)
- You should have visible space and voluminous-looking gathered hair between each clip
- The bottom half of your hair below all clips flows completely free
- Pull 4-5 face-frame pieces loose from the areas between clips to create softness
- Consider using clips in coordinating colors or metals (all rose gold, or all tortoiseshell, etc.) for cohesion
- Gently fluff and separate the waves in each gathered section so they don’t look flat against each other
Pro tip: Smaller clips work better than huge ones for this style, as you want visual separation between each clipped section rather than one massive grip.
Final Thoughts
The beauty of half-up half-down styling with claw clips and wavy hair is that you’re working with your hair’s natural texture rather than fighting it. Every style here looks better on waves than it would on straight hair, because waves provide grip, dimension, and built-in movement that makes these styles feel effortlessly put-together.
What makes each of these styles work is the combination of two things: intentional placement of the claw clip and strategic choice of which pieces to leave loose. The clip itself is doing the practical work of managing your hair, but the loose pieces are doing the styling work. Whether you’re going for the effortlessly romantic soft style, the boldly editorial multi-claw look, or something in between, the foundation is the same: gather, clip, and frame.
Your clip choice matters more than you might think. Tortoiseshell, metal, and pearl finishes all read differently and complement different aesthetics and skin tones. Don’t underestimate how much a clip color change can shift the entire vibe of a style. The exact same gathering and placement can look completely different depending on whether you clip it with a sleek metal claw or a chunky pastel one.
The real win with these styles is that they’re genuinely practical for everyday wear. You’re not doing heat styling, you’re not spending time on complicated techniques, and you’re not damaging your waves. You’re just strategically working with what you already have. That makes them sustainable—these are styles you can actually wear, not just admire in photos and wonder how to recreate.