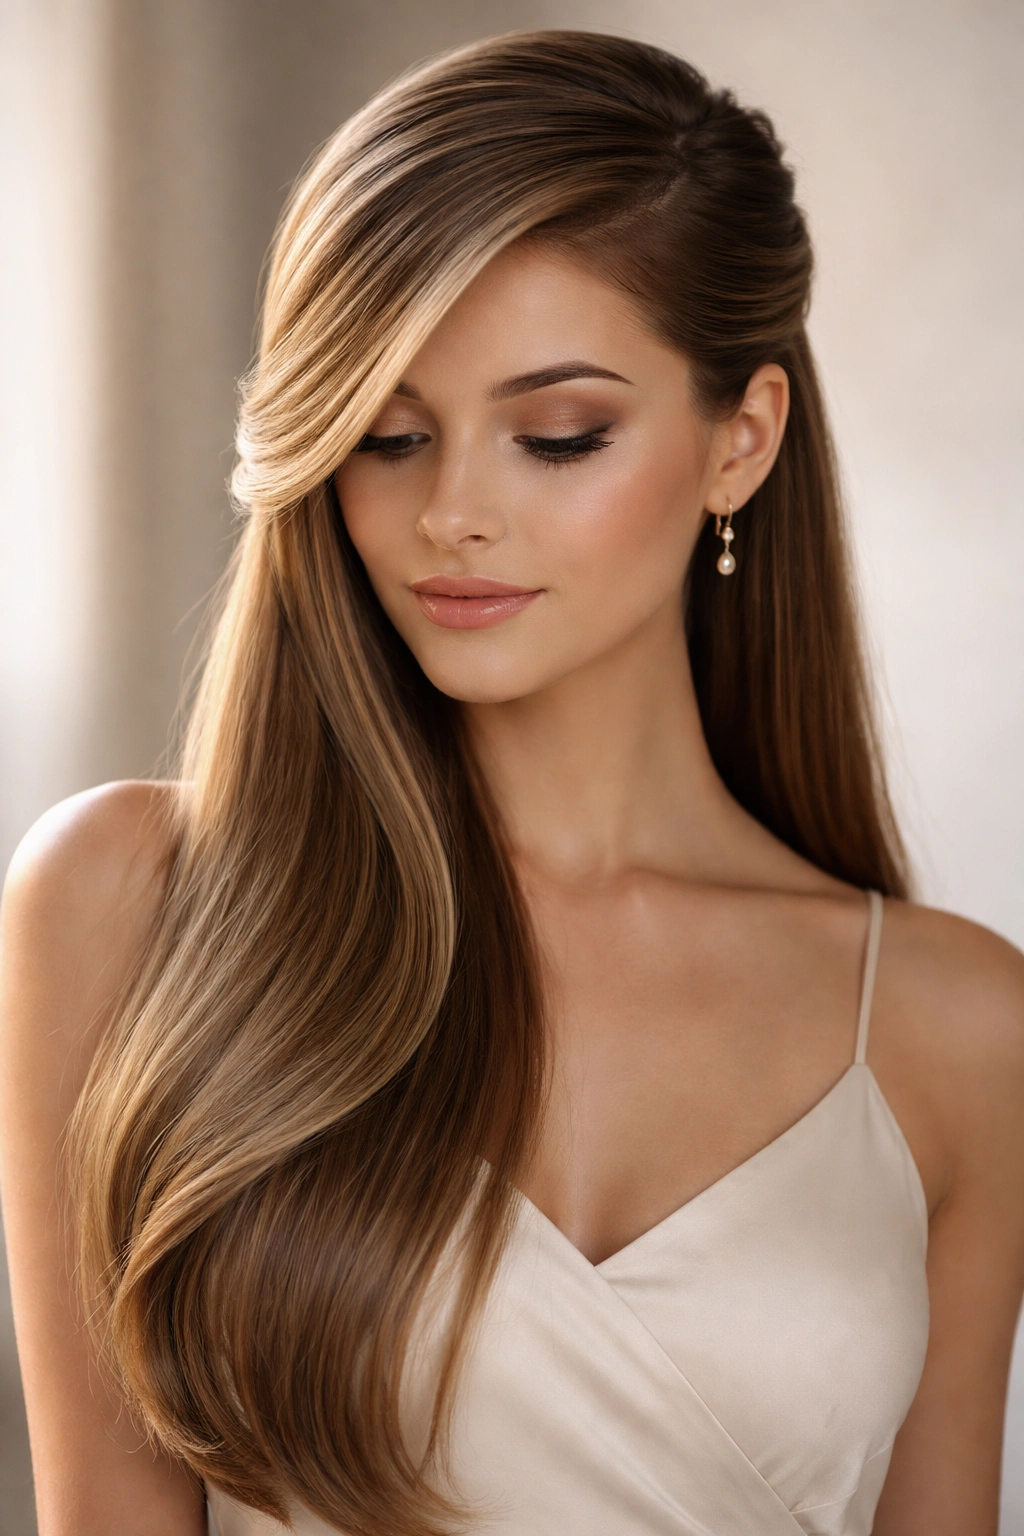
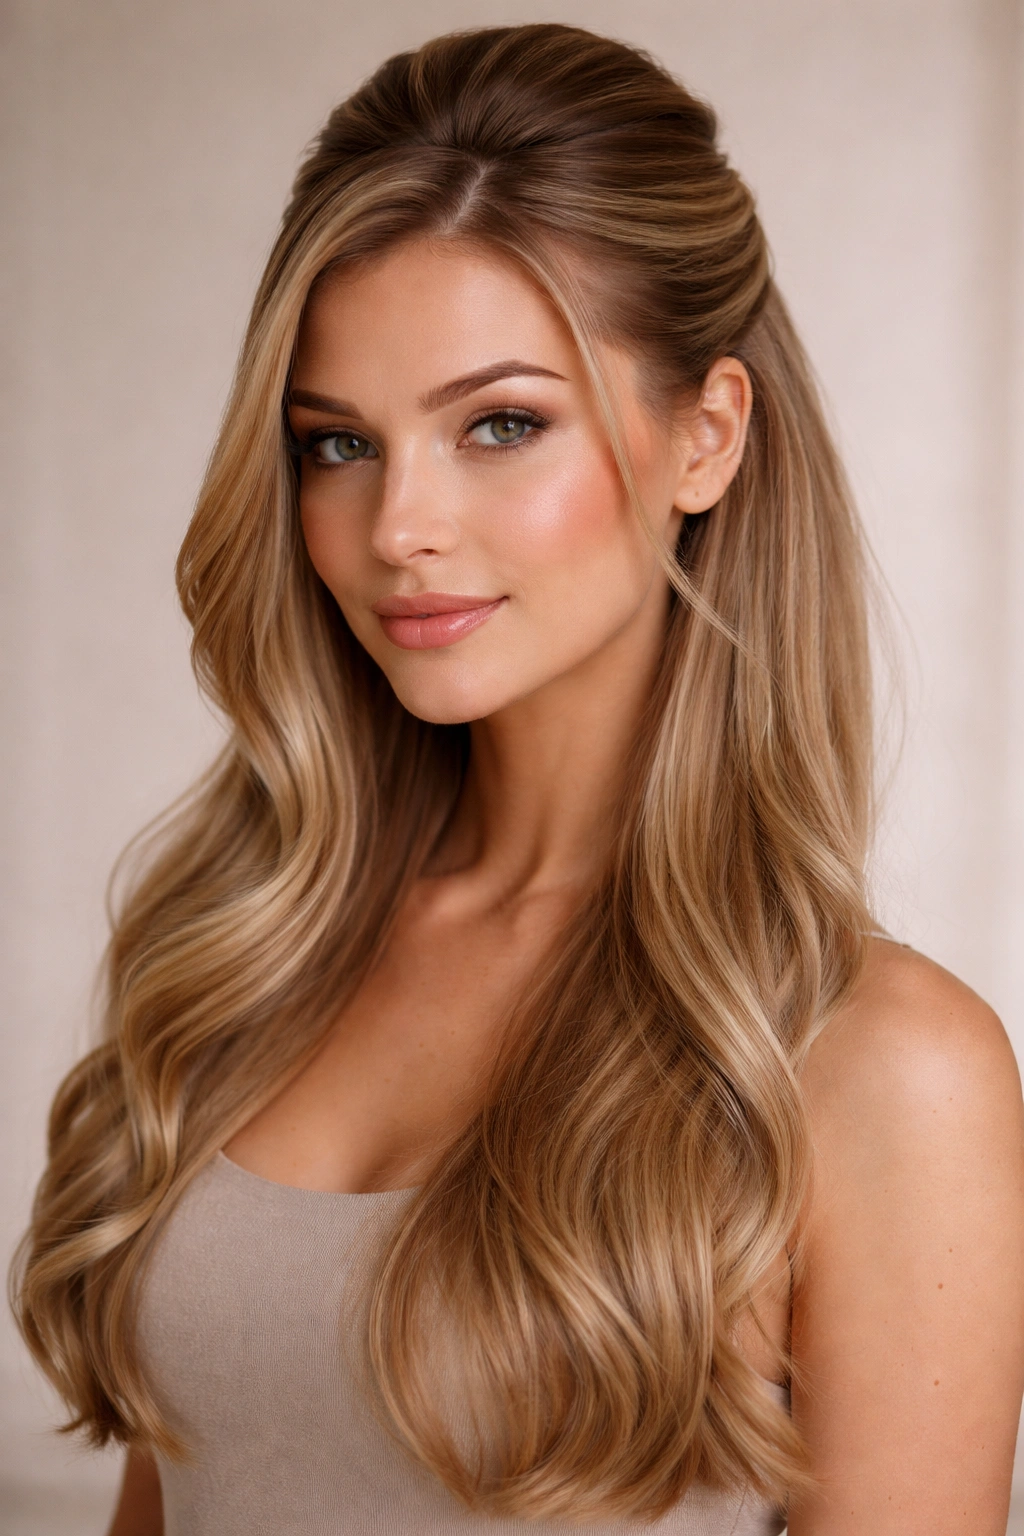
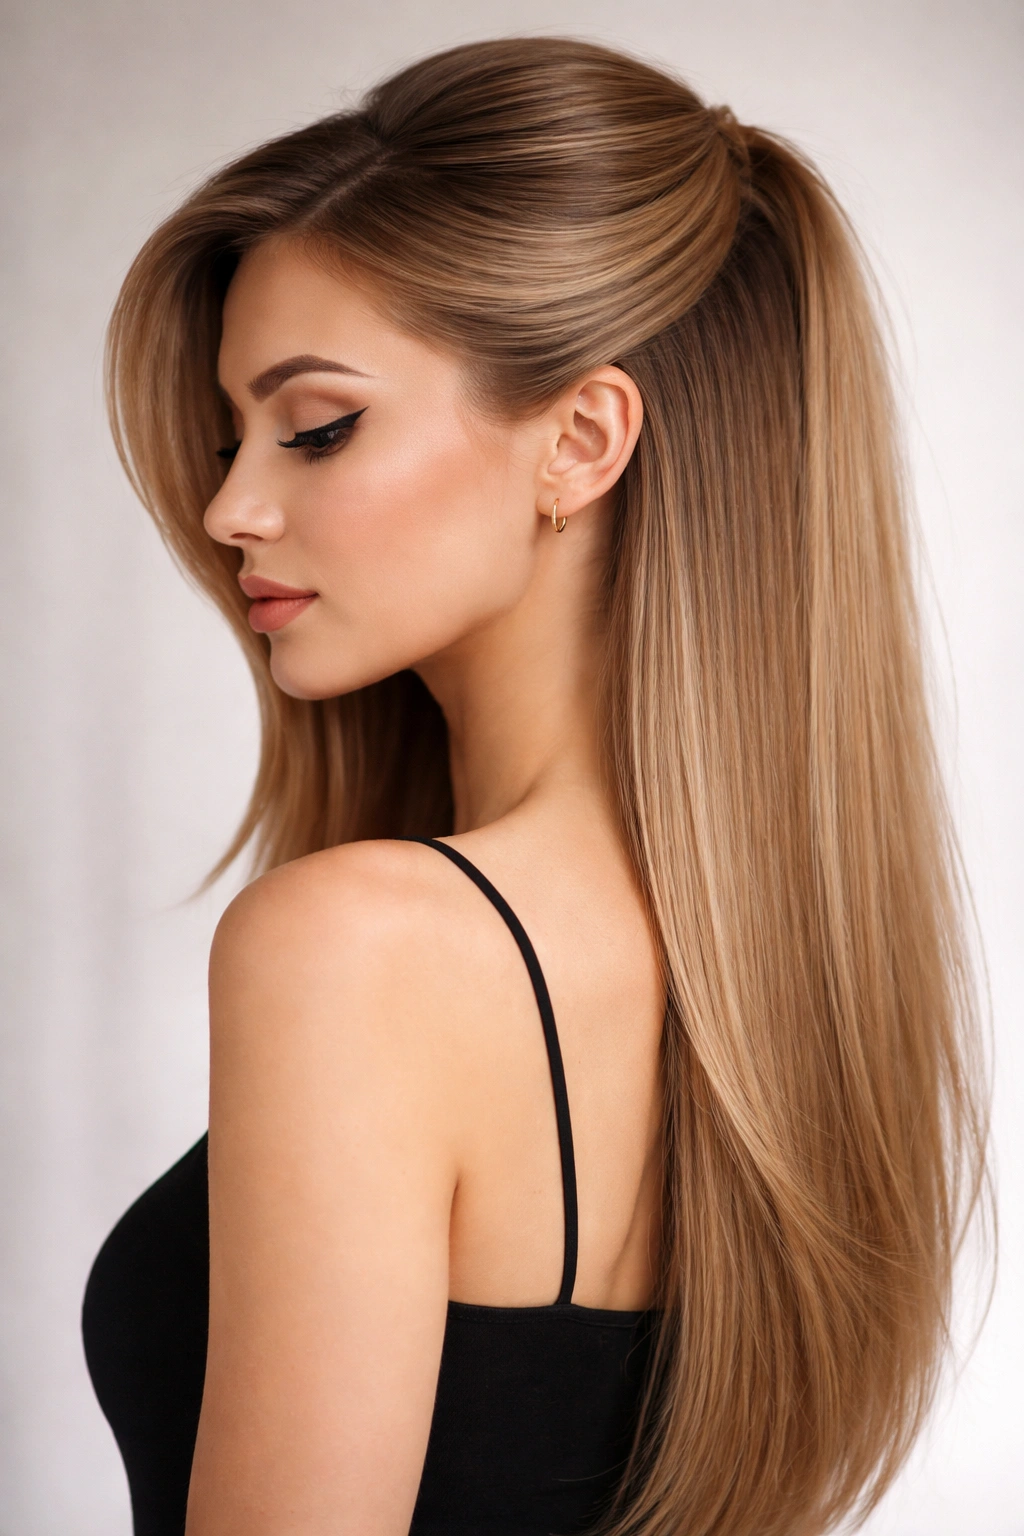
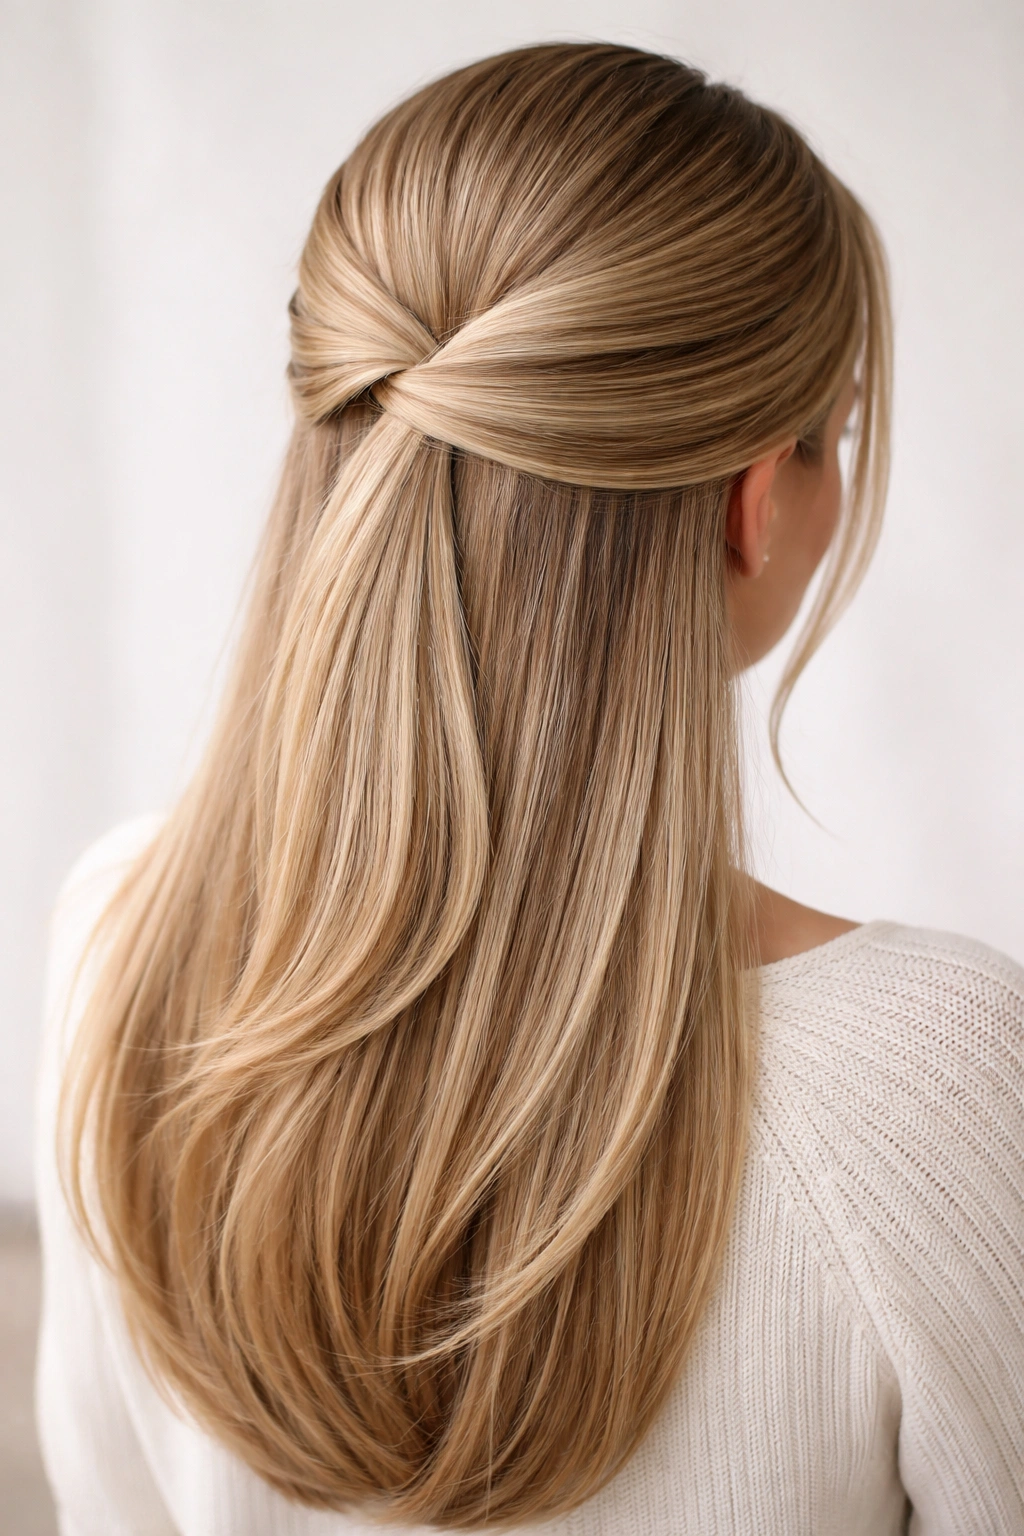
Straight hair offers a stunning canvas for styling, and one of the most flattering ways to showcase it is with a swoop half up half down style. This versatile approach combines the elegance of an updo with the freedom and movement of wearing your hair down, creating a look that works for casual days, professional settings, and special occasions alike. The beauty of these styles lies in their ability to frame the face while keeping hair off your shoulders, and the swoop element—that graceful, curved section of hair swept to one side—adds sophistication and dimension that feels effortlessly polished.
What makes half up half down styles so appealing for straight hair is how they interact with your hair’s texture. Straight hair naturally creates clean lines and smooth surfaces, which means the swoop detail really stands out as a deliberate, elegant choice rather than something that happens by accident. You get the best of both worlds: the practicality of having some hair secured away from your face, plus the beauty of longer lengths still visible and flowing.
Whether you’re looking for something romantic and soft, sleek and modern, glamorous and dramatic, or casual and undone, there’s a swoop half up half down style that’ll work perfectly with your straight hair. The techniques vary in complexity, from super simple five-minute versions to more intricate styles that take a bit longer to master. Once you understand the core concept—the swoop, the secured section, and the balance—you’ll be able to adapt and personalize these looks to match your unique style and the occasion.
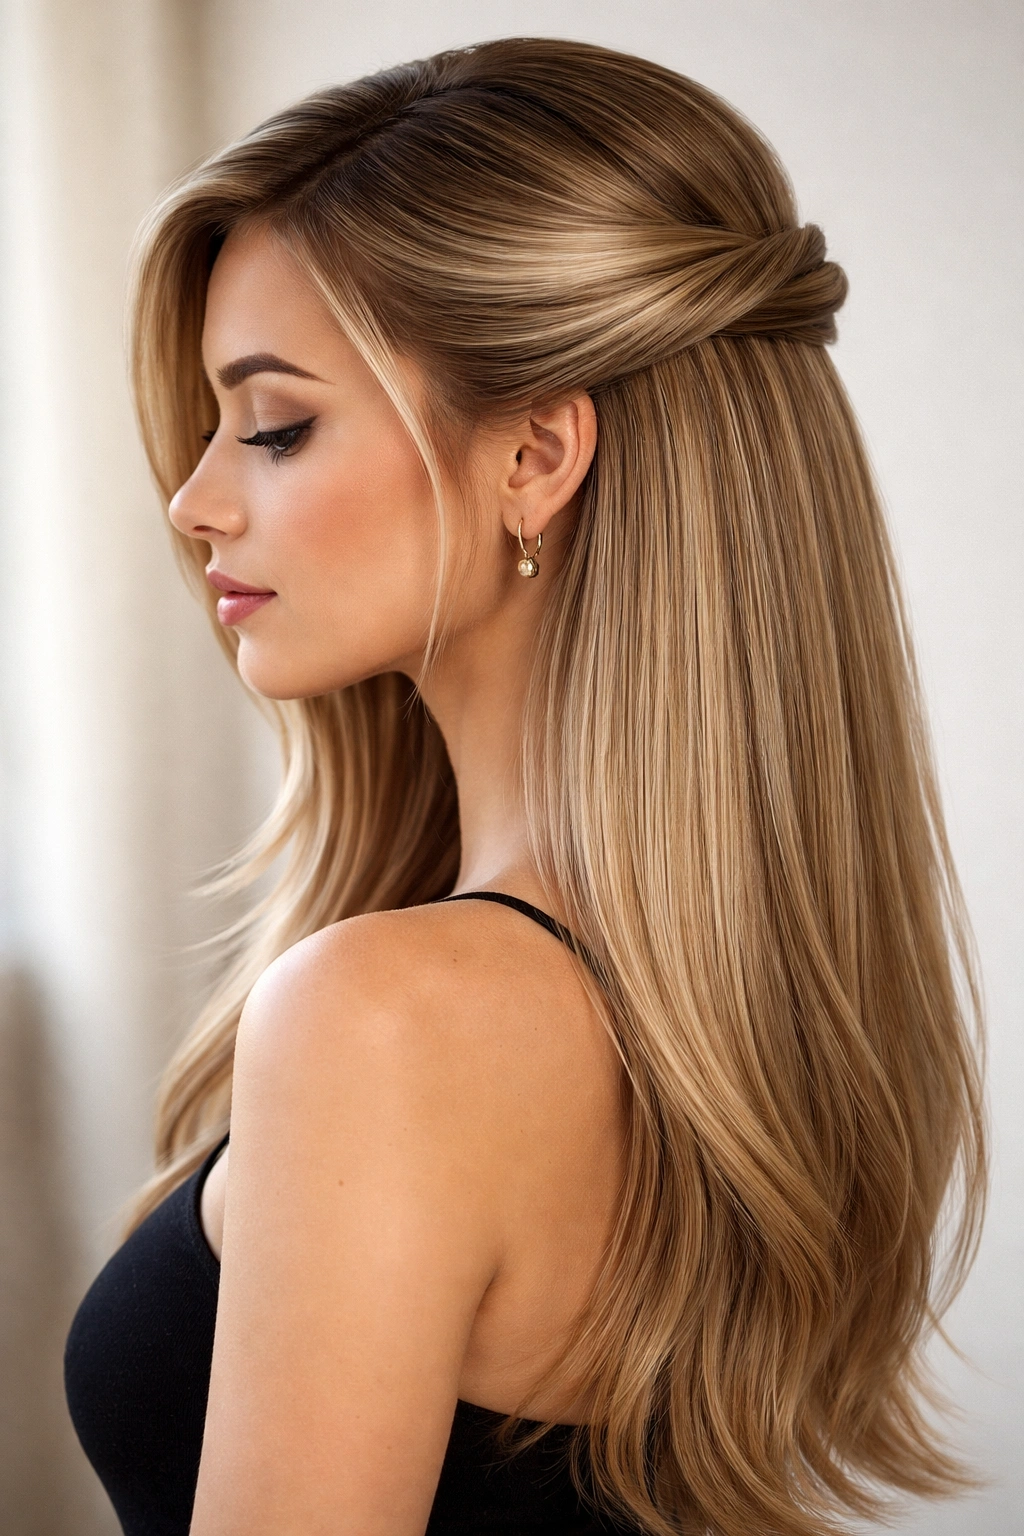
1. The Subtle Side Swoop
The subtle side swoop is the easiest entry point into this styling category, perfect for days when you want something refined but don’t want to spend much time getting ready. With this style, you’re sweeping a section of hair from one side of your head and securing it loosely at the back, creating just a gentle curve that catches light beautifully on straight hair without looking overdone.
Why It Works for Everyday Wear
This style takes advantage of straight hair’s naturally sleek appearance while adding just enough movement and visual interest to avoid looking flat. The swoop creates a subtle contour around your face, making your features appear more defined without requiring any heat styling or complicated techniques. It’s the kind of look that appears effortlessly put-together, which means you can wear it to the office, to coffee with friends, or to run errands without appearing overdressed.
How to Create This Look
- Section your hair: Take a small-to-medium section from the front of your hair on one side of your part
- Sweep it back: Gently brush this section toward the back of your head, creating a soft arc rather than a tight line
- Secure loosely: Use a small bobby pin or clear elastic to anchor it just behind your ear or at the nape, keeping it intentionally relaxed
- Leave face-framing pieces: Don’t pull everything back—let a few whisper-thin pieces fall around your face for softness
Pro tip: If you have truly slippery straight hair, lightly mist the section you’re sweeping with texture spray before pinning it—this gives the bobby pin something to grip and keeps the swoop in place all day.
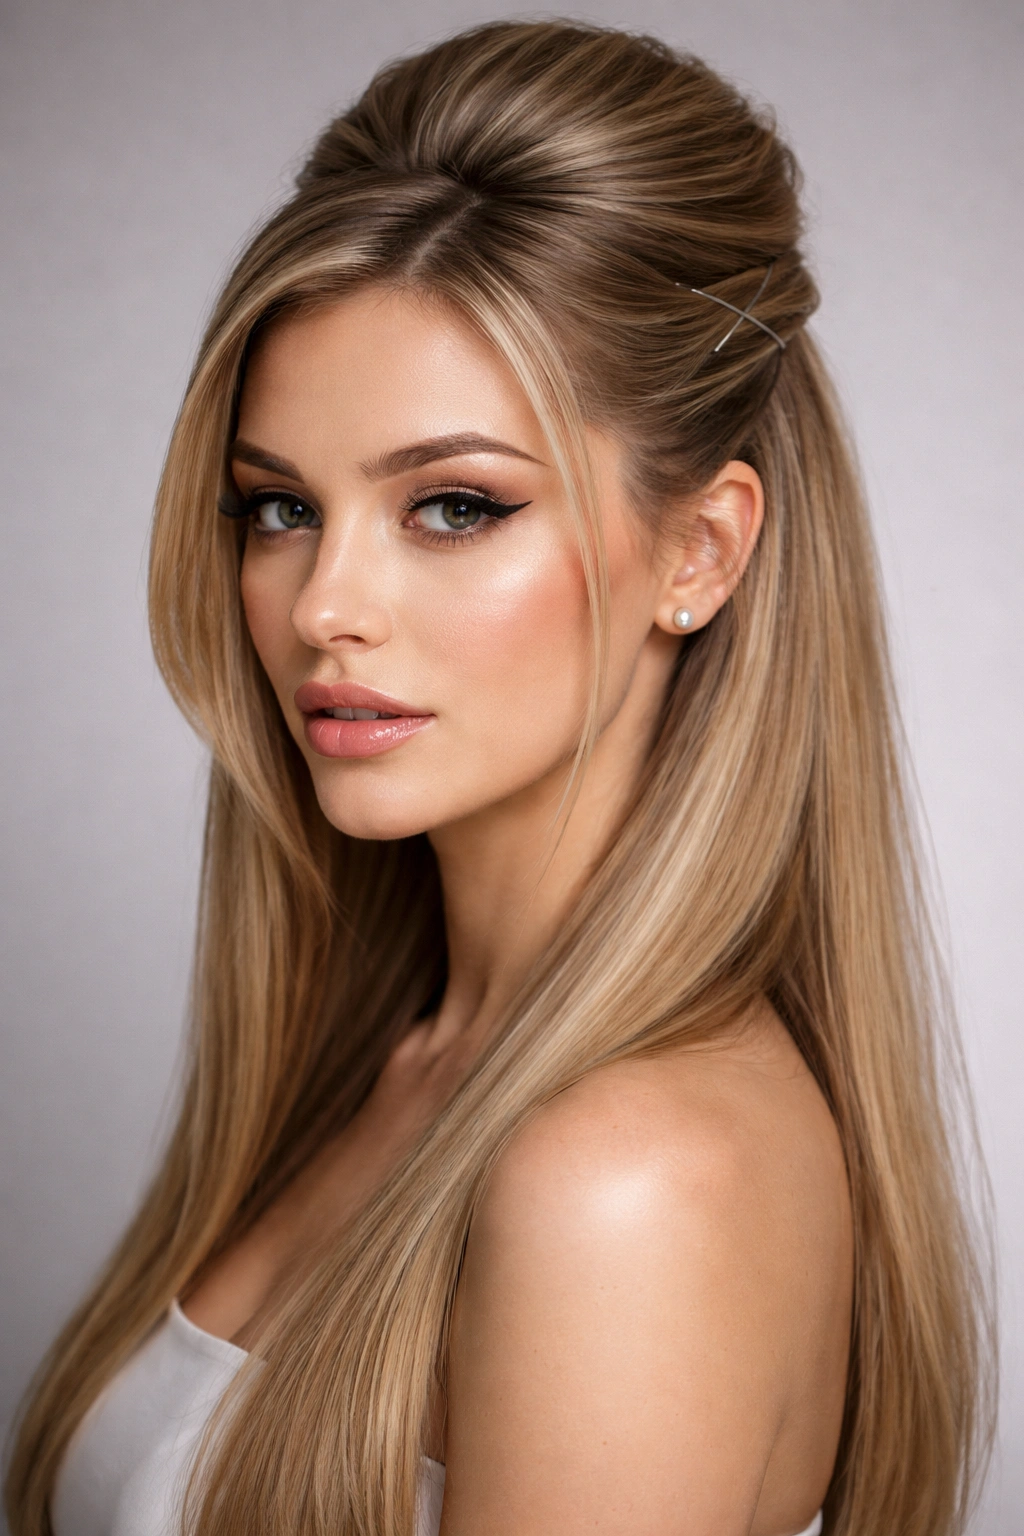
2. The Crossed-Over Swoop
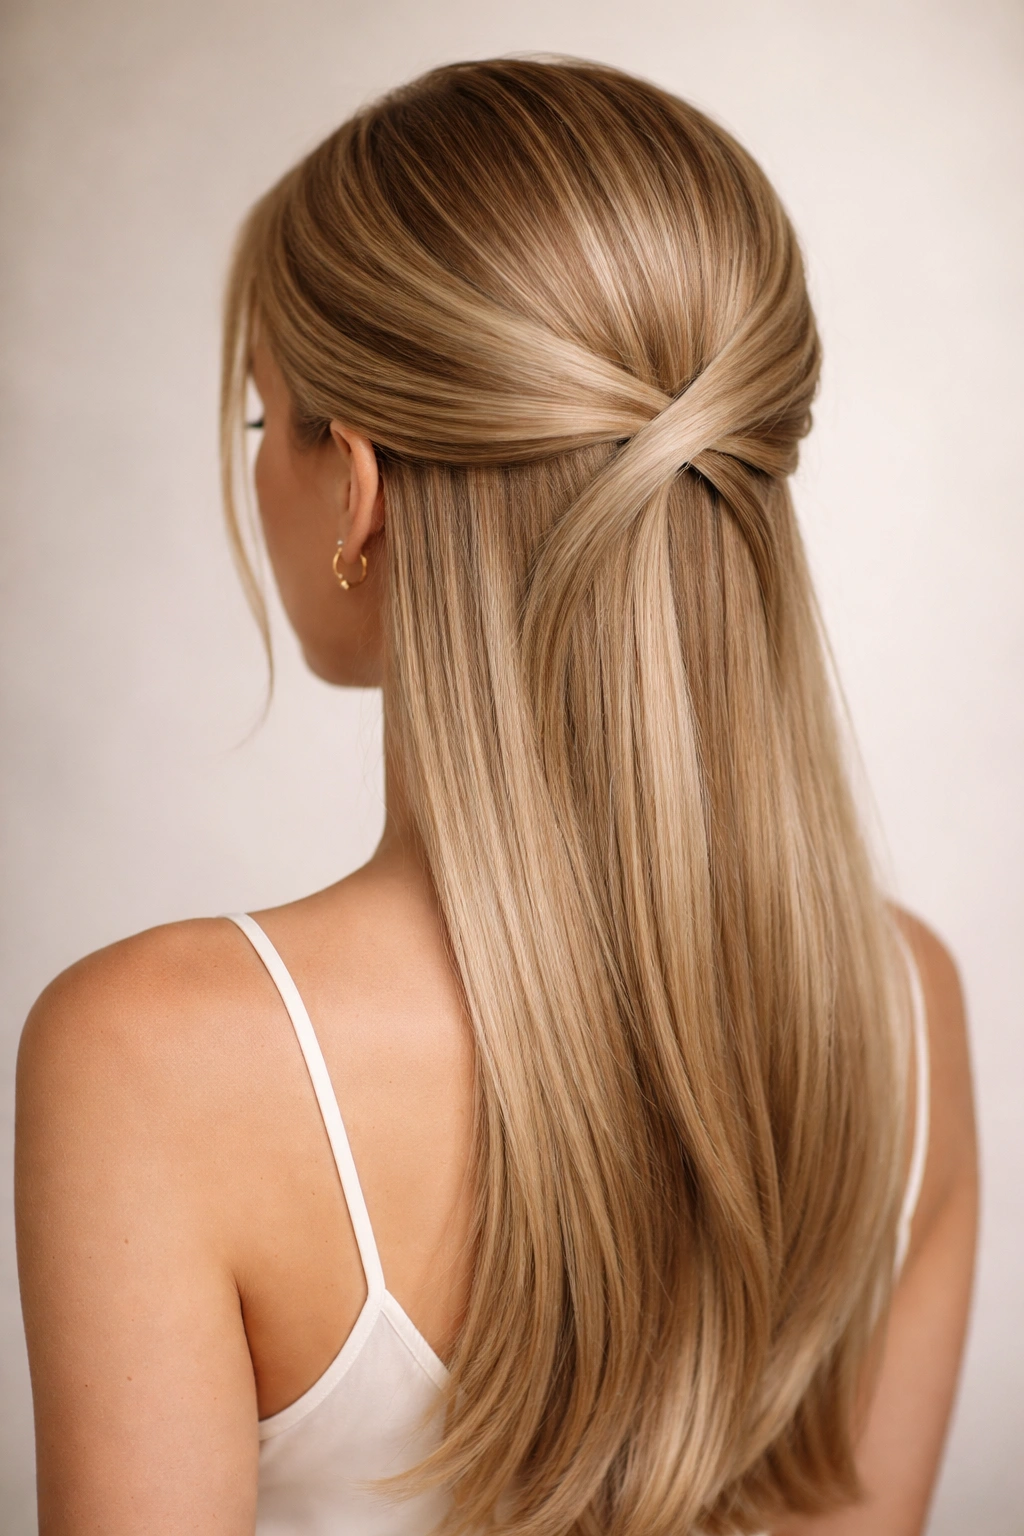
The crossed-over swoop takes the simple side swoop and adds intrigue by creating two swoops that intersect each other at the back. This style works beautifully on straight hair because the clean lines of the crossing sections create a really polished, intentional-looking detail that photographs well and holds all day.
What Makes This Style Stand Out
This variation feels more romantic and put-together than the subtle side swoop, but it’s still straightforward to execute once you understand the concept. The crossing point creates a focal point at the back of your head, and because straight hair doesn’t have texture that hides things, the visual impact of those two swooping sections is unmissable in the best way. It’s the kind of style that looks complicated enough to impress, but simple enough that you can reproduce it every single day if you want to.
Steps to Master the Cross
- Create your first swoop: Sweep hair from the left side of your head toward the back, and secure it with a bobby pin positioned slightly right of center
- Create your second swoop: Now take a section from the right side and sweep it toward the back, crossing it over the first swoop before pinning it slightly left of center
- Adjust for balance: The two sections should overlap gently, creating an X pattern when viewed from above or behind
- Soften any visible pins: Use a small curling iron to gently wave the hair around the pins, which helps disguise them and adds dimension
Pro tip: This style looks especially chic if you leave the very front of your hair unstyled or frame your face with wispy pieces on both sides—it softens the look and prevents it from feeling too severe.
3. The Deep Side Swoop
For a more dramatic take on the half up half down style, the deep side swoop pulls a larger section of hair from one side and sweeps it all the way across the back of your head before anchoring it on the opposite side. On straight hair, this creates an elegant, flowing curve that feels both feminine and sophisticated.
How This Creates Dimension on Straight Hair
Because straight hair lacks natural texture, a larger swept section really demonstrates movement and fluidity. The deep swoop creates a visual line that curves across your head, and because you’re pulling the hair from one side to the other, you’re naturally creating height and shape. This is especially flattering if you have a longer face, as the curved line softens angular features and creates visual balance.
Achieving the Perfect Deep Swoop
- Start with a large section: Take a generous amount of hair from one side—roughly from your temple back to your ear
- Brush it smooth: Use a fine-tooth comb to ensure there are no bumps or snags in the section before you move it
- Sweep dramatically: Pull this section across the back of your head with intention, creating a pronounced arc rather than pulling it straight back
- Anchor on the opposite side: Secure it just behind your opposite ear with multiple bobby pins for stability
- Leave the lower half down: The hair below this swoop stays completely loose, creating that classic half-up silhouette
Worth knowing: The depth of this swoop is proportional to how much hair you include—more hair creates a deeper, more dramatic swoop, while less hair keeps it subtle. You can adjust based on your hair density and how bold you want the statement to be.
4. The Twisted Half-Up with Side Swoop
Adding a twist to the swoop transforms the style from simply curved to textured and refined. This version twists the section of hair before securing it, which creates a visible detail that adds visual interest to straight hair and feels just fancy enough for dressier occasions without requiring significant effort.
Why Twists Elevate Straight Hair
Twists create the illusion of texture and movement even on completely straight hair, breaking up the flatness that can sometimes plague silky-straight styles. When you twist a section before securing it, you’re creating a defined line that catches light differently than untwisted hair, which gives the overall look more dimension and sophistication. Plus, a twist feels slightly dressier than a simple swoop, making this style perfect for date nights or professional events.
The Twist Technique for Straight Hair
- Select your swoop section: Take a section from one side of your head, starting near your temple
- Divide and twist: Split this section into two pieces and twist them around each other, moving from the side of your head toward the back
- Keep it taut: Straight hair can look stringy if a twist is too loose, so maintain gentle tension as you twist to keep the strands together
- Secure at the back: Pin the twisted section at the back of your head, just on the opposite side of center from where you started
- Gentle it out slightly: Once pinned, use your fingers to gently pull tiny wisps from the twist to soften it and prevent it from looking too structured
Insider note: If your twist looks too perfect and precise, it can read as overly done. Deliberately loosening it very slightly by gently pulling at the edges gives it a more relaxed, romantic quality.
5. The Sleek Swoop with Gel
For a more modern, editorial take on the half up half down style, the sleek swoop uses styling gel to create a polished, almost wet-look finish on the swooped section while the rest of your hair remains soft and straight. This contrast between the slicked swoop and the loose bottom half creates contemporary visual interest.
The Modern Appeal of This Styling Approach
This style is incredibly popular in fashion editorials and on the red carpet because it manages to feel both casual (you’re still wearing your hair down) and intentional (the slicked swoop is clearly a styling choice). On straight hair, the gel-slicked swoop is particularly striking because the product’s shine really reads against your hair’s natural texture. It’s a styling choice that says you’ve thought about your look without appearing overdressed.
Creating the Sleek Effect
- Choose your gel carefully: Use a strong-hold gel that’s designed to keep hair in place without flaking or getting crispy as it dries
- Apply to the swoop section: Take your chosen section and apply gel directly to the hair and scalp as you brush it back
- Smooth it down: Use a fine-tooth comb to smooth any flyaways and create a polished surface
- Pin and let it dry: Secure with bobby pins while the gel is still slightly damp, then let it dry completely before removing the pins
- Keep the bottom soft: The contrast is key—use a curl cream or lightweight serum on the loose half-down portion to keep it soft and moveable
Pro tip: Don’t oversaturate your hair with gel or it’ll look stiff and helmet-like. A little product goes a long way, especially on straight hair where every ounce of product is visible.
6. The Half-Up Swoop with Face-Framing Waves
If you want to add a touch of movement to your straight hair while still maintaining the clean elegance of a swoop half-up style, this variation uses a curling iron to create soft waves in the bottom half while keeping the swoop section smooth and structured. The result feels romantic and slightly undone despite being fairly intentional.
Balancing Straight and Wavy Texture
This style bridges the gap between pure straight hair and fuller texture. The waves in the lower section create visual movement and make your hair appear fuller, while the smooth swoop keeps the overall look refined and face-flattering. On straight hair, even gentle waves feel like a significant style change without requiring a full curl or permanent texture treatment.
Wave and Swoop Combination Steps
- Create your swoop first: Secure your half-up swoop section completely before you add any heat to your hair
- Section the bottom half: Divide the loose portion of your hair into 2-3 inch sections, depending on your hair length
- Curl each section away: Using a 1¼-inch curling iron, wrap each section around the barrel and hold for 8-10 seconds, curling away from your face
- Let curls cool: Allow each curl to cool slightly on a clip before moving to the next section—this sets the wave
- Finger-comb the waves: Once all sections are done and completely cool, gently finger-comb through the waves to break them up and create a softer, more natural-looking wave pattern
Worth knowing: The size of your curling iron matters—smaller barrels create tighter waves that read more obviously, while larger barrels (1½ inches or bigger) create looser waves that feel more natural on straight hair.
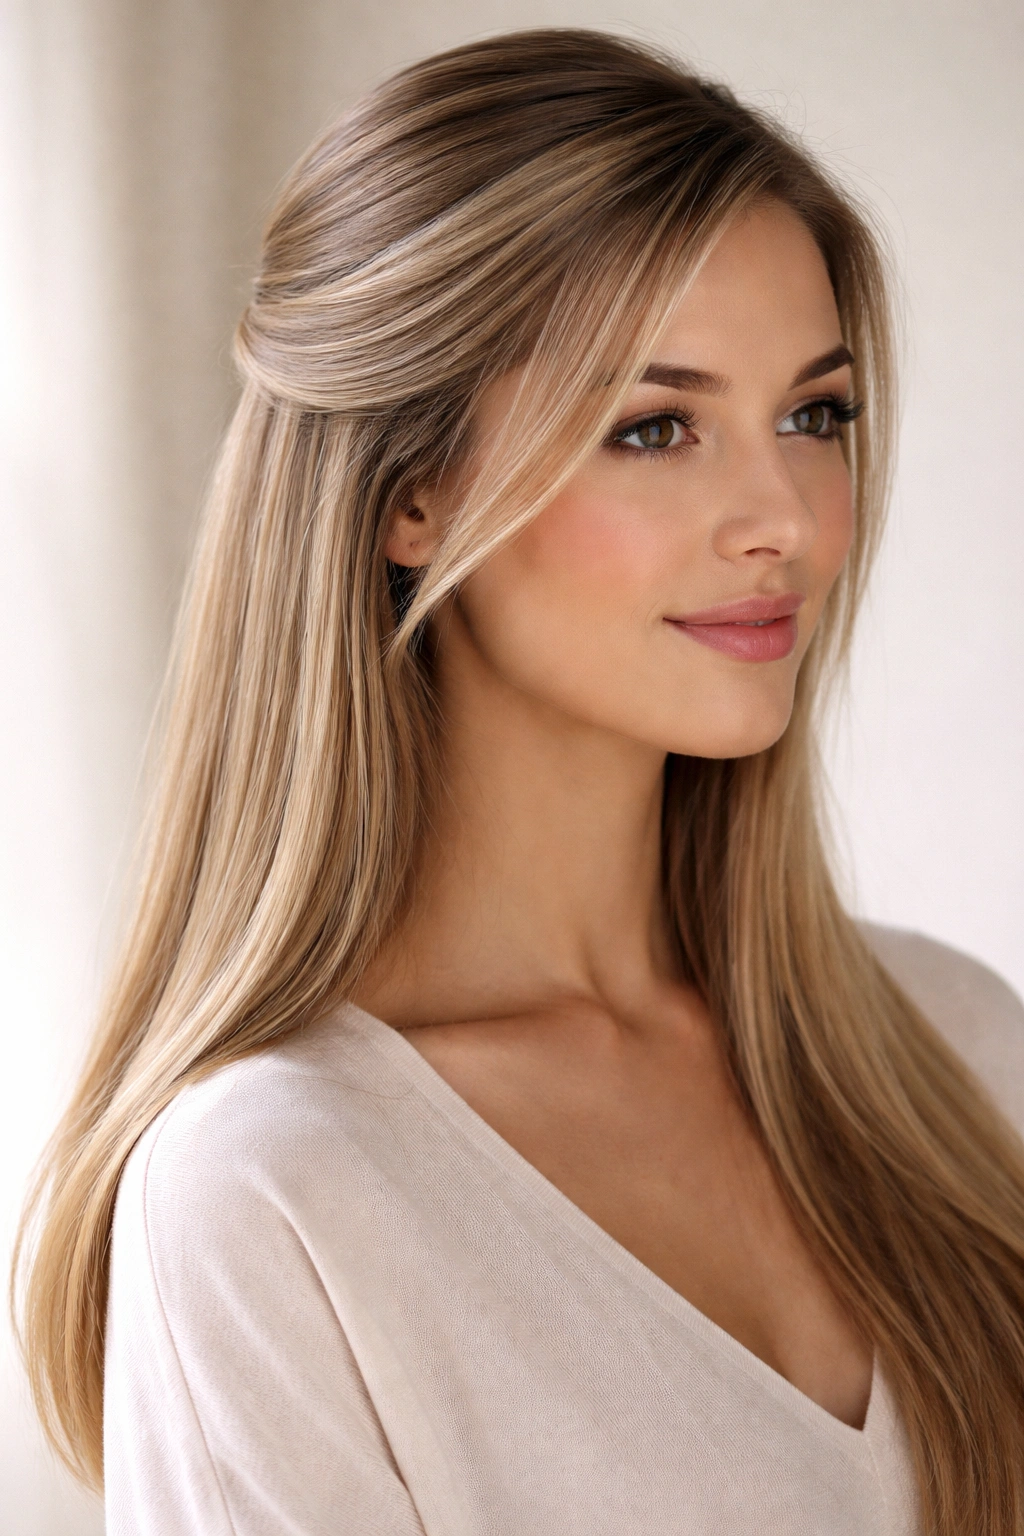
7. The Swooped Crown Style
This elegant variation positions the swoop section higher on your head, creating a crown-like effect where the secured portion sits at the crown of your head rather than at the nape. It’s perfect for days when you want to add height and draw attention upward toward your face.
Why This Placement Works for Straight Hair
By securing the swoop higher, you’re creating instant lift and volume in a spot where straight hair sometimes looks flat. The swooped section creates a line that draws the eye upward, which is particularly flattering if you have a longer face or want to add the illusion of height. Plus, this positioning works beautifully with various hair lengths and face shapes, making it a genuinely versatile choice.
Creating Height With Your Swoop
- Backcomb at the crown: Create a small base of texture at your crown using a backcomb or teasing brush
- Position your swoop higher: Rather than sweeping from ear level, begin your swoop from a higher point on the side of your head, closer to your temple
- Sweep toward the crown: Guide the section toward the backcombed area at your crown
- Secure with multiple pins: This positioning supports more weight, so use 2-3 bobby pins criss-crossed for security
- Leave face-framing pieces: Let several pieces fall loose around your face to prevent the higher positioning from looking too severe
Pro tip: If you’re worried about the swoop sliding down throughout the day, use a tiny dab of volumizing mousse or texturizing spray at the base before you pin—it gives your hair grip and prevents slipping.
8. The Braided Swoop Half-Up
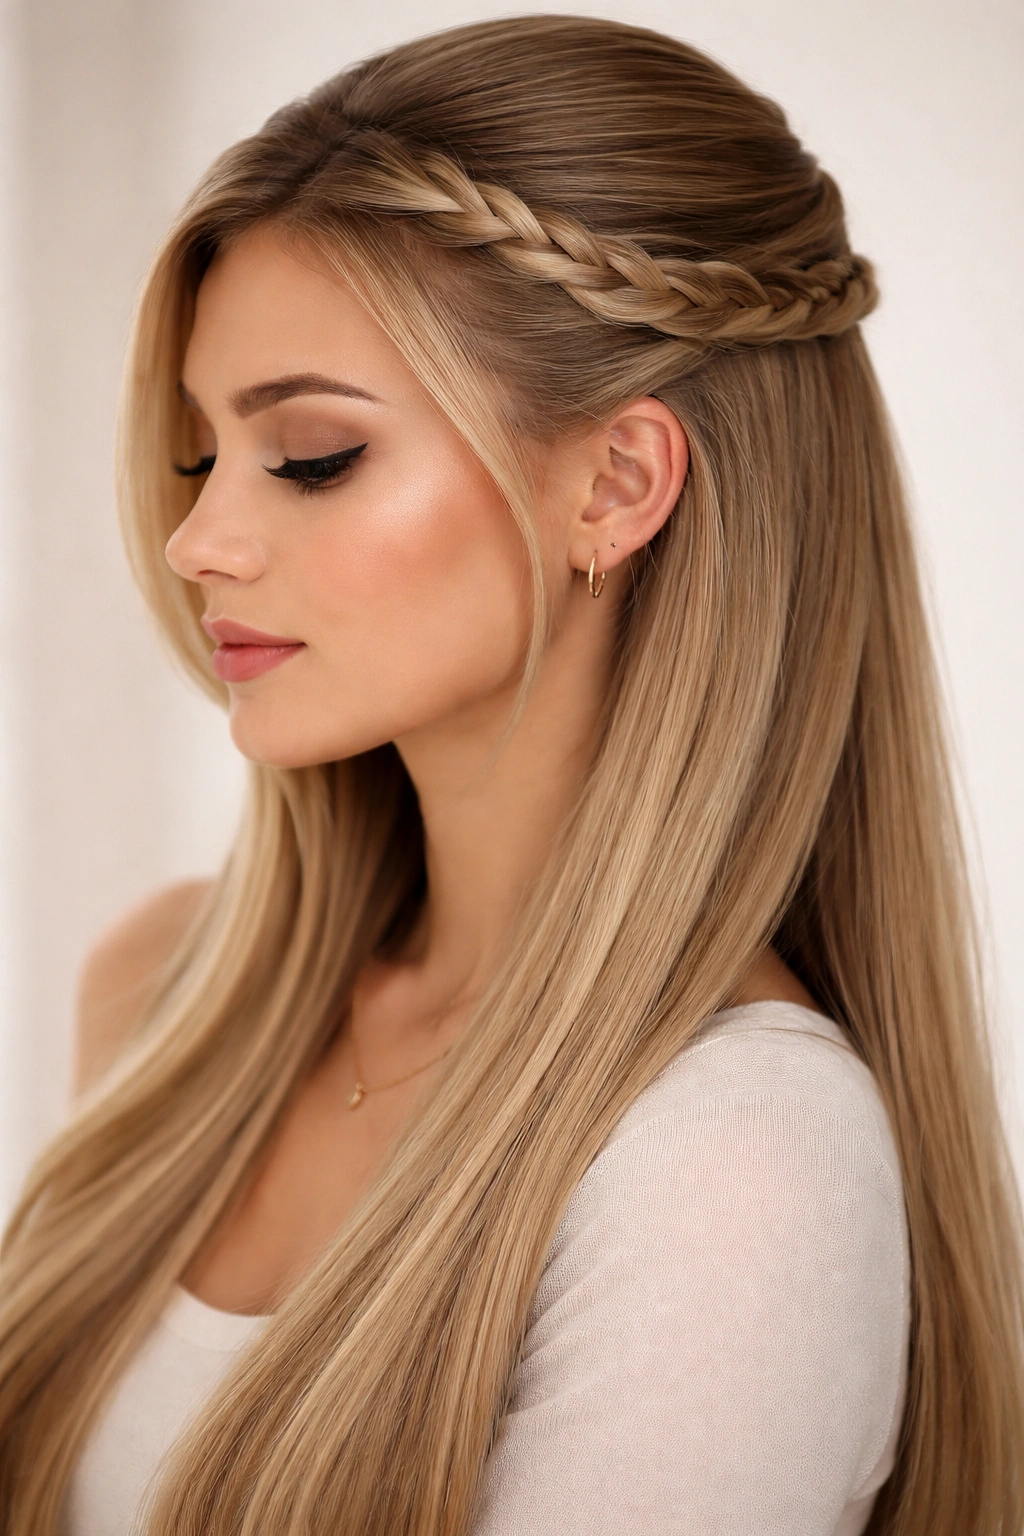
For a more intricate version that still maintains the essence of the swoop half-up style, this variation incorporates a small braid into the swooped section. A thin Dutch braid or French braid woven along the swoop adds texture and visual interest while still looking elegant and put-together on straight hair.
Adding Braid Details to Straight Hair
Braids on straight hair are sharper and more defined than they are on textured hair, which means the braid detail really reads as intentional and sophisticated. By incorporating a braid into your swoop, you’re adding dimension without requiring curls or waves—the braid itself provides the textural contrast. This style feels dressy enough for weddings or formal events, but not so complicated that you can’t recreate it for yourself in under ten minutes once you’ve practiced a few times.
Braiding Your Swoop
- Start your braid: Beginning at your temple, start a Dutch braid (this creates a braid that sits on top of your hair rather than sinking into it)
- Braid toward the back: Continue the braid as you sweep the hair toward the back of your head, following the same curved path your swoop would normally take
- Secure the braid: Bring the braid to the back of your head and pin it in place, either tucking the loose end under or leaving it to blend with the rest of your hair
- Loosen the braid slightly: Gently pull at the edges of the braid to make it appear fuller and softer
- Pin any flyaways: Use bobby pins to tuck in any straight pieces that don’t fit neatly into the braid structure
Worth knowing: Braids look best on hair that has at least a tiny bit of texture—if your hair is extremely slippery, use a light texturizing spray before you start braiding to give the strands something to grip.
9. The Swooped Ponytail
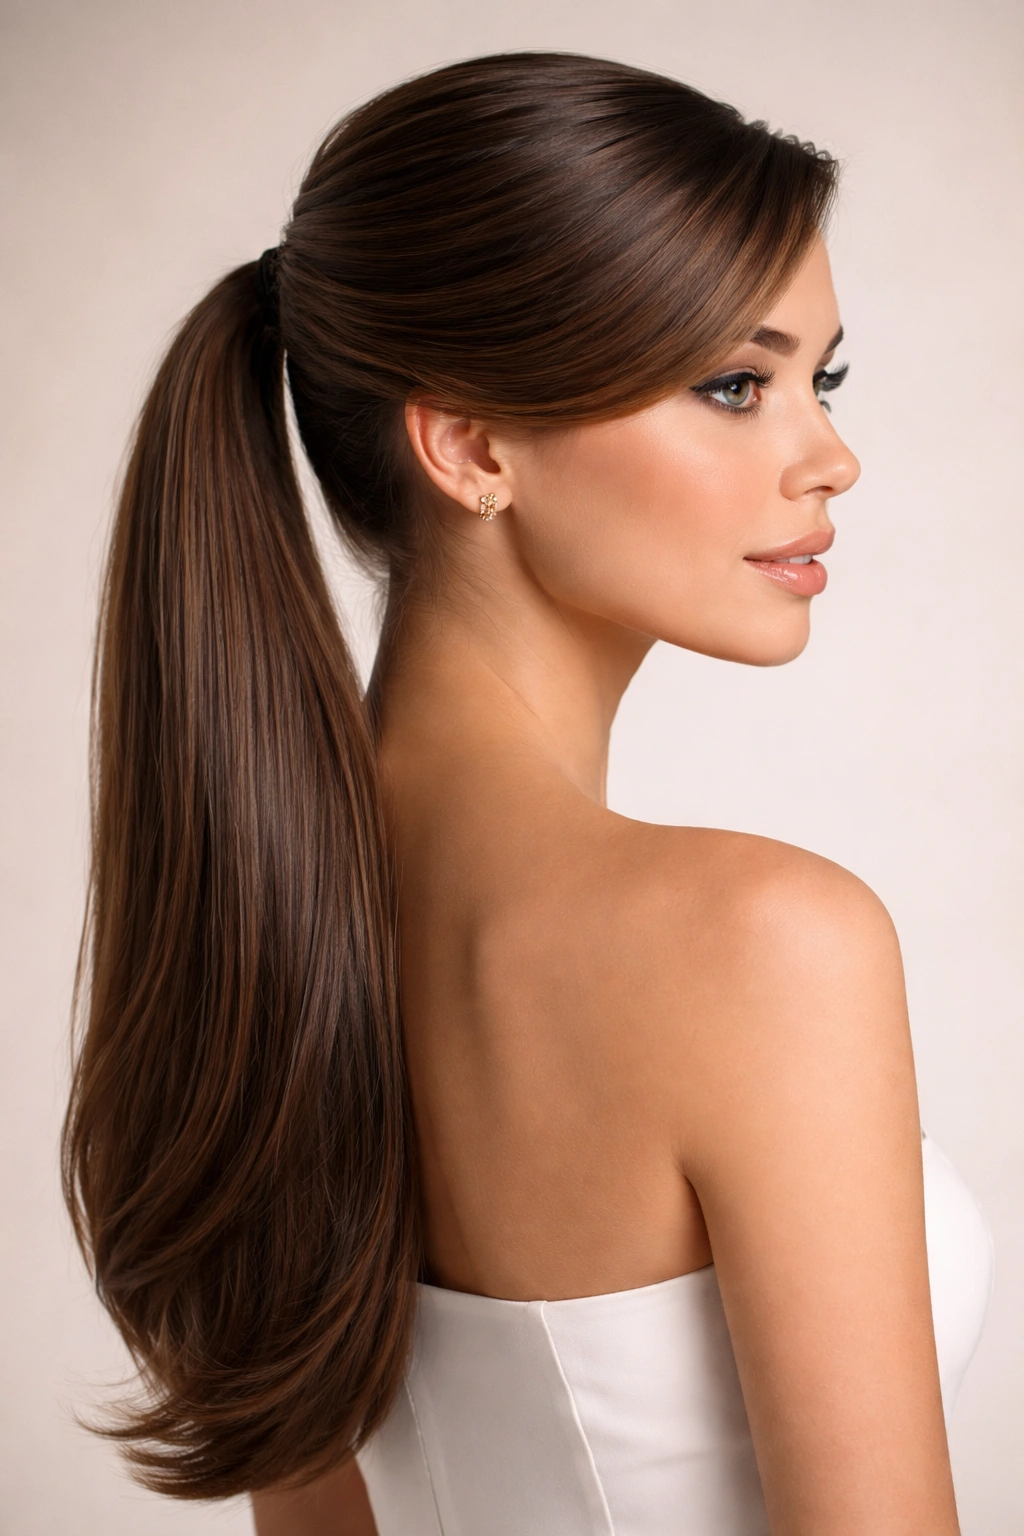
This style takes the half-up swoop concept and extends it further by converting it into a low ponytail rather than leaving the bottom half completely down. The swoop element remains—that graceful curved section of hair swept to one side—but now it’s anchored into a ponytail rather than left loose, creating a style that’s slightly more formal and polished.
When to Choose This Over a Standard Half-Up
The swooped ponytail is perfect for situations where you need your hair more secured but want to maintain the elegance and fluidity of a swoop style. It’s ideal for active days, professional settings where you want everything pulled back, or occasions where you’re moving around enough that a completely loose bottom half might feel in the way. On straight hair, the swoop detail in a ponytail is especially striking because it breaks up what could otherwise be a very simple look.
Steps to Create the Swooped Ponytail
- Create your swoop: Sweep a section of hair from one side toward the back, just as you would for a standard half-up swoop
- Gather all hair at the nape: Add the entire bottom half of your hair to the swoop section, gathering everything into a low ponytail at the base of your neck
- Secure tightly: Use a elastic that matches your hair color and pull the ponytail snug—you want the swoop to maintain its curved shape
- Wrap the base: Take a small section of hair from inside the ponytail and wrap it around the elastic to hide it
- Add shine: Use a light serum or shine spray on the ponytail to make straight hair gleam
Pro tip: This style works especially well if you create a bit of texture at the crown before you start—backcomb slightly, then smooth the top layer. This gives your swoop more visual interest and prevents it from looking completely flat.
10. The Asymmetrical Swooped Half-Up
For a more fashion-forward take on the swoop half-up, the asymmetrical version pulls significantly more hair from one side than the other, creating a very one-sided silhouette that feels modern and editorial. This is the kind of style you’ll see on runways and in fashion magazines—it’s bold and intentional.
The Appeal of Asymmetry on Straight Hair
Asymmetrical styles challenge the typical symmetrical beauty ideal, and on straight hair, they read as especially intentional because there’s no texture to soften or blur the line. The stark asymmetry actually looks chic and design-forward rather than accidental. This style is perfect if you want to make a statement, if you’re experimenting with a new look, or if you simply prefer the visual interest of one-sided styling.
Creating a Dramatically Asymmetrical Swoop
- Take a much larger section: Rather than a medium-sized section, take a large amount of hair from one side—essentially everything from that side of your part back to your ear
- Sweep it deeply across: Pull this generous section all the way across to the opposite side of your head
- Secure on the far side: Pin it on the opposite side from where you started, creating a very dramatic angle
- Keep one side completely loose: The side you didn’t take hair from remains entirely down, creating the asymmetry
- Angle the loose side: You can style the loose side straight down, or use a light wave to add movement on that side only
Worth knowing: This style requires confidence to wear—it’s not a subtle look. But on straight hair, it photographs beautifully and feels incredibly polished and intentional.
11. The Double-Swooped Half-Up
Taking the crossed-over swoop concept even further, the double-swooped half-up uses two distinct swoops that don’t necessarily cross but instead create a more complex, multi-layered effect at the back of the head. This is for days when you want to make a real styling statement without resorting to braids or curls.
Layering Swoops for Visual Drama
By creating two separate swooped sections rather than one, you’re adding depth and complexity to the back of your head. Straight hair really showcases this kind of detailed work because each section reads clearly and cleanly. The viewer’s eye moves across the swooped sections, which creates visual interest and makes the style feel more deliberate and polished than a single swoop.
Creating Multiple Swooped Layers
- First swoop: Create a swoop from one side of your head, sweeping toward the back center and securing with a bobby pin
- Second swoop: Create a second swoop from the opposite side, positioned slightly lower than the first one, and secure it slightly overlapping the first pin
- Vary the heights: The key to this style is that the two swoop sections sit at slightly different heights, creating a stacked or layered effect
- Blend the sections: Use your fingers to gently blend the hair between the two pinned sections so it looks intentional rather than like two separate styles fighting for space
- Add a third swoop (optional): If you’re feeling adventurous and have thick hair, you can even add a third, lower swoop for a truly dramatic effect
Insider note: This style works best on hair with decent thickness—if you have fine or thin hair, two swoops might use up so much of your hair that the bottom half looks sparse.
12. The Half-Up Swoop with Accessories
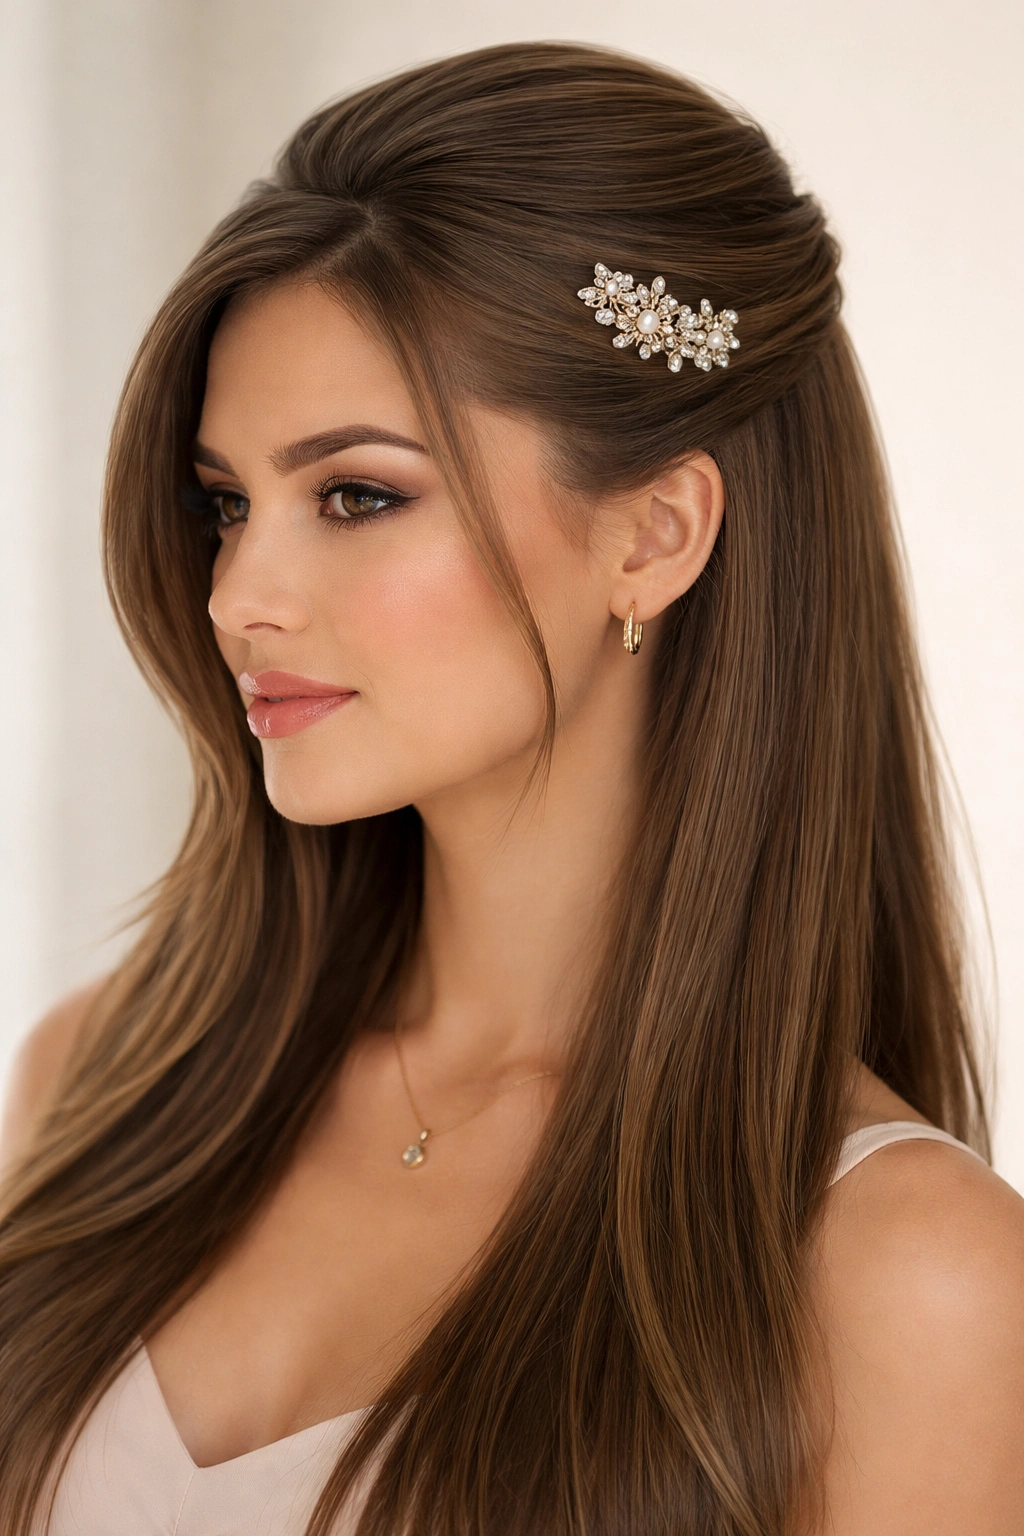
This final variation proves that adding the right accessory can completely transform a basic swoop half-up into something special. By incorporating clips, claw clips, or hair jewelry at the point where your swoop is secured, you’re creating a focal point and adding visual interest that elevates the whole look.
Styling With Intention and Accessories
Accessories aren’t just for covering bobby pins—they’re styling elements that deserve thought and intention. A pearl clip, a vintage-looking claw clip, a decorative bobby pin, or even a small hairpin can transform a simple swoop into something that feels tailored and special. On straight hair, these details really stand out because there’s nothing else competing for visual attention, so your accessories become a design statement.
Making Accessories the Star
- Choose an appropriate accessory: Depending on the occasion, select something that complements your look—dainty clips for everyday, statement pieces for evenings
- Position it purposefully: Place your accessory exactly where you’re securing your swoop, making sure it’s visible and intentional
- Consider your hair color: Gold and rose gold look warm against all hair colors, but you can also match your accessory to your undertones for a more cohesive look
- Use multiple small pieces: Rather than one large clip, two small matching clips can look more sophisticated and polished
- Coordinate with other jewelry: If you’re wearing earrings or necklaces, think about how your hair accessory coordinates with them
Pro tip: If you’re using a decorative clip or claw clip, secure it after you’ve pinned your swoop with bobby pins underneath—the bobby pins provide the hold, and the visible clip adds the style.
Final Thoughts
The swoop half-up half-down style is genuinely one of the most versatile and flattering options available for straight hair, and these twelve variations prove that you never have to get bored with the basic concept. Each version works beautifully on smooth, straight hair, and they range from five-minute versions you can do without even thinking to more elaborate styles that let you play with details and accessories.
The real power of mastering the swoop half-up is that once you understand the core technique—selecting a section, sweeping it back, and securing it intentionally—you can adapt it endlessly based on your mood, the occasion, and how much time you have available. What makes one version feel casual and another feel dressy is often just small tweaks: the size of the section, the exact positioning, whether you add accessories or texture, how firmly you secure it. Straight hair is the perfect canvas for these styles because every detail reads cleanly and intentionally.
Start with whichever version appeals to you most, practice it a few times until you can do it confidently, and then branch out to exploring the others. Within a few weeks, you’ll have a whole arsenal of swoop half-up styles that work for literally any situation—from your regular workdays to special events. And honestly, that’s the sweet spot with hairstyling: simple techniques that look intentional and polished, requiring minimal products or heat styling, and flattering every single time.