The half-up half-down hairstyle is the goldilocks of prom and homecoming looks — it’s got the elegance of an updo with the freedom and movement of wearing your hair down. For medium-length hair, it’s practically a gift. You’ve got enough length to work with for texture and volume, but not so much that the style becomes overwhelming or takes hours to perfect. The best part? This versatile approach works whether you’re going for romantic and soft, bold and dramatic, bohemian and effortless, or sleek and modern.
What makes half-up half-down styles so perfect for homecoming specifically is their balance of sophistication and approachability. They photograph beautifully from every angle, they hold up through dancing and hugging your friends, and they won’t leave you with a serious dent in your hair by 11 p.m. Plus, there’s an endless number of ways to interpret the style — you can add twists, braids, curls, gems, clips, ribbons, or flowers depending on your dress and mood.
Medium hair is genuinely the sweet spot for experimenting here. You can create volume and dimension without the weight that comes with longer hair, and the shorter ends mean you can get away with more texture and movement. Whether your hair is naturally wavy, straight, or curly, the medium length works beautifully with half-up half-down styling.
Let’s explore twenty distinct looks that’ll work for your specific hair length and help you nail the homecoming vibe you’re going for.
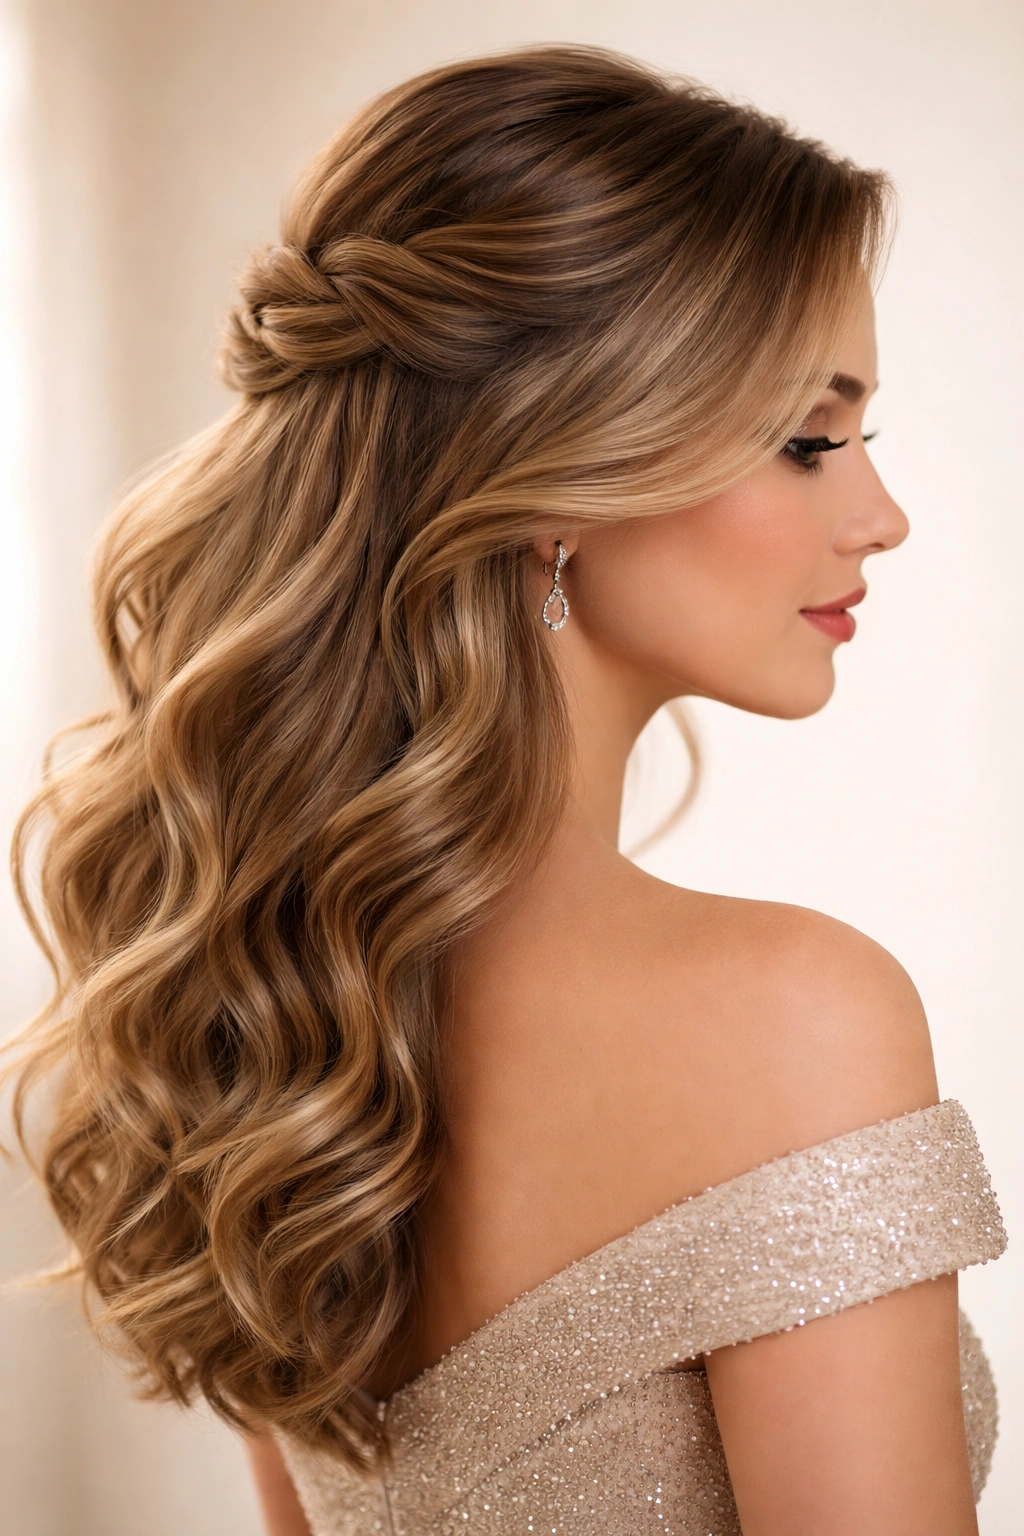
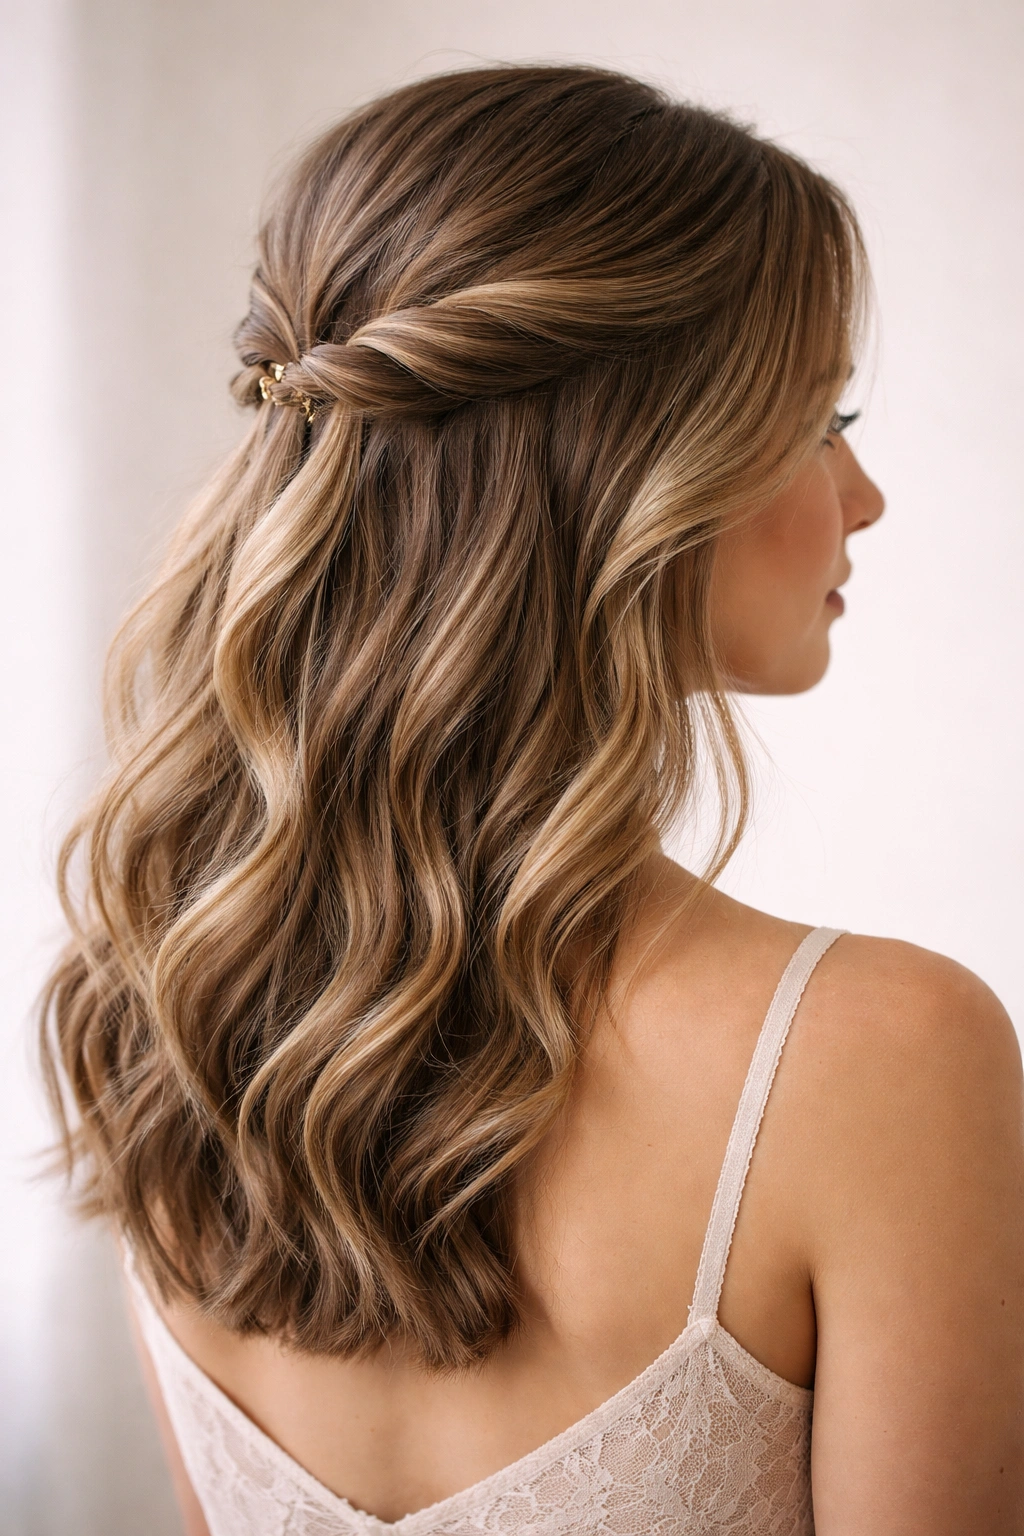
1. The Classic Twisted Half-Up
This is the foundational half-up half-down style, and it’s called a classic for good reason — it works on literally everyone. The concept is simple: take a section of hair from each side of your head at the crown, twist each section gently, and secure them together at the back with a clip or elastic. The twists should be loose and organic, not tight spirals.
What Makes It Timeless
The twisted half-up works because it’s elegant without trying too hard. The twists add texture and visual interest, but they’re not so elaborate that you look overdressed for the occasion. This style suits every face shape, every hair texture, and every dress code — from casual homecoming dances to more formal events.
How to Make It Your Own
- Start with slightly curled or wave-textured hair for the best effect (use a curling iron or heat styling tool beforehand)
- Make sure your twists are intentionally loose, not polished tight — the messy-but-intentional vibe is what makes this look current
- Use a simple metal clip or tortoiseshell barrette instead of an elastic for a more polished finish
- Leave a few face-framing pieces loose around your temples for softness
Pro tip: If your twists feel too loose and keep falling apart as you work, apply a light texture spray or dry shampoo to your hair first — it’ll give you better grip without making the style look greasy.
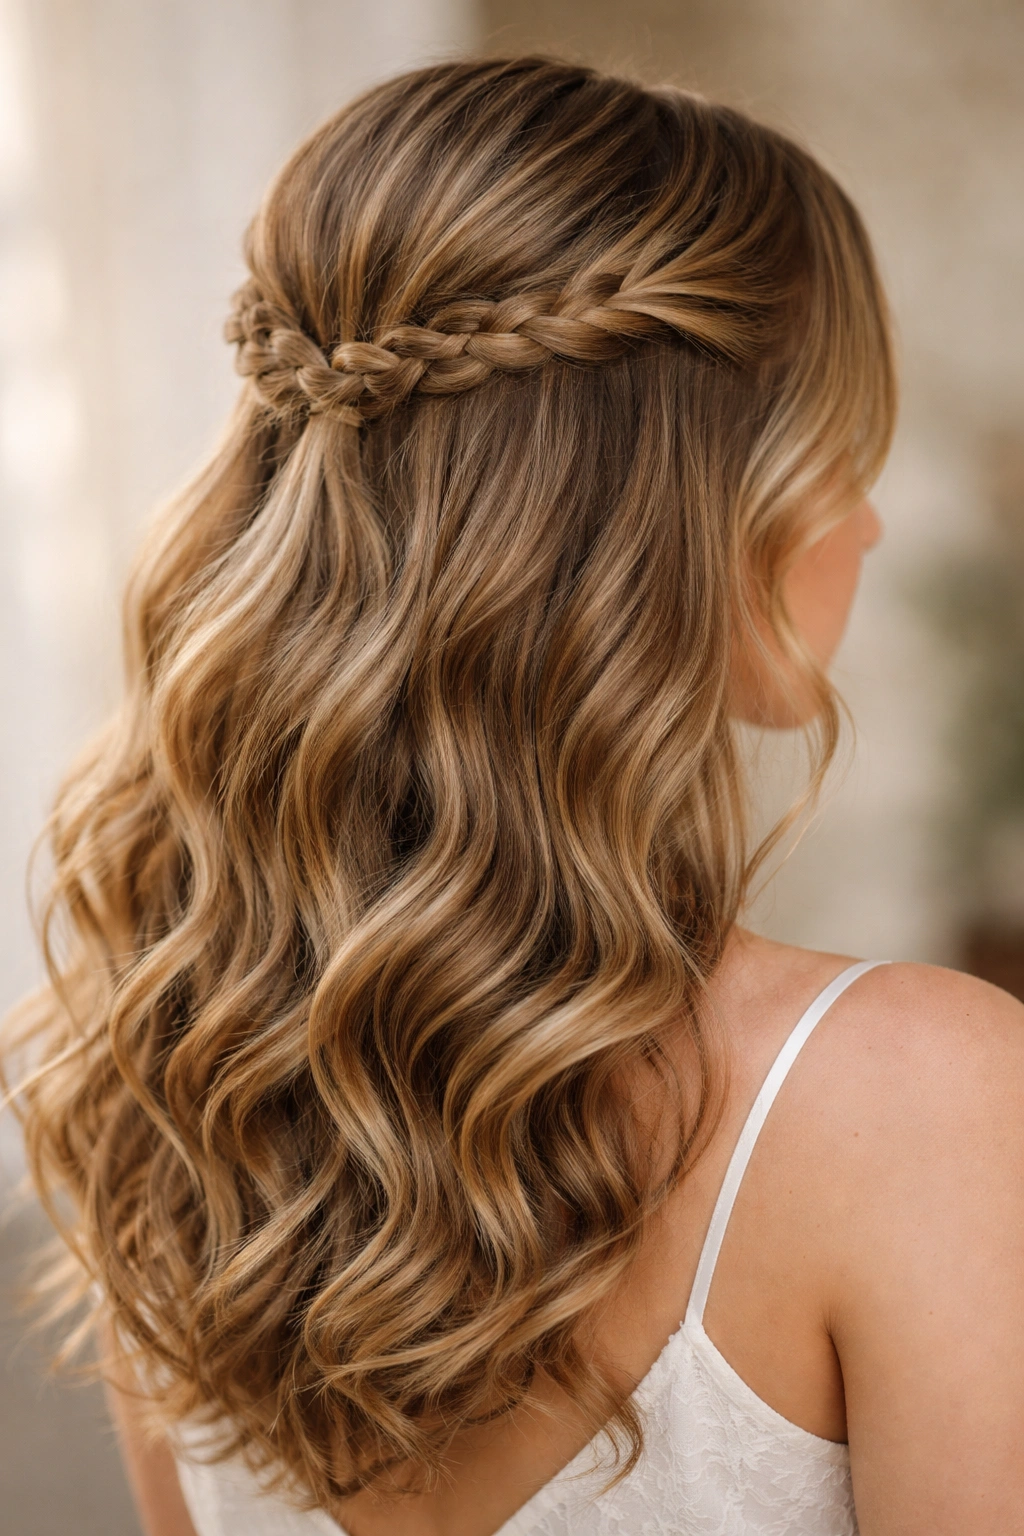
2. The Braided Crown Half-Up
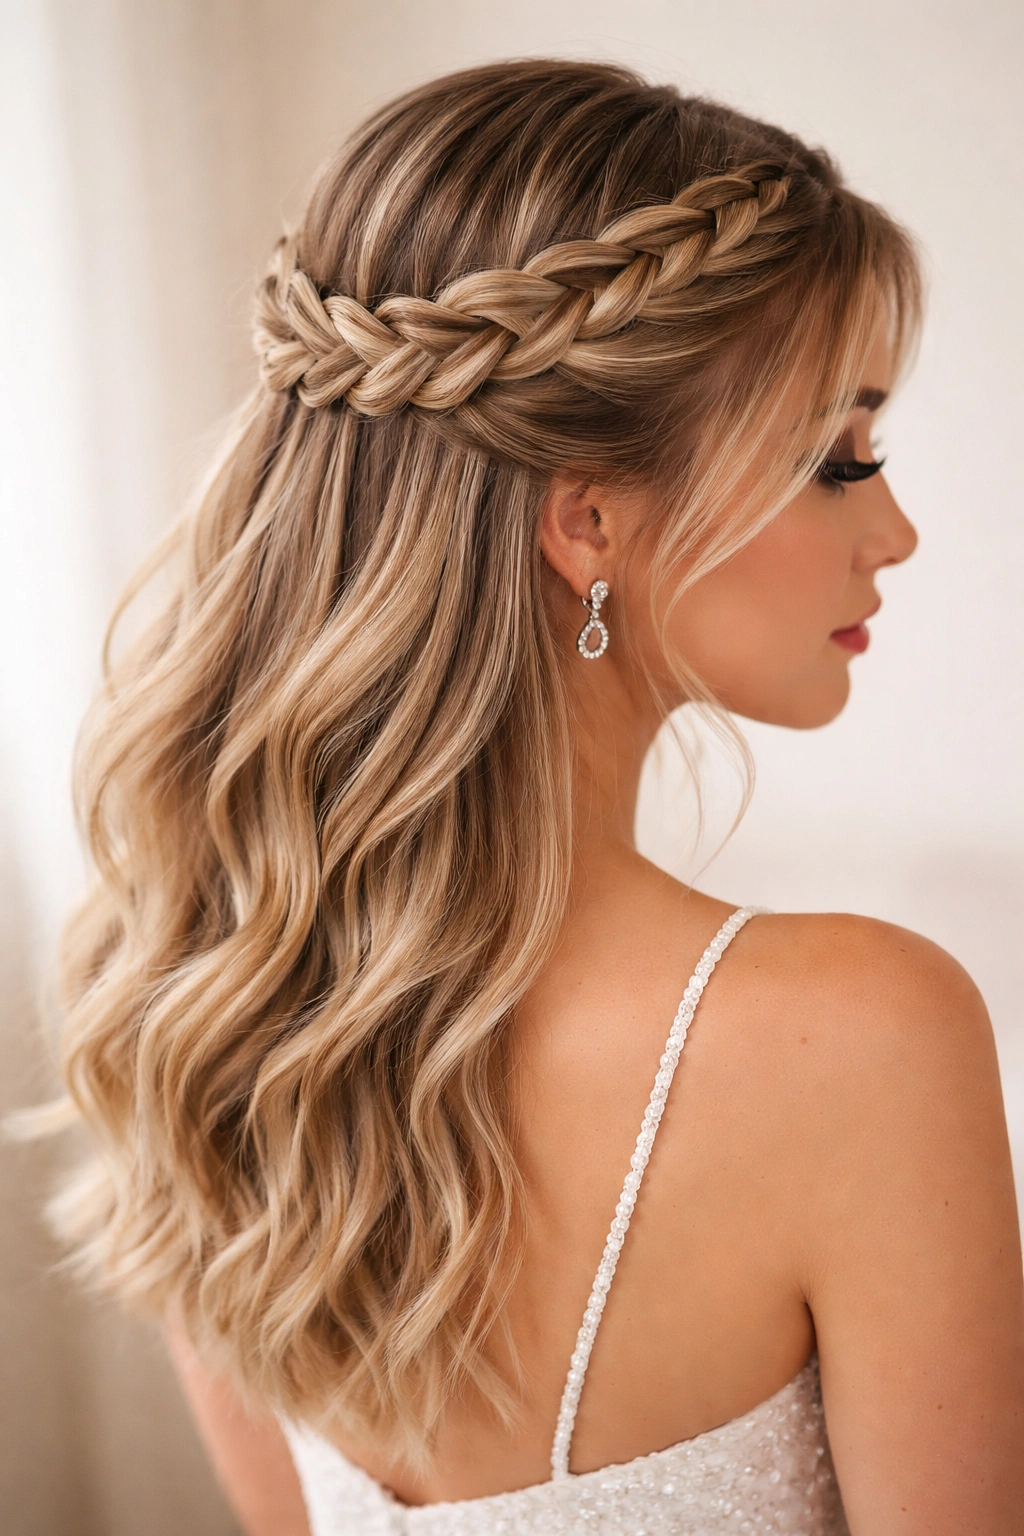
Instead of twists, create two Dutch braids (braids that go inward rather than outward) or simple three-strand braids starting from each temple area and bring them together at the back. This is the style that makes you look like you spent an hour getting ready, even if it only took fifteen minutes.
Why It’s Worth Learning
Braids instantly elevate any half-up half-down look because they add intricate detail and visual movement. The braided crown gives major romantic-princess energy while still feeling current and not costumey. It works especially well if you have a formal or elegant homecoming dress.
Key Execution Details
- French braids and Dutch braids both work — Dutch braids (braiding under rather than over) look slightly more dramatic and polished
- Braid all the way down to the point where you’ll secure them, then gently pull the braids apart slightly to make them look fuller and more romantic
- Use bobby pins that match your hair color to secure the braids at the crown — if you use a large clip, it’ll peek through and break the visual line
- Leave the bottom layer of hair down with soft waves or curls for maximum contrast and movement
Worth knowing: Practice this braid style at least once before homecoming day. Braids are easier than they look, but you want to feel confident executing it when you’re getting ready.
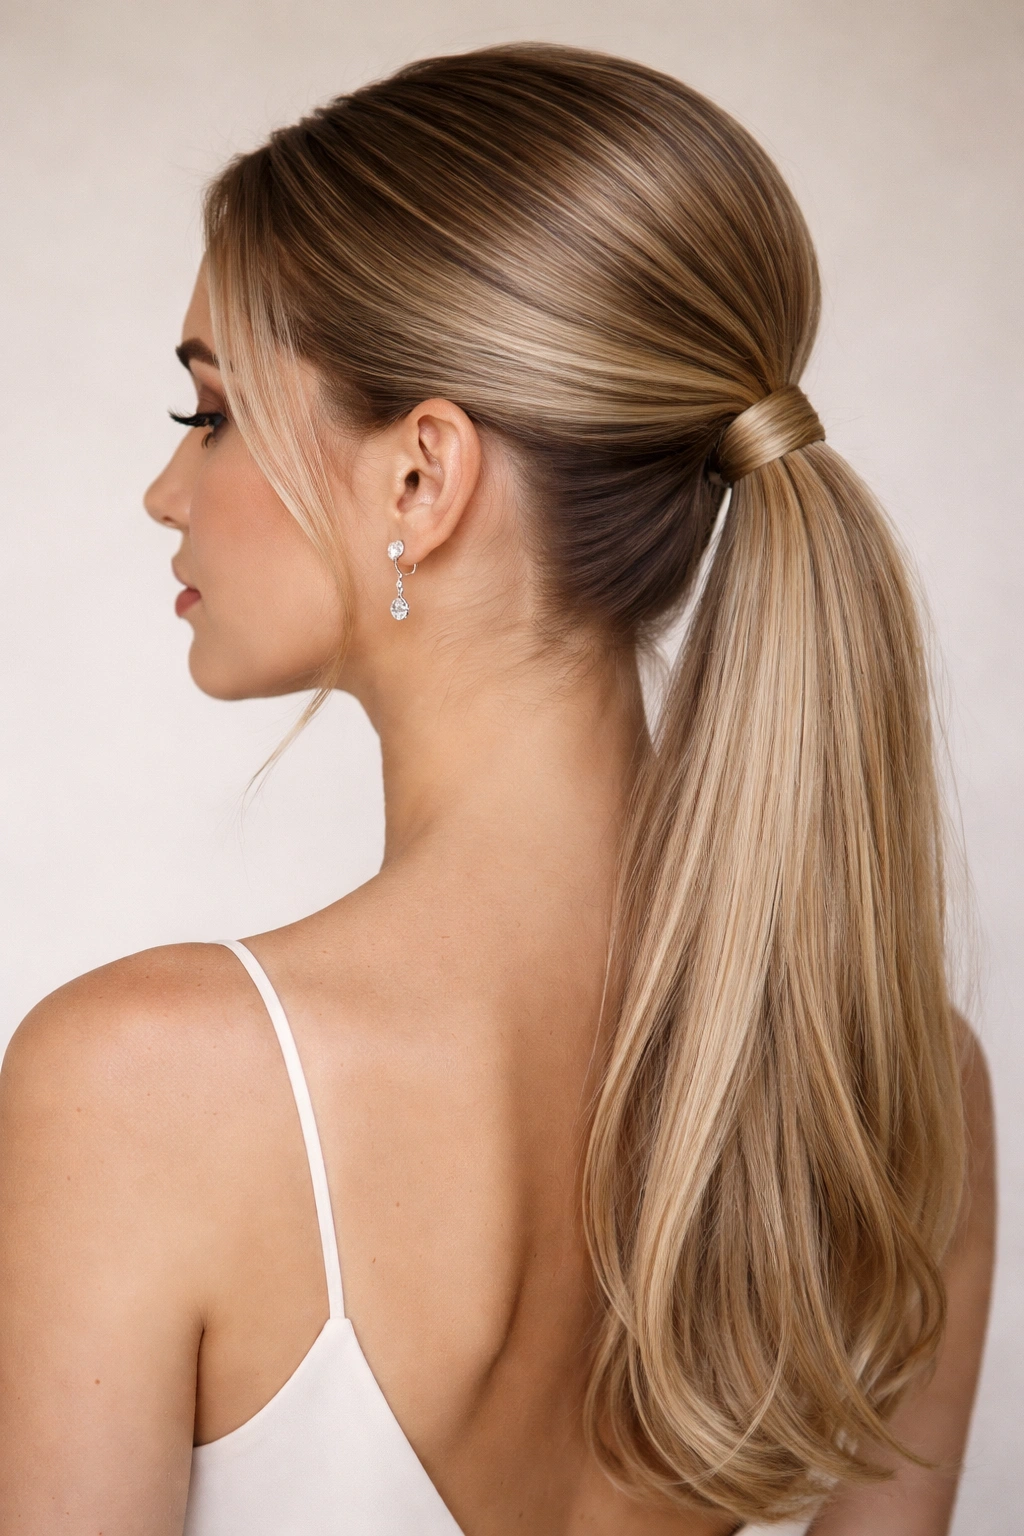
3. The Sleek High Ponytail Half-Up
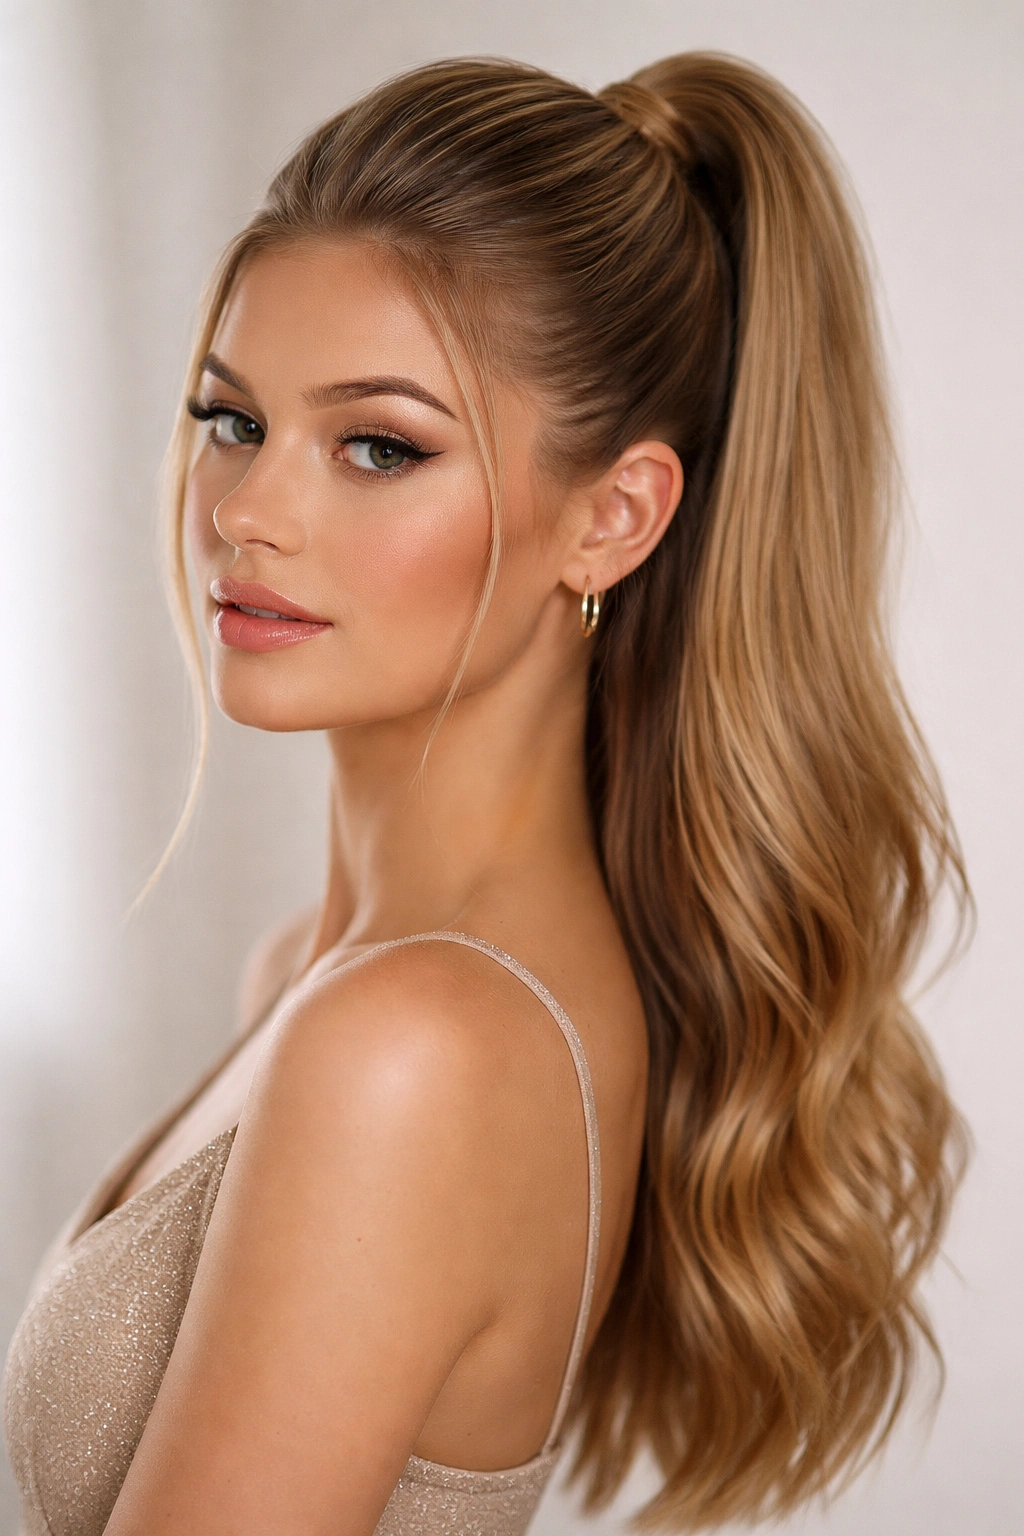
Create a high ponytail with just the top section of your hair, but leave the bottom half down and loose. This style is modern and clean, especially if you smooth the top section with a light gel or serum so it looks polished and intentional rather than accidental.
Why Sleek Works
A sleek high ponytail half-up reads as put-together and intentional. It’s perfect if you’re wearing a dress with a beautiful neckline or back detail, because it draws all the attention downward. This style is also ideal if you want to keep hair completely off your face throughout the night — no flyaways, no pieces falling in your way while you’re dancing.
The Technique That Makes It Work
- Use a fine-tooth comb and smoothing serum or gel to brush the top section back as smooth as possible
- Secure the ponytail with a clear elastic first, then wrap a small piece of hair around the elastic to hide it
- Keep the lower half of your hair completely straight and sleek, or add subtle waves for just a touch of texture
- Consider a minimalist hair cuff or metal hair ring around the ponytail base for modern detail
Real talk: This look requires your hair to be freshly washed or looking really clean — any product buildup or grease will be super visible when you sleek it back. If your hair is prone to frizz, use an anti-frizz serum before styling.
4. The Half-Up Bun with Loose Waves
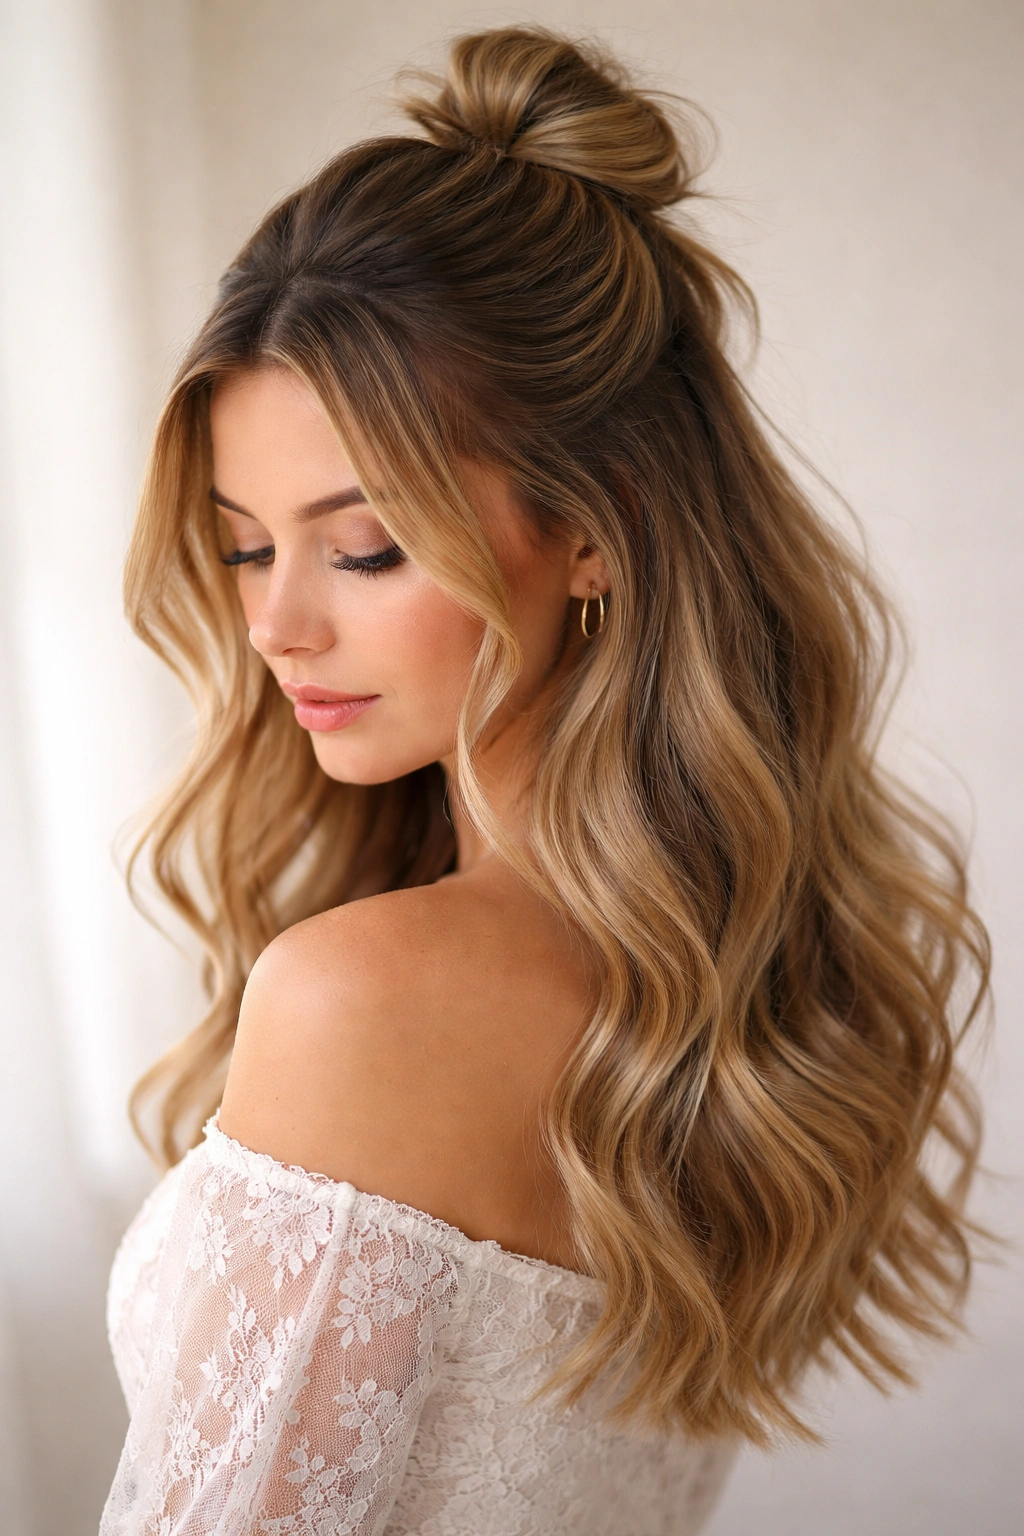
Take the top section of your hair and create a small, intentionally messy bun right at your crown, then leave the bottom half loose with soft waves. This is the perfect middle ground between an updo and wearing your hair down — it feels dressy but still comfortable and moveable.
The Appeal of This Look
This style gives you the practical benefit of having some hair off your face (no more tucking strands behind your ears while dancing) while maintaining the romantic, flowing feel of having your hair down. The small bun creates dimension and visual interest, and the loose waves below soften the whole look.
How to Build the Bun
- Gather the top section of hair and secure it in a low ponytail first, not a high one — this prevents the style from looking too childish
- Twist the ponytail around itself and pin it down with bobby pins to create a relaxed, undone bun rather than a tight, ballet-style one
- Leave at least three to four inches of your hair loose below the bun for proper proportion
- Add loose waves or curls to the bottom section using a curling iron or wand
Insider note: If your bun looks too neat and structured, gently tease it slightly with a fine-tooth comb and pull out a few strategic pieces to make it look intentionally undone. That messy-but-pretty factor is what elevates the look.
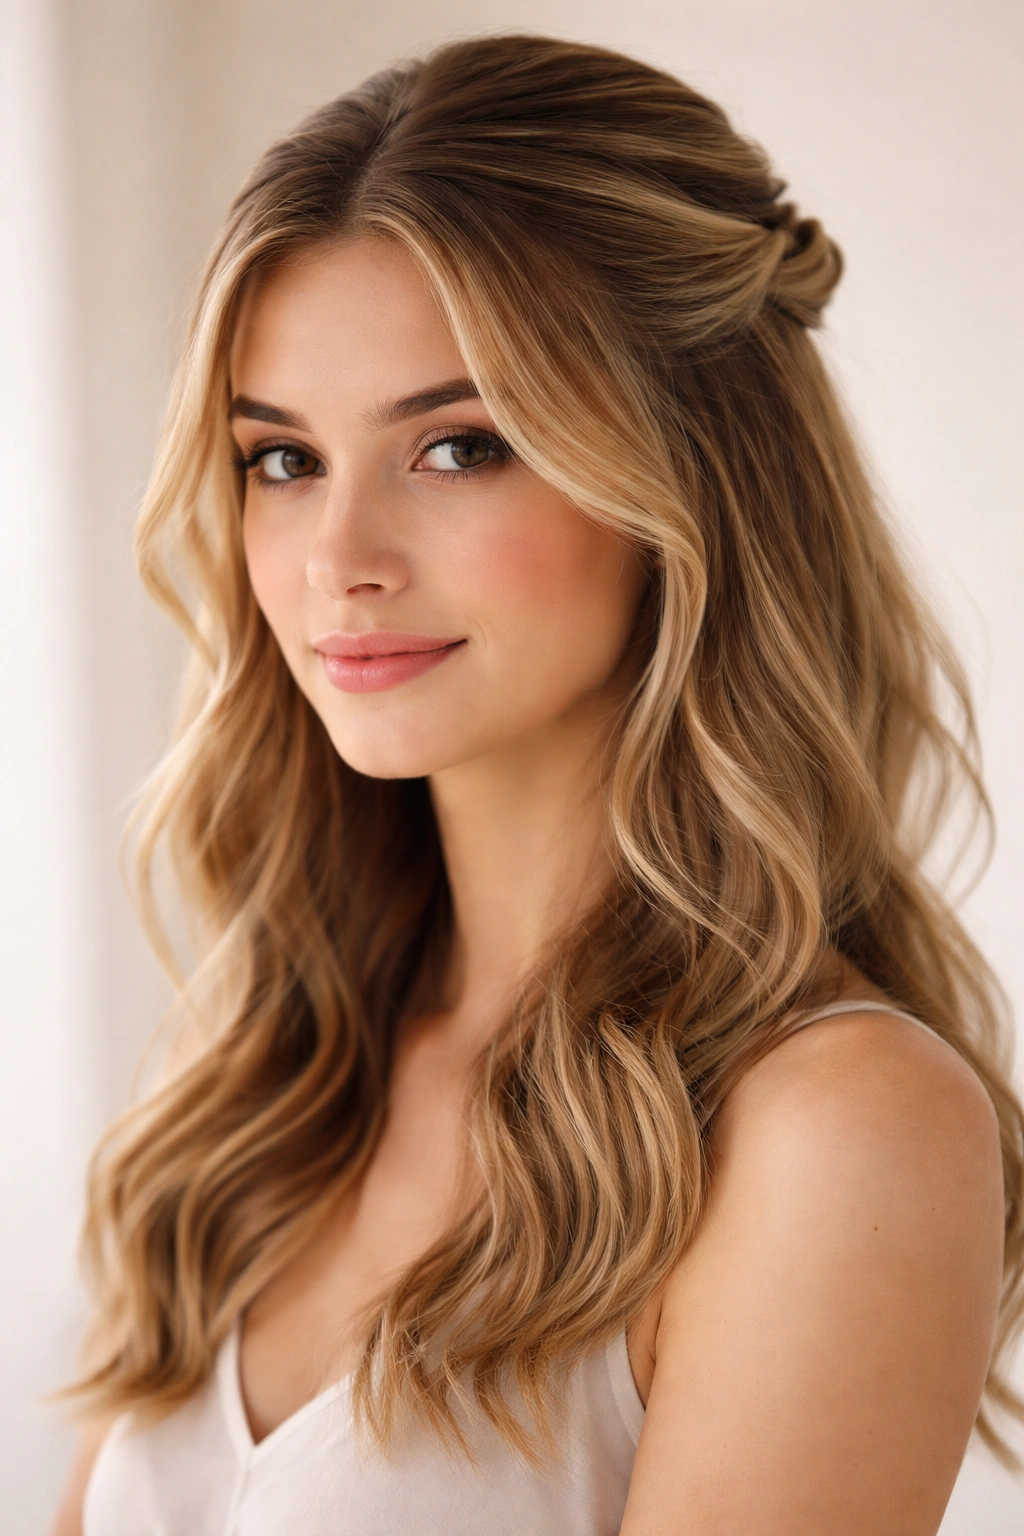
5. The Romantic Side-Swept Half-Up
Sweep the top section of your hair to one side of your head (let’s say the right), twist or braid it, and secure it to the side rather than at the back of your head. Leave all of the bottom half down with romantic curls. This asymmetrical approach is stunning and slightly unexpected.
Why Side-Swept Is Special
An asymmetrical half-up immediately looks more interesting than a centered one because it has movement and directionality. This style is perfect if you’re wearing a dress with interesting detail on one side, or if you simply want something that feels more dynamic and less traditional.
Execution Details
- Don’t make the sweep so extreme that it goes all the way to the side of your head — keep it natural, as if the hair is gently moving that direction
- You can twist, braid, or even create a small clip-secured section on the swept side
- Secure it with bobby pins that match your hair color rather than an obvious clip — this keeps the style looking seamless
- Make sure your curls on the opposite side of your head are slightly fuller to balance the asymmetry
Pro tip: This style looks especially gorgeous if you have some face-framing pieces on the other side (the non-swept side) that fall softly around your cheek and jaw. It creates beautiful balance and frames your face in a flattering way.
6. The Bubble Ponytail Half-Up
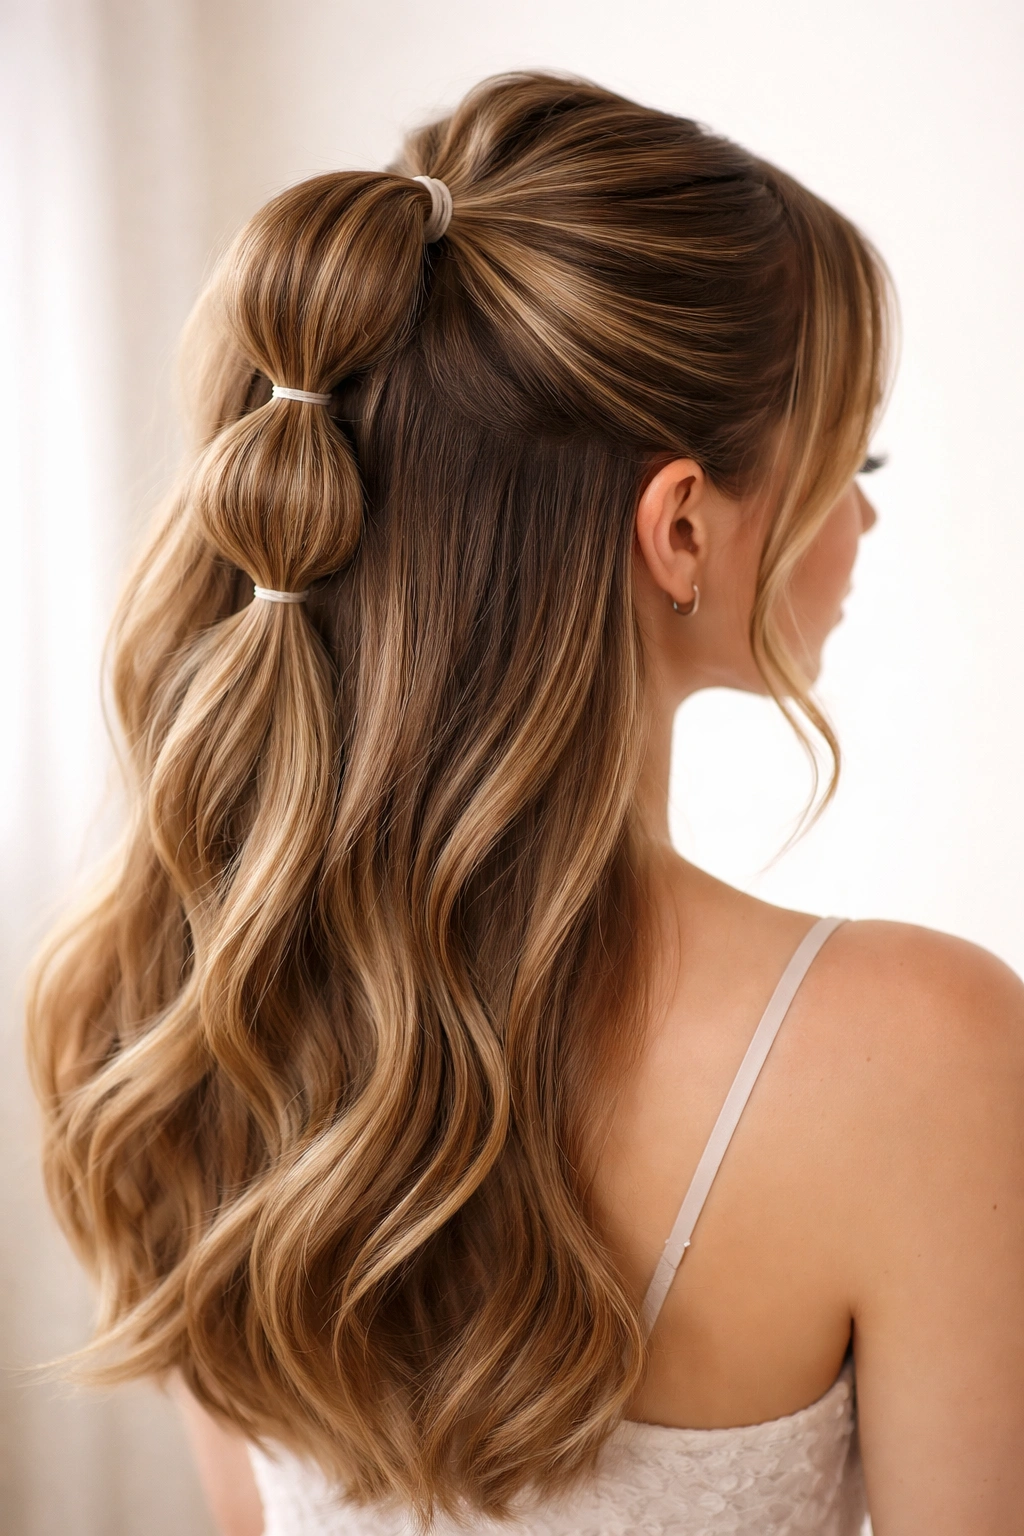
Create a high ponytail with just the top section of hair, then divide that ponytail into three or four sections and secure each section with clear elastics to create “bubbles.” Leave the bottom half of your hair down. This playful style reads as modern and fashion-forward without being costumey.
Why Bubble Ponytails Feel Current
Bubble ponytails have a contemporary, almost editorial quality to them. They’re geometric and structured, which feels fresh and different from the soft, romantic half-up styles. If your dress has clean lines or modern details, this style pairs beautifully.
Getting the Bubble Effect Right
- Create a super sleek high ponytail first — any frizz will be visible between the bubble sections
- Section your ponytail into equal parts (three sections is usually perfect for medium-length hair)
- Use clear elastics (not colored ones) to separate each bubble
- Gently pull out the sides of each bubble slightly to make them look fuller and more defined
Worth knowing: This style requires some bobby pin reinforcement. After you’ve created the bubbles, carefully pin the elastic connection points to make sure they’re secure and won’t slip down during the night, especially if you’re dancing.
7. The Half-Up With Decorative Clip or Comb
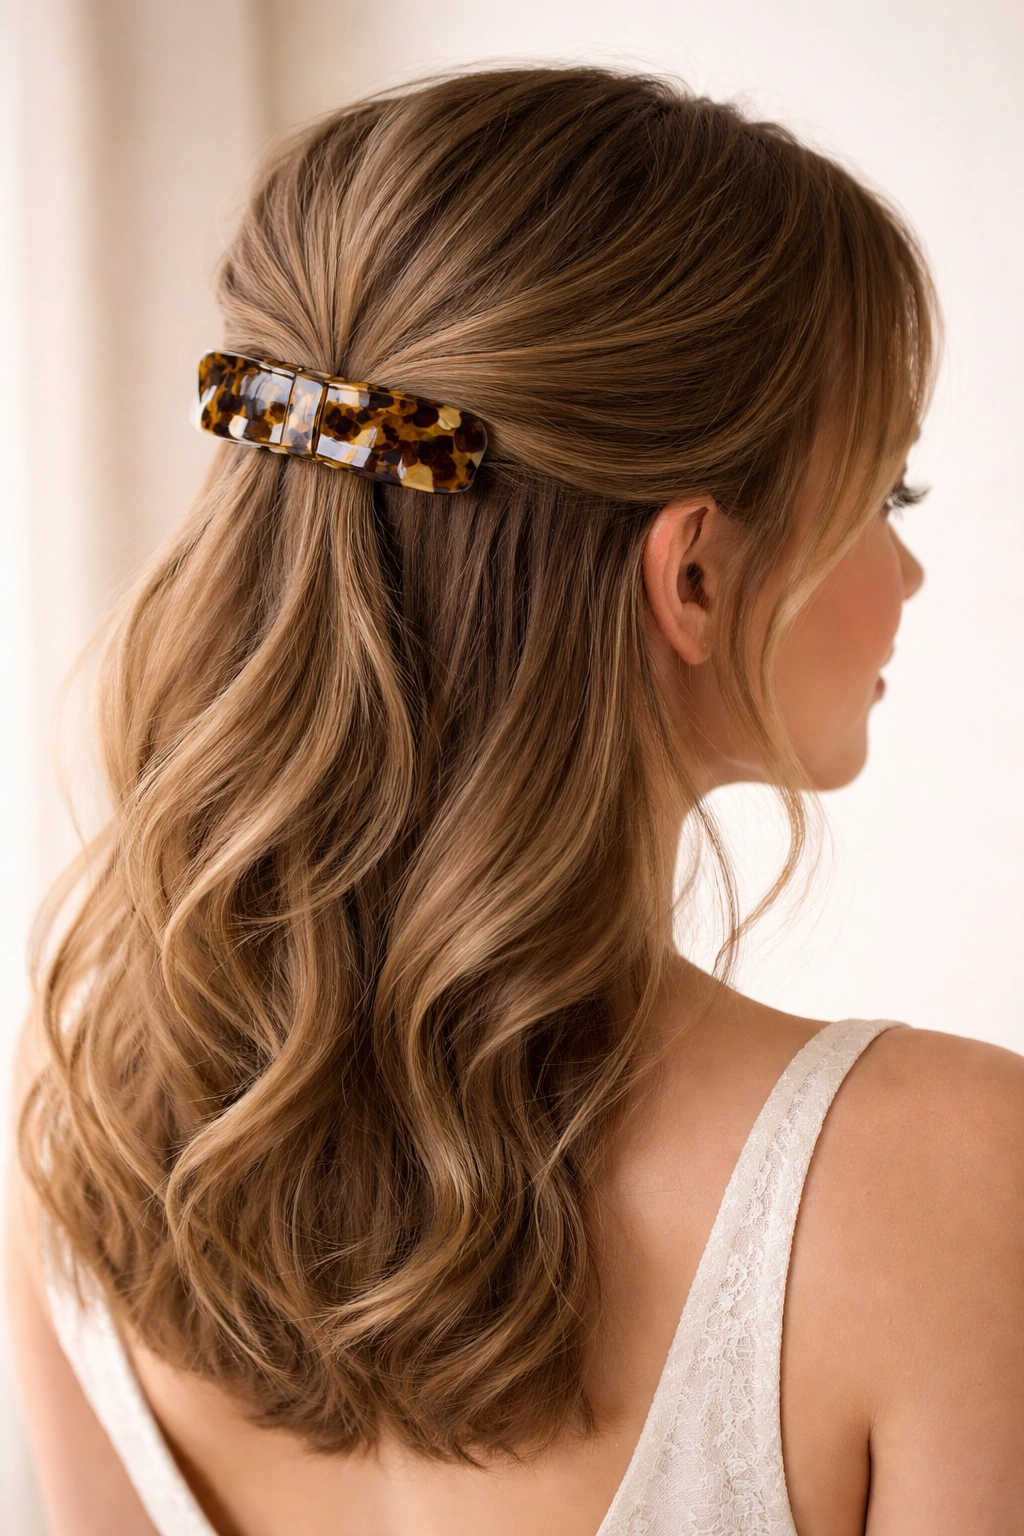
Take a simple half-up section and secure it with a statement clip, decorative comb, or embellished barrette rather than an elastic. The clip itself becomes the focal point of your style. This approach transforms a basic half-up into something special with minimal additional effort.
The Power of the Right Accessory
The right hair clip or comb can completely change the vibe of your look. A tortoiseshell comb reads as effortlessly chic. A pearl-studded clip feels romantic. A geometric metal clip feels modern. Choose based on your dress and the energy you want to project.
Styling Considerations
- Make sure your hair is smooth and well-textured before clipping — any bumps or loose pieces will show
- Use a comb or clip that’s large enough to actually be visible, not so tiny that it disappears into your hair
- Pair the clip with either loose waves or straight hair depending on the style of the clip
- Consider layering the clip over a small twist or braid if you want added dimension
Real talk: Don’t just grab any old clip from your bathroom drawer. Invest in one that feels substantial and matches your dress or jewelry in some way — it’ll be visible all night and should look intentional, not like an afterthought.
8. The Half-Up With Face-Framing Layers
Take the section of hair from the crown area and secure it in a half-up style, but intentionally leave longer pieces loose around your face rather than pulling everything sleek and tight. These face-framing pieces should be slightly more than just “fall-out pieces” — they’re a deliberate design element.
Why Face-Framing Matters
Face-framing pieces soften a hairstyle instantly. They create visual balance, flatter most face shapes, and give you a romantic, approachable look rather than a severe or overly polished one. This works especially well if you have a longer face or sharp features that benefit from softening.
How to Execute Deliberately
- Before you create the half-up, identify which pieces you want to leave loose around your face — usually about an inch or two on each side
- Create your half-up style as normal, but just don’t pull those designated face-framing pieces into the main section
- Curl or wave only those face-framing pieces for extra dimension and softness
- Keep them slightly longer than your other layers so they’re noticeable
Insider note: This is one of those styling choices that looks effortless but is actually very intentional. If you just let random pieces fall out of your half-up, it reads as accidental. If you deliberately style and curl specific face-framing sections, it reads as sophisticated and well-thought-out.
9. The Twisted Half-Up With Loose Curls
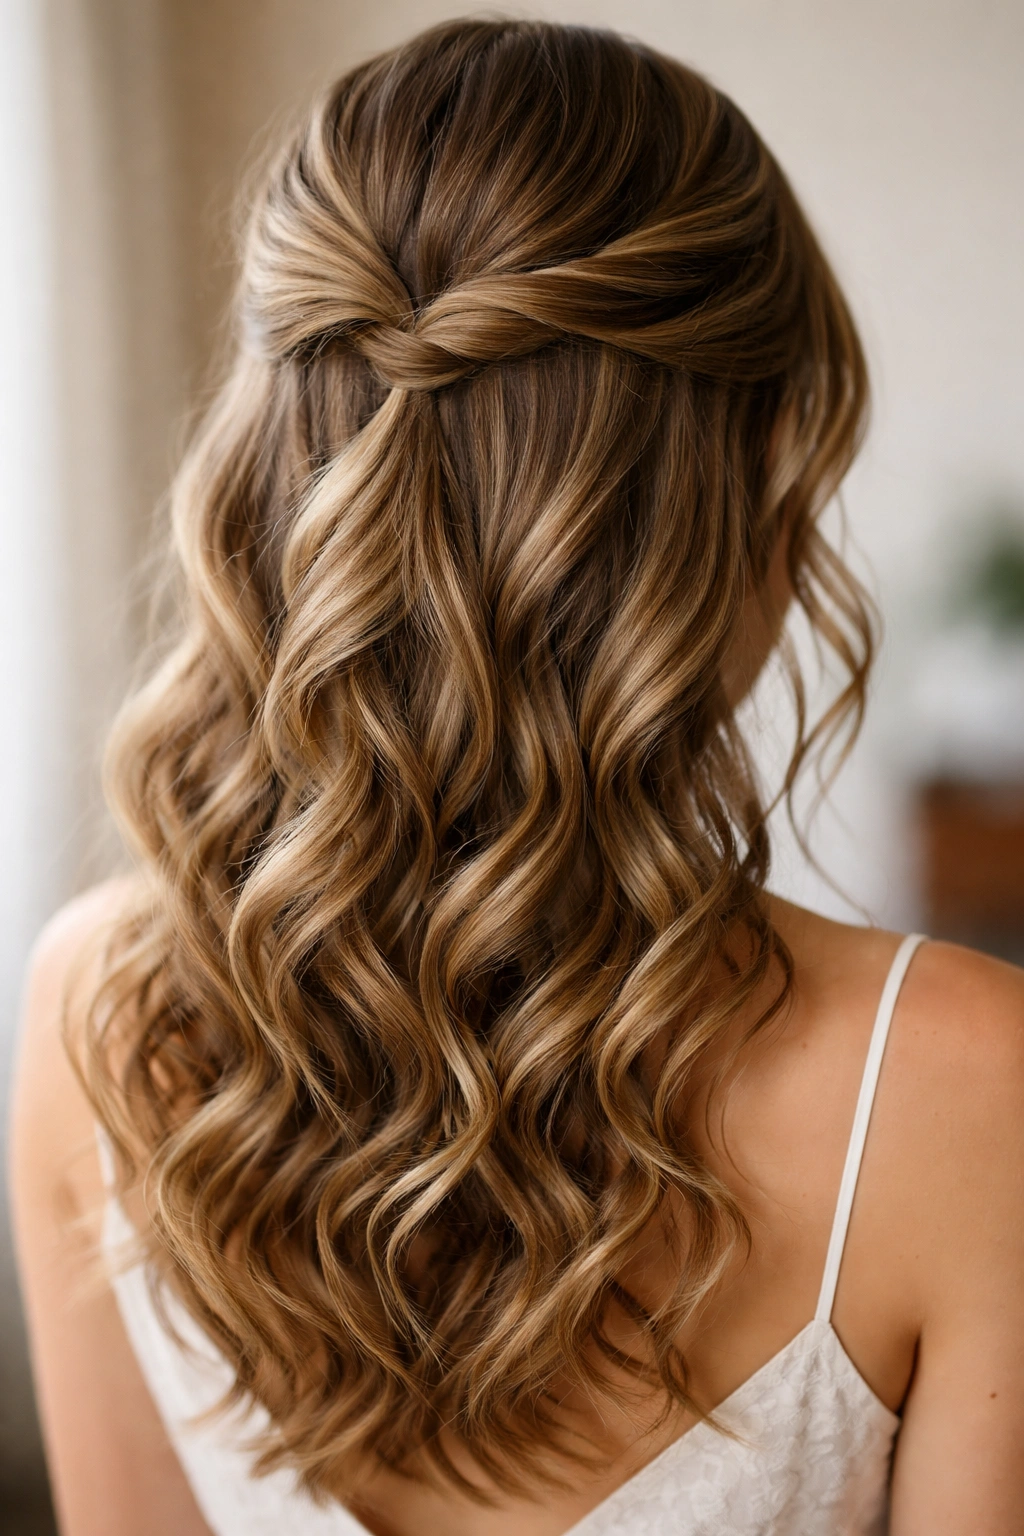
Take two sections of hair from each side of your head, twist them gently, bring them to the back, and secure them together — but instead of stopping there, add loose, romantic curls throughout the bottom half. The contrast between the structured twisted crown and the soft, flowing curls is visually stunning.
Why This Combination Works
The twisted crown provides structure and polish while the loose curls below provide movement and romance. This is genuinely one of the most universally flattering half-up half-down combinations because it works for every face shape, hair type, and dress style. It’s the style you see on most homecoming and prom attendees for a reason — it’s beautiful and it works.
The Curl Question
- Use a 1.25-inch or 1.5-inch curling iron or wand to create loose, romantic curls
- Curl away from your face with the first curl, then alternate — this creates a more natural, less uniform look
- Don’t curl every single piece of hair the same way; vary the curl size and tightness
- Let the curls cool and set before you run your fingers through them
Pro tip: Apply your heat styling products (like a heat protectant spray) to dry hair before curling, and consider applying a curl-holding spray afterward. Medium-length hair sometimes struggles to hold curls through hours of dancing, so a light hairspray is your friend.
10. The Half-Up Braid With Ribbon
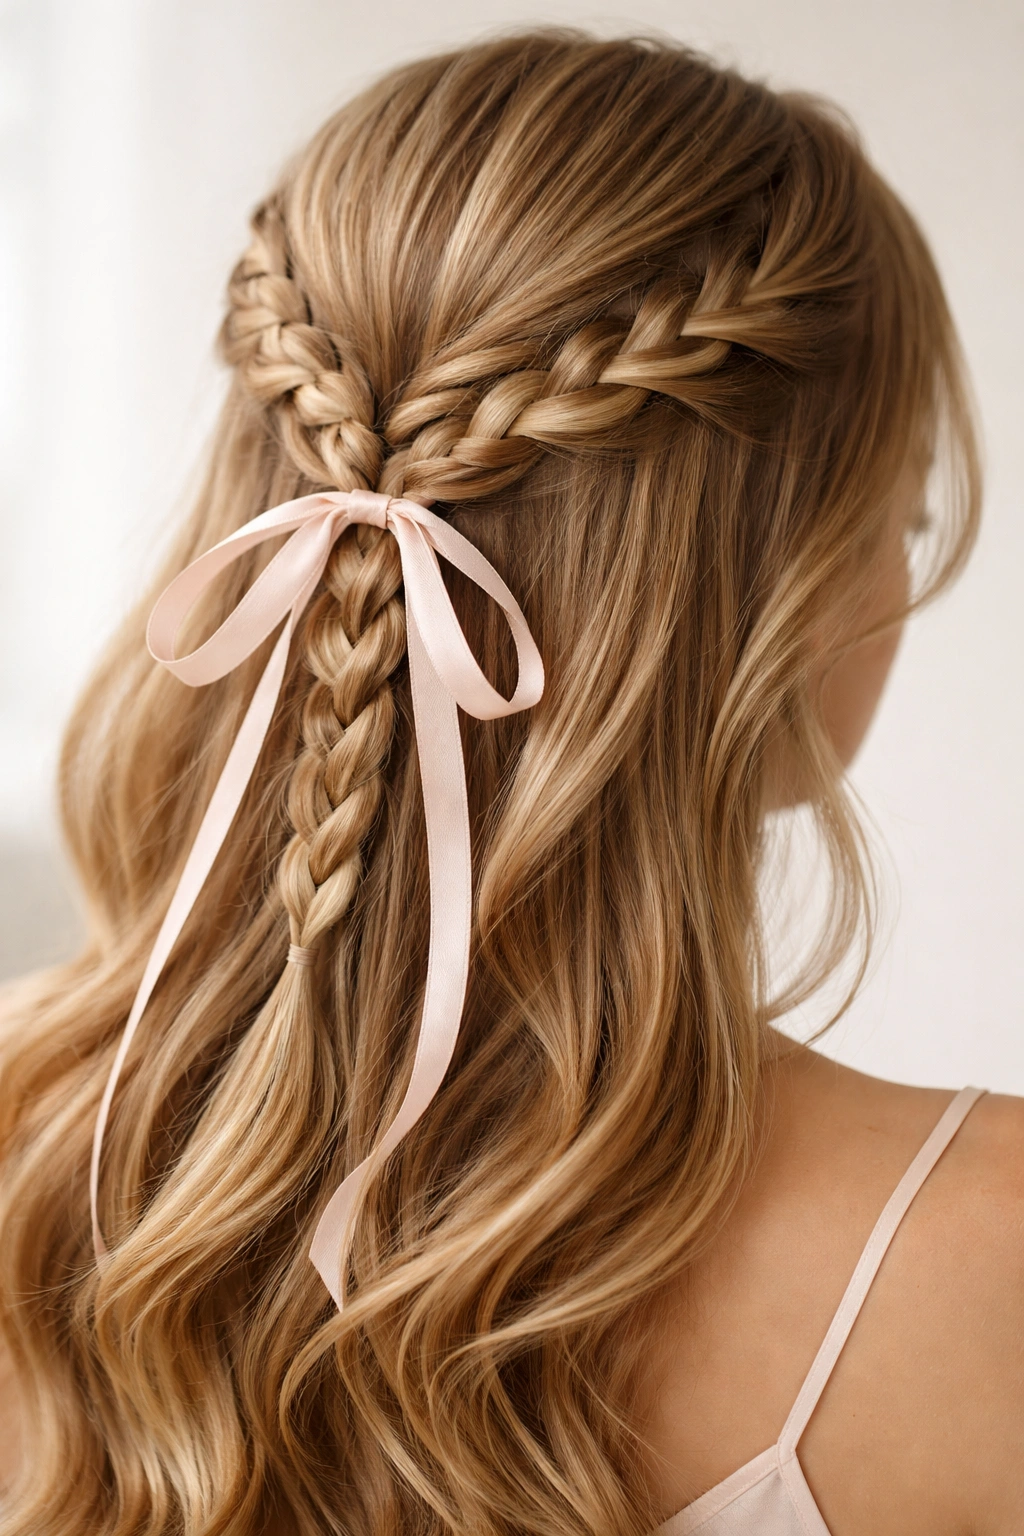
Create a half-up braid and weave a thin ribbon, silk thread, or decorative string through the braid as you go. This adds color, sparkle, or texture to a simple braid without much additional effort. Ribbon braids read as romantic and can be tailored to match your dress perfectly.
Why Ribbon Braids Feel Special
A ribbon woven through a braid transforms a simple style into something that looks much more complex and intentional. You can choose a ribbon that matches your dress, your shoes, or your jewelry, which creates a cohesive, well-planned look.
Executing the Ribbon Braid
- Use a thin satin ribbon, silk string, or metallic thread — thicker ribbons can look costume-y
- Tape one end of the ribbon to the inside of your hair near where you’ll start the braid (this prevents it from sliding around)
- Create your braid and weave the ribbon through as you go, tucking it between the strands
- Leave the ribbon showing in some spots and hidden in others for dimension
Worth knowing: Practice this technique once or twice before homecoming. It’s easier than it sounds, but you want to feel confident that you can actually execute it, especially if you’re braiding your own hair (which is trickier than braiding someone else’s).
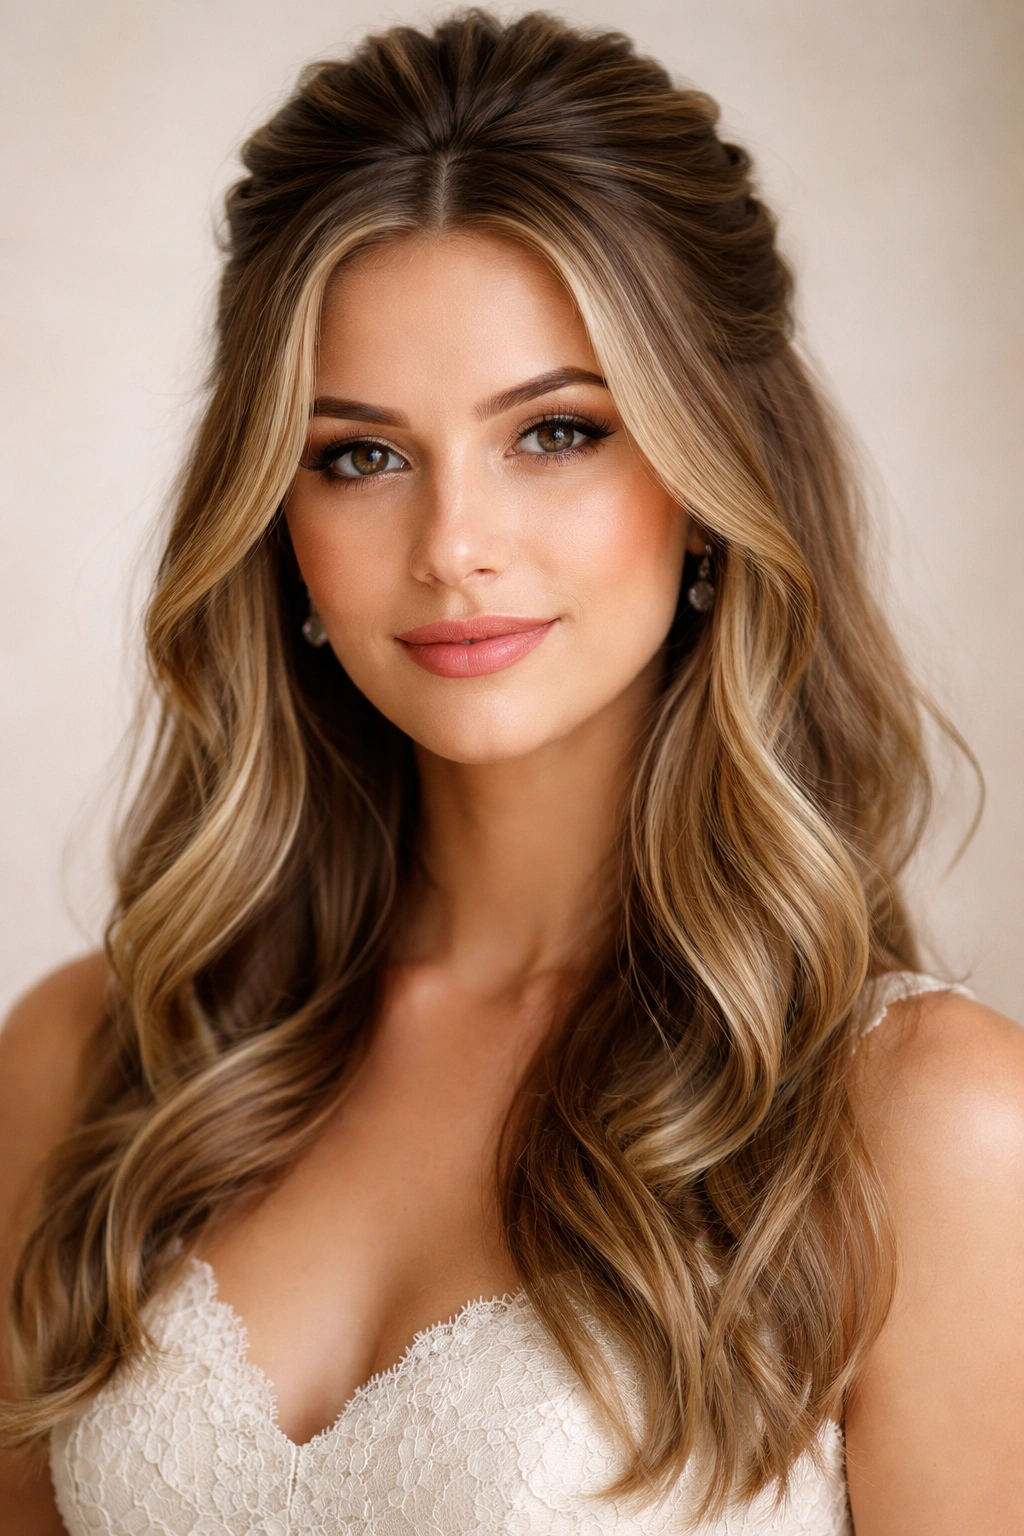
11. The Voluminous Half-Up With Teased Crown

Create a half-up style, but use teasing and backcombing on just that top section to create major volume at the crown. This works especially well if you have naturally flat or fine hair, because you can create the illusion of thick, voluminous hair without it actually being heavy.
The Volume Factor
Volume at the crown instantly makes you look more polished and makes any hairstyle feel more intentional and dressy. A voluminous half-up reads as elegant and put-together, especially compared to a flat, understated version of the same style.
Teasing Techniques
- Use a fine-tooth teasing brush or comb (not a regular brush — it’ll tear your hair)
- Tease gently at the roots of the top section before securing it, brushing downward toward the scalp rather than roughly back-combing
- Smooth the outer layer with a fine-tooth comb after teasing so it looks polished, not matted
- Once you’ve secured the half-up, tease gently at the base of the ponytail or twist to create even more volume
Real talk: Teasing can feel aggressive, but if you do it gently with the right tools, it doesn’t damage your hair and the results are worth it. Just don’t rough it up with a regular hairbrush afterward.
12. The Half-Up With Delicate Bobby Pin Details
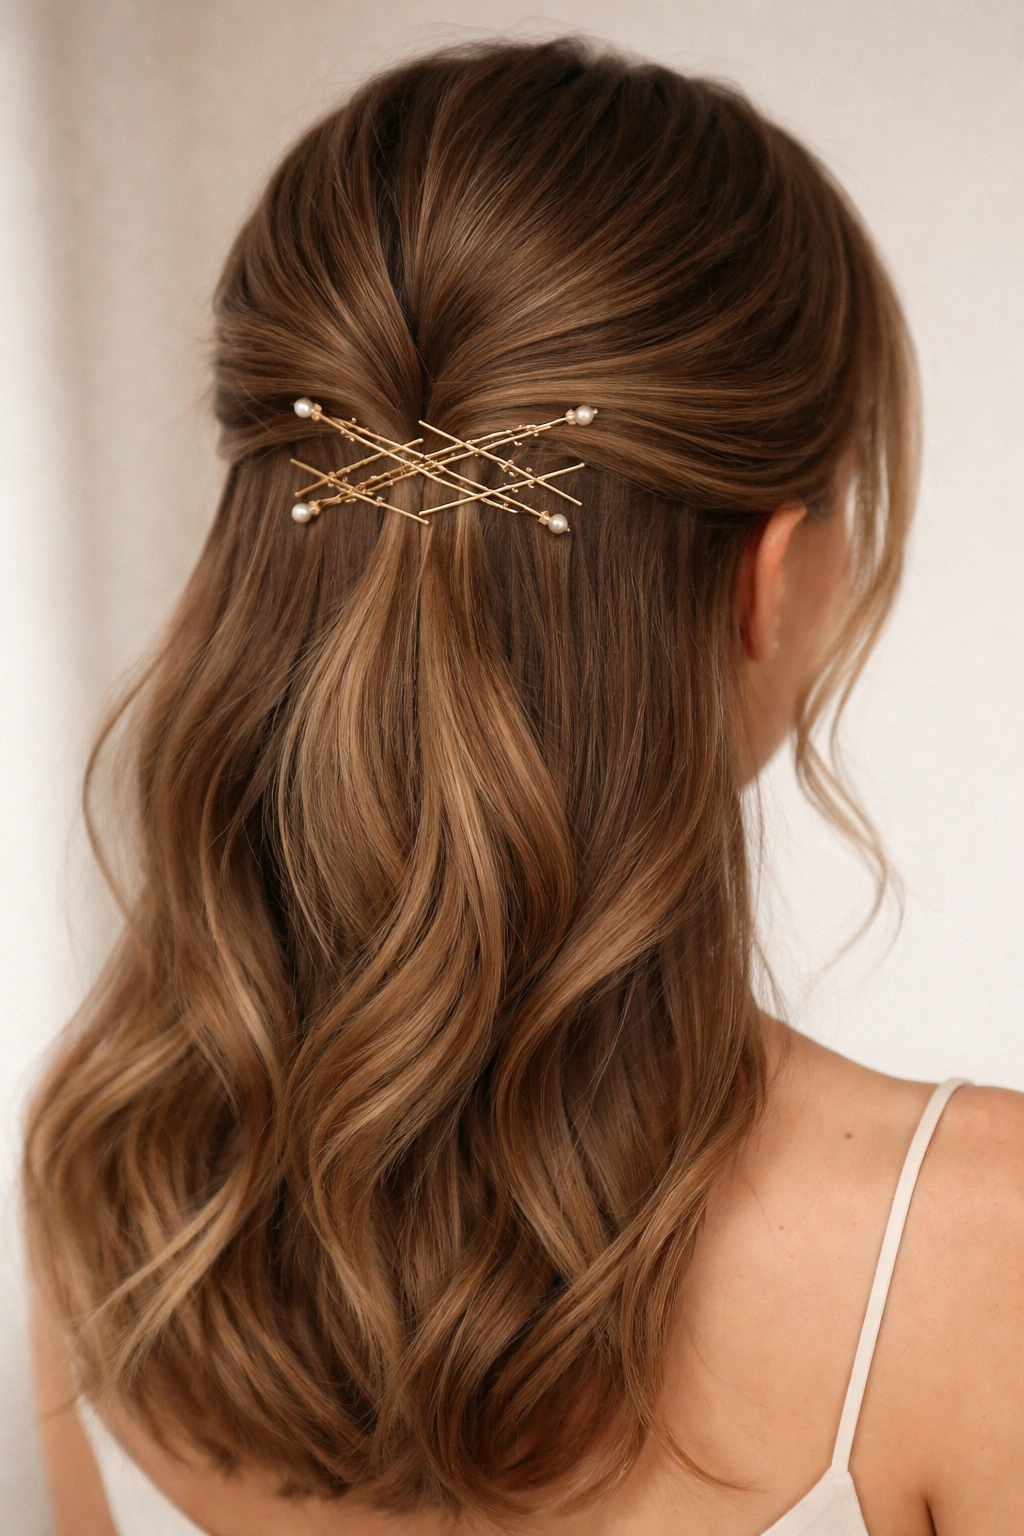
Create a simple half-up or twist, but add multiple bobby pins in a decorative pattern rather than just one or two. You can use gold bobby pins, silver bobby pins, pearl-studded pins, or even colored pins that match your dress. The pins become a visual design element.
Why Bobby Pins as Decoration
This approach is minimalist but impactful. Instead of a bulky clip or barrette, you’re using small, delicate bobby pins strategically to create visual interest and polish. It feels modern, intentional, and very on-trend.
The Arrangement
- Place bobby pins horizontally in a line across the base of your half-up section
- Use three to five pins in a deliberate pattern rather than just placing one wherever it lands
- Make sure the pins are actually serving a function (securing the style) while also looking decorative
- Match the pins to your jewelry or dress details for a coordinated look
Pro tip: This works best if you use pins that have a distinct visual presence — pearl pins, rose gold pins, or thick gold pins. Very thin, basic bobby pins will just disappear into your hair and won’t create the desired decorative effect.
13. The Half-Up Fishtail Braid
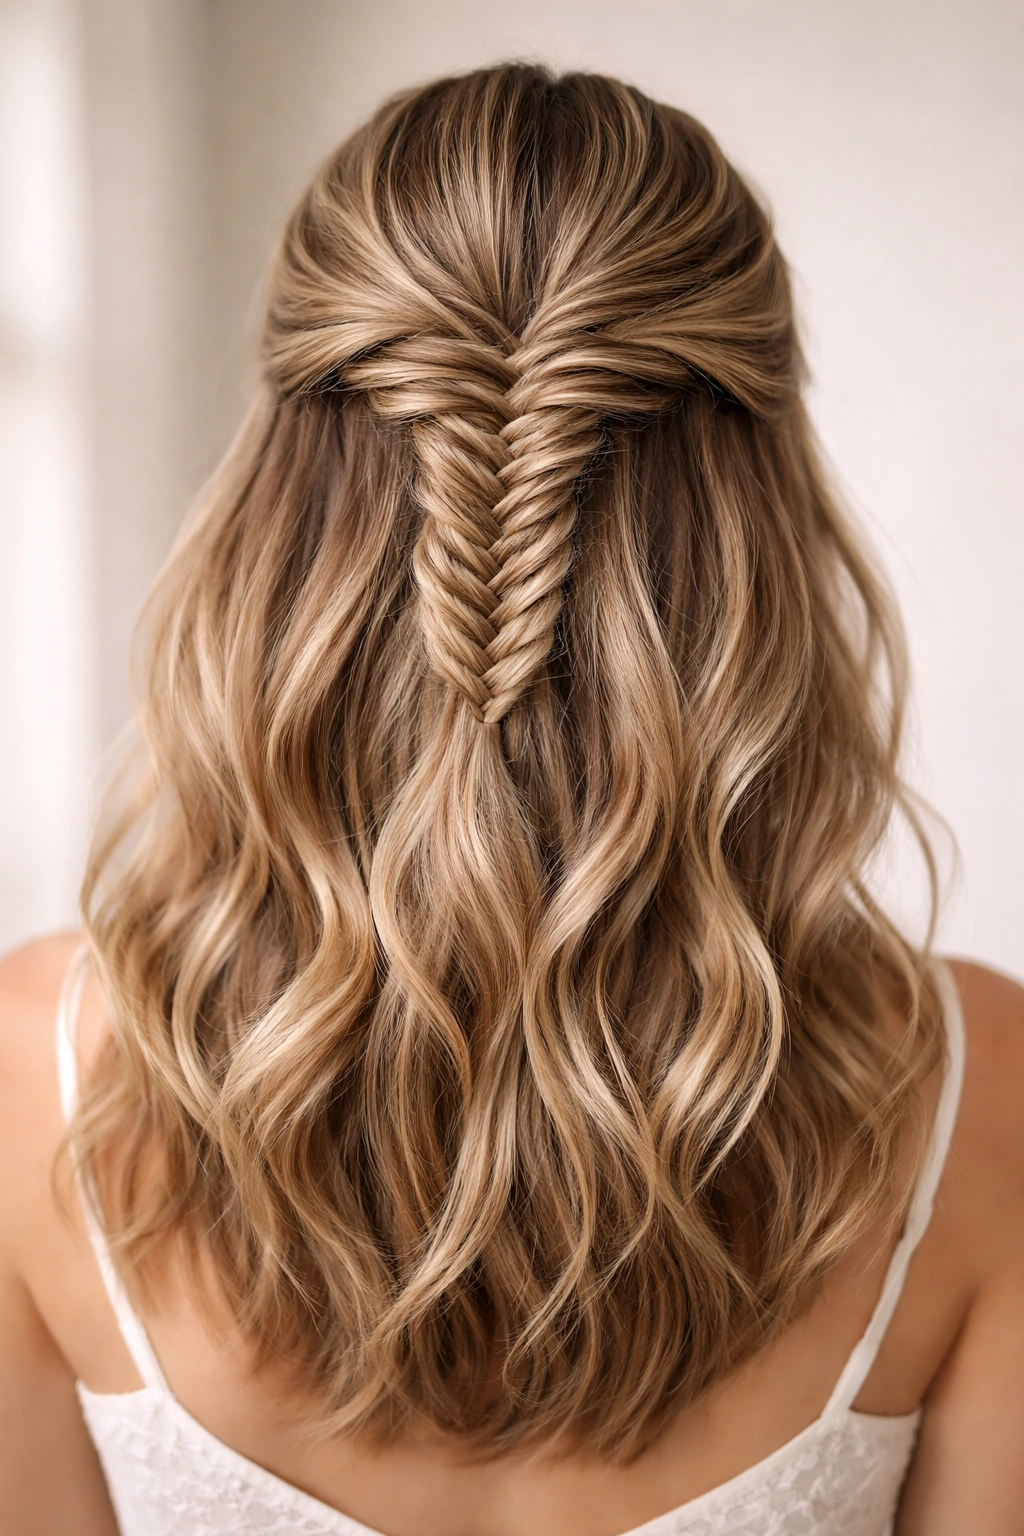
Create a fishtail braid instead of a regular three-strand braid for your half-up section. Fishtail braids have an intricate, delicate appearance that looks incredibly sophisticated, and they’re actually easier to execute than they appear.
Why Fishtail Is Impressive
A fishtail braid reads as more complex and intentional than a regular braid, even though it’s arguably easier to do. The crossed, woven appearance is visually interesting and photographs beautifully. It’s perfect if you want to look like you spent a lot of time on your hair without actually doing so.
The Fishtail Technique
- Divide a section of hair into two equal parts
- Take a small piece of hair from the outside of one section and cross it over to the other section
- Take a small piece from the outside of the other section and cross it back
- Continue alternating back and forth — the small crossover pieces are what create the intricate fishtail pattern
- Pull gently on the sides of the braid to make it look fuller once it’s complete
Real talk: This braid requires a bit more attention than a regular three-strand braid, but once you understand the concept (you’re always pulling from the outside of one section and crossing it to the other), it becomes intuitive. Watch a tutorial video to see the motion, and you’ll get it.
14. The Half-Up Ponytail With Hidden Layers
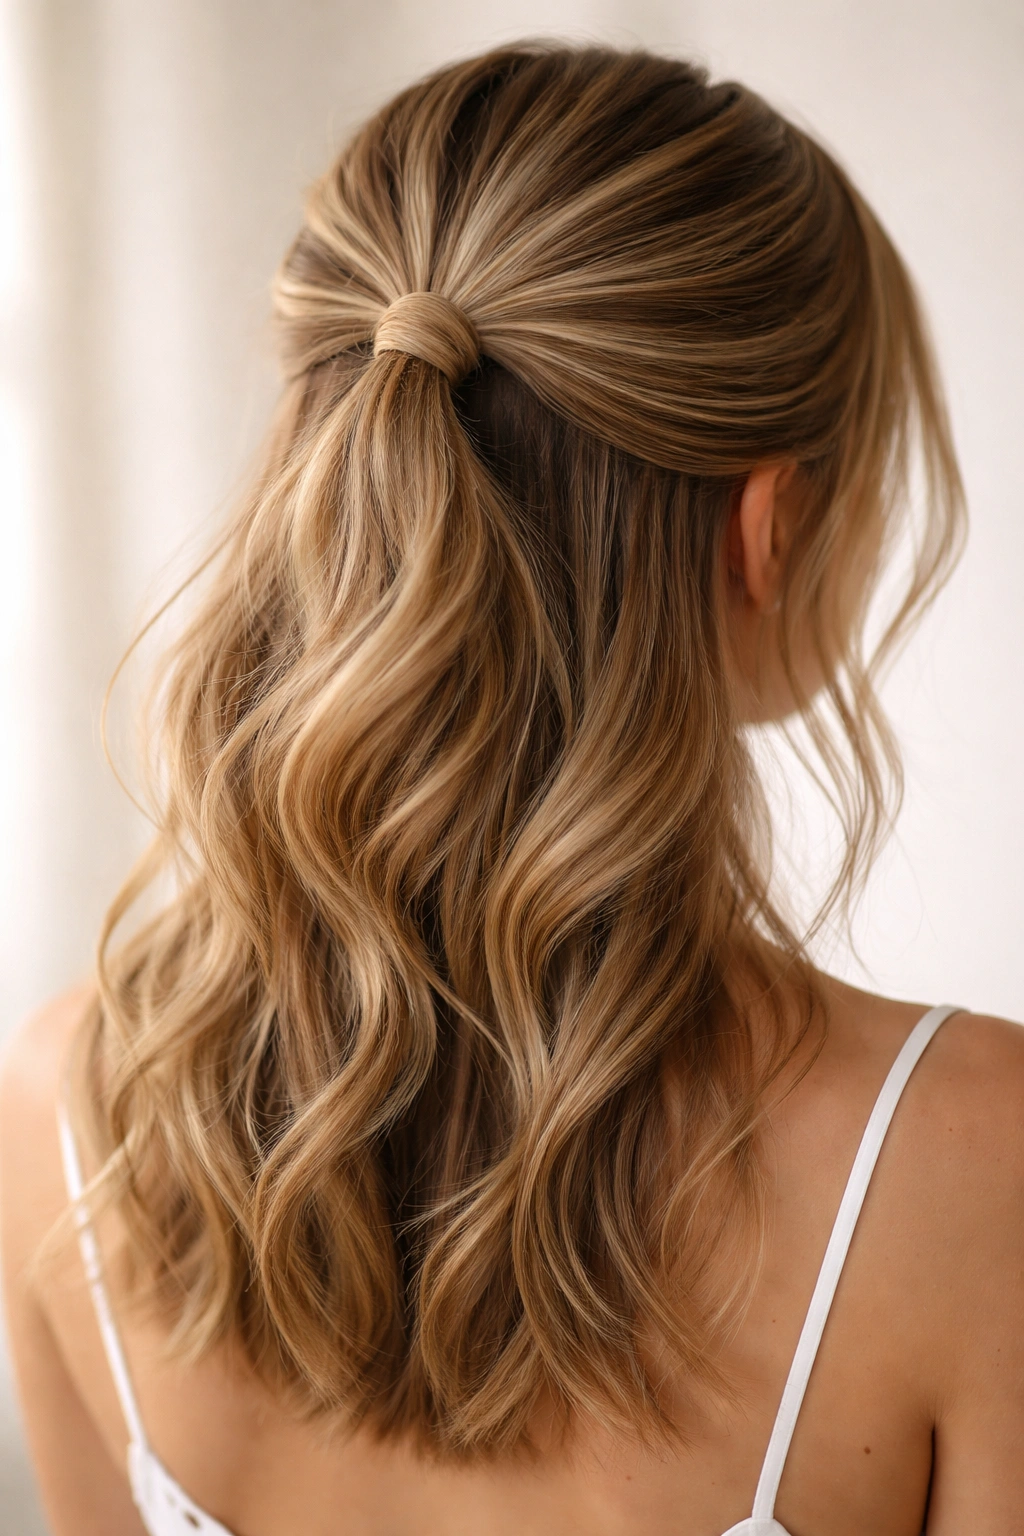
Create a half-up ponytail and then gently pull out individual strands from beneath the elastic to create the illusion of hidden layers and dimension. This adds texture and visual interest without requiring an elaborate styling technique.
Why This Detail Matters
When you pull out strategically placed strands, it creates the illusion that there’s more going on structurally than there actually is. It elevates a basic half-up ponytail into something that feels more complex and intentional.
The Pulling Technique
- Create your half-up ponytail first
- Starting near the elastic, gently pull out a thin strand of hair from directly underneath the elastic
- Pull it slightly away from the main ponytail to create separation and dimension
- Repeat on different sides, pulling out a few strategic strands but not so many that the ponytail becomes loose or unstable
- Use bobby pins to secure any strands that don’t naturally stay where you want them
Pro tip: Don’t overdo this technique. Three to five pulled-out strands is usually perfect; too many and the style starts to look sloppy rather than intentionally textured.
15. The Half-Up With Floral or Jeweled Hairpins
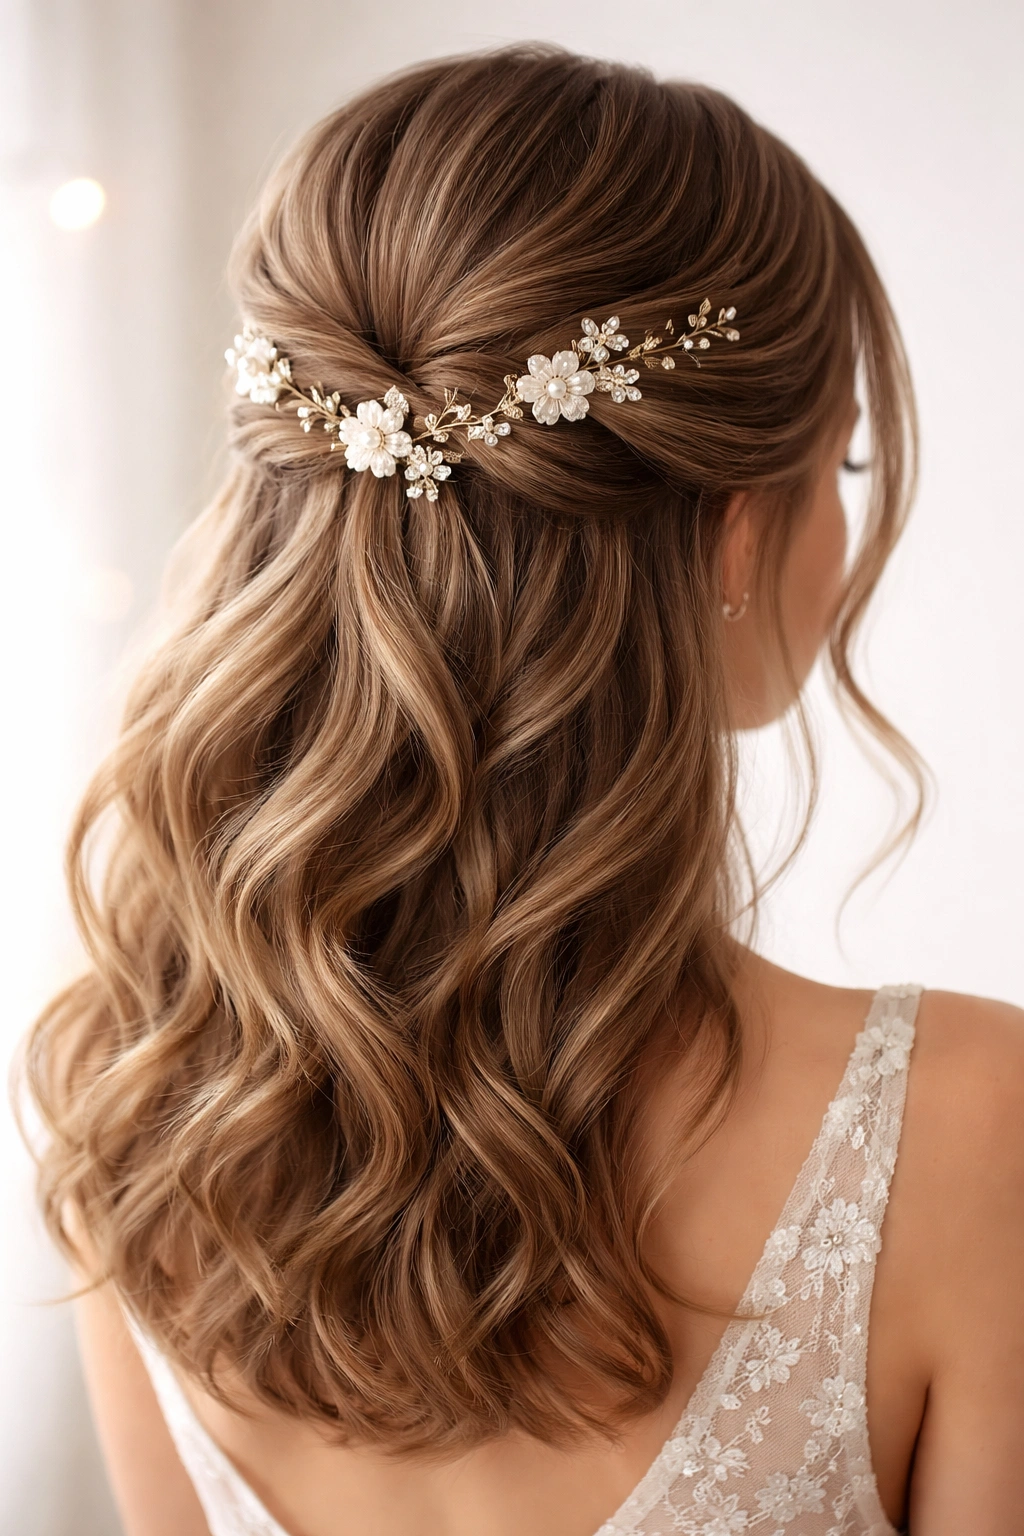
Create any half-up style you prefer, then embellish it with delicate hairpins that have small flowers, crystals, or jeweled details. Scatter these pins throughout the half-up section for a romantic, glamorous effect that feels special without being overwhelming.
Making Accessories Work
Hair accessories don’t have to be chunky or obvious to make an impact. Delicate floral pins or jeweled hairpins add sparkle and femininity while still looking elegant. This works beautifully if your dress has beading or embellishments — the repeated details create a cohesive look.
Placement Strategy
- Use pins that are small enough to look delicate but prominent enough to actually be visible
- Scatter them randomly throughout your half-up section rather than lining them up in a row (which can look costume-y)
- Mix different types of pins (some floral, some jeweled) for more visual interest
- Make sure you’re actually securing the style with these pins, not just placing them decoratively and hoping they stay
Worth knowing: Buy hair pins specifically designed to stay in place — they have better grips than regular bobby pins. Regular bobby pins are prone to slipping throughout the night, especially if you’re dancing or moving around.
16. The Sleek Low Half-Up Ponytail
Instead of placing your half-up ponytail at the crown, place it much lower, almost at the nape of your neck. Keep this ponytail sleek and smooth, and let the upper portion of your hair fall naturally. This placement feels modern and slightly unexpected.
Why Low Placement Feels Fresh
A low half-up ponytail reads as more contemporary than a high one. It has an effortless, not-trying-too-hard quality that feels very current. This works especially well if you have a longer face or if you’re wearing a dress with detail at the shoulders or neckline.
Styling the Low Half-Up
- Use a smoothing serum and brush the top section back gently and smoothly toward the low placement point
- Secure it with a clear elastic, then wrap a thin piece of hair around the elastic to hide it
- Keep the upper portion of your hair with natural texture or very subtle waves — too much curl at the crown will fight against the sleek lower ponytail
- Consider adding a delicate hair cuff or metal ring around the base of the ponytail for a modern touch
Real talk: This style requires your hair to look clean and not greasy. Any buildup or dirt will be visible when you brush it back smoothly. Use a dry shampoo the morning of if your hair is feeling less than fresh.
17. The Half-Up With Decorative Hair Stick or Comb
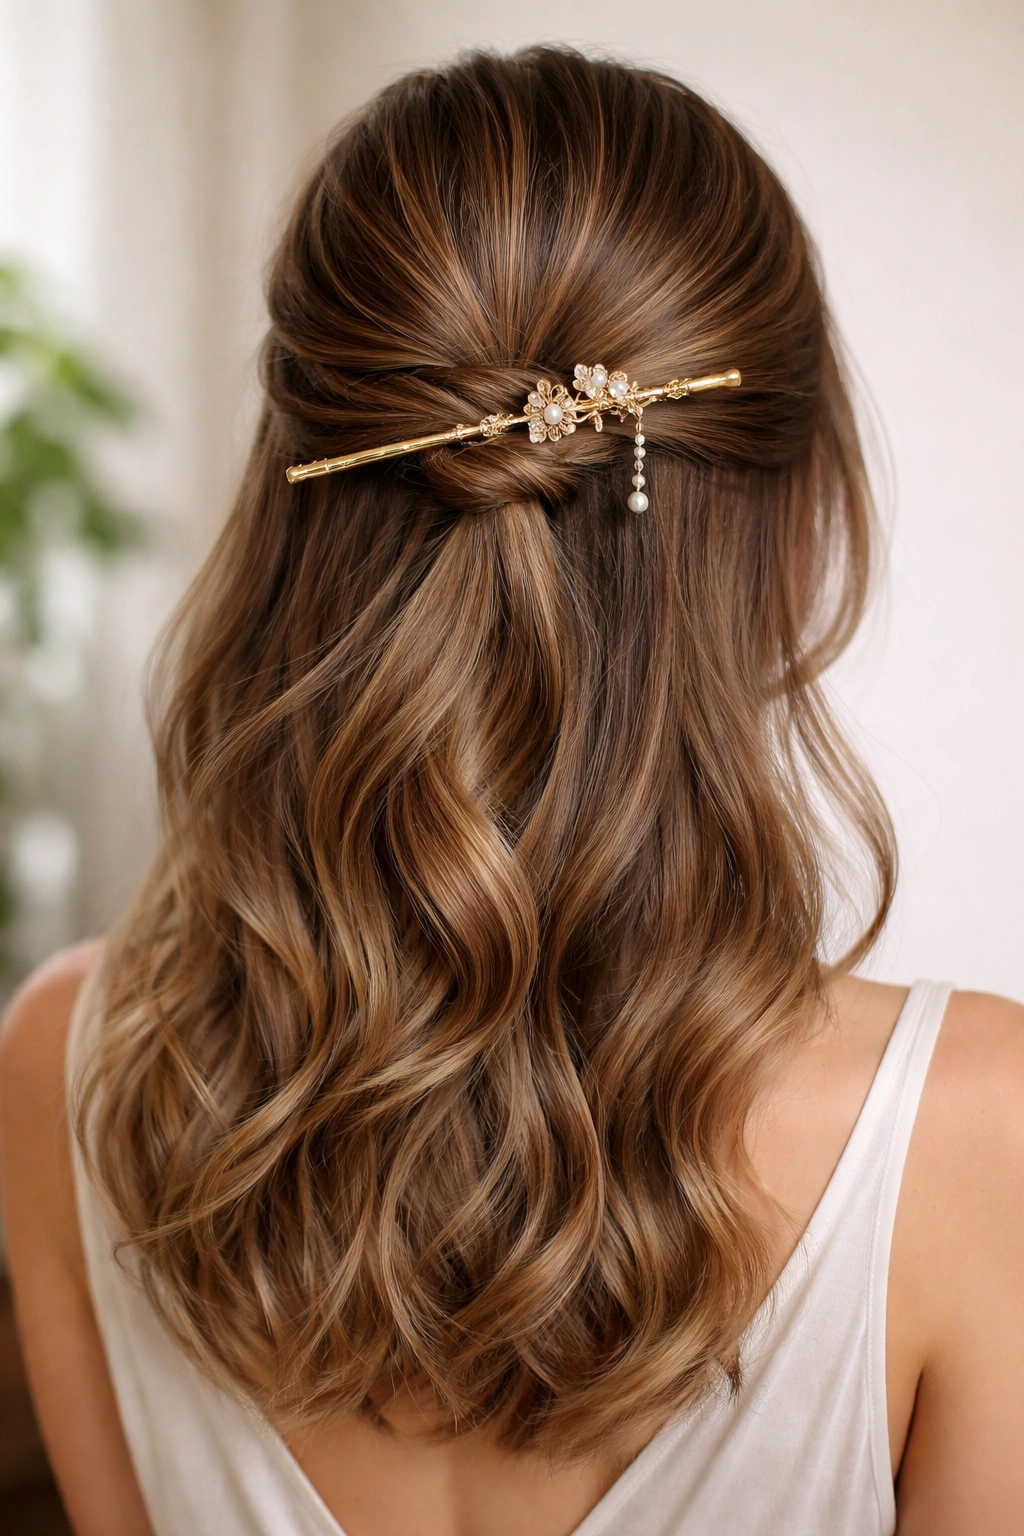
Instead of a clip or elastic, secure your half-up style with a decorative hair stick or ornamental comb. This approach feels elegant and slightly more sophisticated than a standard clip, and it can work with any dress style.
The Hair Stick Advantage
Hair sticks and decorative combs hold hair securely while also being beautiful accessories that serve a purpose. They read as more intentional and thought-out than a basic elastic or standard clip.
Using a Hair Stick or Comb
- Make sure your hair is smooth and slightly textured for grip — completely slippery hair will slide right off a hair stick
- Twist your half-up section gently and insert the stick or comb through the twisted section to hold it in place
- If you’re using a stick, it should go through the entire twist and poke out the other side
- Check throughout the night that it’s still secure, especially if you’re dancing or moving around a lot
Pro tip: Practice using your hair stick or comb before homecoming day. They require a slightly different technique than clips, and you want to feel confident that you can actually use it properly.
18. The Half-Up With Braided Detail and Curls
Create two small braids from the sides of your head, bring them to the back where you’d normally secure a half-up, but instead of fastening them together, weave them together to create one unified braid. Let the bottom half of your hair fall in loose curls. This hybrid approach is visually complex and stunning.
Why This Combination Shines
This style combines the elegance of braids with the romance of loose curls. It’s textured, interesting, and feels intentional without being overdone. It works beautifully for any homecoming dress because it’s sophisticated without being formal.
Executing the Weave
- Create two braids starting from each temple, bring them to the back of your head
- Instead of securing them separately or weaving a ribbon through, literally weave the two braids together — cross one strand over the other, creating an even more intricate pattern
- Secure the woven-together result with bobby pins
- Add loose curls or waves to the remaining bottom half of your hair
Worth knowing: This style looks complex but is actually just two braids woven together, which is easier than it sounds once you understand the technique. The effort-to-impact ratio is excellent.
19. The Half-Up Twisted With Crossed Sides
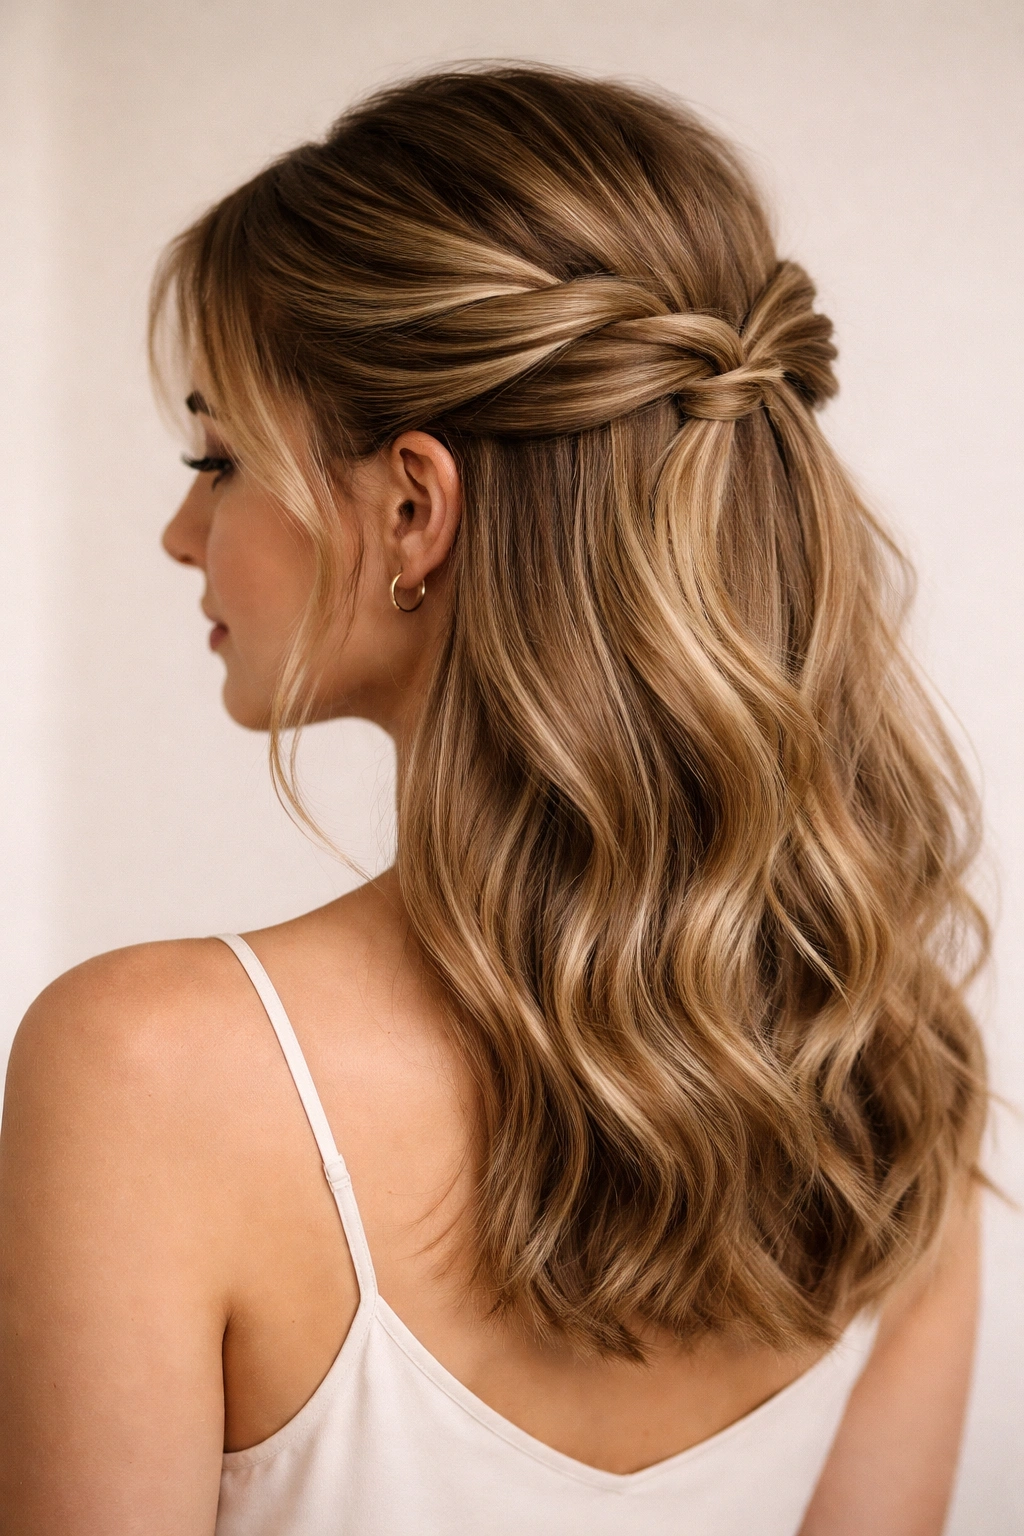
Create twists on each side of your head (like a classic half-up twist), but instead of bringing them straight back to the center, cross them over each other at the back — so the left twist goes to the right, and the right twist goes to the left. Secure them on opposite sides. This creates a visually interesting, almost crown-like effect.
Why Crossing Creates Impact
Crossing your twists creates a more complex, intentional look than bringing them straight back. It has a slight architectural quality that makes it feel more polished and thought-out.
The Crossing Technique
- Create gentle twists on each side of your head, starting near your temples
- As you bring them toward the back, cross the left twist over to the right side
- Cross the right twist over to the left side, so they pass over each other at the back
- Secure each twist on the opposite side with bobby pins that match your hair color
- Leave the rest of your hair down with natural texture or curls
Real talk: This style requires some bobby pin work to look polished. Make sure you’re using color-matched pins and securing everything firmly so nothing slips out of place during the night.
20. The Half-Up With Soft Waves and Minimal Accessories
Sometimes simple is best. Take the top section of your hair, create a soft, loose twist or braid, secure it minimally (maybe just with a clear elastic), and let the bottom half of your hair fall in soft, romantic waves. Skip the extra clips, ribbons, and embellishments in favor of a clean, classic look.
Why Simplicity Works
Not every hairstyle needs to be elaborate. A clean, simple half-up with beautiful waves reads as elegant and timeless. It works with any dress, any skin tone, and any personal style. It’s the kind of look that photographs beautifully and that you’ll love looking back on in pictures years later.
Executing the Simple Approach
- Focus your effort on creating truly beautiful, romantic curls in the bottom half — this is where all the visual impact comes from
- Make your twist or braid very loose and relaxed, not tight or controlled
- Use just one clear elastic to secure the half-up, no additional clips or pins
- Leave some face-framing pieces loose for softness
- Make sure your curls are truly soft and flowing, not tight or uniform
Pro tip: The simpler the style, the more important the hair texture becomes. Invest time in creating beautiful waves or curls, and skip the elaborate braiding and accessorizing. Sometimes the most elegant look is the most understated one.
Final Thoughts
A half-up half-down style with medium hair gives you the best of both worlds — the polish and elegance of an updo with the movement and comfort of wearing your hair down. The twenty looks above cover every possible angle: from the romantic and soft to the sleek and modern, from the simple and classic to the intricate and detailed.
The key to pulling off any of these styles confidently is practice. Pick the one (or two or three) that speaks to you most, and try it out a week or two before homecoming. This takes the pressure off on the actual day and makes sure you know exactly what you’re doing. You’ll know whether you need more hairspray, whether your curling iron setting is right, whether your bobby pins are the right color, and whether you actually enjoy wearing that style on your hair.
Remember that homecoming should feel fun and comfortable, not stressful. You’re going to have an amazing time regardless of your hairstyle, so choose something that makes you feel confident and beautiful. Half-up half-down is genuinely hard to mess up, so trust yourself and have a fantastic time.