Bubble braids have become a go-to styling technique for curly-haired people who want a polished, intentional look without flattening their natural texture. Unlike traditional braids that can feel constraining or visually “muted” on curls, bubble braids work with the volume and movement of natural hair, creating a playful, dimensional effect that’s equal parts romantic and effortlessly chic. The beauty of this style is that it holds curl definition while keeping hair off your face, making it practical for everything from a casual day at home to a special event where you want your curls to stay managed but not tamed.
The magic of bubble braids lies in their flexibility—they work on virtually any curl pattern, from loose waves to tight coils, and they look intentionally styled rather than like you’re trying to fight your hair into submission. What makes the half-up half-down variation especially appealing is that you get the best of both worlds: the security and sophistication of an updo without sacrificing the gorgeous flow of curls down your back. Whether you’re looking for something quick or willing to invest time in a more intricate design, there’s a bubble braid version waiting for your curl pattern.
The following styles showcase different approaches to bubble braiding for curly hair—each with its own vibe, difficulty level, and best-suited occasions. Some are simple enough to do every day, while others are designed to turn heads at weddings or nights out. The key to success with any of these is using the right products to define and hold your curls without creating crunch, and understanding how to work with your hair’s natural texture rather than against it.
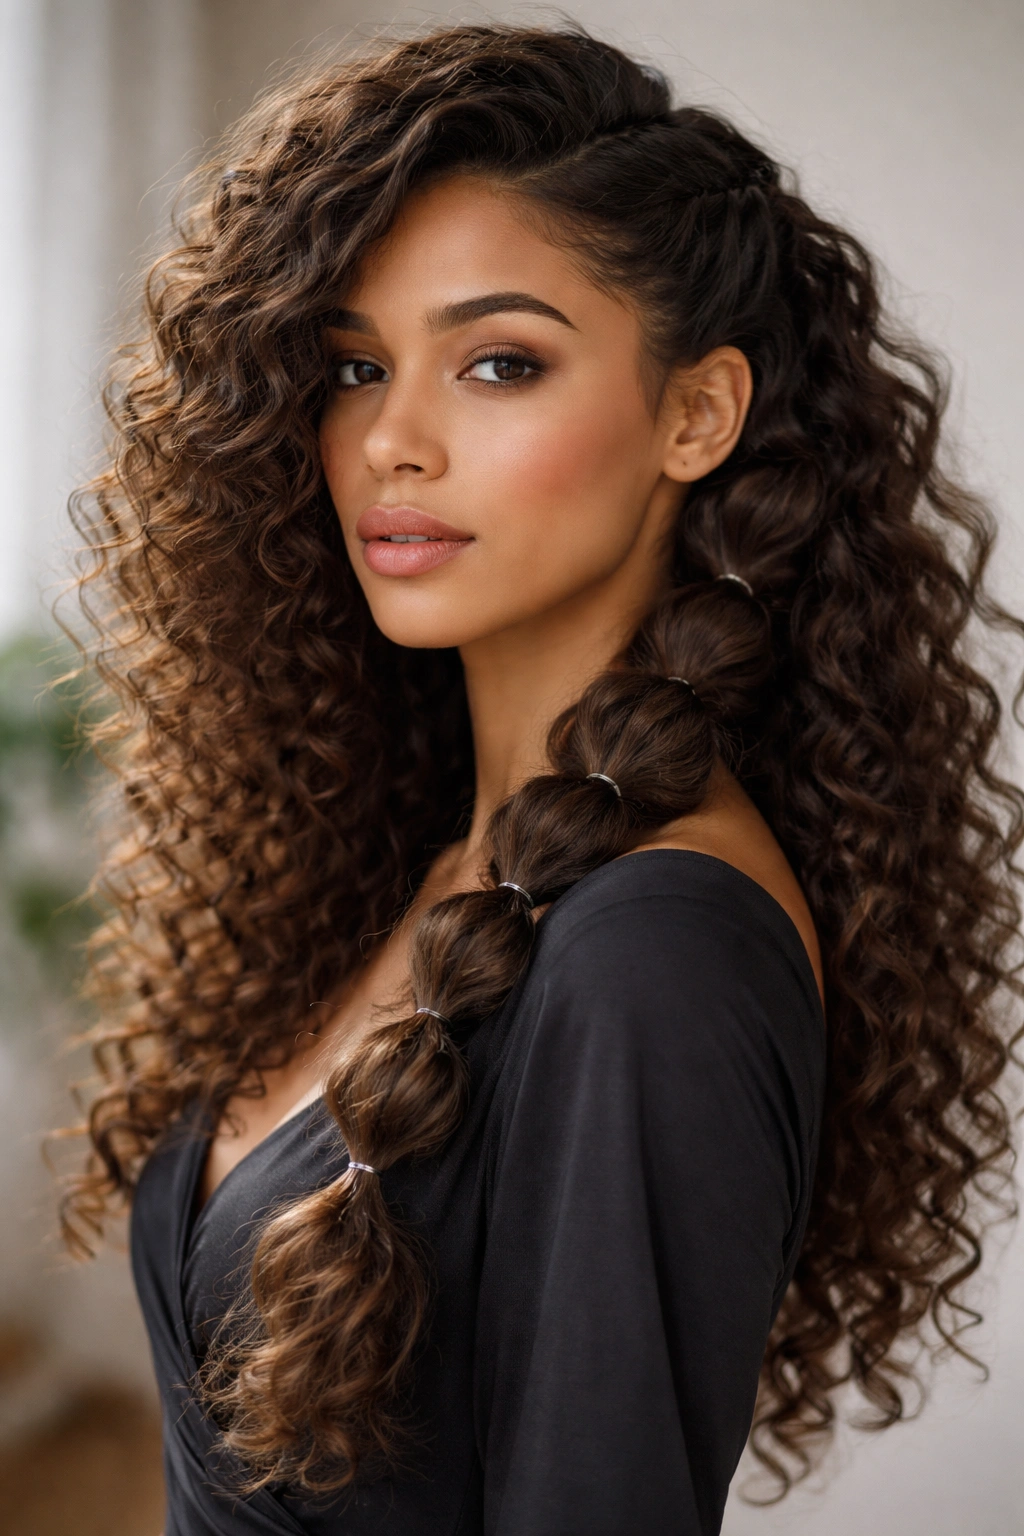
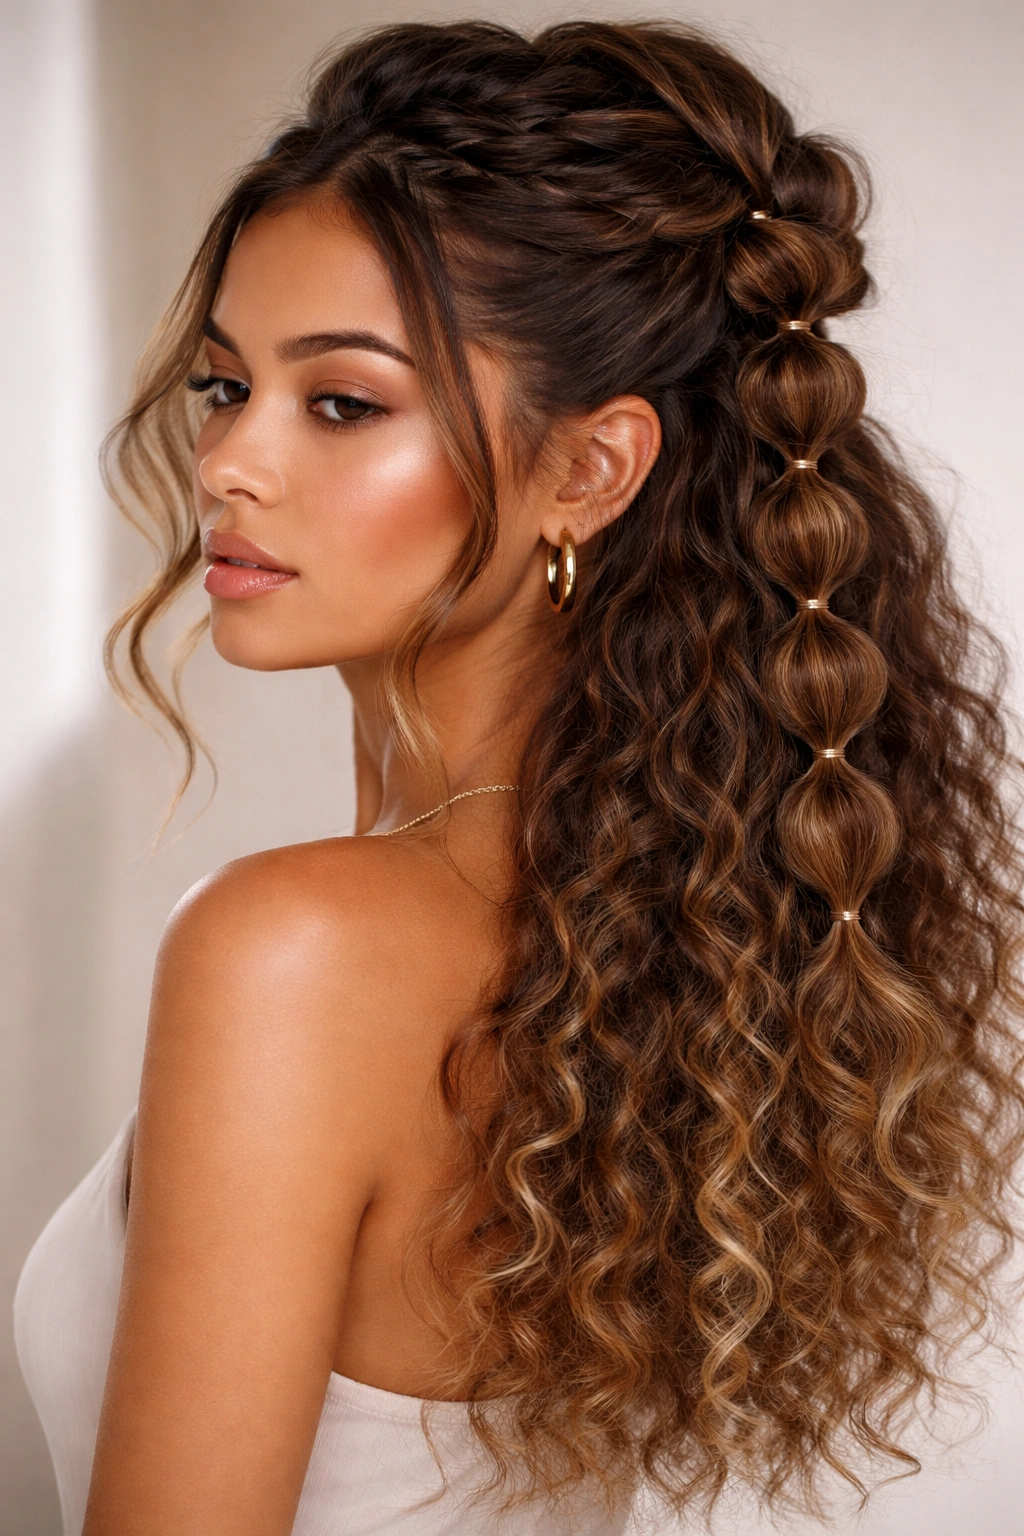
1. Classic Bubble Braid Half Up Half Down
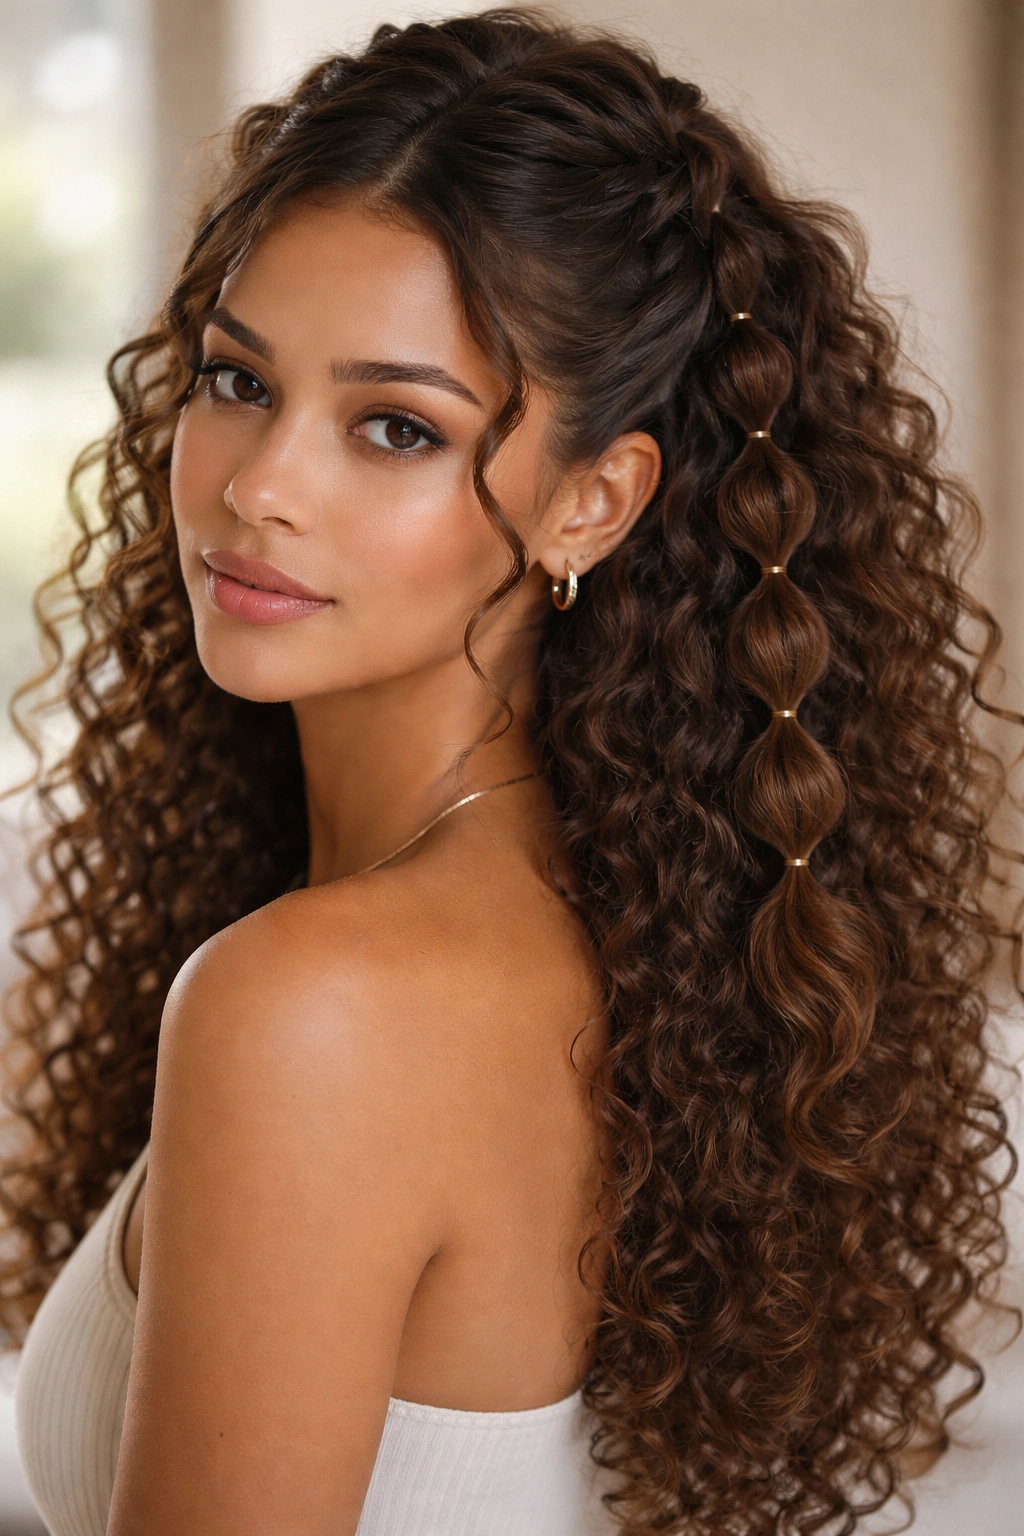
This is the foundational bubble braid style that works beautifully on curly hair because it celebrates volume rather than trying to contain it. Start by sectioning the top half of your hair—think of drawing a line from ear to ear across the crown—and securing it loosely with a hair tie at the base of your skull. The key is keeping this tie loose; you’ll be creating the “bubbles” by gently pulling and teasing the hair between elastic bands to add dimension and bounce.
Why This Style Works for Curls
Bubble braids on curly hair naturally emphasize the texture and movement you already have. The technique of loosening each section creates a fuller appearance that plays into the natural volume of curls rather than fighting against it. The half-up configuration keeps the style from looking too formal while still being polished enough for most occasions.
How to Create the Perfect Bubbles
- Add a second elastic tie about 2 inches below the first, then gently pull and fluff the hair between the two elastics upward and outward to create the bubble
- Repeat this process down the length of your braided section, spacing each elastic 2–3 inches apart depending on your hair length and the fullness you want
- Use a fine-tooth comb or bobby pins to tuck any flyaways back into the bubbles and secure the entire style with bobby pins hidden inside the braided sections
- The lower half of your hair falls freely in your natural curls, creating an uninterrupted flow of texture
Pro tip: Apply a light-hold curl cream or mousse to damp hair before styling, then diffuse-dry if possible. This sets your curl pattern and makes the bubbles hold their shape longer throughout the day.
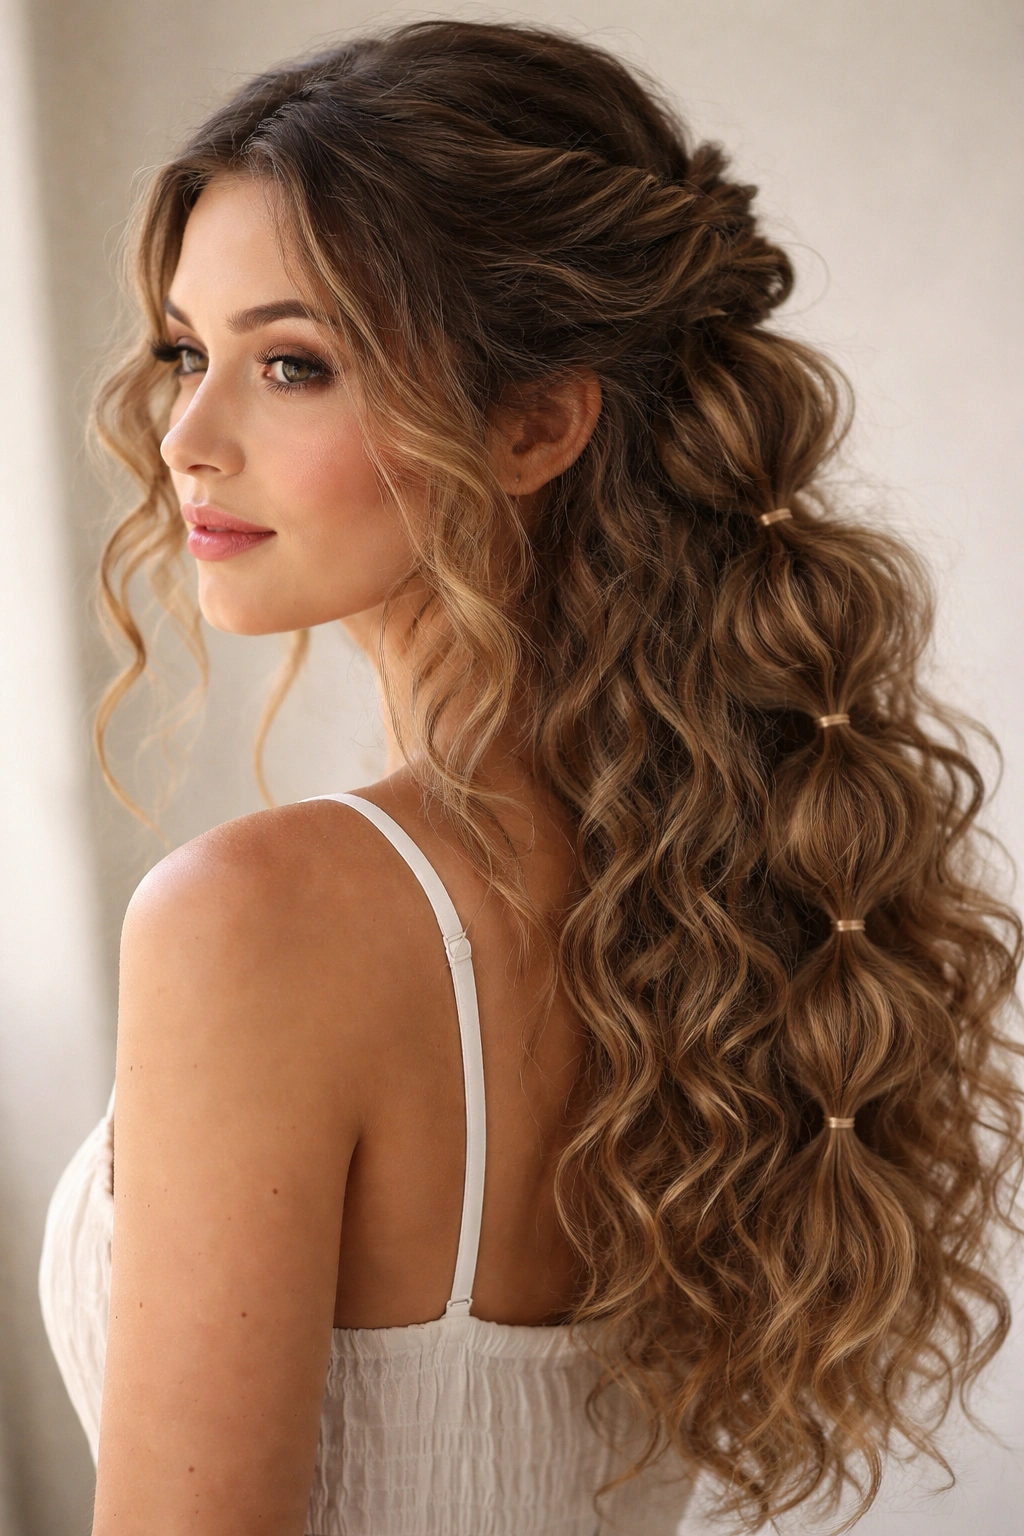
2. Loose, Undone Bubble Braid for Effortless Texture
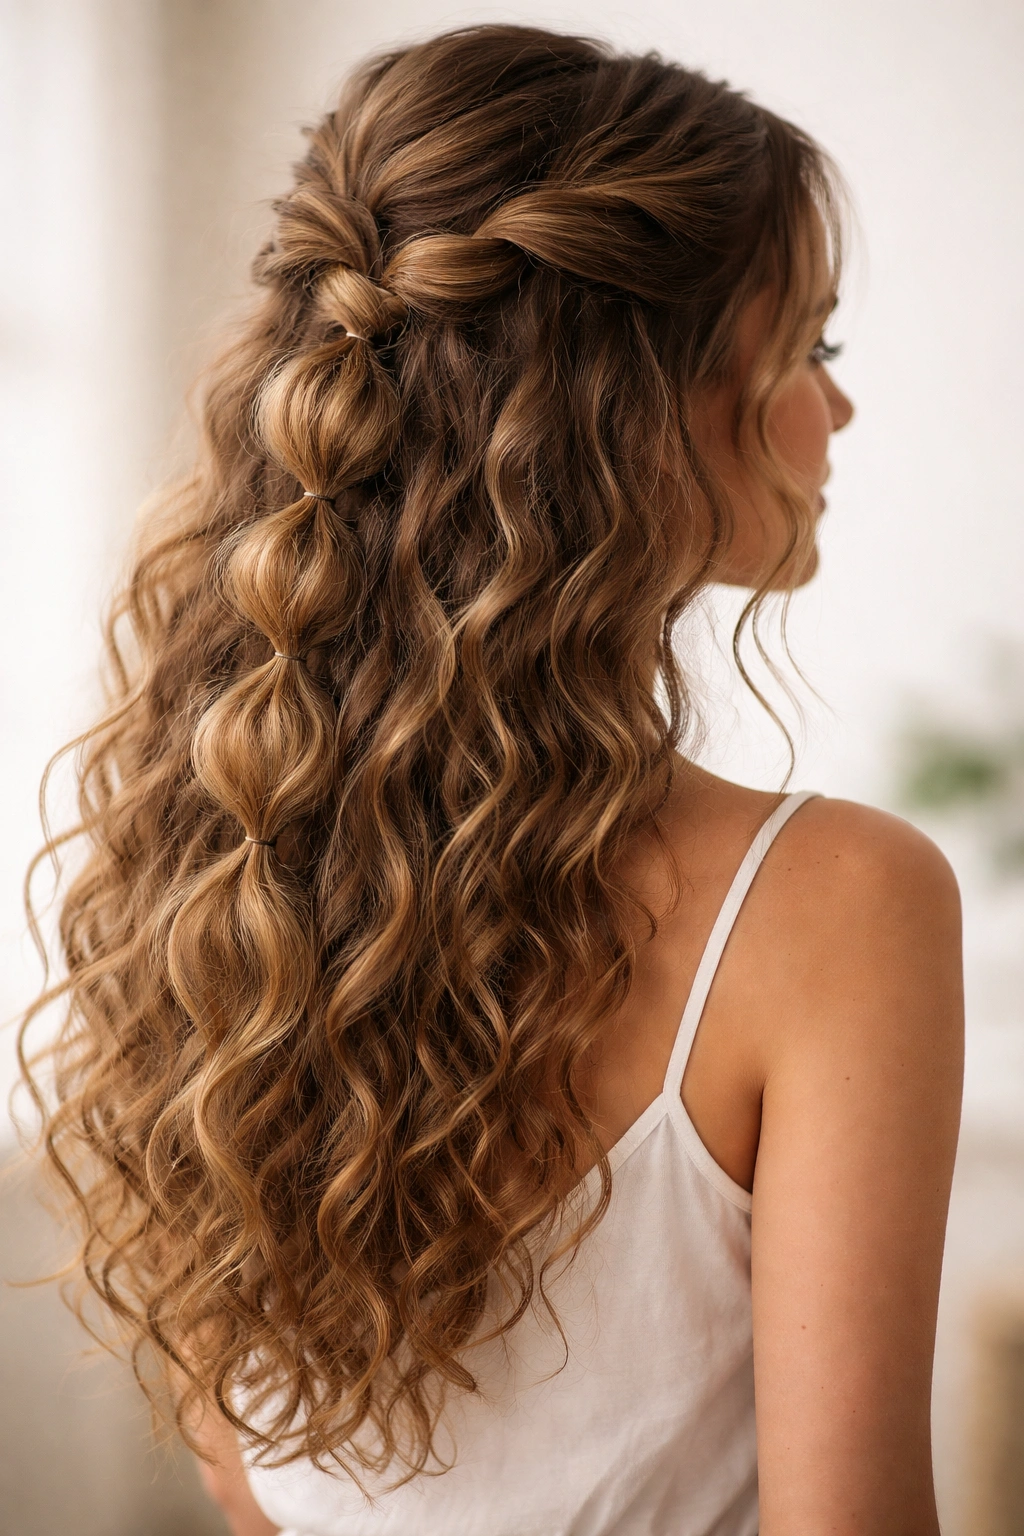
If you love the bubble braid concept but want a softer, more relaxed aesthetic, this loose interpretation is your answer. Instead of pulling your hair tight into a structured braid, you’re creating gentle, oversized bubbles that feel almost like waves pinned up. This works particularly well on looser curl patterns (waves through light curls) and gives the impression of having styled your hair in five minutes when really you’re just working smarter.
What Makes This Version Different
The loose bubble braid deliberately embraces a “undone” quality that reads as confidence rather than carelessness. You’re not aiming for perfect symmetry or taut elastics—instead, you want soft, pillow-like bubbles that seem to have happened naturally. This style bridges the gap between “I woke up like this” and “I actually tried,” which makes it perfect for casual days, brunches, or any time you want to look effortlessly put-together.
Creating Soft, Pillowy Bubbles
- Section the top half of your hair and secure it loosely with a stretchy, padded elastic (these are gentler on curls)
- Space your additional elastics farther apart than you would for a tighter bubble braid—aim for 3–4 inches between each tie
- When pulling the bubbles, use your fingers rather than a comb and create uneven, natural-looking volume rather than uniform puffs
- Leave some shorter pieces and face-framing strands loose for an intentionally piece-y feel
- Gently curl the ends of the lower hair section with a curling iron on the lowest heat setting to enhance the soft, textured vibe
Worth knowing: This style genuinely improves with a day or two of wear—second-day hair actually looks better because the bubbles have settled into a more relaxed shape. You can sleep in this style and fluff it in the morning for an even softer appearance.
3. Twisted Bubble Braid Half Up
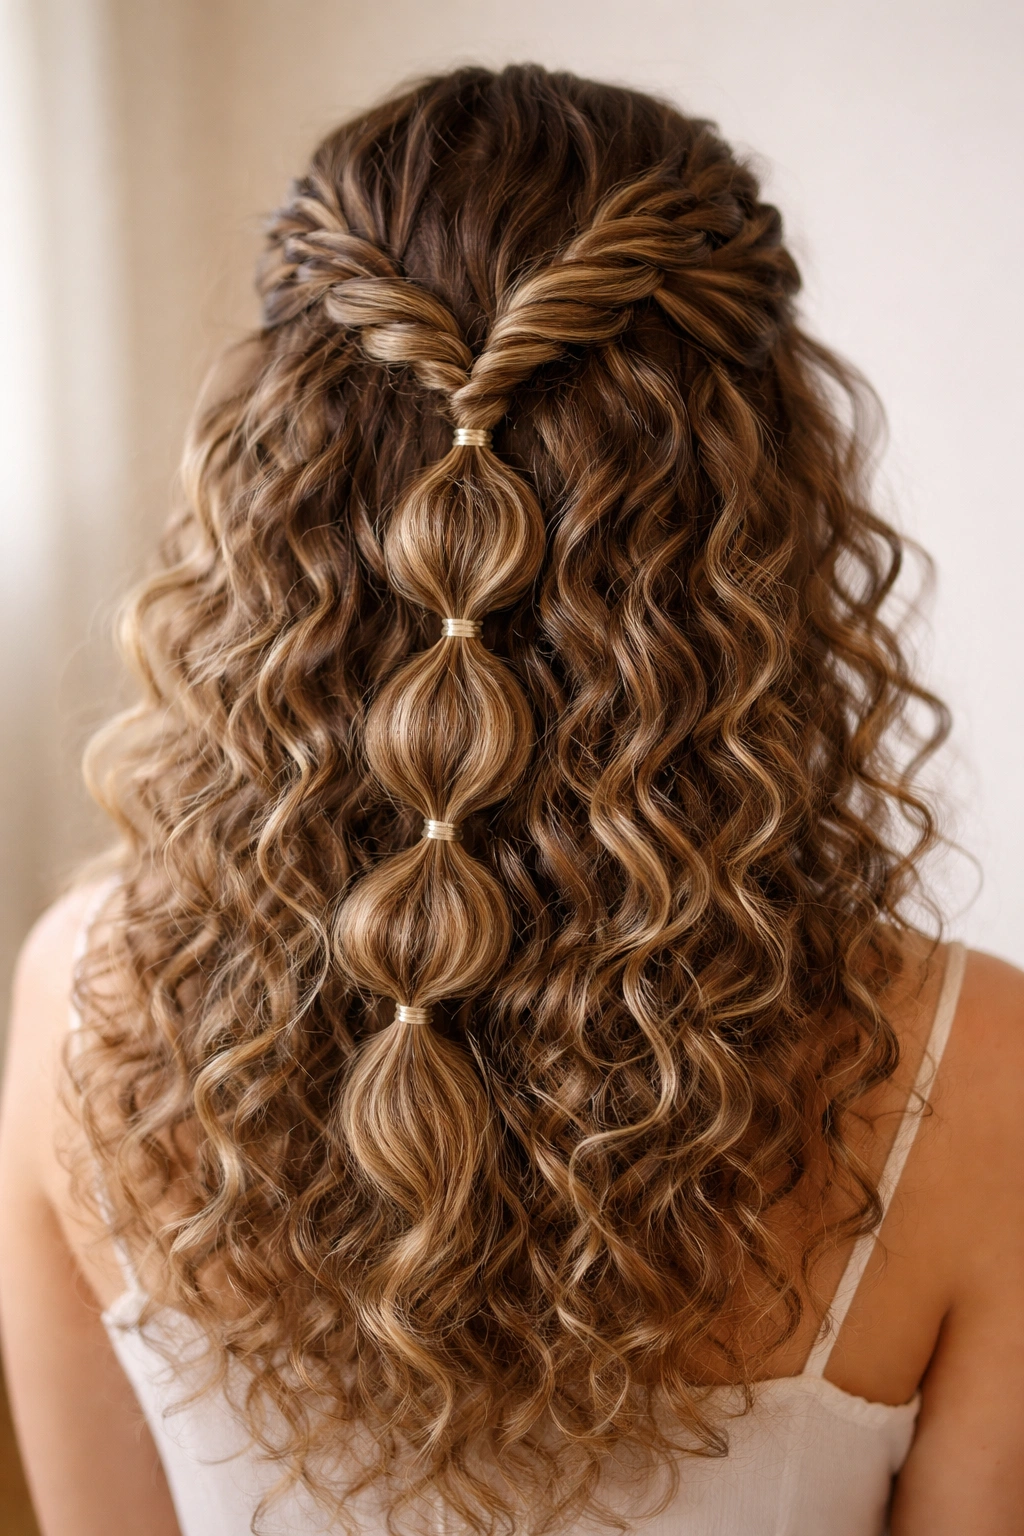
For those who want structure with a twist—literally—this variation swaps traditional braiding for twisted sections, which creates a different visual texture while still maintaining that bubble aesthetic. The twisted bubbles have a sleeker, more refined appearance compared to traditional braids and can be easier to execute if braiding feels complicated on your curl pattern.
The Visual Appeal of Twists Versus Braids
Twisted sections create a ropelike appearance that catches light differently than braids, giving your curls more subtle dimension. This style works particularly well on tighter curl patterns where a traditional braid might get lost in the overall texture. The twists also tend to hold their shape longer throughout the day because the twisted structure is more compact than a loose braid.
Step-by-Step for Twisted Bubbles
- Section the top half of your hair and divide it down the middle into two equal portions
- Twist each portion loosely away from the face, wrapping the two twists around each other as you work downward
- Secure the completed twist with an elastic at the base of your skull
- Add additional elastics down the length of the twist, spaced 2–3 inches apart
- Gently pull and fluff each section between the elastics, using your fingers to encourage the curls to bubble outward rather than stay contained
- Leave the lower section completely down to showcase your full curl pattern
Insider note: If your curls are very fine or fragile, twisted bubbles are gentler than traditional braids because they involve less manipulation and pulling of individual strands.
4. Zigzag Bubble Braid for Visual Interest
This playful variation replaces the straight-down-the-center style with a zigzag pattern, which makes the design more interesting visually and also helps distribute the weight of the style differently across your scalp. It’s a small change that has a big impact on how the style photographs and how it makes you feel wearing it.
Why Zigzag Works on Curly Hair
The zigzag pattern follows the natural contours of your head and works especially well on oval or heart-shaped faces because it can be directed to balance your features. On curly hair, the zigzag also prevents the style from looking too “done” or severe—it adds playfulness and dimension that suits natural texture beautifully.
Creating a Smooth Zigzag Bubble Braid
- Section the top half of your hair, but instead of securing it straight back, angle the first section toward the right side of your head
- Create your first two or three bubbles, then angle the next section toward the left side
- Continue alternating the angle every 2–3 inches as you move down
- Make sure the elastics are secure because the zigzag creates more tension at certain points
- Fluff each bubble fully to soften the geometric precision and let your curls dominate the look
- The lower hair section falls straight down from the center point where the zigzag ends
Pro tip: Map out your zigzag line with a fine-tooth comb before securing any elastics. This ensures your bubbles will follow a clear, intentional pattern rather than looking random.
5. Braided Bubble Crown for Special Occasions

If you want to transform the half-up bubble braid into something that feels more formal or wedding-appropriate, crown it by wrapping the finished braid around your head like a halo. This variation is stunning on all curl patterns and photographs beautifully because it showcases both your braided detail and your full curl texture simultaneously.
Making the Crown Effect Work
A bubble braid crown distributes the weight evenly across your head rather than concentrated at the back, making it more comfortable for long wear. The style looks intentionally bridal or formal without feeling stiff or overly secured. The key is making sure the braid curves smoothly from one side of your head to the other, which requires some practice but becomes intuitive once you understand the technique.
Building Your Bubble Crown
- Section the top half of your hair, but instead of securing it straight down, create your first section as if you’re about to pull hair back at a diagonal angle
- Secure your first elastic, then continue creating bubbles while gradually angling your section around toward the opposite side of your head
- Once you’ve completed enough bubbles to reach the other side (usually 5–7 depending on your hair length), wrap the final section around and secure with bobby pins hidden underneath
- Add a delicate hair comb, pearl-studded bobby pins, or a small hair accessory at the crown point for added elegance
- The lower section falls in full, uninterrupted curls that frame your face beautifully
Worth knowing: This style works best on shoulder-length hair or longer, as shorter lengths won’t provide enough hair to create a crown without looking too sparse.
6. Side-Swept Bubble Braid for Asymmetrical Style
Instead of creating a centered half-up style, sweep the bubble braid dramatically to one side for an asymmetrical look that feels more modern and directional. This variation is perfect if you have a favorite side to show off your curls or if you simply want a style that feels less “balanced” and more intentionally artistic.
The Appeal of Asymmetry
Side-swept styles automatically read as more fashion-forward and editorial than centered styles. On curly hair, the asymmetry allows you to show off more of your curl texture on one side while keeping the other side framed and styled. This also works beautifully for people with longer hair on one side or those who prefer to style their bangs to one particular side.
Achieving the Side Sweep
- Section more hair from one side of your head than the other, angling your initial section toward that preferred side
- Create your bubble braid along this angled path, working from the fuller side toward the back of your head
- Secure the end with an elastic positioned slightly behind your opposite ear rather than at the nape of your neck
- Create bubbles with a bit more volume on the side that’s swept—this adds visual weight that balances the asymmetrical composition
- Leave maximum curl texture on the opposite side to frame your face and create visual movement
Pro tip: This style photographs best from the side that the braid is swept toward, so remember which direction you’ve styled and position yourself accordingly for photos.
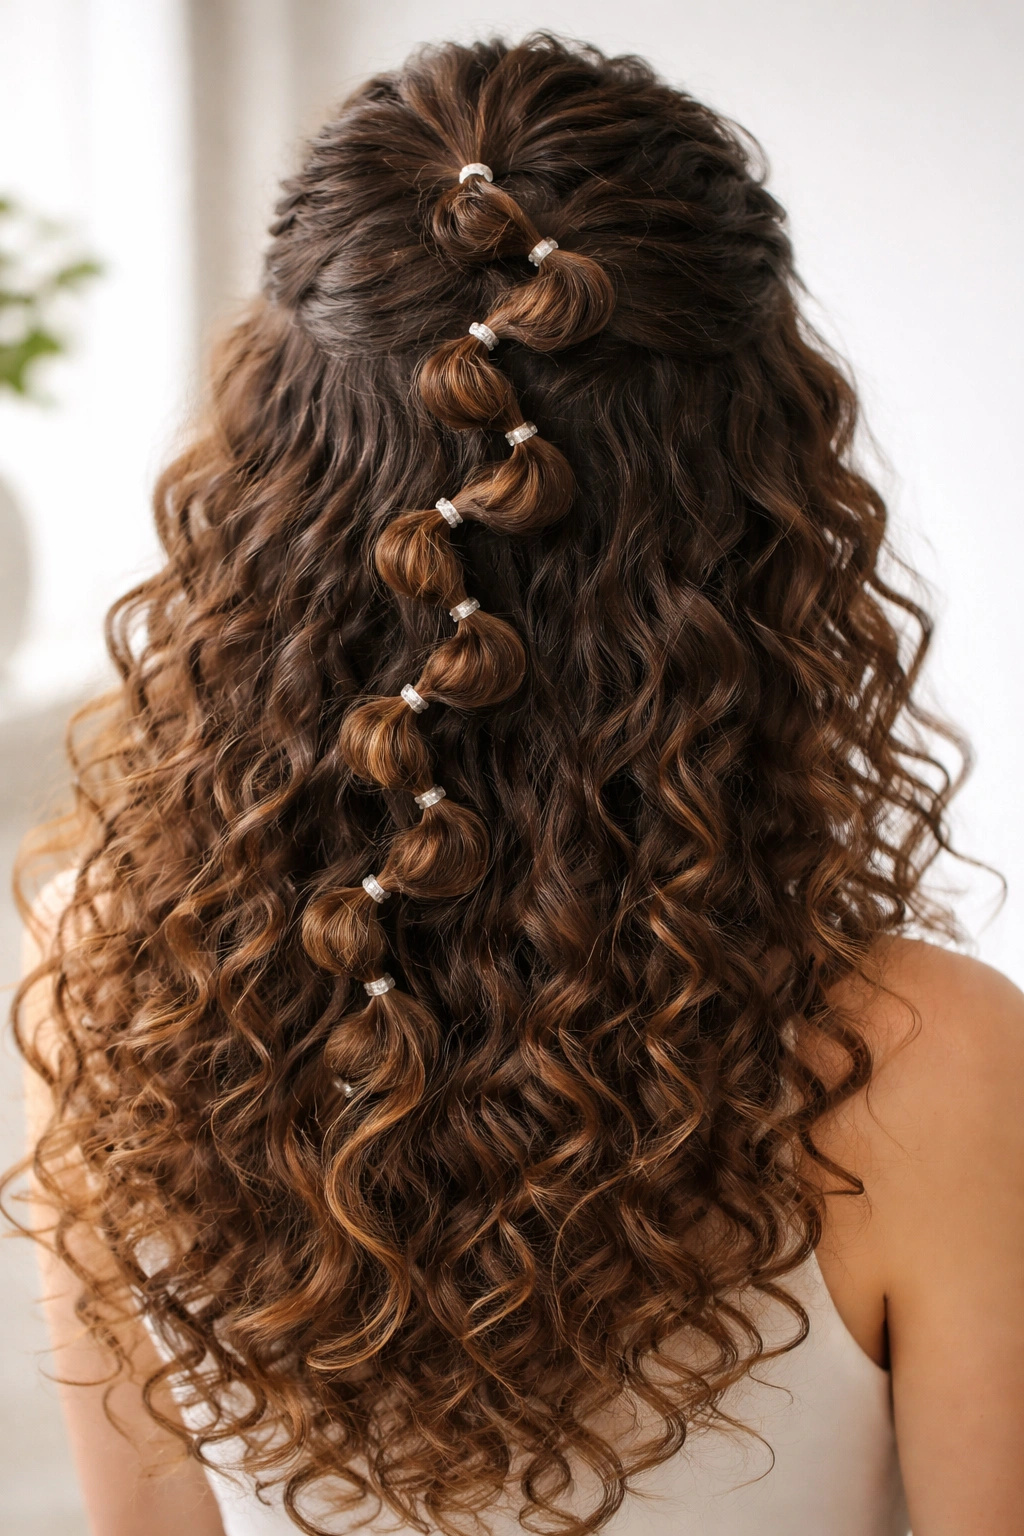
7. Pearl and Accessory-Adorned Bubble Braid
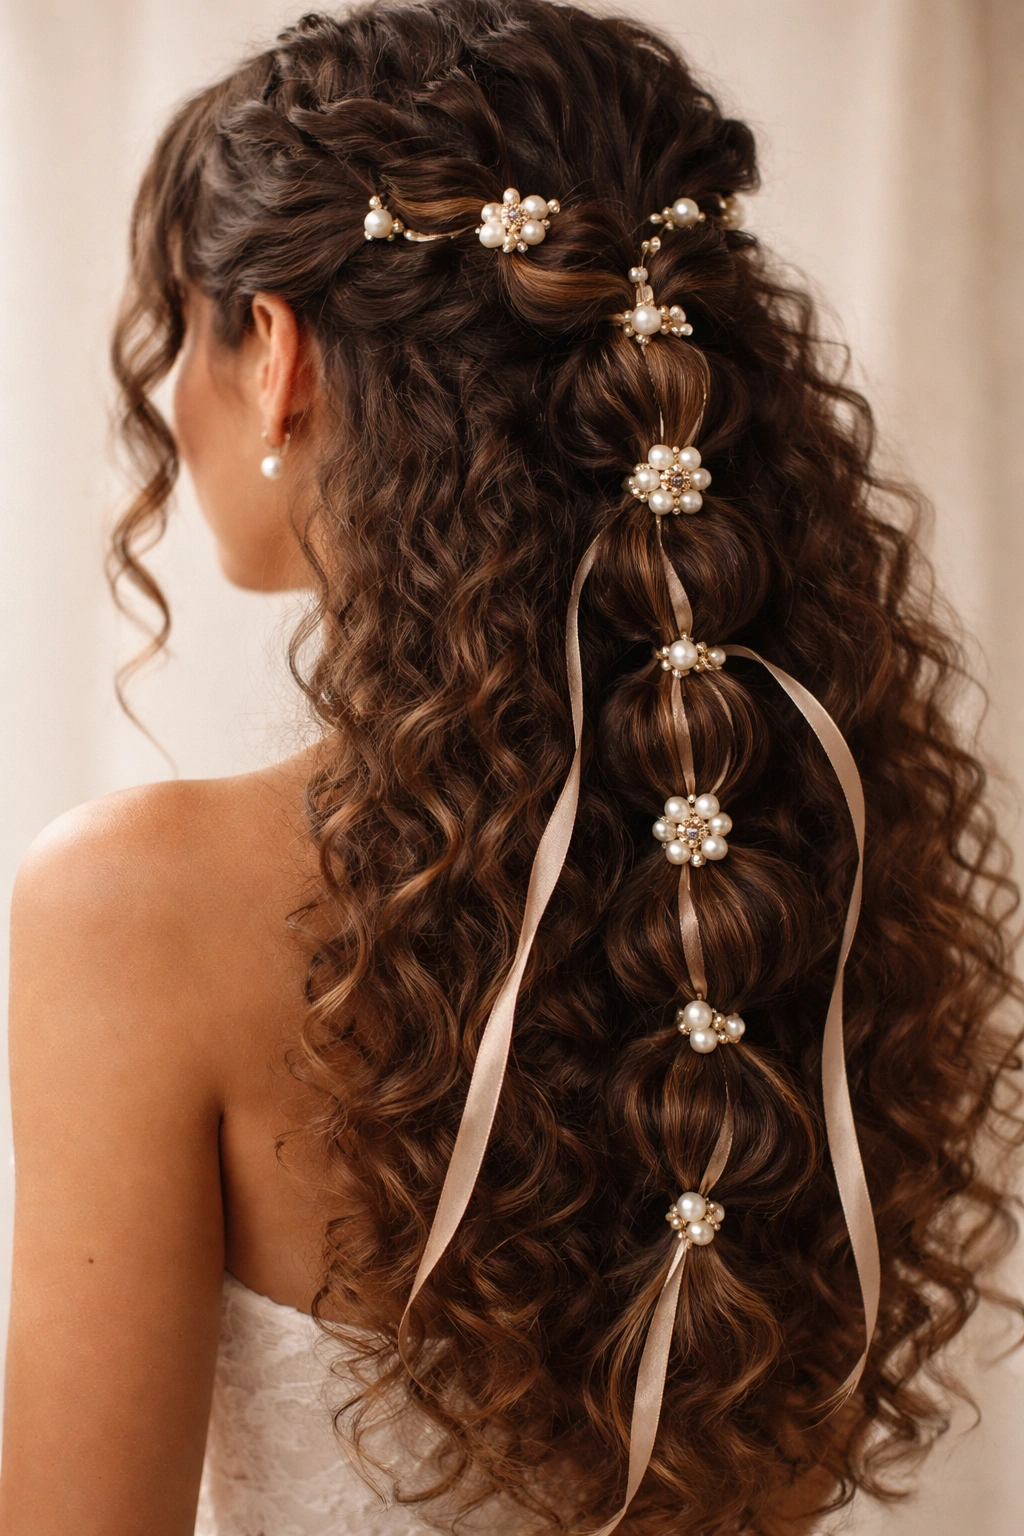
Taking the bubble braid from casual to celebratory, this version incorporates small accessories woven throughout the braid and tucked into the bubbles. Pearl clusters, delicate hair cuffs, colored ribbons, or gold accents transform a simple bubble braid into something precious and special, perfect for ceremonies, formal events, or any time you want your hair to be a statement.
Choosing Accessories That Complement Curls
The key to making accessories work on curly hair is choosing pieces that don’t weigh down the bubbles or create tension. Small, lightweight options like pearl pins, thin ribbons, and delicate cuffs are ideal. Avoid heavy claw clips or thick bands that can deform your bubbles or pull uncomfortably on your curl pattern.
Incorporating Accessories Into Your Bubble Braid
- Create your bubble braid as usual, making sure the bubbles are full and defined
- Weave a thin ribbon or metallic thread through the braided section for subtle shimmer and color
- Tuck small pearl bobby pins, delicate hair cuffs, or gemstone hair sticks into the bubbles at intervals
- Cluster accessories toward the crown area for a more formal, tiara-like effect, or distribute them throughout for playful elegance
- Make sure all accessories are secure and won’t slip out as your curls settle throughout the day
- Add a decorative comb or barrette at the base where the bubbles meet the loose curls for a finishing touch
Insider note: If you’re using ribbon, weave it through as you create the initial braided section rather than trying to thread it through afterward—this gives you much better control and a neater appearance.
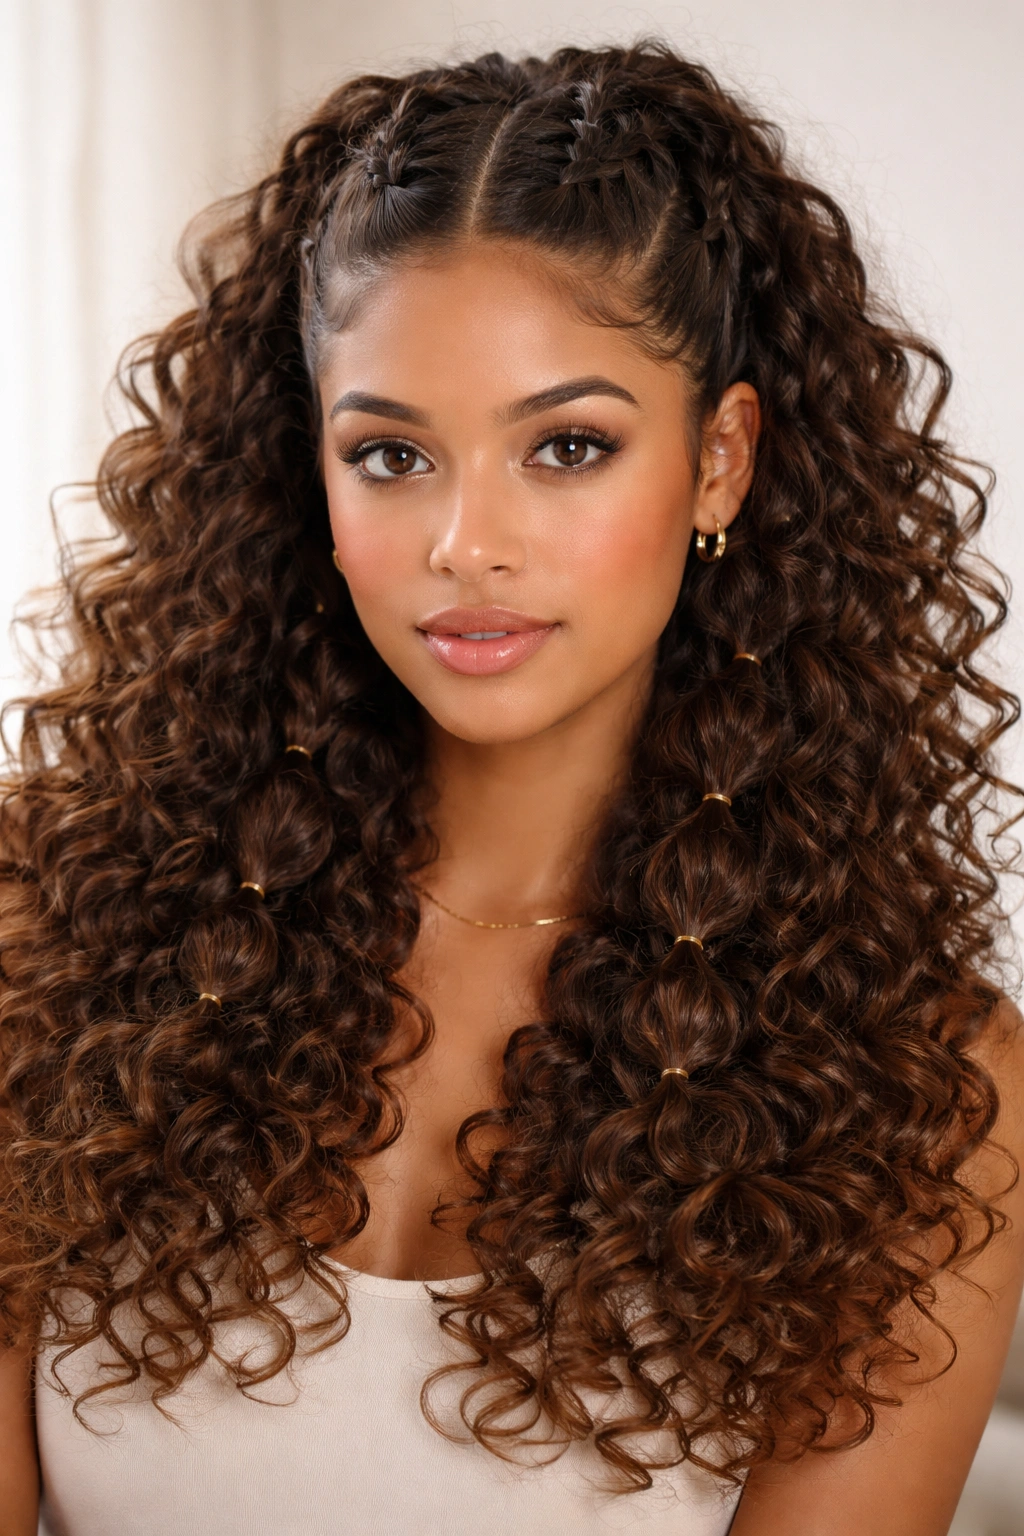
8. Double Bubble Braid Half Up
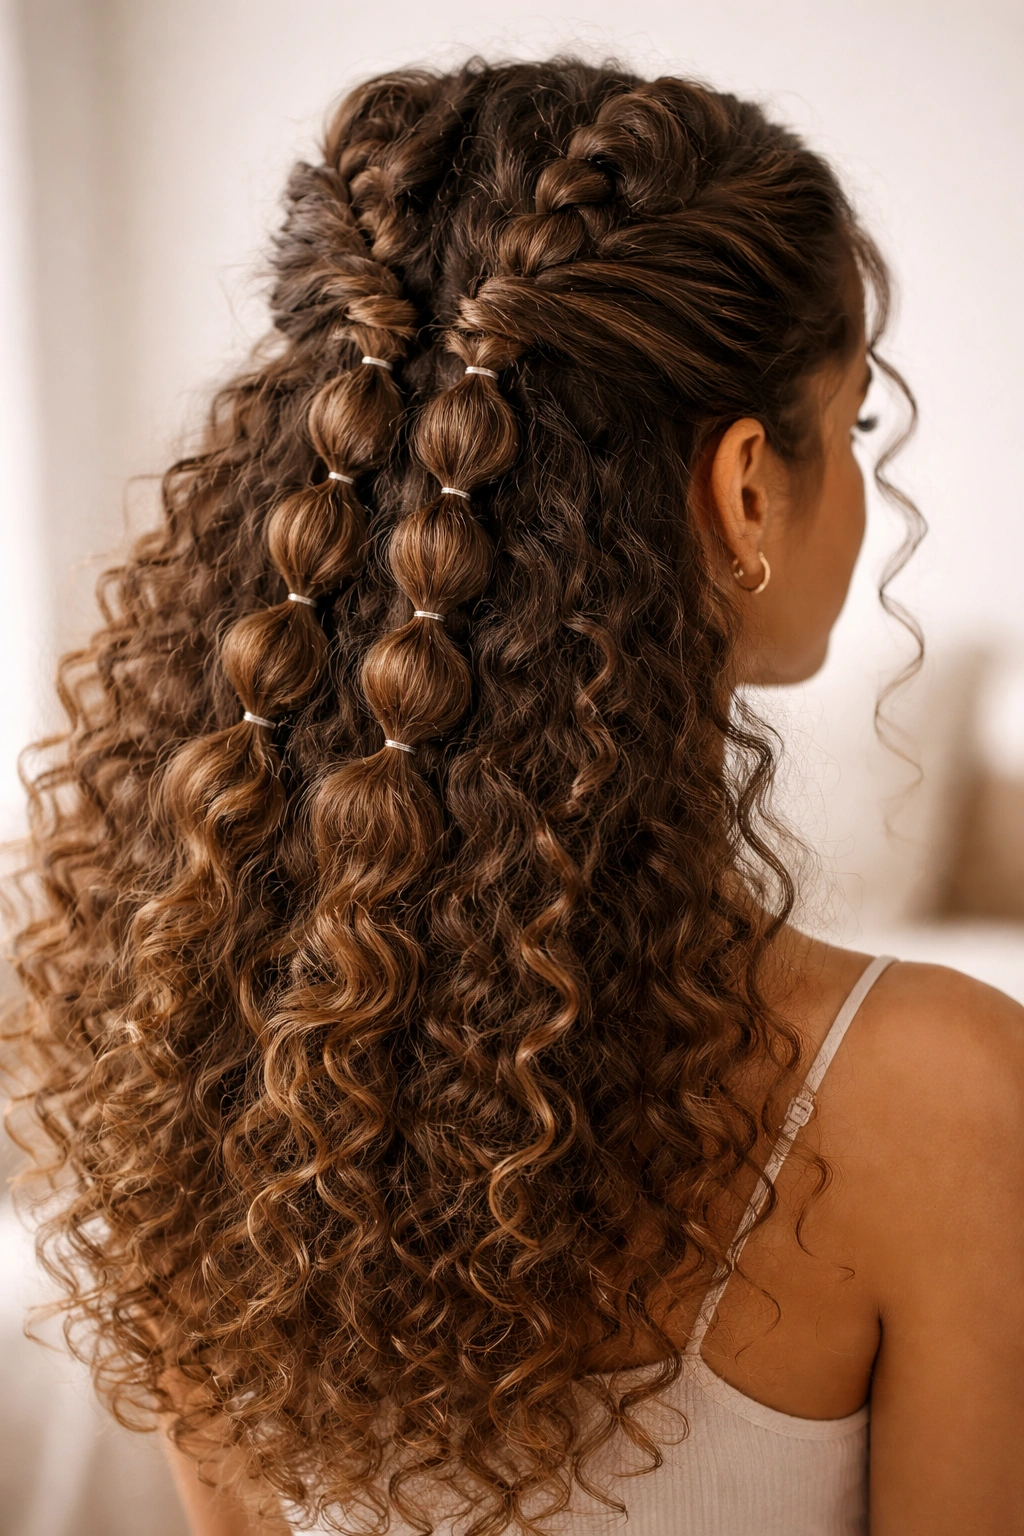
For those with thick, voluminous curls or anyone who simply wants maximum impact, the double bubble braid creates two parallel braids that are then secured together, doubling your visual interest and creating a fuller, more statement-making style. This works beautifully on all hair textures and is especially striking on coily hair where each braid can showcase different textures and dimension.
Why Double Braids Are Better Than One
Two braids create visual complexity without requiring more technical skill than a single braid—you’re just repeating the same technique twice. The double braid also distributes weight more evenly across your scalp, making it more comfortable for all-day wear, and it looks substantially more elaborate while remaining relatively simple to execute.
Creating Twin Bubble Braids
- Section the top half of your hair and divide it down the center into two equal parts
- Create a bubble braid on the left side by securing an elastic at the base of your left section, then adding subsequent elastics and fluffing as usual
- Repeat the exact same process on the right side, making sure both braids have roughly equal spacing and bubble size
- Secure both braids at the nape of your neck with a single elastic that brings them together, or cross them over each other and secure each end individually for a more intricate look
- Fluff all bubbles generously so the curls dominate and the double braid feels organic rather than geometric
- The lower curls flow freely and appear even fuller because the braided sections frame them beautifully
Worth knowing: This style requires slightly more product (mousse or light cream) because you’re creating more structure, but the payoff is a genuinely impressive look that people will ask you about.
9. Cascade Bubble Braid That Flows Into Curls
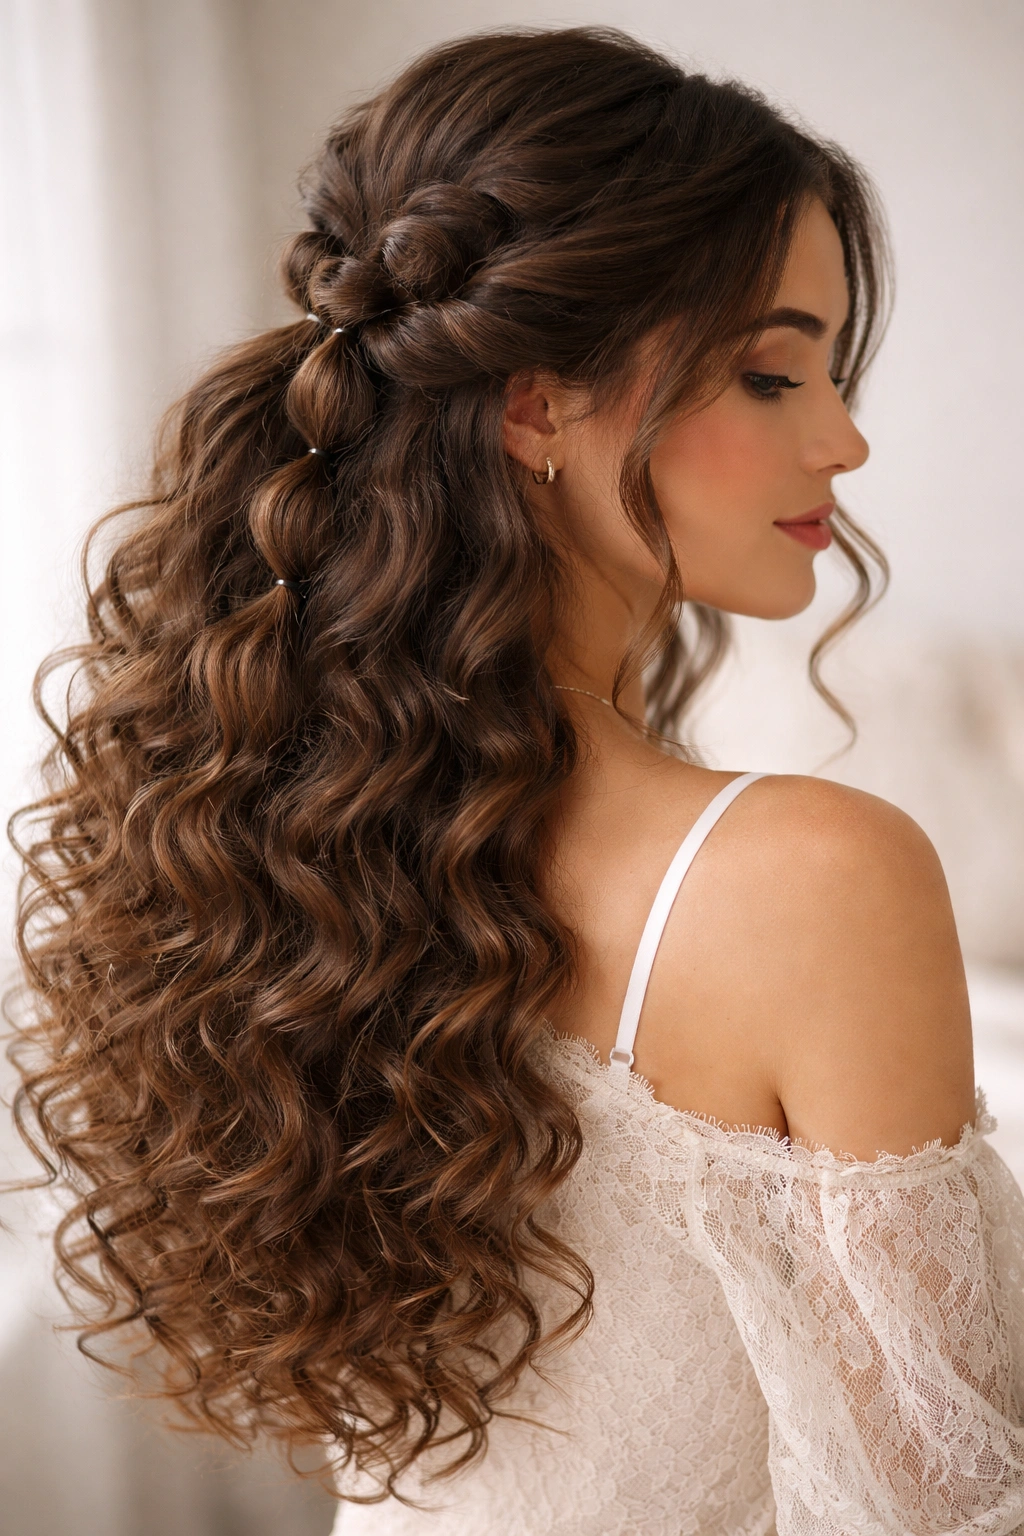
For a style that feels like a bridge between an updo and wearing your hair completely down, the cascade bubble braid gradually transitions from structured bubbles to completely loose curls, creating a waterfall effect. This variation is romantic and modern simultaneously, making it perfect for date nights, engagement parties, or any occasion where you want to look especially beautiful.
The Romance of the Cascade
Cascade styles inherently feel formal and intentional without being restricting. On curly hair, the cascade emphasizes the journey of your hair from styled to natural, which is genuinely stunning. The gradual release also means the lower section remains completely untouched and at maximum volume and definition.
Building a Cascade Effect
- Section the top half of your hair and secure it loosely with an elastic at the base of your skull
- Create your first 3–4 bubbles as usual, making them generous and well-defined
- With your fifth and subsequent bubbles, gradually make them slightly larger and less contained, pulling the hair out more fully
- By the time you reach the transition point (roughly where the middle and lower sections meet), the bubbles should be quite loose and pillowy
- Remove the final elastic and simply let your curls cascade freely from that point downward
- The effect should feel like your hair gradually unfurled as it traveled down your back
Pro tip: Curl the ends of the lower section gently if they’ve become a bit stretched or straightened from the styling process. This ensures the cascade flows into well-defined curls rather than limp ends.
10. Bubble Braid With Curled and Crimped Ends
If you want to add texture and visual interest beyond just the braided section, this variation incorporates additional styling into the lower, loose curls. You might wave, curl, crimp, or even braid the lower section, creating a multi-textured look that feels especially special and intentionally styled.
Layering Textures for Maximum Impact
When your upper section is a structured bubble braid and your lower section has additional styling, the contrast between the two creates visual drama. This style works particularly well for events, photo shoots, or any time you want your hair to feel like a complete, thought-out design rather than a simple utility style.
Adding Texture to Your Lower Section
- Create your bubble braid as usual, keeping the upper section structured and well-defined
- Once the lower section is fully released, use a curling iron, waver, or spiral curler to add intentional curls or waves
- Space the curls vertically down your hair rather than all curling in the same direction—this creates movement and dimension
- You can also add subtle crimping or textured sections for a more graphic effect
- Make sure the added texture complements your natural curl pattern rather than looking inconsistent
- Set everything with a light-hold hairspray so the texture lasts throughout the day
Worth knowing: If you have naturally curly hair, you might only need to curl the lower section with a curling iron in a different direction than your natural curl pattern for subtle contrast. You don’t need heavy additional texture if your natural curls are already gorgeous.
11. Textured, Piece-y Bubble Braid for Movement
This looser, more deliberately undone version of the bubble braid incorporates pieces pulled out intentionally throughout the style, creating a “escaped wisps” effect that feels romantic and soft. This is perfect if you find traditional bubble braids feel too polished or if you simply prefer a style that celebrates movement and texture over precision.
The Charm of Intentional Imperfection
This piece-y approach is less about technical perfection and more about creating a feeling of softness and ease. The style actually improves if a few pieces fall out during the day—it just makes it look even more romantic. This works on all curl types but is especially beautiful on waves and loose curls where the pieces fall naturally around the face.
Creating Piece-y Bubble Braids
- Don’t section your hair too precisely—let the division between your upper and lower sections be slightly irregular and organic
- Create your bubbles but leave them slightly looser than you would for a traditional bubble braid
- Intentionally pull small pieces of hair out of the braid throughout the day and curl them gently around your face
- Leave more pronounced face-framing pieces on both sides, even if they weren’t technically part of your braided section
- Use bobby pins minimally—the more natural and undone it looks, the better
- Embrace movement and the way pieces settle naturally rather than fighting to keep everything in place
Pro tip: This style works beautifully with a texturizing spray applied before styling. The spray creates grip and helps the piece-y sections hold their shape without looking stiff or overdone.
12. Sectioned and Colored Bubble Braid for Bold Expression
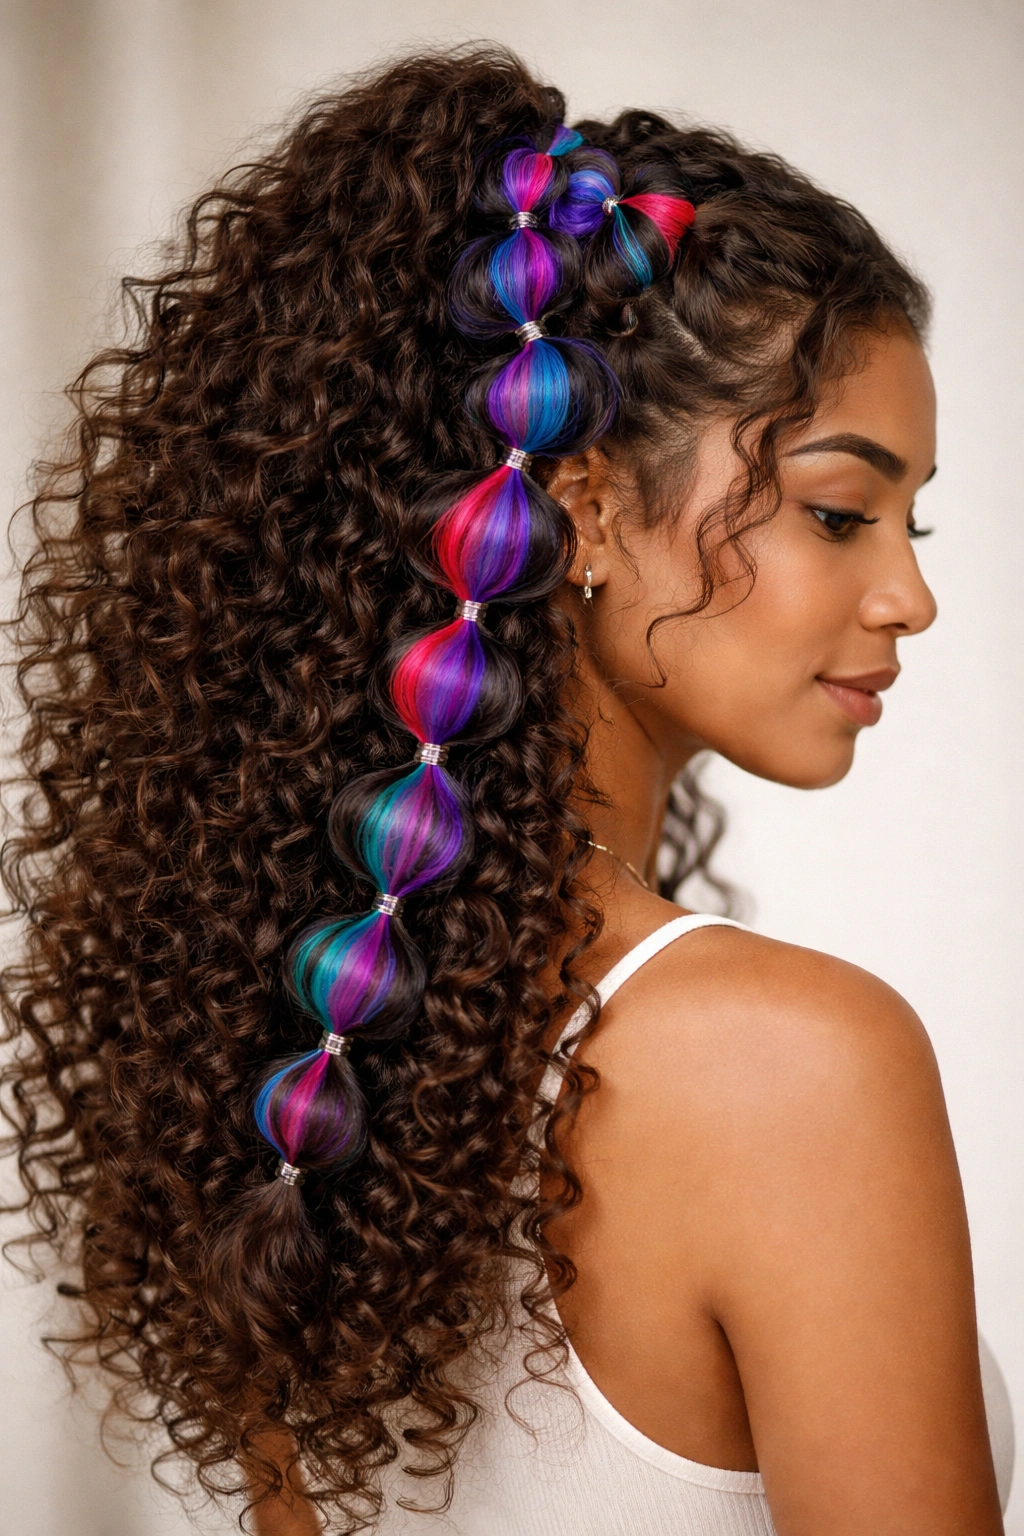
For those who want to showcase their color or create visual interest through dimension, this variation sectionalizes the bubble braid so that different colored or highlighted sections show through. If you have balayage, highlighted layers, or even temporary color, this style makes those details visible and gorgeous.
Why Sectioning Matters for Colored Hair
If you’ve invested in your hair color, you want styling choices that show it off. A traditional bubble braid on straight hair might hide color, but on curly hair with the right sectioning, a bubble braid can absolutely highlight your color or dimension. This creates a genuinely unique look that’s impossible to replicate exactly because it depends on your specific color placement.
Building a Color-Forward Bubble Braid
- Section your hair in a way that showcases your highlights or colored pieces—this might mean sectioning diagonal lines rather than straight lines
- Make sure at least one section of your braid includes visible color difference so the dimension shows clearly
- Create your bubbles generously so the lighter or colored pieces peek through and aren’t hidden
- Position yourself so light hits the braid from the side—this makes color show through more dramatically
- You might add temporary chalk, spray-in color, or even ribbon in a complementary shade to emphasize the color effect
- The lower section should show your full color story, so avoid pulling it up too tightly
Insider note: This style photographs beautifully in natural or bright light where color dimension really shines. If you’re getting photos taken, position yourself near a window or in outdoor light to make your color and the braid detail both visible.
Final Thoughts
Bubble braids on curly hair work because they celebrate what makes your curls special—the volume, the texture, the movement—rather than working against it. Whether you’re drawn to the classic version or prefer something more elaborate with accessories and additional styling, the fundamental principle remains the same: you’re creating structure and style while keeping your natural texture the star of the show.
The beauty of these twelve variations is that each one can be adapted to your specific curl pattern, hair length, and personal style. A style that feels formal and editorial in one version can be intentionally undone and romantic in another. The bubble braid works for everyday styling, special occasions, second-day hair, and everything in between. Once you understand the basic technique, you can experiment freely—loosening bubbles more or less, adding accessories, playing with sectioning patterns, and discovering which version feels most authentically you.
The most important thing is knowing that your curls don’t need to be straightened or severely controlled to look intentional and beautiful. A well-executed bubble braid proves that working with your natural texture, not against it, creates the most stunning results. Start with the classic version if you’re new to bubble braids, then explore these variations until you find the ones that make you feel most confident and gorgeous.