Half up half down hairstyles have a special way of hitting that perfect sweet spot between put-together and effortlessly casual. They keep hair off your face without committing to a full style, which is exactly what straight hair wearers need when you want something that looks intentional but doesn’t feel overdone. The beauty of straight hair is that it holds shape beautifully without much frizz or texture interference—your hair cooperates with clean lines and crisp definition that make even simple variations look polished and deliberate.
What makes these styles so versatile is that they work for virtually any occasion and any hair length. Whether you’re running errands, heading to work, meeting friends for coffee, or preparing for a more casual event, a half up half down look gives you that “I put effort into this” appearance without spending 30 minutes styling. Straight hair especially responds well to these styles because the naturally sleek texture means you don’t need to tease, crimp, or add texture for definition—the shape just stays put on its own.
The real magic of half up half down styles lies in the details. Small tweaks like where you position the hold, what direction you twist the hair, or which strands you choose to frame your face completely transform the vibe. Some looks feel romantic and soft, while others feel modern and edge-forward, and still others land somewhere perfectly casual. The best part? Most of these styles take less than five minutes once you know exactly what you’re doing.
Let’s walk through 18 casual half up half down looks that will work beautifully with straight hair and actually stay in place throughout your day.
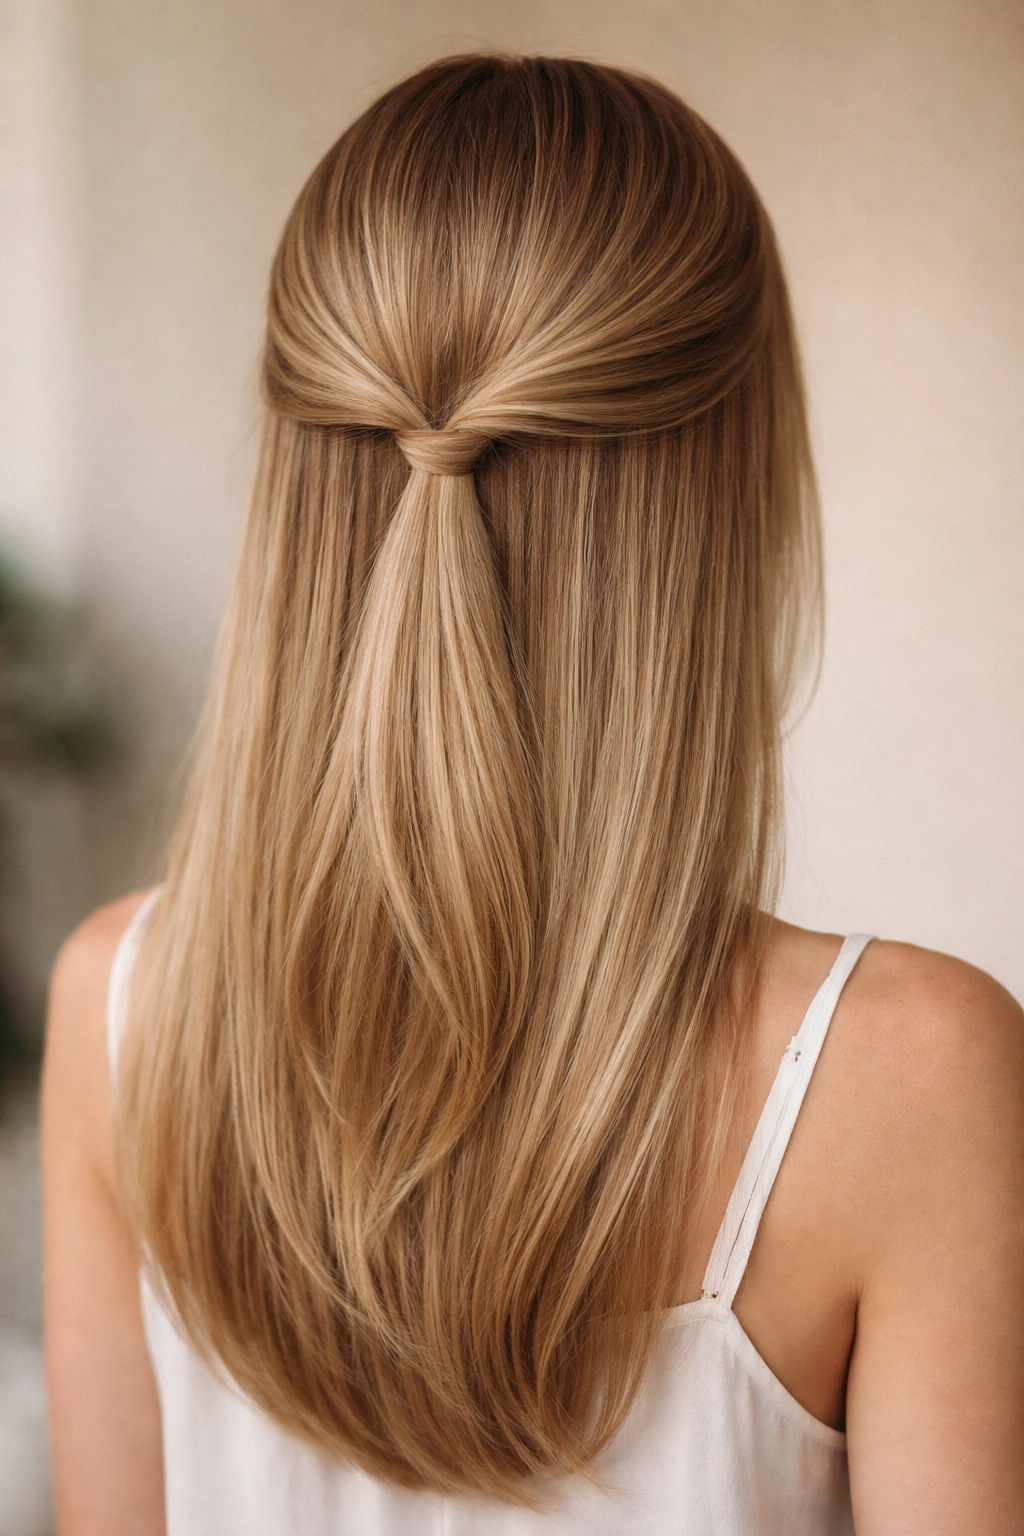
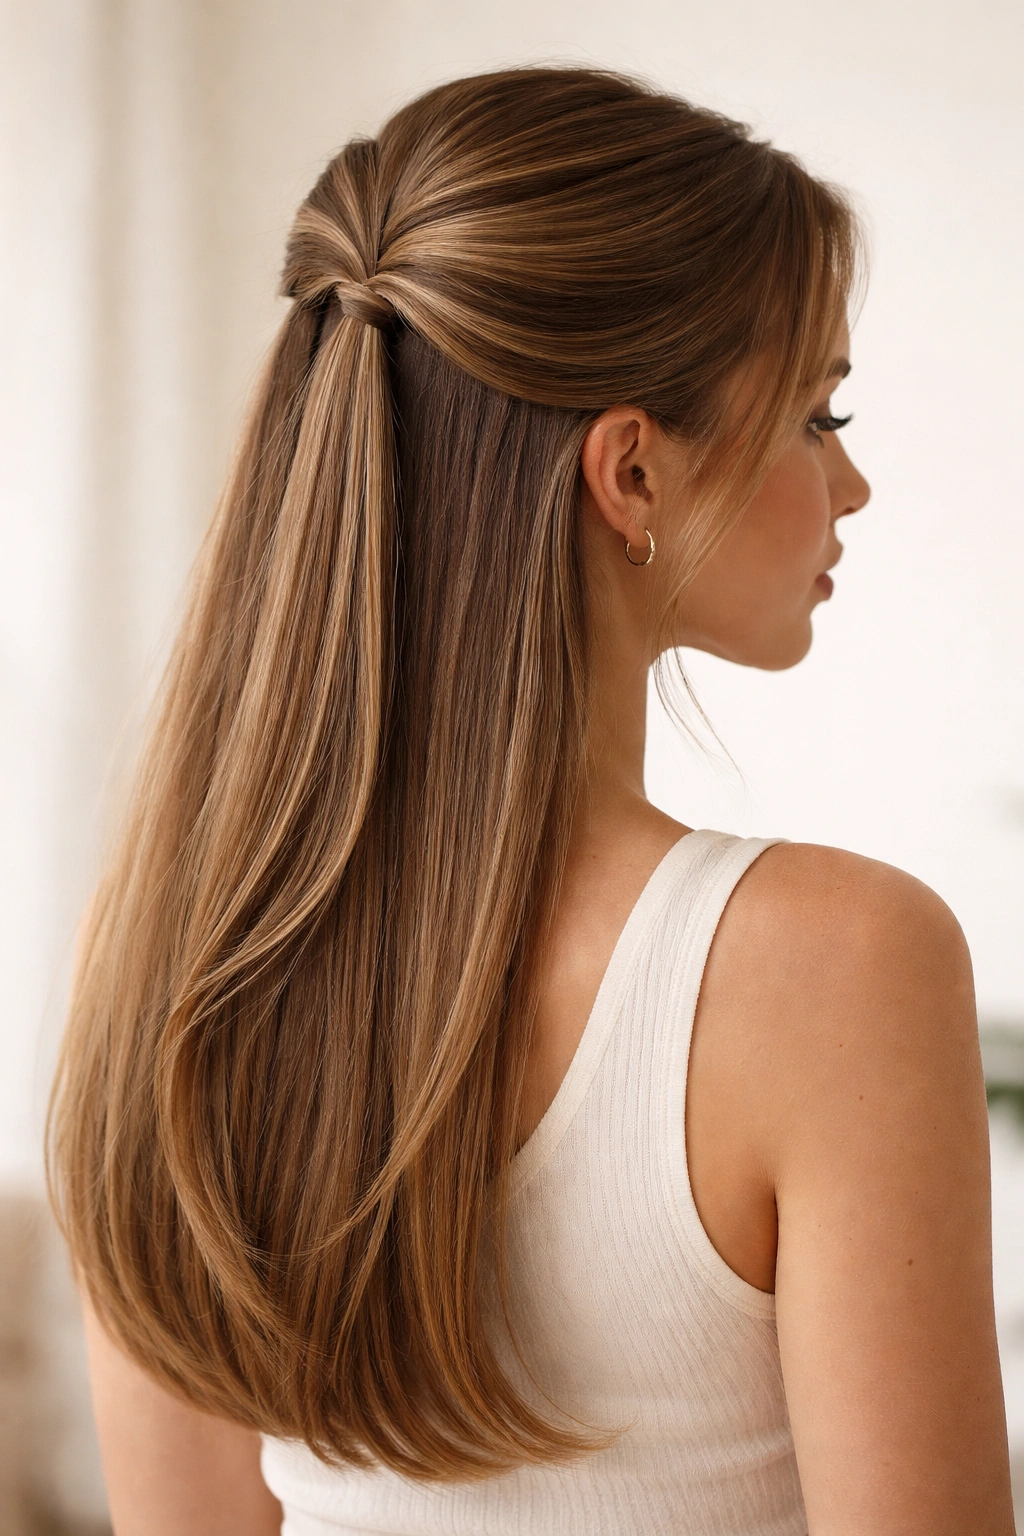
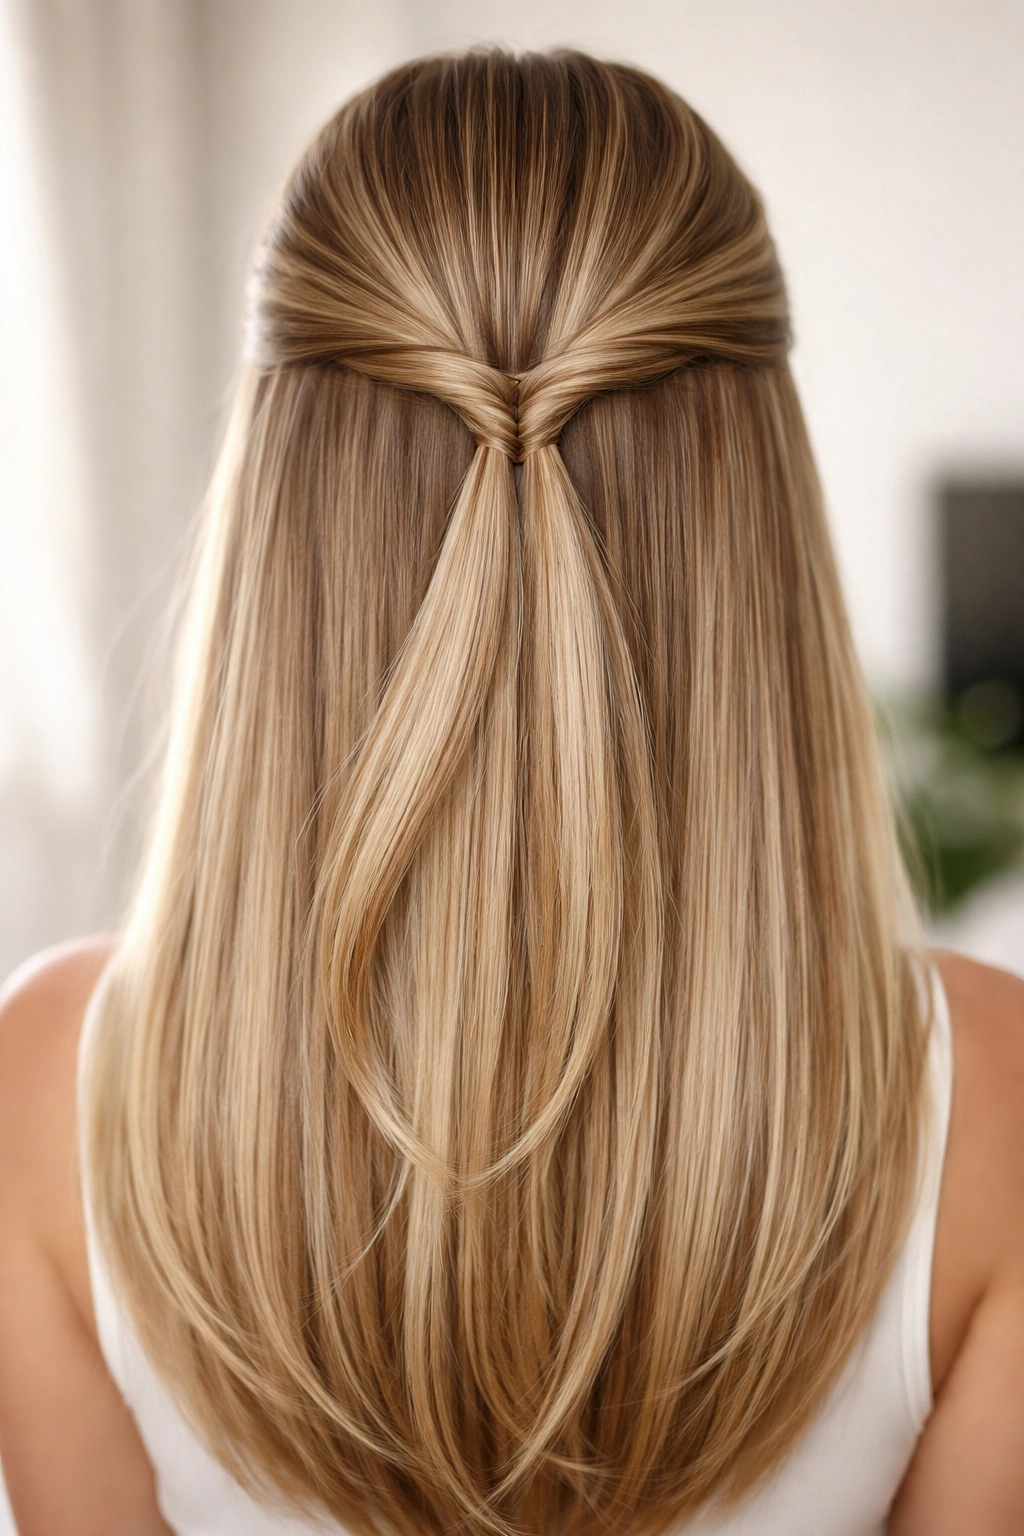
1. The Twisted Knot
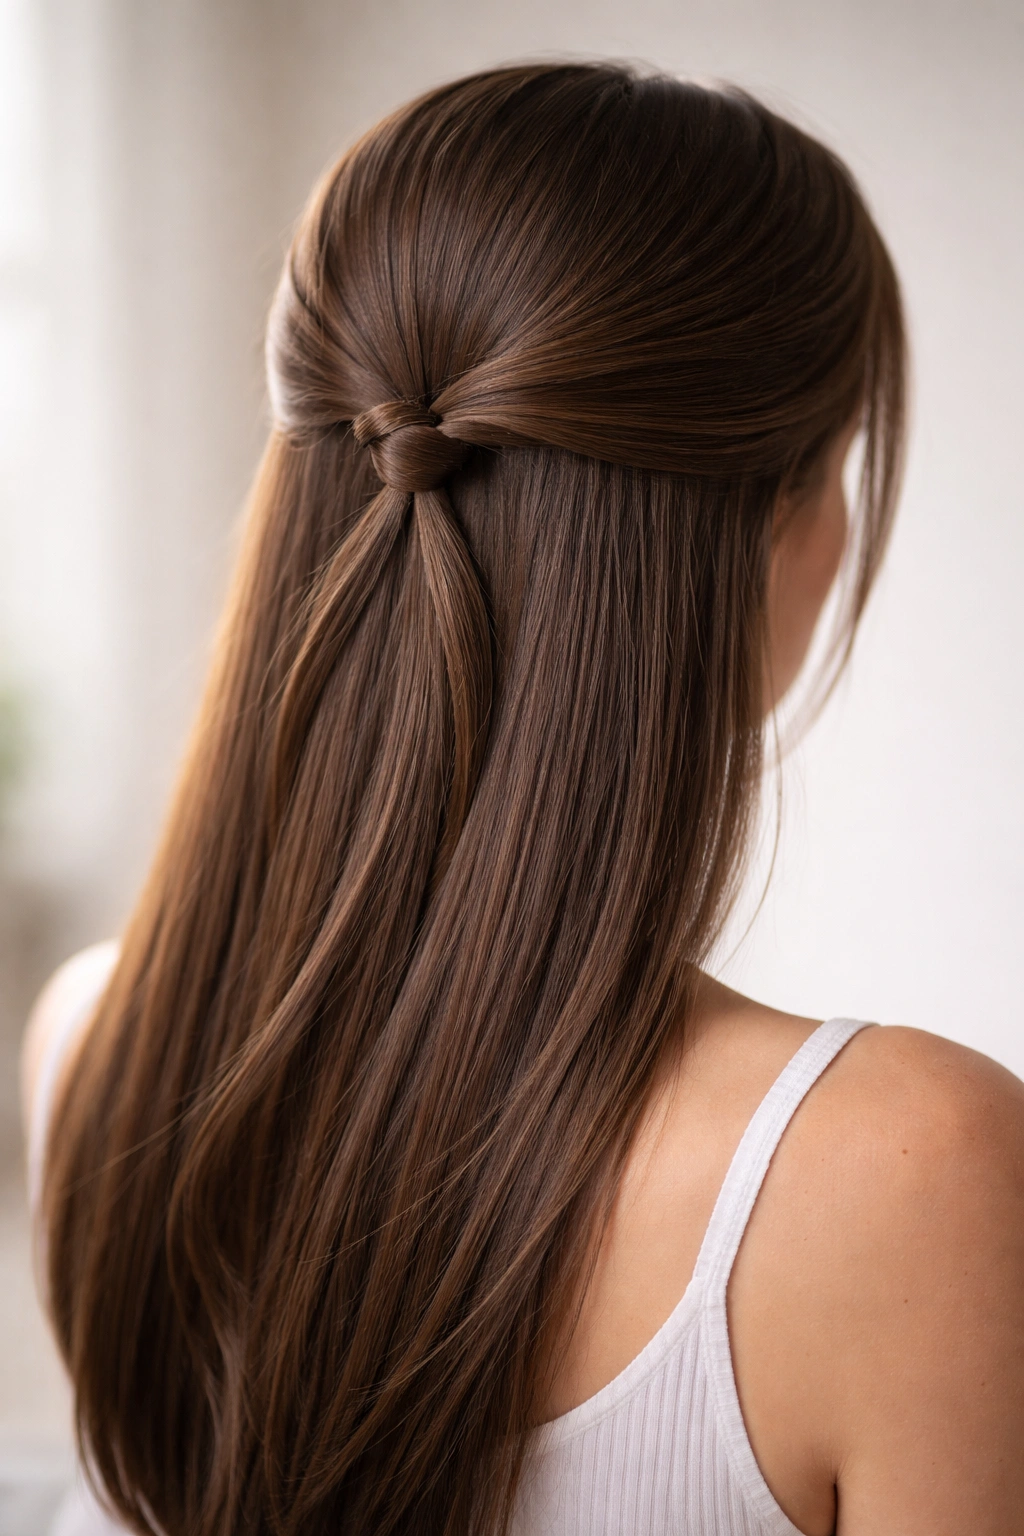
This look is deceptively simple but looks incredibly intentional once you master the technique. You’ll take a section of hair from each side of your head at roughly ear level, twist each section independently, then tie them together at the back of your crown into a knot. The beauty is that straight hair holds these twists perfectly without any texture work—the clean lines of your twists become the design element.
Why This Works for Straight Hair
Straight hair’s natural smoothness means your twists stay defined and sharp-looking all day. There’s no frizz disrupting the clean spiral of each twist, and the knot holds securely without requiring extra bobby pins or products. The contrast between the twisted sections and the straight hair below creates visual interest that’s purely structural rather than textural.
How to Create the Twisted Knot
- Brush your hair smoothly and identify a section at ear level on one side—about 2 inches wide
- Twist this section firmly away from your face, continuing the twist all the way to the back of your head where you’ll meet your second twisted section
- Repeat on the opposite side, twisting toward the back in the same direction
- At the crown, tie both twisted sections together with a clear elastic, creating a knot-like formation
- Gently tug at the twists to loosen them slightly and create a fuller, less severe appearance
- Secure with bobby pins that match your hair color to hide them completely
Pro tip: Tease the very back of your crown slightly before twisting to give the knot more grip and prevent slipping throughout the day.
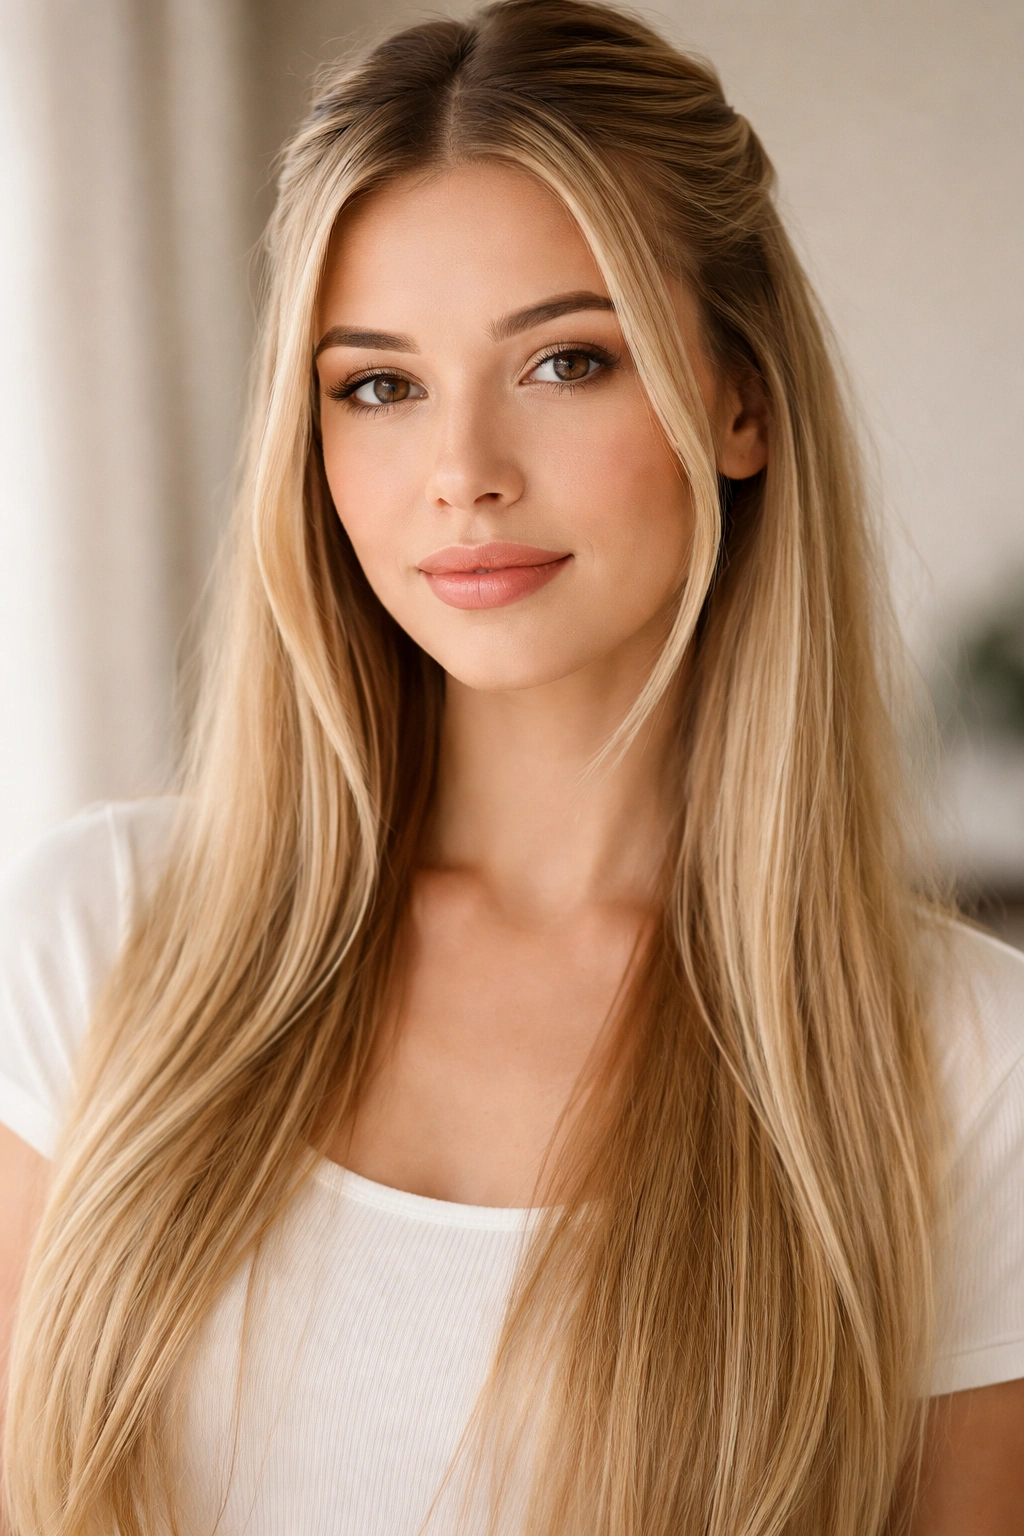
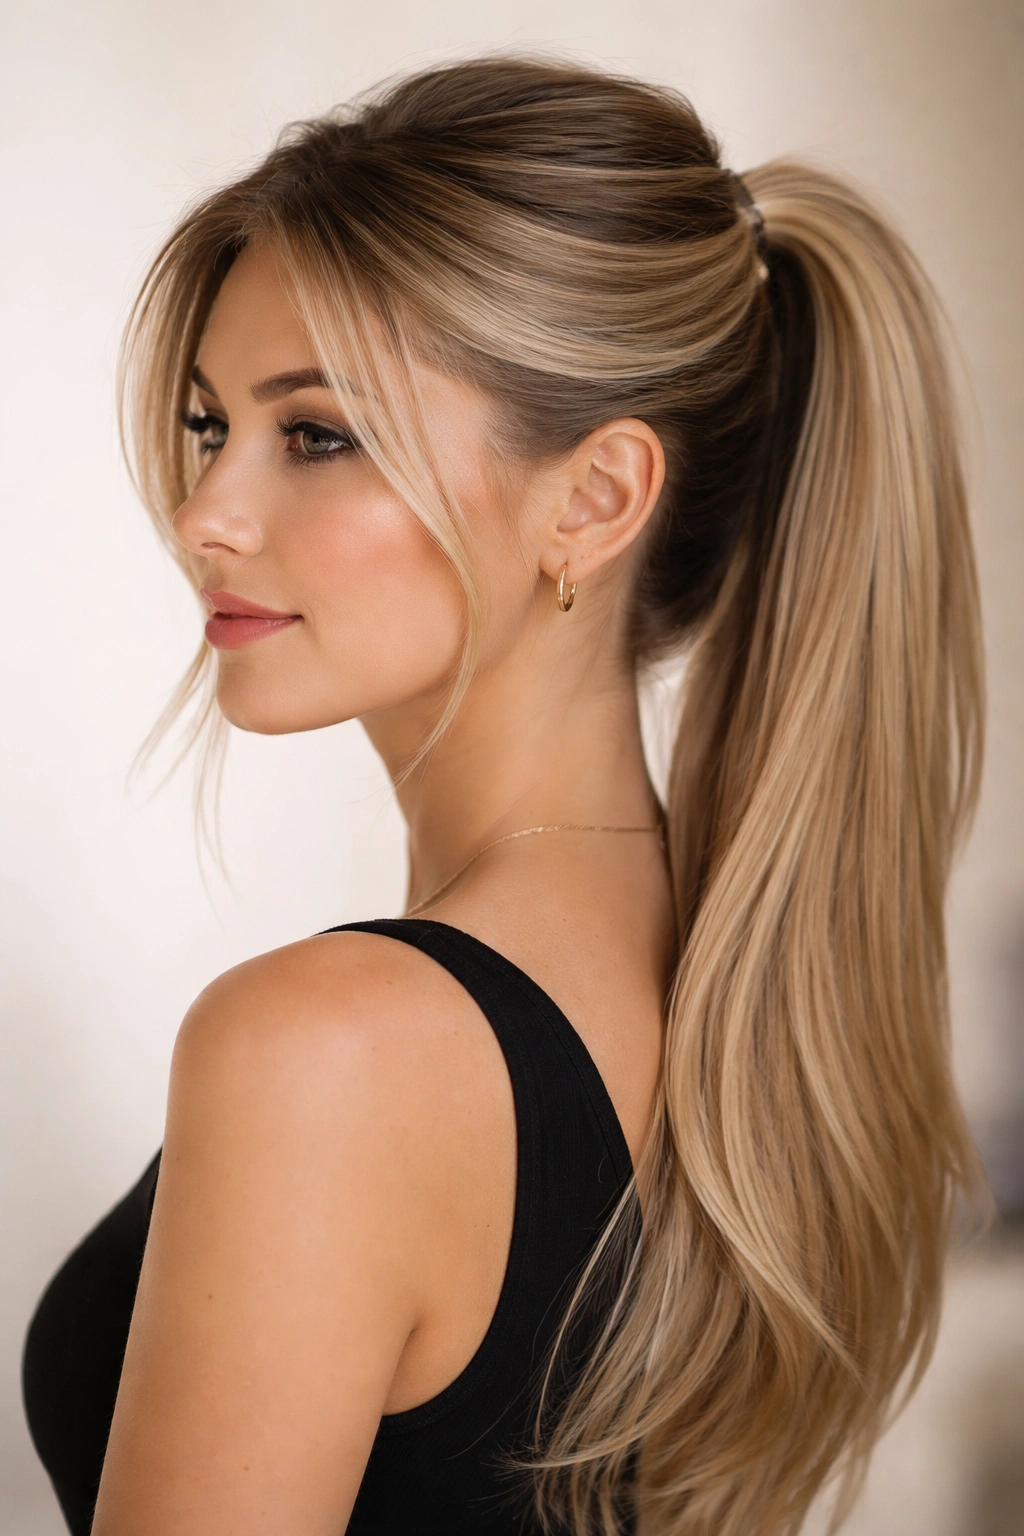
2. The Sleek Ponytail Base
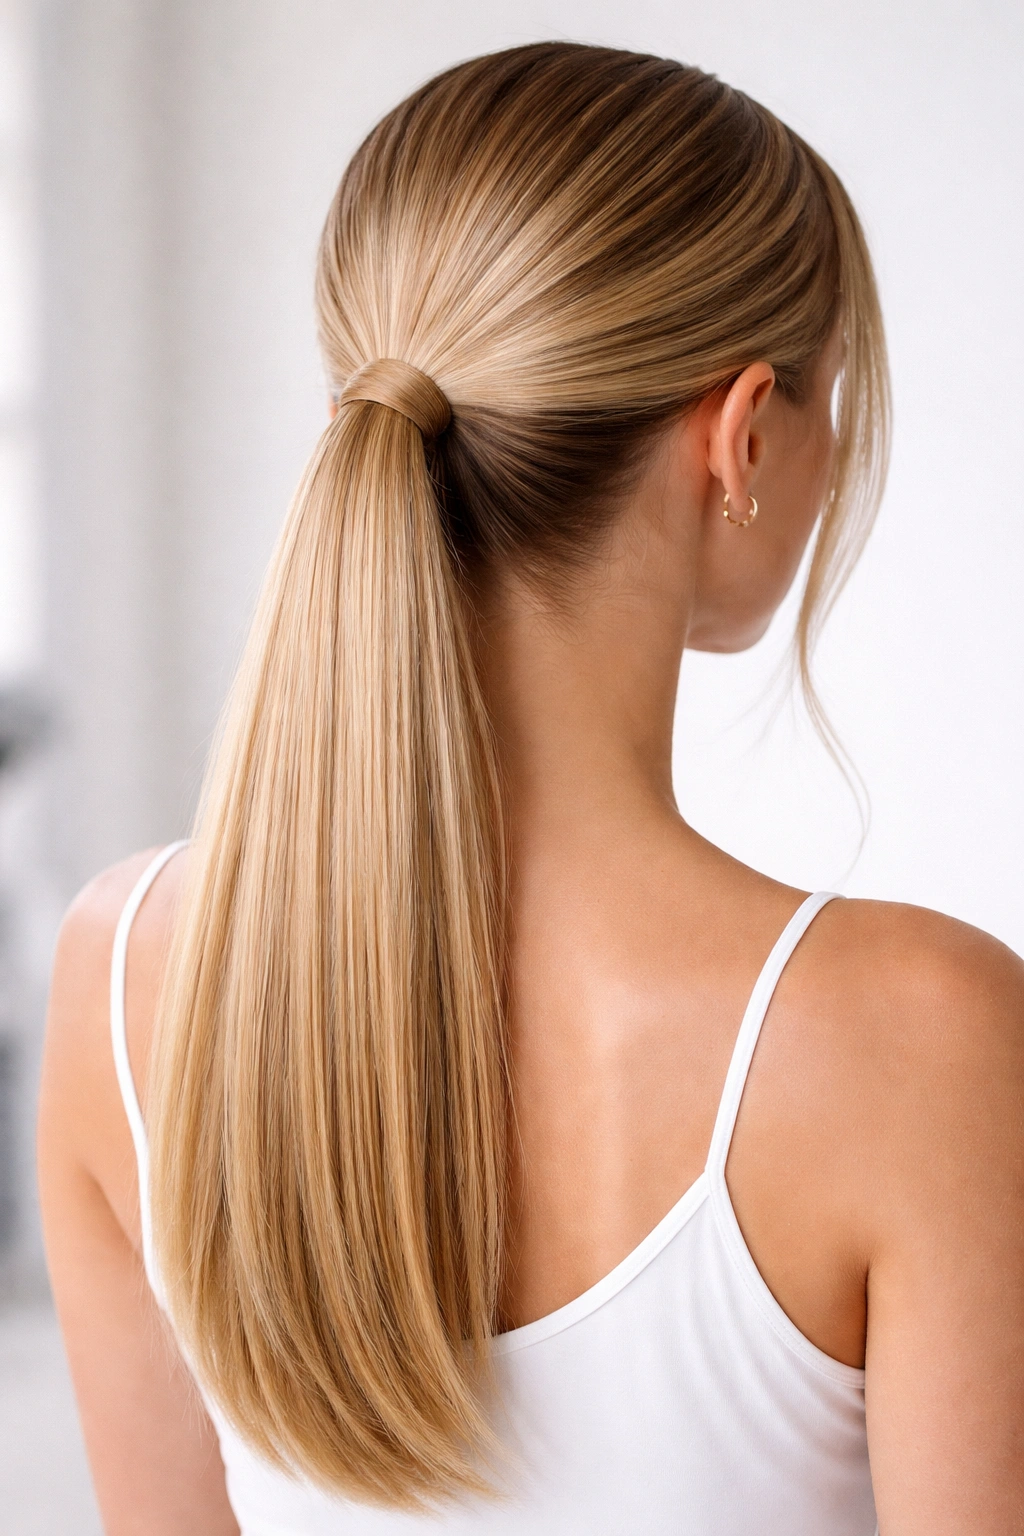
This is the foundation style that looks clean and intentional without being a full ponytail situation. You’re creating a half up half down that anchors with a low, tight ponytail base at the nape of your neck, but you’re leaving most of your hair down for that relaxed vibe. Straight hair makes this work because the smooth texture means the contrast between the secured section and the flowing hair below is razor-sharp.
Why This Works for Straight Hair
The natural shine and smoothness of straight hair means the secured section will look sleek and refined without any flyaways or frizz to distract from the clean line where your ponytail sits. This style actually requires zero texture work—your hair’s natural state is exactly what you want here.
Step-by-Step Guide
- Brush your entire head smoothly from roots to ends until completely knot-free
- Take a section of hair from one side at ear level and section it across to the opposite ear
- Hold this section at the crown and secure it with a clear elastic in a low ponytail position at the nape of your neck
- Wrap a small piece of hair around the elastic to cover it for a polished finish
- Leave the remaining hair down, brushing it smoothly so it flows without waves or texture
- Adjust the secured section so it sits about 2-3 inches above the nape for a relaxed, not-too-formal appearance
Worth knowing: This style works best when the lower half of your hair is razor-straight. If you have any natural wave or texture, a quick straightening iron pass makes all the difference in achieving that deliberately casual look.
3. The Textured Crown Braid
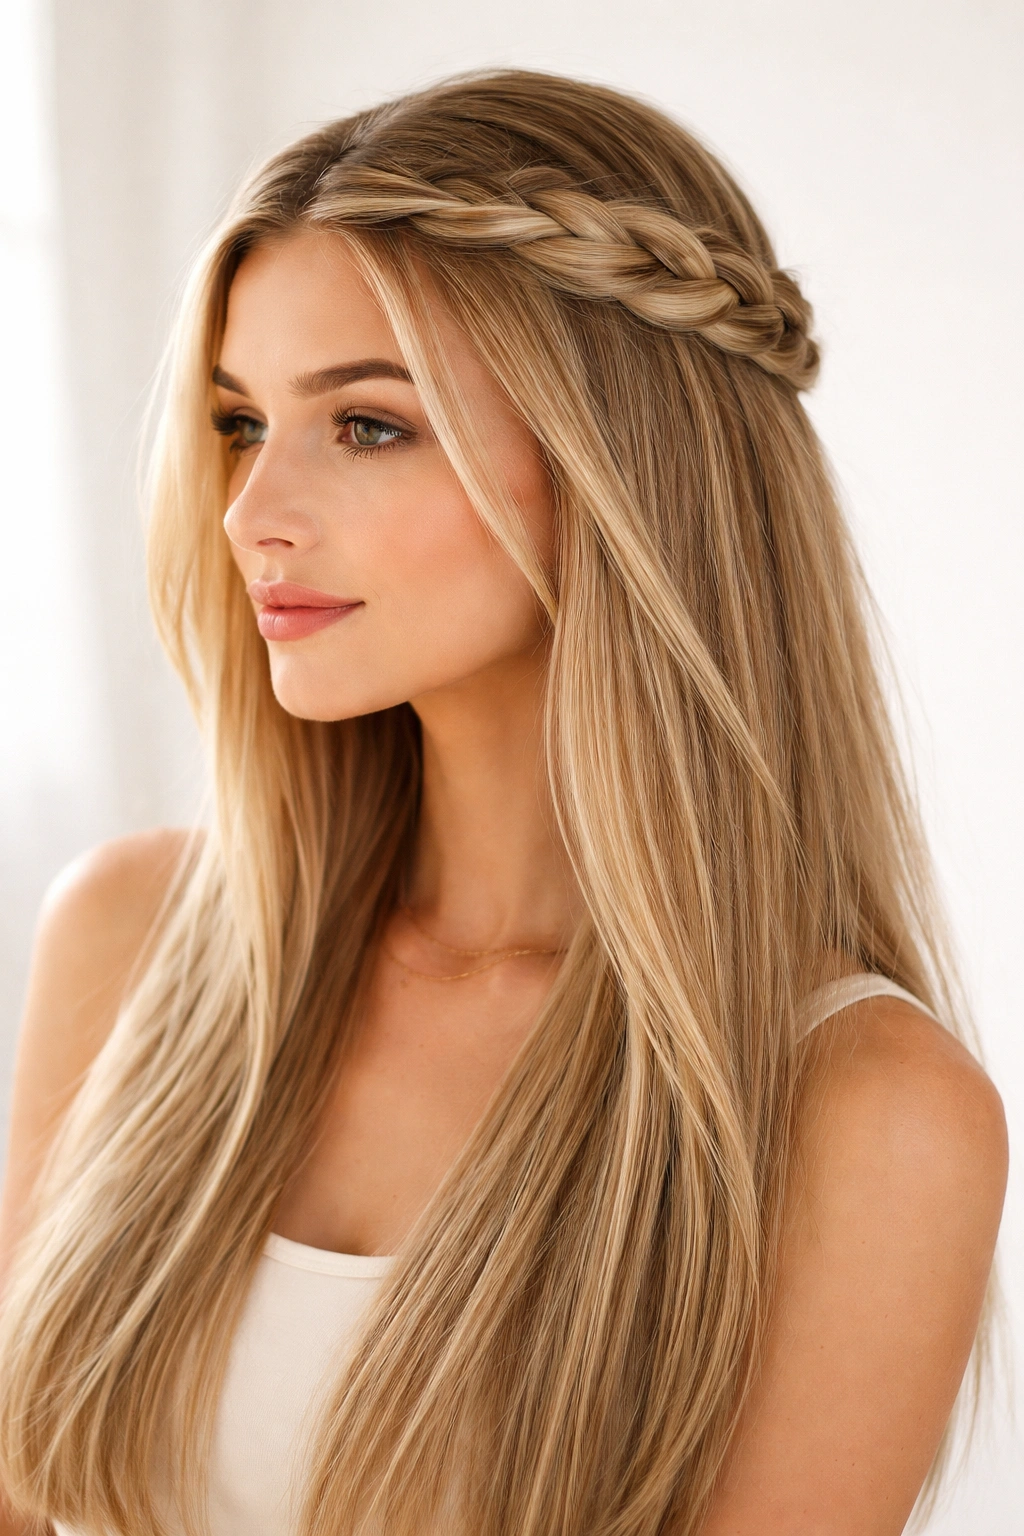
Here’s where we add a little more personality through braiding. Take a thick braid from one side of your head, wrap it around the crown, and pin it into a half up half down arrangement that frames your face beautifully. The braid becomes the statement element while straight hair hanging below keeps the overall vibe light and casual, not heavy or formal.
Why This Works for Straight Hair
Straight hair is actually ideal for braid work because the individual strands stay separated and visible within the braid—you’ll see gorgeous definition in each section of the braid without having to add texture or texture spray. The braid pops visually against the smooth straight hair, creating clear separation between your styled section and your casual bottom half.
How to Build the Crown Braid
- Brush your hair completely smooth and start at one temple area
- Create a thick three-strand braid, incorporating hair as you go (French braid style) around toward the back of your head
- Continue braiding toward the opposite ear, keeping the braid thick and purposeful rather than delicate and intricate
- Once you’ve wrapped the braid partway around your crown, secure it with bobby pins at the point where you want to transition to the half up half down
- Leave the bottom portion of the braid slightly loose and visible between the secured section and the hanging hair below
- Pull gently at the braid sections to widen and soften it slightly—this prevents the braid from looking too tight or formal
Pro tip: The thickness of the braid matters. A thicker braid looks more intentionally casual; a super-thin, intricate braid reads as more formal and polished.
4. The Romantic Loops
This is the style for when you want something that feels soft and deliberate at the same time. You’re creating small loops or half-loops from sections of hair pulled back from your face, securing them at the crown, and letting everything else flow down. Straight hair makes these loops look defined and clean rather than wispy and delicate.
Why This Works for Straight Hair
Straight hair holds loop shapes in a way that textured hair struggles with. The loops maintain their form throughout the day, and the smooth surface makes them catch light beautifully. You get a romantic aesthetic without needing to add waves or texture—the loops themselves become the design element.
Creating Picture-Perfect Loops
- Section off hair from each side of your head at cheekbone height, about 2-3 inches wide
- Create a loop by pulling that section back and securing it loosely with a bobby pin—don’t close it into a full ponytail, let it curve and sit as a loose loop
- Repeat on the opposite side, creating a matching loop that mirrors the first
- Add a second row of smaller loops just behind the first row if you want more visual interest
- Let the remaining hair flow down your back in completely straight lines
- Adjust the loops so they’re full and rounded rather than tight and pinched
Worth knowing: The tighter you pull these loops, the more formal the look becomes. A slightly looser, more relaxed loop placement reads as genuinely casual and effortless.
5. The Half Bubble Ponytail

This style breaks up the traditional ponytail into sections, creating what looks like stacked bubbles down the back of your head. You’re securing the top half portion, then dividing that ponytail into bubble sections below. It’s modern, it’s playful, and straight hair makes each bubble sit cleanly without any texture distraction.
Why This Works for Straight Hair
The bubble effect depends entirely on clean lines and defined separation between sections. Straight hair provides that automatically—each bubble sits clearly defined against the smooth hair of the next bubble. There’s no texture softening the edges or making them blur together.
Building the Bubble Ponytail
- Create a half up half down base by sectioning hair from each side of your head and securing it at the crown with a clear elastic
- Just below that first elastic, about 2 inches down, add a second elastic to the same ponytail, creating your first “bubble”
- Loosen the hair between the two elastics by gently pulling and fluffing to create a rounded bubble shape
- Add a third elastic 2 inches below the second, creating another bubble
- Continue this pattern down as far as you want—usually 3-4 bubbles looks modern without being over the top
- Adjust each bubble so they’re rounded and full, not flat and thin
Pro tip: Slightly fluffing each bubble right before you secure the next elastic makes them look fuller and more intentional.
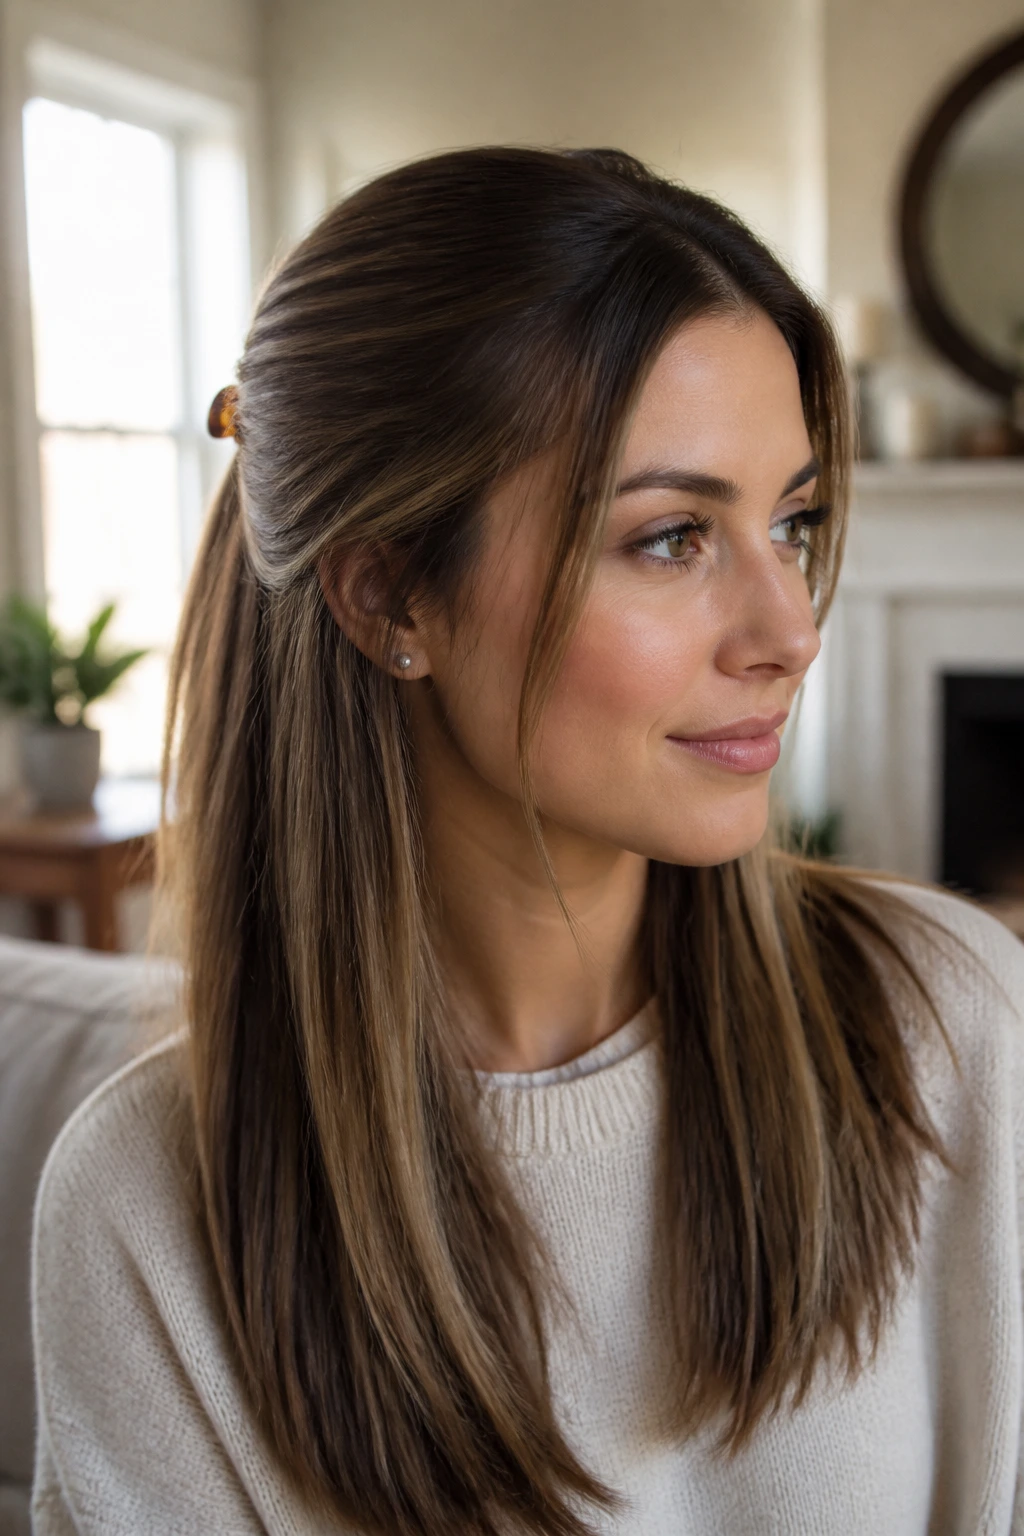
6. The Minimalist Bobby Pin
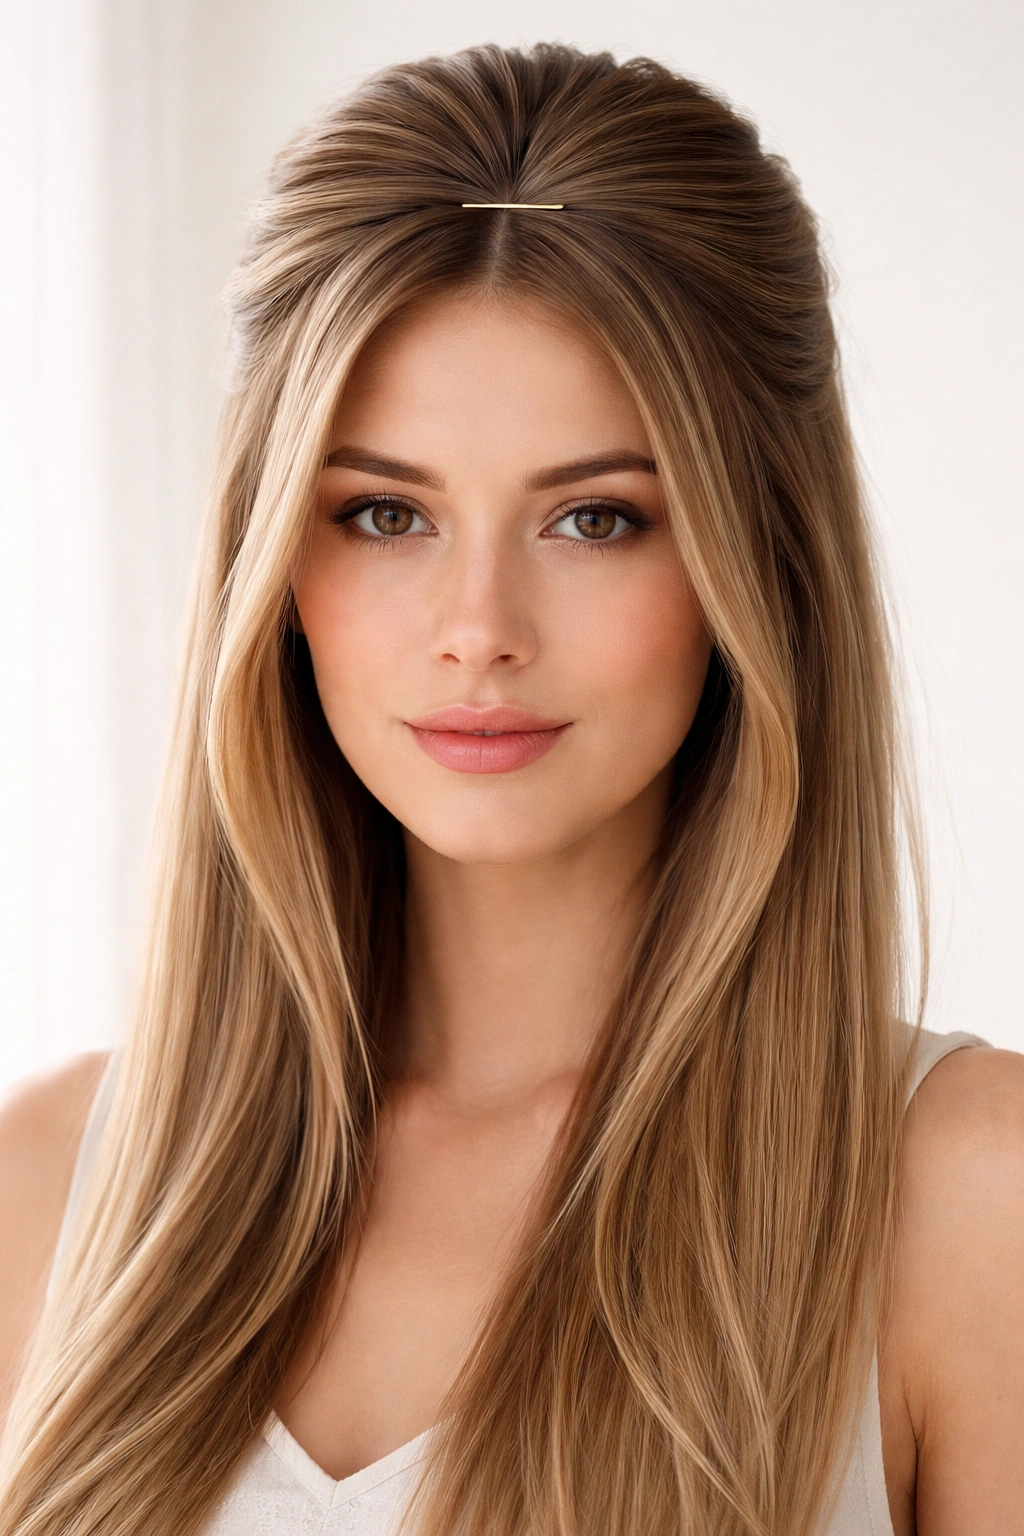
Sometimes the most casual-looking style is actually the most minimal. This one just pulls back hair from your face with a single bobby pin—sometimes two—positioned at the crown. Straight hair makes this work because the structure is already there; you’re not relying on texture or volume to hold the pin in place.
Why This Works for Straight Hair
A single bobby pin works in straight hair because the hair itself is substantial enough to hold securely. The smooth surface means the pin grips naturally without requiring styling products or texture work. The clean lines of straight hair make this minimal approach look deliberately styled rather than accidental.
How to Execute the Single Pin
- Brush your hair smooth and take a section from one side of your head at ear level
- Gently pull this section back toward the crown, creating a soft half-up shape
- Secure it with a single bobby pin positioned at the crown, matching the pin color to your hair for invisibility
- Leave the rest of your hair completely down and smooth
- Adjust the pinned section so it’s not too tight—you want it to look naturally held back, not severely pulled
Worth knowing: This works best with hair that’s at least shoulder length. Shorter hair doesn’t have enough weight to sit naturally in this arrangement.
7. The Zigzag Part

Transform your half up half down simply by changing where you part the hair and how you section it. Instead of taking a straight section across, you’re creating a zigzag or diagonal part and using that as your guide for which hair gets pulled back. Straight hair makes this zigzag visually crisp and modern-looking.
Why This Works for Straight Hair
The definition and clarity that straight hair provides means your zigzag part actually reads as intentional design rather than just a random section. The smooth hair on either side of the zigzag part creates a clean visual line that defines your style.
Creating the Zigzag Part
- Use the tail of a comb to create a section through your hair, starting at one temple and moving diagonally toward the opposite ear
- Instead of moving straight across, make the part zigzag slightly—forward, back, forward again—for visual interest
- Take the hair from one side of this zigzag part and pull it back to the crown, securing with a clear elastic
- Leave the bottom portion hanging straight down
- The zigzag part becomes the visual guide that separates your styled upper half from your loose lower half
Pro tip: The more exaggerated your zigzag, the more modern and intentional the style looks. A subtle zigzag reads as almost accidental.
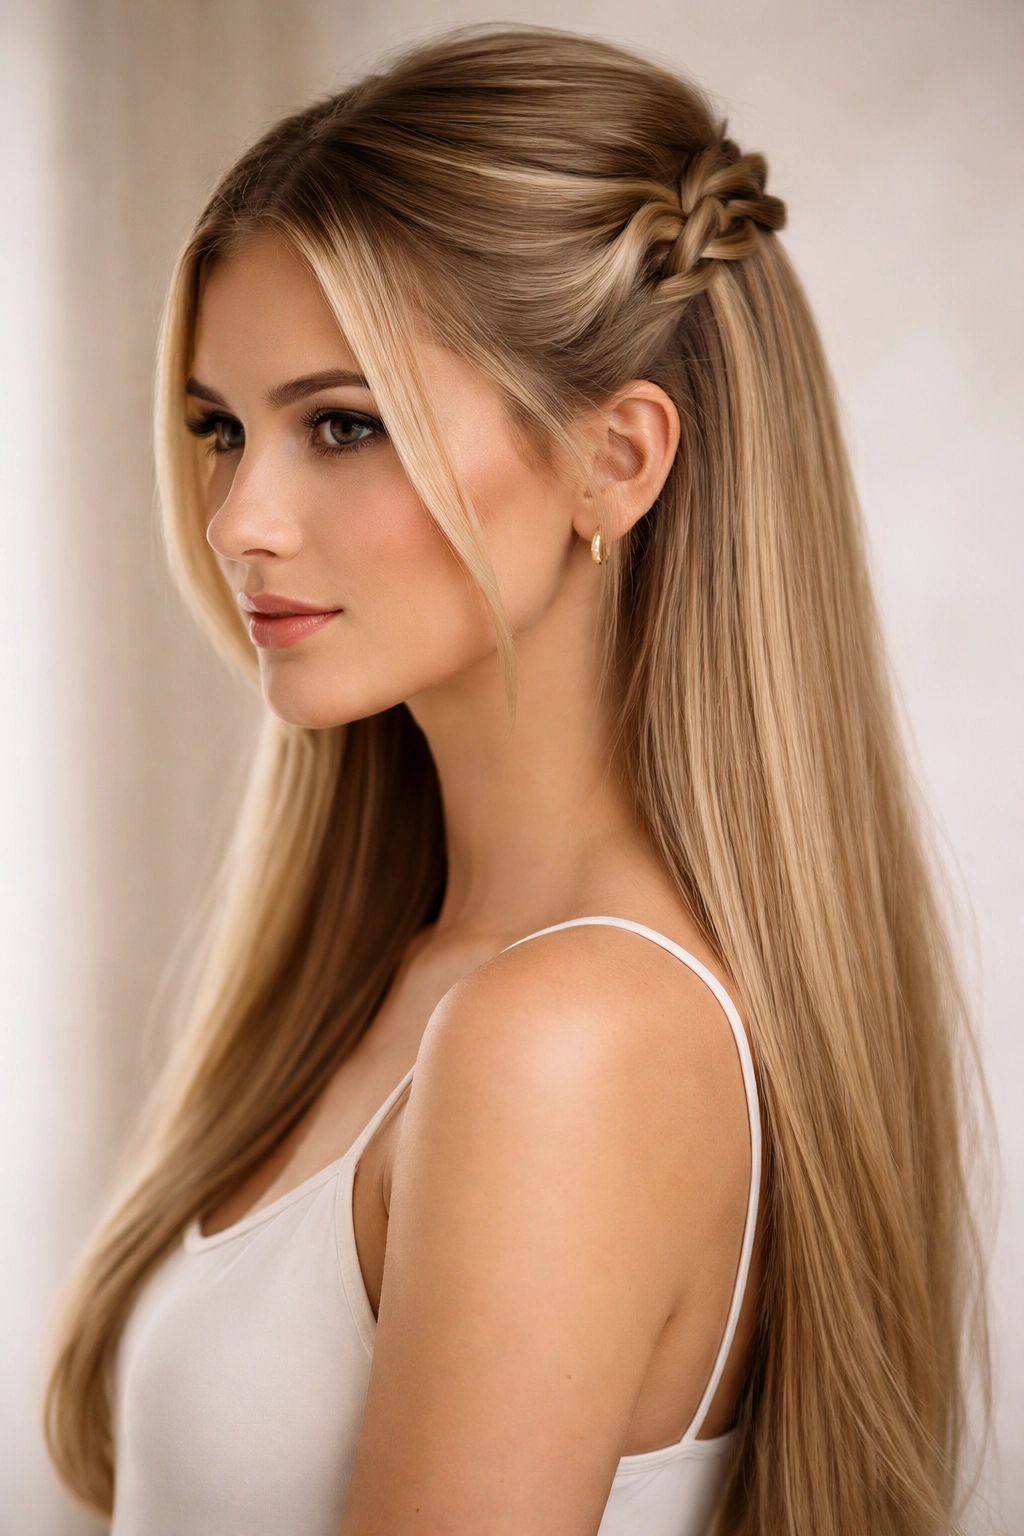
8. The Low Twisted Half-Up
Position your twist lower than you normally would—at the nape of your neck rather than at the crown—for a completely different vibe. You’re taking sections from each side, twisting them, and securing them lower on your head, which changes the proportion and makes the style feel more romantic and less structured.
Why This Works for Straight Hair
Straight hair holds lower twists beautifully because there’s enough hair below the twist point to support it without drooping. The lower position actually distributes the weight better, meaning the hold lasts longer throughout your day. The smooth texture makes the twist detail stand out against the flowing hair above it.
Step-by-Step Low Twist
- Brush your hair completely smooth
- Take a section from one side of your head at ear level, about 3 inches wide
- Twist this section firmly, moving downward and diagonally toward the nape of your neck
- Repeat on the opposite side, twisting in the same direction
- Meet both twisted sections at the nape of your neck and secure them together with a clear elastic
- Leave a small section of the twisted area slightly loose and undone for texture and casualness
- Loosen the twists slightly by gently pulling at them to create fuller, softer definition
Worth knowing: The lower you position this twist, the more romantic and less formal it becomes. This positioning works beautifully for everything from casual outings to date nights.
9. The Face-Framing Strands
Sometimes the most casual-looking style is one that frames your face with just a couple of intentional strands while the rest stays down. This is pure minimalism—you’re not really pulling hair back so much as directing two pieces of hair to frame your cheeks and face shape, secured loosely at the back.
Why This Works for Straight Hair
Straight hair frames the face beautifully without requiring waves or texture. The smooth strands fall naturally along your cheekbones and jawline, following your face shape and creating soft, deliberate definition. No frizz or texture competes with the clean lines of your face-framing strands.
Creating Face-Framing Definition
- Leave your hair down in its natural state and brush it smooth
- Take a small section of hair from directly in front of one ear, about 1-2 inches wide
- Twist or simply hold this section and pull it back gently toward the crown
- Repeat on the opposite side with a matching section
- Secure both sections together at the crown with a bobby pin or small elastic
- Adjust so the strands frame your face and fall naturally from the secured point
Pro tip: The slight slack in these strands matters. Pulling them back too tightly reads as formal; keeping them just slightly loose and natural reads as deliberately casual.
10. The Double Crown Loop
Layer two sets of loops at your crown for more visual interest and a slightly more styled appearance, while still maintaining that relaxed casual vibe. The first loop sits higher, the second sits slightly lower, and together they create depth and movement without requiring a complicated technique.
Why This Works for Straight Hair
Straight hair’s natural weight and structure means multiple loops sit securely in place and maintain their shape throughout the day. The smooth surface of each loop catches light beautifully, making the style look more intentional and designed than it actually is.
Building the Double Crown Loop
- Create your first set of loops as described in the Romantic Loops style
- Just behind and slightly below your first loops, create a second set of loops using hair from behind your ears
- Secure each set with bobby pins positioned at the crown
- The loops should sit at slightly different heights, creating a cascading effect
- Loosen both sets of loops to make them fuller and rounder
- Adjust so the two sets complement each other rather than appearing completely separate
Worth knowing: The space between the two rows of loops matters visually. Too close together and they blur together; too far apart and they read as two completely separate styles.
11. The Sleek Bow Detail
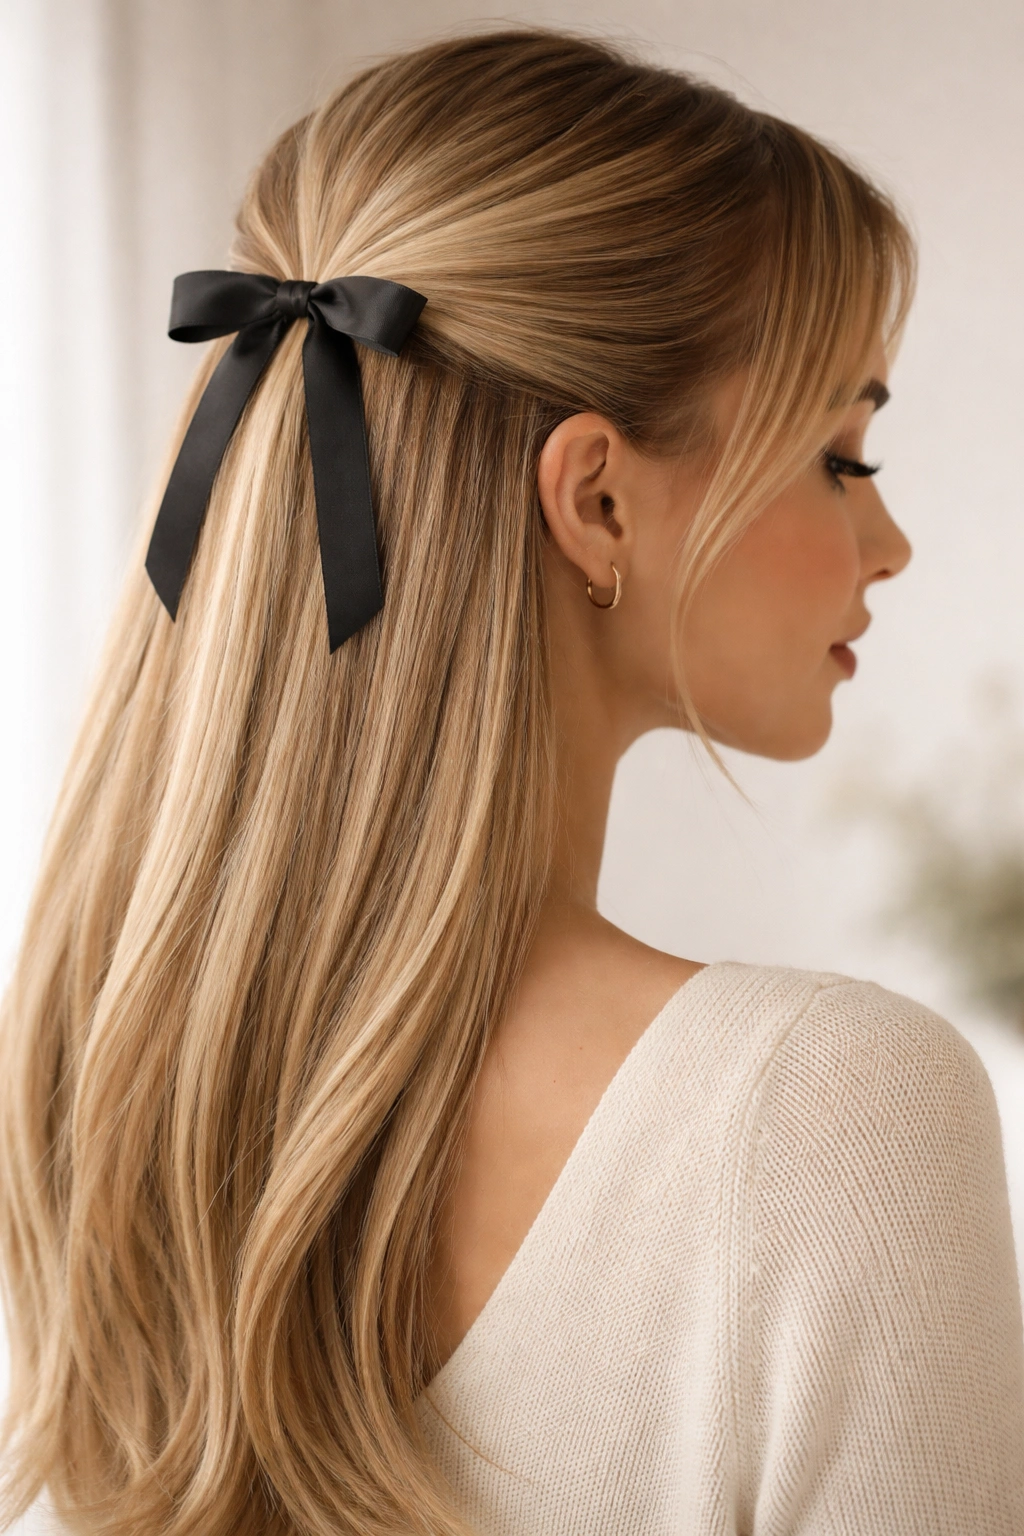
Add a subtle bow or ribbon detail to your half up half down for just a touch of personality without going full hair accessory. You’re securing your half up section, then wrapping a thin ribbon or delicate bow around the elastic for a pop of color or dimension that keeps the overall vibe casual and modern.
Why This Works for Straight Hair
The sleek, smooth backdrop of straight hair makes even a simple bow look elegant and intentional. The straight hair provides the perfect canvas for showcasing whatever bow or ribbon detail you choose without competing textures or texture variation distracting from it.
Adding a Bow Detail
- Create a basic half up half down style by taking sections from each side and securing them at the crown with a clear elastic
- Choose a ribbon, bow, or fabric detail that coordinates with your outfit or personal style
- Wrap the ribbon around the elastic, covering it completely, and secure it with bobby pins that hide behind the ribbon
- Alternatively, tie a small bow around the elastic and adjust it to sit at the perfect angle
- Make sure the bow sits centered and balanced at the crown
- Keep the overall look clean and minimal—one bow detail is enough for the casual aesthetic
Pro tip: Thin, delicate bows read more casual; large, structured bows read more formal. Choose your bow size to match your intended vibe.
12. The Curved Ponytail Swoop
Instead of securing your half up section straight at the crown, curve it slightly to one side before securing, creating an off-center swoop that adds visual interest and a modern edge. Straight hair makes this curved line crisp and visible, transforming a basic style into something more deliberately designed.
Why This Works for Straight Hair
The smooth, straight texture shows off the curved line perfectly—you can actually see the intentional shape you’ve created. The hair sits exactly where you place it without any texture wave or curl softening or changing the line, which means your swooping curve stays visible and defined all day.
Creating the Swooping Curve
- Brush your hair completely smooth and take sections from each side of your head at ear level
- Instead of pulling straight back to the crown, pull the sections back at a slight diagonal, aiming for a point that’s slightly off-center
- Secure them with a clear elastic at that off-center point
- The top section of your hair should now show a gentle curved swoop to one side
- Wrap a small piece of hair around the elastic to hide it
- Adjust the swoop so it’s visible and intentional, not so exaggerated that it looks unintentional
Worth knowing: A slight swoop reads as fashion-forward and modern; an extreme swoop can read as too trendy or overdone.
13. The Side-Swept Half-Up
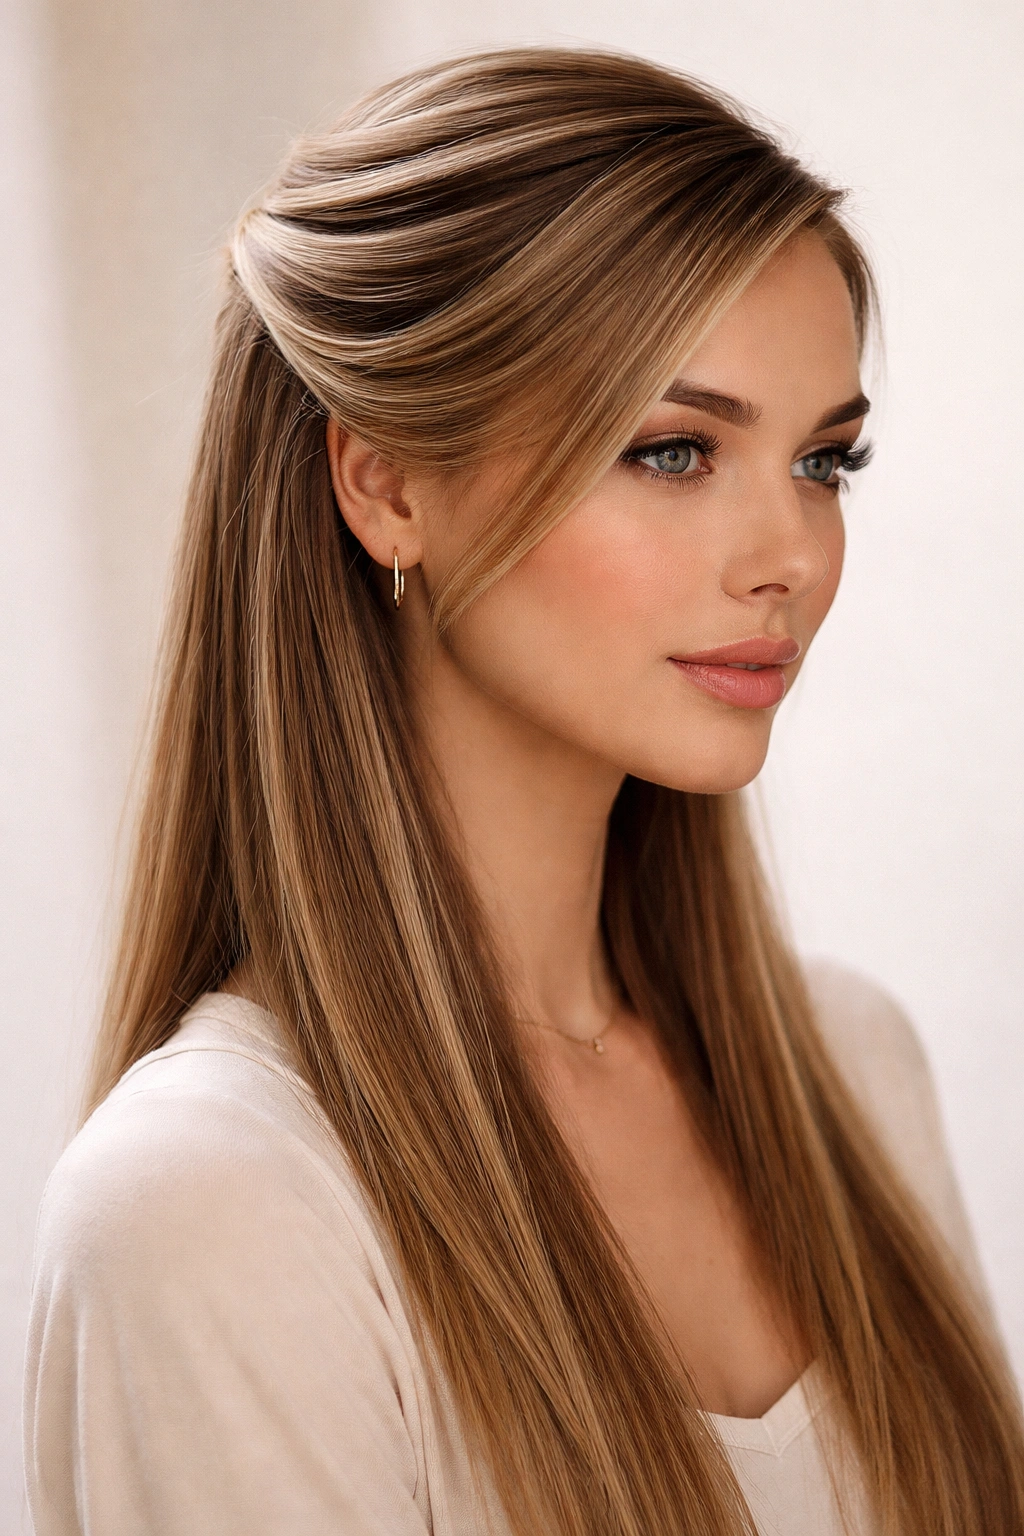
Take your half up section and sweep it dramatically to one side of your head, creating an asymmetrical style that feels modern and effortless. Straight hair cooperates beautifully with side-swept styles because the weight and smoothness mean everything stays exactly where you position it.
Why This Works for Straight Hair
Side-swept styles rely on being able to move all your hair to one side without it fighting back or developing weird waves or texture. Straight hair does exactly what you ask—it sweeps to the side and stays there, maintaining the clean line of the sweep all day.
How to Execute the Side Sweep
- Brush your hair smooth and take a section from one side of your head at ear level
- Pull this section diagonally across the back of your head, aiming for the opposite side where you want it to secure
- Secure it with bobby pins at that point, using multiple pins for security since you’re working against gravity with the sweep
- Leave the rest of your hair down and flowing
- The sweep should be dramatic enough to be visible but not so extreme that it looks uncomfortable
- Adjust your bottom hair so it falls smoothly on both sides of the sweep
Pro tip: Securing a side-swept style with bobby pins on the opposite side of your head means they’ll be hidden behind hair, creating a clean, finished appearance.
14. The High Twisted Half-Up

Position your twist at the very top of your crown for a more structured, intentional-looking style that still reads as casual because you’re leaving most of your hair down. The high placement creates a different silhouette and proportion than a low or center placement.
Why This Works for Straight Hair
The high position on straight hair creates a lifted, elegant look that doesn’t require any teasing or volume work. The smooth texture shows off the twisted detail clearly, and the style sits securely because of straight hair’s natural weight and grip.
Building the High Twist
- Brush your hair smooth and take a thick section from each side of your head, positioning them higher than you normally would—closer to your temples than to your ears
- Twist each section firmly, moving upward and toward the center top of your head
- Secure both twisted sections at the very crown with a clear elastic
- Gently loosen the twists to create fuller, softer definition
- Leave the remaining hair completely down and straight
- The high position of the twist creates a more structured aesthetic while the down hair keeps it casual
Worth knowing: This high positioning works especially well if you have a longer face shape, as it creates visual balance and proportion.
15. The Pearl Pin Accent
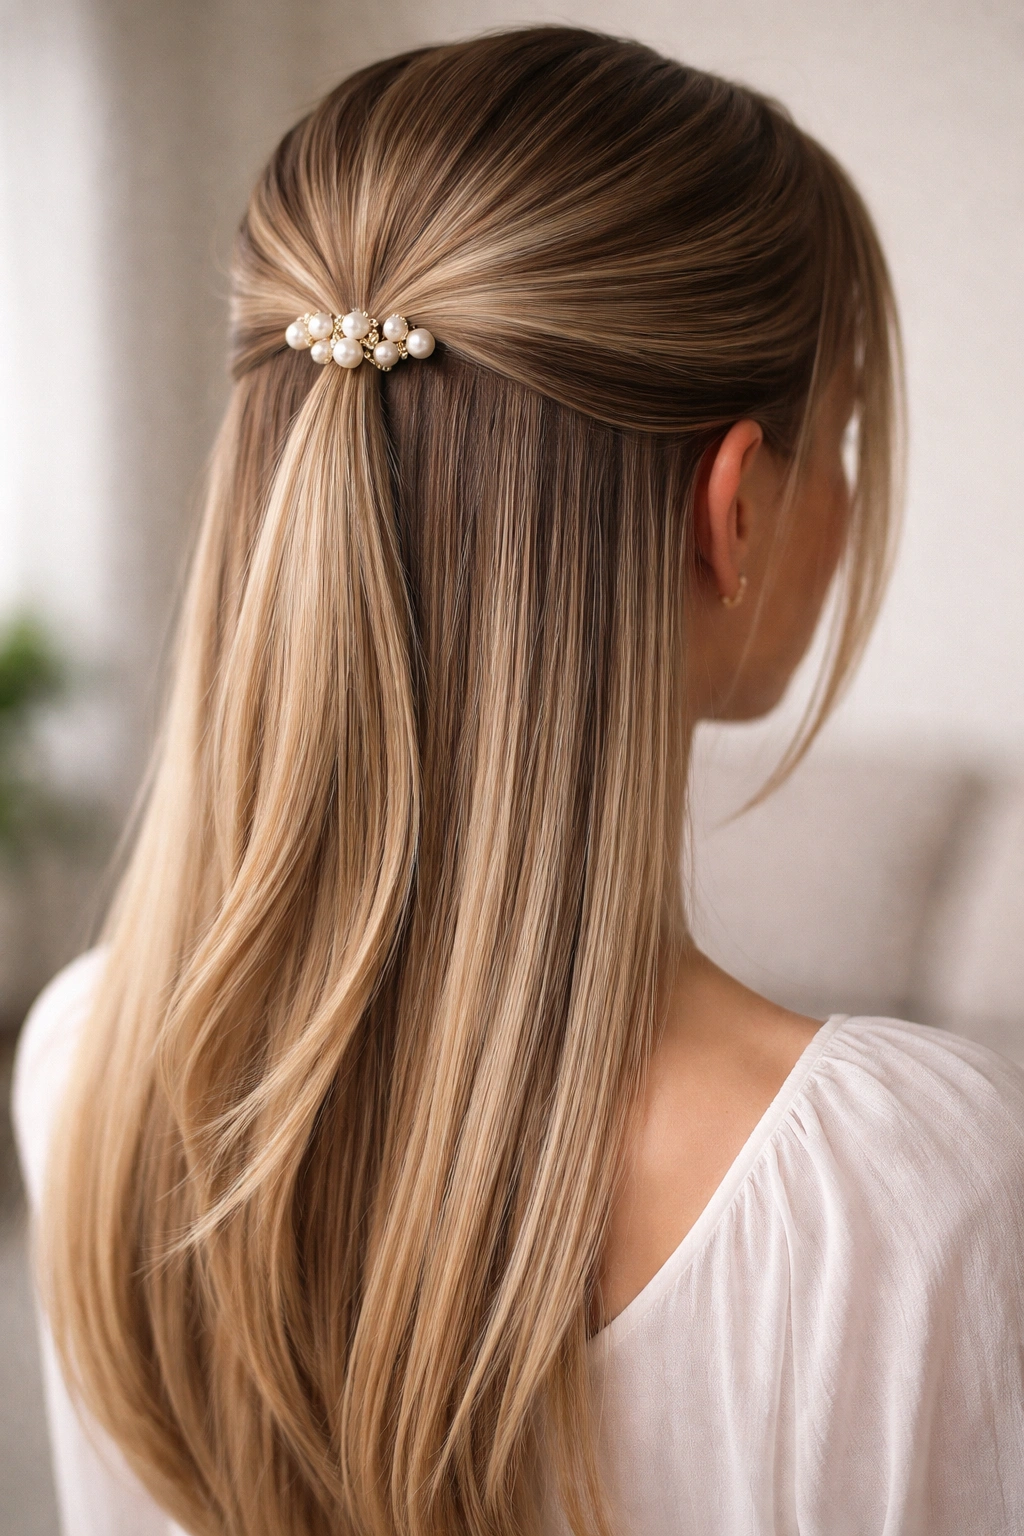
Upgrade any half up half down style by replacing your standard bobby pins with decorative pearl pins or delicate metallic pins. You’re keeping the style simple and casual while adding just enough of a jewelry-like detail to make it feel special and intentional.
Why This Works for Straight Hair
Decorative pins show up beautifully against the smooth, sleek backdrop of straight hair. They become an accessory element rather than a hidden functional element, adding personality without requiring complicated styling work. The clean lines of straight hair make even a simple pin look intentional and designed.
Adding Pearl Pin Details
- Create any half up half down style using your preferred technique
- Instead of matching bobby pins, use decorative pearl pins, metallic pins, or jeweled pins to secure your style
- Position the pins so they’re visible and intentional rather than hidden—this turns them into an accessory
- You might use a single decorative pin at the center of where your style secures, or scatter multiple matching pins around the secured area
- The pins should coordinate with your outfit, jewelry, or overall aesthetic for a cohesive look
Pro tip: Pearl pins add elegance and sophistication; metallic or gold pins add modern edge; jeweled pins add a subtle glamour touch. Choose your pin style to match your intended vibe.
16. The Reverse Twist Half-Up
Try twisting in the opposite direction from how you normally would—twisting toward your face instead of away from it. This simple directional change creates a completely different visual impact and feels fresh even if you’ve done a twist half-up a hundred times before.
Why This Works for Straight Hair
Directional changes are visible and crisp in straight hair. The reverse twist shows off a different spiral direction that reads as intentionally styled rather than casually haphazard. Your hair’s smooth texture means the twisting direction is clearly visible throughout the day.
Creating the Reverse Twist
- Take a section from one side of your head at ear level
- Instead of twisting away from your face (the typical direction), twist toward your face, creating a spiral that curves inward
- Continue this reverse twist toward the back of your head
- Repeat on the opposite side, twisting in the same reverse direction
- Secure both twisted sections at the crown or nape with a clear elastic
- The inward-curving spirals create a different visual effect than traditional outward twists
Worth knowing: The reverse twist creates a slightly more playful, less formal aesthetic than traditional twisting directions.
17. The Relaxed Tousled Hold

Intentionally create a slightly undone, tousled appearance by using your half up section but leaving it purposefully soft and loose rather than crisp and clean. Straight hair actually works beautifully for this because the deliberate looseness reads as intentional styling rather than accidental mess.
Why This Works for Straight Hair
Tousled styles on straight hair require you to actually work at making them look undone—you can’t just let texture do the work for you. This means when a tousled straight-hair style looks relaxed and effortless, it’s genuinely a styling choice, which reads as more intentional and deliberately casual than pure accident.
Creating Relaxed Tousle
- Create a basic half up half down by taking sections from each side and securing them loosely at the crown
- Rather than keeping the secured section tight and defined, gently pull and loosen it so it becomes softer and less structured
- Tease the very back of the crown lightly to create subtle volume in the secured section
- Leave face-framing strands out and slightly loose rather than perfectly positioned
- The overall effect should be a style that could almost pass for effortless but clearly shows intentional shaping and placement
Pro tip: The key to this style is being deliberately loose—every element should be somewhat undone on purpose, not accidentally sloppy.
18. The Geometric Pin Configuration
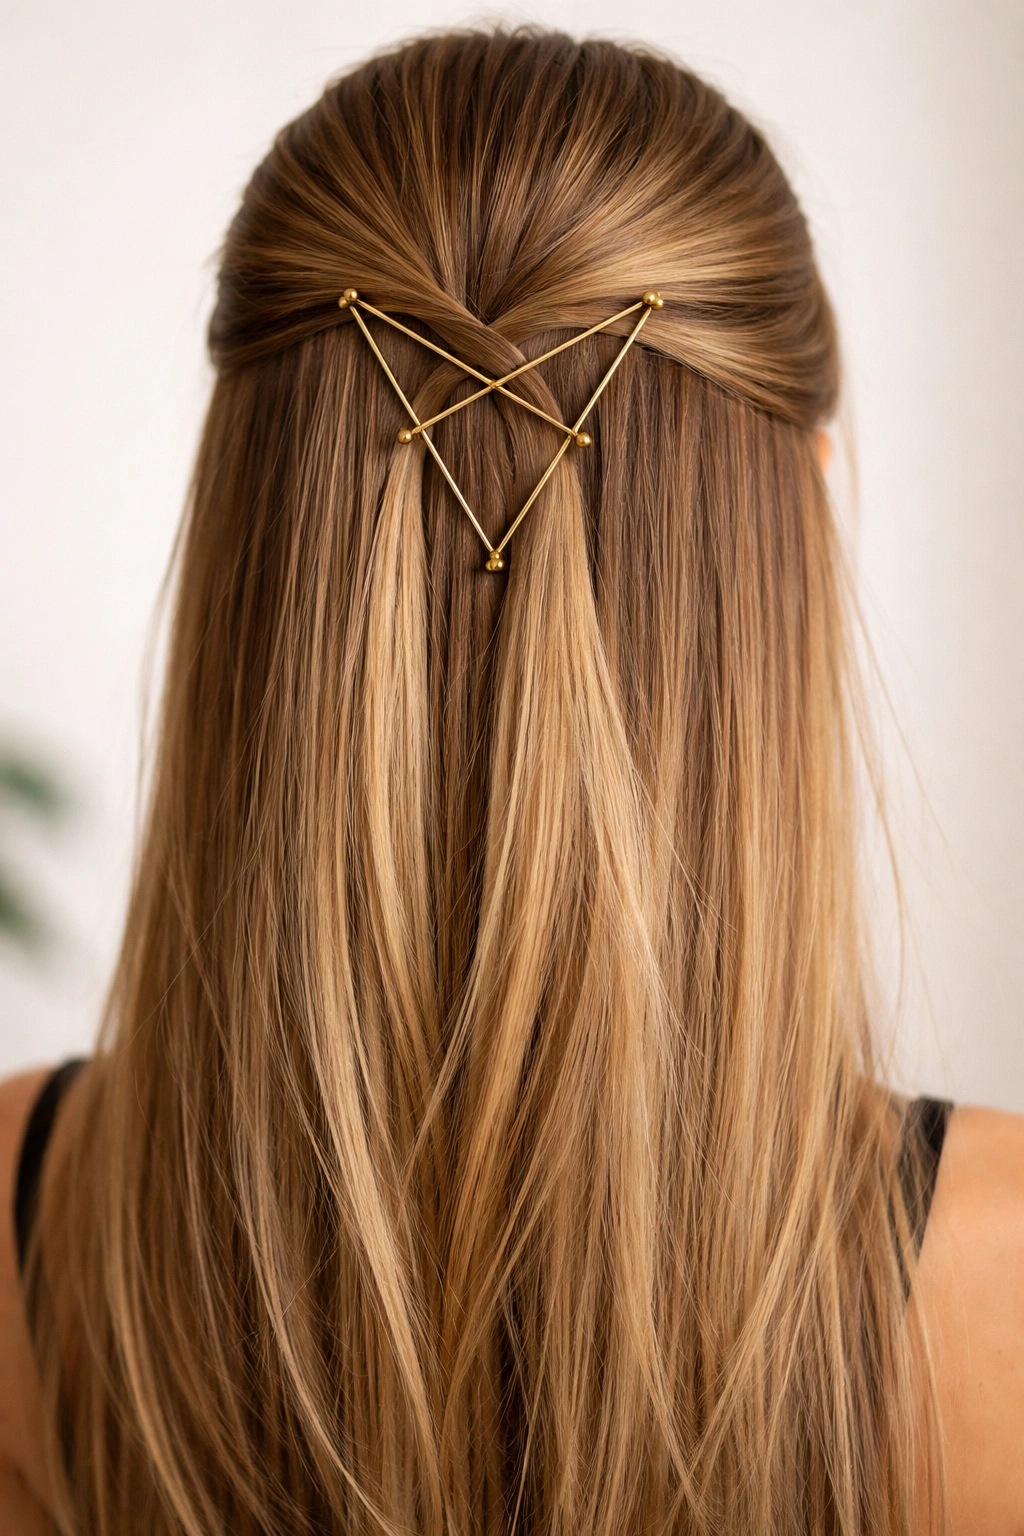
Instead of using a single pin or a standard configuration, try a geometric arrangement of multiple bobby pins positioned in a pattern at the crown. Two pins forming a V, three pins forming a triangle, or four pins forming a square—this unusual approach adds visual interest and makes your simple half up half down feel modern and fashion-forward.
Why This Works for Straight Hair
Straight hair’s smooth surface makes decorative pin arrangements visible and intentional rather than lost or blended into texture. Each pin sits clearly visible, creating a geometric pattern that becomes an accessory element. The clean lines of straight hair make the pattern sharp and defined.
Building the Geometric Pin Configuration
- Create a basic half up half down by taking sections from each side and securing them loosely at the crown
- Instead of hiding your bobby pins, position them visibly to create a geometric pattern—this turns them into a design element
- You might use 2-4 matching pins (gold, silver, or pearl) positioned to create a shape: two pins in a V, three in a triangle, four in a square
- Position them at the crown area where you’re securing your style, making them clearly visible rather than hidden
- The arrangement itself becomes the statement detail of your style
Pro tip: Matching pins in metallic or pearl finishes look intentional and designed; mismatched pins can read as accidental. Choose quality pins that will sit exactly where you position them.
Final Thoughts
The beauty of half up half down styles for straight hair is that they require minimal effort but look incredibly intentional. Your hair’s natural smoothness and weight do most of the work for you—you’re just providing the structure and direction. Whether you choose a simple minimalist approach with just a single pin or go for something more elaborate like a geometric pin configuration or textured crown braid, straight hair makes every variation look polished and deliberate.
The key to rotating through these styles without getting bored is understanding that small changes create big visual impact. A slight twist direction change, a different securing position, or a subtle accessory detail transforms the same basic concept into something that feels completely fresh. You don’t need complicated techniques or time-consuming styling work to look genuinely put-together.
Pick a few of these styles and practice them until they become automatic. Once you’ve mastered three or four variations, you’ll find yourself switching between them based on your mood, your outfit, or what you’re doing that day. That’s when the real magic happens—when your casual half up half down styling becomes so easy that you can actually enjoy how effortlessly put-together you look.