Half up half down hairstyles are the ultimate sweet spot for people with long hair who want to look put-together without fussing with a full updo. They give you the best of both worlds—volume and movement on top with flowing length below—and they work for everything from a casual weekend brunch to running errands to a relaxed evening out. The beauty of these styles is their versatility: you can dress them up or down depending on your mood and the occasion, and most of them take less than five minutes once you get the basic technique down.
What makes half up half down styles so appealing is that they genuinely work for different hair types and textures. Whether your hair is stick-straight, naturally wavy, or curly, there’s a version of this look that’ll flatter you. They’re also surprisingly forgiving—a little texture, a few loose pieces, even some imperfection makes the style look more intentional and casual rather than too polished. You don’t need expensive tools or professional skills; a few bobby pins, maybe a hair tie, and you’re good to go.
The styles below aren’t fussy or complicated. They’re the kind of hairstyles you can actually wear on a regular Tuesday, that hold up through your day without constantly needing adjustments, and that feel natural rather than contrived. Each one has its own vibe, so whether you’re drawn to romantic, edgy, braided, twisted, or textured looks, you’ll find something here that clicks with your personal style.
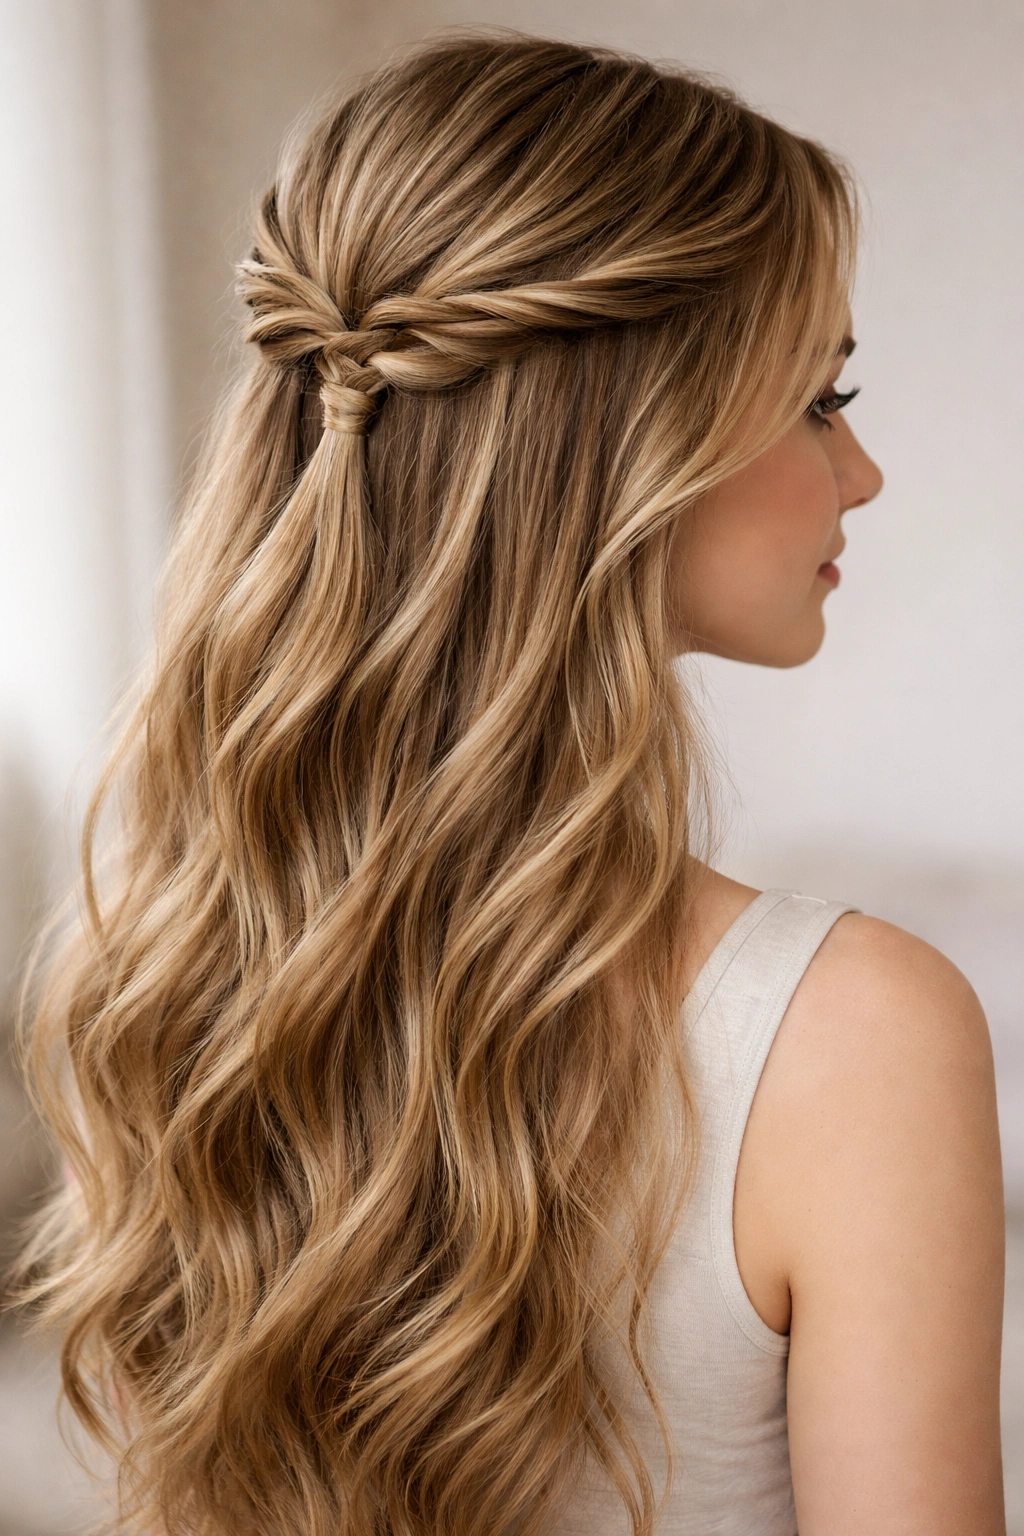
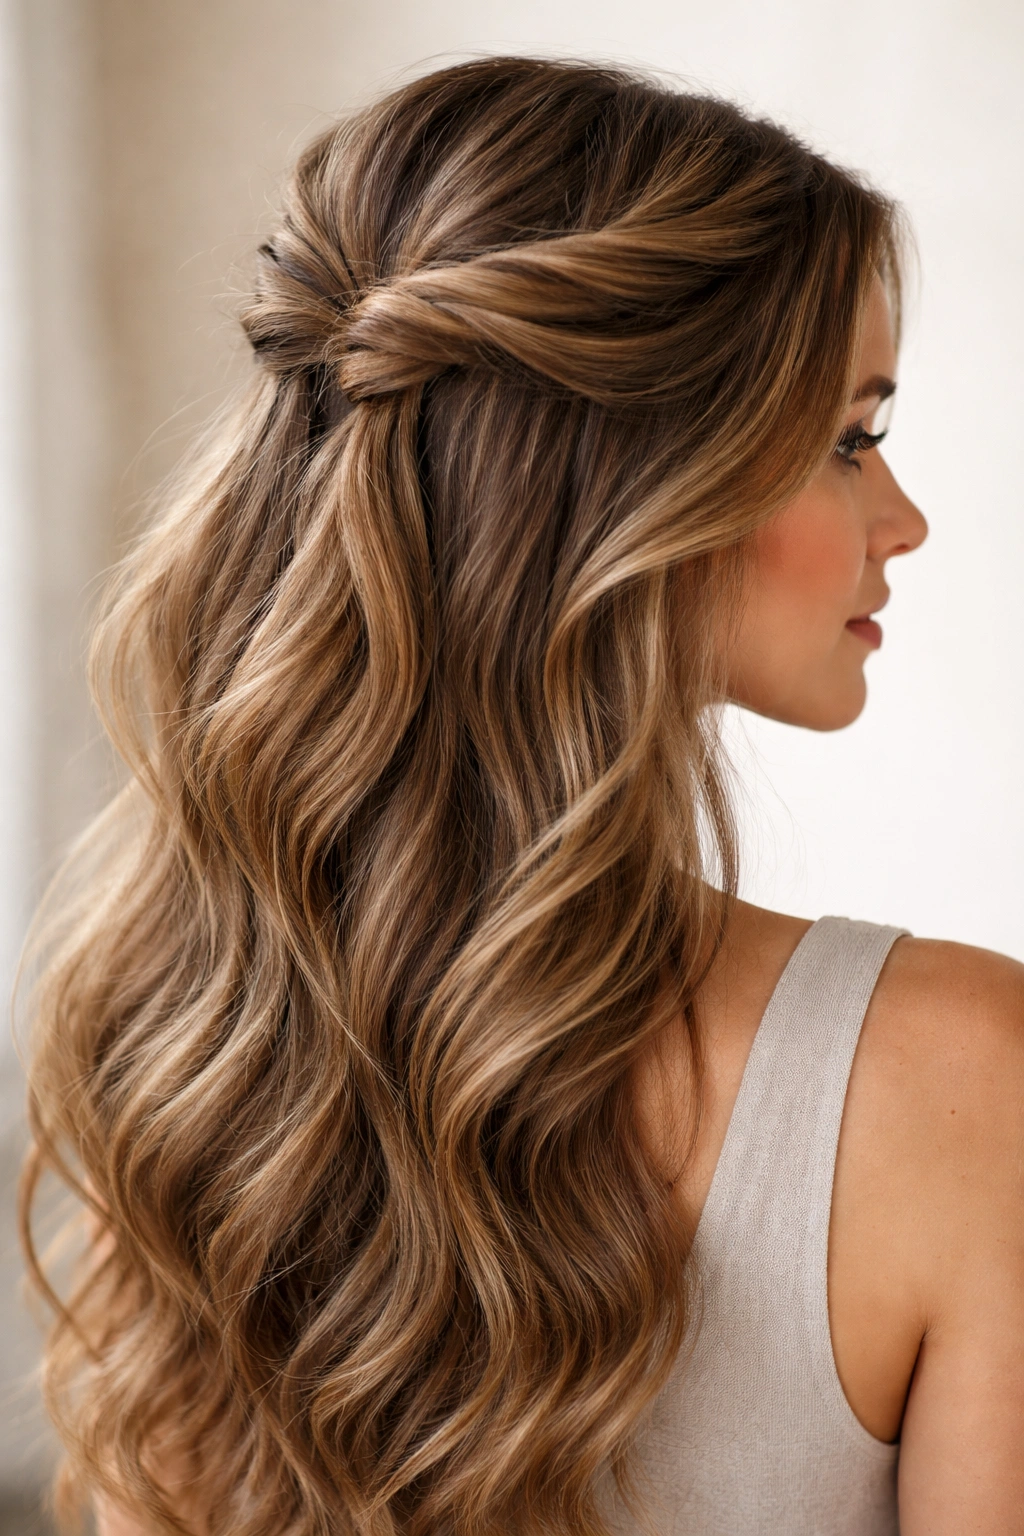
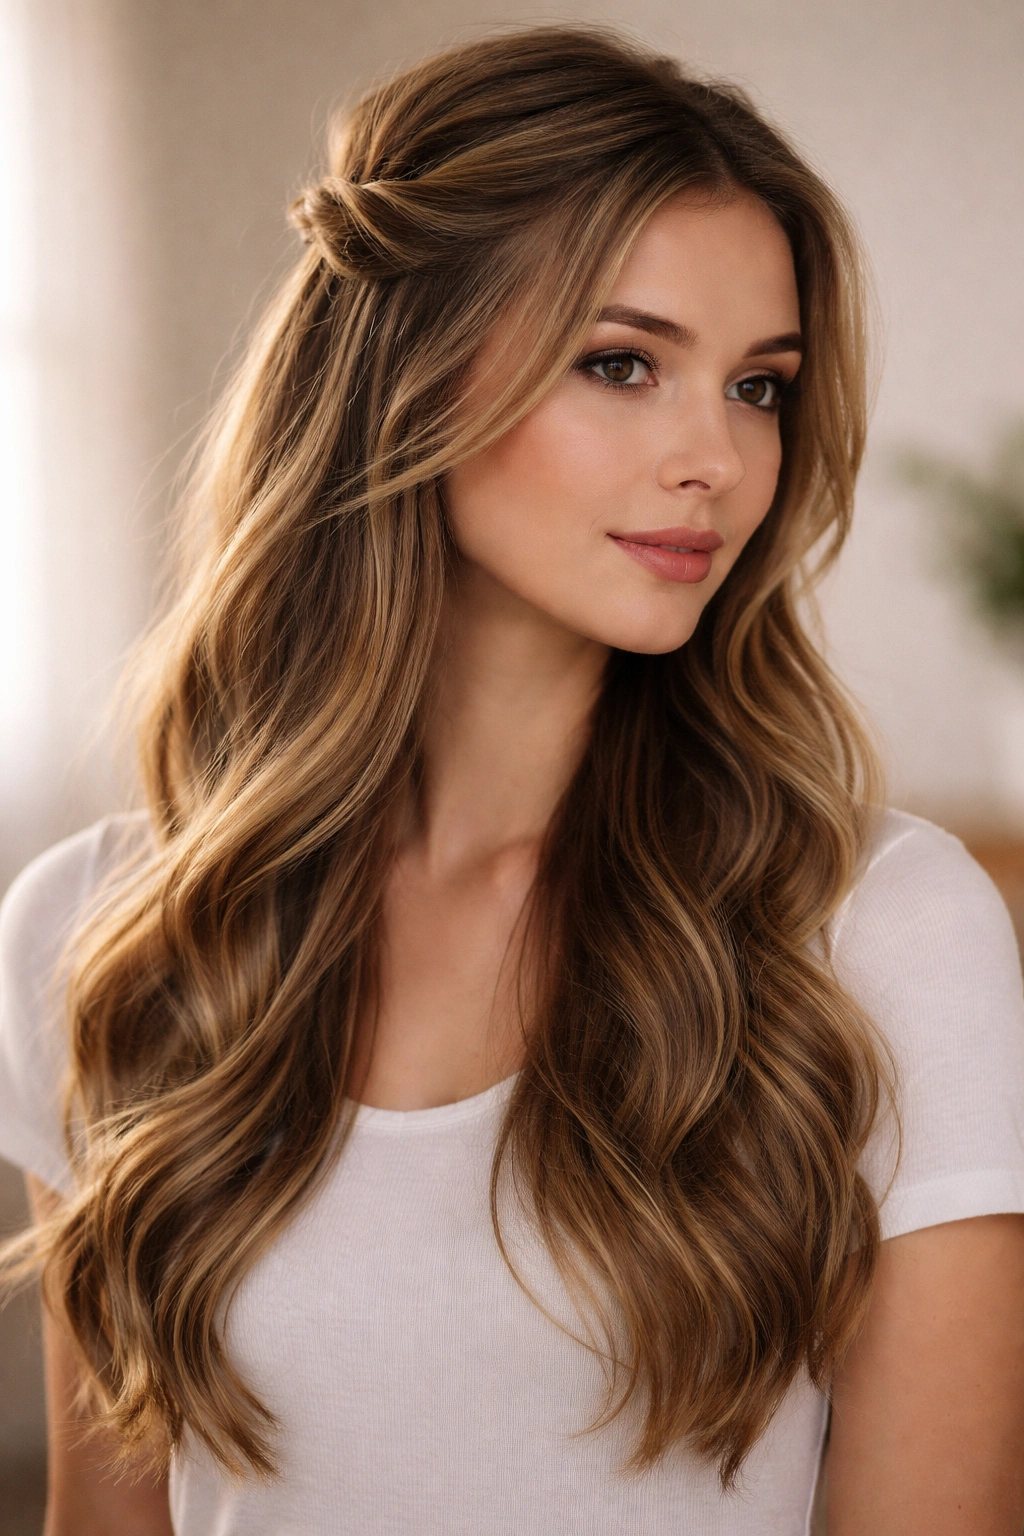
1. The Classic Twisted Half Up
This is the foundation style that works for almost everyone—two simple twists that frame the face and tie the top section back while leaving the length loose. It’s elegant without being formal, and genuinely looks better with a little bit of texture in your hair rather than perfect smoothness. The twists add visual interest and make the style feel more intentional than a basic ponytail.
Why This Works for Everyday Wear
Twists are forgiving because they look good whether your hair is freshly washed or day-old, and they work on straight, wavy, and curly hair textures alike. The style keeps hair off your face without feeling restrictive, and it holds up all day without slipping. You can sleep in twisted hair and wake up with waves the next morning.
How to Create It
- Take a section of hair about 2 inches wide from one side of your head, starting at the temple
- Twist it loosely as you move back toward the crown, keeping the twist relaxed and a bit loose rather than tight
- Do the same on the other side, twisting in the same direction so both twists travel back to the center
- Secure both twists together at the back with a bobby pin or small elastic
- Gently pull and tease the twists slightly to loosen them and add texture
- Leave the rest of your hair down, and if you want extra texture, run your fingers through it or let it wave naturally
Pro tip: Spray your hands lightly with texturizing spray before twisting to give the twists more grip and make them less likely to slip throughout the day.
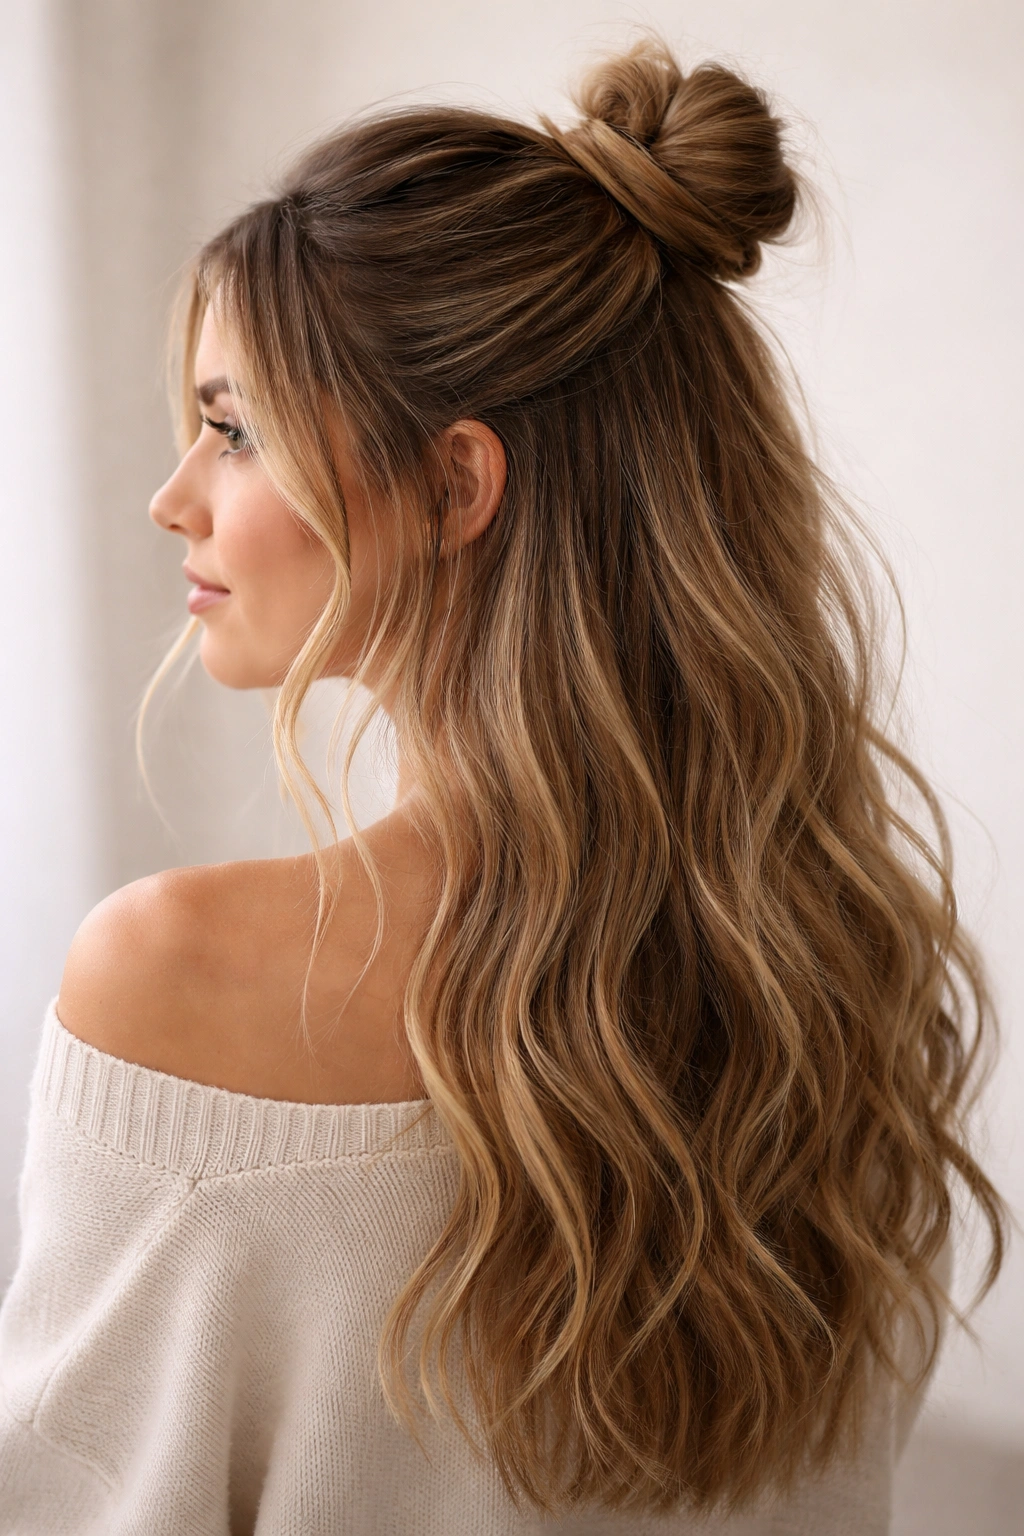
2. The Messy Bun Half Up
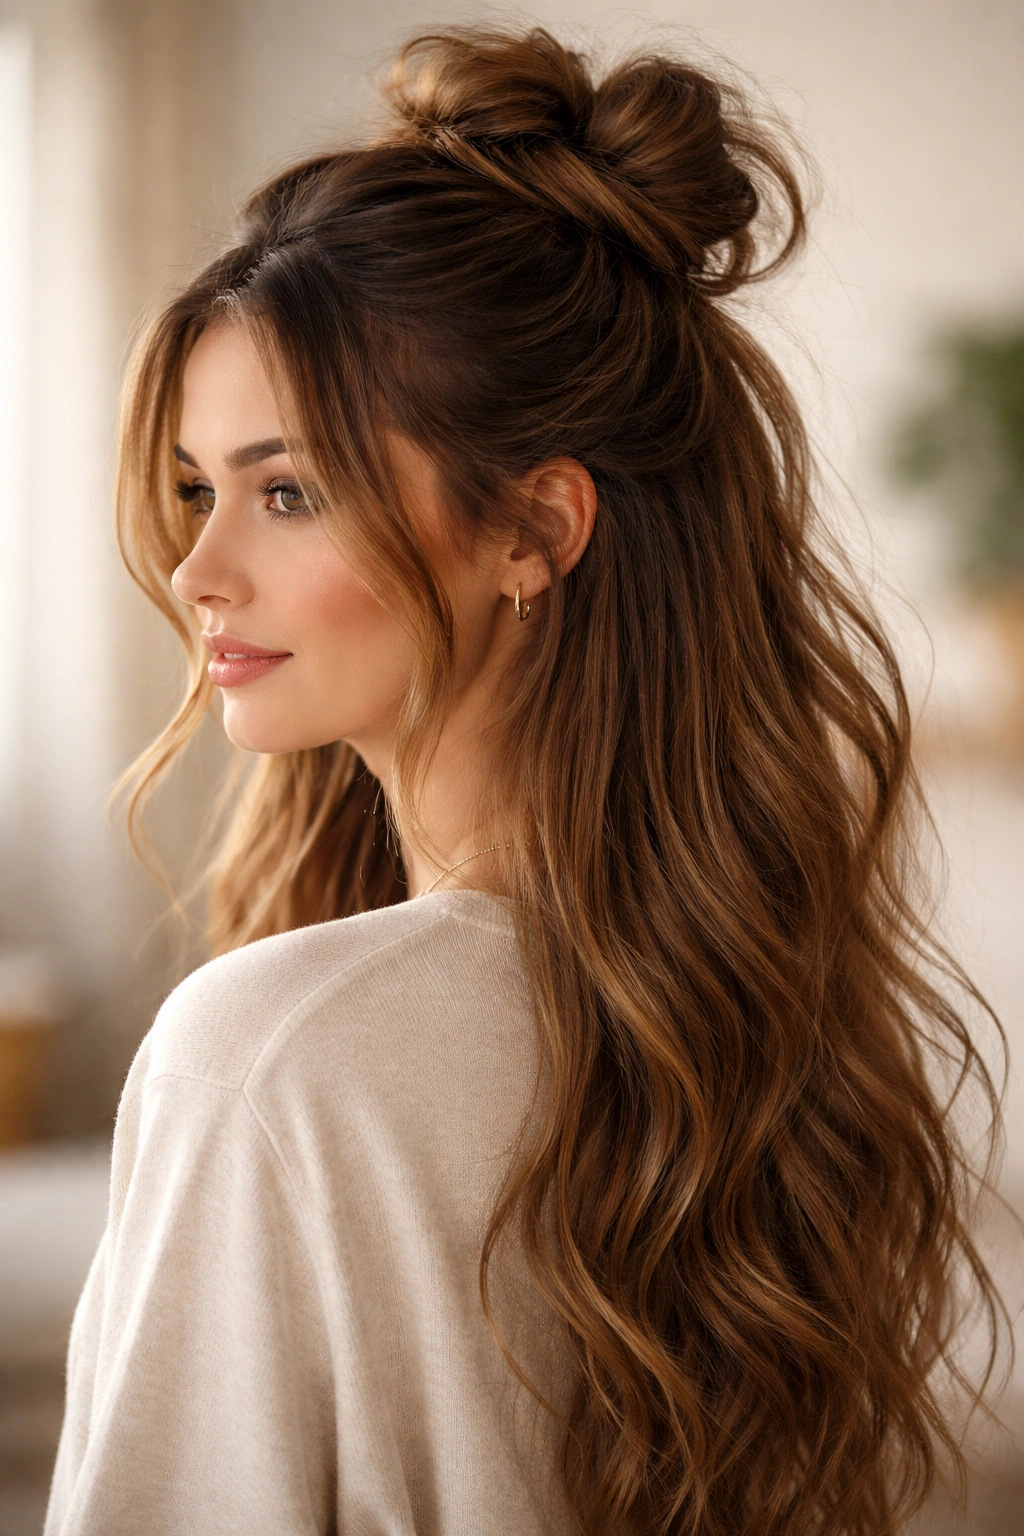
Picture the look where you’ve casually pulled the top section of your hair into a bun—messy, loose, and totally undone-looking. It’s the style that says you didn’t try too hard, even though you actually spent maybe 90 seconds on it. This version keeps half your hair down so you get volume on top with length flowing below, which is a lot more flattering than a full messy bun.
The Appeal of Controlled Messiness
Messy buns look better the more imperfect they are, which takes the pressure off making everything perfect. This style actually looks intentional and put-together if you leave a few pieces out around your face and don’t worry about every strand being in place. The longer pieces hanging down balance the bulk of the bun so your head doesn’t look too top-heavy.
Building Your Perfect Messy Bun Half Up
- Flip your head upside down and gather just the top half of your hair at the crown
- Flip back up and secure that section loosely with an elastic into a ponytail
- Twist the ponytail loosely and wrap it around the base to form a bun shape
- Secure it with bobby pins, leaving the bun intentionally loose and imperfect
- Pull out a few pieces around your face and ears for a softer, more casual look
- You can tease the bun slightly with a fine-tooth comb to make it look fuller and messier
- Leave all hair below the crown down and tousled
Worth knowing: Using a clear elastic and matching bobby pins makes the whole thing less visible so the focus is on the texture and shape rather than the fasteners.
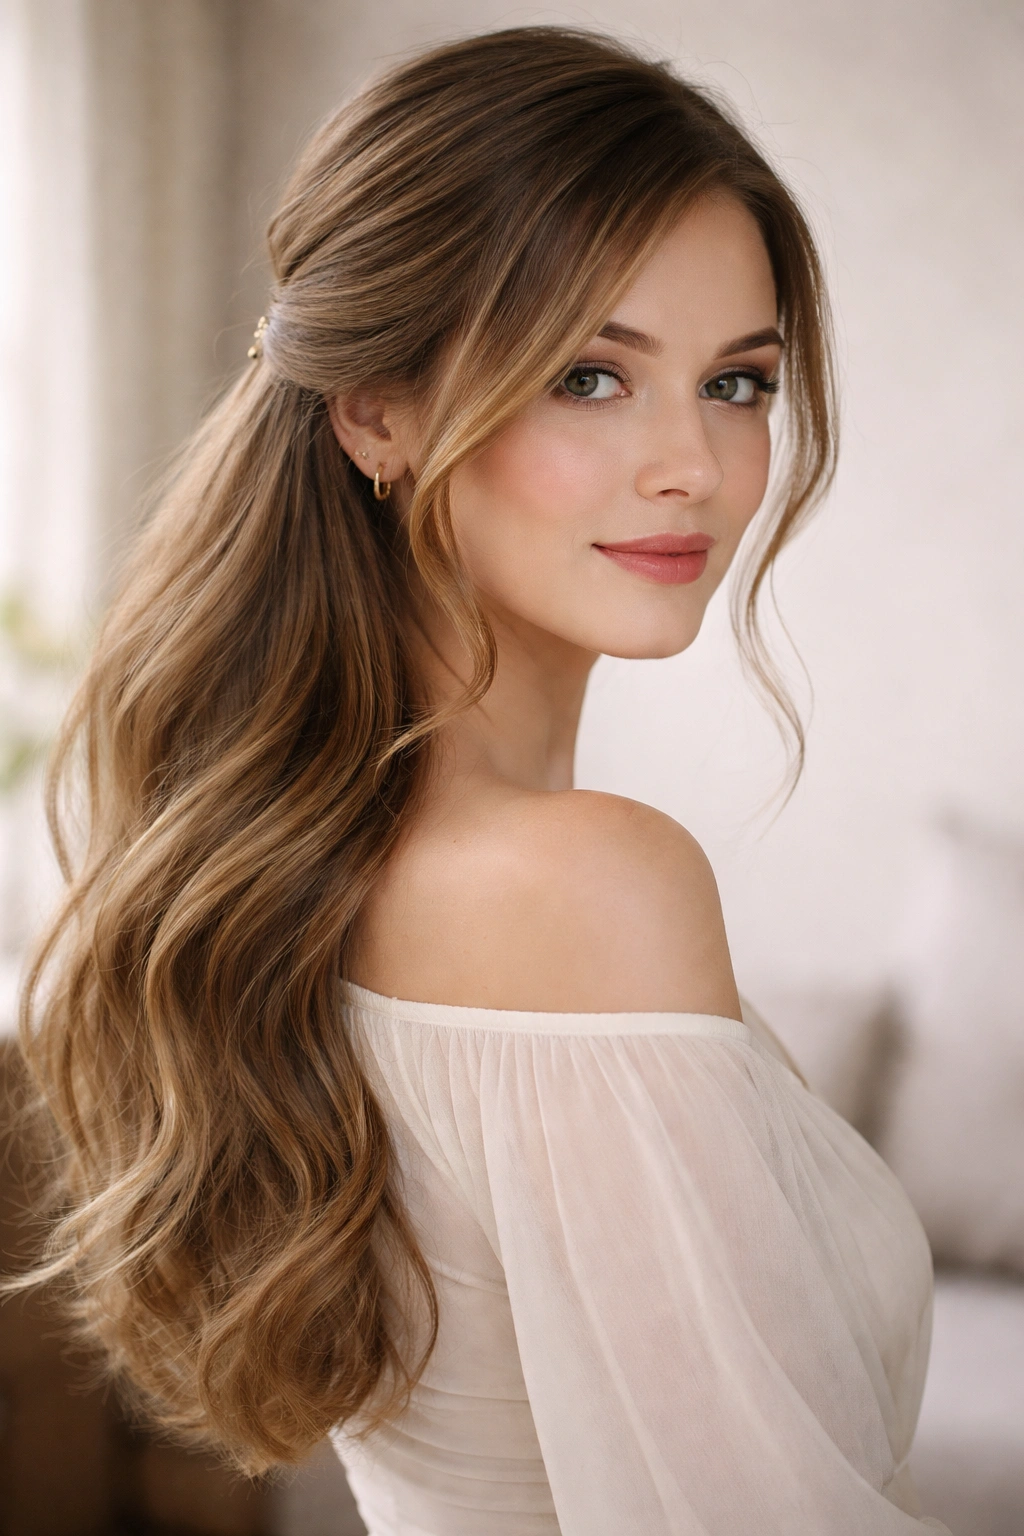
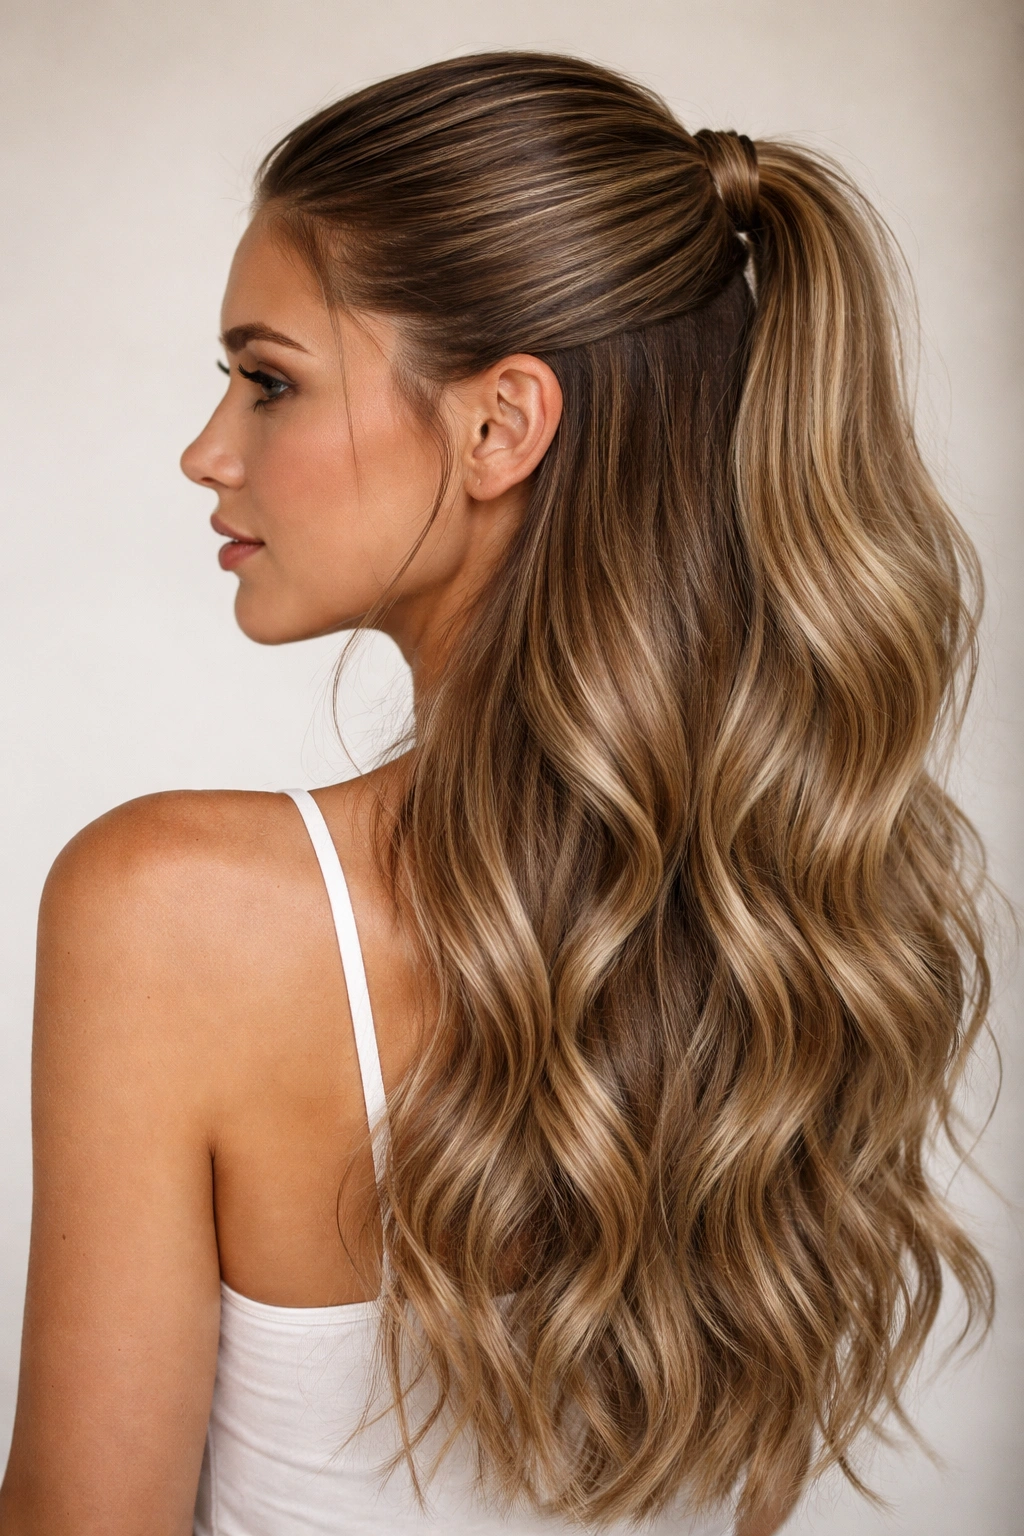
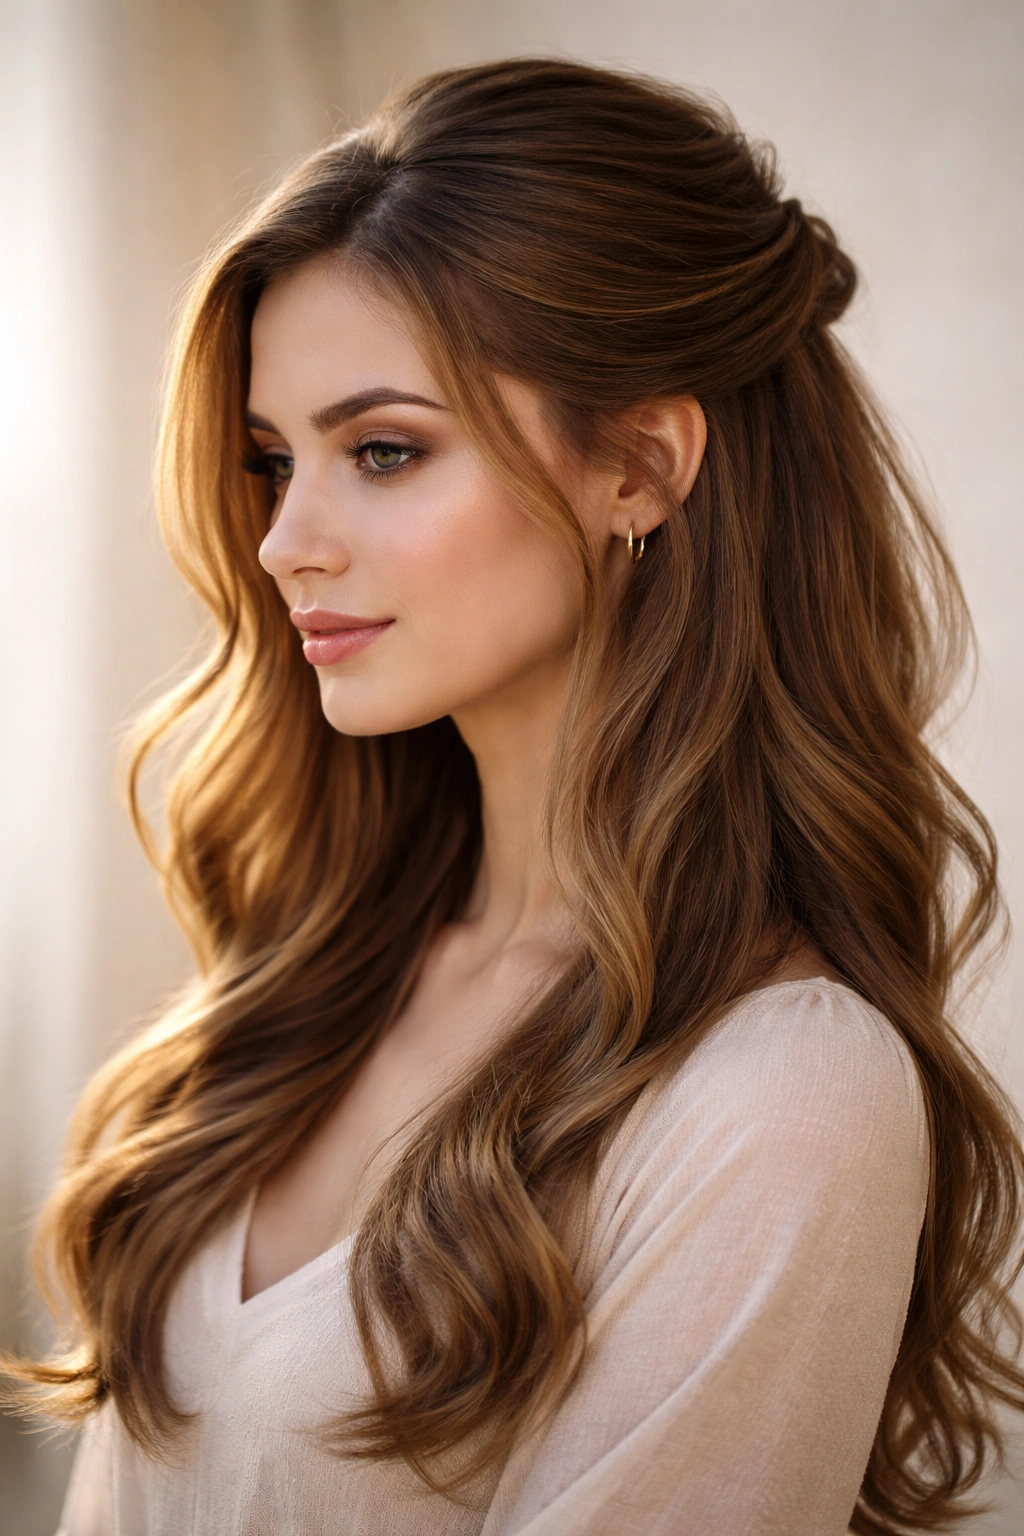
3. The Sleek Ponytail Half Up

For when you want something polished but still casual, this is a high-shine version of the half up style. You take the top section and pull it back into a smooth, controlled ponytail while the lower half hangs freely. It looks intentional and structured but still has the relaxed vibe of half your hair being down.
When Sleek Actually Looks Casual
Sleek ponytails work best on longer hair because the contrast between the structured top and the loose bottom creates visual interest. This style is perfect if you’re the type who likes clean lines and everything in its place, but you still want the movement of half-down hair. It’s dressy enough for a date night but casual enough for everyday wear.
Creating the Polished Look
- Brush your hair back smoothly from the front hairline to the crown
- Gather just the top portion at the crown into a ponytail
- Use a fine-tooth comb or a small paddle brush to smooth down any flyaways
- Secure with a thin elastic close to your scalp
- You can wrap a small section of hair around the elastic to hide it, then pin the wrapped section underneath
- Leave the lower half of your hair down and brush it through so it falls smoothly
- A light smoothing serum on the ponytail section makes it shine
Pro tip: Apply a tiny bit of gel or edge control along your hairline before pulling the ponytail back for a polished look that holds all day.
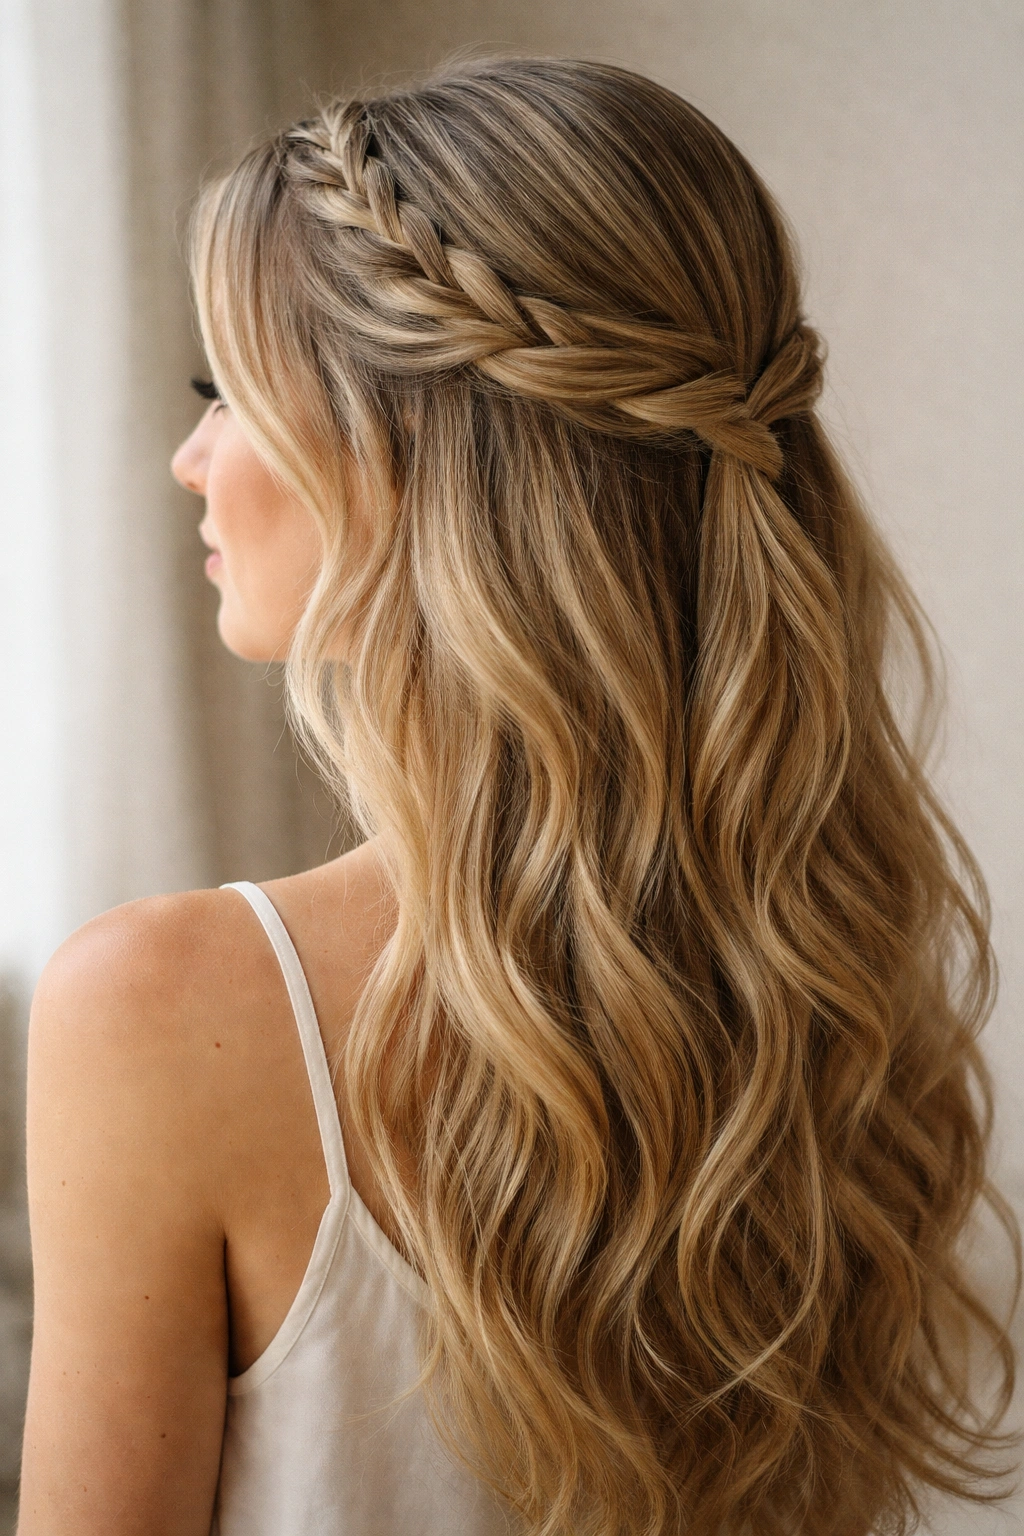
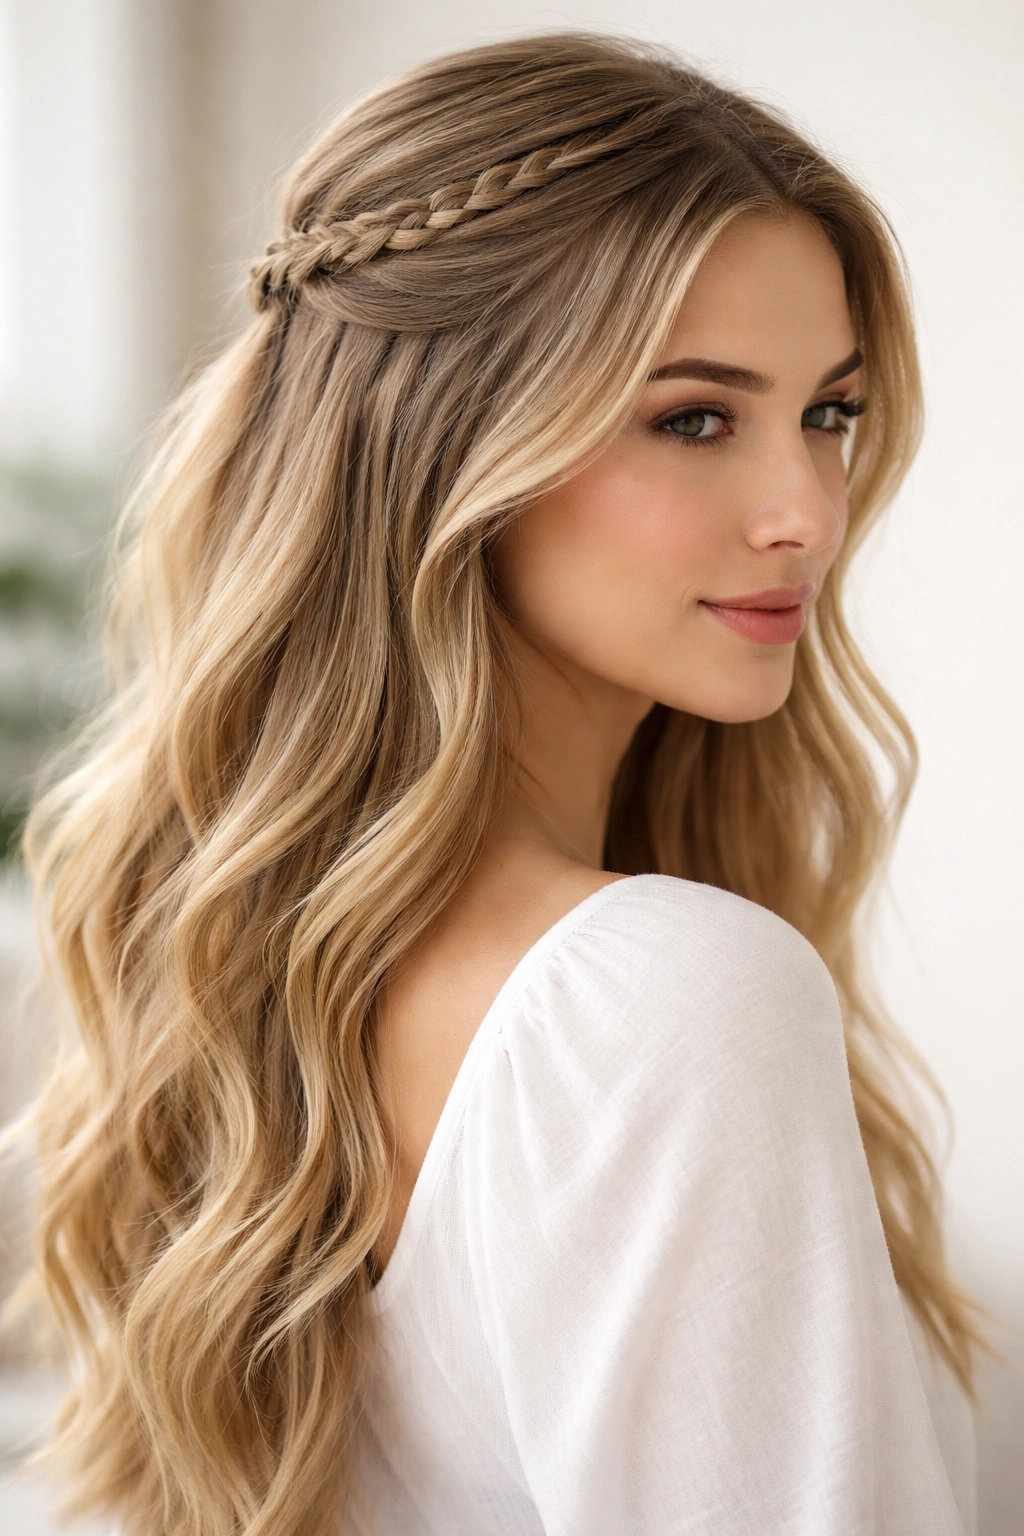
4. The Braided Half Up Crown
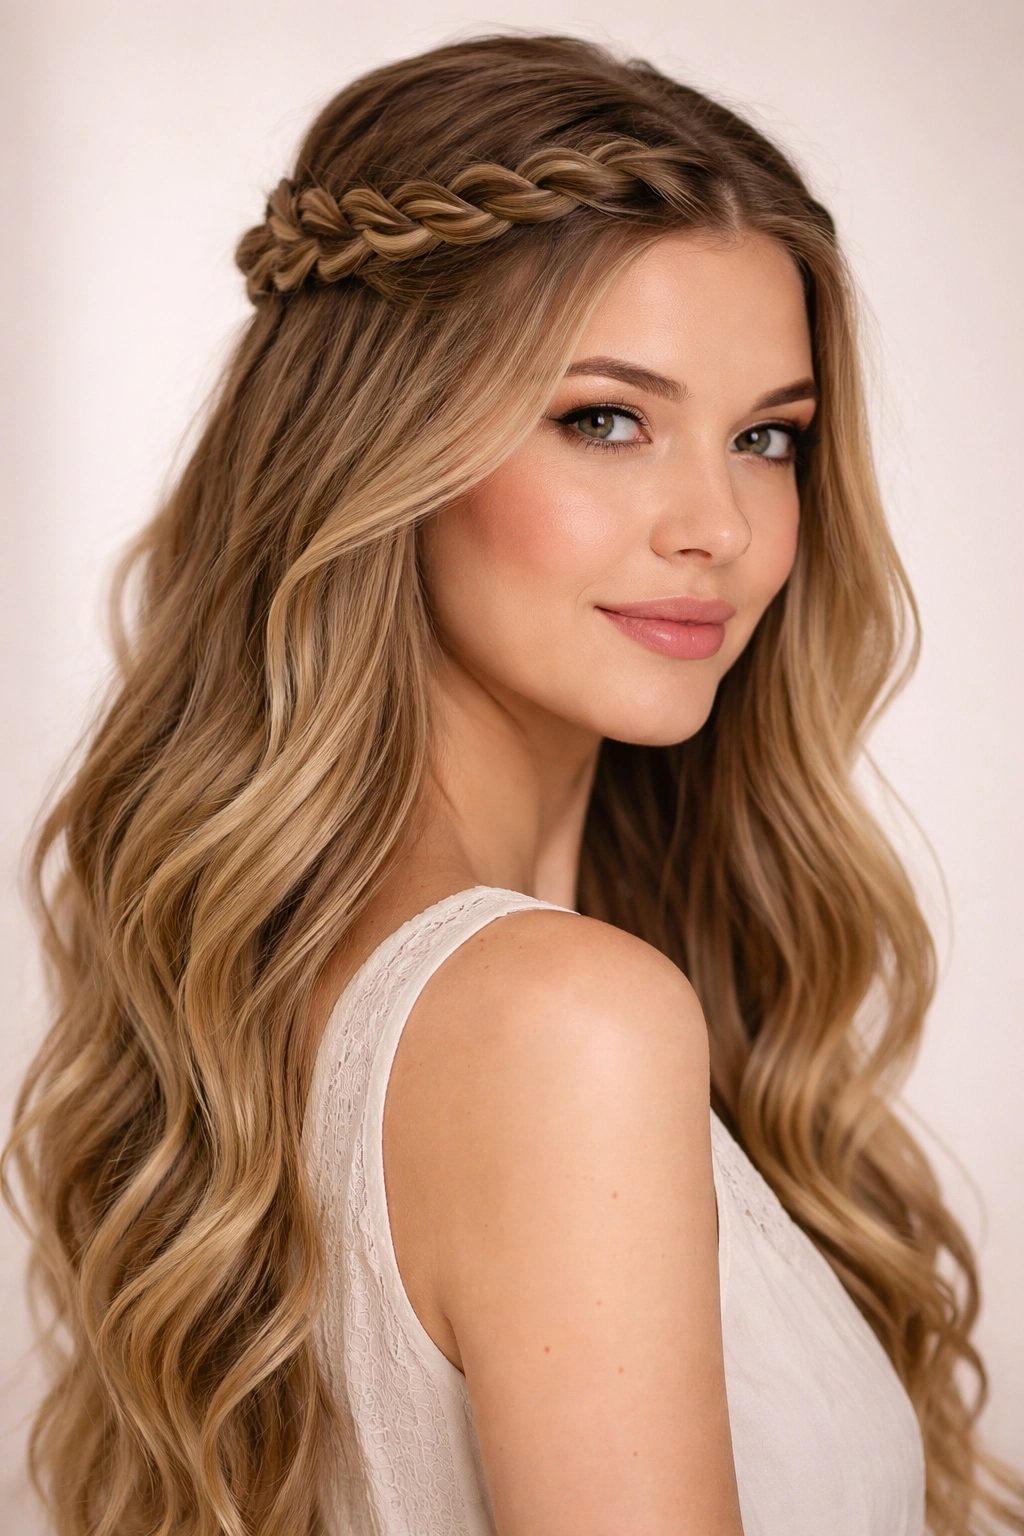
This style weaves a braid across the top of your head like a crown, with the braid sitting horizontally from one side to the other, then pinned at the back while all your hair flows down below. It’s romantic without being overdone, and it looks impressive even though the actual technique is pretty straightforward. The braid automatically creates a focal point at the top of your head that makes the whole style feel more intentional.
Why Braids Add Instant Interest
A single braid reads as more elegant and put-together than just pulling hair back, even though it doesn’t take much longer. Braids hold texture beautifully, so they look great on day-two or day-three hair when you’ve got natural waves built in. The braid also frames your face nicely and keeps hair back without that pulled-tight feeling that some styles give you.
Constructing Your Crown Braid
- Brush your hair and add some texture to it (waves work better than perfectly straight hair for this)
- Start on one side of your head at about ear level, taking a small section of hair
- French braid toward the back, picking up hair as you go across the back of your head
- The braid should travel horizontally from one ear toward the opposite side
- Continue braiding until you reach the other side of your head
- Secure the end of the braid with a small elastic or bobby pin, tucking it behind your ear
- Gently pull at the braid to loosen it and make it fuller
- Leave all hair below the braid completely down
Insider note: Braiding slightly damp or textured hair works way better than trying to braid perfectly dry, slippery hair. If your hair is very straight, add a few loose waves with a curling iron first.
5. The Soft Side Sweep
This is a gentler, more romantic version of the half up style where you’re pulling the hair back at an angle rather than straight back. You take a section from one side, sweep it across the back of your head, and secure it low on the opposite side. It creates an asymmetrical look that feels less structured and more organic than a centered half-up.
The Romance of Asymmetry
Side-swept styles automatically photograph well and feel elegant without being fussy. They’re perfect if you want to show off one side of your face or if you have long layers that fall nicely to one side. This style also works beautifully on wavy or curly hair because the movement is part of the appeal.
How to Master the Sweep
- Take a section of hair from one side, starting near your temple
- Instead of pulling it straight back, pull it at an angle toward the opposite side of your head
- Sweep that section across the back of your head
- Secure it low on the opposite side with bobby pins or a small elastic
- Leave one or two small pieces out around your face on the sweep side for softness
- The rest of your hair stays down and loose
- You can tease your hair slightly at the crown to add volume before sweeping
Pro tip: This style looks best when you don’t pull it too tight. Loose, relaxed tension makes it feel more romantic than structured.
6. The Double-Twisted Half Up
Instead of one twist on each side like the classic twisted half up, you’re doing two thinner twists on each side, creating a more delicate, detailed look. It takes maybe 30 seconds longer than the single twist, but the effect is noticeably more polished and intricate. This version is perfect if you like the idea of a twisted style but want it to feel a bit more special.
Building Complexity Simply
Two thinner twists create more visual texture than one thick twist, making your hair look fuller and more intentionally styled. The extra twists also frame your face more softly because there’s more definition in the texture. This style works especially well on longer hair because you have enough length for the twists to be visible and impactful.
Executing the Double Twist
- Divide each side into two sections, so you have four sections total
- Twist the front section on the right side loosely and secure it temporarily with a bobby pin
- Twist the back section on the right side and secure it as well
- Repeat on the left side, twisting both sections back
- Bring all four twists together at the crown or slightly lower, depending on how dramatic you want the look
- Secure all four twists together with an elastic or clip
- Gently pull at each twist to loosen and texturize them
- Leave the rest of your hair down and wavy
Worth knowing: Using a lightweight texturizing spray before twisting makes the twists hold better and look fuller without weighing your hair down.
7. The Twisted and Pinned Style
Similar to the twisted half up, but instead of tying the twists together, you’re pinning them both back individually and letting the twists sit higher on your head. This gives you a more open, airy look where the focus is on the texture of the twists themselves rather than on a hair tie or clip. It’s more subtle and less structured than other half-up styles.
The Subtlety Factor
This style feels effortless and barely-there, which is perfect for people who prefer understated looks. Because there’s no elastic pulling your hair into a defined style, it just looks like you’ve simply pinned a couple of pieces out of your face. The style also feels lighter than having an actual hair tie at the back of your head.
Pinning Your Twists Perfectly
- Take a section from one side of your head at the temple
- Twist it loosely as you move back toward the crown
- Instead of securing it with an elastic, pin it at the back of your head with a bobby pin that matches your hair color
- Do the same on the other side, twisting and pinning
- You can cross the twists over each other for a more decorative look, or keep them parallel
- Make sure the pins are well-secured because there’s no elastic to hold them
- Gently pull the twists to loosen them slightly
- Leave all your hair down in waves
Pro tip: Using two bobby pins per twist (one on each side of where the twist ends) gives you way more security than a single pin, and they’ll be less noticeable if they match your hair color.
8. The Braided Twist Hybrid
This style combines a braid and a twist by doing a loose three-strand braid on one side and a simple twist on the other, then bringing both back and securing them together. It’s more textured and interesting than doing the same thing on both sides, and it feels creative without being complicated. The contrast between the braid and twist creates a dynamic look.
Why Mixing Techniques Works
When you use different techniques on each side, the style feels intentional and thoughtful rather than just functional. The braid adds more structure and detail on one side while the twist keeps the other side softer and simpler. This asymmetry is actually more interesting and flattering than perfect symmetry.
Combining Braid and Twist
- Take a section from one side and create a loose three-strand braid
- Braid from your temple area back toward the crown, keeping it relaxed and loose
- Secure the end of the braid with a bobby pin
- On the other side, create a simple twist from temple back toward the crown
- Bring both the braid and twist together at the back of your head
- Secure them together with an elastic or pin
- Gently pull and loosen both the braid and twist so they look full and undone
- Leave the rest of your hair down and wavy
Insider note: Using different techniques actually makes your styling job easier because each side does something different—you don’t have to worry about getting both sides exactly symmetrical.
9. The Wrapped Ponytail Half Up
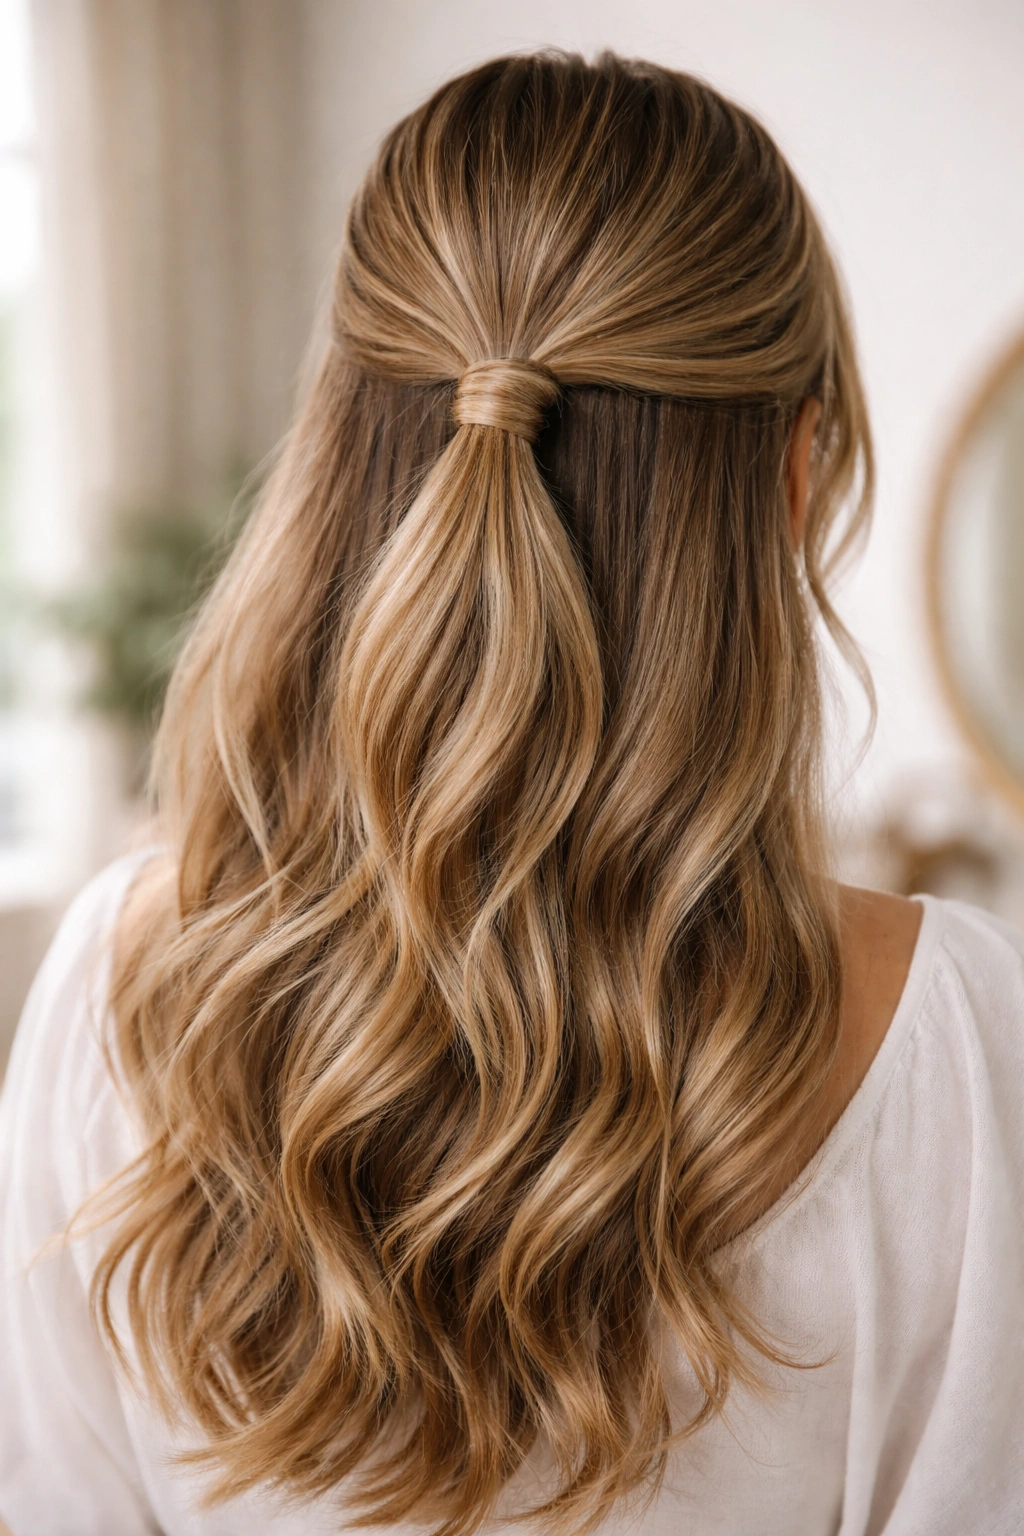
For this style, you’re pulling the top section back into a low ponytail, then wrapping a section of hair from the ponytail around the elastic to hide it, creating a more finished look. It’s the kind of detail that makes a casual style feel more polished and intentional, and it takes maybe one extra minute. The wrapped elastic creates a visual focal point that draws the eye to the back of your head.
Making Details Count
Small finishing touches like wrapping the elastic actually change how the whole style reads. It takes something that could look hastily done and makes it look carefully executed. This is a great style if you like the idea of a ponytail but want it to feel less casual and more put-together.
Creating the Wrapped Look
- Gather the top section of your hair at the crown
- Secure it with an elastic into a ponytail
- Take a thin section of hair from the ponytail itself
- Wrap that section around the base of the ponytail where the elastic is
- Pin the wrapped section underneath with a bobby pin
- The elastic should be completely hidden
- You can tease the ponytail slightly to make it look fuller
- Leave all hair below the ponytail down and flowing
Pro tip: Taking the wrapping section from the inside/back of the ponytail makes it less noticeable than taking it from the front, and the wrapped part looks more intentional.
10. The Textured Half Up with Face-Framing Pieces
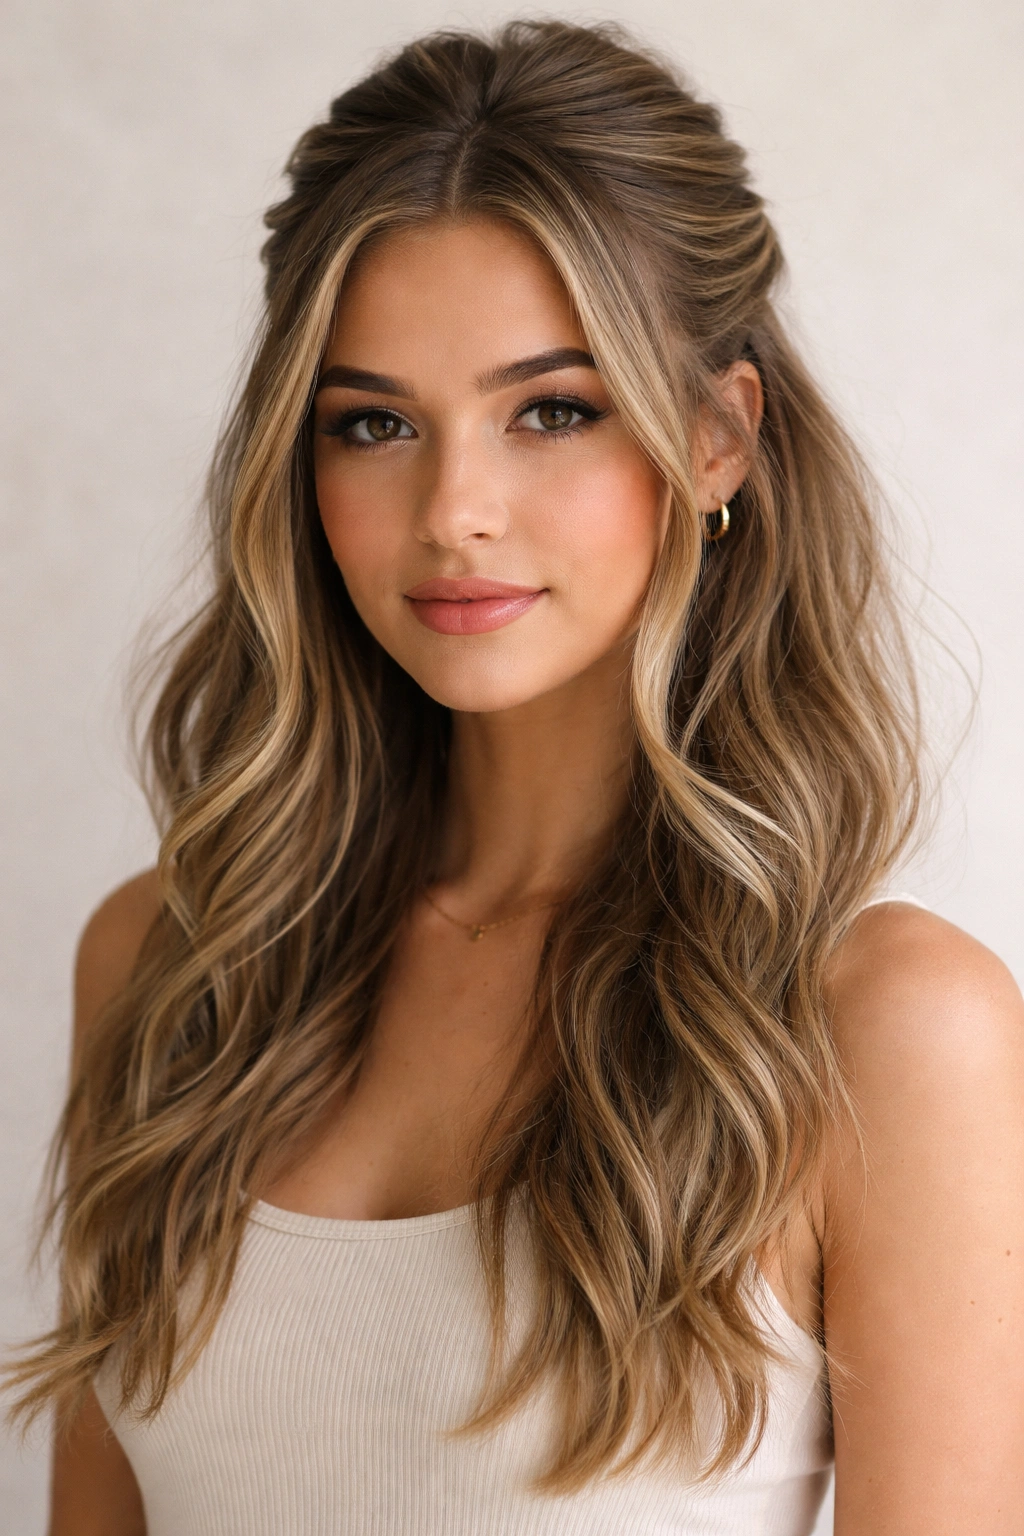
This is the style where you pull the top half back but intentionally leave pieces down in front of your ears and face. It’s a technique-forward approach where the styling is actually about what you’re leaving down rather than what you’re pulling back. The pieces around your face soften the entire look and add movement and dimension.
The Power of Strategic Pieces
Face-framing pieces automatically make any hairstyle look softer, more youthful, and less severe. They also give you something to tuck behind your ear or play with throughout the day, which adds to the casual, undone vibe. This approach works beautifully on longer hair because the length of the pieces is part of what makes the style work.
Styling with Intention
- Decide which pieces you want to leave down (usually from the front of your ears back)
- Gather everything else at the crown into a low ponytail or secure it with a clip
- Make sure your face-framing pieces are long enough to move and flow
- You can curl or wave your entire head of hair before pulling the top section back for more texture
- The face-framing pieces should contrast with the pulled-back section visually
- Leave the lower half of your hair down completely
- Tease at the crown slightly for volume before securing
Worth knowing: Using a texturizing spray or salt spray on all your hair before styling makes pieces move better and the whole look feel more textured and intentional.
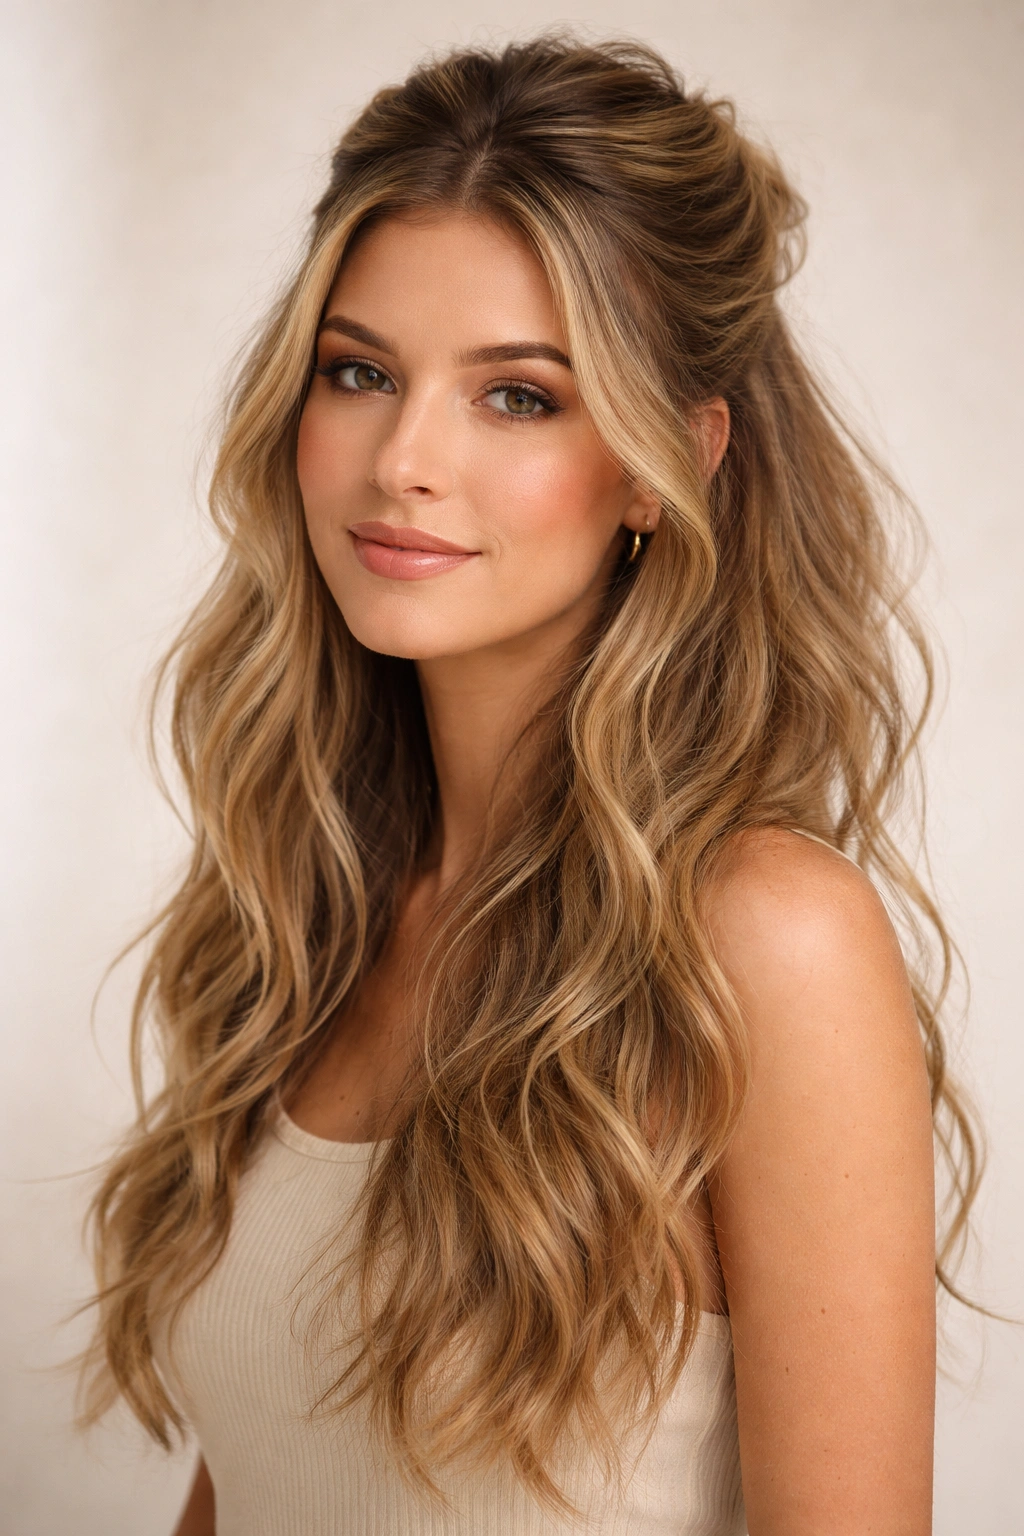
11. The Curled Half Up with Volume
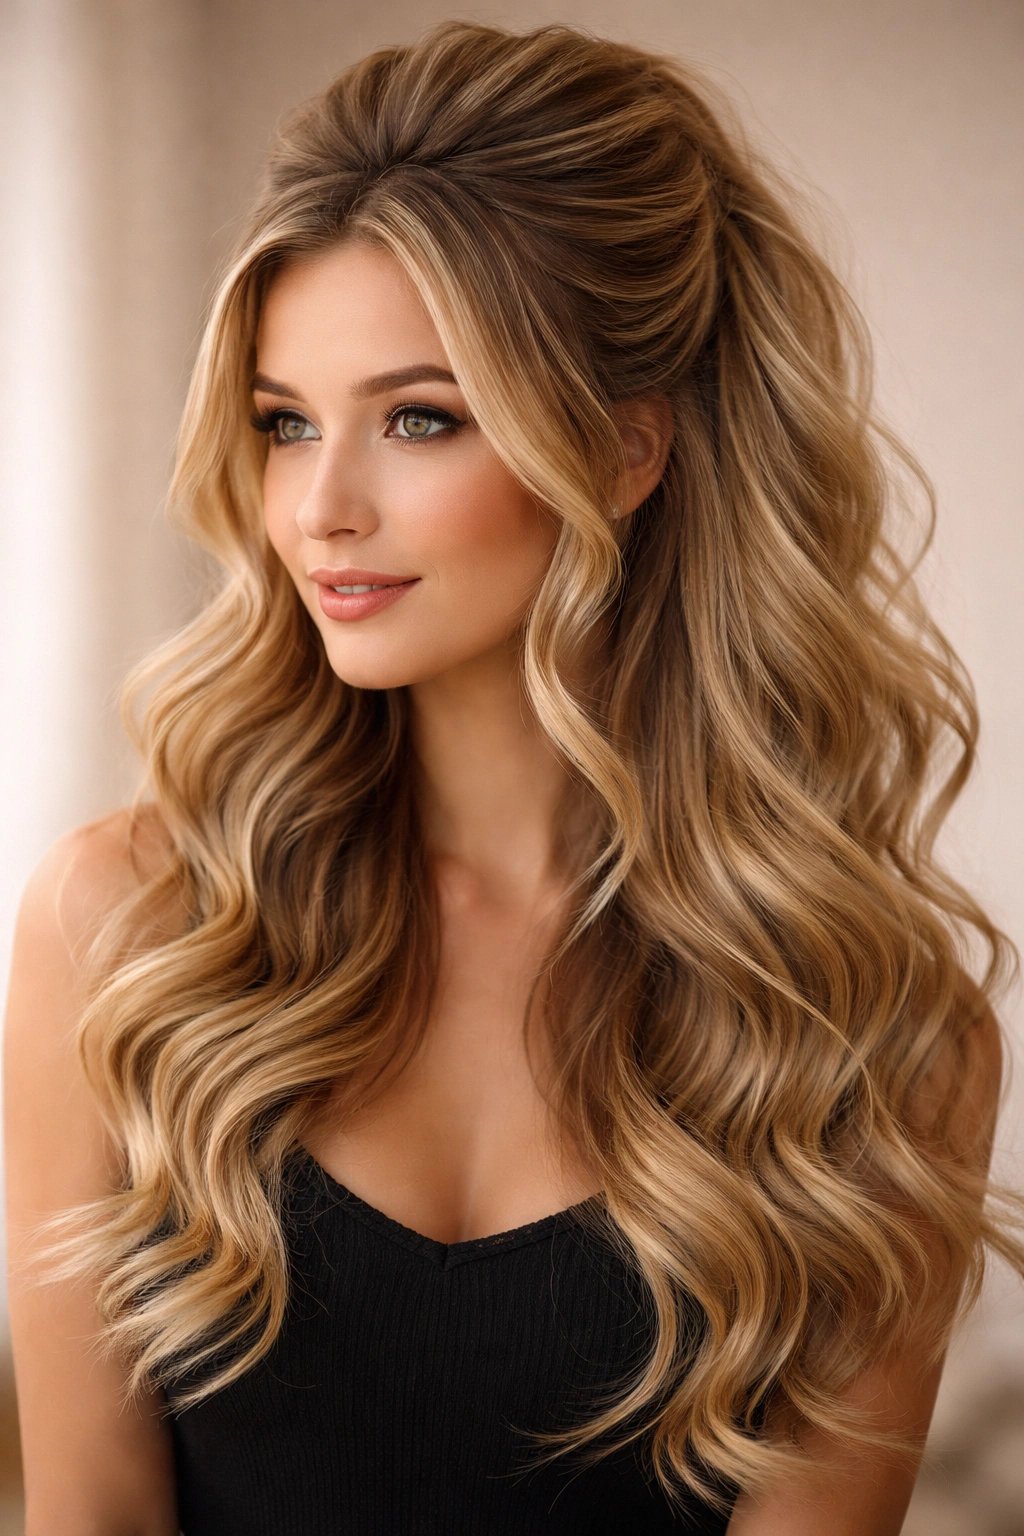
This style uses actual volume and curls throughout your hair, with the top section pulled back into a ponytail or clip while the curls flow down below. It’s more glamorous than casual, but it still reads as half-up-half-down because of the styling placement. The curls make everything feel more special and polished, even when you’re just wearing casual clothes.
When Curls Elevate Everything
Curled hair instantly makes any hairstyle look more intentional and put-together. The curls in the lower portion of your hair create movement and dimension that reads as special effort, while the pulled-back top keeps you looking polished rather than overdone. This style is perfect for date nights or when you want to feel a bit more dressed up while still keeping things casual.
Creating Volume with Curls
- Curl your entire head of hair with a curling iron or heat tool, creating loose waves
- Let the curls cool completely—this sets them and makes them last longer
- Once cool, run your fingers through the curls gently to break them up slightly
- Gather the top section at the crown and secure it into a ponytail
- Tease the ponytail slightly at the crown to create volume
- Leave the curled lower portion completely down and flowing
- Separate and arrange the curls with your fingers so they look full and intentional
Pro tip: Using a curl-setting spray or finishing spray before pulling the section back keeps the curls from falling flat and makes them hold all day.
12. The Sleek With Texture Contrast
This style is all about contrast: the top section is smooth and sleek and pulled back tight, while the bottom half is wavy, curly, or textured. The sharpness of the sleek top against the texture below creates visual interest and makes the whole look more dynamic. It’s perfect if you want half your hair looking polished and the other half looking effortless.
Using Contrast for Impact
Playing texture against sleekness is a professional styling technique that instantly elevates your look. The sleek section says you put effort in, while the textured section says you’ve got natural texture and movement. Together, they create a balanced, intentional appearance that reads as both polished and casual.
Combining Sleek and Textured
- Apply smoothing serum or gel to the top section of your hair
- Use a flat iron or paddle brush to make that section completely smooth
- Gather the smooth top section at the crown into a tight ponytail
- Use an elastic that matches your hair color or a metallic clip
- Wave, curl, or texture the bottom portion of your hair with heat tools
- Let the texture cool and set before finalizing the style
- You can use texturizing spray on the bottom half for more defined texture
- The contrast between smooth top and textured bottom should be obvious
Insider note: This style photographs beautifully because the contrast creates visual depth and makes the style look more editorial and intentional.
13. The Clip Half Up Style
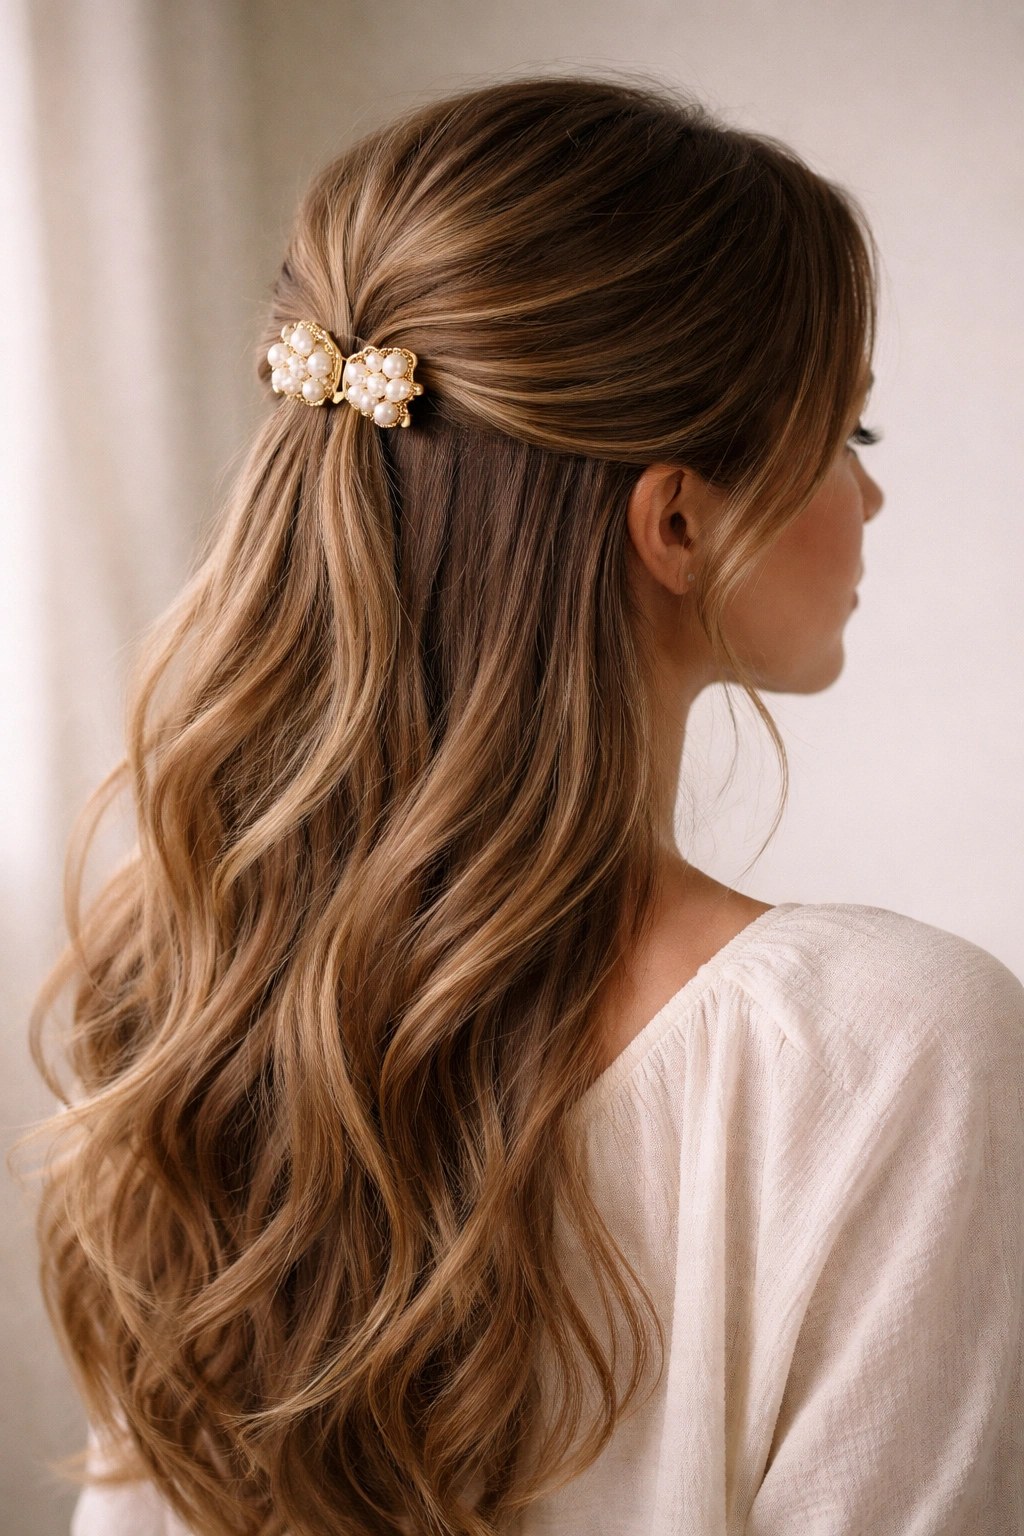
Instead of using an elastic or pins to secure the top section, you’re using a pretty clip or barrette. This changes the whole vibe of the style because the clip becomes a visible accessory rather than just a functional fastener. It adds a design element and gives you more flexibility in styling because you can easily remove the clip and restyle if you want.
The Accessory Approach
Using a clip instead of an elastic turns your half-up style into an accessory moment. You can choose a clip that complements your outfit or adds a pop of color or metallic accent. Clips also feel slightly less formal than other securing methods, which is perfect for truly casual styling. They also give you flexibility because you can adjust the height or style of the section easily.
Styling With a Clip
- Gather the top half of your hair at the crown or slightly higher
- Instead of using an elastic, secure it with a clip that has good grip
- The clip should be hidden or mostly hidden under the gathered hair
- You can use a decorative clip if you want the clip to be visible and part of the style
- Leave the lower half of your hair down and textured
- Tease at the crown slightly before clipping to add volume
- Make sure the clip is secure enough that it won’t slip throughout the day
Pro tip: Metallic clips (gold, silver, rose gold) work with almost any hair color and outfit and feel more intentional than plain clips.
14. The Braided Sections Half Up
For this style, you’re creating two small braids (one on each side) and pulling those braids back together while leaving everything else down. The braids are thin and delicate, creating detail and interest without the styling feeling heavy or overdone. It’s a more refined version of braided half-ups because the braids are smaller and the overall effect is more subtle.
Subtle Braiding Details
Thin braids add visual interest without making your hair look like you’re trying too hard. They work beautifully on all hair textures and they hold texture really well. Thin braids also frame your face nicely and create definition without the bulk of thicker braids.
Creating Delicate Braids
- Start on one side near your temple with a small section of hair
- Create a three-strand braid, keeping it thin and relaxed
- Braid back toward the crown and secure the end with a tiny elastic
- Repeat on the other side, creating a matching braided section
- Bring both braided sections together at the back of your head
- Secure them with an elastic or pin
- Gently loosen the braids by pulling at the sides to make them look fuller
- Leave everything else down and wavy
Worth knowing: Thinner sections of hair actually braid more easily than thick sections, and thin braids look more delicate and intentional than chunky ones.
15. The Half Bun with Strands
This is the style where you gather the top section into a half bun, but you intentionally leave a couple of longer strands out to fall alongside your face. It’s softer and more romantic than a full half bun, and the loose strands add movement and a less polished vibe. It’s like the style is letting you have some structure while also keeping things relaxed.
Strategic Looseness
Leaving strands out of a bun softens the whole effect and makes it feel less formal. The strands also frame your face beautifully and add softness around your features. This approach works especially well on longer hair because the strands have somewhere to go and something to do visually.
Building Your Half Bun with Strands
- Before you start, decide which strands you want to leave out—usually from the temples back
- Gather the top section into a low ponytail, being careful not to pull the strands you’re leaving out
- Twist or braid the ponytail loosely and wrap it around the base to form a bun
- Secure the bun with bobby pins
- Pull and loosen the bun to make it look undone and full
- Make sure your face-framing strands are visible and can move freely
- Leave the rest of your hair down
Pro tip: Using a small elastic that matches your hair color makes the ponytail less visible and focuses attention on the bun shape and the strands framing your face.
16. The Romantic Side Part Half Up
This style uses a deep side part with the larger section from the side part being pulled back into the half up, while the smaller section stays down to create asymmetry. The side part itself becomes part of the style, adding sophistication and showing off one side of your face. The asymmetry makes it feel less structured and more romantic than a centered half-up.
Side Parts Mean Movement
A deep side part automatically creates movement and dimension because your hair is traveling to one side rather than staying centered. It also lets you show off one side of your face and one side of your neck, which adds visual interest. This approach works beautifully on longer hair because the side part creates a clear directional flow.
Creating the Side Part Half Up
- Create a deep side part—deep enough that one side has significantly more hair than the other
- From the larger side, gather the top section at the crown
- Pull it back and secure it with an elastic or pin
- The smaller side from your side part stays down and frames one side of your face
- The rest of your hair below the crown stays down on both sides
- You can wave or curl your entire head before styling for more texture
- The side part should be obvious and intentional
Insider note: Using a fine-tooth comb to create a sharp side part and smooth the hair on both sides makes the whole style look more polished and intentional.
17. The Wrapped Twist Half Up

This is a more detailed version of the simple twisted half up where you’re wrapping a section of hair around the base of where the twists connect, similar to the wrapped ponytail technique. The wrapping adds a finished detail that makes the style look more carefully executed. It’s a great option if you like twists but want a bit more polish or visual interest at the back of your head.
Details That Matter
Wrapping the base of twisted sections creates a visual focal point and makes the styling feel more intentional. It’s a technique borrowed from more formal styling but it works beautifully on casual styles too. The wrapping also hides any elastics or pins, making the style look cleaner.
Executing the Wrapped Twist
- Create two twists from each side of your head, traveling back toward the crown
- Bring both twists together at the back of your head
- Secure the twists together temporarily with a bobby pin
- Take a small section of hair from one of the twists
- Wrap that section around the base where the two twists meet
- Pin the wrapped section underneath to hide the pin
- Loosen and texturize both twists by gently pulling at them
- Leave all hair below completely down
Pro tip: Wrapping one of the twists themselves (rather than a separate section of hair) looks more cohesive and means you’re not using extra hair to create the wrap.
18. The Textured Layers Half Up
This final style embraces the natural texture and layers in longer hair by pulling the top section back while letting all the longer layers flow down. You’re not trying to smooth or straighten anything—you’re working with your hair’s natural texture and movement. This style is perfect if you have naturally wavy or textured hair or if you’ve created texture with heat tools before styling.
Working With What You Have
This approach to styling celebrates texture rather than fighting it. If your hair has natural movement or you’ve curled it, all of that texture becomes part of the style’s beauty. Longer layers automatically create dimension and movement, especially when the top section is pulled back to show off the layers.
Styling Textured Layers
- Add texture to your entire head with curling tools or heat if your hair is straight
- Let any heat-styled texture cool and set completely
- Gather the top section at the crown—this section should include your shorter layers
- Secure it with an elastic, clip, or pin
- Leave all the longer layers down and flowing
- Don’t brush or smooth the texture—let it be visible and undone
- Arrange layers with your fingers so the texture is obvious and intentional
- You can use texturizing spray to enhance any natural wave or curl
Worth knowing: The messier and more textured this style looks, the more intentional and polished it actually appears. Don’t try to make everything perfect or smooth.
Final Thoughts
Half up half down styles are genuinely some of the most wearable, practical hairstyles for long hair because they give you options. On days when you want everything polished and put-together, you can go sleek and structured. On days when you want to feel relaxed and undone, you can embrace texture and looseness. The styles work whether you’ve got five minutes to get ready or thirty, and they genuinely look better with real-world texture than with perfectly smooth, perfect hair.
The most important thing about these styles is picking one that matches your personality and your hair type. If you’ve got naturally straight hair, some of these styles might need heat styling to hold, while if you’ve got waves or curls, you might find that the styles hold better with minimal effort. The styles that involve texture like twists and braids tend to be more forgiving than the sleek styles, but the sleek styles always look polished.
Start with whatever style resonates with you most, and then experiment from there. You’ll likely find that once you master the basic technique of one style, creating variations is super straightforward. Half your hair is already down, so even if something doesn’t go perfectly, the result usually still looks intentional and cute. That’s the magic of half up half down—it’s genuinely hard to mess up, and most of the time, a little imperfection is actually what makes the style look best.