Medium hair is the sweet spot for half up half down styles — long enough to create volume and texture, yet short enough to avoid looking weighed down or overly complicated. This versatile length gives you the freedom to play with everything from soft romantic waves to modern textured looks, all while keeping your hair off your face without requiring a full updo commitment.
The beauty of casual half up half down hairstyles is that they work for virtually any occasion. Whether you’re heading to work, meeting friends for coffee, or just having a low-key day at home, these styles strike the perfect balance between polished and effortless. They’re the kind of hairstyles that look like you didn’t try too hard, even though you absolutely did — and that’s exactly what makes them so appealing.
Medium-length hair naturally lends itself to these styles because the proportions work in your favor. The half-up section has enough length to hold interesting texture and dimension without pulling everything backward, while the loose lower half still has enough volume to create movement and visual interest. You’ll find that many of these styles come together in just five to ten minutes, making them practical for busy mornings while still looking intentional and put-together.
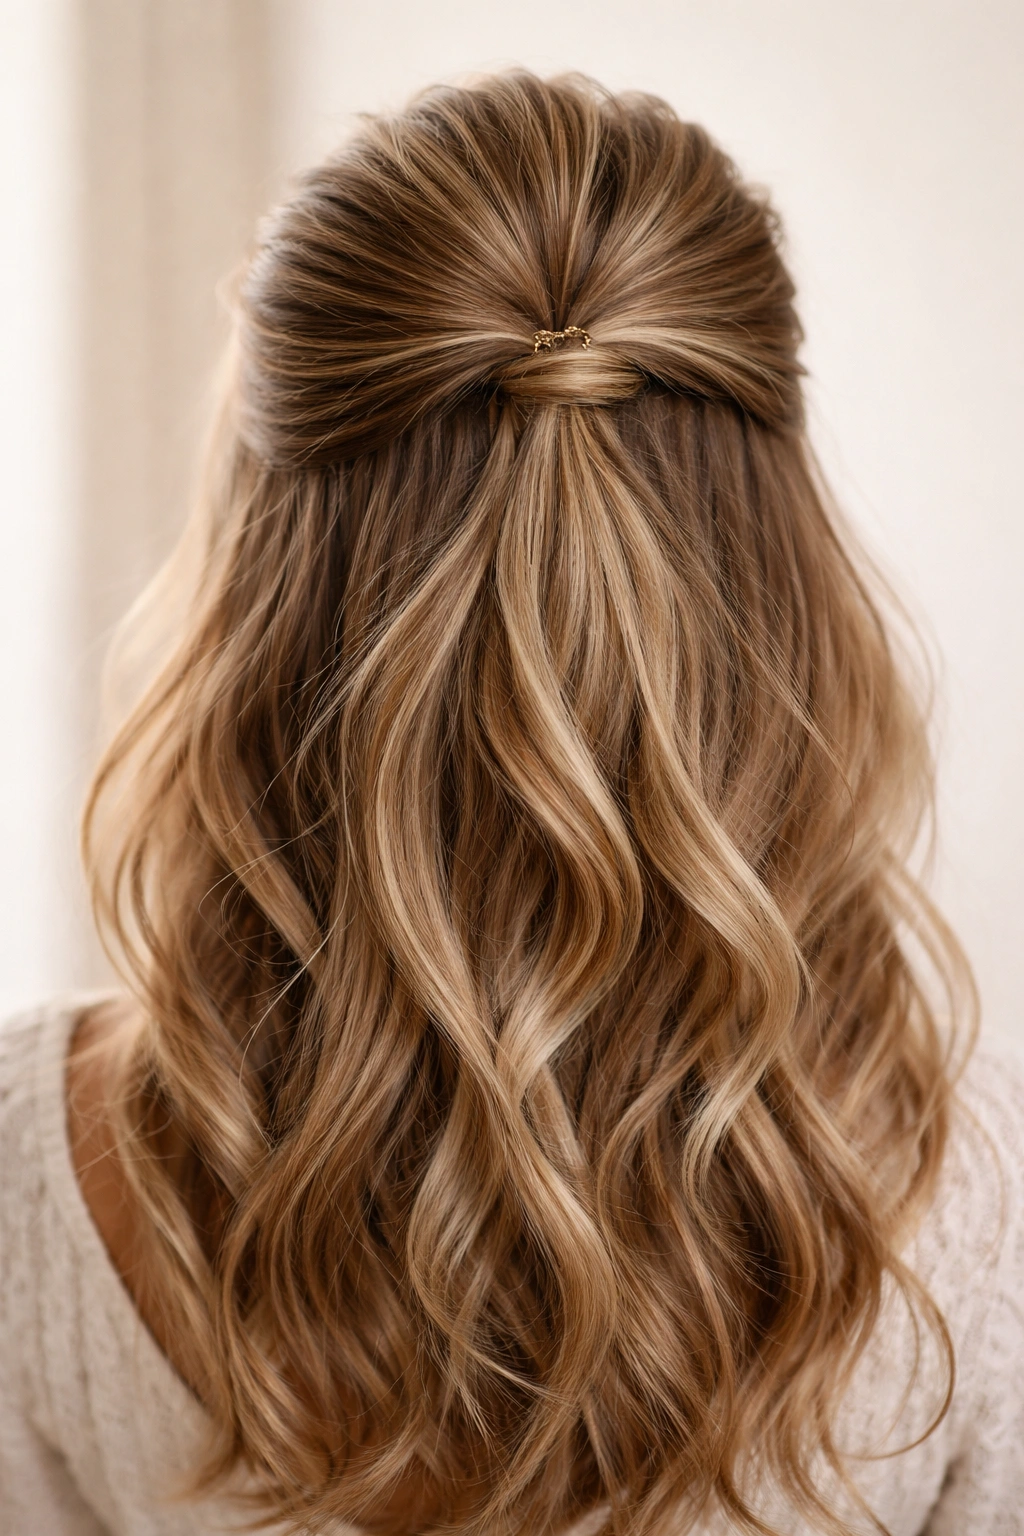
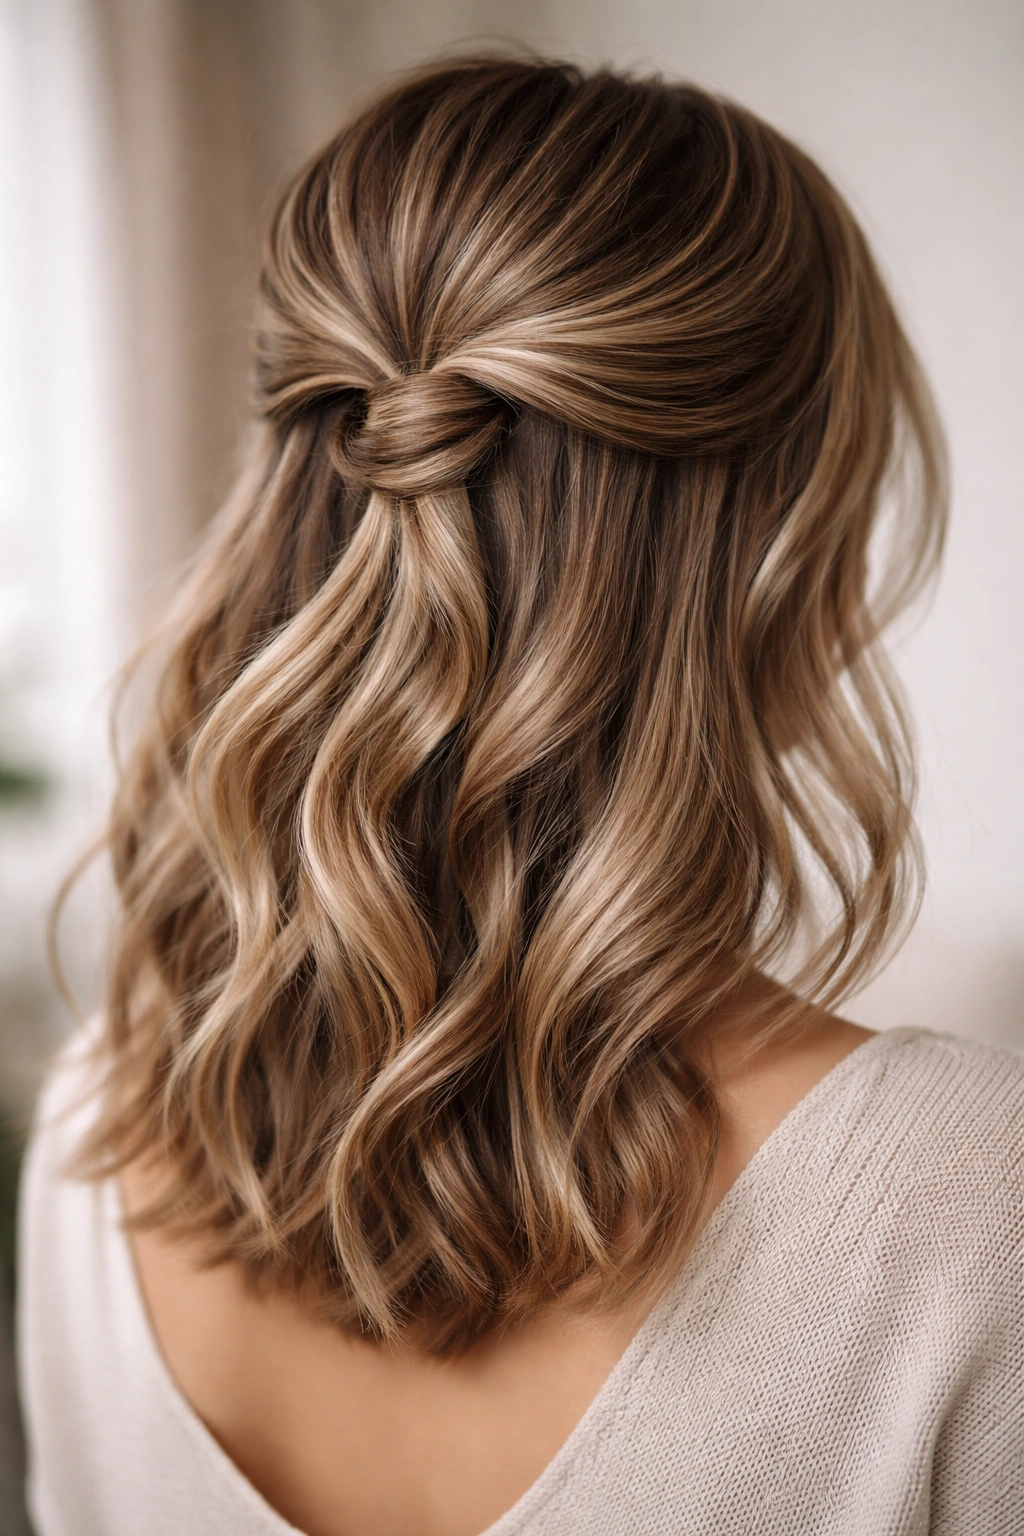
1. The Classic Twisted Half Ponytail
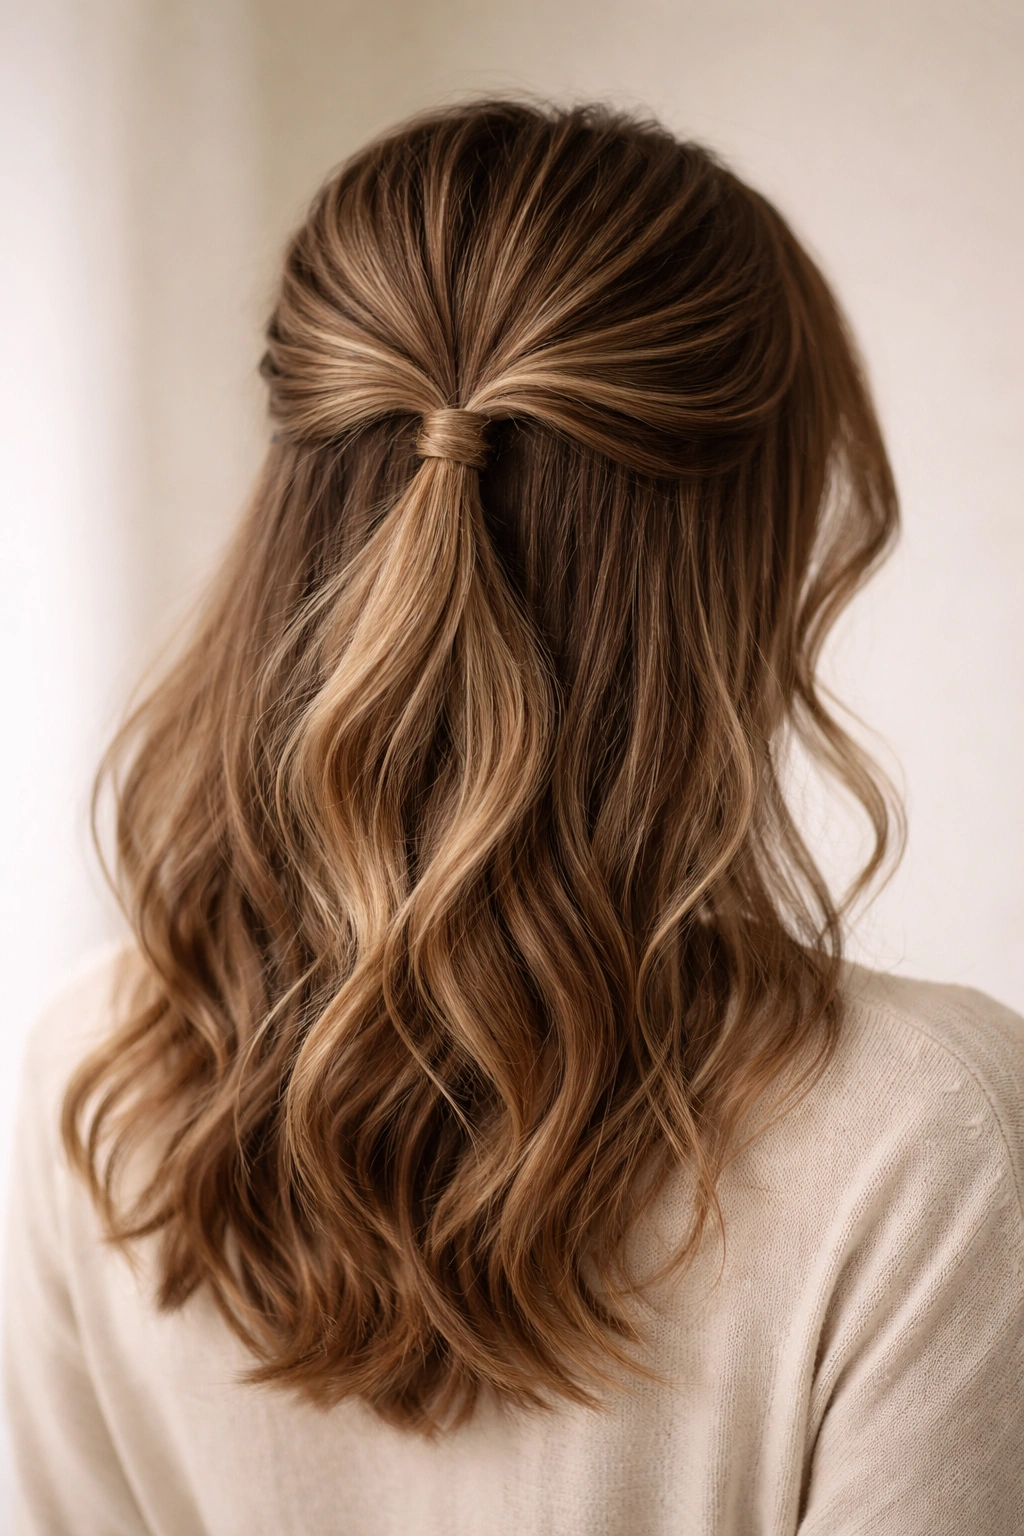
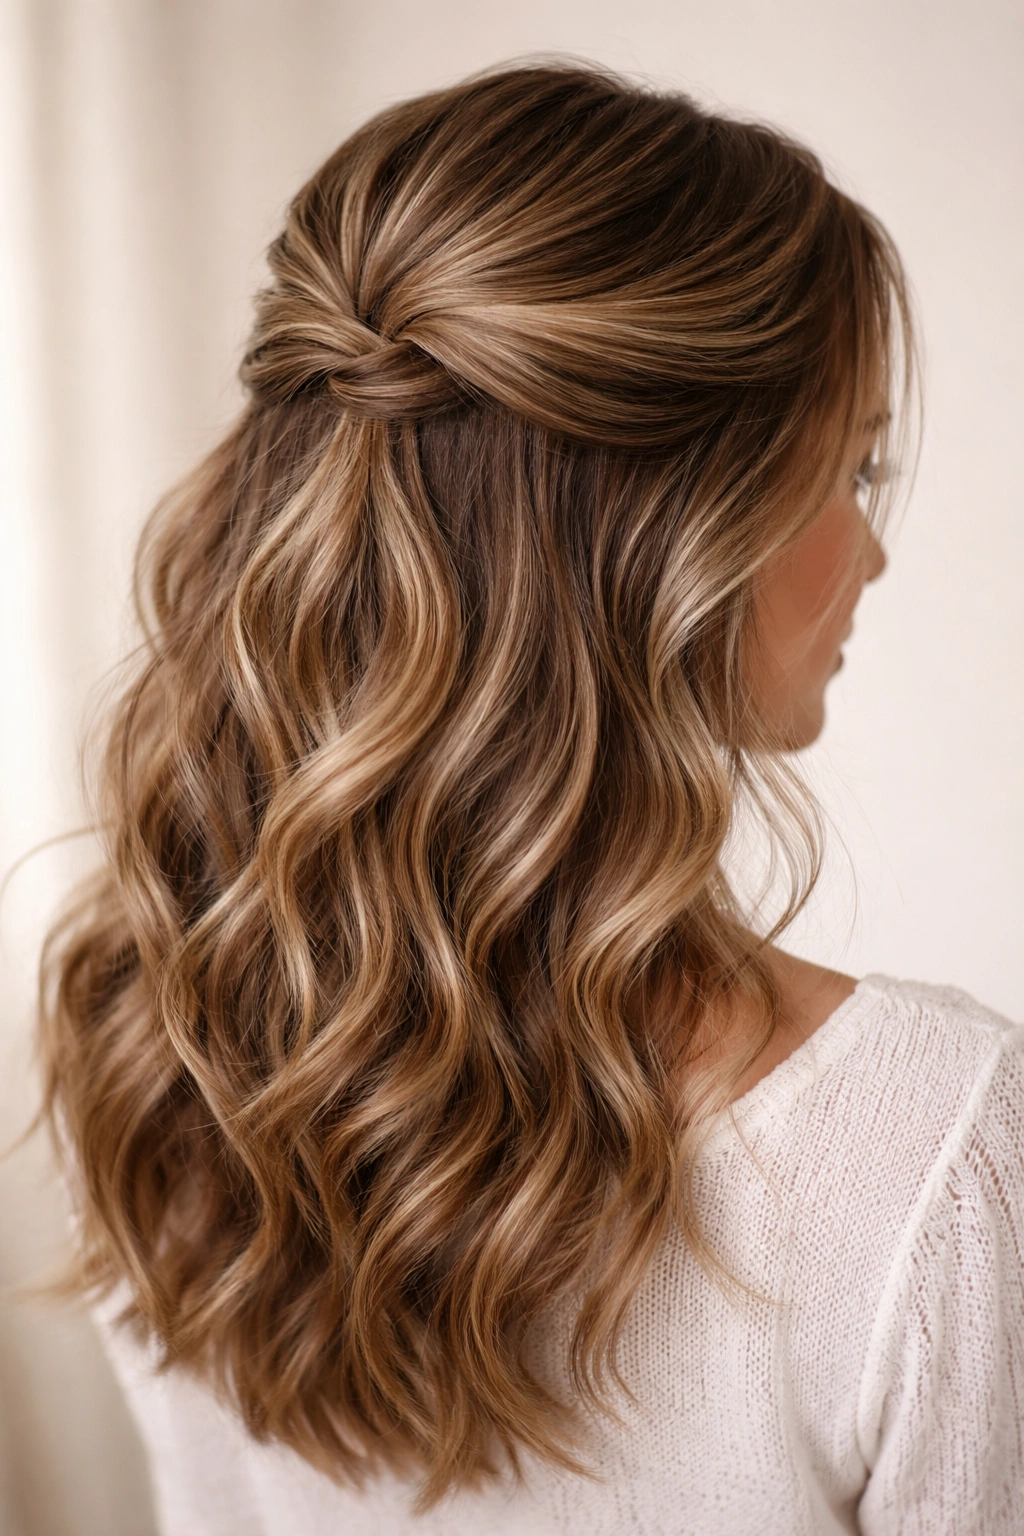
This is the foundation style that everyone should master because it’s genuinely foolproof and works on any hair type, texture, or thickness level. Start by taking a horizontal section of hair from one temple area across the back of the head to the opposite temple, then twist that section gently as you bring it to the crown. The twist doesn’t need to be tight or perfect — in fact, a loose, relaxed twist looks far more intentional and modern than something overly polished.
How to Create This Style
Brush through the top section of your hair to remove any knots, then begin at one temple area. Take a section roughly two inches wide and start twisting it loosely as you move backward toward the crown. Keep the tension gentle so your hair stays a bit textured and undone-looking. As you reach the crown, gather the twist and any additional hair from the sides and secure everything with a small elastic. You can leave the elastic visible for a casual vibe or wrap a small section of hair around it to hide the elastic completely.
Why This Style Is So Versatile
- Works beautifully on straight, wavy, or curly hair without any special preparation
- Takes about three minutes once you’ve practiced it once or twice
- The loose twist naturally hides flyaways and textured sections
- You can tighten or loosen the twist depending on your mood and the occasion
- Pairs perfectly with both messy waves and sleek straight hair
Pro tip: If your hair feels too slippery to hold a twist, lightly mist the section with dry shampoo or texturizing spray before twisting. This gives the hair grip without making it feel sticky or product-heavy.
2. The Double-Twisted Crown Style
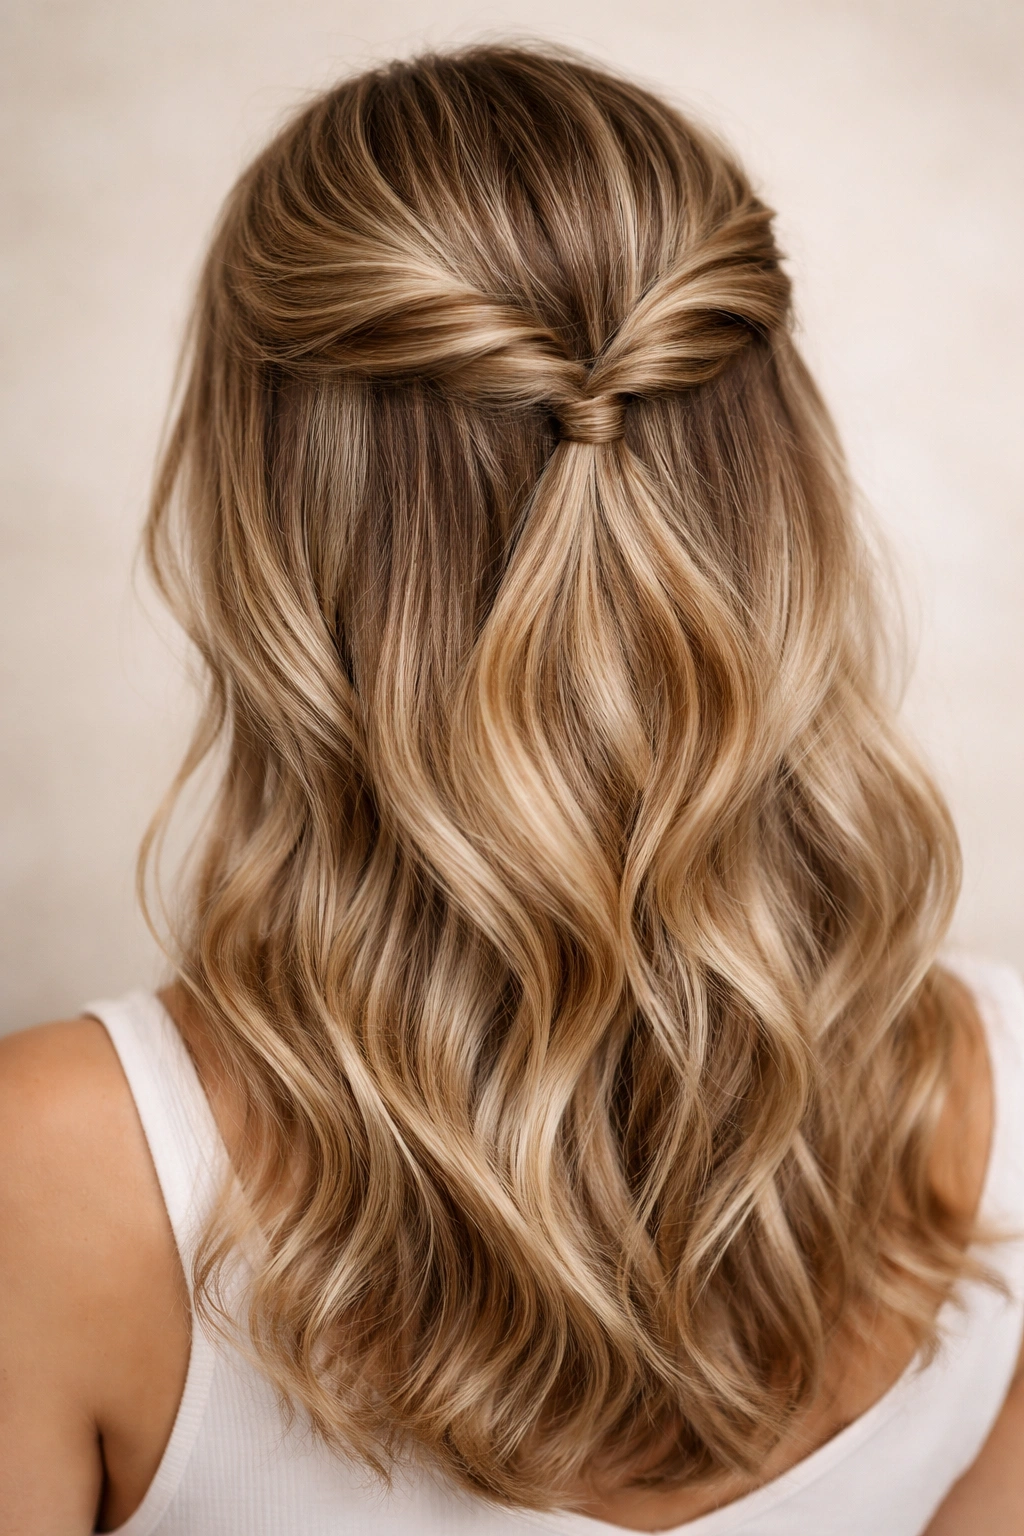
This style takes the twisted ponytail concept and doubles it, creating a richer, fuller look at the crown that’s surprisingly easy to execute. The double twist creates the illusion of more hair volume and looks particularly striking on medium-length hair because both twists are visible and contribute to the overall aesthetic. This is the style to choose when you want something that looks more intentional and styled than your everyday go-to.
How to Create This Style
Section off the top portion of your hair as you normally would for a half-up style, but this time divide that section into two equal parts down the middle. Twist one section from the left side and one from the right side, bringing both twists toward the center crown. The two twists should meet at roughly the same point, then you’ll secure both together with a single elastic. For a softer look, loosen both twists after securing them by gently pulling small sections outward to create texture.
The Texture and Volume Factor
- The two twists visually double the perceived thickness at the crown
- Creates natural dimension and movement in the style
- Looks especially polished when you loosen the twists afterward
- Works beautifully with both flat-ironed and textured hair
- The style holds well throughout the day without needing midday touch-ups
3. The Soft Braided Half-Up
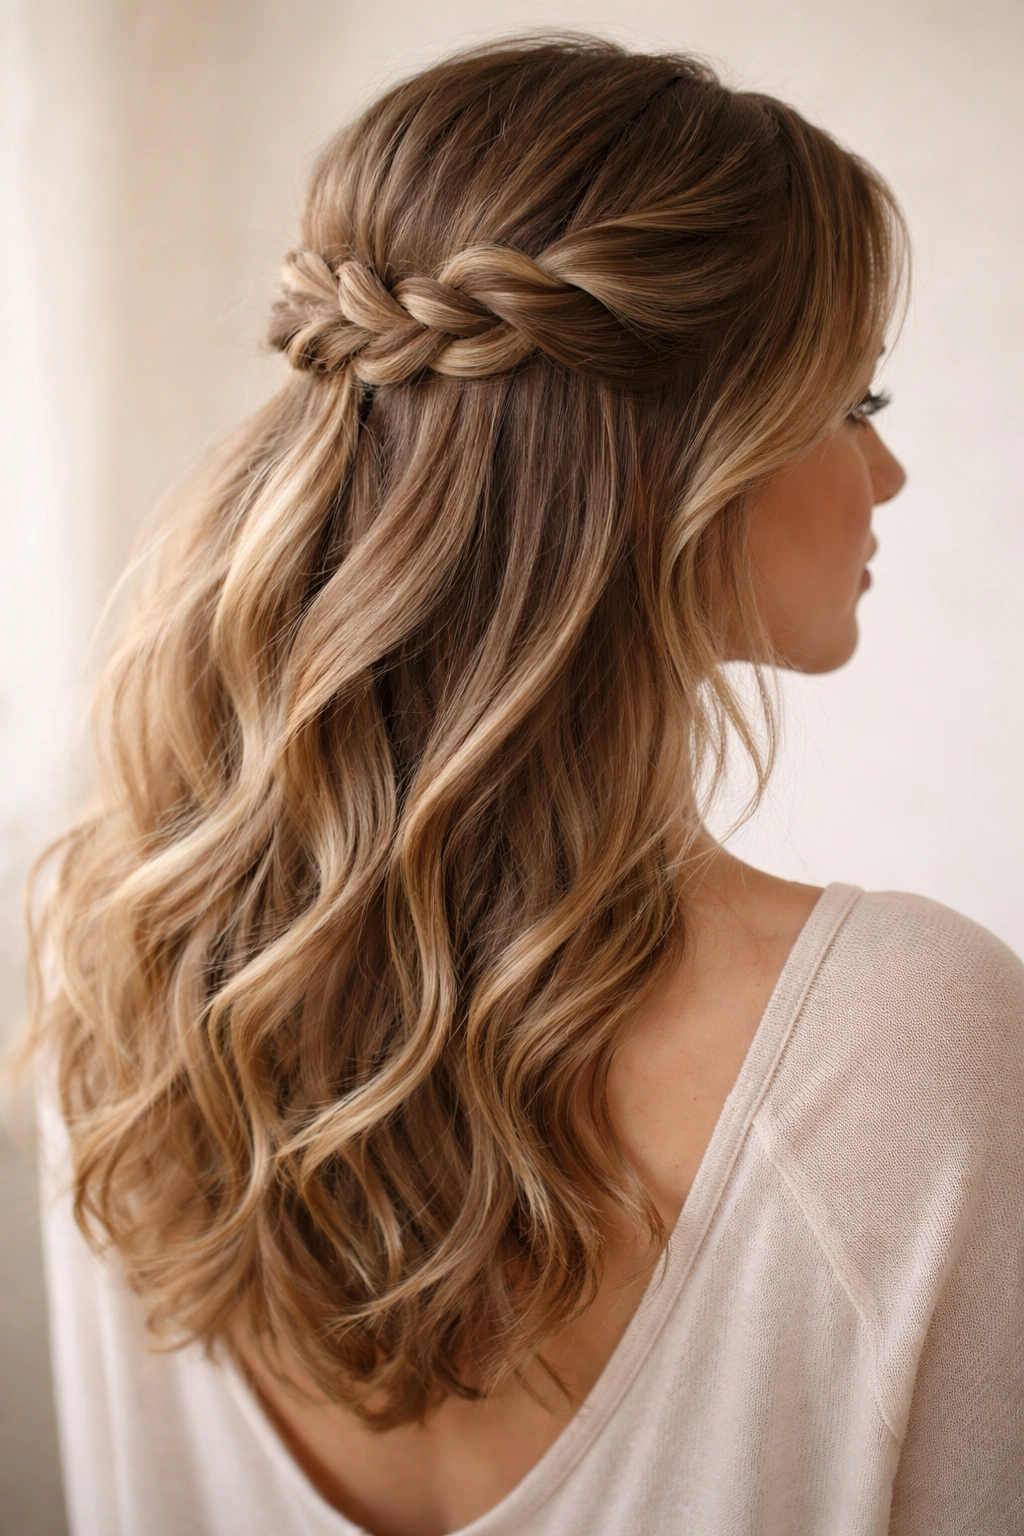
Braids instantly elevate a half-up style from casual to intentional without requiring advanced braiding skills. A loose, relaxed braid is far more modern than a tight, structured one, and it works with virtually any hair texture. The key is using a simple three-strand braid and then deliberately loosening it afterward to create that effortless, undone aesthetic that makes the style feel wearable for everyday situations.
How to Create This Style
Take your half-up section of hair and divide it into three strands. Begin braiding loosely, keeping the tension slack throughout the entire process — you’re aiming for a braid that looks like it might fall apart any second, which is exactly the look you want. Once you reach the crown, secure the braid with a small elastic. Now comes the important part: gently pull the sides of the braid outward to create texture and width. Each little pull makes the braid look fuller and more romantic.
Perfect for These Situations
- Low-key work days when you want something more interesting than a plain ponytail
- Casual weekend plans where you want to look effortlessly pretty
- Days when your hair isn’t freshly washed but still needs to look intentional
- Pairing with sundresses, casual shirts, or athleisure looks
- Creating a softer, more romantic vibe than a simple twist or ponytail
4. The Ribbon-Woven Half-Up
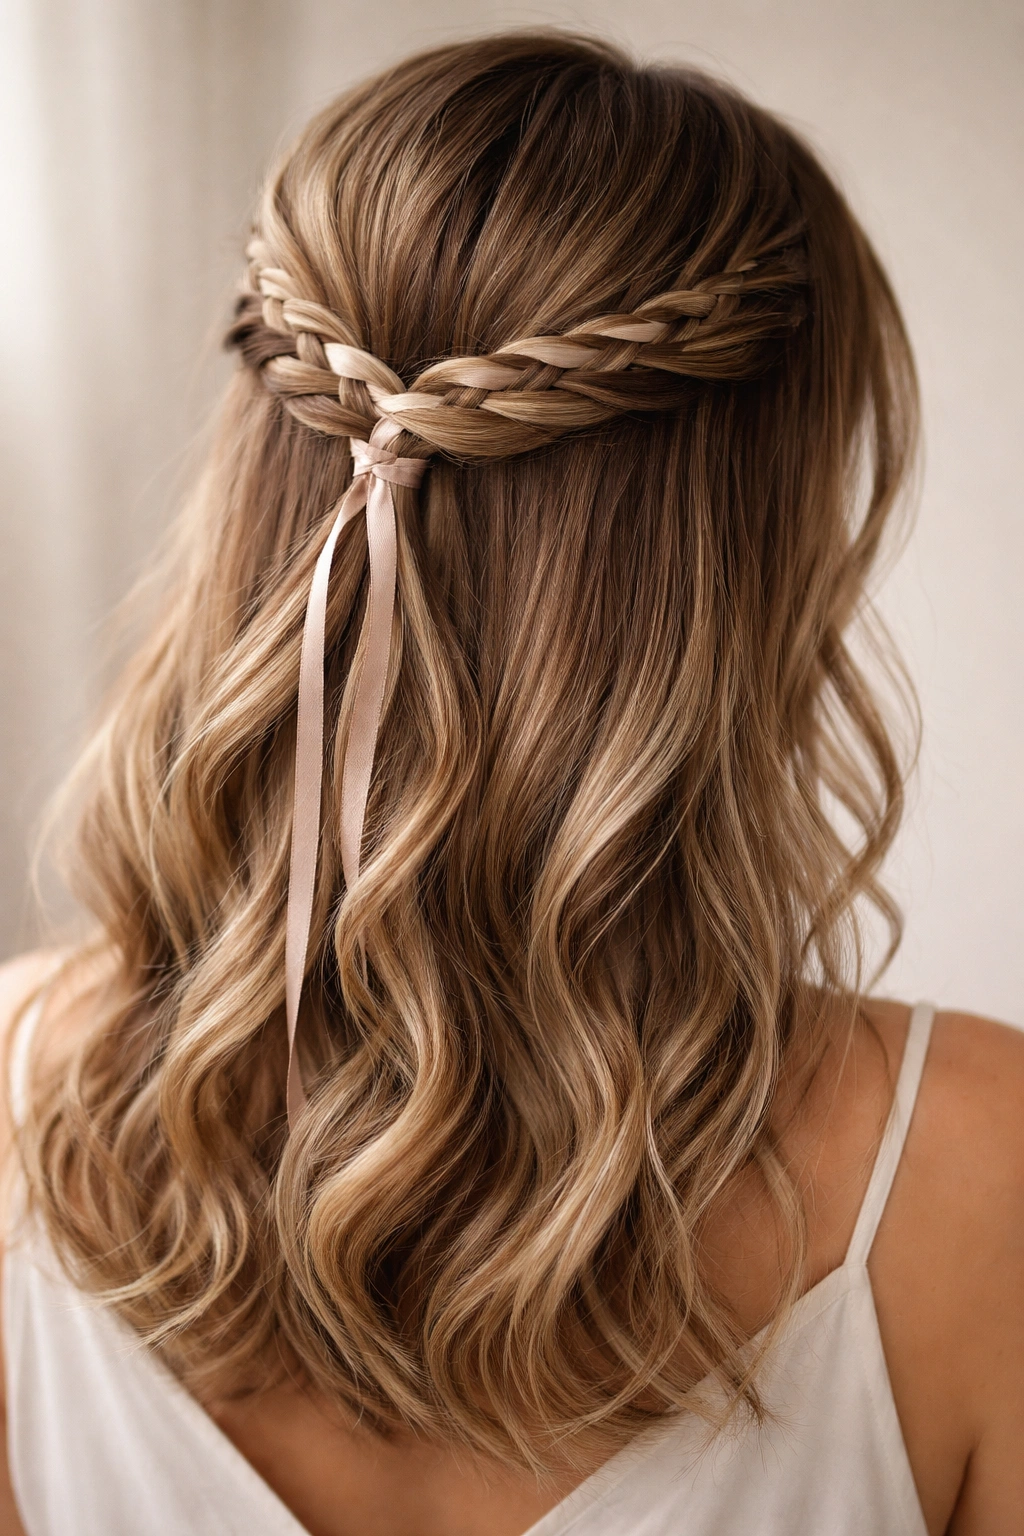
Adding a thin ribbon or fabric strip to your half-up style instantly transforms it from basic to distinctive. The ribbon can be woven through a braid, wrapped around a twist, or simply tied through the elastic at the crown. This is a surprisingly impactful way to customize your look without requiring any additional styling skills — the ribbon does most of the visual heavy lifting for you.
How to Create This Style
Style your hair into a classic half-up twist or braid as you normally would. Once secured, thread a thin ribbon through the strands of your braid or wind it around your twist, letting it weave in and out naturally. If you prefer a simpler approach, just tie the ribbon directly through the elastic where your half-up is secured, letting the ribbon tails flow down alongside your loose hair. The ribbon should be thin enough that it looks delicate rather than costume-like.
Ribbon Selection Guide
- Satin ribbons for a romantic, polished look
- Plaid or patterned ribbons for a playful, casual vibe
- Velvet ribbons if you want something with texture and substance
- Metallic ribbons for subtle shimmer without glitter
- Colors that complement your outfit or hair tone for a cohesive look
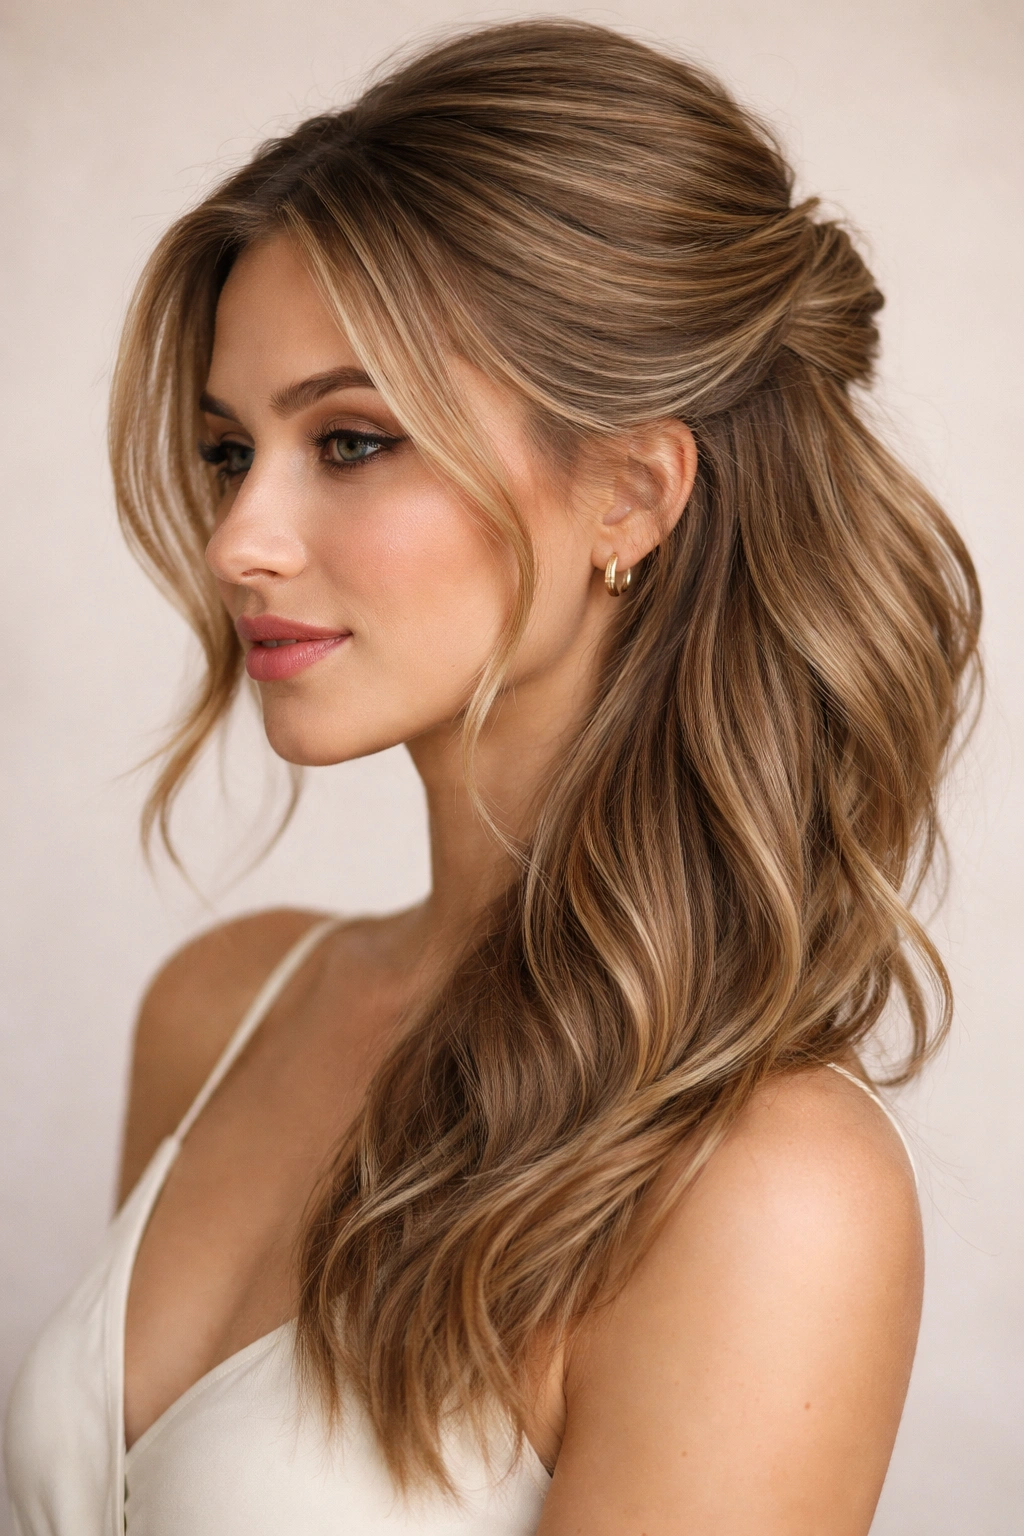
5. The Textured Wave Half-Up
Before securing your half-up, spend two minutes with a curling iron or straightener to create loose, undulating waves throughout your hair. The waves create natural texture that makes even a simple half-up style look far more interesting and intentional. This approach works particularly well if your hair is naturally straight or slightly wavy but lacks volume, as the waves add dimension that your hair might not have on its own.
How to Create This Style
Divide your hair into sections roughly two inches wide. Using a one-and-a-quarter-inch curling iron, curl each section away from your face, holding the iron for about five seconds before releasing. Don’t worry about making perfectly shaped curls — you’re going for waves, not ringlets. Once you’ve waved the entire head, gently run your fingers through the waves to soften and separate them. Then secure your half-up section, letting all those waves frame your face below.
Why Waves Change Everything
- Waves catch light and create the illusion of thicker hair
- They soften the overall look, making any hairstyle feel more romantic
- Waves hold all day, so your half-up looks fresh from morning to evening
- They’re particularly flattering with length framing the face and jawline
- Waves work with virtually any face shape or hair type
6. The Sleek-Top Casual-Bottom
This style plays with contrast: the top section is sleek and smooth, almost sculptural, while the bottom remains textured and relaxed. This creates visual interest through the juxtaposition of polished and undone. It’s a smart approach if you want your style to look intentionally styled rather than accidentally casual — the smoothness at the top reads as deliberate, while the waves below feel effortlessly pretty.
How to Create This Style
Brush and smooth the top section of your hair with a fine-tooth comb and some lightweight smoothing serum or gel. Create a ultra-clean half-up, using a bit of product to keep stray hairs in place around your face and crown. Once the top is polished, switch gears entirely for the bottom half: apply a texturizing spray or cream to the lower section and either create waves with your curling iron or simply tousle with your fingers for texture. The contrast between the two sections is what makes this style striking.
When to Wear This Style
- Professional settings where you want to look pulled-together but not overdone
- Occasions where your outfit is casual but you want a style that reads as intentional
- Days when you have time to style your hair but want it to feel effortless
- Pairing with minimalist outfits that let your hair become a focal point
- When you want a modern, fashion-forward hairstyle that still feels wearable
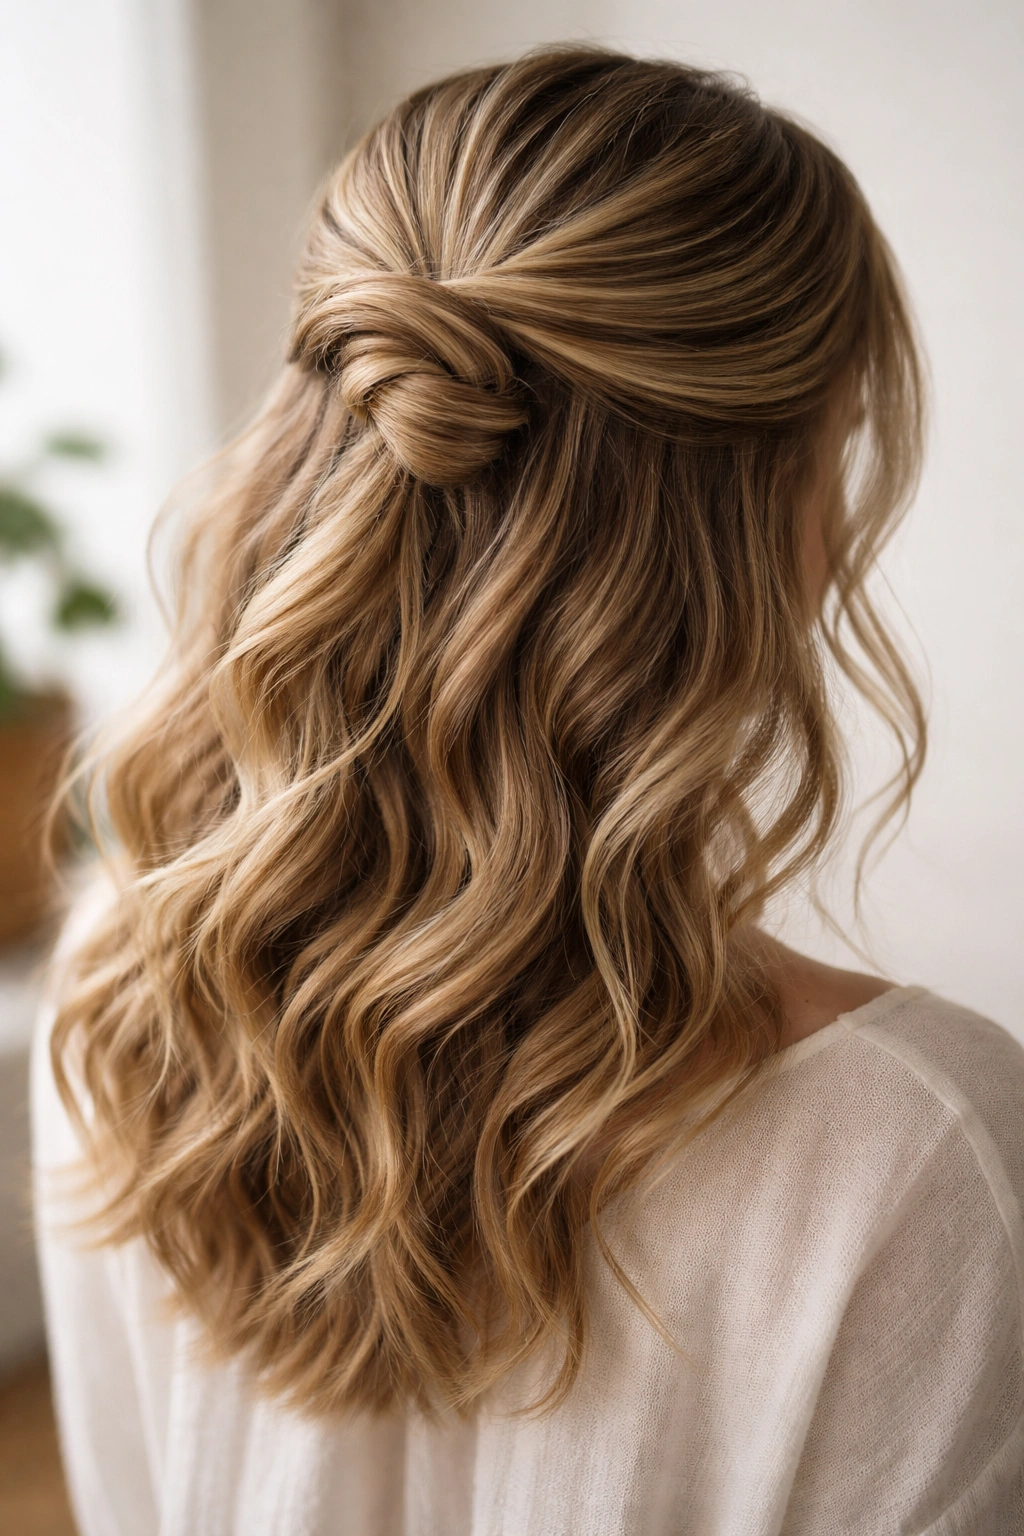
7. The Messy Bun Half-Up
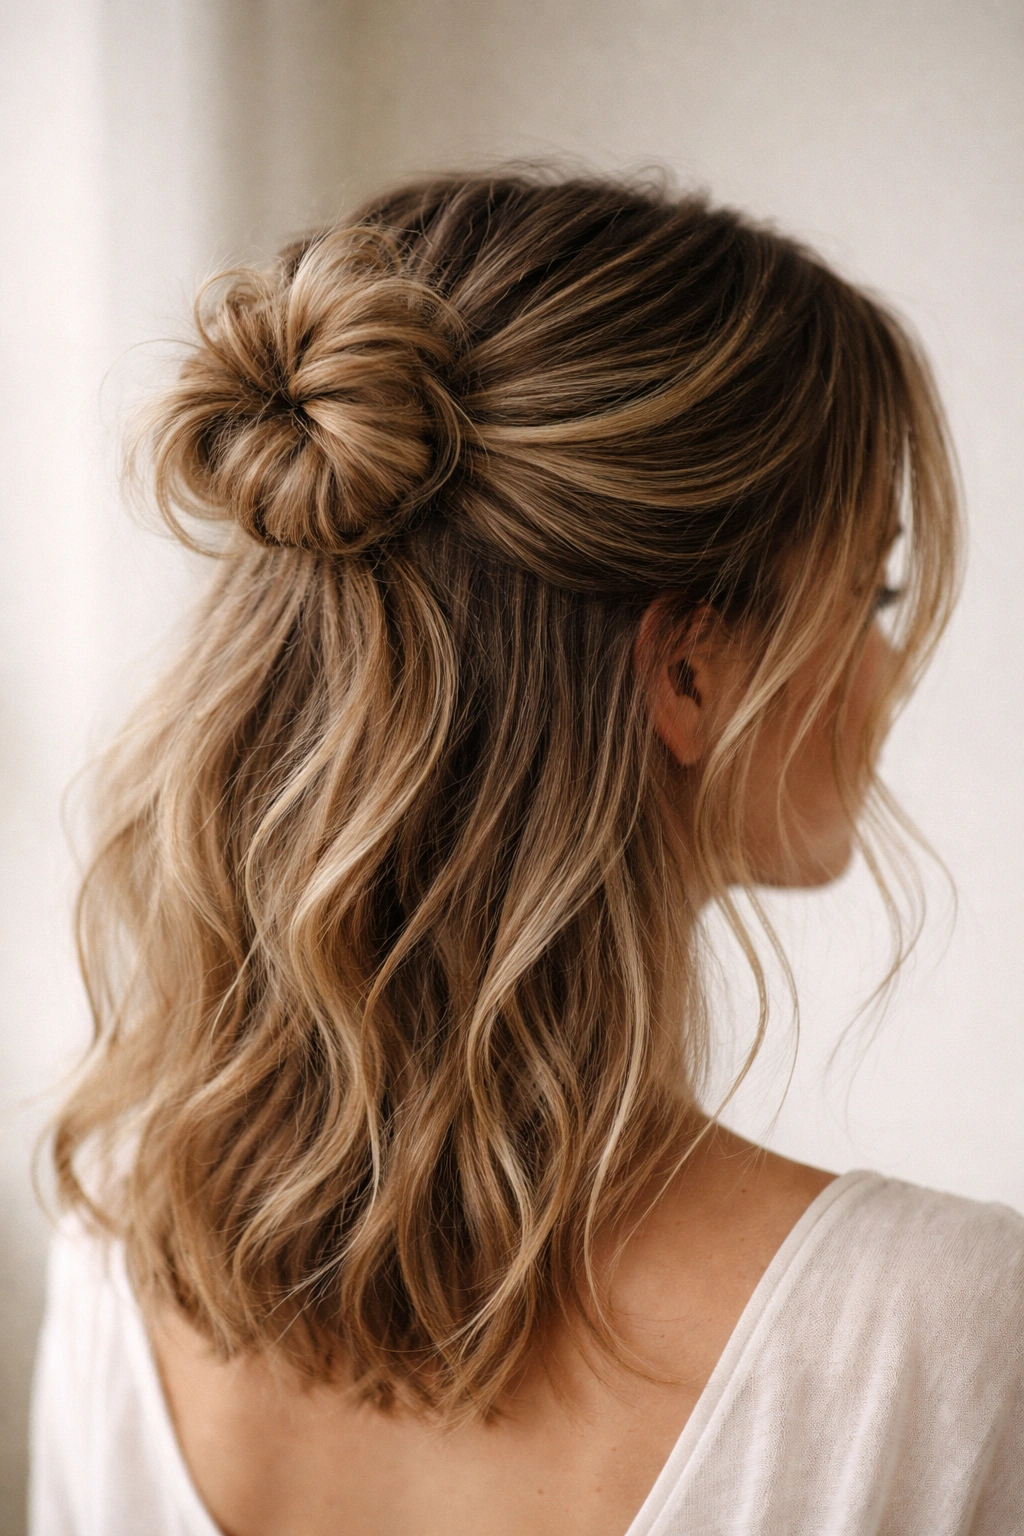
Instead of bringing your half-up all the way down into a ponytail, twist or braid it and then loop it into a loose, textured bun right at the crown. This creates a style that’s somewhere between a half-up and an updo — it keeps hair off your face and neck while still showing off length and dimension below. The key to nailing this look is keeping the bun intentionally undone rather than trying to polish it too much.
How to Create This Style
Take your half-up section and twist or loosely braid it as usual. Once you reach the crown, instead of securing it straight, loop the twist or braid into a loose circle and pin it in place using bobby pins. Don’t pull everything tight or smooth — leave wispy pieces out around the crown and let the bun look slightly undone. A few seconds with texturizing spray before you create the bun helps it hold its shape while maintaining that lived-in aesthetic.
The Practical Benefits
- Keeps your hair completely off your face and neck, perfect for hot weather
- The bun sits low enough that it won’t interfere with wearing hats or hoods
- Creates the illusion of an updo while still showing off your hair length
- Works equally well with straight, wavy, or curly hair
- Takes about five minutes once you’ve practiced the technique
8. The Face-Framing Piece Half-Up
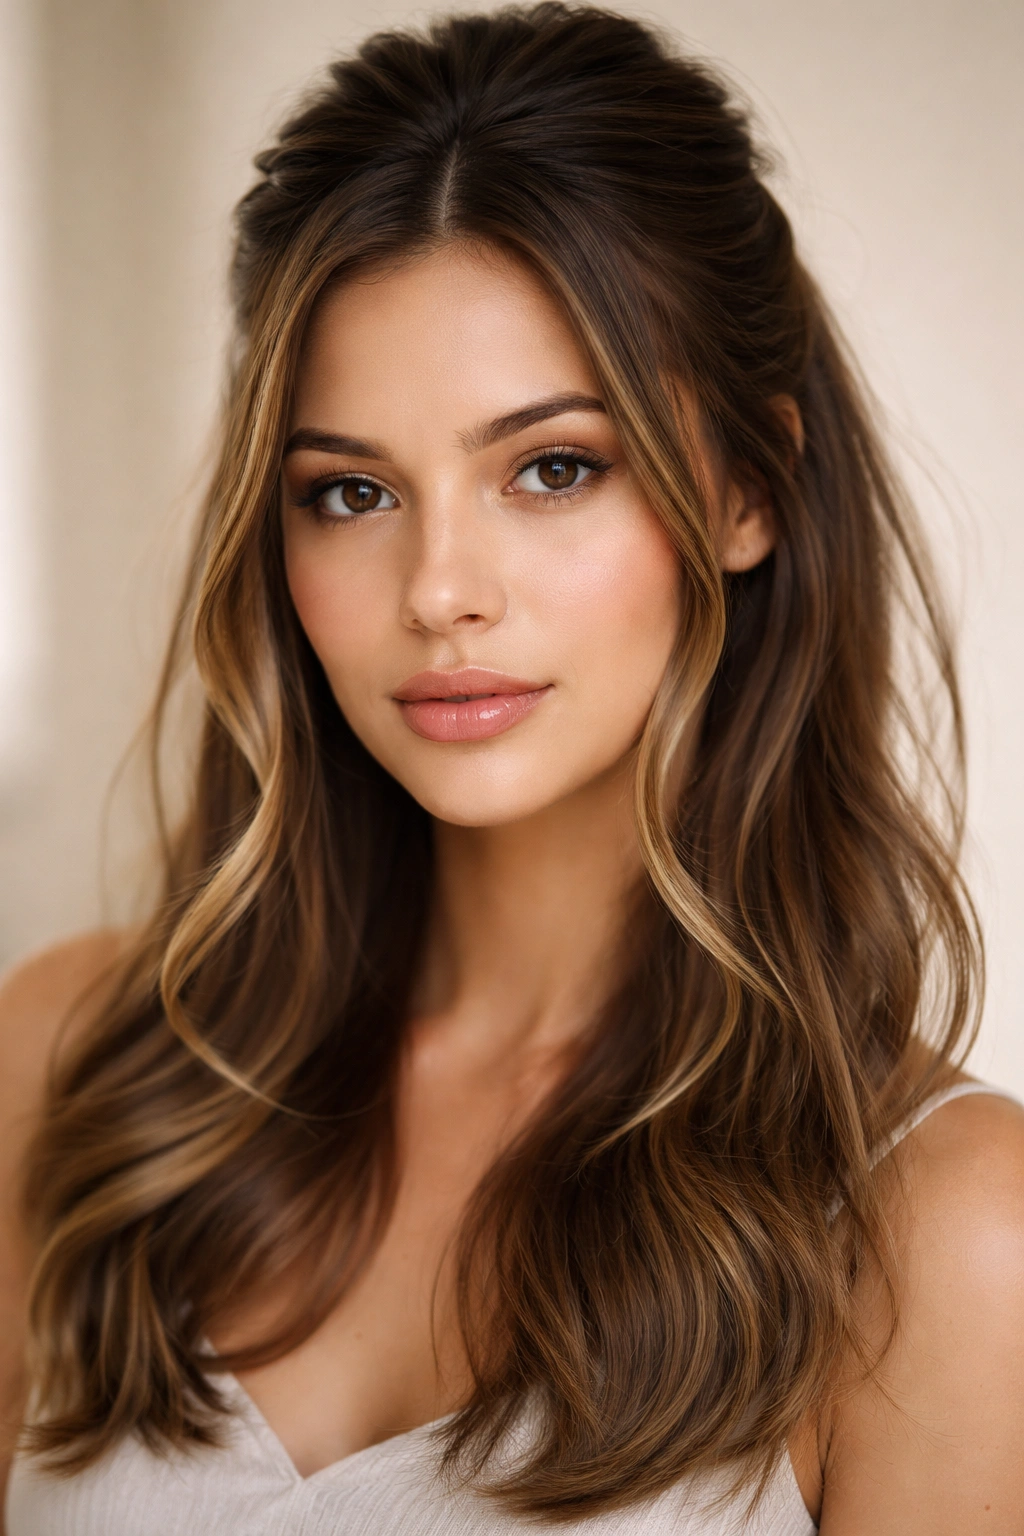
This style intentionally leaves small sections of hair loose around your face even though you’re securing a half-up style. These face-framing pieces soften the overall look and draw attention to your features. It’s a subtle technique that makes an enormous difference in how polished and intentional your style appears — the loose pieces make even a very simple half-up look thoughtfully styled rather than hastily thrown together.
How to Create This Style
Before taking your half-up section, deliberately leave small pieces of hair loose on both sides of your face near your temples. These pieces should be thin enough that they frame your features without blocking your vision. Now take your half-up section as normal, securing it at the crown. Let those face-framing pieces fall naturally, and if you want them to have more movement, curl them slightly with a straightener or small curling iron.
Visual Impact of Face-Framing
- Creates a softer, more romantic look than a tight, pulled-back half-up
- Makes the style work for more face shapes, particularly longer or more angular faces
- The loose pieces catch light and add visual interest around your face
- Naturally softens any harsh lines or angles in your face shape
- Makes you look more intentionally styled, like you planned every detail
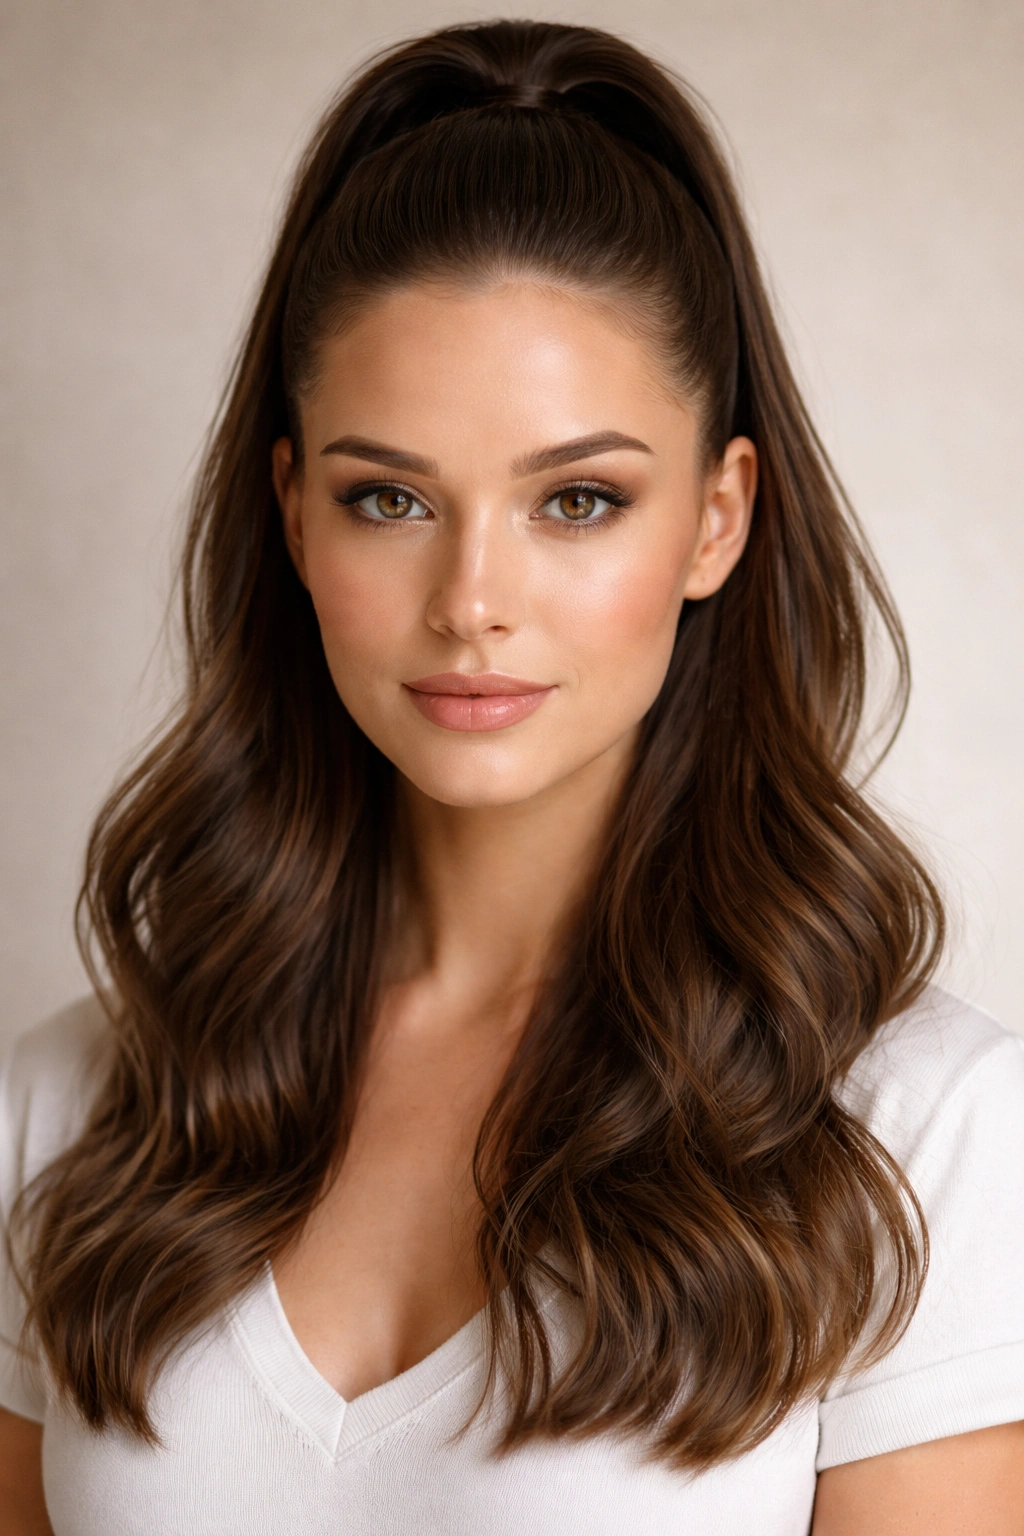
9. The Half-Up High Pony
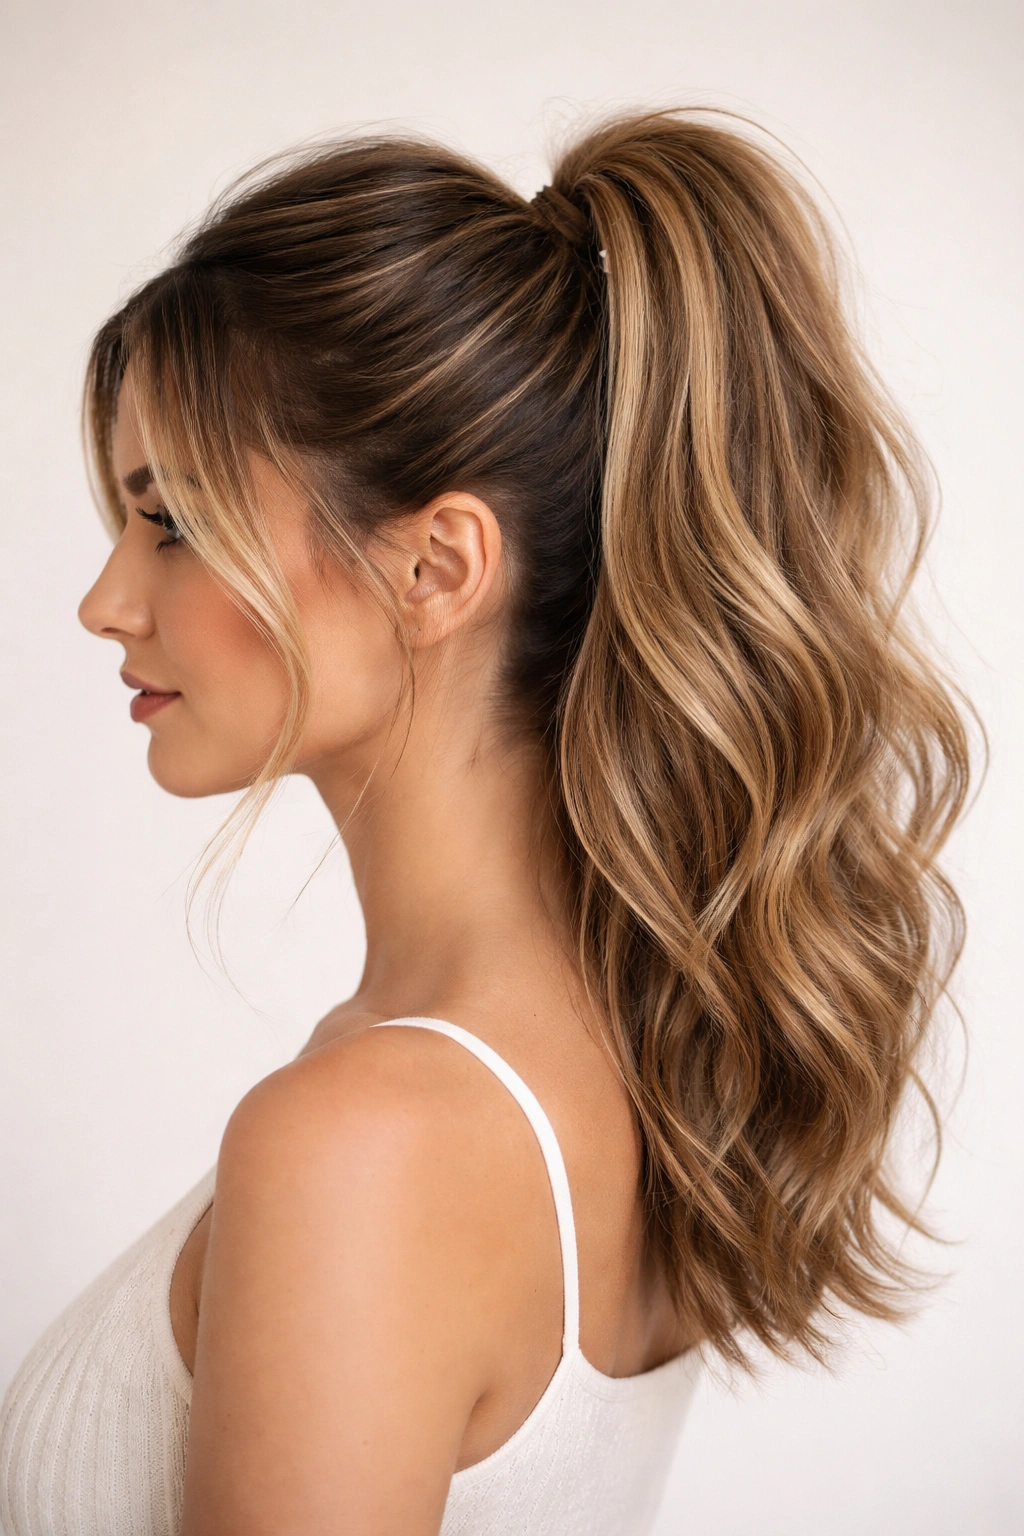
This variation takes the half-up and secures it into a ponytail rather than leaving it loose, but you position the ponytail significantly higher than you would for a traditional full ponytail. This creates a style that’s part half-up, part ponytail — polished enough for work or events, but with enough length showing that it still feels casual and effortless. The high positioning makes it look more modern and fashion-forward than a standard ponytail.
How to Create This Style
Create your half-up section as normal, but instead of securing it at the crown, position your elastic much higher — roughly where the crown of your head naturally curves. Gather the half-up section plus any additional hair from the sides into one cohesive ponytail and secure it tightly at that high position. You can smooth this style completely for a sleek look, or backcomb the crown for added volume before creating the ponytail.
Why High Positioning Matters
- Makes your face appear larger and more open without a heavy style pulling it down
- The higher placement automatically reads as more intentional and styled
- Works well with both professional and casual outfits
- Creates a lifted, youthful appearance that’s flattering on many ages
- The loose hair below the ponytail still shows off your length and texture
10. The Braided Crown
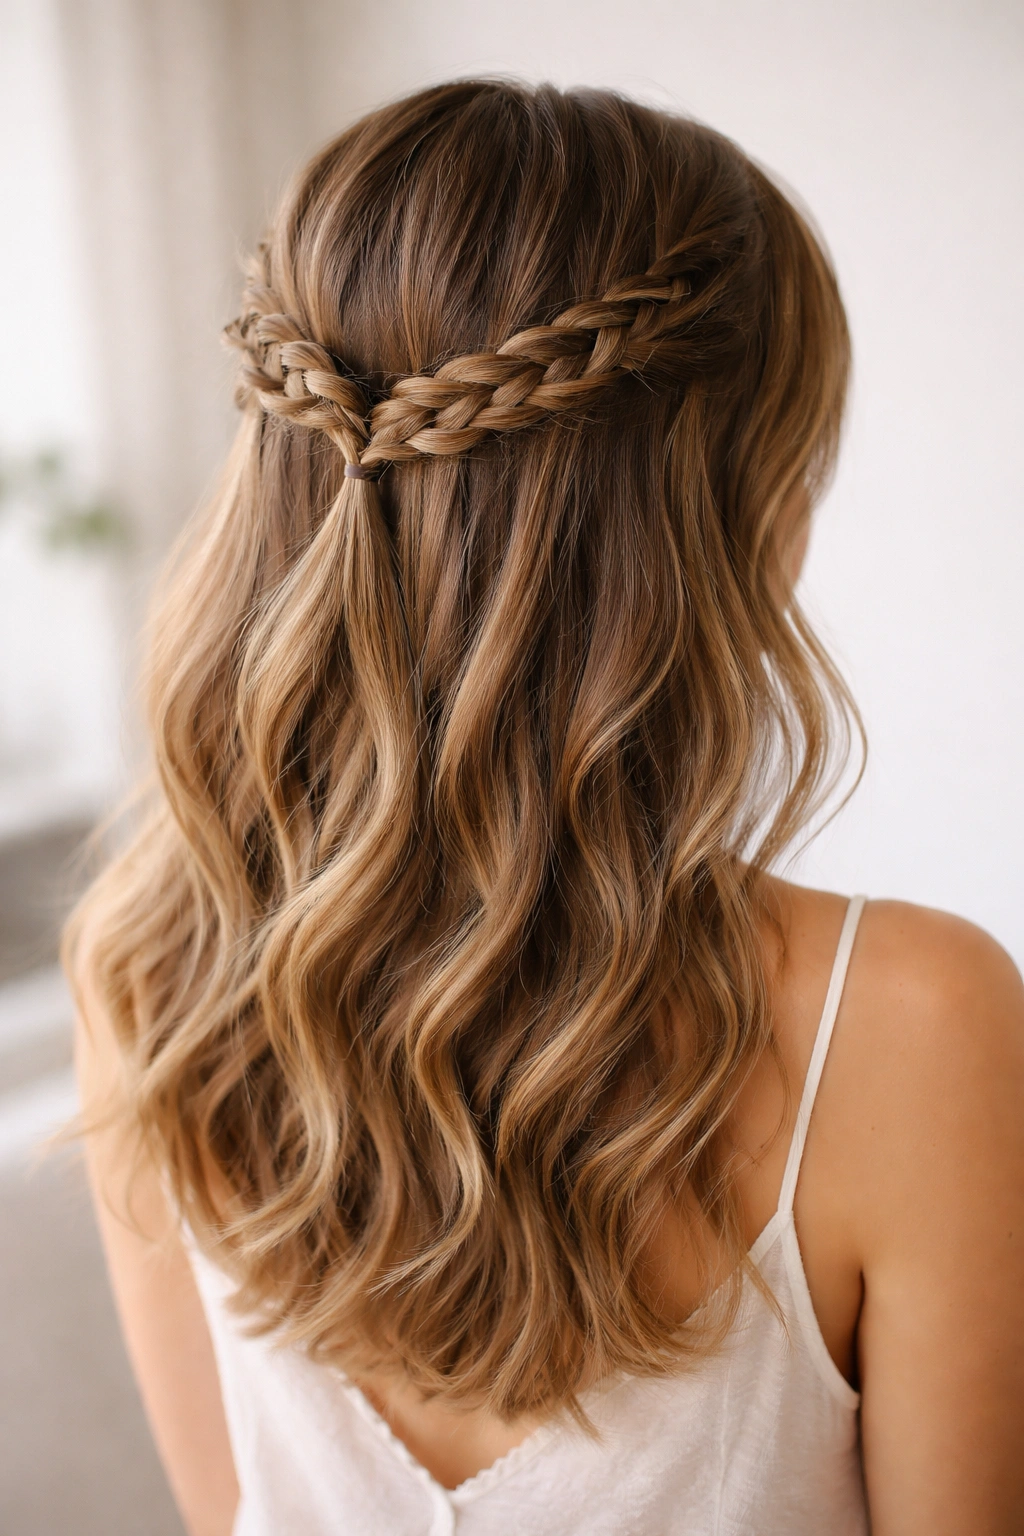
This style creates a delicate crown effect by braiding small sections of hair from each temple area and bringing them to meet at the back of the head. Unlike a traditional braid, this lives only in the half-up section and the rest of your hair flows freely below. It’s feminine and romantic without being overdone, and it works beautifully on wavy or textured hair that has natural volume.
How to Create This Style
Take a small section of hair from one temple and begin a loose three-strand braid, moving it toward the back of your head in a slightly curved path rather than a straight line. Once you reach the back, secure that braid with a small bobby pin or let it flow into a ponytail. Repeat on the other side, bringing the second braid to meet the first at the center back. For extra interest, weave the two braids together where they meet before securing everything with a single elastic.
Occasions for the Braided Crown
- Romantic dinners or date nights where you want something special but not formal
- Wedding guest looks that need to feel elegant without being costume-like
- Summer gatherings where you want protection from flyaways without looking overdone
- Any time you want a style that generates compliments without requiring major effort
- Photos or events where you want something that photographs beautifully from all angles
11. The Voluminous Teased Half-Up
Backcombing your crown before securing your half-up instantly creates volume that makes even thin or fine hair look fuller and thicker. The key is backcombing strategically in the half-up section only, creating a subtle cushion that supports your style while keeping the look modern rather than 1980s throwback. This technique is especially useful if your hair naturally lacks volume or if you’re working with fine texture.
How to Create This Style
Take a fine-tooth comb and section off the top portion of your hair where your half-up will sit. At the crown area, use the comb to backcomb gently — you’re creating texture and grip, not a matted bird’s nest. Work in small circular motions, combing backward toward your scalp, creating a subtle cushion of texture. Once you’ve teased the crown area, smooth the outer layer of hair over the teased section using the same fine-tooth comb. This smooths the outer layer while keeping the volume underneath. Now secure your half-up as normal.
Benefits of Strategic Backcombing
- Creates dramatic volume without requiring thickening sprays or special products
- Makes fine or thin hair appear significantly fuller and healthier
- The teased section holds your style in place naturally, reducing slipping throughout the day
- Works on all hair types, from straight to curly
- Takes about two minutes once you understand the technique
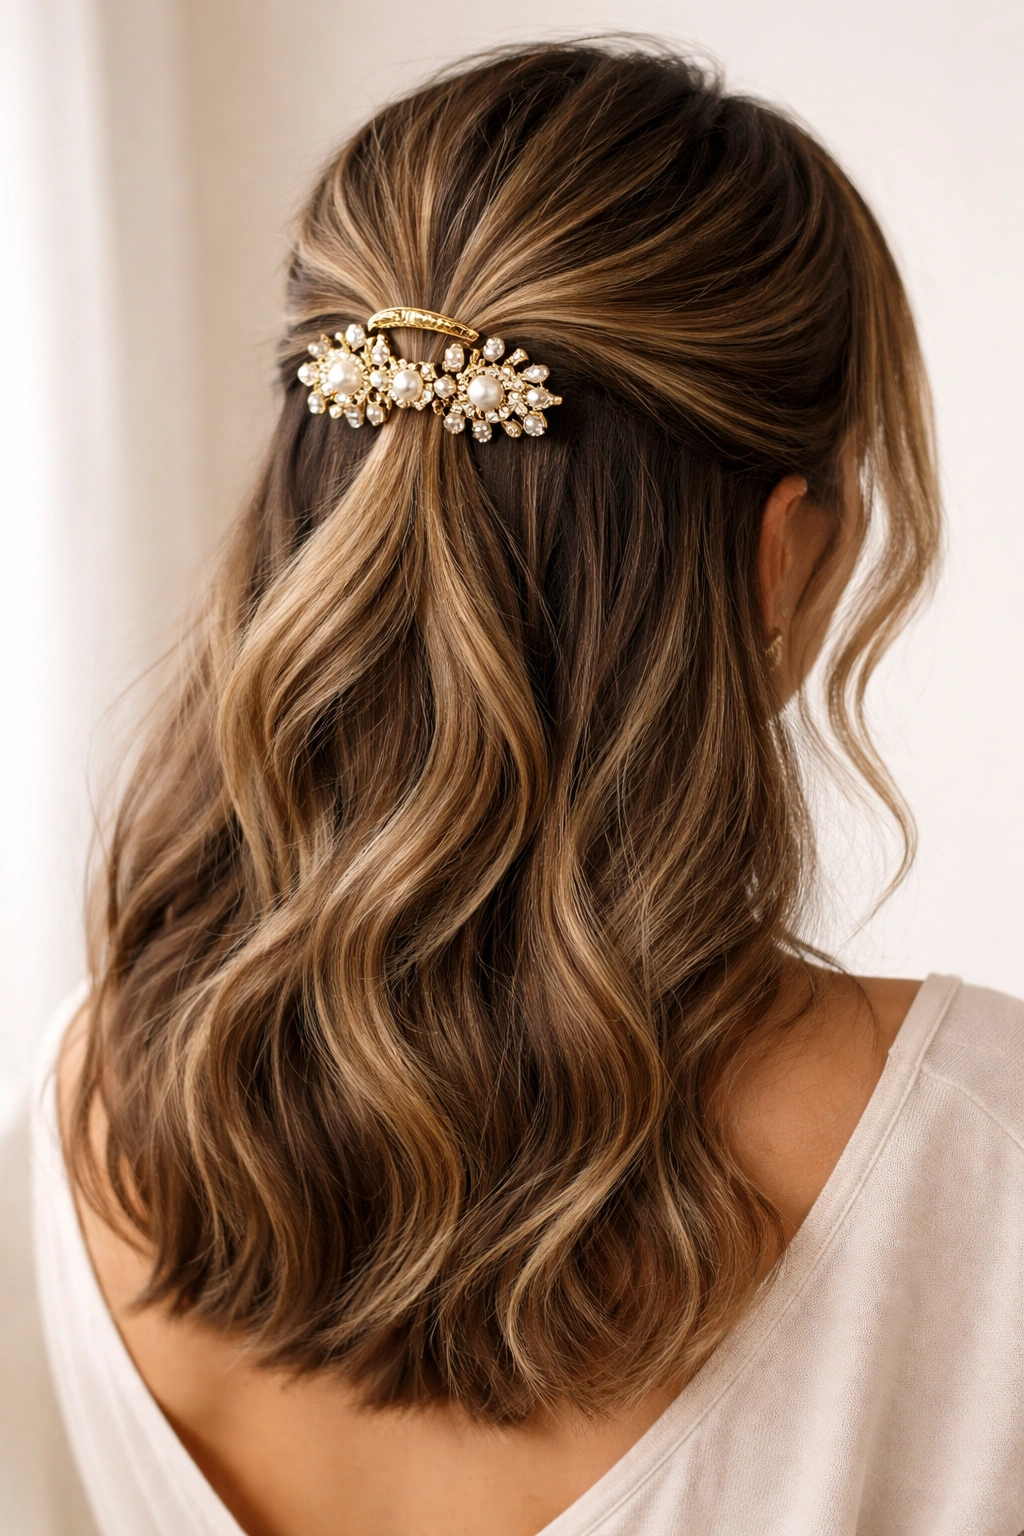
12. The Pearl-Pinned Half-Up
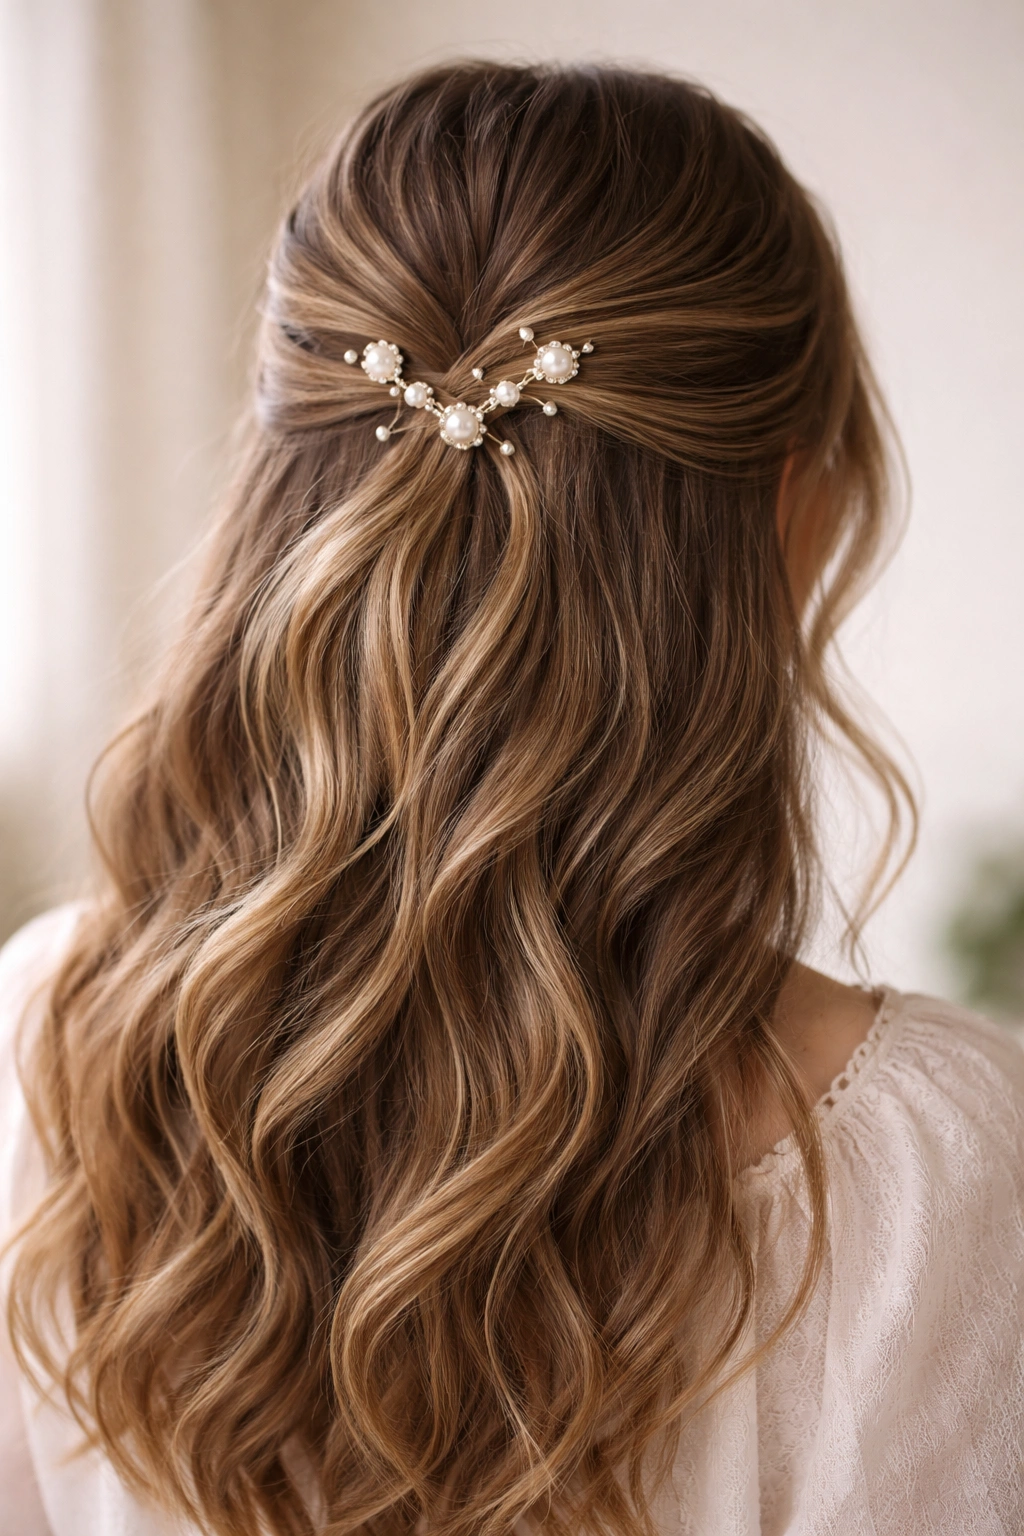
This style uses decorative pins or clips as the securing element rather than a standard elastic, instantly elevating your look from casual to special-occasion-ready. Pearl-topped pins, crystal clips, or even simple gold bobby pins all create visual interest at the crown while securing your style. It’s a small detail that creates an outsized impact on how polished and intentional your hairstyle appears.
How to Create This Style
Create your half-up section as you normally would — a twist, braid, or simple gathered ponytail style. Instead of using an elastic to secure it, use decorative bobby pins or clips. You’ll likely need two to four pins depending on how thick your hair is and how secure you need the style to be. Cross the pins in an X shape or use them parallel to each other, letting the decorative tops show. You can position them in the center back or off to one side depending on your aesthetic preference.
Pin Selection That Works
- Pearl-topped pins for classic, timeless elegance
- Crystal or rhinestone clips for subtle sparkle without costume vibes
- Tortoiseshell clips for texture and visual interest
- Metallic pins that complement your jewelry and overall look
- Multiple small pins clustered together for a more modern, fashion-forward vibe
13. The Slicked-Back Half-Up
For days when you want maximum polish with minimum fuss, slick back your entire top section using gel or smoothing serum, then secure it into a sleek half-up. This style reads as intentionally styled and works beautifully for professional settings, formal events, or simply when you want your features and face shape to take center stage. The sleekness at the top contrasts beautifully with textured waves or curls flowing below.
How to Create This Style
Apply a smoothing serum or lightweight gel to your hands and run them through the entire top section of your hair, smoothing every piece straight back toward your crown. Use a fine-tooth comb to ensure every piece is in place and that you have a clean, sleek finish with no flyaways. Secure the back section with an elastic, making sure the elastic is positioned exactly where you want it — this style doesn’t forgive imprecise placement. For extra staying power, lightly mist with hairspray once everything is in place.
When to Choose This Style
- Professional environments where you want to look polished and put-together
- Formal events or special occasions requiring an intentional, styled appearance
- Days when you want your face and eyes to be the focal point of your appearance
- Outfits with interesting necklines, jewelry, or details that a softer style might hide
- When you’re working with freshly washed or treated hair that needs to look pristine
14. The Half-Up with a Statement Claw Clip
Using a decorative claw clip instead of a traditional elastic to secure your half-up instantly makes the hairstyle feel more modern and fashion-forward. Claw clips come in countless colors, patterns, and sizes, so you can switch your look just by changing your clip. This is the easiest way to customize your half-up style without learning new techniques or spending time on additional styling.
How to Create This Style
Create your half-up section as you normally would — twisted, braided, or simply gathered. Instead of securing it with an elastic, position your claw clip at the crown and lock it in place. The clip should hold your half-up securely without requiring an elastic underneath. The beauty of this method is that the clip itself becomes a visible part of your style, so choose one that complements your outfit, skin tone, or hair color. You can position it centered at the back of your crown or slightly off to one side for a more casual vibe.
Clip Selection Guide
- Tortoiseshell or amber clips for warmth and visual texture
- Clear or frosted clips for a modern, minimalist aesthetic
- Pastel or jewel-toned clips that coordinate with your outfit
- Metallic clips for shine and glamour without being over the top
- Larger clips for a bolder statement, smaller clips for a subtle accent
15. The Side-Swept Half-Up
Instead of securing your half-up at the center crown, bring it to one side of your head, creating an asymmetrical style that feels more casual and modern. This works beautifully on medium-length hair because it shows off your length on one side while keeping hair mostly off your face on the other side. The asymmetry creates visual interest and movement that centered styles sometimes lack.
How to Create This Style
Create your half-up section as normal, but instead of bringing it straight back to the crown, guide it diagonally toward one side. Secure it with an elastic or pin positioned off-center. The half-up should sit somewhere between your crown and your ear on the side you’ve chosen. You can add a twist, braid, or leave it simply gathered depending on your preference. The loose hair on the opposite side of your face should drape naturally, creating movement and softness.
Why Asymmetry Is So Flattering
- Asymmetrical styles make your face appear more interesting and dynamic
- The off-center placement creates an illusion of dimension in your face shape
- Side-swept styles photograph beautifully from many angles
- The asymmetry automatically reads as intentionally styled rather than accidental
- Works with virtually any face shape, though particularly flattering on round or square faces
16. The Spiral Half-Up with Texture
Instead of a simple twist, spiral your half-up section by wrapping it around itself in a coil before securing it at the crown. This creates visual interest and texture that a straight twist sometimes lacks. The spiral technique works especially well if you’ve already added waves or curls to your hair, as the texture picks up the waves and creates a rich, multidimensional look.
How to Create This Style
Create a loose twist as you normally would, but instead of bringing it straight back, gently wrap the twisted section around itself in a spiral shape, pinning it in place as you go. Use bobby pins to secure the spiral at multiple points so it holds its shape throughout the day. You can create a tight, sculptural spiral for a modern look, or a loose, flowing spiral that looks more romantic and undone. Once pinned, gently pull sections of the spiral outward to create texture and soften the overall shape.
Technical Tips for Success
- Start your twist looser than usual so there’s enough length to wrap into a spiral
- Pin as you go rather than waiting until the end to secure everything
- Use at least three bobby pins positioned at different points around the spiral
- Loosening the spiral slightly after pinning creates a more modern, effortless look
- This technique works best with wavy or textured hair that already has movement
17. The Underneath Twist Half-Up
This style plays with perspective by creating a twist that appears to travel underneath your hair rather than on top. It’s a subtle optical illusion that makes even a simple twist look far more interesting and intentional. The underneath twist works beautifully on wavy or textured hair and creates a style that looks effortless despite requiring only slightly more technique than a standard twist.
How to Create This Style
Take your half-up section as usual, but instead of twisting it in the standard way (where the twist is visible on the surface), twist it by bringing the sections under rather than over as you move backward. This creates an underneath twist where the darker roots and shadow of the twist create dimension. As you twist, keep your fingers slightly underneath the sections of hair you’re working with, which naturally encourages the underneath wrapping. Secure at the crown and gently loosen the twist to soften its appearance.
Visual Impact
- The underneath twist creates natural depth and dimension
- Works beautifully with darker hair or hair with dimension already
- Creates a sophisticated look that appears more complex than it actually is
- Particularly flattering with wavy or textured hair that has natural movement
- The shadow created by the underneath twist adds visual interest
18. The Bubble Half-Up Ponytail
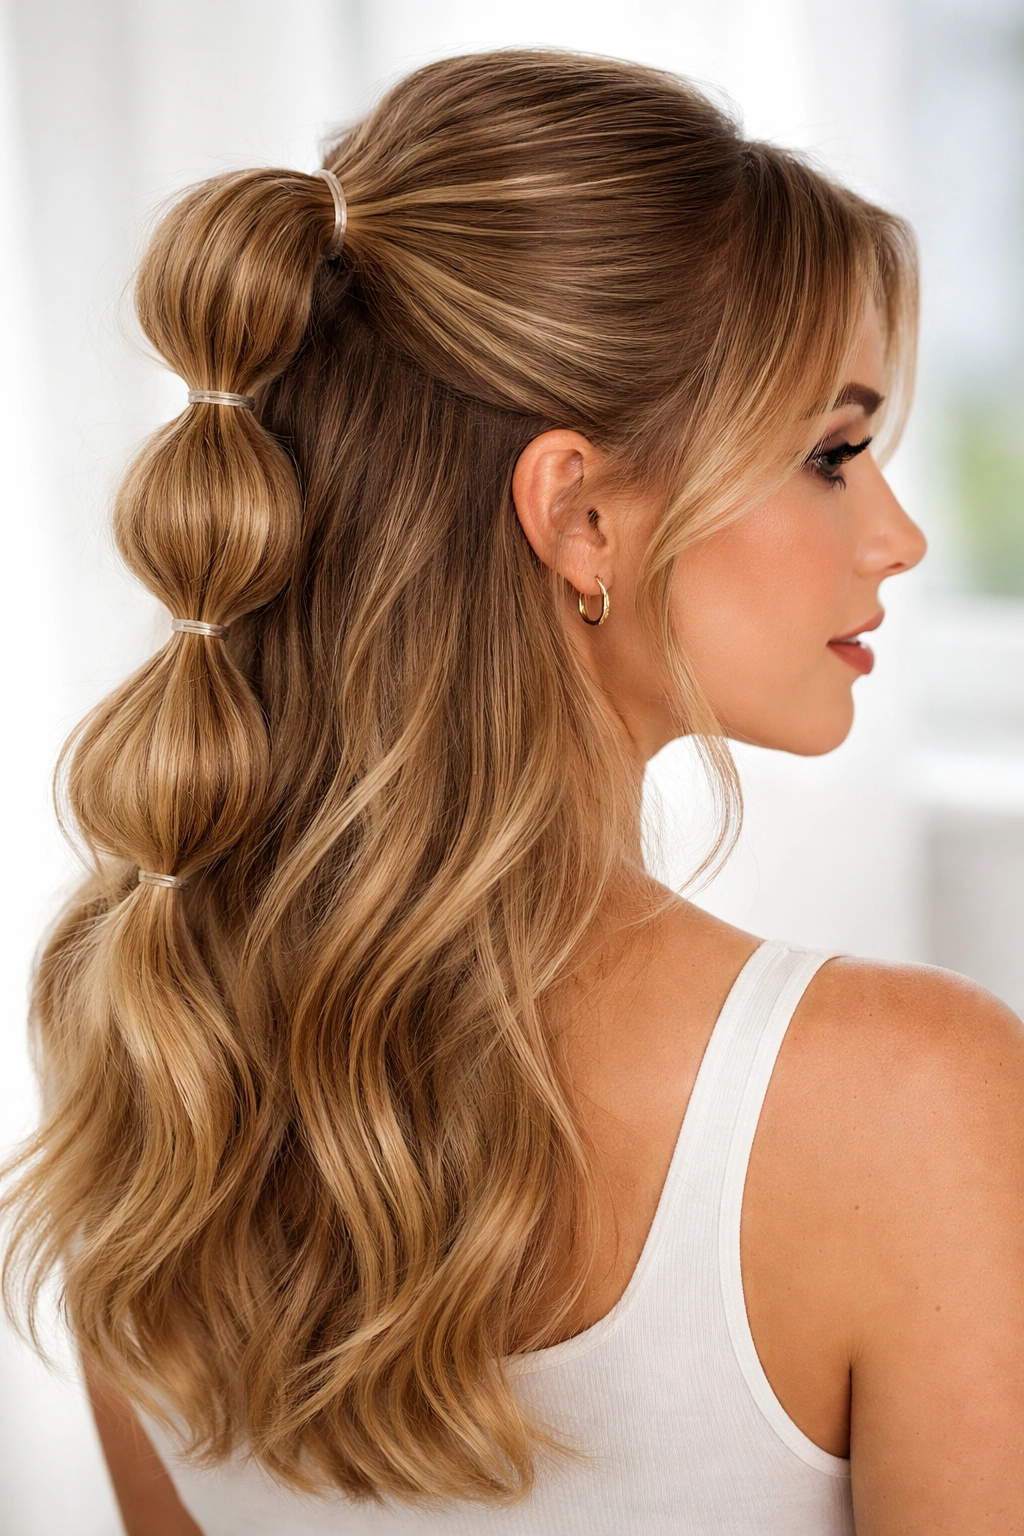
This playful style divides your half-up ponytail into sections and secures each section with its own small elastic, creating a stacked or “bubble” effect. It’s more playful and modern than a standard ponytail while still being incredibly easy to create. This style works beautifully on medium-length hair and pairs especially well with casual outfits or creative, fashion-forward looks.
How to Create This Style
Create a standard half-up ponytail as you normally would, securing it at the crown with an elastic. Now take a second elastic and position it about an inch or two below the first one, creating the first “bubble” section. Gently pull this section outward to create fullness and softness. Continue this pattern with additional elastics and bubbles down the length of your ponytail, creating three to five bubble sections depending on how long your ponytail is and how many sections you want.
Why This Style Works
- Creates visual interest and movement that a smooth ponytail sometimes lacks
- Takes about five minutes total, making it perfect for casual everyday wear
- The bubbles naturally hide elastic-damaged hair sections
- Works beautifully with wavy hair, straight hair, and even slight texture
- The playful nature makes it perfect for casual outfits, date nights, or creative events
- Each bubble can have slightly different fullness for an intentionally undone look
The versatility of medium-length hair really shines when you explore half up half down styles. These eighteen options represent just the beginning of what’s possible when you start mixing and matching techniques — adding ribbons to braids, combining waves with twists, or using creative clips to secure your style. The key to making any of these styles work for you is accepting that imperfect, slightly undone looks far more polished and intentional than trying to make everything absolutely perfect. Medium hair is forgiving enough to work with you rather than against you, so you can experiment freely without worrying that one loose piece will ruin your entire day.
Start with whichever style resonates with you most, practice it two or three times until it feels natural, then gradually experiment with the others. You’ll likely find yourself rotating through a handful of favorites that you can create without thinking, mixing and matching elements depending on your mood, outfit, and how much time you have available. The beauty of half up half down styles is that they’re endlessly customizable and always look intentional, even on the days when you’re rushing out the door with five minutes to style your hair.