The half up half down style sits in that perfect sweet spot between polished and relaxed—and when you’re getting ready for a party, that balance is everything. For Black women, this versatile look opens up countless possibilities because it works beautifully across every hair texture, length, and styling preference. Whether you’re rocking natural coils, sleek bone-straight lengths, flowing locs, or intricate braids, the half up half down silhouette is a canvas for creativity that lets your personality shine while keeping your hair manageable and elegant all evening long.
What makes this style particularly powerful for party looks is that it feels intentional and elevated without requiring you to commit to one singular statement. You get the best of both worlds: enough of your hair down to show off length, texture, or a fresh blowout, while the upper portion is secured and styled in a way that feels special and thought-out. A simple half up can become a glam centerpiece with the right accessories, or a subtle artistic statement through clever braiding and twists. The style photographs beautifully from every angle, works in humid or air-conditioned spaces, and actually keeps hair off your neck and shoulders when you’re dancing or moving around.
Let’s walk through twenty stunning half up half down party looks designed with Black women’s hair in mind—each one offers a distinct vibe, from romantic and soft to bold and editorial.
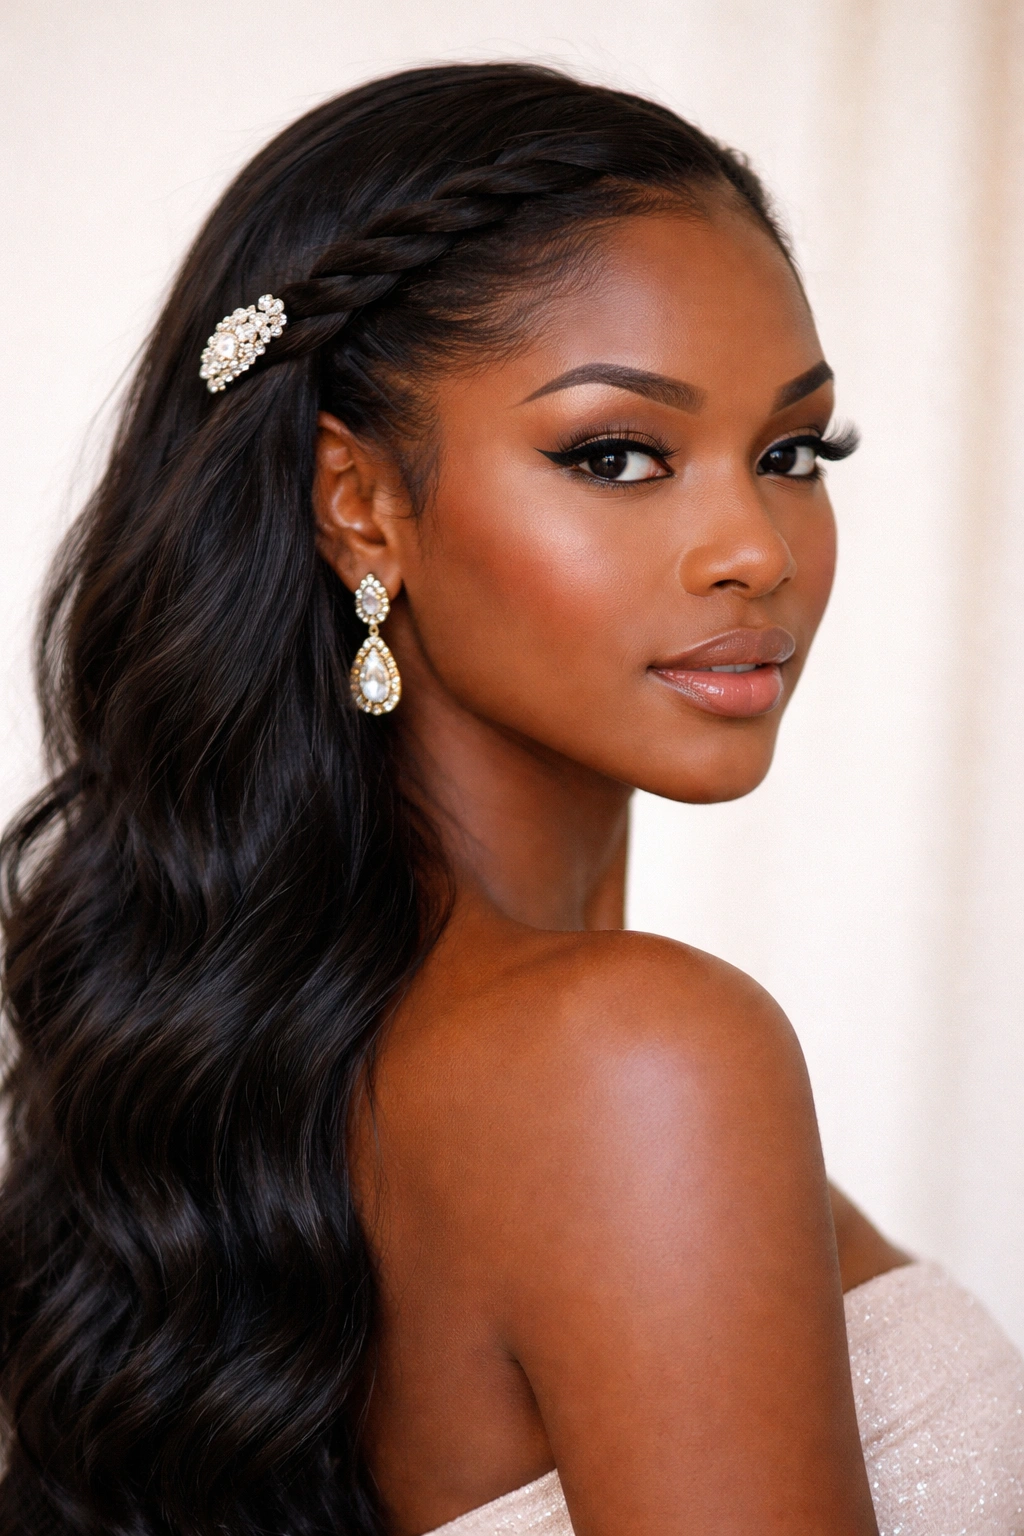
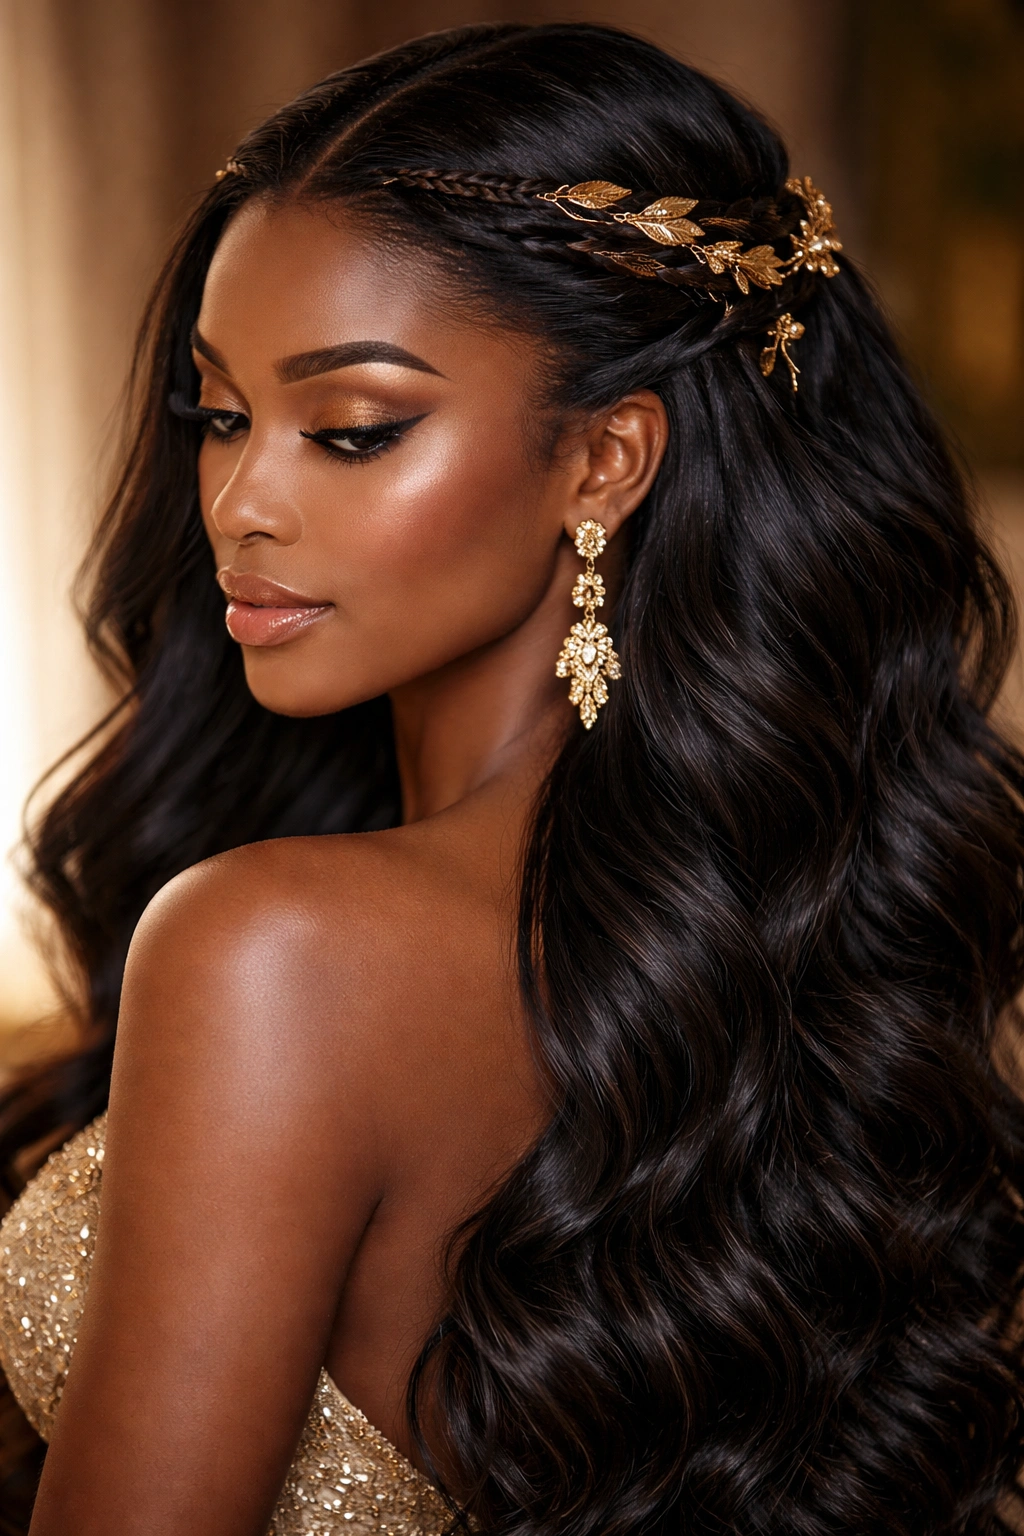
1. Golden Goddess Twisted Crown
This look combines two twists that wrap around the crown of your head before meeting at the back, creating a regal frame for your face while keeping hair off your forehead. The twists are smooth and defined, whether you’re working with natural curls, locs, or straightened hair, and they catch light beautifully when you add gold hairpins or threading through the twists themselves. The remaining hair flows down with maximum volume, creating a stunning contrast between the controlled crown and the free-flowing length below.
How to Create This Elevated Look
This style works across every hair texture because the technique itself is flexible. Start by sectioning two pieces from each temple, then twist each section toward the back of your head, pinning them where they meet. The magic happens in how you finish—you can tighten the twists for a sleek, controlled vibe, or loosen them slightly for a softer, more undone feel that still reads as intentional and party-ready.
Styling Details That Make It Pop
- Use gold or rose gold bobby pins that match your skin tone for an invisible hold, or choose contrasting metallic pins if you want them to be a visible design element
- Add delicate gold threading through the twists while you’re creating them for extra shine and dimension
- Curl the loose hair underneath with a wand or let your natural curl pattern shine through with product for added texture
- Finish with hairspray that holds without flaking, so the twists stay crisp all night
- Layer thin gold chains or a delicate hairpiece across the crown for additional glam
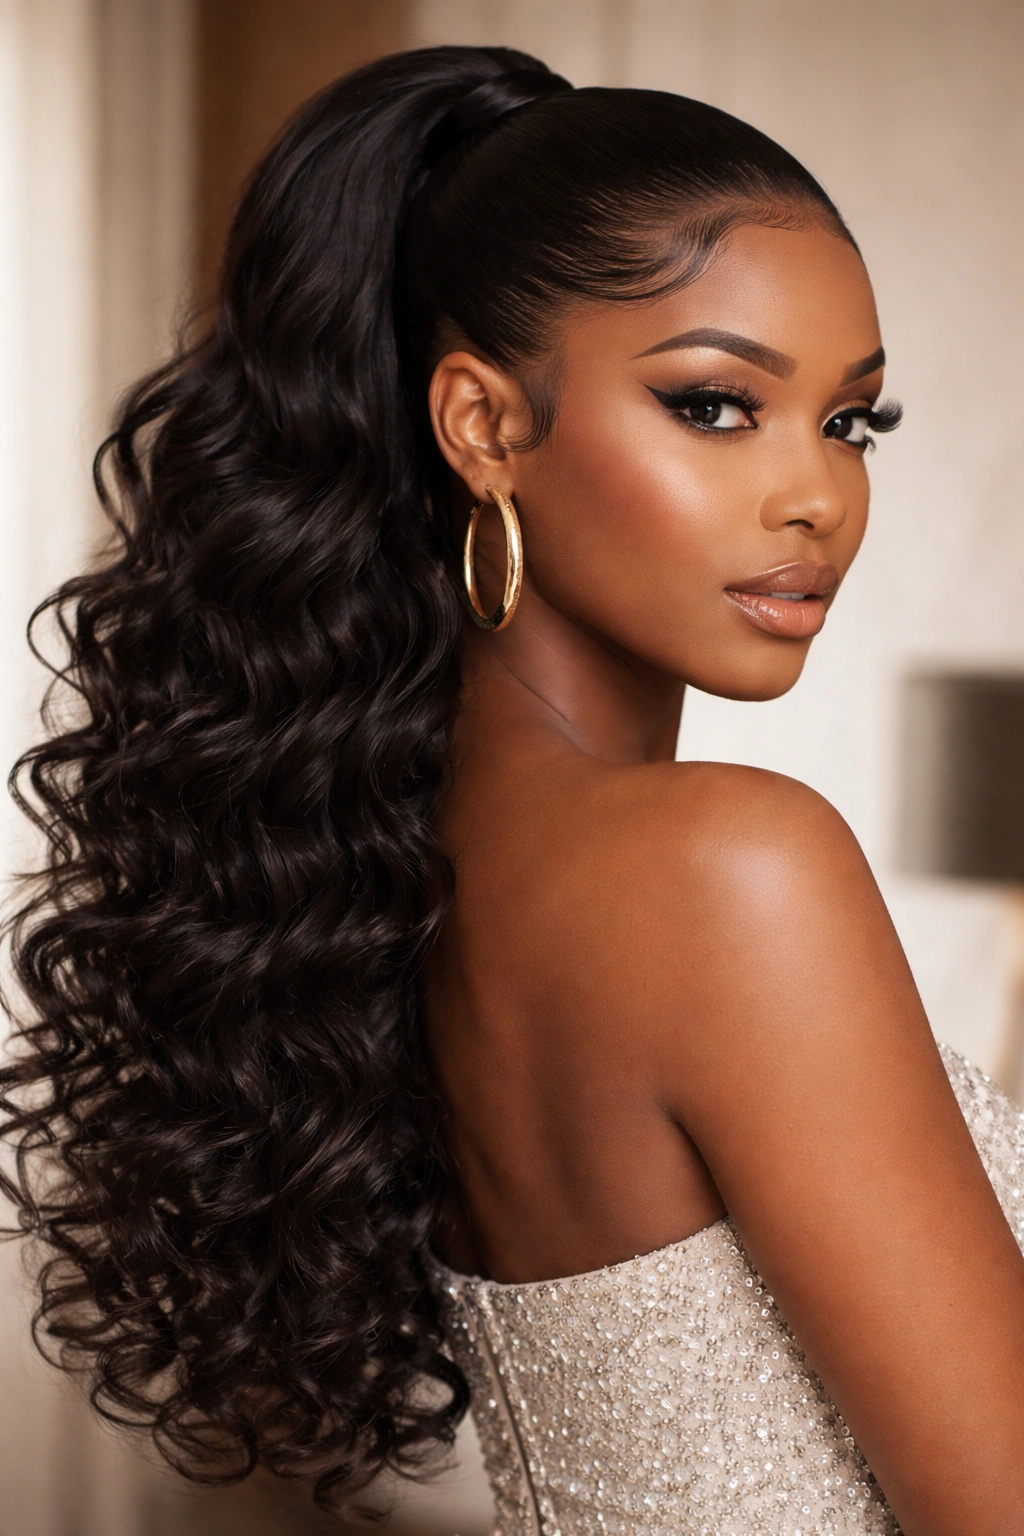
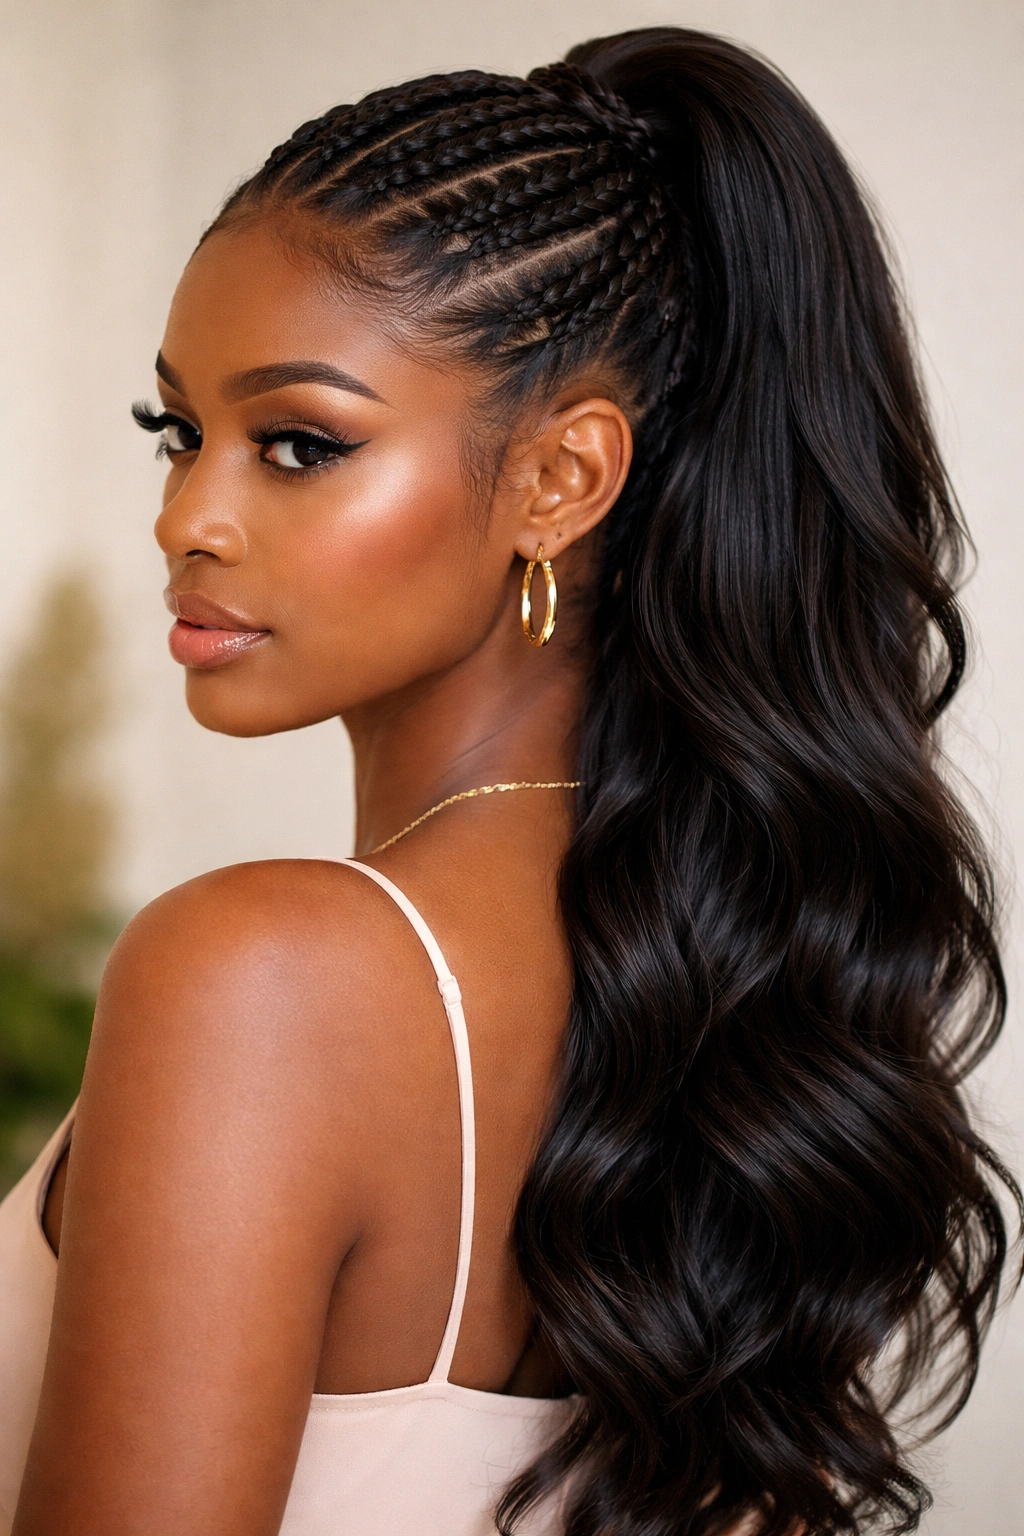
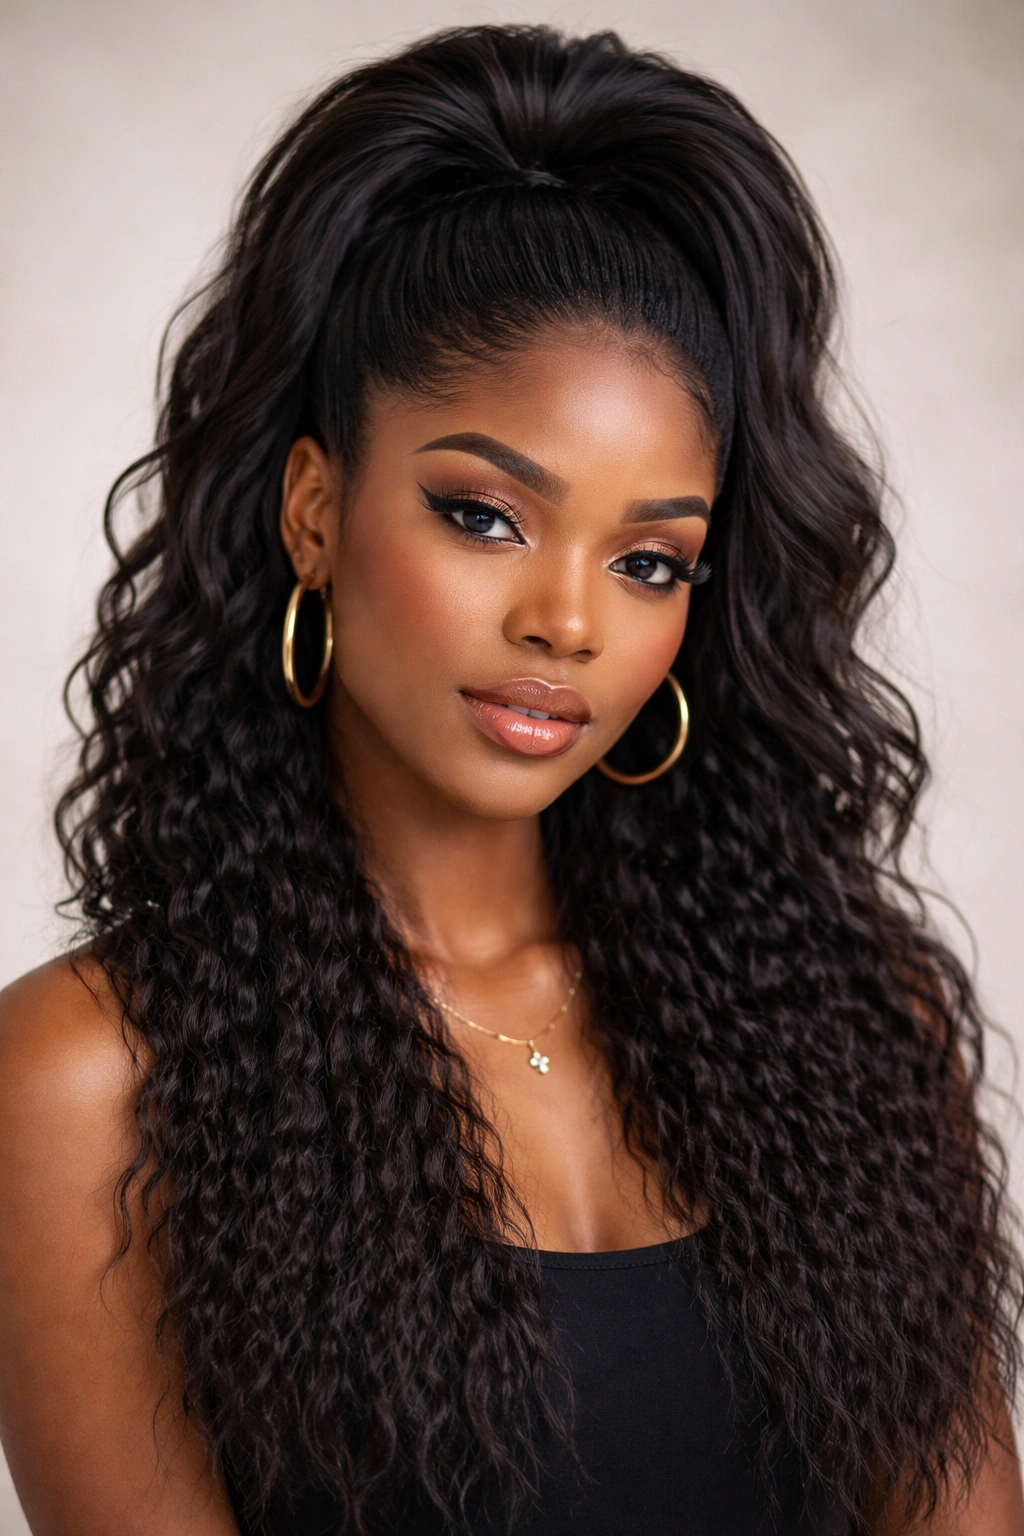
2. Sleek Slicked-Back High Pony Half Style
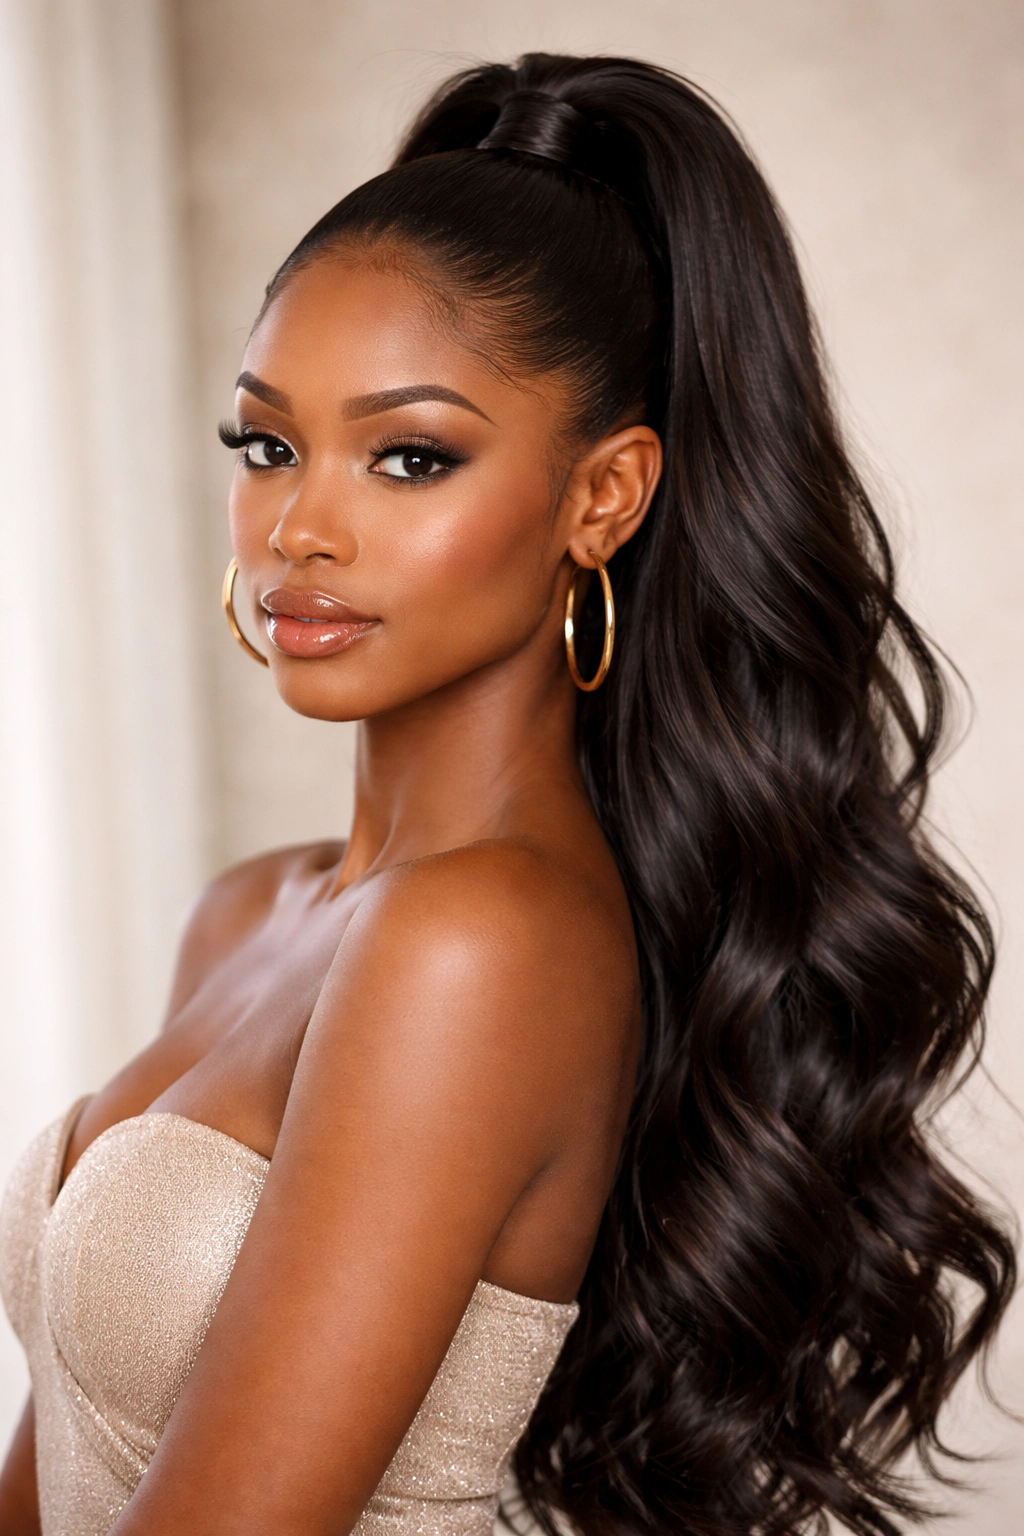
This hybrid look takes the slickness of a pulled-back style and pairs it with free-flowing hair below, creating a sophisticated edge that’s perfect for modern, fashion-forward parties. The front and crown are smoothed back tightly with gel or edge control, while a substantial portion of hair (usually from mid-back length downward) stays down and voluminous. The contrast between the polished top and textured bottom creates real visual interest and demonstrates that you have complete control over your look.
What Sets This Apart From Basic Styles
The key to making this feel elevated rather than sporty is the placement and the way you finish the secured portion. Instead of a tiny, tight ponytail, you’re creating a more generous half-up section that’s still visibly controlled and deliberate. This style photographs incredibly well because the sleekness frames your face while the volume below adds movement and dimension in photos and in person as it catches light.
Pro Technique Details
- Use a flexible edge control that won’t flake or crunch—this matters more than people realize because flaking shows in photos and under party lighting
- Brush the back section smoothly into the ponytail with a paddle brush and soft bristles to avoid breakage or frizz
- Secure the ponytail with a wide, smooth elastic that won’t crease your hair or create a visible dent when you remove it later
- Consider a silk or satin hair tie rather than rubber, which catches less light and sits more elegantly
- Leave a few delicate face-framing pieces loose if you want softness, or keep it fully slicked for drama
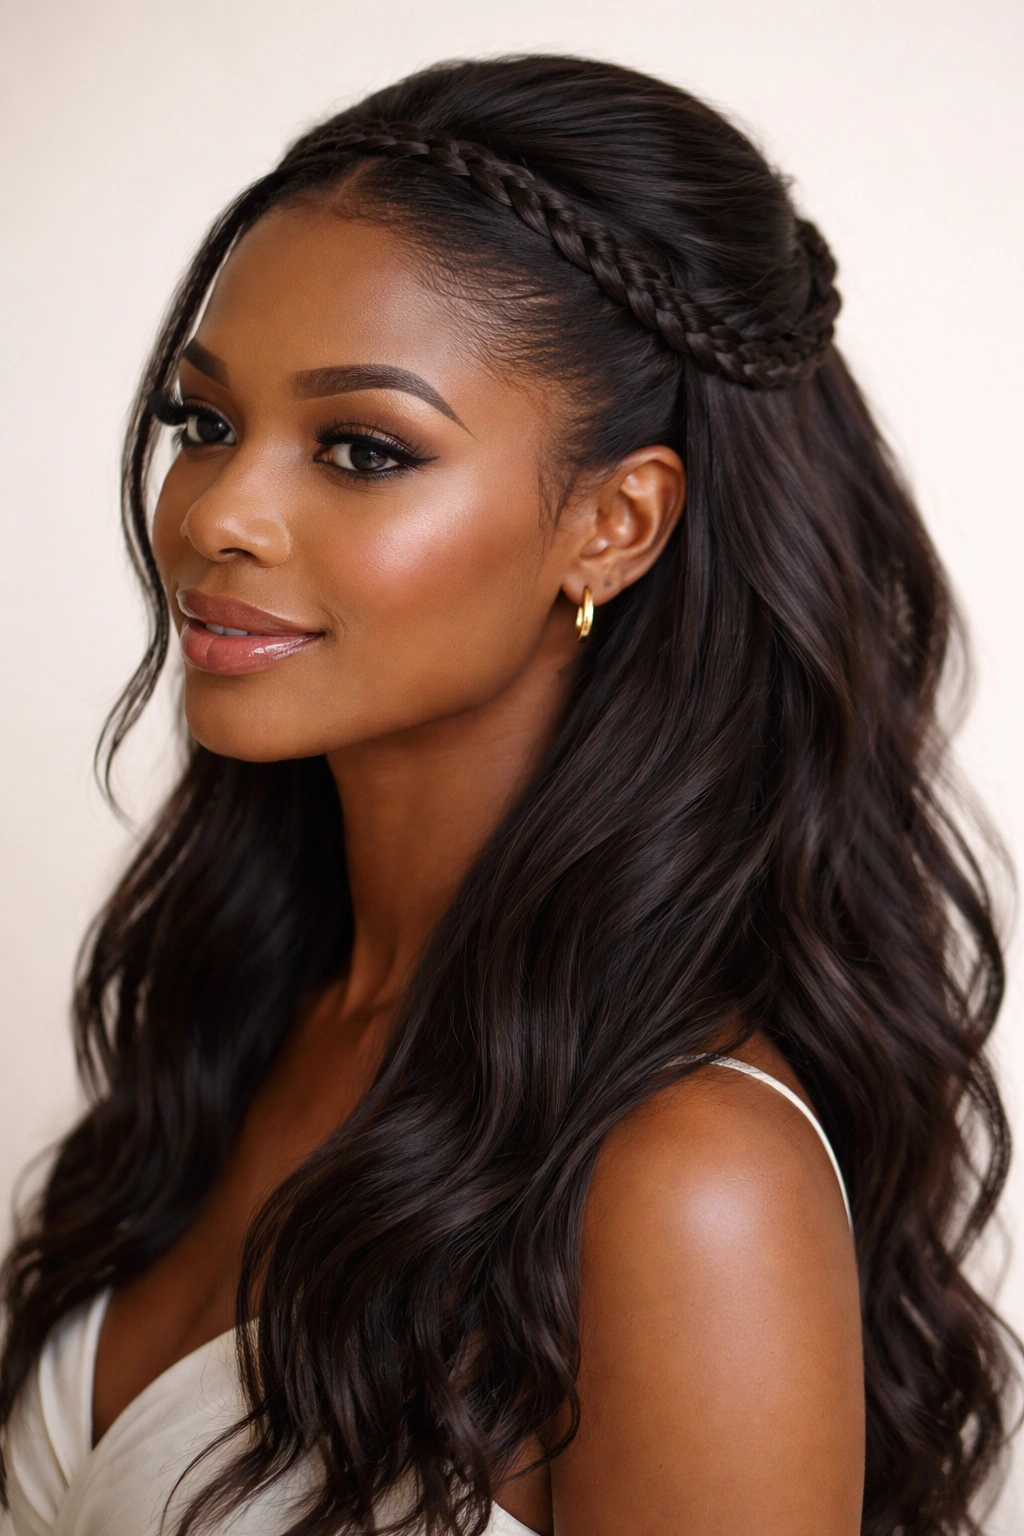
3. Braided Halo Half Up
A thick, defined braid that wraps around the crown of your head from one side to the other creates an ethereal, almost bridal-adjacent look that still feels youthful and current. This style showcases length beautifully while the braid itself becomes a featured element, especially if you choose to incorporate threading, beads, or leave sections slightly loose and textured. The halo effect naturally frames your face and works across all hair textures and lengths, from shoulder-length to waist-length hair.
Building a Stunning Braid Crown
Start with a deep side part and begin your braid at one temple, incorporating sections as you work across the crown toward the opposite ear. The thickness of your braid should be generous enough to read as intentional—this isn’t a tiny Dutch braid, but a statement-making three-strand or even five-strand braid depending on your preference and hair volume. As you braid, you can go tight and sleek for polish, or loosen it slightly after completion for texture and movement.
Details for Maximum Impact
- Dutch braid (raised braid) reads slightly more formal and catches light beautifully; French braid feels slightly softer and more romantic
- Wrap the braid around the entire crown from temple to temple, then secure the end with a small elastic that matches your hair color
- Leave the bottom-back section unbraided and open, letting it flow in waves or curls
- Weave gold ribbon, beads, or tiny flowers through the braid as you complete it for added dimension
- This style pairs perfectly with a clear or metallic accessory piece in the back where the braid ends
4. Twisted Side Sweep Half Up
This style pulls texture and movement from one side, creating an asymmetrical, fashion-forward look that immediately reads “intentional styling.” Multiple twists from one side of your head spiral toward the back, where they’re secured together, leaving the opposite side completely open. The asymmetry creates visual interest and photographs beautifully, while the twists showcase the beautiful detail of your natural texture or styling work.
Creating the Asymmetrical Balance
Begin sectioning from one temple and create 2-3 twists of varying sizes, spiraling them gently toward the back of your head where they meet and secure together with pins or an elastic. This style works gorgeously on natural hair where each twist showcases your curl pattern, on straightened hair for sleek contrast, or on locs and braids for texture play. The key is that the twists should feel substantial enough to be the featured element while still allowing plenty of hair to flow freely.
Styling Techniques to Elevate It
- Loosen completed twists very slightly for a softer, more textured appearance that still feels controlled
- Add temporary color, threading, or small accessories woven through the twists for personalization
- Leave wavy, curled, or naturally textured hair loose on the untwisted side for maximum movement contrast
- Pin the secured twists with decorative pins that coordinate with jewelry or clothing
- Finish with flexible hold hairspray that moves with your hair rather than freezing it in place
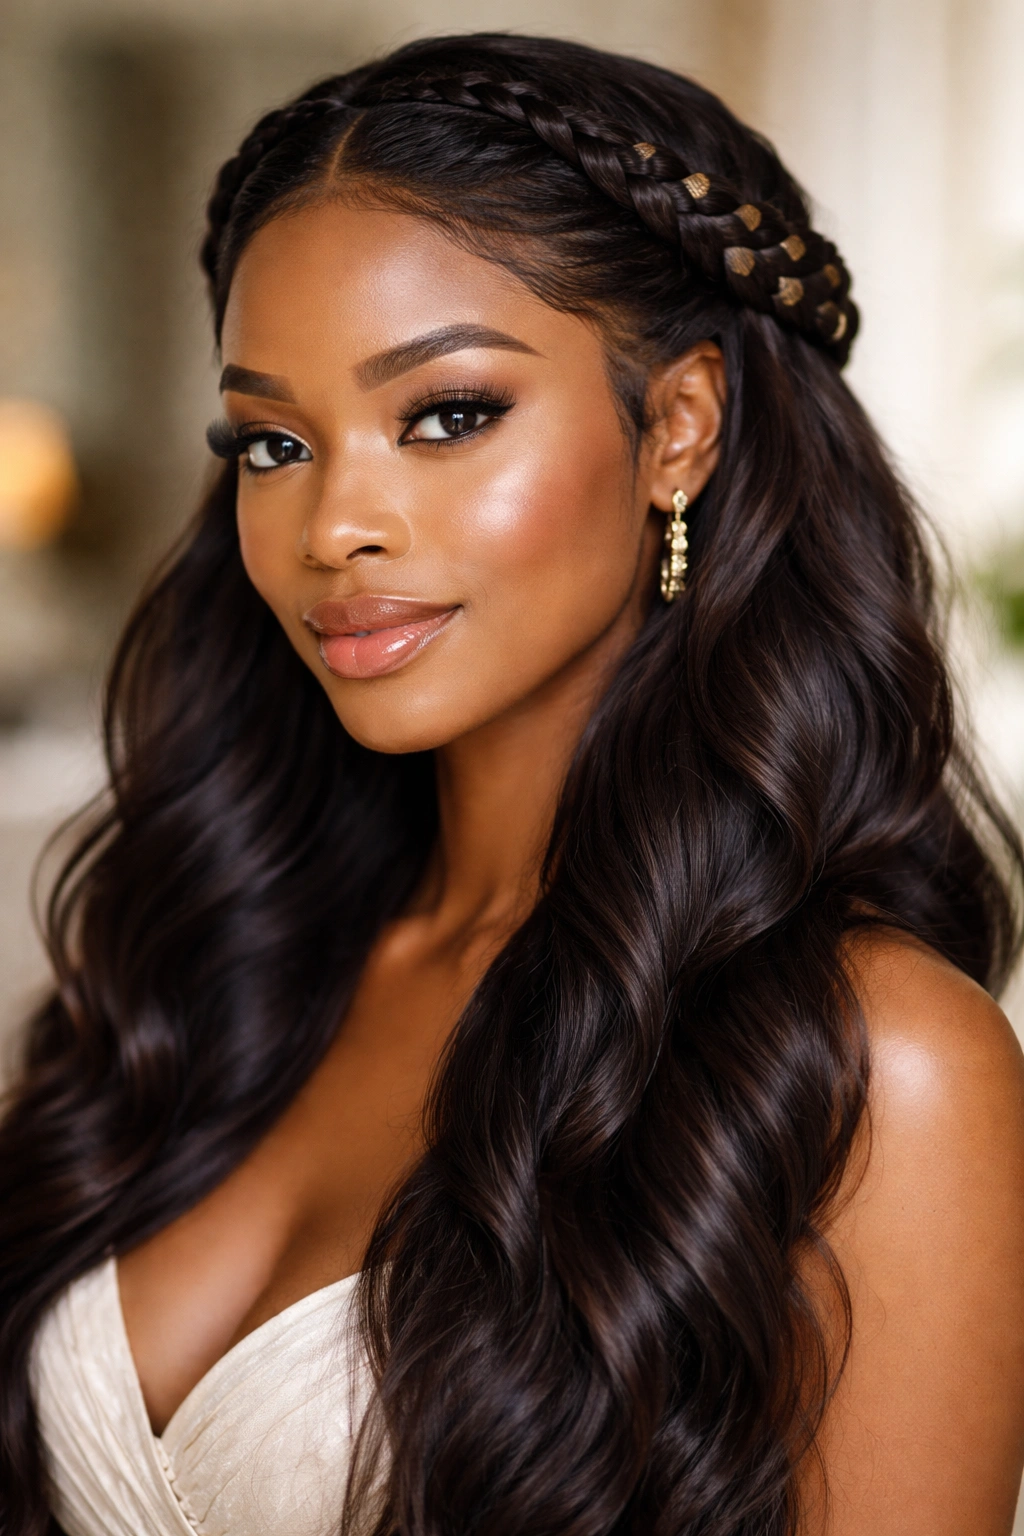
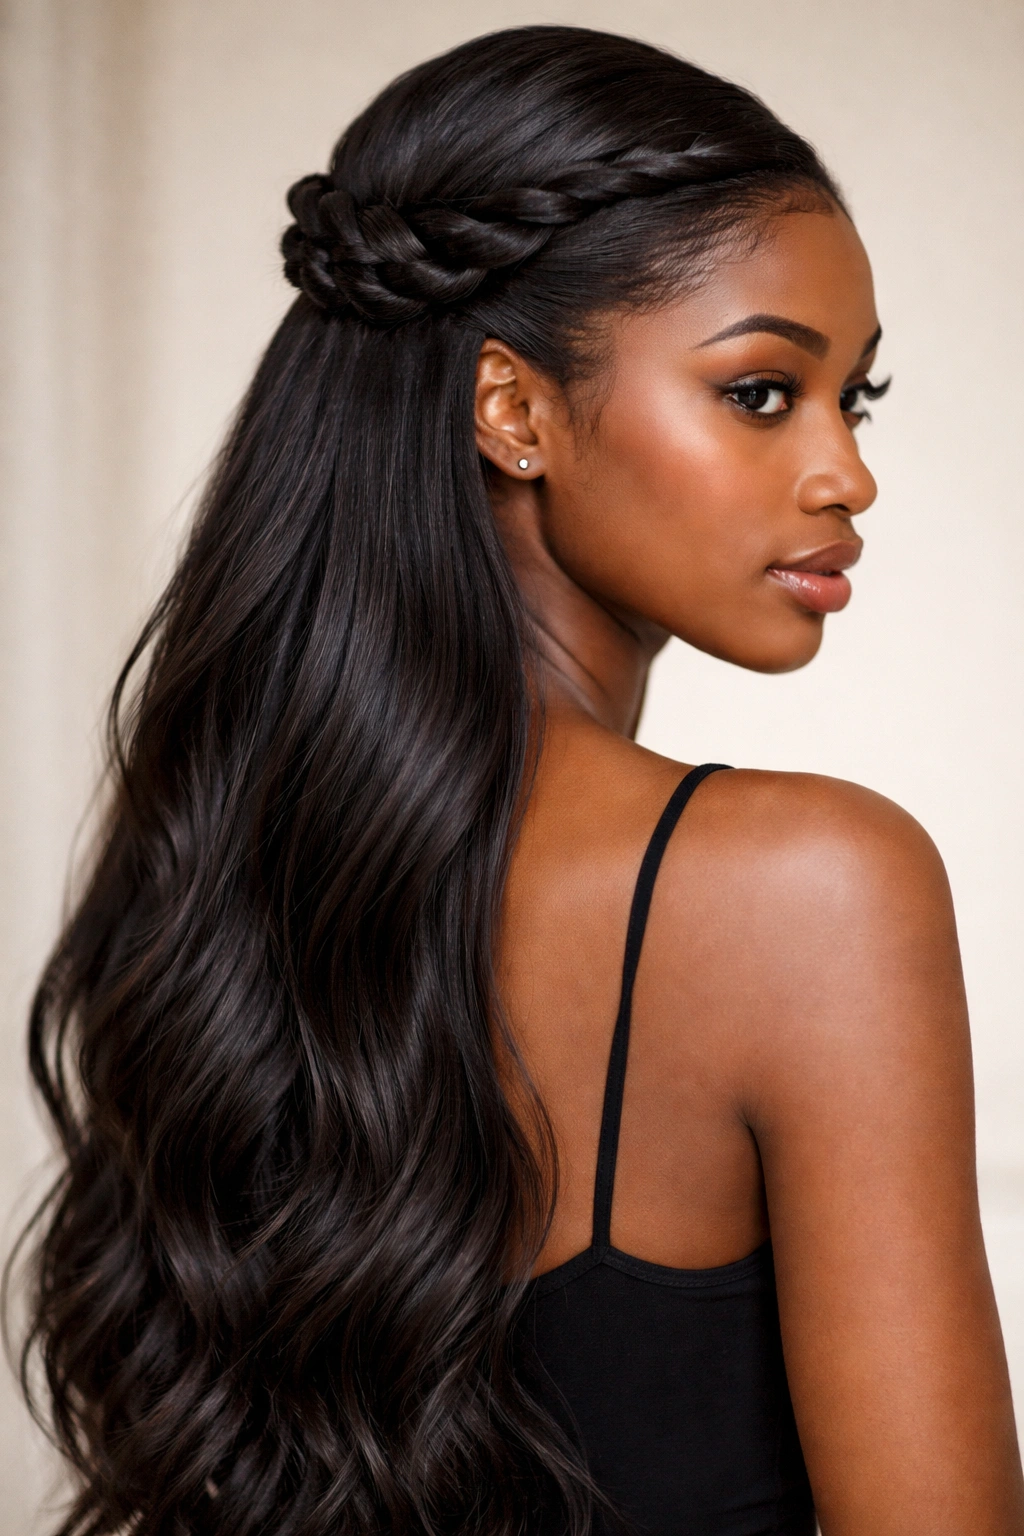
5. Double-Braided Crown with Cascading Curls
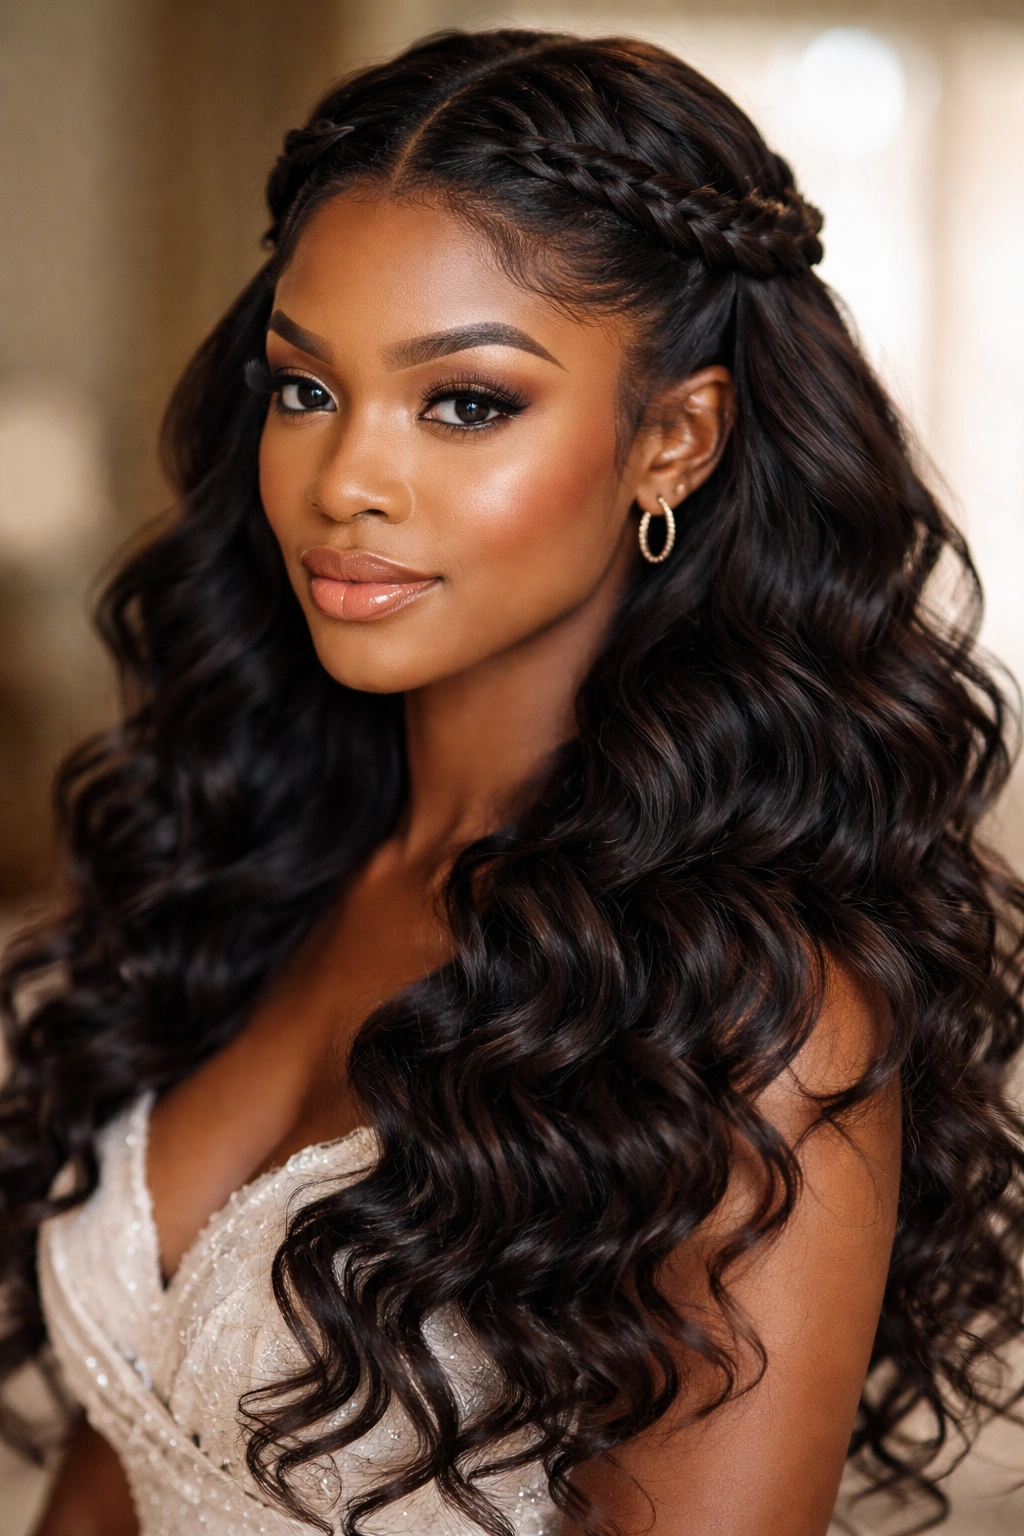
Two medium braids that start at the temples and wrap toward the back of the head, meeting and securing together, create a romantic, ethereal aesthetic that’s powerful without being severe. Unlike a single halo braid, the dual-braid version feels slightly more playful and allows for more texture play, especially if you curl or wave the length underneath. This style sits beautifully on all hair textures and works for everything from club parties to upscale events.
The Technical Approach to Perfect Symmetry
Start with a deep side part or center part, then create two braids of equal thickness, one from each temple, working them toward the back where they intersect. You can overlap them, cross them, or twist them together at the meeting point—each approach creates a slightly different aesthetic. The braids should feel neither too tight (which can be uncomfortable and risk damage) nor too loose (which looks unfinished). That sweet spot is firm enough to hold all night but loose enough that you can see the beautiful detail and dimension of each braid.
Customization Options
- Incorporate delicate threading in gold, silver, or jewel tones through the braids for shimmer
- Add small clip-in or clip-on curls to the loose hair below for instant volume and bounce
- Weave baby’s breath, small flowers, or decorative elements through the braids for a special-occasion feel
- Leave the loose hair in your natural texture pattern or curl it for waves and movement
- Secure the meeting point with an ornamental hair comb or decorative clips rather than standard bobby pins
6. Smooth Gel-Slicked Back with Voluminous Curls Below
This ultra-polished look takes edge control and shaping to an art form, creating sharp, visible edges around a smoothly pulled-back crown while releasing a dramatic amount of volume from the mid-back down. The contrast between the geometric precision of the slicked portion and the wild, untamed beauty of curls below creates a look that’s both editorial and wearable. This works particularly well on natural hair where you can showcase your curl pattern in its full glory, but translates beautifully to other textures too.
Creating Flawless, Show-Stopping Edges
The slickness comes from application technique as much as product quality. Use a flexible gel that won’t flake or feel crunchy, applying it section by section with a fine-tooth comb, brushing smoothly against the grain and then with the grain to create an invisible hold. Work from the front hairline back, then down the sides, creating clean geometric shapes. The precision matters because this is meant to be a style element, not just functional hair holding.
The Curl Explosion Below
- Release the held-back hair from roughly mid-back down, allowing maximum volume and movement
- Use a curling iron, wand, or flexi-rods to create defined, bouncy curls if your hair is straight
- Embrace your natural curl pattern if you’re wearing natural hair, using curl-defining cream or gel for definition
- Add lightweight mousse to damp hair before curling for lasting bounce that doesn’t weigh hair down
- Consider clip-in curls if you want more volume than your natural hair alone can create
7. Sleek Bun with Loose Face-Framing Pieces
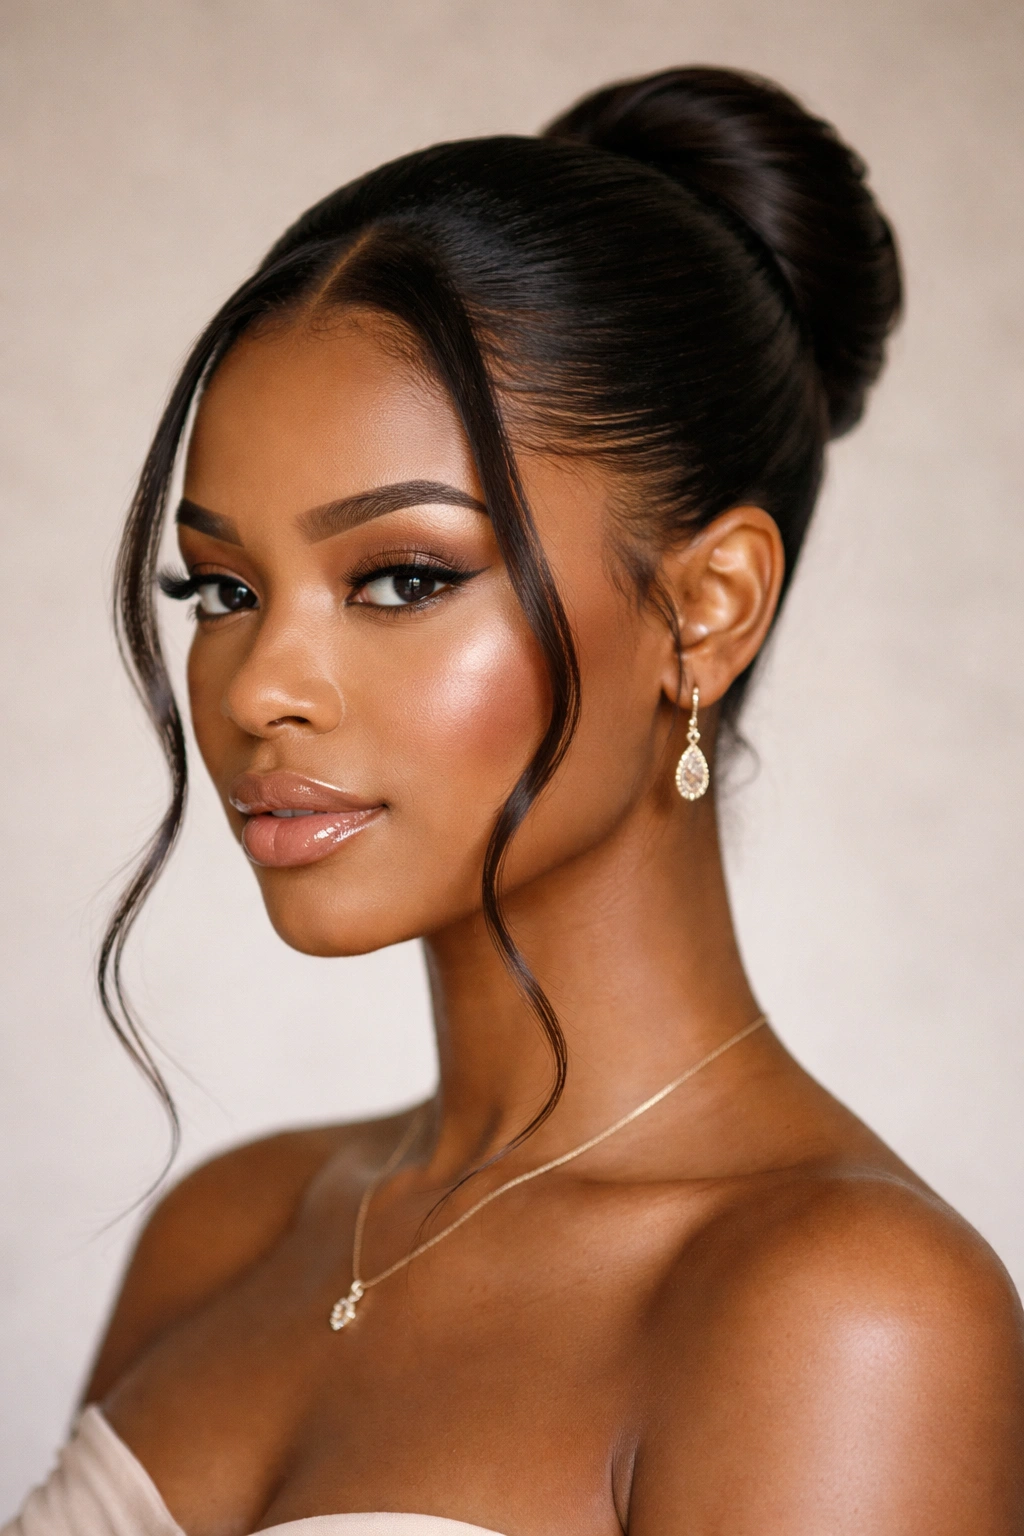
A smooth, tight bun or low knot positioned at the back of the crown becomes an elegant, minimal base while you leave the front and sides completely open with face-framing pieces. This style is the epitome of understated sophistication—it’s not flashy, but it reads as incredibly polished. The exposed face, ears, and neck feel modern and fashion-forward, especially when paired with statement jewelry or a striking makeup look.
Building the Perfect Compact Bun
Gather the upper portion of your hair into a high or mid-height ponytail, then twist or wrap it around the base to create a bun shape. Secure with bobby pins that match your hair color, tucking them in strategically so they’re invisible. The bun itself should be compact and smooth, whether you’re working with natural texture, straightened hair, or locs. Smooth any flyaways or baby hairs with edge control for a sleek finish, but avoid making it so tight that it looks severe or uncomfortable.
Face-Framing Details That Soften It
- Leave pieces at both temples loose and slightly curled or waved, framing your face gently
- Create softer lines by leaving small sections of hair from the front open rather than pulling everything back
- If desired, allow one or two wavy pieces to frame one side only for asymmetrical softness
- The contrast between the sleek bun and softer face-framers creates dimension and prevents the style from feeling severe
- This look pairs beautifully with statement earrings or a strong makeup look since the face is so exposed
8. Voluminous Bubble Ponytail Half Style
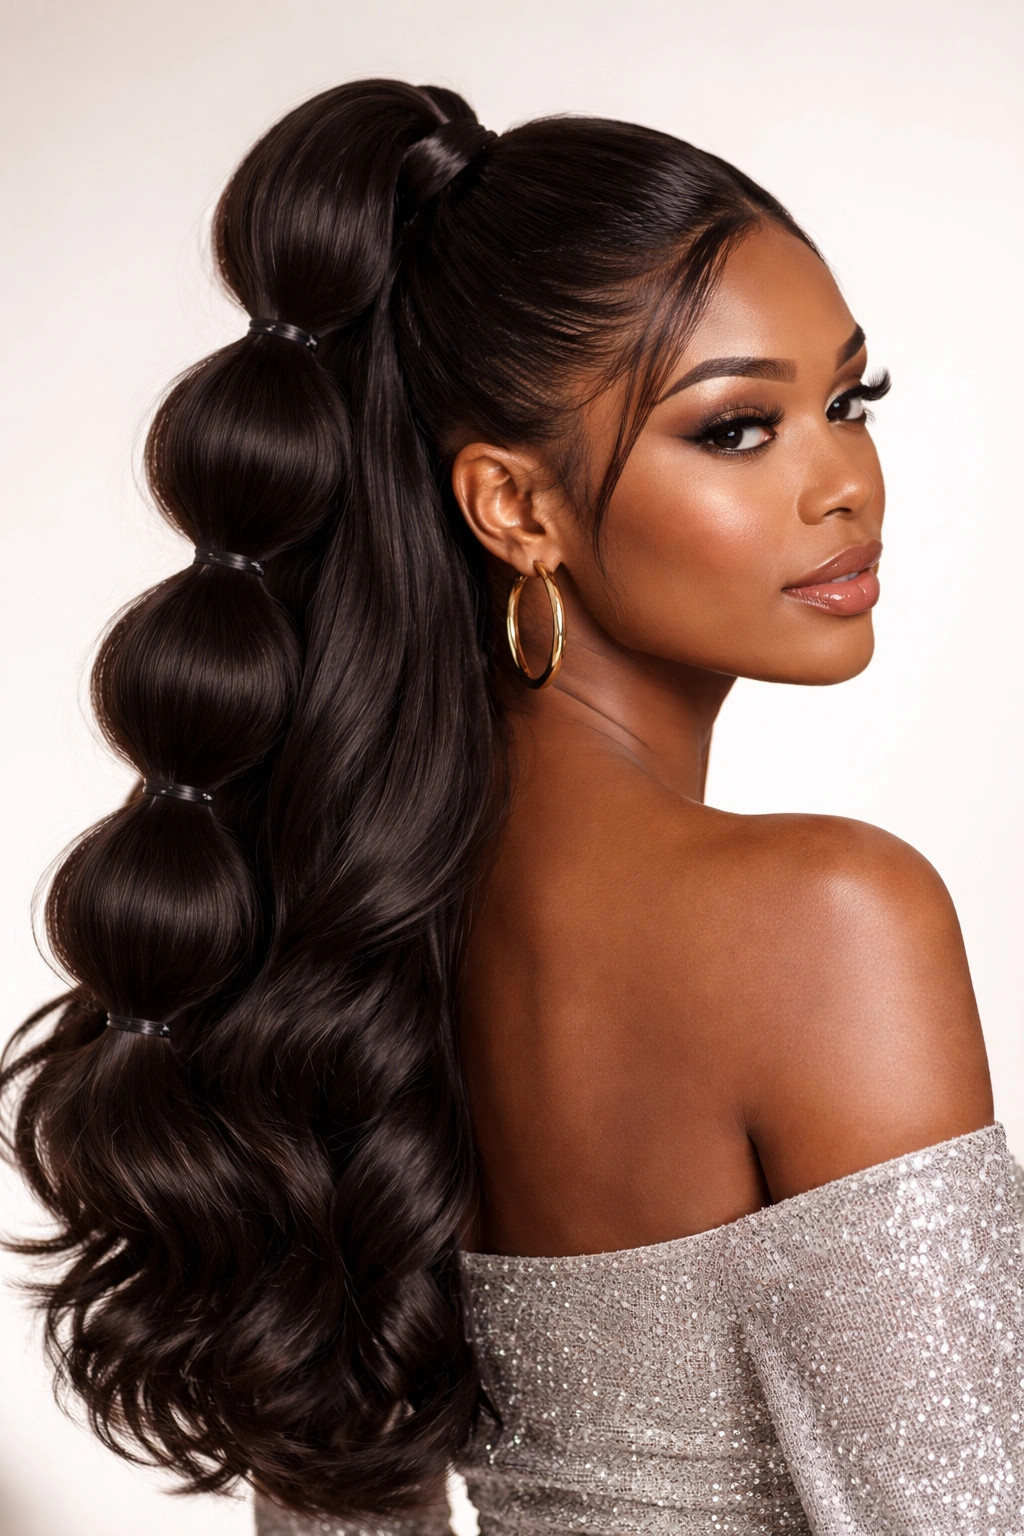
Multiple hair elastics positioned at intervals down the length of a high or mid-level ponytail create distinct “bubbles” of volume between each elastic, transforming a simple half-up ponytail into a sculptural, contemporary statement. This style showcases volume beautifully and works across all hair textures and lengths. The bubbles catch light and movement, creating visual interest from every angle while the style remains completely secure and practical for all-night wearing.
Creating Picture-Perfect Bubbles
Gather the upper portion of hair into a smooth, voluminous half-up ponytail at your desired height. Secure with an elastic, then add additional elastics about 2-3 inches down the ponytail. Between each elastic, gently pull and fluff the section of hair outward to create a bubble effect. Each bubble should feel full and deliberate, not skinny or pulled. Continue this pattern down the length of your ponytail—typically 4-5 bubbles create a substantial, impressive visual effect.
Styling Variations for Different Effects
- Use clear elastics for an invisible, seamless look, or colored elastics that match your outfit for a coordinated moment
- Smooth each bubble or leave it slightly fluffy and textured depending on your hair texture and desired vibe
- Curl the very end of the ponytail into ringlets or waves for added movement and texture
- Wrap small pieces of hair or ribbon around each elastic to conceal them and add visual interest
- This style photographs exceptionally well in video and flash photography because the bubble structure catches light beautifully
9. Sleek Twisted Knot with Open Length
Two sections from the top of your head are twisted together and secured into a knot shape, creating a defined, sculptural element while releasing substantial length below. This style sits somewhere between a full style and completely down hair—it’s minimal enough to feel effortless but intentional enough for party wear. The twisted knot becomes a featured design element, especially if you emphasize it with strategic hairpins or leave it slightly loose and textured.
The Technique for a Polished Knot
Section two pieces from the crown area and twist each one firmly but not painfully tight. Once you have two twisted sections, tie them together into a knot, pulling the knot taut so it sits cleanly against the crown. Secure with bobby pins positioned underneath and throughout the knot so they’re invisible from the front and sides. The knot should feel solid and secure—this isn’t a delicate accessory but a structural element that can handle movement and dancing.
Visual Elevations
- Keep the twisted sections smooth and sleek, or loosen them slightly after tying the knot for a softer texture
- Use metallic pins or decorative pins to secure the knot, making them intentional design elements rather than hidden
- Leave the hair below completely open for maximum contrast and movement
- Consider curling the underneath length in waves or ringlets for texture contrast against the sleek knot
- This style works beautifully with both minimalist and maximalist jewelry because the knot itself is a statement
10. Braided Ponytail Half Style
Instead of securing a regular ponytail, braid the entire half-up section before it becomes a traditional pony, creating a style that reads as significantly more polished and detailed. The braid can be single-strand, Dutch, French, or even a hybrid, depending on your skill level and desired aesthetic. This style takes a classic half up and elevates it immediately by adding texture and dimension to what’s secured, making it feel special without being overly complicated.
Building the Braided Pony Foundation
Section your hair and create your half-up section as usual, but instead of securing it with a standard elastic, braid this section first. The braid can start from the crown and continue down to where the ponytail would naturally begin, or you can create the half-up section and then braid it in place. Either approach works—choose based on your comfort level with styling. Secure the braid’s end with a small elastic that matches your hair, then you can style the remaining hair however you wish.
Styling Directions for Maximum Impact
- Use a Dutch braid (inverted or raised) for visual impact that reads more formal and editorial
- Loosely weave the braid after securing it for a softer, more romantic appearance
- Leave the bottom portion in its natural curl pattern, or curl and style it for waves and movement
- The braid itself becomes a featured design element, so consider incorporating threading or beads if you want additional dimension
- This style works beautifully on medium to longer hair lengths where the braid and the open length below are both substantial
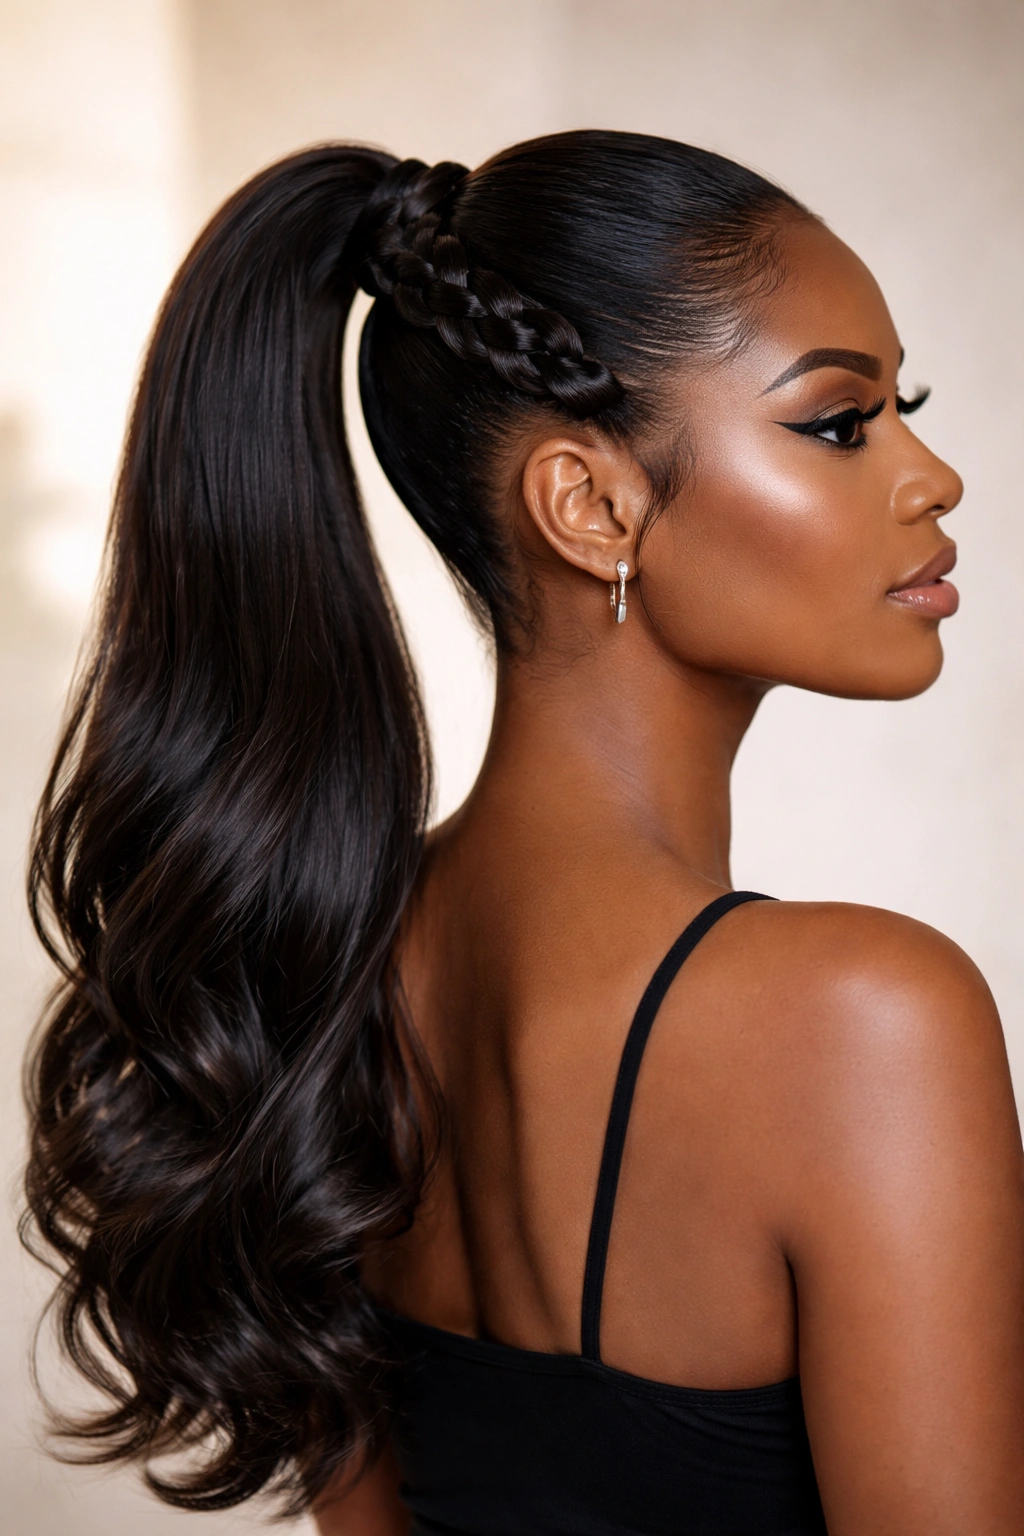
11. Sleek High Ponytail with Cascading Curls and Length
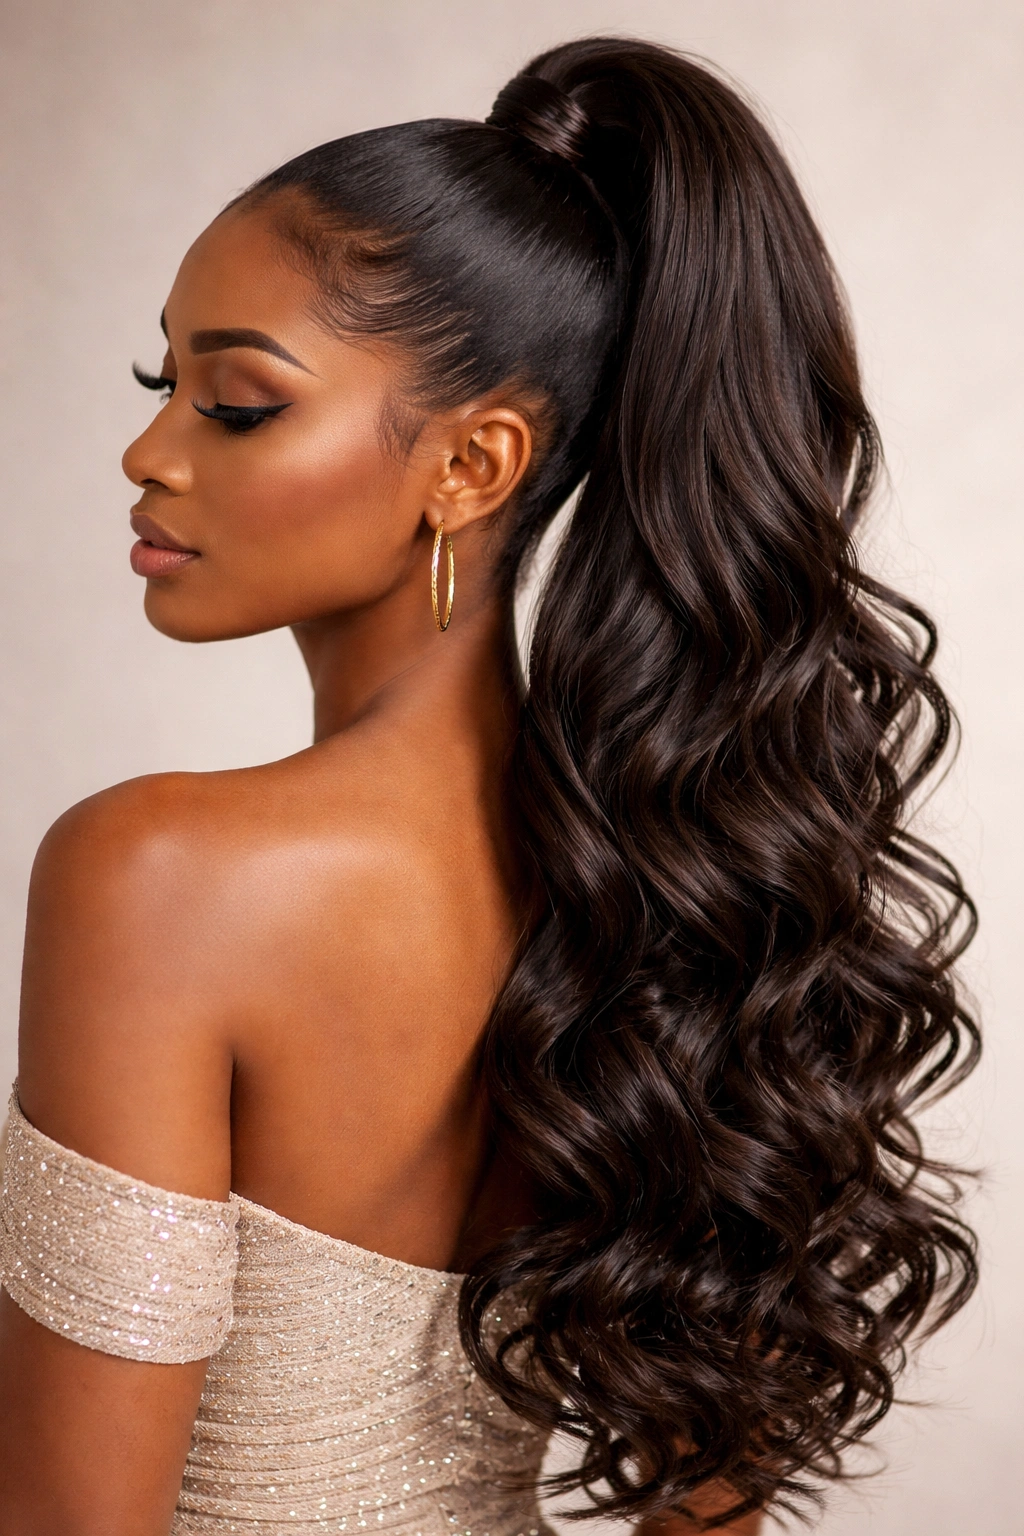
This style pulls the upper portion of hair smoothly back into a high, tight ponytail, then lets the remaining length flow freely in loose, cascading curls. The sleekness of the ponytail contrasts dramatically with the romantic, bouncy curls of the free-flowing length, creating a look that’s both sophisticated and playful. The high placement of the ponytail elongates the neck and face while the voluminous curls below add movement and femininity.
Achieving Sleek, Visible Edges
The slickness here comes from careful application of edge control and proper brushing technique. Use a paddle brush and flexible gel, working from the hairline back in smooth, deliberate strokes. The precision matters because the sleekness becomes a design feature of the overall look. Create a visible geometric shape in the back rather than trying to hide the transition between slicked and loose hair.
Creating the Curl Cascade
- Curl the loose length with a barrel curling iron or wand for defined, bouncy ringlets
- Create larger, looser curls with a larger barrel iron for a softer wave pattern
- Use flexi-rods or pin curls set overnight for natural, lasted curls that don’t require daily styling
- Apply curl cream or lightweight mousse to damp hair before curling for longer-lasting curls
- The curls should feel voluminous and move freely, creating maximum visual impact as you move and dance
12. Twisted Crown Topknot with Wavy Underneath

Three to four twisted sections are gathered and looped into a small topknot secured at the crown, leaving the entire underneath section open and wavy. This style creates a sculptural element at the top while maximizing the visible length below, offering a modern, youthful aesthetic that still reads as intentionally styled. The combination of the constructed topknot with soft, flowing waves below feels balanced and contemporary.
Building the Twisted Crown Base
Section your hair into 3-4 pieces from the front, crown, and upper-back area. Twist each section individually, then gather all twisted sections together at the crown. Loop them and pin them to create a topknot shape—the knot should be compact but substantial enough to read as intentional rather than accidental. The twists create visual texture even though the overall silhouette is minimal.
The Waves Below for Maximum Contrast
- Use a wand or barrel iron to create loose, flowing waves in the open length underneath
- Leave your natural curl pattern fully open if you have textured hair—the natural volume creates beautiful contrast with the topknot
- Apply wave cream or lightweight mousse to damp hair for softer, more natural-looking waves
- Pin the topknot with decorative pins or allow bobby pins to be visible if they match your outfit color
- The contrast between the geometric topknot and flowing waves creates a modern, fashion-forward silhouette
13. Metallic-Threaded Braided Half Up
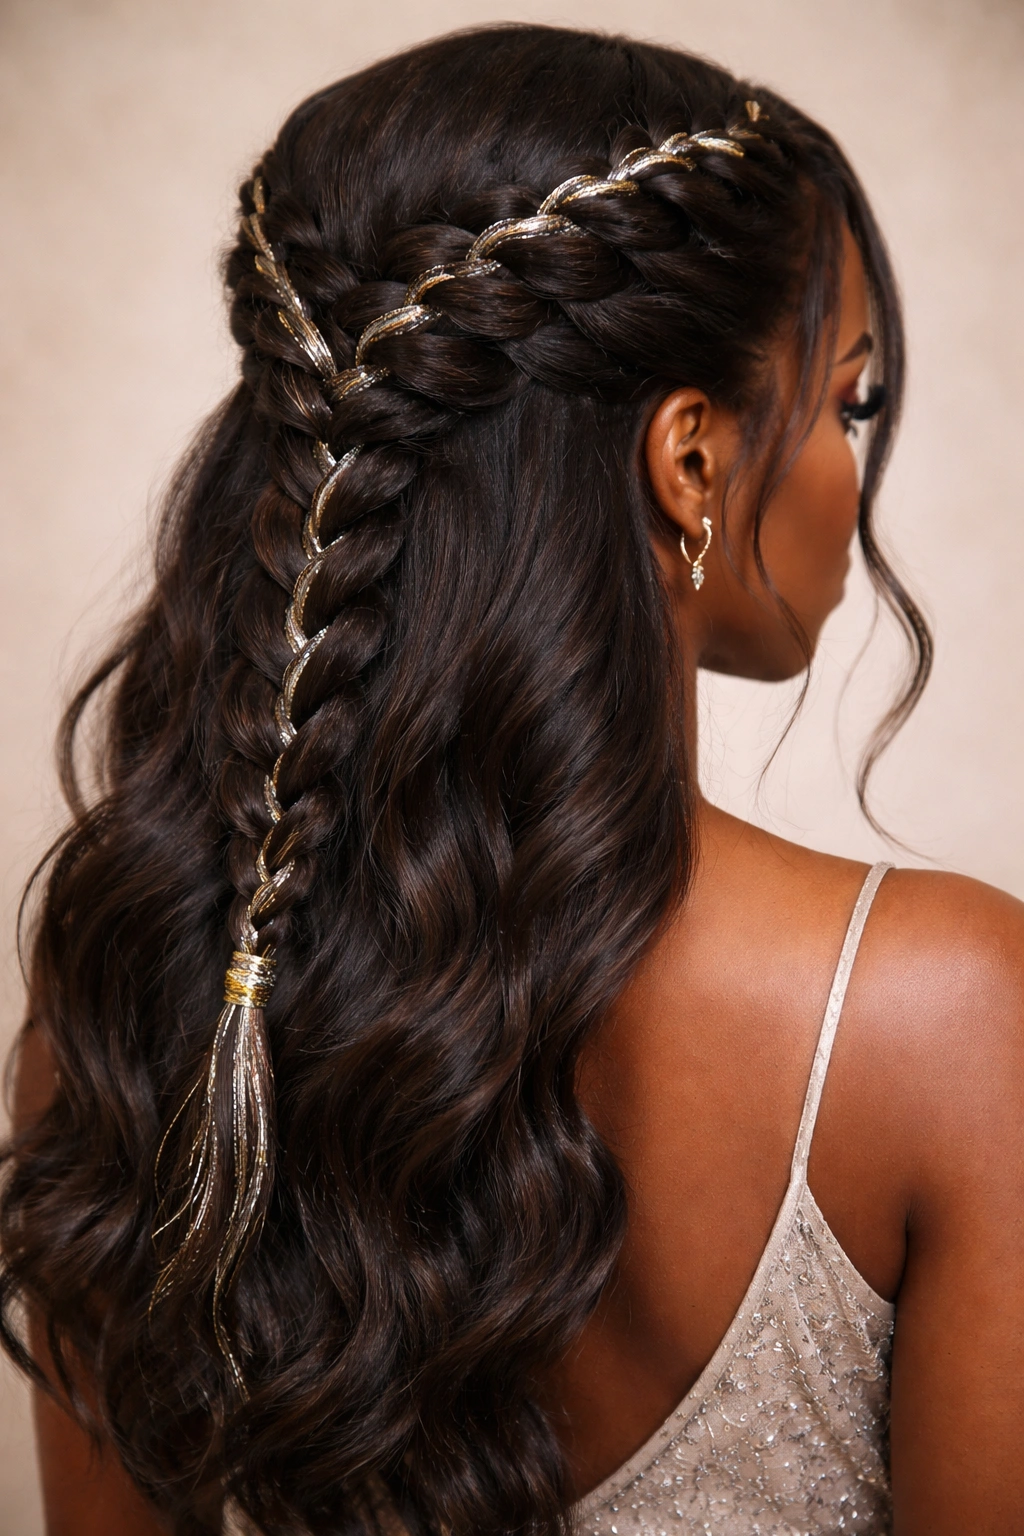
A thick, single-strand or Dutch braid that incorporates metallic thread woven through it from start to finish becomes a glittering design element that transforms a standard party style. The thread catches light with every movement, creating shimmer and visual interest. This style showcases beautiful detail work and demonstrates that you’ve put real thought and effort into your appearance, which is exactly what party styling should communicate.
Incorporating Metallic Threading Seamlessly
Choose a metallic thread color—gold, silver, rose gold, or even holographic—that coordinates with your jewelry and overall look. Begin your braid as usual, but incorporate the thread by holding it alongside a section of hair and braiding around it. The thread should be visible but not overwhelming; it’s an accent, not the main event. Continue weaving the thread through the entire braid length, securing the thread at the end along with your hair elastic.
Finishing Details
- Use a Dutch braid for maximum shimmer visibility, as the raised braid presents the thread more prominently
- Choose thread thickness and color based on how prominent you want the accent to be
- Loosen the completed braid slightly for a softer texture while the thread still glimmers
- Secure with a cuff or decorative piece that coordinates with the thread color
- This style pairs beautifully with metallic makeup or jewelry that echoes the thread color
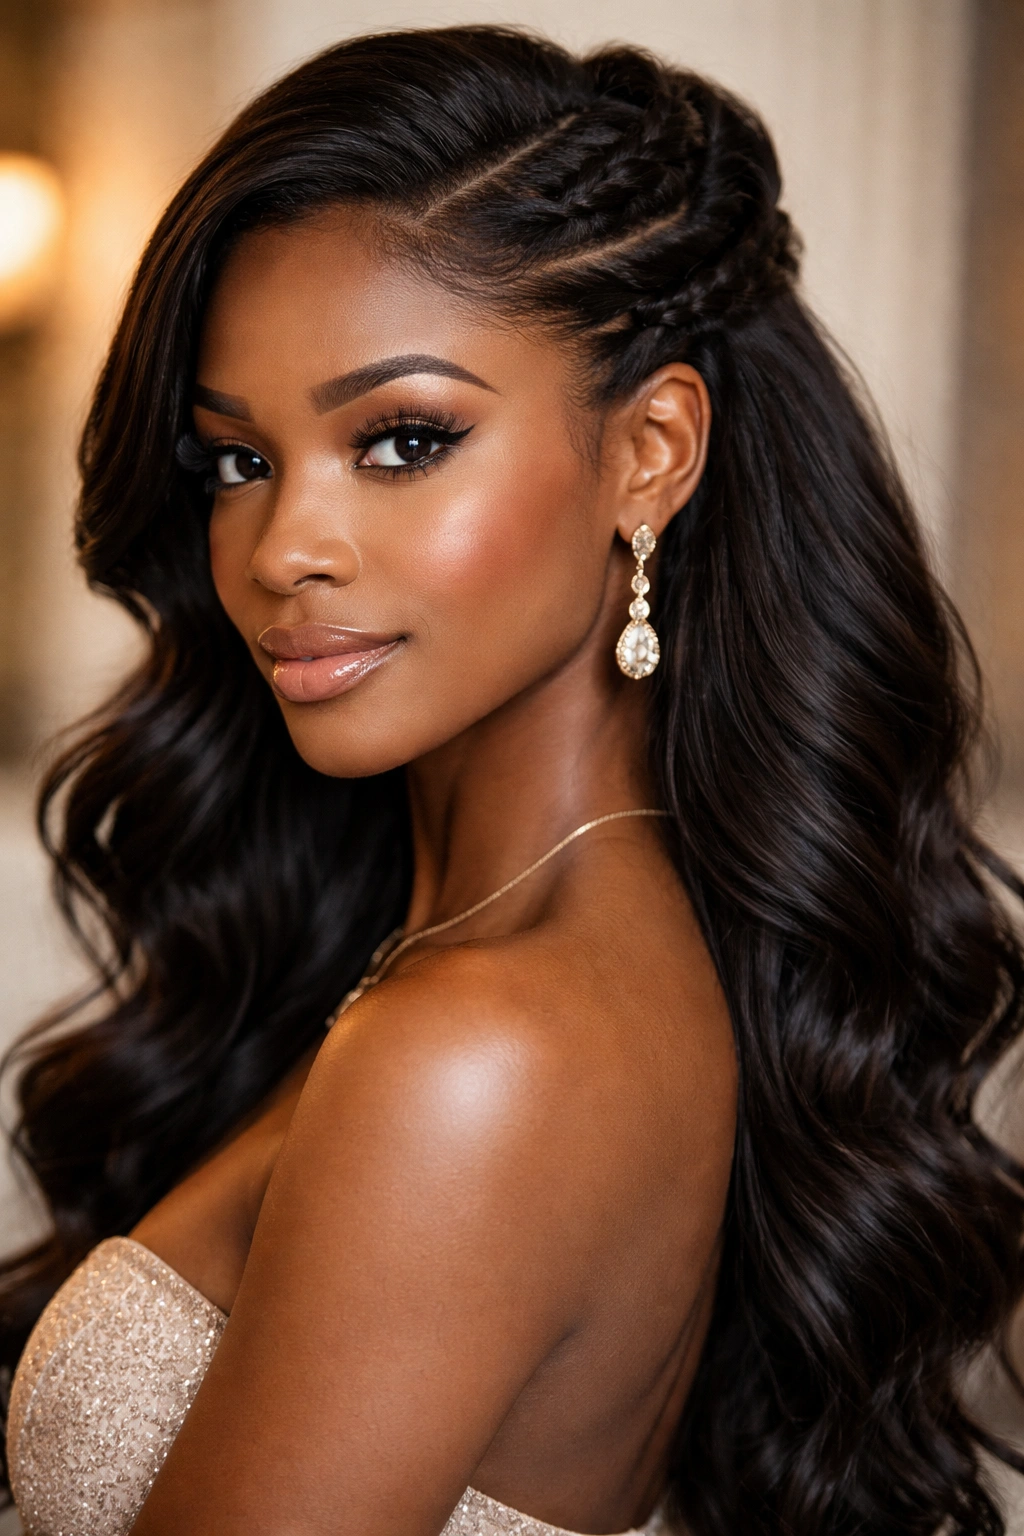
14. Low Side-Swept Twisted Half Up
Two or three twists that start from one side and sweep toward the back create a low, romantic, asymmetrical half-up that feels effortlessly elegant. This style showcases your beautiful face completely while still securing hair in a way that’s practical and intentional. The low placement reads softer and more romantic than a high half-up, making this an excellent choice for sophisticated parties or evening events.
Creating the Side-Sweep Effect
Begin with 1-2 substantial twists originating from one temple or side part, and spiral them gently toward the back of your head. The twists should feel loose and flowing rather than tight and sleek—this softness is what creates the romantic vibe. Secure the twists where they meet at the back, leaving the opposite side completely open and un-gathered, which creates the asymmetrical balance.
Styling Nuances
- Loosen the twists after securing them for texture and movement
- Leave the open side in your natural curl pattern or add waves with a curling iron
- Add temporary color or threading through the twists for personalization
- The twists should feel substantial but relaxed, never pulled tightly
- This style photographs beautifully in profile as well as full-face angles because of its asymmetrical design
15. High Volume Crown Section with Crimped Texture Below
The upper section is smoothly pulled back into a voluminous, fluffy crown while the underneath length is crimped for exaggerated texture and dimension. This style celebrates texture in a modern way, using the contrast between the smooth crown and textured underneath to create visual interest and movement. The crimped texture adds retro-modern flair while the smooth crown keeps the look current and wearable.
Creating Volume at the Crown
Gently backcomb the upper portion of hair at the crown for natural volume, then smooth the surface layer slightly so you can see the backcomb texture but it looks intentional and controlled. Gather this voluminous section and secure it with a strong elastic. The volume should feel substantial and somewhat sculptural—this isn’t a tiny half-up but a significant section.
Crimping the Lower Length
- Use a crimping iron on damp or dry hair to create exaggerated waves and texture
- Work section by section to ensure even texture coverage throughout the underneath length
- The crimped texture should look intentional and modern, not accidentally frizzy
- Apply lightweight mousse or texture spray to enhance and hold the crimped waves
- Style the crimped section in waves or leave it in the crimp pattern depending on desired effect
16. Braided Wrap-Around Headband Half Style
A single, thin braid wraps around your head like a headband from one temple across the crown to the opposite temple, with the remainder of hair flowing freely below. This style creates the illusion of a delicate headpiece while using only your own hair, making it feel both special and intimate. It works beautifully across all hair textures and reads as effortlessly elegant rather than heavily styled.
Creating the Braid Headband
Begin your braid at one temple and work it across the crown, paralleling your hairline. This is typically a thin to medium three-strand braid that sits slightly away from the scalp, creating a floating effect. Continue the braid across to the opposite temple, then secure the end with a small elastic that can be tucked behind your ear or hidden beneath hair on that side.
Finishing Touches
- The braid should sit gently on the head rather than pulled tightly—this softness creates the “headband” illusion
- Leave considerable length loose below the braid for maximum contrast and movement
- Curl the loose length in waves or let your natural texture shine
- Tuck the braid end behind the ear on the opposite side, or secure it with a small comb or pin
- This style photographs beautifully because the braid creates a natural frame for your face and features
17. Smooth Ponytail with Looped Braid Detail
A sleek, smooth high or mid-level ponytail is created, then a small section of hair from the ponytail itself is braided and looped back up, threading through the base of the ponytail to create added dimension and visual interest. This technique adds a design detail that demonstrates technical skill without requiring complicated styling. It’s the kind of detail that makes a simple style feel special and intentional.
Creating the Base Ponytail
Gather the upper portion of hair smoothly into a firm, high or mid-height ponytail. Smooth any bumps or flyaways with edge control or fine-tooth comb, creating a sleek, polished base. Secure with a strong elastic that matches your hair color. The ponytail itself should be smooth and well-constructed because it becomes the foundation for your detail work.
Adding the Looped Braid
- Take a thin to medium section from the ponytail and braid it smoothly
- Bring the braided section back up and pin it so it threads through the base of the ponytail
- The braid section creates a visual element without adding to the weight or volume of the ponytail
- Secure the looped braid end with pins that match your hair color, hidden within the braid
- This technique works beautifully on medium to longer lengths where there’s enough ponytail to create a notable detail
18. Deep Side Part with Twisted Sides Secured Back

A deep, dramatic side part creates the foundation for a style where the larger side is twisted and pulled toward the back and secured, while the smaller side flows freely down past your shoulder. This asymmetrical approach creates a fashion-forward, editorial quality that feels sophisticated and intentional. It’s a style that demands a strong makeup look and confident energy to pull off fully.
Working With the Deep Side Part
Create a very deep, visible side part—the deeper and more dramatic, the stronger the impact. On the larger side, create one or two substantial twists that spiral toward the back of your head. Secure these twists where they meet the smaller side, then allow the smaller side to flow freely at full length. The asymmetry is the entire point of the style—it should feel unbalanced by design.
Styling for Maximum Drama
- Loosen the twists slightly after securing for a romantic, soft texture
- Leave the free-flowing side in your natural curl pattern or wave it with a curling iron
- The contrast between the controlled twist side and flowing free side is what makes the style work
- This style demands strong, intentional makeup and jewelry to balance the asymmetry
- It photographs beautifully from the side angle where the deep part is most visible
19. Crown of Curls with Sleek Back Section
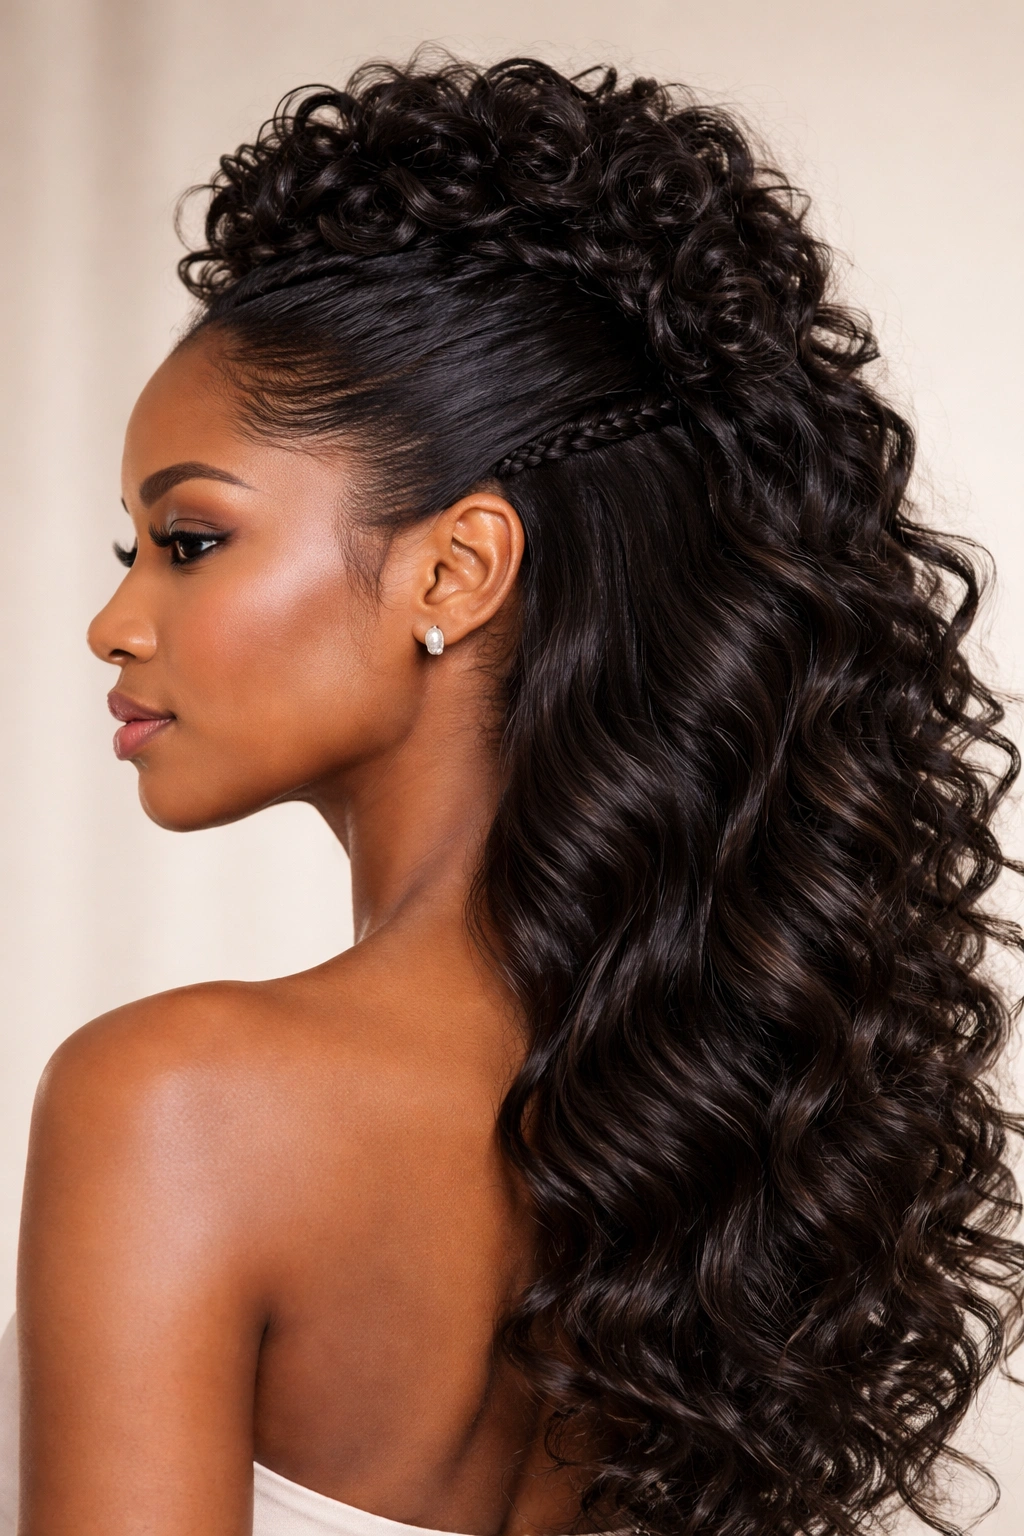
Curled sections from the crown are left loose and voluminous while the back section from the ears downward is braided or twisted smoothly and laid against the back of your head, creating a layered, textured effect. The combination of full, bouncy curls at the crown with controlled lines at the back creates a style that feels both romantic and polished. This works beautifully on longer lengths where you have enough hair to create substantial volume at the crown.
Building the Curled Crown
Curl generous sections from your crown and upper head with a barrel curling iron or flexi-rods, focusing on creating loose, bouncy ringlets. Leave these curls at full volume and height, allowing them to sit up and away from the head. The curls should feel substantial and intentional—this isn’t just a few curls but a notable crown of volume.
Creating the Sleek Back Control
- Gather hair from approximately ear-level down and create a smooth braid or twisted section along the back of your head
- The braided or twisted section should lie flat against your head, creating a strong line
- Secure the braid or twist with pins, allowing it to sit invisibly beneath the crown of curls
- The contrast between the volume at the crown and the sleekness at the back creates visual balance
- This style works beautifully with pulled-back makeup or skin, emphasizing features while the curled crown adds softness
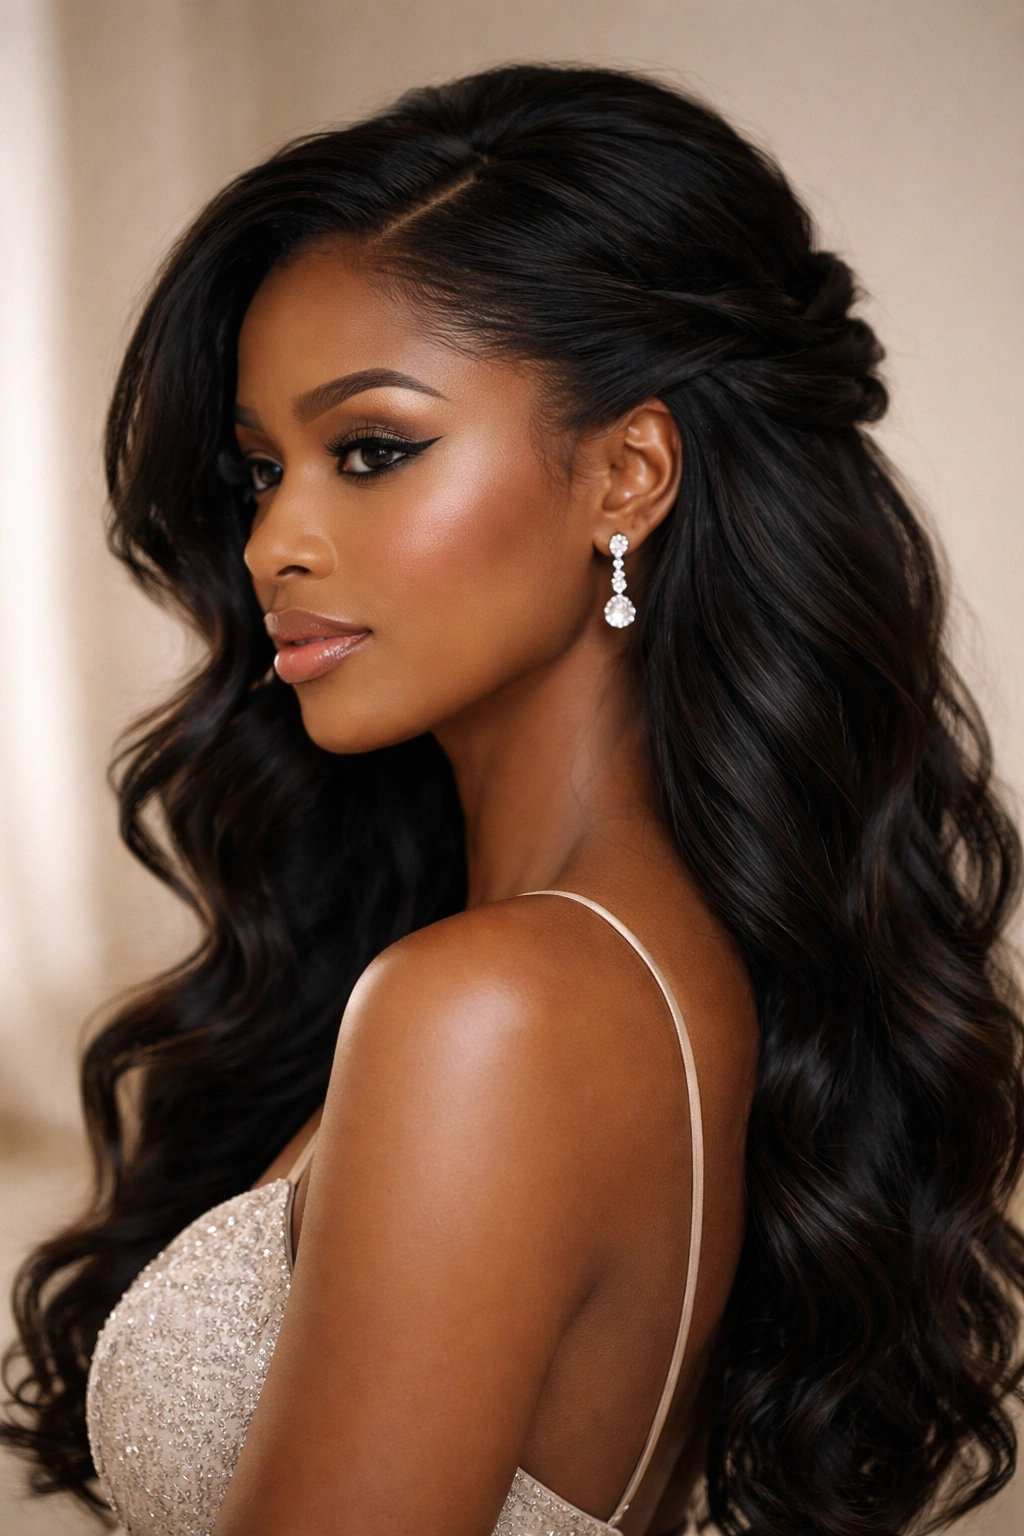
20. Minimalist Single-Twist with Statement Drop
A single, thick twist that travels from one temple back toward the ear is secured with a single statement hair comb or clip, then the rest of the hair is left completely open. This almost-down style reads as intentionally minimal and modern, letting your face and hair’s natural beauty shine while adding just enough styling detail to read as party-appropriate. It’s the kind of style that works for women who prefer their hair mostly down but want to show they’ve made a styling effort.
Creating Impact With Minimal Elements
The single twist should be thick and substantial, not skinny or delicate. Work it from one temple back toward the opposite ear, positioning it lower than a traditional half-up so it reads more as an accent than a structural style. Secure with a single, notable hair comb, claw clip, or decorative pin that becomes a featured element rather than a hidden fastener.
The Power of Understated Styling
- Keep the twist loose and textured rather than sleek for a modern, undone aesthetic
- Choose a statement comb or clip in gold, tortoiseshell, pearl, or jeweled finishes that complement your outfit
- Leave the remainder of your hair in its natural texture or add soft waves—it should feel mostly down
- This minimalist approach works beautifully with statement earrings or a bold lip because the style doesn’t compete
- The simplicity of the styling emphasizes facial features and allows other elements of your look to shine
Final Thoughts
Half up half down styling gives you the freedom to express exactly who you are on any given night—whether you’re drawn to polished, romantic, dramatic, or minimalist aesthetics. The beauty of these twenty looks is that they’re not fixed formulas but starting points. You can mix elements from different styles, swap styling tools based on what you have available, adjust the tension and looseness to match your comfort level, and make every single style your own.
The most important thing to remember is that your hair is meant to make you feel confident and beautiful. If a style requires uncomfortable tightness that gives you a headache, that’s not serving you—loosen it slightly. If you love the detail work of intricate braiding, lean into that. If you prefer your styling minimal and effortless, own that energy. The goal is to show up to your party feeling like the absolute best version of yourself, and that happens when your styling reflects your genuine preferences and comfort level.
Pay attention to what makes you feel most beautiful in these styles—is it the edge control and sleekness? The volume and bounce? The intricate detail of braids and twists? The romantic movement of waves? Once you identify what resonates with you, you can repeat and remix those elements across future styling, building a personal signature that’s distinctly yours. That’s when styling becomes less about following a formula and more about expressing your authentic self.