Choosing the right hairstyle for bridesmaids involves more than just looking pretty—it’s about finding a style that’s flattering, photogenic, sturdy enough to last through the ceremony and reception, and easy enough to achieve without requiring a professional stylist at the salon. Half up half down styles are the perfect sweet spot for bridesmaid hair because they offer versatility, elegance, and practicality all in one. These styles work with nearly every dress neckline, suit almost every face shape and hair texture, and give you the freedom to keep hair off your face while still showing off length and movement. Plus, they’re genuinely simple to create—most can be styled in 15 to 20 minutes with basic hair tools and techniques.
Whether bridesmaids have straight, wavy, or curly hair, thick or fine strands, long locks or shoulder-length bobs, there’s a half up half down style that will work beautifully. The styles below range from classic and romantic to modern and unexpected, but every single one strikes that crucial balance between polished elegance and achievable simplicity. These aren’t complicated updos that demand hours of practice or professional-level technical skills—they’re styles a bridesmaid with basic hair knowledge can create herself or that any stylist can pull off reliably on the wedding day.
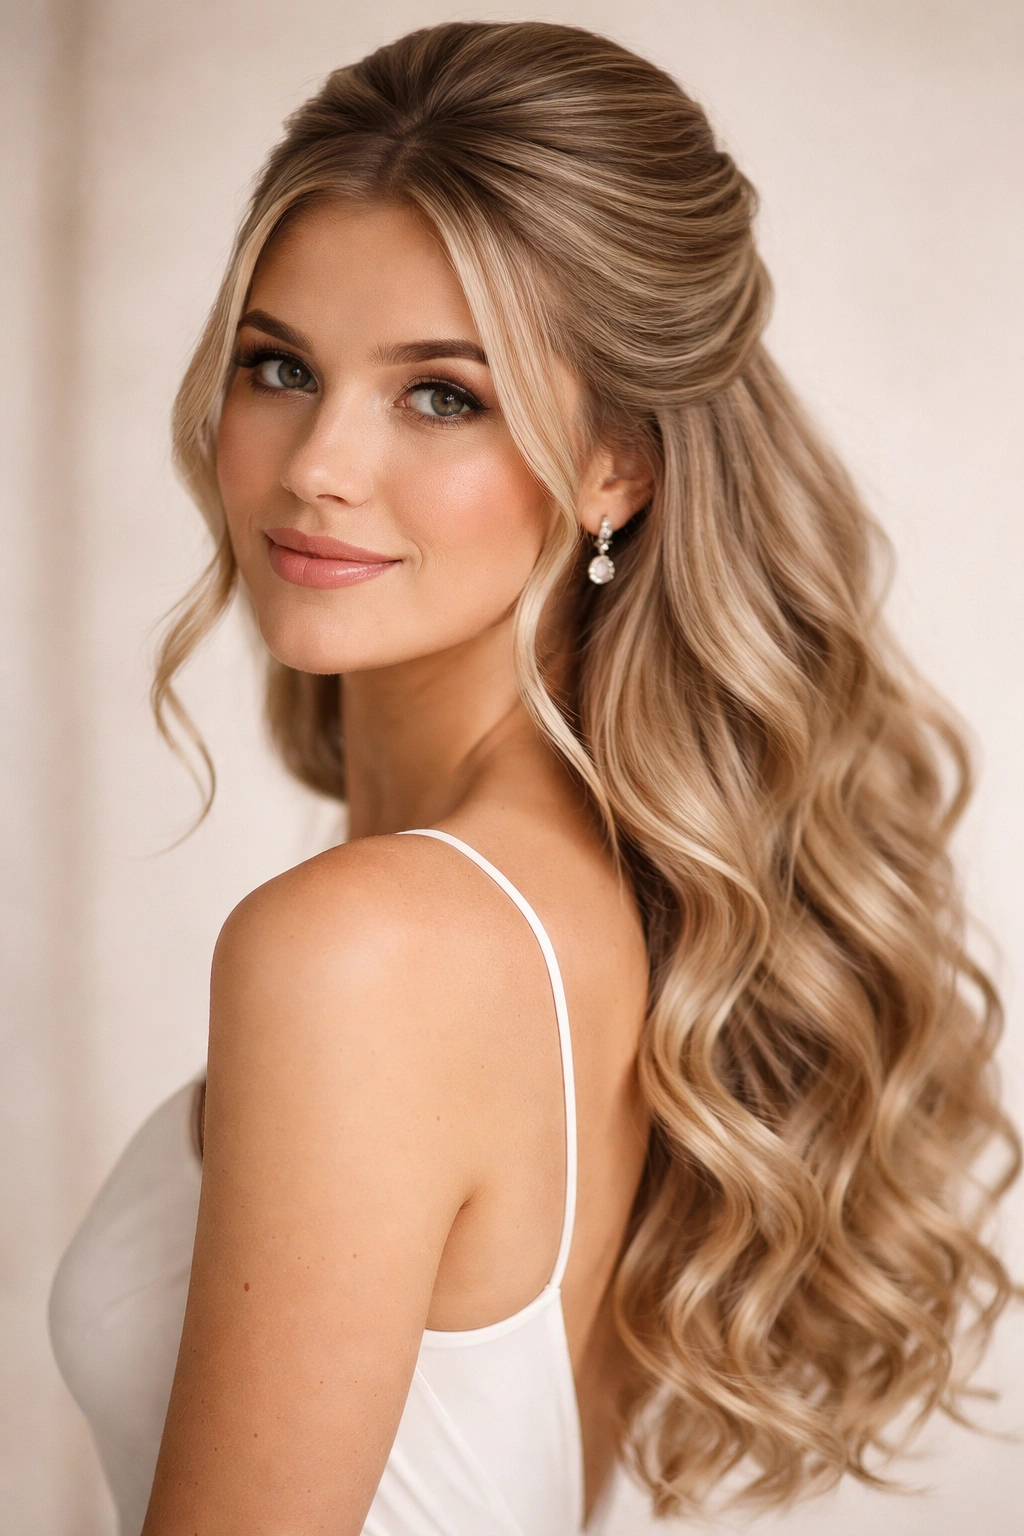
1. The Classic Twisted Half-Up
This timeless style never fails to deliver elegance and sophistication. Two sections of hair are twisted away from the face and secured at the crown with a matching clip or bobby pins, while the remaining hair flows freely down the back and shoulders. The twisted detail adds visual interest without looking overdone, and the style frames the face beautifully in photos from every angle.
Why This Works for Bridesmaids
The twisted half-up is instantly recognizable as a formal style, which makes it appropriate for any wedding aesthetic from traditional to modern. The twists are tight enough to stay in place all day and night, even during dancing and movement, yet the twisted sections are loose enough that they don’t look stiff or uncomfortable. This style also takes only about 10 minutes to create, even on longer or thicker hair, making it a practical choice for a morning wedding schedule.
How to Create the Look
- Start with clean, dry or lightly dampened hair and brush it smooth
- Take a thin section of hair from one side of your head, just above your ear
- Twist the section away from your face, turning the hair outward, and continue twisting as you work toward the back of your head
- Repeat on the opposite side, twisting the second section in the same direction
- Meet both twisted sections at the crown of your head and secure with bobby pins or a small metal hair clip
- Gently tug at the twists to loosen them slightly, creating softness and dimension
- Smooth flyaways with a light hairspray designed not to flake
Pro tip: If your hair doesn’t have much texture or tends to be slippery, backcomb the crown area very lightly before securing the twists—this gives the bobby pins more grip and keeps everything anchored.
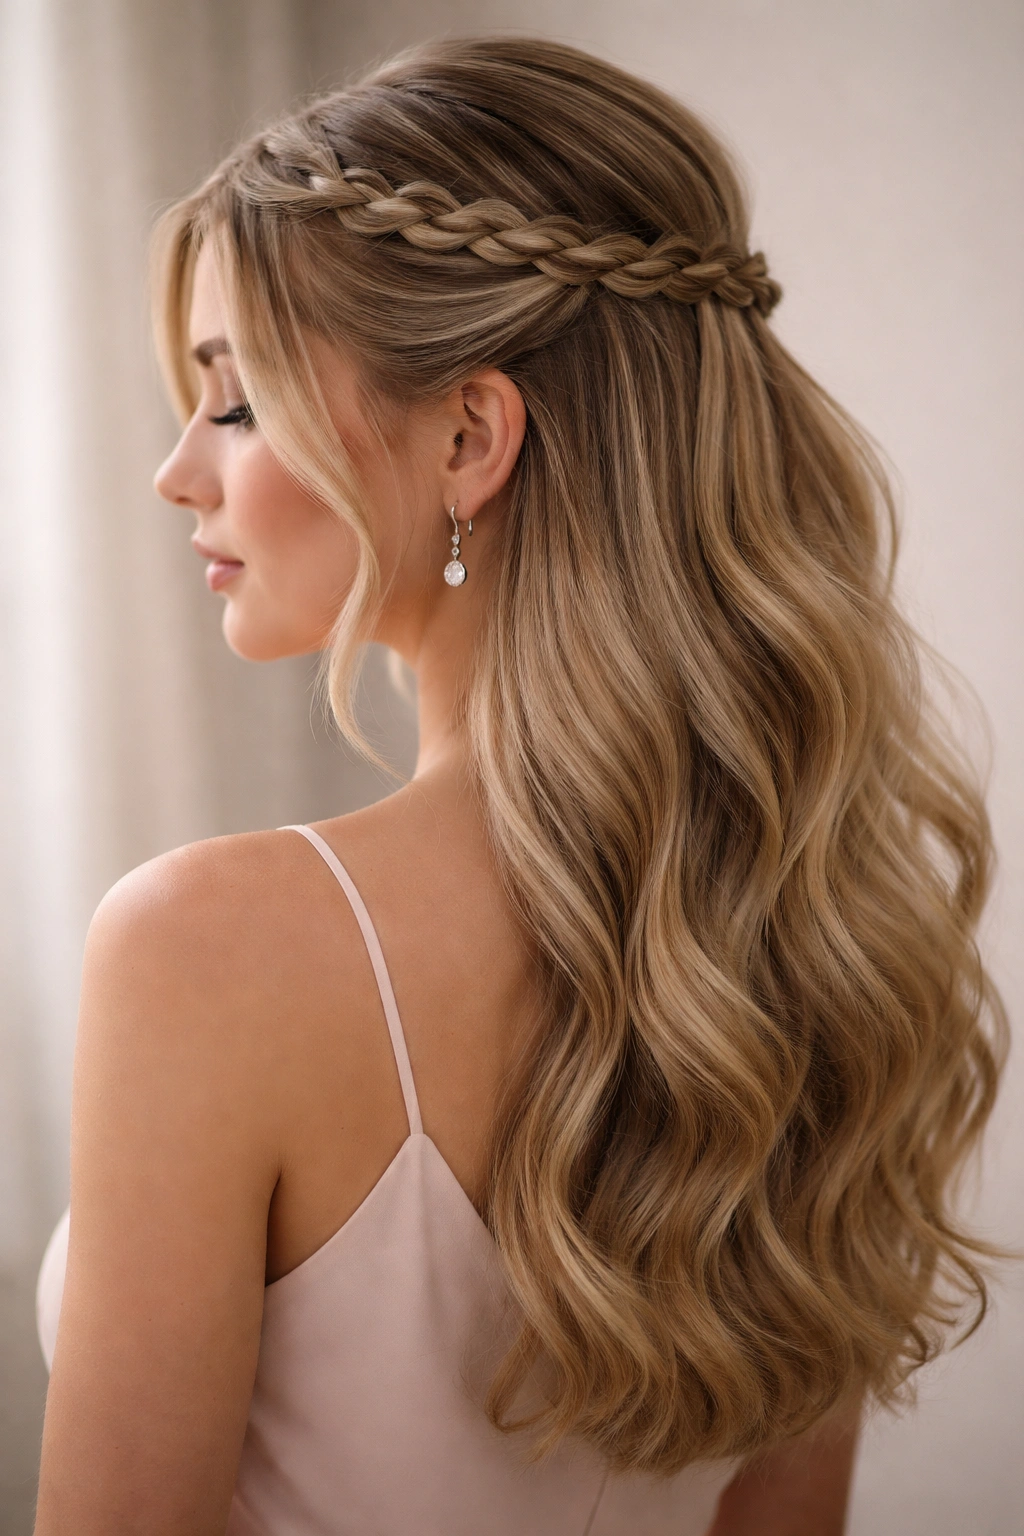
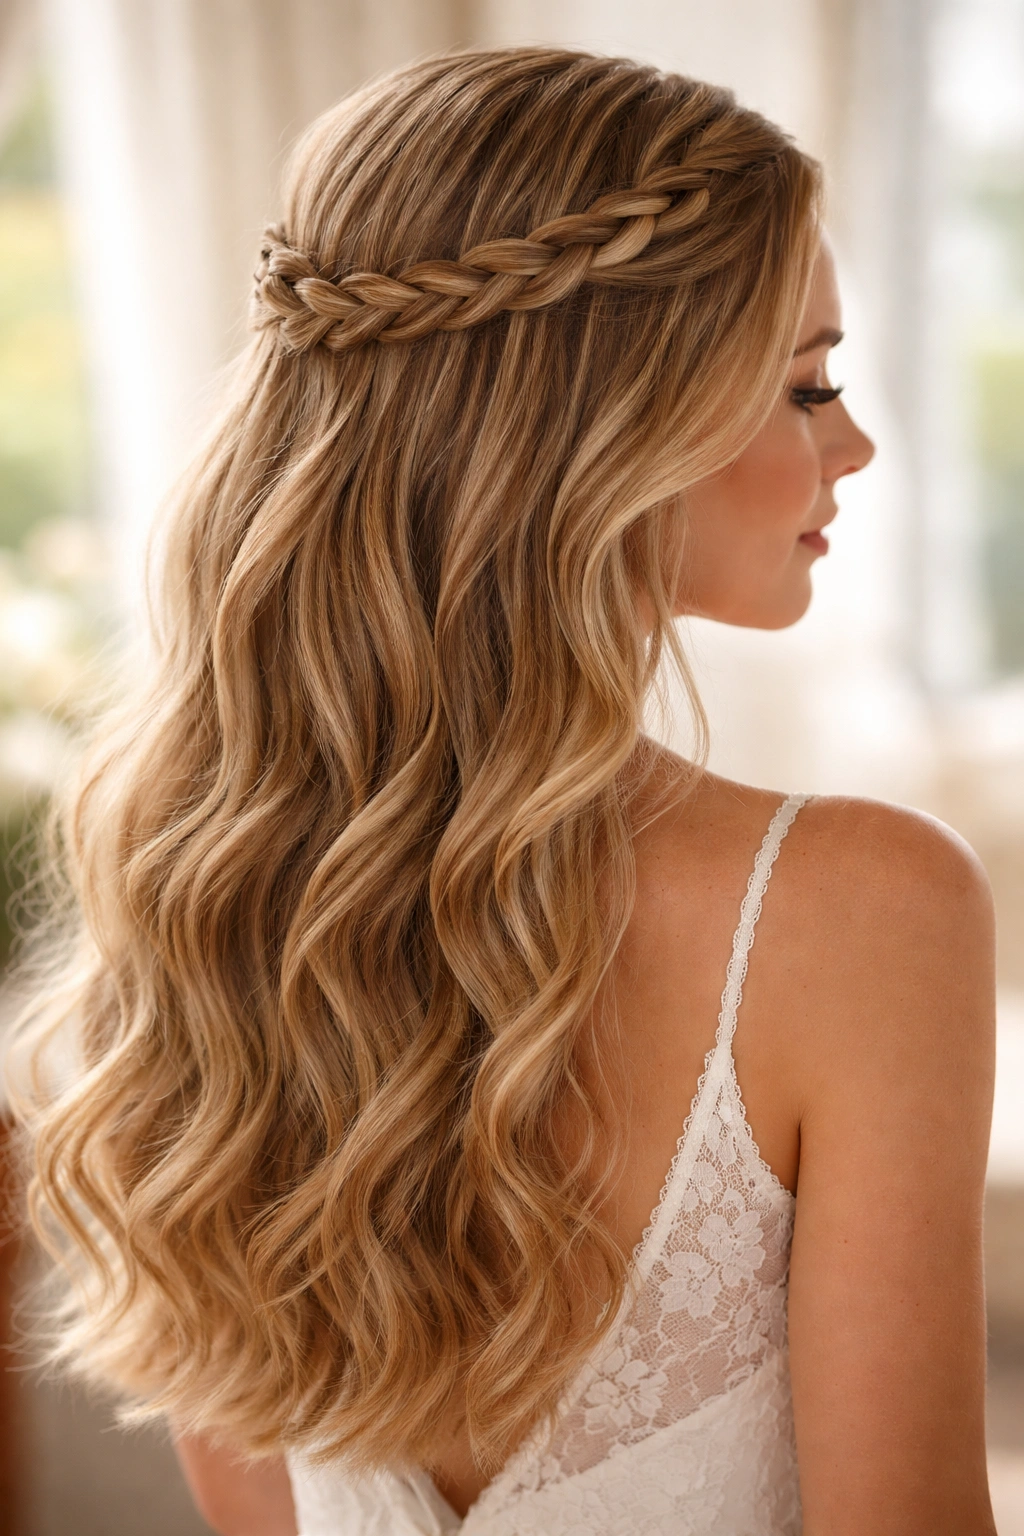
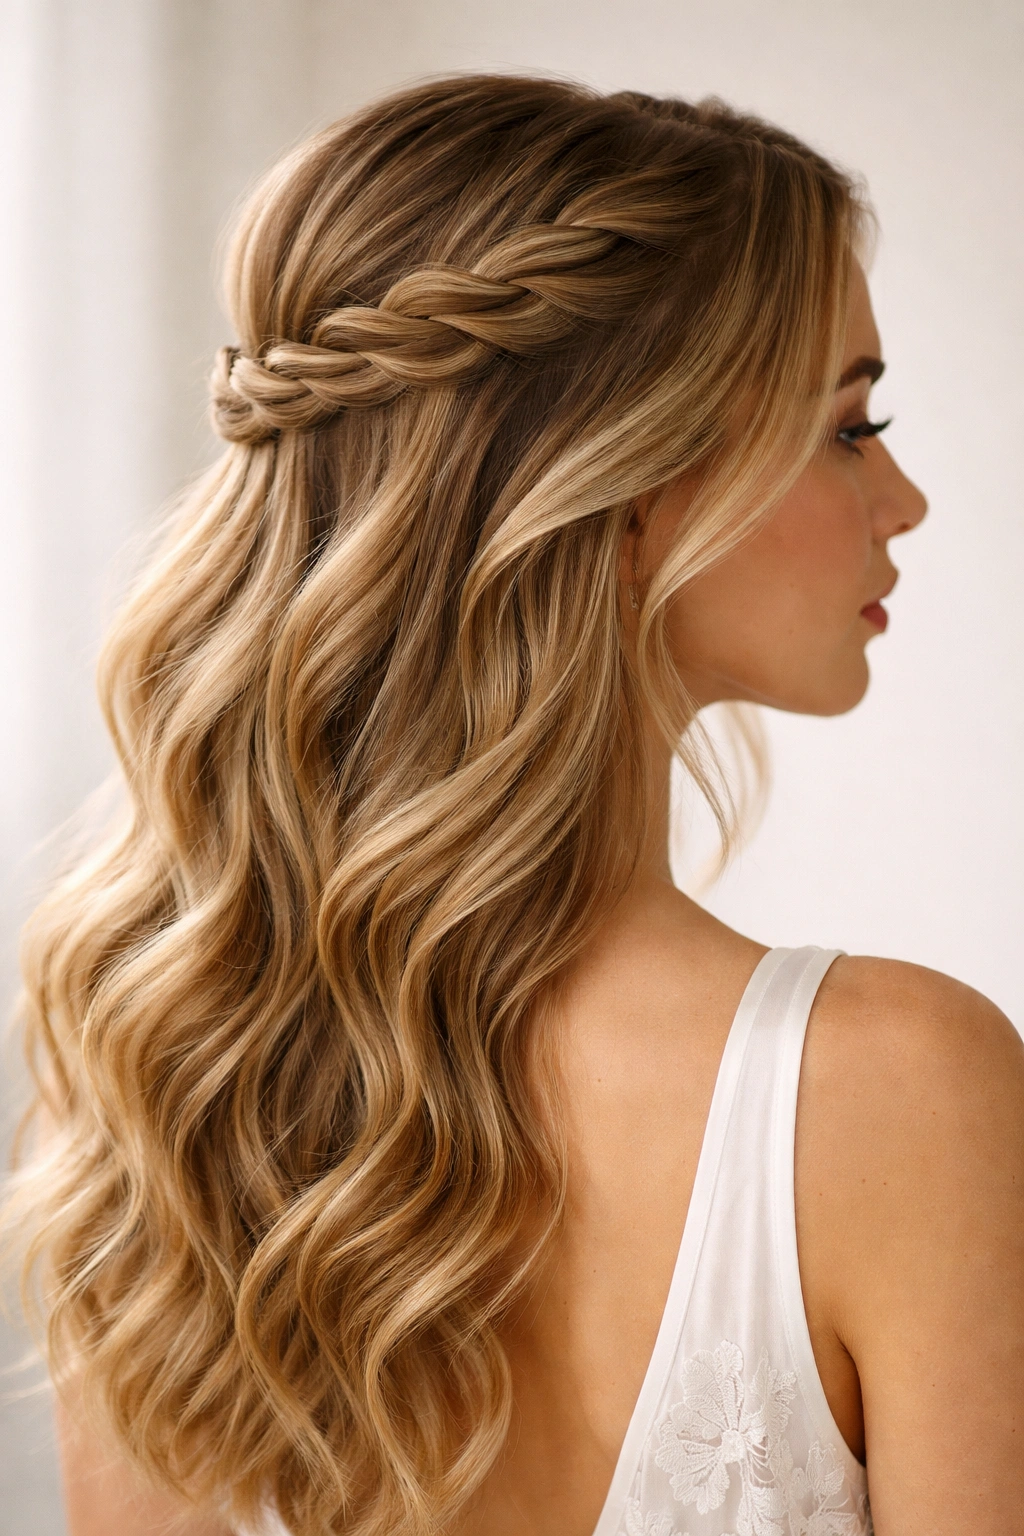
2. The Romantic Braided Crown
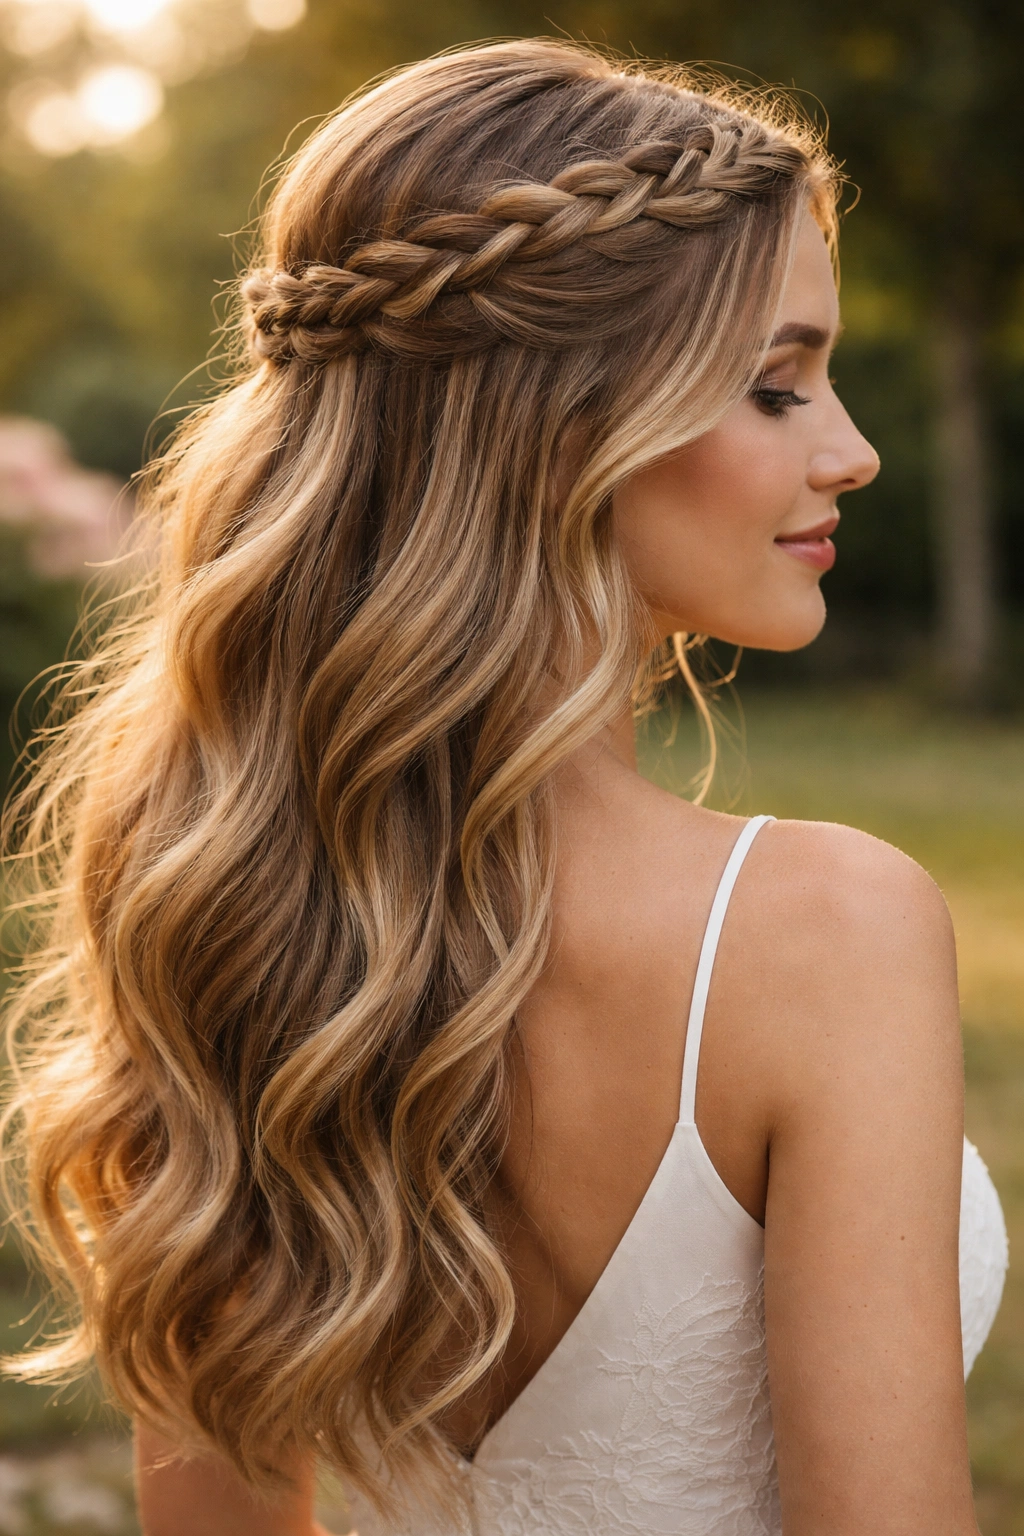
A single braid runs from one side of the head to the other, creating a crown-like effect while the underneath hair stays down and loose. This style is ethereal and feminine, perfect for outdoor or garden weddings, and it works especially well on wavy or naturally textured hair. The braid sits at about ear level and curves over the crown, catching the light beautifully in photographs.
Why This Works for Bridesmaids
The braided crown creates an instant sense of romance and intentional styling without looking like the bridesmaid spent hours in the salon. Braids hold exceptionally well throughout the entire wedding day—even through dancing, sitting, standing, and wind if the wedding is outdoors. The style is flexible enough to work over both thick and fine hair, and it doesn’t require hair extensions or any special products to look full and intentional.
How to Create the Look
- Brush hair smooth and start at one temple with a three-strand braid
- Braid loosely and continue the braid across the back of the head, slightly above ear level, toward the opposite side
- Finish the braid at the opposite temple, braiding all the way to the ends
- Secure the end of the braid with a small clear elastic or bobby pin tucked underneath the braid
- Gently pull at sections of the braid to create softness and width—this makes the braid look fuller and more romantic
- Leave the bottom section of hair completely down and, if desired, add subtle waves with a curling iron
- Finish with a flexible hold hairspray that won’t stiffen the braid
Pro tip: French braiding (incorporating new sections of hair as you go) creates a more elegant, seamless effect than a regular three-strand braid for this style.
3. The Sleek Ponytail with Face-Framing Layers
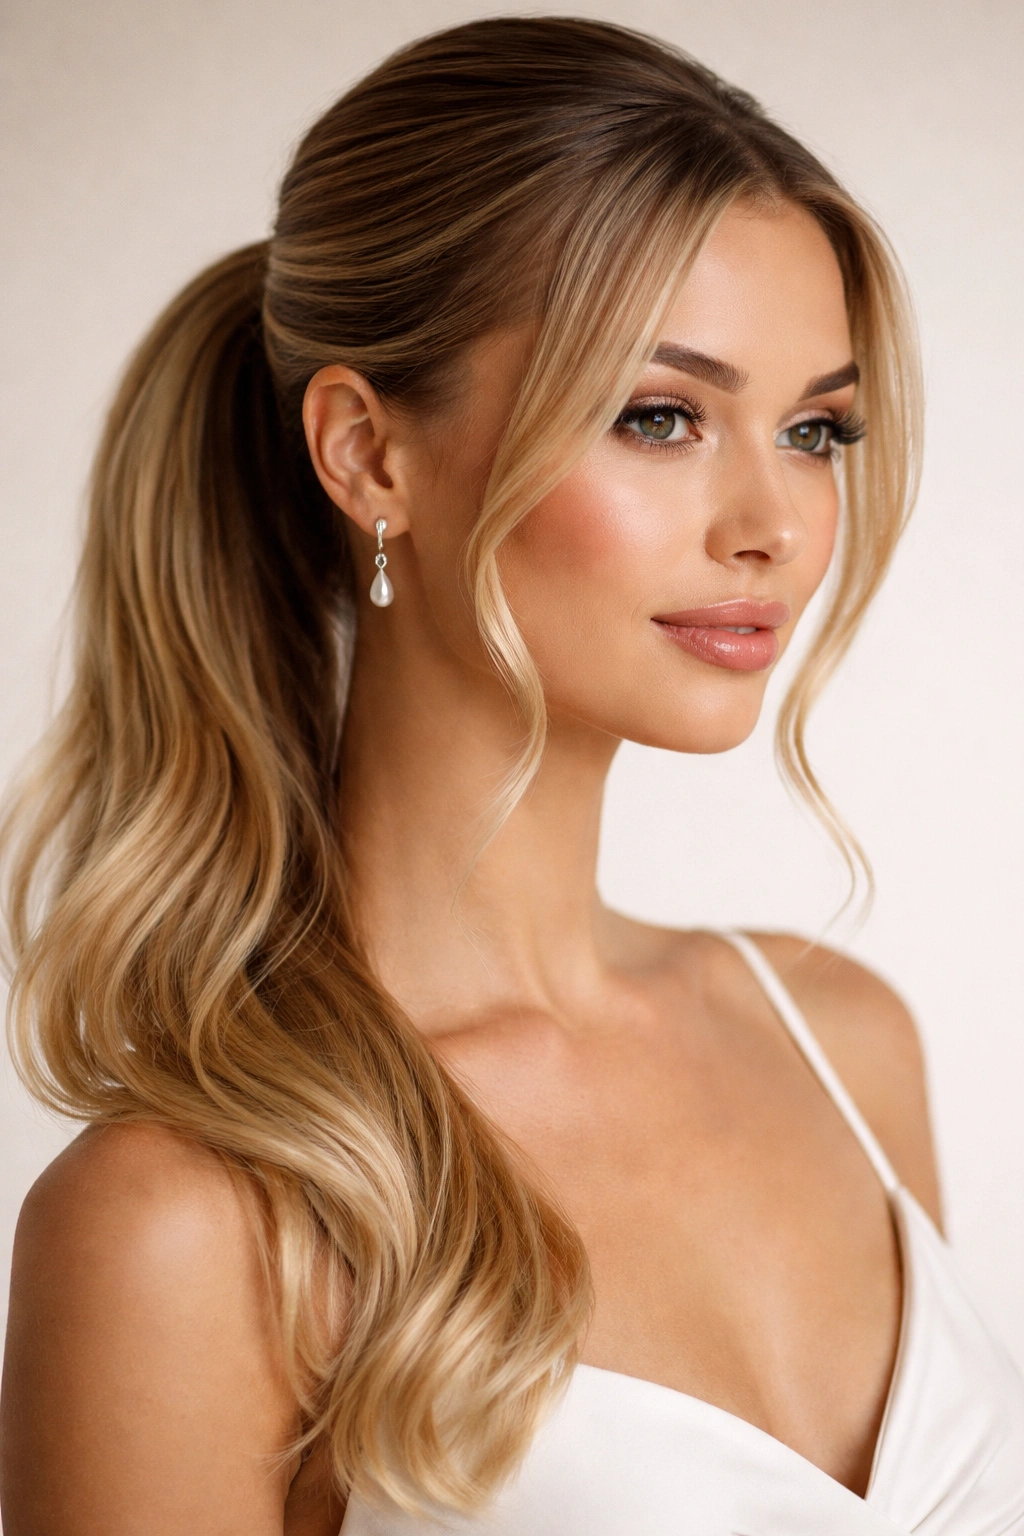
The top half of the hair is smoothed back into a low ponytail at the nape of the neck, while carefully selected face-framing pieces are left down on both sides. This modern, polished style is striking in photographs and works beautifully on all hair types. The contrast between the sleek, controlled ponytail and the softer face-framing pieces creates visual interest and flatters a wide range of face shapes.
Why This Works for Bridesmaids
This style reads as intentionally modern and put-together without being overly casual. The sleekness conveys polish and sophistication while the face-framing layers add softness and dimension. It’s particularly flattering on bridesmaids with longer faces or more angular features, as the face-framing pieces add width and softness. The style holds perfectly all day and photographs beautifully from both front and side angles.
How to Create the Look
- Use a fine-tooth comb or gel to smooth the top section of hair straight back from your forehead
- Gather the top half of your hair into a low ponytail at the nape, just below where the crown meets the nape
- Secure the ponytail tightly with a small elastic, making sure it’s centered and smooth
- Leave thin sections of hair framing both sides of your face—take these sections from behind your ears
- Use a curling iron to create soft waves in the face-framing pieces and the rest of the down hair
- Apply a flexible-hold hairspray to the smooth sections to prevent flyaways
- For extra polish, wrap a small section of hair around the base of the ponytail to hide the elastic
Pro tip: If your hair is particularly thick, you can tease the crown area very slightly before smoothing it back—this gives the ponytail a subtle height and makes the style feel more intentional.
4. The Soft Bohemian Bun with Wisps
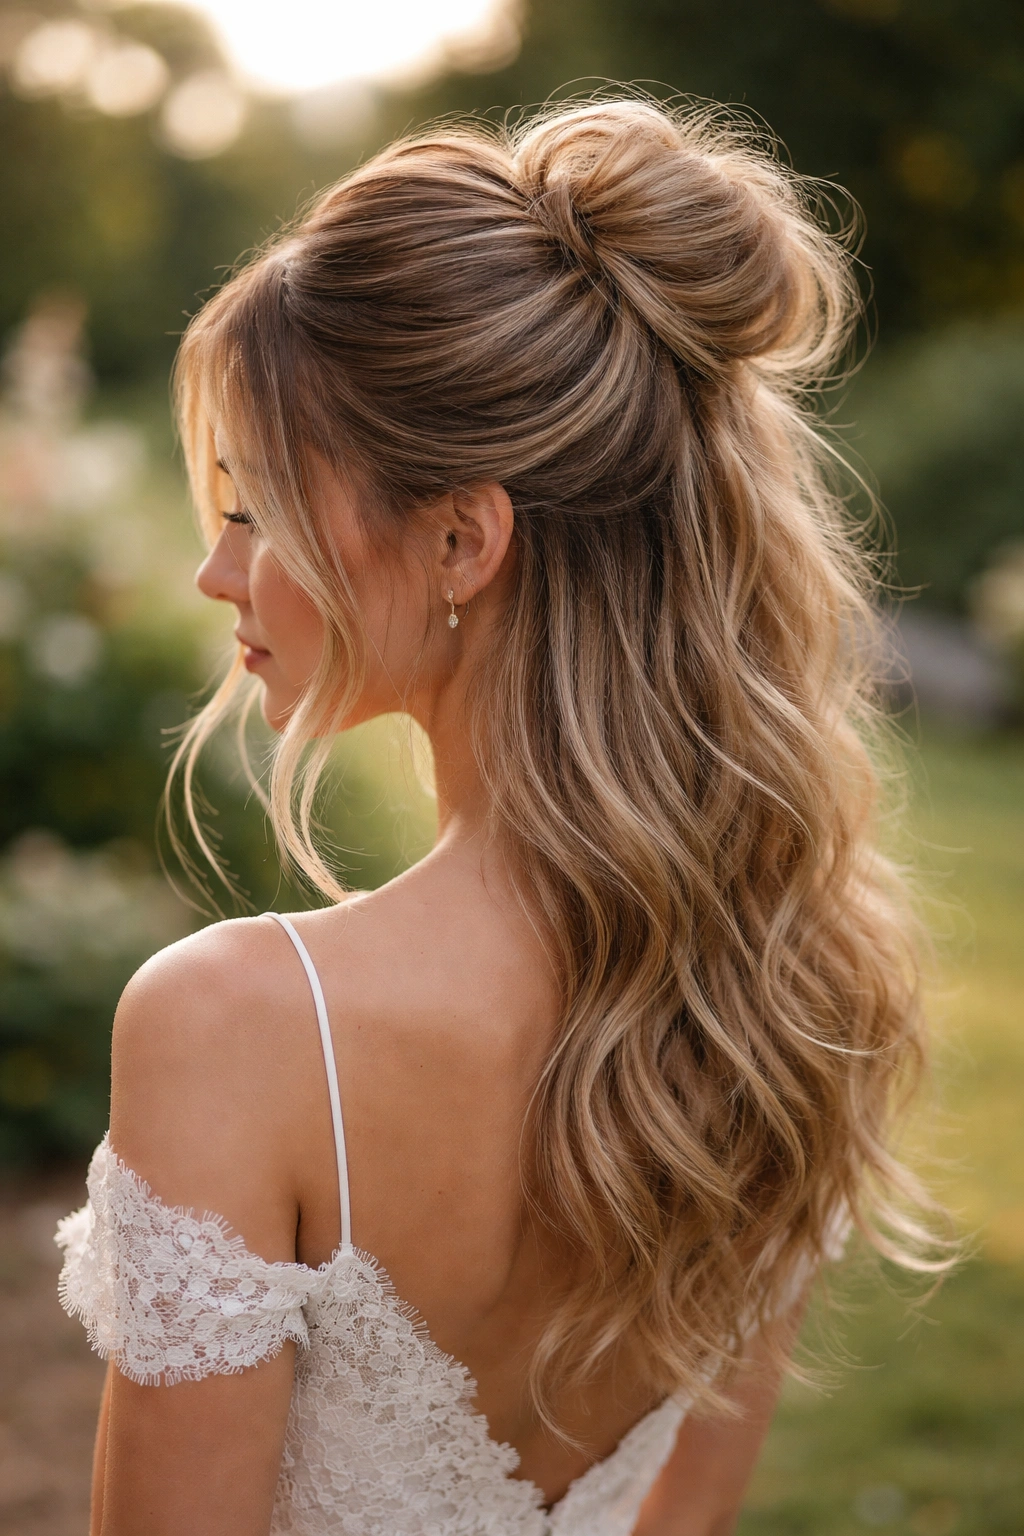
The majority of the hair is gathered and loosely twisted into a small, intentionally undone-looking bun at the crown, while soft wisps and tendrils are left around the face and sides. This effortlessly beautiful style is perfect for bridesmaids who want an updo feel while keeping some hair down, and it’s ideal for outdoor or casual weddings. The texture and softness of the style photograph beautifully and create a romantic, approachable aesthetic.
Why This Works for Bridesmaids
The boho bun walks the line between formal and relaxed, making it appropriate for destination weddings, garden ceremonies, and casual receptions. Because the bun is intentionally loose and tousled, it actually hides imperfections and is very forgiving of minor flyaways. The style is comfortable to wear for 12+ hours and doesn’t create tension headaches even when the bun is positioned higher on the head. Fine or thin hair often looks fuller in this style because of the intentional texture and tousling.
How to Create the Look
- Create soft waves throughout your hair using a curling iron or waves can form naturally overnight
- Take the top half of your hair and gather it loosely at the crown
- Twist the gathered section loosely and coil it around itself to form a bun—do not try to make it neat or compact
- Secure the bun loosely with bobby pins, allowing pieces to stick out and creating intentional texture
- Leave soft wisps around your face, temples, and the back of your neck
- Gently tug at sections of the bun to make it appear softer and more undone
- Use a flexible-hold, non-flaking hairspray to set everything in place
Pro tip: This style is actually easier to create on hair that’s been slept on overnight or hasn’t been washed in a day or two—the slight texture and natural oils make the bun hold better and look more intentionally tousled.
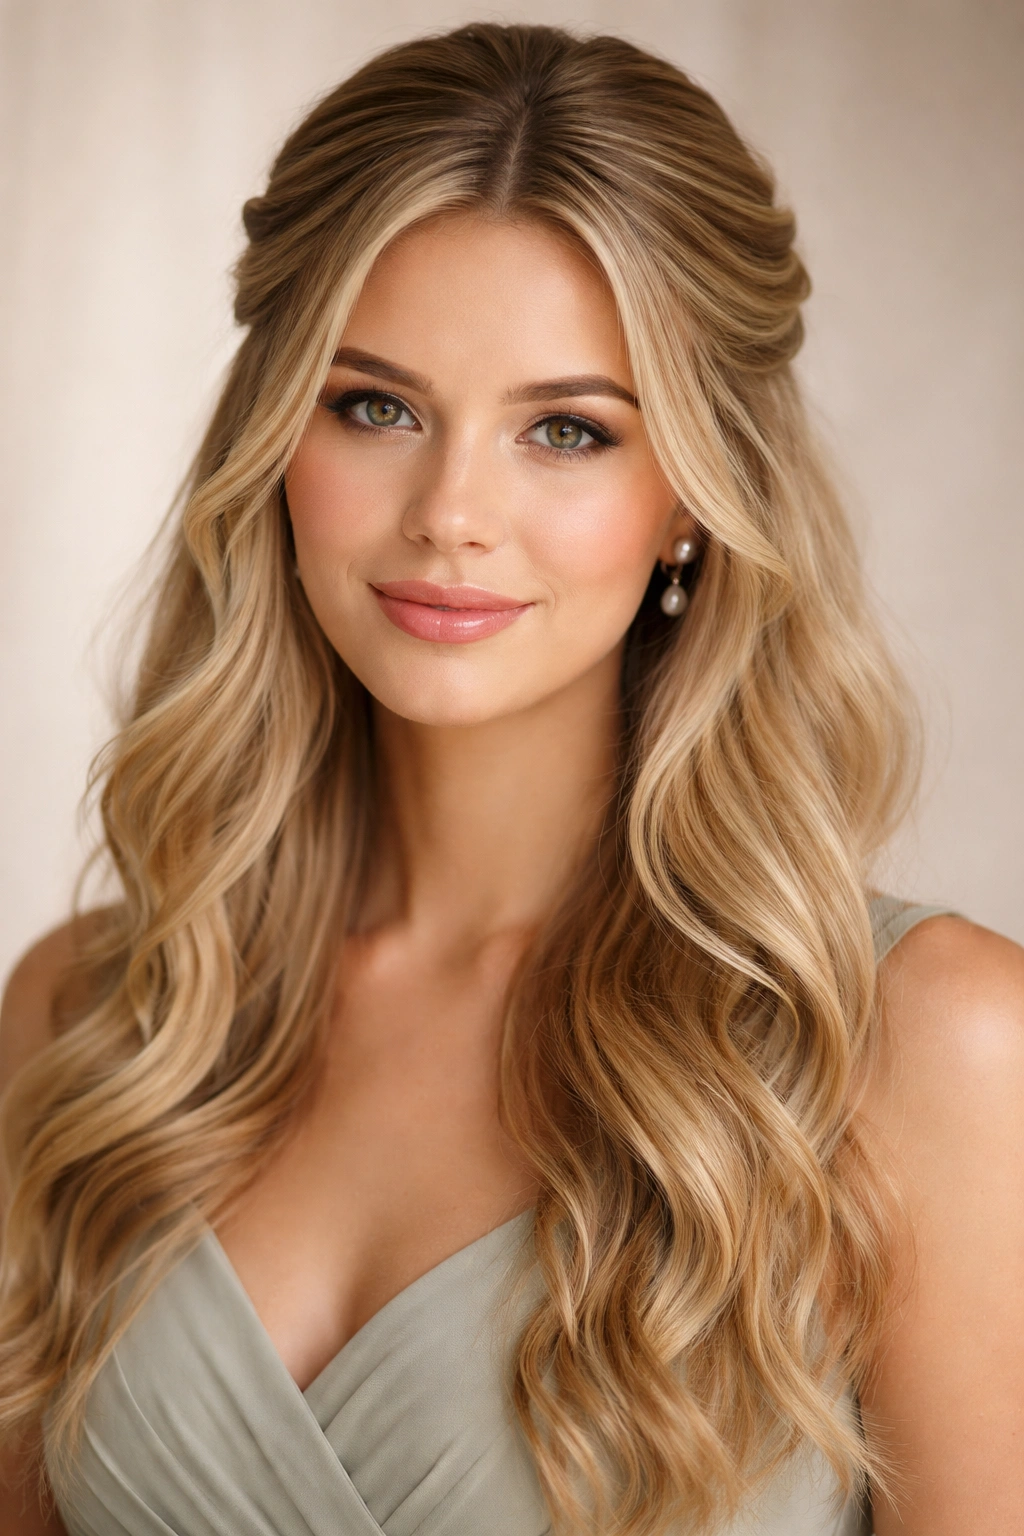
5. The Double Twisted Half-Up with Pearl Pin
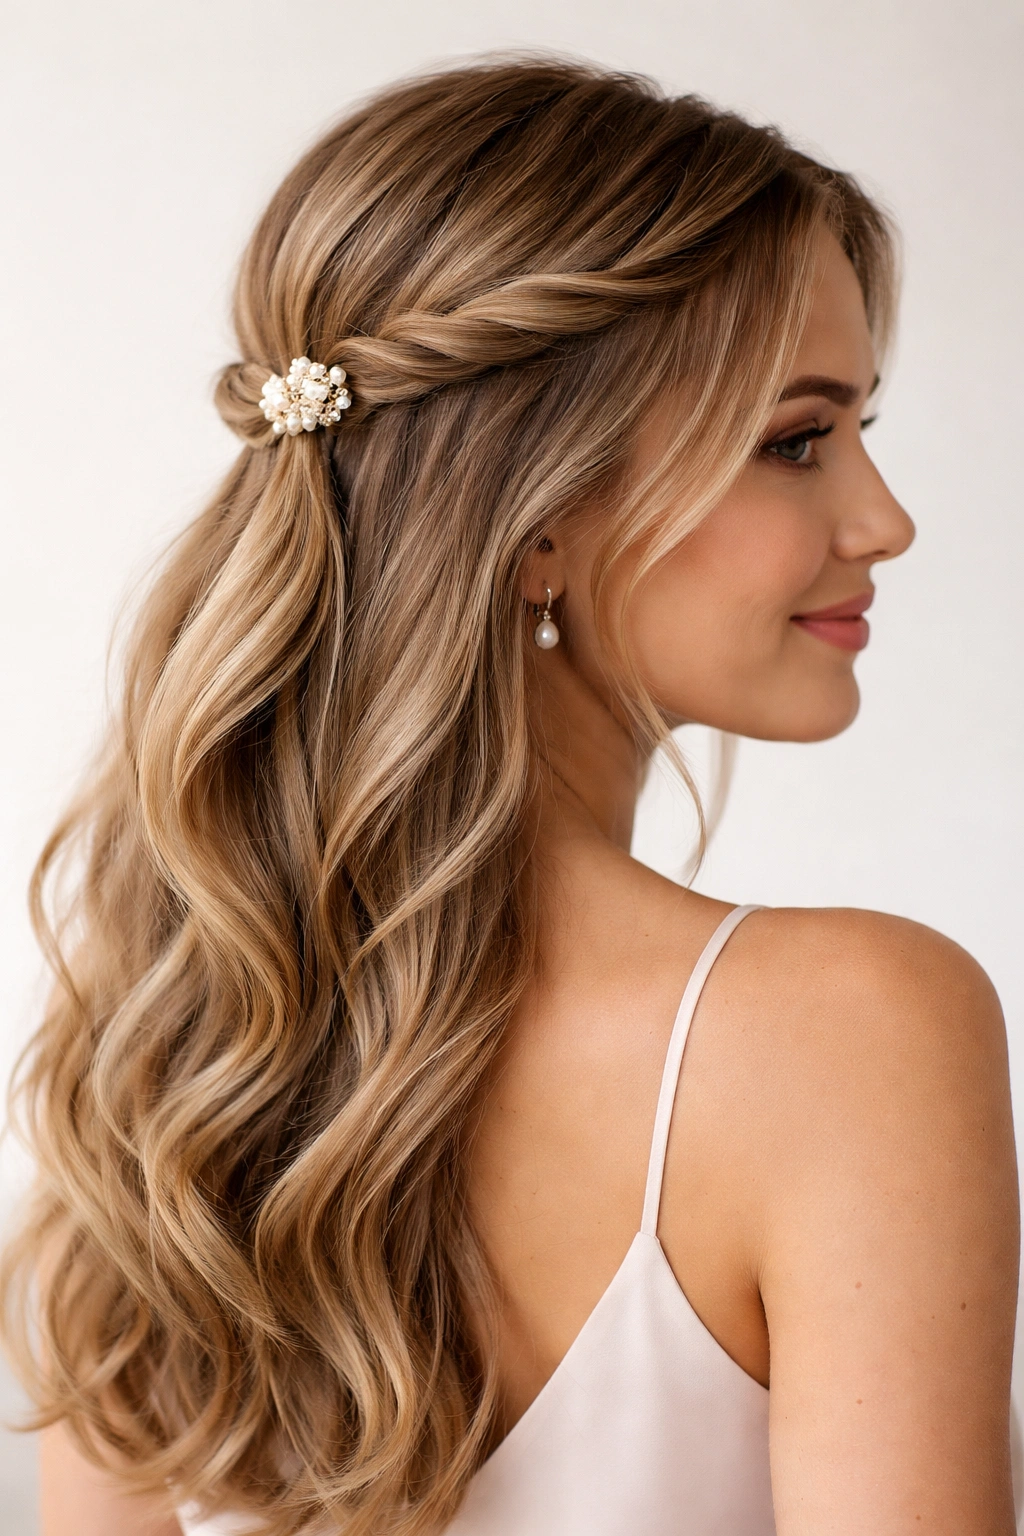
Two thin twisted sections, created from hair closer to the face, twist back toward the crown where they’re secured with a decorative pearl-topped bobby pin or hair clip. This style is refined and feminine, with the pearl pin adding a touch of jewelry-like elegance. The double twists create more visual interest than a single twist while still maintaining simplicity and ease.
Why This Works for Bridesmaids
The pearl pin is a subtle detail that elevates the entire look and makes the bridesmaid feel special and intentional styling-wise. The double twists create dimension and texture without requiring braiding skills or complicated sectioning. This style works beautifully on both straight and wavy hair, and the twists hold securely even on fine or slippery hair when the pearl pin is inserted properly. The style is universally flattering and works with nearly every dress neckline.
How to Create the Look
- Brush hair smooth and divide it into two sections from temples toward the crown
- Take the first section and twist it loosely away from your face
- As you continue twisting, add very small sections of hair from near your temple to the twist
- Meet this section at the crown of your head
- Repeat the same process on the opposite side with the second section
- Cross one twisted section over the other at the crown
- Secure both sections with a decorative pearl-topped bobby pin or clip
- Adjust the twists so they’re slightly loose and soft-looking
- Spray lightly with hairspray to set
Pro tip: Wearing the pearl pin slightly to one side of center (rather than directly in the middle) creates a more modern, deliberately styled appearance.
6. The Half-Up with Cascading Curls
The top portion of the hair is smoothly pulled back and secured with a decorative clip or elastic, while the remaining hair is styled into loose, romantic curls that fall down the back and shoulders in a cascading effect. This style is timelessly elegant and works for both classic and modern weddings. The curls catch light beautifully in photos and create an appearance of fullness and movement.
Why This Works for Bridesmaids
Cascading curls are universally flattering and work on all hair types and lengths (though they’re most dramatic on longer hair). The curls hold their shape throughout the entire wedding day, especially if a flexible-hold hairspray is used. The style doesn’t require extreme technical skills—anyone comfortable using a curling iron can execute this look. Bridesmaids also tend to love this style because the curls feel special and celebrate their hair while still keeping it off the face.
How to Create the Look
- Brush hair smooth and take the top section, from just above your ears and backward
- Pull this section straight back and secure it with a small elastic or clip at the crown
- Take a 1-inch section of hair and wrap it around a 1-inch curling iron barrel
- Hold the curl for 10-15 seconds, then release and allow the curl to cool
- Repeat with the remainder of the down hair, curling away from the face on both sides
- Once all curls are created and cooled, gently finger-comb through the curls to soften them slightly
- Run your fingers through all the curls to blend them together
- Secure with a flexible-hold hairspray
Pro tip: Curling the hair away from the face on both sides creates a more flattering frame than curling toward the face, which can make features look wider.
7. The Low Half-Up with Ribbon Weave

A low, centered section of hair is gathered and woven through with a thin ribbon that matches the bridesmaid dress or wedding colors. This style is romantic and unexpected, with the ribbon creating a pop of coordinated color. The weaving technique is simple but looks intricate and intentional, and the ribbon can be silk, satin, or velvet depending on the wedding’s aesthetic.
Why This Works for Bridesmaids
The ribbon weave is a detail that makes the bridesmaid’s hairstyle feel coordinated with the overall wedding design without being matchy-matchy. The ribbon can incorporate the wedding’s color scheme or complement the bridesmaid dress beautifully. This style is quick to create once you’ve gathered the hair, taking only a few extra minutes compared to a basic half-up. The ribbon adds visual interest and gives bridesmaids a chance to feel like they’re part of a cohesive wedding design.
How to Create the Look
- Brush hair smooth and decide on the width of your ribbon weave (usually 1-2 inches wide)
- Separate a section of hair down the center back, from the crown to about mid-back
- Attach a ribbon to the base of this section using a small bobby pin
- Divide the section into two halves with the ribbon starting down the center
- Take a thin section of hair from the left side and cross it over the ribbon to the right side
- Take a thin section of hair from the right side and cross it over the ribbon to the left side
- Continue alternating left to right, right to left, creating a woven pattern with the hair and ribbon
- Secure the end of the weave with the ribbon’s end and a bobby pin
- The rest of the hair (not in the weave) stays down and can be left straight or curled
Pro tip: Practice the weaving motion once or twice before the wedding day—it’s easier than it looks, but a quick practice run builds confidence.
8. The Sleek Low Bun with One Twisted Accent
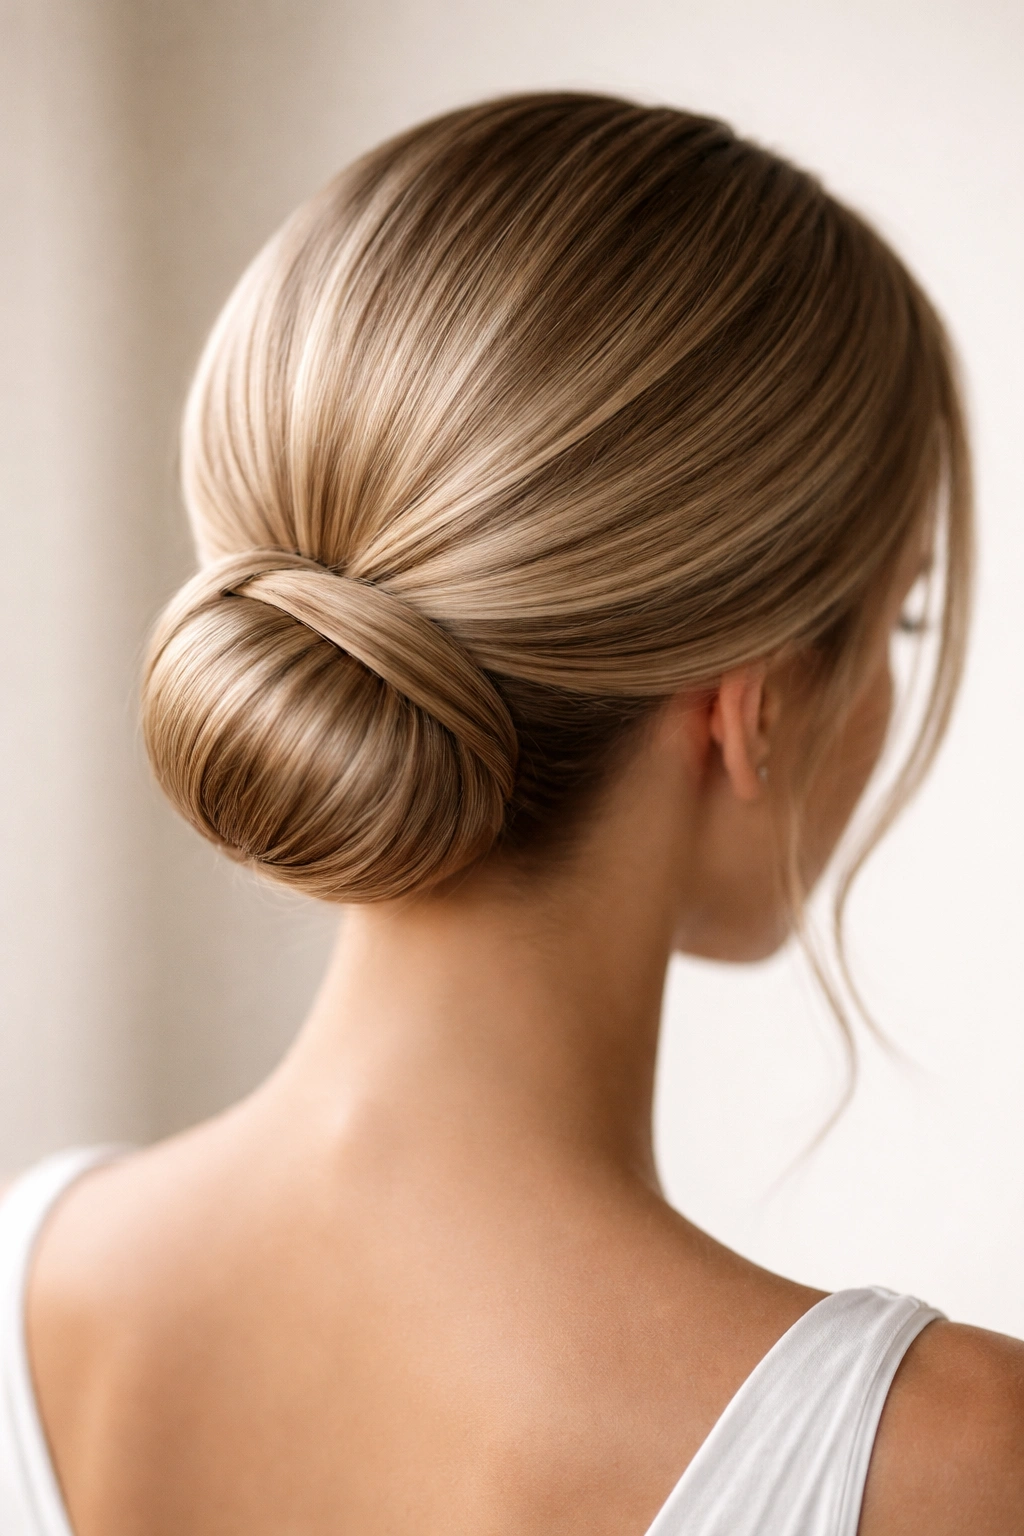
A low bun is positioned at the nape of the neck, smooth and polished, with a single delicate twisted section wrapping around the base of the bun for added detail. This style is sophisticated and modern, working beautifully for black-tie or formal weddings. The single twisted accent prevents the bun from looking too severe or plain while maintaining its polished, put-together aesthetic.
Why This Works for Bridesmaids
The low bun is inherently elegant and flattering to nearly all face shapes and hair types. By adding the twisted accent, the style becomes more interesting visually while still being easy to achieve. This style is exceptionally durable and comfortable—the low placement means no tension headache, and the bun holds perfectly throughout a long wedding day. Bridesmaids also appreciate that a low bun keeps hair completely off the face and neck, which is ideal in warm weather or for outdoor ceremonies.
How to Create the Look
- Brush hair completely smooth
- Gather all of your hair into a low ponytail at the nape of your neck, centered and smooth
- Secure the ponytail tightly with an elastic
- Twist the ponytail loosely and coil it around the base to form a bun
- Secure the bun with bobby pins, aiming for a smooth, compact shape (not loose or tousled)
- Take a thin section of hair from the ponytail before twisting it, and set it aside
- Twist this thin section tightly and wrap it around the base of the bun, covering the elastic
- Secure the twisted accent with bobby pins tucked underneath
- Smooth any flyaways with a gel or hairspray designed for sleek styles
Pro tip: A small decorative comb or clip can be inserted into the base of the bun to add just a touch of sparkle or to coordinate with bridesmaid jewelry.
9. The Half-Up with Braided Sides
Hair is sectioned so that small braids are created on both sides of the head, and these braids meet at the crown where they’re secured together. The remaining hair flows down the back and shoulders in waves. This style is modern and playful while still being formal enough for weddings. The dual braids create symmetry and dimension, and the style is distinctive without being overly complicated.
Why This Works for Bridesmaids
The braided sides style is eye-catching in wedding photography, creating clear visual interest from multiple angles. The braids are tight and secure enough to withstand all-day wear, yet loose enough that the style doesn’t look severe. This style works on all hair types and is particularly striking on thick hair or hair with natural texture. Bridesmaids appreciate that the braids feel intricate and special while being relatively simple to create—most people with basic braiding skills can execute this style independently.
How to Create the Look
- Brush hair smooth and create a deep side part
- On the fuller side of the part, take a thin section of hair just above your ear
- Create a three-strand braid starting at that section, braiding as you work toward the back of your head toward the crown
- On the opposite side, create a second braid in the same manner
- Bring both braids to meet at the crown of your head
- Secure both braids together with a small elastic or decorative clip
- Tug gently at the braids to loosen them and create softness
- Leave the rest of the hair down, and add waves with a curling iron if desired
- Secure with a flexible-hold hairspray
Pro tip: Fishtail braids (created using a two-strand technique rather than three strands) create an especially elegant, intricate-looking effect for this style.
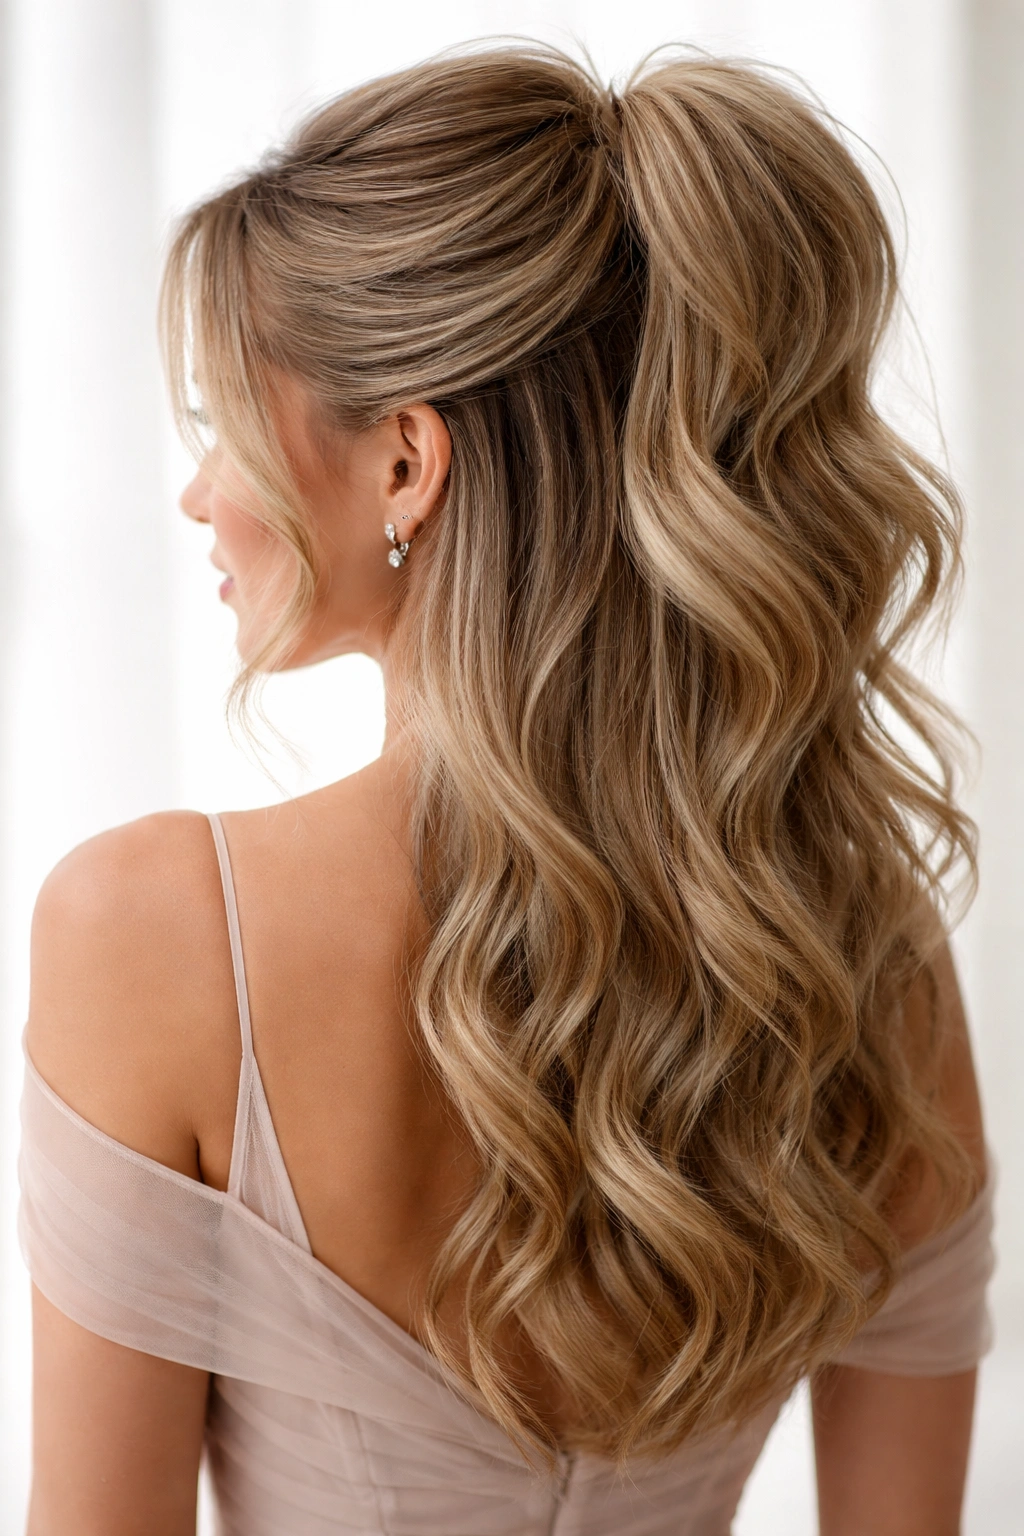
10. The Voluminous Half-Ponytail with Teasing
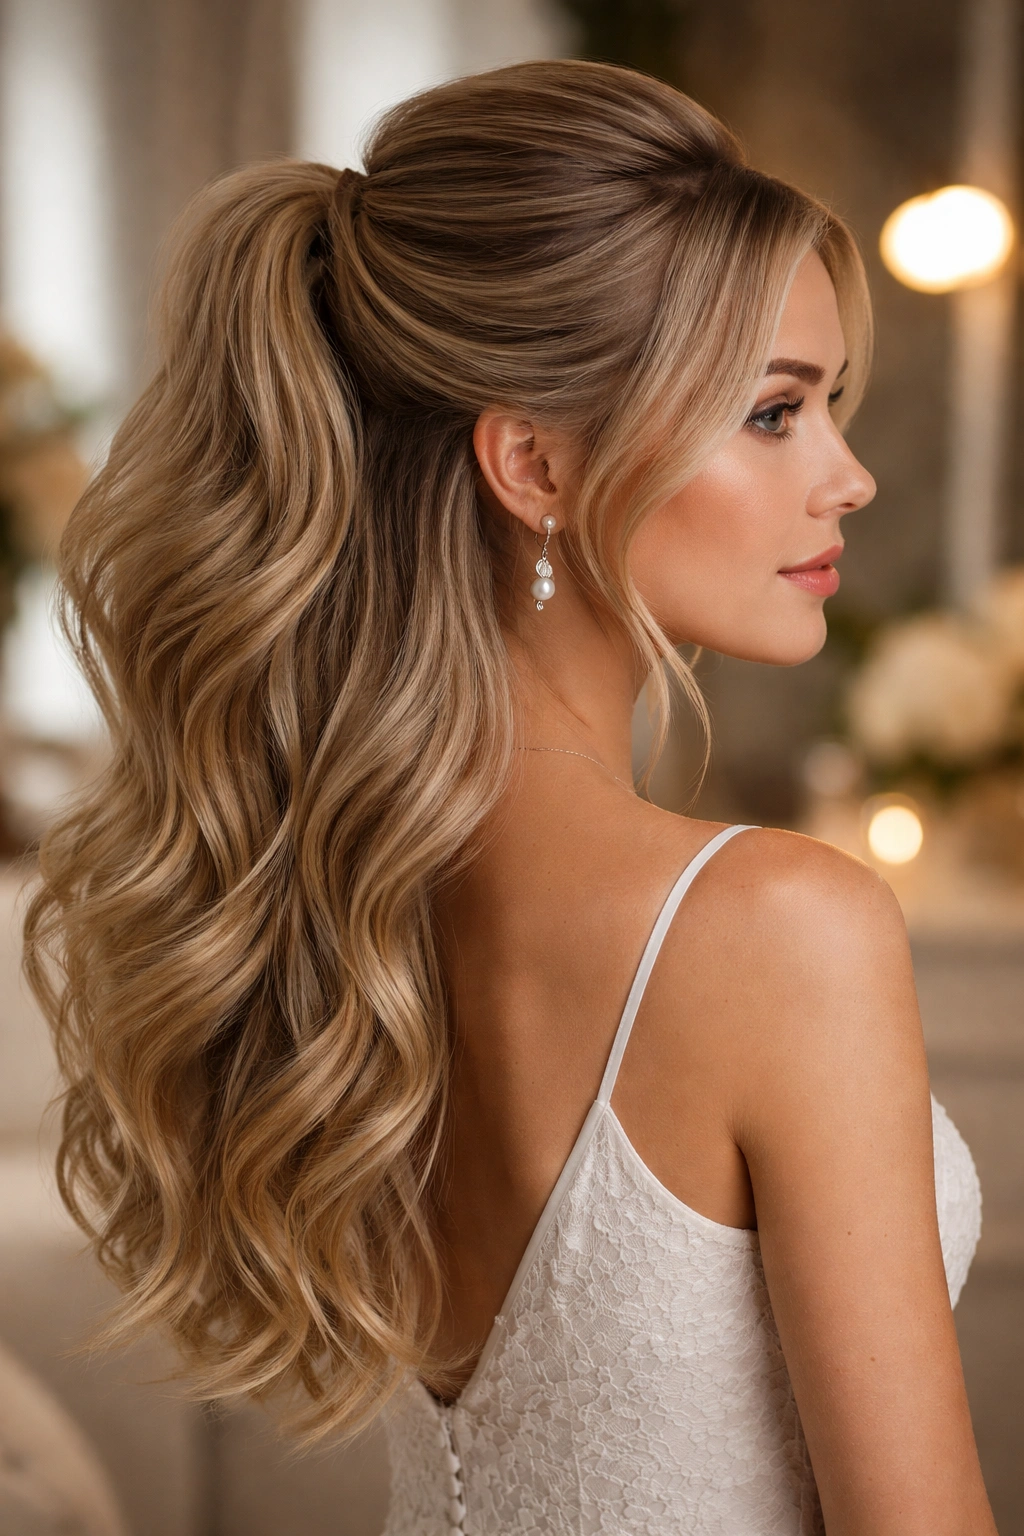
The top half of the hair is gathered into a half ponytail, but the crown section is heavily teased and backcombed to create significant volume and height before securing. The remaining hair stays down and loose, creating contrast between the voluminous crown area and the soft lower section. This style is dramatic and photogenic, ideal for bridesmaids who want their hair to look full and substantial.
Why This Works for Bridesmaids
The teased crown creates the illusion of thicker, fuller hair, which is flattering to almost everyone and photographs beautifully. The volume draws the eye upward to the face and creates a flattering frame for most face shapes. This style is comfortable despite the teasing—the backcombing is only in the crown area, not throughout the entire head. The half ponytail placement is secure and won’t slip throughout the day, even with the volume created by teasing.
How to Create the Look
- Brush your hair smooth and apply a light texturizing spray to the crown area
- Section out the hair that will go into the half ponytail (top half, from ear to ear)
- Using a fine-tooth comb or teasing brush, backcomb the crown section by brushing backward toward the scalp
- Tease until you’ve created the desired volume—usually 2-3 passes with the brush
- Gently smooth the surface layer of the teased section with a regular brush or comb to remove knots
- Gather the teased crown section plus the rest of the top half into a half ponytail
- Secure with an elastic band and adjust until the volume looks balanced
- Leave the bottom half of your hair completely down and style with waves if desired
- Finish with a flexible-hold hairspray that won’t flatten the volume
Pro tip: Don’t worry about the teased section looking messy before you smooth it—that’s exactly what should happen, and the smoothing step creates that polished-yet-voluminous effect.
11. The Twisted Half-Up with Flower Pin
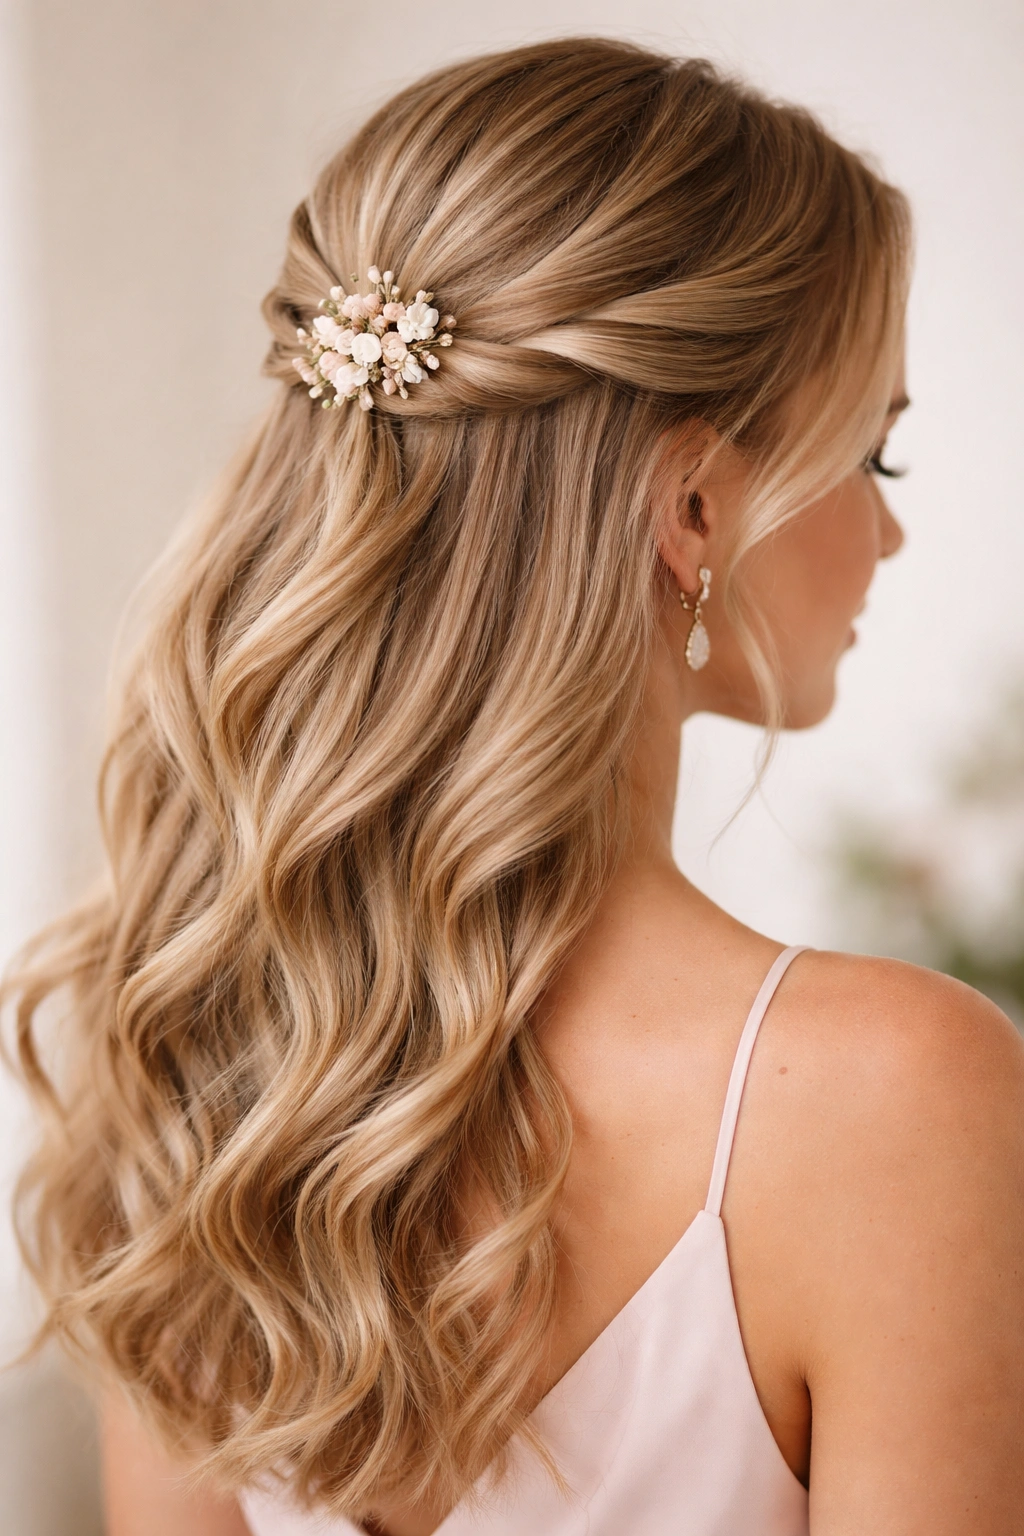
Two sections of hair are twisted away from the face and secured at the crown with a small decorative flower pin or fresh floral accent that coordinates with the wedding’s flowers. This romantic style combines the simplicity of twists with the delicate beauty of florals. The flower pin serves as both a functional hair fastener and a lovely decorative detail that photographs beautifully.
Why This Works for Bridesmaids
Flowers worn in the hair are romantic, timeless, and inherently festive—they automatically make a hairstyle feel wedding-appropriate. Fresh flowers or high-quality faux flowers add dimension and color to the hairstyle without requiring any hair skill beyond basic twisting. The twisted sections provide a secure anchor for the flower pin, and the combination looks intentionally designed. Bridesmaids feel special and feminine wearing flowers, and this detail makes them feel coordinated with the overall wedding aesthetic.
How to Create the Look
- Brush hair smooth and, if desired, create soft waves throughout using a curling iron or overnight waves
- Take a thin section of hair from just above one ear and twist it away from your face
- Continue twisting as you work toward the back of your head
- Repeat on the opposite side with a second section, twisting in the same direction
- Bring both twisted sections to the crown of your head
- Secure both twisted sections with the stem of a fresh flower or faux flower pin
- Adjust the twists so they’re soft and loose-looking
- If using fresh flowers, insert the flower stem into a small floral water tube (available at craft stores) to keep the flowers hydrated
- Secure everything with a light hairspray
Pro tip: Fresh flowers wilt faster in warm weather, so if the wedding is outdoors in summer, use high-quality faux flowers or secure fresh flowers in a tiny water tube attached to bobby pins.
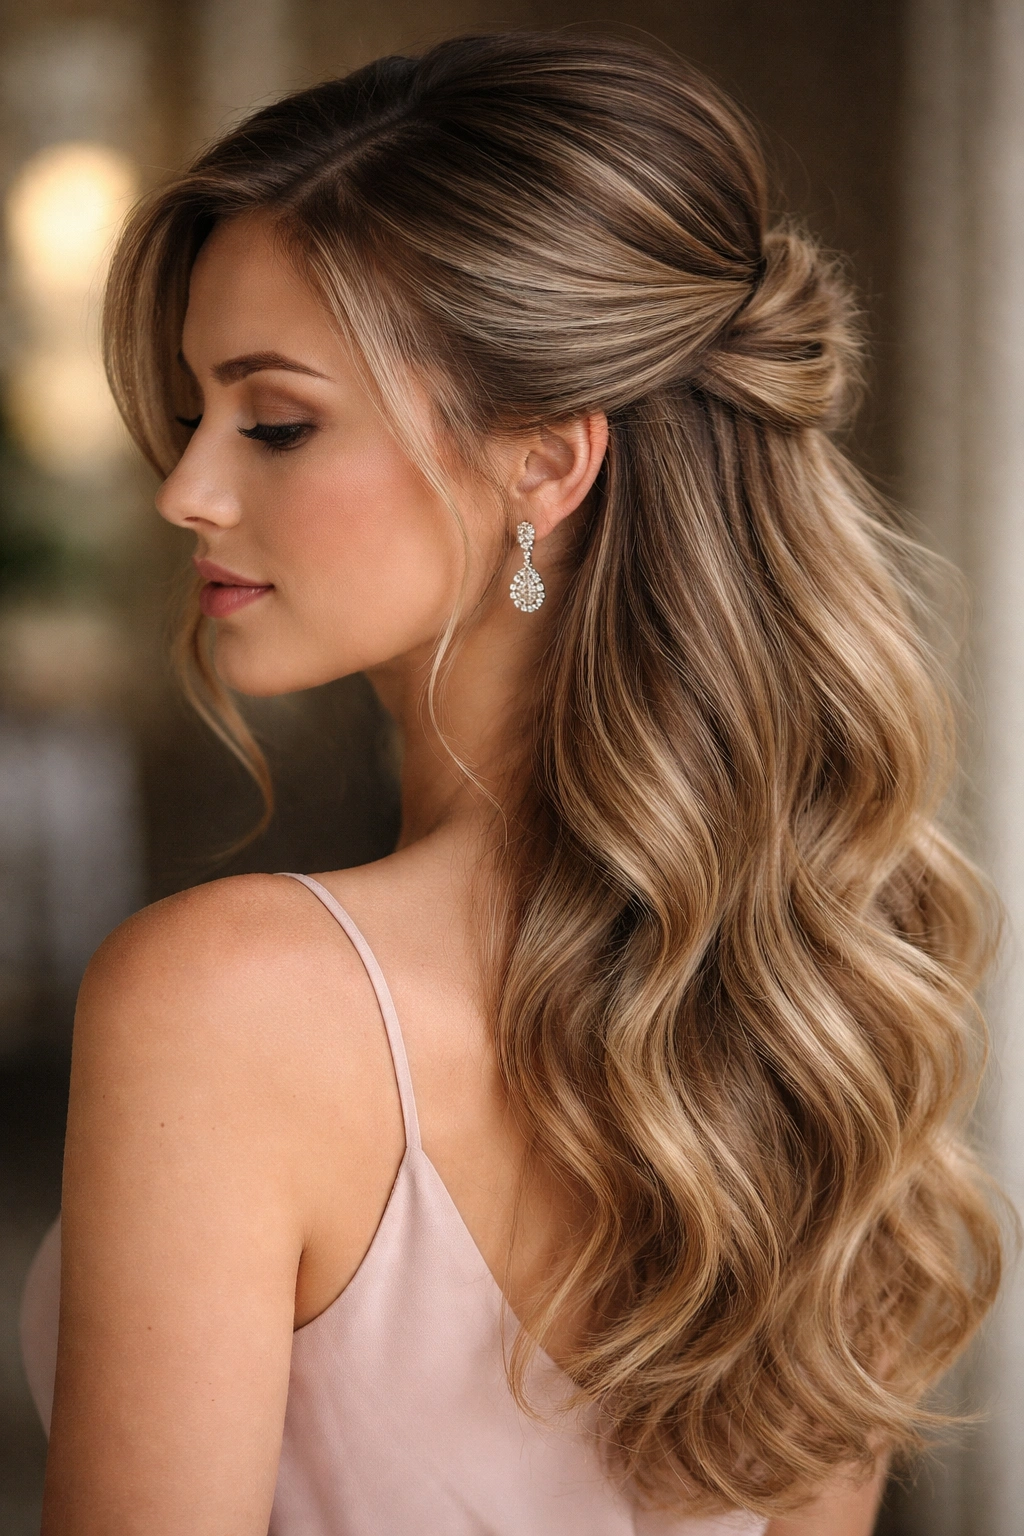
12. The High Half-Up with Volume and Layers
The hair is gathered into a higher half-up position (at the crown rather than the nape), creating more height and drama. The gathered section is slightly teased for volume before securing, and the remaining hair is styled into soft waves. This style is modern and flattering, working beautifully for bridesmaids who want their hair to appear thicker or fuller.
Why This Works for Bridesmaids
The higher placement of the half-up draws attention to the face and creates a flattering frame. The added volume in the crown makes the overall look more substantial and polished. This style works on all hair types and is particularly flattering to bridesmaids with longer or thinner faces, as the height adds width and proportion. The style is secure enough for all-day wear and photographs beautifully from every angle.
How to Create the Look
- Apply a light texturizing spray to the crown area for grip
- Gather the top half of your hair (from ear to ear) into a half ponytail at the crown—higher than the typical half-up
- Before securing with an elastic, gently tease the gathered section to create volume
- Smooth the surface layer and secure with an elastic band
- Adjust and fluff the gathered section so it has height and shape
- Release the bottom half of your hair and create soft waves with a curling iron
- Pull a tiny section of hair from near the elastic and wrap it around the elastic to hide it
- Secure with flexible-hold hairspray
Pro tip: Placing the half-up slightly to one side of center (rather than directly down the middle) creates a more modern, intentionally styled look.
13. The Sleek Wrap-Around Half-Bun
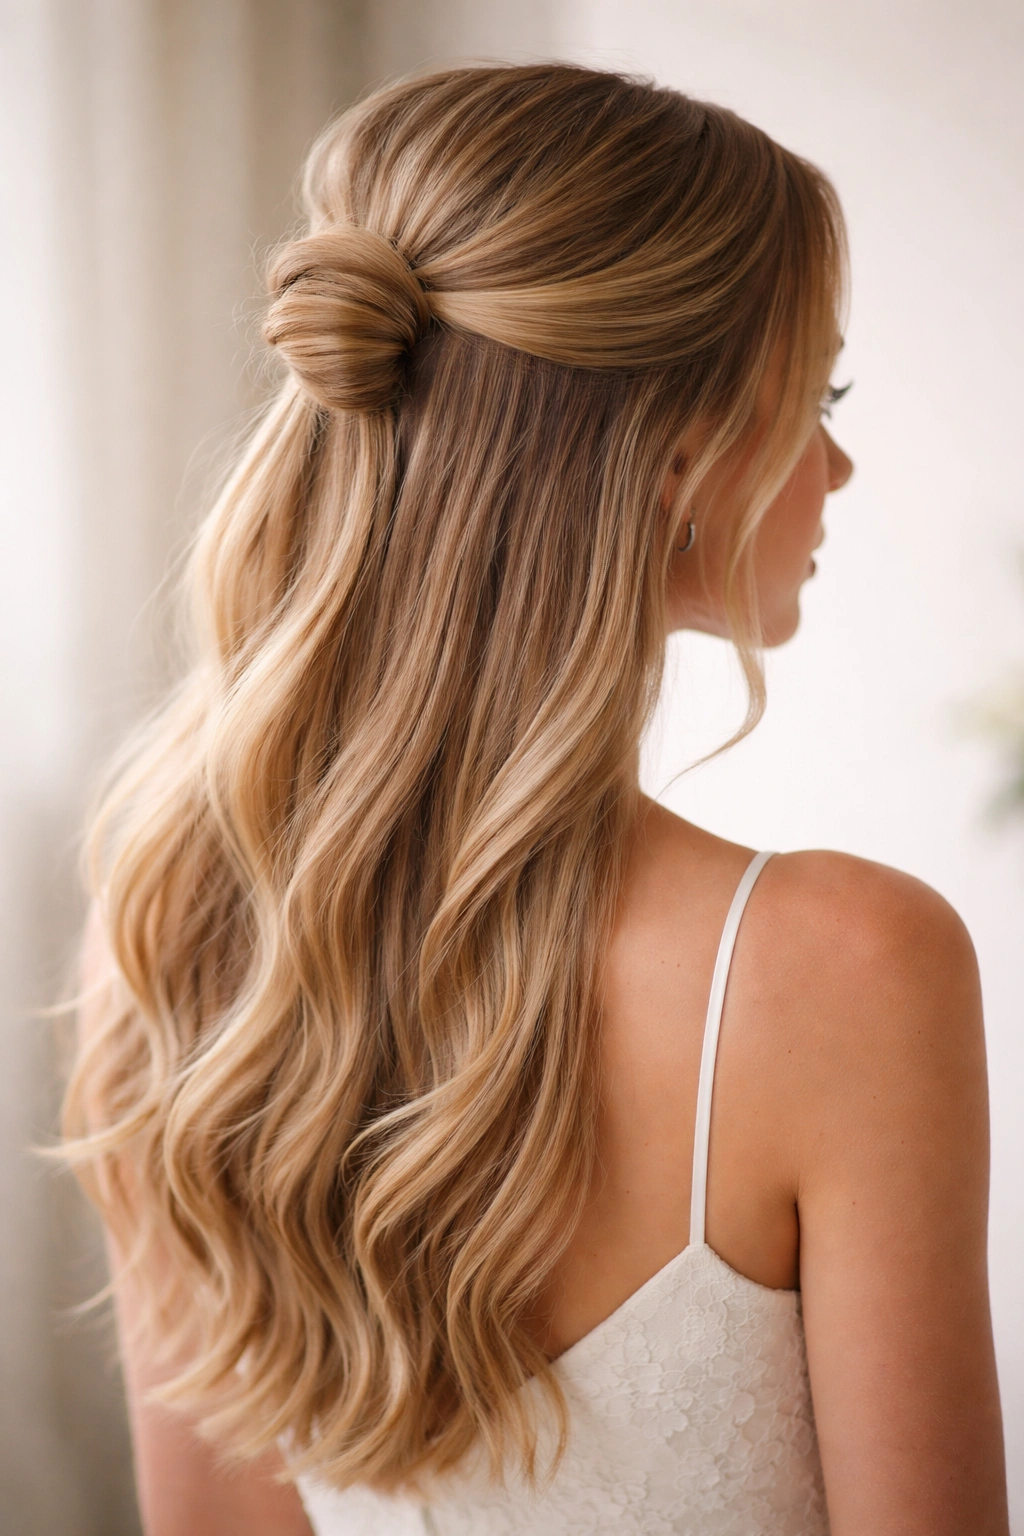
The top section of hair is gathered and twisted, then wrapped around itself at the crown to create a small, sophisticated bun. The remaining hair stays completely down and straight or softly waved. This style is modern and sleek, with the wrap-around detail creating visual interest without appearing complicated. It works beautifully on all hair types and is particularly striking on straight hair where the contrast between sleek and smooth is most apparent.
Why This Works for Bridesmaids
The wrap-around technique creates an elevated look from a simple gathered-and-twisted base. The style is secure and won’t slip, even with active movement or dancing. It’s formal enough for black-tie weddings yet modern enough for contemporary ceremonies. The style also works on shorter hair or bobs, making it a versatile choice for bridesmaids with varying hair lengths. The bun section photographs beautifully and the detail-oriented technique shows intentional styling.
How to Create the Look
- Brush hair completely smooth and apply a smoothing serum or light gel if desired
- Gather the top half of your hair into a half ponytail at the crown
- Twist the gathered section loosely
- Instead of coiling it into a bun, wrap the twisted section around the base of the ponytail once or twice
- Secure the wrapped twist with bobby pins tucked underneath
- Leave the bottom half of your hair completely down—keep it straight or add very soft waves
- Use a smoothing hairspray to prevent flyaways and maintain sleekness
- Tuck any ends of the twisted section underneath and secure them discreetly
Pro tip: This style works best when the wrap-around twist is deliberately tight and smooth—don’t aim for softness or tousled texture here, which would defeat the sleek aesthetic.
14. The Braided Half-Up with Loose Waves
A single three-strand or fishtail braid is created from the crown down the back of the head, incorporating new sections of hair as it goes (like a Dutch or French braid). The braid ends at about mid-back and is secured, while all the remaining hair is released and styled into soft, romantic waves. This style is timelessly elegant and works for weddings of any style.
Why This Works for Bridesmaids
The braid serves as the focal point and structure of the style, while the loose waves create femininity and romance. This combination works on all hair types and is particularly striking on hair with natural texture or waves. The braid holds securely all day, even with active movement, while the loose waves stay soft and touchable. The style is practical—bridesmaids can create it themselves or have a stylist do it, and it takes only 20-25 minutes to complete.
How to Create the Look
- Brush hair smooth and create soft waves throughout using a curling iron
- Section out a rectangle of hair at the crown, from your forehead back to your crown
- Begin a French braid from your forehead, taking small sections of new hair as you braid
- Braid down the back of your head to about mid-back length
- Secure the end of the braid with a small elastic
- Release the remaining hair (all the sections not included in the braid)
- Gently pull at sections of the braid to loosen it and create softness
- Tousle and arrange the loose waves to frame the braid beautifully
- Finish with flexible-hold hairspray
Pro tip: Creating the braid on slightly dirty hair (hair that hasn’t been washed in a day or two) makes the braid hold much better and look more intentionally textured.
15. The Double Bun Half-Up
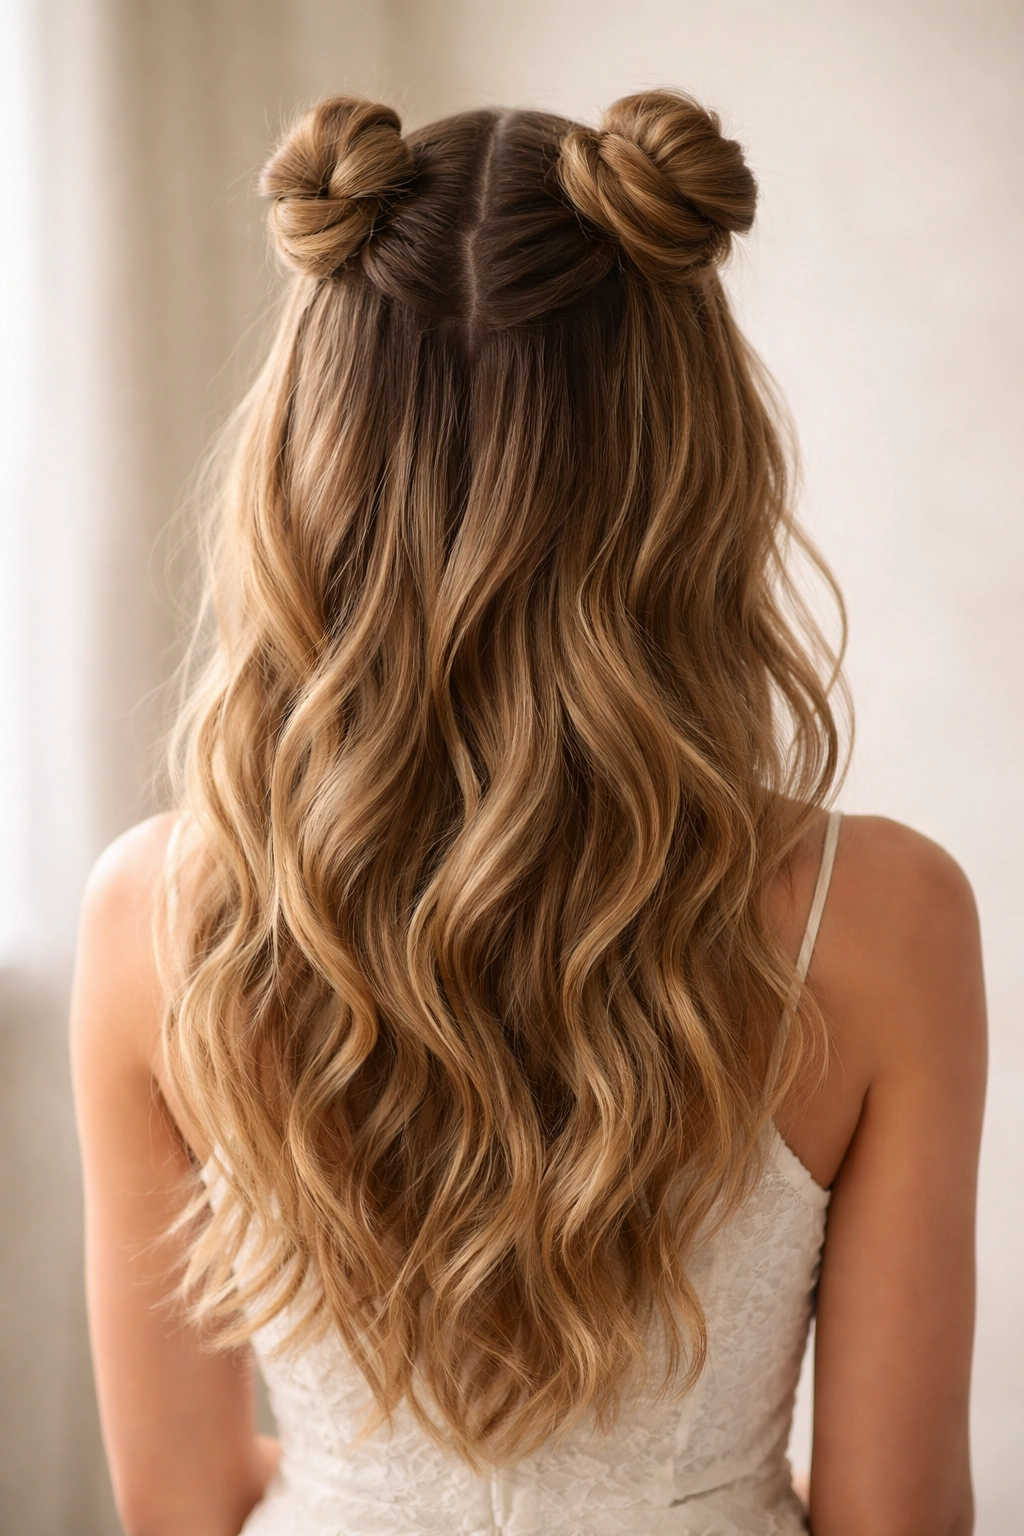
Two small buns are created at the crown area, one on each side, with the remaining hair flowing down the back. This playful style is modern and unexpected while still being formal enough for weddings. The double buns create a youthful, artistic aesthetic that works beautifully for casual or modern wedding styles. This style is particularly striking on bridesmaids with longer hair.
Why This Works for Bridesmaids
The double buns are fun and distinctive, making bridesmaids feel like they have a special, personalized style. The style is surprisingly formal when executed neatly, yet it has a modern, creative edge. The buns are small and relatively unobtrusive while still creating visual interest at the crown. This style works on all hair types and actually hides fine or thinner hair better than a single bun would.
How to Create the Look
- Brush hair smooth and create a center part down the back of your head
- Divide the top half of your hair into left and right sections with this center part
- Take the left section and gather it into a small bun at the crown—coil and twist it, then secure with bobby pins
- Take the right section and create a second small bun in the same manner, matching the size and height of the first
- Leave the bottom half of your hair completely down
- Adjust both buns so they’re symmetrical and at the same height
- Add soft waves to the down hair if desired
- Secure everything with flexible-hold hairspray
Pro tip: Making the buns slightly loose and undone-looking (rather than perfectly neat) gives this style a more intentional, fashion-forward appearance.
16. The Half-Up with Decorative Clip and Layers
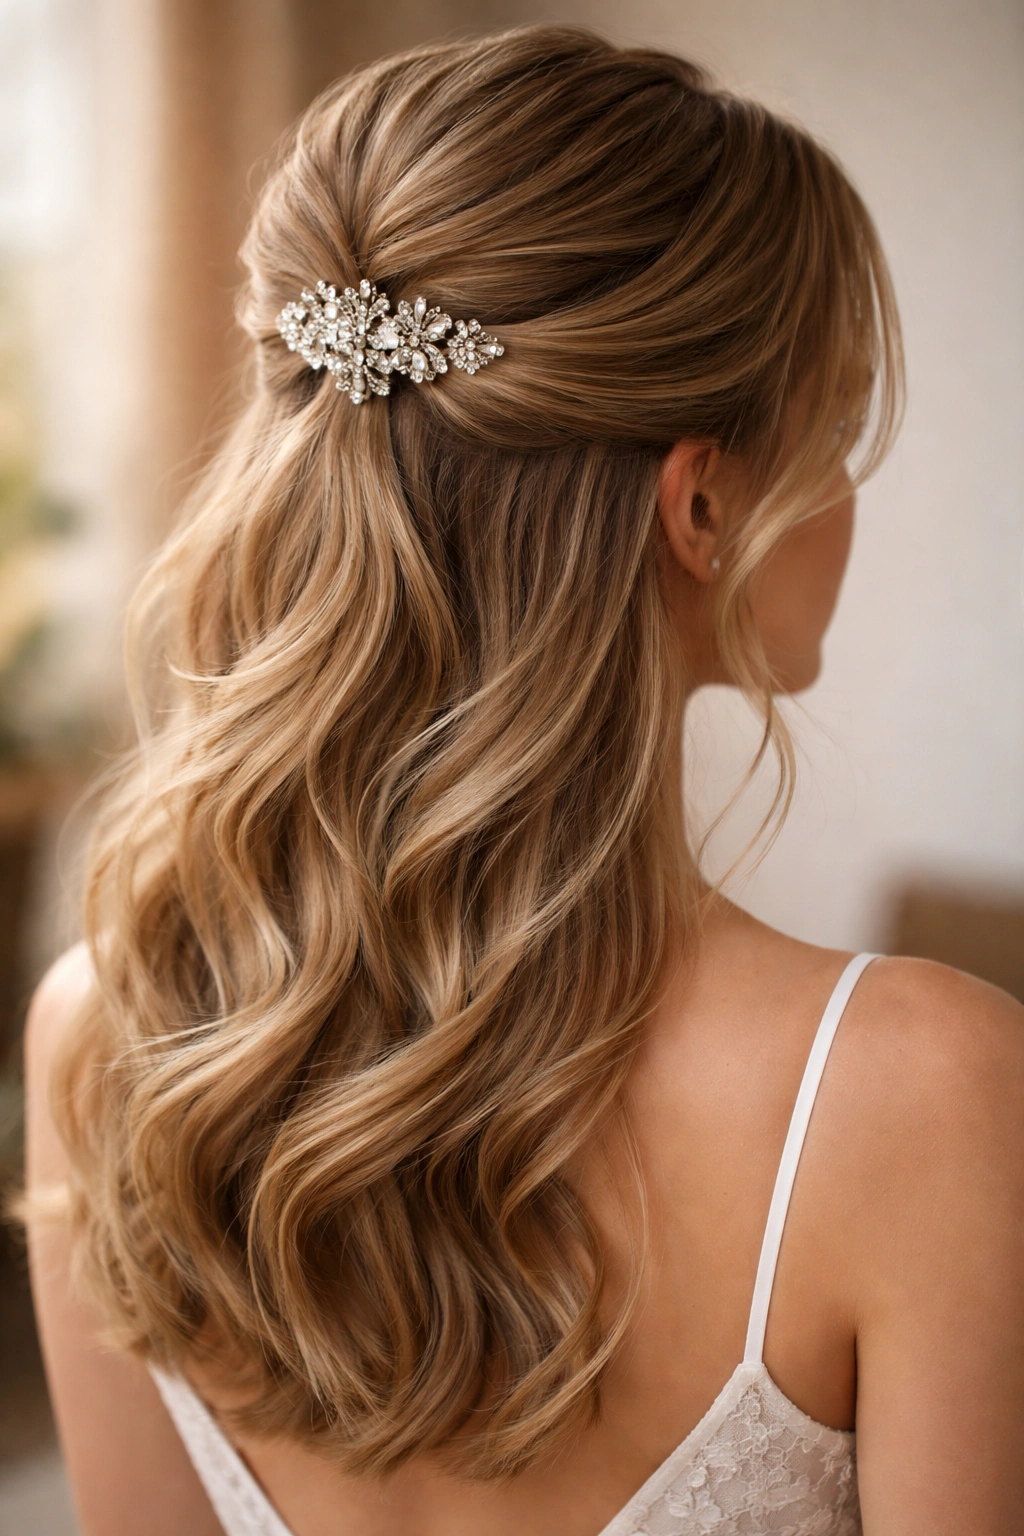
The top half of the hair is smoothly gathered and secured with a decorative claw clip, ornamental barrette, or jeweled hair clip that coordinates with jewelry or the wedding aesthetic. The remaining hair is left completely down and styled with soft, layered waves. This style is effortlessly elegant and the decorative clip serves as both a functional piece and a statement accessory.
Why This Works for Bridesmaids
A beautiful decorative clip elevates even a simple half-up into something intentional and polished. The clip can introduce sparkle, color, or texture that complements the overall wedding design. This style is quick to create and requires minimal hair skill—gathering hair and securing with a clip is something anyone can do independently. The clip also provides a practical function, keeping the style secure throughout the entire day without requiring bobby pins that might slip.
How to Create the Look
- Brush hair smooth and section out the top half (from ear to ear)
- Pull this section smoothly back toward the crown, creating a polished appearance with no bumps or texture
- Secure the section with a decorative clip positioned at the crown or slightly to one side
- Leave the bottom half of your hair completely down
- Create soft waves throughout the down hair using a 1.25 or 1.5-inch curling iron
- Gently finger-comb the waves to soften them and blend them together
- Add a flexible-hold hairspray to set the waves and secure any flyaways
- Check that the decorative clip is positioned how you want it—adjust if needed
Pro tip: The decorative clip should coordinate with the bride’s jewelry or the bridesmaid dress without exactly matching—this creates a cohesive look without being overly matchy-matchy.
17. The Side-Swept Half-Up with Texture
The hair is gathered into a half ponytail but positioned significantly to one side of the head rather than down the center. This creates asymmetry and movement, and the gathered section is slightly teased for texture before securing. The remaining hair is styled with waves and also swept to the same side, creating a cohesive, flowing silhouette.
Why This Works for Bridesmaids
The side-swept style is flattering to most face shapes because the asymmetry creates movement and dimension. The off-center positioning makes the style feel modern and intentionally designed rather than default. The gathered section positioned to the side keeps most hair off the face, which is practical for long days and photographs beautifully from multiple angles. This style works on all hair types and is particularly striking when paired with a deep side part.
How to Create the Look
- Create a deep side part, with more hair on one side than the other
- Gather the top half of your hair into a half ponytail, but position it to the fuller side of your part
- Before securing, tease the gathered section gently for texture and volume
- Smooth the surface and secure with an elastic band
- Release the remaining hair and create soft waves throughout
- Sweep all the wave hair to the same side as the half ponytail
- Tousle and arrange so the overall style flows to one side
- Finish with flexible-hold hairspray
Pro tip: A decorative bobby pin or small clip can be hidden beneath the half ponytail where it meets the elastic, adding just a touch of sparkle.
18. The Braided Twist Half-Up Hybrid
One side of the hair is braided from the temple back, while the opposite side is twisted, and both sections meet at the crown where they’re secured together. This hybrid style combines the intricate look of braiding with the ease of twisting, creating visual interest without requiring two complicated skills. The remaining hair flows down the back and sides in waves.
Why This Works for Bridesmaids
The combination of a braid and a twist creates a sophisticated, intentional-looking style that actually requires fewer technical skills than either technique alone. The hybrid approach is distinctive and photograph-worthy, making bridesmaids feel like they have a special, personalized style. This style works on all hair types and is particularly striking when the braid and twist are tightened just enough to look intentional but loose enough to look romantic. The asymmetry of mixing two different techniques feels modern and artistic.
How to Create the Look
- Brush hair smooth and section out the top portion from ear to ear
- On one side, create a French braid (incorporating new sections as you braid) from just above your temple toward the crown
- On the opposite side, create a twisted section by twisting a section of hair as you work toward the crown, adding small sections as you go
- Bring both the braided section and twisted section to meet at the crown
- Secure both sections together with a small elastic or decorative clip
- Tug gently at both the braid and twist to loosen them and create softness
- Leave the remaining hair completely down and style with soft waves
- Finish with flexible-hold hairspray
Pro tip: Mixing a braid on one side with a twist on the other creates the most visually interesting asymmetrical effect—avoid doing the same technique on both sides for this particular style.
Final Thoughts
Choosing the perfect half up half down style for your bridesmaid role comes down to three practical considerations: what works with your hair type and texture, what feels comfortable and secure enough to last through a full day of festivities, and what makes you feel confident and beautiful in photographs. All 18 of these styles check every one of those boxes—they’re genuinely easy to create or have created for you, they hold reliably throughout dancing and celebration, and they photograph beautifully from every angle.
The best approach is to try creating your chosen style at least once before the wedding day. Set aside 20 minutes on a random evening, pull together your hair tools, watch yourself in the mirror as you work through the steps, and get comfortable with the technique. If you get stuck or something doesn’t feel right, you can troubleshoot on your own time rather than discovering challenges on the morning of the wedding. Most bridesmaids find that their second or third attempt at a new style is significantly easier and faster than the first—your hands remember the motions, and you gain confidence in how the style should look.
If you’re nervous about creating the style yourself, share your chosen style and a couple of reference photos with your stylist well before the wedding. Most stylists can execute half up half down styles reliably and quickly, taking only 15-20 minutes from start to finish. This means even if you’re doing hair for several bridesmaids, the process stays efficient. Whether you’re handling your own hair or working with a professional, you’ll walk down that aisle looking polished, feeling confident, and knowing that your hair will stay in place all day and night.