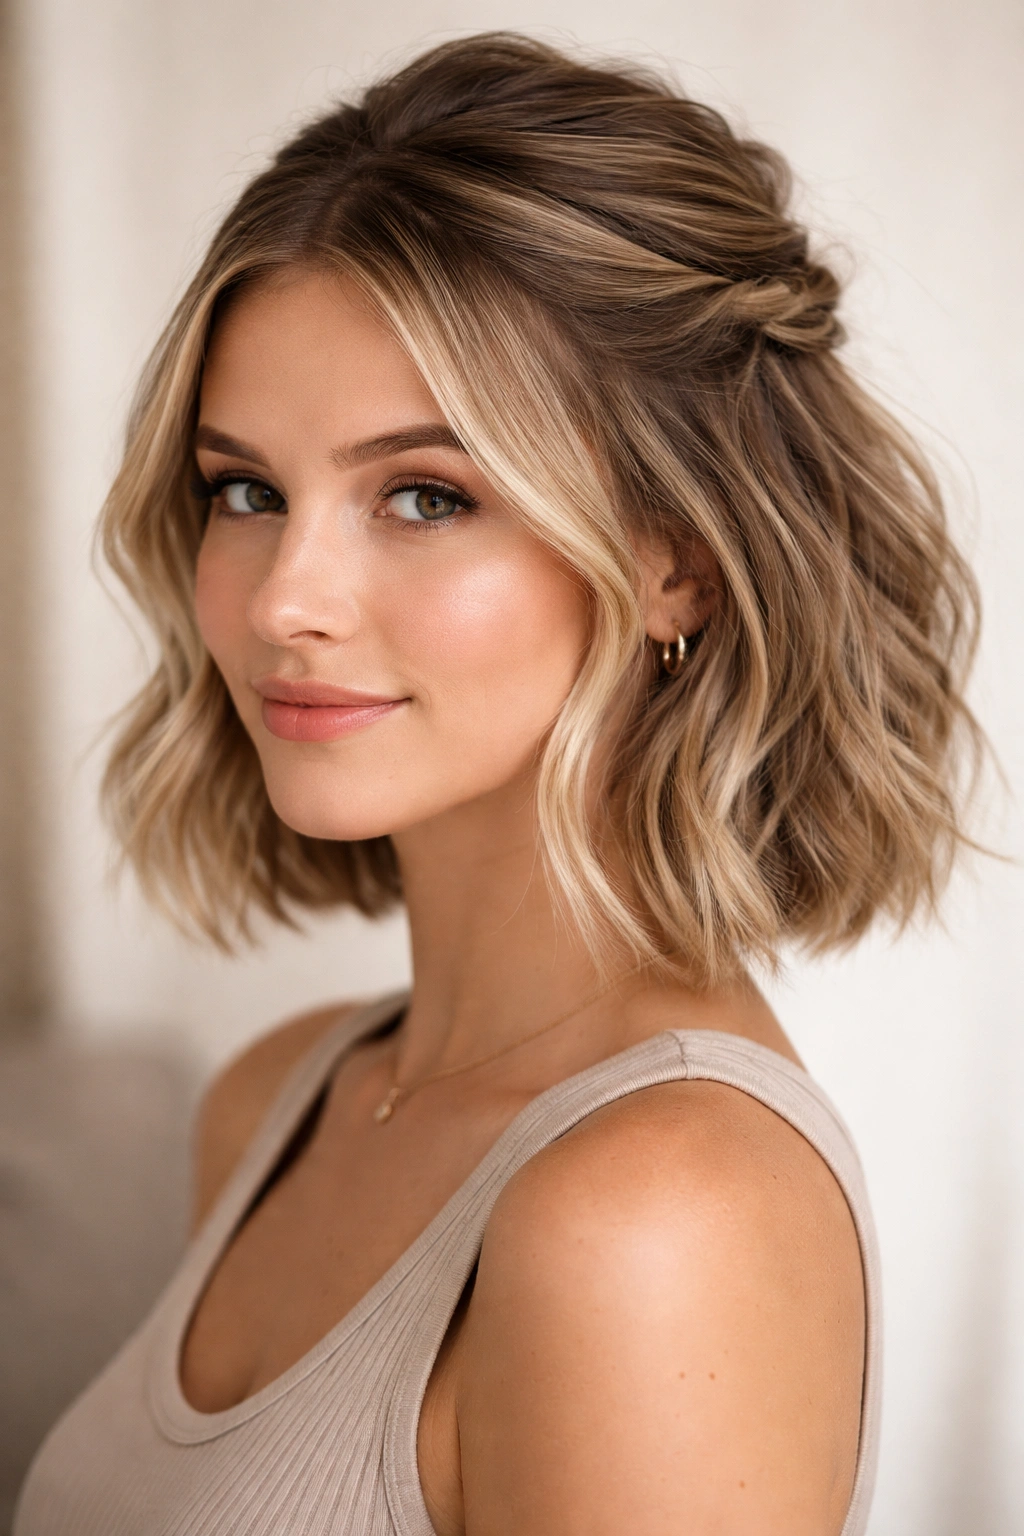
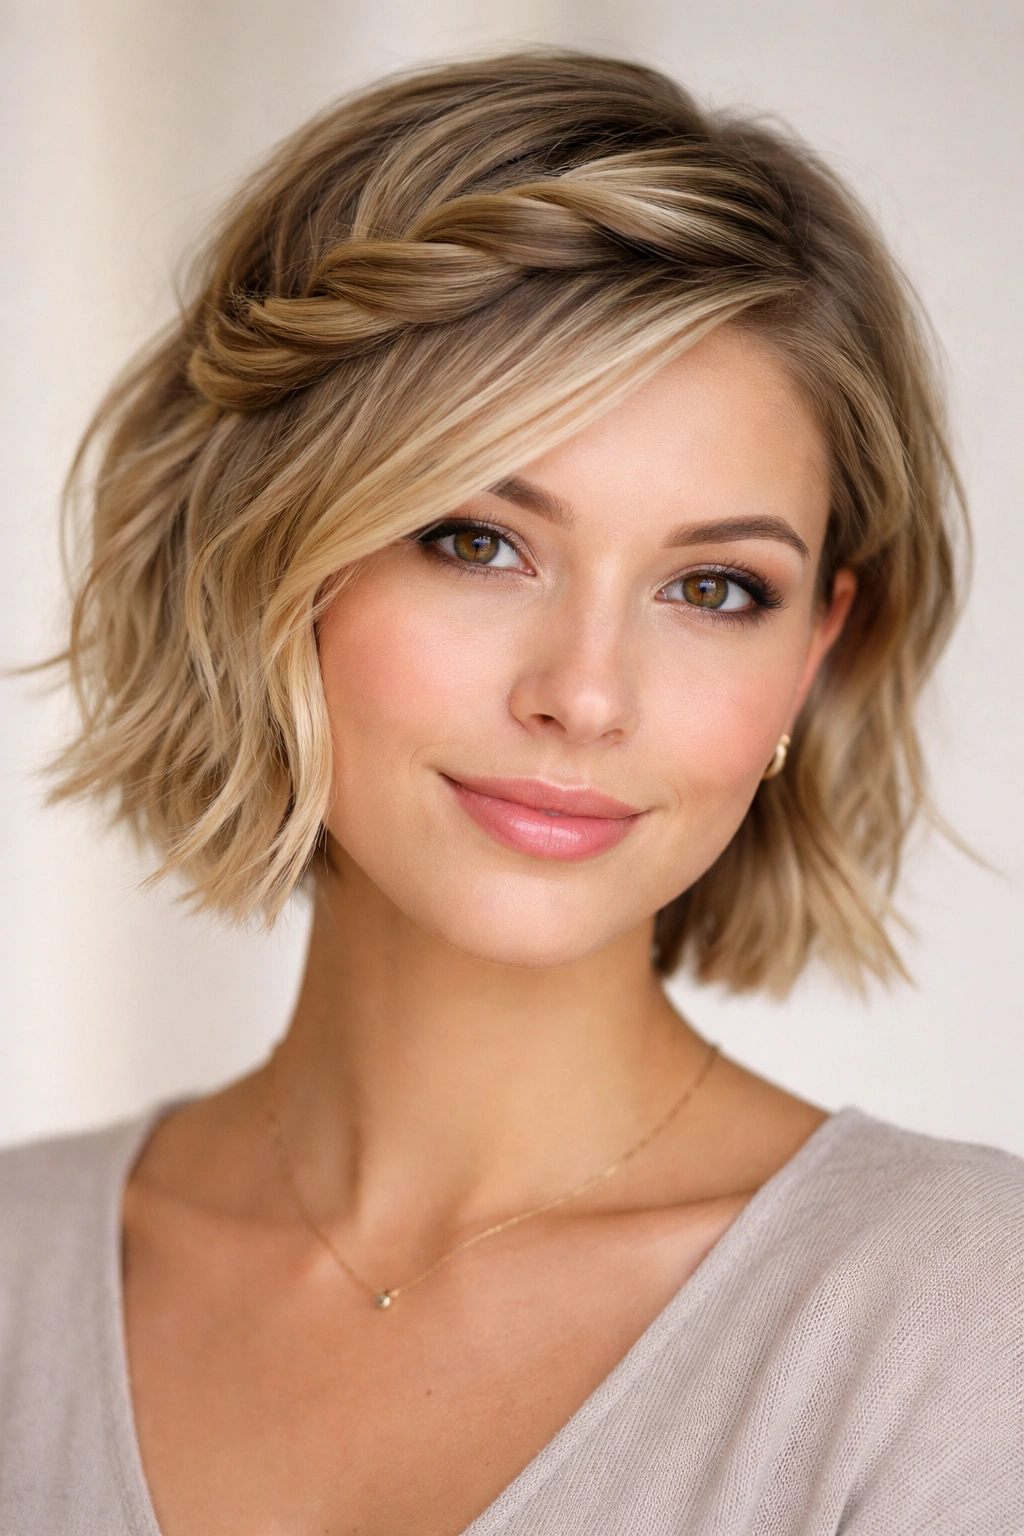
Short hair doesn’t have to mean sacrificing versatile styling options. In fact, half-up half-down styles offer a perfect middle ground for shorter lengths — they add dimension and interest without requiring the length needed for full updos, and they keep hair off your face while showcasing your cut. The beauty of half-up looks on short hair is that they work across virtually every hair type, texture, and thickness, from fine and straight to thick and curly.
The challenge with short hair is that there’s less to work with, which means the specific technique matters far more than it does with longer lengths. A small twist, a subtle braid, or the placement of a few bobby pins can completely transform how a half-up style looks and whether it actually stays put throughout the day. The stakes are higher because there’s less hair to hide imperfections or anchor styling elements, but that same constraint also forces creativity and precision that produces genuinely polished results.
What makes half-up half-down twists particularly effective for short hair is their geometry. A twist uses existing hair volume and wraps it strategically, creating the illusion of more fullness and deliberate structure without adding height or requiring length you don’t have. Whether you’re styling for a casual day, a special occasion, or just something different from your usual straight-down look, twists offer flexibility, texture, and a finished appearance that feels intentional rather than like you’re just trying to manage your hair.
Understanding Short Hair Half-Up Styling Basics
Short hair sits in a sweet spot for half-up styling — typically defined as hair that falls somewhere between chin-length and shoulder-length, though some styles work beautifully on even shorter pixies and bobs. The key difference when styling short hair is that you’re working with fewer inches to manipulate, which means every section you incorporate, every twist you create, and every pin placement matters significantly to the final look.
The amount of hair you pull up is proportionally more noticeable on short lengths. If you take a large section on long hair, it might hardly register visually. Take the same section on short hair, and it becomes a bold design element. This is actually an advantage — it means your styling choices are highly visible and create real impact, so even subtle twists read as intentional and polished.
Texture matters tremendously on short hair, even more than it does on longer lengths. Straight hair can show every flyaway and every pin placement, so precision becomes essential. Wavy or curly hair on shorter lengths often holds styling beautifully because the natural texture grips the twists and maintains them throughout the day. If you have fine, slippery hair, you may need slightly more secure pinning or smaller sections to ensure twists don’t slip out.
Essential Tools and Products for Short Hair Twists
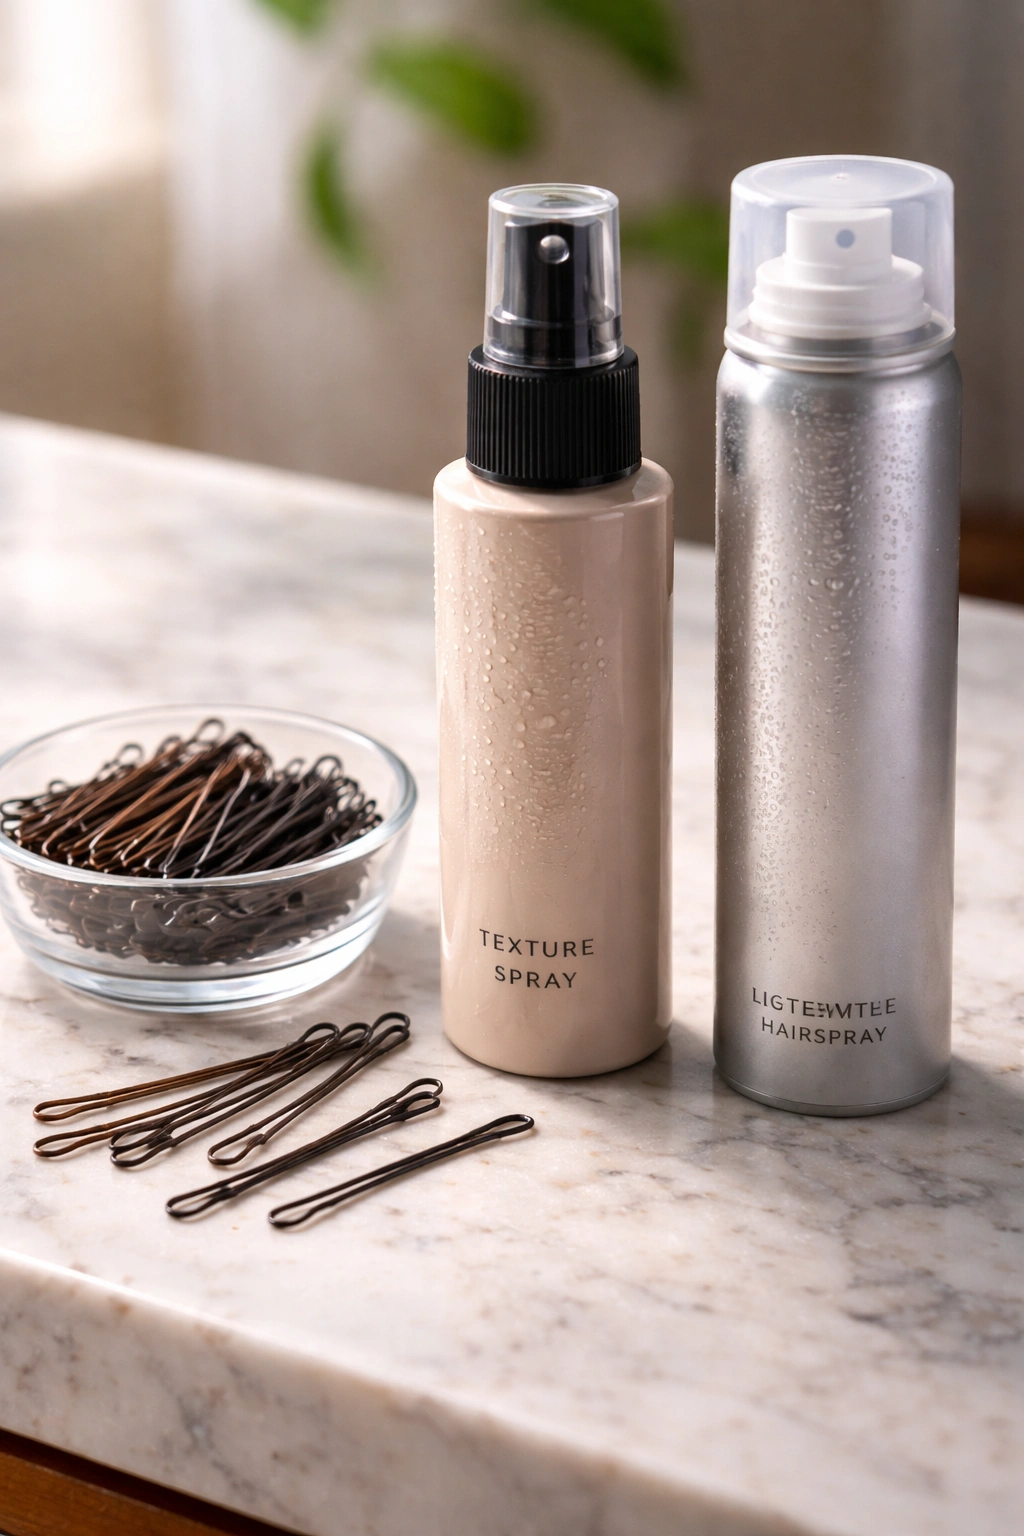
The right preparation makes the difference between a half-up style that lasts all day and one that falls apart after an hour. For short hair twists, you need bobby pins that match your hair color — they’ll be visible, and matching pins essentially disappear while mismatched ones look like an accent you didn’t intend.
Texturizing spray or dry shampoo applied to your roots before styling creates grip and prevents slipping. Even if your hair is clean, adding subtle texture gives sections something to hold onto. Apply it the morning of or even the night before, and it’ll provide the micro-grip that makes short twists stay locked in place.
A light hairspray is your friend — use it during styling on each section before twisting, not just at the end. This sets each small section as you go rather than relying on a single mist at the finish. For particularly tricky styles or particularly fine hair, consider a stronger hold product, but start light and build if needed. Heavy products on short hair can weigh it down and make the style look limp rather than intentional.
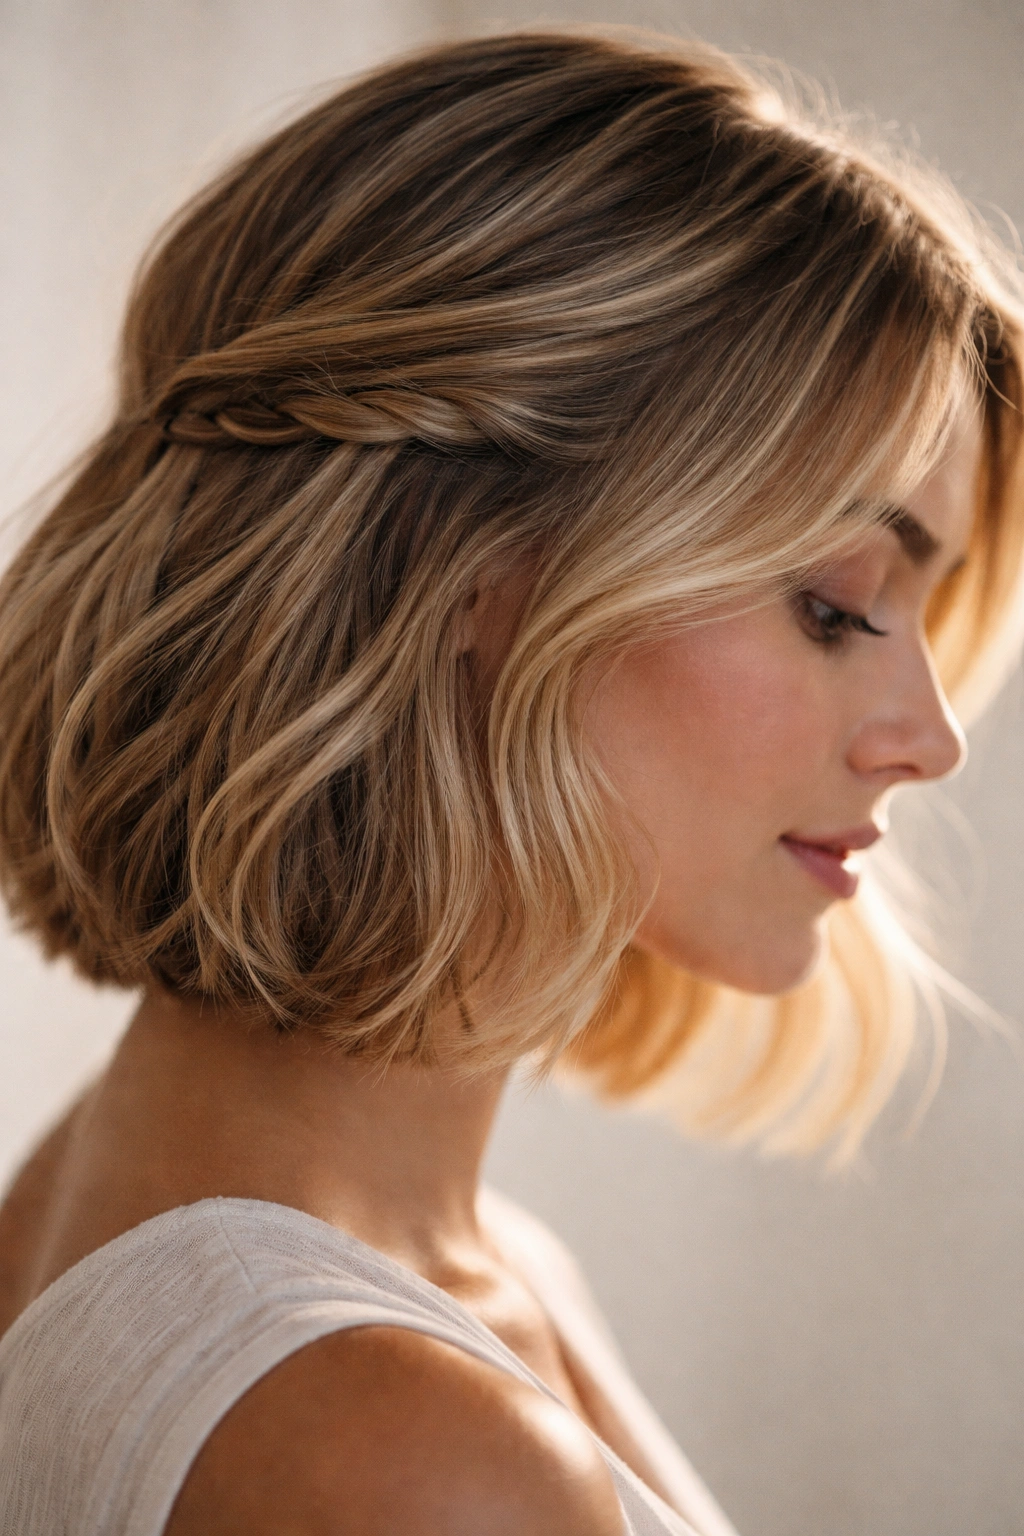
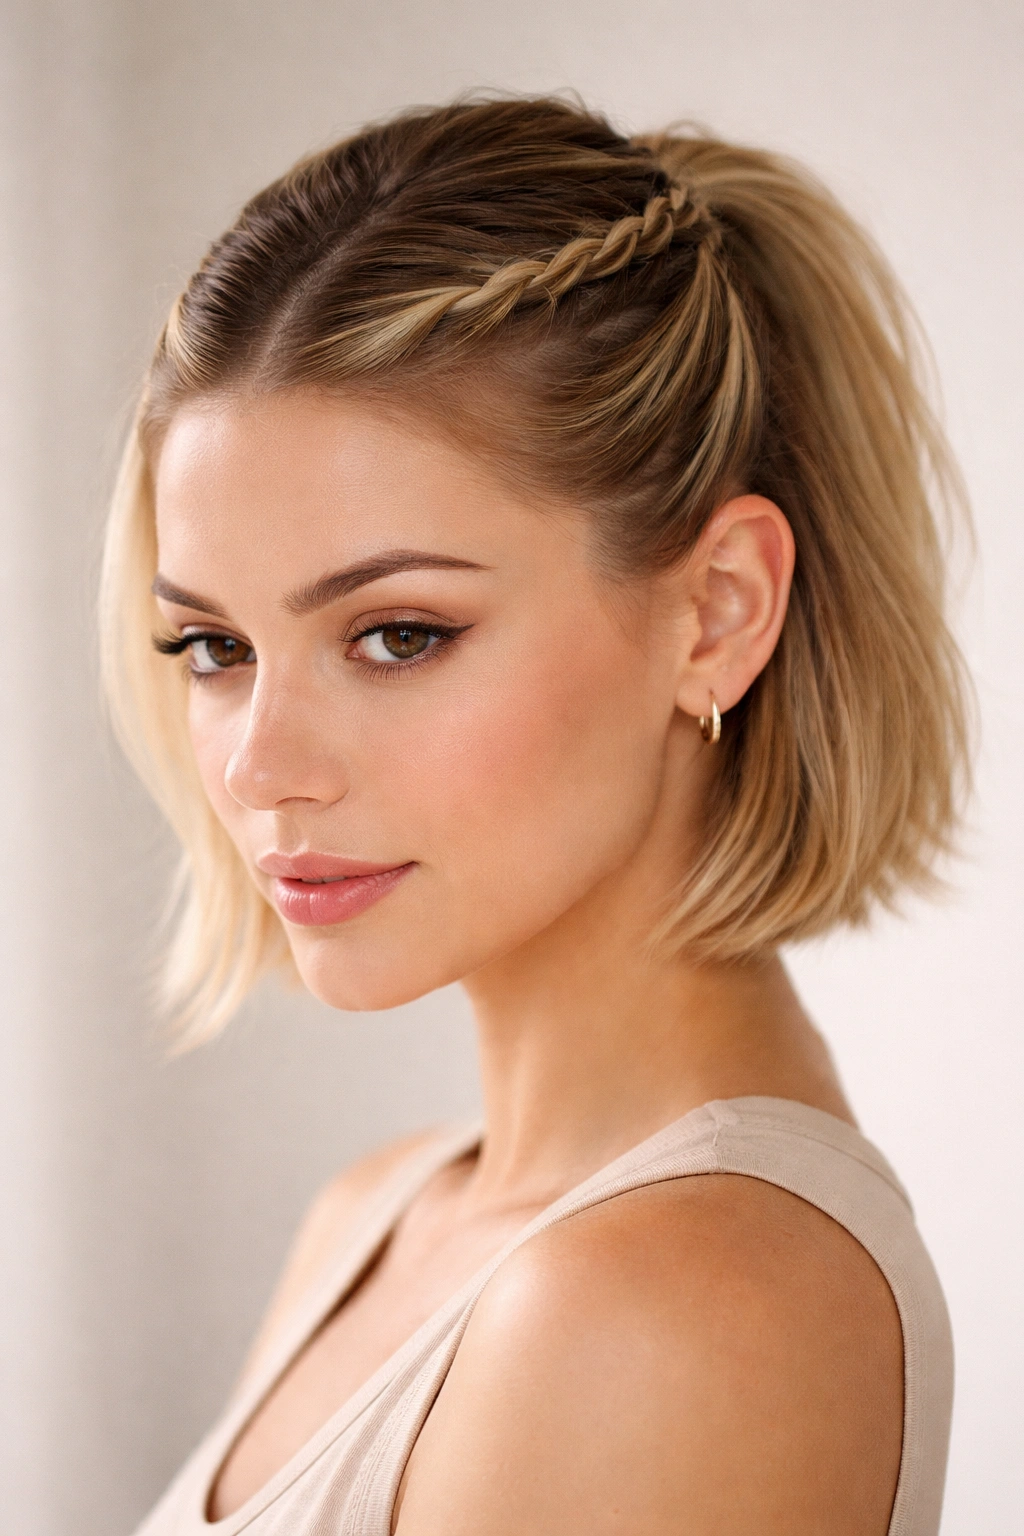
1. The Delicate Front Twist With Texture
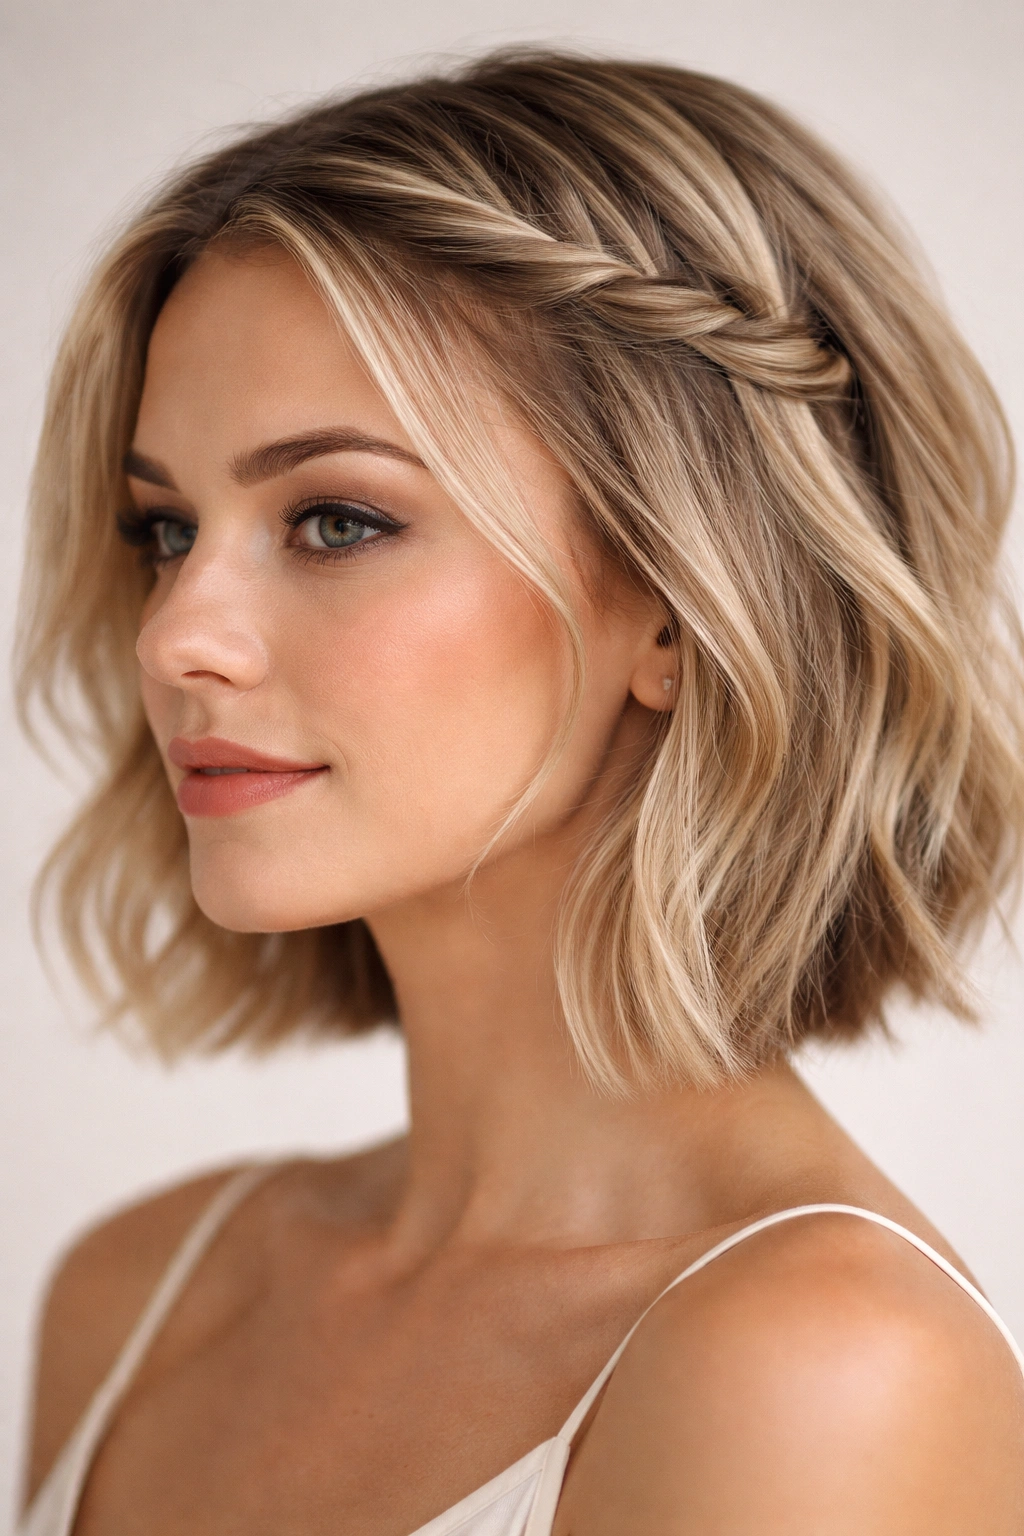
This style begins at one temple and twists a thin section of hair back toward the crown, creating a graceful frame for your face that works beautifully on bobs and shorter layers. The “delicate” part is the key — using a thinner section than you might with longer hair prevents the twist from feeling bulky on your smaller canvas.
How to Execute This Style
Start by taking a 1-inch section of hair from your front hairline, about an inch from your face. Twist this section loosely toward the back of your head — the twist should feel smooth and slightly textured, not tight. As you twist, you can incorporate more hair from that side if your cut allows, but on very short hair, you might keep it as a single thin twist that sits as a visible accent.
Secure the twist at the back with a single bobby pin tucked discretely just behind the crown. The twist should feel light and graceful, almost like you casually tucked hair back rather than created a structured updo element.
Why This Works for Short Hair
The delicate front twist frames your face without pulling hair so tightly that it creates tension on short strands. It works on straight hair because the fine lines of the twist become a deliberate design feature, and it works on textured hair because the natural waves and curls make the twist appear fuller and more intentional.
Styling note: This twist is your friend for second-day hair or slightly greasy roots — the texture that might make other styles look unclean actually enhances this delicate twist because it provides grip and visibility.
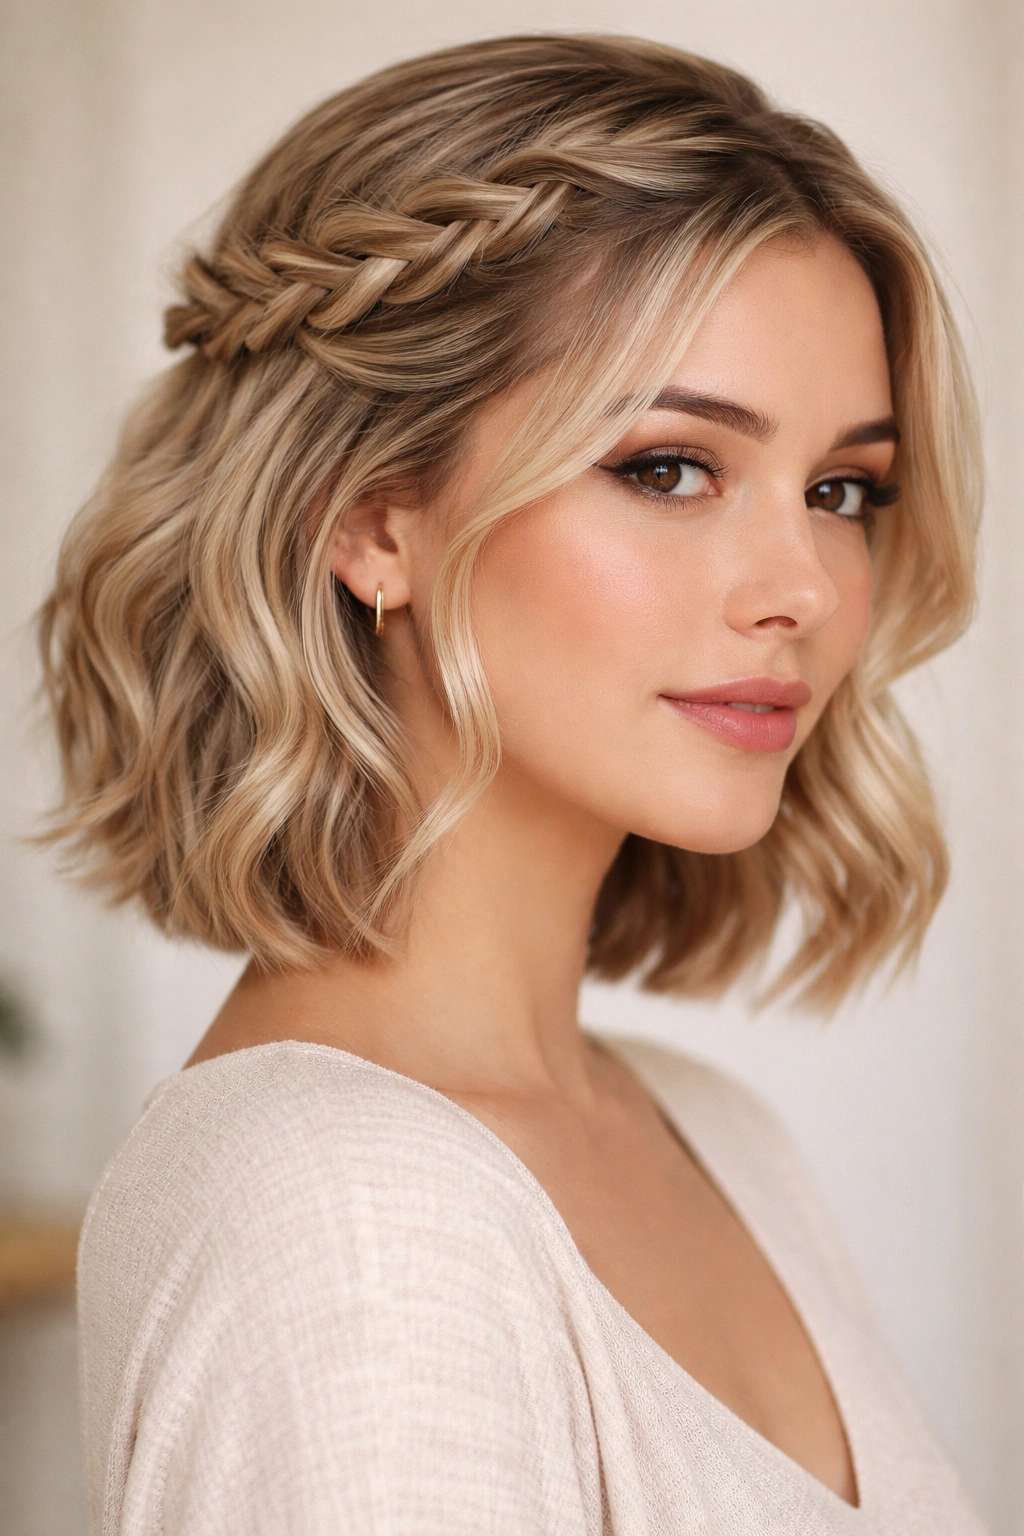
2. The Double Twisted Crown
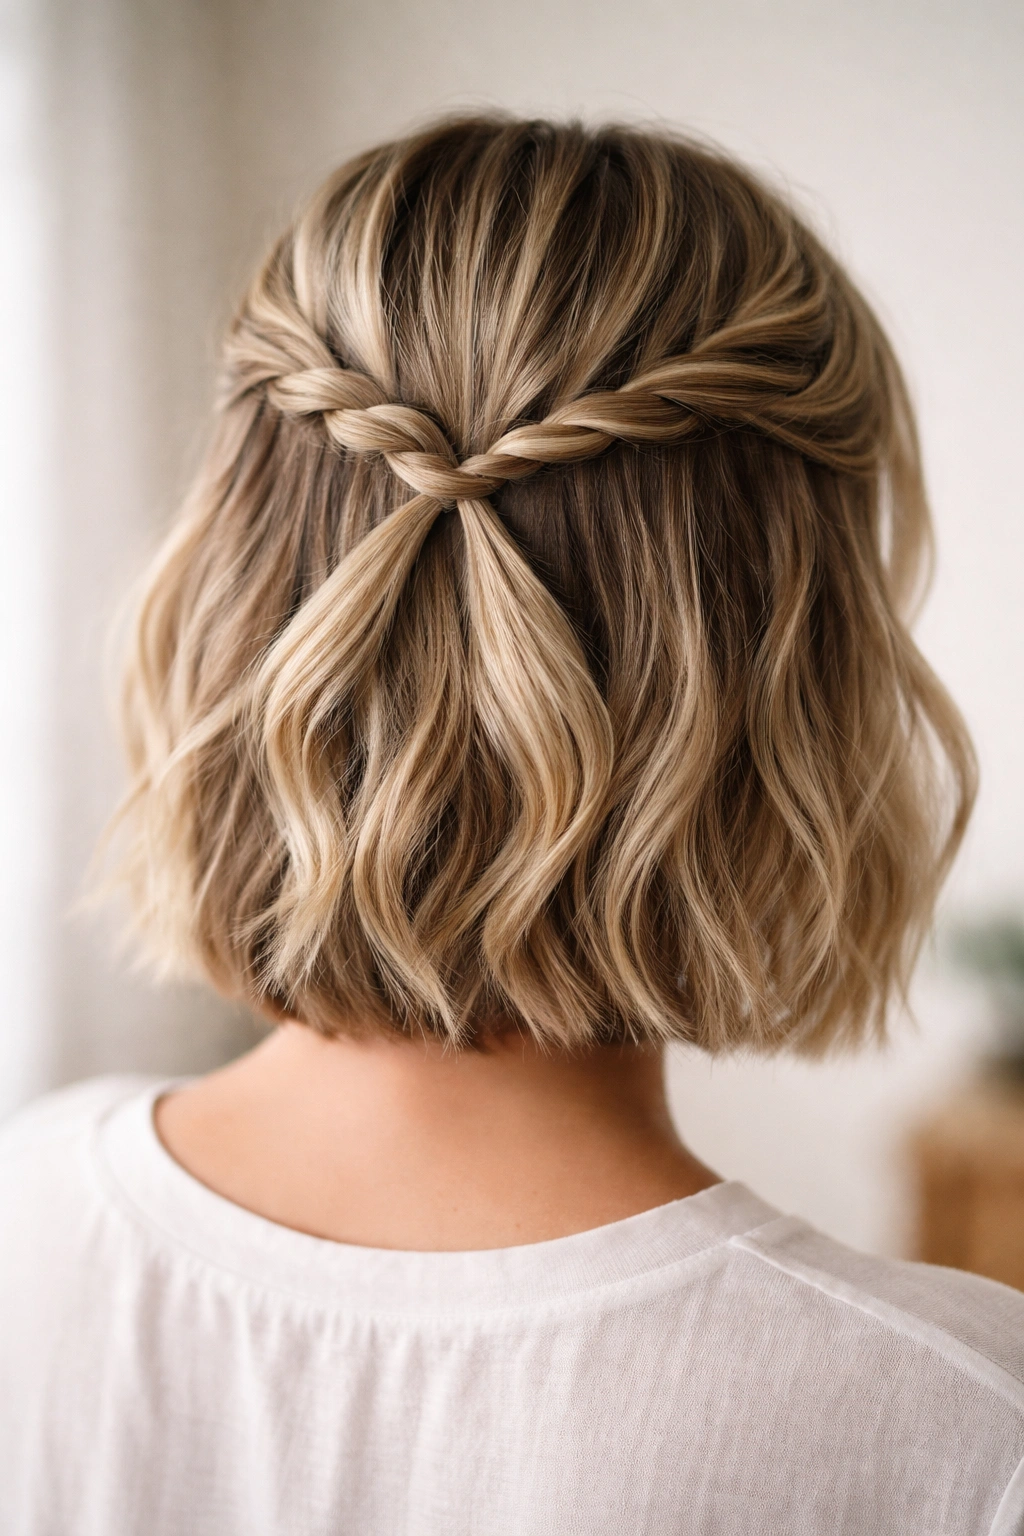
This style takes two thin twists from either side of your head and brings them together at the crown, creating a structured, polished look that reads as more formal while using minimal hair. It’s ideal for bobs or pixie cuts with some length on top, and the double-twist geometry creates visual fullness even on very fine hair.
How to Execute This Style
Divide your head into two vertical sections down the middle. Starting on one side, take a section about an inch from your temple and begin twisting it diagonally back toward the crown. Keep the twist relatively loose — tight twists on short hair look harsh rather than elegant.
Simultaneously (or after completing the first), create the matching twist on the opposite side. Both twists should converge roughly at the crown where you’ll secure them together with two bobby pins crossed in an X pattern. This crossing technique distributes the weight and makes pinning invisible rather than relying on a single point that might show.
Why This Works for Short Hair
The double-twist crown works because it uses minimal hair but creates maximum visual structure. On curly or wavy short hair, each twist becomes a defined curl accent that frames the face beautifully. On straight hair, the symmetry of the double twist is the design statement itself.
Pro tip: This style benefits from being slightly undone rather than perfectly polished — intentionally leave a few smaller pieces unpinned at the temples so they softly frame your face rather than being pulled completely back.
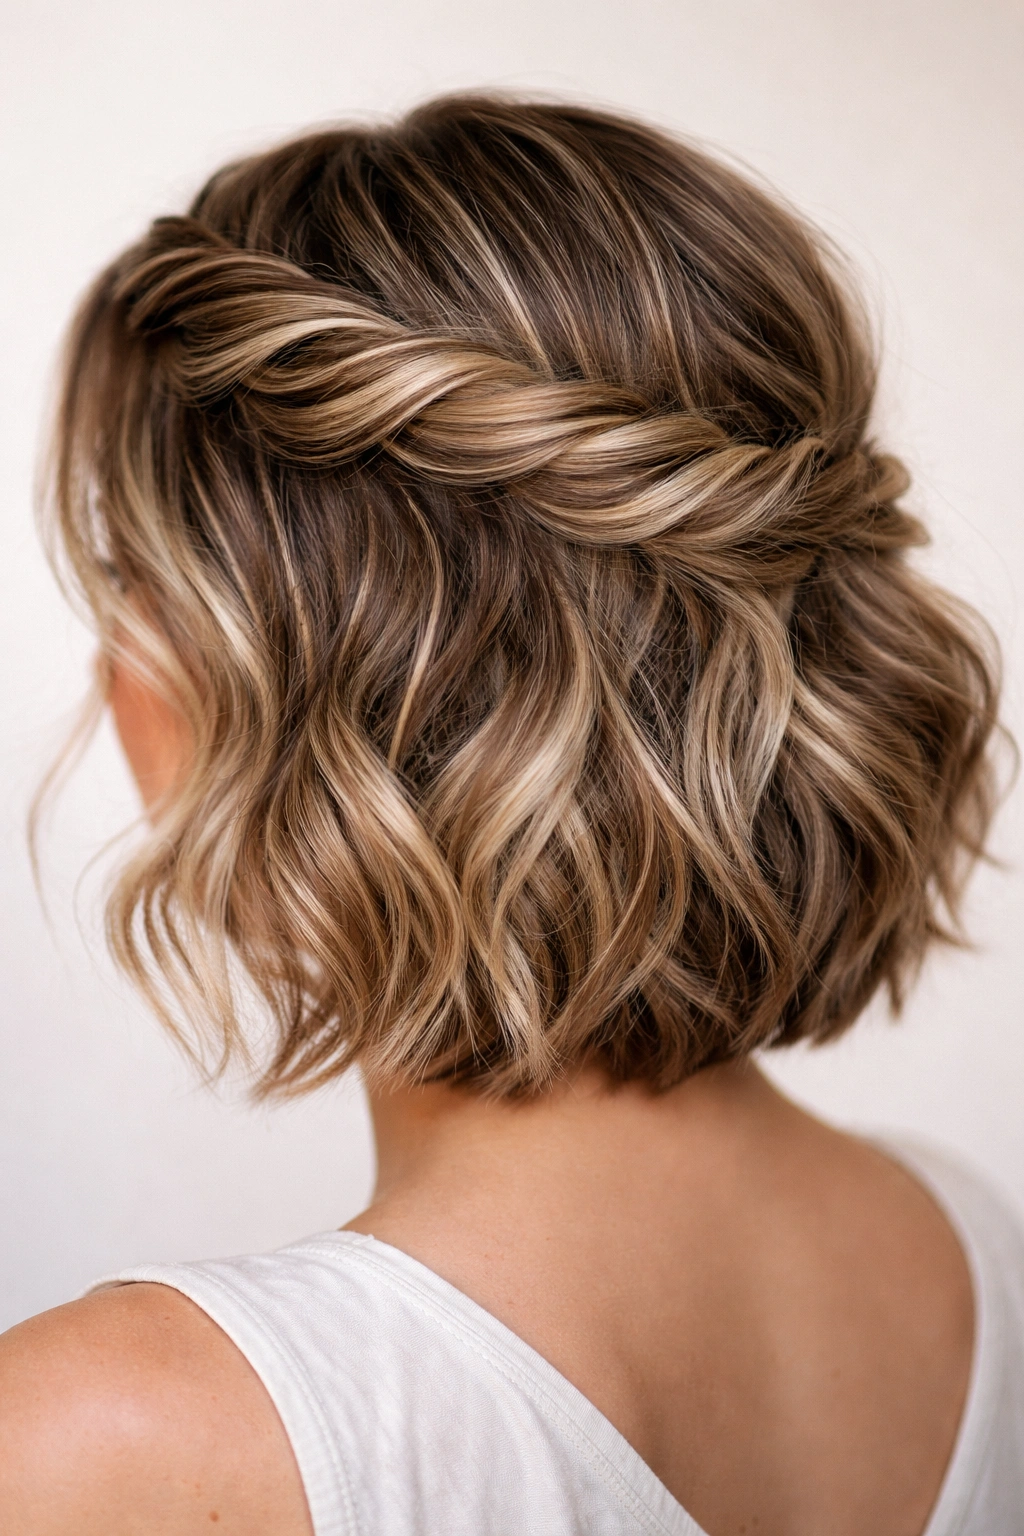
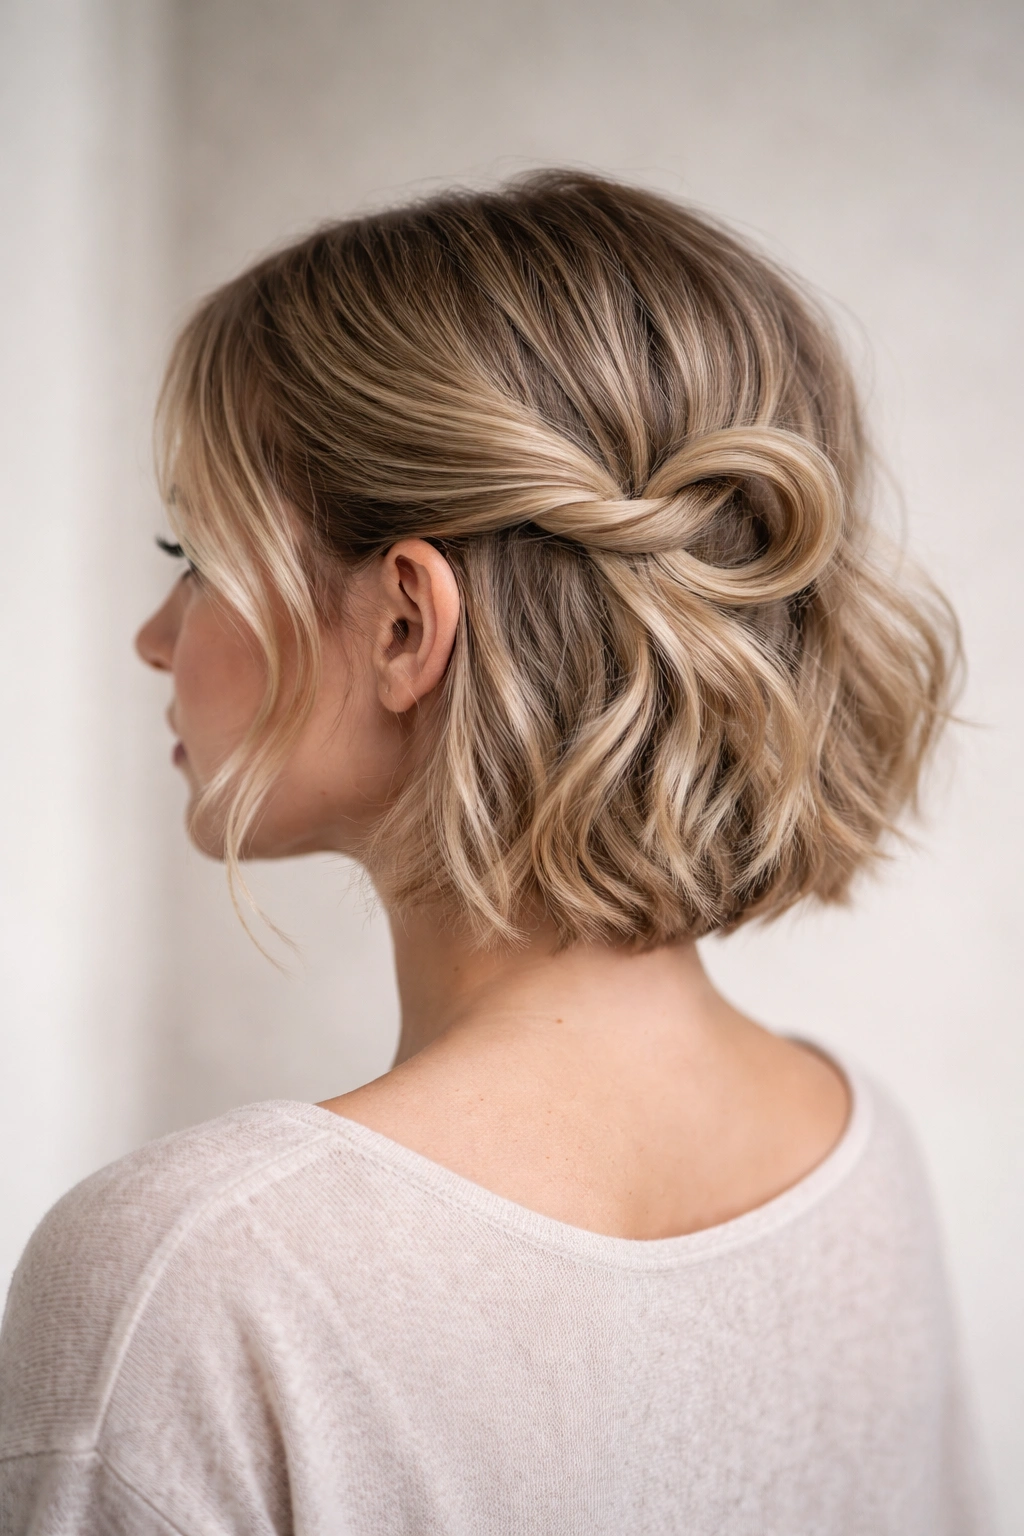
3. The Side-Swept Twisted Accent
This casual style takes a single larger twist from one side and sweeps it across the crown to pin on the opposite side, creating an asymmetrical half-up look with movement and dimension. It’s less formal than two-sided styles but more styled than simply pushing hair back, making it perfect for work, weekend, or in-between occasions.
How to Execute This Style
Starting at your temple on your dominant side, take a section roughly 1.5 inches wide and begin twisting it. Twist with medium tension — not loose, not super tight — and sweep the twist across the crown of your head toward the opposite side. Pin it just above your opposite ear with one or two bobby pins, leaving a few inches of the twist unanchored so it appears to naturally fall away from the pin.
The key is the pin placement — hide it behind hair so the twist appears to be falling gracefully rather than being held up by visible hardware. You want the visual emphasis on the twisted texture, not the securing mechanism.
Why This Works for Short Hair
The side-swept twist creates movement and asymmetry, which is incredibly flattering on short cuts because it keeps one side slightly fuller while the other side shows off the shape of your cut. It works especially well on shorter bobs where you want to break up too-perfect symmetry.
Worth knowing: This style looks best when you don’t twist too tightly because tight twists appear sparse and show too much scalp. A slightly looser, textured twist appears fuller and more glamorous.
4. The Spiral Crown Twist
This style takes a larger section from one side and creates a full spiral twist that wraps around the crown, creating a more romantic, feminine look. It requires more hair than some other short-hair twists but creates beautiful visual impact, especially on wavy or textured hair.
How to Execute This Style
Starting at your temple, take a section about 2 inches wide and begin twisting. Continue twisting and gradually spiraling the twist around the crown, picking up small additional pieces as you go if your hair allows and if you want additional fullness. The goal is to create a soft spiral rather than a tight geometric shape.
Once you’ve spiraled around to the opposite side of your crown, secure the twist with bobby pins — you may need 2-3 to hold it depending on how much hair you’ve incorporated. Leave the end of the twist slightly loose and falling rather than pinning it completely flat against your head.
Why This Works for Short Hair
The spiral creates dimension and visual interest without requiring the length needed for full-head upstyles. It’s particularly beautiful on shorter lengths because every element of the twist is visible rather than hidden by longer hair, making the texture and design of the twist the focal point.
Insider note: This is one of the few short-hair twists that actually benefits from slightly damp hair — apply your texturizing product and work with hair that’s about 70% dry rather than bone-dry for better grip and hold.
5. The Slicked-Back Twist Pair
This style creates two small tight twists that hug close to your scalp, pulling hair back and off your face while maintaining the half-up aesthetic. It’s particularly useful for shorter, finer hair that struggles to hold looser twists, or for days when you want a more athletic, sleek vibe.
How to Execute This Style
Create a deep side part on whichever side you prefer. Starting from your forehead at the part line, take a thin section and twist it tightly back along your scalp toward the crown. Create a second matching twist starting just below the first. Both twists should follow your natural hairline as closely as possible, creating almost a braided frame around your head.
Secure both twists together at the crown with bobby pins, and if you have texture, you can lightly backcomb the twists after pinning to create a slightly fuller appearance.
Why This Works for Short Hair
Tight, slicked twists work beautifully on short hair because they’re precise and intentional — there’s no trying to hide thickness or work around length constraints. The style is particularly striking on straight hair where the clean lines of tight twists become a design element. On curly hair, tight twists create defined ringlets that frame your face.
What to watch for: Make sure you’re not pulling so tightly that you’re creating tension on your scalp, especially if you’re doing this style frequently. Tension alopecia is real, even with short hair, so keep twists snug but not cranking-tight.
6. The Underneath Twist Hidden Detail
This style creates a twist that sits mostly underneath the top layer of hair, creating a hidden structural element that holds hair back without looking overtly styled. It’s perfect for naturally wavy hair or when you want something that reads as effortless rather than intentional.
How to Execute This Style
Taking a section from your temple, create a twist but position it so it sits underneath your natural hair fall rather than on top. The twist should be just under the surface, visible only when you move or when light hits at a certain angle. Secure it with bobby pins positioned so they’re hidden by the overlying hair layer.
The top layer of hair should appear relatively undone and unstyled, with the twist doing all the work underneath to keep everything off your face while maintaining that “I-just-woke-up-like-this” aesthetic.
Why This Works for Short Hair
This hidden-detail twist is genius for short hair because it gives you the functional benefits of an updo while maintaining the undone, effortless appearance that’s often more flattering on shorter lengths. It also works beautifully on very fine hair because the visible hair looks full and natural while the twist underneath provides the actual holding power.
Pro tip: Use a firm-hold texturizing spray on this style because you’re relying on the hidden twist for all the structure — if it slips, the whole style falls apart immediately.
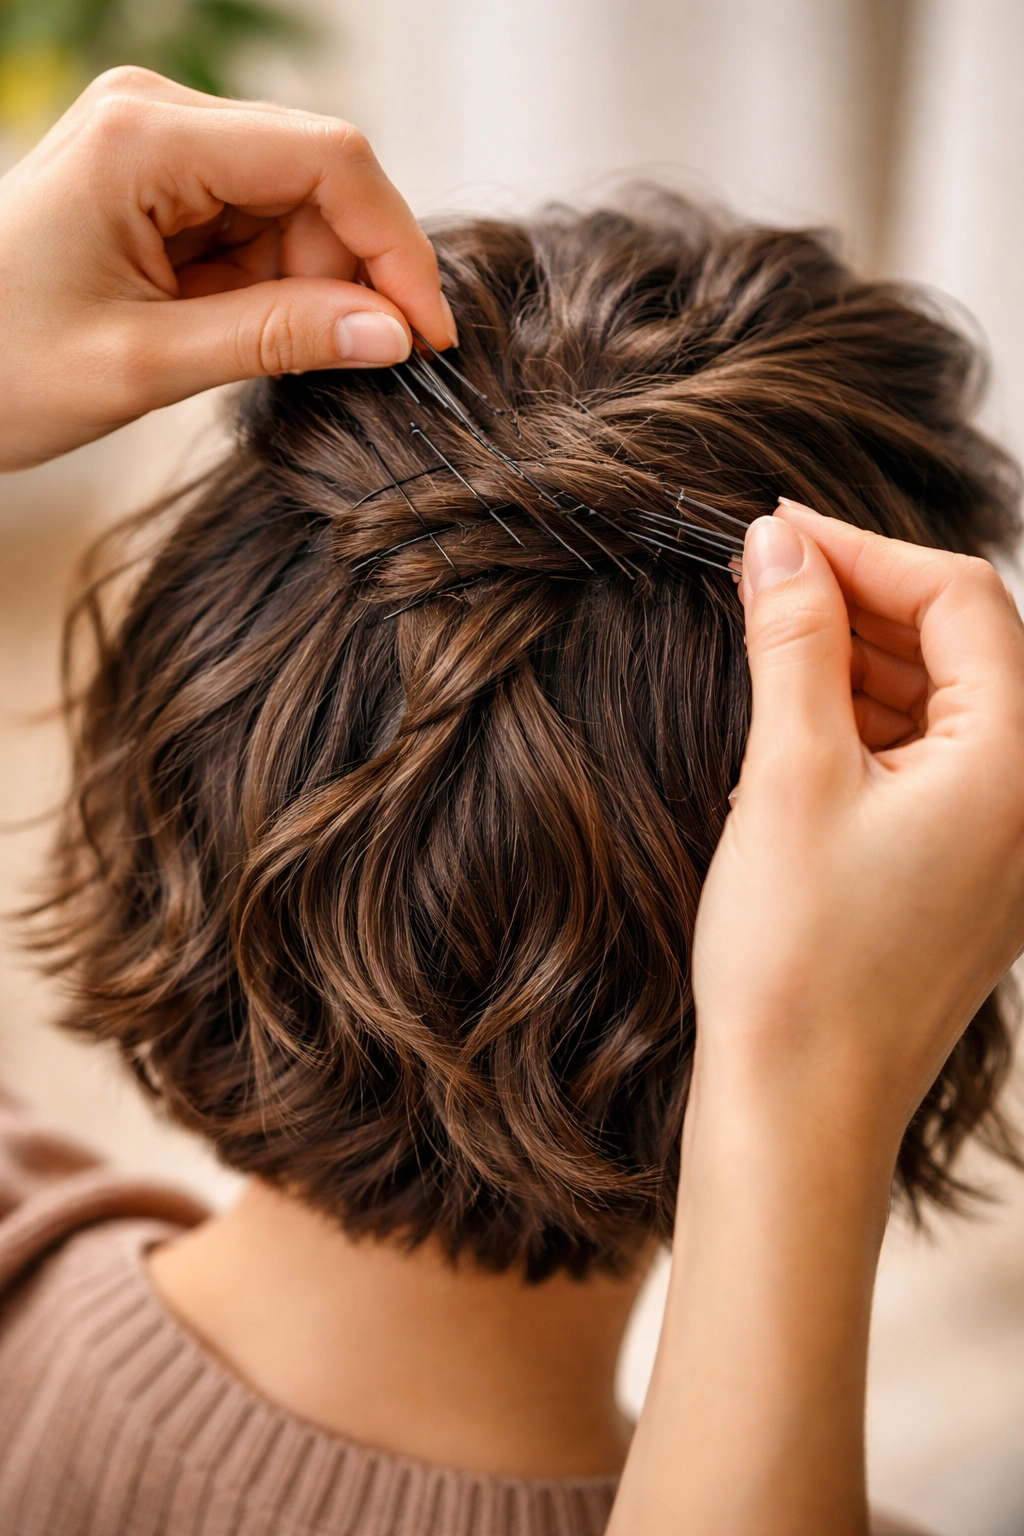
7. The Multi-Strand Twisted Bun
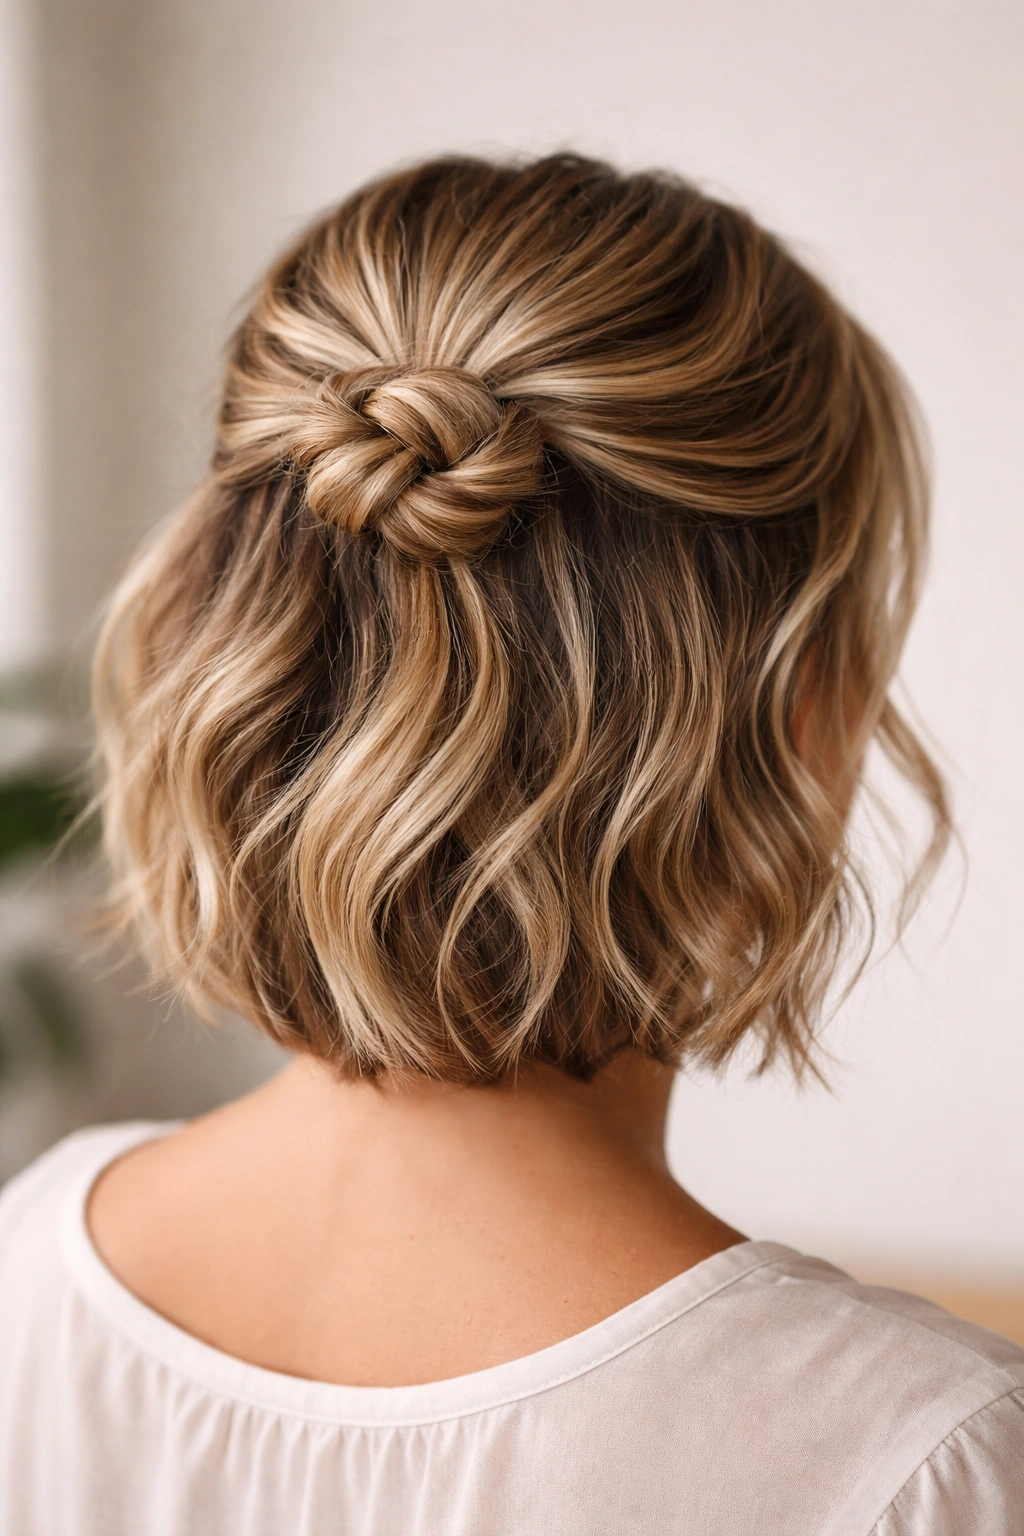
This style creates three small twists that wrap around each other and coil into a tiny bun at the crown, creating a sophisticated half-up look with actual structure. It’s more involved than some other twists but requires less total hair than a full bun would on longer lengths.
How to Execute This Style
Create three small sections at the front and sides of your crown area — roughly 1 inch each. Twist each section separately, then bring the three twisted strands together at your crown. Wrap the three twists around each other in a coiling motion, then wrap the entire coiled group into a small bun. Secure with bobby pins and finish with a light hairspray.
The coiling creates texture and visual interest rather than a sleek bun, making it feel more intentional and less like you’ve just bundled your hair away.
Why This Works for Short Hair
This style works on short hair because the small scale is actually an asset — a full-size bun on short hair can look awkward and choppy, but a small twisted multi-strand bun looks refined and intentional. It works beautifully for special occasions or dressier events.
Worth knowing: This style works best on hair that’s at least shoulder-length or has enough length around the crown to gather into a bun. On very short pixies, it won’t have enough hair to execute.
8. The Asymmetrical Twisted Loop
This style creates a single twist that forms a loop shape on one side of your head, pinning only the base of the loop while the loop itself remains loose and decorative. It’s modern and playful, with a sculptural quality that works especially well on textured hair.
How to Execute This Style
Starting at your temple on one side, take a section about 1.5 inches wide and begin twisting. Twist for about 3-4 inches, then fold the twisted section back on itself to create a loop. Pin only the base of the loop where it meets your head, leaving the loop itself completely loose and three-dimensional.
The twisted loop should sit as a textural accent on the side of your head, visible and deliberate. It’s almost jewelry-like in its structural quality.
Why This Works for Short Hair
The loop shape creates visual interest and dimension on short hair without requiring the length you’d need for longer, more flowing styles. It’s particularly striking on curly hair where the natural texture makes the loop appear fuller and more textured.
Insider note: This style benefits from being created in hair that’s been lightly waved or curled — use a curling iron or wand to create soft waves before twisting, and the natural texture makes the twist appear fuller and hold better.
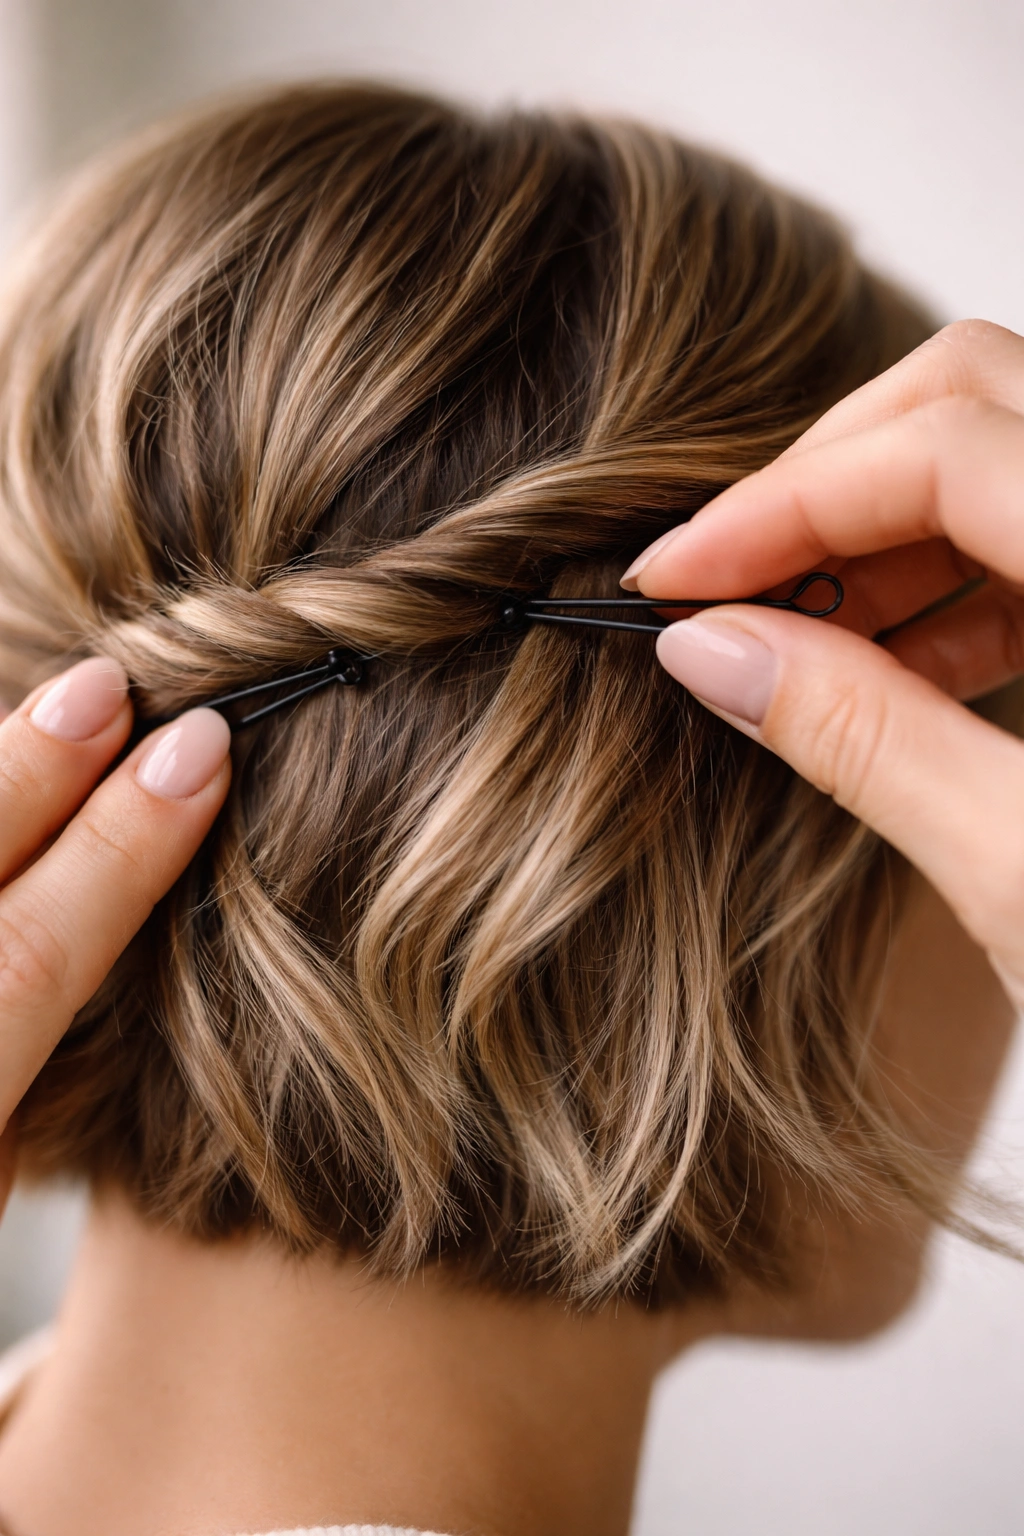
9. The Pinned Twist With Decorative Bobby Pins
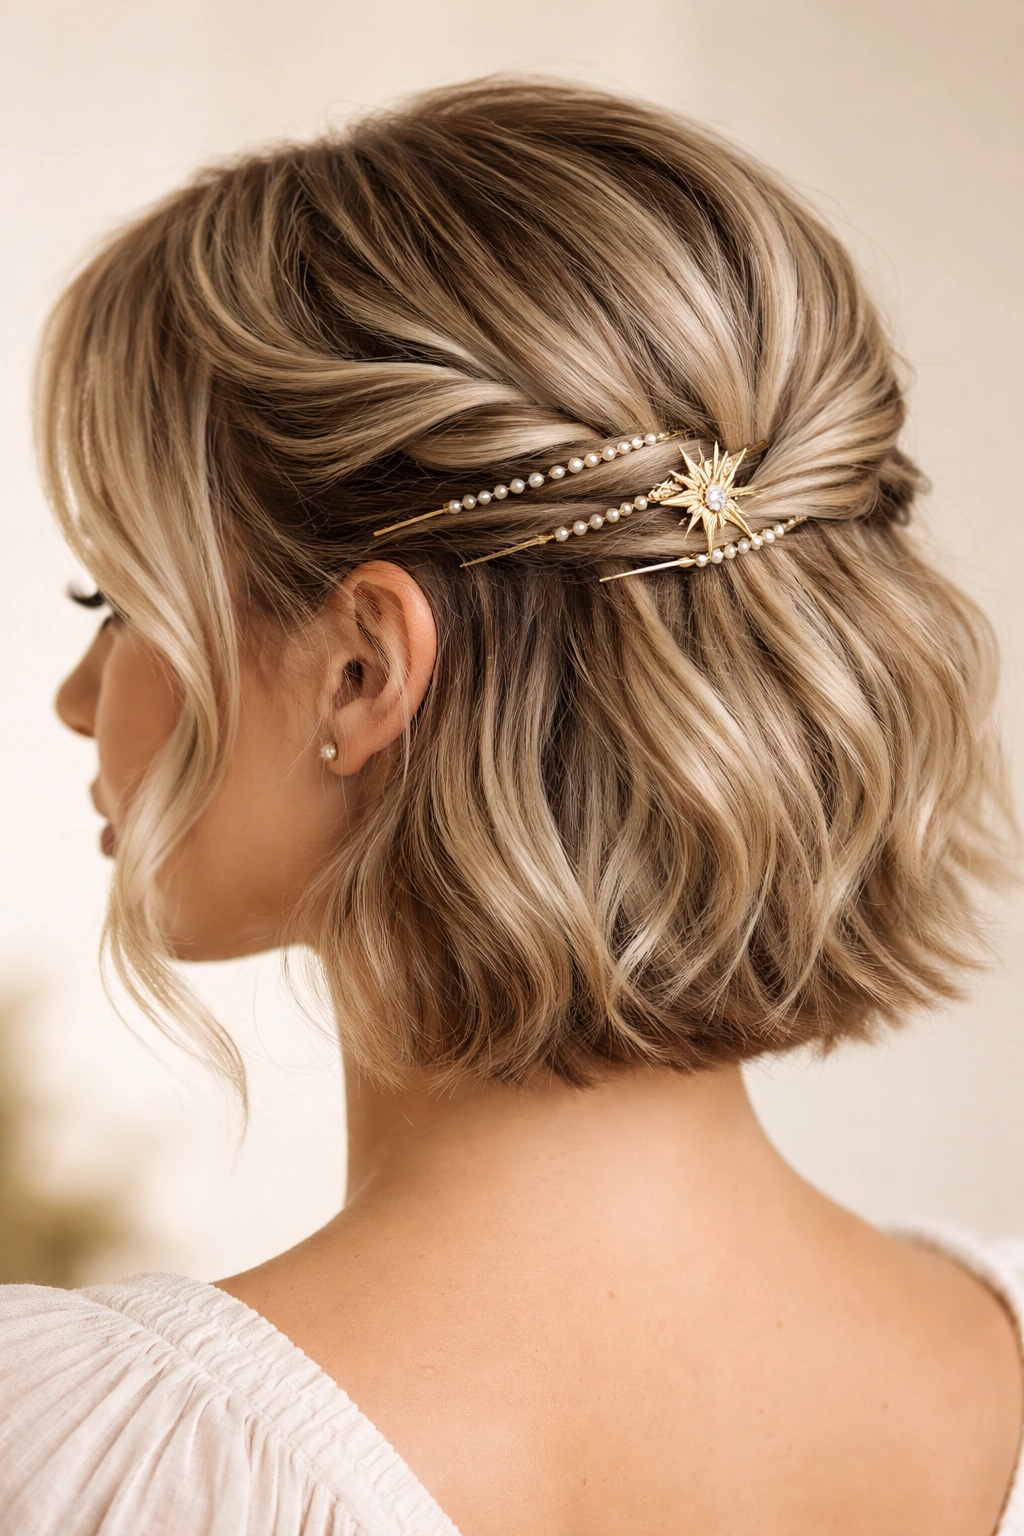
This style takes a delicate twist and secures it with decorative bobby pins that become a visible design element rather than hidden hardware. It’s perfect for when you want to lean into the styling aspect deliberately and add a fashion-forward edge.
How to Execute This Style
Create a simple twisted section from your temple back toward the crown, keeping the twist relatively loose and textured. Instead of hiding bobby pins completely, use decorative bobby pins — pearl-topped, colored, or geometric varieties — to secure the twist. Let the pins be visible, spacing them strategically so they appear intentional rather than accidental.
The decorative pins should complement your overall look — metallic for an edgy vibe, pearls for romantic, colors for playful. The key is committing to them as a design element rather than trying to hide them.
Why This Works for Short Hair
On short hair where everything is visible anyway, leaning into decorative hardware is a smart move. It transforms functional securing mechanisms into intentional styling accessories. This works on every hair type and texture, though it’s particularly effective on sleek, straight hair where the clean lines of the pins become striking.
Pro tip: Invest in quality decorative bobby pins — cheap ones often don’t grip well and will slip right out of short hair. Better hardware holds better and also looks more polished.
10. The Dutch-Twisted Crown
This style creates a twist that incorporates surrounding hair as it moves back, similar to a Dutch braid but using the twist technique. It requires a bit more skill but creates a fuller-looking style that’s incredibly polished.
How to Execute This Style
Starting at your hairline, take a small section and begin twisting. Instead of keeping it as a simple two-strand twist, incorporate small pieces of hair from both sides as you move back, working the twist tighter as you go. This creates a twist that’s woven into the surrounding hair rather than sitting on top of it.
Secure the twist at the crown, and for extra fullness on fine hair, you can lightly backcomb the twist after securing it to create a slightly textured, fuller appearance.
Why This Works for Short Hair
The Dutch-twisted crown distributes your hair across a larger scalp area, which creates the visual illusion of more fullness. On fine or thin hair, this is incredibly useful because you’re essentially spreading less hair across more real estate. The twist appears more substantial and intentional.
Worth knowing: This style takes practice — if your first attempt looks loose or undone, that’s actually fine on short hair where slightly loose twists often look more modern and less severe than perfectly tight ones.
11. The Twisted Halo With Layers
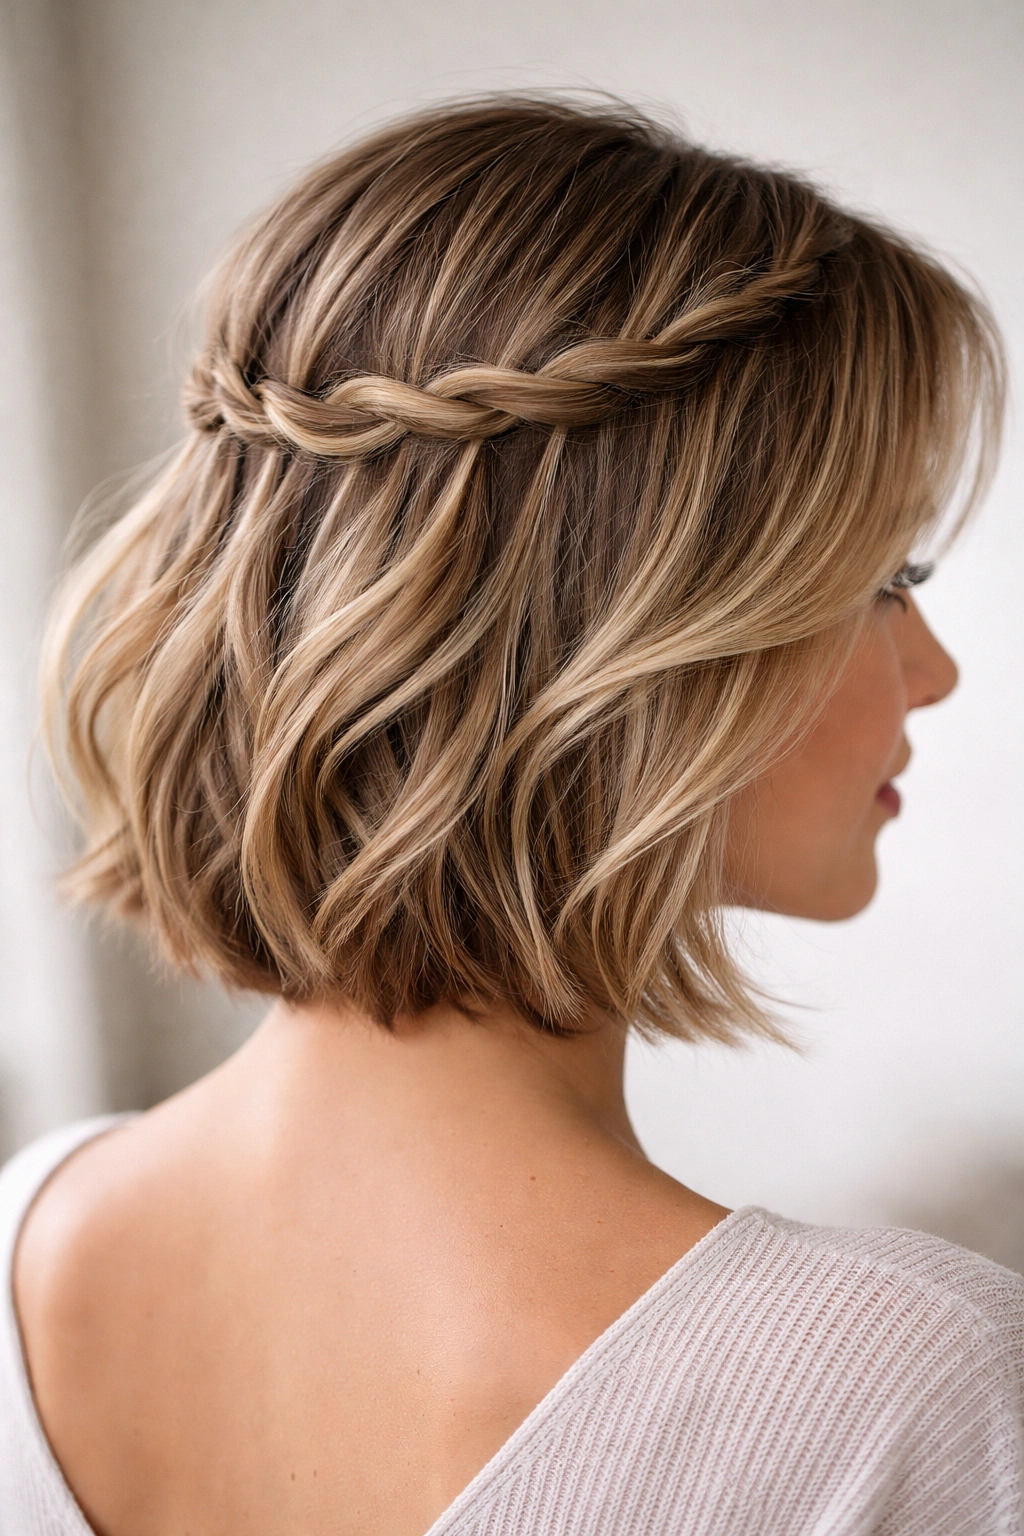
This style uses multiple thin twists that wrap around your head like a crown or halo, incorporating the natural layers of your short cut. It’s romantic and elaborate without being heavy, making it perfect for shorter layered bobs.
How to Execute This Style
Create 3-4 thin twisted sections working from one temple around the crown toward the opposite temple. Each twist should be approximately 0.5 inches wide and relatively loose. Rather than securing each twist separately, let them wrap around your head together, anchoring everything at the back with bobby pins.
The layers in your short cut will naturally fall through and around the twisted sections, creating dimension and movement. The twists become a framework that the layers fall around rather than a solid structure.
Why This Works for Short Hair
This style is custom-made for shorter layered cuts because it uses the layers as design elements. The twists define and frame the layers rather than fighting against them. It’s one of the few styles that actually celebrates short, choppy layers rather than trying to work around them.
Pro tip: This style works best with slightly textured hair — the natural waves make each individual twist appear fuller and the gaps between twists read as intentional texture rather than sparse hair.
12. The Twisted Low Side Knot
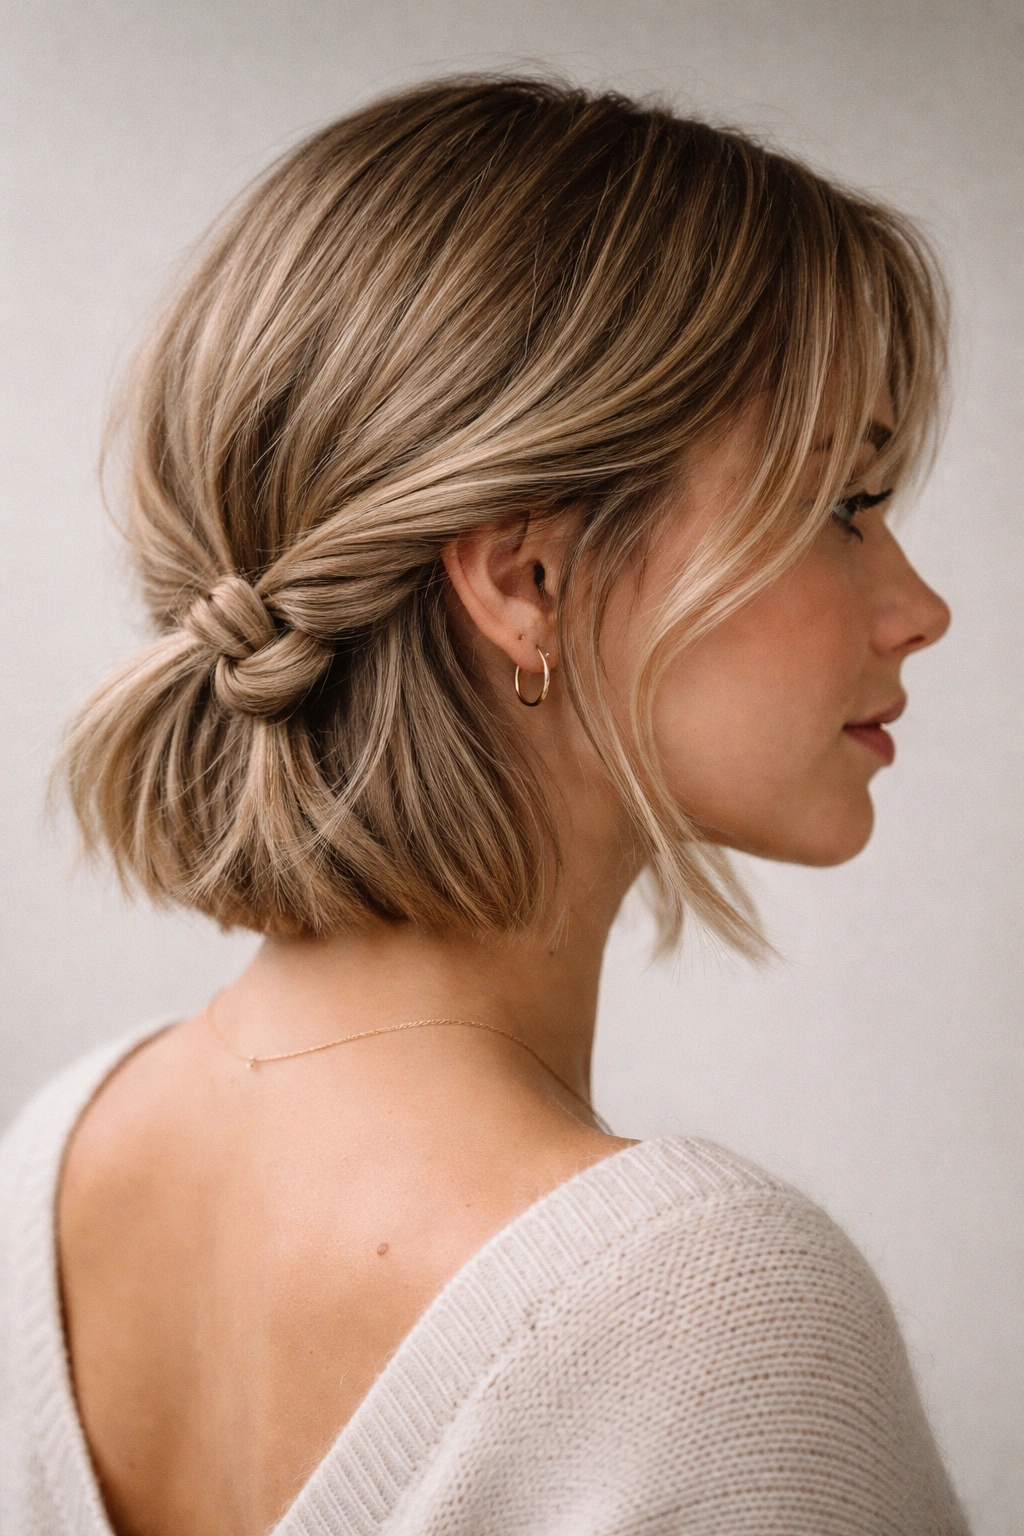
This final style creates a twisted section that ties into a small knot at the lower side of your head, creating a half-up look that’s closer to a half-back style. It’s casual and easy but looks considered and intentional.
How to Execute This Style
Take a section from one side starting at your temple. Twist it loosely as you work it toward the opposite side of your head at about ear level. Instead of pinning it, you’re going to tie it. Take a small section of hair from the opposite side and loop it through the twisted section, pulling it snug to create a knot.
Pin the knot in place and let a few loose pieces fall in front of your face for a soft, romantic finish. The knot should feel slightly undone rather than perfectly tight.
Why This Works for Short Hair
The knotted finish is playful and modern while still feeling polished. On short hair, this casual-elegant vibe is perfect because it doesn’t try to be something too formal or structured. It works on every hair type and requires minimal skill once you practice tying the knot.
Worth knowing: The lower placement of this knot works beautifully for shorter cuts because it doesn’t pull hair straight back, which can be unflattering. The side placement flatters most face shapes.
Styling Techniques That Work for Short Hair Twists
Getting short hair twists to actually hold is as much about technique as it is about product. The most important technique is using the right bobby pin placement — pins should be inserted into the twist at a 90-degree angle, not parallel to the scalp. When you insert pins perpendicular to the surface, they grip the twisted hair more securely rather than just sitting on top.
Backcomb the base of your twist before pinning if you’re struggling with slipping. Just a few gentle combs with a fine-tooth comb or teasing brush creates micro-texture that gives pins something to hold. This is especially important on fine or slippery hair. Don’t feel like you need to tease heavily — subtle texture is all you need.
The order of your bobby pins matters more than people realize. Don’t just use one pin and call it a day on short hair. Use 2-3 pins per twist, distributing them along the length of the twist rather than all at the base. This spreads the weight and makes the style more stable. Cross pins in an X pattern whenever possible — this distributes pressure and makes pins nearly invisible.
Hair type absolutely affects how you approach twisting. Straight hair requires more texture and tighter securing because there’s nothing to naturally grip the twist. Wavy hair holds beautifully because the natural waves create grip automatically. Curly hair can sometimes be too grippy — you might need to straighten sections first if your curls won’t let you create clean twists. Fine hair needs smaller sections and more careful technique, while thick hair can handle larger sections but may need stronger products.
Understanding Your Hair Type for Best Results
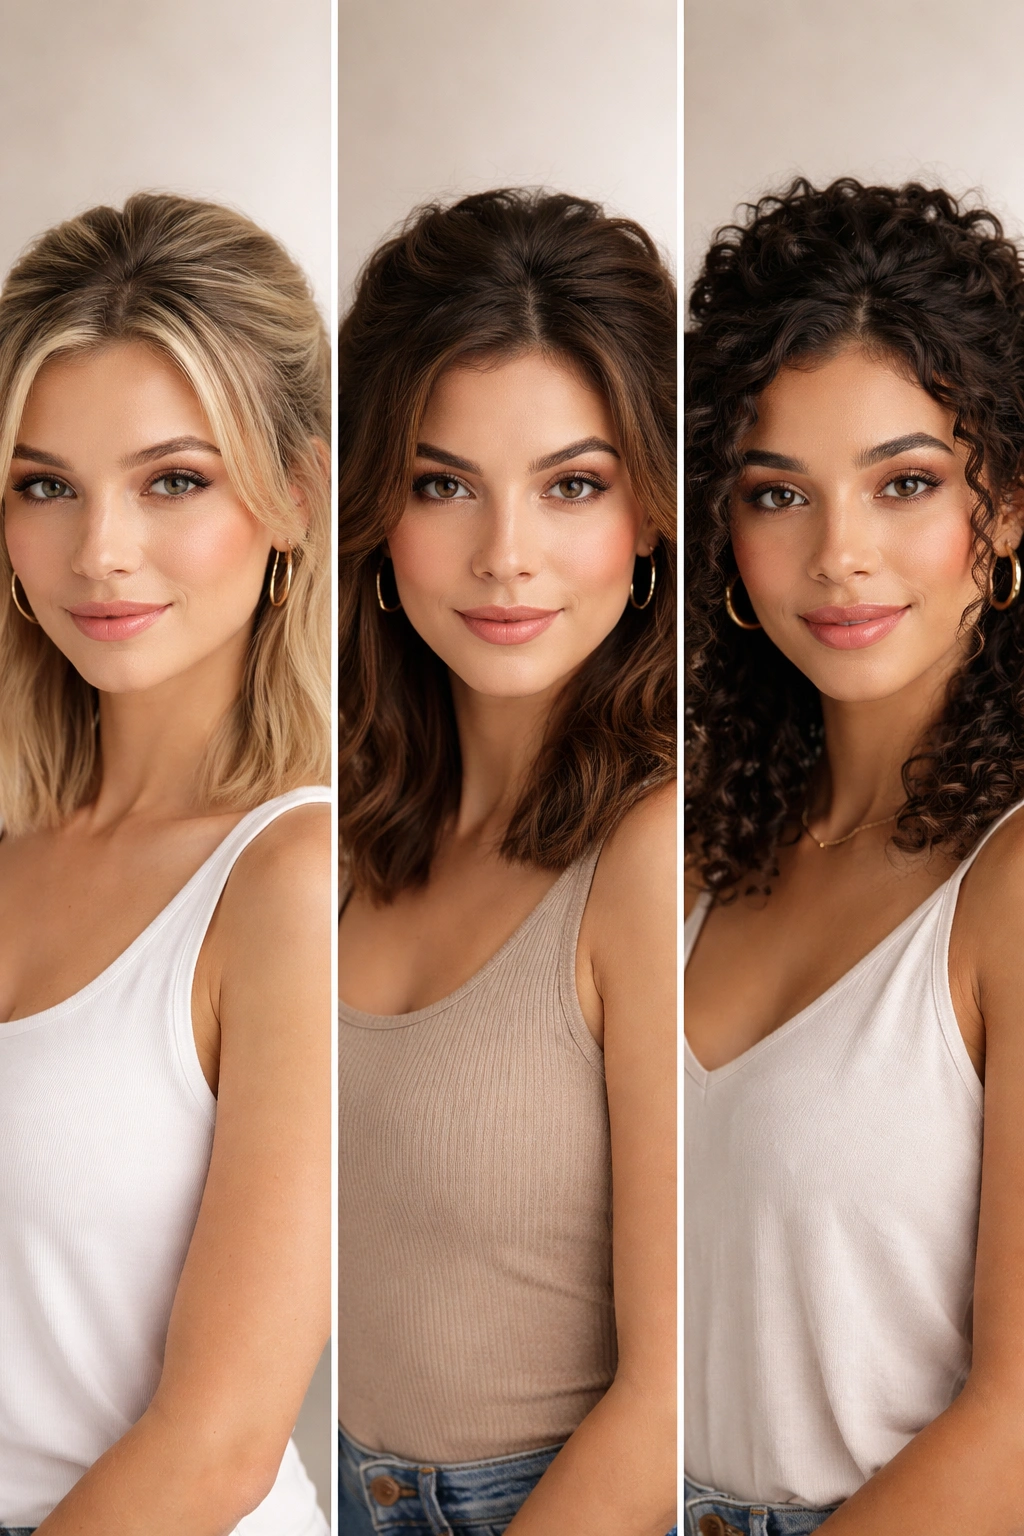
Fine hair requires a completely different approach than thick hair, especially on short lengths. If you have fine hair, you’re working with less density, which means every single strand matters visually. Create smaller, more delicate twists rather than chunky ones. Use bobby pins that match your hair color precisely because they’ll be more visible on fine strands.
Apply texturizing products more generously on fine hair — you need that grip more than someone with naturally textured or thick hair. Work with hair that’s not freshly washed; second-day or third-day hair holds twists infinitely better than freshly shampooed strands.
Thick hair can handle bolder, chunkier twists and larger sections. You actually have the luxury of using more hair for each style element, which can make twists appear fuller and more intentional. The trade-off is that thick hair sometimes needs stronger hold products and more careful pinning because there’s more weight.
Curly hair is a complete category unto itself. Curls naturally hold twists beautifully because the curl texture grips the twist formation. However, you may need to do some strategic straightening with a flat iron before twisting if you want clean, defined twist lines. Alternatively, embrace looser, fluffier twists that work with your natural texture rather than fighting it.
Straight hair requires the most careful technique because there’s nothing naturally gripping the twist. Use your texturizing products liberally. Consider curling your hair lightly before twisting to create texture that holds. Tighter twists often work better on straight hair than looser, more romantic ones because there’s no natural texture to make loose twists appear full.
Quick Troubleshooting for Common Short Hair Twisting Problems
If your twists keep slipping out, you’re likely using pins that aren’t gripping well or using too few pins. Add an extra bobby pin using the X-crossing technique, and make sure you’re inserting pins perpendicular to your scalp rather than parallel. Sometimes the issue is simply that your hair is too slippery — apply dry shampoo or texturizing spray before styling.
If your twists look too thin or sparse, you’re probably creating twists that are too tight or too small. Try loosening the twist slightly and using slightly larger sections. Backcomb the base before pinning to create visual fullness. On fine hair, sometimes the visual thinness is just a reality of having fine hair — using decorative bobby pins or adding hair accessories can make thin twists look intentional rather than like a styling failure.
If your twists look lopsided or uneven, practice is your answer. Creating balanced twists is a skill that improves with repetition. Use a mirror and take your time rather than rushing. Mark your starting point clearly so both sides start from the same height.
If your twists fall out immediately, you likely need more product grip. Apply dry shampoo the night before, or try texturizing spray just before twisting. If you’re using bobby pins that are too smooth or slippery, upgrade to pins with a grippier finish. Some brands have textured pins that hold far better than standard smooth ones.
Final Thoughts
Half-up half-down twists are genuinely one of the most versatile options for short hair because they work on every hair type, texture, and cut, and they adapt to every occasion from casual to formal. The styles range from delicate and romantic to modern and architectural, meaning there’s something for every personality and preference.
What makes these styles work on short hair is precision, the right products, and understanding that less hair means every element is visible, which is actually an advantage when you’re trying to create intentional, polished styling. A twist that might be invisible on long hair becomes a design statement on short hair, and that’s exactly what you want.
Start with whichever style calls to you most and practice it a few times before trying others. Each twist uses slightly different technique and requires different pinning, so building mastery one style at a time will give you the confidence to mix and match, combine elements, and eventually create your own variations. Short hair twists are endlessly customizable — these twelve styles are starting points, not the final word.