When you’ve got thick hair and you’re walking down the aisle—or standing beside someone who is—your hair is both a blessing and a challenge. Thick locks offer incredible volume and movement that thinner hair can’t achieve, but they also demand a style that’s substantial enough to carry all that gorgeous texture without looking flat or boring. The half-up-half-down style is a particularly smart choice for thick hair because it solves multiple problems at once: it keeps hair off your face, shows off the length and movement you’ve spent months growing, manages volume strategically, and photographs beautifully from every angle.
Unlike styles that pull the entire crown tight (which can look strained on thick hair and create an unflattering bulge at the nape), a half-up-half-down configuration allows you to work with your hair’s natural density rather than fighting against it. The sections you secure can handle extra volume without looking overdone, while the loose waves or curls below show off dimension and texture that made you fall in love with your hair in the first place. Plus, this versatility means you can adapt the style for your specific hair type—whether you’re working with thick straight strands, waves, coils, or curls.
Here are 15 half-up-half-down wedding styles that look absolutely stunning on thick hair, along with exactly how to create each one and what makes it work specifically for your hair type.
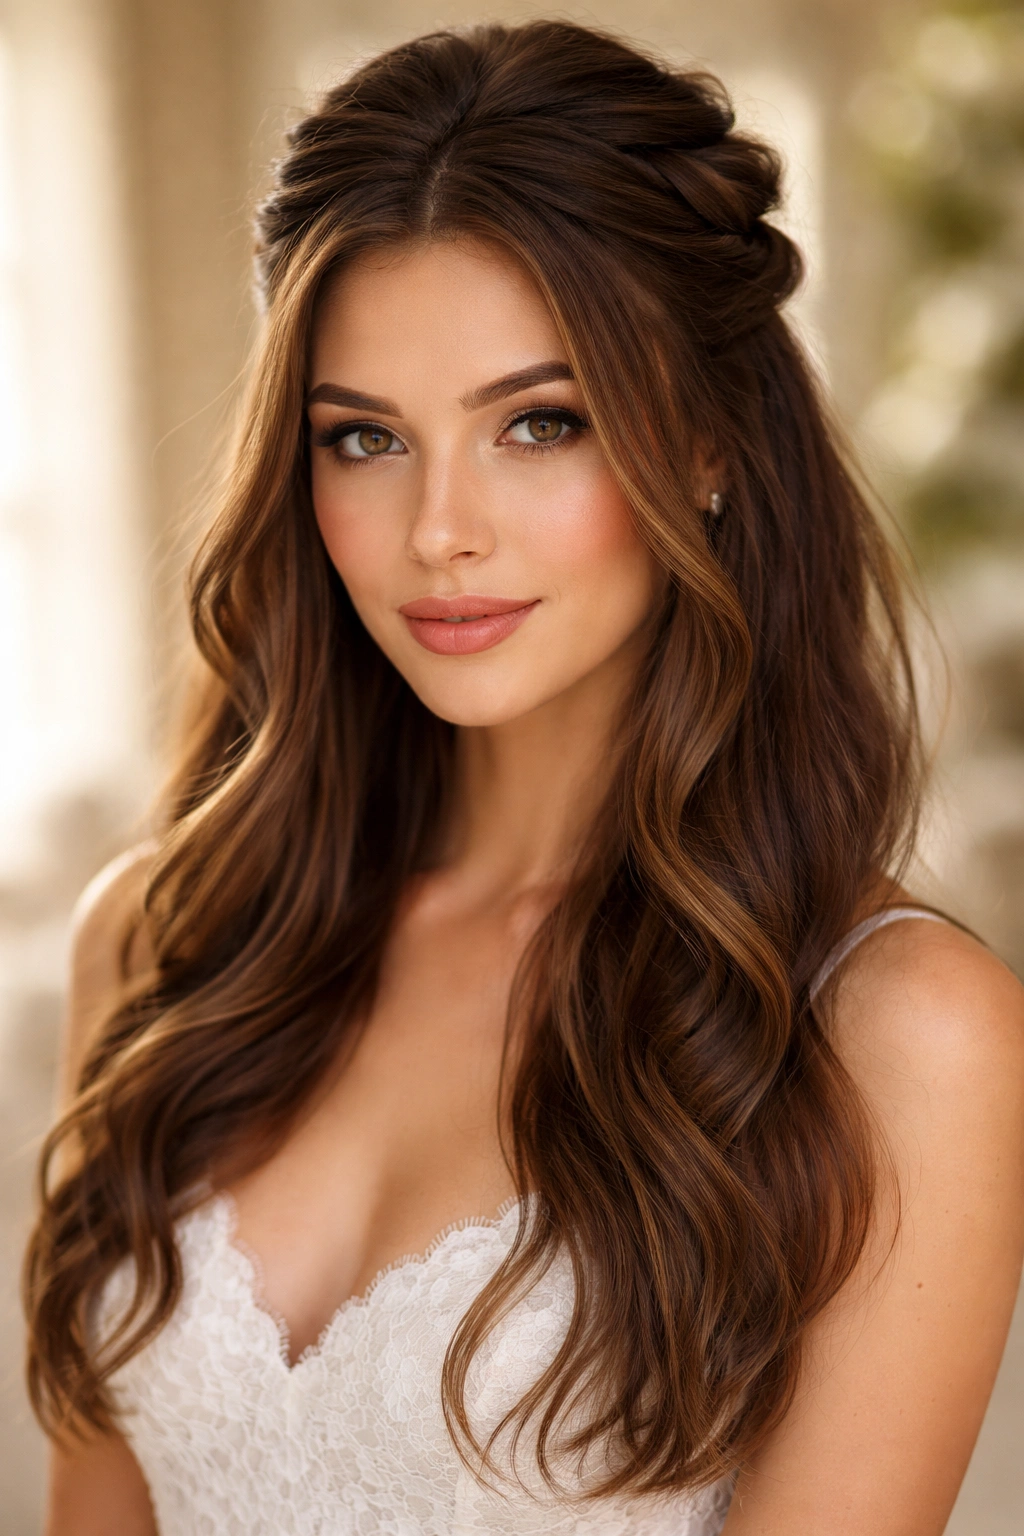
1. Classic Twisted Crown with Loose Waves
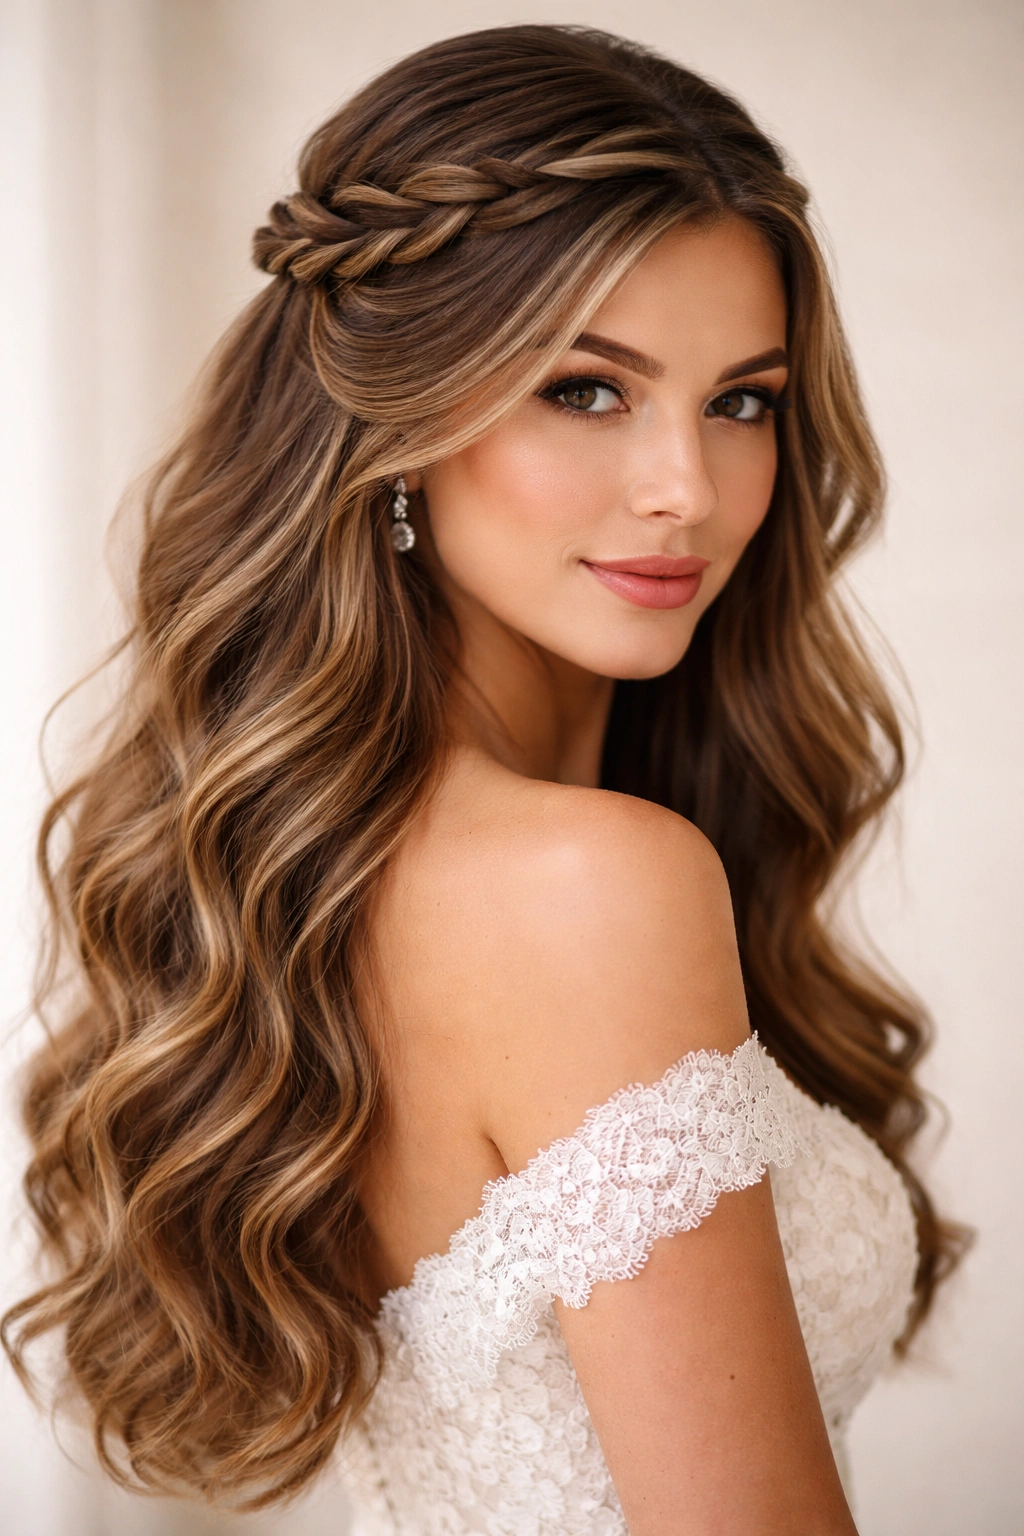
This timeless style takes the simplicity of a half-up-half-down and elevates it with elegance through twisted sections rather than straight pulls. You’re creating a soft halo effect that frames the face while the twisted detail adds visual interest and structure that thick hair can absolutely carry off.
Why It Works for Thick Hair
Twisted sections actually manage volume better than traditional pulls because the twist compresses the hair slightly while still showcasing its fullness. The twists create dimension and texture that photograph beautifully, and because thick hair has enough weight, the twists stay put throughout an entire wedding day without constant re-pinning. The loose waves below let your hair’s natural body shine without being weighed down by an overly complicated style.
How to Create It
Start with waves or curls already set into your hair using a curling iron or wand—you want defined texture that will hold all day. Take a section from one side of your head (roughly from temple to ear level) and twist it gently as you move back toward the crown. As you twist, leave the outer edges slightly loose and less uniform to keep the look romantic rather than geometric. Repeat on the other side. Secure both twists at the back of the head with bobby pins hidden beneath the twists themselves, then add a small decorative clip or comb if you’d like. The key with thick hair is using enough pins—at least 2-3 per twist—so the weight stays put.
Perfect For
Outdoor ceremonies, classic or romantic wedding aesthetics, brides who want their hair to move and feel natural rather than look heavily styled.
Pro Tips
Curl your hair in larger sections (1.5 to 2 inches) rather than tiny ringlets—this creates waves that read as elegant rather than overdone. Tease gently at the crown beneath where you’ll secure the twists to give you an anchor point the pins can grip. Use bobby pins that match your hair color exactly, and angle them horizontally for maximum holding power.
2. Braided Half-Up with Undercut Detail
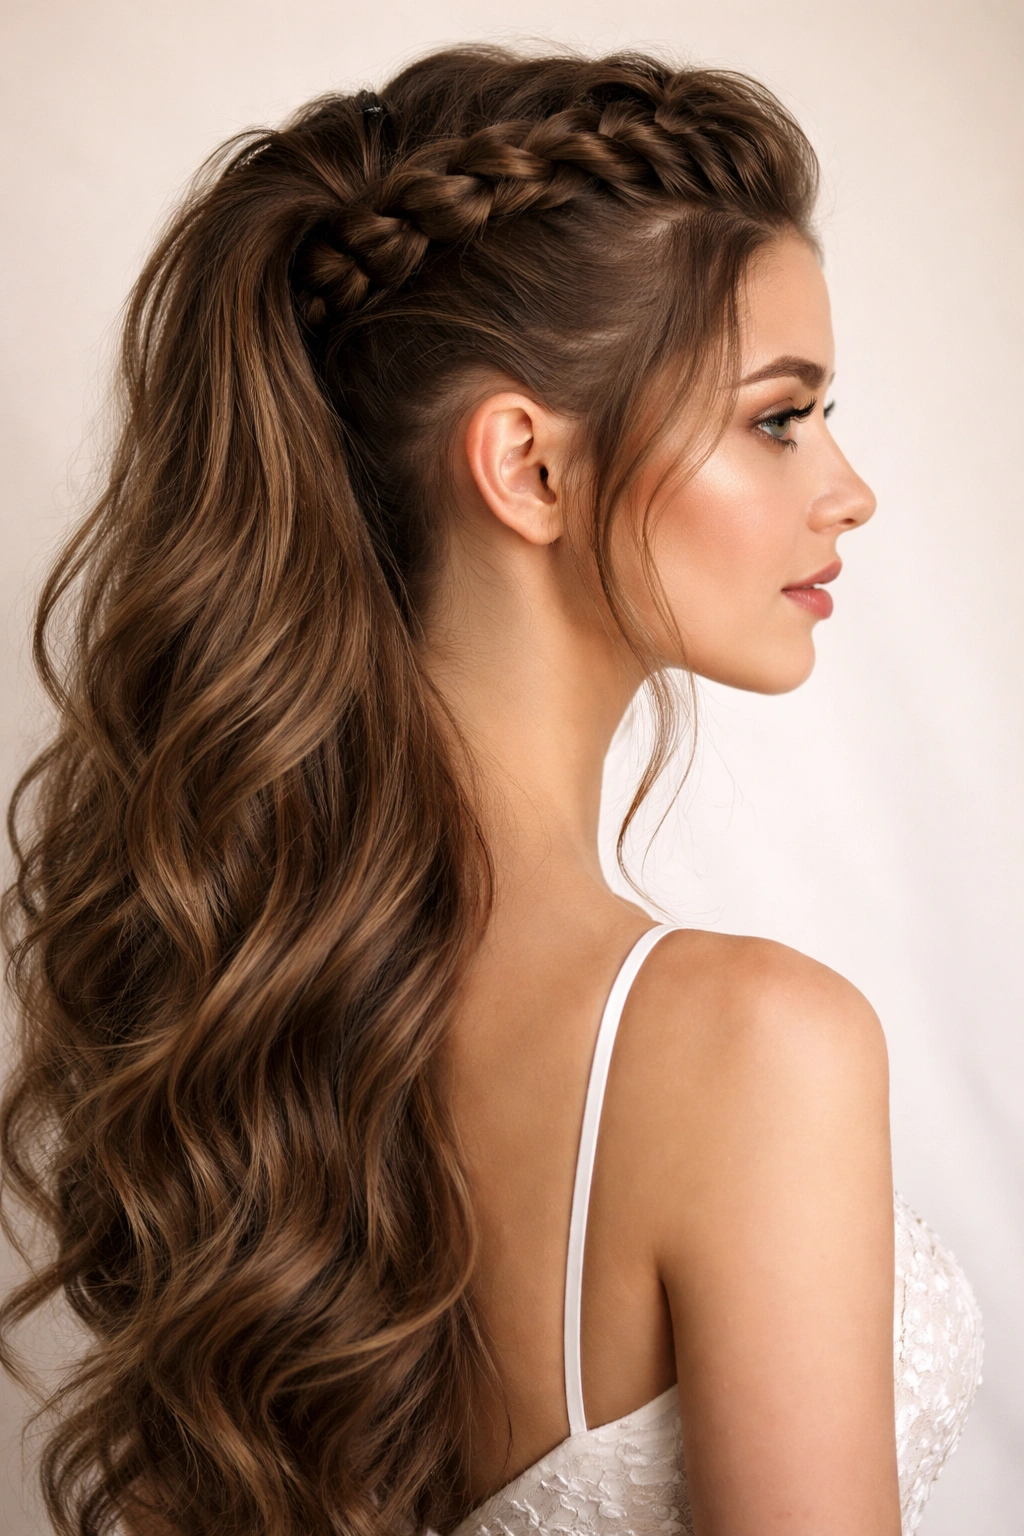
This style braids only the upper section of hair, creating a defined frame for your face while the unbraided lower half gets to showcase all its gorgeous thickness and length. The contrast between structured and free-flowing is what makes this feel intentional and polished.
Why It Works for Thick Hair
A braid made from thick hair creates visual texture and definition that a twist alone can’t quite achieve. The braid sits high and secure on your head, which means it won’t slip down throughout the day—a huge advantage when you’re dealing with substantial hair volume. The braid also creates an attractive anchor point where you can tuck small flowers or add a jeweled hair comb without worrying about it sliding out.
How to Create It
Part your hair down the center or slightly off-center, then take a section from one side (starting roughly from your temple) and braid it back toward the crown. You can do a traditional three-strand braid, a looser four-strand braid, or even a Dutch braid that shows more texture. As you braid, pull the edges of the braid slightly to create a soft, romantic width that frames your face. When you reach the back of your head, secure the braid with an elastic and bobby pins, then tuck and conceal them beneath your loose hair. Repeat the braiding process on the other side if you want symmetry, or keep one side looser and more casually waved if you prefer asymmetry.
Perfect For
Bohemian or rustic wedding themes, outdoor ceremonies, brides who want an intricate detail that still feels effortless.
Pro Tips
Leave the very first inch of hair unbraided at your temple to soften the line against your face. Gently backcomb the section you’re about to braid to give it grip and make the braid hold its texture throughout the day. After braiding, gently tease the edges outward with a fine-tooth comb to create a softer, fuller braid width.
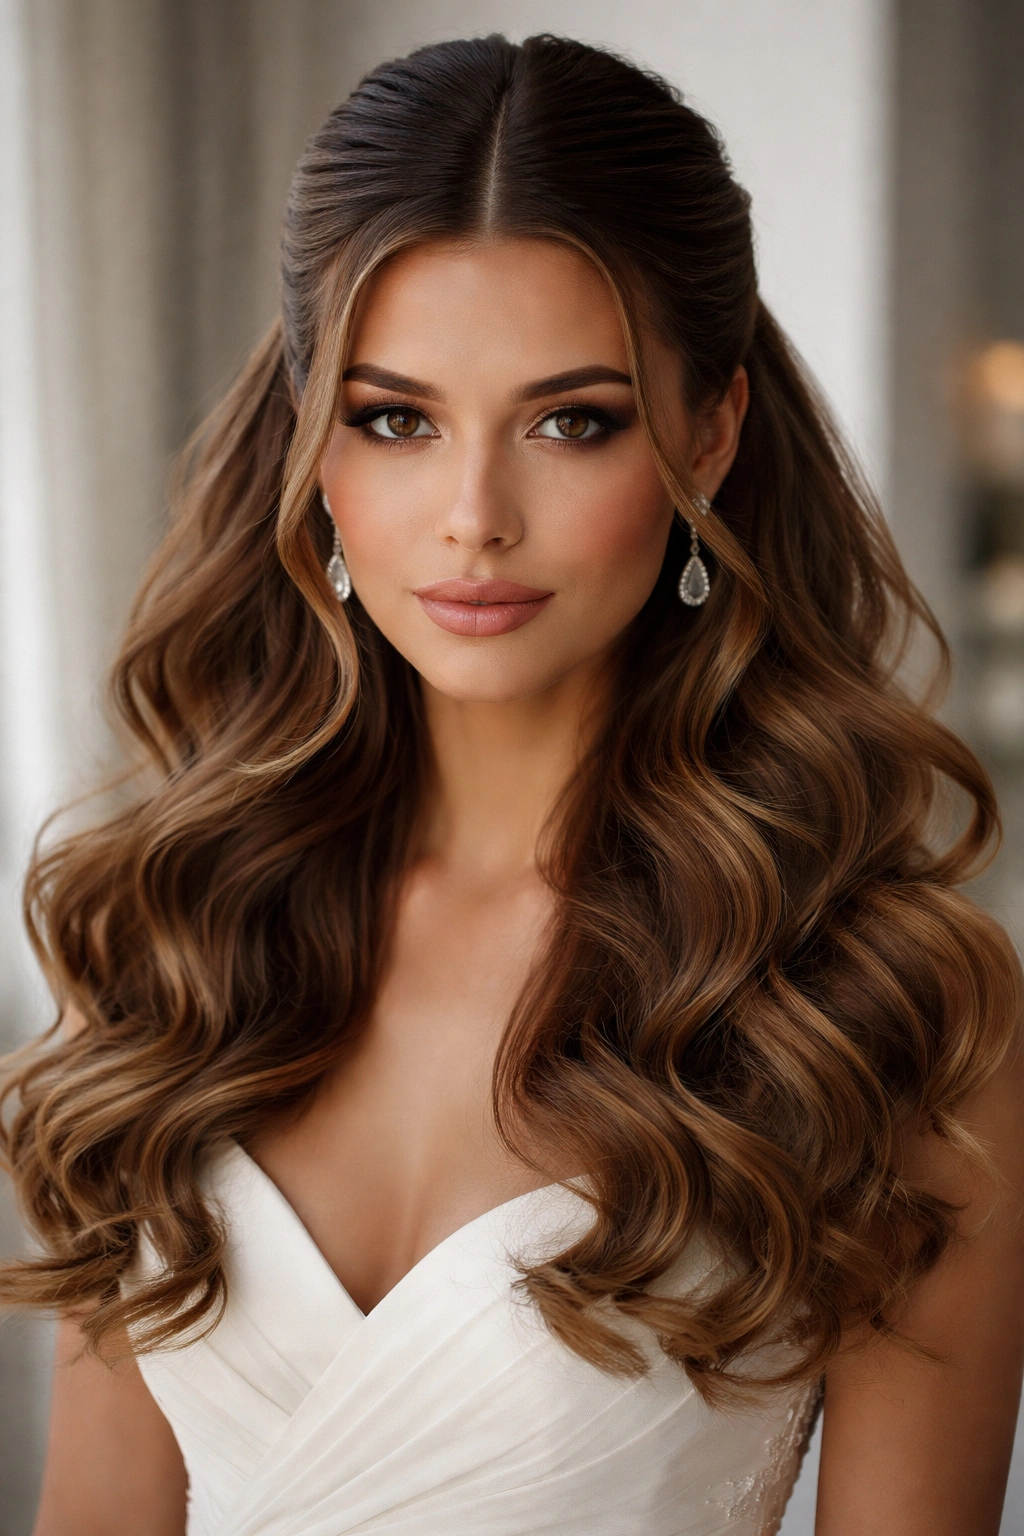
3. Sleek High Pony with Cascading Curls
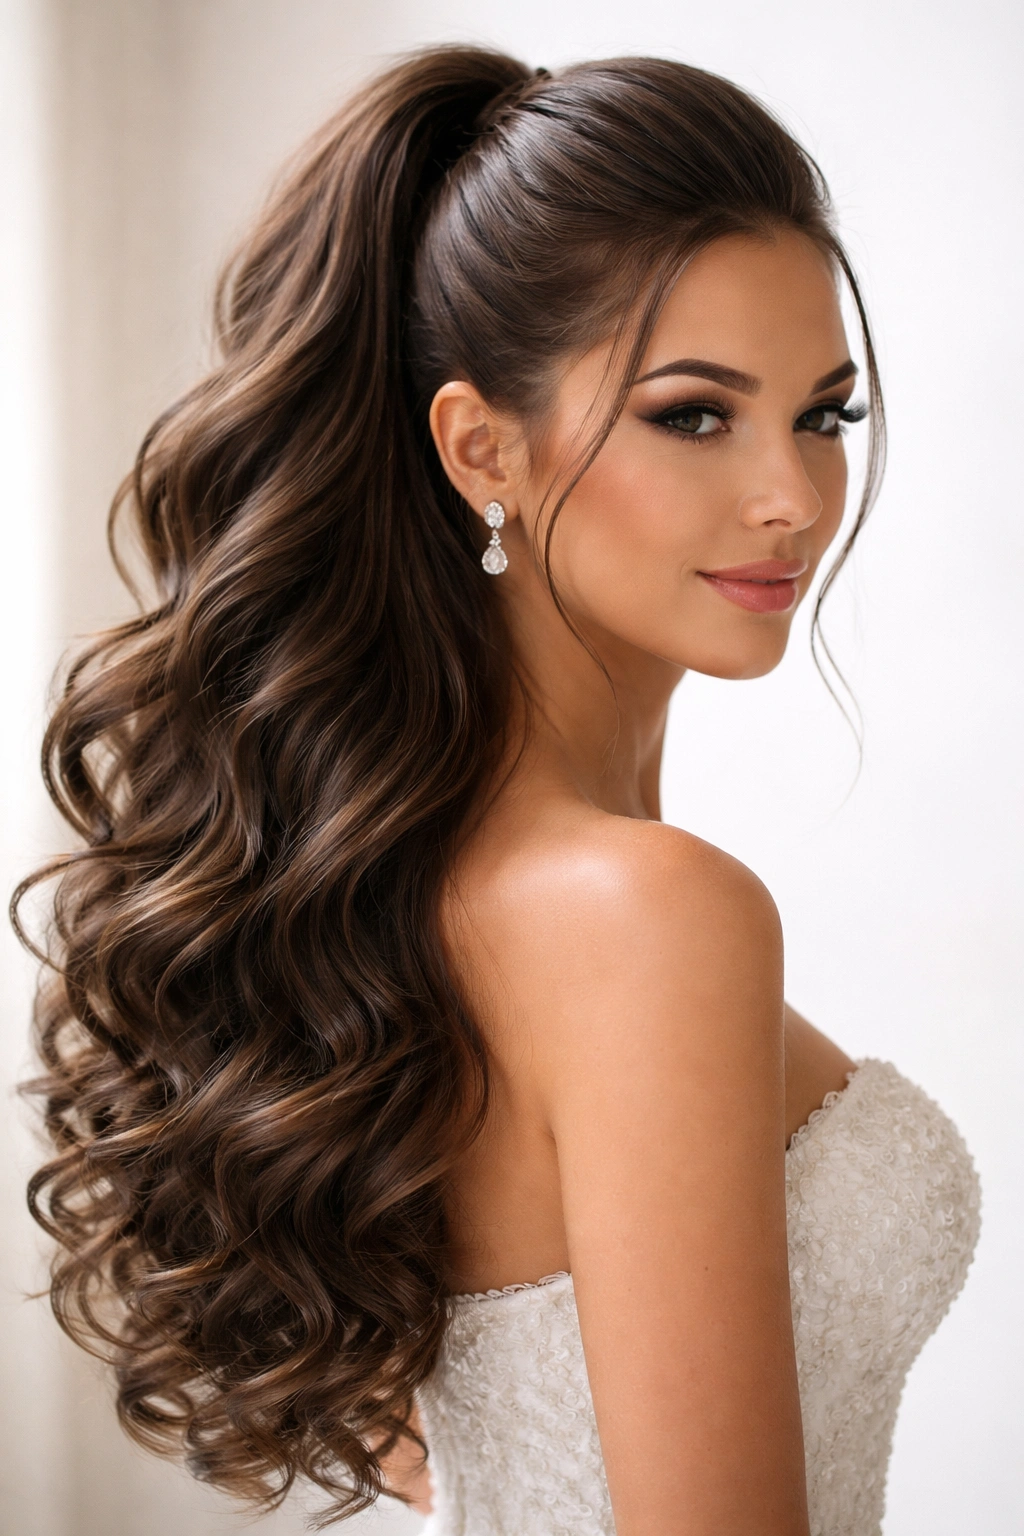
While this leans more toward a full-up style, you can modify it to be half-up by securing only the top two-thirds of your hair into a high ponytail at the crown, then leaving the lower third loose. This creates the visual effect of a half-up-half-down while giving you the polish and intentionality of a pulled-back style.
Why It Works for Thick Hair
Thick hair creates an absolutely gorgeous, full ponytail that looks expensive and high-maintenance even if you’ve done it yourself. The volume at the crown is substantial enough to look polished and intentional, while the loose curls below have enough body to catch light and create movement in photographs. You can easily hide all your elastic and pins in the dense hair at your crown.
How to Create It
Blow-dry your hair smooth, then curl the lower two-thirds of your hair with a 1.5-inch curling iron in sections. Once all the curls are set and cooled (this matters—don’t work with warm curls), flip your head upside down and gather the top portion of hair into a high ponytail at your crown. Secure it with an elastic, then tease the base of the ponytail gently to create height and volume. Wrap a small section of hair around the elastic to conceal it, then pin that wrapped section with bobby pins. Gently brush through the curls below to loosen them into soft waves.
Perfect For
Modern or glamorous wedding aesthetics, brides who want a polished look that still feels romantic, ceremonies where you want maximum face exposure.
Pro Tips
Use a texturizing spray on your curled sections before you pull the ponytail up—this helps the curls hold their shape all day. Tease the very base of your ponytail before you wrap the concealing section around it; this creates a lifted, voluminous look that’s especially flattering on thick hair. Secure your wrapped concealer section with at least 3 bobby pins in an X pattern for maximum hold.
4. Romantic Halo Braid
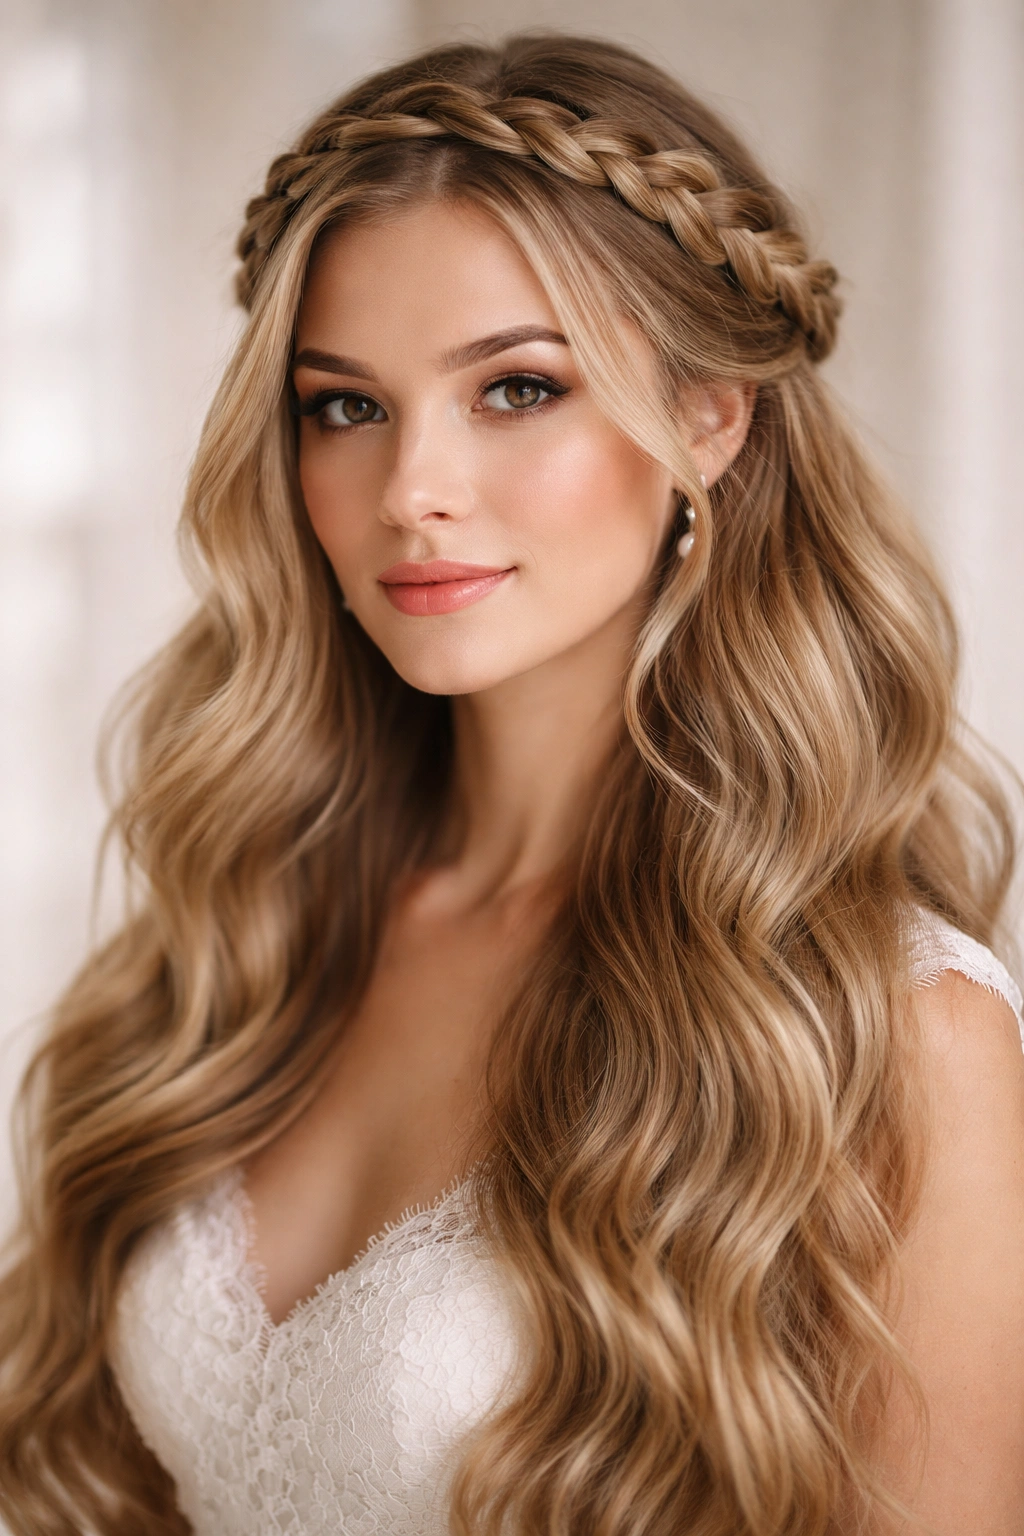
A halo braid that runs from one side of your head to the other creates a crown-like effect that’s nothing short of magical for thick hair. Unlike a full updo, you’re leaving the majority of your hair down, which keeps the style feeling soft and romantic rather than formal.
Why It Works for Thick Hair
Thick hair creates a beautifully substantial halo braid that draws the eye to your face and creates a striking frame. The density of the braid means it holds its shape and texture all day without the delicate, wispy quality that can make thin hair feel sparse. A halo braid on thick hair reads as intentional and romantic rather than fragile.
How to Create It
Begin by curling your entire head gently with large-barrel curling iron to create waves. Start the braid on one side of your head at temple level, taking a section that’s roughly 2-3 inches wide. Begin braiding (a Dutch braid that sits slightly proud of your scalp creates the most flattering halo effect) and continue the braid around the back and side of your head, following the natural line where your head would meet a crown. You can bring the braid all the way to the opposite temple, or stop at the nape and pin it there. Secure the end with a small elastic and bobby pins, tucking them out of sight. Gently pull the edges of the braid outward with a fine-tooth comb to create a softer, fuller appearance.
Perfect For
Garden or outdoor ceremonies, romantic or princess-inspired wedding aesthetics, brides who want an elaborate detail that’s still wearable.
Pro Tips
Use a texturizing spray or dry shampoo on your braided section before you create the braid—this gives the braid more grip and helps it hold all day. Don’t braid too tightly, especially with thick hair; a looser braid that’s then gently loosened with a comb looks infinitely more romantic. If your halo braid feels slippery, weave a thin ribbon through it; this adds visual interest and gives your pins more to grip.
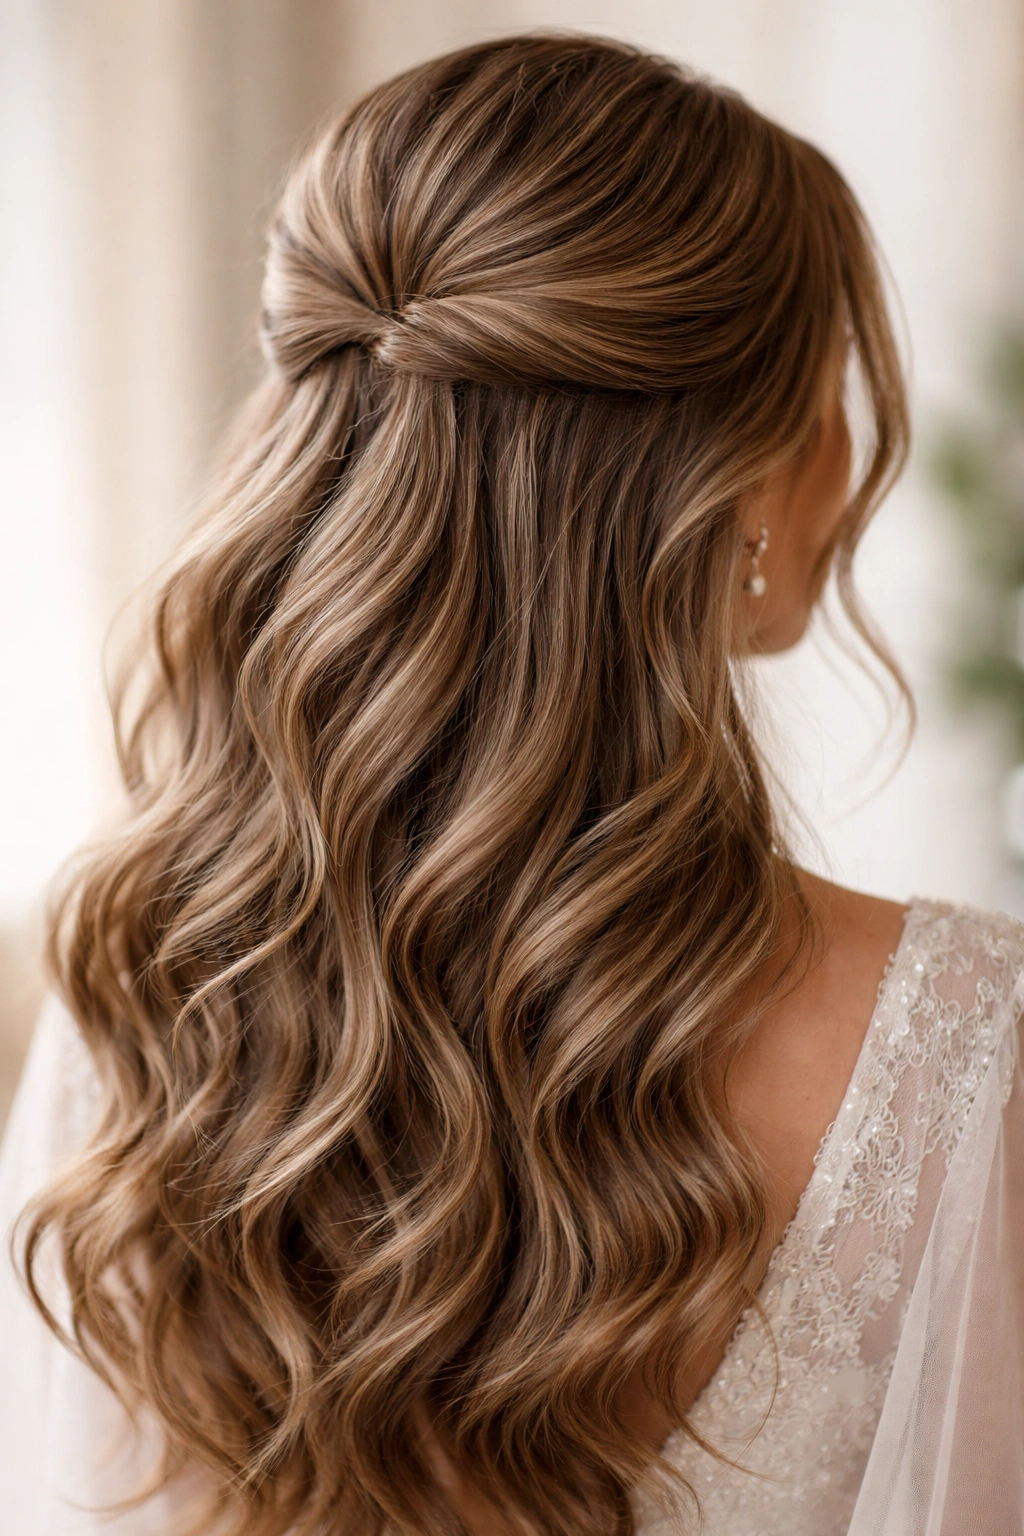
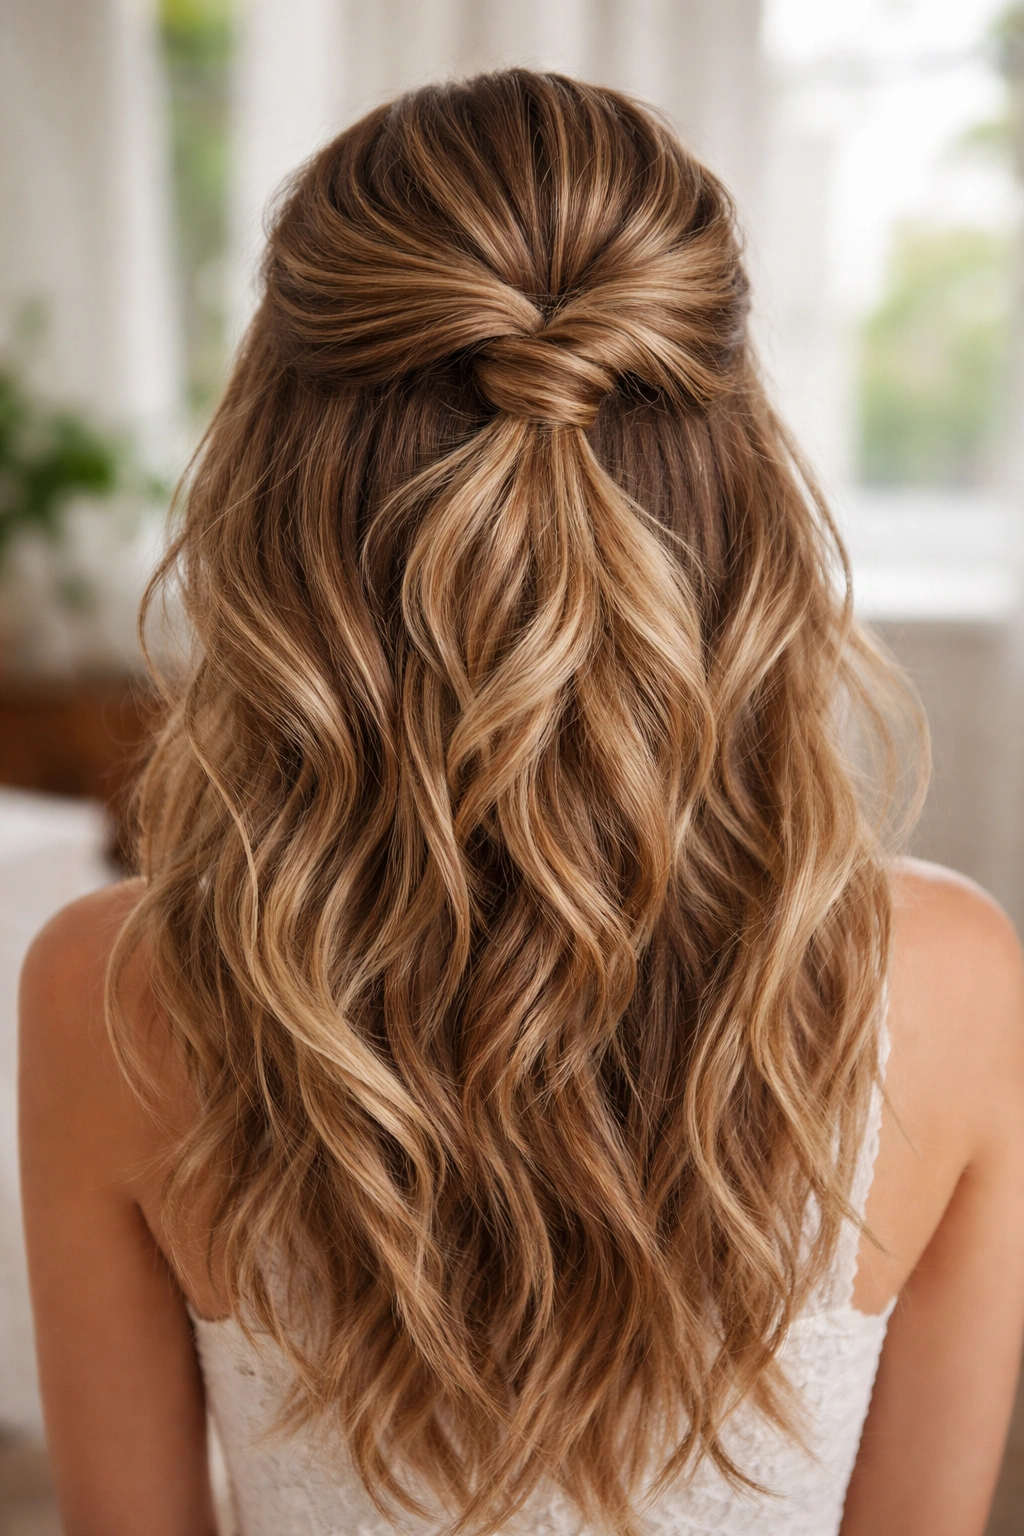
5. Half-Up Knot with Face-Framing Layers
This style skips the braid or twist entirely and instead creates a soft knot from the upper-half section, pinning it at the base of the crown. The result is polished, intentional, and has a modern sensibility that works beautifully on thick hair.
Why It Works for Thick Hair
A knot made from thick hair creates an absolutely gorgeous focal point at the crown. The knot has visual weight and substance that photograph beautifully, and thick hair gives you plenty of volume to work with so the knot never looks sparse or thin. You can loosely knot the hair, which creates a romantic, undone vibe that’s particularly flattering on textured or wavy thick hair.
How to Create It
Tease gently at the crown to create a grip point, then take a section from one side of your head (starting from temple level) and loosely twist or braid it back to the crown area. Instead of securing it, take this section and gently loop and knot it, tucking the ends beneath the knot where they’ll be hidden. Repeat the process on the other side, then secure the entire arrangement with bobby pins and a small jeweled or pearl pin if you’d like. The key is keeping the knot loose and romantic rather than tight and geometric.
Perfect For
Modern weddings, minimalist or contemporary aesthetics, brides who want an understated detail that’s still visually interesting.
Pro Tips
Leave pieces out around your face rather than pulling everything back smoothly—these face-framing layers make the style feel softer and more flattering. Use a dry shampoo or texturizing spray the morning of your wedding to give your hair grip and prevent slipping. Knot the hair loosely enough that a small flower or delicate hair comb can be tucked into the knot without looking forced.
6. Double Twisted Half-Up with Pearl Pins
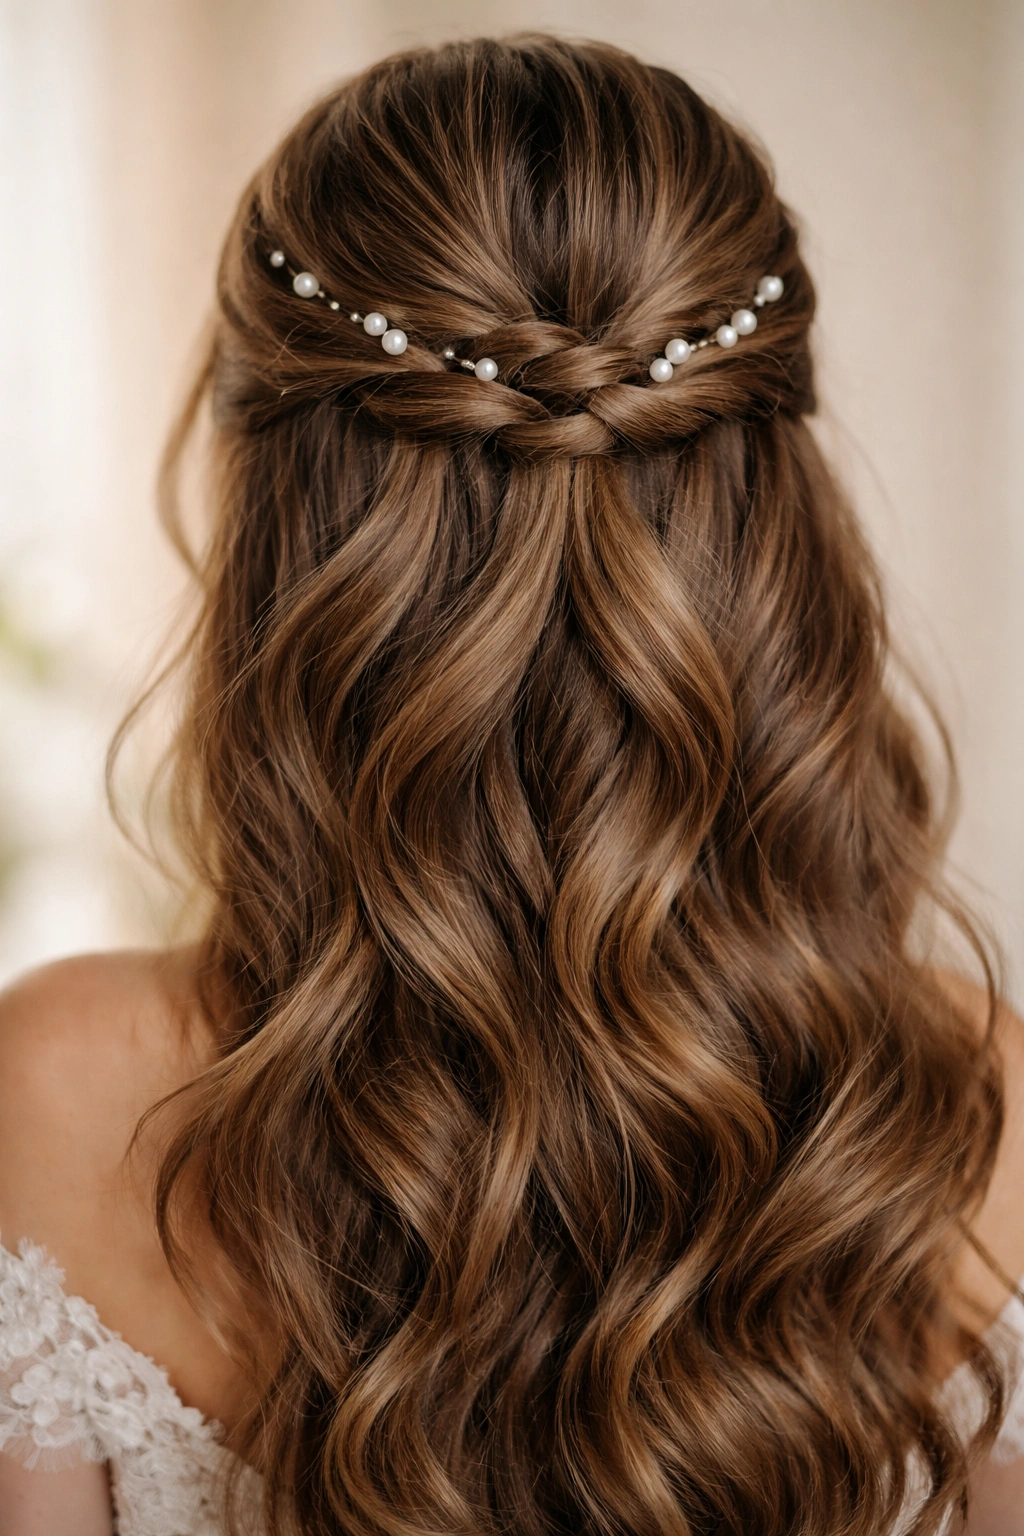
This style takes the classic twisted half-up and adds a second, thinner twist that spirals around the first one, creating a more intricate crown-like effect. Small pearl or crystal pins are threaded throughout, catching light in your photographs.
Why It Works for Thick Hair
Two twists create more visual texture and intricacy than one, and thick hair makes both twists look substantial and intentional. The layering of the twists gives your hair dimension and depth, and the pearl pins add a jewelry-like quality that photographs gorgeously. The double-twist approach also distributes the weight of your hair more evenly, so nothing slides down or feels loose throughout the day.
How to Create It
Create loose waves throughout your entire head with a large-barrel curling iron. Take a section from one side of your head and twist it back toward the crown. As you twist, hold it in place with one hand. Then, take a thinner adjacent section and twist it around the first twist in a spiral motion. Secure both twists together at the base with bobby pins, distributing the pins throughout rather than clustering them in one spot. Gently loosen the twists by running your fingers through them and pulling the edges slightly outward. Insert pearl pins along the twists, angling them so they catch light.
Perfect For
Glamorous or formal weddings, brides with wedding day hair that already feels special due to its thickness and health, upscale or black-tie events.
Pro Tips
Mist the twists lightly with hairspray as you create them; this helps them hold their shape and gives the pins something to grip. Use 5mm or larger pearl pins so they’re visible in photographs; tiny pins can disappear into thick hair. Angle all your pins so they’re visible from the front and sides, not hidden flat against your head.
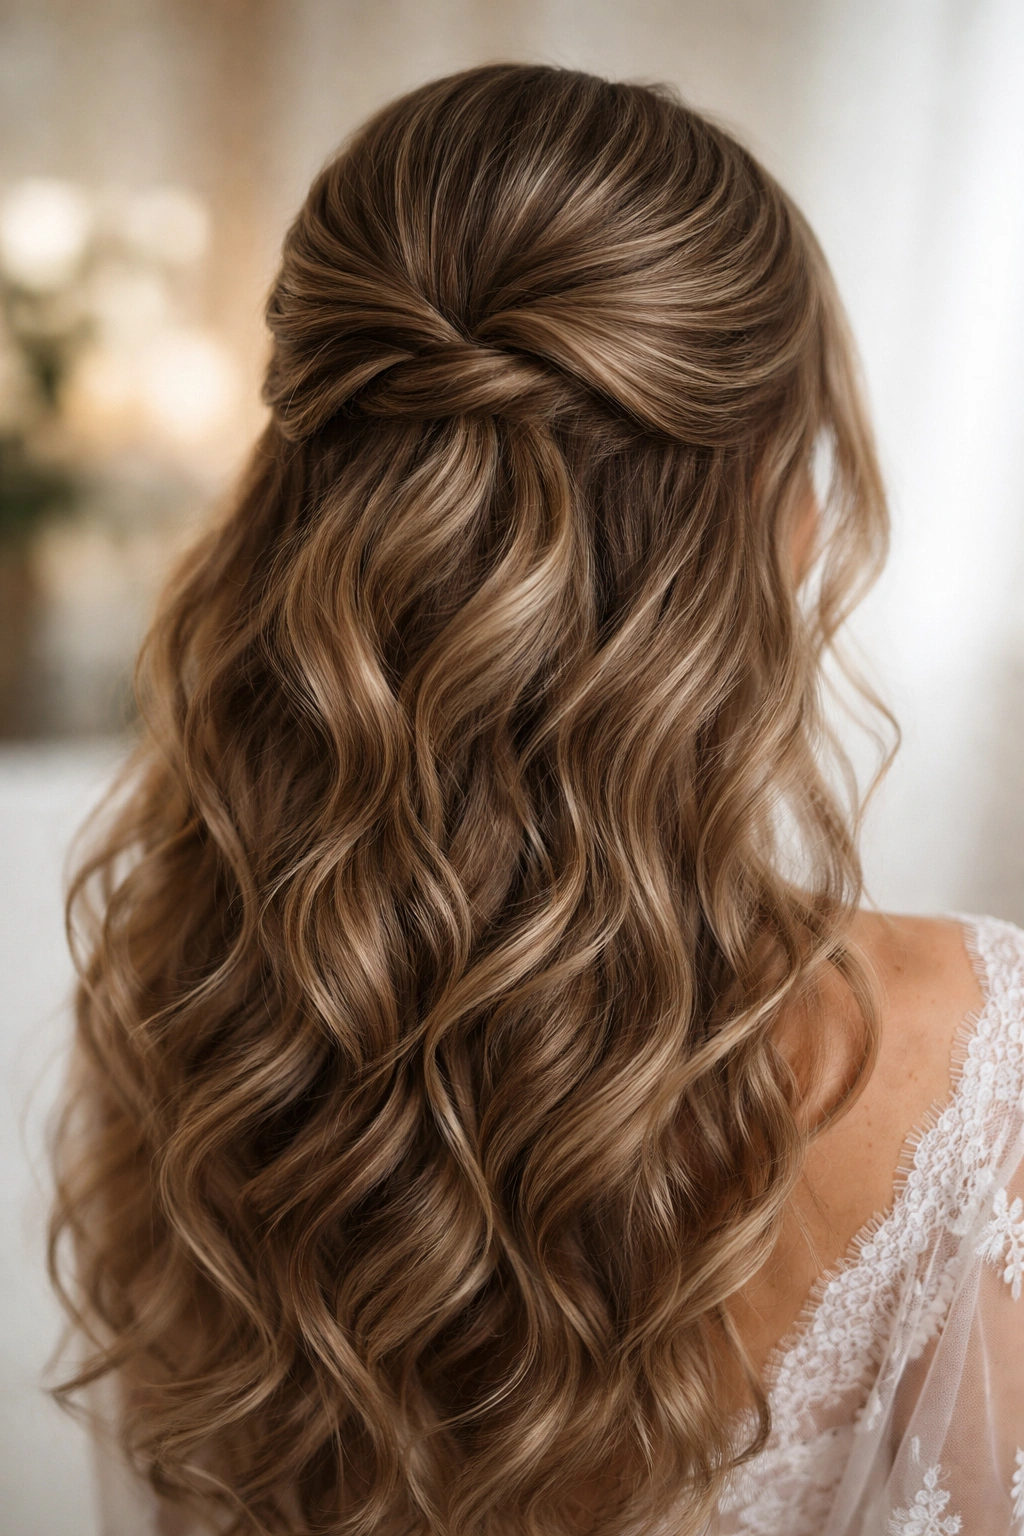
7. Half-Up with Textured Waves and a Decorative Comb
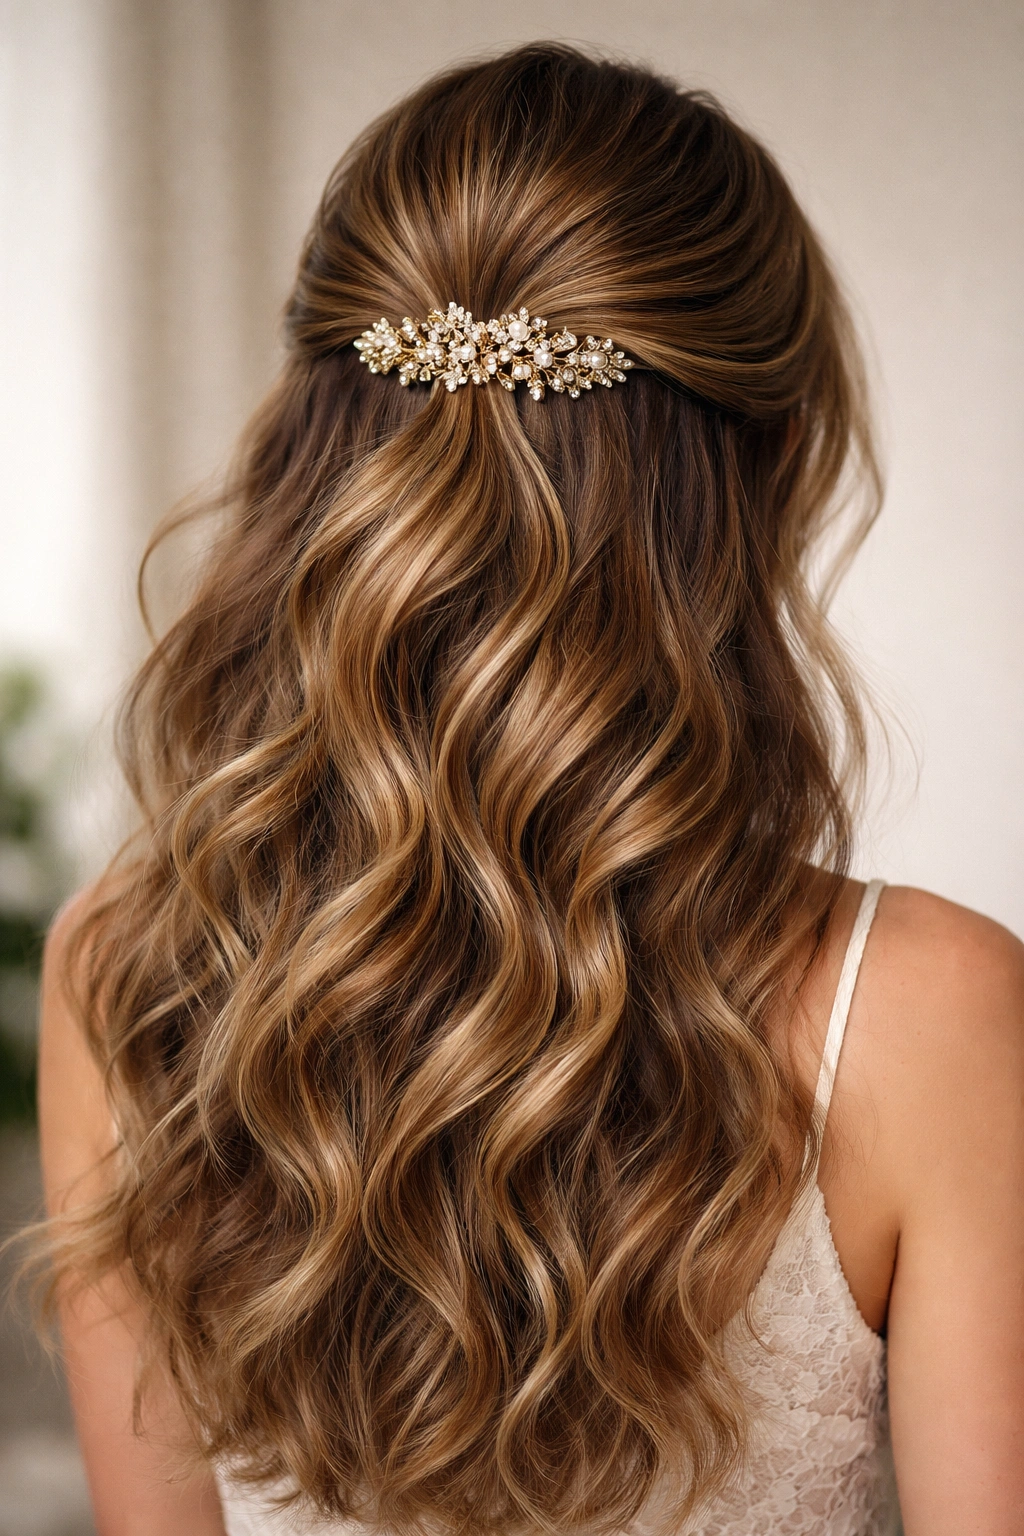
This relatively simple style lets your thick hair’s natural texture do the heavy lifting. You’re securing the upper half with a single, beautiful decorative comb that becomes the focal point, while the waves below showcase movement and dimension.
Why It Works for Thick Hair
Thick hair with texture (whether natural wave or deliberately curled waves) already has all the visual interest you need. By keeping the styling minimal, you’re letting your hair’s actual quality shine rather than over-processing it with elaborate braids and twists. A single decorative comb is all the detail you need, and it becomes a stunning focal point when placed into thick, textured hair.
How to Create It
Dry your hair naturally or blow-dry it with a diffuser attachment if you want to enhance your natural wave. If you want more defined waves, curl sections of hair loosely with a 1.5-inch barrel. Once you have your desired wave or texture, take a section from both sides of your head (starting around temple level and moving back toward your ears) and gather these sections at the back of your crown. Secure them with a decorative comb that’s wide enough and heavy enough to handle thick hair. Let the comb rest horizontally so it’s fully visible. Leave the rest of your hair completely loose.
Perfect For
Bohemian or garden weddings, brides with naturally textured or wavy thick hair, ceremonies where you want to feel like yourself rather than heavily styled.
Pro Tips
Choose a comb with substantial weight and width—delicate, tiny combs can disappear into thick hair or slip out. Position the comb so it sits visibly at the base of your crown; you want it to be a feature, not hidden. Use 2-3 bobby pins beneath the comb to anchor it, angling them down and forward for maximum grip.
8. Side-Swept Half-Up with Volume at the Crown
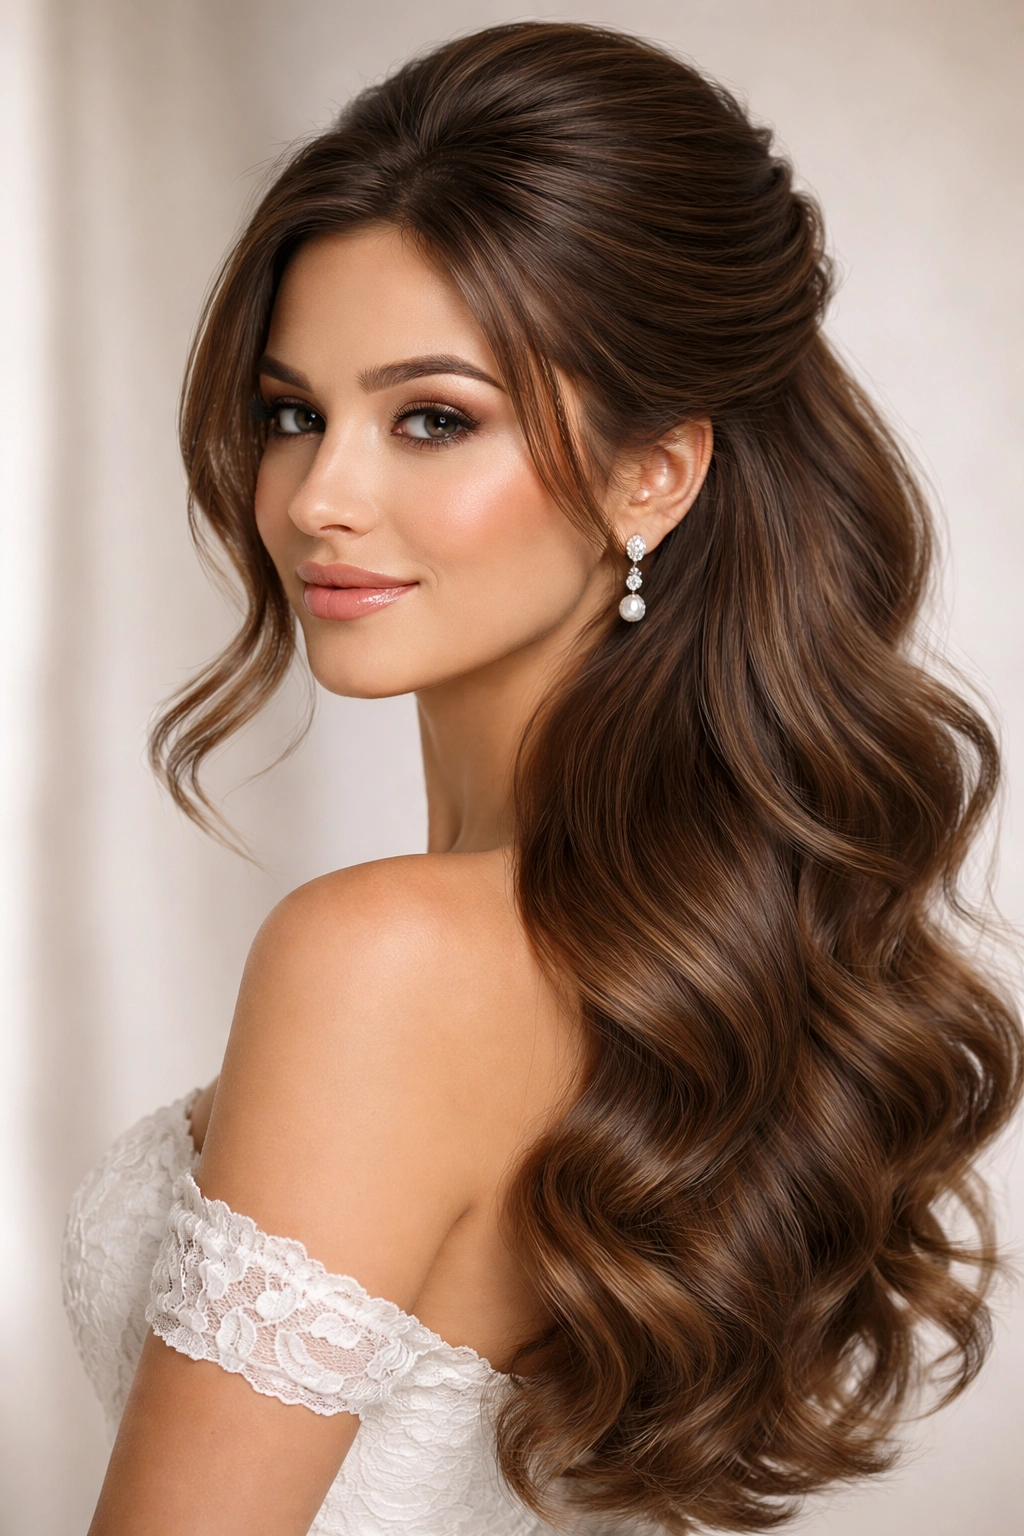
This style sweeps one side of your hair dramatically to the opposite side, securing it asymmetrically at the back of your crown. The asymmetry creates movement and visual interest, and thick hair makes this look polished rather than accidental.
Why It Works for Thick Hair
The side-swept movement is flattering because it frames your face from an unexpected angle. Thick hair creates volume at the crown that supports the swept section without the arrangement looking lopsided or unbalanced. The asymmetry feels intentional and modern, especially when thick hair adds substance to every element.
How to Create It
Tease gently at the crown to create a base, then part your hair slightly off-center toward the side you want to sweep toward. Create soft waves or curls throughout your hair. Take a section from the opposite side of your head (the side you’re NOT sweeping toward) and sweep it dramatically across the back of your head toward the side you ARE sweeping toward. Secure this swept section at the back of your crown with bobby pins, letting the ends extend down the back of your head. Leave the hair on your sweeping side loose and waved.
Perfect For
Modern or glamorous weddings, brides with a strong facial bone structure who can carry off asymmetry, ceremonies where photography will be done from multiple angles.
Pro Tips
Backcomb the section you’re sweeping so it has grip and won’t slip throughout the day. Sweep the section at a high angle (nearly parallel to the ground) rather than at a low, drooping angle; this keeps the style looking intentional and flattering. Use at least 4 bobby pins spaced throughout the secured section, not clustered in one area.
9. Twisted Half-Up with Scattered Baby’s Breath
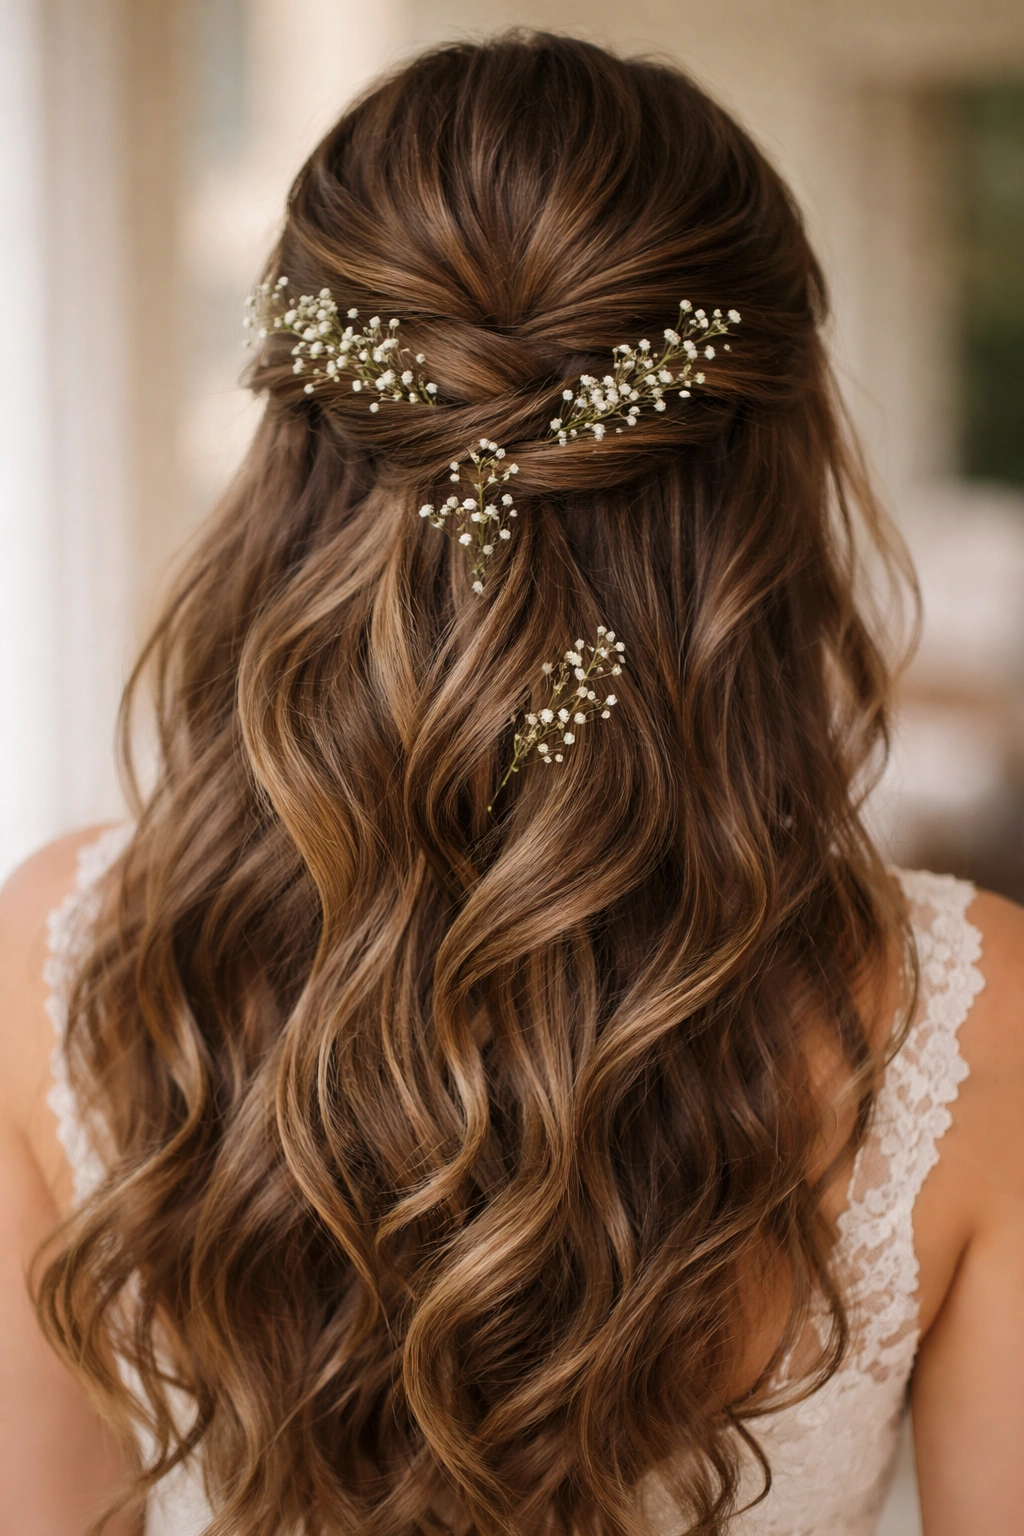
This style adds the romance of baby’s breath flowers throughout the twisted sections, creating a garden-fresh look that’s particularly stunning on thick hair. The baby’s breath weaves through the twist rather than just being pinned on top, so it looks like part of the hairstyle rather than an afterthought.
Why It Works for Thick Hair
Woven flowers have more to grip onto in thick hair, so they stay in place all day without slipping or requiring constant re-adjustment. The density of thick hair means the flowers are surrounded and supported by hair rather than perched precariously on top. The contrast between the soft white flowers and substantial dark or light hair creates a striking visual that photographs beautifully.
How to Create It
Prepare small clusters of baby’s breath by cutting them into 2-3 inch pieces and removing excess foliage. Create loose waves throughout your hair. Take a section from one side of your head and twist it back toward the crown, then begin weaving baby’s breath sprigs through the twist as you go—tuck a few sprigs in, continue twisting, tuck a few more sprigs in, and so on. Secure the twist and flowers at the back of your head with bobby pins. Repeat on the other side. The key is spacing the flowers throughout the twists rather than clustering them all in one spot.
Perfect For
Romantic or garden weddings, outdoor ceremonies, brides who want a fresh, natural aesthetic without looking completely unstyled.
Pro Tips
Ask your florist to prepare the baby’s breath pieces for you (removing foliage and cutting to length) the morning of your wedding. Have extra bobby pins on hand to secure both hair and flower stems. Mist the hair lightly with hairspray as you weave the flowers in to help everything stay put. If baby’s breath isn’t available or wilts quickly, use delicate silk flowers instead.
10. Half-Up with a Sleek Center Part and Voluminous Curls Below
This style creates deliberate contrast: a sleek, polished upper section with a precise center part, and incredibly voluminous curls in the lower half. On thick hair, this contrast is absolutely stunning because you have enough density to make the voluminous curls look intentional and gorgeous.
Why It Works for Thick Hair
The sleekness of the upper section is a striking frame for thick hair’s natural volume below. Rather than fighting your hair’s thickness by trying to smooth everything down, you’re leaning into it—smooth on top, voluminous below. Thick hair allows you to create curls that are bouncy and defined rather than droopy or flat, so the contrast really works.
How to Create It
Blow-dry your hair smooth with a paddle brush. Part your hair precisely down the center. Take sections from both sides of your head (starting near your temples) and smooth them back toward the center of your head at the crown, then secure everything together with a sleek band or elastic. The upper section should look polished and smooth, not textured. Then, take the loose lower half of your hair and curl it in 1.5-inch sections with a curling iron, making sure to curl away from your face on the sides. Once all curls are set and cooled, brush through them gently to create soft waves rather than tight ringlets.
Perfect For
Modern or contemporary wedding aesthetics, brides with very thick hair who want to showcase the contrast between sleek and voluminous, ceremonies with lots of photography.
Pro Tips
Use a smoothing serum on the upper sleek section to make it shine and look intentionally polished. Blow-dry your hair with a paddle brush and then a round brush to create maximum smoothness on top. Curl the lower section in larger sections (1.5 to 2 inches) so the curls look romantic rather than overly done.
11. Braided Headband Half-Up Style
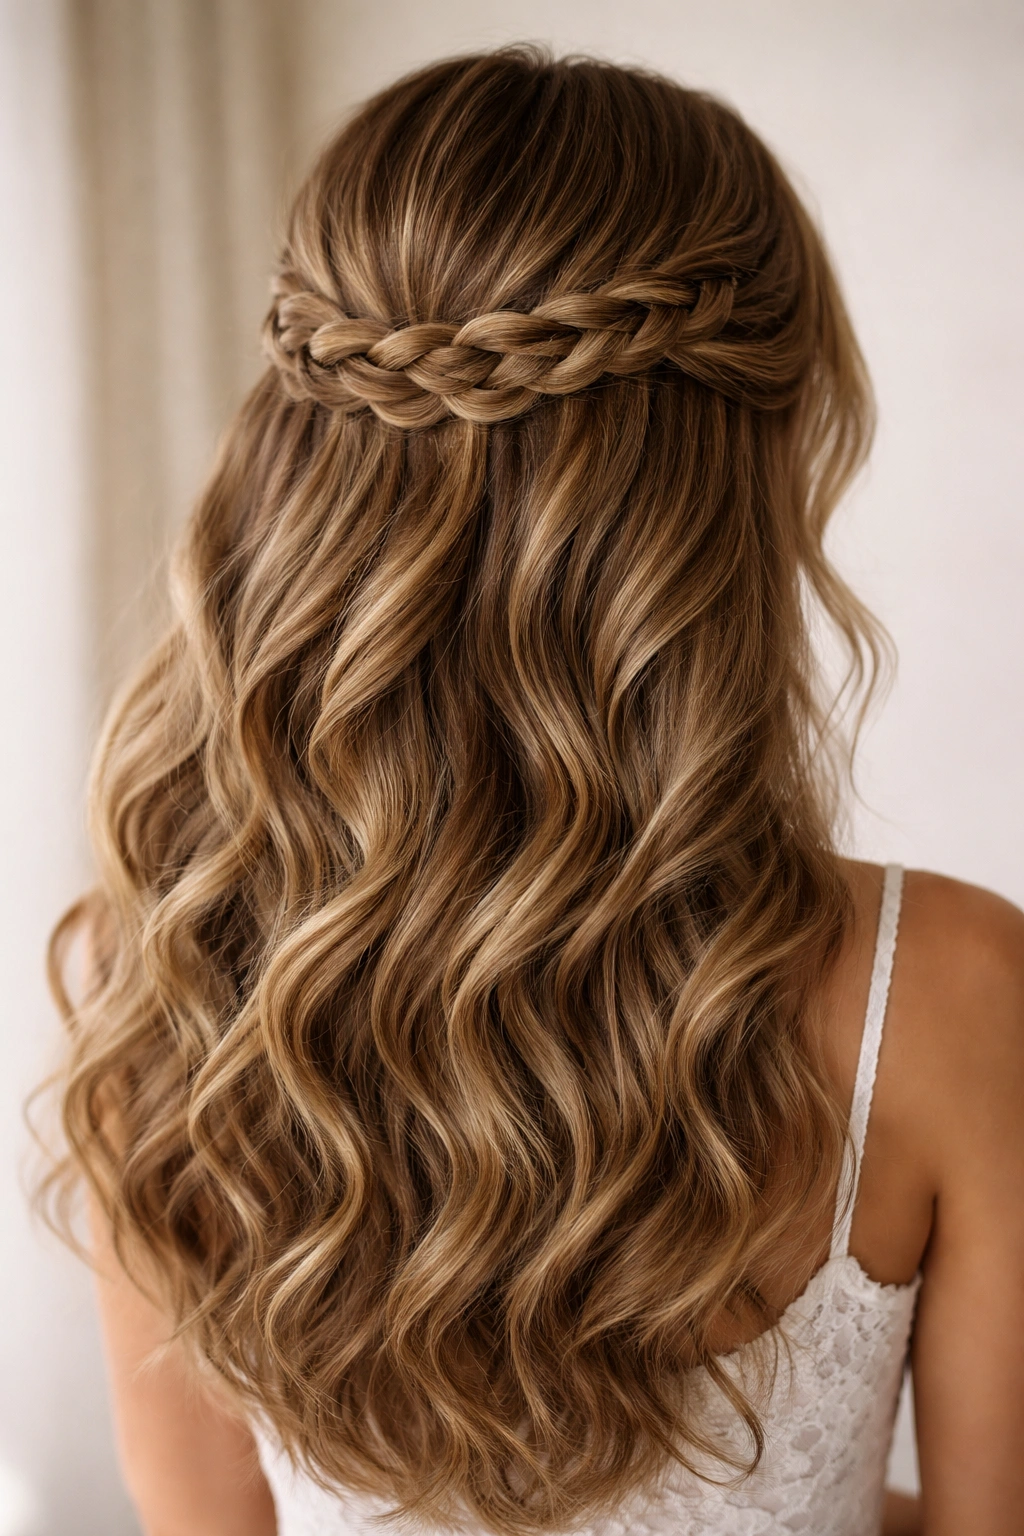
Instead of twisting from the sides, this style creates a braid that runs like a headband across the back of your head, about two inches above your nape. The braid is visible, ornamental, and creates the perfect anchor for securing the upper-half hair.
Why It Works for Thick Hair
A thick braid that sits horizontally across the back of your head is substantially more visible and striking than a thin braid would be. You’re using the braid as a design element rather than just a functional holder, and thick hair makes that braid look intentional and gorgeous. The horizontal positioning also distributes the weight of your hair evenly across the back of your head, preventing any single section from getting too heavy.
How to Create It
Create soft waves throughout your entire head. Starting on one side of your head at roughly ear level, begin a braid and continue it horizontally across the back of your head (rather than braiding straight back toward the nape). The braid should sit about two inches above the nape. Continue until you reach ear level on the opposite side, then secure the braid end with a small elastic and bobby pins. Now, gather the hair above the braid (the upper half) and bring it down and over the braid, securing it at the center where your braid ends meet. This creates a half-up-half-down effect with the braid as a visible, ornamental element.
Perfect For
Modern or artistic weddings, brides who want a distinctive detail that’s different from standard twisted half-ups, ceremonies where you’ll have a back-of-the-head angle in photos.
Pro Tips
Make your braid loosely so it reads as romantic rather than geometric. Tease gently at the crown before you pull the upper hair over the braid to create a lifted, voluminous look. Mist the braid with light hairspray to help it maintain its shape throughout the day.
12. Half-Up with Invisible Clips and Soft Waves
This modern style uses nearly-invisible hair clips (like Invisibobble or similar textured elastics) to secure the upper half, creating the illusion that your thick hair is just naturally falling into a half-up configuration. The entire look feels effortless and undone.
Why It Works for Thick Hair
Thick hair is heavy enough that even an invisible clip will hold securely without slipping. The invisibility of the clip means all the focus is on your gorgeous hair texture and waves rather than on metal or plastic fasteners. The effortless, undone aesthetic works beautifully on thick hair because the density itself creates the perception of volume and movement.
How to Create It
Create soft, romantic waves throughout your entire head with a 1.5-inch curling iron. Once the waves are cool and set, gently brush through them to loosen the curl slightly. Take a section from both sides of your head (starting at temple level) and gather these sections at the back of your crown. Secure them with a textured elastic or invisible clip; the clip should be hidden beneath the hair once fastened. Let the secured section fall naturally down the back of your head, mixing with the loose curls below. The arrangement should look like your hair naturally fell into this configuration.
Perfect For
Casual or modern weddings, outdoor ceremonies, brides who want a polished look that doesn’t feel heavily styled, bohemian aesthetics.
Pro Tips
Invest in quality invisible clips designed for thick hair—cheap versions will slip out. Backcomb gently at the crown before you gather the upper sections; this creates an invisible anchor point for the clip. Tease the gathered section slightly before clipping so the clip has something to grip. Let a few pieces frame your face rather than pulling everything back smoothly.
13. Twisted Half-Up with a Jeweled Brooch
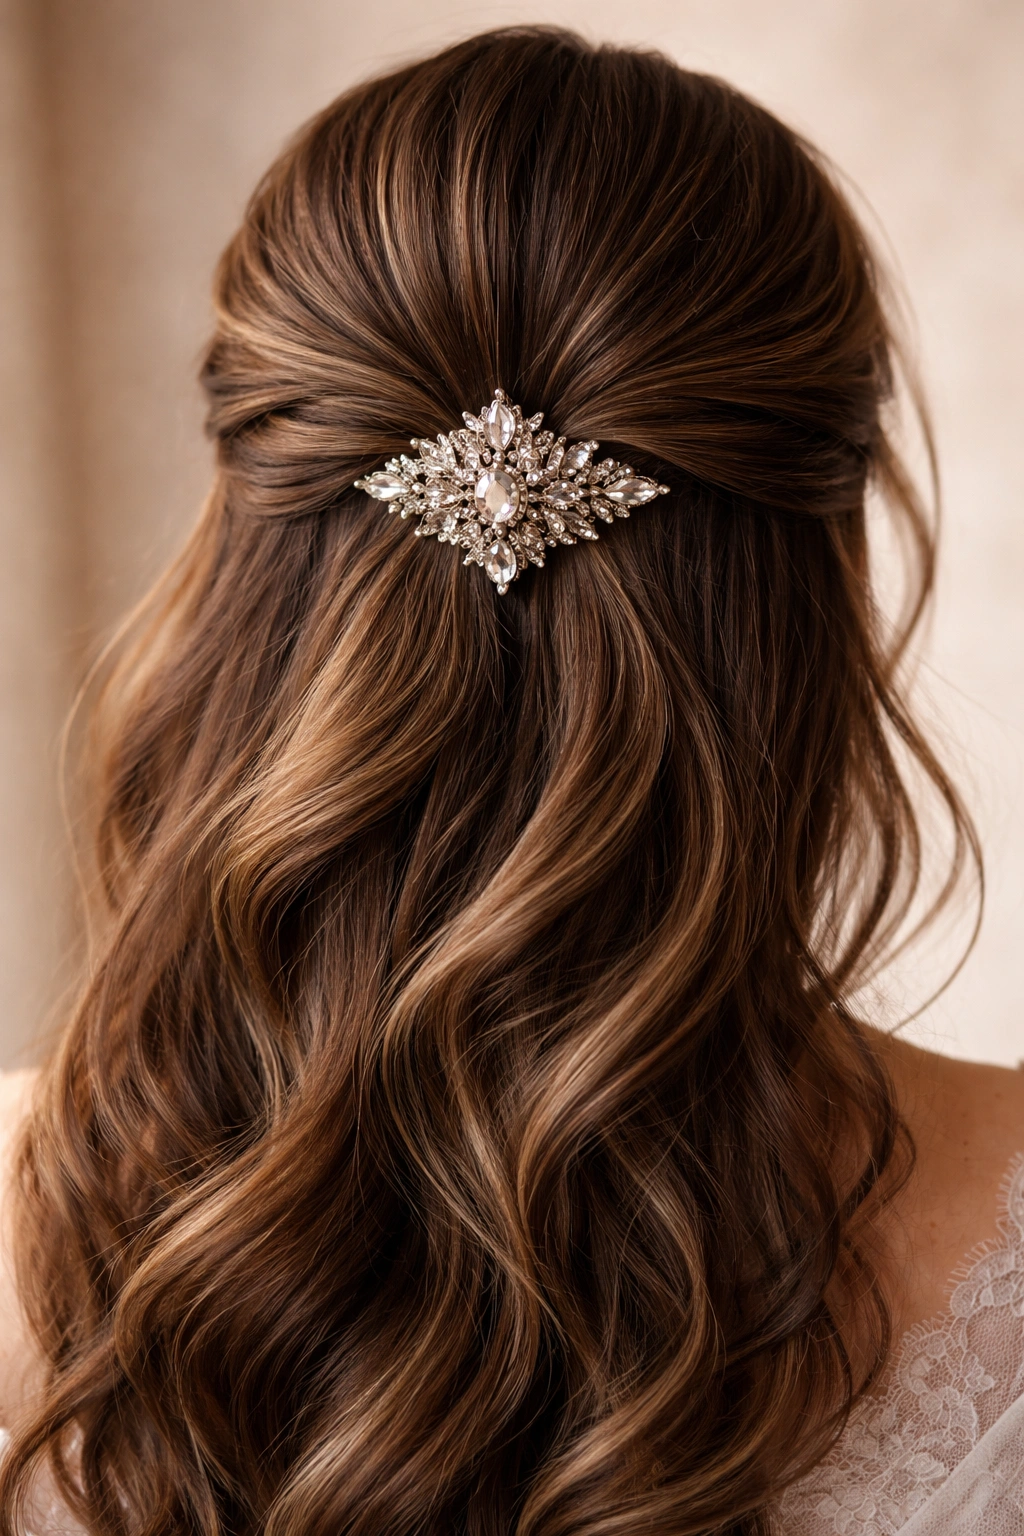
This style is identical to a classic twisted half-up, but instead of relying solely on bobby pins to secure the twist, you’re using a large, decorative jeweled brooch that functions as both a fastener and a focal point for your hairstyle.
Why It Works for Thick Hair
A substantial brooch has enough weight and structure to secure thick hair securely without slipping. The brooch becomes a stunning focal point that photographs beautifully, especially when it catches light or is positioned to reflect your wedding colors or theme. Thick hair fills around the brooch beautifully, making the brooch appear intentional and integrated rather than like an afterthought.
How to Create It
Create loose waves throughout your hair. Take a section from one side of your head and twist it gently back toward the crown. As you hold the twist in place, take the second twisted section from the opposite side and wrap it around the first twist. Gather both twists at the center of the back of your crown. Instead of securing with bobby pins alone, slide your decorative brooch through the twisted arrangement, making sure it sits at the central point where both twists meet. Secure the brooch with bobby pins that angle through the brooch and into your hair. Add additional bobby pins on either side of the brooch for extra security.
Perfect For
Glamorous or formal weddings, vintage-inspired ceremonies, brides who want a standout detail that complements their wedding jewelry, upscale or black-tie events.
Pro Tips
Choose a brooch that’s at least 1.5 inches wide so it’s visible in photographs and doesn’t disappear into your thick hair. Angle your brooch so the front (the decorated side) is fully visible from all angles. Secure it very firmly; you want zero movement throughout the day. Have a backup brooch or regular bobby pins on hand in case something goes wrong.
14. Half-Up with Choppy Layers and Textured Twist
If you have layers already in your thick hair, this style uses those layers to your advantage. You’re creating a twisted half-up that intentionally showcases the choppy, layered lengths, making your hair look modern and intentionally styled rather than just casually pulled back.
Why It Works for Thick Hair
Layers in thick hair create natural texture and movement that becomes even more striking when you use them as part of your styling. The twist holds the upper layers while the lower layers fall freely, creating a graduated length effect that’s visually interesting. Thick hair with layers has enough dimension that you don’t need complicated braids or multiple twists to look special.
How to Create It
If your hair doesn’t already have layers, this is a perfect time to add some (ask your stylist to focus layers on the bottom half and around your face). Blow-dry your thick hair with a diffuser attachment to enhance your natural texture, or use a curling iron to create loose waves emphasizing the layers. Once your hair has texture and movement, create a twist from one or both sides of your head, moving toward the back of your crown. Secure the twist with bobby pins. The key is letting the layers below fall freely so they’re visible and frame your face.
Perfect For
Modern or contemporary weddings, brides with layered thick hair, casual or semi-formal ceremonies, outdoor weddings.
Pro Tips
Ask your hairdresser to add layers that are choppy and blunt rather than subtle and blended; this makes them more visually striking in your hairstyle. Use a texturizing spray on your hair before twisting to enhance the layered effect. Leave more pieces out around your face than you normally would to showcase the layers.
15. Half-Up with Volume and a Delicate Gold Chain Woven Through
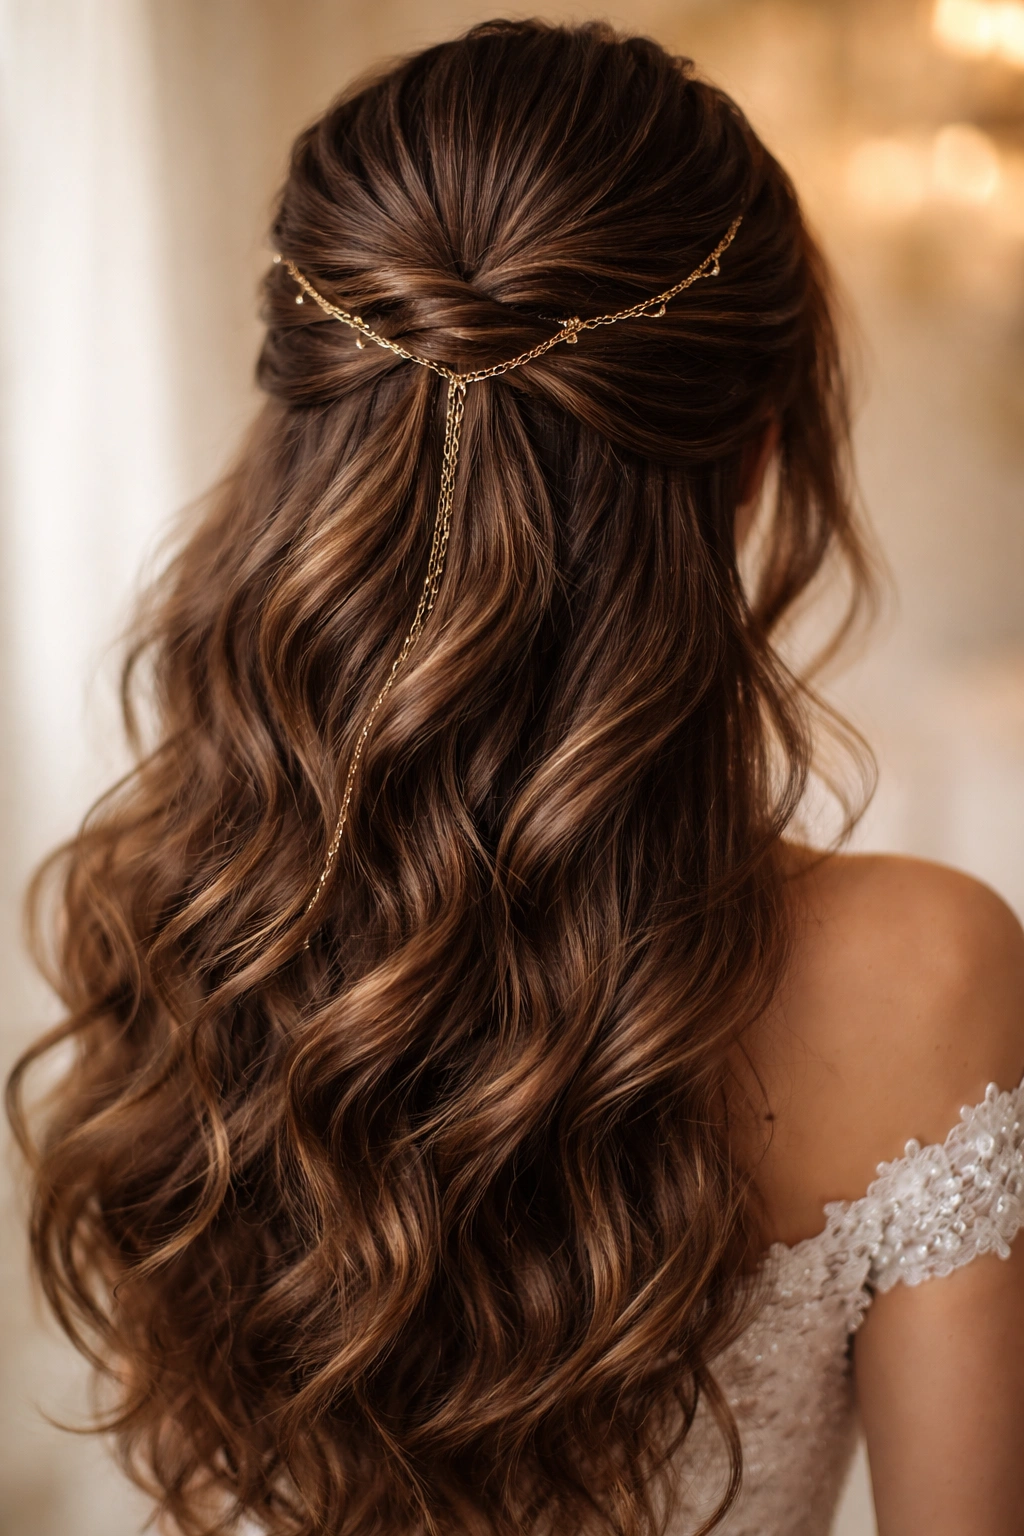
This luxurious style weaves a delicate gold chain through your twisted or braided half-up section, creating an elegant, jewelry-like detail that’s particularly stunning against thick hair.
Why It Works for Thick Hair
A gold chain woven through thick hair becomes a striking visual element without needing to be heavy or oversized. The chain catches light beautifully in photographs, especially when contrasted against dark hair or when you position it where the sun hits it outdoors. Thick hair supports the chain securely without the arrangement looking delicate or fragile.
How to Create It
Create soft waves throughout your hair. Take a section from one side of your head and prepare to twist it. As you twist, position your delicate gold chain alongside the twist, weaving the chain through the twist as you go. Secure both the twist and the chain at the back of your crown with bobby pins. The chain should be woven throughout the twist rather than just draped on top, so it looks like an integrated element of your hairstyle. You can use a vintage chain, a delicate modern chain, or even a custom chain created by a jeweler to match your wedding jewelry.
Perfect For
Glamorous or luxury weddings, brides who want a jewelry-forward detail that complements their wedding day accessories, modern or contemporary aesthetics with an upscale feel, ceremonies with lots of photography.
Pro Tips
Choose a chain with delicate links that won’t catch or pull your hair. If you’re using a vintage chain, have it inspected by a jeweler first to make sure there are no sharp edges. Photograph your hair from multiple angles before the ceremony to decide which angle shows the chain most beautifully. Consider having your hairstylist practice this look beforehand to make sure the chain and twist work together smoothly.
Final Thoughts
Thick hair is an absolute advantage when it comes to half-up-half-down wedding styles because the density and volume give you options that thinner hair simply can’t achieve. Every one of these 15 styles looks effortlessly gorgeous on thick hair because you’re not fighting against your hair’s natural characteristics—you’re working with them.
The real secret to a half-up-half-down style that lasts all day on thick hair is starting with the right foundation: waves or curls created the night before or early morning of your wedding, gentle backcombing at your crown to create an anchor point, and bobby pins placed generously throughout your twist or braid rather than clustered in one spot. Thick hair is forgiving, which means you have flexibility to adjust, re-pin, and perfect your style right up until you walk down the aisle.
Whether you choose something simple and romantic like scattered baby’s breath, or something more elaborate like a decorative comb or gold chain, your thick hair will carry the style beautifully. The fact that you have so much gorgeous hair to work with means you can focus on feeling confident, comfortable, and absolutely stunning on your wedding day—which is really what every hairstyle should achieve.