Your prom night is one of those moments you’ll look back on forever, and your hairstyle needs to match the significance of the occasion. Half up half down styles offer the perfect balance—they’re elegant and polished while keeping your face beautifully framed and your hair flowing. For straight hair, this versatility becomes an incredible advantage because the clean lines and natural shine create a sophisticated canvas that works with everything from delicate accessories to bold statement clips.
The magic of half up half down lies in how it adapts to any dress, personality, and vibe you’re going for. Whether you’re envisioning something romantic and feminine, sleek and modern, or bold and dramatic, straight hair gives you the foundation to execute virtually any version flawlessly. The styles that follow range from timeless classics that’ll always photograph well to trend-forward designs that let your personality shine through. Each one is designed to hold up through an entire evening of dancing, photos, and celebration without losing its shape or elegance.
What makes these styles particularly smart for prom is that they require less maintenance than a full updo but deliver just as much visual impact. You get the best of both worlds—the romantic drape of down hair combined with the intentional styling that says you’ve put genuine thought into your look. Straight hair’s natural texture makes each style crisp and defined, which means your stylist (or you, if you’re doing this yourself) can create really clean lines and precise shapes that photograph beautifully under professional lighting.
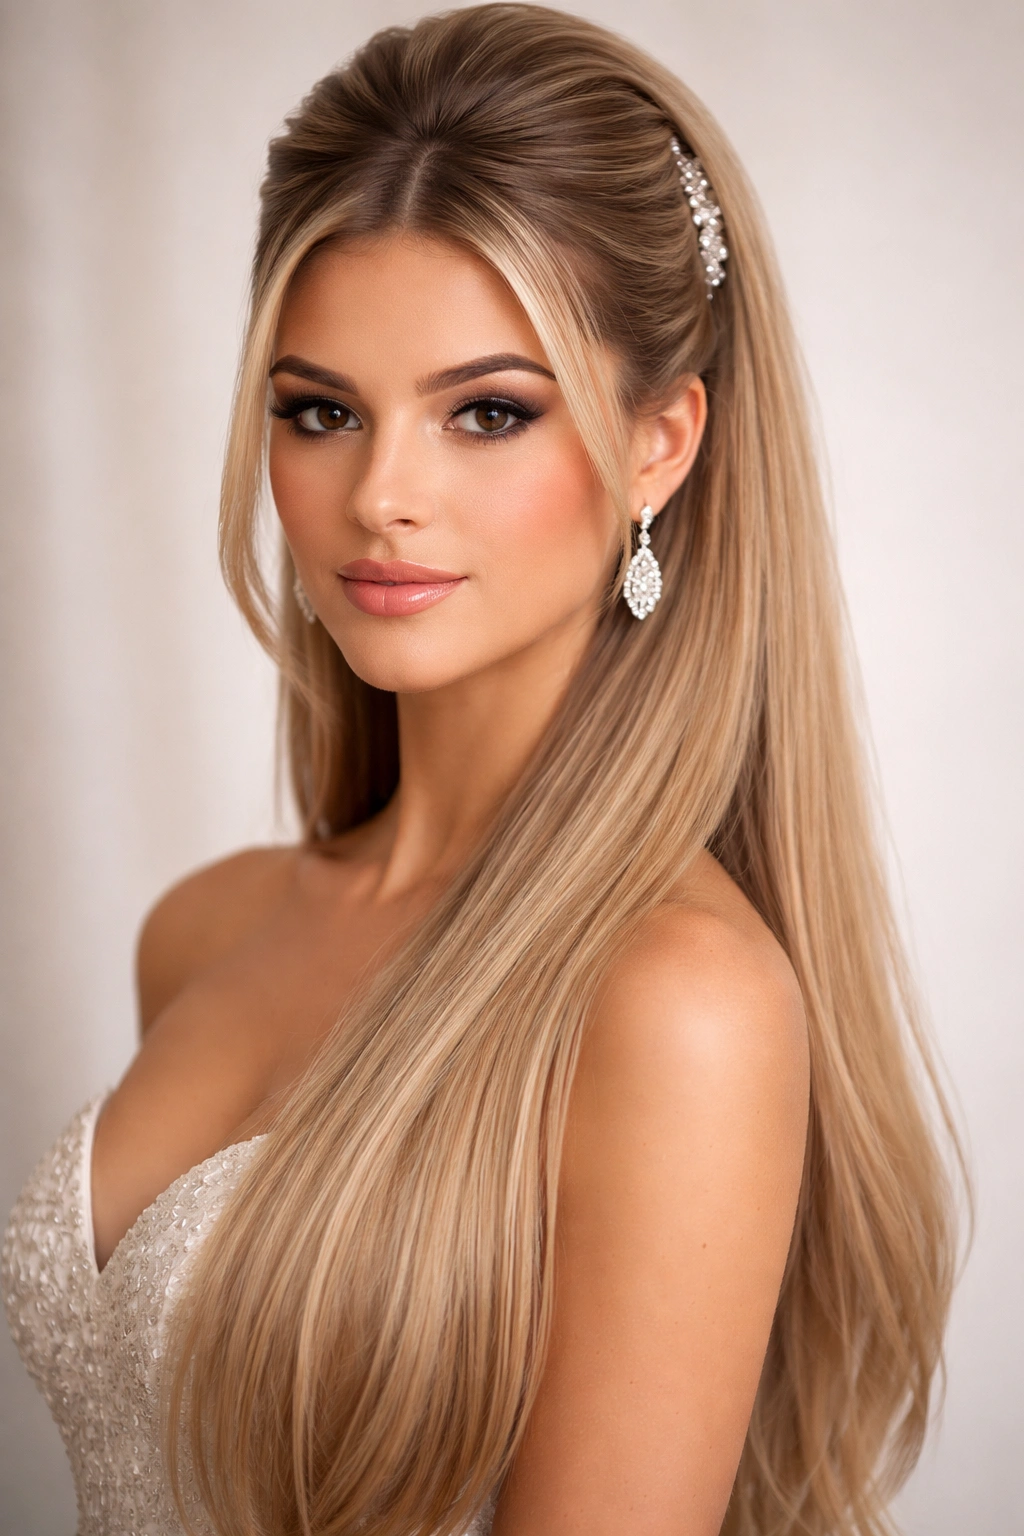
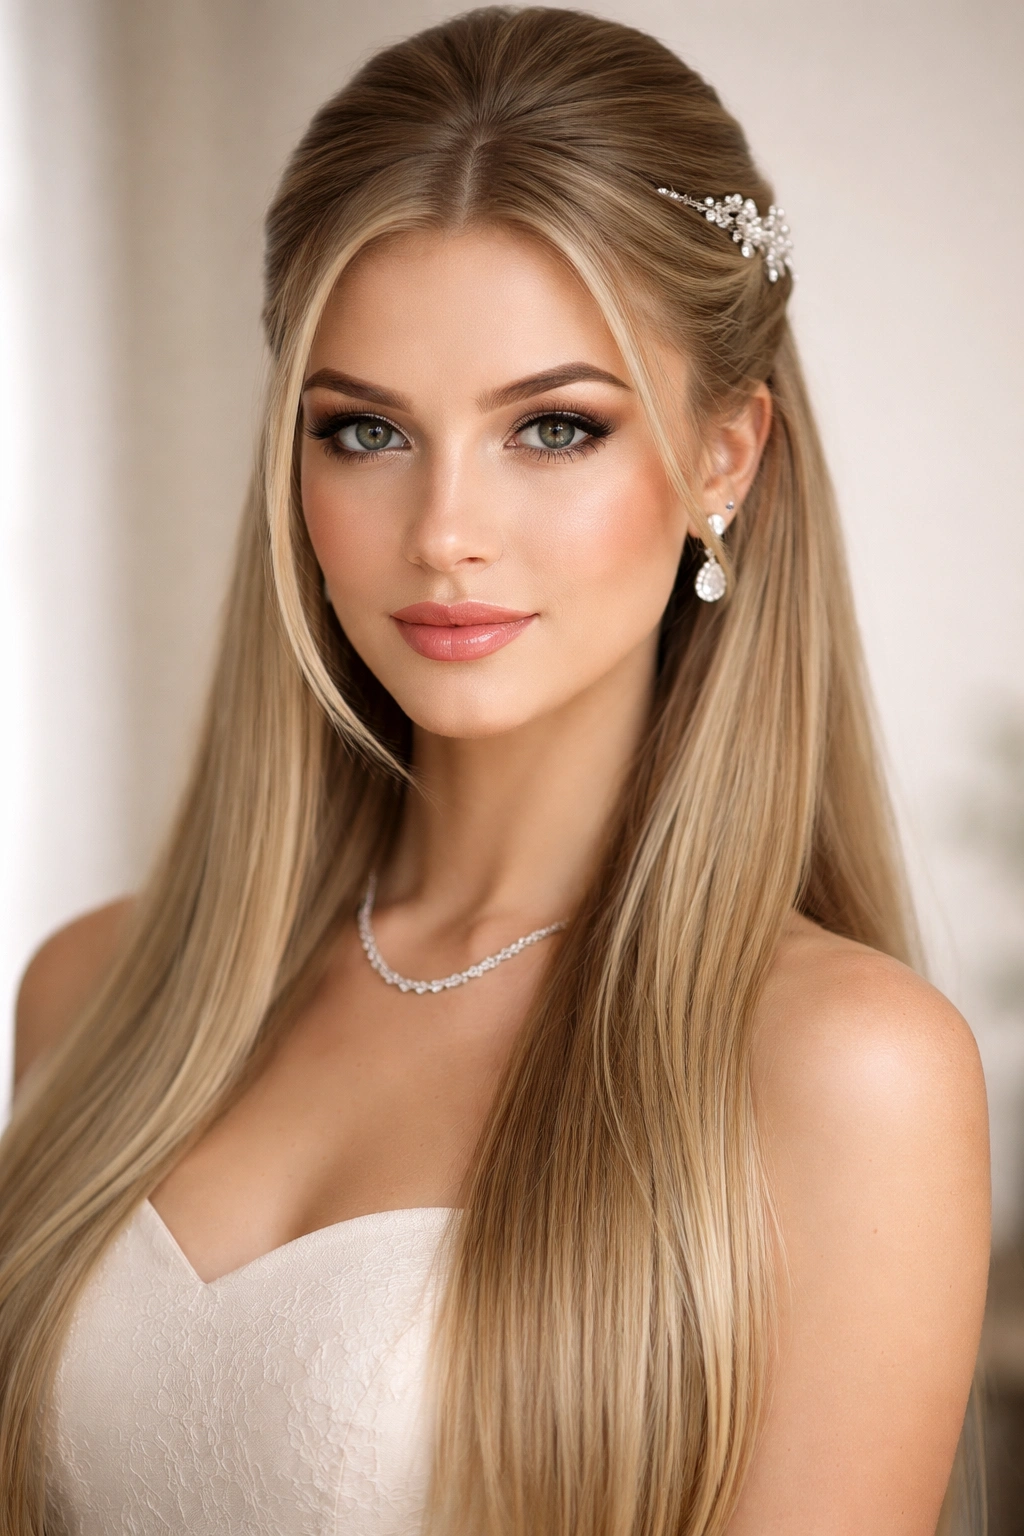
1. Classic Half-Up with Pearl Hair Pins
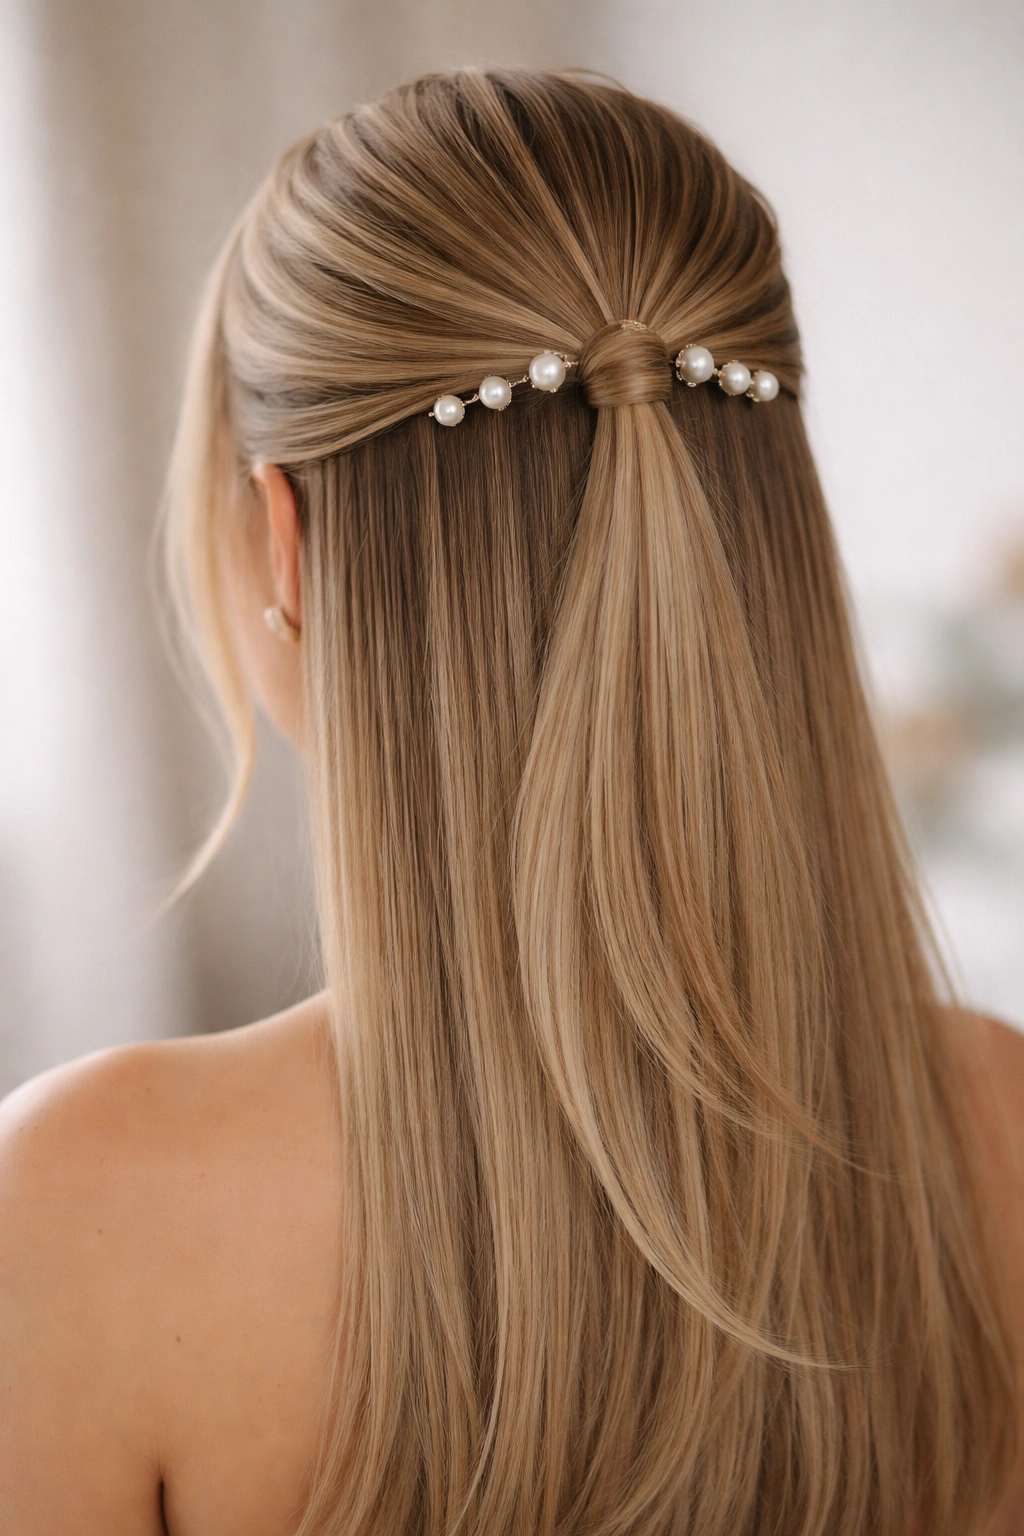
This timeless style is the prom version of a white button-down shirt—it works with literally every aesthetic and never looks wrong. The top half of your straight hair is gathered at the crown, secured with an elastic, and then softened with strategically placed pearl or crystal bobby pins scattered throughout the gathered section. The bottom half flows freely, creating an effortless elegance that photographs beautifully from every angle.
Why It’s a Foolproof Choice
Pearl pins catch light in a way that adds understated glamour without screaming “I’m trying too hard.” The style works equally well with an elaborate ball gown or a sleek bodycon dress because it’s elegant without being costume-y. Straight hair shows off pearl accessories perfectly—there’s no texture to compete with the shine of the pearls themselves.
How to Execute It Perfectly
- Start with smooth, straight hair that’s been blow-dried with a light styling spray to add grip
- Take the top section from temple to temple, gathering everything at the crown into a small ponytail
- Secure with a thin elastic that matches your hair color
- Remove the elastic and place 4-6 pearl bobby pins around the gathered section, crisscrossing them slightly for visual interest
- Gently tease the gathered hair ever so slightly before adding pins for better hold
- Allow the bottom section to flow naturally; a light hairspray mist keeps flyaways from appearing during the night
The beauty of this style is that it works with any hair length and requires almost zero special skills to recreate, yet it looks expensive and intentional the moment you add those pearl pins.
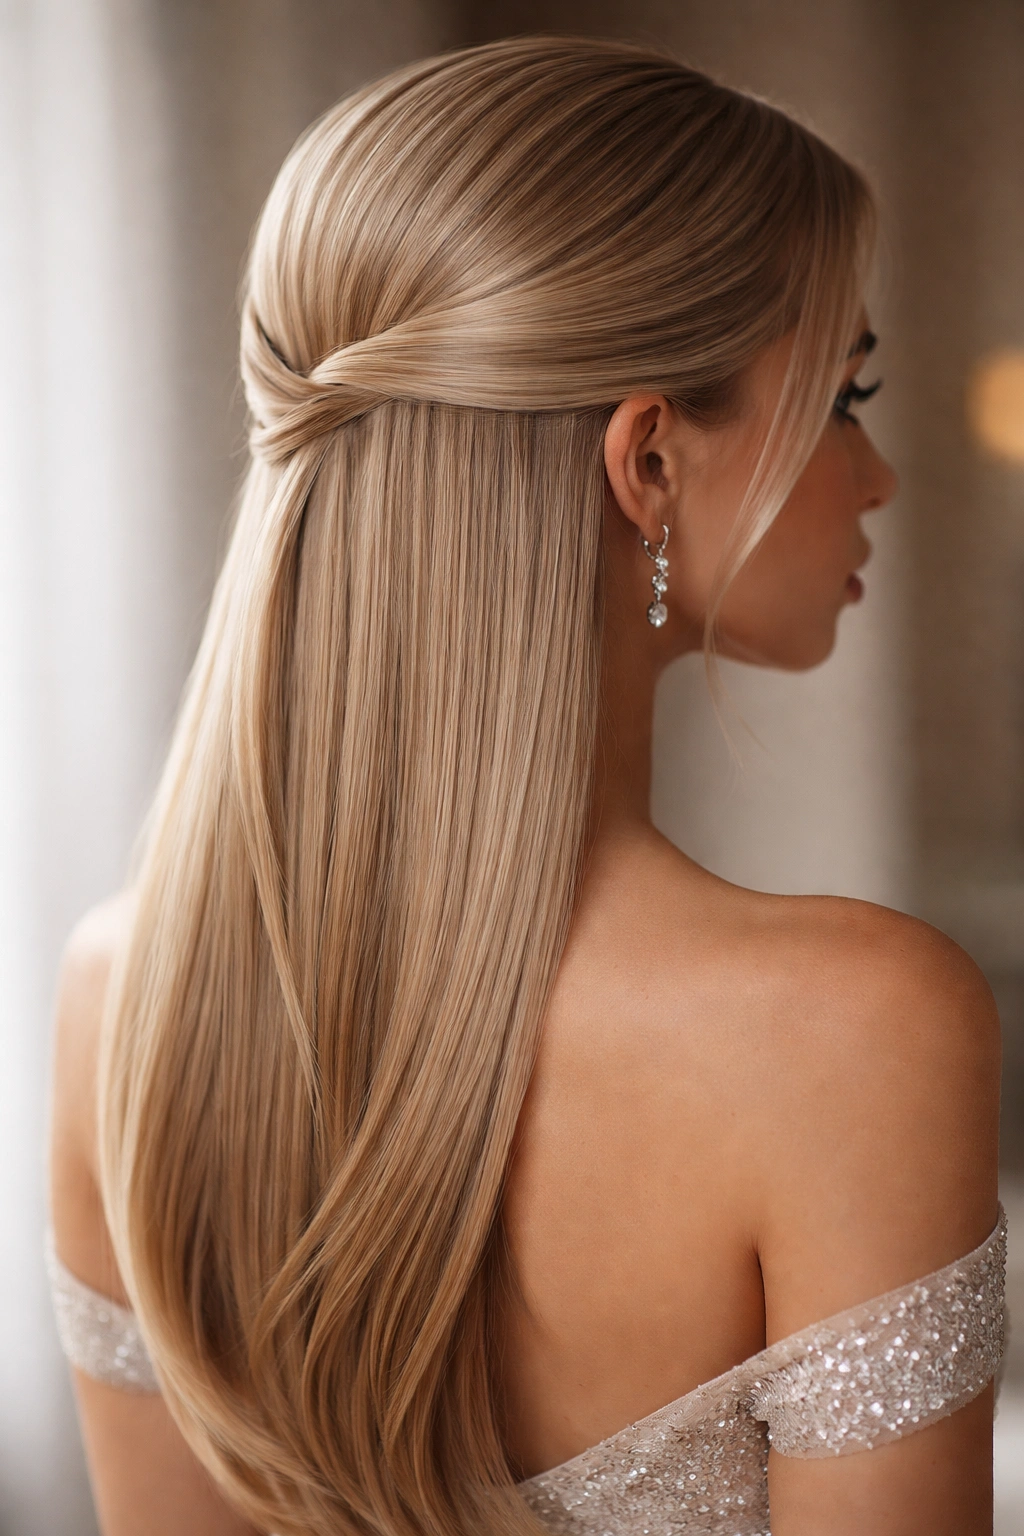
2. Half-Up Twisted Crown
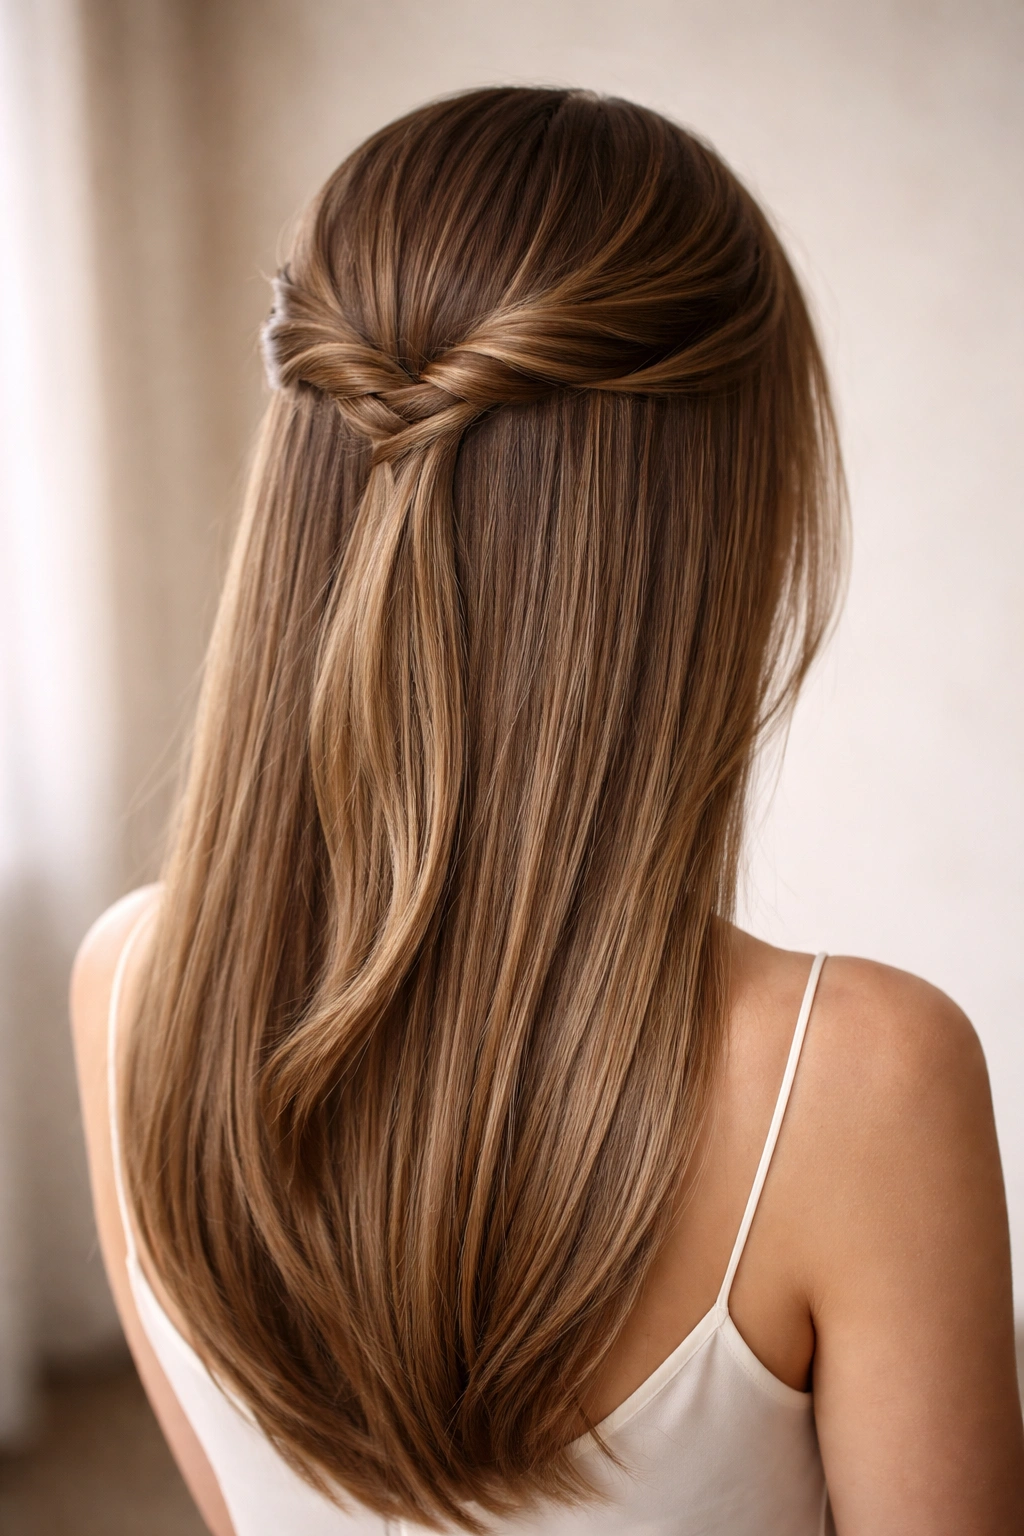
If you want something with more visual complexity without actually being complicated, this twisted version delivers serious impact. Instead of a simple gathered ponytail, you’re taking sections from each side and twisting them around the back of your head like a crown, meeting in the middle where they’re secured together. The result looks intricate and fashion-forward while being surprisingly straightforward to execute on straight hair.
The Sophisticated Appeal
Twists create an automatic sense of elegance and refinement, and the crown placement makes you feel like the main character at your own event. This style actually looks more polished on straight hair than on textured hair because the twists are clean and defined, with no frizz to soften the intended lines. It photographs exceptionally well from behind, which matters if you’re taking shots in your dress.
Step-by-Step Construction
- Blow-dry your hair until it’s completely smooth with a slight amount of texture or volume at the roots
- Create a deep side part on whichever side feels natural for your face shape
- Take a 2-inch section from just behind your ear on the larger side of the part and begin twisting away from your face
- Twist all the way to the back of your head, staying relatively close to the hairline
- Repeat on the other side, twisting toward the back
- Where the two twists meet at the back of your head, secure them together with bobby pins
- Leave the bottom half completely down and flowing
- Mist with light hairspray to set the twists without weighing down the straight sections
The asymmetry of a deep side part combined with the crown twists creates a face-flattering look that feels current and intentional.
3. Sleek Half-Up Ponytail with Ribbon
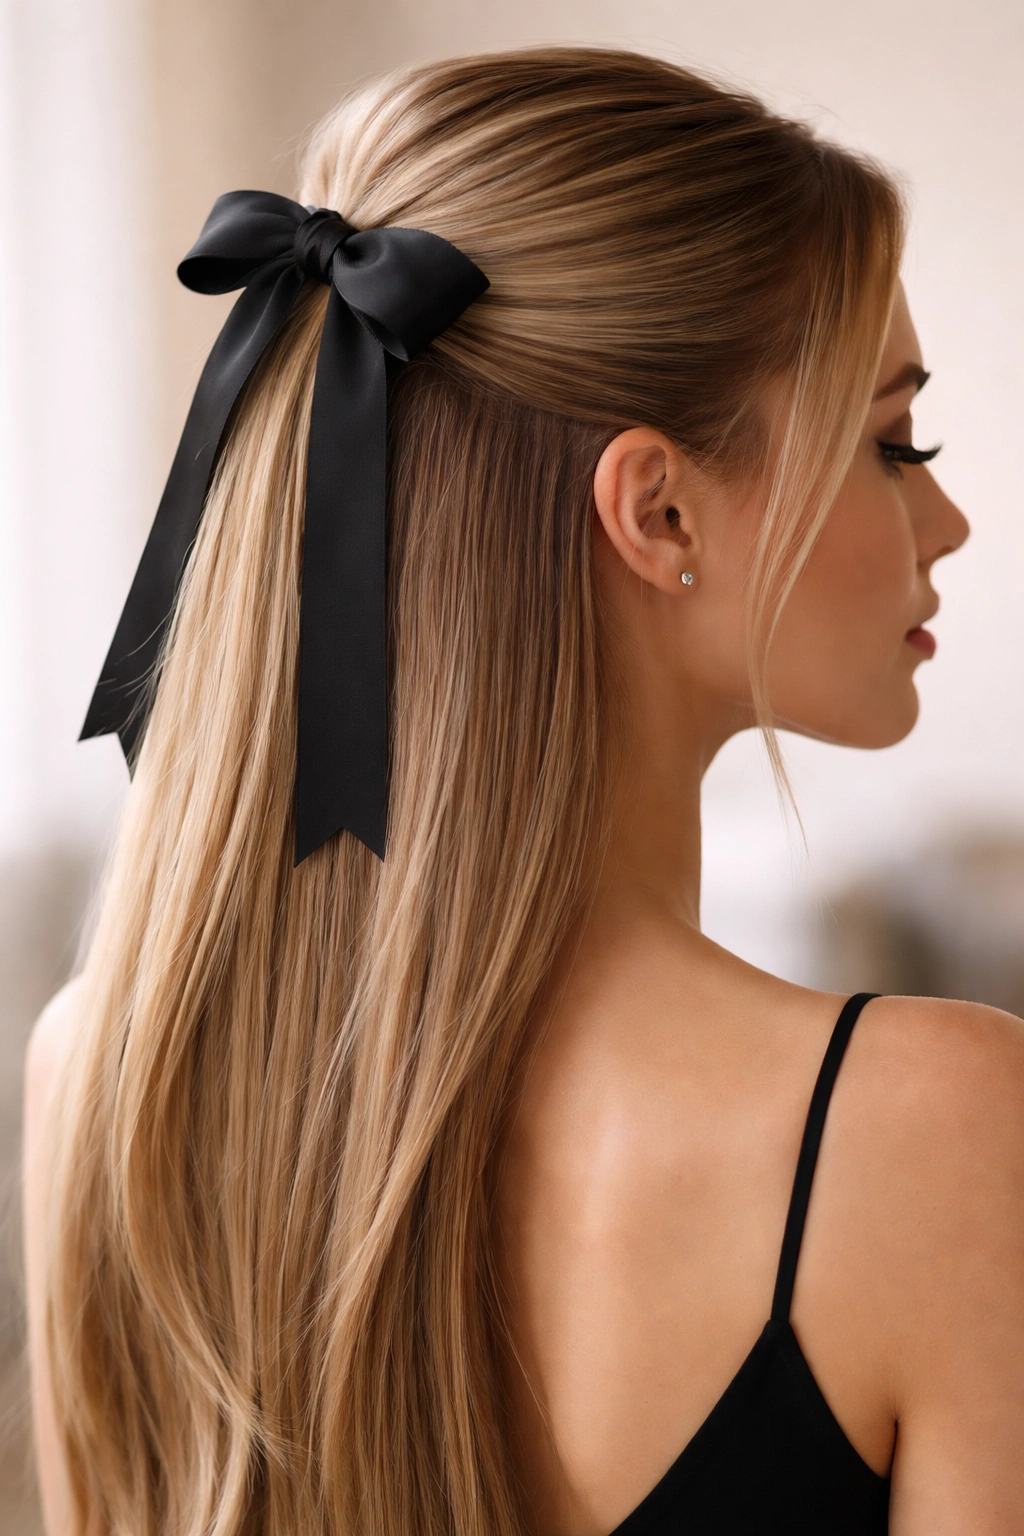
This is your style if you love the polished, put-together aesthetic and you’re pairing it with a dress that has a sleek or minimalist vibe. The top half gathers into a small, tight ponytail at the crown, and then a ribbon—silk, satin, velvet, or metallic—is woven through or wrapped around the base of the ponytail. Straight hair makes the ribbon weaving incredibly crisp and visible, so the accessory becomes a genuine design feature rather than just decoration.
Why Ribbons Elevate Everything
A ribbon transforms a basic half-up style into something that feels intentional and coordinated. You can match the ribbon to your dress, your shoes, or intentionally choose a complementary color that adds visual interest. The ribbon against straight hair has a graphic quality—it sits exactly where you place it, with no texture to soften or blend it away. This is perfect if you want your accessories to make a statement.
Achieving Perfect Execution
- Start with hair that’s been smoothed and blow-dried straight with no texture or volume
- Gather the top section at the crown into a very precise, tight ponytail
- Secure with a thin elastic that matches your hair color
- Select your ribbon (typically 2-4 inches wide works best for prom styling)
- Either wrap the ribbon around the elastic base (covering it entirely) or carefully weave the ribbon in and out of small subsections of the ponytail itself
- If wrapping, secure the ribbon ends with bobby pins hidden beneath
- Keep the bottom half of your hair completely straight and smooth
- A smoothing serum or anti-frizz spray is essential here—any texture breaks the sleek aesthetic
The key to this style is precision in gathering and tension—a sloppy ponytail base will never look intentional enough to pair with a ribbon.
4. Braided Half-Up Style
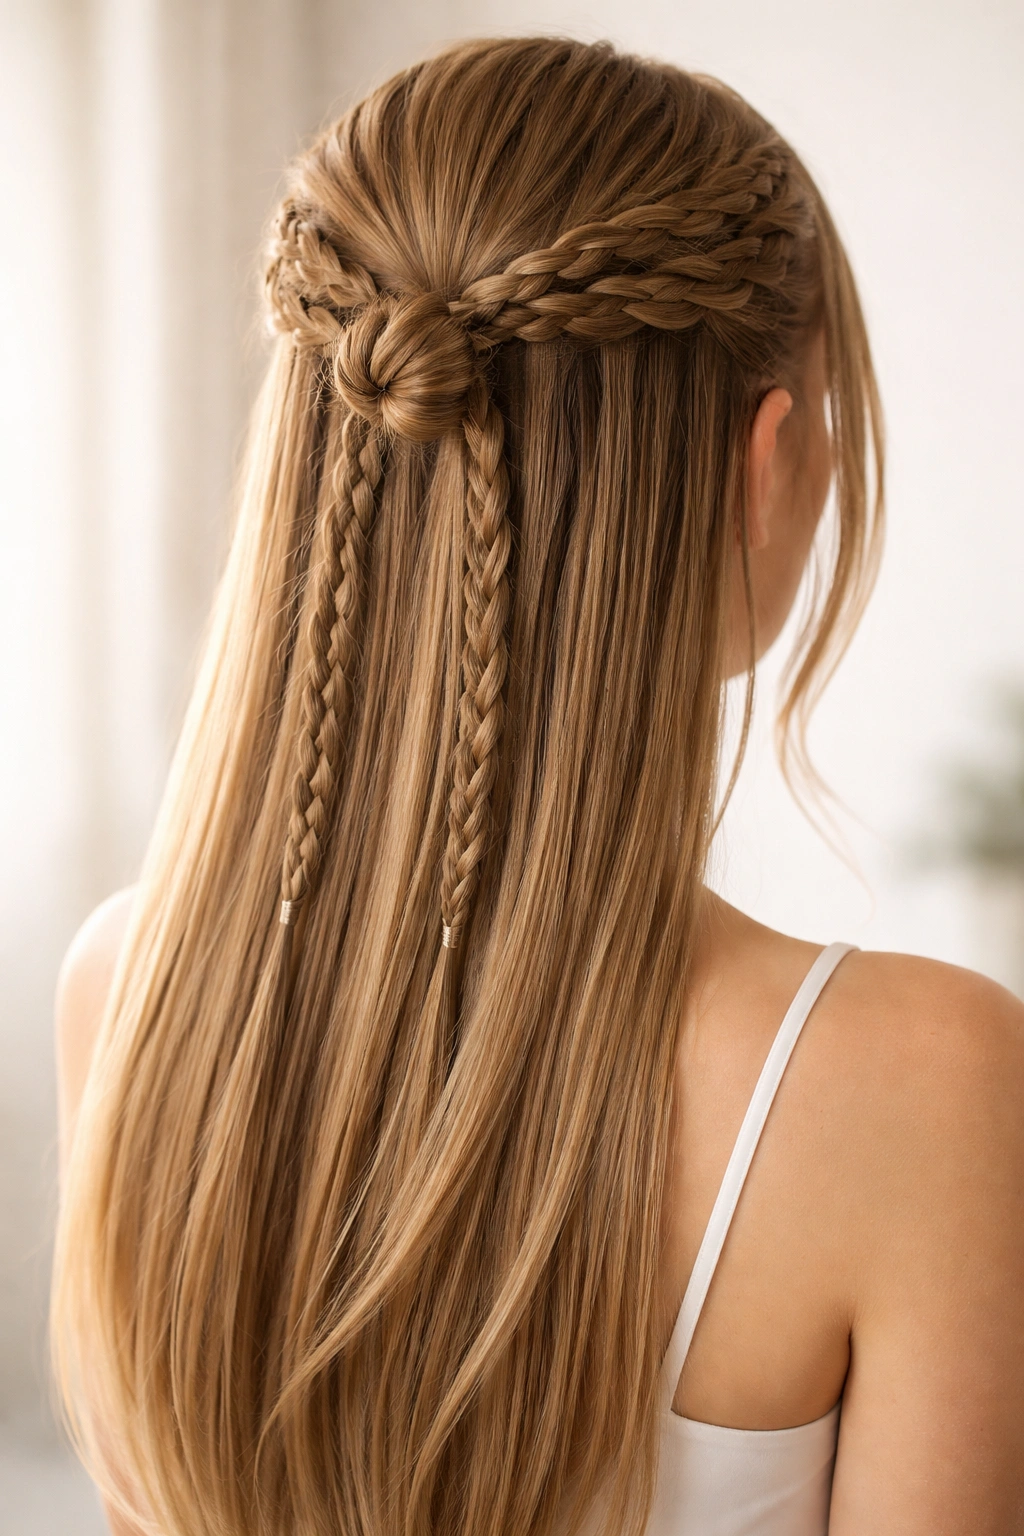
Straight hair is actually ideal for braiding because the texture doesn’t fight against the braid structure the way curly or wavy hair sometimes does. This half-up style begins with one or two braids starting from the top temples or sides, with both braids gathering together at the crown where they’re secured into a small bun or gathered point. The braids add visual interest and dimension without looking overly complicated.
The Dimension Factor
Braids automatically create texture and visual interest on straight hair, which prevents the overall look from feeling flat. Even though your hair is straight, the braid structure gives you movement and shape that photographs beautifully. The gathered braids create a focal point at the back of your head that’s elegant and memorable.
Building the Braided Framework
- Begin with smooth, straight hair that has very light texture (blow-dry with a round brush for subtle volume at roots)
- Take a 2-inch section from just above your right temple and begin a three-strand braid
- Braid downward and backward, adding small pieces to the braid as you move toward the back (this is a partial French braid)
- Repeat on the left side with another braid
- Both braids should meet at the crown of your head
- Secure both braids together using bobby pins, or gather them into a tiny bun
- Leave the lower section completely down and straight
- Use a light hairspray to keep the braid from loosening throughout the night
This style works beautifully with updos or pull-through braids if you want to get even more creative with the crown section.
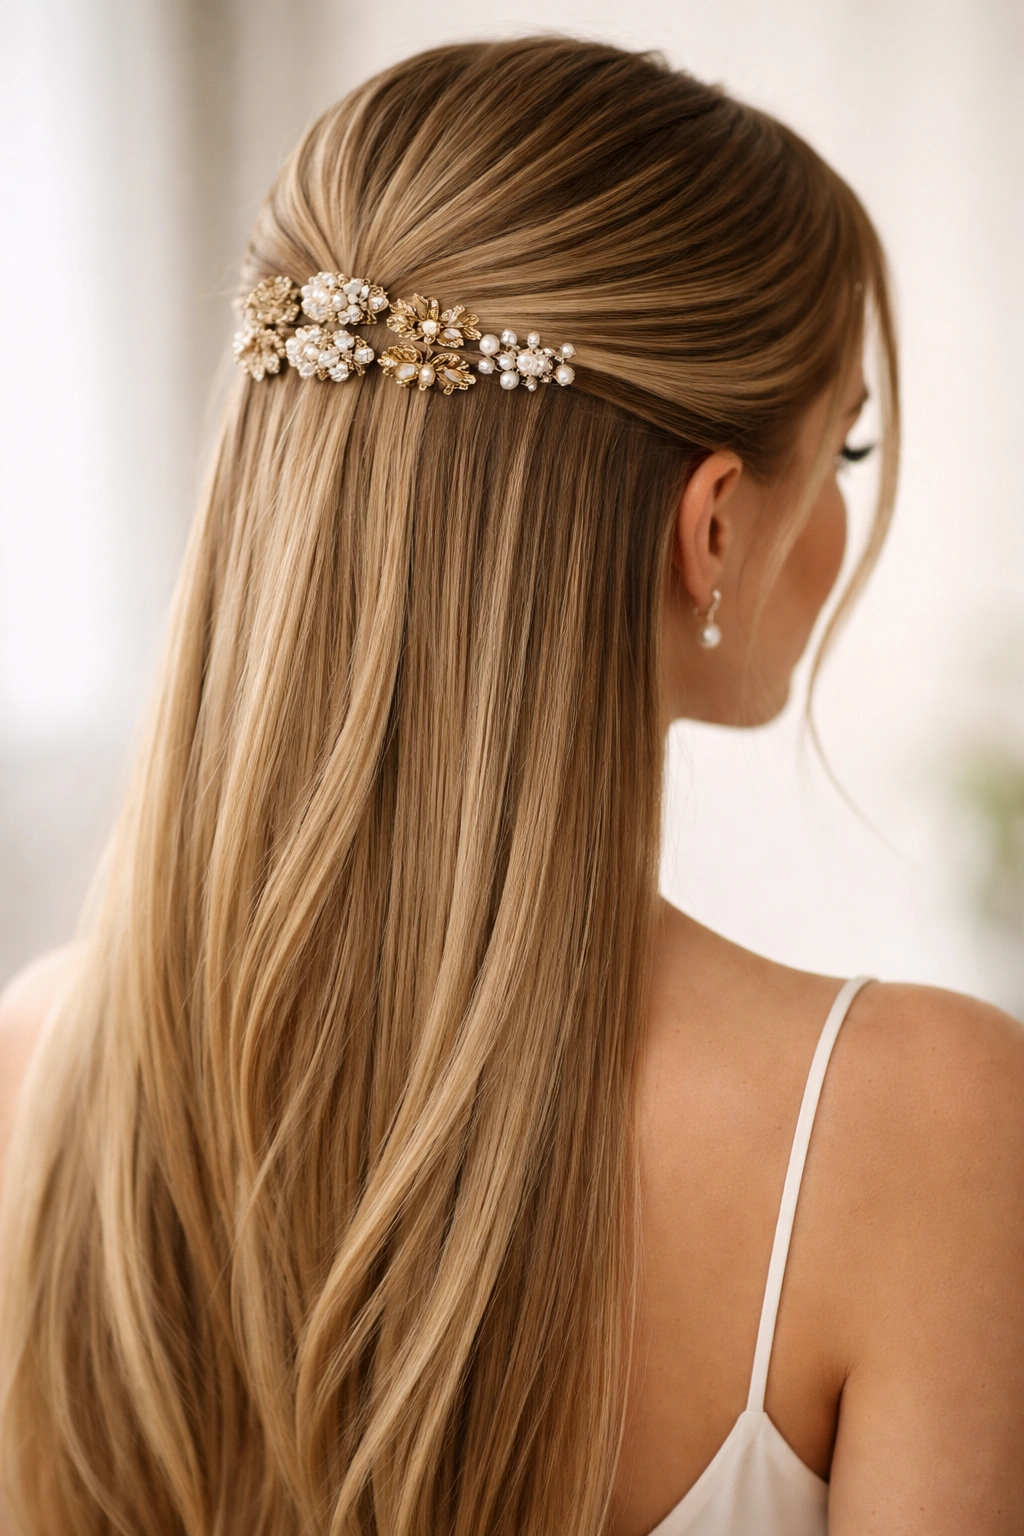
5. Half-Up with Crystal Hair Comb
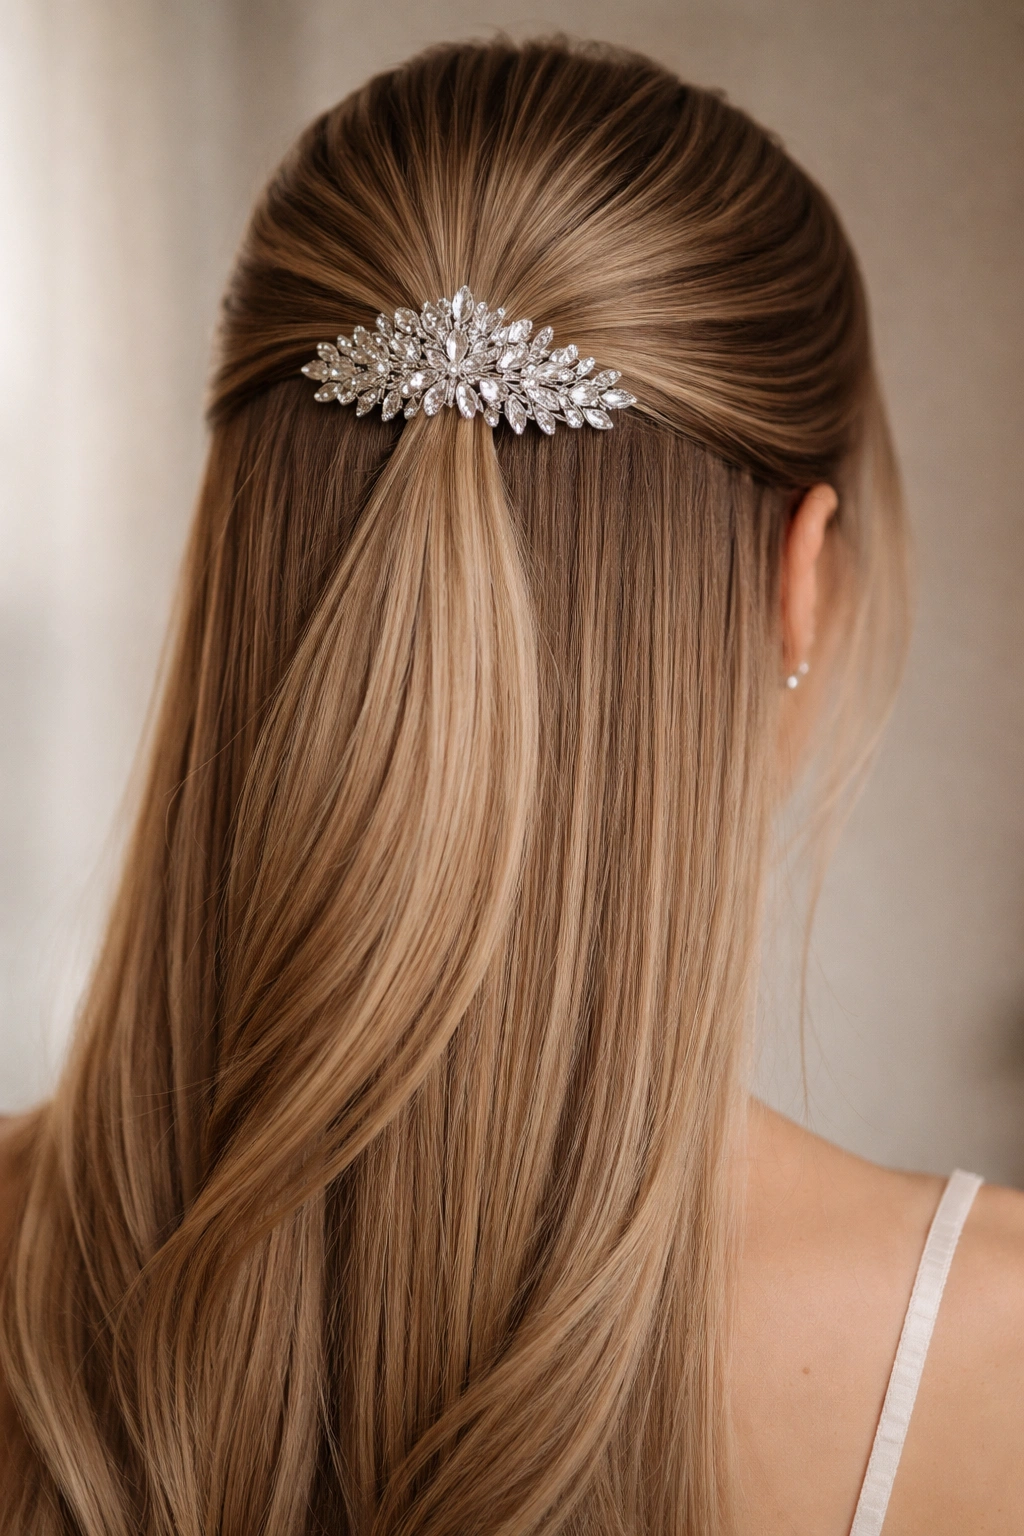
Statement hair accessories are having a major moment, and a crystal or decorative hair comb used to secure the gathered half-up section is one of the easiest ways to look absolutely stunning without overcomplicating your styling. The comb sits at the base of the gathered crown section, holding the hair in place while simultaneously serving as your primary style statement. Straight hair showcases the detail and sparkle of a quality comb beautifully.
Why a Statement Comb Works
The beauty of using a comb as your primary accessory is that you can keep everything else minimal—no other clips, no ribbons, just the comb doing the heavy lifting. It sits at the pivot point where your hair transitions from gathered to down, making it impossible to miss. For straight hair, this means the comb’s detail remains sharp and visible rather than getting lost in texture.
Comb Placement for Maximum Impact
- Blow-dry your hair completely straight with no texture or waves
- Gather the top section (roughly from temple to temple) at the crown into a ponytail shape
- Don’t secure it with an elastic yet—instead, hold it in your hand
- Position your decorative comb horizontally at the point where the hair is gathered, with the comb’s teeth facing downward into the gathered hair
- Push the comb backward gently so it grips and holds the gathered section in place
- The handle and detail of the comb remain visible, framing the back of your head
- Let the lower section flow freely in perfectly straight lines
- Secure any flyaway pieces around the comb with a bobby pin if needed
This approach means your accessory is doing both the functional work of holding your hair and serving as the visual centerpiece of your style.
6. Textured Half-Up with Soft Waves
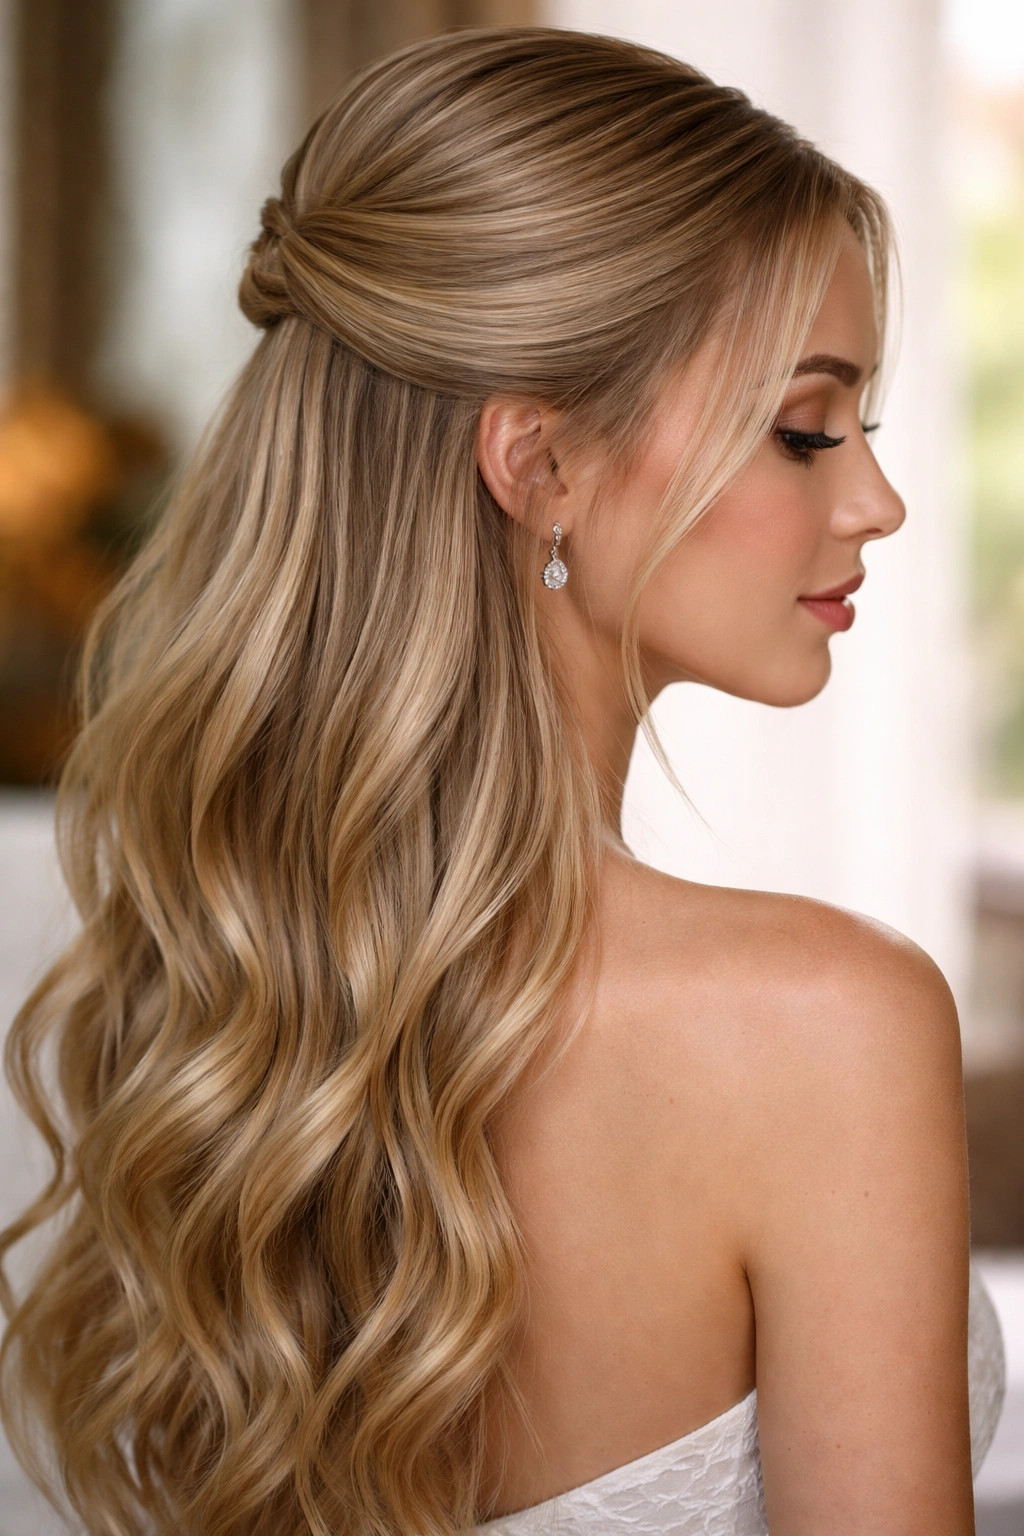
While your straight hair is naturally beautiful, adding very subtle, soft waves to the down section creates a more dynamic and romantic overall look. This style gathers the top half smoothly but allows the bottom half to feature soft, loose waves created with a large-barrel curling iron or a wave cream applied to damp hair before blow-drying. The contrast between the smooth gathered top and the wavy bottom creates movement and dimension.
Creating Intentional Contrast
The gathered top section appears even more polished because it’s contrasted against the softer texture below. This isn’t frizz or random texture—it’s intentional waviness that reads as romantic and feminine. Straight hair that’s been very deliberately waved reads as more intentional than naturally textured hair, which is actually an advantage here.
Technique for Perfect Soft Waves
- Start by blow-drying your hair completely straight as a base
- Gather the top section at the crown and secure with an elastic
- Using a 1.5-inch barrel curling iron, wrap small sections of the bottom half around the barrel away from your face
- Hold each section for 8-10 seconds, then release
- Don’t brush out the waves—instead, finger-comb them gently to separate slightly
- Apply a light texture spray or sea salt spray for hold and definition
- The waves should be soft enough that they look natural, not ringlet curls
- Light hairspray throughout (avoid heavy-duty options that’ll stiffen the waves)
This style photographs beautifully because the waves catch light and create visual depth that pure straight hair sometimes lacks.
7. Half-Up High Pony
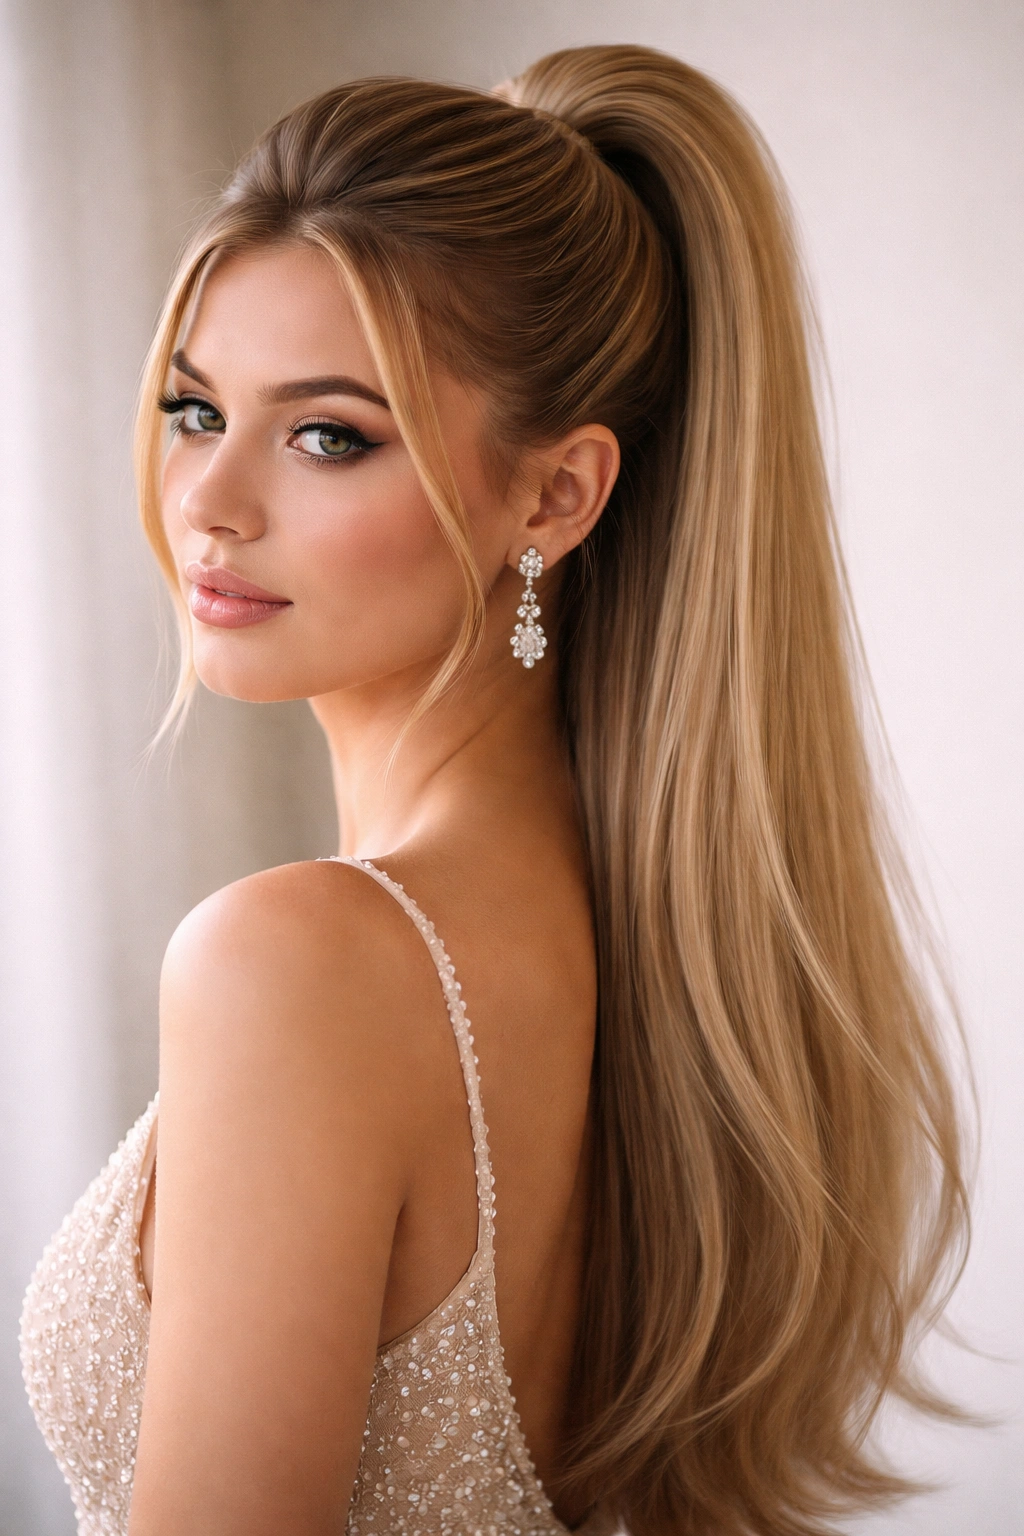
If you love the feeling of having your hair up and off your face but you’re not ready to commit to a full updo, this hybrid is perfect. The gathered section sits higher than a traditional half-up—closer to where a high ponytail would normally sit—but the bottom section still flows freely down your back. It’s more dramatic than a traditional half-up but still maintains that elegant down-hair element.
The Confidence Factor
A high half-up reads as bolder and more fashion-forward than the classic version. You’re showing more of your face, neck, and shoulder line, which photographs beautifully and works with virtually every dress neckline. The higher placement also means the gathered section creates more of a visual statement—it’s not subtle, it’s intentional.
Executing the High Placement
- Blow-dry your hair with slight volume at the roots for a lifted appearance
- The gathering point should be roughly 2-3 inches higher than a typical half-up (so higher on the crown rather than at the crown)
- Take a larger section this time—gather from temple to temple, but take it from slightly higher up
- Use a thin elastic to secure, and create a small boost by teasing gently at the base before securing
- The higher the ponytail sits, the more intentional and modern the overall style feels
- Leave the bottom section completely smooth and straight
- A light texturizing spray on the gathered section helps it hold its shape throughout the night
The proportion of gathered to down hair is roughly 40/60, which gives you enough up for visual impact without feeling like you’re wearing a full updo.
8. Asymmetrical Half-Up Side Style
For anyone who wants their half-up to lean bold and directional rather than symmetrical and traditional, this asymmetrical version gathers the hair to one side of your head rather than down the center back. This creates an entirely different visual dynamic—it’s modern, fashion-forward, and photographs beautifully from one particular angle (which matters when you’re planning those formal photos). Straight hair makes the asymmetry intentional and crisp rather than looking accidental.
The Directional Advantage
Asymmetrical styling naturally guides the viewer’s eye in a specific direction, which is a sophisticated design principle. It also means you’re creating different visual impact depending on the angle—from one side you see the gathering point and structure, from the other you see the length and flow. This actually makes the style more interesting and memorable.
Creating Purposeful Asymmetry
- Create a deep side part (whichever side feels natural for your face)
- Take the larger section and gather it to the side of your head, at about the level where your ear is
- Secure with bobby pins and a small elastic that’ll be hidden by the gathered section
- The gathered section sits on one side of the back of your head, creating a sculptural shape
- The smaller front section stays down and frames your face asymmetrically
- The bottom section flows freely, completely down your back
- The asymmetry means one side of your face is more exposed, so consider your makeup and face angle accordingly
- Sleek hairspray keeps the part clean and the gather in place
This style works exceptionally well in formal photos because the directional element creates more visual interest than symmetrical styling.
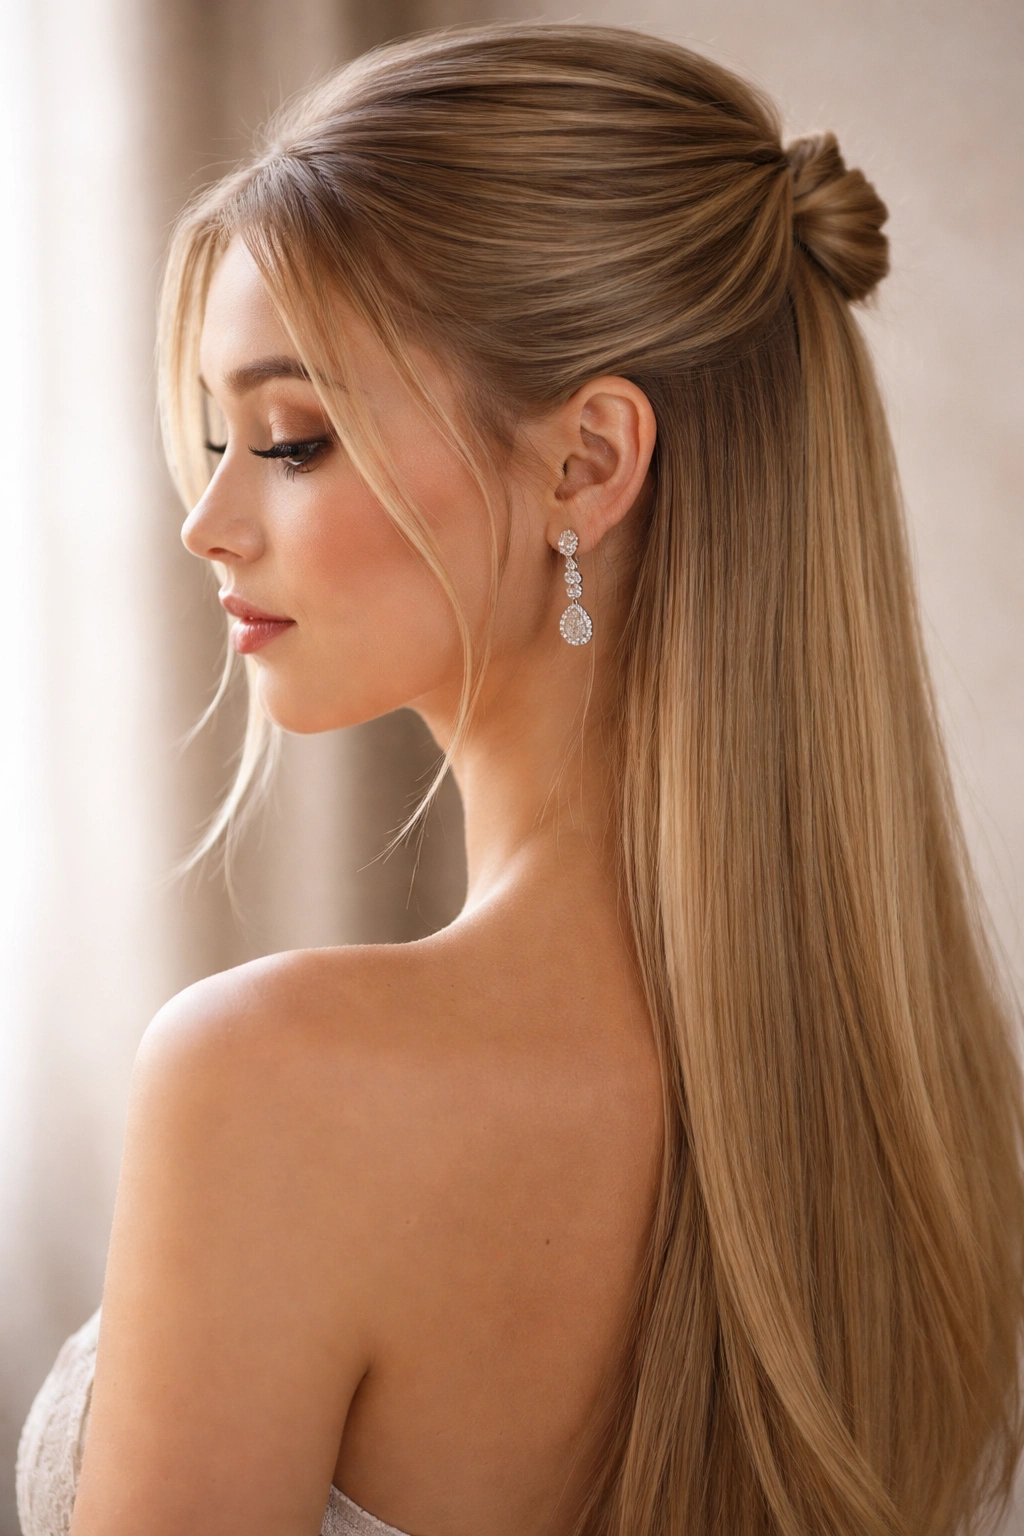
9. Double Half-Up Knots

If you want something playful, interesting, and still completely appropriate for prom, double half-up knots are your answer. Rather than gathering all the top section into one point, you’re creating two small sections—one from each side—and tying them together in the middle, leaving small loops of hair that resemble tiny buns or knots. It’s sweet without being juvenile, and it works beautifully on straight hair because the knots are defined and intentional.
The Sophisticated Playfulness
This style sits in an interesting middle ground—it’s more decorative and playful than a traditional half-up, but it’s still entirely prom-appropriate. The double knots create visual interest and movement that keeps the style from feeling boring or overdone. It’s the kind of style that makes people ask what inspired the look, which is exactly what you want.
Building Double Knots Correctly
- Start with smooth, straight hair that has light volume at the roots
- Take a 2-inch section from just behind your left ear and a matching section from just behind your right ear
- Bring both sections to the center back of your head at roughly the crown level
- Tie the two sections together in a single knot, keeping it fairly high and tight
- Leave the ends of those two sections down (they’ll blend with the rest of your hair)
- Take another small section from just behind each ear, slightly lower than the first pair
- Tie these two sections together in a second knot just below the first
- Two knots, stacked vertically, create the design element
- The rest of your hair flows freely below
- Bobby pin each knot base if needed to keep them from slipping
This style requires very light hairspray so the knots hold but don’t look rigid or shellacked.
10. Half-Up with Hairpiece Extension
If you want more volume, length, or visual drama than your natural hair alone provides, adding a hairpiece extension to your gathered half-up section is an elegant solution. A straight hairpiece (either clip-in or attached with elastic) blends seamlessly with your own straight hair and dramatically increases the visual impact of your gathered section. This is a game-changer if you have finer hair or you want a more dramatic presentation.
The Volume Amplifier
Hairpieces are actually a secret weapon in professional hair styling—they allow you to create volume and length without damaging your own hair and without spending hours on styling techniques. A quality straight hairpiece matches your hair color and texture perfectly, creating seamless blending that looks entirely natural. The gathered section suddenly appears fuller and more voluminous.
Integrating a Hairpiece Seamlessly
- Use a clip-in hairpiece that matches your exact hair color and length
- Blow-dry your hair completely straight and gather the top section at the crown
- Secure your natural hair with bobby pins in an invisible grid pattern
- Clip the hairpiece into the grid (most clip-in pieces have multiple clips that distribute the weight)
- Arrange the hairpiece so it blends completely with your natural hair
- Add a thin elastic over the entire gathered section (both your hair and the hairpiece) to blend everything
- The hairpiece expands the visual size of your gathered section substantially
- Style the bottom section of your natural hair to frame the fuller top
- The contrast between the voluminous gathered section and the straight down hair is dramatic
Make sure your hairpiece matches your hair color and texture exactly—even slight variations will be visible on straight hair where there’s no texture to disguise mismatches.
11. Half-Up with Decorative Hair Clips
Rather than scattering individual bobby pins throughout your style, use the gathered section as an anchoring point for multiple decorative clips. These can be vintage-inspired tortoiseshell clips, modern geometric shapes, colorful enamel clips, or delicate metal designs—whatever matches your dress and overall vibe. The clips are visible and intentional, turning them into primary design elements rather than hidden securing tools.
Making Clips the Star
When clips become the visible design feature rather than hidden accessories, you’re making a style statement. This works beautifully on straight hair because there’s no texture to hide or soften the lines of the clips themselves. Each clip’s shape and detail remain sharp and visible, which is exactly what you want when you’re investing in nice clips.
Strategic Clip Placement
- Gather your top section at the crown and secure loosely with bobby pins (don’t use an elastic)
- Starting at one side of the gathered section, place your first decorative clip perpendicular to the gathered section
- The clip grips both the elastic (if you’re using one) and the gathered hair, holding everything in place
- Add additional clips in a line down the back of the gathered section, spacing them roughly 1-2 inches apart
- You can create a perfectly straight line of clips, a diagonal line, or scatter them asymmetrically
- Each clip both functions as a securing tool and serves as a visual design element
- Use quality clips with strong grip strength—flimsy clips won’t hold gathered hair securely
- The gathered section appears more voluminous with the clips creating visual breaks and dimension
This approach means your accessories are doing real work while also looking intentional and styled.
12. Low Half-Up with Curved Sections
Instead of gathering a traditional horizontal section at the crown, this variation gathers a curved or diagonal section that creates a different silhouette entirely. The gathered section is lower than traditional half-ups and positioned slightly off-center, creating a curved or sculpted shape at the back of your head. On straight hair, these curves read as intentional and architectural rather than accidental or messy.
The Sculptural Approach
Thinking about your hairstyle as sculpture rather than just as something to contain your hair opens up entirely new possibilities. A curved gathering creates visual interest and sophistication that traditional symmetrical half-ups sometimes miss. It’s the kind of detail that photographs beautifully from behind and makes people realize you’ve put genuine thought into your style.
Creating the Curve
- Part your hair deeply to one side (whichever side feels natural)
- Taking the larger side, gather hair in a curved or diagonal line that goes from temple to the lower back of your head (roughly ear-level or slightly lower)
- The gathered section should curve slightly rather than sitting perfectly straight
- Secure with bobby pins and a small elastic hidden within the gathered section
- The curve creates a sculptural shape that’s visible from behind
- The front section on the larger side stays down and frames your face
- The smaller side stays down entirely
- The bottom section flows freely and completely straight
- This asymmetrical gathering creates a totally different visual than centered styles
This style works exceptionally well if you want something that feels modern and architectural without being overly trendy.
13. Half-Up with Delicate Pin Details
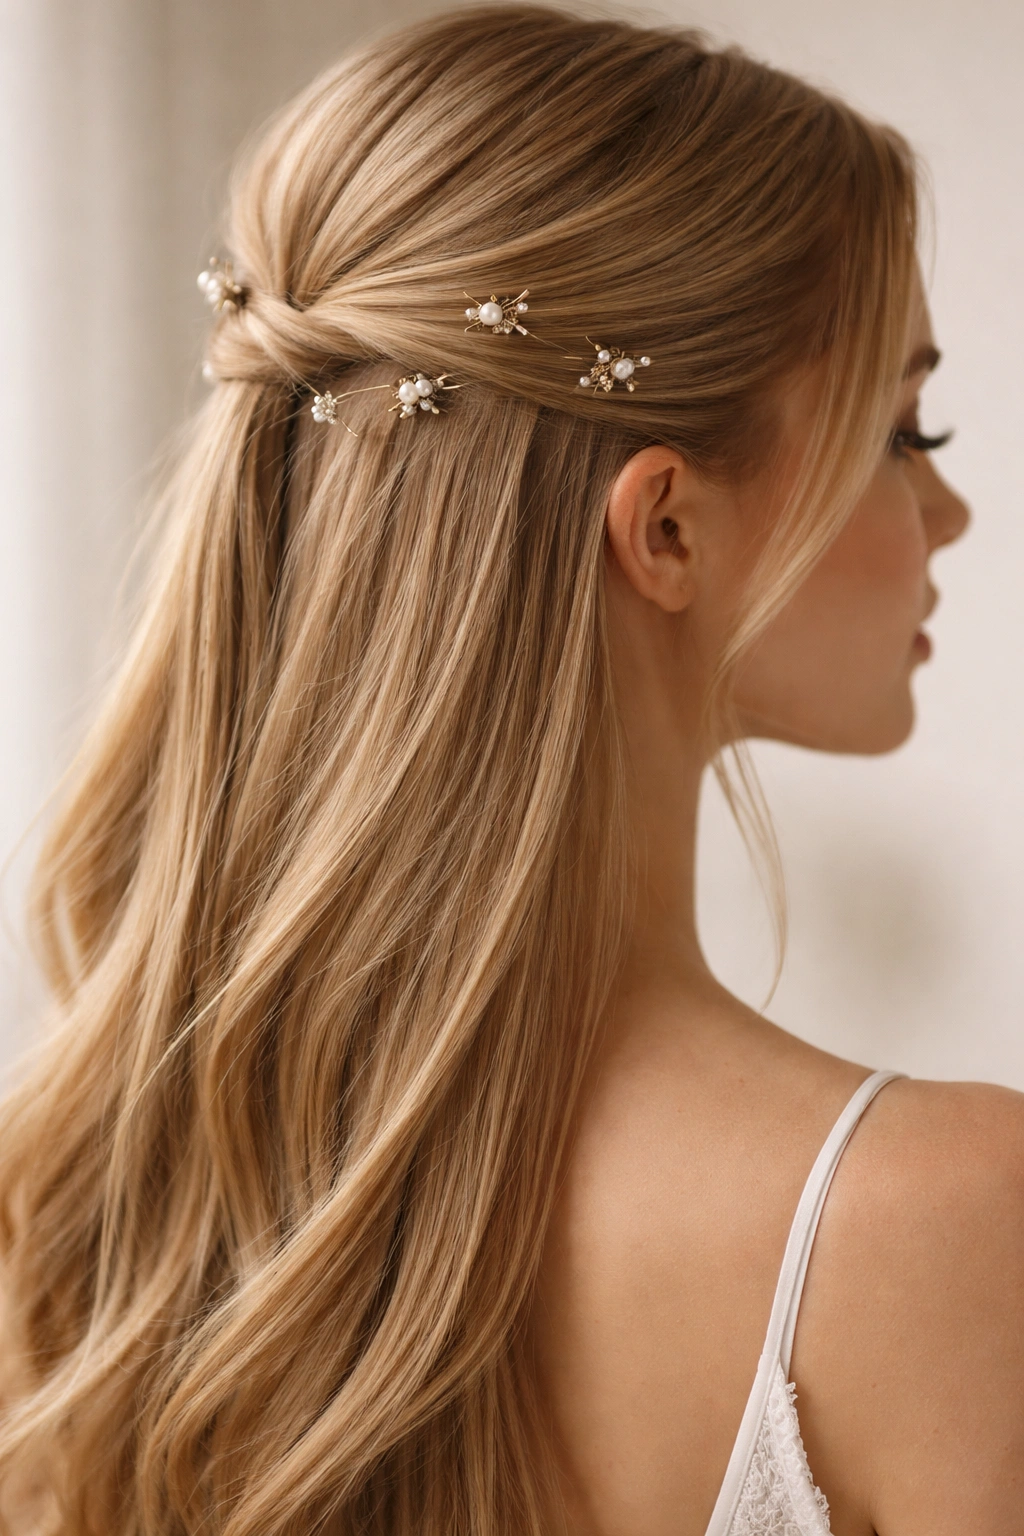
For minimalists who want visual interest without loudness, tiny delicate pins—think thin gold or silver pins, dainty pearl pins, or thin chain-style pins—scattered throughout the gathered section add sophistication without drama. This is about refinement and detail rather than making a bold statement. Straight hair showcases delicate pins beautifully because there’s no competing texture to draw the eye away from the accessories.
The Subtle Luxury Approach
Sometimes the most elegant choices are the quiet ones. Delicate pins scattered through a gathered section reads as refined and thoughtful rather than overdone. This is the hairstyle equivalent of wearing fine jewelry versus costume jewelry—it’s about quality and precision rather than volume.
Pin Placement for Elegant Impact
- Gather your top section smoothly at the crown
- Secure with an elastic that matches your hair color
- Rather than clustering pins in one spot, scatter 5-8 delicate pins throughout the gathered section
- Place them at slightly different angles rather than all aligned the same way
- The pins should be visible but not overwhelming—think jewelry rather than decoration
- You can place pins horizontally, vertically, or diagonally through the gathered section
- The effect should look intentional but not costume-y
- This works especially well with metallic or pearl pins that catch light subtly
- Pair with minimal other accessories for maximum impact
This style photographs beautifully because the details are refined enough to show up in photos without looking harsh or overdone.
14. Half-Up Bubble Ponytail Style
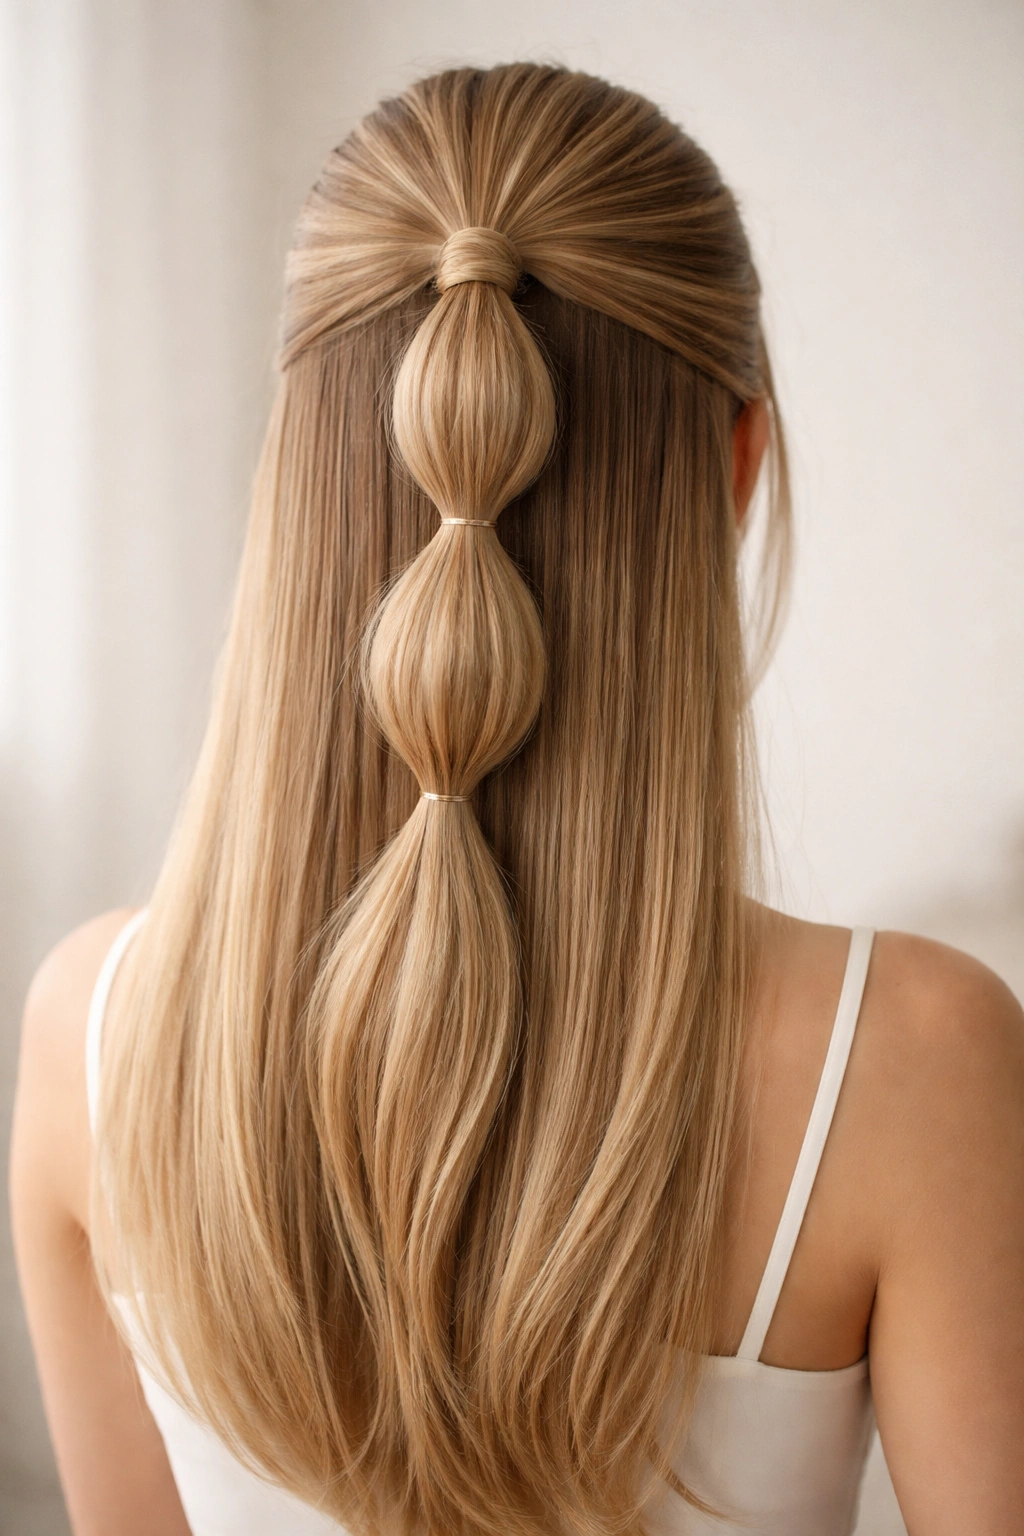
A bubble ponytail is a modern, playful style where the gathered ponytail is divided into sections and each section is expanded with bobby pins to create rounded “bubbles” down the length of the ponytail. For a half-up version, you gather the top section and create 2-3 bubbles within it, creating visual dimension and a trendy, fashion-forward look. Straight hair is ideal for bubble ponytails because the sections are crisp and clean.
The Modern Moment
Bubble ponytails have become a signature style for people who want something that feels current and intentional without being overly complicated. The bubbles create visual breaks and dimension that add interest to an otherwise simple gathered section. On straight hair, each bubble is perfectly defined and shaped.
Creating Defined Bubbles
- Gather your top section at the crown and secure tightly with an elastic
- About 1 inch below the elastic, take a thin elastic and wrap it around the gathered hair (going all the way around, not just partway)
- The hair between the first and second elastic creates your first “bubble”
- Gently tease and expand the bubble by pulling the hair outward slightly
- Repeat: place another elastic about 1 inch below, create another bubble, tease and expand
- Continue for 2-3 bubbles depending on the length of your gathered section
- Each bubble should be slightly rounder and fuller than it naturally is
- The bubbles create visual texture and dimension on straight hair
- Use elastic that matches your hair color so the securing bands blend in
- Light hairspray helps keep the bubbles defined throughout the night
This style reads as trendy and intentional, perfect if you want something that feels current but still elegant.
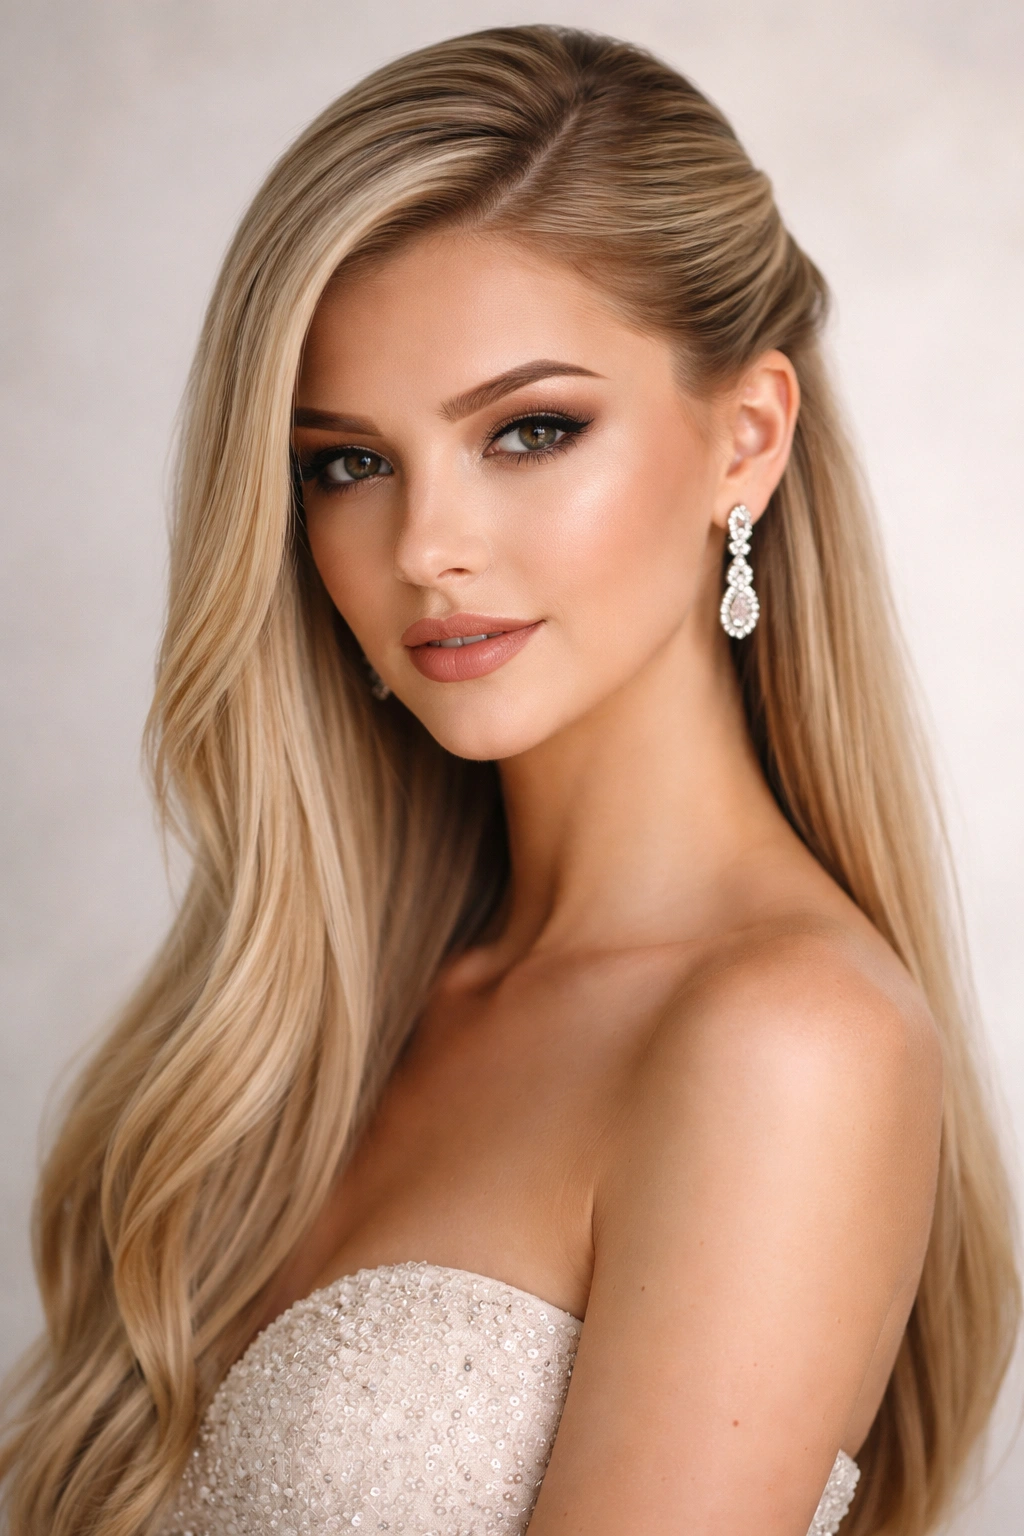
15. Half-Up with Wispy Pieces
Sometimes the most elegant approach is to gather almost all your hair but intentionally leave tiny, delicate pieces framing your face. These wispy pieces should be so fine that they’re barely there—just enough to soften the gathered section and add a touch of femininity without looking messy. On straight hair, these wisps remain perfectly smooth and defined, creating an intentionally romantic aesthetic.
The Romantic Refinement
Wispy pieces are the hairstyle equivalent of a perfectly placed highlight—they should barely be visible unless you’re looking for them, but their absence would be noticeably missed. They add a softness and femininity to a gathered style without compromising the polished appearance. This is the style for someone who wants elegance with a romantic edge.
Placing Strategic Wisps
- Gather your top section at the crown, but before securing, identify 2-3 tiny pieces from near each temple that you’ll leave out
- These pieces should be almost invisible—thin enough that they’re barely noticeable
- Secure the main gathered section with an elastic
- Leave your identified wisps down to frame your face
- These pieces should fall perfectly straight and smooth, looking like they just naturally escaped rather than being styled
- Use a smoothing serum on these pieces to keep them perfectly sleek and shiny
- Arrange them to frame the highest points of your cheekbones
- The overall effect should be polished with just a whisper of softness
- Avoid creating multiple thick pieces—this should look accidental and delicate, not intentionally layered
This style photographs beautifully in close-ups because the tiny wisps catch light and create a romantic halo effect around your face.
Final Thoughts
The beauty of half up half down styling is that it works because it’s genuinely versatile—it adapts to your dress, your personality, your comfort level, and your hair texture. Straight hair gives you an incredible advantage because every detail is crisp and visible, which means your style choices (whether you’re going classic, modern, romantic, or bold) read exactly as intended. There’s no texture to blur your carefully chosen elements or hide the accessories you’ve selected.
The styles that feel most polished are the ones where you’ve made intentional choices about every element. Whether you’re using pearl pins, statement combs, ribbons, or braids, each element should feel like part of a cohesive design rather than random additions. Your straight hair is your canvas—the smoothness and shine should support your chosen style rather than fight against it.
Remember that the best prom hairstyle is the one that makes you feel genuinely beautiful and confident. Try a few of these styles before your event—either with a professional stylist or at home with the help of friends or family. Your hair should feel secure enough that you’re not worried about it during the night, which means it’ll be able to focus on actually enjoying your prom. The time you invest in finding the right style is absolutely worth it when you’re looking back at photos and remembering how incredible you felt.