The bubble braid has quietly become one of the most elegant and Instagram-worthy hairstyles you can wear to prom, and there’s a really good reason why. It’s the perfect combination of looking intricate enough to turn heads while actually being achievable without a professional hairstylist (though one definitely helps). When you take that bubble braid concept and transform it into a half-up half-down style, you’re adding even more dimension — you get the polished, intentional look of an updo with the romance and movement of down hair. The half-up approach also frames your face beautifully, doesn’t hide your entire look from behind, and feels modern without being trendy in a way that’ll look dated in your photos.
Whether you’re going for delicate and romantic, bold and glamorous, or somewhere in between, a bubble braid half-up style offers incredible versatility. You can dress it up with accessories, keep it minimal and elegant, add texture and volume, or incorporate braids within braids for that “I woke up like this but also spent three hours getting ready” vibe. The best part? Most of these styles work with various hair lengths and types — you don’t need to have thick, long, perfectly straight hair to pull off a stunning bubble braid. With some teasing, the right products, and a bit of patience, virtually anyone can create one.
Let’s walk through twelve different ways to style a bubble braid half-up half-down look that’ll have your prom date (and everyone else) unable to stop looking at you from every angle.
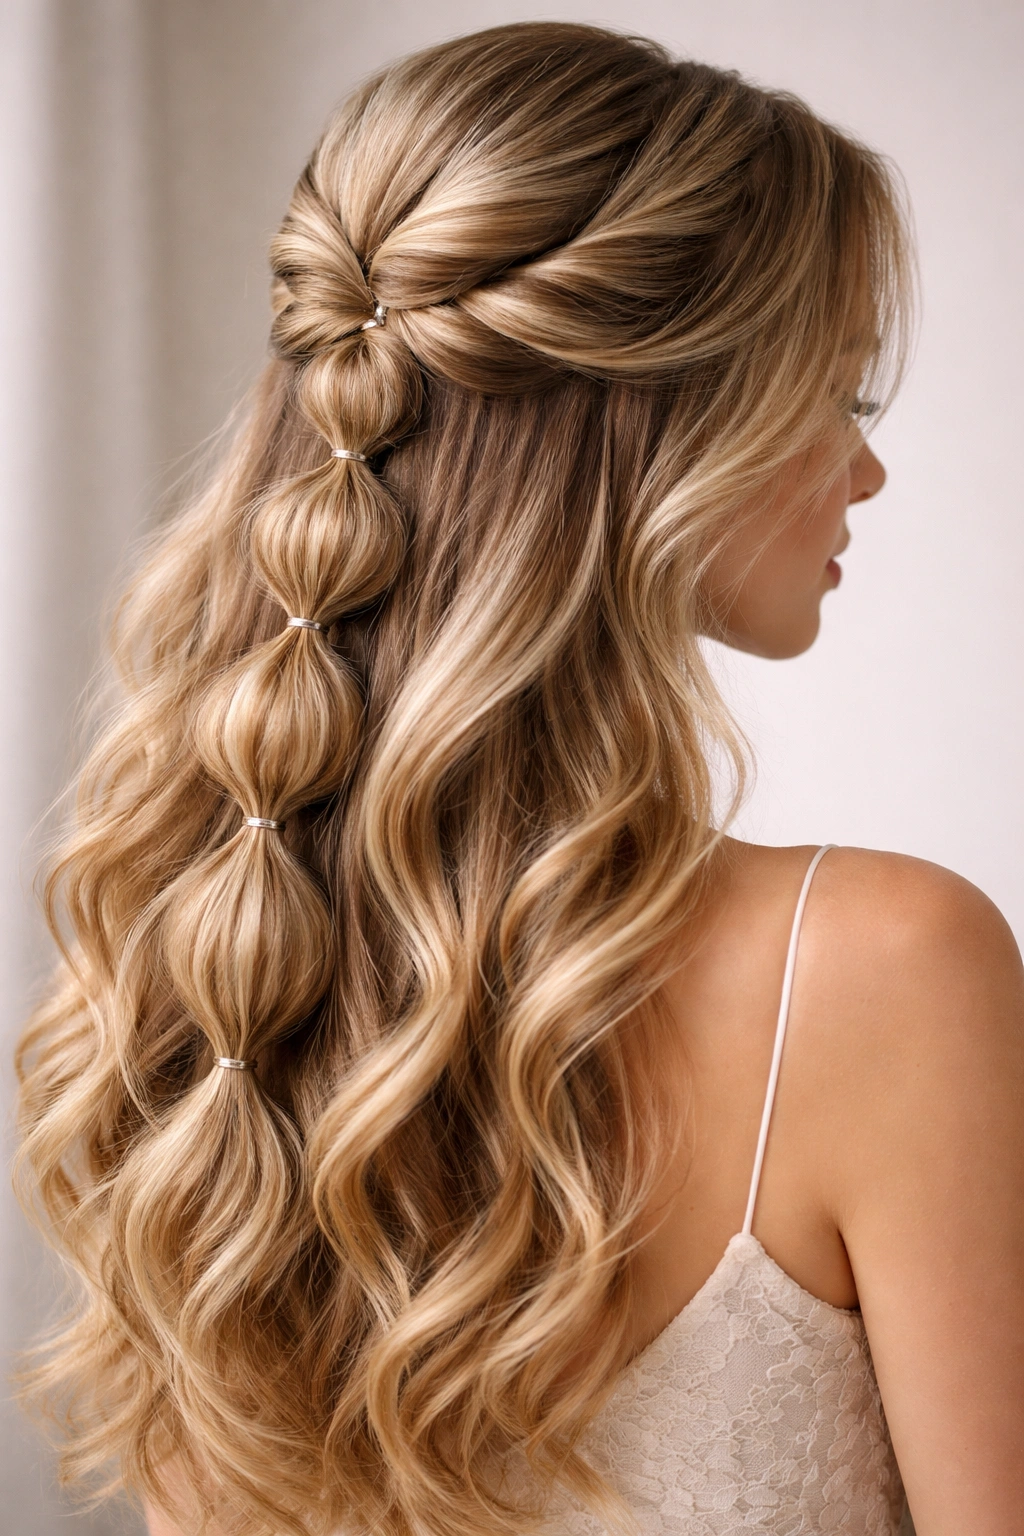
1. Classic Blonde Bubble Braid Half-Up Style
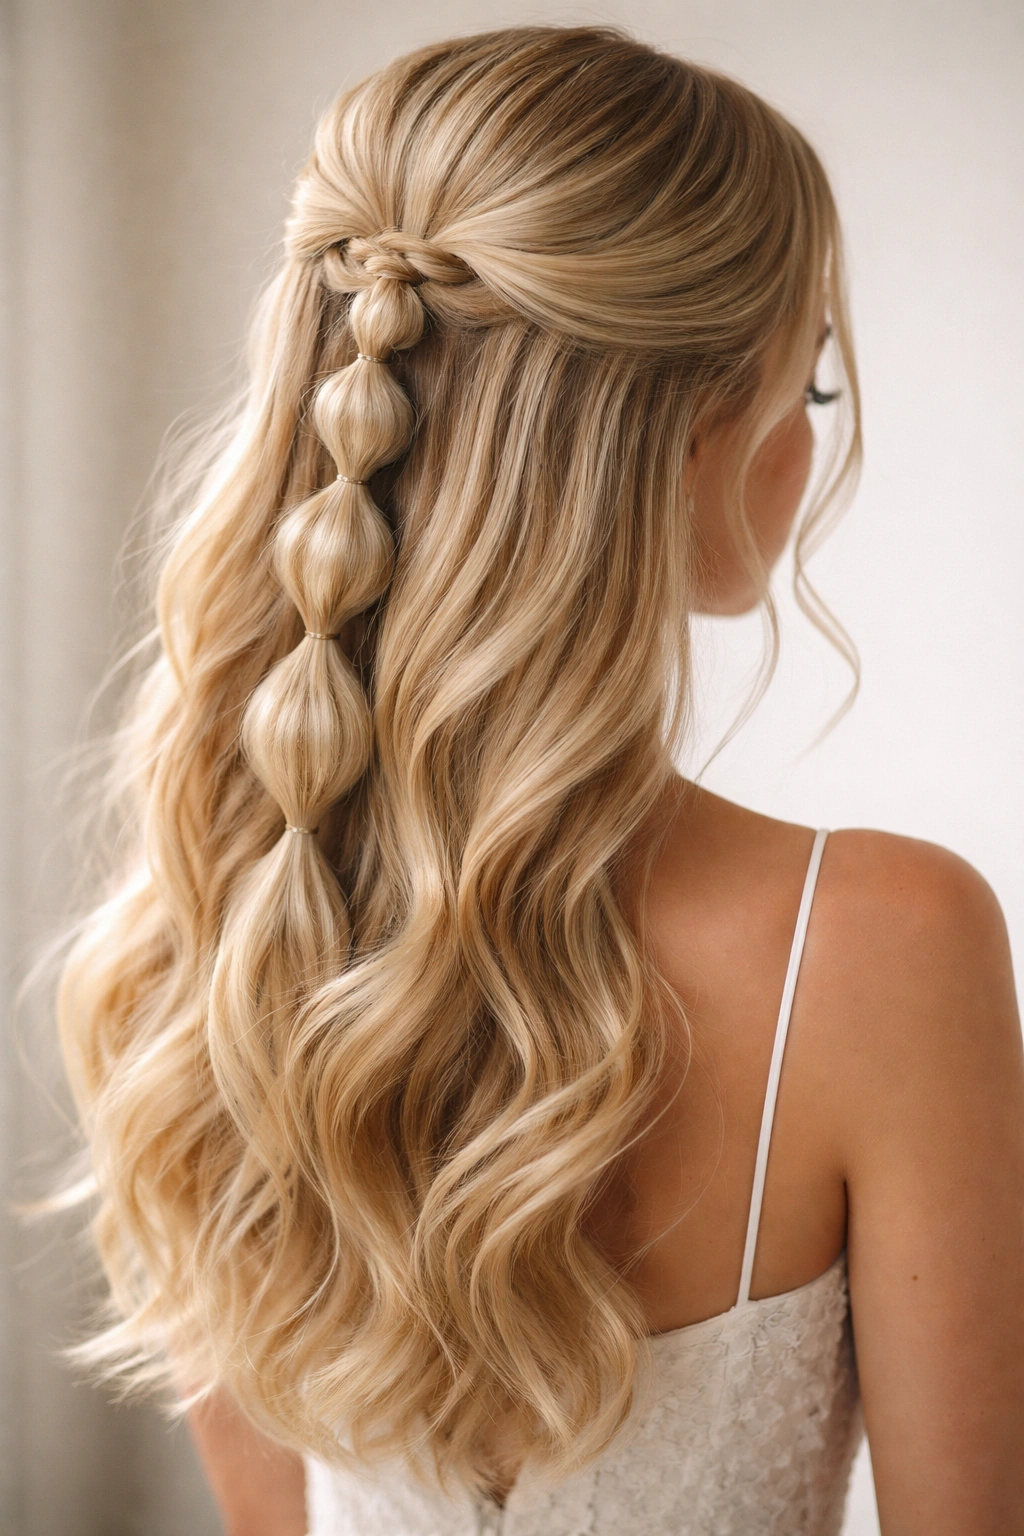
This is the foundational bubble braid half-up look — timeless, elegant, and guaranteed to photograph beautifully under any lighting. Start by taking a section of hair from one side of your head (about two inches wide) at the crown and secure it loosely with a clear elastic. This is your first bubble. Below that elastic, section off another small strand of hair and wrap it around the first elastic to hide it completely, then secure this new section with another clear elastic just below. Continue this process all the way down — each section becomes slightly looser and more voluminous than the last, creating that signature bubble effect.
Why This Look Works for Prom
The classic bubble braid reads as refined and intentional without trying too hard. It’s not aggressively trendy, which means your photos will feel timeless. The half-up format elongates your neck and keeps your face completely visible, which matters when you’re trying to look your absolute best. Clear elastics make the whole look feel even more delicate because the braids themselves become the visual focus rather than chunky bands.
How to Perfect Your Bubble Braid Technique
- Tease gently at the roots of each section before securing it to create texture and prevent slipping
- Use clear elastics in a size slightly smaller than your hair thickness — they grip better
- Pull each bubble outward and slightly upward after securing it to create maximum volume
- Don’t worry if it looks messy; some texture actually makes it more romantic
- Finish with a light hairspray that doesn’t make it crunchy — you want movement, not armor
Pro tip: Do your bubble braid the night before your prom if possible. It’ll set overnight, and the next morning you can add gentle waves or curls to your down hair for extra dimension.
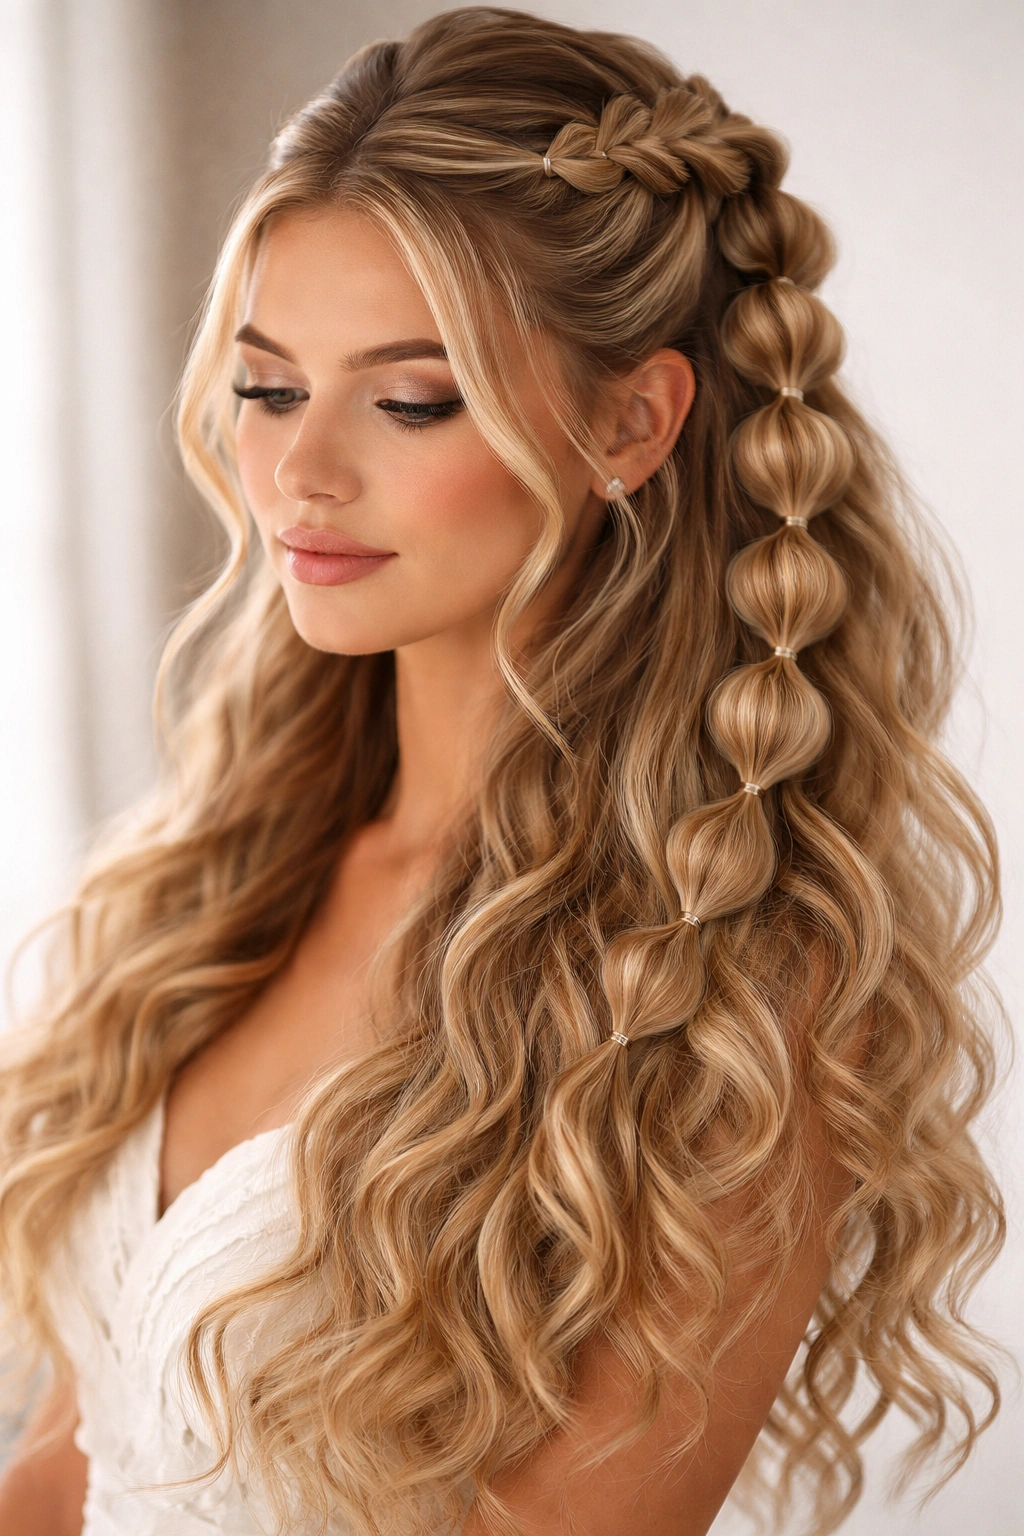
2. Boho-Inspired Bubble Braid with Flower Crown
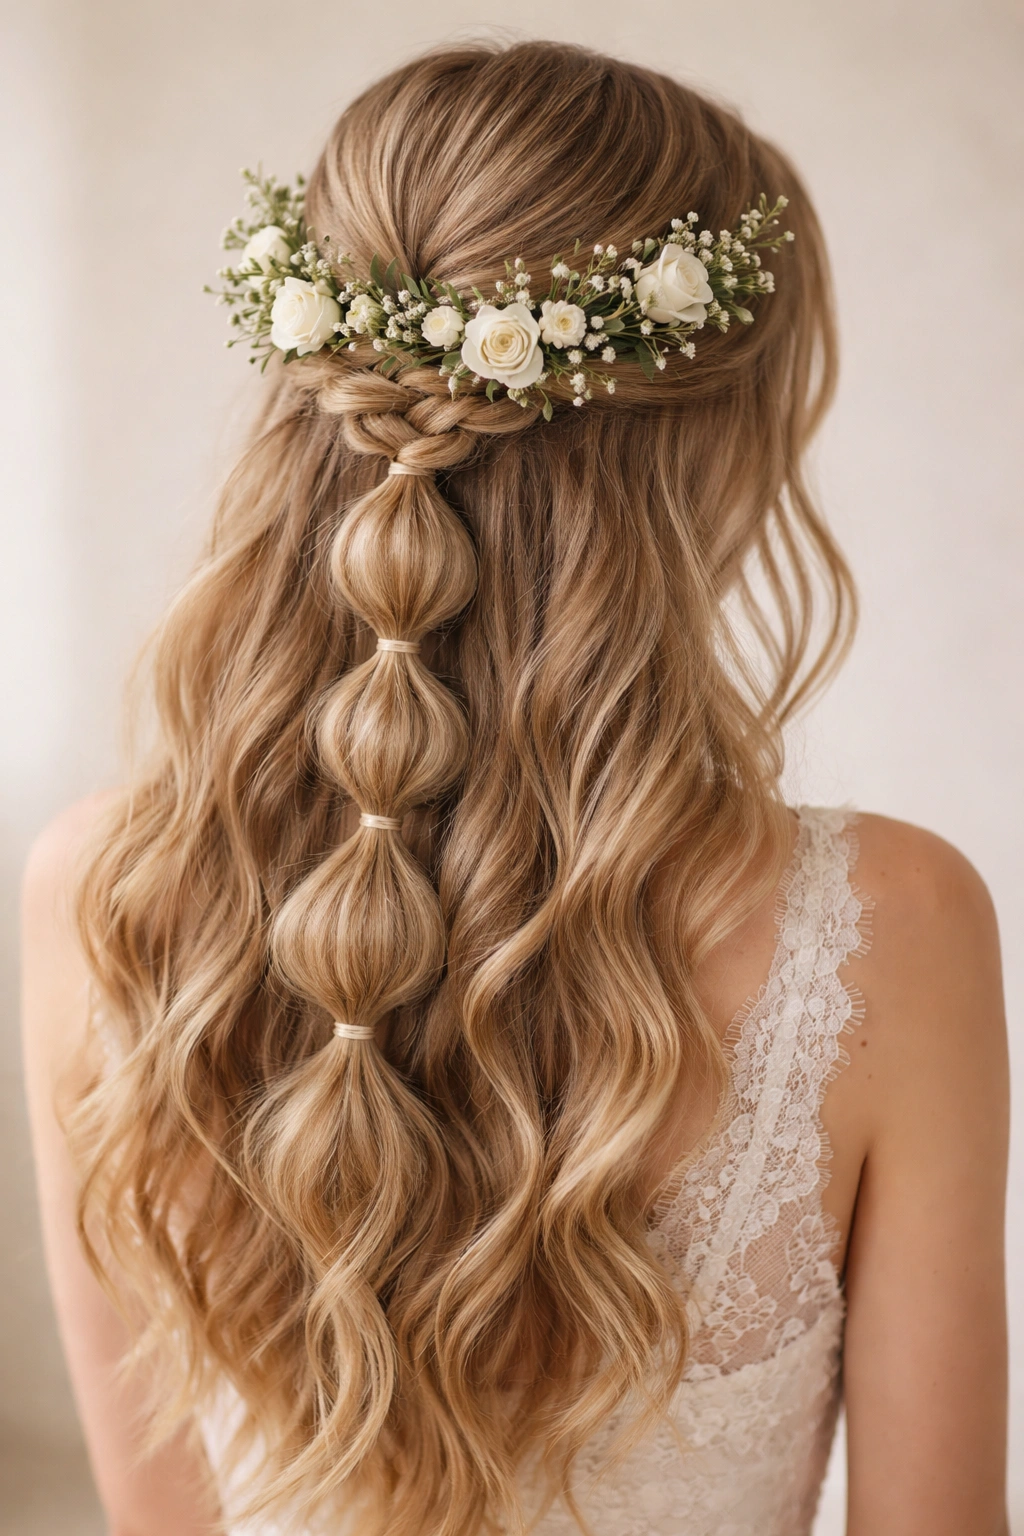
This version transforms a bubble braid half-up into something that feels completely ethereal and romantic. Create your bubble braid the same way as the classic version, but use slightly thicker sections so the bubbles are more generous and rounded. Once your bubble braid is complete and secured, weave fresh flowers or a delicate flower crown through the braided section. Real flowers work best — eucalyptus, baby’s breath, and small roses are traditional choices, but you can use whatever complements your dress and skin tone.
What Makes This Feel Boho Rather Than Costume
The key is restraint. You’re not creating a full flower crown that covers your entire head — you’re just threading blooms through the bubble sections themselves. This creates the illusion that flowers grew organically into your hair rather than you “wearing” a crown. Stick to a color palette (all white, all blush pink, or whites mixed with greenery) rather than using a rainbow assortment. The simplicity is what makes it feel sophisticated rather than costume-y.
Adding the Right Floral Elements
- Order your flowers from a florist the morning of prom so they’re fresh and pliable
- Remove excess thorns and leaves that would poke your scalp
- Wrap the stems lightly with floral tape to prevent scratches
- Tuck shorter stems into the bubbles; longer stems can trail down the back
- Mist the flowers lightly with water in a spray bottle 30 minutes before you leave
- Ask your florist about preservative spray if you’re worried about wilting
Pro tip: Bring a small backup flower or two in your clutch in case one falls out during the night. A single stem tucked back in takes five seconds and saves your entire look.
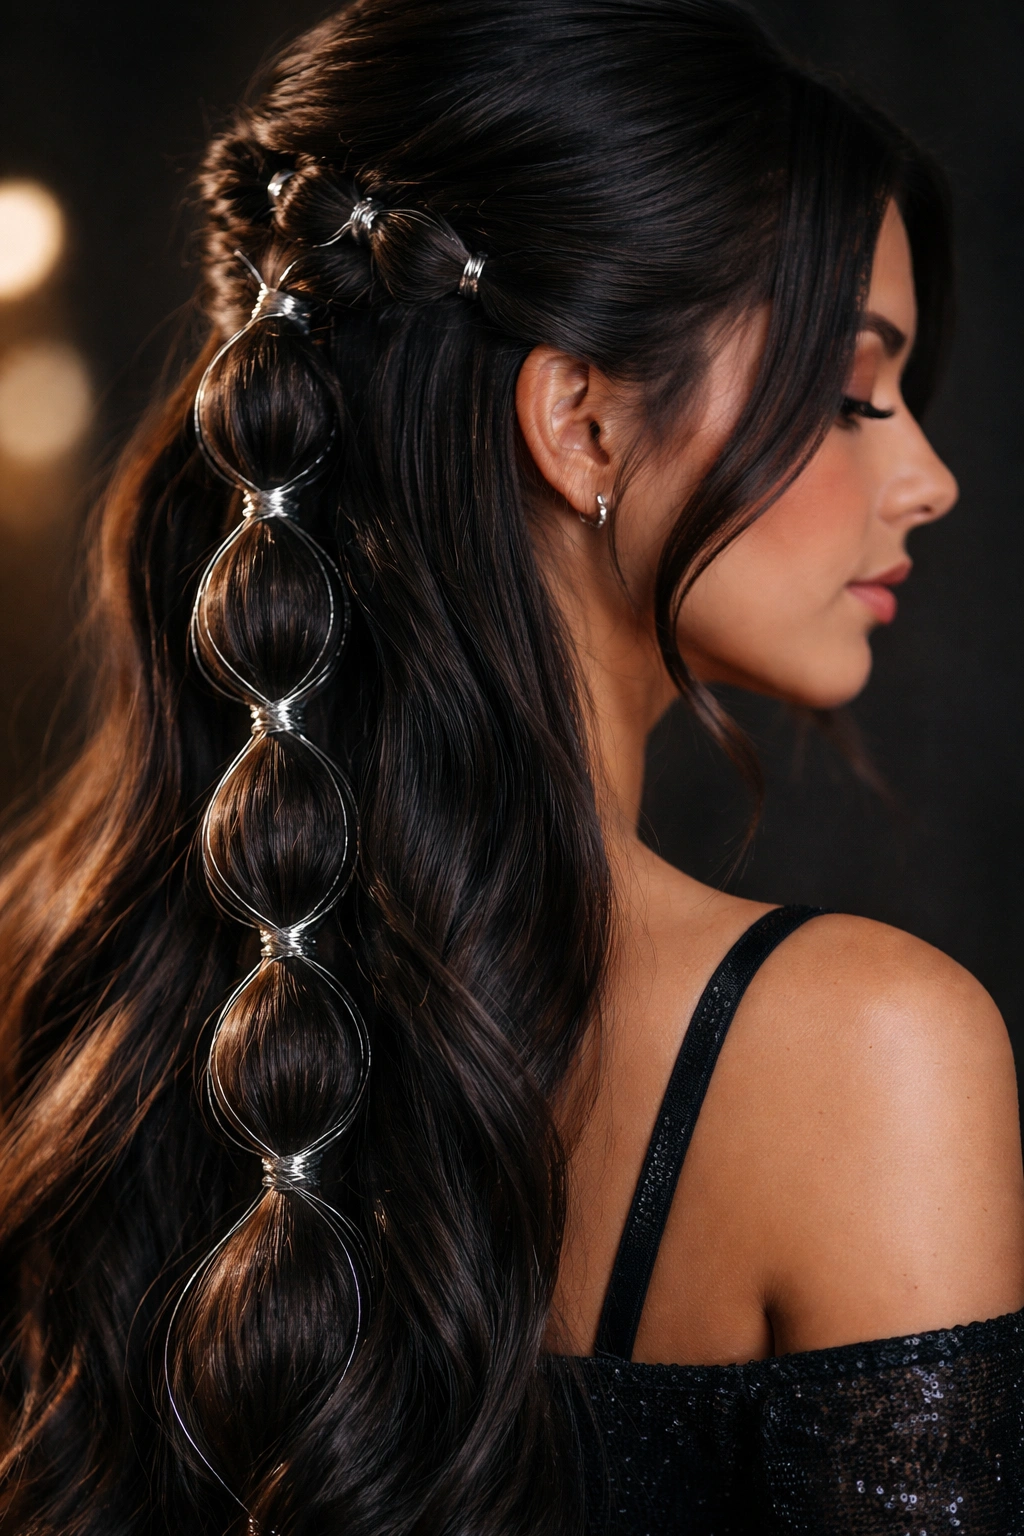
3. Sleek Black Bubble Braid with Volume
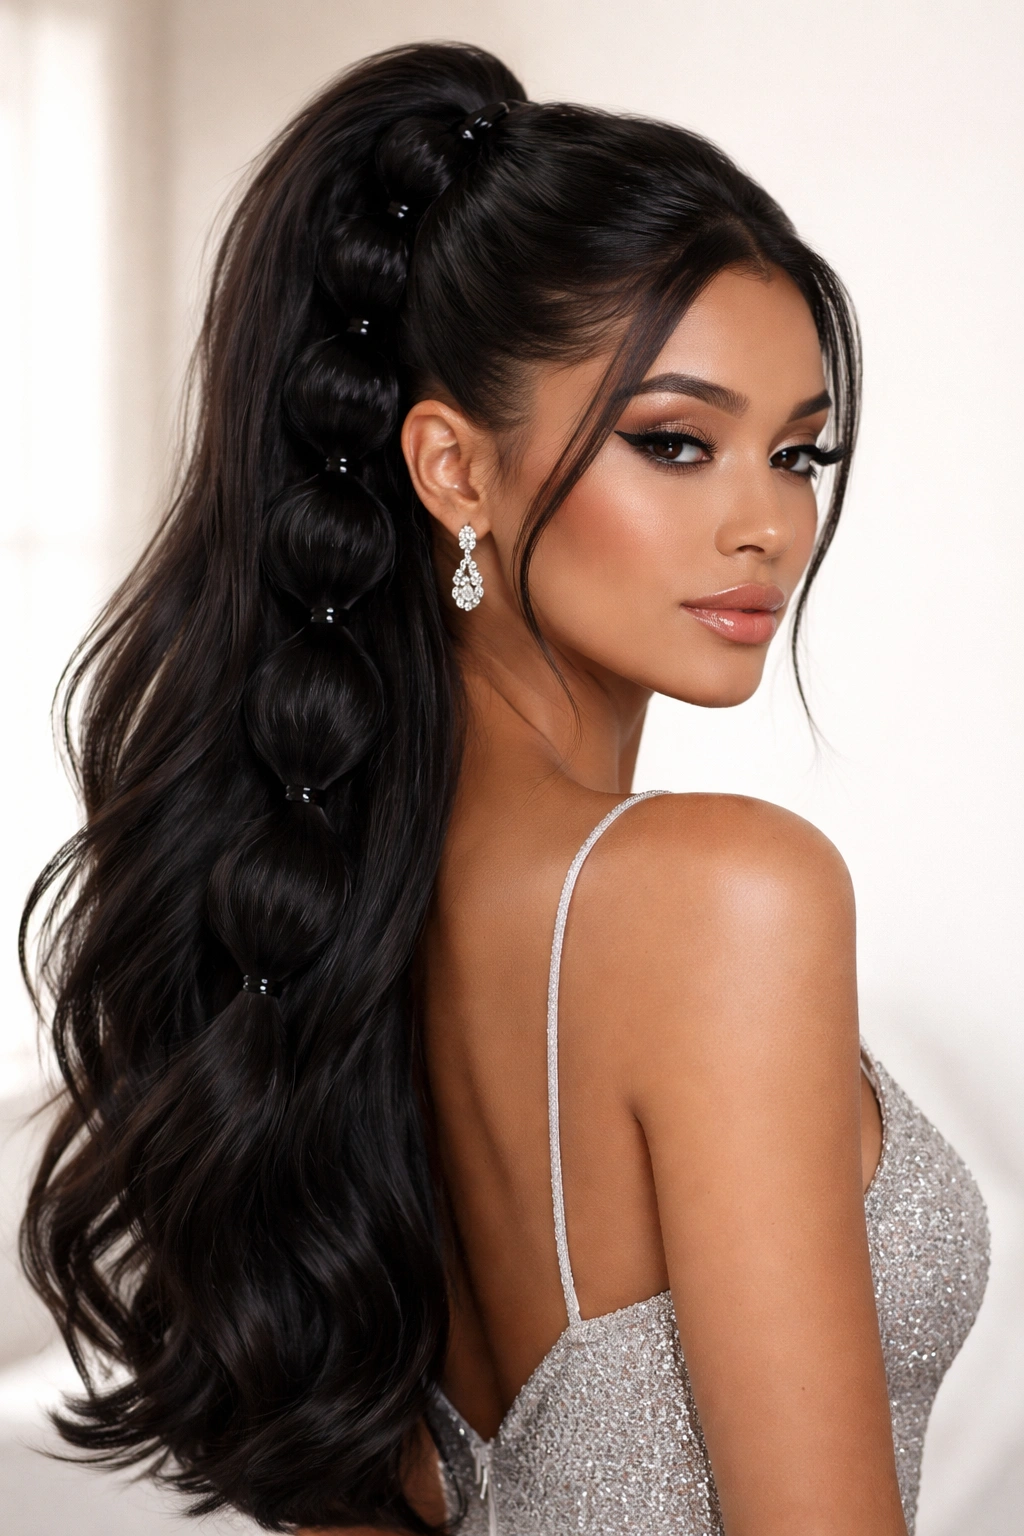
High-contrast styling works beautifully for prom, and a sleek black bubble braid against skin creates exactly that impact. The trick here is creating maximum volume in each bubble while keeping the braid sections themselves tight and controlled. Start with very smooth, polished hair — blow dry with a paddle brush to flatten it completely, and use a smoothing serum on the strands to eliminate frizz. Create your bubble braid, but this time, pull each bubble out more dramatically than you would in a classic version.
Creating That Sleek-But-Voluminous Contrast
The juxtaposition of a tightly braided, almost sculptural bubble braid against billowing waves below creates a really modern, editorial feeling. It’s high-fashion without being costume. Use a smoothing product that adds shine — not matte styling creams, but something glossy. This makes the braided section really pop against the softer texture of your down hair.
Volume and Texture Techniques for This Look
- Blow dry your down hair in sections using a round brush to create wave-pattern memory
- Use a curling iron after blow-drying to add tighter waves or curls that will last all night
- Backcomb at the roots of your down hair gently to add structure
- Use a light-hold volumizing spray rather than heavy gel
- Consider subtle highlights or lowlights that create dimension in the braided section
- Add a glossy finishing spray only to the braided portion to keep it sleek
Pro tip: Take a section of your down hair and wrap it once around the base of your bubble braid to hide the elastic completely. This creates a seamless transition from braid to loose hair.
4. Rainbow Ombre Bubble Braid Half-Up
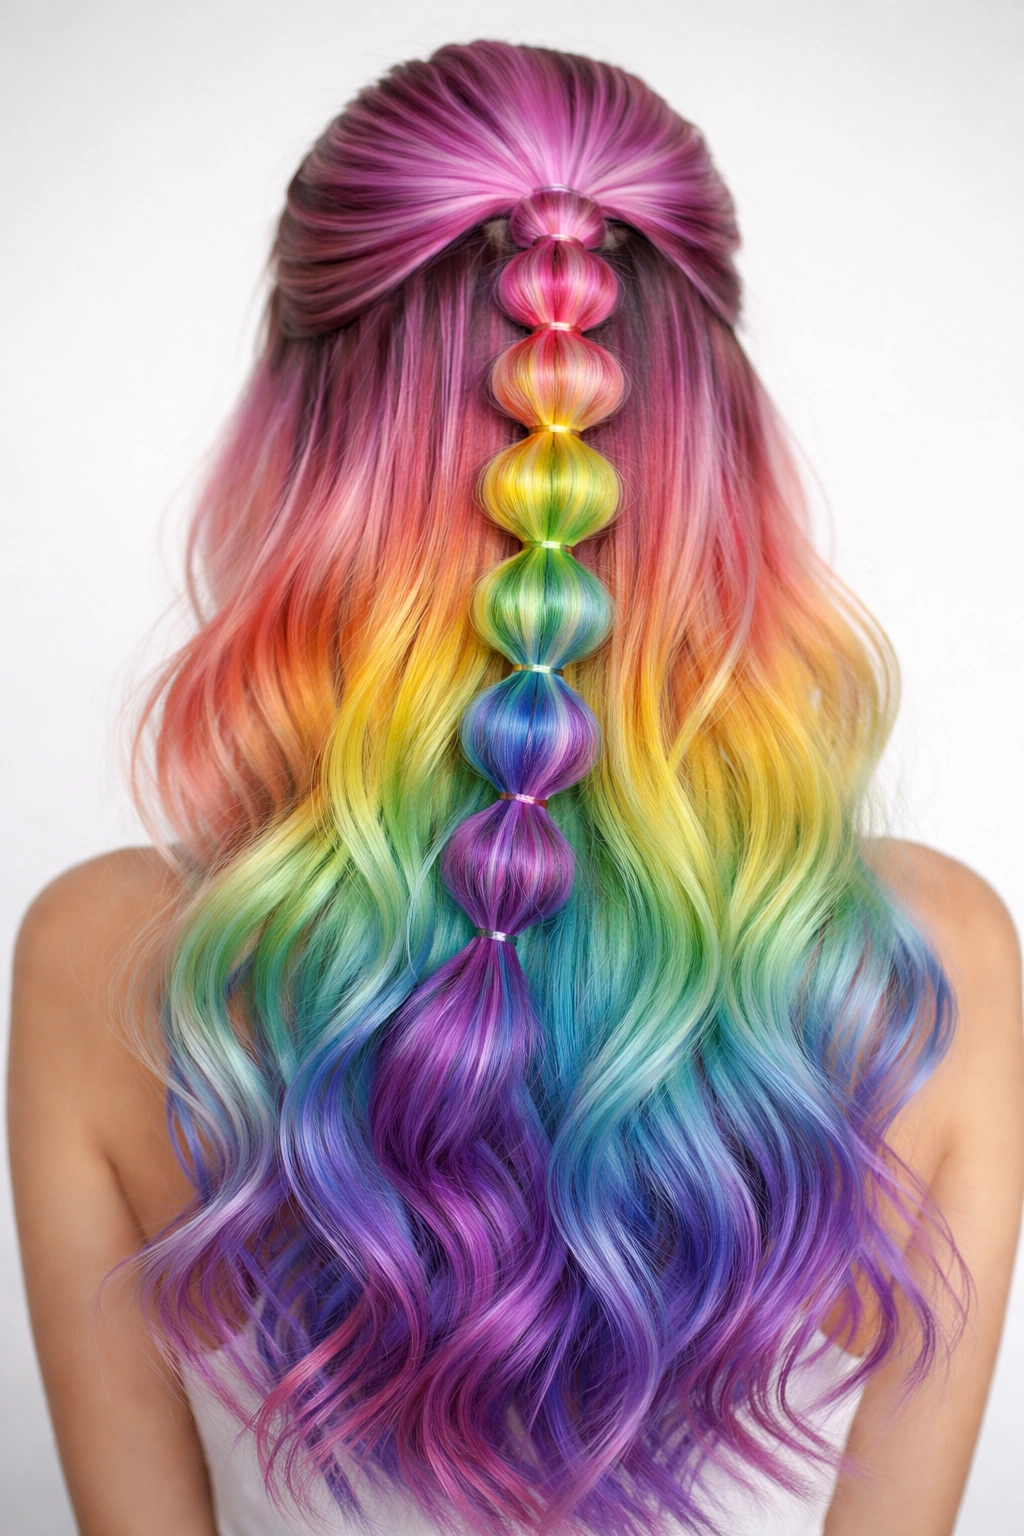
This is the statement-making version — perfect if your prom dress is a bold color or if you’re the type of person who loves when people turn around on the street to look at you. Use temporary color sprays or clip-in color extensions woven through your natural hair as you create your bubble braid. Start with a lighter shade at the crown and shift through the color spectrum as you move down the braid. The visual effect is a braided rainbow that becomes the focal point of your entire look.
How to Choose Your Color Palette
Most people assume rainbow means using every color of the spectrum, but that’s actually overdone. Instead, pick a color story: soft pastels (pale pink, pale yellow, pale blue, pale purple) all the way down, or jewel tones (emerald, sapphire, amethyst), or warm shades (coral, peach, rose gold). This feels intentional rather than chaotic. Your dress should either be neutral so the hair is the star, or it should be one of the colors you’re using in your braid to tie everything together.
Incorporating Color Without Permanent Damage
- Use temporary spray-on hair color in lightweight formulas that wash out easily
- Alternatively, purchase temporary colored hair extensions or clip-in color pieces
- Colored extensions can be woven in as you create each bubble section
- Spray color works best on pre-lightened or platinum blonde hair
- Test everything on a small, hidden section of hair 48 hours before prom
- Have the color spray nozzle set to “mist” rather than “spray” for even coverage
Pro tip: Coordinate your nail color to include one or two colors from your braid. This creates visual harmony across your whole look and photos look more intentional.
5. Twisted Bubble Braid Hybrid
This variation switches things up by creating twisted sections instead of traditional braids within your bubble. Start at the crown with two sections of hair and twist them tightly around each other, then secure with a clear elastic. Now you have your first “bubble” made of twisted hair instead of braided hair. Below that elastic, take another two sections and twist them together, then secure. The visual effect is very similar to a bubble braid but with a slightly different texture that catches light differently.
Why Twisted Bubbles Feel Different
Twisted sections have a rounder, smoother appearance than braided sections because the twists are tighter and more compact. This works particularly well if your hair is thinner or finer — the twists don’t require as much volume as braids, so they work better with less dense hair. The twisted version also works beautifully on straighter hair types, whereas braids sometimes need at least a little wave or texture to look full.
Building a Twisted Bubble Section Correctly
- Separate your hair into two equal parts at the crown
- Twist each part tightly around its own axis (like a rope)
- Cross the two twisted strands around each other twice
- Secure with a small elastic at the base
- Gently pull the entire twisted section outward to add fullness
- Add a light backcomb inside the twisted section for texture
- Each twisted bubble should be slightly bigger than the last as you go down
Pro tip: Twisted bubbles hold really well throughout the night because the tension in the twist itself prevents slipping. This is an excellent choice if you’re dancing hard or dealing with heat and humidity.
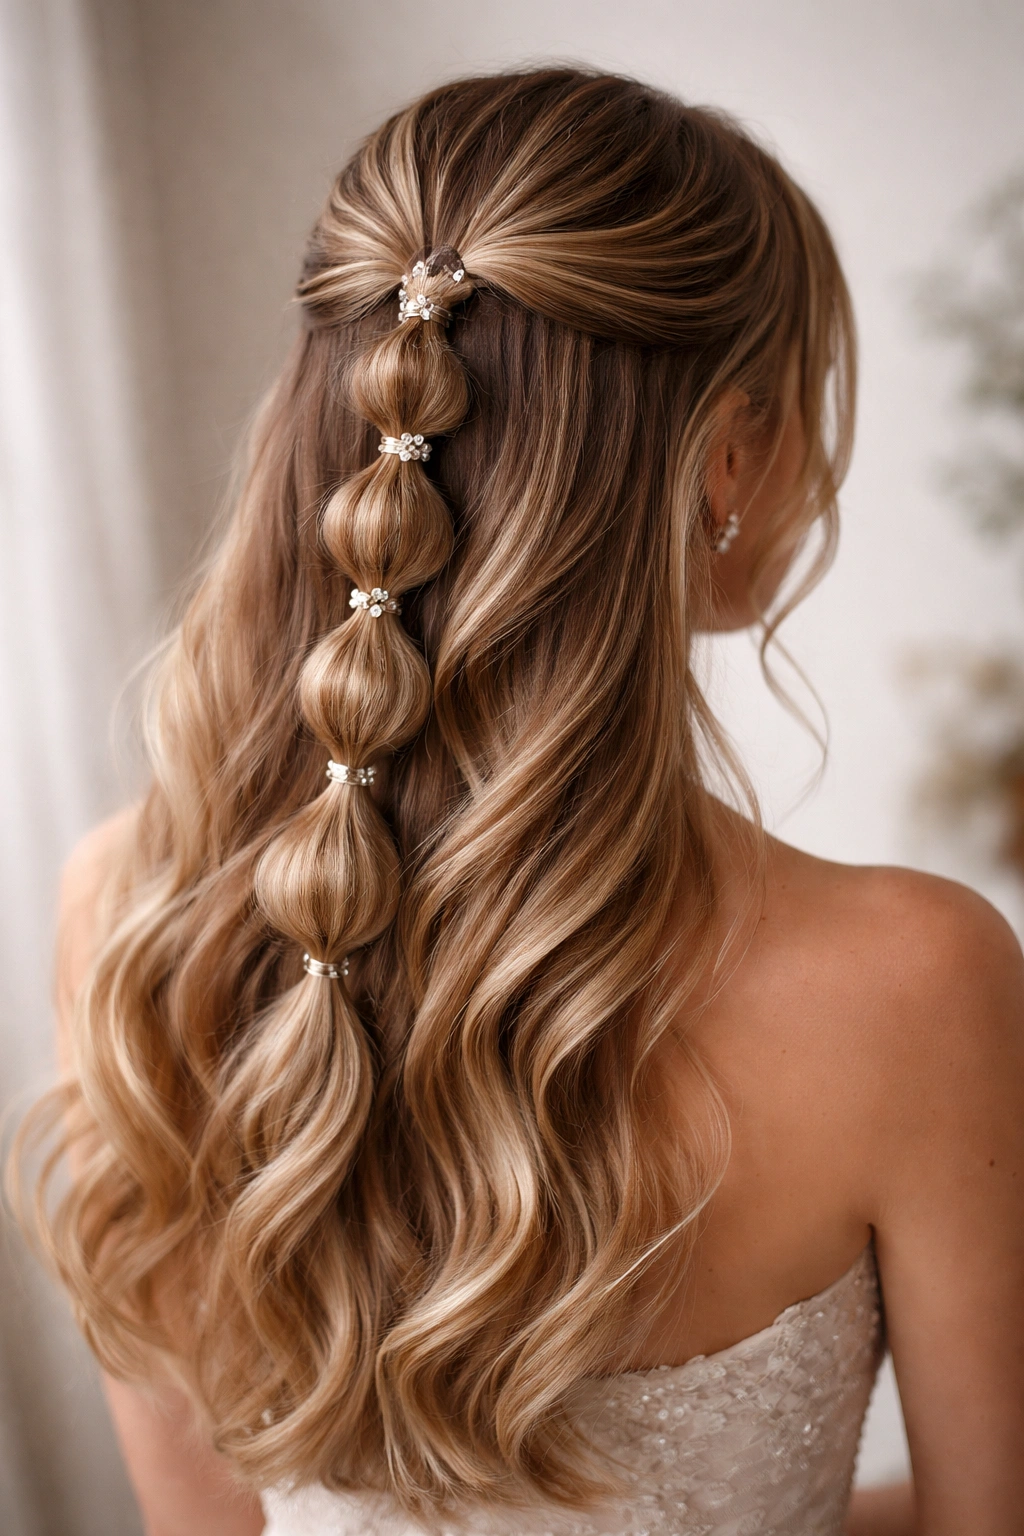
6. Low Bubble Braid Half-Up with Pearl Pins

Instead of starting your bubble braid at the crown, start it much lower — around ear level or just slightly above. This creates a low half-up half-down silhouette that feels incredibly sophisticated and modern. As you create your bubbles, secure each section not with elastics but with small pearl or crystal bobby pins. You can use pins that match your hair color to make them nearly invisible, or use metallic pins intentionally as part of the design.
Why Low and Lower-Key Feels Prom-Appropriate
High bubble braids can feel very trendy and costume-y if you’re not careful. A low bubble braid feels more grown-up and editorial. By moving the braid lower and using pins instead of visible elastics, you’re creating something that looks less “hairstyle” and more “I just have naturally perfect hair.” It’s a confidence move, not a costume move.
Securing Bubbles with Pins Instead of Elastics
- Use bobby pins in pairs or groups of three for each section to ensure they don’t slip
- Cross the pins over each other in an X pattern — this distributes the tension and prevents shifting
- For added security, hairspray the base of each bubble before pinning
- Pearl or crystal pins can actually be part of the design — don’t hide them
- This method takes longer than elastics but lasts much longer and looks more polished
- You can remove pins one at a time during the night if you want to gradually let down your hair
Pro tip: If you’re worried about pins showing, use the same color pin as your hair. If you want them to be obvious, use gold or silver pins as decorative elements — just commit to the look rather than trying to hide them halfway.
7. Voluminous Textured Bubble Braid
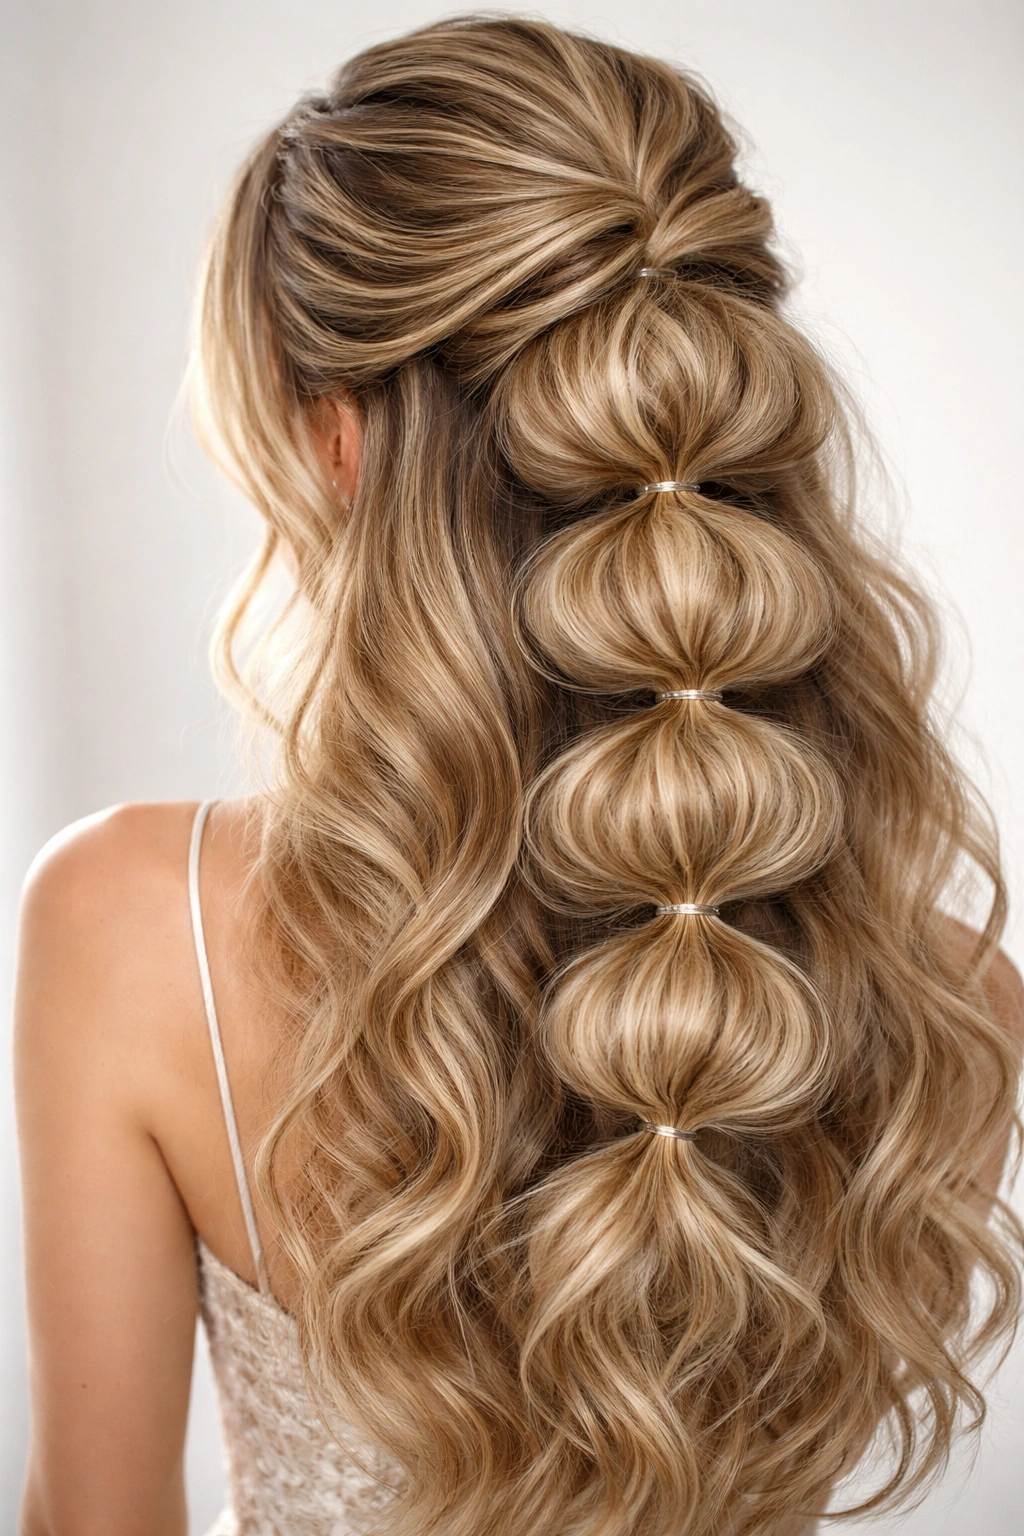
This version prioritizes maximum, unapologetic volume at every step. Start with your entire head of hair teased aggressively at the roots — not just where your braid will be, but everywhere. Create a loose, chunky bubble braid using very thick sections. Pull each bubble out so dramatically that it’s almost wider than it is tall. The goal is a bubble braid that looks absolutely stuffed with texture and movement.
Building Volume From the Foundation
Texture creates volume, and the more you tease, backcomb, and tousle your hair before creating your braid, the bigger and more impressive your bubbles will be. This look requires more product than a sleek version — texturizing sprays, light hairsprays, and volumizing powders are your best friends. The payoff is absolutely worth it for that “red-carpet” level of hair volume.
Creating Dramatic, Picture-Perfect Bubbles
- Use dry shampoo or volumizing powder at the roots before blow-drying
- Blow dry your hair upside-down to maximize root lift
- Backcomb aggressively but carefully to create texture without breakage
- Create your braids using very thick sections of already-teased hair
- Pull each bubble outward, upward, and even slightly backward
- Use a light texturizing spray between bubbles to set the shape
- Consider adding clip-in extensions to increase volume further
- The bubbles should look almost architectural — intentionally big, not accidentally messy
Pro tip: Volumizing textured bubble braids photograph incredibly well because they create depth and dimension that flat hair simply can’t achieve. If you’re taking professional photos before prom, this is the route to go.
8. Metallic Hair Wrap Bubble Braid
Take your bubble braid and wrap thin metallic thread, wire, or ribbon around each bubble section for a look that’s both elegant and eye-catching. Gold, silver, or rose gold metallic wraps woven through a dark-haired bubble braid create an effect that’s almost jewelry-like. The wrap sits on top of the bubble, so it catches light and creates shimmer throughout the entire arrangement.
Choosing Your Metallic and Hair Color Combination
Gold metallic wraps on dark hair or against cool-toned skin create warmth. Silver wraps on blonde hair create coolness and make the hair look shinier. Rose gold is universally flattering and works with virtually any hair color or skin tone. The key is choosing one metallic tone and sticking with it — mixing gold and silver can look chaotic rather than intentional.
Securing Metallic Wraps Properly
- Use thin metallic ribbon, thread, or specialty hair wrap material from beauty suppliers
- Wrap it around each bubble two to three times, starting from the left and spiraling as you go
- Secure the end of the wrap by tucking it under the elastic of the next bubble
- The wrap should be snug but not so tight that it cuts off circulation or damages hair
- Real gold or silver wire can scratch and damage hair — opt for synthetic metallic materials
- You can also use super-thin metallic thread woven directly into the bubble itself
- This works beautifully with both sleek and textured bubble braids
Pro tip: Metallic wraps photograph beautifully under camera flash, which means your professional prom photos will have extra sparkle and dimension. This is an excellent detail that translates incredibly well to photos.
9. Double Bubble Braid Half-Up Style
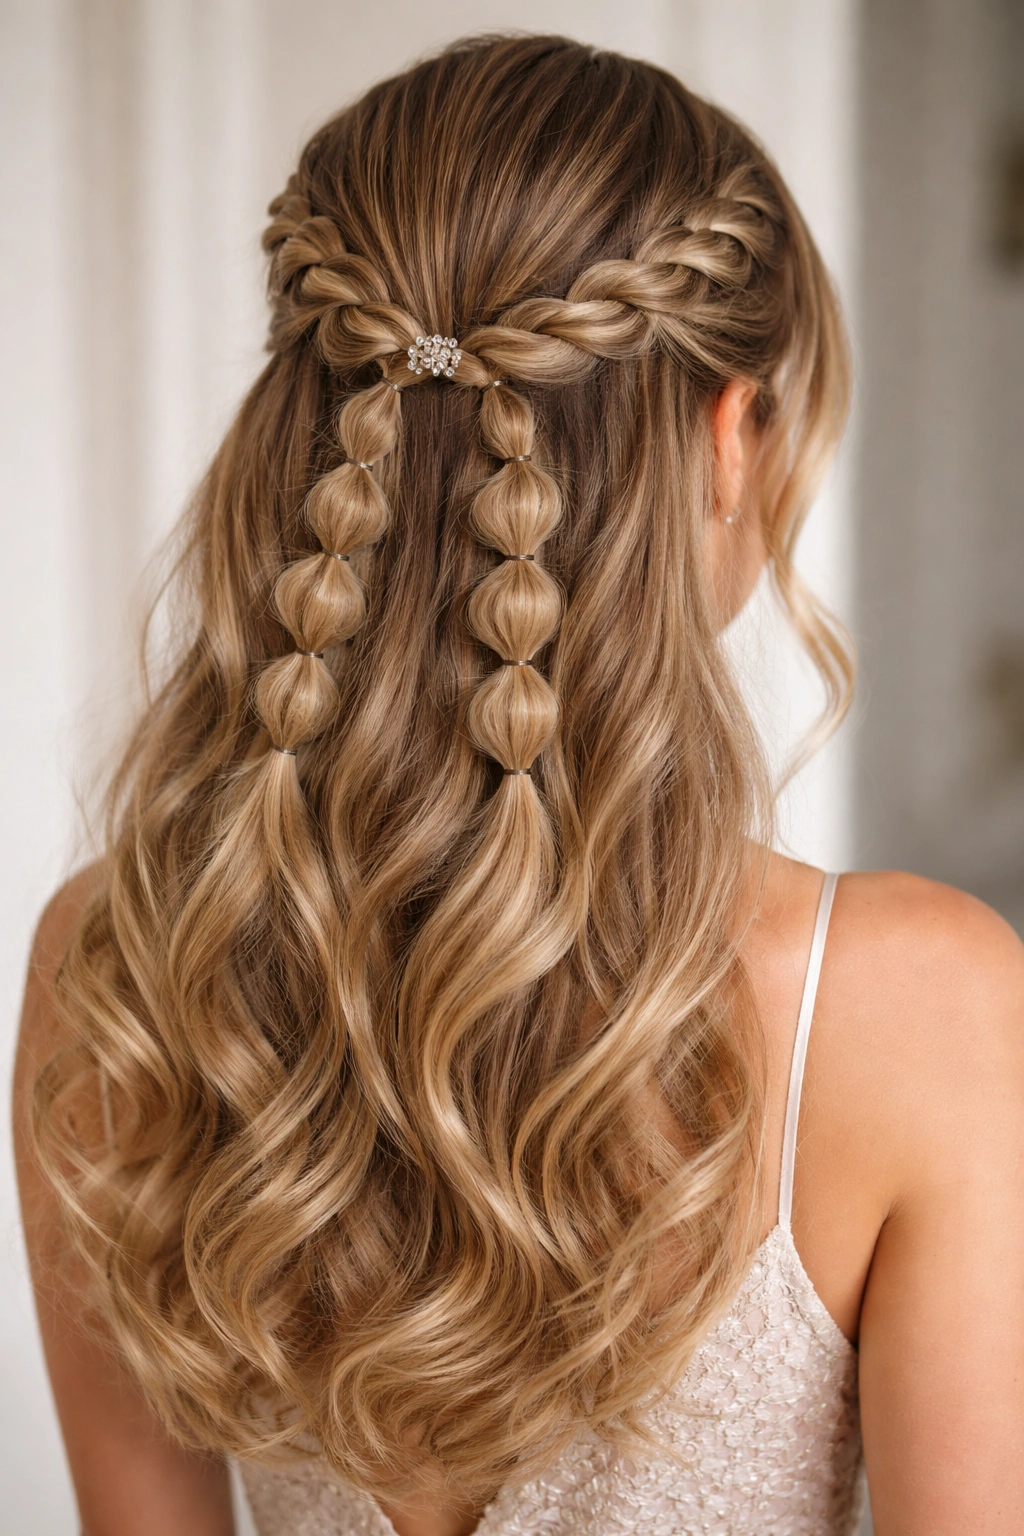
Instead of creating one bubble braid down the center, create two smaller bubble braids symmetrically, one starting at each side of your head and meeting in the center back. This creates a balanced, almost crown-like effect that’s incredibly flattering and feels more refined than a single center braid. The two braids can twist around each other at the back, or they can sit parallel and be secured together with a decorative clip.
Why Double Braids Feel More Elegant
A single centered braid can sometimes feel severe or one-dimensional. Two balanced braids create symmetry and feel more rounded and feminine. This style also works better on rounder face shapes because the side placements create visual lengthening. The double approach gives you more hair in your overall braid, so even people with thinner hair can create a fuller look by using more of their head.
Creating Symmetrical Double Braids
- Mark the center of your head with a clip so your starting points are equal
- Create your first bubble braid starting from just above your ear on the right
- Create an identical bubble braid starting from the same point on the left
- Both braids should move toward the back center
- At the back, you can cross them, intertwine them, or lay them parallel
- Secure both braids together with a decorative clip, comb, or covered elastic
- You can leave a gap between them at the back or close them tightly together
- The down-hair section is now framed beautifully by the two braids
Pro tip: Double bubble braids work exceptionally well if you’re wearing your hair down and wavy. The braids frame your face and waves, creating a really polished but soft overall look.
10. Glitter and Bubble Braid Combination
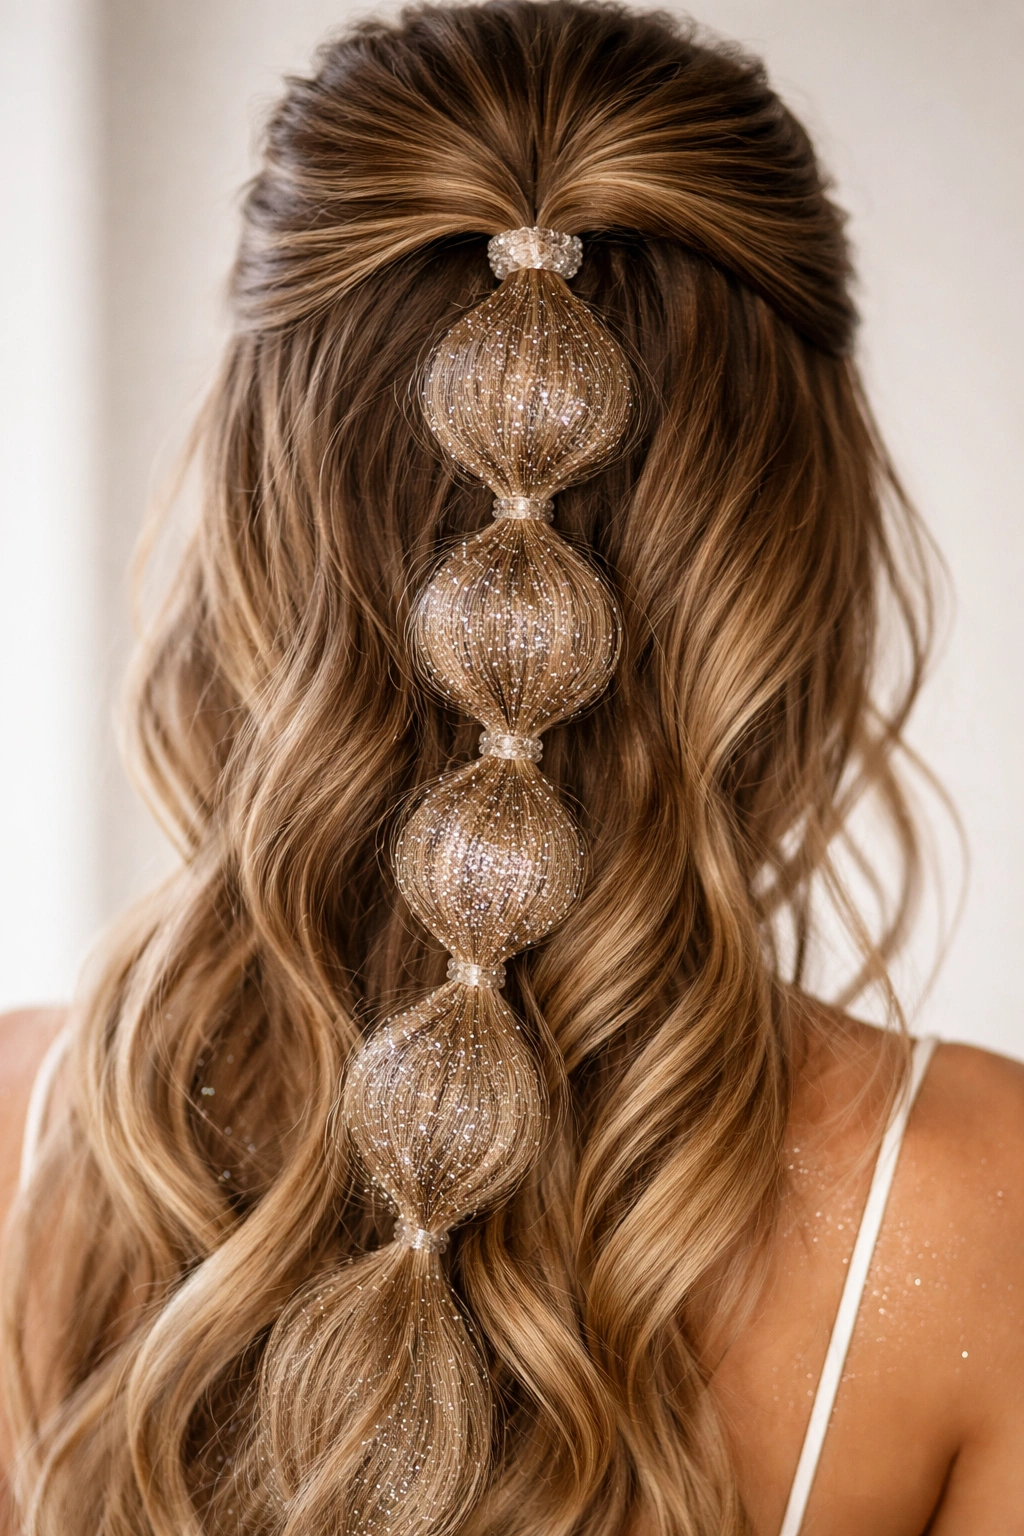
Create your bubble braid as a foundation, then add temporary glitter directly to the braided sections using either spray-on glitter products or by carefully applying glitter gel to the braids after they’re complete. The glitter sits on top of and within the braid, catching light with every movement. This is perfect if your prom dress has sparkle, or if you simply love the idea of sparkling hair.
Choosing Glitter That Doesn’t Damage Hair
Fine cosmetic-grade glitter designed specifically for hair is essential — never use craft glitter, which can get tangled and cause breakage. Glitter spray products are safest because they’re designed to adhere without damaging hair. Alternatively, use glitter gels or temporary glitter tattoo adhesive (which is actually safer than you’d think) to attach individual glitter pieces to your braid.
Applying Glitter Without Overdoing It
- Start with just a light glitter spray and add more if you want
- Apply spray glitter from about 6 inches away in short bursts
- The goal is scattered sparkle, not a solid coat of glitter
- Glitter works best on textured bubble braids rather than sleek ones — it has more to grab onto
- You can also apply glitter gel to individual bubbles for a more controlled look
- Clear or iridescent glitter works on any hair color; colored glitter should complement your hair
- Set everything with a light hairspray so glitter doesn’t shed everywhere
Pro tip: Ask your venue if there are any restrictions on glitter before the big night. Some venues care about glitter cleanup; knowing in advance means you can make adjustments if needed.
11. Bubble Braid with Curl Extensions
If you want maximum thickness and length in your bubble braid without damaging your natural hair with a ton of teasing, clip-in curly extensions are a game-changer. Clip them into the sections you’re about to braid, then braid over them so the extensions become part of your braid. The curly texture of the extensions creates instant volume and texture that reads as incredibly full and luxe.
Selecting the Right Extensions for Your Hair
Match the extension color as closely as possible to your natural hair color, or go one shade lighter since extensions sometimes look slightly different in certain light. Curly extensions work better than straight ones for bubble braids because the curl texture adds volume without needing tons of teasing. The extensions should be a similar hair texture to yours (if you have naturally wavy hair, look for wavy extensions rather than ringlet curls).
Integrating Extensions Into Your Bubble Braid
- Clip extensions into the section you’re about to braid before you section it
- Braid over the extensions so they become interwoven with your natural hair
- The extensions add thickness that makes each bubble look fuller
- You’ll use less teasing and backcombing because the extensions add volume naturally
- This method is much gentler on your natural hair than extreme teasing
- Extensions can be removed after prom and reused multiple times
- Make sure clips are fully secured before you start braiding
Pro tip: Test your extensions and see how they clip and feel in your hair at least a week before prom. You don’t want to discover on prom day that they slip or feel uncomfortable.
12. Romantic Bubble Braid with Tulle and Beads
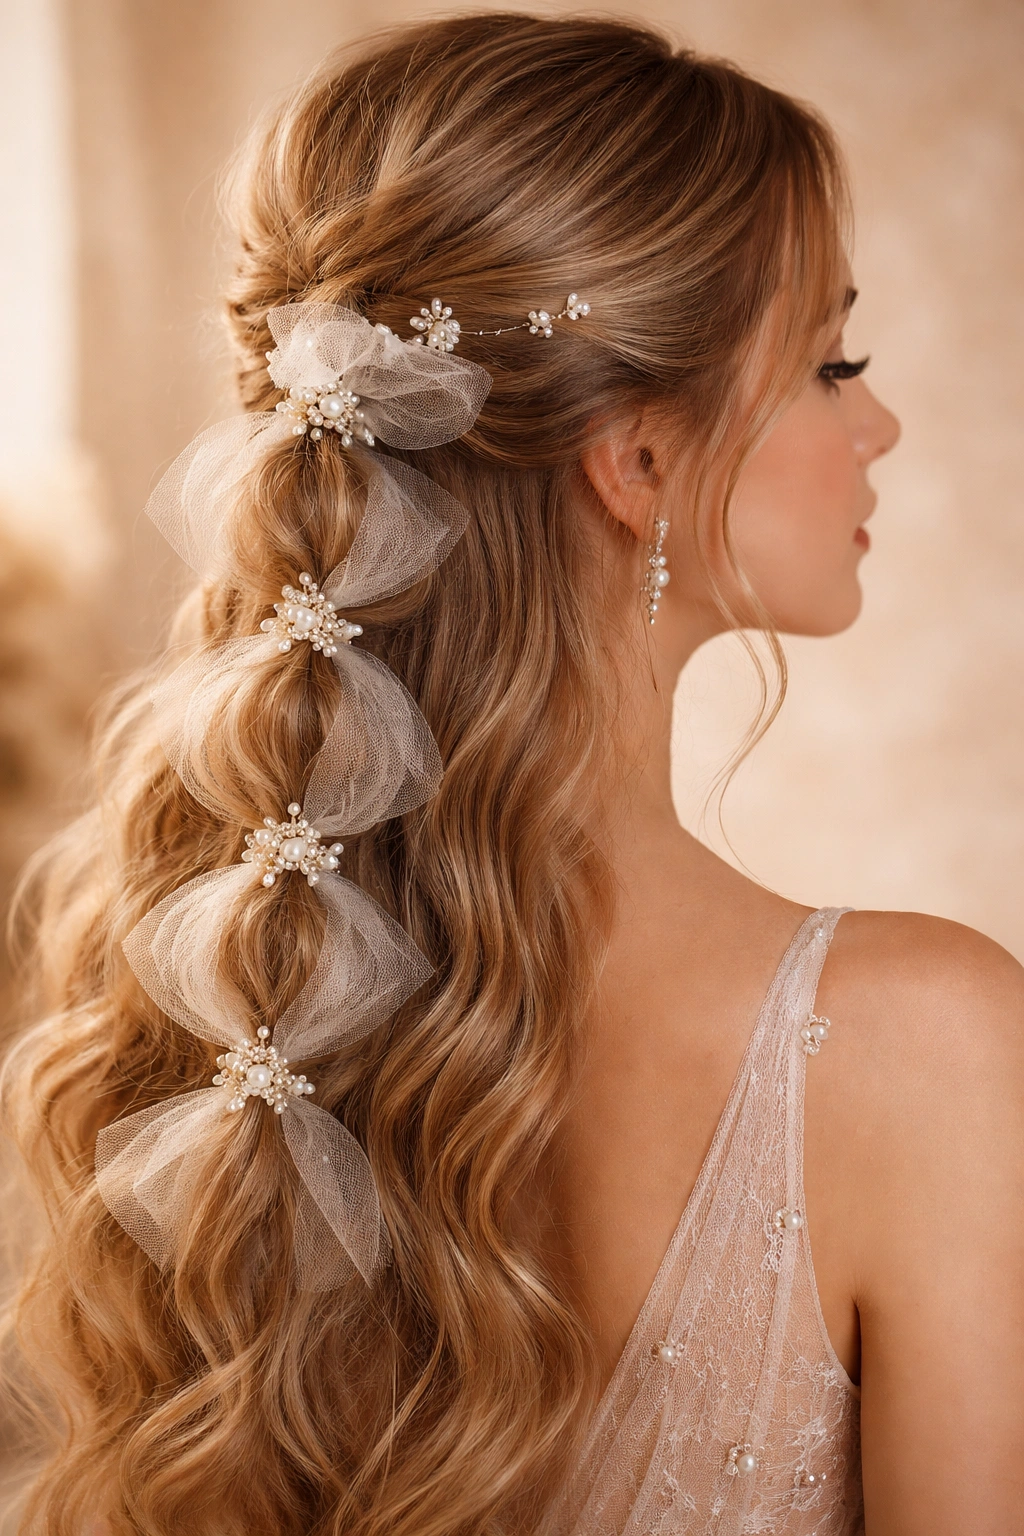
This version treats your bubble braid as a base for even more embellishment. Create your bubble braid, then thread delicate tulle, pearl beads, or small rhinestone strands through and around the bubbles. You can also use thin tulle to create small puffs that sit within each bubble section. The overall effect is incredibly romantic and detailed — perfect for a formal, elegant prom or if your dress has lots of embellishment.
Building a Detailed, Embellished Look
This is the most labor-intensive bubble braid option, so plan extra time to create it. The payoff is absolutely worth it if you love intricate, detailed looks. Every angle of your hair becomes interesting to look at; there’s visual interest at every level. This style photographs beautifully because there’s so much going on that images feel rich and dimensional.
Securing Beads, Tulle, and Delicate Elements
- Use fishing line or thin thread to weave beads through your bubbles
- Tulle can be gathered and secured to the bubble with small bobby pins
- Work slowly and carefully — you’re creating jewelry out of your hair essentially
- Small pearl beads are classic and flattering on virtually everyone
- Rhinestones work if your dress is very sparkly, but pearls are more elegant overall
- Test all materials to make sure they’re secure before leaving for prom
- The whole arrangement needs to be quite tight so nothing slips during the night
- Consider having a hair stylist create this one for you — it requires real skill
Pro tip: If you’re doing this yourself, work on a section at a time rather than trying to embellish your entire braid all at once. You’ll get better results and it’ll be less overwhelming.
Final Thoughts
A bubble braid half-up half-down style gives you the best of every world — the polished, intentional look of a styled updo, the romance and movement of down hair, and endless opportunities for personalization and embellishment. Whether you go for classic and elegant, bold and statement-making, or intricate and detailed, a bubble braid elevates your entire look in a way that feels effort-appropriate for prom without looking costume-y or trying too hard.
The key to making any of these styles work is starting with healthy, well-moisturized hair and then using the right products for your hair type. If you have thin hair, go with twisted bubbles or use extensions rather than relying on extreme teasing. If you have thick, curly, or textured hair naturally, you’re already halfway to a spectacular bubble braid — you’ll just need less product and less preparation time. Practice your chosen style at least once or twice before prom night so you’re familiar with how long it takes and what adjustments you need to make.
Remember that your hair doesn’t have to be perfect to be beautiful. Some texture, some messiness, some imperfection — that’s actually what makes these styles feel current and romantic rather than overly formal. If something slips during the night, a few bobby pins and a light hairspray touch-up from your clutch will fix it in seconds. Your prom night is about celebrating, dancing, and making memories, not about obsessing over whether every single bubble is perfectly symmetrical. Pick a style that makes you feel confident and beautiful, and then go have the best night.