Half up half down hairstyles strike that perfect balance between keeping natural hair off your face while still celebrating the length and texture you’ve grown out and nurtured. When you layer twists into the equation, you get a styling option that feels both intentional and effortlessly beautiful — the kind of look that works for everyday wear, special occasions, or those days when your natural curls need a little directional guidance. The versatility of twist-based half updos means you can adapt them to any hair length, texture density, or lifestyle, whether you’re looking for something that takes fifteen minutes or something more intricate that you can spend an hour crafting.
What makes half up half down twists particularly appealing is how they work with your natural texture rather than against it. Unlike styles that require significant manipulation or chemical alteration, twists honor the curl pattern, coil, or wave that’s naturally yours while giving you creative control over placement, direction, and overall aesthetic. You can dress them up with jewelry or minimal accessories for a polished look, keep them simple and clean for a professional setting, or add adornments for a celebratory vibe. The styling possibilities feel almost endless once you understand the core techniques and how to adapt them to your specific hair type and density.
This guide walks you through twelve distinct approaches to half up half down twists for natural hair — each one offering a different visual impact, difficulty level, and time commitment. Whether you’re a seasoned natural-hair styler looking to expand your repertoire or someone newly exploring what’s possible with twists, you’ll find techniques here that match your skill level and your vision. Many of these styles can be achieved with just your fingers and a few bobby pins; others benefit from a rat-tail comb for clean sectioning. All of them prioritize the health and integrity of your hair while delivering the polished, intentional look that makes you feel like yourself — just styled.
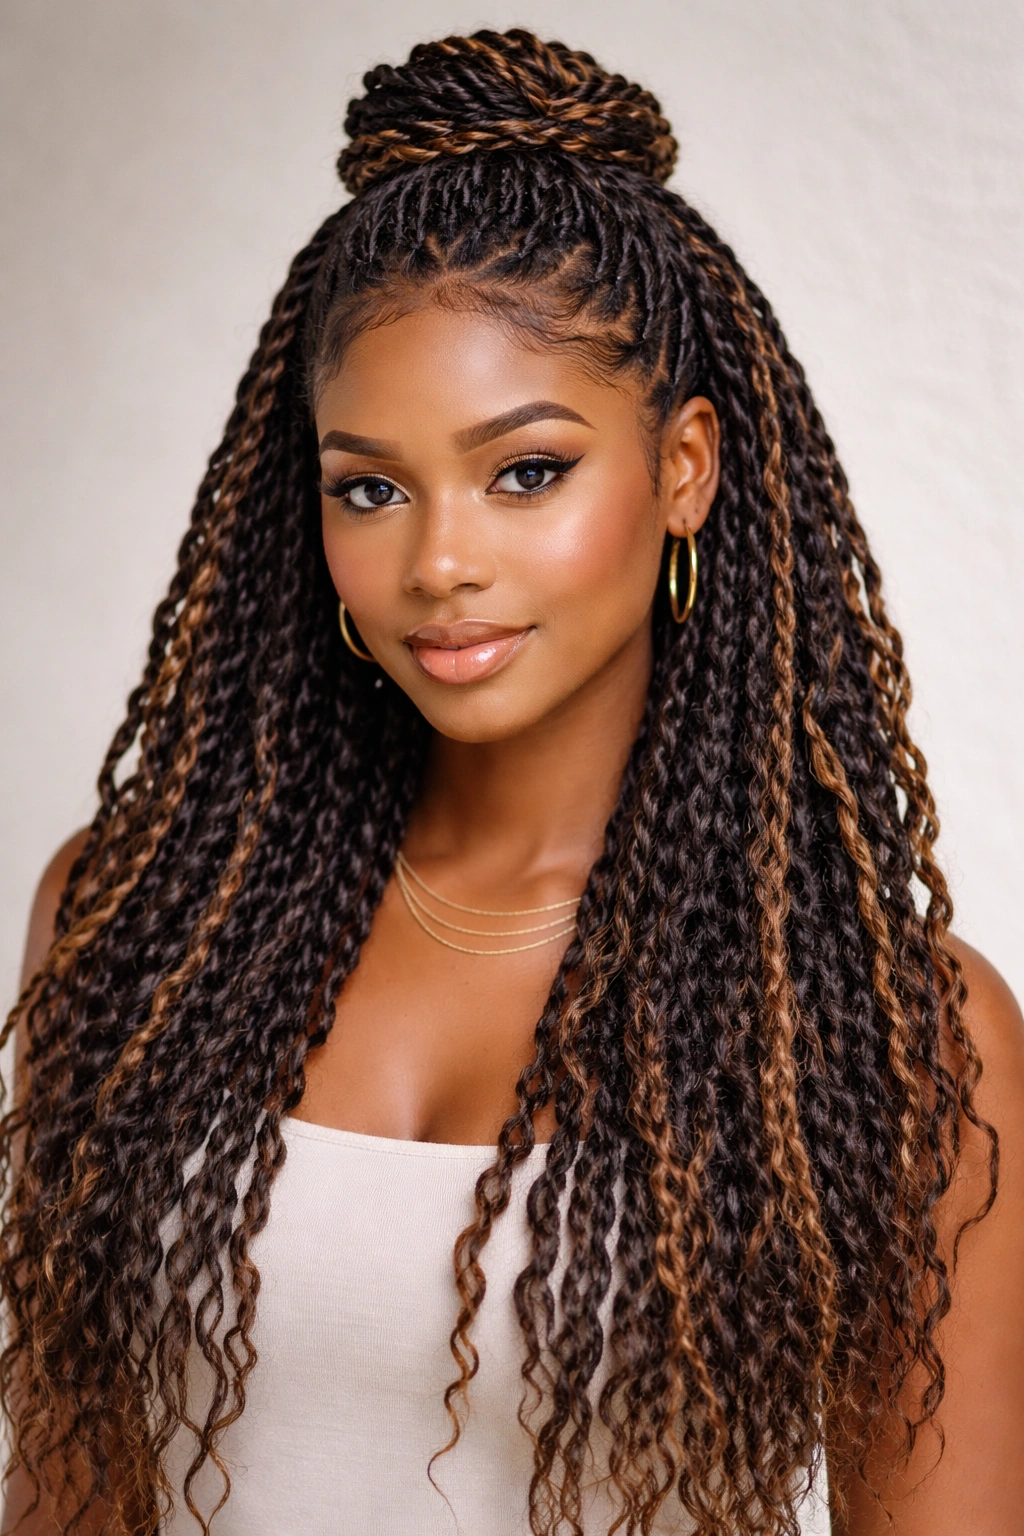
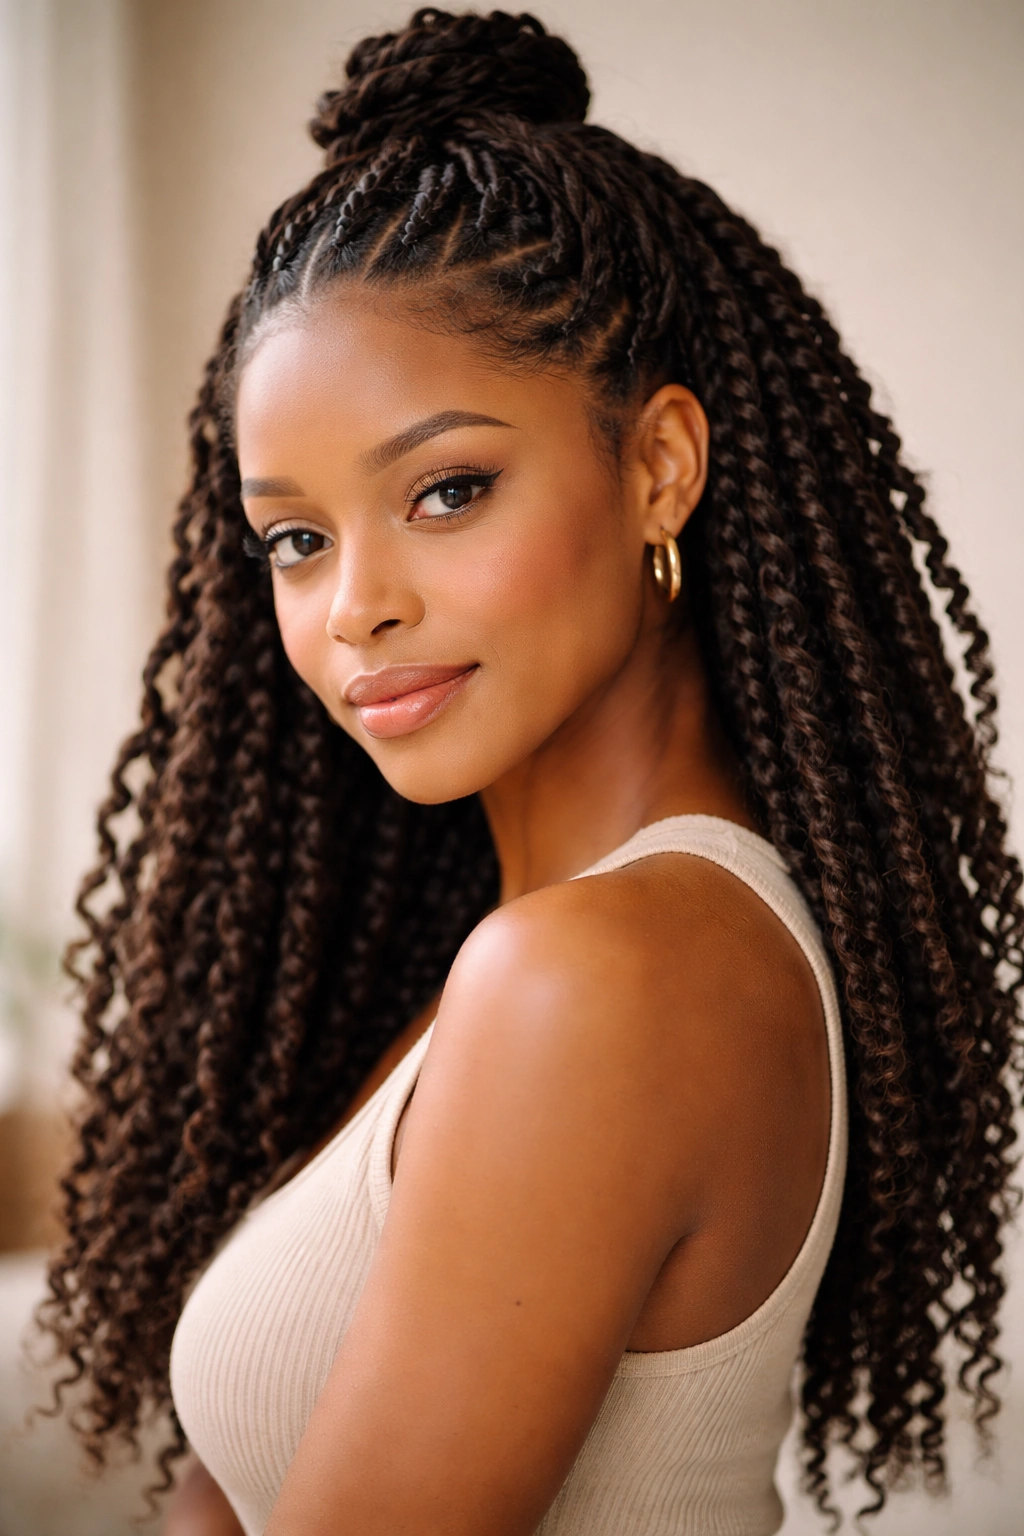
1. Classic Twisted Bun Half Up
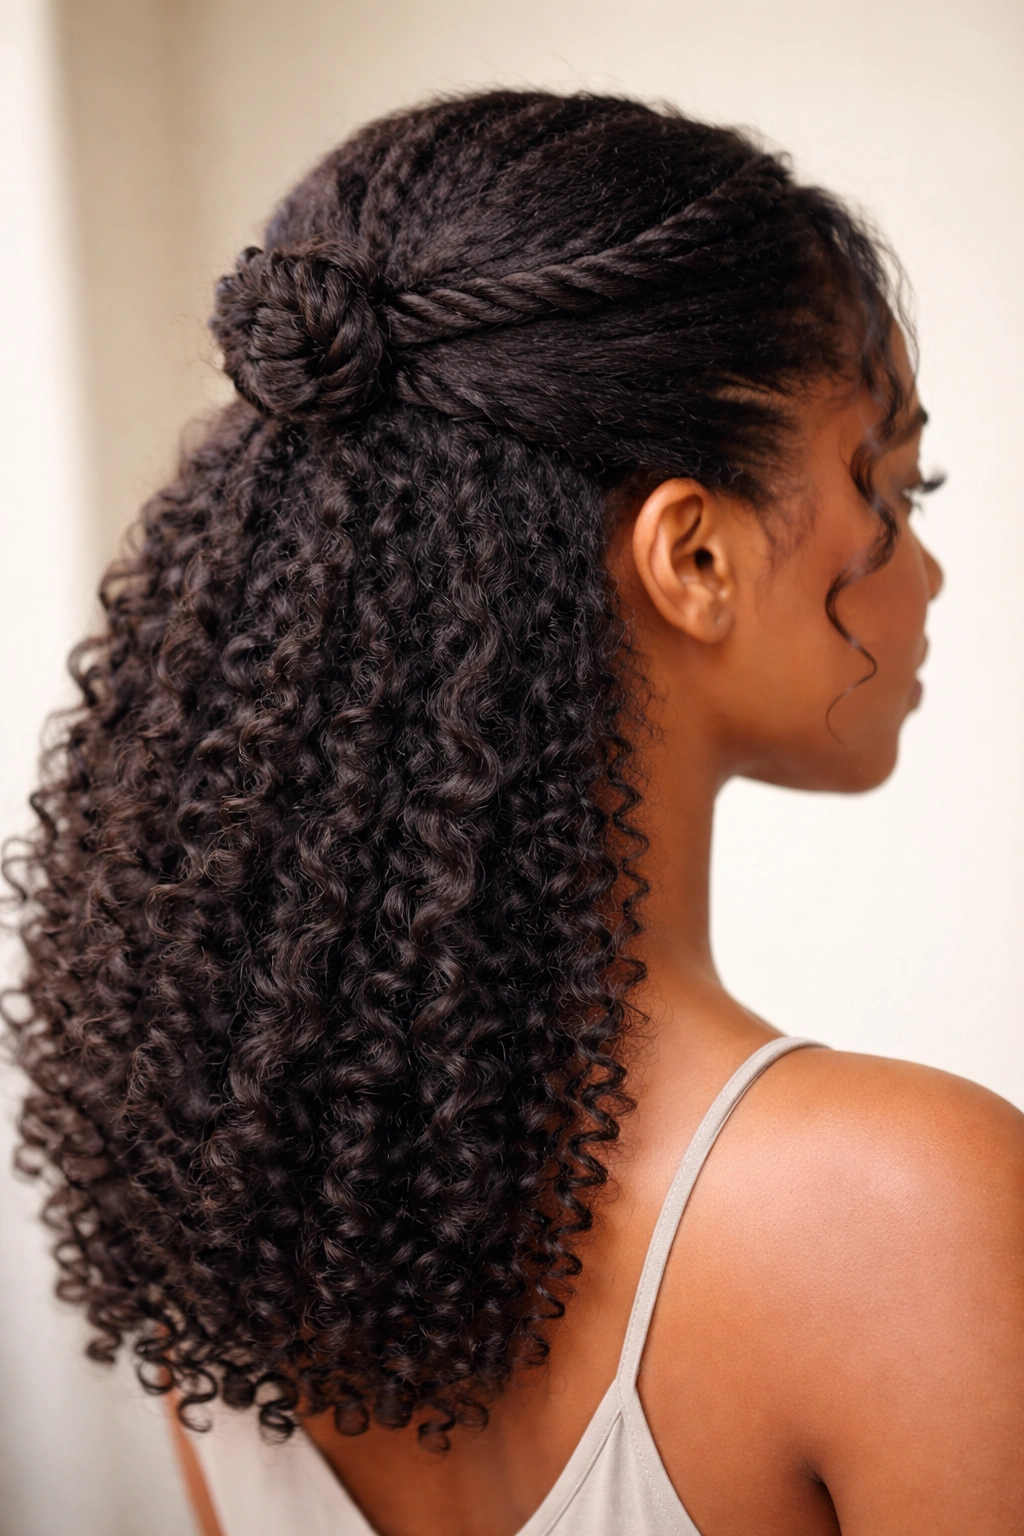
The twisted bun half up is the workhorse style that never feels boring because you control the height, tightness, and finish. Start by sectioning the top half of your hair horizontally from ear to ear across the crown — this top section is what you’ll twist up into the bun. Divide that top section into two equal parts, right down the middle. Twist each section away from your face, keeping the tension even and deliberate as you work from the roots all the way down. Once both twists are complete, bring them together at the crown, wrap them around each other to form a small coil, and secure with bobby pins tucked underneath so they’re invisible from the top.
Why This Style Stands Out
This version works because it’s genuinely adaptable to different occasions and energy levels. A tight, neat execution gives you a polished, work-appropriate style in about ten minutes. A slightly looser, more textured version reads as effortlessly cool and works for casual settings or when you want the style to feel less formal. The visual weight of the twisted bun anchors your look while the rest of your hair flows freely, creating flattering proportions for most face shapes.
How to Get It Right
- Create clean sections using a rat-tail comb or your fingertip so each twist stays separate and defined
- Keep consistent tension throughout each twist — loose twists read as relaxed, tight twists look more polished and structured
- Tuck the base of the twisted bun underneath itself before securing to create the illusion of volume and lift
- Use 3-5 bobby pins arranged in an X pattern underneath the bun for maximum security and invisibility
- This style holds better in hair that’s at least shoulder-length; shorter hair may need the twists to be tighter for proper grip
Pro tip: If your twists feel slippery or loose, you can slightly dampen your hands before twisting for better grip without needing to wet your whole section.
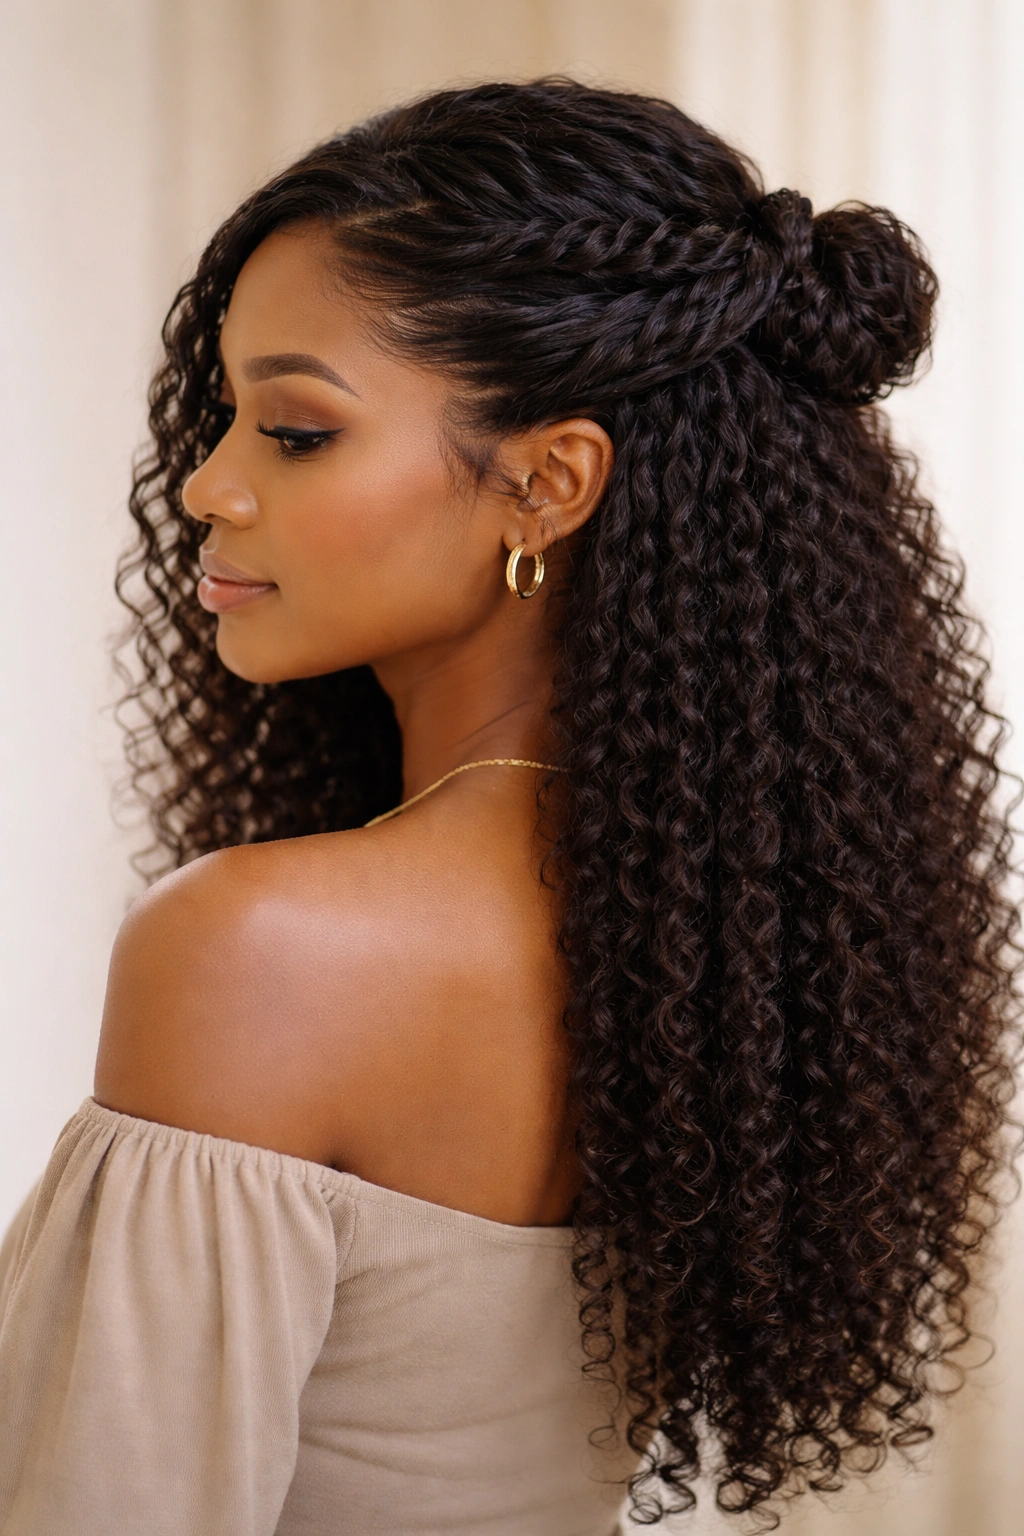
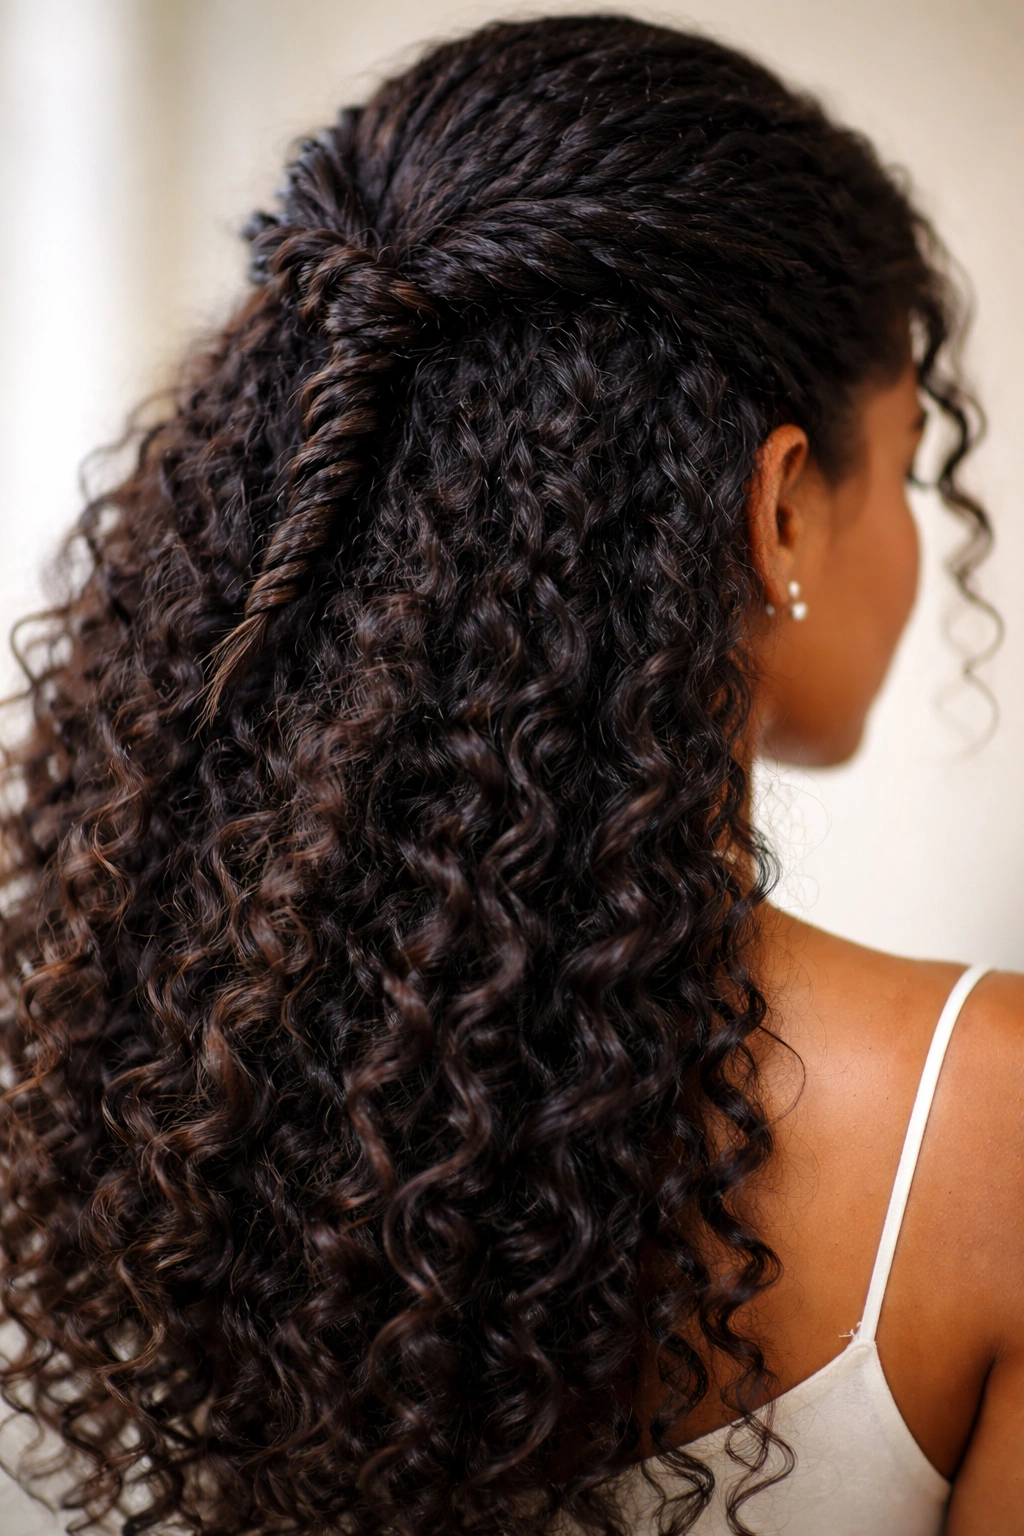
2. Rope Twist Half Up Half Down

A rope twist differs from a traditional two-strand twist in that it uses a spiraling, wrapped technique that creates a rounder, thicker cord of hair. Rope twists feel more substantial visually and often hold better in longer wear or overnight styles. Section your crown area roughly four to six inches wide, then divide it into two equal sections. Instead of twisting them around each other, wrap one section around the other in a spiral motion, as if you’re wrapping rope around a post. Keep the wrapping consistent and smooth, working from roots to the ends. Do the same with the second section, spiraling it in the opposite direction. When both rope twists are complete, bring them together and either twist them around each other one more time or cross them and tuck the ends into the base of a half-up bun.
What Makes Rope Twists Different
Rope twists have more visual texture and presence than a standard two-strand twist because of the wrapped, coiled appearance. They photograph beautifully, catch light in interesting ways, and feel sturdy enough that you can refresh them in the morning if you sleep on them the night before. The technique takes a few practice rounds to nail, but once you get the rhythm of the spiraling motion, it becomes meditative and satisfying.
Key Techniques to Master
- Keep your two sections equal in thickness; uneven sections create lopsided rope twists
- The wrapping motion should feel smooth and continuous — think of wrapping yarn around a ball, not jerking or bunching
- Rope twists can be slightly looser than standard twists and still hold beautifully because of the wrapped structure
- Secure the base with bobby pins hidden underneath, and you can add a small clip or cuff over the secured base for extra polish
- This style works especially well in hair with significant coils or shrinkage because the rope structure contains movement while honoring texture
Pro tip: Once you’ve mastered the basic rope twist, try doing it with three sections instead of two for a more complex, braided appearance.
3. Goddess Braid Twist Hybrid

This style merges the elegance of a goddess braid with the textural impact of twists, giving you a look that feels both intentional and organic. Begin with a clean section from your temple area, diagonal toward the crown. Instead of braiding, you’re going to create a twisted pattern by picking up small sections of hair and twisting them together as you move toward the back. The key difference from a standard feed-in twist is that you’re weaving the new hair in a more directional, sculptural way, more like you would with a braid. Bring the twist to the side or back of your head and secure it, allowing your loose natural hair to cascade from that foundation.
How This Hybrid Approach Works
Goddess braid twists give you the sophistication and defined shape of a braid without the tightness that can stress your edges or pull uncomfortably. Because you’re using twists as the foundation instead of traditional three-strand braiding, the finished look feels more textured and less uniform. The style reads as intentional and crafted but doesn’t require you to manipulate your hair as tightly or for as long, making it a gentler option for frequent styling.
Steps to Execute This Style
- Start your twisted “braid” at the temple and angle it toward the crown or ear, depending on which direction you prefer
- As you twist, pick up small sections of hair from the loose section ahead of your twist and incorporate them in, the way you would with a feed-in technique
- Keep the twisted “braid” relatively close to your scalp for a clean, defined appearance
- Secure the endpoint with a small elastic or bobby pins hidden underneath the style
- Leave the remaining hair down and allow it to blend naturally with the twisted foundation
Pro tip: Apply a light styling gel or twist cream to your hands before starting if your hair tends to frizz; this keeps the twisted pattern clean and defined throughout the day.
4. Double Twisted Knots Half Up
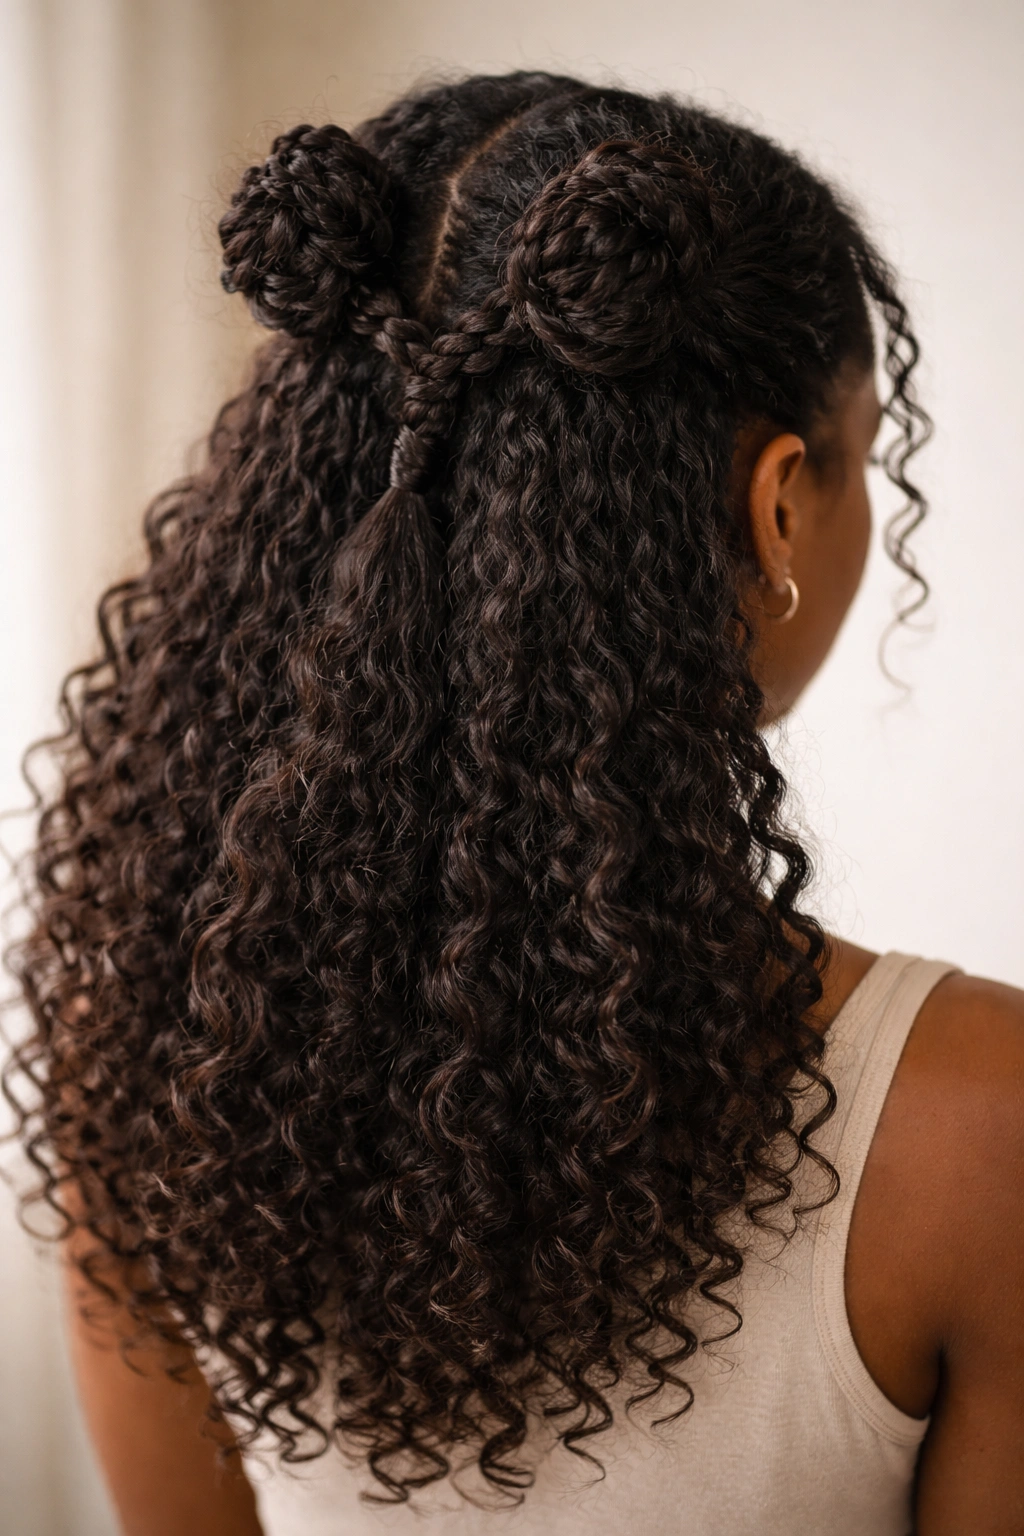
Double twisted knots are stunning and feel more elaborate than they actually are to create — you’re essentially making two small twisted knots on either side of your head and connecting them in the middle. Section one area on the left side of your crown and another on the right, each about the size of a plum. Divide each section into two equal parts and twist them around each other until you’ve created a small knot of twisted hair. Secure each knot with a bobby pin close to your scalp. Then, take a thin section of hair from the loose portion of your hair on each side and bring these strands together in the middle back of your head, twist them together, and pin them into place, anchoring them to the two knots you already created.
Why Double Twisted Knots Feel Special
This style has incredible visual impact without being overly complicated — the two knots draw the eye upward and create a flattering frame around your face, while the connecting twist in the back prevents the style from feeling too top-heavy. It’s elegant enough for events or professional settings but also works as a casual everyday look. The playfulness of the double knots adds personality that a single bun doesn’t quite achieve.
Key Details for Success
- Make sure both knots are at roughly the same height so the style feels balanced
- The connecting twist in the middle can be as simple or as elaborate as you want — a single two-strand twist or a more complex feed-in twist
- Use bobby pins that match your hair color so they disappear into your style
- This style works especially well if you have medium-density hair; very fine hair may need slightly tighter knots for security
- You can add small hair accessories (clips, rings, pearls) directly into each knot for an elevated, special-occasion look
Pro tip: Practice creating the knots when your hands are warm and slightly damp — you’ll have better control and less slipping as you twist.
5. Side-Swept Twist Half Up
A side-swept half up with twists is your answer when you want asymmetry and visual interest without committing to a full side part. Section off the top half of your hair with an emphasis on one side — take more hair from the fuller side of your head, creating an imbalance that sweeps toward the smaller side. Divide this section into two or three parts and create twists, working from the fuller side toward the back. Bring all your twists together slightly off-center (toward the smaller side of your head) and secure them into a small bun, a knot, or simply clip them back with a decorative clip or hair cuff.
What Makes Side-Swept Work
Asymmetrical styling is flattering because it creates visual balance — if one side of your face feels wider or you want to draw attention away from one side, sweeping the hair toward the other side works beautifully. The off-center placement of the secured twists adds movement and dimension to your overall silhouette. This style particularly suits rectangular or square face shapes because the asymmetry softens angles.
Execution Tips
- Section your hair generously on the fuller side; you want obvious volume there to make the sweep intentional and not accidental
- Use two or three twists depending on your hair density and the weight you need to hold the style in place
- The secured twists can be a small knot, a bun, or even left as loose twists pinned back — all variations look polished
- If you have very thick hair, this style benefits from slightly damp hands or a lightweight styling cream so the twists stay defined
- Refresh the style in the morning by gently loosening the twists slightly and re-pinning; they often hold overnight
Pro tip: Add a small decorative comb or hair stick through the base of your secured twists for both function and visual interest.
6. Flat Twist Half Up Style
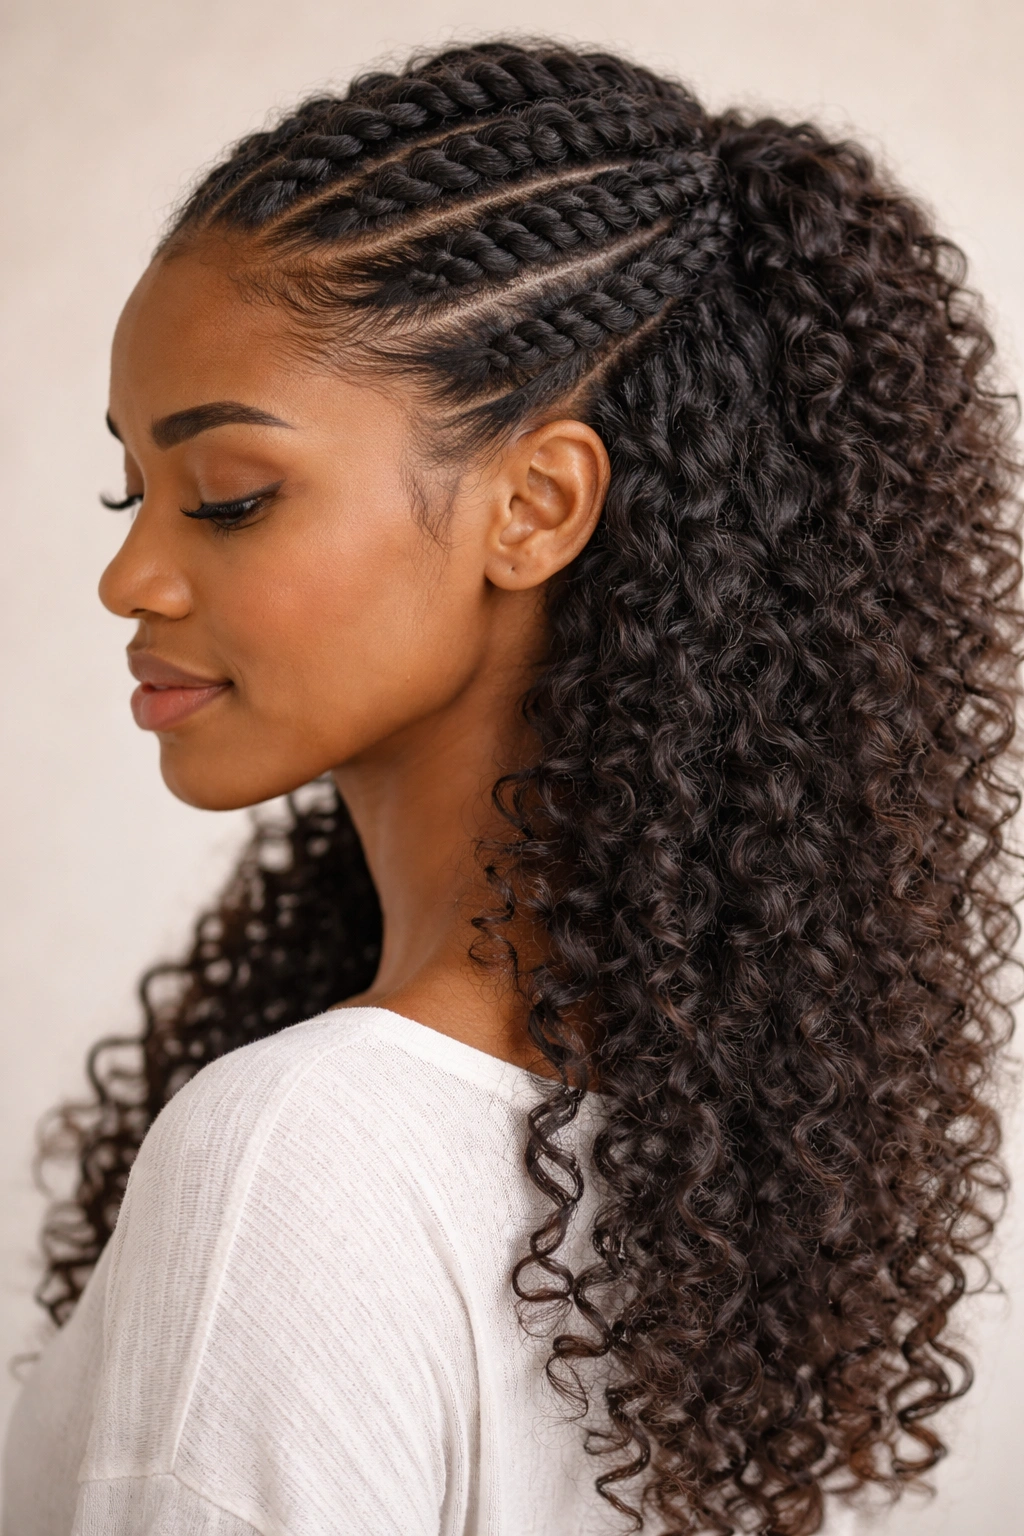
Flat twists are twists that lie against your scalp rather than floating away from it — they’re created by twisting two sections of hair while simultaneously picking up new hair with each rotation, similar to the technique of a cornrow but with a twist rather than a braid. Create flat twists from one side of your crown toward the back, picking up hair as you go, then secure the endpoint. The loose natural hair flows freely below, creating a defined line where the flat twist ends and your natural texture takes over.
Why Flat Twists Are Worth Learning
Flat twists create incredible definition and visual structure without requiring you to learn braiding. They’re also gentler than braids because the twisting motion with pick-ups distributes tension differently across your scalp. The clean line where a flat twist ends gives you a sharp delineation between your styled and unstyled hair, which reads as intentional and polished. Flat twists also tend to last longer than loose twists — they can hold for three to five days if your hair is the right texture.
How to Master Flat Twists
- Start your flat twist at the temple or side of your crown, depending on which direction you want it to travel
- As you twist, pinch and pick up a small section of hair from your scalp directly in the path of your twist
- Incorporate that new hair into your next twist rotation, keeping the pattern tight and controlled against your scalp
- Continue until you reach your desired endpoint — the back of your head, behind your ear, or wherever your design calls for
- Secure with bobby pins hidden beneath the twist, and allow your natural hair to fall freely below
Pro tip: Flat twists are easiest to create when your hair has been cleansed within the last two to three days and has a bit of natural oil for grip; bone-dry hair tends to slip and separate.
7. Marled Twist Half Up Half Down
Marled twists involve twisting together sections that are different — perhaps a section of your natural hair twisted together with braiding hair, or two different textures of yarn, or even two sections of hair where one is moisturized and one is drier (which creates visible variation in the twist pattern). The visual result is a twist that has obvious color or texture contrast running through it. For natural hair, you can create this effect by using two strands of hair at different moisture levels, different curl patterns from different sections of your head, or by incorporating a small amount of decorative fiber or thread. Once you understand the basic concept, marled twists feel creative and more personalized than straightforward twists.
What Makes Marled Twists Distinctive
Marled twists automatically look more intentional and artistic because of their visual complexity — they read as a deliberate design choice rather than a neutral protective style. They’re especially stunning in longer hair where the twist pattern can be clearly seen. If your natural hair has variation in texture (many curly and coily hair types do), you can lean into that by intentionally selecting strands from different areas of your head to twist together, celebrating the variation that already exists.
Creating Marled Twists Successfully
- Select two strands that have noticeable visual difference — different moisture levels, different curl patterns, or different thickness
- Twist them together keeping both strands visible and distinct rather than blending them into a uniform twist
- You can use very thin threads, ribbons, or decorative fibers twisted in alongside your hair if you want to experiment without commitment
- Marled twists read best when they’re relatively loose or medium-tension — too tight and the visual variation gets lost
- Secure the half-up portion with bobby pins, and let your natural hair cascade below
Pro tip: Before you incorporate any synthetic fibers into your hair, do a small test with one twist to ensure it’s comfortable and doesn’t cause any irritation or dryness.
8. Zigzag Twisted Crown Half Up
A zigzag pattern creates visual movement and complexity without adding actual time to your styling routine. Instead of traveling straight back from one side to the other, your twists follow a zigzag path — forward, diagonal back, forward again, and so on. Section the top half of your hair in a zigzag pattern (imagine drawing a Z or lightning bolt shape), create a twist along that path incorporating hair as you go, and secure the endpoint at the back. The zigzag pattern is immediately eye-catching and reads as more intricate than a straight-line half up.
Why Zigzag Patterns Work
The zigzag creates movement and directionality that a simple side-to-back twist doesn’t offer. It’s a technique borrowed from braiding traditions but translates beautifully to twists. The pattern is especially flattering for rounder face shapes because the directional lines create visual sculpting. It also feels creative and intentional — this isn’t a default style, it’s a choice, and that intentionality shows.
Steps to Execute Zigzag Twists
- Use a rat-tail comb or your finger to draw out the zigzag path before you start styling
- Begin your twist at one side of your crown and follow the zigzag pattern as you pick up hair and twist
- The peaks and valleys of the zigzag should be obvious enough to be visually interesting but not so extreme that the pattern feels chaotic
- Secure your endpoint at the back with bobby pins, keeping the entire twisted pattern clean and defined
- Allow your natural hair to flow freely below the secured twists
Pro tip: Photograph the back of your head once you’ve finished to see the full zigzag pattern — you might be surprised by how striking it looks from that angle.
9. Chunky Twist Half Up with Curls Down

Chunky twists are visually bold and work especially well when you want your styled hair to have obvious texture and presence. Instead of creating multiple thin twists, you create just one or two very thick twists using thick sections of hair. The weight and dimension of chunky twists creates a different aesthetic than delicate multi-twists — it feels bolder, more sculptural, and slightly less delicate. Divide the top section of your hair into just one or two sections (depending on your overall density), create a thick twist from roots to ends, and secure it at the back in a bun or knot while your natural curls flow freely below.
What Makes Chunky Twists Stand Out
Chunky twists feel confident and take up visual space in a way that thin, delicate twists don’t. They’re faster to create, which is appealing if you’re styling on a time crunch, and they’re also more secure — the weight of the twist helps it stay in place throughout the day. Chunky twists pair beautifully with loose, defined curls cascading below; there’s a nice visual balance between the structured twist above and the bouncy texture below.
How to Create Chunky Twists with Impact
- Use thick sections of hair — ideally 1.5 to 2 inches wide each
- Keep tension even and consistent as you twist so the rope of hair looks smooth and finished
- One chunky twist reads differently than two chunky twists; one feels more dramatic and asymmetrical, while two feels balanced
- Secure your chunky twist in a small bun, knot, or even leave it twisted and coiled back on itself
- The contrast between the substantial twisted base and the loose curls below is part of what makes this style visually interesting
Pro tip: Chunky twists hold better if your hair has been stretched or plopped to remove excess water before styling — dampness gives you grip without making the twists wet enough to slip apart.
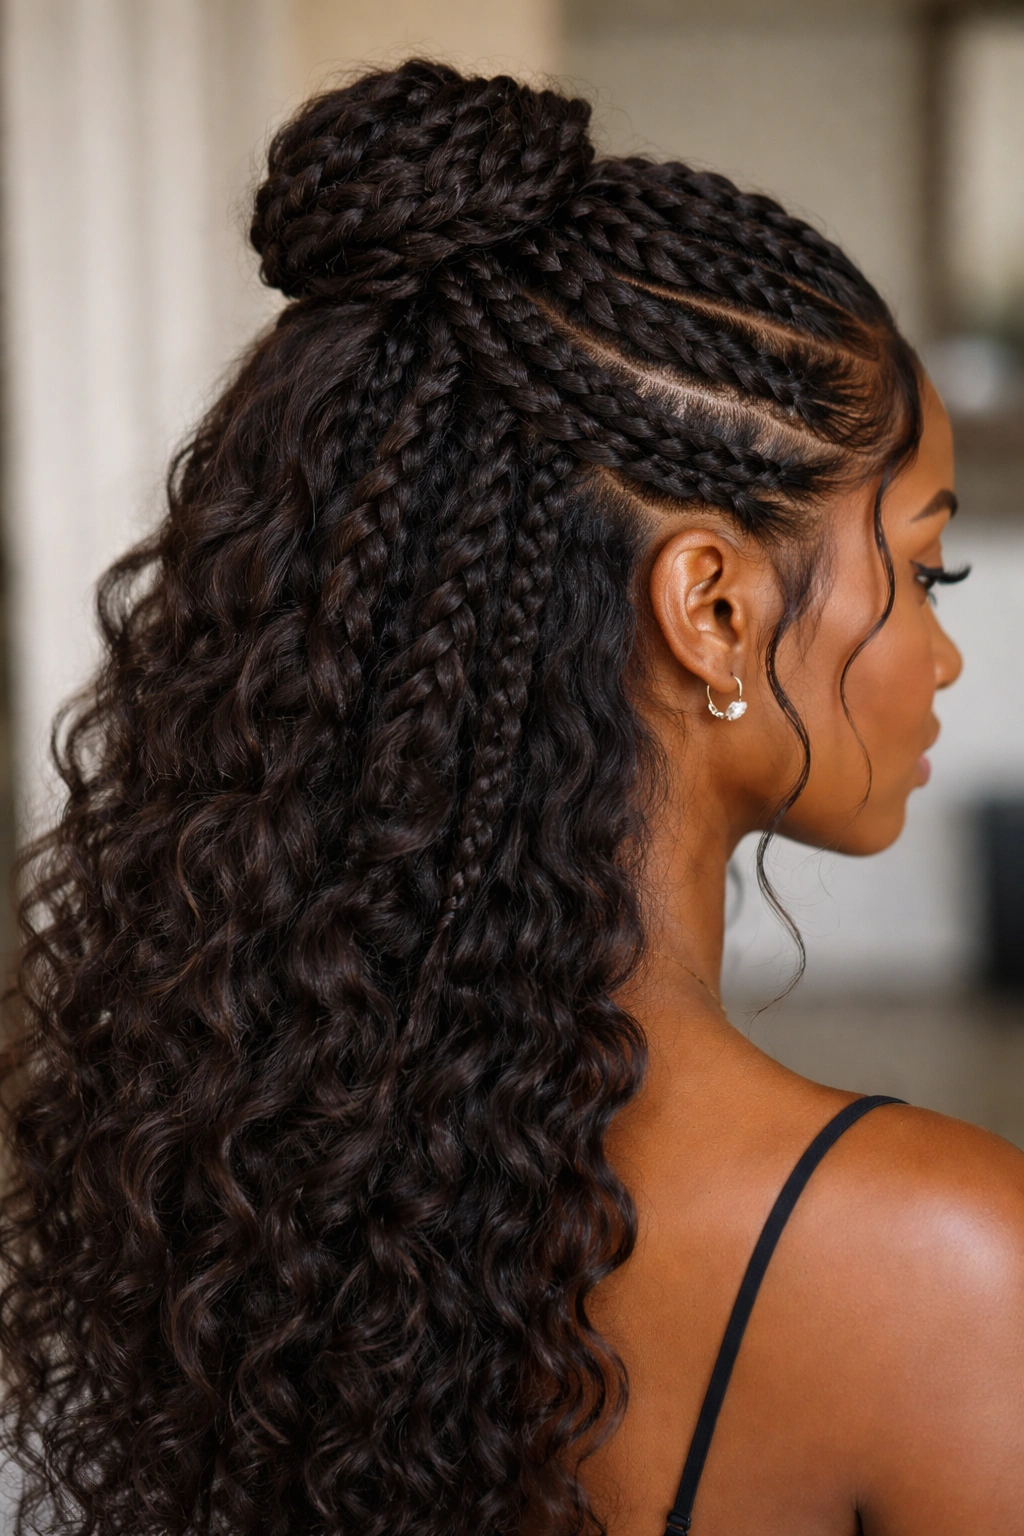
10. Twisted Topknot with Loose Natural Curls

This style prioritizes volume at the crown by creating a topknot directly at the very top of your head using twisted sections rather than gathered straight hair. Section all the hair from your crown in a circular area (imagine a two-to-three-inch circle), divide it into two to four sections, and create twists from each. Bring all the twists together at the very top and coil them into a small, intentional knot, securing it with bobby pins. The result is a lifted, voluminous topknot that shows off your twists as a featured design element rather than a means to an end.
Why Topknot Twists Feel Different
A twisted topknot automatically reads as more intentional and special than a simple gathered bun because you can see the twisted construction. The height of the knot at your crown creates a flattering lift and draws the eye upward. This style works especially well if you have naturally voluminous hair or if you’ve air-dried your hair the night before so your curls have gained some lift and spring.
Creating a Polished Twisted Topknot
- Start with hair that has significant texture and curl definition; the curls help disguise any imperfections in your twists
- Create two to four twists depending on the amount of hair you have in your crown area
- Each twist should be secured with bobby pins before you bring them all together, so they don’t unravel
- Coil the twists into a small knot at the very crown and use at least three bobby pins to anchor it securely
- The looser your curls below, the more dramatic the topknot appears — pair with some refreshed curls for maximum impact
Pro tip: If you’re styling a day or two after washing, spritz your crown area with a light curl-refreshing spray before sectioning to add bounce and definition to your twists.
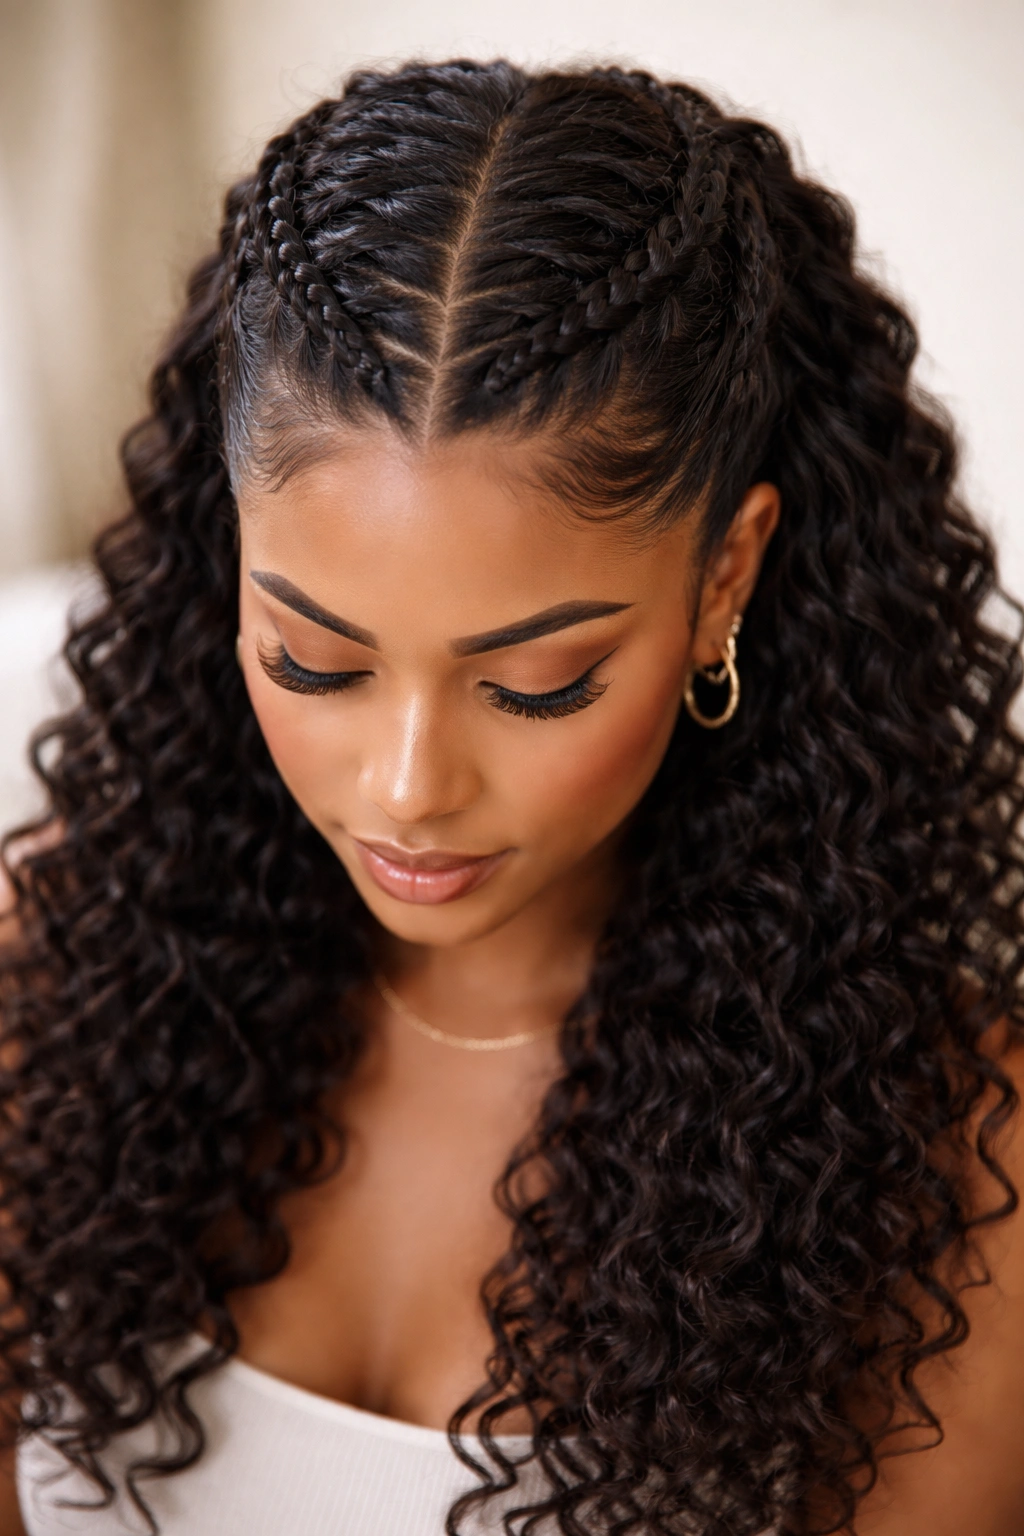
11. Intertwined Half Up with Feed-In Twist
A feed-in twist where the new hair is incorporated gradually as you work creates a more seamless, elegant appearance than a simple two-strand twist. This technique allows you to transition smoothly from twisted hair to loose natural hair without an abrupt line. Begin with a small section of hair at your temple, create a two-strand twist while simultaneously picking up new hair from the loose section ahead of you with each rotation. As you work, gradually pick up more hair with each rotation, incorporating the entire top section into your twist. By the time you reach your endpoint, you’re twisting only your original two strands without any new pickups. Secure the end with a bobby pin or small elastic, and your natural hair flows seamlessly below.
What Makes Feed-In Twists Sophisticated
Feed-in twists create a polished, intentional appearance because the transition from styled to unstyled is seamless rather than abrupt. The technique also allows you to create larger, more substantial twists than you could with just the hair you’re picking up. Feed-in twists take more time and concentration than simple two-strand twists, but the payoff in terms of visual refinement is significant.
Mastering the Feed-In Technique
- Start with a small, manageable initial section so you have something to twist before you start picking up new hair
- As you twist, pinch a small amount of new hair and incorporate it with your next twist rotation
- The pickups should be consistent in size so your twist looks even and controlled
- Gradually decrease your pickups as you move toward the endpoint, so you’re not suddenly holding a huge amount of hair
- This style reads best with slightly damp or moisturized hair for grip and definition
Pro tip: Practice your feed-in twists when your hands are already slightly warm and your hands are slightly damp for the best control and smoothest execution.
12. Spiral Twist Half Up Style
Spiral twists are created by twisting one section of hair tightly around itself, creating a corkscrew or spiral pattern. Instead of two strands twisting around each other, you’re coiling a single strand on itself. Spiral twists create a distinctive, springy appearance and work beautifully as a half-up style because the spiral pattern is immediately visually interesting. Take a section of your hair and twist it very tightly around itself — the tighter you twist, the springier and more defined the spiral becomes. Secure the spirals at the base with bobby pins while your natural curls flow freely below.
What Makes Spiral Twists Unique
Spiral twists photograph beautifully and create texture variation that multiple two-strand twists don’t offer. The corkscrew pattern is especially striking in longer hair where you can see the entire spiral from root to tip. Spiral twists also have a playful, bouncy quality once you release the tension slightly, making them ideal if you want your style to feel fun and youthful rather than formal.
Creating Spiral Twists with Definition
- Use a single section of hair about the thickness of a marker
- Twist it very tightly around itself, maintaining consistent tension from root to end
- The tighter your initial twist, the tighter and more defined your finished spiral
- Once you’ve completed the twist, you can leave it coiled or allow it to loosen slightly and spring into a spiral shape
- Secure both ends with bobby pins so the spiral doesn’t unravel
- You can create one statement spiral or two or three thinner spirals depending on your hair density and desired impact
Pro tip: Spiral twists hold better if you mist them lightly with a lightweight setting spray once you’ve secured them — this keeps the shape intact throughout the day without making your hair feel stiff or crunchy.
Final Thoughts
Half up half down twists offer you the rare combination of protecting your natural hair, looking intentional and beautiful, and feeling completely achievable with a little practice and patience. Each of these twelve approaches gives you a different mood and aesthetic — some are polished and professional, others feel casual and everyday-appropriate, and several are fancy enough to work for events and celebrations. The beauty of mastering twists is that once you understand the basic techniques (two-strand twists, rope twists, flat twists, and feed-ins), you can adapt them endlessly to create new styles or variations that feel uniquely yours.
The real secret to natural-hair twists is consistency and patience while you’re learning. Your first attempts might feel awkward or loose, and that’s completely normal. Each time you practice, your hands learn the rhythm better, your tension becomes more even, and your finished twists look more polished. It’s also worth paying attention to what your hair needs in terms of moisture and product — some hair thrives with just a bit of styling cream, while other textures benefit from a lightweight gel or oil to create better grip and definition.
As you move through these styles, notice which ones feel best on your head, which ones align with your lifestyle and schedule, and which ones make you feel most like yourself. Your favorite style might be one you wear repeatedly, or you might love the variety of switching between different twists depending on your mood, the occasion, or what your hair needs that particular week. The fact that you have twelve distinct approaches means you’re never limited to just one option — your half up half down twists can evolve just as much as your natural hair does.