Your kid’s hair doesn’t have to be pulled straight back or left completely down — the half-up half-down ponytail sits right in the sweet spot between putting hair off their face and keeping it loose and flowing. Whether you’re styling for school, a special occasion, or just want something that looks intentional without requiring expert skills, there’s a half-up half-down option that will work.
The beauty of these styles is that they look polished and finished, yet they’re forgiving enough for busy mornings. Most of them take just five to ten minutes once you’ve done them a couple of times, and they hold up well throughout the day without constant adjustment. Plus, kids seem to love the way they look — not too severe, not too babyish, just right.
What makes half-up half-down ponytails especially appealing for children is the flexibility. You can dress them up for pictures or events, scale them down for everyday wear, and adapt nearly every variation to your child’s hair type and length. Whether your kid has fine, thick, wavy, curly, or straight hair, you’ll find options that actually work with their texture instead of fighting it.
Let’s walk through fifteen creative half-up half-down ponytails that range from simple five-minute styles to fancier braided versions. Each one includes the specific technique so you can recreate it confidently, plus tips for making it work with your child’s particular hair.
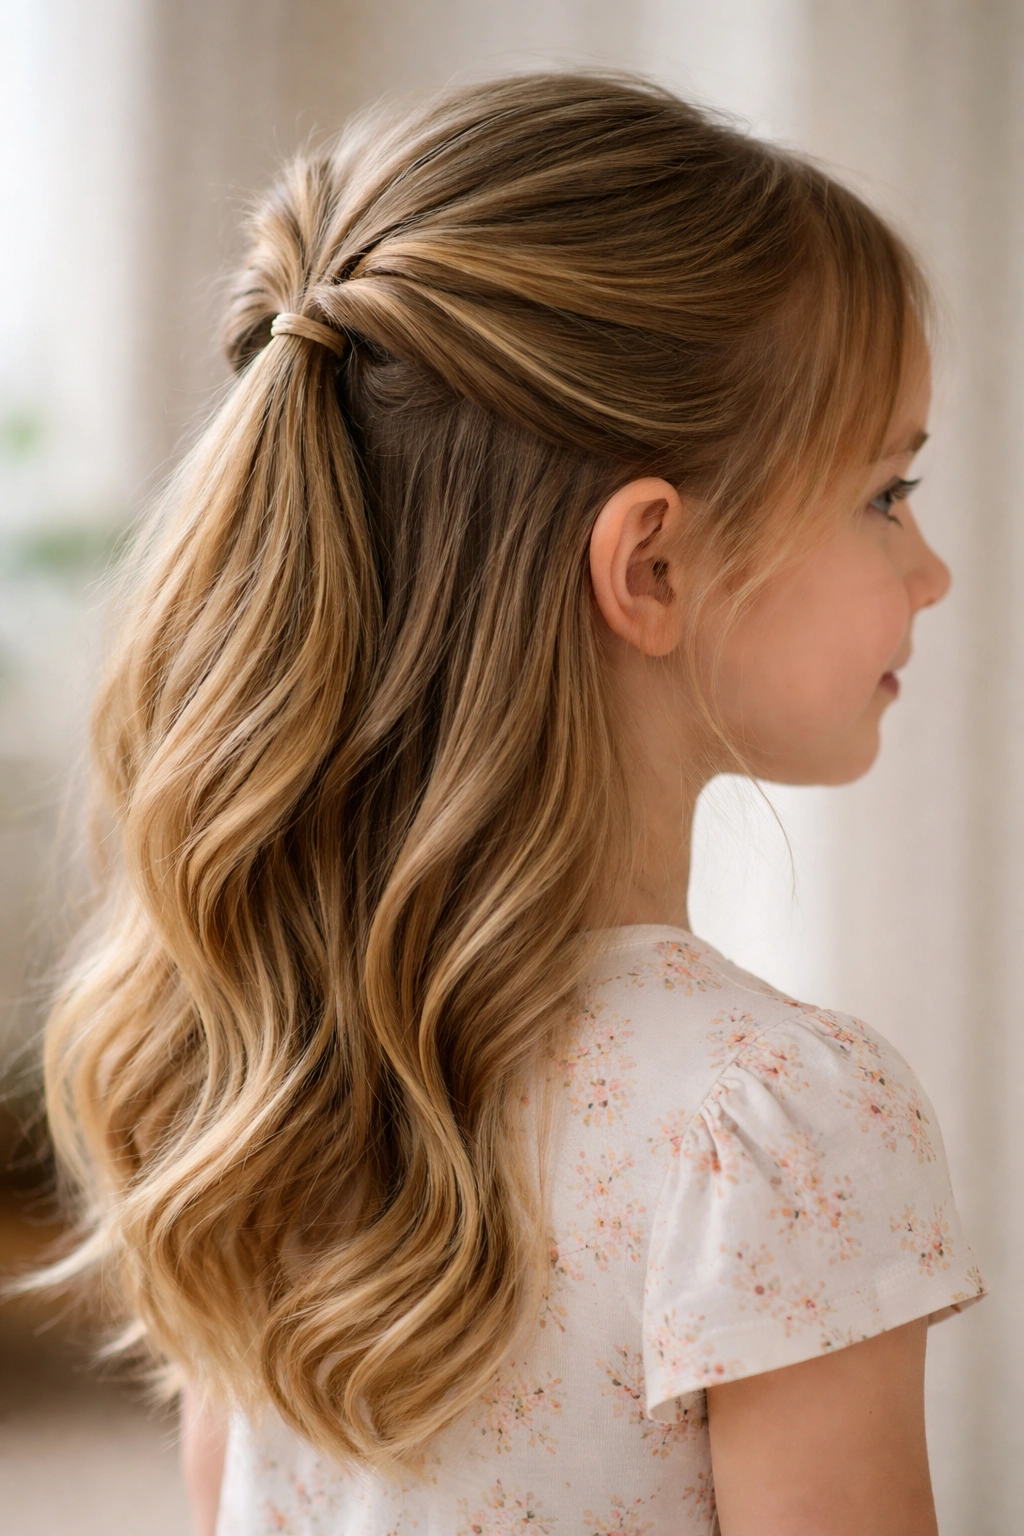
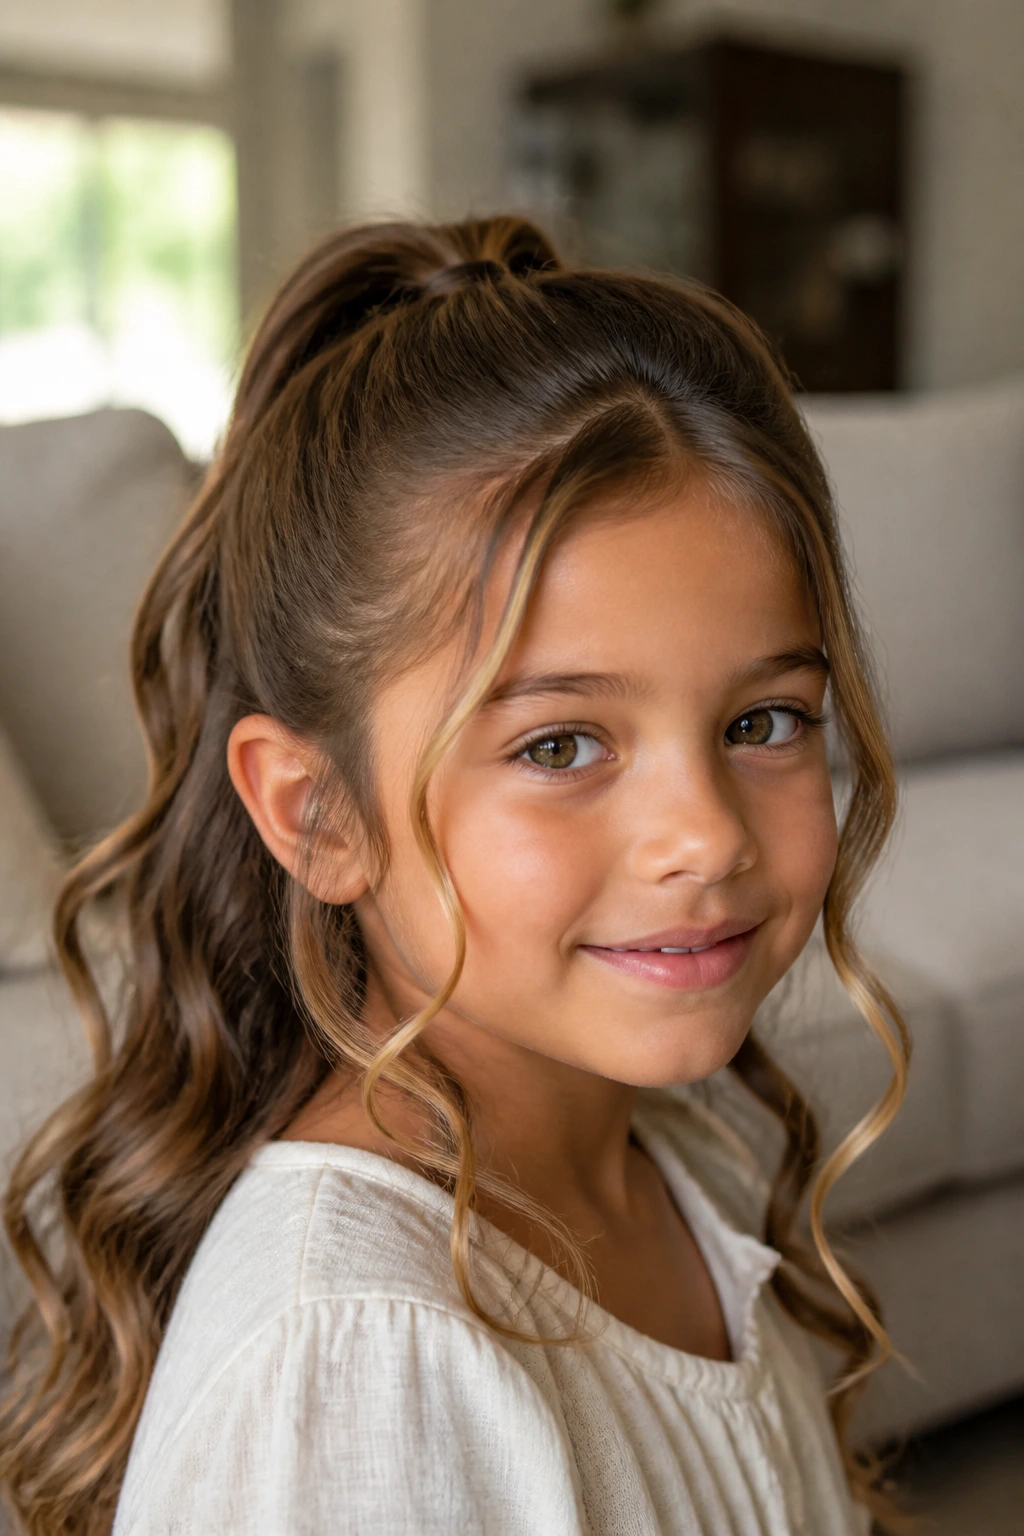
1. The Classic Half-Up Knot
This is the starting point — simple, elegant, and genuinely cute without feeling overdone. Take a section of hair from each side of the head (roughly from the temples to behind the ears), bring it up to the crown, and tie it with a small elastic. The result is a soft, unstructured look that frames the face while the bottom half flows freely.
Why Kids Love This Style
The classic half-up knot feels mature without being fussy. It keeps hair out of their face during activities like sports or playing, but doesn’t pull so tightly that it causes discomfort. The loose ponytail at the crown has a naturally pretty shape that photographs well, which matters if you’re capturing first-day-of-school or event photos.
How to Perfect It
- Start with clean or lightly damp hair for better grip — completely dry hair will slip out of the elastic
- Take the sections from roughly temple height, not too far back on the head
- Use a small elastic that matches your child’s hair color for a seamless look
- Leave some face-framing pieces loose if your child’s hair naturally falls that way
- For extra hold, lightly spray the finished style with a kid-safe hairspray (unscented works best)
Pro tip: If the ponytail slides down throughout the day, try using a texturizing spray on the crown area before styling — this gives the elastic something to grip onto without making the hair feel stiff or crunchy.
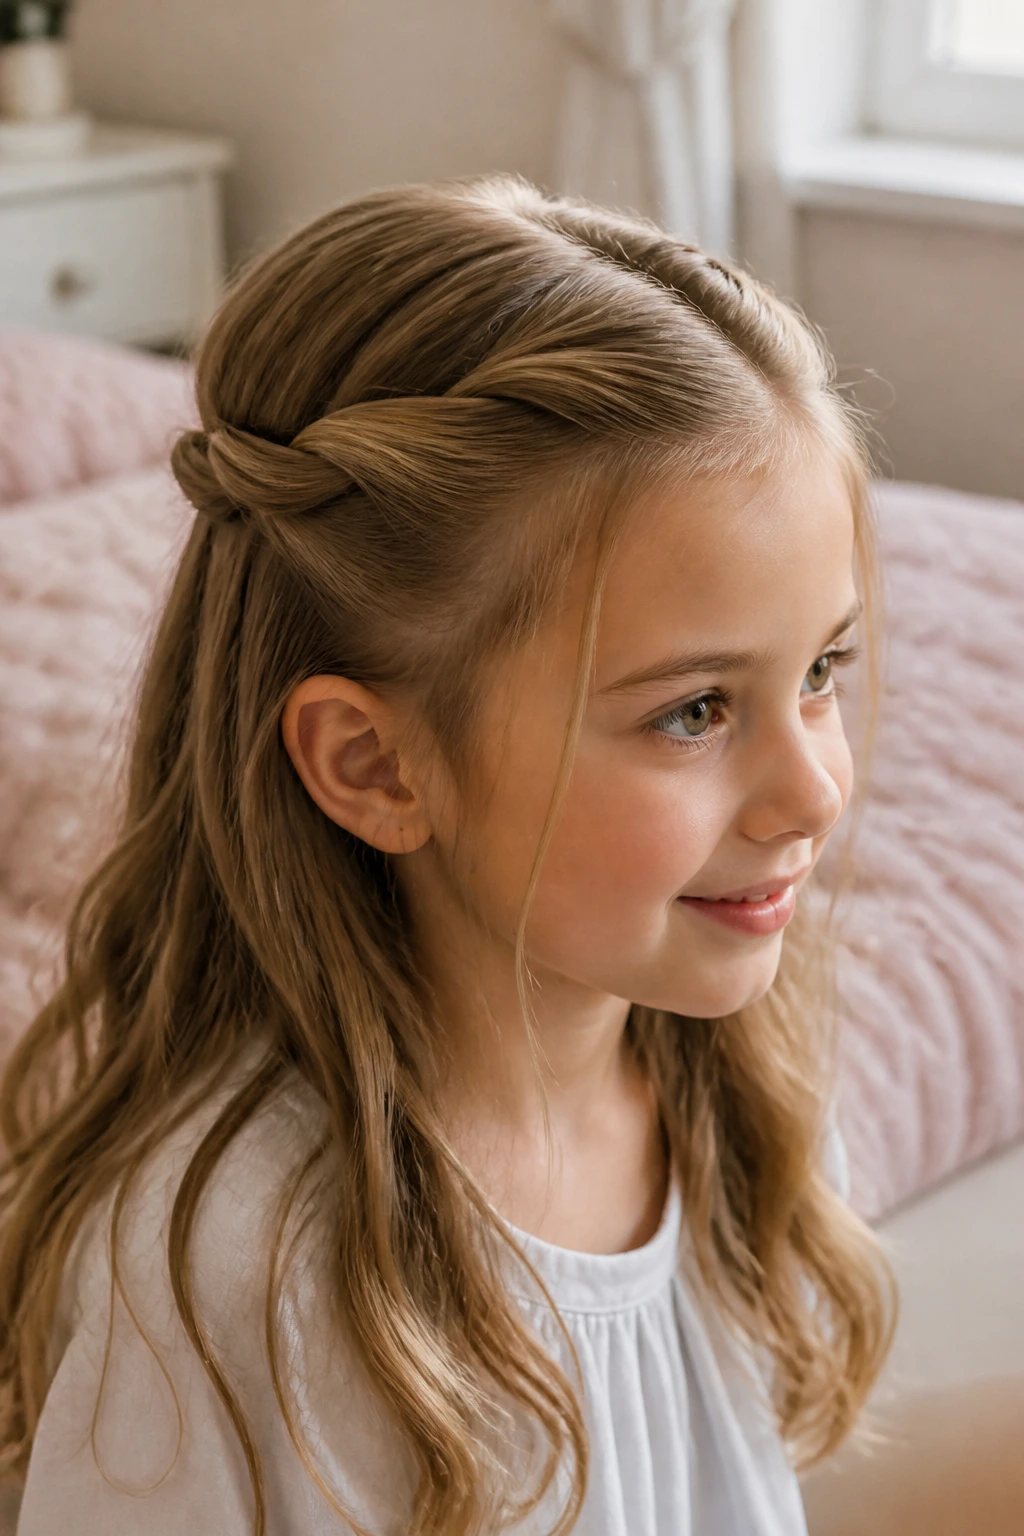
2. The Twisted Half-Up Ponytail
Instead of simply tying up the top section, twist each side before bringing it to the crown and securing it together. This adds visual interest and a more sophisticated vibe while still being quick to create. The twist helps distribute the hair more evenly and gives the overall style more dimension than a straight half-up.
What Makes Twists Different
Twists are actually easier for many kids’ hair types than braids, especially if the hair is fine or slippery. They also create a more delicate, less structured appearance than braids, which works beautifully for softer, more romantic styling. The spiral effect automatically draws the eye upward and makes thin hair look fuller.
Getting the Twists Right
- Separate the hair into two sections, one from each side
- Twist each section loosely away from the face — the twist should be gentle enough to feel comfortable but tight enough to hold its shape
- Bring both twisted sections up to the crown and secure with a single elastic
- Leave the ends of the twists slightly loose for a relaxed, intentional look
- For finer hair, don’t twist too tightly or you’ll straighten out the texture
Insider note: If the twists start to unravel before bedtime, secure each one with a tiny bobby pin hidden underneath — your child won’t feel it, and it keeps everything in place.
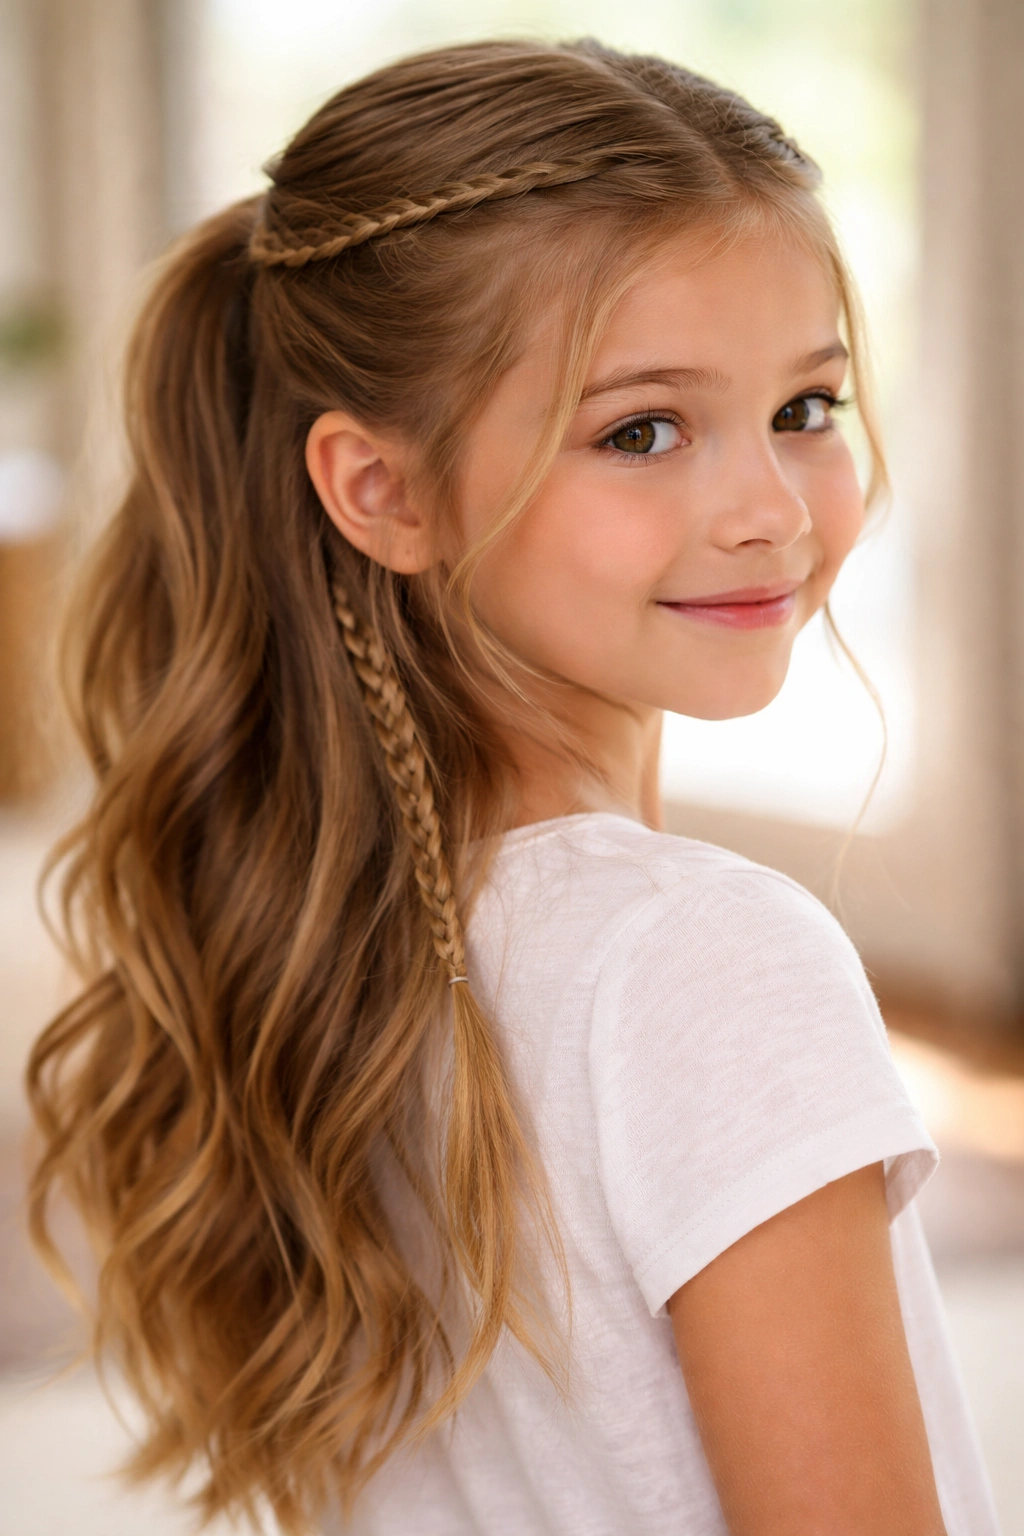
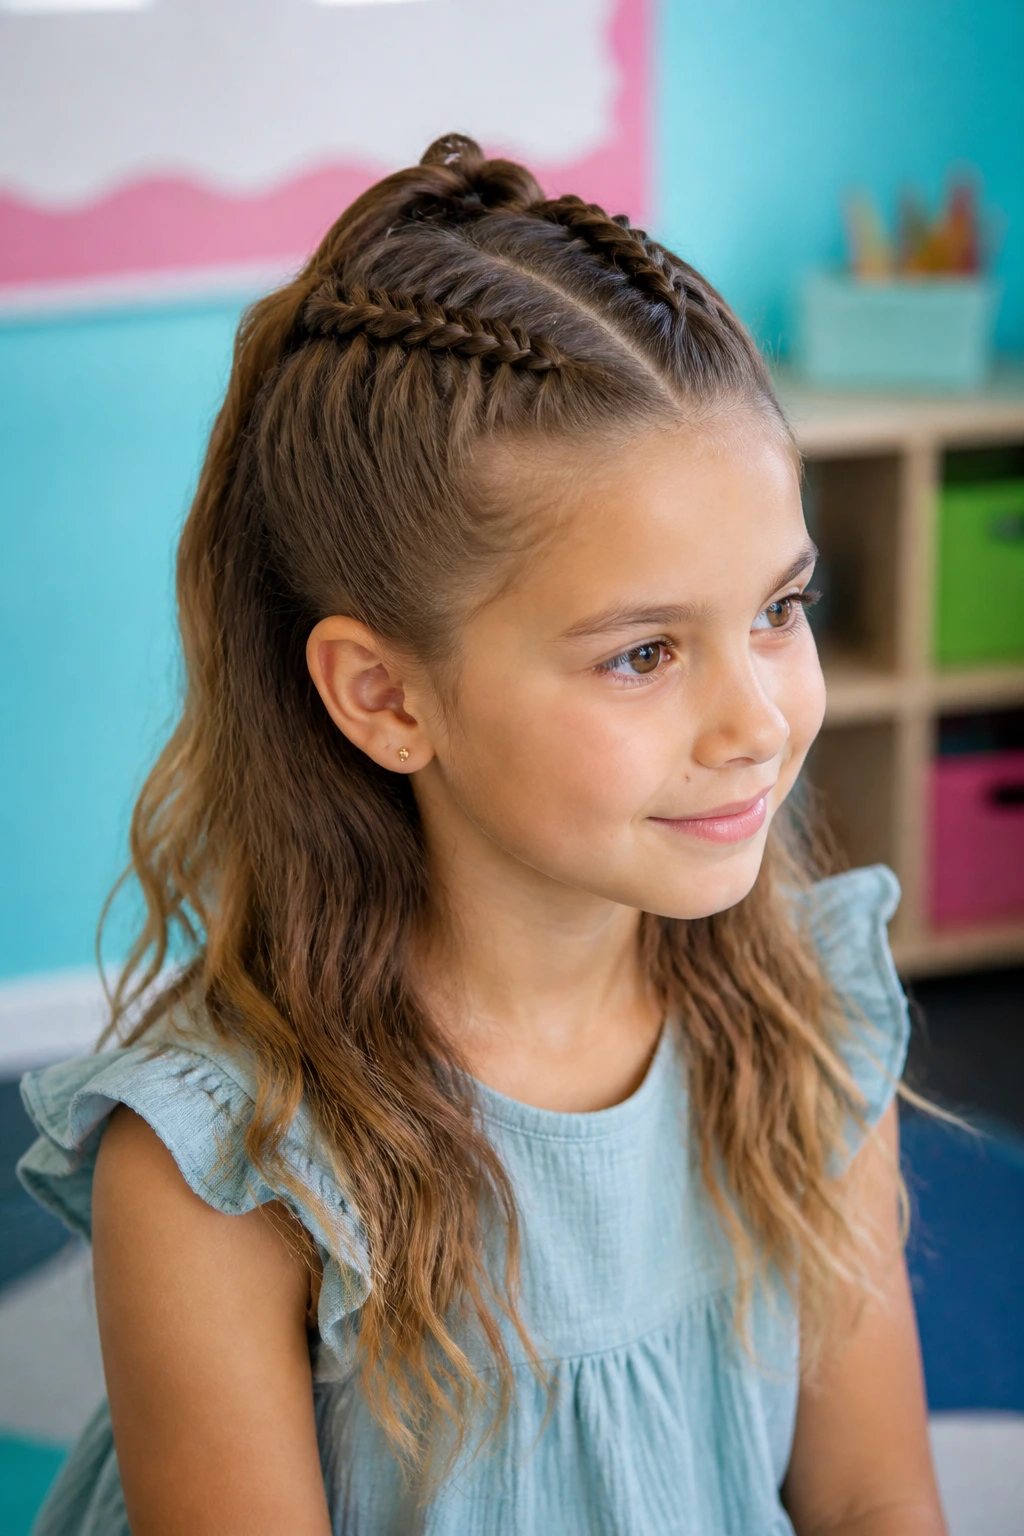
3. The Braided Half-Up with Loose Waves
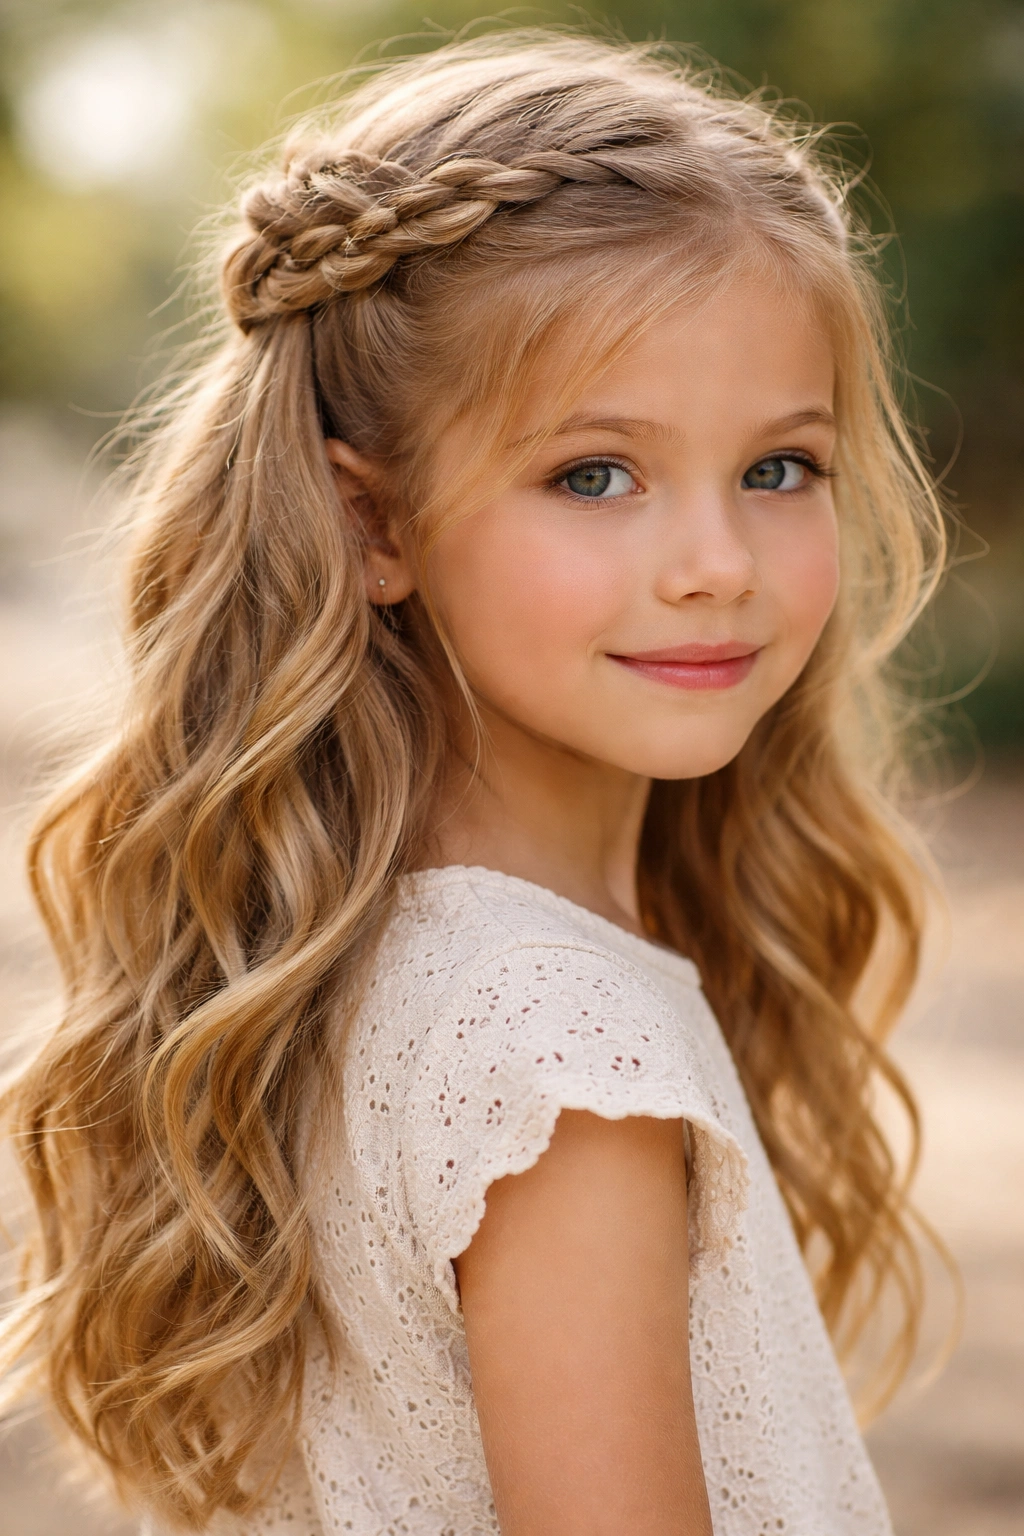
Take a simple three-strand braid from each side of the head and bring both braids to the crown, securing them together with an elastic. This works beautifully with wavy or curly hair because the texture shows off the braid detail. Even if your child’s hair is straight, braided half-ups have an effortlessly polished quality.
The Braid Advantage
Braids hold all day without loosening, which is why they’re perfect for active kids. They also add visual fullness and texture to the style, making thin hair look thicker and fine hair look more substantial. A braid at the sides automatically frames the face in a flattering way, especially if you leave a few pieces loose around the hairline.
Creating the Side Braids
- Divide the hair into a left and right section with a deep side part
- Starting from the temple area on one side, begin a three-strand braid and braid down toward the nape
- The braid should be loose enough to feel comfortable but tight enough to hold the shape — aim for a braid that’s about as thick as your child’s thumb
- Repeat on the other side, then bring both braids up to the crown
- Secure with an elastic, then gently pull on the braids to loosen them slightly for a fuller appearance
Worth knowing: Slightly damp hair braids much more easily than completely dry hair, so if you’re styling in the morning and the braids feel floppy, try misting the hair with a spray bottle first.
4. The Half-Up with a Bow or Clip Detail
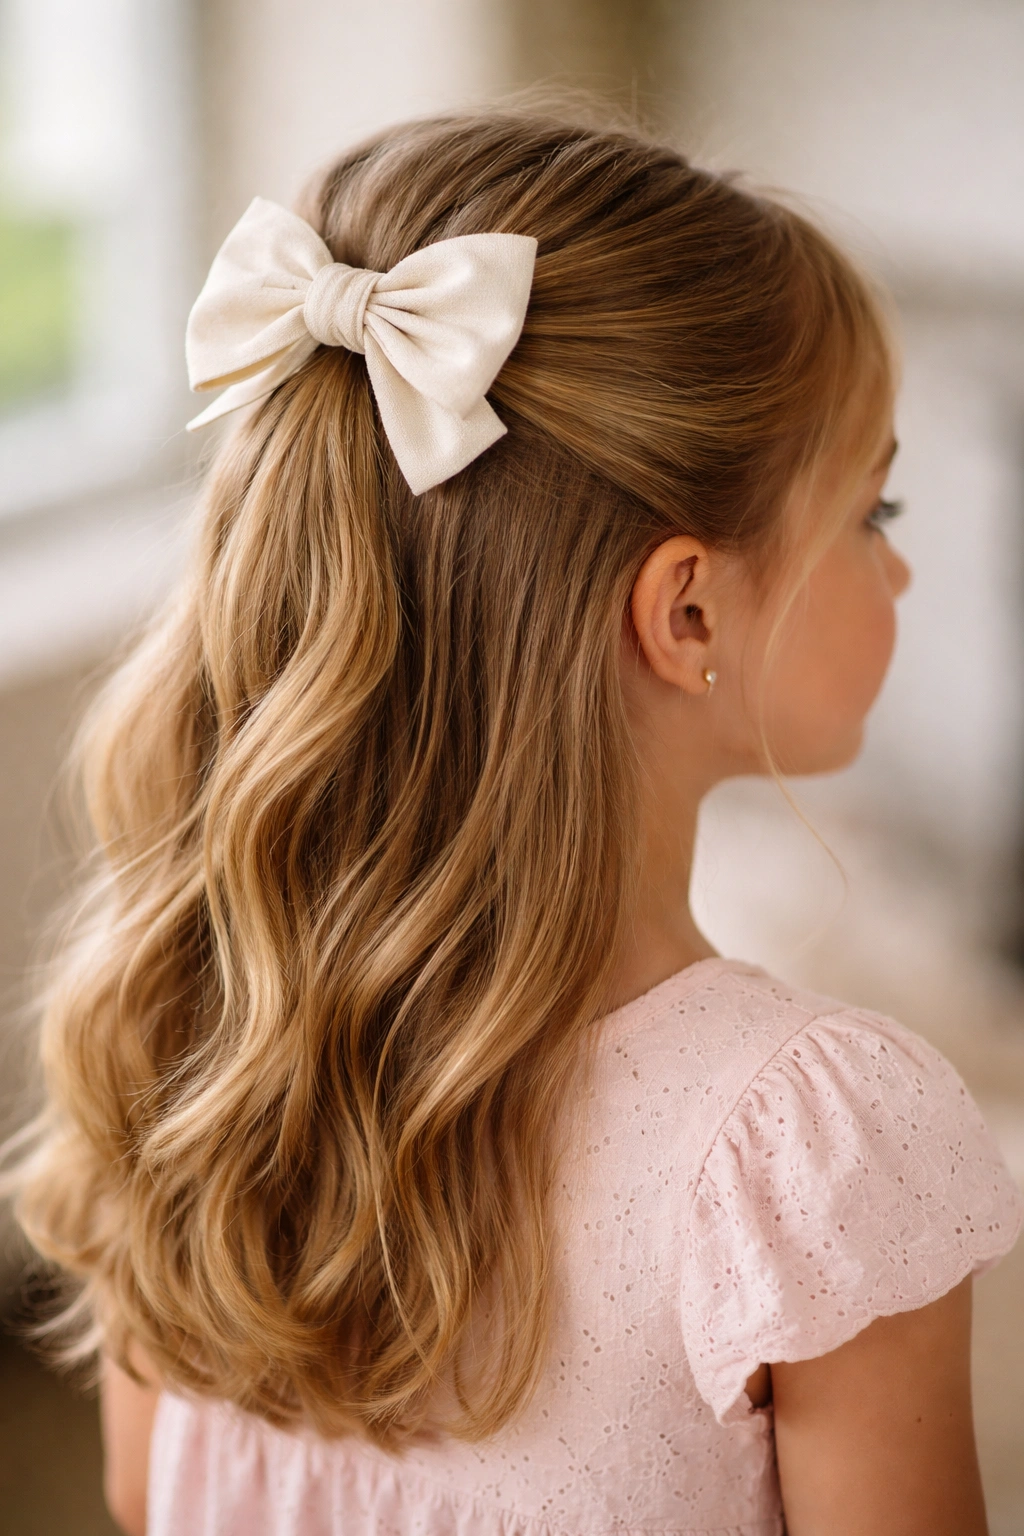
The half-up half-down ponytail becomes extra special when you add a bow, clip, or decorative detail at the base of the crown ponytail. This simple addition elevates the style instantly and gives kids that polished, put-together look without requiring any advanced styling skills. The detail acts as a focal point that makes even a simple ponytail feel intentional and styled.
Choosing the Right Accessory
Bows work beautifully, especially velvet bows, ribbon bows, or bows that match the child’s outfit or school colors. Decorative clips, metallic claw clips, and jeweled hair clips all add personality. The key is choosing something with enough visual weight to balance the volume of hair in the ponytail — a tiny clip on a thick ponytail will disappear, while an oversized bow on fine hair can look overwhelming.
Styling with Accessories
- Create your half-up ponytail as usual
- Slide a bow or clip over the elastic securing the ponytail, positioning it so it covers the elastic completely
- Make sure the accessory is secure enough not to slip throughout the day — if you’re worried, use a small bobby pin to tack it in place from the back
- For bows, fluff the tails so they hang nicely
- For clips, position them facing forward for maximum visibility
Quick tip: Keep a small collection of bows and clips in your child’s backpack so they can change them throughout the week without restyling the hair itself.
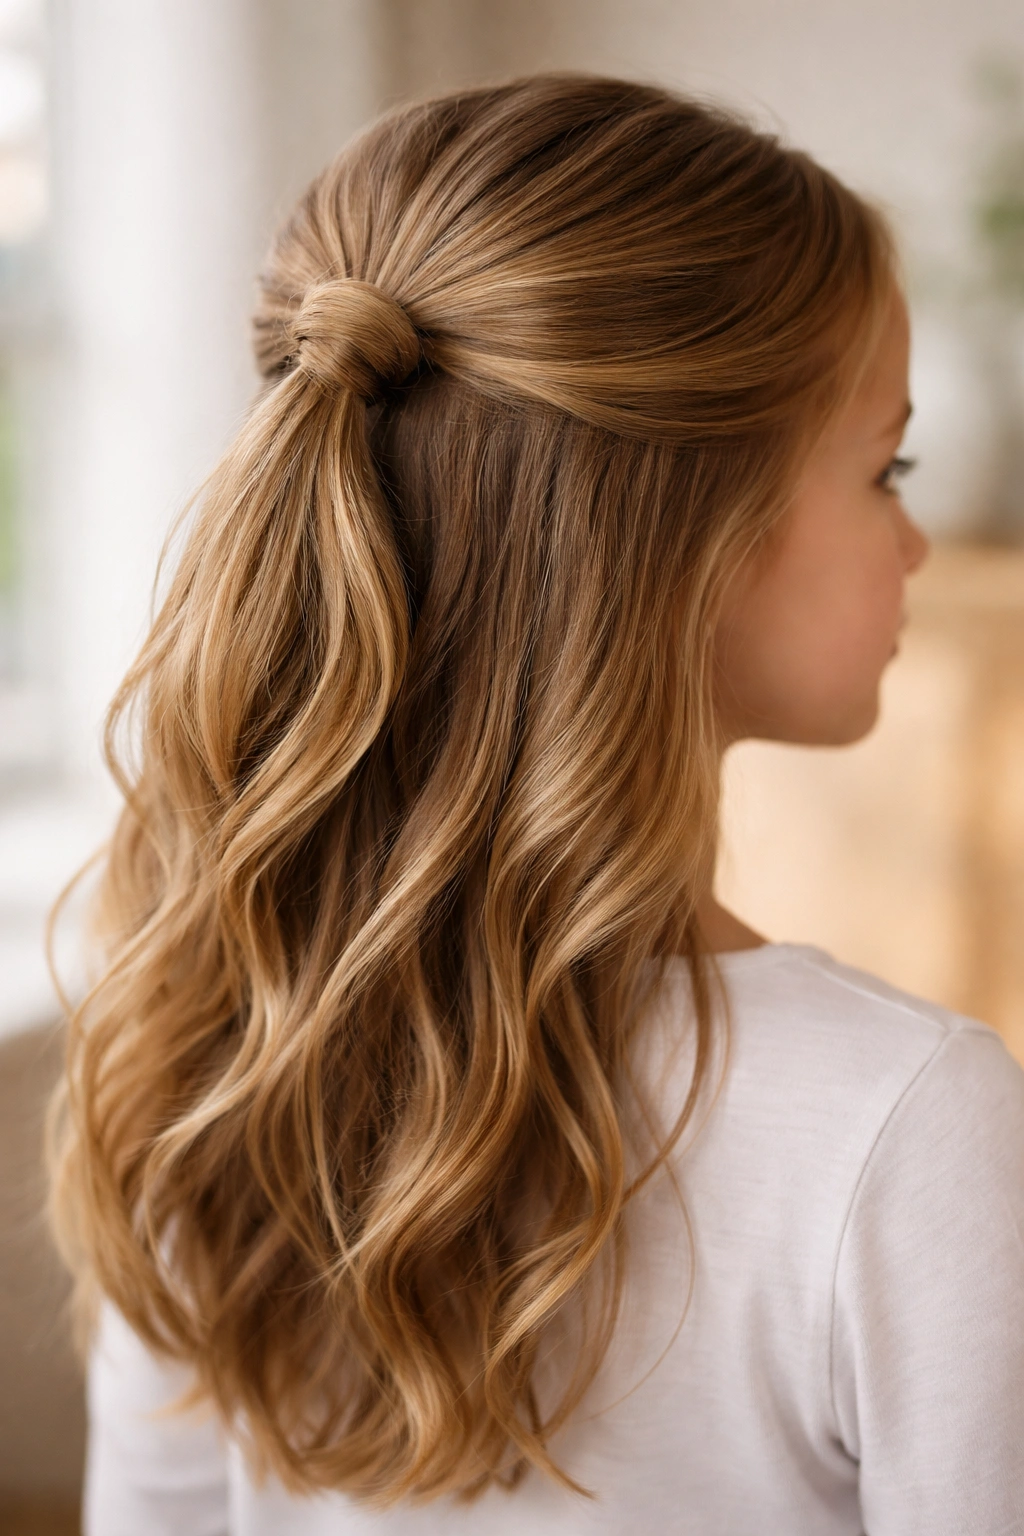
5. The Looped Half-Up Ponytail
Instead of a traditional ponytail knot, create a half-up style by bringing the top section of hair up to the crown and securing it with an elastic, then wrap a small piece of hair (or use a matching thread) around the base to hide the elastic. Flip the top section to create a loose loop or knot at the crown, which gives a more modern, fashion-forward vibe than a standard ponytail.
The Looped Effect
Looped ponytails have a casual, effortless aesthetic that works for everyday wear or dressier occasions. The loop sits at the crown and creates height and dimension, making the style look more intentional than a simple half-up. This works particularly well for kids with longer hair because you have enough length to create a substantial loop without the style feeling flimsy.
Creating the Loop
- Create a standard half-up ponytail by gathering the top section and securing with an elastic
- Pull the secured ponytail into a loop at the crown by lifting the section upward and securing it with another elastic closer to the base of the crown
- Wrap a small strand of hair (or a thin ribbon) around the base to conceal the elastic
- Leave the bottom half of the hair down and slightly curled or waved for contrast
- This style works especially well if you lightly backcomb the crown area first for added volume
Pro tip: If the loop feels loose or unstable, use a small bobby pin hidden inside the loop to anchor it to the base of the crown — your child won’t feel or see it, but the style will hold through the entire day.
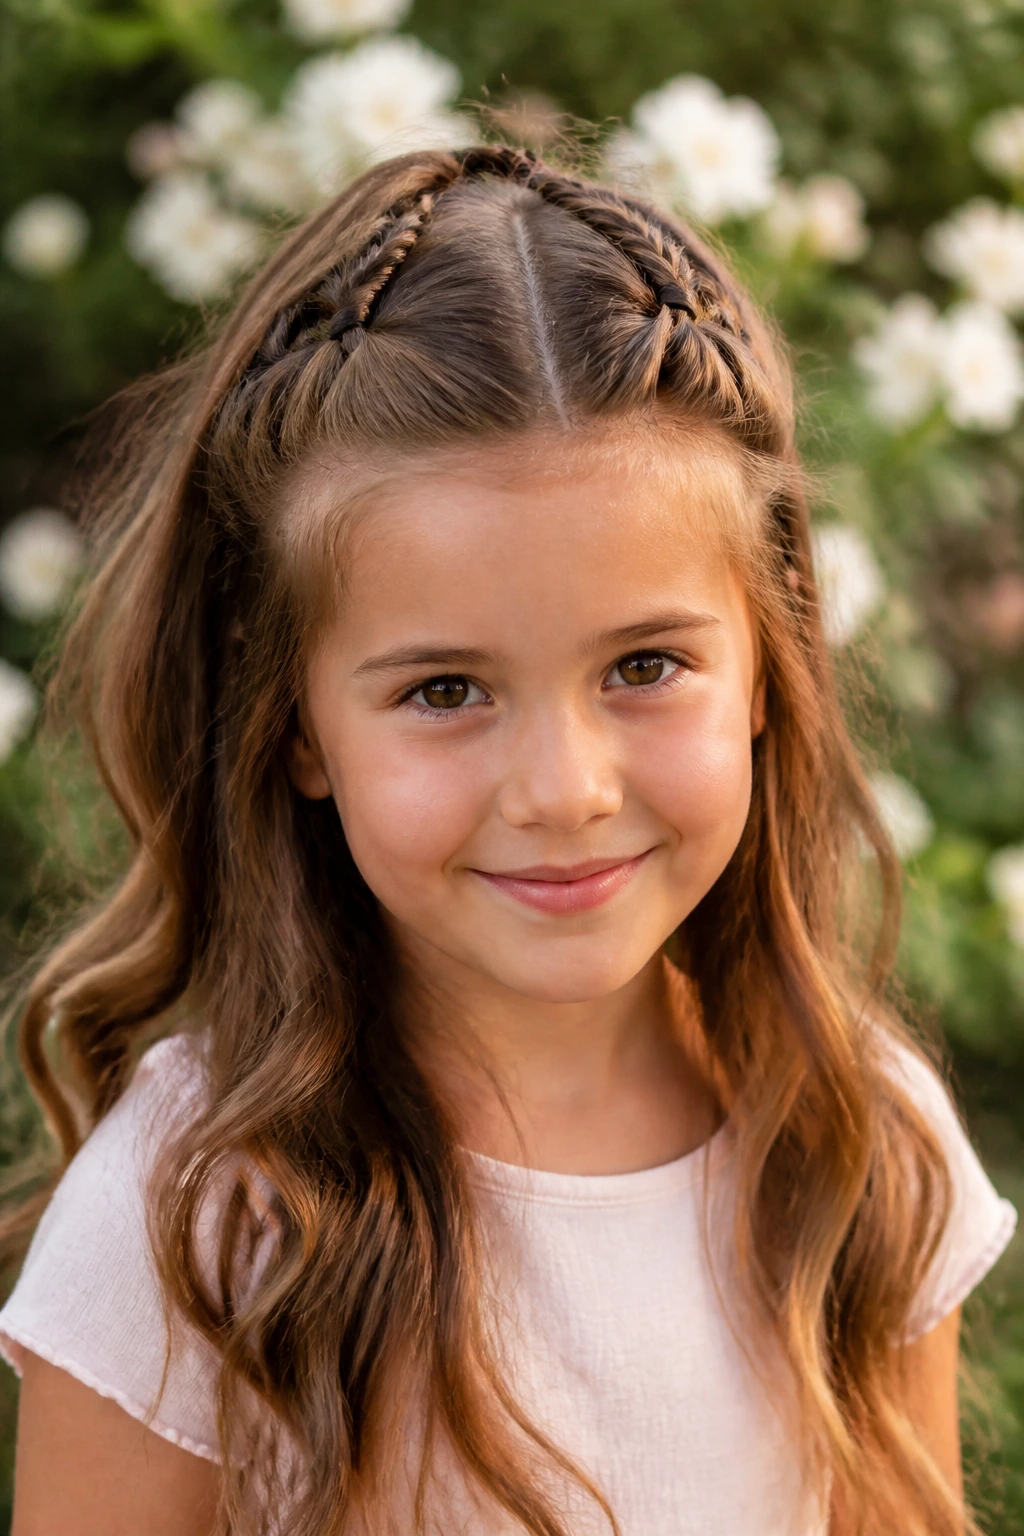
6. The Double Braid Half-Up
Take two thin braids from the front sections of hair on each side and bring them together at the crown into a single ponytail. This creates a more detailed, intricate look than a single braid while still being completely manageable. The double braids add sophistication and visual interest without requiring your child to sit still for an extended styling session.
Double Braid Benefits
Two smaller braids are actually easier to manage than one thick braid, especially on kids who get fidgety during styling. The dual braids add texture and dimension, and they photograph beautifully. This style works on almost any hair type and length, from waist-length hair to shorter bobs that hit just past the shoulders.
Styling Two Braids
- Create a center part down the middle of the head
- Starting from the left side of the part at the temple, create a thin three-strand braid
- Repeat on the right side, keeping the braids roughly the same size and thickness
- Bring both braids around the back of the head and secure at the crown with a single elastic
- Gently loosen the braids by pulling on the outer strands for a fuller, more romantic appearance
- Leave the remaining hair down for balance
Worth knowing: If one braid is thicker than the other, loosen the thicker one more aggressively to create visual balance — this also makes the style look intentionally relaxed rather than uneven.
7. The Twisted Crown Half-Up
Create two soft twists that spiral around toward the back of the head from behind the ears, then secure them together at the crown for a half-up style with serious visual impact. This style has a sophisticated, almost princess-like quality while still being comfortable and wearable for everyday activities. The twists frame the face beautifully and add dimension throughout the crown area.
Crown Twist Technique
The crown twist combines the ease of twists with placement that makes a real visual statement. Unlike side twists that meet at the crown, crown twists spiral from the sides and actually wrap partially around the back of the head before meeting. This creates more complexity and interest while the underlying structure remains simple enough for kids with various hair types.
Creating the Crown Twist
- Take a small section of hair from just behind one ear
- Twist it gently up toward the crown, following the curve of the head as you twist
- The twist should spiral from the ear area toward the back-center of the head
- Repeat on the opposite side, mirroring the path of the first twist
- When both twists reach the back, secure them together with a small elastic
- Gently loosen the twists by pulling the outer strands for a fuller appearance
- Leave the remaining hair flowing down the back
Insider note: This style works especially well if you twist loosely and then backcomb the crown area slightly before securing — the texture gives the twists more presence and makes them less likely to slip.
8. The Half-Up Fishtail Braid
A fishtail braid is essentially a two-strand braid that creates a delicate, woven appearance. Take a fishtail braid from each side of the head and bring both to the crown for a half-up style that looks intricate but is actually simpler than a three-strand braid. Fishtail braids have an incredibly soft, romantic quality that works beautifully on all hair types.
The Fishtail Advantage
Fishtail braids look intentionally sophisticated and work particularly well on fine or thin hair because they don’t compress the hair as much as thicker braids do. The woven effect is visually interesting without being overly structured. Kids love the delicate appearance, and parents love how much less time they take compared to traditional three-strand braids.
How to Fishtail Braid
- Divide the hair into two equal sections at the starting point
- Take a small piece of hair from the outer edge of one section and cross it over to join the other section
- Take a small piece from the outer edge of the now-outside section and cross it back
- Continue alternating sides, always taking from the outer edge and crossing to the center
- For the crown braids, start at the temple and braid down toward the nape
- Once you reach the base, secure with a small elastic and repeat on the other side
- Bring both braids to the crown and secure together
Pro tip: Fishtail braids hold better in slightly textured hair, so if your child’s hair is very slippery, try a light texture spray before braiding.
9. The Half-Up with Face-Framing Pieces
Create a simple half-up ponytail, but intentionally leave face-framing pieces loose on both sides. These pieces should be pulled from just in front of the ears, framing the face naturally. This style softens the overall look and adds movement and fluidity — it’s polished but not severe, and it works beautifully on kids with various face shapes.
The Face-Framing Effect
Face-framing pieces instantly make a hairstyle feel more current and sophisticated. They soften the appearance of a pulled-back style and add movement that keeps the look from feeling too structured. This is especially useful if your child finds tight ponytails uncomfortable — you can loosen the crown ponytail while still keeping most of the hair off their face.
Styling with Face-Framing Pieces
- Before creating your half-up ponytail, identify the pieces you want to leave loose — typically from temple to jaw length
- Create your half-up ponytail by securing everything except those designated pieces
- Gently curl or wave the face-framing pieces with a curling iron or by braiding them loosely while damp and letting them dry
- The loose pieces should look intentional, not like they escaped the ponytail
- Add a tiny bit of hairspray to the loose pieces so they stay where you’ve placed them
- If your child doesn’t like curls, the pieces look beautiful styled straight or slightly waved
Worth knowing: If your child has a lot of hair and is concerned about loose pieces feeling too wispy, take slightly thicker sections for the face-framing — this creates more presence and substance.
10. The Half-Up with Ribbon Weave
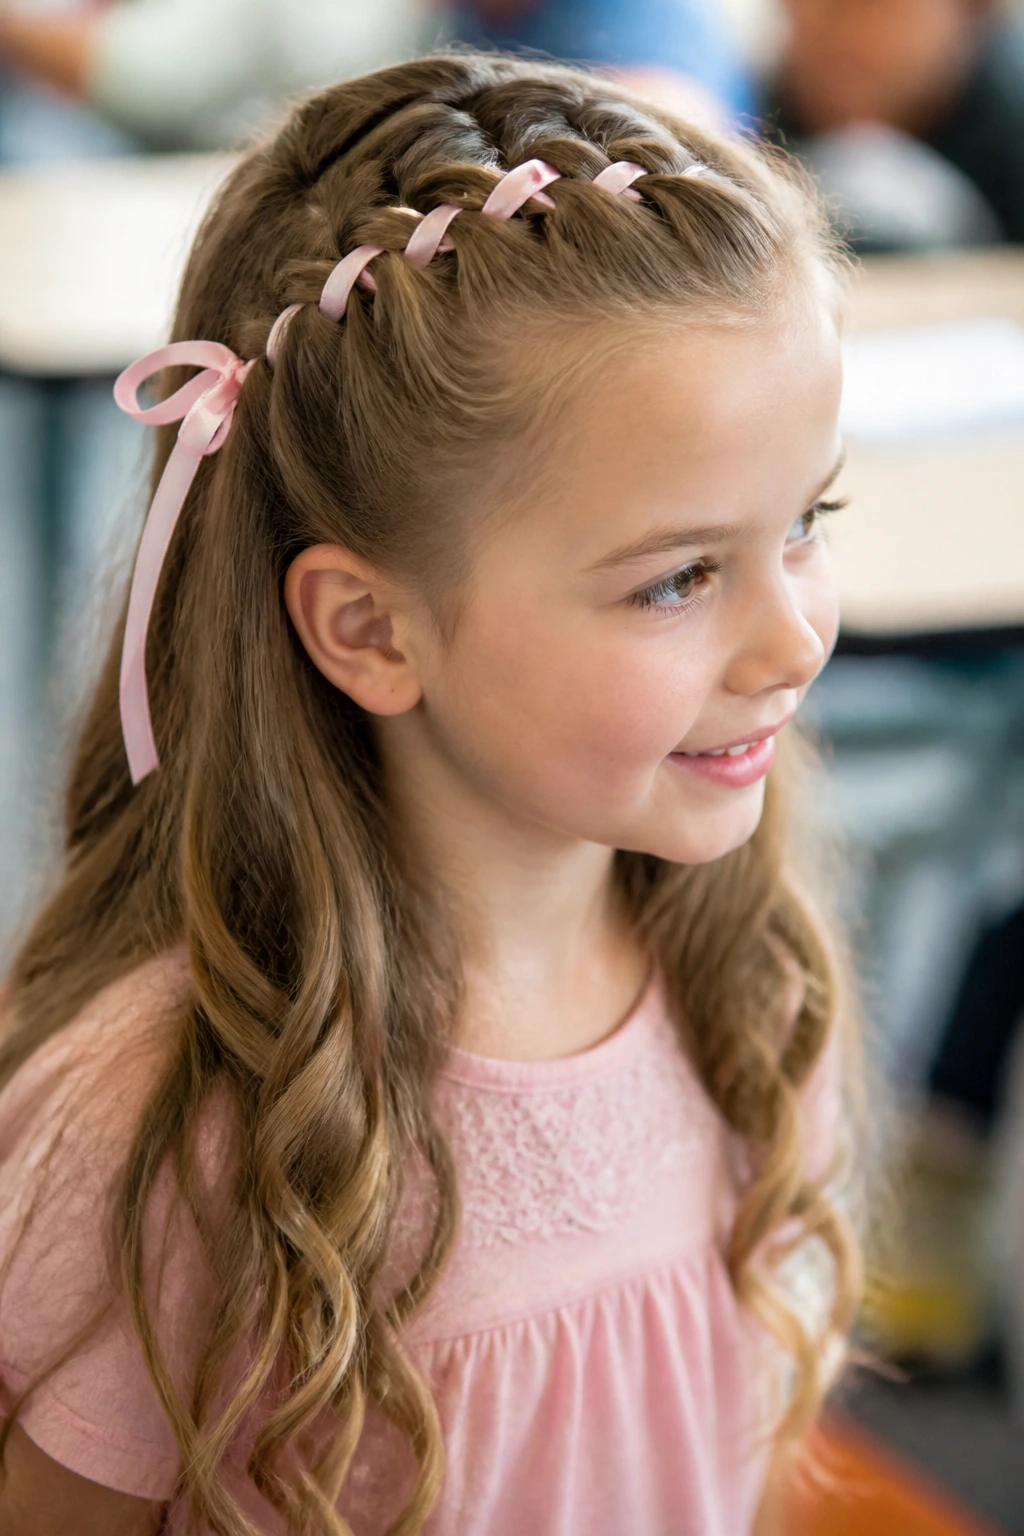
Create a half-up ponytail, then weave a thin ribbon through the sections of a braid or through the loose hair of the ponytail. Ribbon weaving adds color, dimension, and special-occasion polish to an otherwise simple style. This works beautifully for school events, pictures, or any time you want the style to feel extra.
Ribbon Weaving Possibilities
Ribbons can be woven through braids for an intricate look, woven directly into loose hair for texture, or simply tied around the base of the half-up ponytail as an accent. The color options are limitless — match the ribbon to the child’s outfit, school colors, or a favorite color. Ribbons made from satin, silk, or lightweight materials work best because they’re easier to manipulate and drape beautifully.
Adding Ribbon to Your Half-Up
- Create your half-up ponytail with a braid or simple gather
- Choose a ribbon in your desired color and width
- For braided styles, weave the ribbon through the braid by threading it over and under the strands as you work
- For loose ponytails, you can create a simple two-strand braid with the ponytail hair and weave the ribbon through, or simply pin the ribbon at the crown and let it cascade down
- Secure the ribbon at the top and bottom so it doesn’t slide out
- Trim the ribbon to match the length of the ponytail or braid
- Curl or wave the tail of the ponytail for extra polish
Quick fact: Ribbon-weaving looks especially striking in photos because the color adds dimension that reads well on camera.
11. The Half-Up Bun
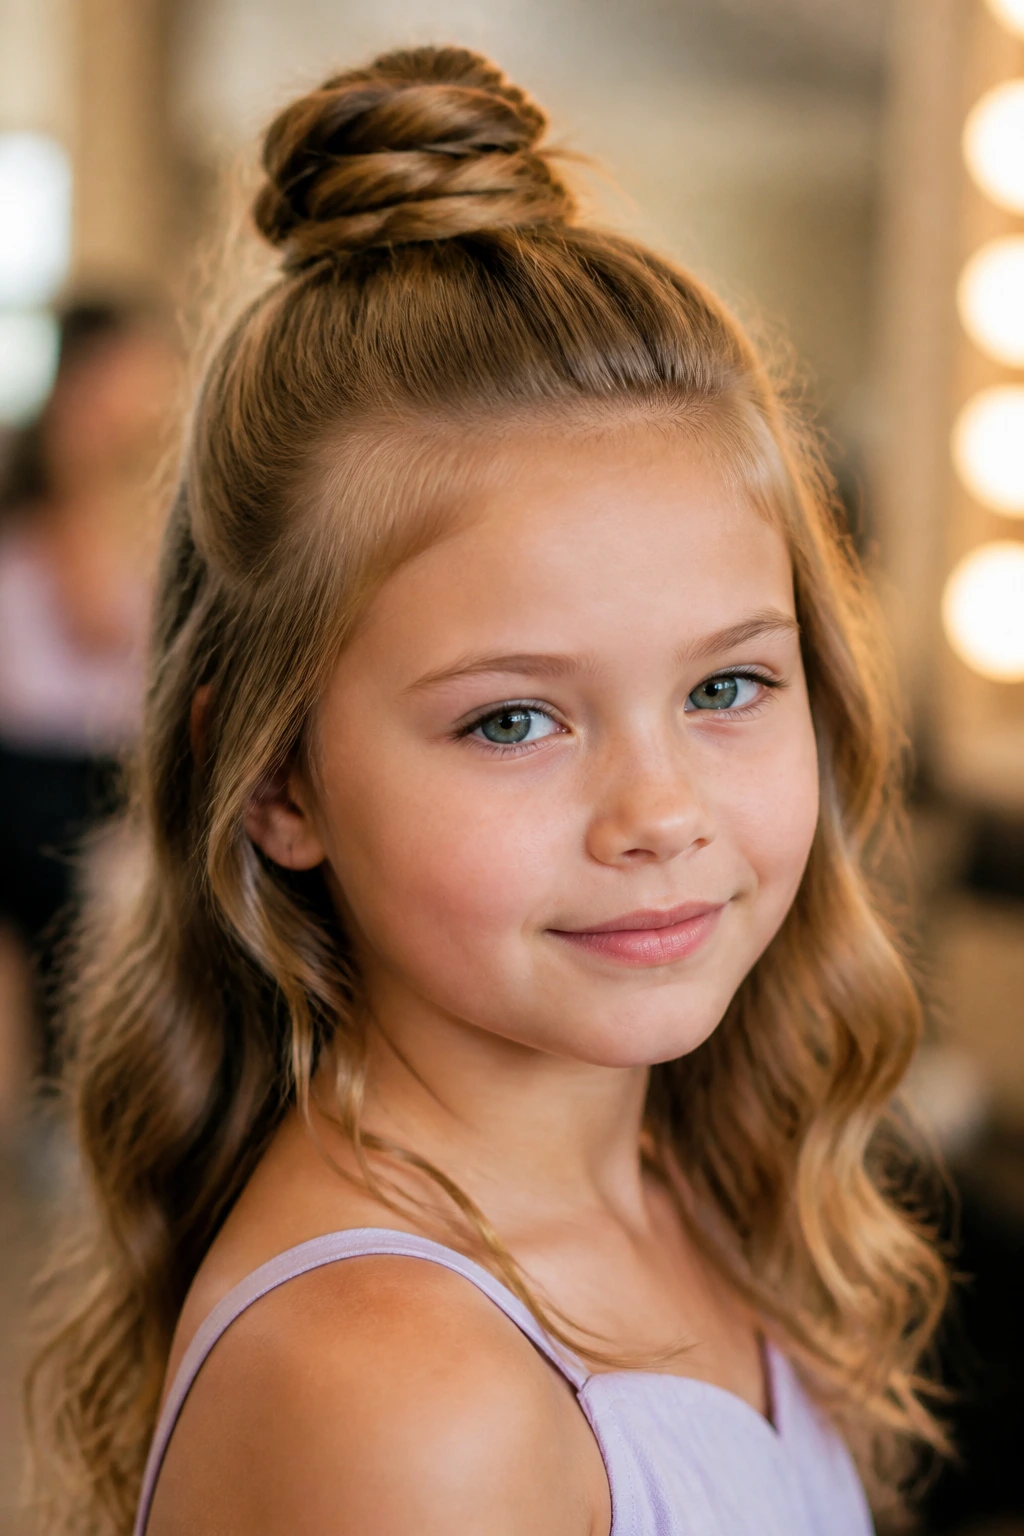
Instead of leaving the top section as a ponytail, twist it into a small bun at the crown and secure it with bobby pins. This style is perfect for active kids because everything stays completely in place. It’s also more formal-looking than a standard half-up ponytail, making it ideal for special occasions, recitals, or performances where you need a polished, finished look.
When to Choose a Bun
A half-up bun is the way to go when you need the style to hold through physical activity, dance class, or a full day without adjustment. The bun sits securely at the crown and doesn’t move, which many kids prefer. This style also works beautifully with longer hair because you have enough length to create a substantial bun without the style feeling sparse.
Creating the Half-Up Bun
- Gather the top section of hair and secure it with an elastic at the crown, just as you would for a standard half-up
- Take the secured ponytail and twist it until it forms a spiral
- Coil the twisted ponytail around the base of the crown, forming a bun shape
- Secure the bun with bobby pins, tucking them under the coils so they’re hidden
- Use at least 3-4 bobby pins to ensure the bun is truly stable
- Smooth down any flyaways with a bit of hairspray or edge control
- Leave the bottom half of the hair down and styled as desired
Pro tip: If you backcomb the crown area lightly before gathering the hair into the half-up, the bun will have more grip and be less likely to rotate or slip throughout the day.
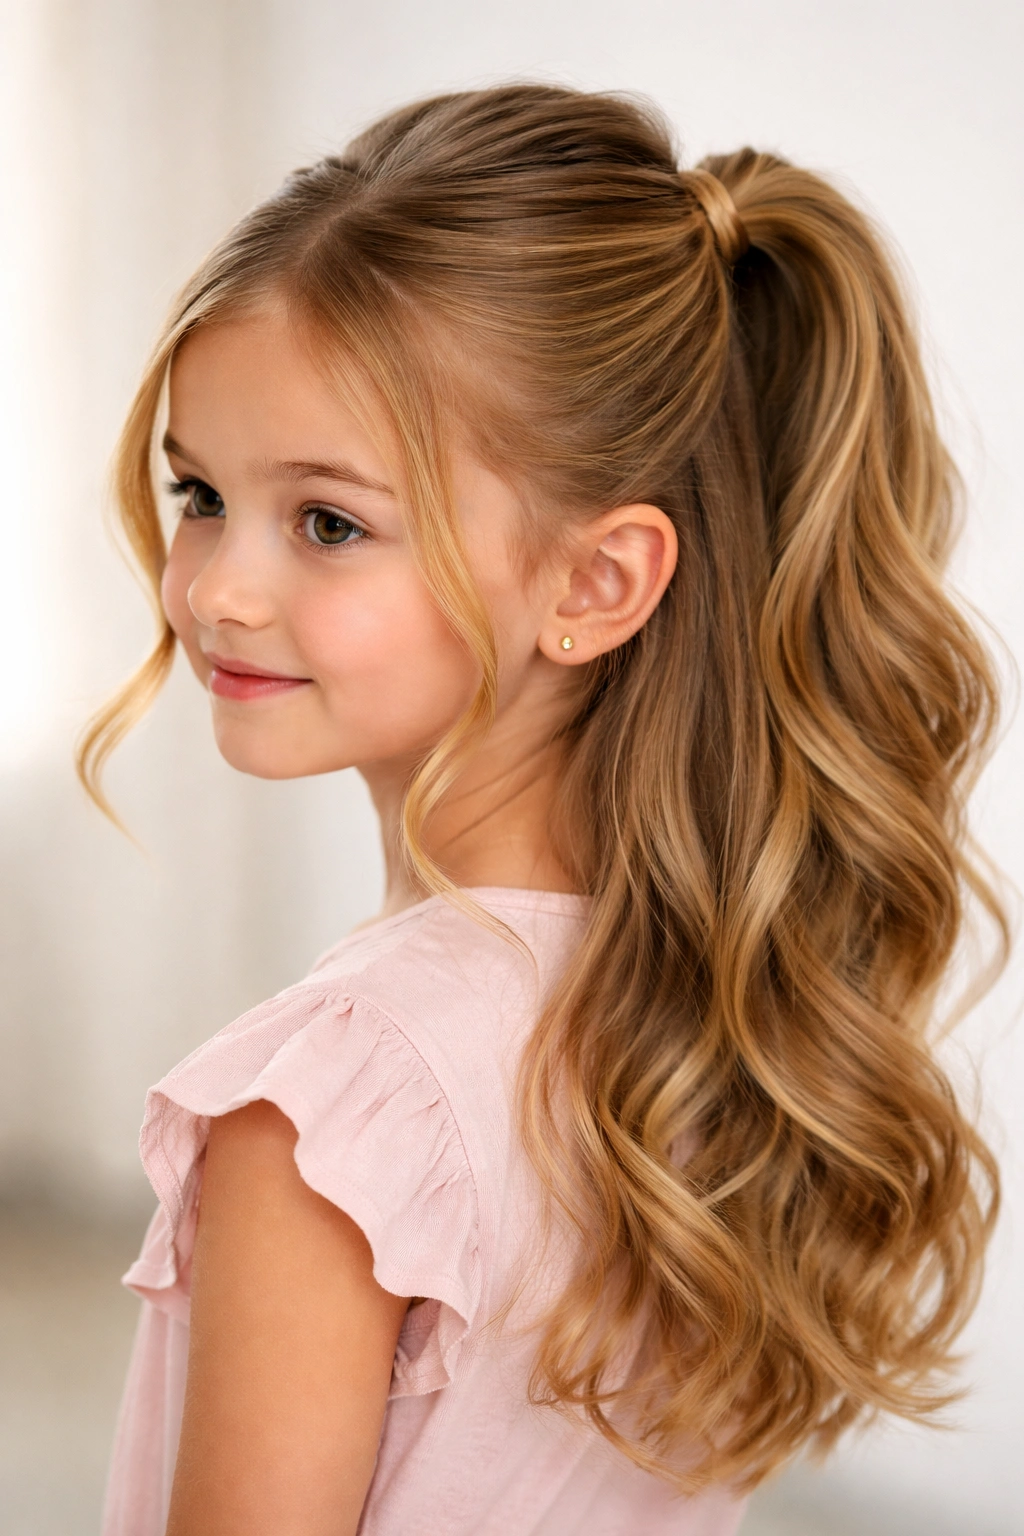
12. The Half-Up with Curled Ends
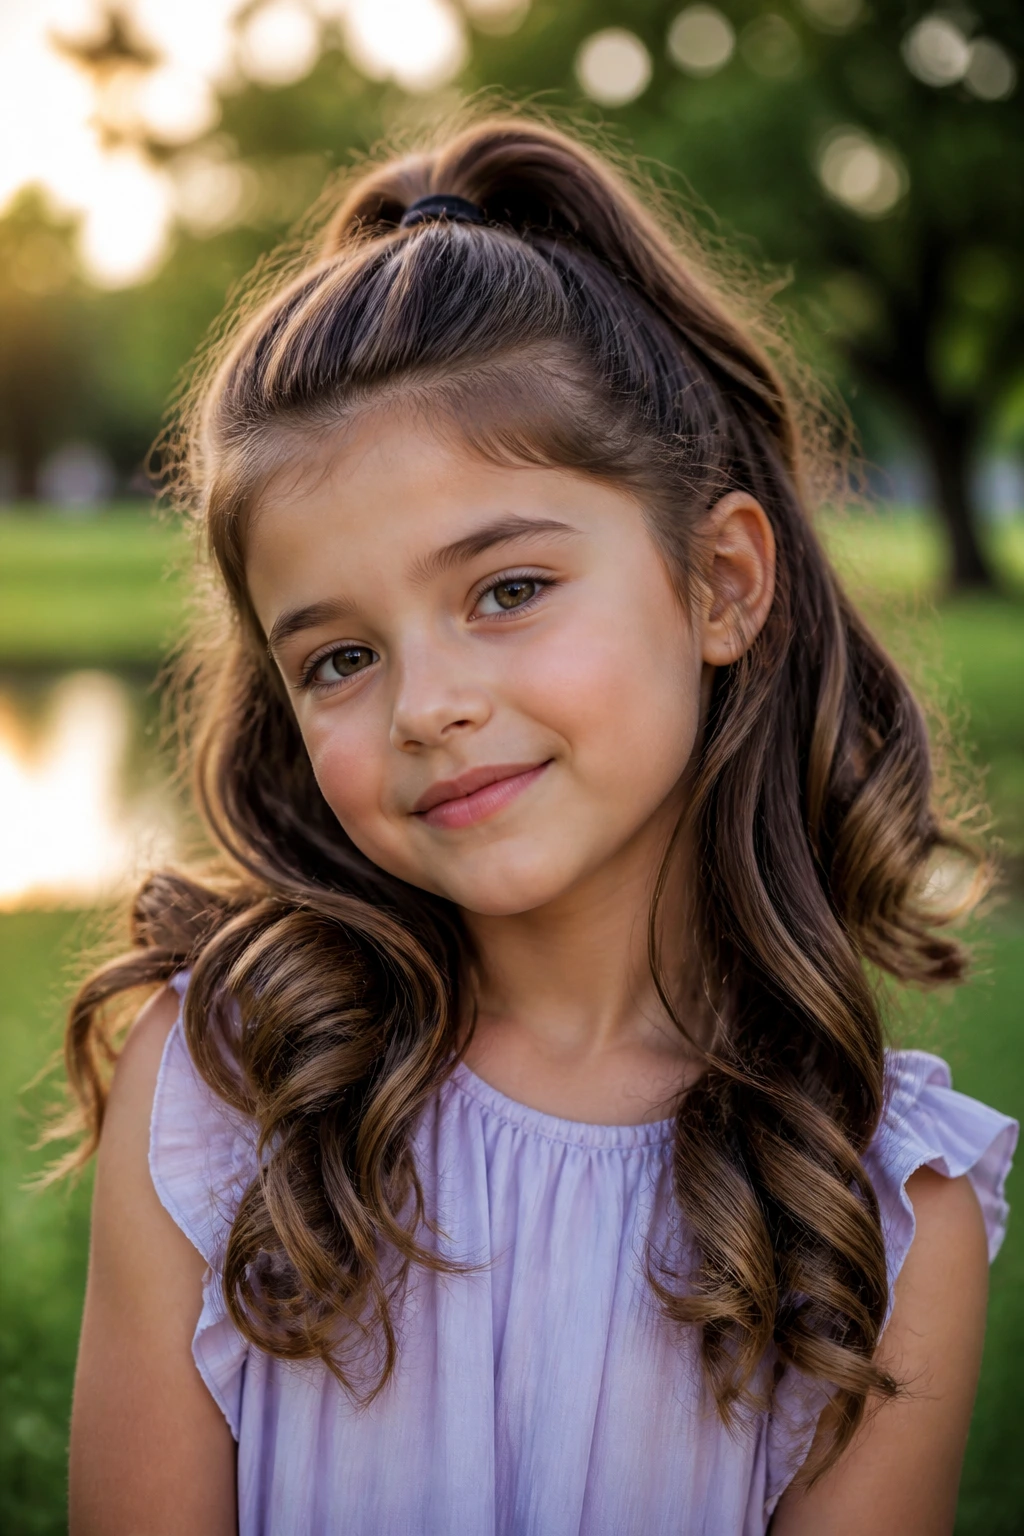
Create a simple half-up ponytail, then curl or wave the bottom half of the hair with a curling iron. The contrast between the neat, pulled-back crown and the soft curls at the bottom creates visual interest and volume. This style works on kids with longer hair and looks especially beautiful for occasions when you want a more dressed-up appearance.
Curling for Kids
Curling your child’s hair requires a gentle hand and realistic expectations about whether they’ll sit still for the entire styling process. Rather than curling every strand perfectly, go for a more relaxed, intentional wave effect that still looks polished. The half-up structure means you’re only curling the lower half of the hair, which is much less time-consuming than curling the entire head.
Styling Curled Ends
- Create your half-up ponytail as usual
- Divide the bottom half (the hair left down) into sections about the width of your curling iron barrel
- Wrap each section around the barrel, holding for 5-10 seconds depending on hair thickness and texture
- For a softer, more relaxed curl, wrap the barrel loosely and let the hair unwind gradually
- For tighter curls, hold the barrel more firmly and let the curl cool slightly before releasing
- Once all sections are curled, gently brush through the curls with your fingers to loosen them slightly
- Finish with a light hairspray to set the curls
Worth knowing: Curls hold much better in slightly damp hair, so if you’re styling in the morning after a shower, your child will have better results than if the hair has been dry all day.
13. The Half-Up with Zigzag Part
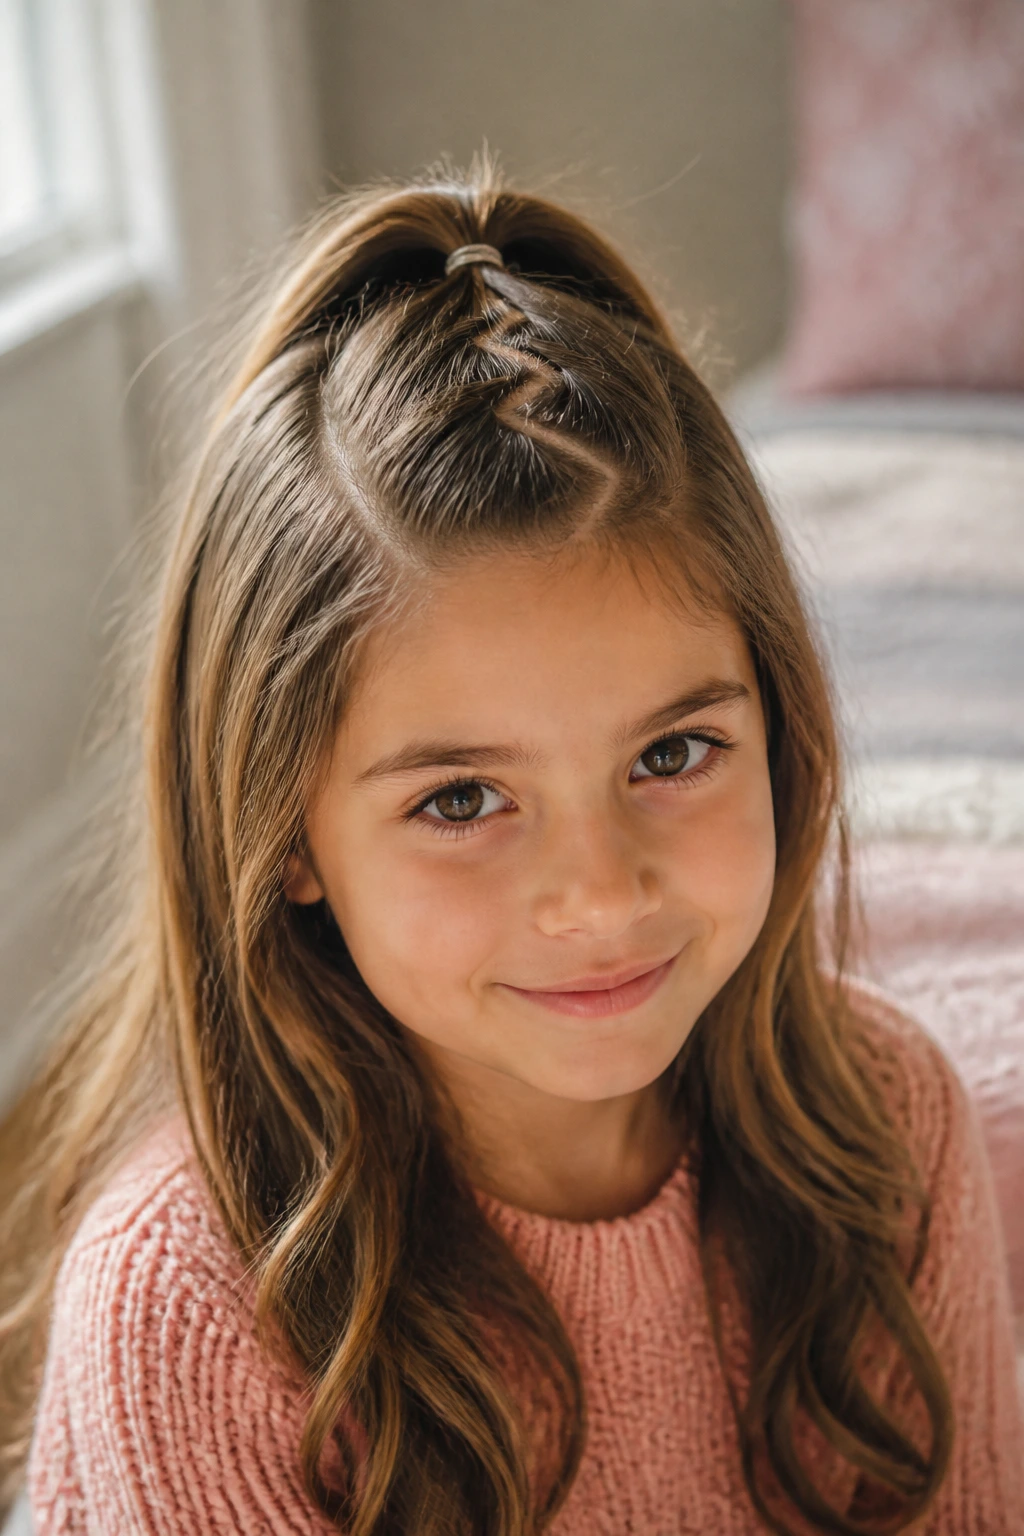
Create a half-up ponytail using a zigzag part instead of a straight center part or standard section. The zigzag part adds visual movement and a playful, youthful quality to the style. This works especially well for kids who prefer their styles to feel fun and less formal. The zigzag part creates the illusion of fuller, thicker hair because the irregular line draws the eye across the crown.
The Zigzag Effect
Zigzag parts are instantly more interesting than straight parts, and they work on all hair types. A zigzag part automatically gives the impression that you put extra thought into the styling, even though it takes about the same time as a regular part. Kids love the playful aesthetic, and the irregular line actually makes thin hair look fuller.
Creating a Zigzag Part
- Start at the center of the scalp at the front hairline
- Using the pointed end of a comb, create a zigzag pattern by moving the comb side-to-side as you move backward toward the crown
- The zigzag pattern should be about the width of a pencil wide and should move smoothly from the front to the crown
- Divide the hair on each side of the zigzag and gather into your half-up ponytail
- Secure with an elastic
- The zigzag part is now your main design element, so keep the rest of the style relatively simple
- Enhance the zigzag by misting it with a light hairspray so the line stays defined
Insider note: A finer-tooth comb works better than your fingers for creating a precise zigzag pattern — your child will feel the technique more clearly, which helps them stay still for styling.
14. The Half-Up with Dutch Braid
A Dutch braid is the inverse of a regular braid — instead of crossing strands over, you cross them under, which creates a braid that sits on top of the hair rather than sinking into it. Dutch braids from each side brought to the crown create a more sculpted, defined look than regular three-strand braids. This style is perfect for kids who want their half-up to feel special and intentional.
Dutch Braid Advantages
Dutch braids create more visual impact than regular braids because they sit raised on the scalp. They photograph beautifully and add an athletic, polished quality to the style. Dutch braids take exactly the same amount of time as regular braids but look noticeably more sophisticated.
Creating Dutch Braids
- Start with a small section of hair from the temple area on one side
- Cross the right strand under the middle strand, then cross the left strand under the new middle strand
- This “under” crossing creates the inverted appearance
- As you braid, continue adding small sections of hair from the scalp into your working strands (just like a French braid)
- Continue down toward the nape, then secure the end with a small elastic
- Repeat on the opposite side
- Bring both braids to the crown and secure together with an elastic
- Gently loosen the braids by pulling the outer edges
Pro tip: If Dutch braids feel confusing at first, practice on a doll head or ask your child’s hair stylist to show you the technique in person — once you understand the under-crossing, it becomes second nature.
15. The Half-Up with Decorative Pins
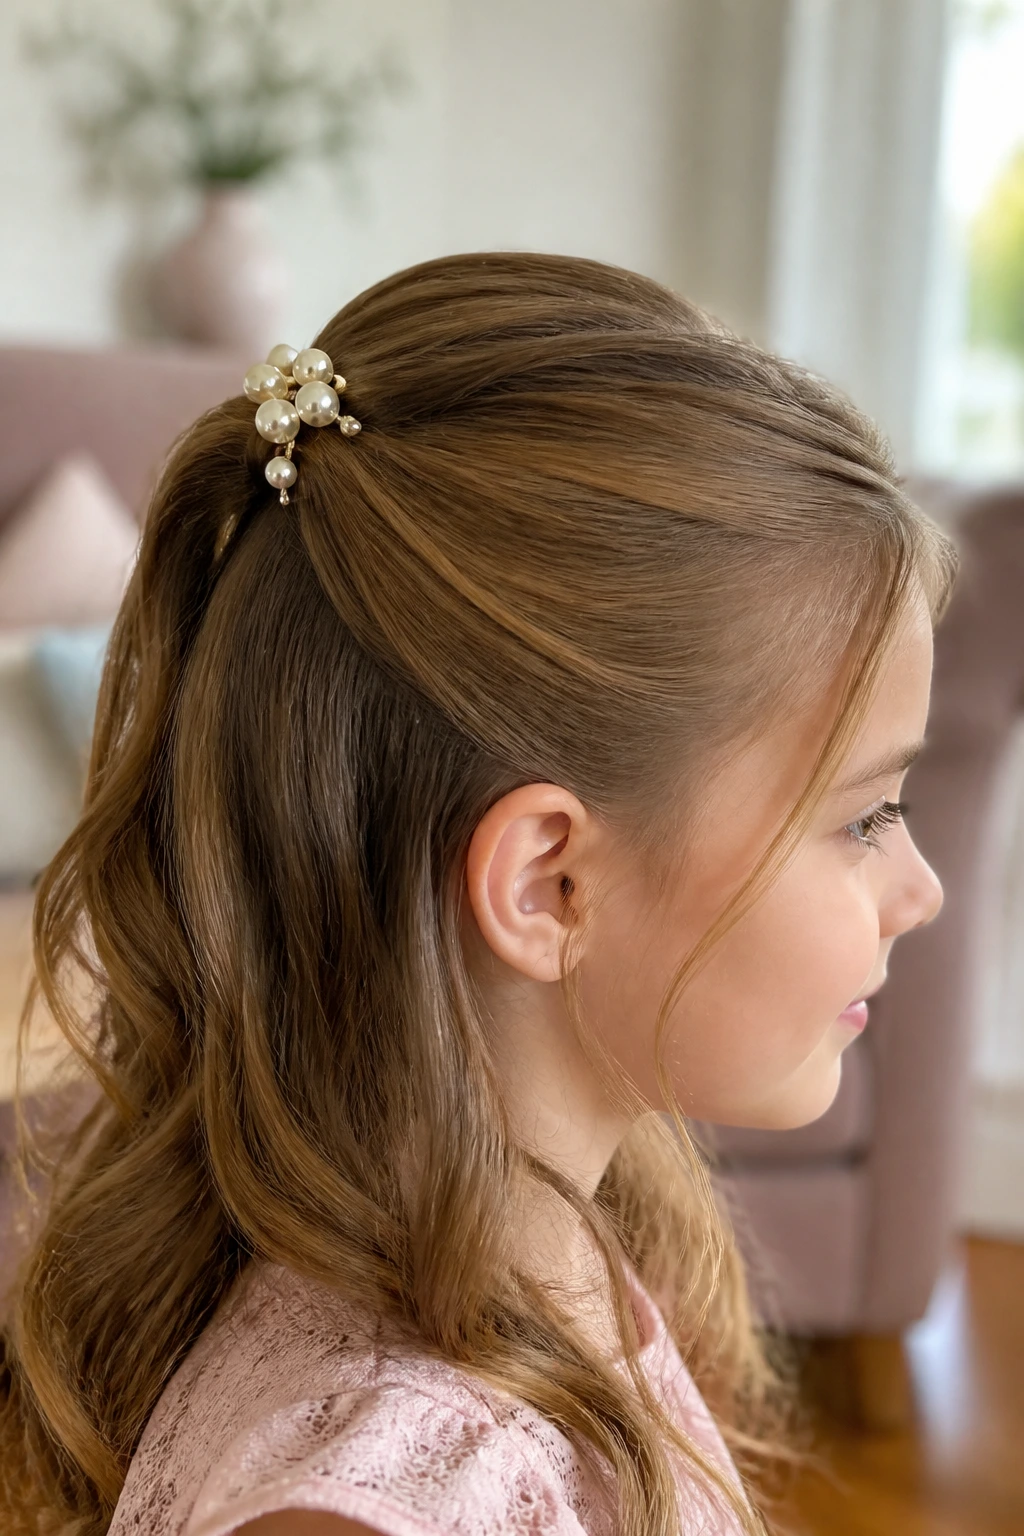
Create a simple half-up ponytail, then use decorative bobby pins, pearl pins, or small hair clips to secure the ponytail and add visual interest. Rather than hiding the pins, let them be part of the design. This trend-forward approach transforms a basic style into something special. You can cluster multiple pins together or space them around the base of the ponytail.
Using Decorative Pins as Design Elements
Decorative pins come in countless styles — pearl, metallic, jeweled, minimalist metal, and more. Using them visibly as part of the design means you’re not trying to hide the mechanics of the hairstyle; instead, you’re celebrating them. This works beautifully for special occasions or school events where you want the styling to feel intentional and fashion-forward.
Incorporating Decorative Pins
- Create your half-up ponytail and secure it with a clear or color-matched elastic
- Slide a decorative pin through the elastic, positioning it so it’s clearly visible
- You can use just one substantial pin or create a cluster of 2-3 smaller pins for more impact
- Position the pins so they sit on top of the ponytail, facing toward the front
- For maximum hold, use actual bobby pins that sit underneath the decorative pins to secure everything
- This style works especially well with metallic or pearl-finish pins against darker hair
- For lighter hair, try tortoiseshell or gold-toned pins
Worth knowing: If you’re using decorative pins for the first time, test them with a regular (non-event) hairstyle first to make sure your child is comfortable with how they feel in the hair — some kids find them too noticeable, while others love the styling element.
Final Thoughts
Half-up half-down ponytails are the real secret to looking pulled-together without requiring elaborate styling skills or spending half an hour in the chair. Whether you go with something as simple as a classic knot or something more involved like a Dutch braid with decorative pins, the foundation is the same — gather the top, secure it, and let the bottom flow.
The key is finding the specific variation that works with your child’s hair texture, length, and personality. Some kids love the security and polish of a braided style; others prefer the softness and movement of simple twists or a classic ponytail. Try a few different options and pay attention to which styles your child actually wants to wear, which ones hold up best throughout their day, and which ones make them feel confident and comfortable.
Once you’ve mastered two or three go-to styles, mornings become dramatically easier. You’ll develop a rhythm, your hands will know exactly what to do, and your child will feel good heading out the door. That’s the real win with these styles — they’re simple enough to do on a regular Tuesday morning, but polished enough to work for photos or special occasions without any additional effort.