Prom night arrives and your shoulder-length hair sits right at that perfect in-between zone—not quite long enough to pull off the dramatic floor-grazing styles, but absolutely ideal for one of hairstyling’s most flattering options. The half-up half-down style has dominated red carpets and prom venues for good reason: it gives you the romance and elegance of an updo without the severity, keeps hair off your face while letting the bulk flow freely, and works with virtually any dress style from classic ball gowns to sleek modern silhouettes.
Shoulder-length hair hits a sweet spot for this look. It’s substantial enough to create genuine volume at the crown, versatile enough to support intricate braids and twists, yet manageable enough that you won’t spend two hours in the chair. Whether you’re drawn to vintage Hollywood glamour, bohemian texture, sleek modern polish, or something completely unexpected, there’s a half-up half-down variation that’ll make you feel like the best version of yourself walking through those prom doors.
The real magic of half-up half-down styling is that it reads as effortlessly elegant—like you woke up that stunning, rather than looking like you tried too hard. That balance between polished and relaxed is exactly what prom-goers search for, and these fifteen looks nail it in completely different ways. Each one is achievable with the right guidance, works beautifully with shoulder-length hair, and absolutely photographs well from every angle.
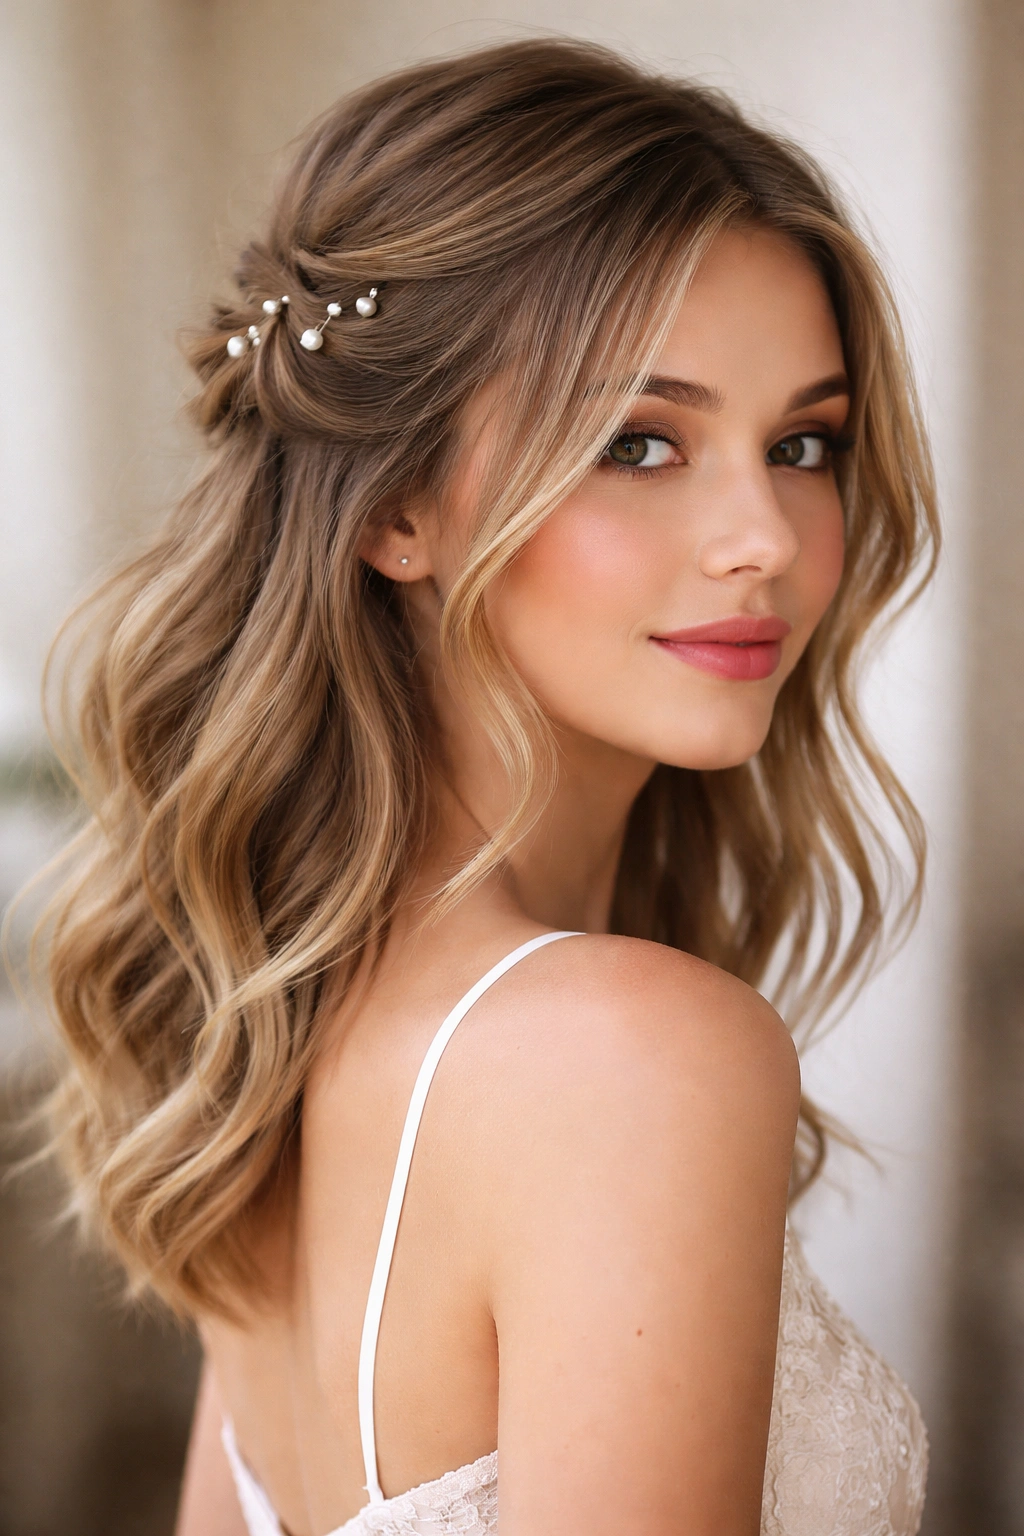
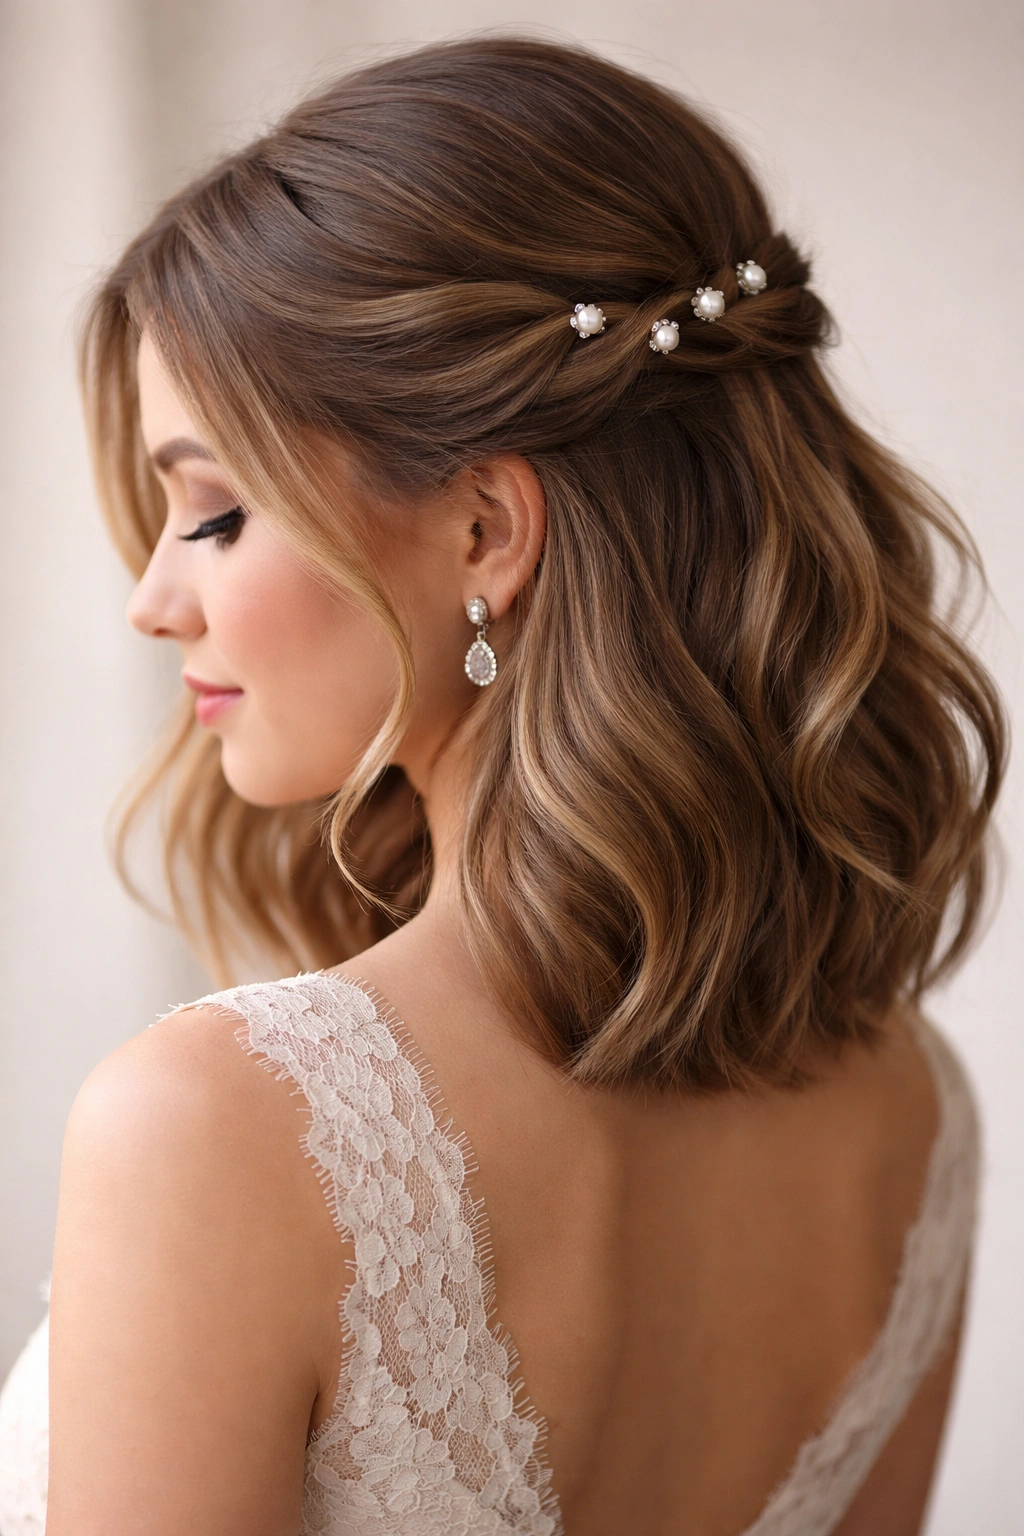
1. Classic Twisted Half-Up with Pearl Pins
This timeless style starts with a clean center part and works best when you’ve added some gentle waves or curls to your hair beforehand. Take a section from each side of your head at about temple height, twist both sections away from your face, and secure them at the back of your crown with pearl bobby pins or a decorative clip. The pearl pins shouldn’t hide—let them be a feature, catching light as you move.
Why This Works for Shoulder-Length Hair
Twists don’t require excessive length to look substantial and intentional. With shoulder-length hair, your twists will be clearly visible and elegant without looking thin or sparse. The style works because it creates a frame for your face while leaving the majority of your hair down, and the classic simplicity means it pairs beautifully with any hair texture from straight to wavy.
Getting the Details Right
- Keep your twists loose and romantic rather than tight and structured
- Use 2-3 pearl pins per twist for a romantic, intentional look
- Make sure waves extend all the way to your ends for cohesion
- This pairs beautifully with minimal makeup since your face is so visible
- The style holds for the entire night with a light hairspray
- Consider adding a delicate hair vine or thin silver pins for extra sparkle
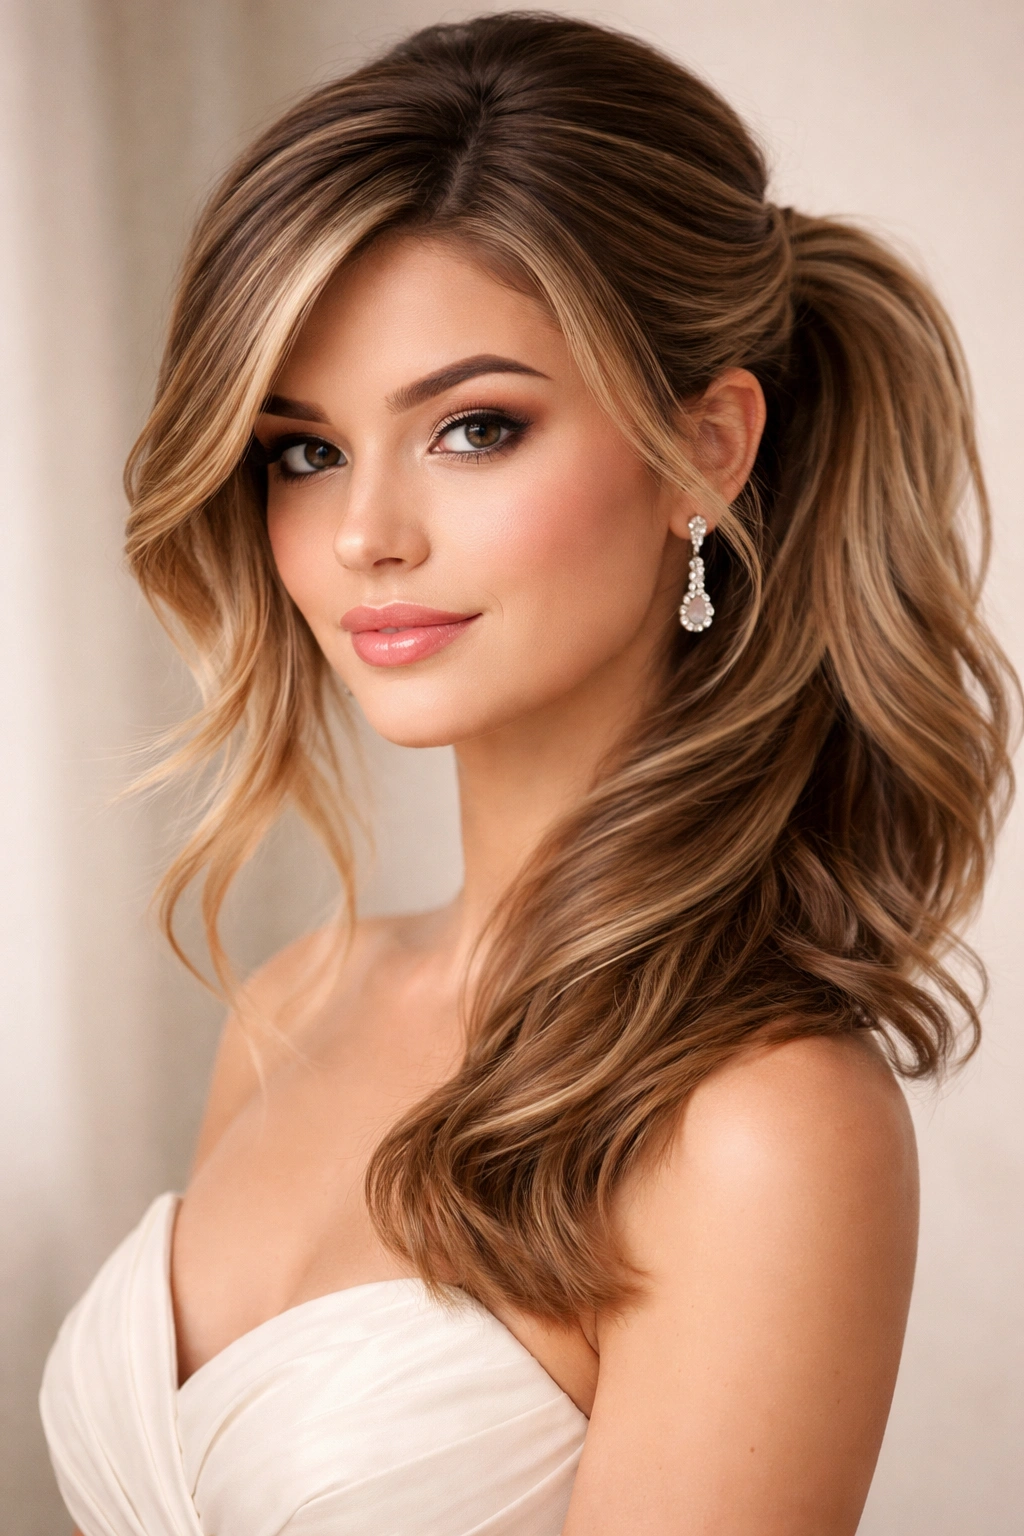
2. Sleek High Ponytail Half-Up with Texture Below
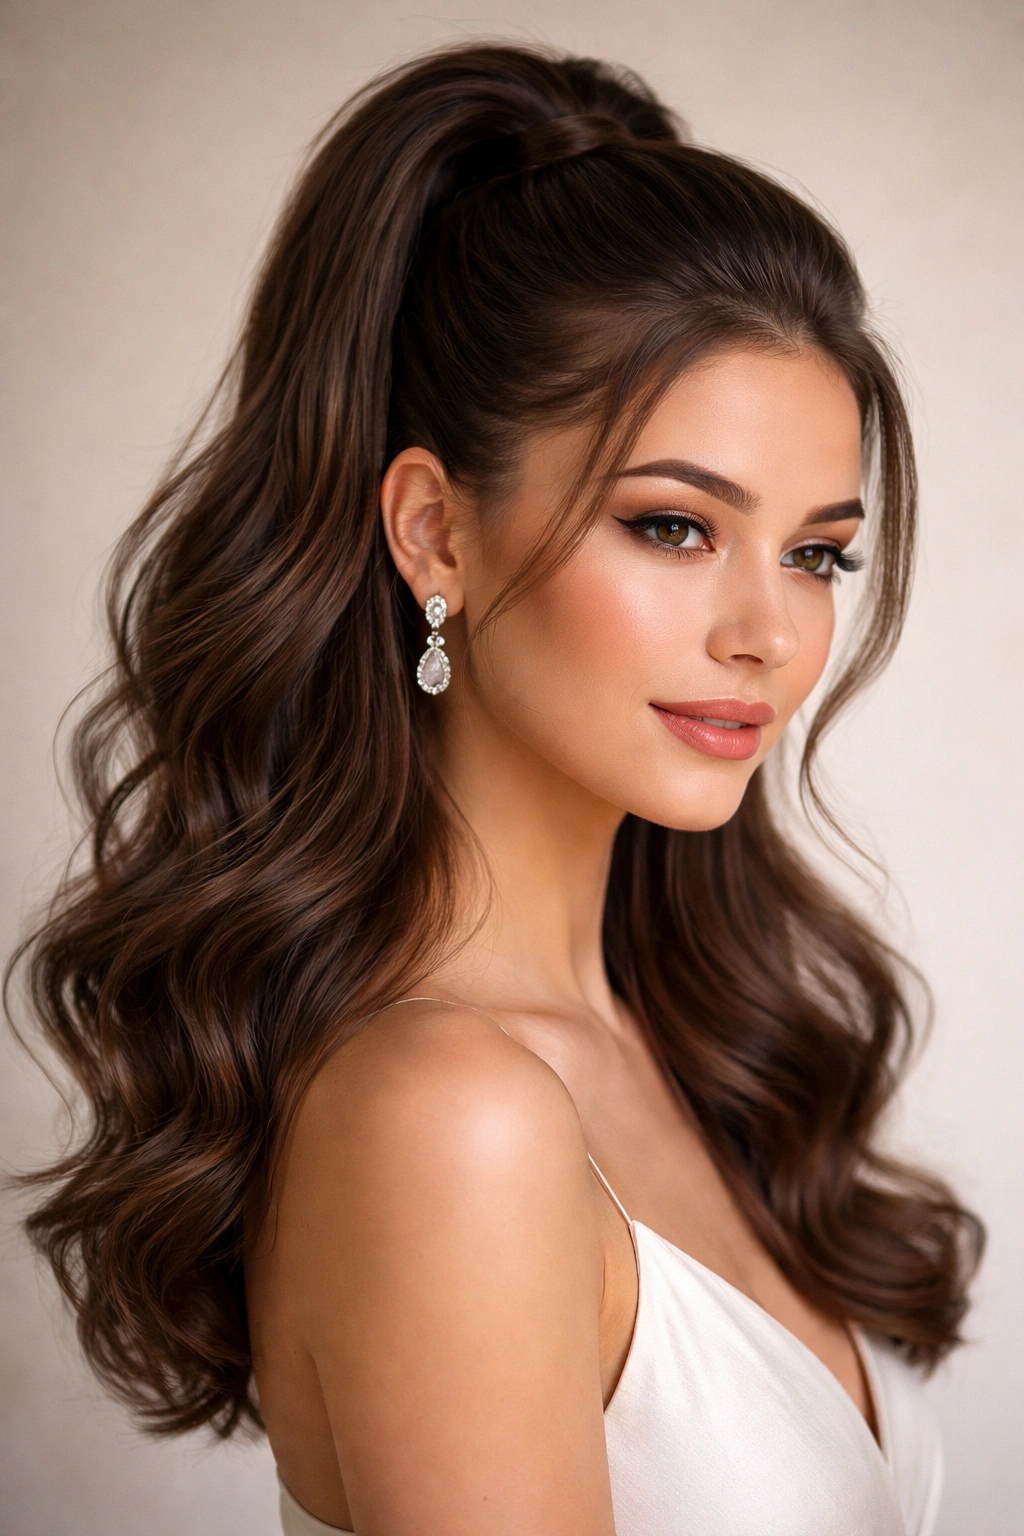
Pull the top section of your hair—from about ear to ear across the crown—into a high, tight ponytail at the back of your head. The key is making it polished and smooth at the top while leaving the bottom half completely loose. This creates dramatic contrast: structured elegance meeting flowing softness.
The Modern Appeal
This look feels contemporary and slightly edgy while remaining completely formal-appropriate. It suits the shoulder-length length perfectly because the tight upper section shows off your bone structure and the loose lower section maintains movement and volume. The contrast between the two textures creates visual interest.
Making It Stunning
- Use a fine-tooth comb and smoothing cream to make the upper ponytail impeccably smooth
- Wrap a thin section of hair around the elastic to hide it
- Curl or wave only the bottom half for maximum textural contrast
- A sleek high ponytail works especially well with strapless or off-shoulder dresses
- Add a delicate comb or barrette at the ponytail base for understated sparkle
- This style keeps hair perfectly in place during dancing and photo moments
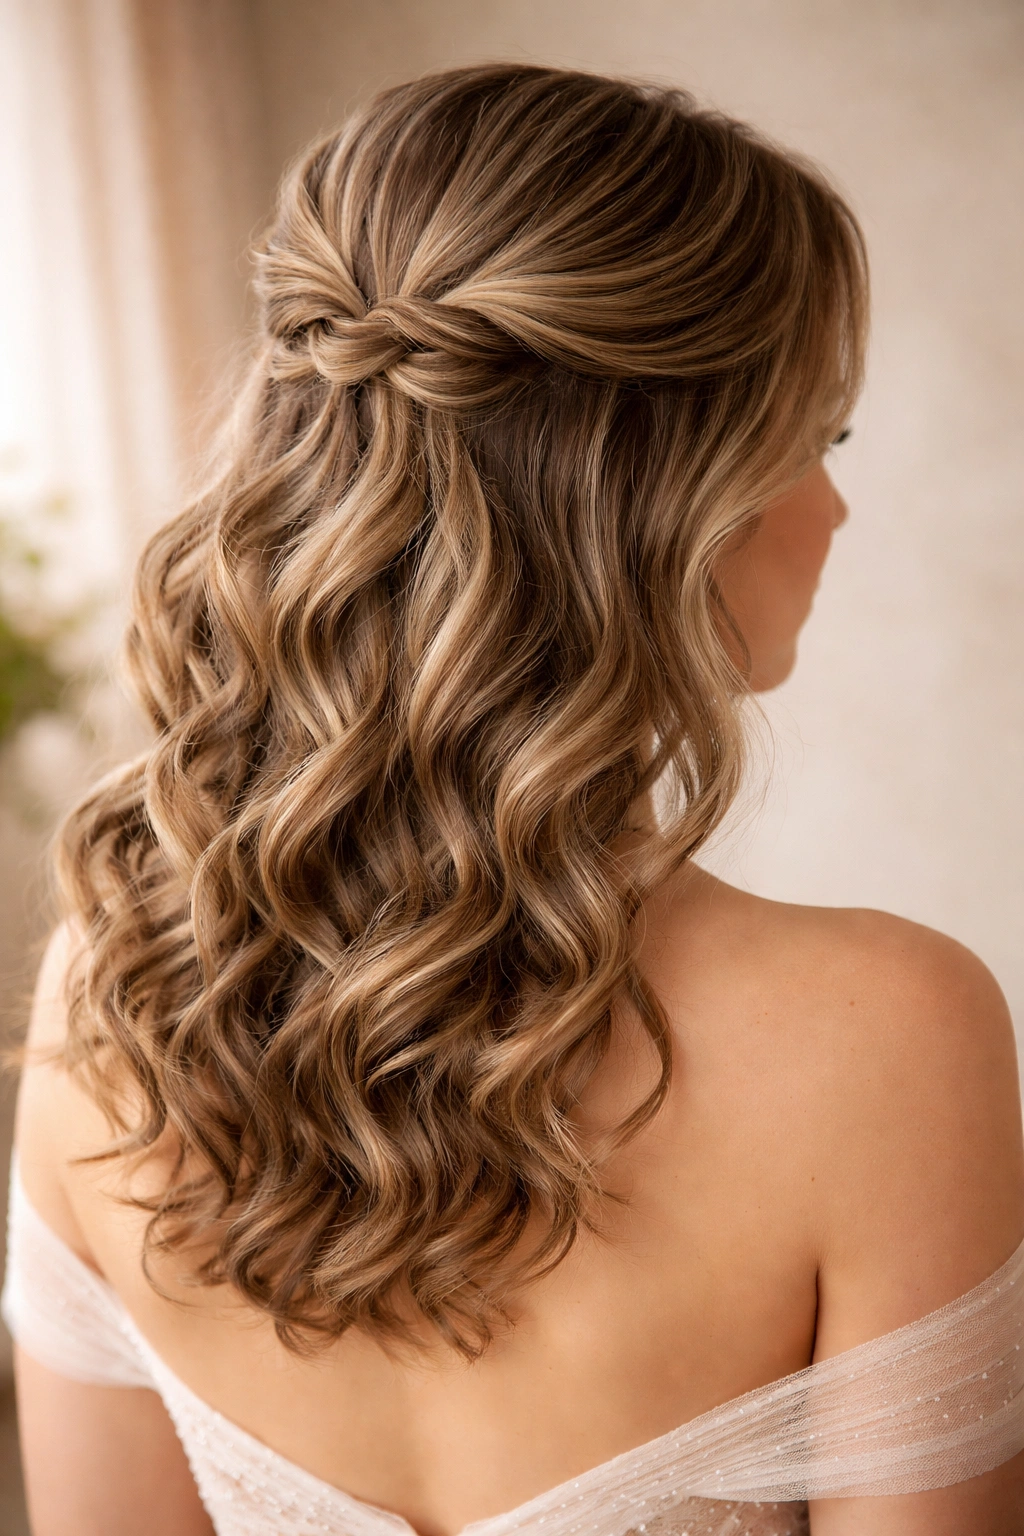
3. Braided Crown with Loose Waves
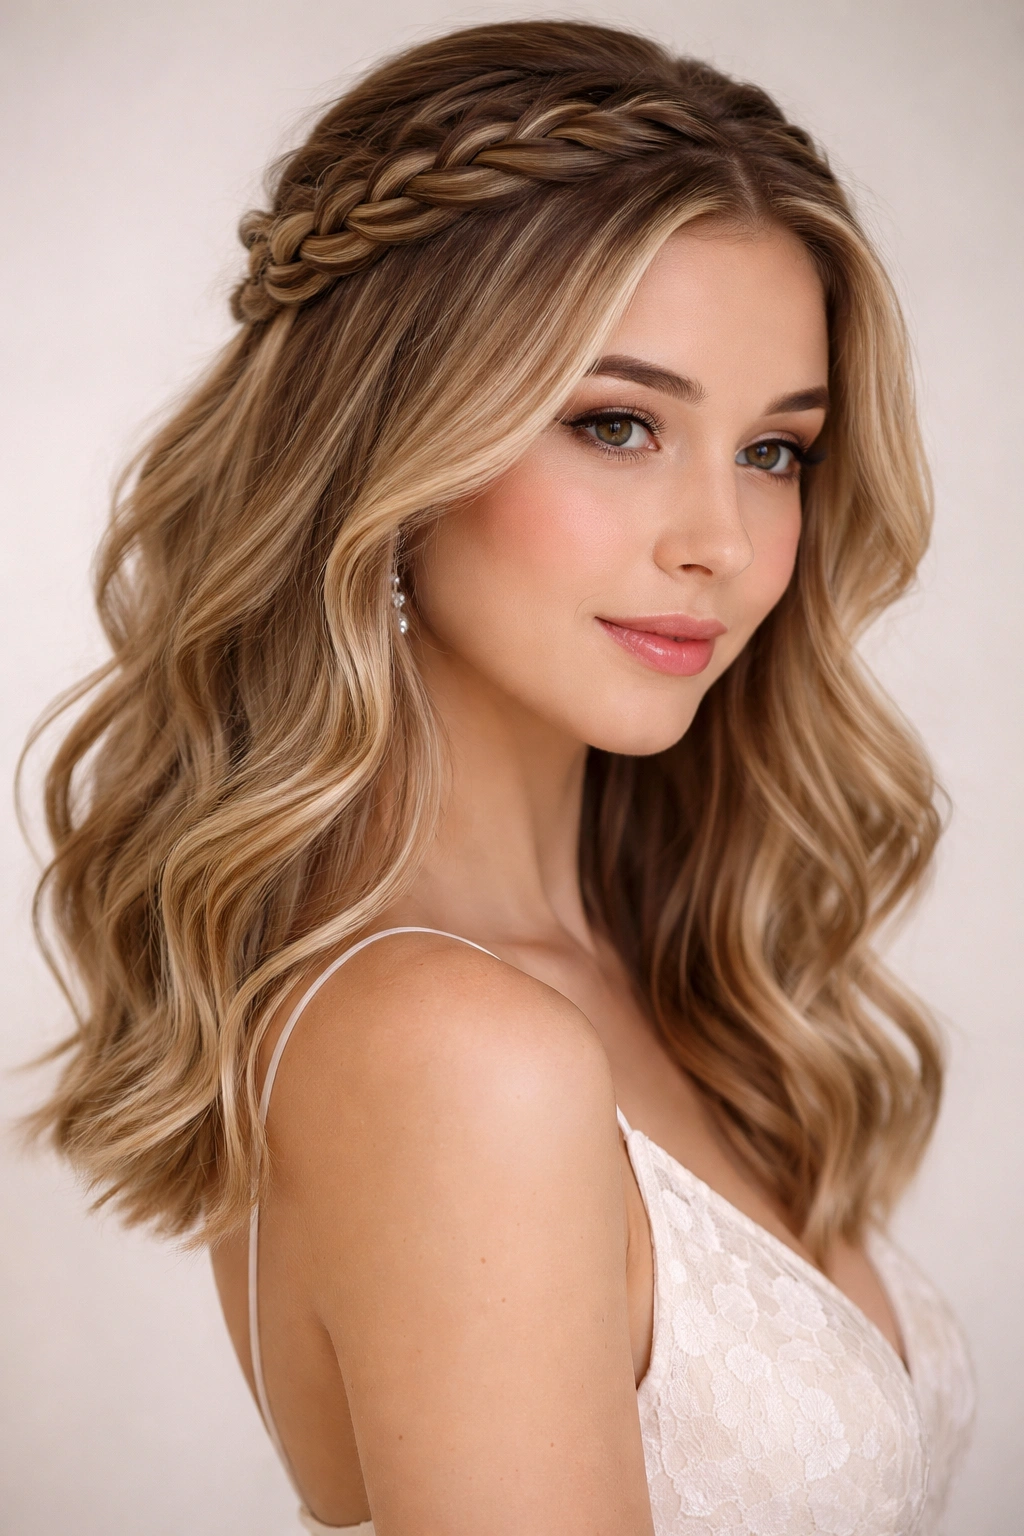
Start with two thin French braids beginning at your temples, each braiding toward the back of your head where they meet and secure with bobby pins. The rest of your hair stays completely down and wavy, creating an ethereal frame. This style has a distinctly romantic, fairy-tale quality that photographs beautifully.
The Technical Breakdown
French braids require practice but create the most elegant prom-worthy effect. Starting the braids at your temples rather than directly at the part creates a softer frame. Shoulder-length hair gives you enough length to complete the braids without them feeling rushed or thin at the ends. The loose waves balance the structure of the braids perfectly.
Execution Tips
- Practice braiding twice before prom day—it makes a difference
- Don’t pull the braids too tight; slightly loose, textured braids look more romantic
- Use matching bobby pins in your hair color to make them nearly invisible
- Combine this style with half-up curling for waves that hold through the evening
- A small delicate comb placed where the braids meet adds a finishing touch
- This look is gorgeous with updos-style makeup since your face is partially framed
4. Voluminous Teased Half-Up Bun
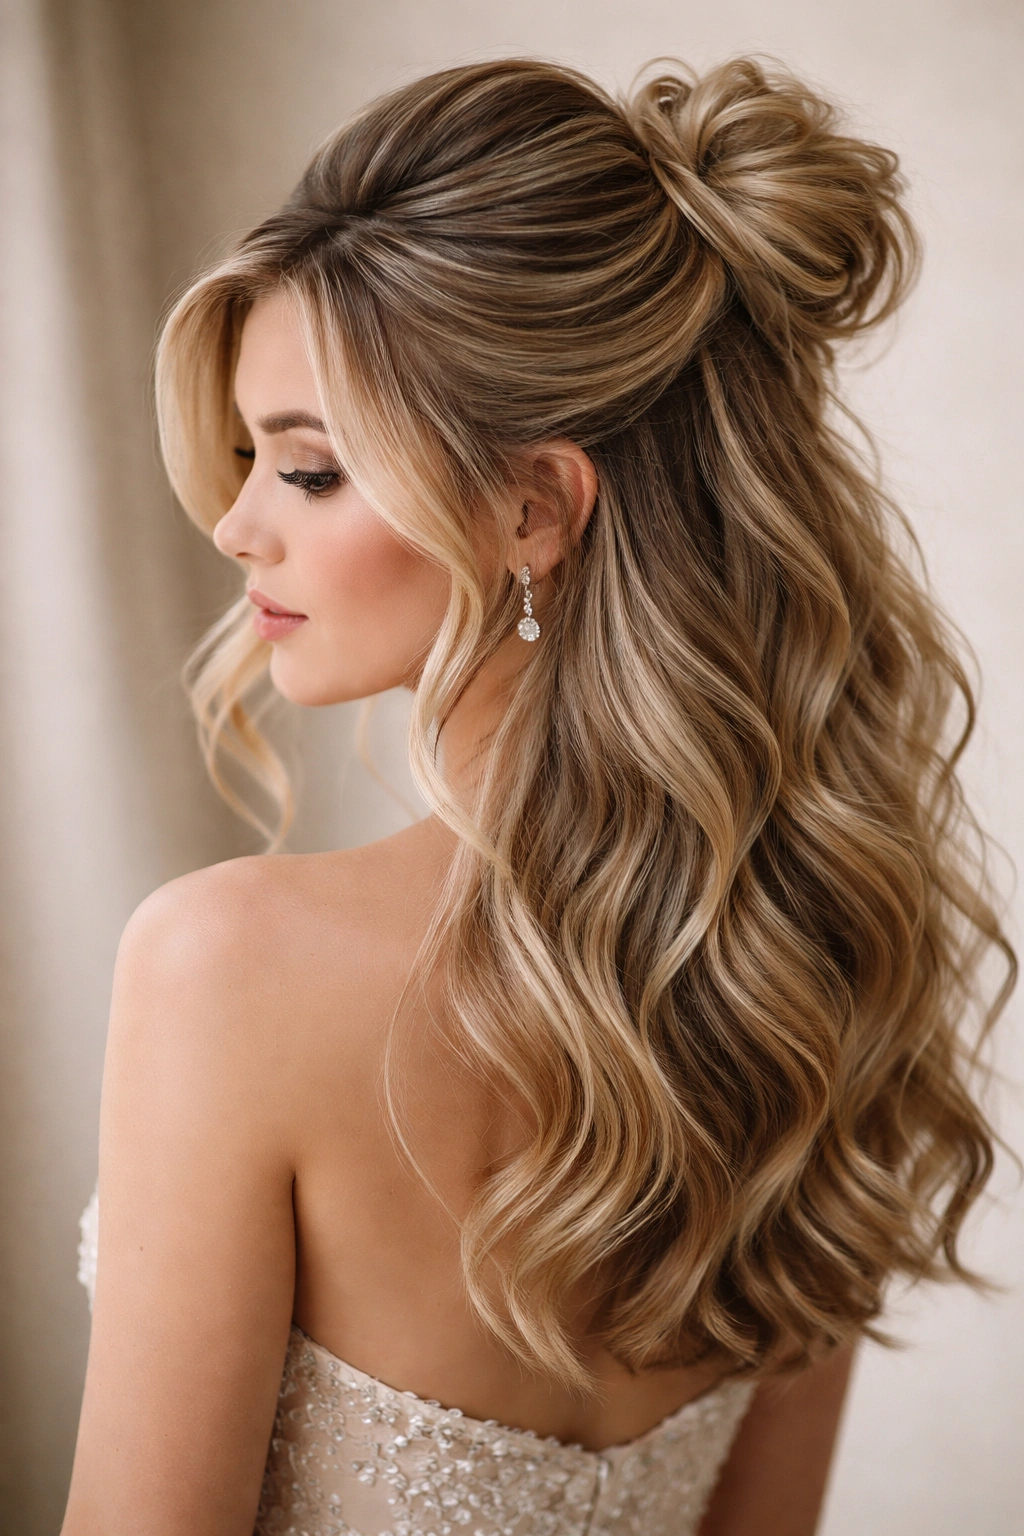
Tease the crown section generously to create serious height, then gather it into a loose, textured half-up bun at the back of your head. Leave face-framing pieces down on each side, and keep the bottom half of your hair in soft waves. The teasing creates dimension that makes even shoulder-length hair feel luxuriously full.
Why Volume Matters
Teasing isn’t cheating—it’s a professional styling technique that transforms ordinary hair into editorial-quality texture. For prom, it creates that “wow” impact the moment someone sees you. With shoulder-length hair, strategic teasing at the crown creates an illusion of thickness and height that makes the entire style feel more formal and special.
Building the Volume
- Use a fine-tooth tease brush and tease backward in small sections
- Smooth the outer layer once you’ve built your base
- Gather loosely into a bun rather than a tight knot
- Let some pieces escape the bun for a slightly undone, romantic effect
- The teased foundation means your bun will absolutely hold all night
- Finish with volumizing hairspray for lasting hold and texture
5. Low Side Ponytail Half-Up with Ribbon
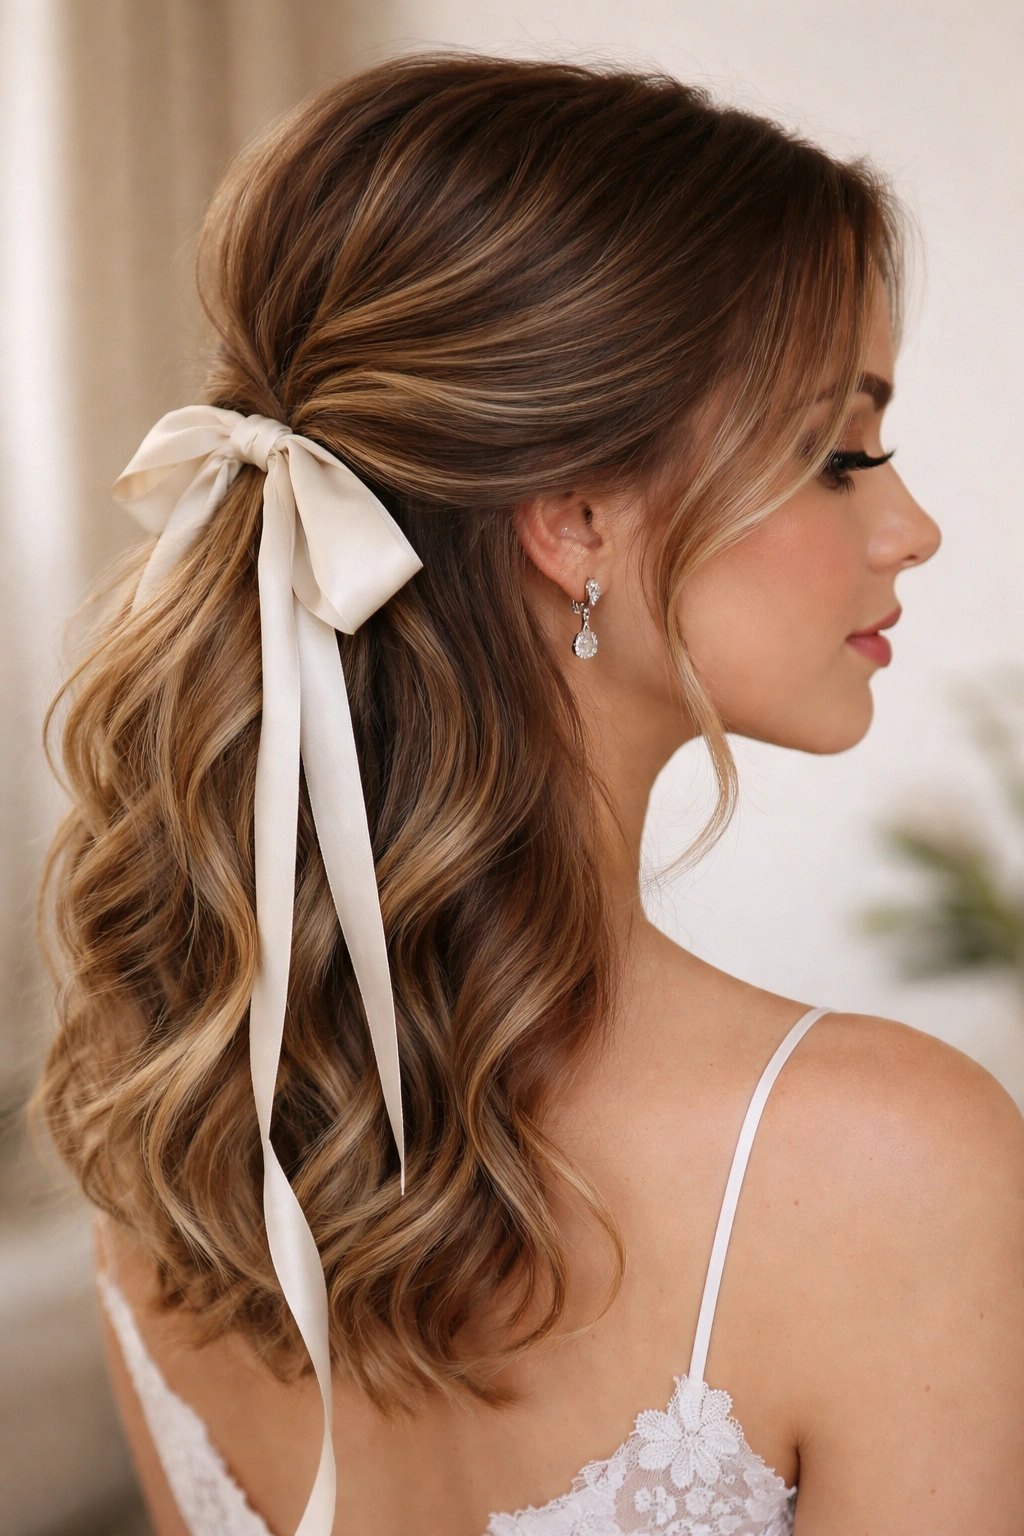
Take a section from one side of your head, sweeping back and securing into a low ponytail just below the crown on the opposite side. Weave a silk ribbon through or around the ponytail base, letting the ribbon trail down the side of the ponytail. Leave the rest of your hair down in waves or curls for movement and softness.
The Sophisticated Touch
Adding ribbon to a half-up style immediately elevates it from everyday to formal-occasion. The ribbon creates a custom, intentional look that says you thought about every detail. This works particularly well with shoulder-length hair because the ponytail sits at an angle that’s flattering to most face shapes while still allowing substantial hair to flow freely below.
Making the Ribbon Moment Count
- Use high-quality silk ribbon rather than synthetic—the difference is visible
- Weave it so it’s partially visible, not completely hidden
- Match the ribbon color to a dress accent or keep it neutral with blush, ivory, or gold
- Make sure waves or curls in the bottom half are distinct and separate from the ponytail texture
- Secure the ribbon’s end with a small bobby pin tucked out of sight
- The contrast between structured ponytail and loose waves below is what makes this work
6. Wispy Face-Framing Pins with Half-Up Knot
Leave delicate pieces down on both sides of your face, and gather the rest of your hair into a loose, casual knot at the back of your crown. Secure small pearl or crystal pins around the knot, letting them catch light as you move. The face-framing pieces should be wispy and soft, not blunt.
Creating Intentional Wispy Pieces
The difference between “hair that escaped” and “intentional face-framing” is straightforward: intention and styling. You should choose which pieces frame your face before you start, make sure they’re styled (with curl or wave), and position them deliberately. This creates a polished, edited look rather than an accidental one.
Putting It Together
- Use a curling iron on the face-framing pieces to create soft waves
- Make sure the knot is loose enough to feel romantic and effortless
- Space pins around the base of the knot for visual balance
- Consider a single decorative comb placed slightly off-center
- Keep the bottom half of your hair in flowing waves or curls
- The wispy pieces should fall just at cheekbone height or slightly lower
7. Platinum and Twisted Half-Up Bun
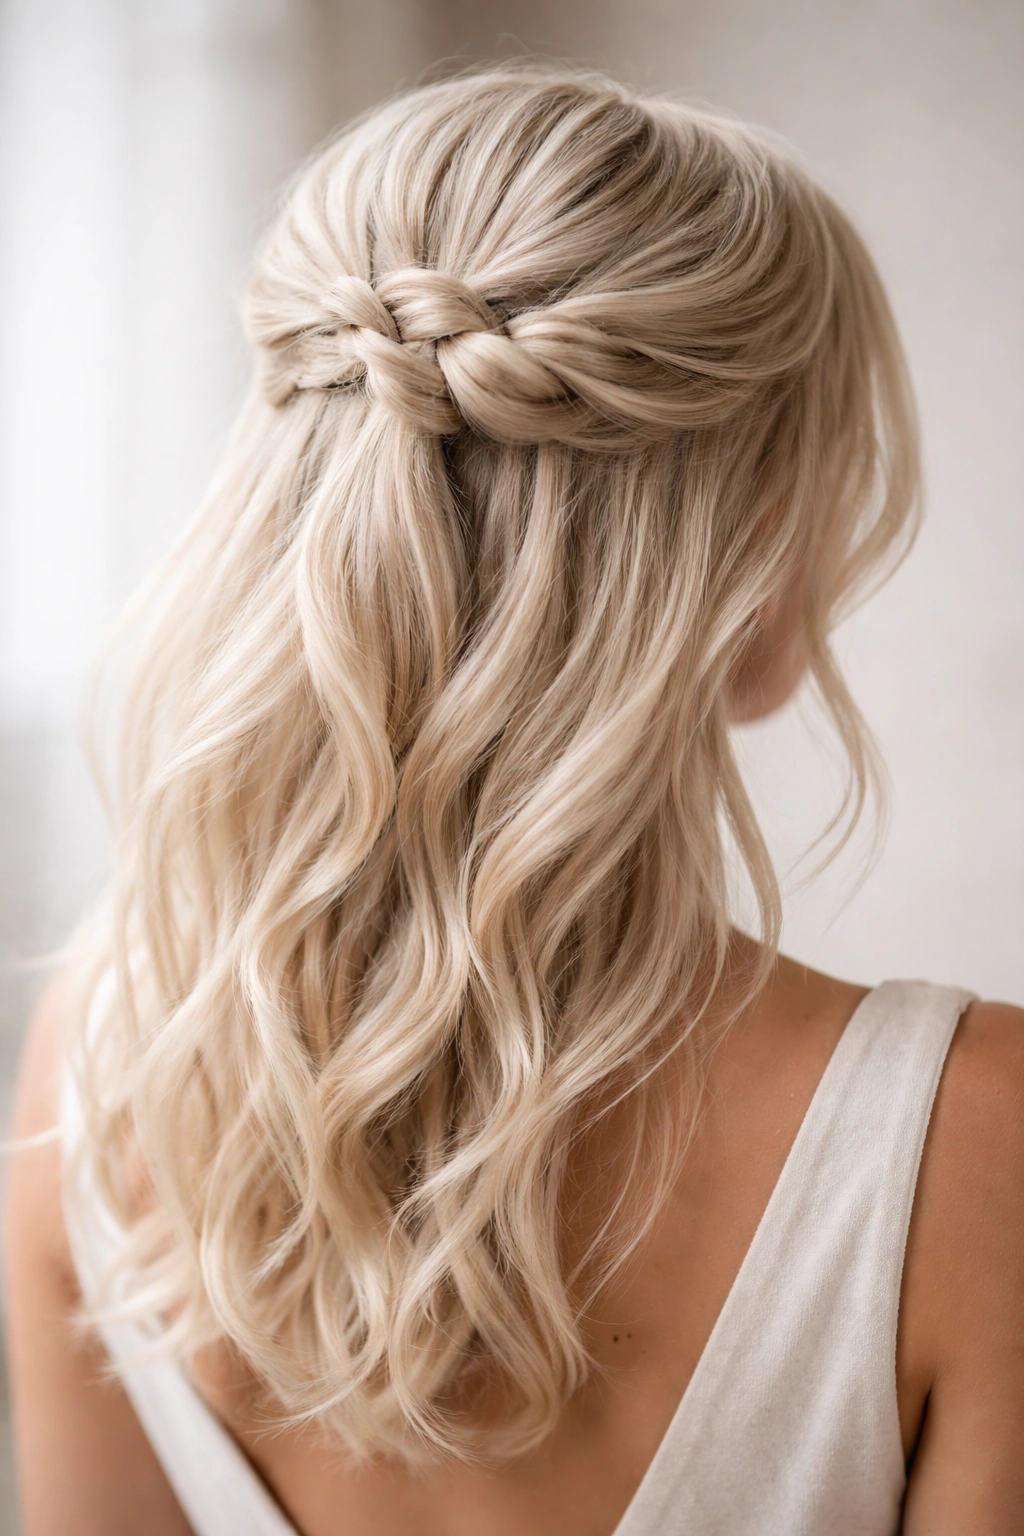
This style is exactly what it sounds like: multiple thin twists gathered together into a half-up bun. Begin twisting small sections from various points around your head—from your temples, from behind your ears, from the side—and wrap them all together into a loose bun at the back of your crown. It looks intricate but is surprisingly achievable.
Why Multiple Twists Transform the Look
What makes this different from a simple twisted half-up is the number of twists that converge into one bun. It creates an illusion of complexity and craftsmanship that reads as expensive and editorial. Shoulder-length hair is the ideal length for this because you have enough hair to create multiple visible twists without it looking thin.
Building the Twisted Bun
- Start by creating 4-6 thin twists from different areas around your head
- Twist loosely and hold each in place temporarily with bobby pins
- Gather all twists together at the back of your crown
- Secure into a loose, textured bun
- Let a few twisted pieces escape the bun for romance
- Use bobby pins in your hair color so they’re nearly invisible
- This style pairs beautifully with delicate jewelry since your neck and shoulders are visible
8. Half-Up with Scattered Baby Braids

Create a half-up style and intersperse tiny baby braids throughout the gathered section and the loose section below. These braids should feel organic and scattered rather than symmetrical and planned. The overall effect is bohemian and playful while remaining completely formal-appropriate.
The Boho-Meets-Formal Aesthetic
Baby braids bridge casual and formal beautifully. They add texture and interest without reading as too relaxed for prom. Shoulder-length hair accommodates baby braids perfectly—they’re visible and intentional without looking out of place in a formal style.
Placing the Braids
- Create 3-4 baby braids, each about as thick as a pencil
- Place them asymmetrically through your half-up section
- Add 1-2 more through the loose hair below for continuity
- Braid loosely for a romantic, undone appearance
- Secure each braid end with a tiny elastic in your hair color
- Combine braids with soft waves for contrast in texture
9. Sleek Low Half-Up with Statement Comb
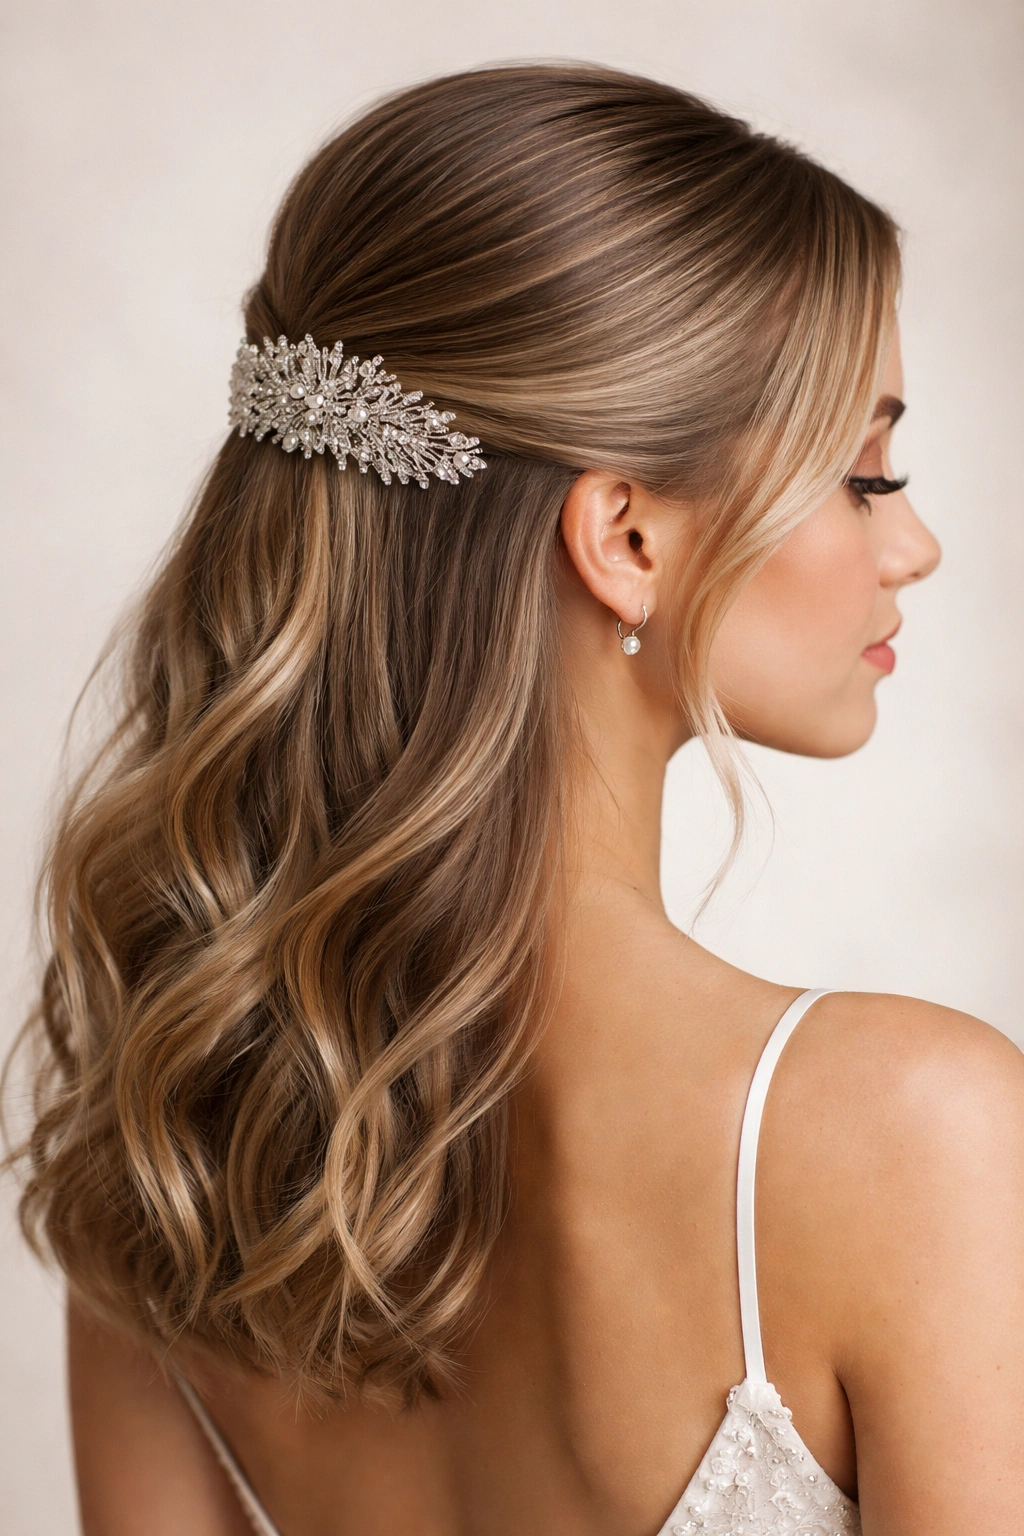
Make the top section impossibly smooth and sleek—use smoothing cream and a fine comb, no texture at all—and gather it into a low, tight ponytail just at the nape of your neck. Place a large, decorative statement comb at the base, making it a focal point rather than something hidden. Leave the bottom half completely loose and wavy.
The Power of a Statement Comb
The right comb becomes jewelry for your hair. By keeping everything else smooth and simple, you create a clean canvas that lets the comb shine. This is a bold choice that works for confident people who want a striking, sophisticated look rather than romantic softness.
Executing the Contrast
- Invest in a beautiful comb—it’s the star of this look
- Make the upper section immaculate with not a hair out of place
- Use a gel or pomade for ultimate sleekness
- The lower section should have movement and volume to balance the smooth top
- Let the comb be visible and styled—don’t hide it behind hair
- This works especially well with upswept makeup and bold lipstick
10. Curly Half-Up with Delicate Loops
Curl your entire head in loose, romantic curls. Then gather the top section and secure it with delicate bobby pins or clips. Here’s where it gets special: create small, intentional loops from the secured section, pinning them back into the gathering point. These loops add dimension and sophistication.
The Dimension of Intentional Loops
Loops are distinct from a standard bun—they’re controlled, visible, and add architectural interest. With shoulder-length curls, these loops sit perfectly at the crown where they catch light and look deliberate. They elevate the style beyond basic half-up.
Creating the Loop Effect
- Curl your entire head thoroughly so curls hold through the night
- Gather the top section as you normally would
- Rather than securing everything flat, create 2-3 loops by pinning sections of the gathered hair back into the gathering point
- Let the loops be visible and three-dimensional
- Keep the rest of your curls loose and romantic
- This pairs beautifully with soft, romantic makeup
11. Twisted Half-Up with Gold Hair Cuff
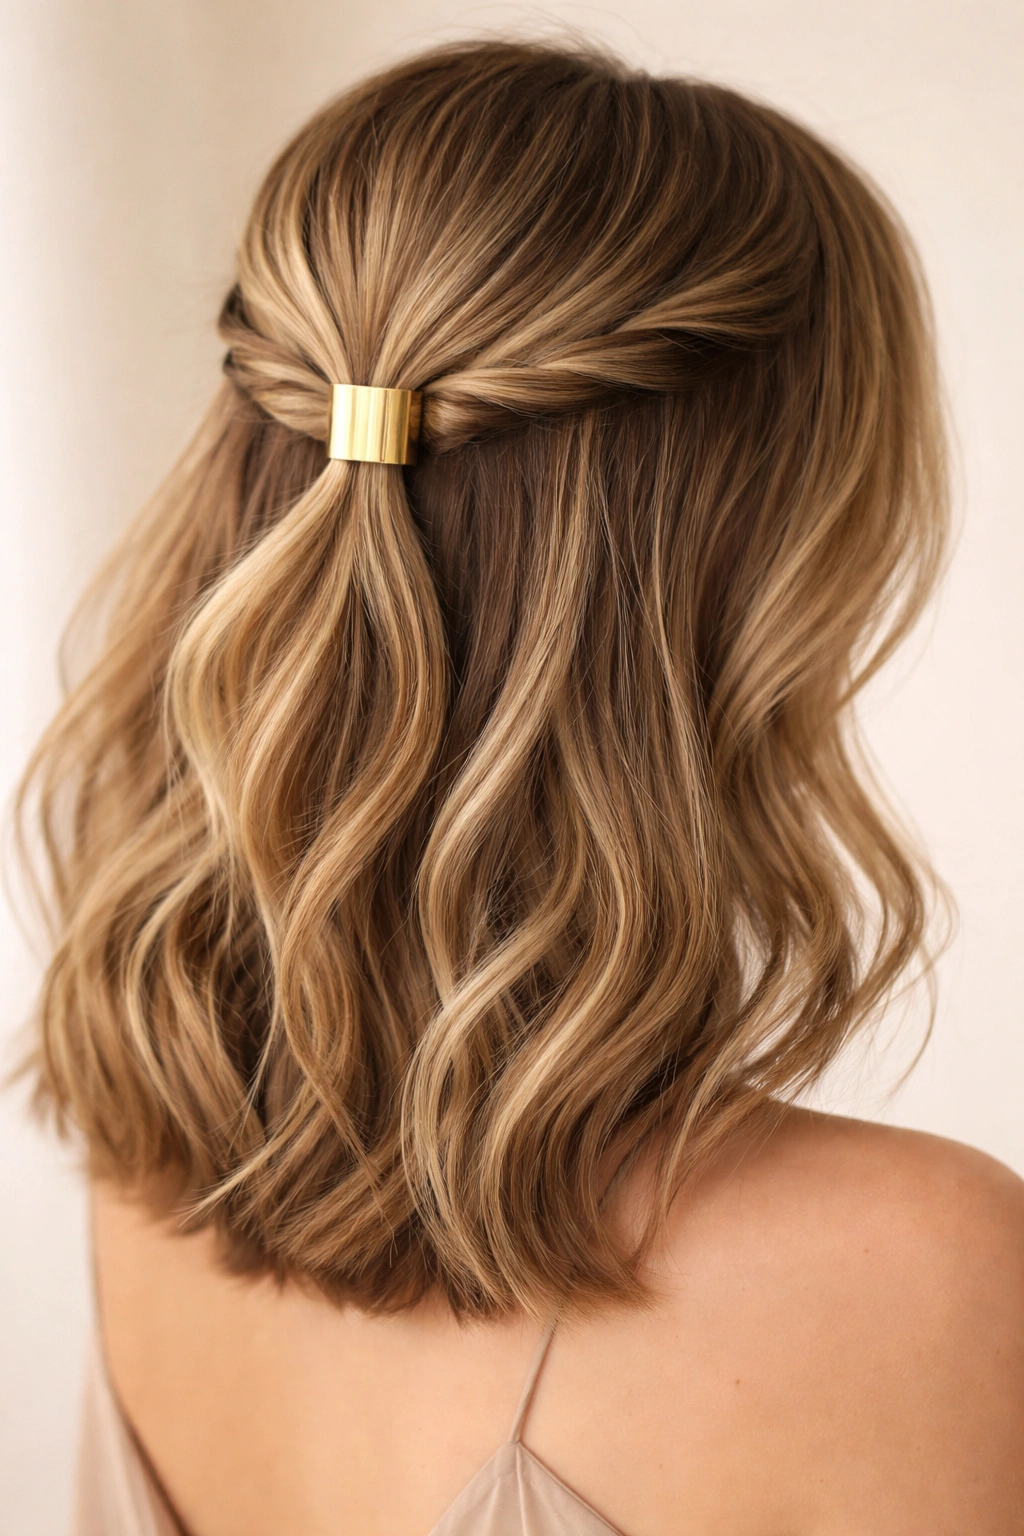
Create two thin twists from your temples, bringing them back and crossing them over each other at the back of your crown. Rather than securing with typical bobby pins, slide a delicate gold (or rose gold, or silver) hair cuff over both twisted sections where they cross. It’s a contemporary, unexpected detail that feels luxe.
Why Metal Cuffs Matter
Hair cuffs and rings are having a major moment because they’re unexpected. Using a cuff instead of a traditional clip or pin creates a designer moment. It signals that you thought about every detail and aren’t just following a standard formula. Shoulder-length hair shows off the cuff beautifully.
Working with the Cuff
- Choose a cuff in a metal that matches your jewelry
- Make sure the cuff sits right where the twists cross for visual balance
- The twists need to be substantial enough to hold the cuff without slipping
- Keep everything else about the style simple so the cuff is the focal point
- Leave the bottom half in loose waves or straightened for maximum elegance
- This is a statement piece—pair it with understated everything else
12. Half-Up Bun with Pearl Netting
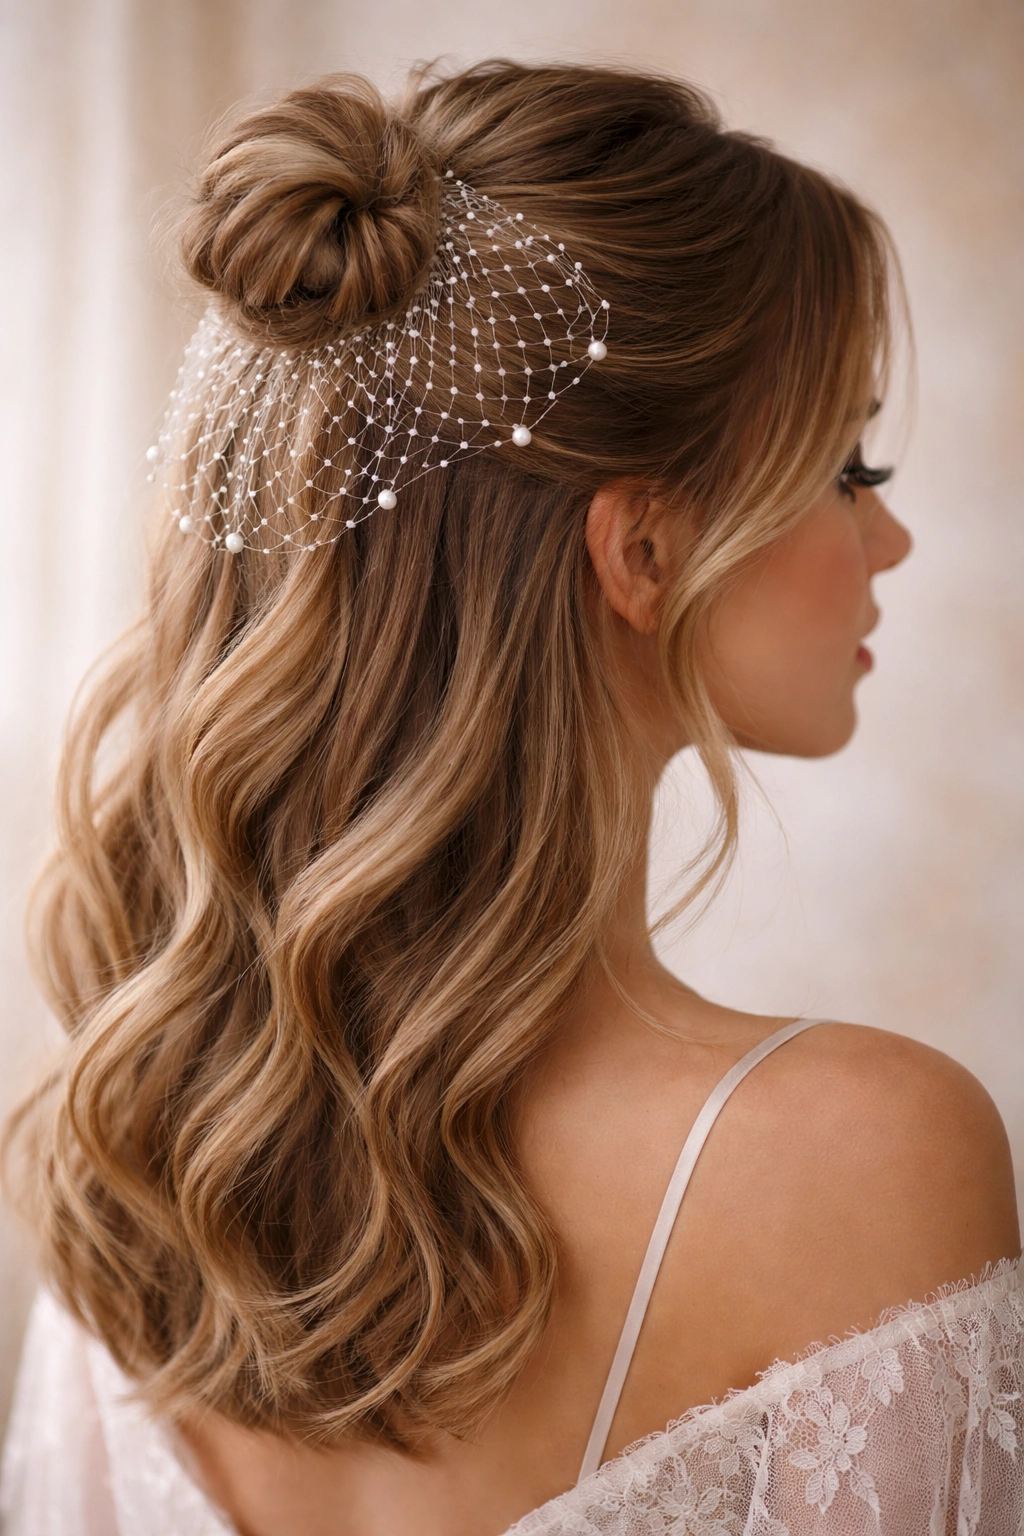
Gather the top section into a half-up bun. Once the bun is secure, drape delicate pearl netting over it, securing the netting with bobby pins around the bun’s base. The netting should be translucent enough that people can see the bun’s texture through it, but visible enough to make a romantic impact.
The Vintage Romance of Netting
Pearl or crystal netting is deeply romantic and slightly vintage in the best way—it reads as effortlessly elegant rather than costume-y. For prom, it creates that “wow” moment. Shoulder-length hair is actually the perfect length for netting because the bun sits at an accessible height and the netting works with your proportions.
Styling with Netting
- Make sure your bun is textured and voluminous before adding netting
- Drape the netting loosely rather than stretching it tight
- Secure it so it stays in place but looks like it’s floating
- The bottom half of your hair should be soft waves to balance the structure above
- Consider keeping makeup slightly more dramatic since part of your face is framed by netting
- This style works beautifully in photographs
13. Side-Swept Half-Up with Feathered Layers
Sweep your hair to one side, gathering the top back half into a ponytail secured on the opposite side of your head from where your hair is swept. The effect is asymmetrical and modern. Make sure you’ve added feathered layers throughout beforehand—these catch light beautifully when swept to one side.
The Modern Asymmetry
Asymmetrical styling reads as contemporary and intentional. Sweeping to one side creates a flattering line for most face shapes while the ponytail placement on the opposite side creates visual interest. This style is perfect for people who want something that feels modern rather than traditionally romantic.
Creating the Sweep
- Use a side part or sweep hair to one side without a specific part
- Make sure layers are visible through the sweep so movement is obvious
- Gather the back section into a ponytail secured toward the opposite temple
- Leave the front section completely loose and swept
- Curl your hair before styling for maximum movement and texture
- This works beautifully with dramatic eye makeup since one side of your face is completely visible
14. Braided Halo with Center Ponytail
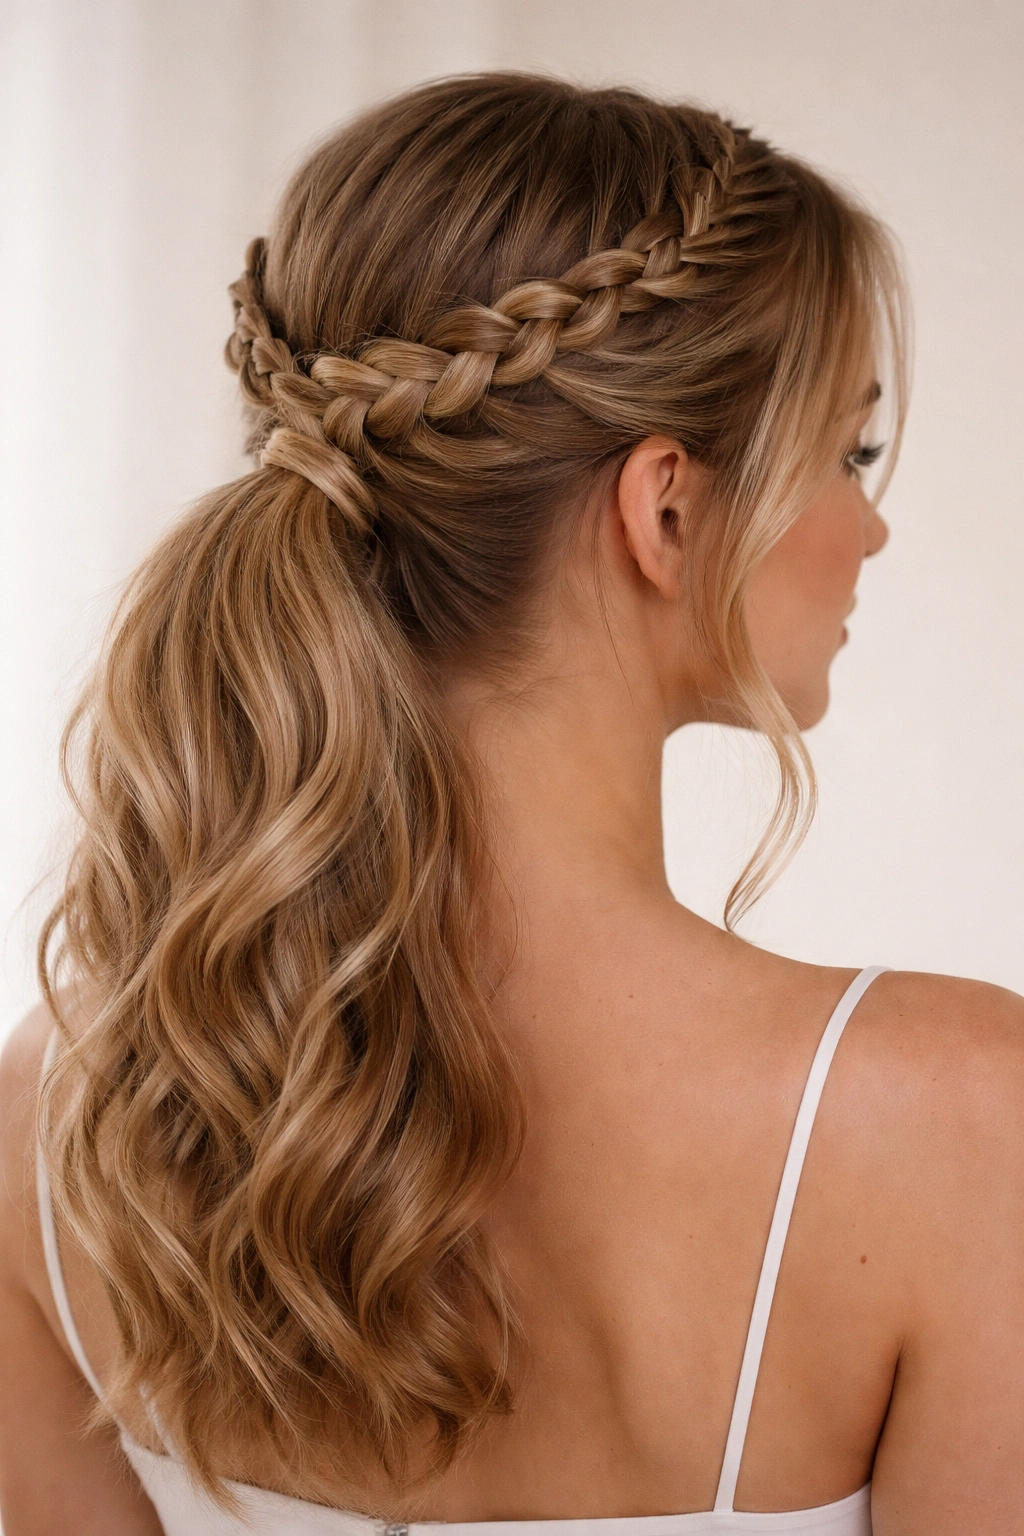
Create a halo braid that runs from one temple, across the back of your head, to the other temple. At the center back where the braid ends, gather all your hair—including the braid—into a center ponytail. The halo braid creates a crown effect while the ponytail adds structure.
The Crown Effect
Halo braids are inherently flattering because they literally frame your face like a crown. Combined with a half-up ponytail, they create a distinctly formal, special-occasion energy. This is an especially gorgeous choice for people with round or square face shapes because the halo softens features.
Executing the Halo
- Start your braid at one temple, braiding across to the opposite temple
- Try for a Dutch braid (braiding outward) so the braid is visible
- Keep the braid slightly loose for a romantic effect
- Secure the braid end when you reach the opposite temple
- Gather all hair, including braid ends, into a center ponytail at the back
- Leave the ends of your ponytail down in waves or curls for softness
15. Double Twisted Half-Up with Intertwined Gold Thread
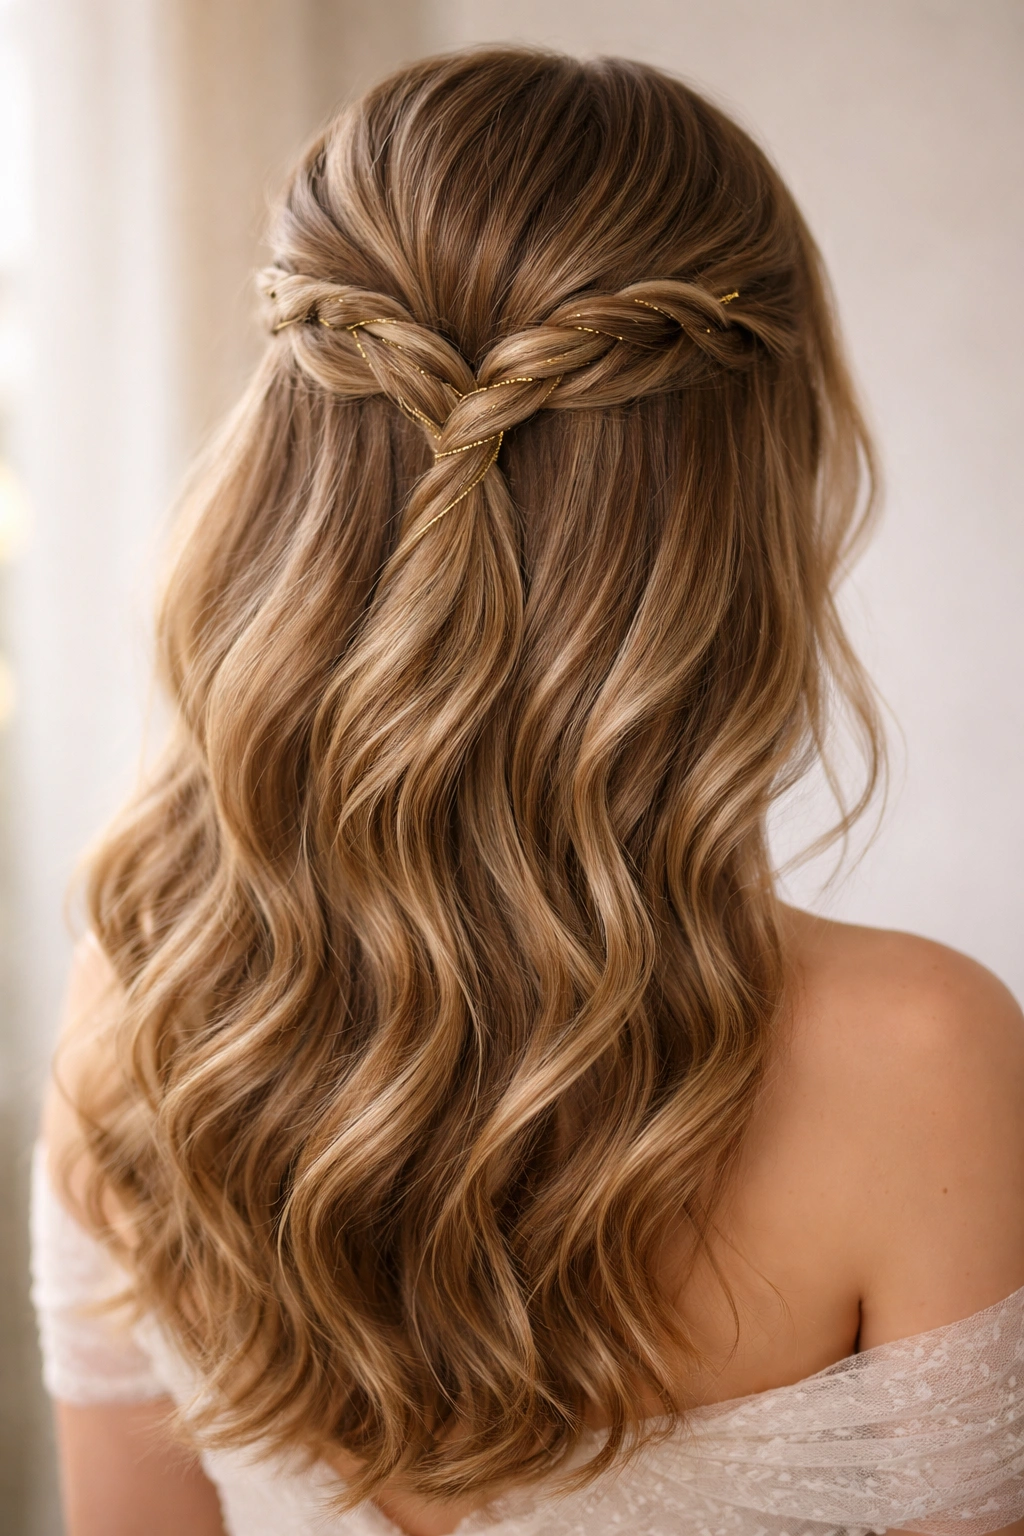
Create two thick twists, one from each side of your head, meeting at the back of your crown. Intertwine a delicate gold thread through both twists as they wrap, and secure everything with bobby pins where the twists meet. The gold thread creates an unexpected luxury detail that catches light beautifully.
The Luxury of Intertwined Details
Adding a delicate thread through twists is a detail borrowed from high-fashion styling. It’s unexpected, personal, and creates a custom moment that looks far more complicated than it actually is. Shoulder-length hair is perfect for this because the twists are visible and substantial enough to display the thread beautifully.
Working with Thread
- Use actual jewelry-quality thread or thin metallic ribbon, not craft thread
- Braid or weave it through the twists as you create them
- Make sure the thread is visible and intentional, not hidden
- The intertwined effect should look organic, like the thread belongs in the style
- Keep the bottom half of your hair in flowing waves to balance the structured top
- This is a statement piece that works best with understated everything else
Final Thoughts
Half-up half-down styling is the prom-night equivalent of finding the perfect dress—it should make you feel like the best version of yourself the moment it’s finished. With shoulder-length hair, you have options that feel elegant and current, romantic or modern, simple or intricate. The magic is that every single one of these styles achieves that perfect balance between “I’m clearly polished and ready for something special” and “I’m not so overdone that I can’t move, dance, and enjoy myself.”
The real key to making any of these styles work is taking time to practice beforehand. Most of these aren’t difficult, but they do benefit from a rehearsal run. Your hair behaves slightly differently depending on humidity, the products you use, and how thoroughly you’ve curled or waved it beforehand. Spend an hour two or three days before prom creating your chosen style so you know exactly how long it takes and what products work best.
On prom night itself, you’ll be calm because you’ve done this before, you’ll have the exact products and pins you need already assembled, and you’ll look absolutely stunning knowing that you chose a style that’s genuinely you.