There’s something undeniably sophisticated about a well-executed half up, half down bun for a formal event. It strikes that perfect balance between polished and romantic—your hair looks intentional and elevated, but not so severe that you feel like you’re wearing an untouchable sculpture on your head. You get the best of both worlds: the elegance of an updo with the softness and movement of down hair. Whether you’re attending a wedding, gala, black-tie dinner, or any occasion that calls for an elevated look, a half up, half down bun offers endless styling possibilities depending on your hair type, face shape, and personal aesthetic.
The beauty of this style lies in its versatility. Unlike a full updo that requires a specific hair texture or length, the half up, half down approach works beautifully on straight hair, wavy hair, curly hair, and everything in between. You can style it sleek and modern, romantic and textured, adorned with pearls and jewels, or completely understated. The key is understanding the subtle variations that set one style apart from another, and knowing exactly how to execute each one so it stays secure throughout an entire evening of celebration.
What makes the half up, half down bun different from simpler half-up styles is the bun itself. Instead of just gathering a section of hair into a ponytail or twist, you’re creating actual dimension and structure at the crown or side of the head. This is what photographs beautifully and holds up beautifully when you’re dancing, mingling, or sitting through a multi-course dinner. Let’s explore twelve distinct half up, half down bun styles that will elevate your formal look and keep you feeling confident all night long.
1. The Classic Crown Bun
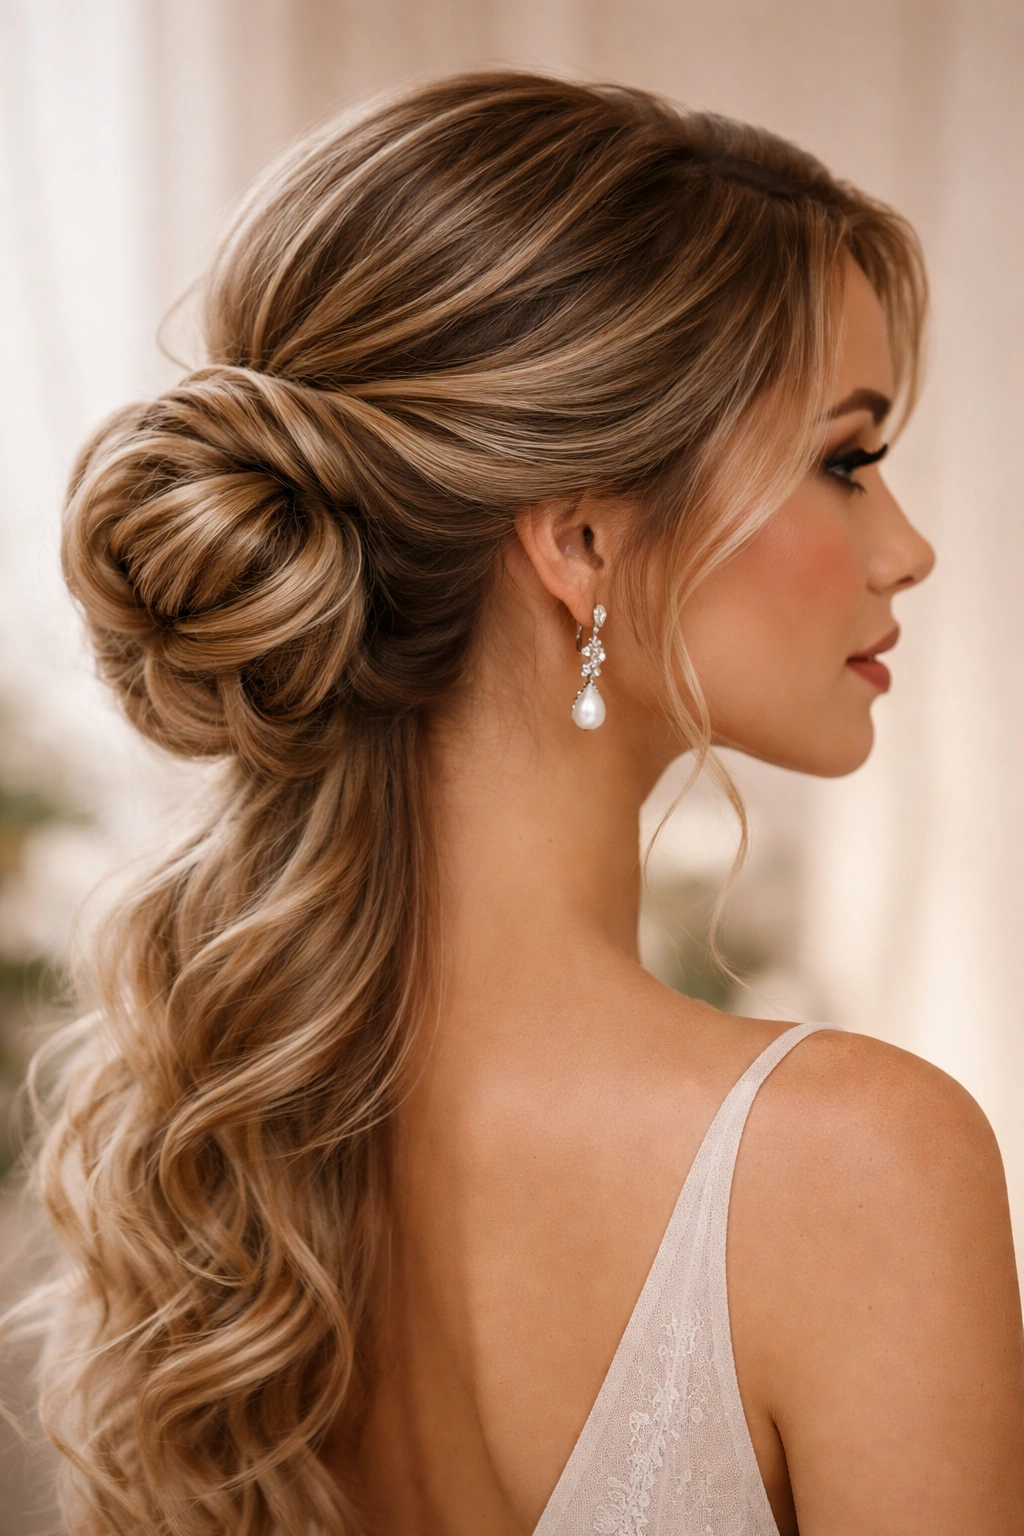
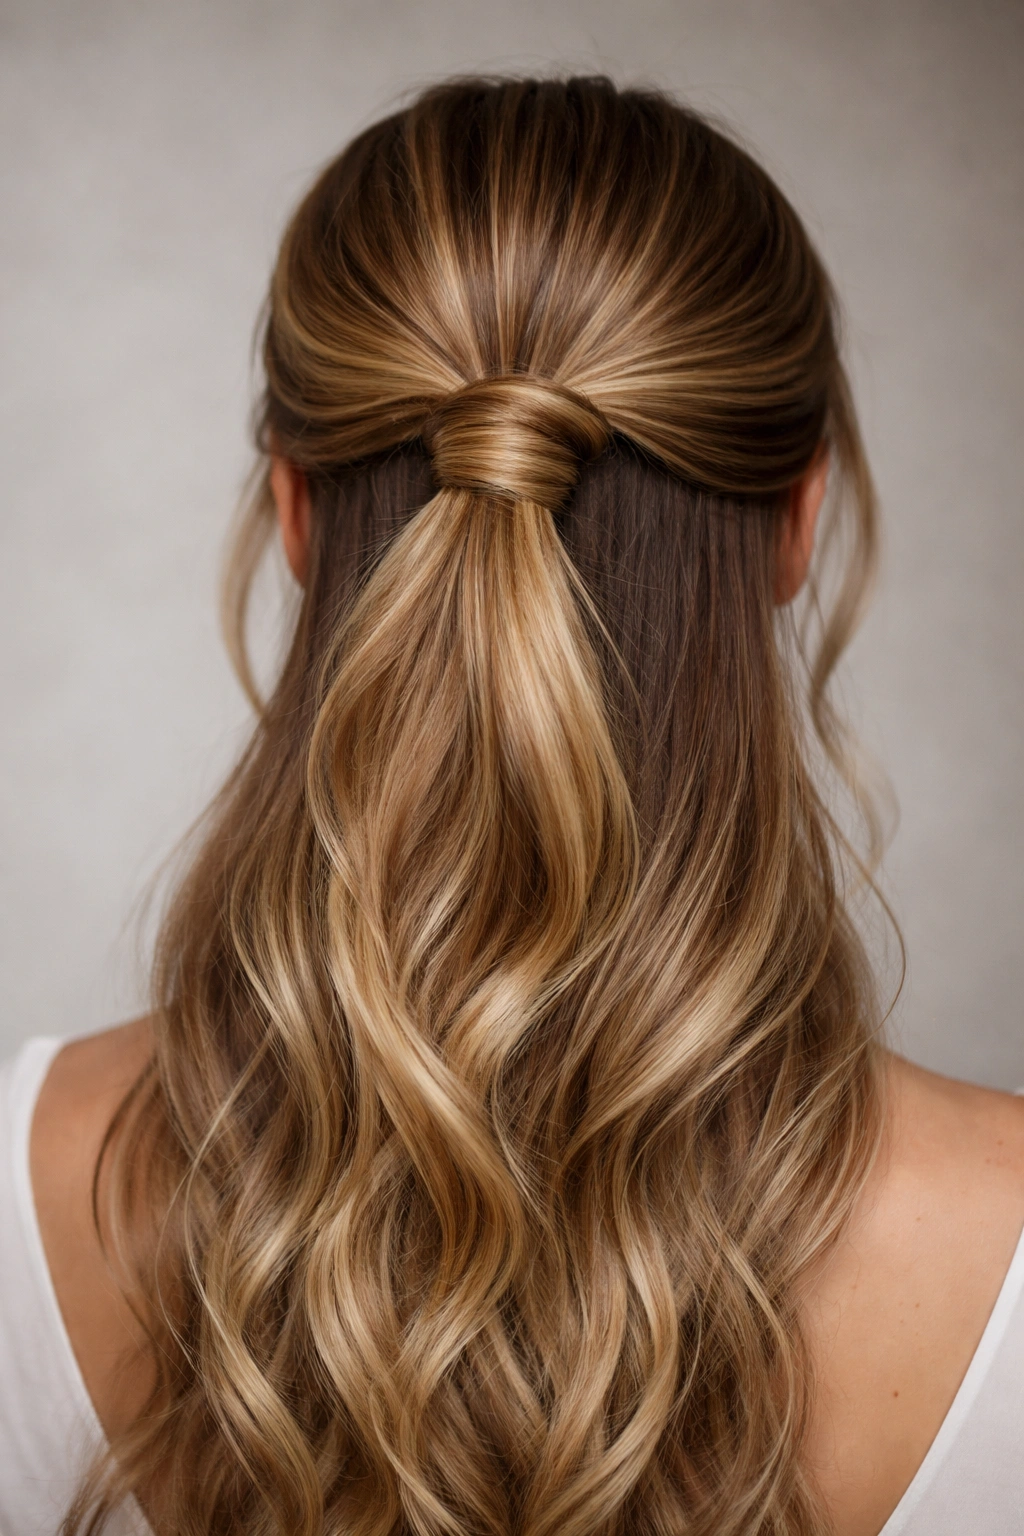
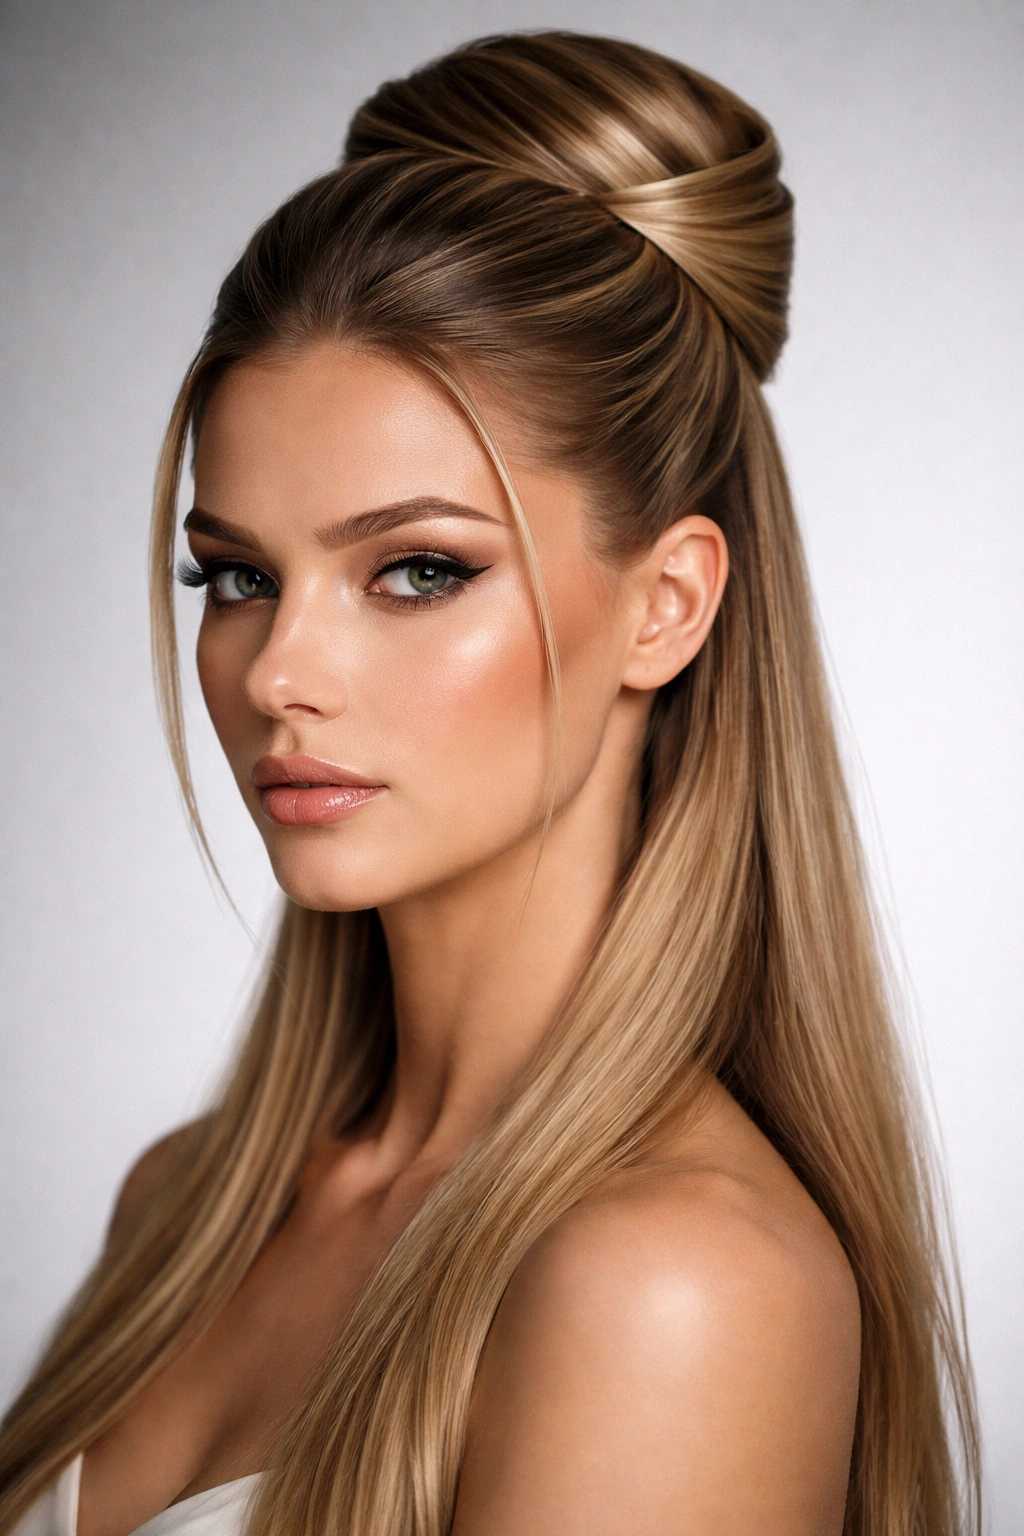
This is the timeless version you’ve likely seen at countless weddings and formal events—hair gathered from the crown upward, twisted into a neat bun right at the top of your head, with the lower half left down to flow freely. The crown bun works on nearly every hair type and face shape because it draws attention upward while the length below balances everything beautifully. When executed well, it reads as immediately polished and intentional.
How to Achieve the Classic Crown Look
Start with hair that’s been curled or waved for texture—smooth, flat hair can look too severe in this style. Flip your head upside down and backcomb the crown section very gently to create a subtle texture base; this prevents the bun from slipping. Gather hair from roughly your temples to the back of your crown (about the upper third of your head) into a high ponytail. Twist this section loosely and wrap it around itself to form a bun, securing with bobby pins that match your hair color, inserted at different angles for maximum hold. Spray lightly with hairspray before you move on.
Styling Tips for Maximum Impact
- Soften the look by gently pulling a few wispy pieces around your face—this prevents the style from feeling too tight or severe
- Tease the bun itself slightly to create volume and texture, which photographs far better than a sleek, flat bun
- Leave the bottom section of hair in loose waves or curls that brush your shoulders—the contrast between the structured bun and the soft waves is what makes this work
- Add a delicate hairpin, pearl comb, or crystal clip into the bun for a touch of glamour
Pro tip: If your bun feels slippery even with backcombing, use a small velcro roller inside the ponytail before twisting it into a bun—this creates a stable base that holds all evening without looking bulky.
2. The Twisted Side Bun
Rather than positioning the bun at the crown center, this style moves everything to one side of the head, creating an asymmetrical, romantic silhouette. You gather hair from the opposite side, twist it across the back of your head, and coil it into a bun at the side. This style is particularly flattering on people with longer faces because the asymmetry is softening, and it feels a touch more modern and editorial than the centered crown bun.
Why It Works for Formal Occasions
The side-positioned bun creates natural movement and visual interest without being dramatic. Because the bun sits lower and to the side rather than at the very crown, you have more flexibility with your hair length—even shoulder-length hair can work with this style if you have enough volume. The twist itself creates a sophisticated texture that catches light beautifully in photos, and the asymmetry reads as intentional and fashion-forward.
Steps to Create the Look
- Determine which side you want the bun on (usually opposite your face’s wider side for a balancing effect)
- Starting at the temple on the opposite side, take a section of hair about two inches wide and twist it back toward the side where your bun will sit
- As you twist, you can gather additional hair into the twist for more fullness, or keep it as a single strand wrapped with loose hair for a lighter feel
- Once you reach the desired bun location (usually at the nape or mid-back of the head), coil the twist into a bun and pin securely
- Leave the opposite side of hair down in soft waves
Worth knowing: This style benefits from a light texturizing spray on the twists before you create them—it prevents the hair from slipping and makes the twist more visible and defined.
3. The Double-Twisted Half Up Bun
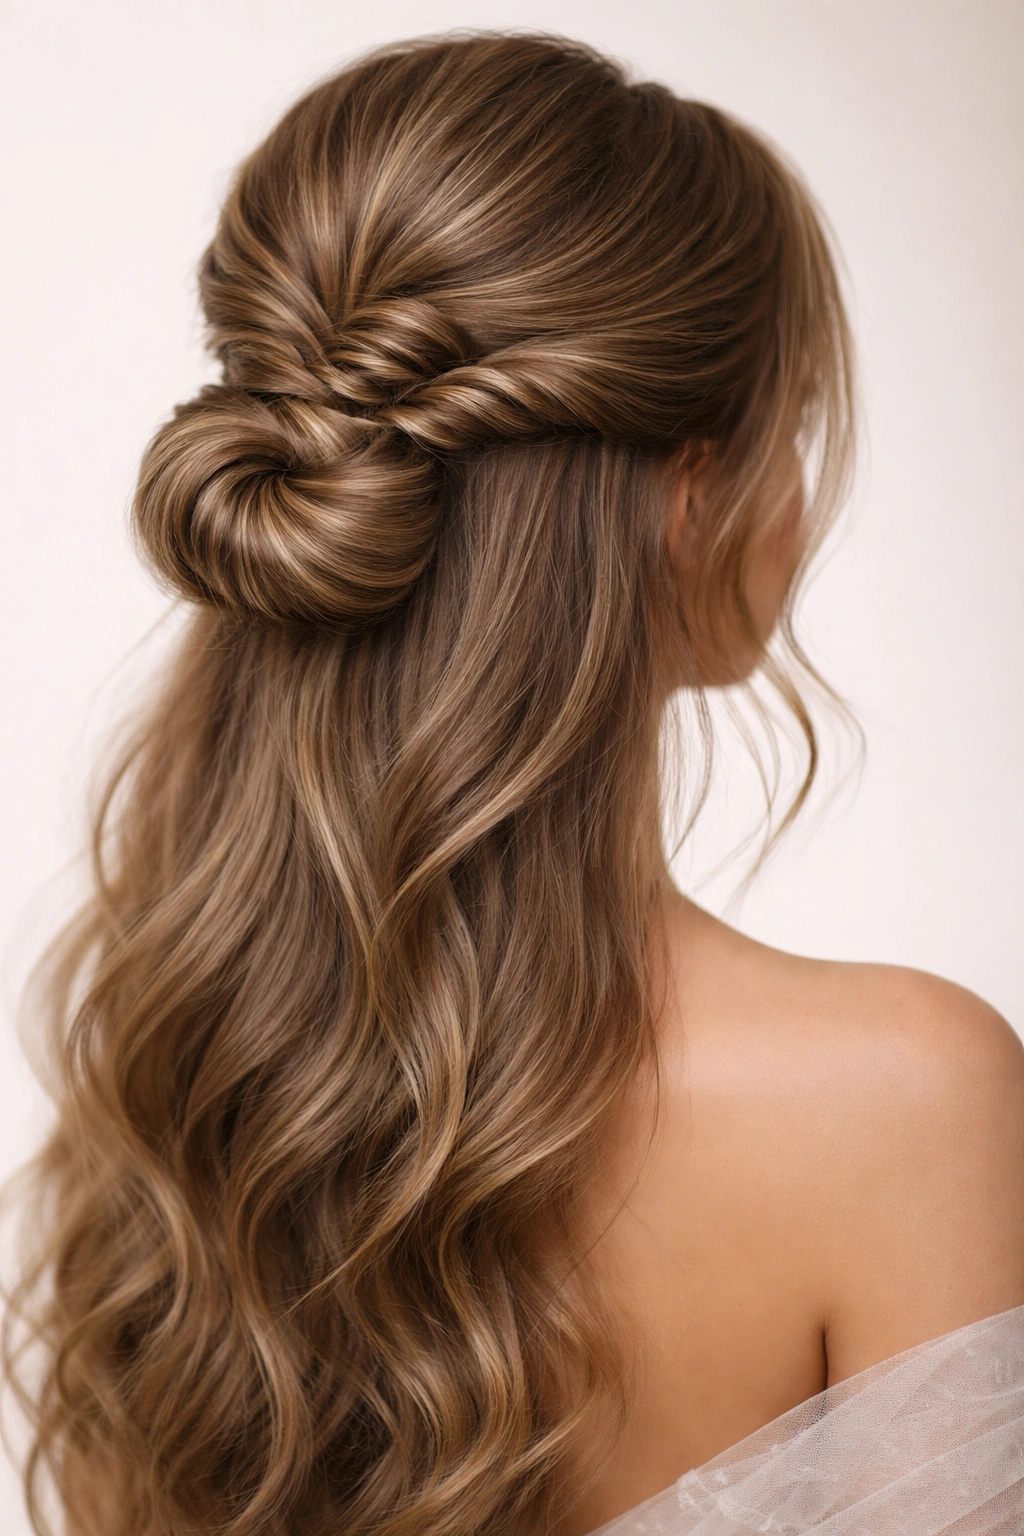
For those who want something more intricate, the double-twisted version takes two separate sections from either side of the head, twists each one, and combines them into a single bun at the back. This creates a fuller bun with more visual complexity, and it reads as a more intentional, carefully-crafted style. It’s the choice for someone who wants to make a statement without going full updo.
What Makes It Special
The double twist is beautiful because it creates symmetry while still maintaining the relaxed half-down aesthetic. Each twist intertwines with the other, and when you coil them together into a bun, you get gorgeous dimension and texture. Because you’re working with two sections rather than one, you can create a noticeably fuller bun even if your hair is naturally fine, and the dual-twist mechanism makes the style feel more secure throughout the evening.
Execution Details
- Part your hair down the center or slightly off-center
- Take a one-inch section from your right temple and twist it back; simultaneously, take a matching section from your left temple and twist it back
- Twist each section tightly enough to hold its shape but loosely enough that you can still see the twist texture
- When both twists reach the back of your head, wrap them around each other once or twice, then coil them together into a bun
- Pin with multiple bobby pins inserted at different angles—this style’s security depends on a truly anchored base
Pro Styling Tips
- This works best with medium to thick hair or with added texture from curling or waves
- A small velcro roller placed inside the bun base before you coil the twists adds instant volume
- Leave face-framing pieces on both sides to soften the symmetry and prevent the style from feeling severe
- Add a pearl or crystal hairpin that weaves through the bun for subtle glamour
4. The Braided Crown Bun

If you want maximum visual interest and a style that truly photographs like a work of art, the braided crown bun is your answer. Rather than twisting, you braid a section from crown to back, then coil that braid into a bun. The braid creates beautiful linear texture that’s far more interesting than a simple twist, and it adds an element of craftsmanship that reads as elevated and thoughtful.
Why This Style Stands Out
The braid itself is the focal point here, so people immediately see that effort and intention went into your styling. Braids catch light differently than twists, creating more visual dimension. Because you’re working with three strands instead of two twisted sections, the braid is also inherently more secure—it’s harder to slip or unravel throughout the evening. This is an excellent choice if you’re going to be dancing, celebrating, or moving around significantly.
How to Braid for the Best Effect
- Start with textured hair (waves or curls make the braid far more visible and interesting)
- Take a section of hair from your crown roughly two inches wide
- Create a three-strand braid; as you braid, you can either keep the braid tight to yourself (closer to the scalp) or let it be slightly looser for a more romantic, textured feel
- Braid all the way to the back of your head where your bun will sit
- Coil the braided section into a bun and pin securely with bobby pins hidden inside the coil
Customization Options
- You can create the braid as a single center braid, or you can create two thinner braids (one from each side) that meet at the back
- Adding thin ribbons or faux pearls woven into the braid as you go creates instant luxury without requiring additional adornment
- For a looser, more romantic feel, gently pull at the sides of the finished braid to make it wider and airier
Worth knowing: Practice this braid at least twice before the event, because the technique of braiding while simultaneously gathering the lower hair into the bun takes coordination. Video tutorials are invaluable here.
5. The Sleek Low Bun with Face-Framing Pieces
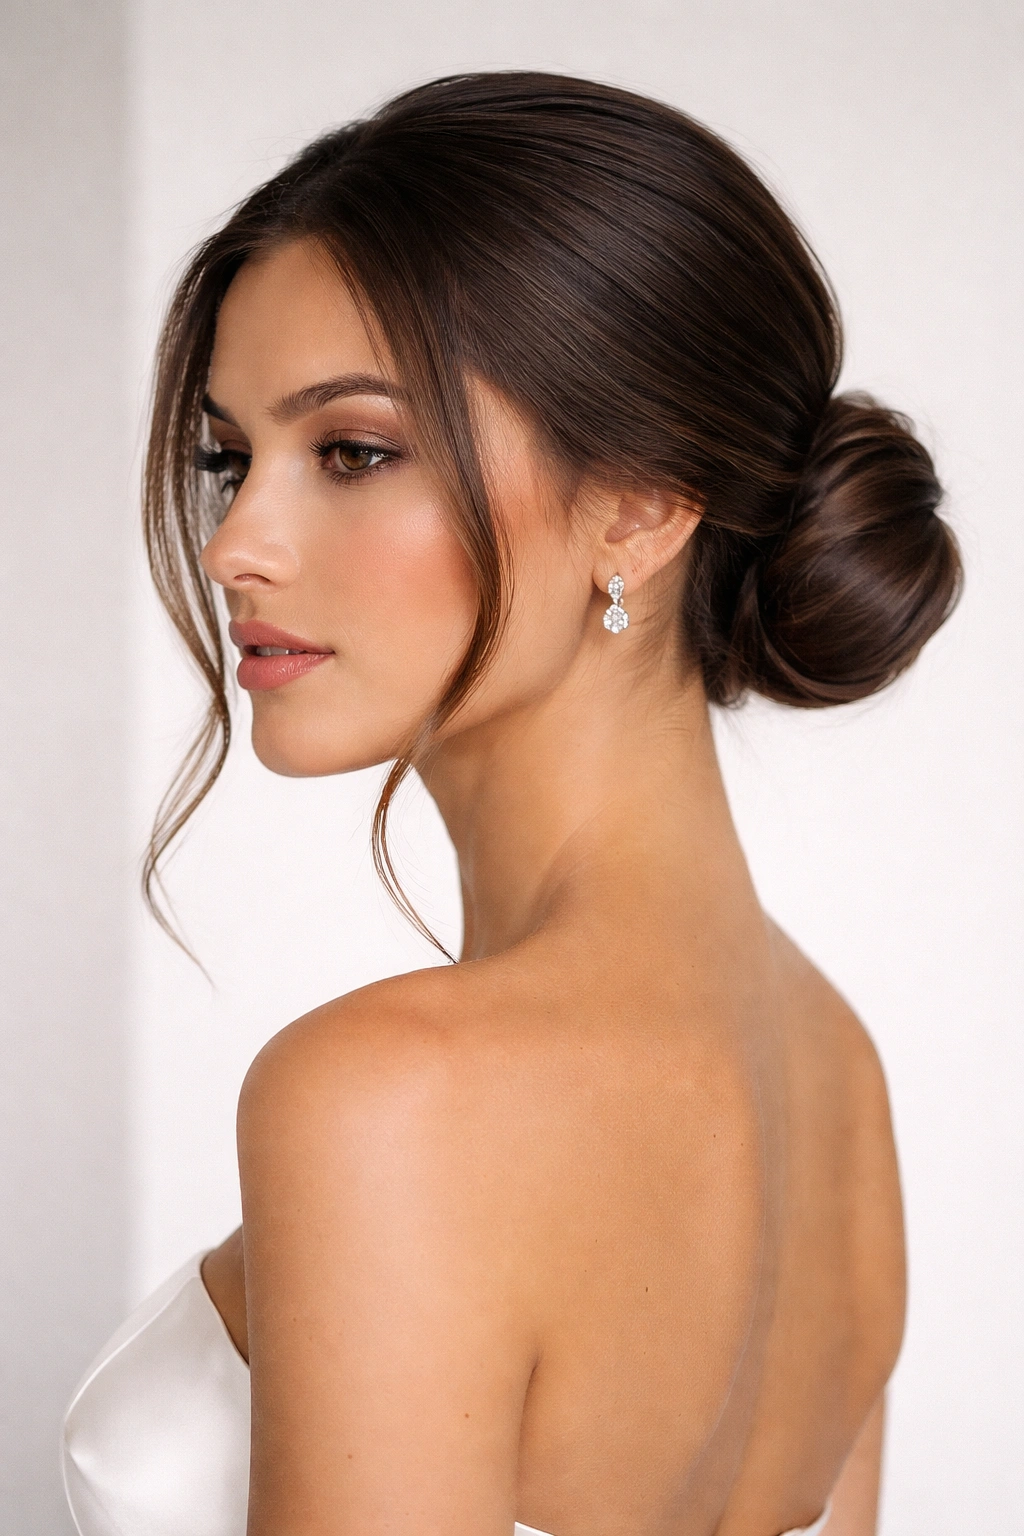
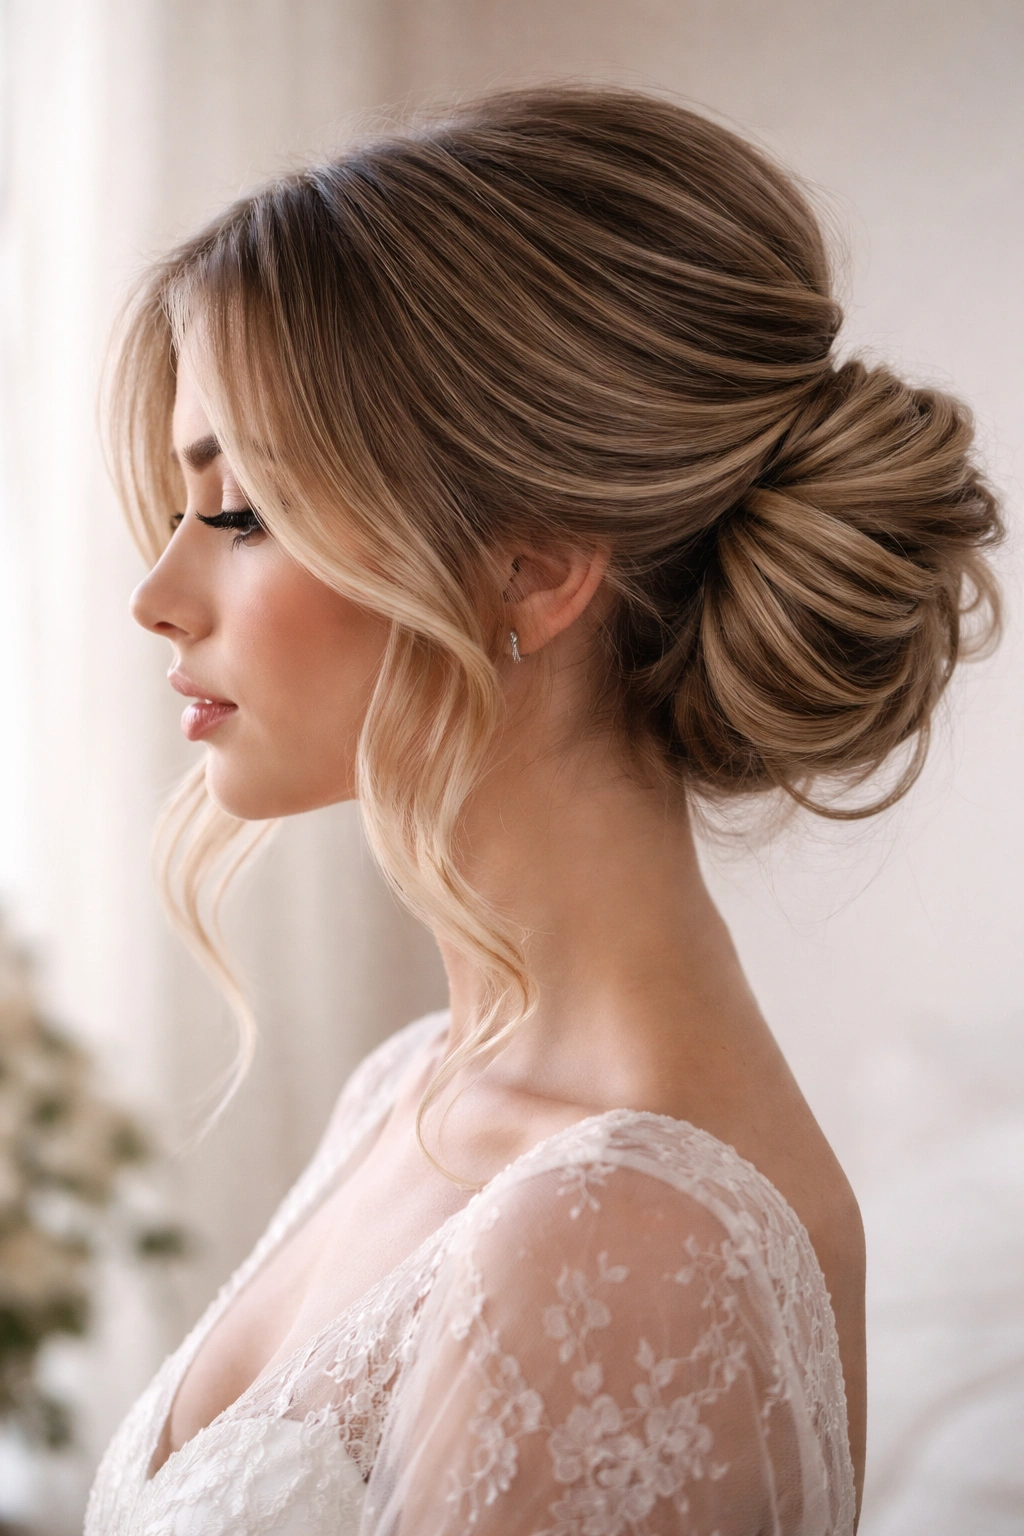
For a more modern, minimalist-leaning formal look, the sleek low bun is absolutely perfect. This version keeps the bun lower on the head—at the nape or slightly below—and uses a smoothing technique rather than texture to create polish. Two pieces of hair frame the face loosely, creating softness without compromising the clean, sculpted aesthetic. This is the choice for someone who prefers understated elegance over romantic volume.
How to Achieve the Sleek Finish
You’re aiming for hair that looks smooth and intentionally polished, not textured or volumized. Use a strong-hold gel or smoothing cream on damp hair, blow dry with a paddle brush for maximum smoothness, and then finish with a flat iron if needed for perfectly sleek strands. Once you’ve achieved smoothness, gather hair from the half-up point into a low ponytail, then twist and coil it into a tight bun at the nape. Pin very securely—you want zero flyaways.
Face-Framing for Balance
- Before you secure the bun, pull out two thin, face-framing pieces from just in front of each ear
- These pieces should be incredibly subtle, maybe ½ inch wide
- Curl them gently around your face with a small-barrel curling iron for a soft, romantic contrast to the sleek bun
- This small touch of texture prevents the style from feeling severe or overly austere
Best Practices for All-Night Hold
- Use a strong-hold gel during blow-dry and styling—don’t skip this step
- When you create the bun, use at least 6-8 bobby pins inserted at different angles, not all from the same direction
- Finish with a strong-hold hairspray, spraying the bun and the back of your head thoroughly
- Pack bobby pins and hairspray in your bag for touchups if needed
Pro tip: If you have any baby hairs or flyaways around your face, a tiny edge control brush and some smoothing cream applied in the morning will keep everything locked in place all evening.
6. The Romantic Textured Bun with Cascading Waves
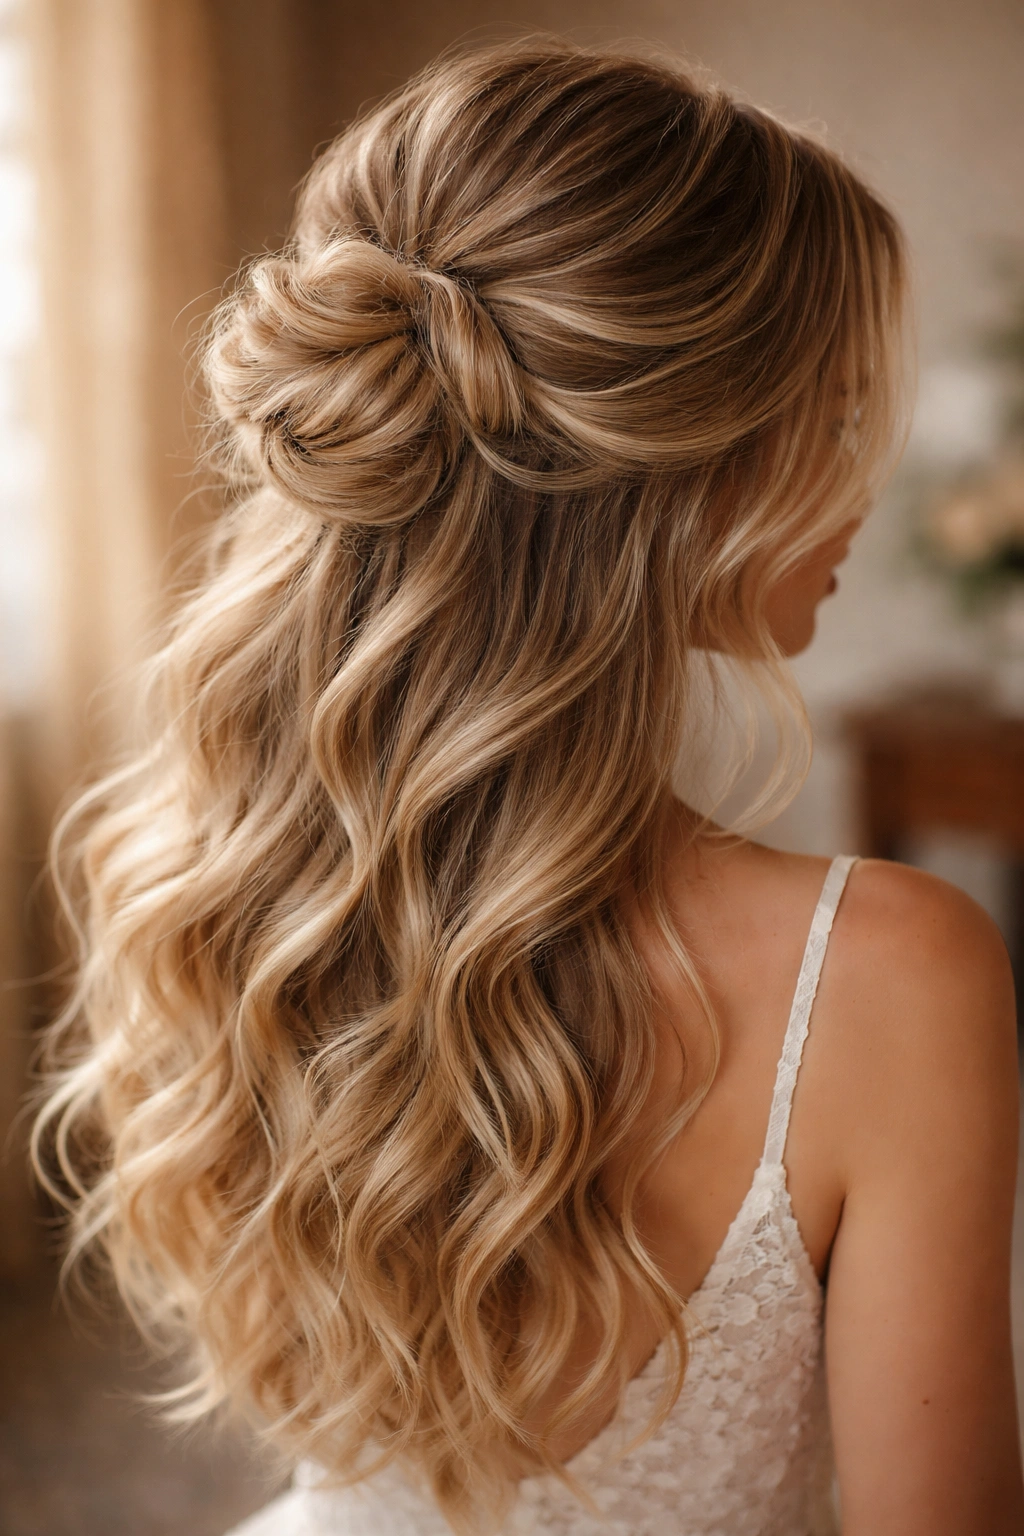
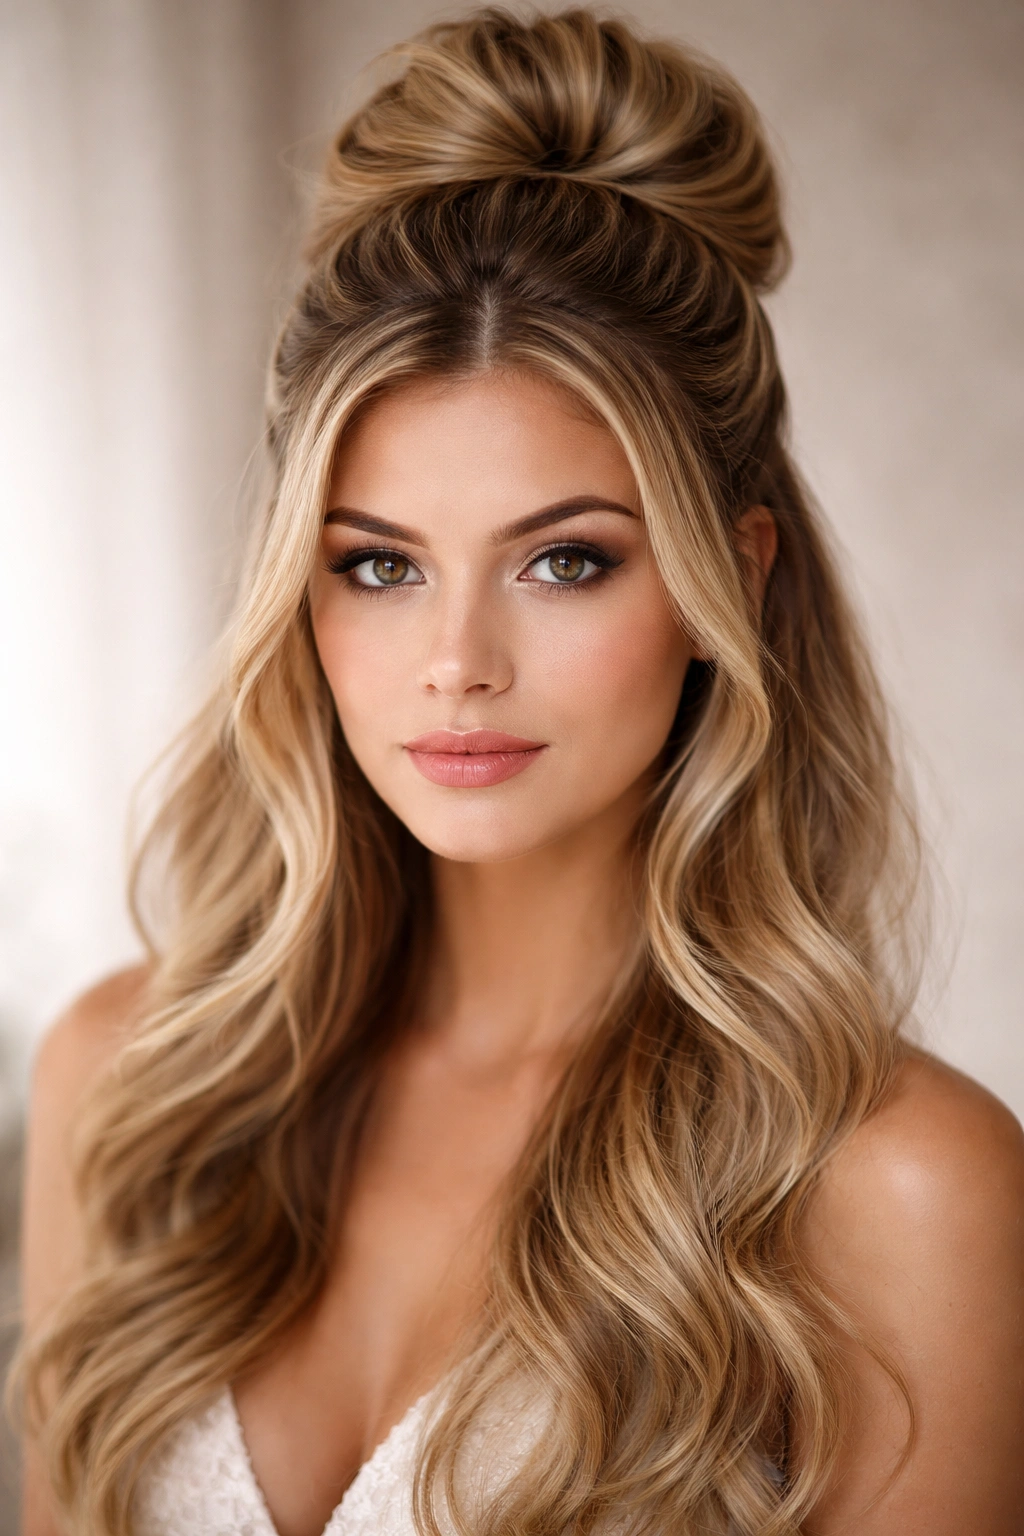
This is the dreamy option—a soft, textured half-up bun where the down section isn’t just loose, but genuinely waves and cascades in defined, beautiful curls. The bun itself is loose and touchable rather than tight, and the overall effect is undeniably romantic. This style works beautifully for weddings, galas, or any formal event where you want to lean into elegance with a softer edge.
Creating Maximum Texture and Movement
Start the day before your event by applying a curl-enhancing mousse or serum to damp hair, then sleeping in braids or a pineapple bun to create natural waves. On event day, release the braids gently and finger-comb the waves to enhance their shape and dimension. You should have loose, defined waves throughout your entire head—these create the foundation for the style.
Building the Bun with Intention
- Gather the upper half of your hair for the bun, but don’t worry about it being perfect or perfectly smooth
- Twist or braid this section loosely—you’re going for artfully textured, not refined or controlled
- Coil it into a bun, but leave it slightly looser than you normally would; you want people to see the texture and movement within the bun itself
- Rather than pulling it tight, let the coil sit with a bit of volume and dimension
- Don’t backcomb the bun—the natural texture from your curled hair is enough
Styling for Romance
- Use a light texturizing spray rather than a heavy gel or smoothing cream
- Gently pull wispy pieces from the bun and from the wave-framed face area
- The whole look should feel lived-in and soft, never stiff or overly controlled
- Consider adding thin ribbons woven through the bun, or small pearl bobby pins clustered together
Worth knowing: This style actually looks better the slightly messier it is, so perfectionism works against you. If you’re someone who usually goes for very polished looks, intentionally embrace a little softness and texture here.
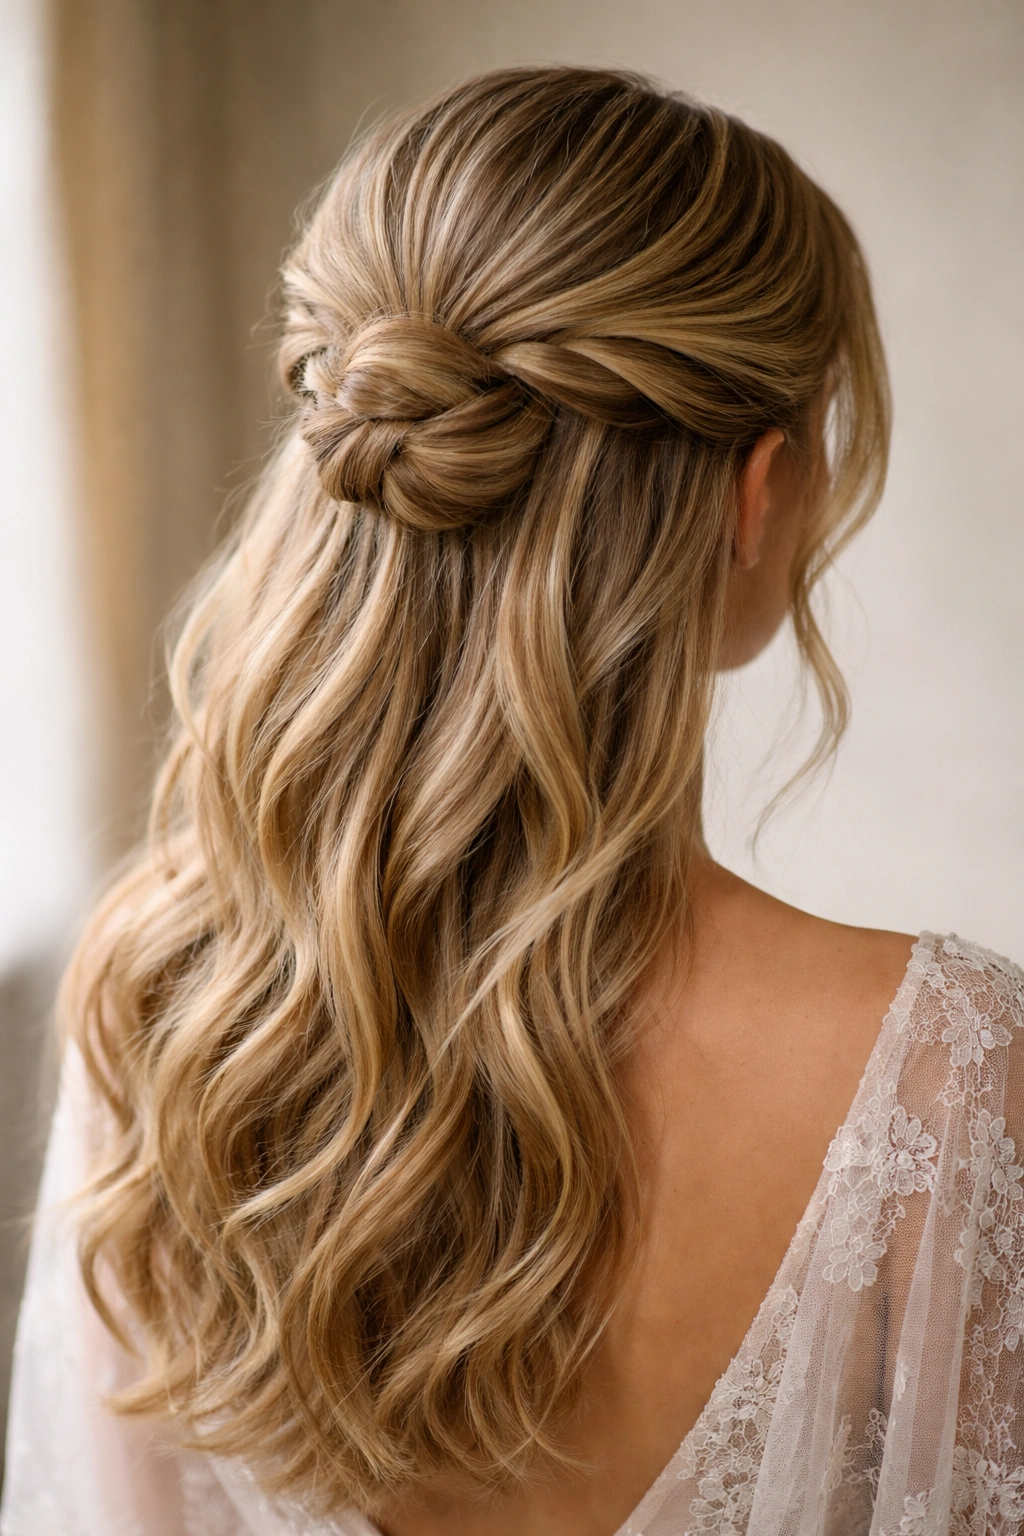
7. The Wrapped Ponytail Bun
This technique uses a clever styling trick: you create a half-up ponytail, then wrap a small section of hair from that ponytail around the base, and finally coil the remainder into a bun. The wrapped section creates a polished base and hides the elastic completely, which makes the entire style look more intentional and refined. It’s technically involved but absolutely worth learning.
The Wrapping Technique That Elevates Everything
Create your half-up ponytail first, positioning it where you want your bun to sit. Take a very thin one-inch section from the underside of the ponytail—this section will wrap around the elastic to hide it. Wrap this section tightly around the base of the ponytail three or four times, tucking the end under and securing it with a bobby pin hidden inside. Now you have a ponytail that looks like it has no elastic visible, which immediately reads as more sophisticated.
Completing the Bun
- With the ponytail base now wrapped and polished, take the remaining hair in the ponytail and coil it into a bun directly above the wrapped section
- Pin this bun securely; the wrapped base acts as a sturdy anchor point
- The wrapped section creates visual separation between your down hair and the bun, making the entire style feel more intentional and structured
Why This Detail Matters
This one small technique—wrapping the base—is what separates an everyday half-up style from something that feels salon-quality and formal. It’s a tiny detail that most people won’t consciously notice, but they’ll absolutely sense that something about your styling is more refined. It’s the kind of thing that makes people ask, “Did you get your hair done professionally?”
Pro tip: Practice this wrapping technique several times before your event. It becomes muscle memory quickly, and once you’ve done it a few times, it takes only 30 seconds to execute.
8. The Fishtail Half-Up Bun
For those who love intricate braiding details, the fishtail braid offers visual complexity that regular three-strand braids simply can’t match. A fishtail has a delicate, intricate appearance even though it’s created with just two sections of hair. When you fishtail from the crown back to the bun, you’re creating a style that photographs beautifully and feels genuinely elevated.
Understanding the Fishtail Technique
A fishtail braid looks complicated but follows a simple pattern: divide your hair into two sections, then take a tiny piece from the outer edge of one section, cross it over to the other section, and repeat on alternating sides. It creates a woven, delicate texture that’s far more visually interesting than a standard three-strand braid. When you’re doing a half-up version, you’re taking hair from the crown area and fishtailing back to where your bun will sit.
Execution Steps
- Divide the crown section you’re working with into two equal parts
- Take a thin piece from the outer right section, cross it over to the left section
- Take a thin piece from the outer left section, cross it over to the right section
- Continue alternating; the tinner your individual pieces, the more intricate the final fishtail will look
- Fishtail all the way to the back of your head
- Coil the finished fishtail into a bun and pin securely
Why It Photographs Exceptionally Well
The fishtail creates such a delicate, intricate pattern that it genuinely looks like art when viewed from behind. Professional wedding photographers absolutely love this detail because it adds visual interest and craftsmanship to formal event photos. Even if most guests won’t see the detail from the front, everyone looking at photos afterward will be impressed.
Worth knowing: The looser you make a fishtail, the more dramatic and interesting it looks. Tight, controlled fishtails can look almost plain, but a gently loosened fishtail is stunning.
9. The Low Side-Swept Bun with Volume
This variation positions everything lower and to the side, creating a swept, asymmetrical silhouette that’s incredibly flattering and modern. Rather than pulling the bun straight back, you’re sweeping it to the side, and you’re creating volume throughout the bun rather than keeping it sleek. This is perfect for someone who wants something beyond the classic crown bun but still wants to feel undeniably feminine and polished.
Building Volume at a Lower Position
Start by curling your entire head in soft waves—these waves are essential because they give you the texture needed for volume. Part your hair deeply to one side, taking most of your hair to the opposite side. From the temple on the larger-hair side, gather hair back and twist or braid it toward the side you want the bun on. As you gather, you’re not aiming for a tight, controlled line, but rather a softly swept, somewhat loose gathering.
Creating Fullness in the Bun
- Tease the section you’ve gathered slightly before coiling it into a bun—this adds volume and prevents the bun from looking flat
- Coil it at the side of your head at ear level or slightly lower, rather than at the crown
- Leave the bun noticeably looser than you would a standard bun; you want people to see texture and movement within it
- Pull a few soft pieces loose around your face for additional romance
Styling for the Swept Effect
- The side-part is crucial—it creates the swept aesthetic
- Use a light texturizing spray rather than a heavy smoothing product
- Consider using a side-swept bang if you have one; it reinforces the directional, swept feeling
- This style looks best with waves throughout the down hair, not straight pieces
Pro tip: If you’re worried about the bun slipping with a looser construction, use a velcro roller inside the coil before you pin—the roller provides structure without being visible.
10. The Double Bun with Center Part
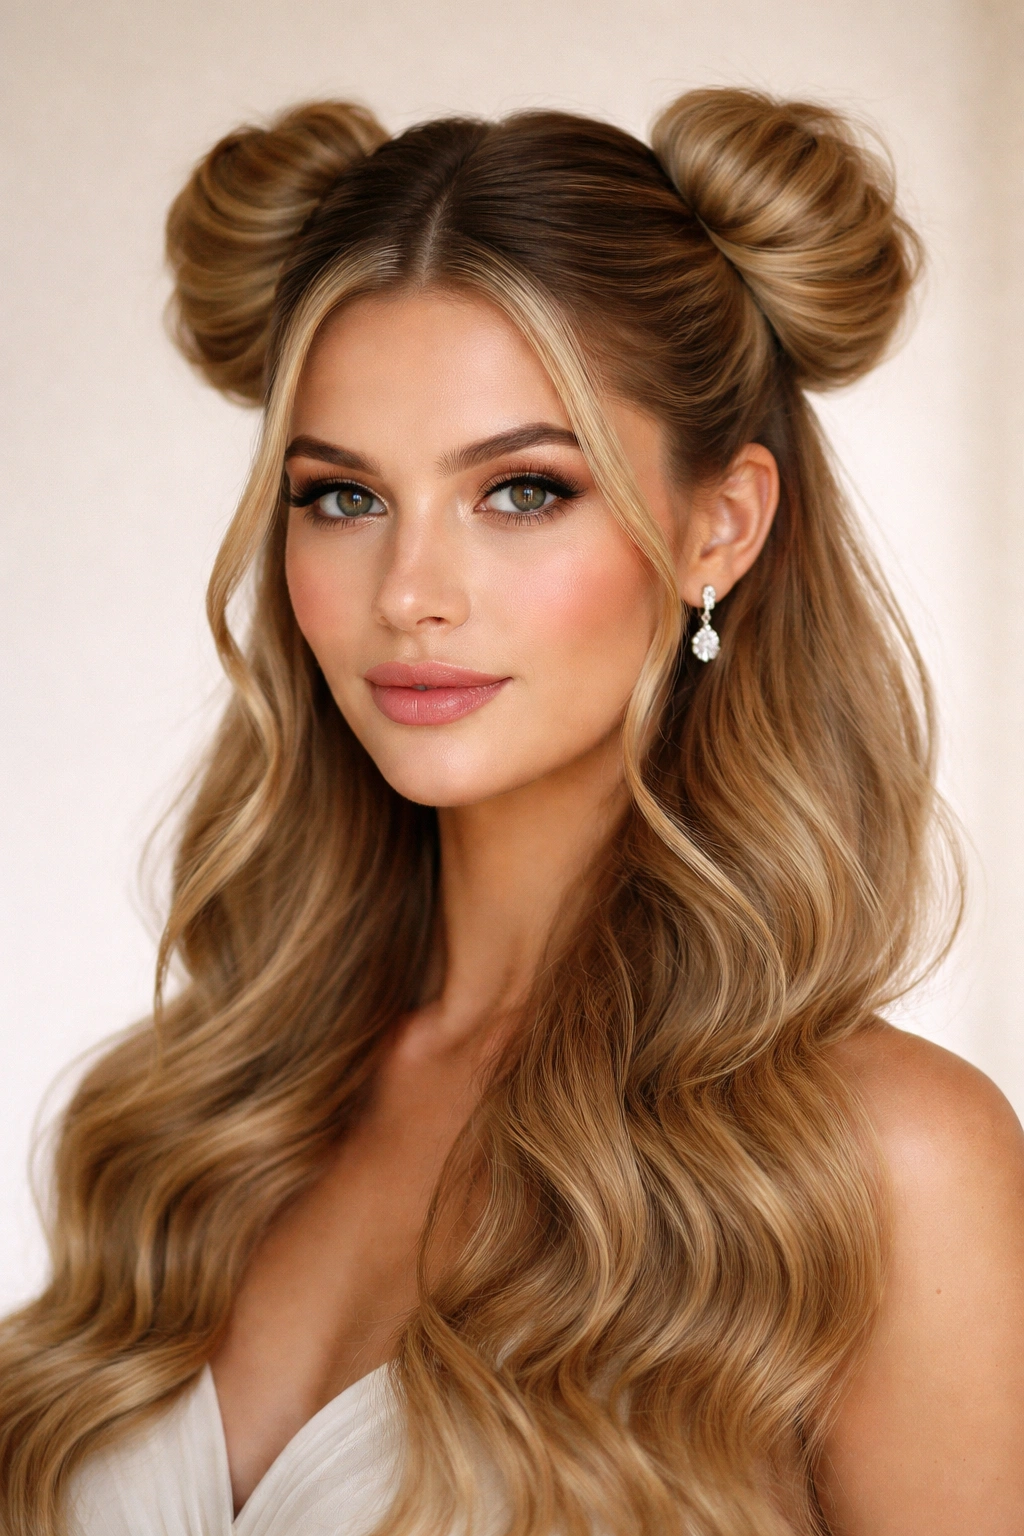
For something more playful and fashion-forward (while still formal), the double bun—gathering half your hair into two buns positioned symmetrically on either side of your head—offers visual interest and a touch of personality. Rather than a single bun at the crown or side, you’re creating two smaller buns that still leave the lower half of your hair down. It’s modern, slightly unexpected, and absolutely works for formal events if you style it with enough polish and refinement.
Positioning for Formal Elegance
Create a center part and divide your hair evenly down the middle. Take the front section from one side and sweep it back toward the side of your head, gathering it into a bun positioned roughly at ear level or slightly higher. Repeat on the opposite side with the other section. The two buns should sit symmetrically and be roughly the same size. Leave everything below the buns loose in waves or curls.
Preventing a Costume Appearance
The key to making double buns work in a formal context is keeping them polished and avoiding the playful space-bun aesthetic. Create the buns with enough refinement that they read as intentional styling rather than experimental. Use a strong-hold product, keep the buns smooth and controlled rather than loosely textured, and style the down hair in elegant waves. The formula is: refined buns + polished down hair = formal and contemporary.
Customizing for Your Face
- If your face is round, positioning the buns slightly higher and slightly back creates a flattering line
- If your face is longer, you can position them a bit lower and slightly more forward
- Leaving a bit of face-framing texture around your temples softens the symmetry
Worth knowing: This style genuinely works best on medium to thick hair because thin hair can make the double buns look sparse. If you have fine hair, you might add clip-in extensions just for volume in this style.
11. The Bohemian Loose Bun with Ribbon

For a romantic, bohemian-leaning formal aesthetic, the loose bun woven through with ribbon is absolutely gorgeous. You’re not going for a tight, controlled bun here—instead, you’re creating something soft and textured, and you’re weaving a delicate ribbon or silk thread through the bun as you coil it. The result feels artfully crafted and romantically complex.
Building the Loose Bun Foundation
Curl your entire head in soft waves and let them set. Take the upper-half section and twist or braid it loosely—you’re going for visible texture, not a refined, smooth twist. As you coil this twist or braid into a bun, thread a delicate ribbon (typically 1/4 inch wide) through the coils as you go. You can weave it in and out of the bun structure, letting it catch light and adding visual interest.
Choosing the Right Ribbon
- Silk ribbons photograph beautifully and feel luxurious against your hair
- Metallic ribbons add glamour; blush, champagne, or gold tones are especially flattering
- Ivory or white ribbons create a romantic, vintage feeling
- Consider ribbon width (thinner is more delicate and sophisticated than thicker) and finish (matte is more formal than shiny)
Finalizing the Look
- Pull soft, wispy pieces loosely from the bun and from around your face
- Use a light texturizing spray rather than heavy products
- The whole effect should feel organic and romantic, not stiffly controlled
- Add fresh flowers woven into the bun if your event allows for it (weddings, garden parties)
Pro tip: Practice threading ribbon through a bun before your event, because the technique takes a light touch and coordination. You don’t want to pull too tightly and disturb the bun structure you’ve created.
12. The Sleek Geometric Bun with Sharp Lines
For the most modern, editorial formal look, the geometric bun uses sharp lines and perfect symmetry to create something that looks almost architectural. Rather than soft, romantic texture, you’re going for precise, clean lines. The hair is sleek, the bun is sculpted, and the face-framing pieces (if any) are equally precise. This is the choice for someone attending a black-tie event who wants to feel cutting-edge and fashion-forward.
Achieving Precise Geometry
Blow-dry your hair with a paddle brush for perfect smoothness, then flat-iron it if needed. Using a fine-tooth comb and smoothing serum, create a perfectly straight center or side part with no wavering lines. Gather the half-up section and secure it into a high, tight ponytail with a strong elastic. Twist this ponytail tightly and coil it into a very neat, compact bun. The tightness is essential—you’re not going for touchable or soft, but rather sculpted and polished.
Styling for Maximum Impact
- Use a strong-hold gel during blow-dry and styling to ensure zero flyaways
- Finish with a strong-hold hairspray applied generously
- Keep the bun compact and very round in shape
- If you add face-framing pieces, they should be equally sleek and precise, not soft or wispy
- Consider adding a single geometric hairpiece or architectural comb for visual interest
Who This Look Suits Best
This style looks stunning on people with strong facial features and those who naturally gravitate toward minimalist aesthetics. It’s not for everyone, but for the right person, it reads as undeniably chic and intentional. It photographs beautifully because the clean lines are visually striking.
Worth knowing: This is the style that demands absolute precision—any messiness or looseness undermines the entire effect. If you’re someone who loves this aesthetic, it’s worth investing in good styling products and possibly getting it done professionally the first time to understand exactly how tight and sculpted it should be.
Final Thoughts
The perfect half up, half down bun for your formal event depends entirely on your personal style, hair texture, and the specific occasion. A romantic wedding calls for something soft and textured; a black-tie gala might warrant the sleek, geometric approach; an elegant garden party feels perfect with ribbons and loose, bohemian texture. The beautiful part is that you have genuine options, and each one is achievable with practice and the right technique.
The single most important thing you can do is test your chosen style at least twice before the actual event. Do your hair, leave it up for a few hours, move around, eat, sit down—see how it holds and where you might need extra pins or product. Take a photo from behind to see how it actually looks, because that’s often the angle people will see. This isn’t about perfectionism; it’s about confidence. When you know your style will hold beautifully all evening, you can relax and actually enjoy your event instead of worrying about your hair.
Remember that the best version of any of these styles is the one that makes you feel like yourself—just elevated. Whether that’s romantic and soft, sleek and modern, or intricately braided and detailed, own it completely. You’ve done the work to create something beautiful; now enjoy every moment of the event knowing your hair is absolutely holding up its end of the bargain.