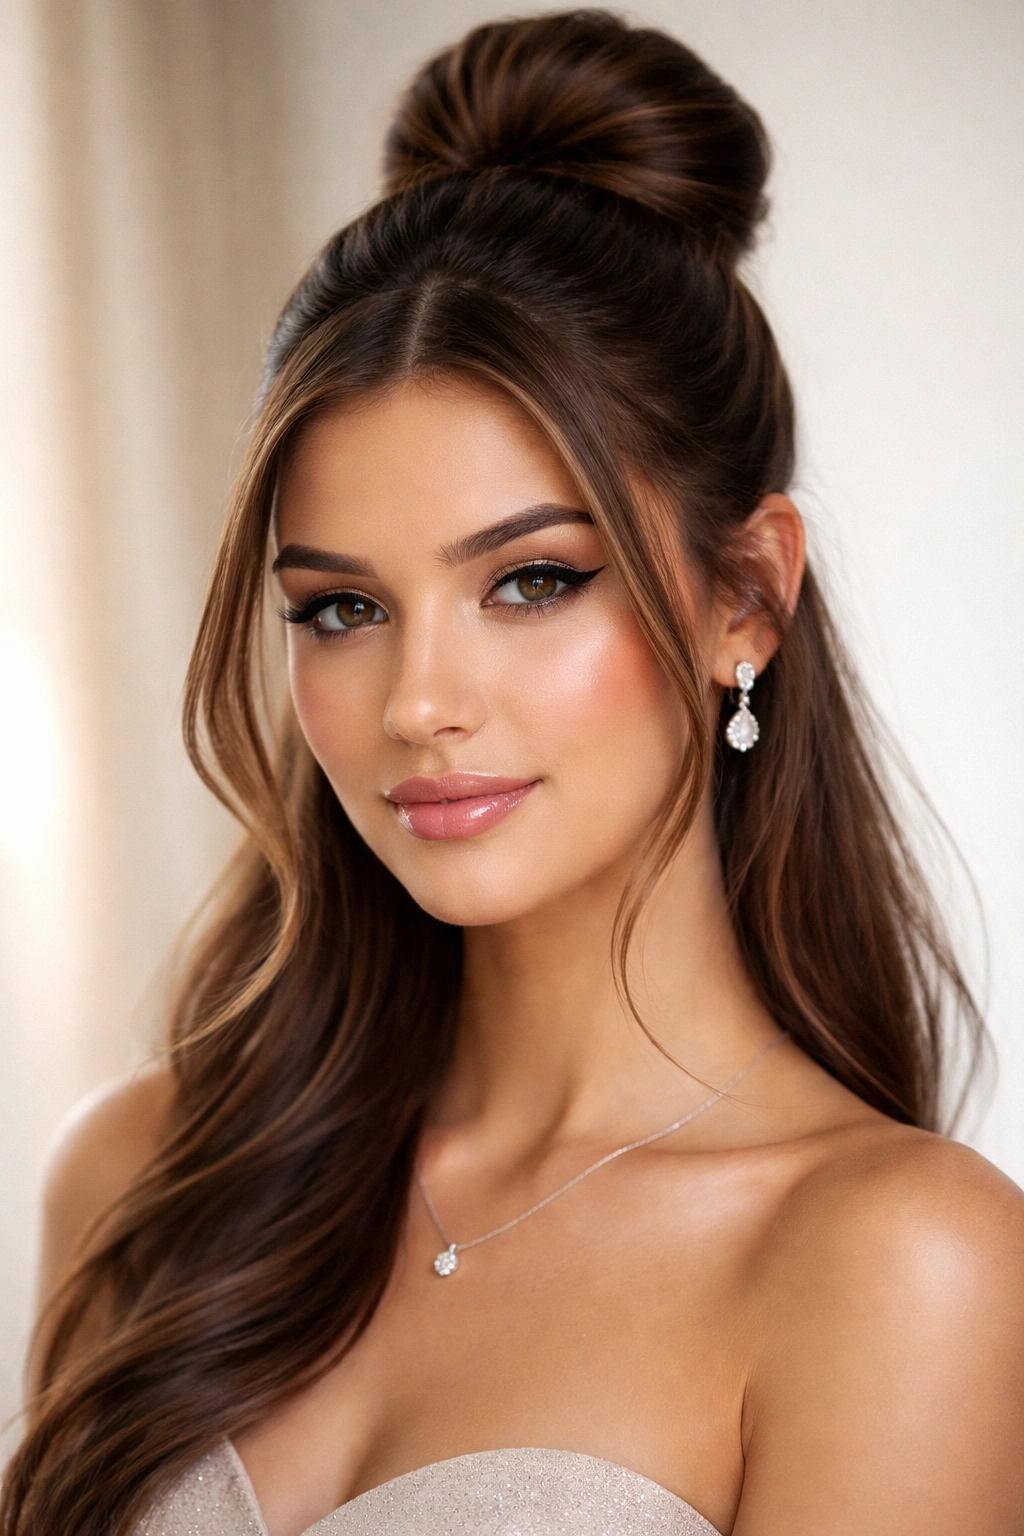
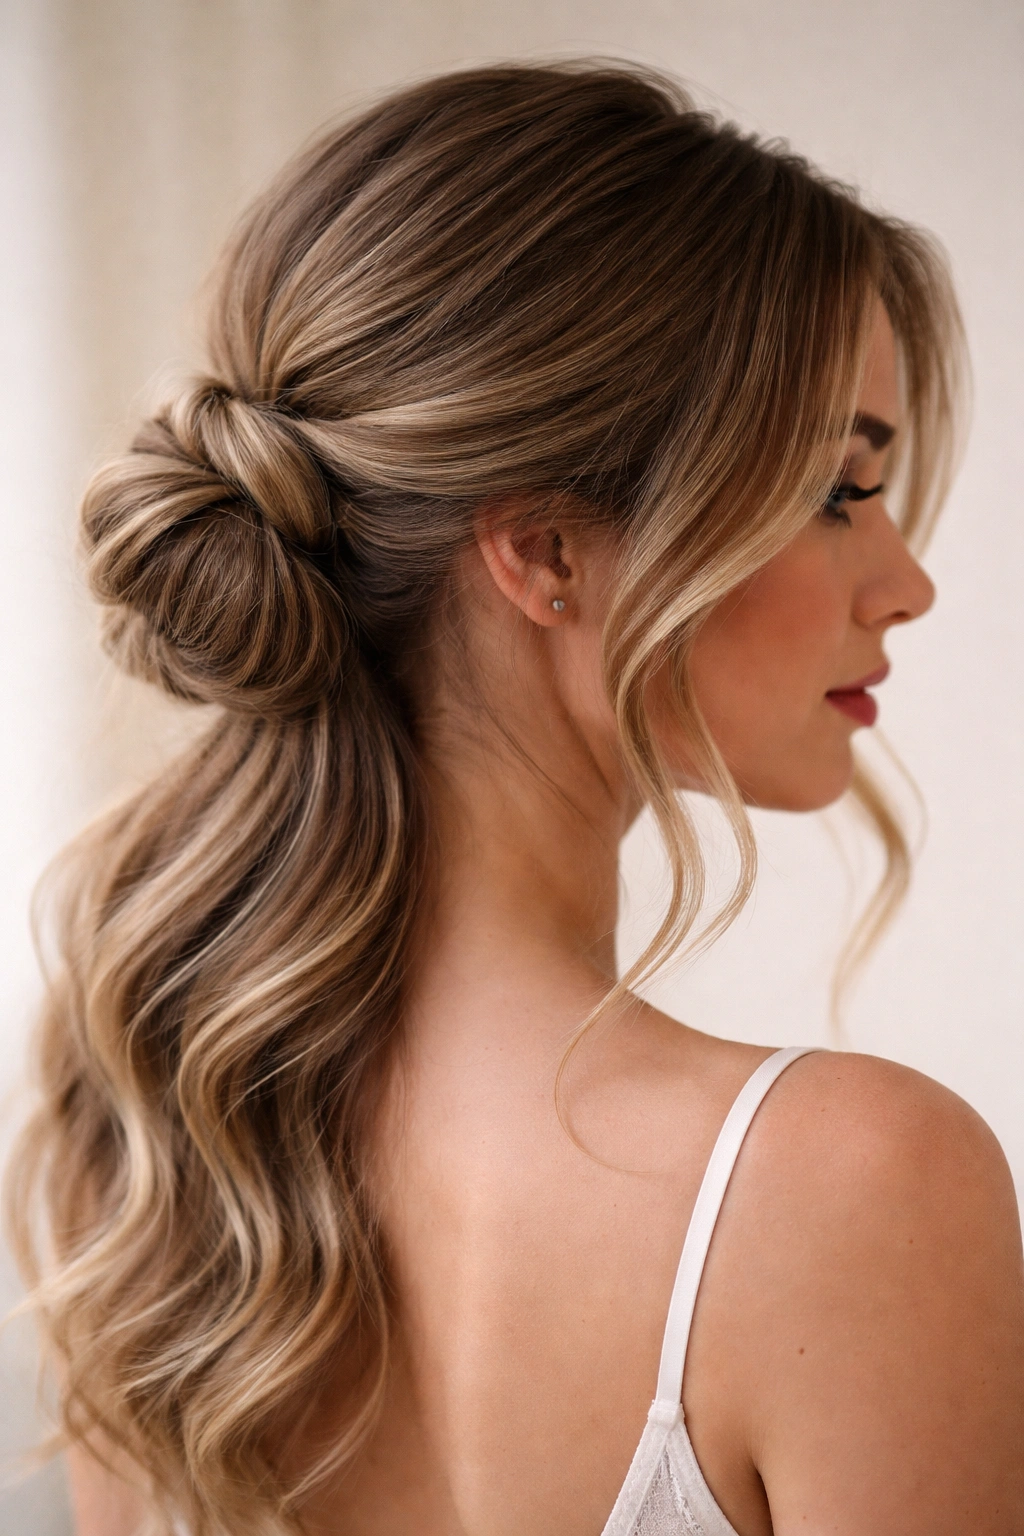
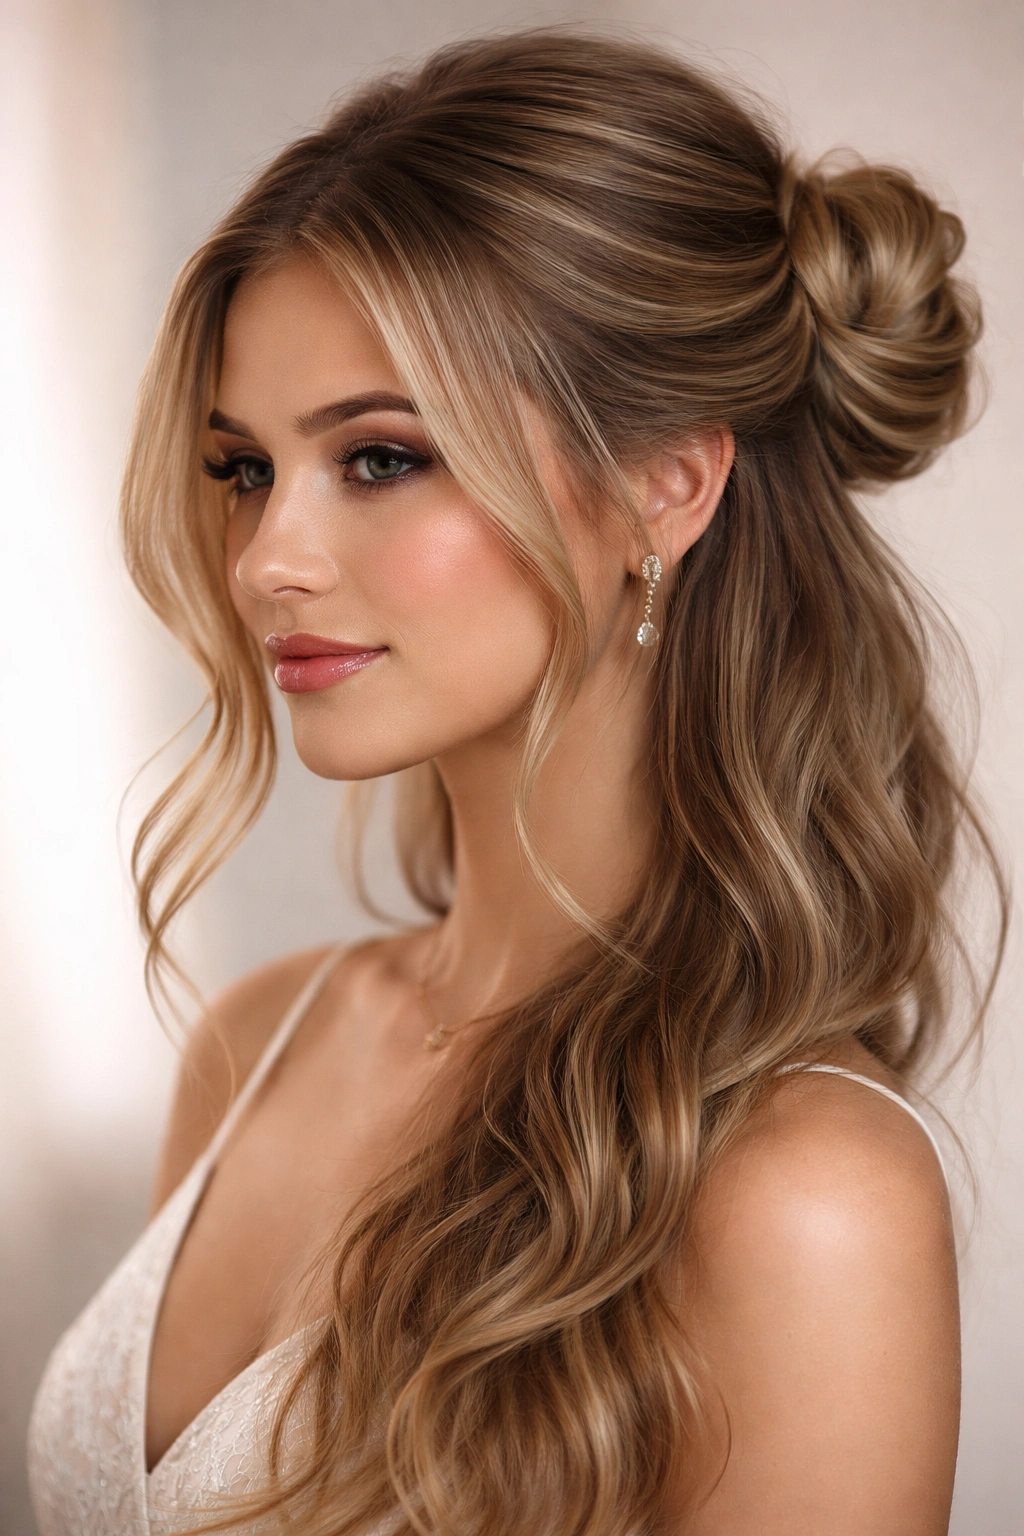
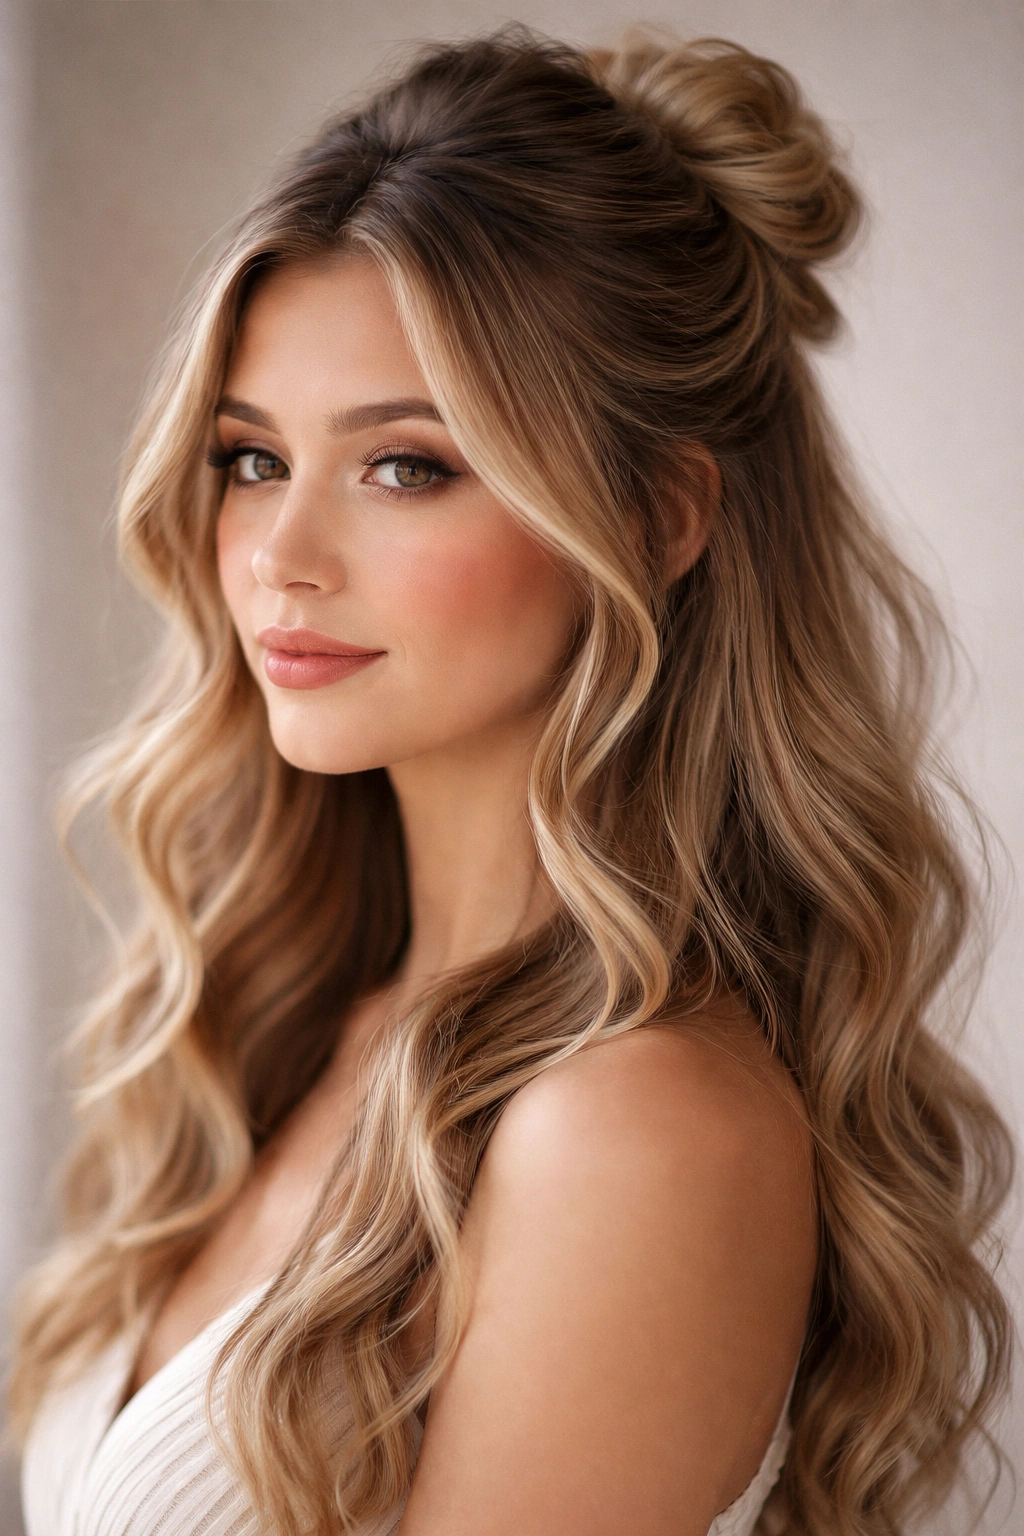
Homecoming is one of those occasions where your hair deserves to be as memorable as the night itself. You want something that looks polished and put-together, but not so formal that it feels like you’re at prom in your parents’ living room. Enter the half up half down bun—the hairstyle that strikes that perfect balance between effortlessly romantic and genuinely intentional. It keeps hair off your face and neck while still showing off length and movement, and it photographs beautifully from every angle.
The beauty of this particular style is its sheer versatility. Whether you’re going for soft and romantic, sleek and modern, or playfully textured, the half up bun gives you room to experiment. You can dress it up with accessories, keep it minimal and chic, add braids for extra dimension, or incorporate your natural curl pattern. It works with virtually any hair length, texture, and color, which means you can find a version that feels authentically you rather than forcing your hair into something uncomfortable or unfamiliar.
The other major advantage? It’s genuinely achievable at home. You don’t need professional tools or hours of styling time to pull off most of these looks. Many of them can be created with skills you probably already have, plus maybe a quick online tutorial and some practice beforehand. This is your invitation to experiment, discover what works with your hair, and build the confidence to style yourself for this night.
Let’s walk through 12 distinct half up half down bun styles that range from classic to creative, so you can pick one that fits your homecoming vision.
1. The Sleek High Bun with Face-Framing Layers
This is the version that feels undeniably elegant and polished without being overdone. You’re pulling the top half of your hair straight back and securing it into a tight, smooth bun at the crown, while leaving the bottom half down and sleek. The key is the tight, smooth finish on the gathered section—no flyaways, no texture—which creates that high-fashion, intentional look that photographs like a dream under homecoming lighting.
Why It Photographs So Well
The sleekness creates definition and shows off your face and features without distraction. The high placement draws attention upward, which naturally flatters most face shapes. From the back, you get that satisfying view of a perfectly formed bun with a full cascade of hair below it, which reads as “I put thought into this” rather than “I didn’t have time to do my hair.”
How to Create It
- Section the top half of your hair (from ear to ear) and brush it straight back with a fine-tooth comb, smoothing every flyaway with a damp brush and some lightweight smoothing serum
- Gather this section at the crown and secure with a clear elastic
- Divide this ponytail into two sections, twist each section tightly, then wrap them around the base of the ponytail to form a bun, pinning as you go with bobby pins that match your hair color
- Lightly tease the bun at the base with a fine-tooth comb to give it subtle dimension, then smooth the outer layer
- Leave the bottom half of your hair down and straighten or style it to match the polished vibe of the bun
Pro tip: Use a smoothing serum or anti-frizz cream on the sections you’re pulling back—it makes the difference between looking polished and looking messy.
2. The Braided Crown Half Bun
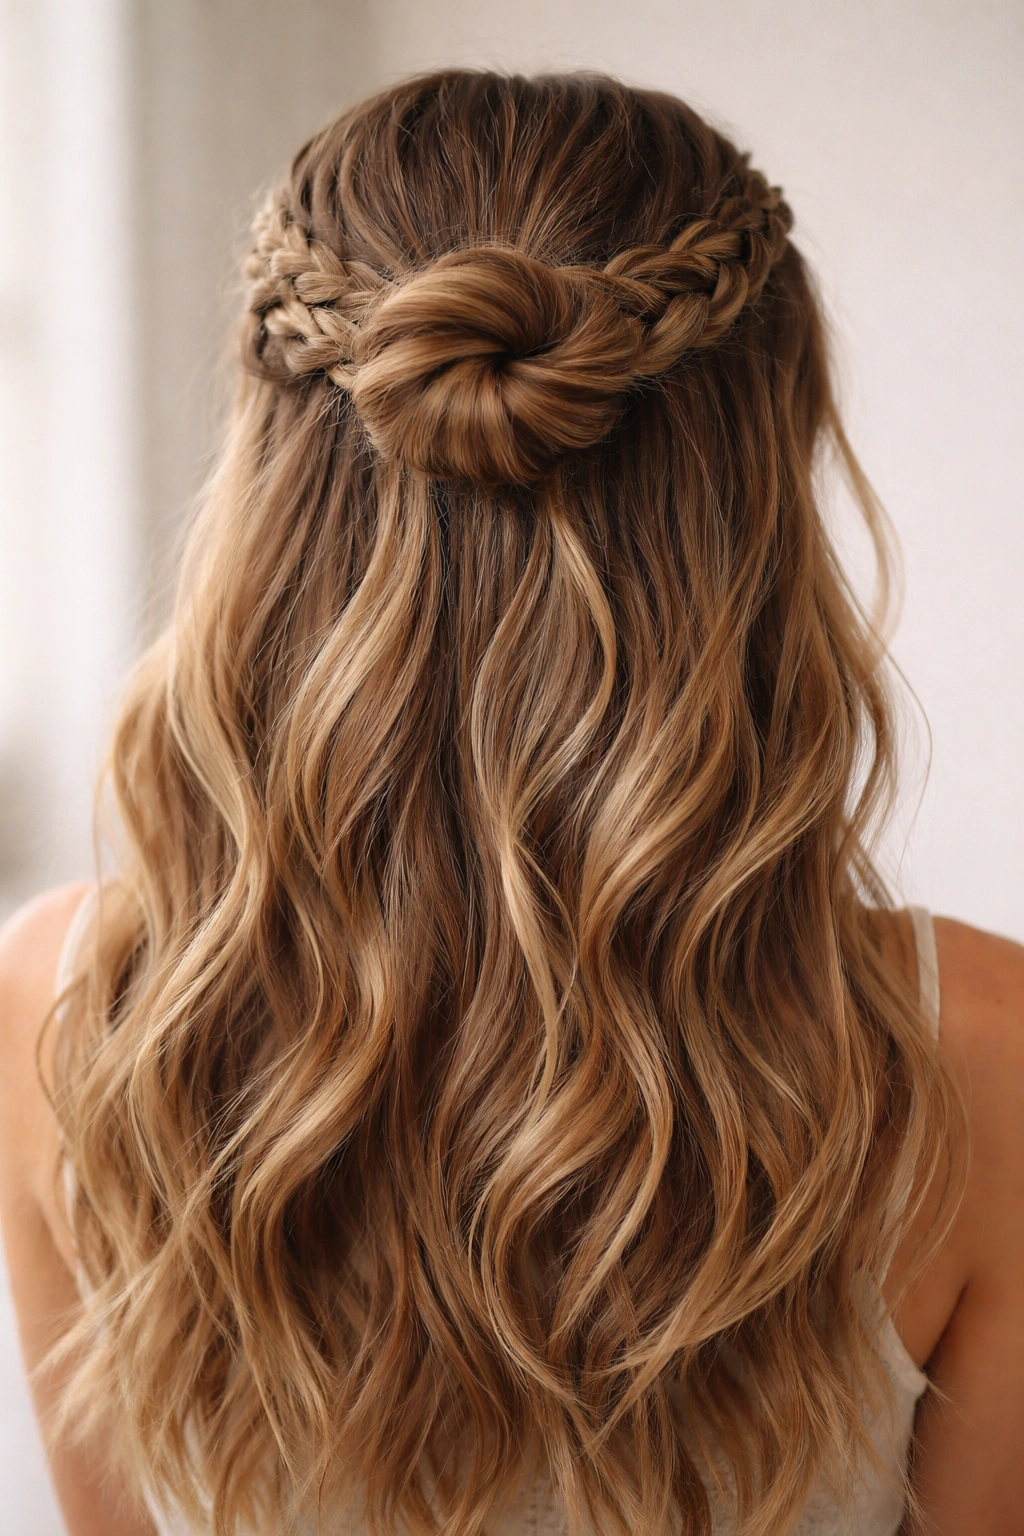
This style layers texture and dimension, which adds visual interest and feels more current than a plain bun. You’re creating one or two Dutch or French braids from the front sections on either side of your head, then bringing them together at the back and securing them into a bun while the rest of your hair flows freely below.
What Makes This Style Stand Out
Braids add an immediate sense of intentionality and craftsmanship. They also hide any imperfections in your hair texture and work beautifully with both straight and wavy hair. The braids catch light differently than solid sections do, which adds visual depth and movement even when you’re standing still.
Steps to Execute It
- Section a piece of hair from one temple and begin a Dutch braid (braiding away from your face), moving toward the back of your head
- Repeat on the other side, so you have two symmetrical braids framing your face
- Gather the ends of both braids plus the hair at the crown and secure into a ponytail at the back of your head
- Twist or braid this ponytail section, then wrap it into a bun and pin securely
- Leave the remaining hair down, and gently pull on the braids to widen them slightly and create a softer, fuller appearance
Worth knowing: This style works best if you braid when your hair has a bit of texture or is second-day hair—freshly washed, super slippery hair can be harder to braid neatly.
3. The Twisted Double Bun
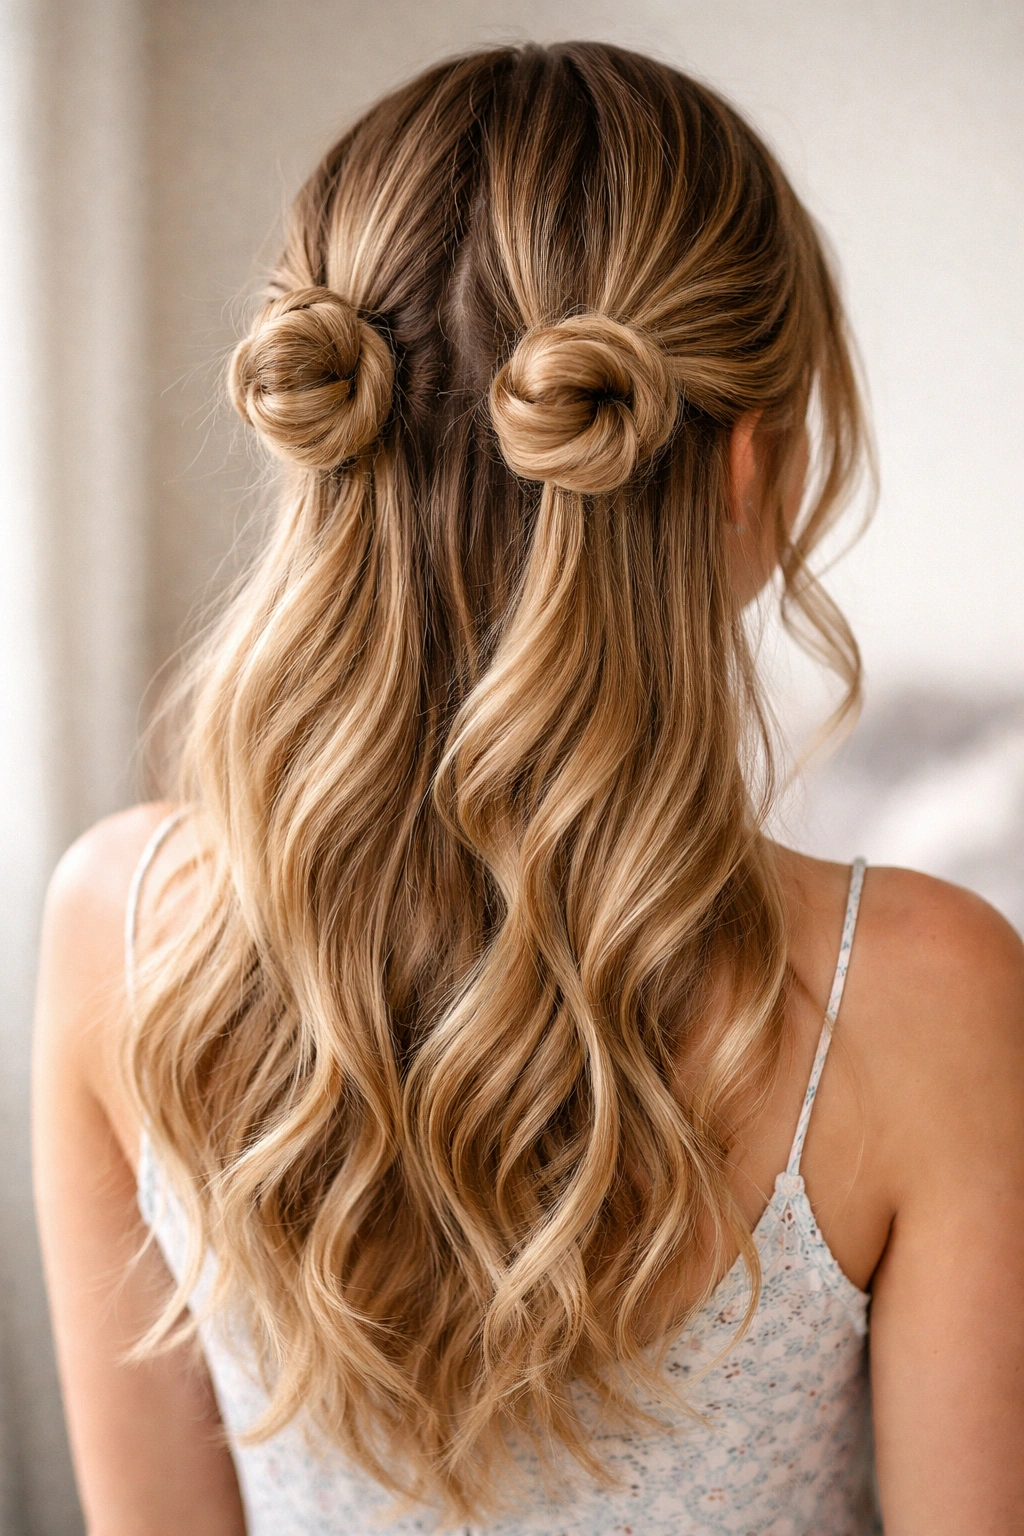
Instead of one centered bun, you’re creating two smaller buns on either side of the back of your head, which feels playful and youthful while still being appropriate for homecoming. This style has an inherent cuteness factor that photographs really well and feels less formal than a single bun.
Why Homecoming Loves This Version
It’s unexpected enough that it looks intentional and creative, but not so daring that it reads as costume-y. It balances sweetness with sophistication, and the two-bun format naturally creates nice visual symmetry from behind.
Creating Symmetrical Double Buns
- Section the top half of your hair down the middle, from your forehead to the nape of your neck
- Gather one side and secure it into a ponytail slightly to the left of center at the back of your head
- Repeat on the other side, creating a matching ponytail to the right of center
- Twist each ponytail tightly, wrap it around its base to form a bun, and pin securely
- Tease each bun very slightly to give them softness and dimension
- Leave the bottom half of your hair down and style as desired
Insider note: Make sure your two ponytails are at the exact same height and positioned symmetrically, or the whole look will feel unbalanced.
4. The Messy Textured Bun
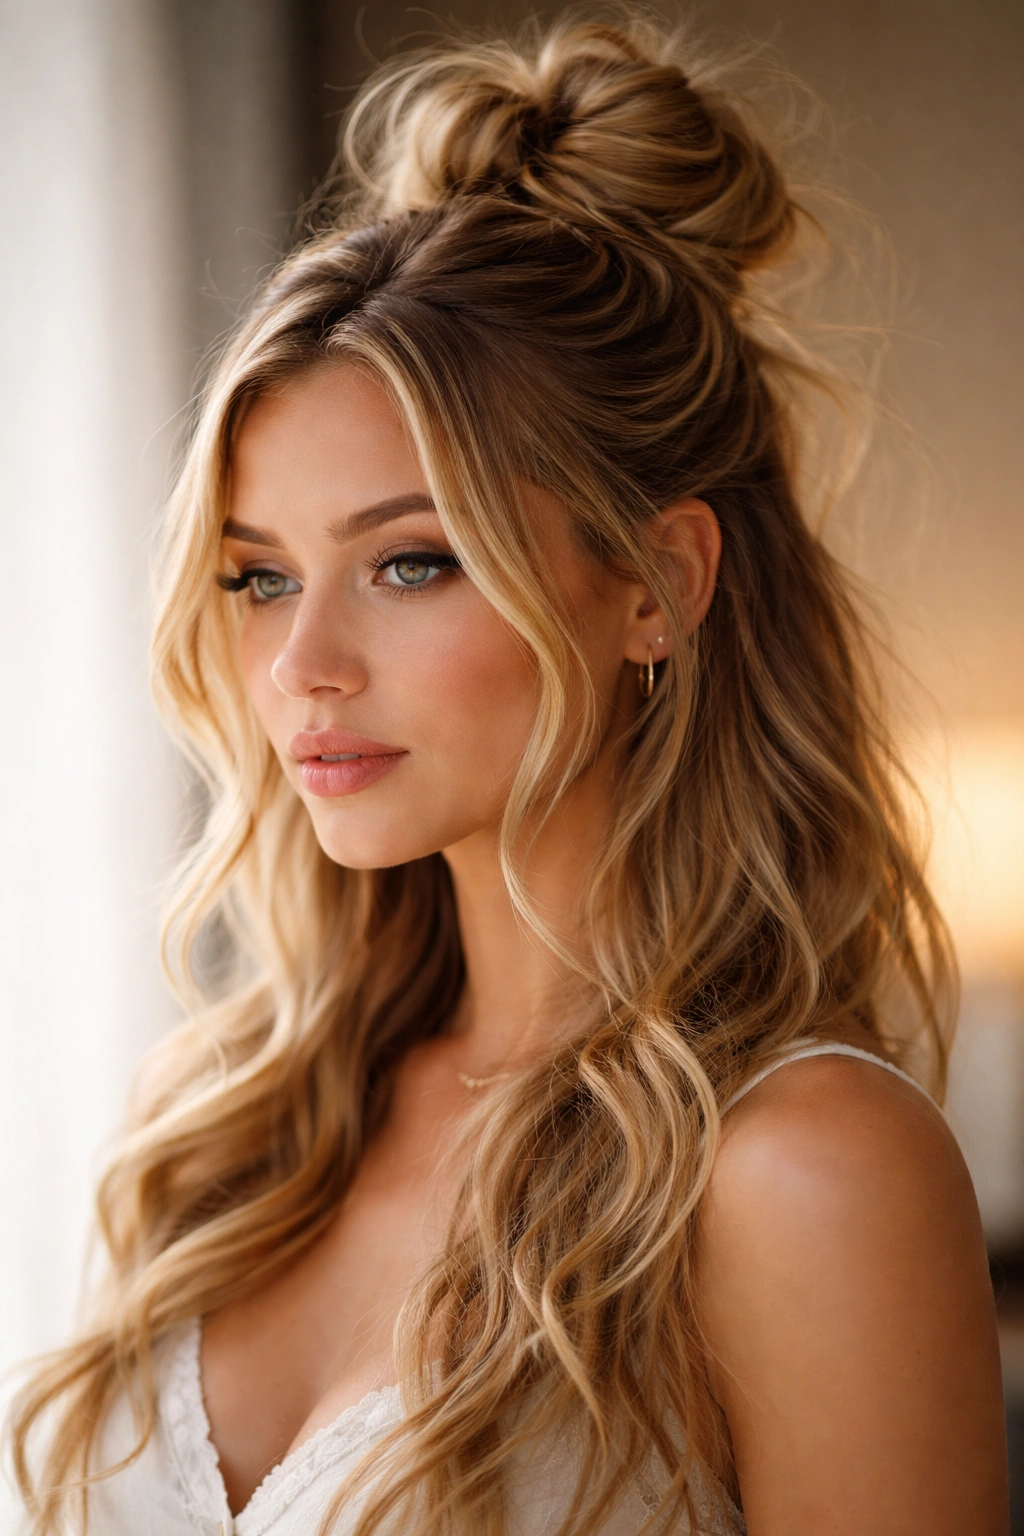
This is the version for people who want the updo feel without the precision. You’re gathering the top half of your hair into a bun, but you’re deliberately leaving it slightly undone—with flyaways, texture, and a just-right amount of imperfection that actually looks more sophisticated than you’d think.
The Appeal of Intentional Imperfection
Messy doesn’t mean sloppy; it means textured and relaxed. This style works beautifully with wavy, curly, or textured hair, and it photographs as effortlessly romantic. It also means you don’t have to stress about perfection, which is honestly freeing when you’re getting ready for an event.
Building the Messy Bun
- Tease or backcomb the crown section of your hair for volume
- Gather the top half of your hair into a high ponytail, leaving some face-framing pieces loose around your face
- Wrap the ponytail around the base loosely, leaving strands out and allowing the bun to have an undone shape
- Pin it with multiple bobby pins but don’t worry about making it pristine—you want visible texture
- Let flyaways frame your face; use a texture spray or dry shampoo to enhance the tousled feel
- Wear your bottom hair down in loose waves or curls to match the textured vibe
Pro tip: Create this style on second or third-day hair (not freshly washed) for the easiest, most naturally textured result.
5. The Low Bun with Face-Framing Waves
This variation places the bun much lower—at the nape of your neck rather than the crown—which creates an entirely different silhouette and vibe. It’s softer, more romantic, and feels distinctly different from the higher bun placements, giving you face-framing pieces that curve around your cheeks.
Why Lower Works for Homecoming
A lower bun elongates your neck and creates a more delicate, refined appearance. The face-framing waves add romance and movement, and the lower placement is sophisticated without feeling overly formal. It’s the version that pairs beautifully with a statement necklace or up-do appropriate jewelry.
Styling Steps for Lower Placement
- Gather the top half of your hair at the nape of your neck (not at the crown) and secure with an elastic
- Twist or braid this section, wrap it into a bun, and pin securely
- Create a few deliberate face-framing pieces by gently pulling out some front sections and curling them with a curling iron
- Leave the rest of your hair down in loose, flowing waves
- Use a light hairspray to hold the waves and face-framing pieces without weighing them down
Quick fact: Lower buns naturally feel more romantic and are often the choice for softer, more feminine aesthetics.
6. The Sleek Bubble Bun
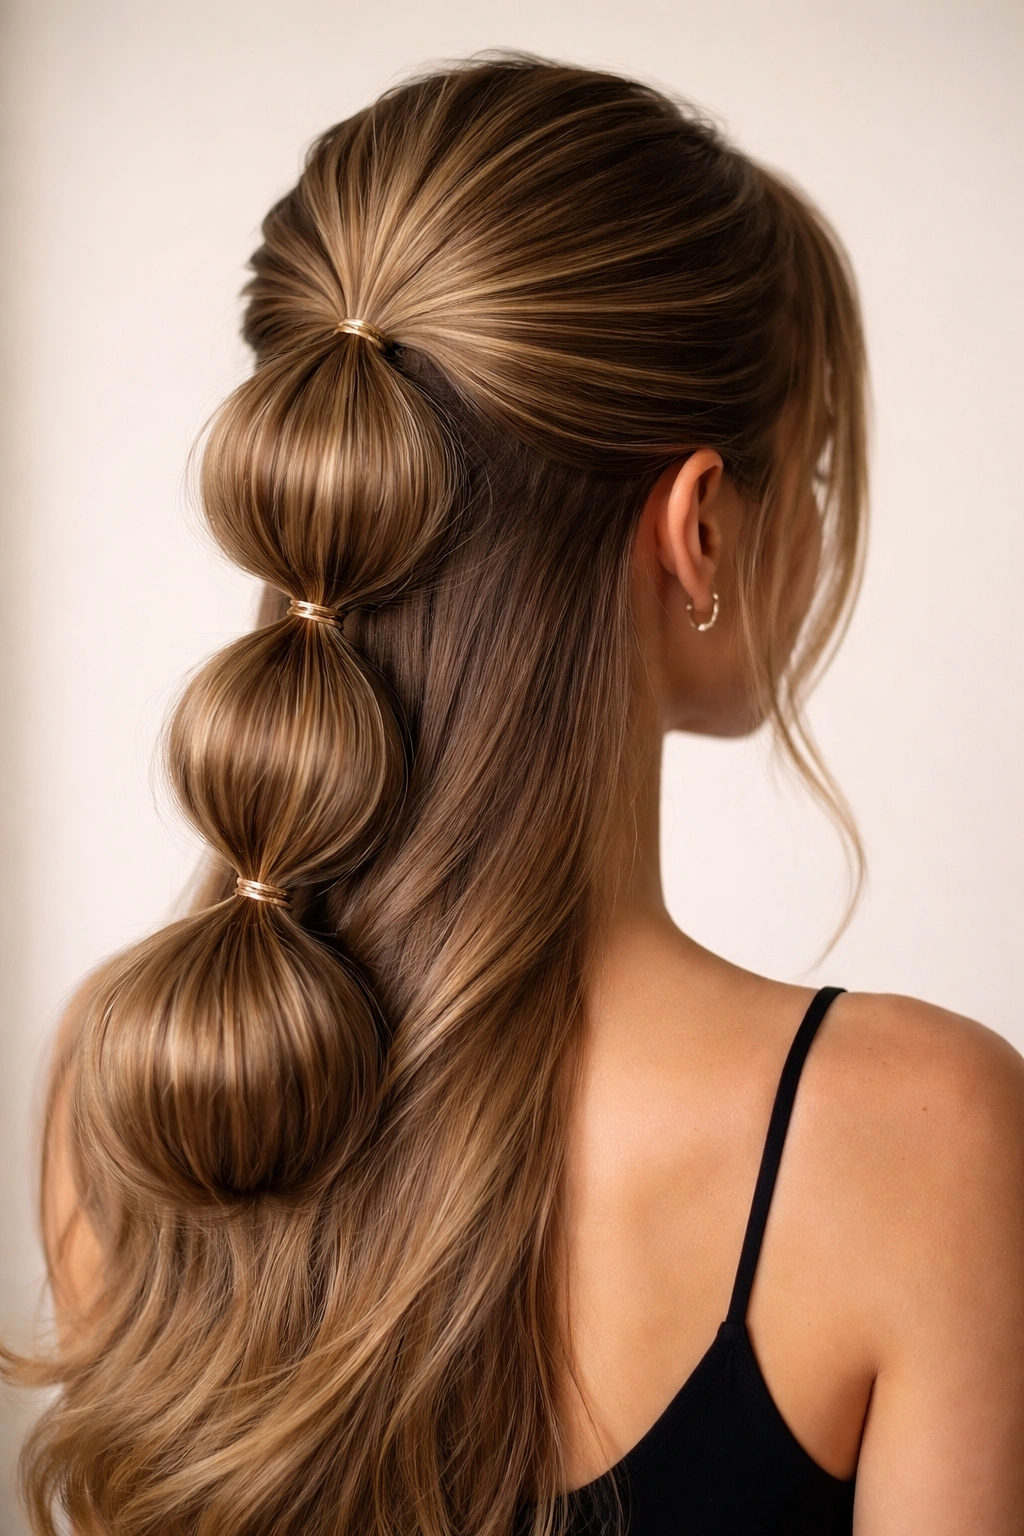
This is a style that adds visual interest and dimension by creating multiple smaller “bubbles” of gathered hair stacked vertically, with a bun at the top. It’s playful, unexpected, and honestly impressive-looking—but surprisingly simple to execute.
What Makes the Bubble Bun Special
The stacked bubbles create depth and movement, catching light differently at each level. From every angle, this style shows that you put real thought into your hair, and it reads as creative without being over-the-top. It also works beautifully for both long and medium-length hair.
How to Create Bubble Sections
- Section and secure the top portion of your hair in a ponytail at the crown
- Secure the middle section in a ponytail just below the first one
- Pull the top ponytail down slightly to create the first “bubble,” then secure the second ponytail just below it
- Gather both of these sections together and secure them into a third ponytail at the nape of your neck
- Twist this final section and wrap it into a bun, then pin securely
- Gently pull on each bubble section to widen them and create fullness
Worth knowing: This style requires patience and practice, but once you get it, it’s a showstopper.
7. The Romantic Curled Half Bun
This is the version where your bun is soft and slightly undone, and your down hair is in loose, romantic curls that mirror the texture of the bun. The overall effect is cohesive, feminine, and deeply photogenic—perfect for formal photos and dancing.
The Power of Matching Texture
When your bun and your down hair have the same texture and energy, they feel intentional together rather than like two separate looks. Romantic curls paired with a soft, textured bun create a unified, polished aesthetic that works beautifully with formal wear.
Creating the Romantic Look
- Curl your entire head with a 1.25-inch curling iron, working in sections and curling away from your face
- Allow the curls to cool completely, then gently finger-comb them into soft waves rather than tight ringlets
- Gather the top half of your hair loosely and secure with an elastic
- Twist the ponytail and wrap it into a soft bun, leaving some texture visible
- Pin the bun, allowing some curled pieces to fall out and frame your face
- Finish with a flexible hold hairspray that doesn’t stiffen the curls
Insider note: The key to romantic curls is not spraying them immediately; let them cool first, then spray lightly so they stay soft and moveable.
8. The Twisted Knot Bun
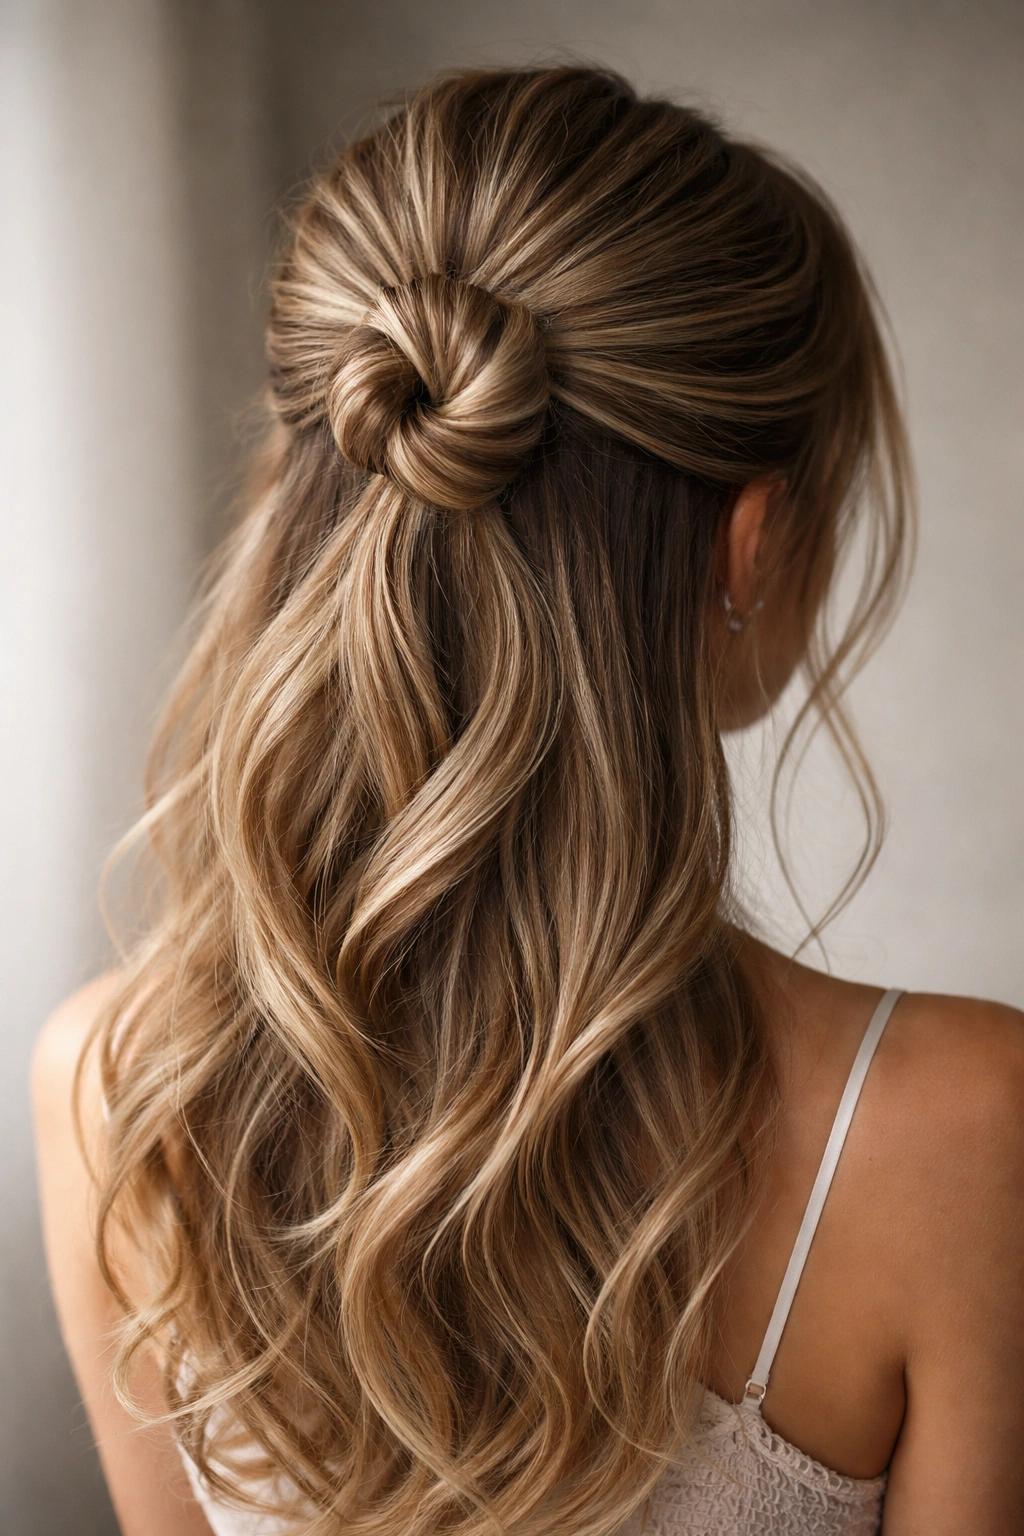
Instead of wrapping a ponytail around itself, this style creates its visual interest from two thick sections twisted together into a knot shape, then secured as the bun. It’s modern, geometric, and has a contemporary feel that photographs beautifully.
The Modern Appeal
The twisted knot is more architectural and defined than a standard wrapped bun, which makes it read as intentional and current. It also shows incredible hair texture detail from behind, which makes it ideal for hair with depth, dimension, or color variation.
Executing the Twisted Knot
- Gather the top half of your hair into a high ponytail
- Divide this ponytail into two equal sections
- Twist the right section tightly, then twist the left section tightly
- Wrap these two twisted sections around each other to create a knot shape
- Secure the knot at its base with bobby pins, wrapping and tucking as needed
- Leave the bottom half down and style however you prefer
- Allow small wisps to escape from the knot for a slightly softer effect
Pro tip: Pull the knot slightly to the side instead of centering it directly at the crown for a more interesting, less formal look.
9. The Accessorized Half Bun with Hair Sticks or Decorative Clips
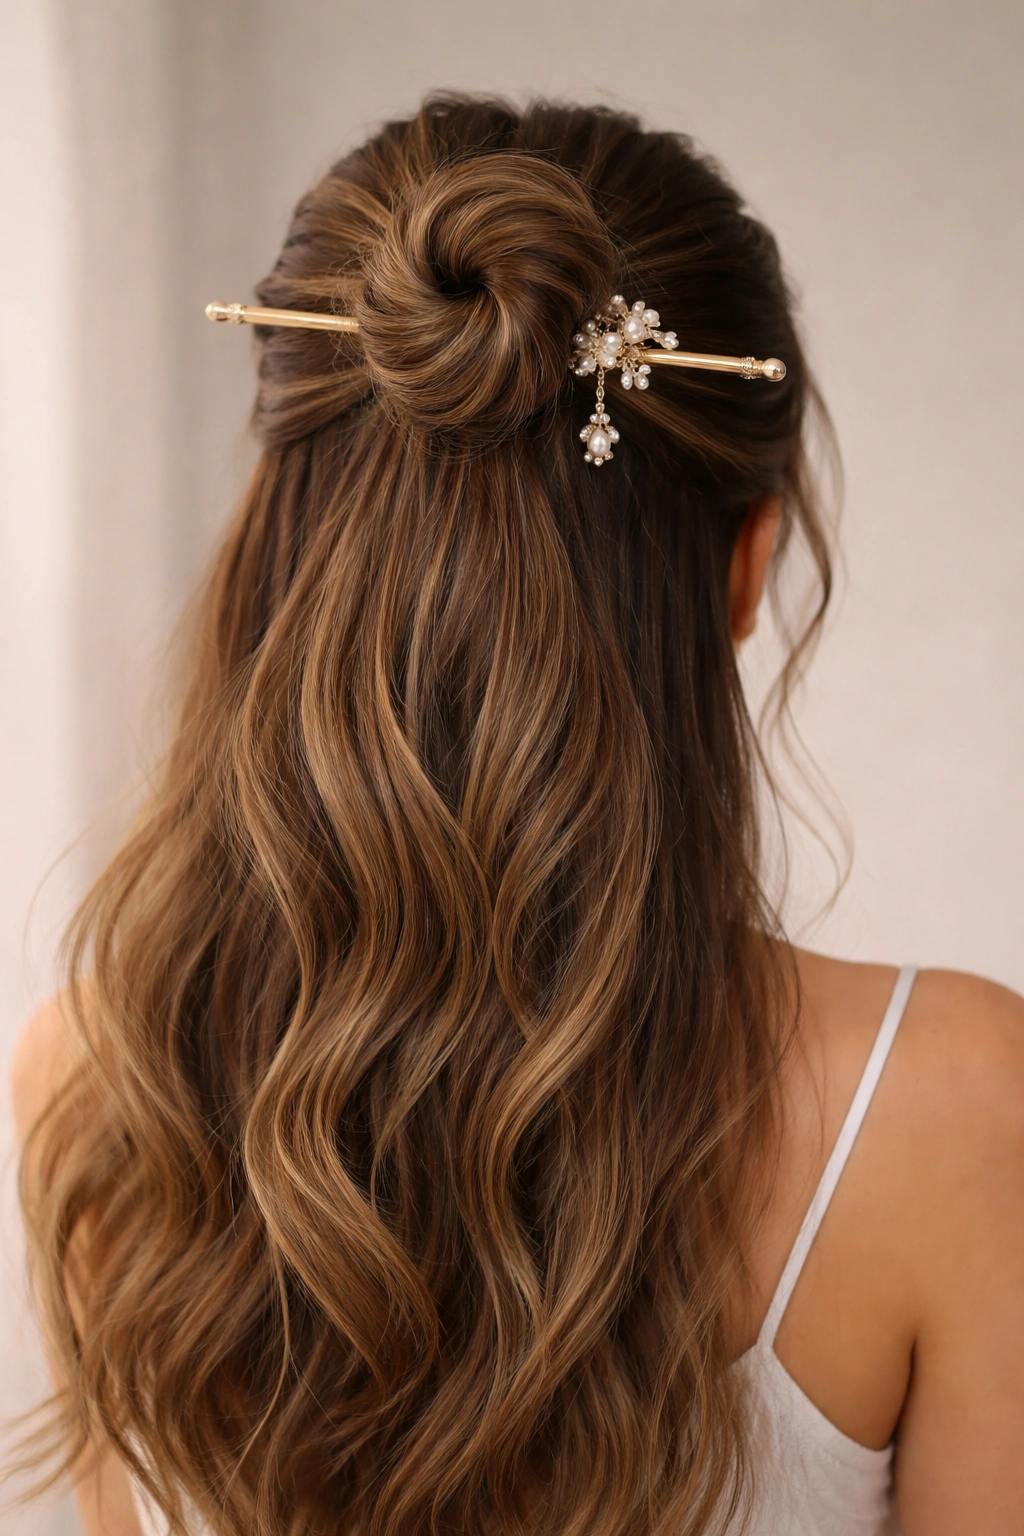
This is where your bun becomes jewelry. You’re securing your half-up section with a decorative hair stick, ornate claw clip, pearl-encrusted bobby pins, or a statement hair comb. The bun itself is beautiful, but the accessory elevates it into genuinely eye-catching territory.
How Accessories Transform a Basic Style
The right accessory immediately communicates that your look is intentional and considered. It catches light, draws attention to your hair styling work, and photographs like a statement piece. This is your chance to show personality or match your homecoming outfit’s color scheme or vibe.
Styling with Intention
- Create a neat, well-formed bun (choose your favorite method from the above options)
- Slide a decorative hair stick through the bun horizontally, or use it as a top finishing pin
- Alternatively, secure your bun first with a clear elastic, then pin a decorative claw clip or ornate comb over the base
- Make sure the accessory is secure and won’t slip during dancing or movement
- Leave your bottom hair down and keep the styling simple so the accessory remains the focal point
Worth knowing: Match your accessory to your outfit and overall vibe—pearl and gold for classic elegance, colorful clips for fun and playfulness, minimalist metal for modern sophistication.
10. The Side-Swept Half Bun
Instead of centering your bun at the crown or nape, you’re sweeping the top half to one side and securing it into a bun positioned on the side of the back of your head. This asymmetrical placement feels fresh, modern, and flatters most face shapes by creating movement toward one side of the face.
The Visual Effect of Asymmetry
Side placement naturally draws the eye to one side of your face and neck, which is flattering for most people. The asymmetrical placement feels less formal than a centered bun, and it creates an interesting silhouette that photographs beautifully from multiple angles.
Creating the Side-Swept Look
- Gather the top half of your hair and brush it toward one side (let’s say the right)
- Secure this ponytail on the right side of the back of your head, positioned lower than a traditional crown placement
- Twist or braid the ponytail, wrap it into a bun, and pin securely
- Leave the left side of your face more open and framed, with some face-framing pieces around the right side
- Leave your bottom hair down in waves or straight, depending on your preference
- Consider tucking the ponytail slightly behind your ear for an extra polished effect
Insider note: This works especially well if you have a side part already, since it creates a natural flow from your parting to your side bun.
11. The Braided Bun with Woven Ribbon
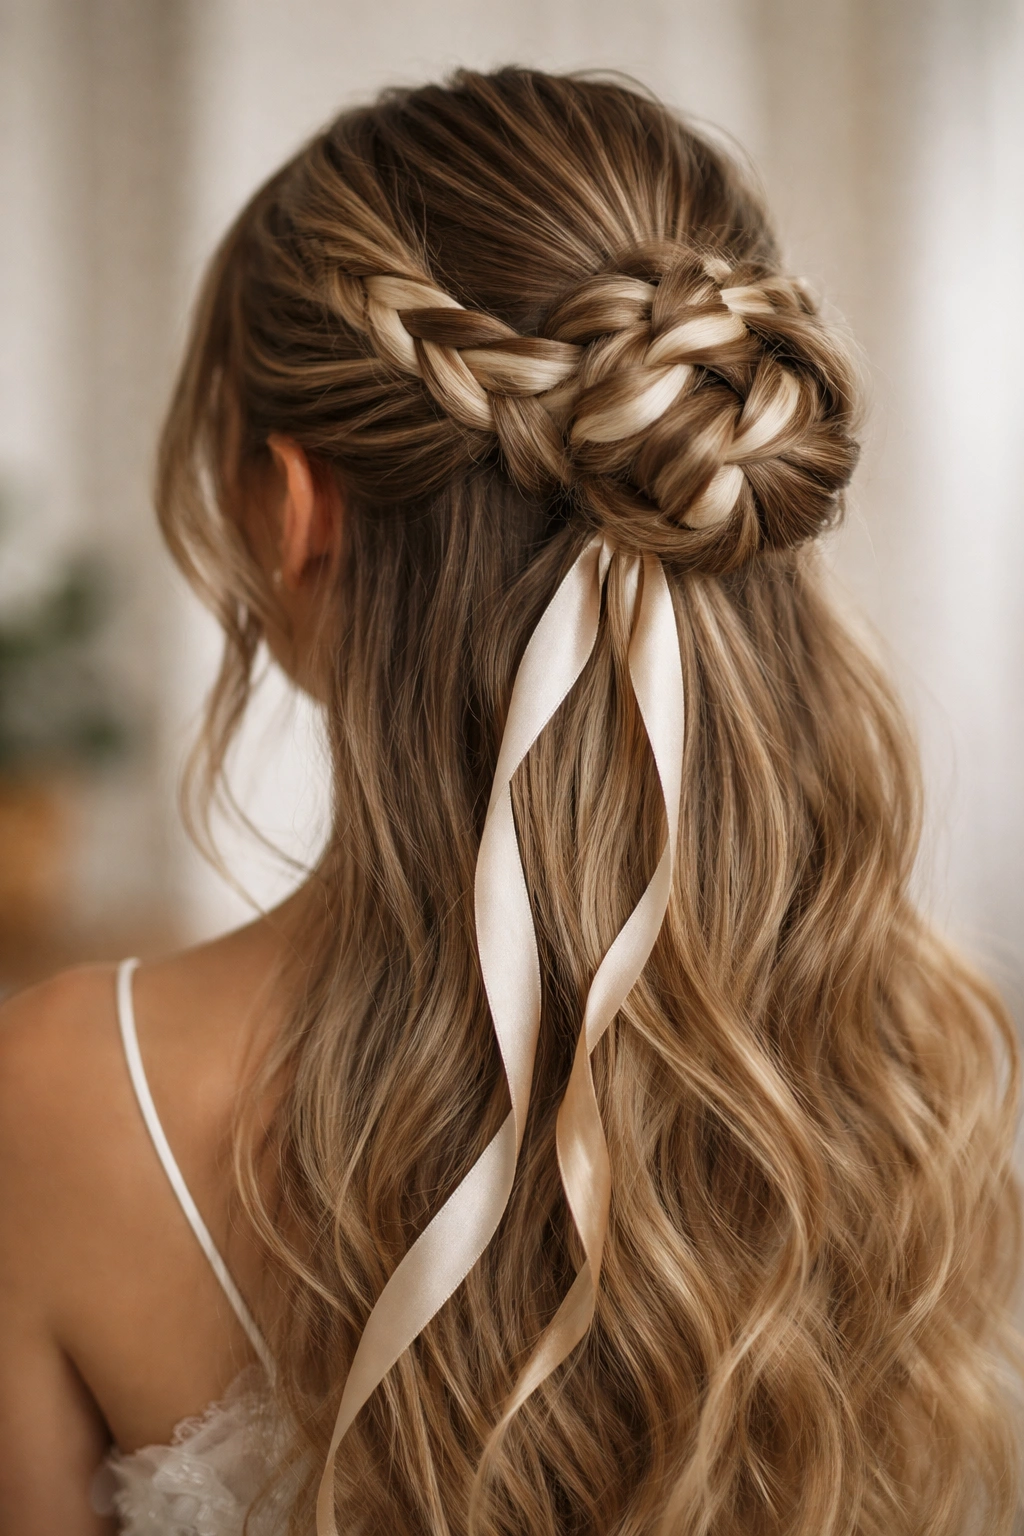
This combines two details for maximum visual interest: a braid incorporated into your bun, plus a satin or metallic ribbon woven through it. It’s romantic, shows clear styling effort, and the ribbon adds color and movement that plain hair can’t match.
Why Ribbon Elevates a Braid
Ribbon adds texture, color, and a tactile element that makes your bun look professionally done. It catches light differently than hair alone, and it moves slightly with your head, creating subtle animation. This style works beautifully for formal wear and photographs incredibly well.
Executing Braided Bun with Ribbon
- Select a ribbon in a color that complements your outfit (gold, silver, blush, navy, black)
- Begin a French or Dutch braid from the back of your head, incorporating the ribbon by braiding it alongside one strand of hair
- Bring the braid and any additional gathered hair together at the back of your head
- Wrap and pin into a bun, keeping the ribbon visible and woven through the bun structure
- Secure the ribbon’s end with a small clip or pin at the base of the bun
- Leave your bottom hair down and keep it simple so the braided bun with ribbon remains the focal point
Pro tip: Use a ribbon that’s at least 1 inch wide so the color and texture actually show through the bun and don’t disappear into the hair.
12. The Voluminous Teased Half Bun
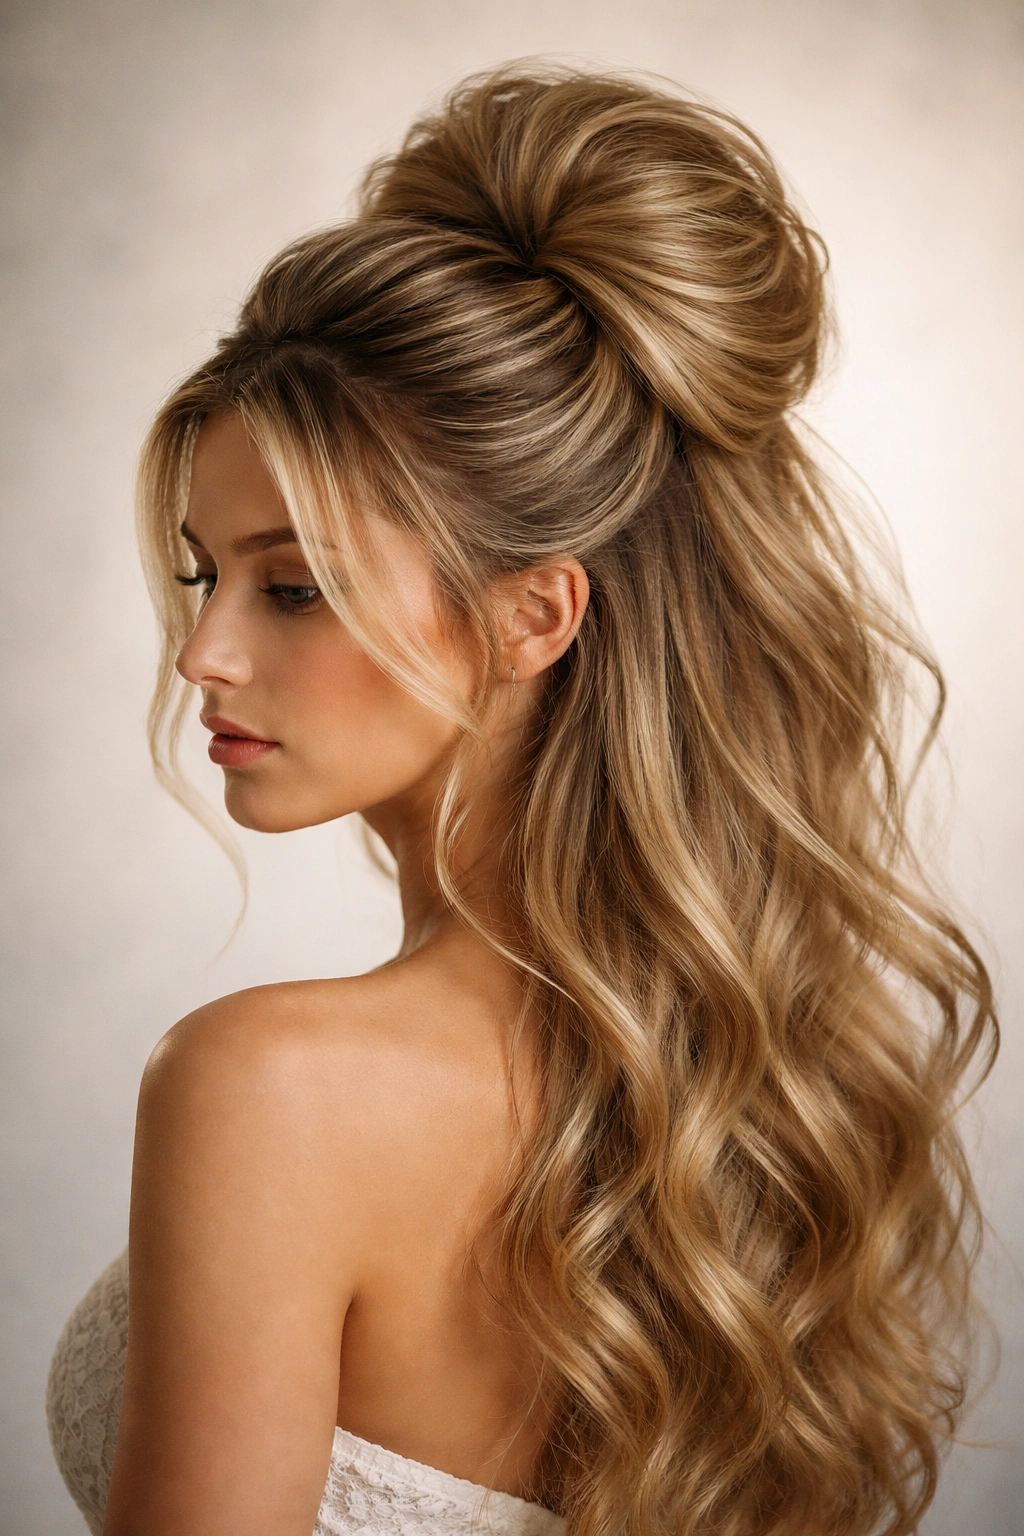
This is the red carpet version—a bun that’s deliberately voluminous, textured, and obviously styled with intention. You’re teasing and backcombing sections to create maximum fullness, giving you a bun that looks glamorous, substantial, and undeniably show-stopping.
The Glamour Factor
A voluminous bun reads as elegant and polished, especially when paired with formal wear. It photographs beautifully under any lighting, creates an impressive silhouette, and absolutely commands attention. This is the style for someone who wants their hair to be a featured element of their look.
Building Volume and Dimension
- Tease the crown and crown-adjacent sections thoroughly with a fine-tooth comb or teasing brush
- Gather the top half of your hair into a high ponytail, keeping some of the teased texture visible rather than smoothing it out completely
- Divide the ponytail into 3-4 sections and lightly tease each section at its base
- Wrap these sections loosely around the base of the ponytail to form a full, dimensional bun
- Secure with multiple bobby pins, allowing the bun to maintain its textured, non-uniform shape
- Smooth only the very outer layer slightly so it reads as intentional rather than accidental
- Leave your bottom hair down in loose waves to balance the volume at the top
Worth knowing: Voluminous buns require good hairspray to maintain throughout the night—a medium or firm hold product is essential.
Final Thoughts
Your half up half down bun can be as simple or as involved as you want it to be. The style you choose should feel authentic to how you normally wear your hair and should make you feel confident and beautiful. If you’ve never tried one of these styles before, pick one and practice it a few times in the weeks leading up to homecoming—muscle memory matters, and you’ll feel so much calmer on the actual night if you’ve already done it successfully at least once.
The truth is that homecoming is about celebrating with people you care about, and your hair should support that by making you feel good. Whether you go sleek and polished, romantic and textured, or playfully creative, a half up half down bun communicates that you put thought into your appearance without looking like you’re trying too hard. That balance—that “I’m put together but I’m still myself” energy—is exactly what makes homecoming special. Pick the style that speaks to you, practice it, and then enjoy the night knowing your hair is handled.