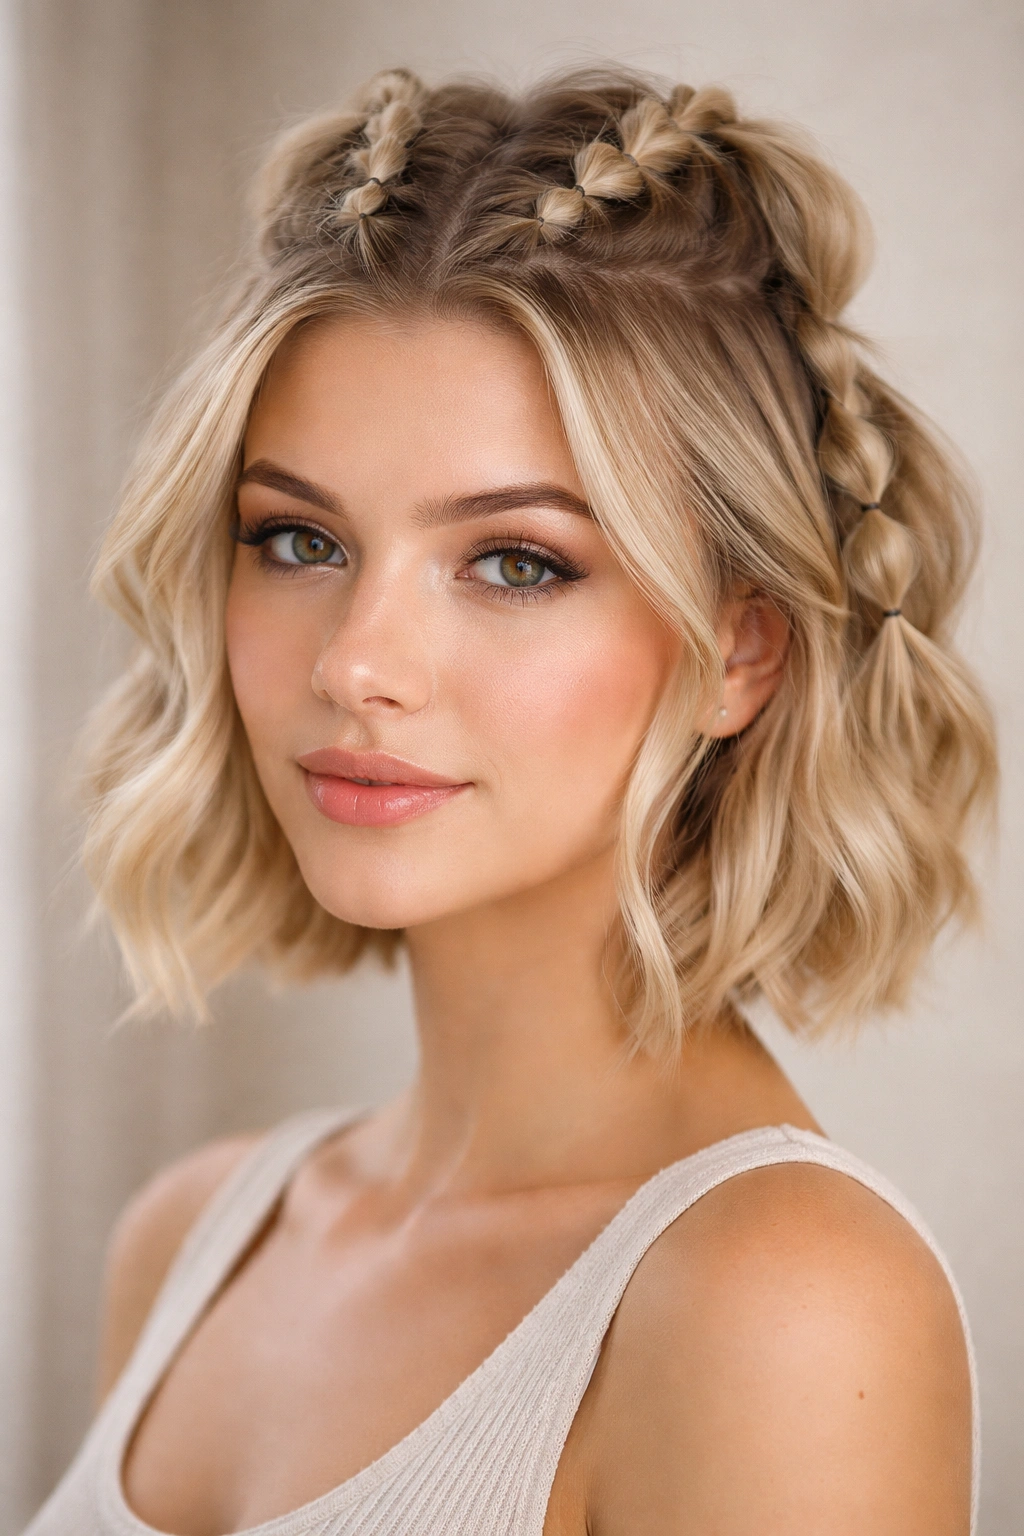
Bubble braids are having a moment, and honestly, they’re perfect for short hair that needs a little personality boost. If you’ve scrolled past those ethereal, romantic hairstyles on social media and thought “I could never do that with my length,” it’s time to reconsider. The half up half down version strikes the ideal balance—keeping your face framed while adding visual interest without the commitment of a full protective style. The beauty of bubble braids is their versatility; they work equally well for casual coffee runs, date nights, or even polished professional settings if you style them with intention.
What makes bubble braids especially brilliant for shorter hair is that they don’t disappear into length you don’t have. Every bubble stands out, every fold of the braid becomes part of the visual composition. The technique itself—creating those signature puffy sections by gently pulling and teasing the braid strands—is more forgiving on shorter lengths because you’re working with texture and movement rather than relying on weight and length for impact. Plus, the half up half down approach means you’re not trying to coral every inch of hair into one style; you’re creating a focal point at the crown while letting the rest flow naturally.
Short hair with bubble braids reads modern and intentional in a way that feels fresh compared to traditional braiding techniques. Whether you’re working with a pixie cut, a chin-length bob, or that in-between length where you’re not quite sure what you have, there’s a bubble braid variation waiting for you. The styles that follow aren’t just tutorials—they’re real, wearable options that work with your actual hair, not Instagram fantasy hair.
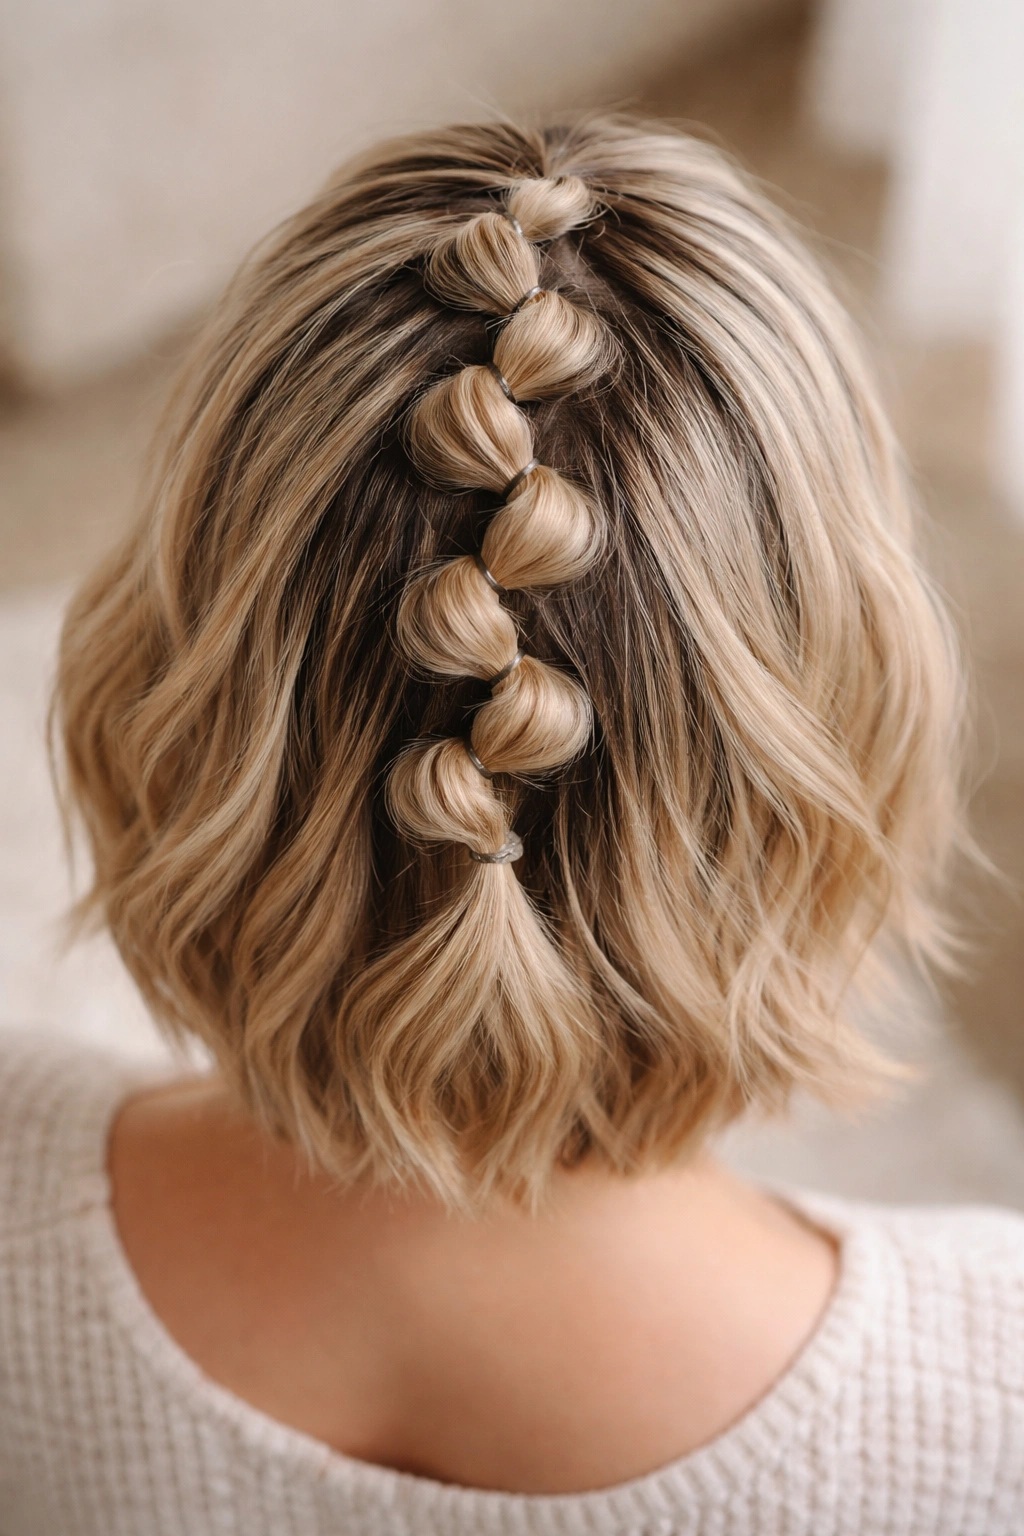
1. The Classic Center Bubble Braid
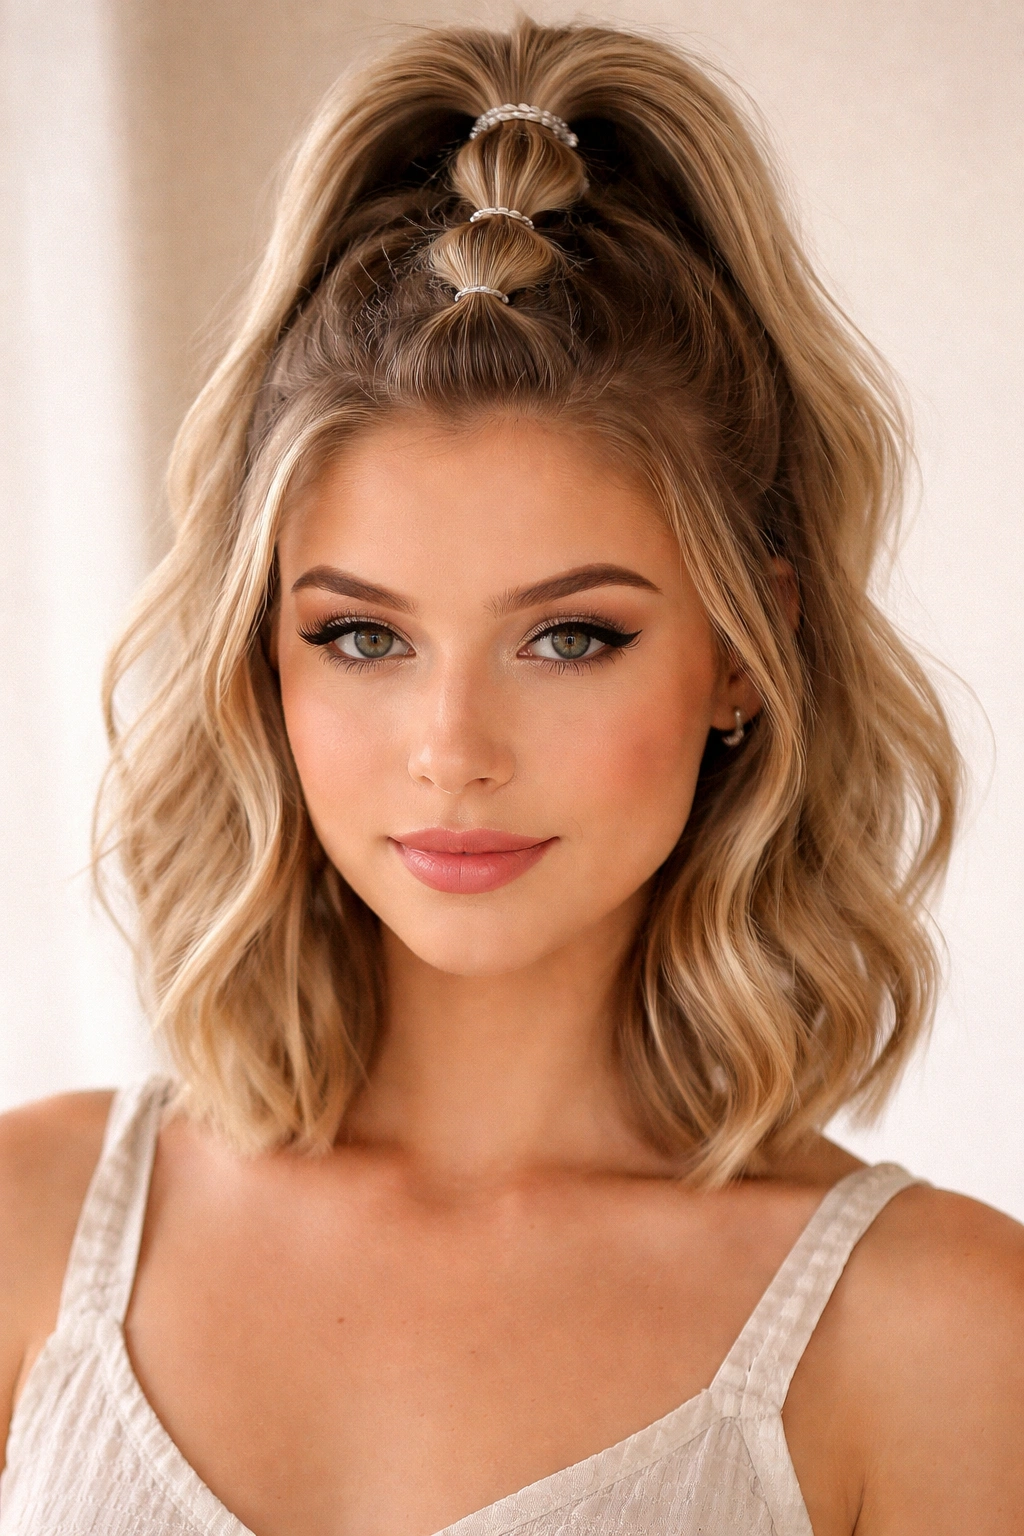
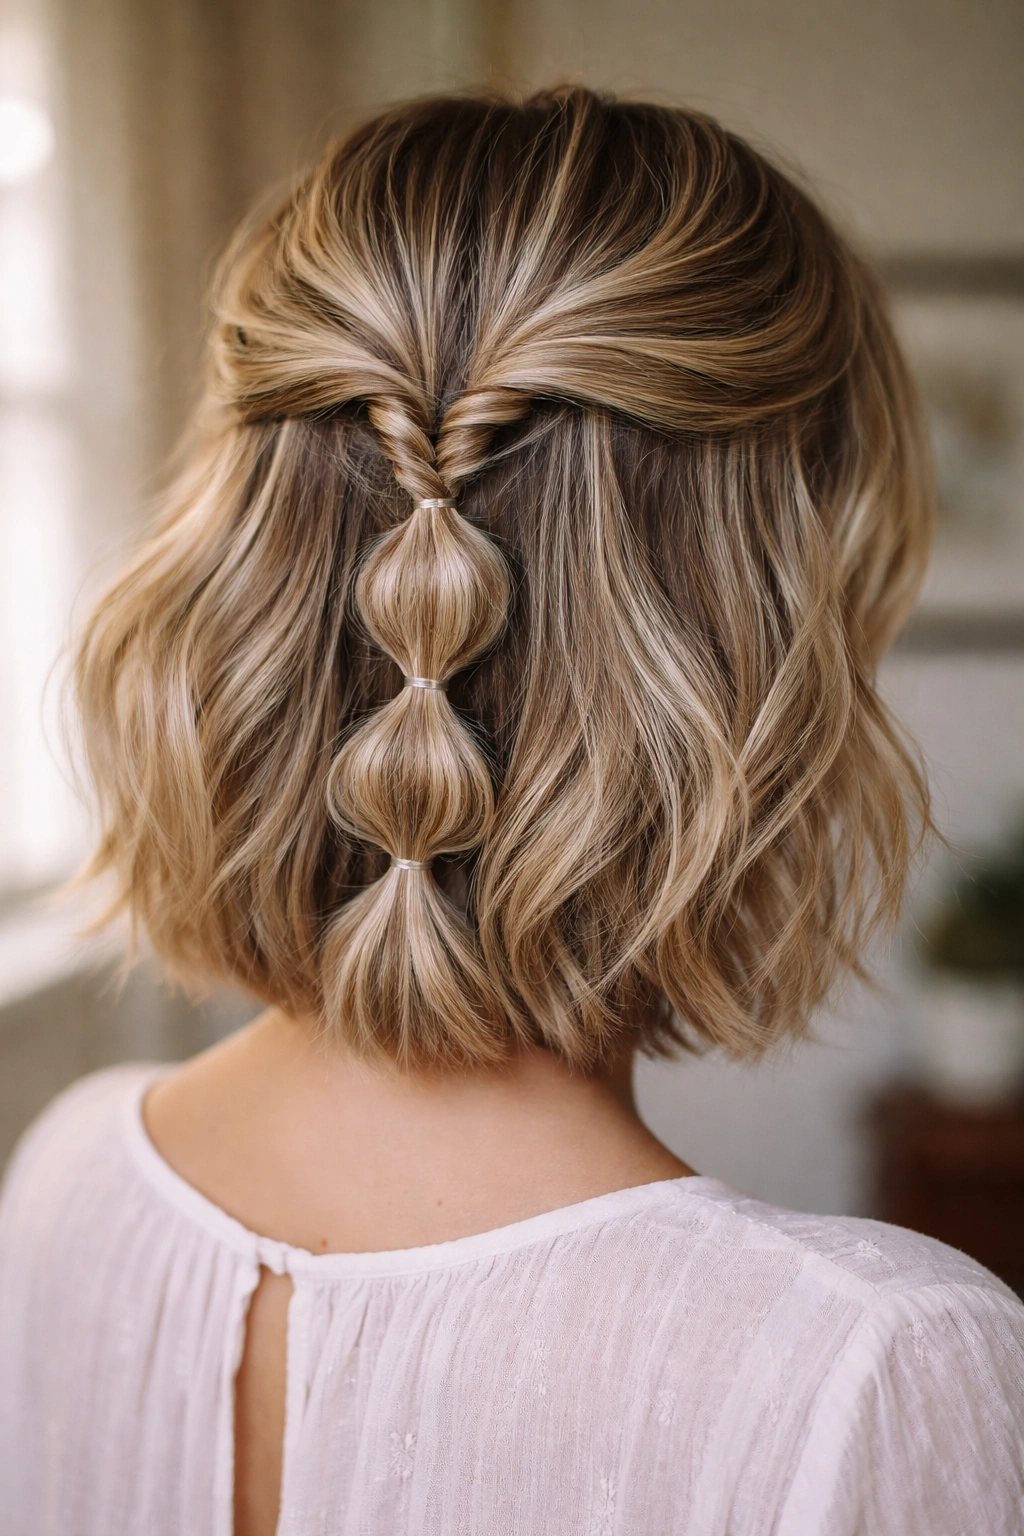
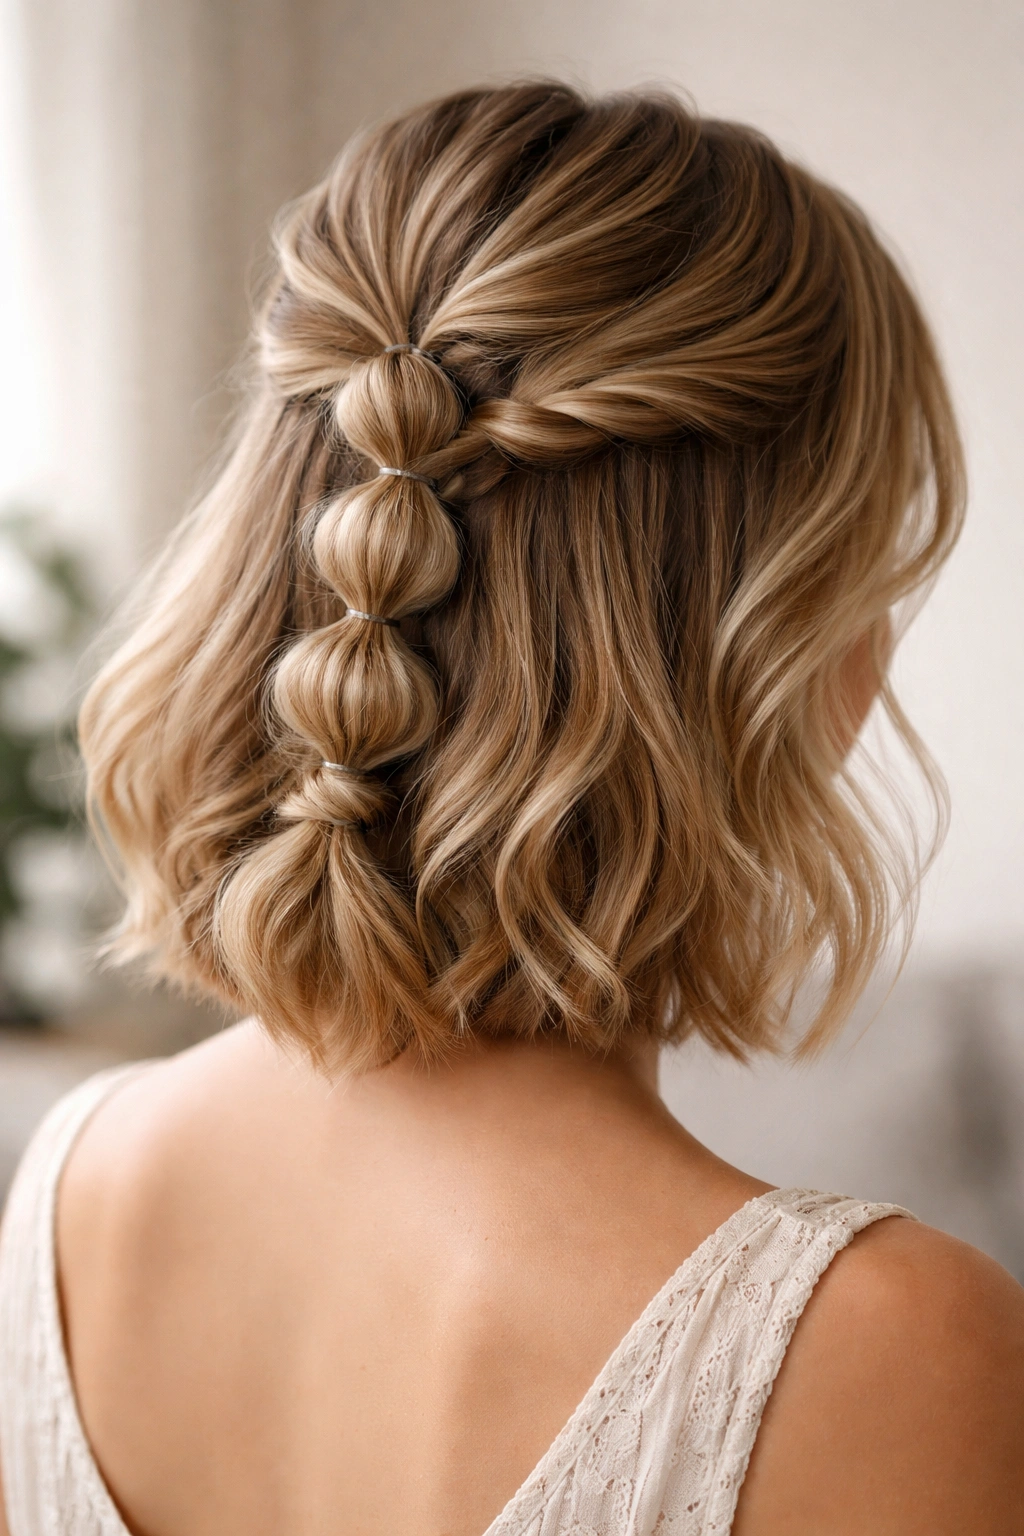
This is the entry point for anyone new to bubble braids and short hair styling. Start by sectioning the top half of your hair with a deep center part, then gather it into a high ponytail using a clear elastic. Divide this ponytail into 3 sections and begin a standard three-strand braid. The key difference from regular braiding is the next step: after completing each interlocking motion, gently pull and fluff the outer strands of each section to create that signature puffy bubble effect.
Why It Works for Short Hair
The centered placement draws attention upward and creates an immediate focal point that suits most face shapes beautifully. On shorter lengths, the bubble effect is especially pronounced because the texture you’re creating isn’t competing with long lengths below. The style reads intentional and polished without requiring advanced braiding skills or hours of prep work.
How to Perfect It
- Use a teasing brush or fine-tooth comb to gently backcomb the outer strands before pulling them apart—this gives more texture to work with
- Pull bubbles to different widths for an organic, asymmetrical look rather than perfectly uniform spheres
- Secure the end with a thin elastic and hide it with a small bobby pin inserted into the braid itself
- Finish with a light hairspray to keep texture in place without making it stiff
Pro tip: Do this style on day-two or day-three hair when you have more natural texture to grip. Second-day waves hold bubble formation better than freshly washed, silky strands.
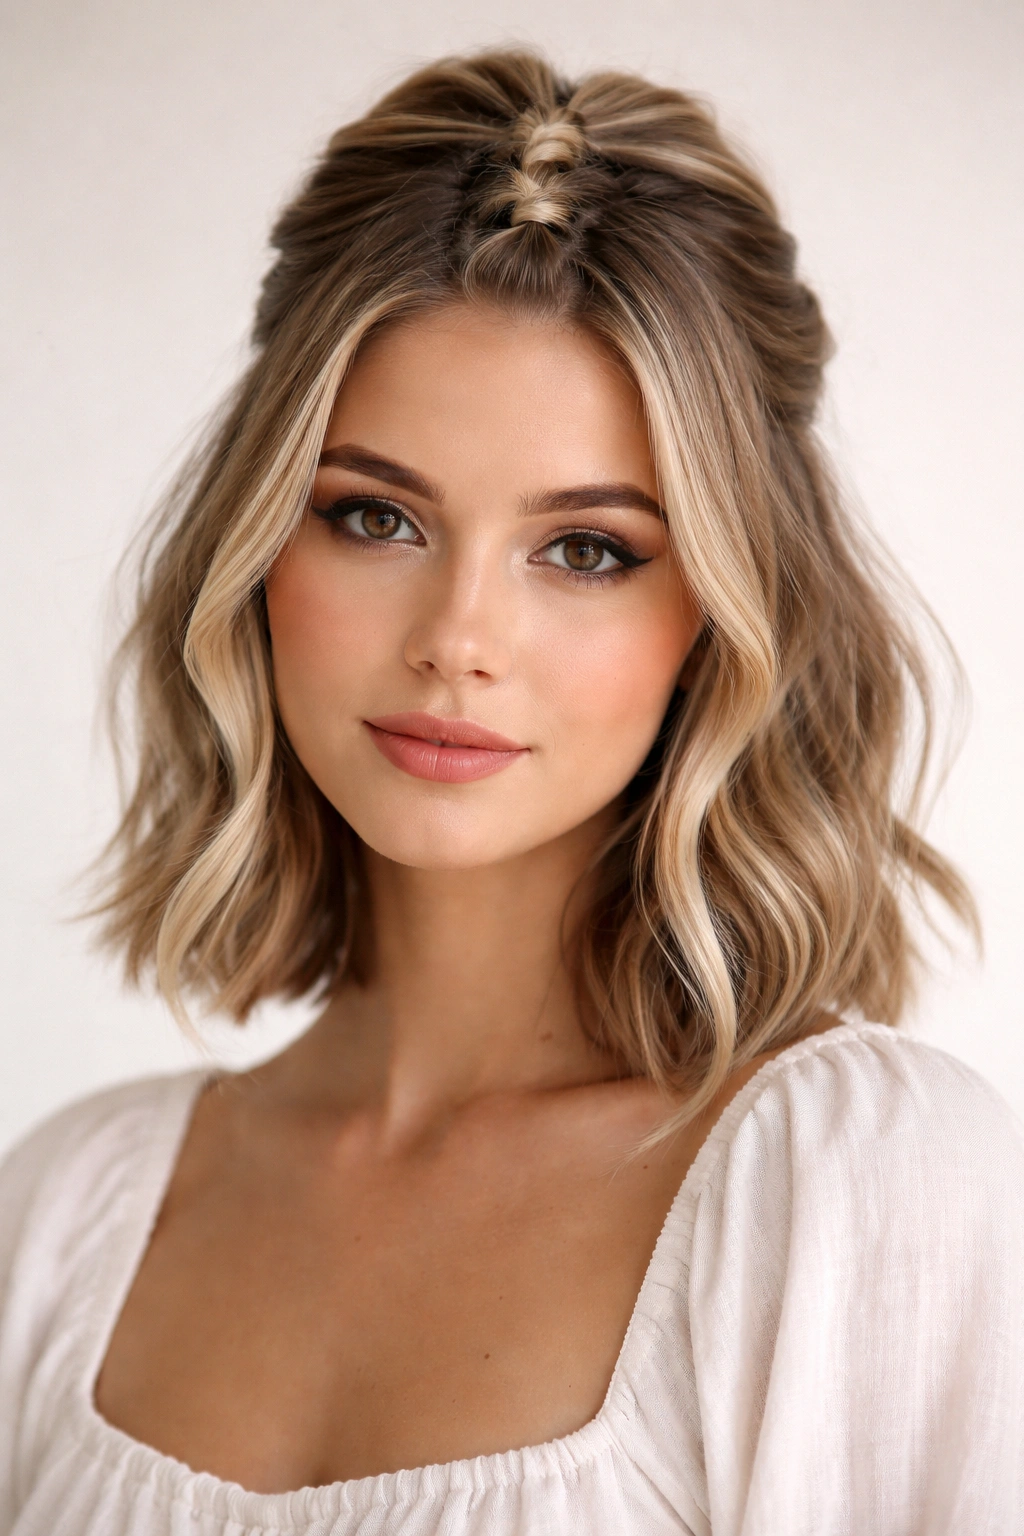
2. The Twisted Bubble Half-Up
Instead of a traditional three-strand braid, this version uses two twisted sections that you wrap around each other. Take your top section and divide it into two halves. Twist each half away from the center, then twist these two twisted pieces around each other. Once you’ve established the twisted base, apply the same bubble-pulling technique—alternating between the two sides as you work your way down.
Why It Works for Short Hair
Twists create a different visual pattern than braids while maintaining that textured, dimensional quality that photographs beautifully. The alternating bubble pulls create a more fluid, less geometric look that feels romantic rather than structured. This style is particularly flattering if your short hair is on the wavy or curly side, as the twist format plays better with natural texture than tight braids sometimes do.
How to Perfect It
- Pre-curl your hair with a curling iron before starting for added dimension and staying power
- Twist tighter initially so the bubbles you pull have something substantial to grip
- Use bobby pins that match your hair color to anchor sections if your short hair slides easily—hidden support means the style lasts longer
- Spray as you go, not just at the end, to keep each bubble section locked in place
Worth knowing: Twisted bubbles tend to last longer throughout the day than braided ones because the spiral structure holds texture better when you move.
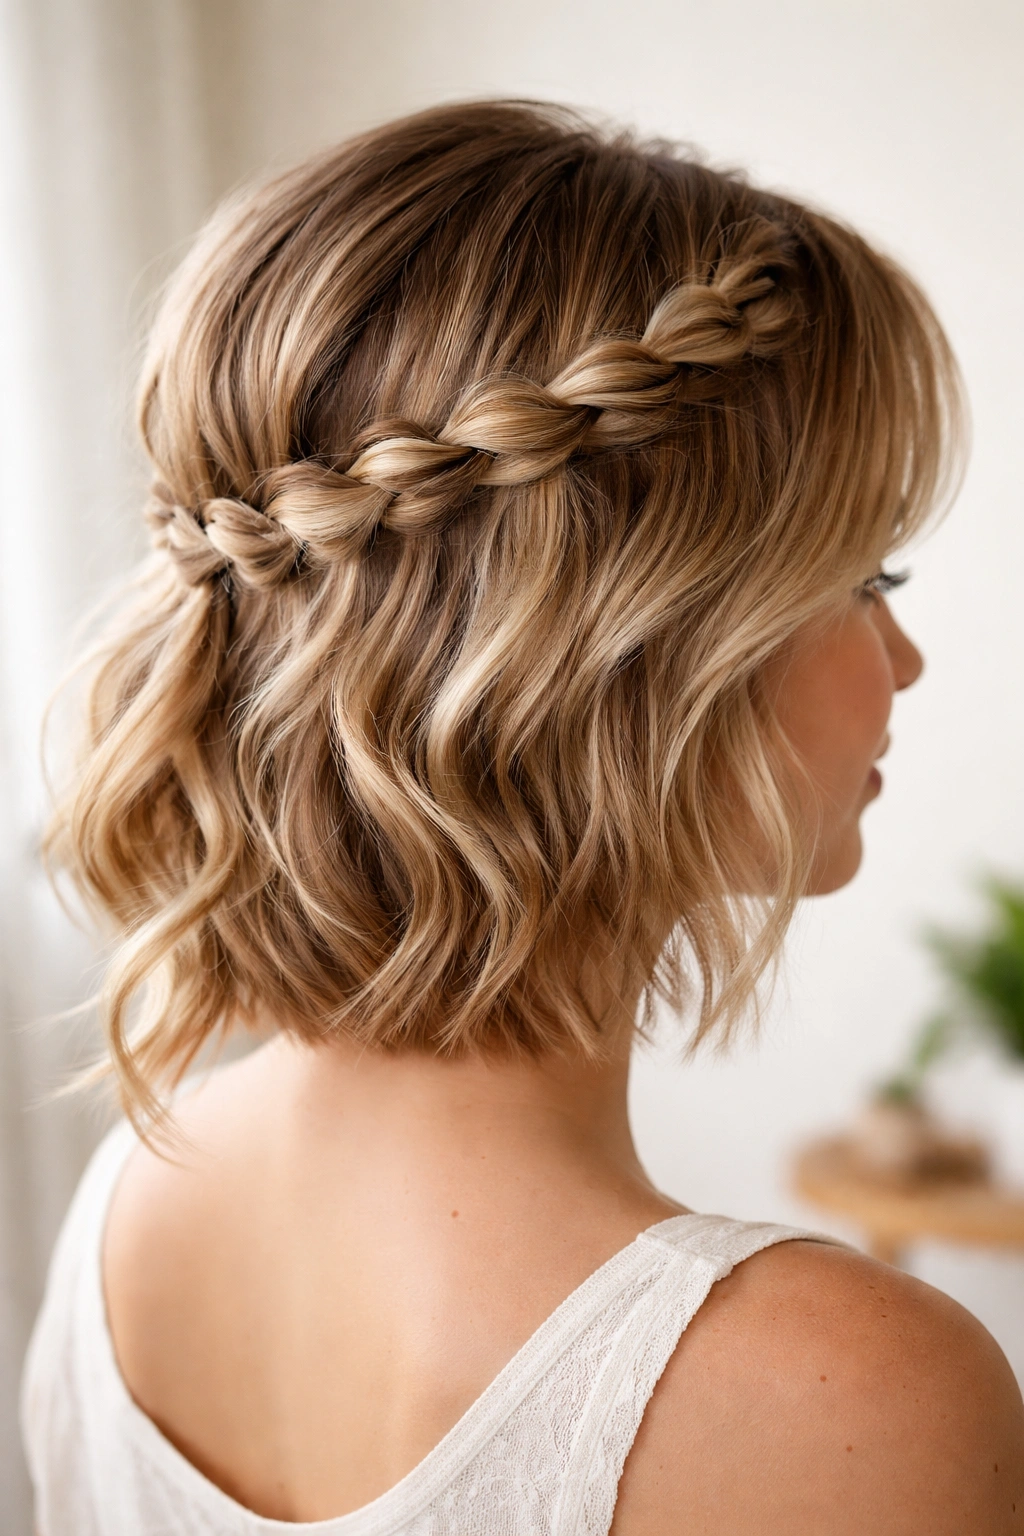
3. The Diagonal Sweep Bubble Braid
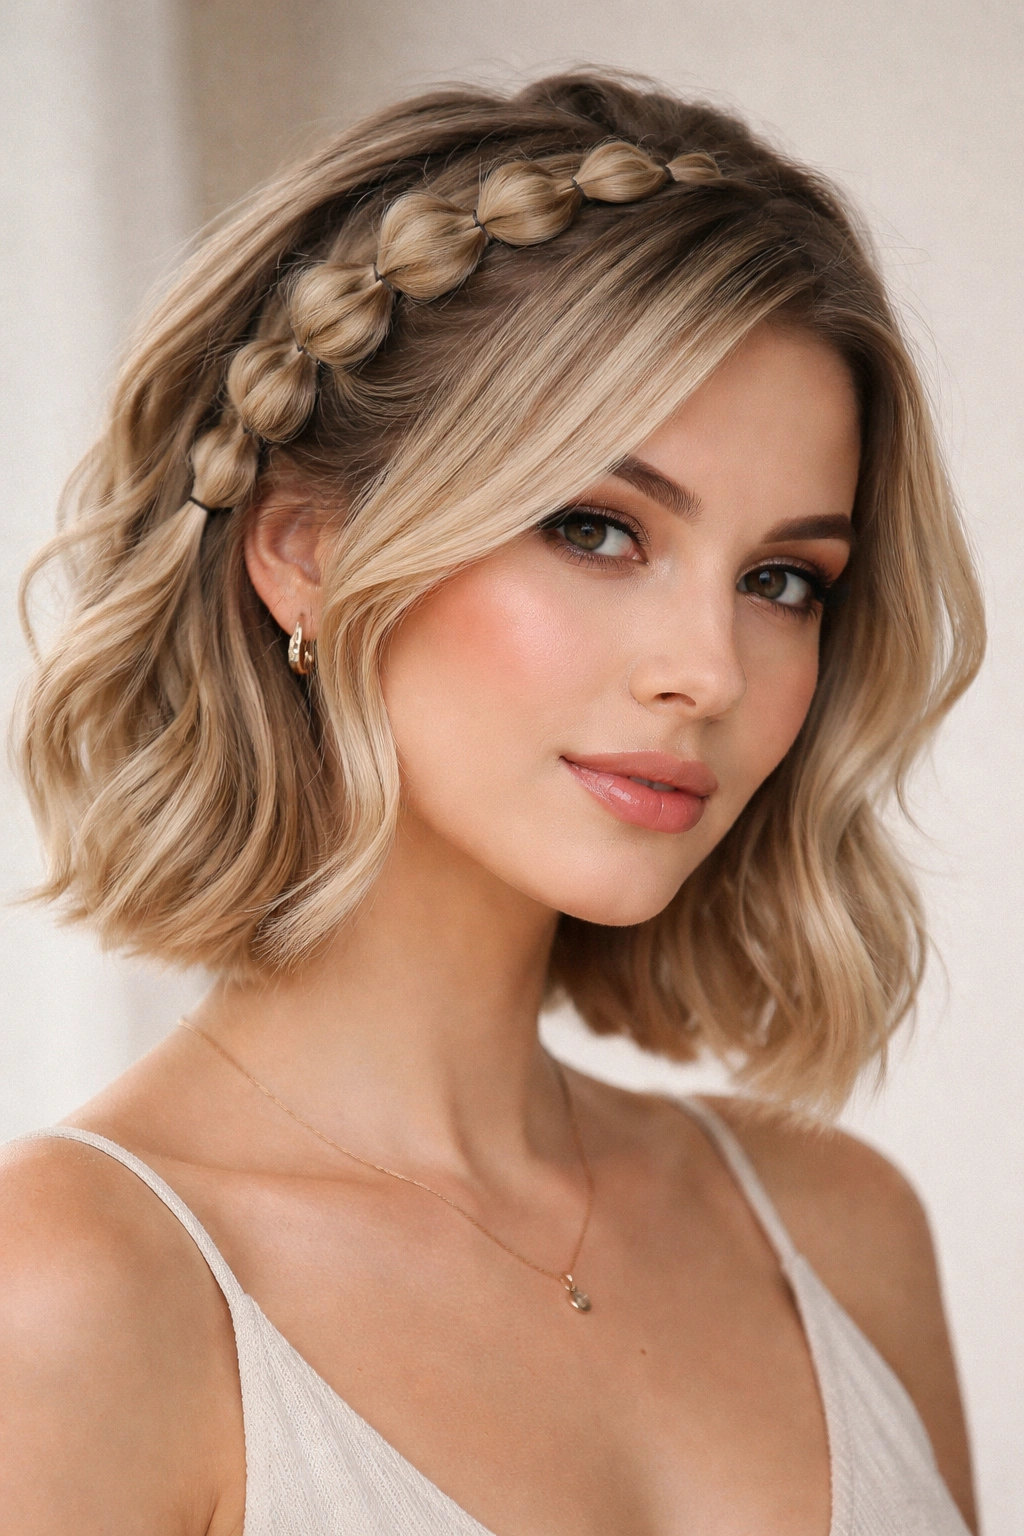
This style pulls the half-up section diagonally across the crown from one side to the other, creating an asymmetrical effect that’s incredibly chic on short hair. Start with a shallow subsection just above one ear, braid it with the bubble technique, and sweep it diagonally across the back of your head toward the opposite side. Secure it near the other ear, allowing the remaining loose hair to flow naturally.
Why It Works for Short Hair
Diagonal placement creates movement and elongates the face visually, which is a huge advantage on shorter lengths. The style has an intentional, designed quality that says you meant to look this polished. It’s the kind of hairstyle that makes people ask how long you’ve been doing this, even if you finished it ten minutes before they saw you.
How to Perfect It
- Tease the diagonal section slightly before braiding for more dramatic bubble pulls
- Use hair wax or pomade on the underside of the braid to smooth flyaways while keeping the top textured and voluminous
- Secure with bobby pins that follow the diagonal line rather than straight across—this makes the line cleaner visually
- If your short hair is fine or slippery, mist with flexible hold hairspray before starting
Insider note: The diagonal approach works especially well on short bobs because it creates visual interest without needing length to work with.
4. The Double Bubble Braid Half-Up
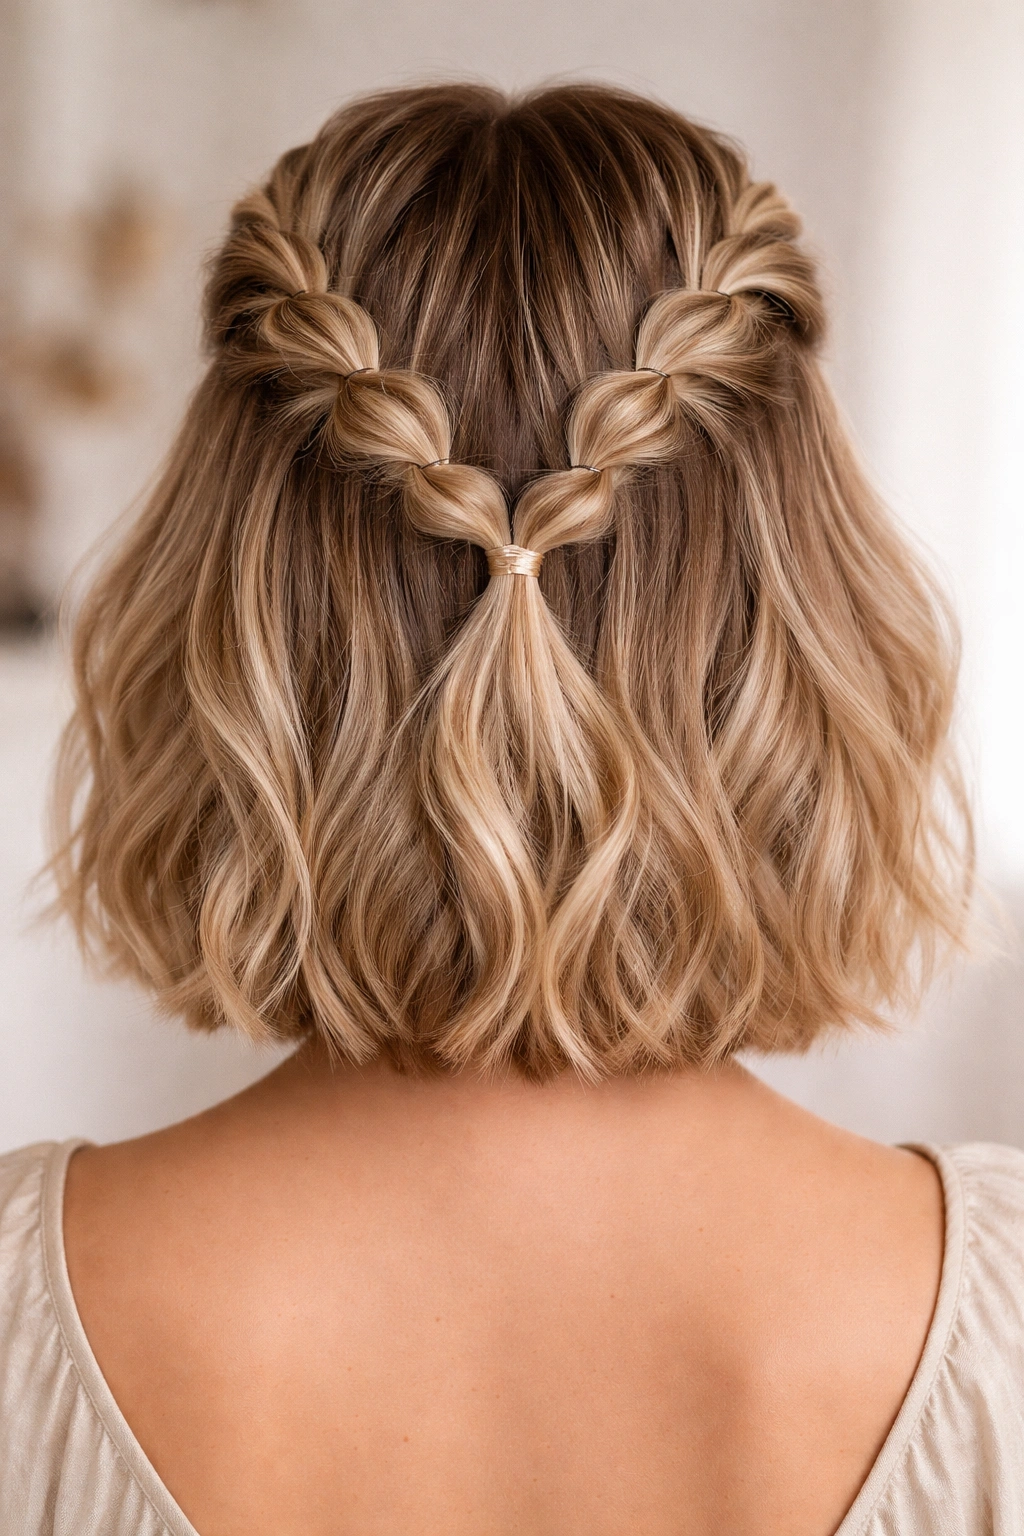
This version creates twice the visual impact by building two separate bubble braids on either side of the crown. Part your top section down the middle, and create a bubble braid on each side, working from temple toward the back. Join them together at the center back with a decorative clip or by weaving them into one another with bobby pins.
Why It Works for Short Hair
Two braids automatically create more dimensional texture, and the symmetry is visually satisfying without being boring. On short hair, dual braids prevent the style from feeling too heavy on the crown because the visual weight is distributed. It’s an excellent option when you want to feel extra put-together but aren’t trying to look like you spent hours styling.
How to Perfect It
- Start each braid at the same height to maintain balance—asymmetrical braids can work, but intentional symmetry is easier to pull off when you’re new to this
- Pull bubbles slightly larger on the braids closest to your face, where they frame most visibly
- Use clear elastics so you can see exactly where the braids end and determine the best joining point
- Blend where the two braids meet with a decorative clip that holds everything in place while looking intentional
Pro tip: Weave baby’s breath or small flowers through the bubbles if this is for a special occasion—the dried flowers sit perfectly in the textured spaces.
5. The Low Bubble Braid with Volume on Top
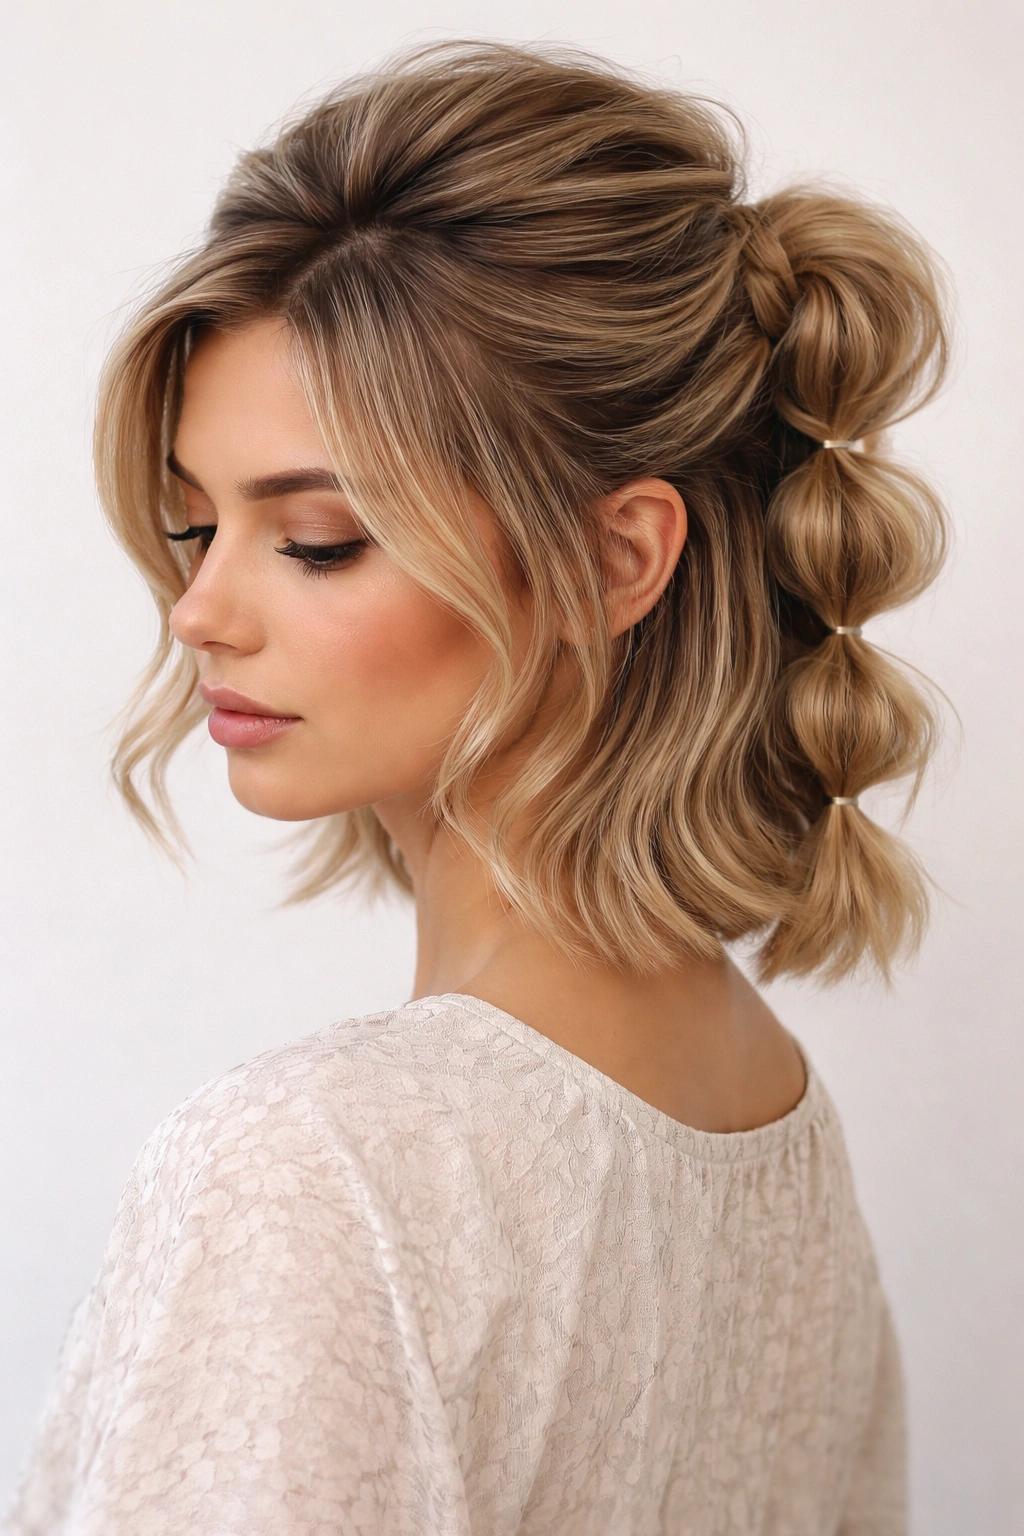
This approach keeps the half-up section positioned lower on the crown while creating maximum volume on top. Leave the uppermost section loose and tease it gently, then gather your next-lower section into a bubble braid. The loose teased portion sits above the braid, creating a stacked effect where textured loose hair transitions into textured braided hair.
Why It Works for Short Hair
This style is genius if you’re dealing with thinner hair on top or want to create an illusion of more volume. The loose teased section catches light differently than the braid, creating depth and dimension. It’s also more forgiving if your short hair isn’t uniformly thick—you can work with what you have and build the style around it.
How to Perfect It
- Backcomb the loose top section deliberately; don’t be timid with the teasing brush
- Smooth the outer layer lightly with a fine-tooth comb while keeping the inner structure fluffy
- Secure the loose section with bobby pins tucked into the teased area so they’re hidden
- Pin the bubble braid below the loose section so they read as separate layers rather than one mushed-together shape
Worth knowing: This style looks best on day-two hair when you have natural grit and texture to work with. Freshly washed hair will flatten the teased section too quickly.
6. The Bubble Braid with Loose Face-Framing Pieces
Some of your best short-hair framing work happens when you intentionally leave small sections out of the braid entirely. Create your bubble braid half-up as usual, but before gathering the top section, pull out one thin piece on each side near your face. These pieces stay completely loose while the rest gets braided and bubbled. The contrast between structured braid and soft loose waves is what makes this special.
Why It Works for Short Hair
This style softens the frame around your face while maintaining the polished, intentional vibe that bubble braids bring. On shorter hair, these loose pieces are visible and impactful—they’re not whisper-thin threads but actual, visible framing that adds movement. It’s romantic without being overly done, polished without feeling rigid.
How to Perfect It
- Release your face-framing pieces before gathering your braid section so they don’t accidentally get included
- Curl the loose pieces with a curling iron before or after the braid is complete—loose waves read better than straight strands
- Use a texture spray or dry shampoo on the loose pieces to give them grip and separation from the braid
- Pin the braid itself slightly back from your face so the loose pieces can flow forward and frame visibly
Pro tip: This style is especially flattering if you have a longer face—the loose pieces close off space and soften angular features.
7. The Zigzag Bubble Braid Path
Instead of creating a straight vertical or diagonal braid, this style uses the bubble braid technique but changes the direction as you go. You might braid straight back for three bubbles, then angle diagonally, then shift back again. This creates a zigzag visual line when viewed from above, which adds complexity and visual interest to the style.
Why It Works for Short Hair
The zigzag pattern creates movement and prevents the style from feeling static or simple. On short hair, this complexity makes a huge visual impact because every centimeter of the braid is exposed and visible. It’s the kind of style that makes people wonder how you did it, even though the technique is just the standard bubble braid with a directional shift.
How to Perfect It
- Map out your zigzag mentally or with a pencil (lightly!) before you start—knowing your directional changes makes execution cleaner
- Shift directions at consistent points so the zigzag reads as intentional pattern rather than unplanned wandering
- Use bobby pins at each directional change to anchor the shift in place
- Photograph from above after you’re done so you can actually see the zigzag pattern you created
Worth knowing: This style is trickier than basic bubble braids, so it’s worth practicing when you’re not on a time crunch.
8. The Bubble Braid Crown with Floating Ends
This version creates a bubble braid that wraps around the crown like a halo, with the ends of the braid left loose rather than tucked away. Start your bubble braid at one temple, work it back and around like you’re creating a crown, then let the finished end fall freely at the opposite temple. The loose end can be curled, braided further, or left straight depending on your preference.
Why It Works for Short Hair
The floating end adds movement and draws attention to the back and sides of your head, creating a fuller silhouette visually. This style is especially smart if you’re dealing with shorter layers or choppy texture—the movement of the loose end balances any unevenness in length. It’s also surprisingly versatile; you can make it look boho, romantic, or modern depending on how you finish the loose end.
How to Perfect It
- Start your braid slightly higher than you think you need to—this gives the crown shape more presence
- Make your bubbles slightly larger on the sides so they frame your face from the front view
- Curl or wave the loose end with a curling iron for movement and visual interest
- Secure the braid’s anchor point with bobby pins rather than trying to hide the start—this reads as design choice rather than accident
Pro tip: If your short hair has texture or layers, weave a thin ribbon or hair jewelry into the loose end for extra visual interest and to show off those layers.
9. The Two-Tone Bubble Braid with Colored Extensions
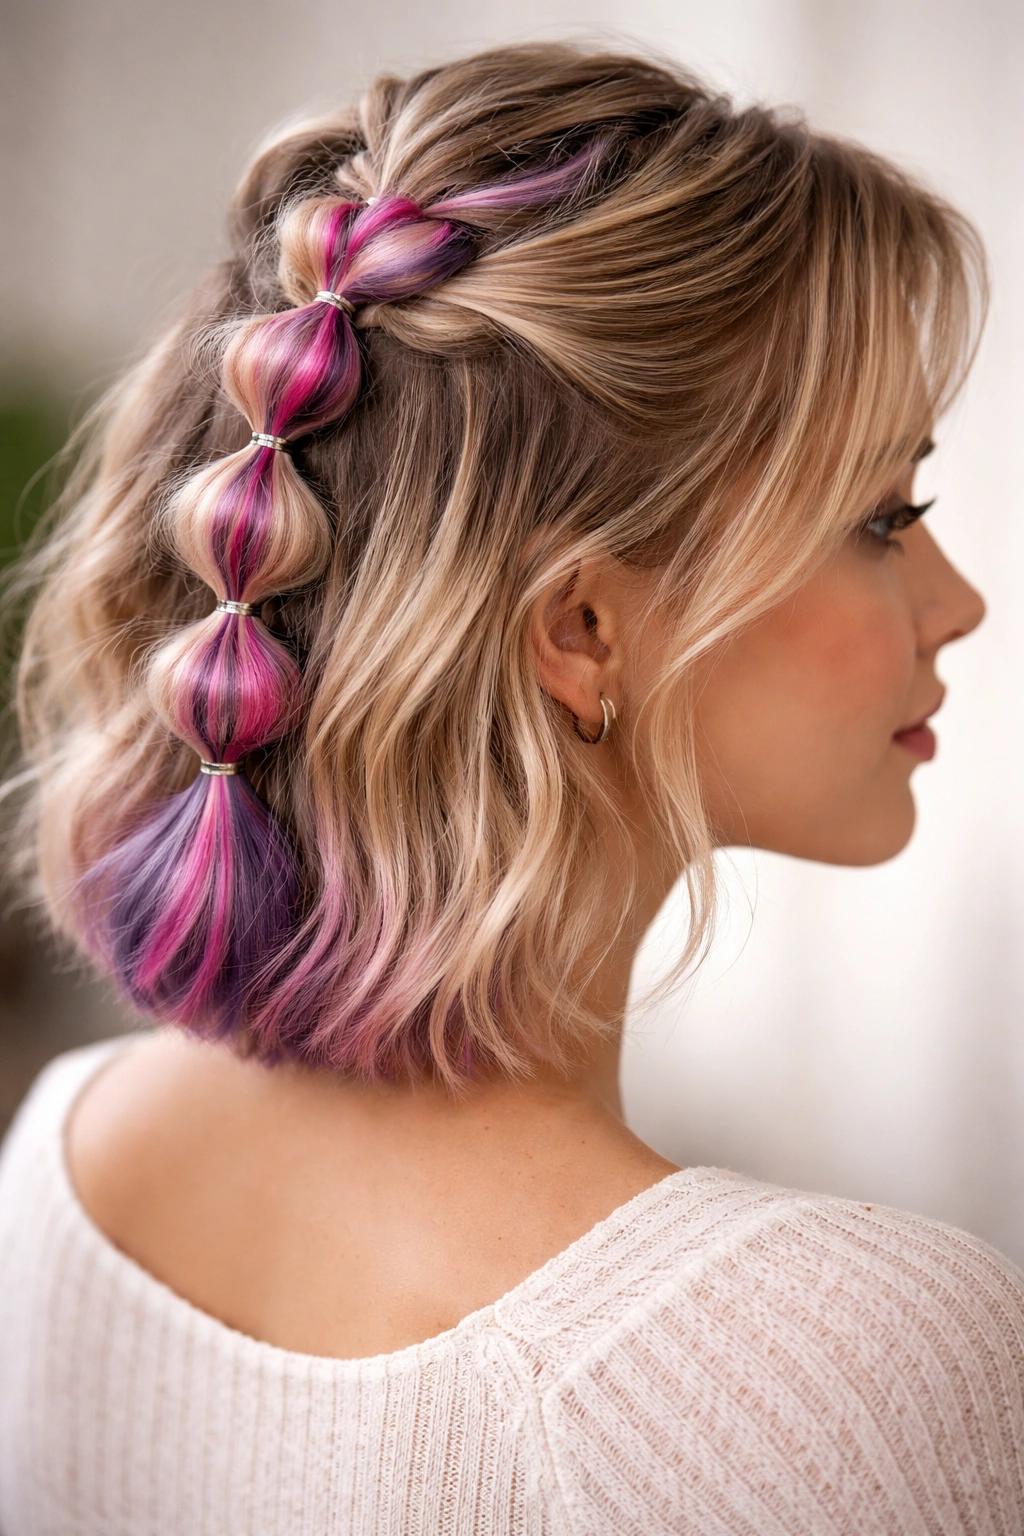
This style weaves in temporary colored hair extensions or even thin ribbons alongside your own hair as you create the bubble braid. The color winds through the braid structure, creating a striped effect that’s particularly striking on short hair. Use hair colors that complement your base color—metallics, pastels, or bold brights depending on your vibe.
Why It Works for Short Hair
Short hair is the ideal canvas for colorful accents because there’s no length to overwhelm the boldness of the color. The color winds through the bubble structure, creating dimension that makes the style feel more elaborate than it actually is. It’s an excellent option if you want to experiment with color without committing to a full dye job.
How to Perfect It
- Use clip-in colored extensions for easy application and removal—they should match the thickness of your actual hair
- Weave the extension through every other section of your three-strand braid for visible impact
- Pull bubbles slightly larger when colored extensions are involved so the color shows clearly in the texture
- Secure the extension end with bobby pins that match your hair color so they’re invisible
Worth knowing: Metallic extensions work especially well on short hair because the reflective quality makes the braid appear to have more dimension and movement than it actually does.
10. The Bubble Braid Knot with Half-Up Sections
This style combines braiding with knots for an intricate-looking but surprisingly simple effect. Create a half-up bubble braid, then instead of securing it with an elastic, tie the braid end into a loose knot and secure it with bobby pins. The knot takes up space and adds texture without requiring additional length.
Why It Works for Short Hair
Knots create an unexpected element that makes people assume you’re much more skilled at styling than you probably are. On short hair, the knot sits right at the nape or just below, creating a focal point and preventing the style from feeling flat. It’s elegant and modern while still being approachable and achievable.
How to Perfect It
- Create your bubble braid fully before attempting the knot—trying to tie a knot with partially finished braiding is frustrating
- Make your knot loose enough to see the braid texture inside it; a tight knot hides all your hard work
- Pin the knot in multiple places so it doesn’t shift and unfold as you move
- Leave a small tail of braid trailing below the knot for visual interest and movement
Pro tip: This style works beautifully with a velvet ribbon threaded through the braid instead of just your hair—the ribbon adds luxury and the knot becomes even more visually interesting.
11. The Bubble Braid with Pearl or Gold Bobby Pins
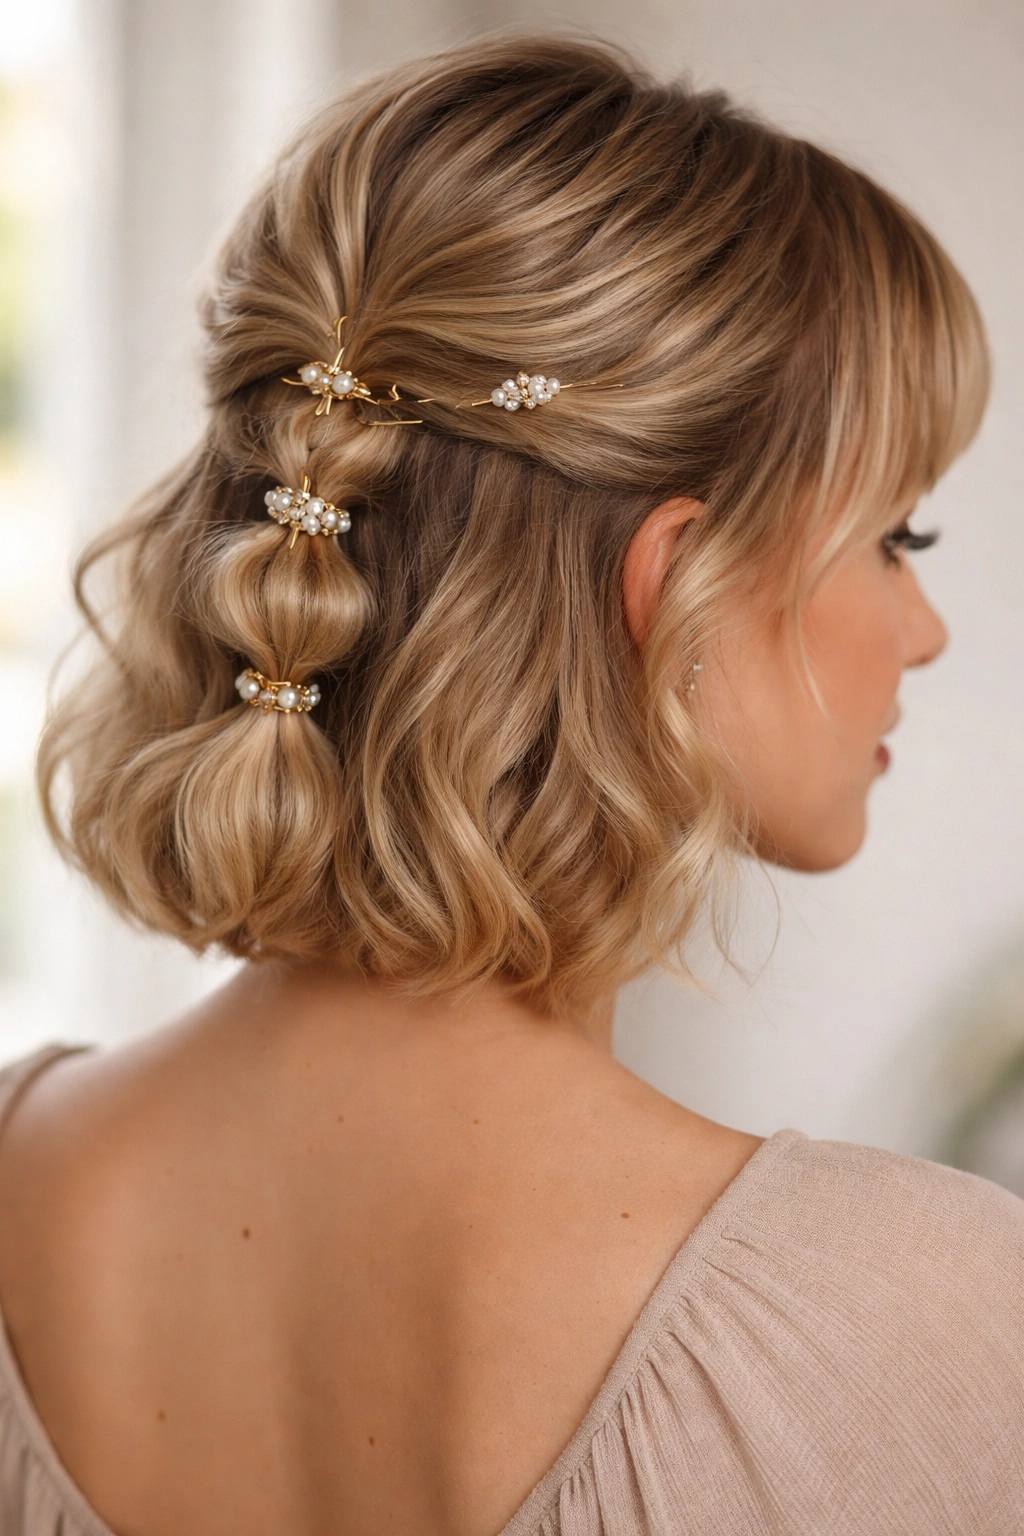
This style isn’t about a new braiding technique but rather about finishing your bubble braid with visible, decorative bobby pins instead of hiding them. Create your bubble braid half-up as usual, then secure it with pearl, gold, or colored bobby pins arranged visually rather than haphazardly. The pins become part of the design.
Why It Works for Short Hair
Decorative bobby pins are having a major moment, and short hair gives them room to be featured rather than hidden. The visible pins add a jewelry-like quality to your hairstyle, making it feel intentional and designed. It’s an easy way to dress up a basic bubble braid and make it feel special.
How to Perfect It
- Use 3-5 decorative pins arranged in a line or pattern rather than scattering them chaotically
- Match the pin color to your eye color, skin tone, or outfit for cohesion
- Position pins so they’re visible from the front even though they’re at the back—this creates visual interest when people see you in profile
- Mix metals (gold and silver) or mix textures (pearls and matte) if you want a more modern, eclectic look
Worth knowing: The pins don’t have to match your braid color—contrast creates more visual impact. Silver pins on dark hair, gold pins on blonde, copper on red hair all read differently and strikingly.
12. The Textured Bubble Braid with Waves
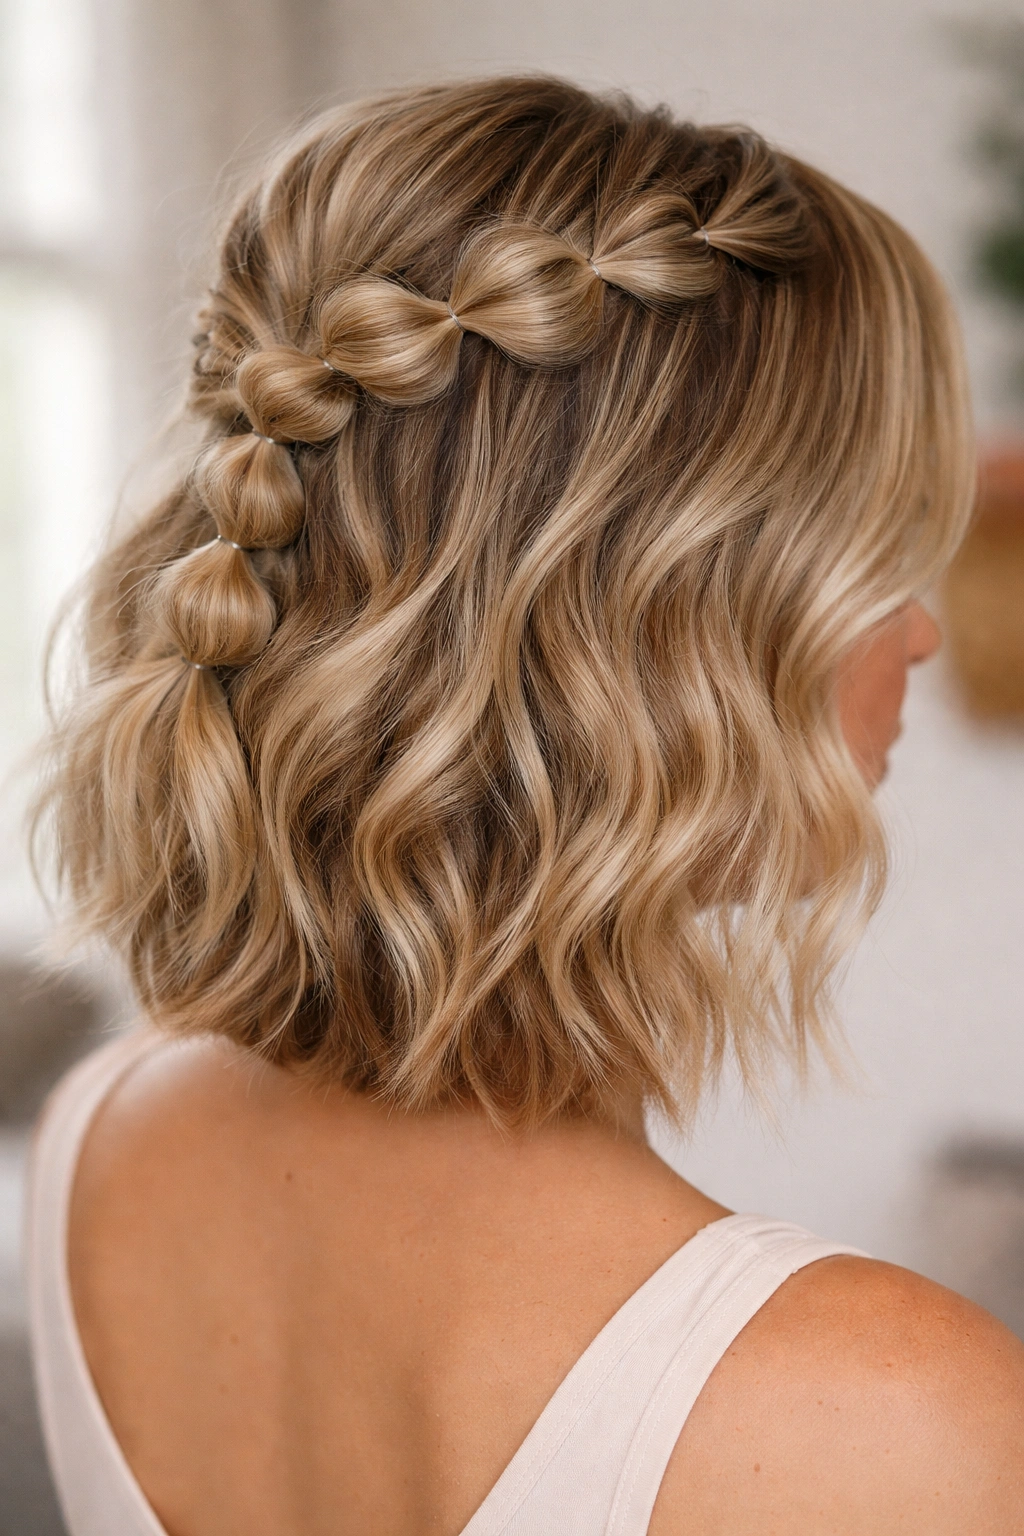
This final style combines the bubble braid technique with intentional wave texture throughout the entire head. Before creating your half-up bubble braid, curl your entire head loosely with a curling iron or braiding method. Then create your bubble braid on top of this wavy foundation. The combination of structured braid and unstructured waves creates a sophisticated, lived-in aesthetic.
Why It Works for Short Hair
Waves add volume and texture that makes short hair feel fuller and more visually interesting. The bubble braid sitting on top of waves is more forgiving than bubble braids on straight hair—the underlying texture hides any imperfections in your braiding technique. It’s an excellent option when you want to look effortlessly polished rather than meticulously styled.
How to Perfect It
- Create your waves first and let them cool before braiding—warm waves flatten when you handle them to braid
- Use a texture spray or volumizing mousse on damp hair before curling for better wave hold
- Braid loosely to allow the underlying waves to show through and enhance the overall texture
- Finish with hairspray applied in sections as you go rather than one heavy mist at the end
Pro tip: Sleep in loose braids the night before to create natural waves, then unbraid in the morning and add your bubble braid—this combination of gentle overnight texture and fresh bubble braid texture creates the most beautiful, dimensional effect.
Final Thoughts
Bubble braids on short hair aren’t just a trend—they’re a legitimate styling technique that works with your actual length rather than fighting against it. The half-up approach gives you the visual impact of a complex hairstyle without the commitment of styling every inch of your head. Whether you’re drawn to the simplicity of a classic center braid or the complexity of zigzag patterns and floating ends, there’s a version here that matches your skill level and your vibe.
The real magic of these styles is how forgiving they are once you understand the basic bubble-pulling technique. Your first attempt might not look Instagram-perfect, but it won’t look bad either—bubble braids have inherent texture and movement that reads as intentional even if your technique is imperfect. Practice one or two styles until they become automatic, then branch out to the others as you build confidence.
Short hair deserves styling that celebrates its length instead of apologizing for it. Bubble braids do exactly that—they turn every centimeter into visible, stylish texture, and the half-up approach ensures maximum impact with minimum effort. Pick a style, grab some bobby pins, and start practicing. Your next great hair day is just a few bubbles away.