Natural hair demands styling approaches that celebrate texture while protecting those precious curls and coils. The swoop half-up half-down style has become a versatile go-to for people with textured hair—it strikes that perfect balance between protective styling and letting your natural pattern breathe. Unlike styles that rely on heat or tight pulling, swoops work with your hair’s inherent movement, creating volume and dimension while keeping the bulk of your length down and stress-free.
The beauty of swoop half-up styles lies in their adaptability. Whether you’re working with loose waves, tight coils, or anything in between, there’s a swoop variation that’ll complement your curl pattern and fit your lifestyle. Some swoops are quick weekend looks you can refresh daily; others are statement styles worth the extra 20 minutes of styling time. The technique itself is grounded in one core principle: you’re gathering a section of hair from one or both sides, sweeping it back in a curved or diagonal pattern, and securing it while leaving the bottom half completely down.
What makes these styles particularly special for natural hair is that they’re genuinely protective while remaining low-manipulation when done correctly. Your ends stay tucked away from friction, your scalp gets some breathing room, and you avoid the tension that comes with super-tight updos. Even better, most swoop styles work beautifully on second-day or third-day hair—that’s when your curl definition is often at its absolute best. Let’s explore twelve swoop variations that’ll have you rethinking what’s possible with your natural texture.
1. The Classic Curved Swoop
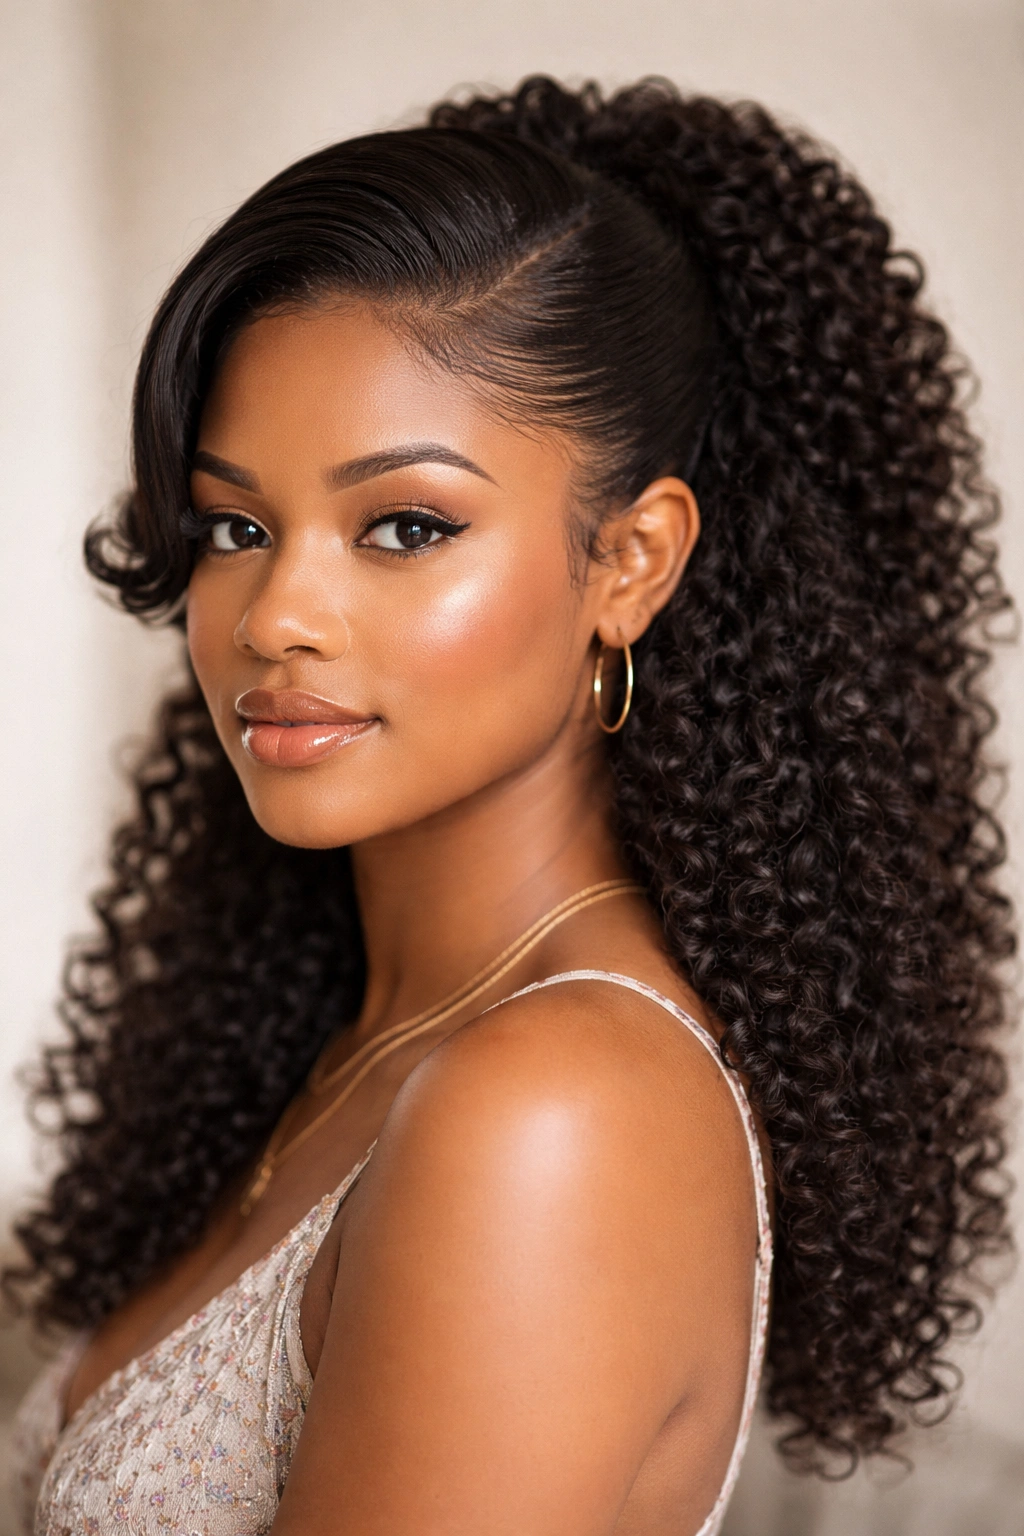
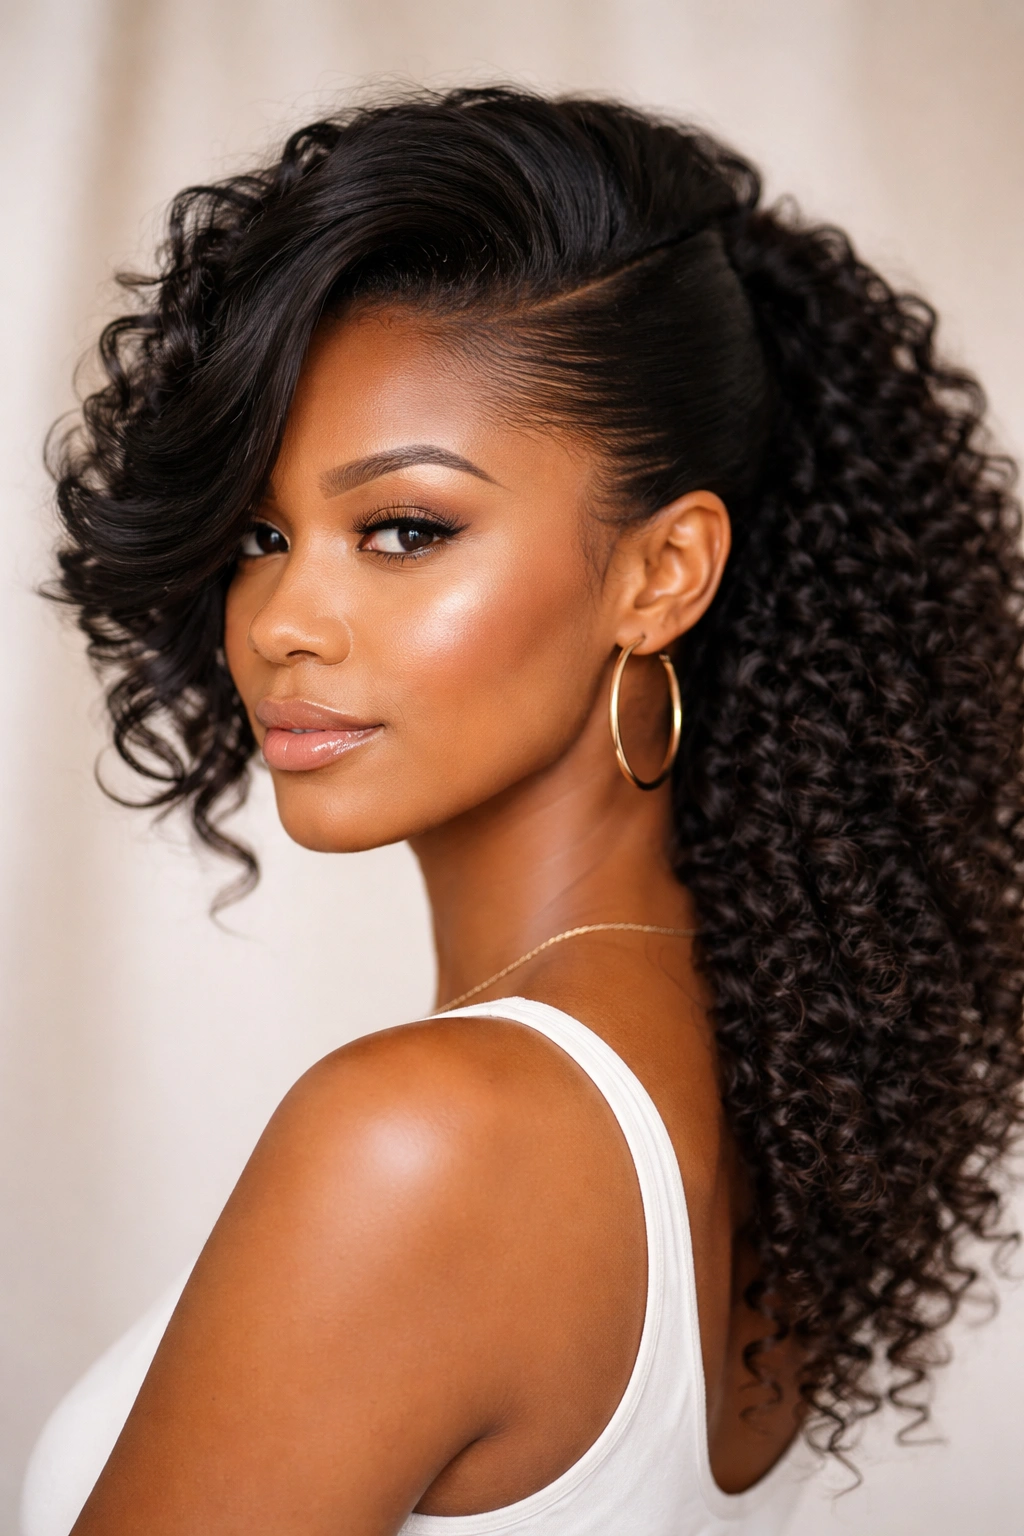
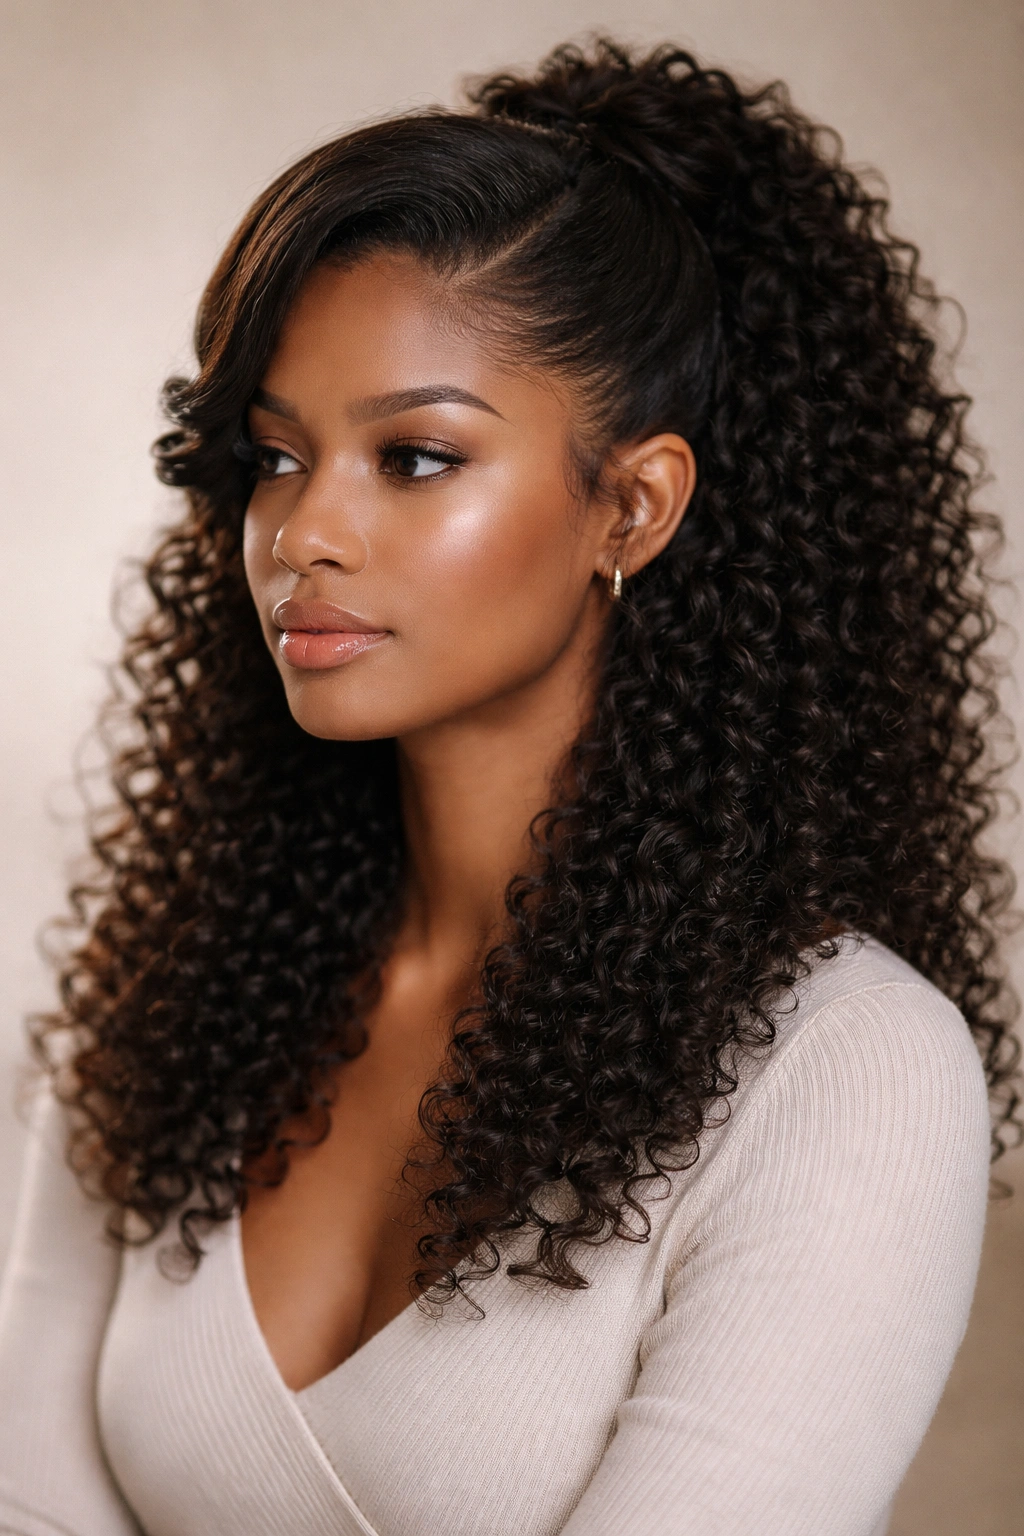
This is the foundational swoop style that everything else builds from—a smooth, curved sweep from one side that feels effortless but actually demonstrates solid technique. Starting from the temple on one side of your head, you’re gathering hair and curving it back toward the crown, creating that signature swooping motion before securing everything together. The key is working with your natural curl pattern rather than fighting against it; let your curls form the curve naturally instead of forcing a sharp angle.
Why This Works for Natural Hair
The curved swoop respects how your hair actually moves when it’s not manipulated into submission. Because you’re following your hair’s natural trajectory, the style holds longer and looks fuller since you’re not stretching strands taut. The curved sweep is also incredibly forgiving—slight bumps or flyaways actually add to the romantic, textured vibe rather than looking messy.
How to Execute It
- Start with damp or slightly dampened hair—completely dry hair can feel stiff when you’re trying to create a smooth swoop
- Apply a lightweight curl cream or gel to the section you’re sweeping (this helps definition and hold without weighing everything down)
- Use your fingers or a wide-tooth comb to gather the hair, following the natural direction it wants to go
- Sweep from temple toward the back, creating a C-shape curve
- Secure at the crown with bobby pins matched to your hair color, tucking the ends of the pins into your curl pattern so they disappear
- Gently tousle the secured section to blend the texture and hide the pins
2. The Deep Side Swoop
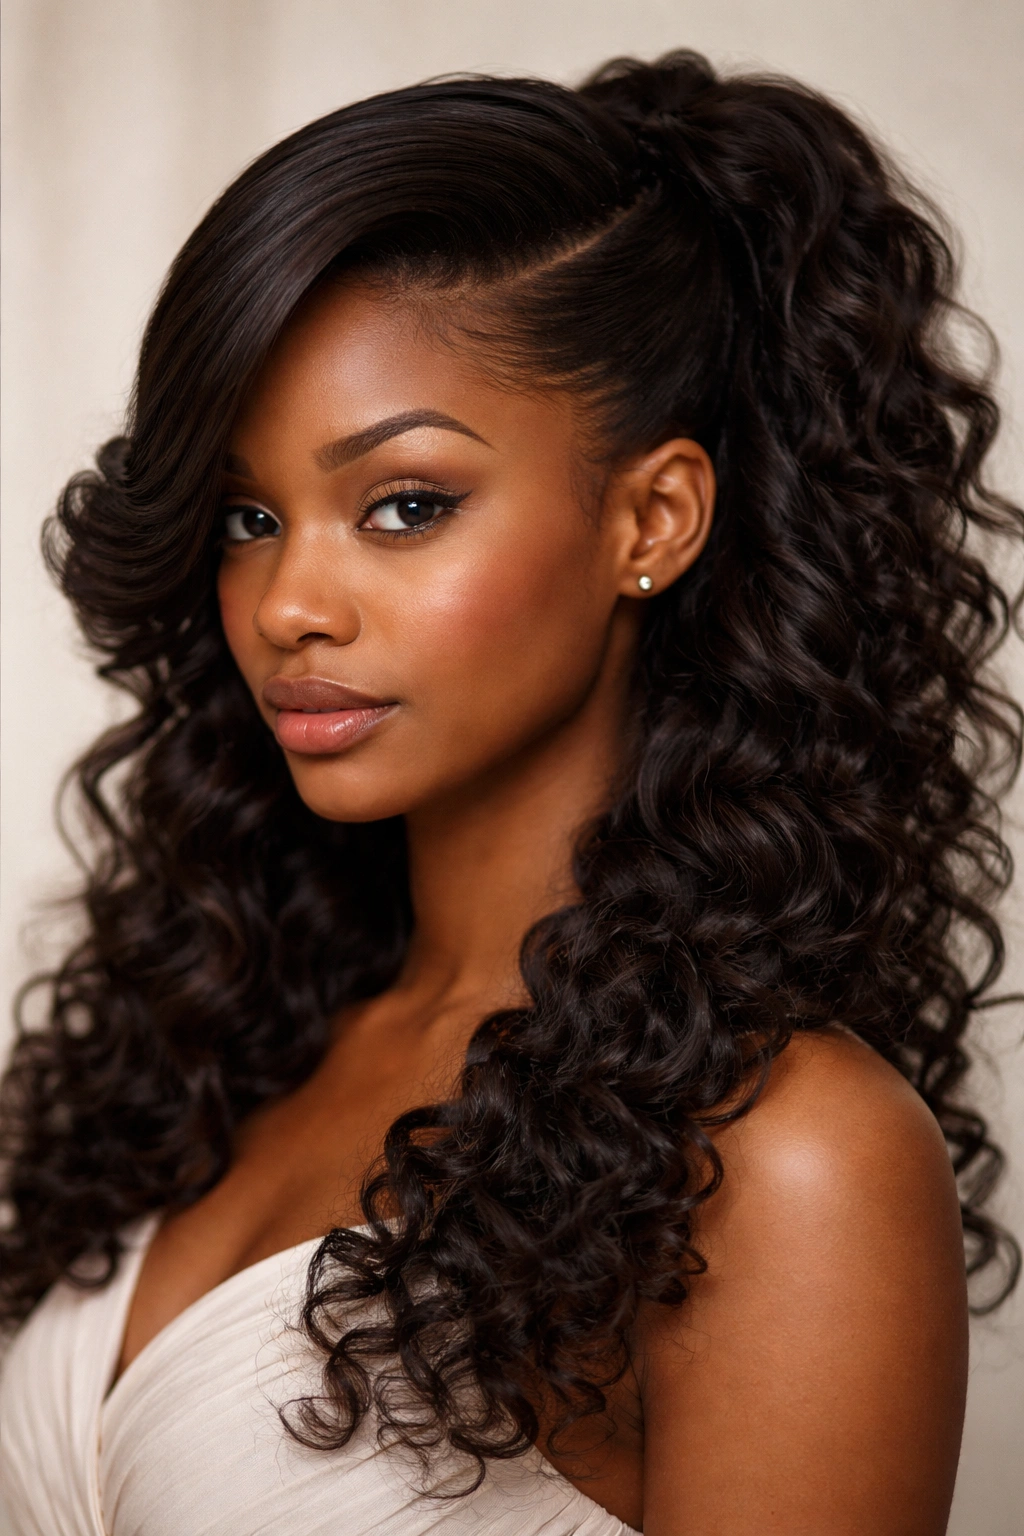
This variation takes the classic swoop and exaggerates it dramatically—you’re gathering hair from much deeper on one side, sometimes starting almost at your ear. The sweep travels a longer distance, creating a bolder visual line and more height at the crown. It’s a style that photographs beautifully and commands attention without looking overdone, making it perfect for events or days when you want to feel extra put-together.
The Technique Behind the Drama
A deeper swoop requires more hair and longer strands to execute smoothly, so this style works best if you have at least shoulder-length hair. The key is creating tension in your hands as you sweep—not tension on your scalp, but gentle control so the curve is deliberate rather than accidental. You’re essentially creating a diagonal line that pulls the eye upward and across.
Making It Last
- Braid the section you’re sweeping before you secure it; a loose three-strand braid hidden within the swoop holds the shape all day
- Use a flexible-hold gel or mousse rather than a hard-hold product; your curls need to move slightly as you move throughout the day, or the pins will pop out
- Pin at multiple points along the swoop rather than one central point
- Don’t make your swoop too tight at the root; a little give actually helps it hold better
3. The Twisted Double Swoop
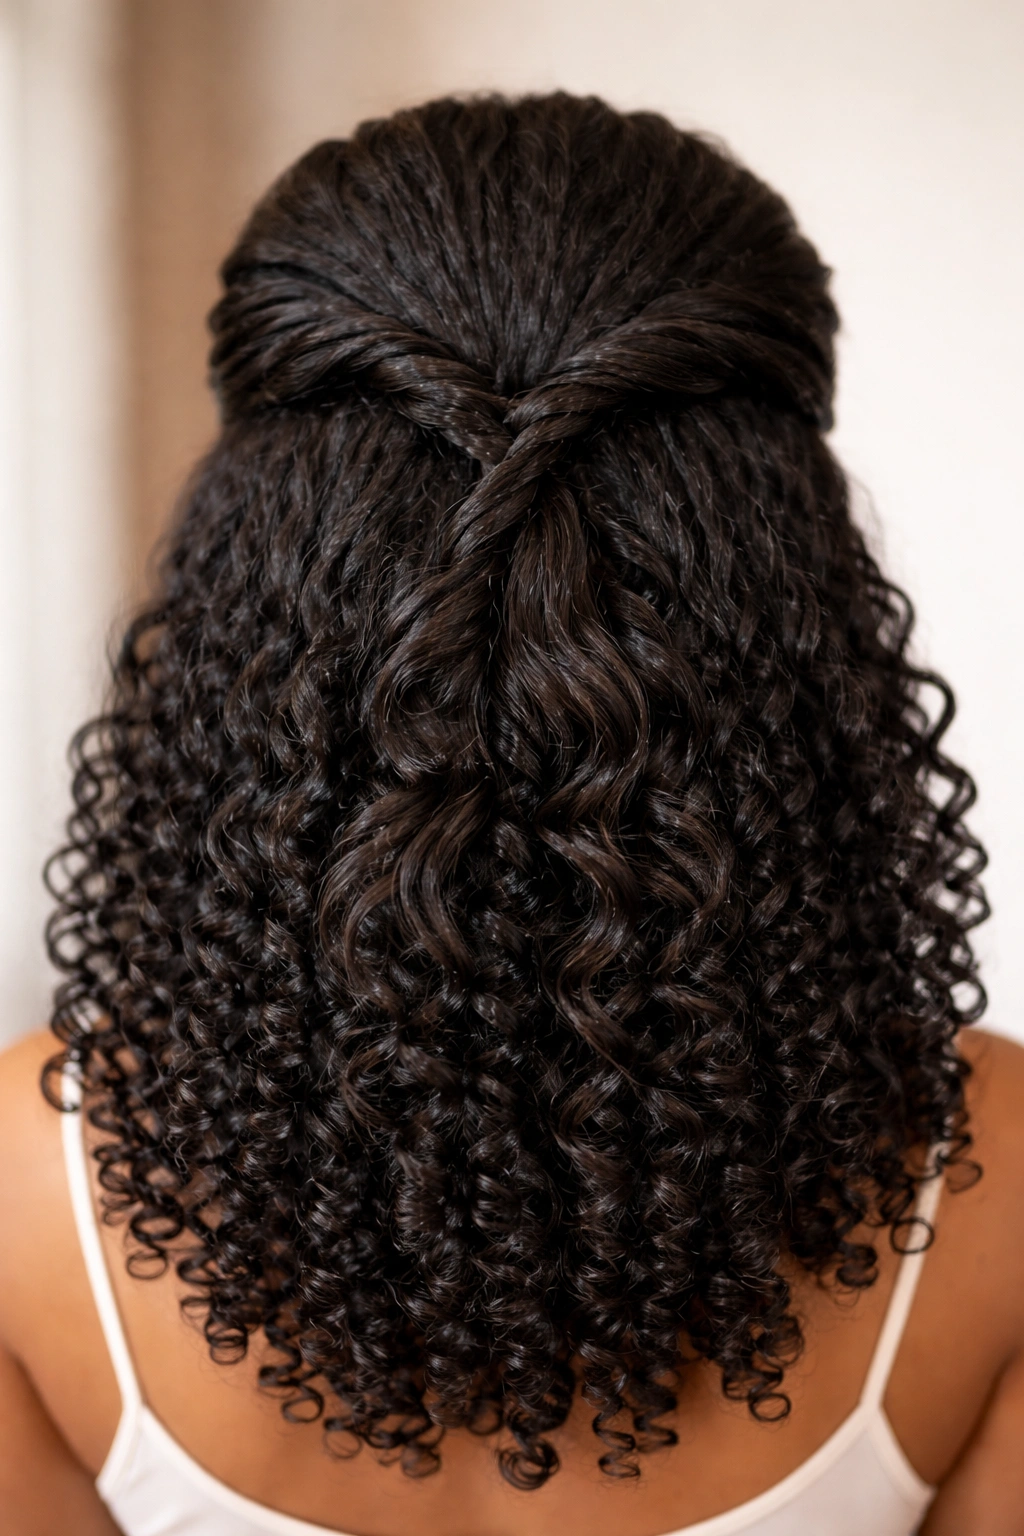
Instead of one curved section, you’re creating two swoops—one from each side—that meet at the back. The twist comes in literally: each side is twisted rather than simply swept, which adds visual interest and helps everything stay put. This style works beautifully on wash day when you want maximum hold without gel overload, and it’s feminine without being fussy.
Why the Twist Matters
Twisting as you swoop does several things at once. It compresses your curls slightly, creating definition. It gives you a more deliberate hold point because the twist is self-securing—the curl pattern essentially locks the twist in place. And visually, it reads as more intentional and polished than a simple sweep. Two twisted swoops from opposite sides frame your face and create beautiful symmetry.
Step-by-Step Execution
- Take a section from your right temple, about 2-3 inches wide
- Twist this section loosely as you move it back and slightly up toward the crown
- Repeat on the left side with a mirror-image section
- Bring both twisted sections together at the back center of your head
- Secure with bobby pins, threading them through the twists
- Release the twists slightly with your fingers to create texture and hide the structure
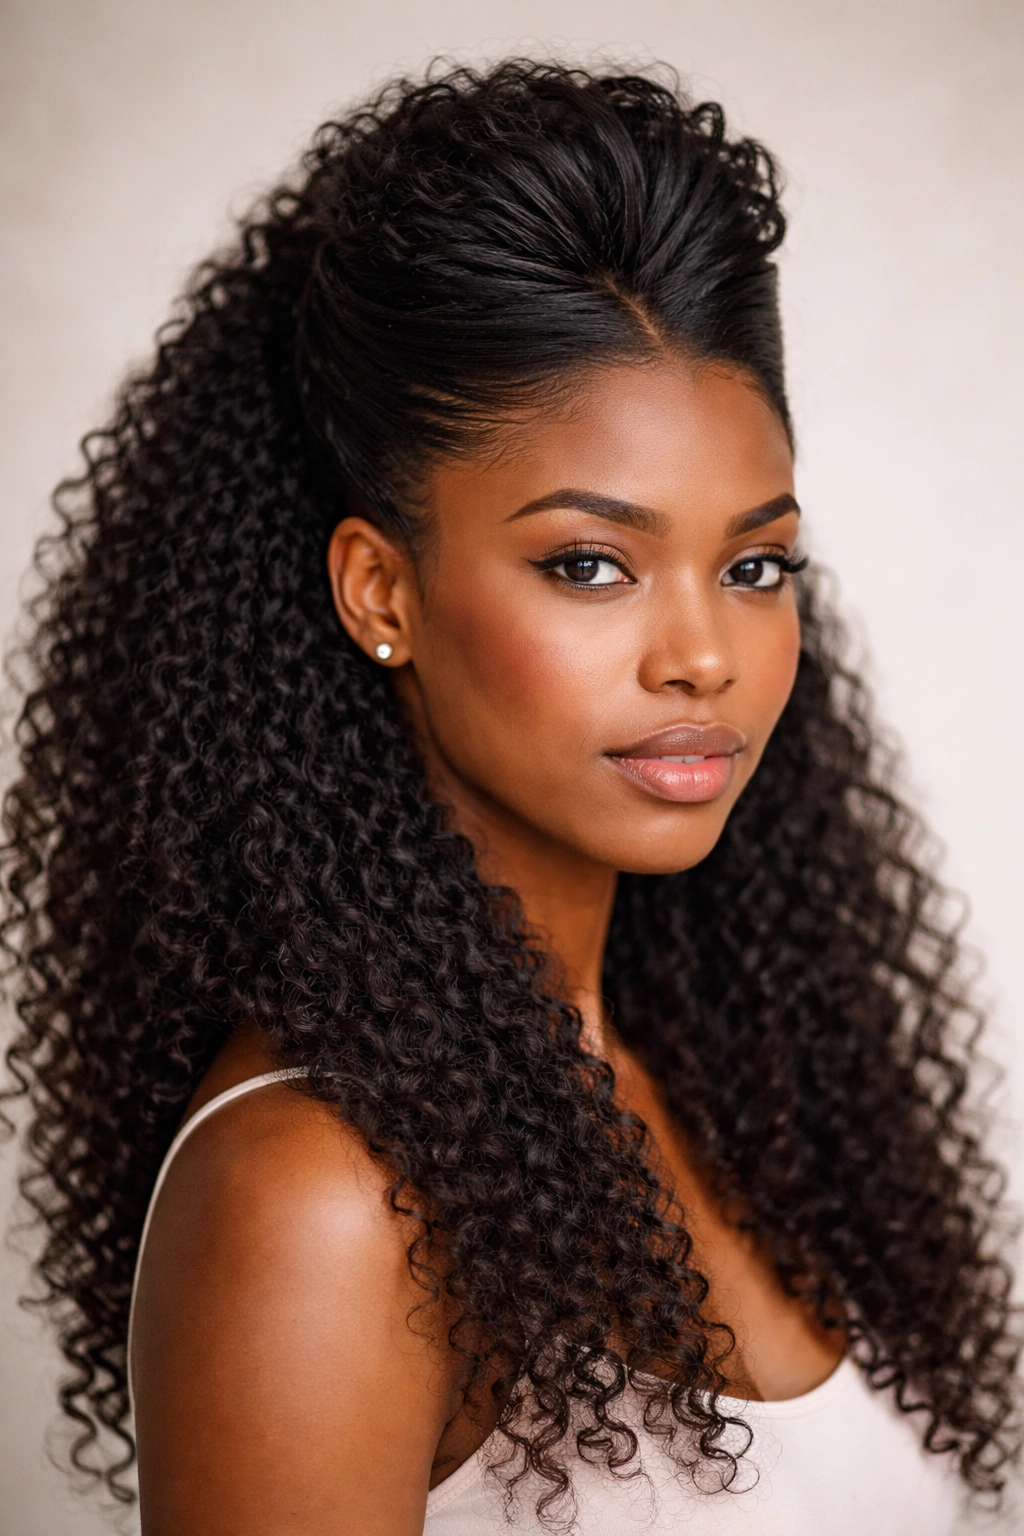
4. The Soft Swooped Puff

This is the swoop’s best friend when you love the look of a puff but want something less structured. You’re creating the height and volume of a puff at the crown, but instead of gathering everything straight up, you’re sweeping some of that hair back and to the side in a gentle curve. It’s less severe than a traditional puff and gives you movement and dimension that feels very modern.
Achieving Softness Without Losing Shape
The trick here is gathering your puff section loosely rather than pulling it into submission. Use your fingers rather than a fine-tooth comb; fingers naturally create a softer, less uniform grip. Add texture by not smoothing everything down—those slightly undefined edges read as intentional rather than undone. A puff that’s meant to sit high and round should have some visible curl pattern visible around the perimeter.
Styling Tips for Longevity
- Use a puff cuff or hair tie that’s actually comfortable, not one that cuts circulation
- After you’ve gathered and secured your puff, flip your head upside down and gently shake the puff to redistribute the curls and create volume
- Secure with bobby pins placed horizontally through the puff rather than vertically; horizontal placement distributes tension better
- The swooped section should curve naturally from the puff, not be yanked backward
5. The Sleek Swooped Bun

When you want polished and intentional, a sleek swoop leading into a bun at the back gives you that elevated look without high heat or harsh manipulation. The swoop itself has texture—your natural curl is visible—but the gathered section smooths into a neat bun. This is office-appropriate, date-night appropriate, and versatile enough to work with both casual and dressy outfits.
Building the Sleek Factor
Sleekness doesn’t mean fighting your texture; it means defining it. A smoothing cream or gel applied to the swooped section will set your curls in place without making everything look stiff. The bun at the back should have some intentional texture too—a twisted bun or a bun made from loosely braided sections reads as intentional and textured rather than trying-too-hard.
Creating Definition and Hold
- Apply product to damp hair and allow it to set before styling; this gives you better definition than trying to slick down dry curls
- Use a smooth comb for the swoop portion to define each curl and eliminate frizz
- Create your bun from braids rather than a simple twisted base; braids hold better and create a more interesting texture
- Secure everything with strong bobby pins, using multiple pins rather than one centralized point
6. The Swooped Space Buns
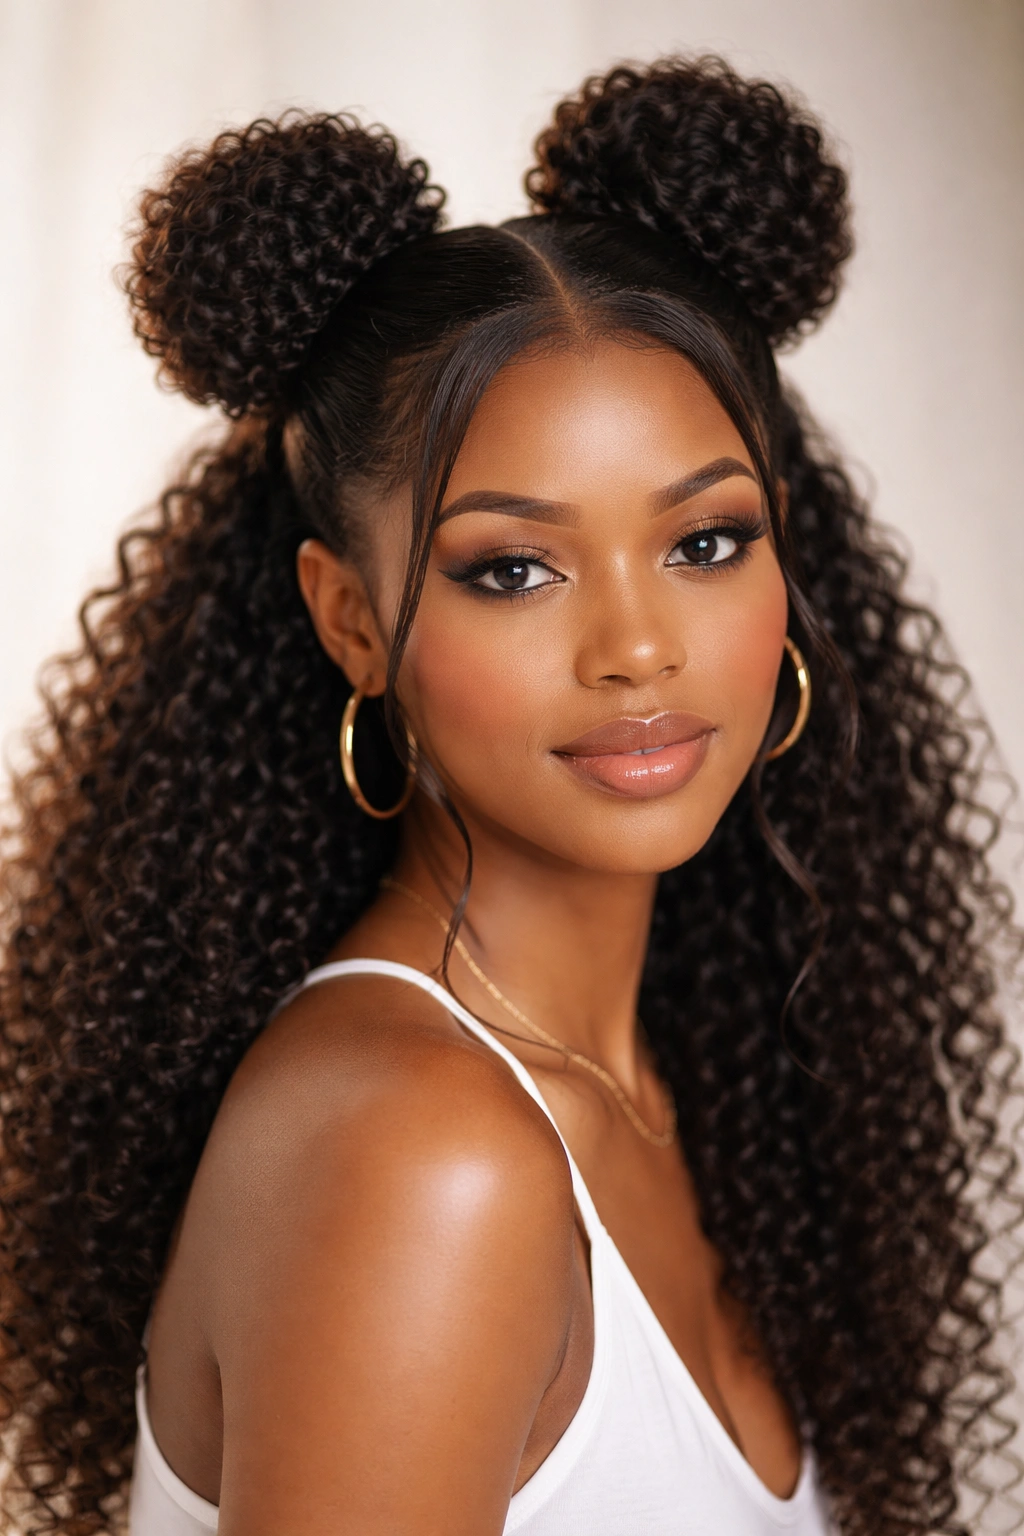
This playful, younger-energy style features two buns positioned at the crown area, with hair swept up and back into each one. It’s half-up half-down technically, but it reads as more whimsical because of the dual bun element. Works brilliantly on natural hair because the texture creates interest in the buns themselves—you’re not trying to create smoothness, you’re celebrating the curl pattern.
Making Space Buns Work on Natural Hair
The key difference between space buns on straight hair versus natural hair is that you want your buns to look full and round, not perfectly smooth. Loose braids or twists swept up into each bun create better shape and texture than trying to smooth everything back. Your natural curl is the feature here, not an obstacle to work around.
Execution and Styling
- Section your hair into two halves down the center back of your head
- From each side, create a loose braid or twist that curves back toward its corresponding bun spot
- Wrap and secure each braid/twist into a loose bun shape at the crown area
- Don’t oversecure; let the buns have some height and bounce
- A light curl cream applied before styling helps definition without weighing things down
- These actually improve over 24-48 hours as your curls fully set into the shape
7. The Asymmetrical Side Swoop
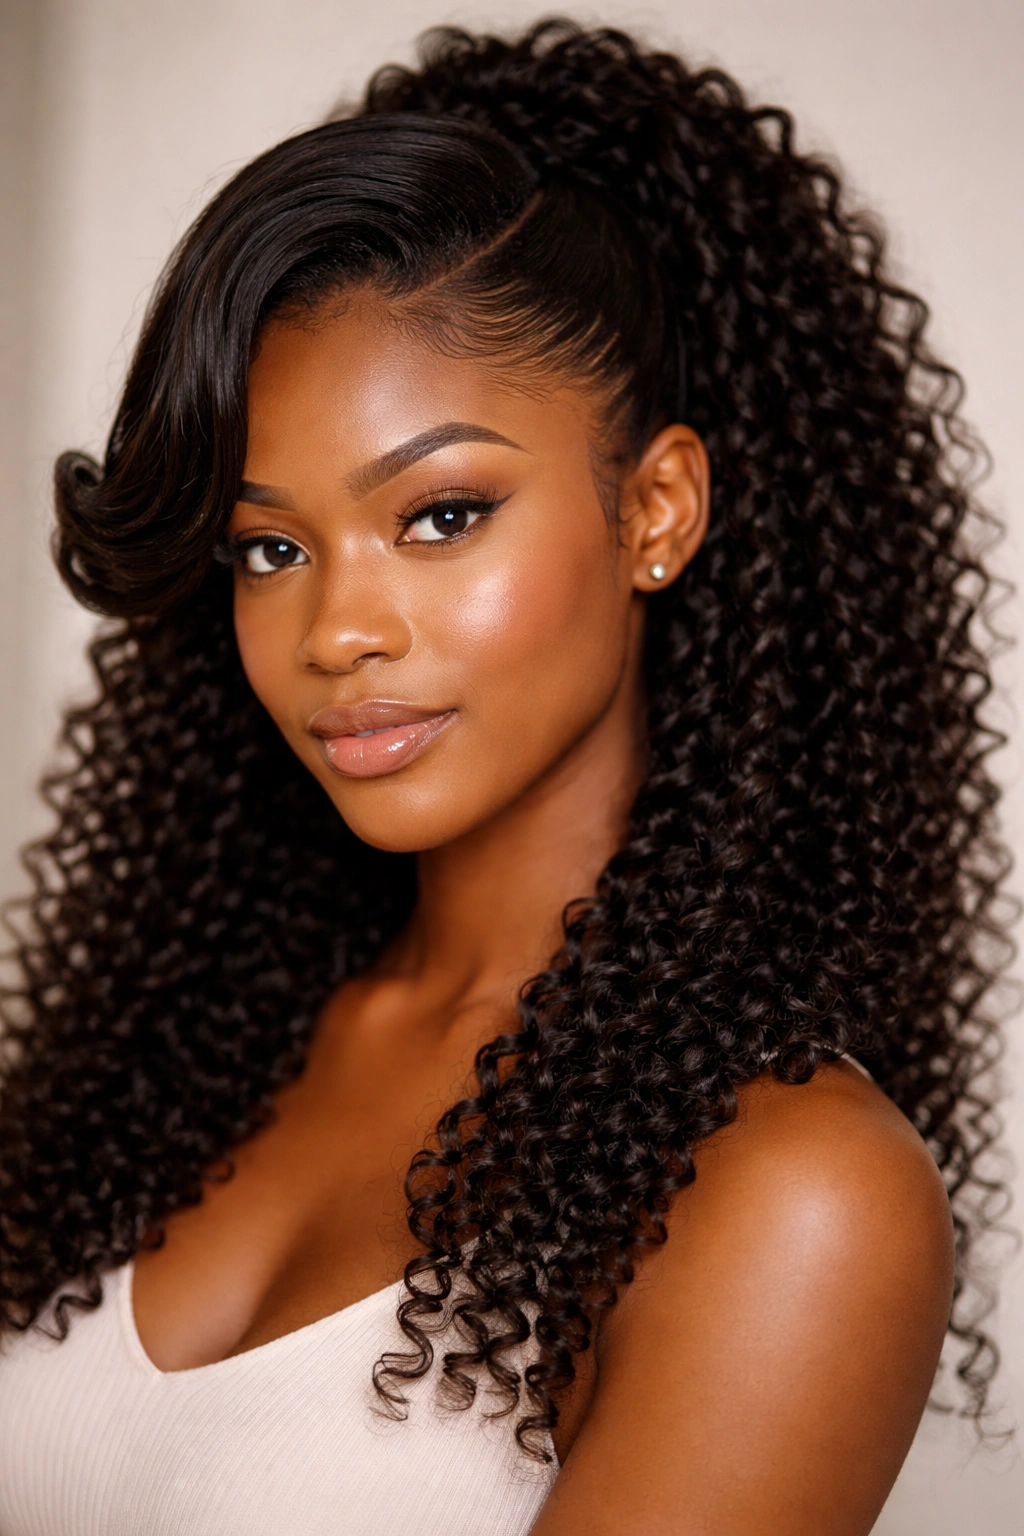
This is for when you want to break the rules of symmetry and embrace one side completely. Hair is swept dramatically from one side only, leaving the other side of your head completely free and showing off your curl pattern. The asymmetry makes a statement—it’s modern, confident, and visually interesting in a way symmetrical styles can’t quite match.
Working with Asymmetry
Asymmetrical styling actually works better on natural hair than on straighter textures because your curls add dimensionality that prevents the look from feeling unbalanced. The side without the swoop can have maximum volume and movement; let your curls live their best life there. The asymmetry should feel intentional, not like you forgot to style one side.
Technical Execution
- Create significant volume on the unswooped side—this balances the visual weight of the swoop on the other side
- The swoop itself should be bold and clearly defined so it reads as intentional rather than accidental
- Pin the swoop low and at the nape rather than at the crown; this lengthens the sweep and makes the asymmetry more dramatic
- Leave the front section on the unswooped side completely free and allow curls to frame your face
8. The Swooped Braid-Out Swoop
If you’re wearing a braid-out or twist-out (that beautiful defined curl pattern you get from unraveling braids or twists), the swoop style works even better because your curls are already set into their shape. You’re simply gathering those beautifully defined curls and sweeping them back, creating a style that’s automatically textured and defined without extra product or manipulation.
Timing and Preparation
Braid-outs and twist-outs are typically done the night before or several hours before you style; the longer you leave them in, the more defined and long-lasting your curl pattern becomes. This actually makes swooping easier—your curls hold their shape as you manipulate them, so you need less product to maintain the look. Apply your swoop style to second-day or third-day braid-out hair for maximum definition and hold.
Swoop Styling Over Braid-Out Hair
- Use just a light refresher spray or curl cream rather than heavy product; your curls are already set
- Gently gather the sections you’re sweeping, allowing the braid-out texture to remain visible
- Secure with bobby pins placed strategically to blend into your curl pattern
- The beauty here is the swoop acts as a frame for the detailed curl definition in your braid-out
9. The Swooped Coil-Out Swoop
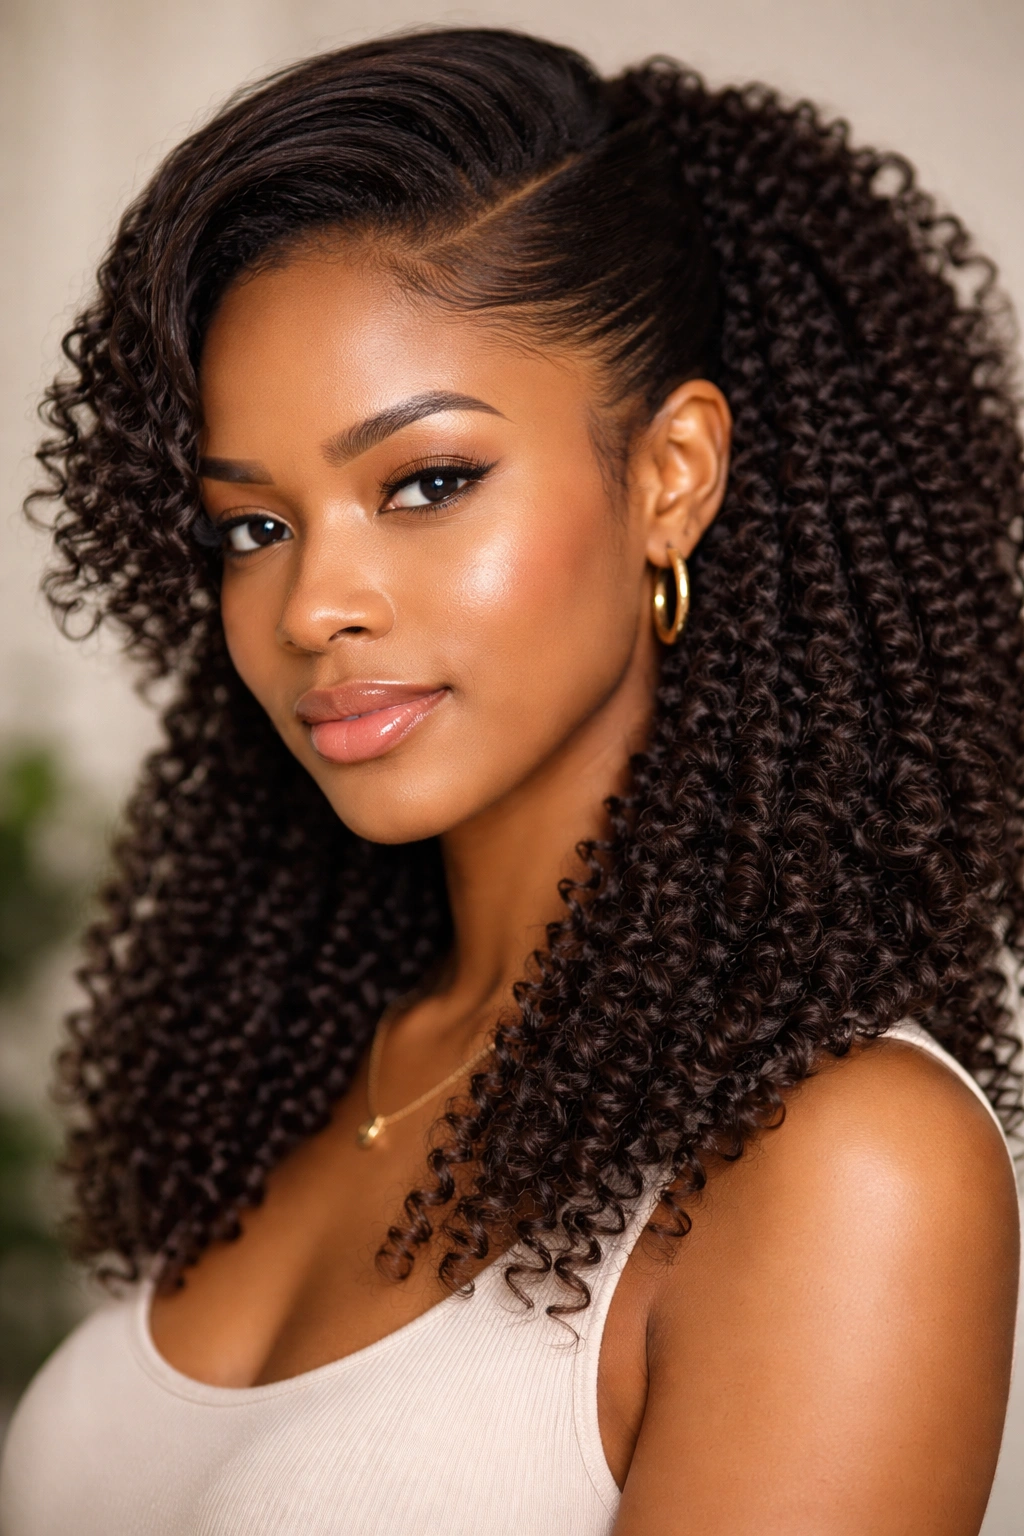
Similar to the braid-out, a coil-out (where you’ve coiled small sections of hair around your finger and allowed them to set) gives you perfectly defined coils that you can swoop back for a style that’s both protective and visually stunning. The coils create natural texture and definition that works perfectly with the swoop framework.
Maximizing Coil Definition
Coils are generally tighter and more springy than braid-out curls, which means they hold their shape exceptionally well when swept. You might actually need less product than you’d use with a looser curl pattern because the coils themselves are so stable. A light misting of refresher spray and you’re ready to swoop.
Swoop Technique for Coils
- Work with day two or three coil-out hair when the coils have fully relaxed and set
- Be gentler when gathering coils compared to looser curl patterns; you want to maintain each individual coil’s integrity
- Let coils show through the swoop—don’t try to blend them or smooth them out
- Pin at the base of your swoop rather than throughout it; fewer pins mean less disruption to the coil pattern
10. The Swooped Crown Swoop with Undercut Detail
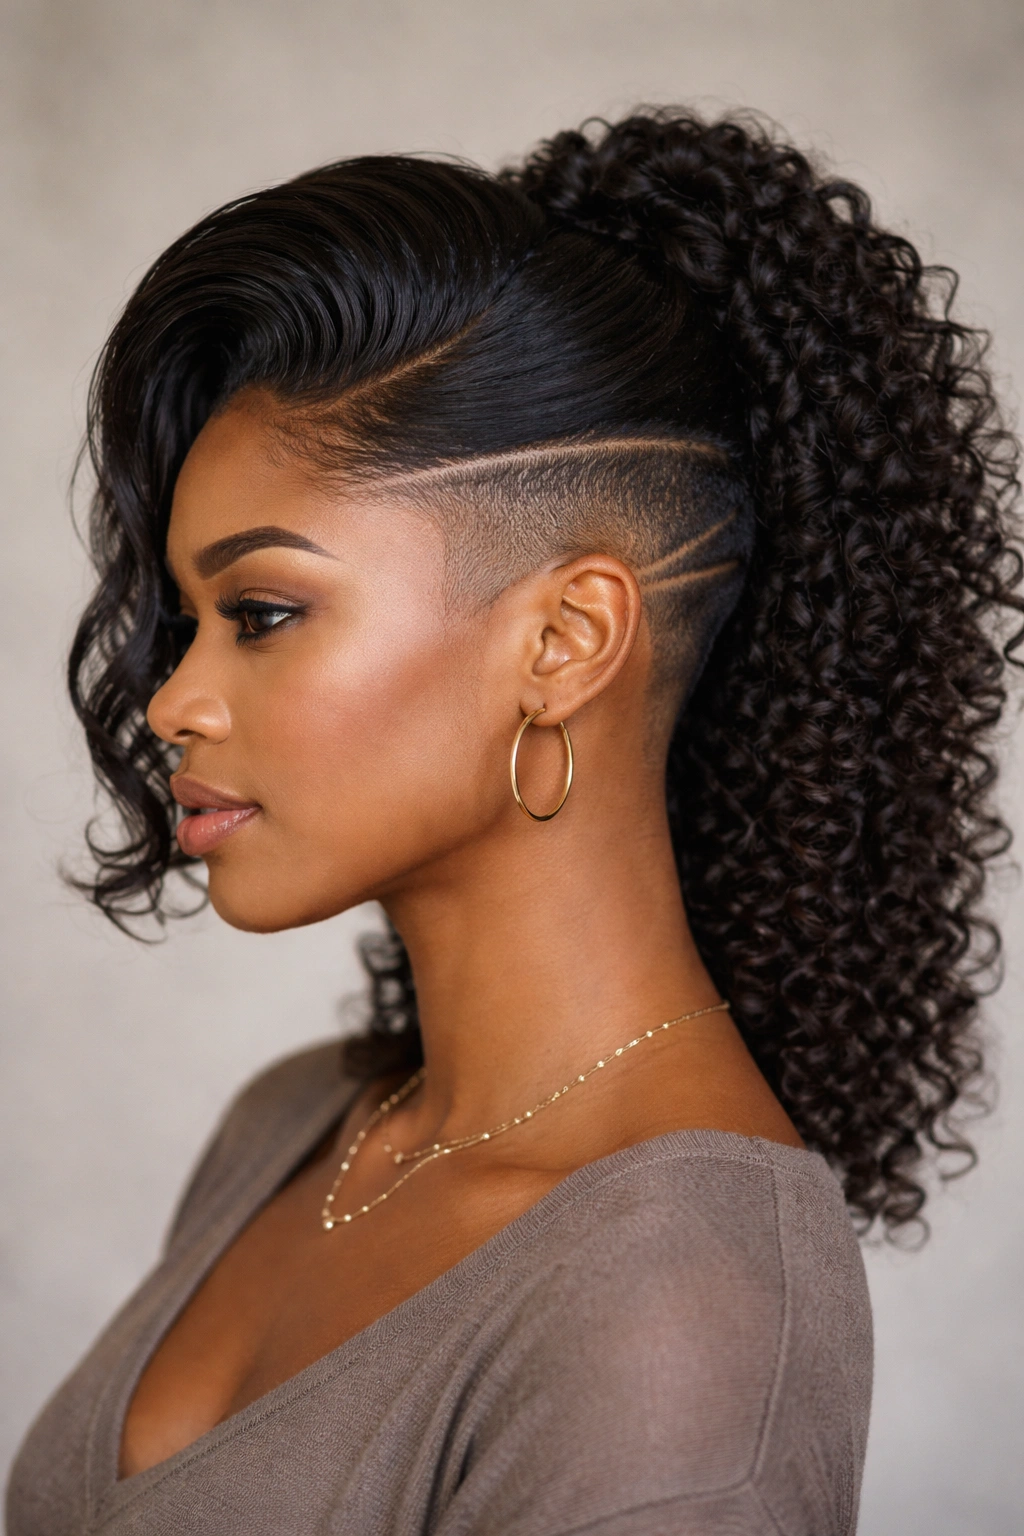
If you have an undercut or shaved portion of your head (sides or back), a swoop style that reveals this detail while keeping the crown full becomes a powerful styling choice. You’re sweeping hair from the fuller sections and securing it in a way that showcases the textured contrast between the undercut section and your fuller natural hair. It’s an edgy, contemporary look that celebrates both your curl pattern and any intentional hair texture work you’ve done.
Working with an Undercut
Your swoop should originate from the sections with more length and volume—typically the crown and upper sides. The undercut section remains partially or fully visible, becoming part of your style’s visual design rather than something to cover. This creates a geometric, architectural quality that’s very current and visually striking.
Styling Considerations
- Make sure your swoop is secure enough that it won’t shift and cover your undercut—this defeats the purpose
- Consider adding texture or designs to your undercut (shapes, lines, patterns in your hair) if you want to maximize this element
- The swoop itself should have clean lines where it meets the undercut so the transition reads intentionally
- This style works beautifully as a more temporary look because swoop security is high-priority here
11. The Swooped High Pony Half-Up
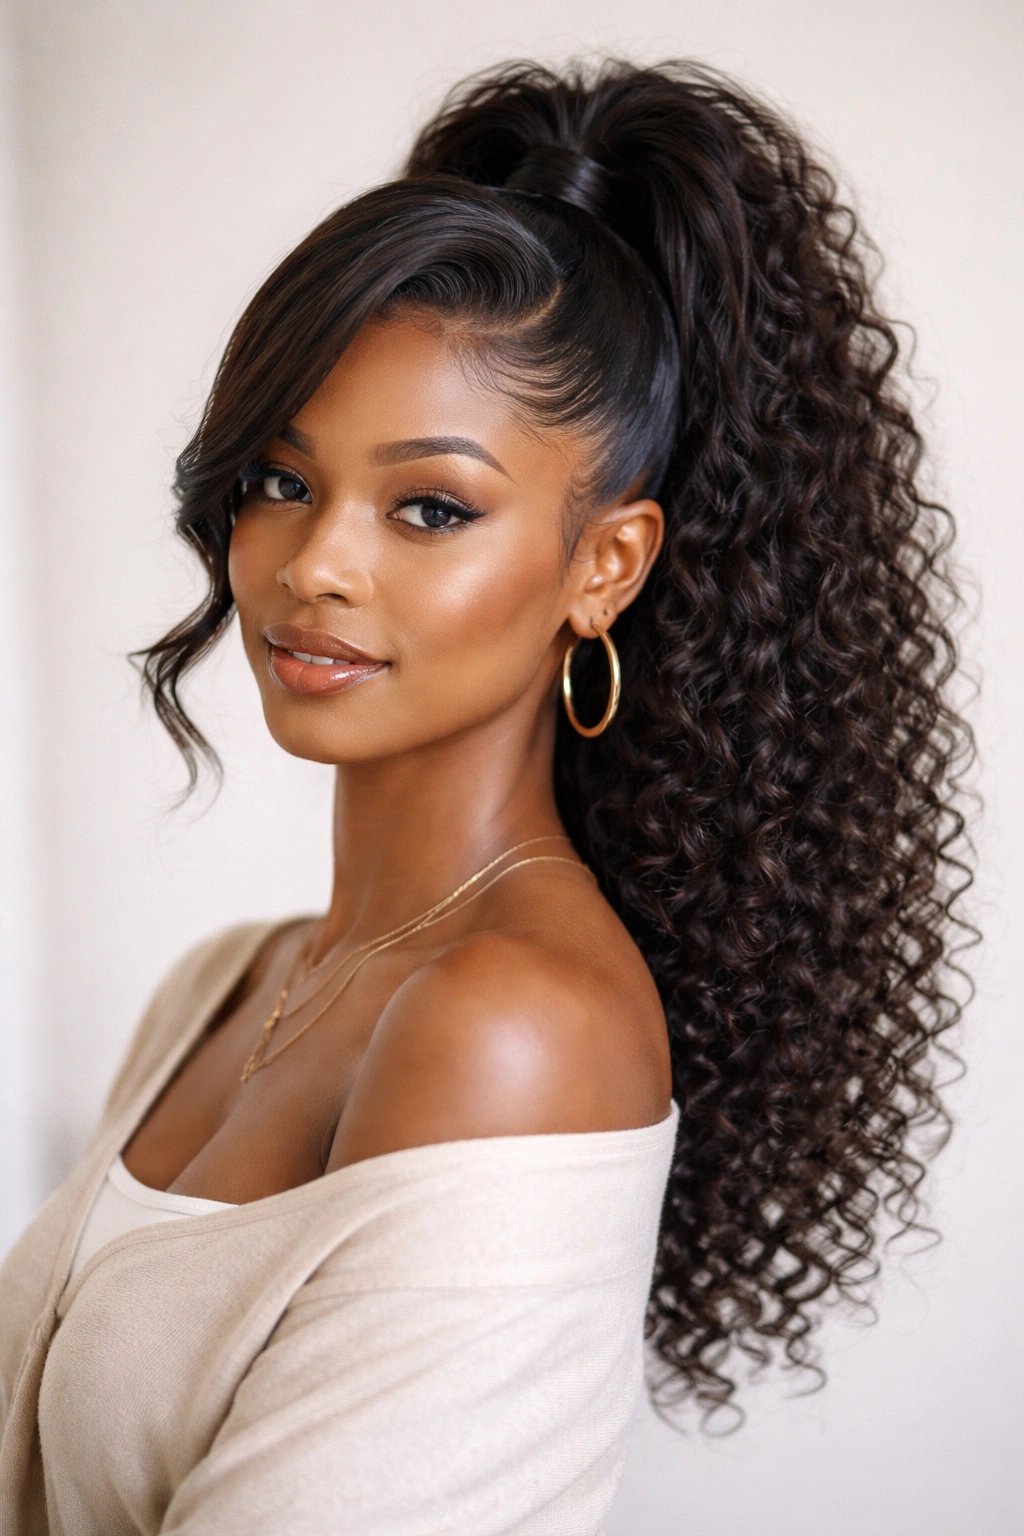
This bridges the gap between a traditional swooped style and a higher ponytail—you’re sweeping sections back and securing them at the crown, then adding more height by gathering the full top section into a ponytail above where your swoop was secured. The result is a style with clear visual interest and structure while still keeping the bottom half of your hair completely free.
Building the Layers
The trick here is securing your initial swoop in a way that allows you to add the ponytail without creating a lumpy, uncomfortable base. Use bobby pins for the swoop rather than a hair tie; then, when you create your ponytail above it, the hair tie will sit on top of the bobby pins without you noticing them. The layered effect creates depth and makes your hair look fuller than it actually is.
Execution Steps
- Create your swoop as you normally would, securing with bobby pins at the crown
- Gather the full top section (including the hair from your swoop) into a ponytail positioned above the bobby pins
- Use a hair tie or clip to secure the ponytail
- Gently ease out some curls from the swoop section to blend it with the ponytail and hide the layering
- The swoop becomes hidden detail that you see when you move but creates beautiful dimension in the overall look
12. The Swooped Half-Up Faux Hawk
For your boldest, most intentional styling day, the swooped half-up faux hawk creates serious height and attitude. Rather than a gentle curve, you’re creating sharp, defined sections that swoop from both sides and meet at a central line at the crown, creating that hawk-like silhouette while keeping everything half-up half-down. It’s architectural, modern, and absolutely eye-catching.
Creating the Hawk Structure
A faux hawk requires more deliberate product and pin placement than gentler swoop styles. You’re looking for defined texture and hold that maintains the shape all day. Braiding or twisting each swooped section before securing it helps create the structured lines you’re aiming for. The center line should have clear definition—this is where your style’s personality lives.
Styling and Maintenance
- Prep with a strong-hold curl cream or gel; you need definition that lasts
- Braid or twist sections from both sides, making the braids or twists fairly tight so they maintain defined shape
- Secure the braids at the crown center, with clear definition between left and right sides
- Allow some curls to escape from the braids for texture; a completely smooth braided hawk can read as trying too hard
- The bottom half should have maximum volume and movement, providing visual balance to the structured top
- Refresh by spritzing with refresher spray if needed; the braided structure typically holds beautifully for multiple days
Final Thoughts
Swoop styles for natural hair are about more than just moving hair around—they’re about working with your texture instead of against it, creating styles that last because they respect how your curls actually behave. Each of these twelve variations offers something different, whether you’re after quiet elegance or bold statement-making. The common thread running through all of them is that they’re protective, they’re adaptable to your specific curl pattern, and they keep the focus on celebrating what makes your hair uniquely beautiful.
The best swoop style for you depends on your hair length, curl pattern, lifestyle, and how much time you want to invest each morning. Some of these styles are genuinely five-minute affairs once you get the technique down; others reward a little extra attention. All of them look better on day-two or day-three hair, so don’t feel pressured to recreate them fresh daily. Experiment, find the variations that make you feel most confident, and remember that a swoop that feels good and holds securely matters infinitely more than achieving some imaginary perfect form. Your natural hair is already the main event—these styles just give it a frame.