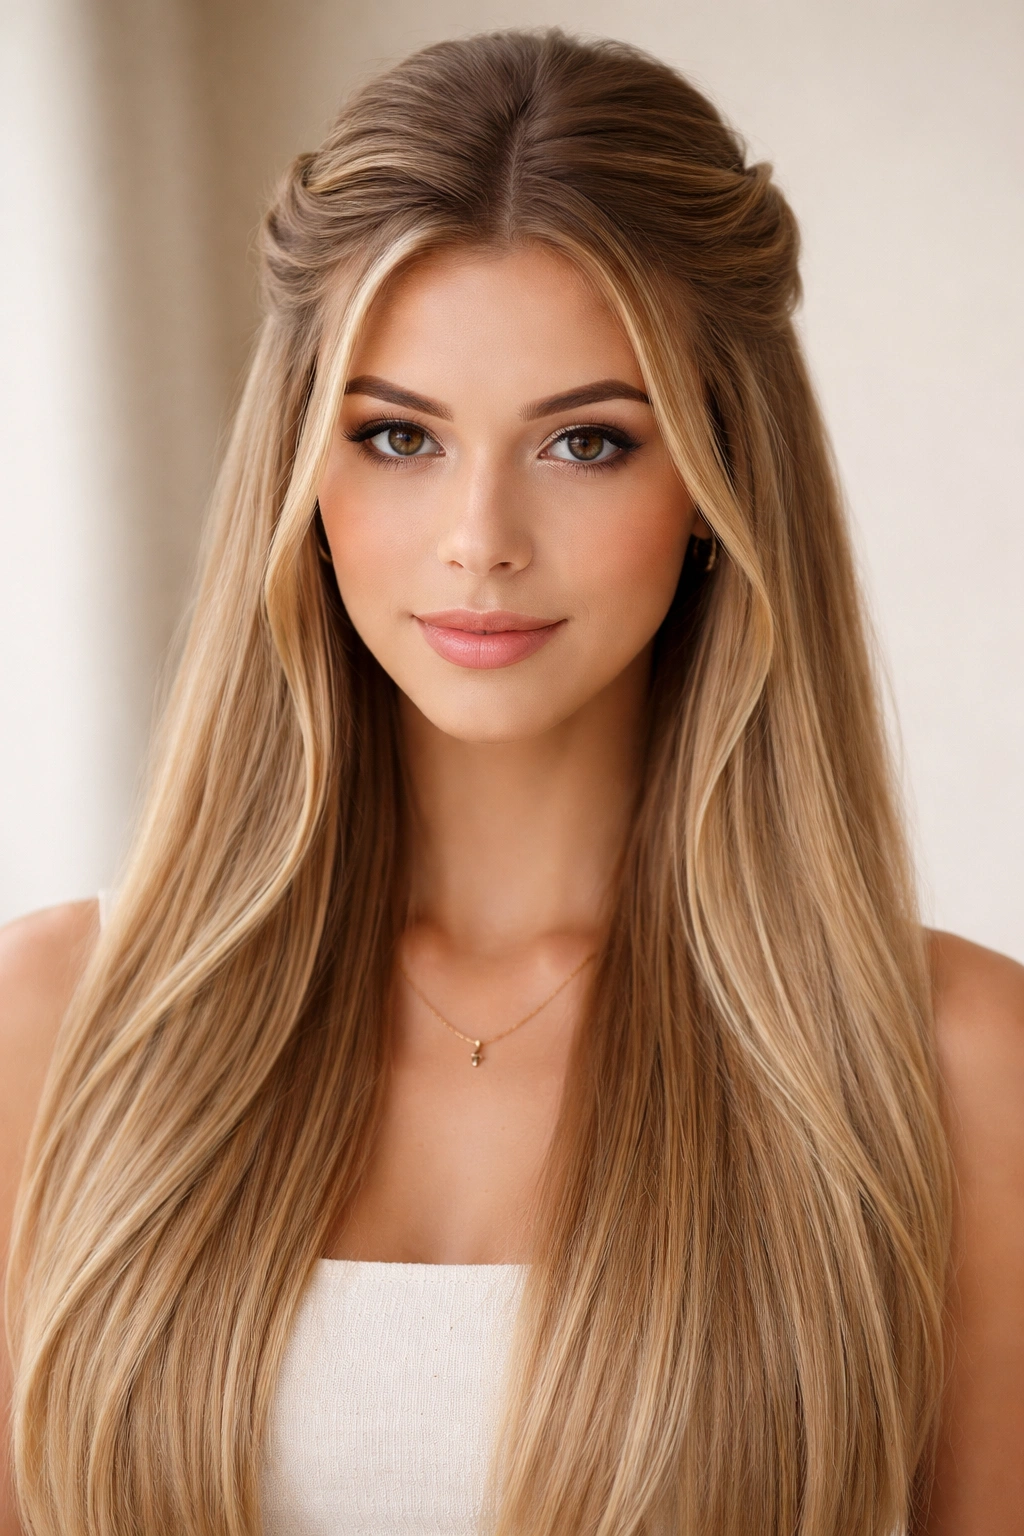
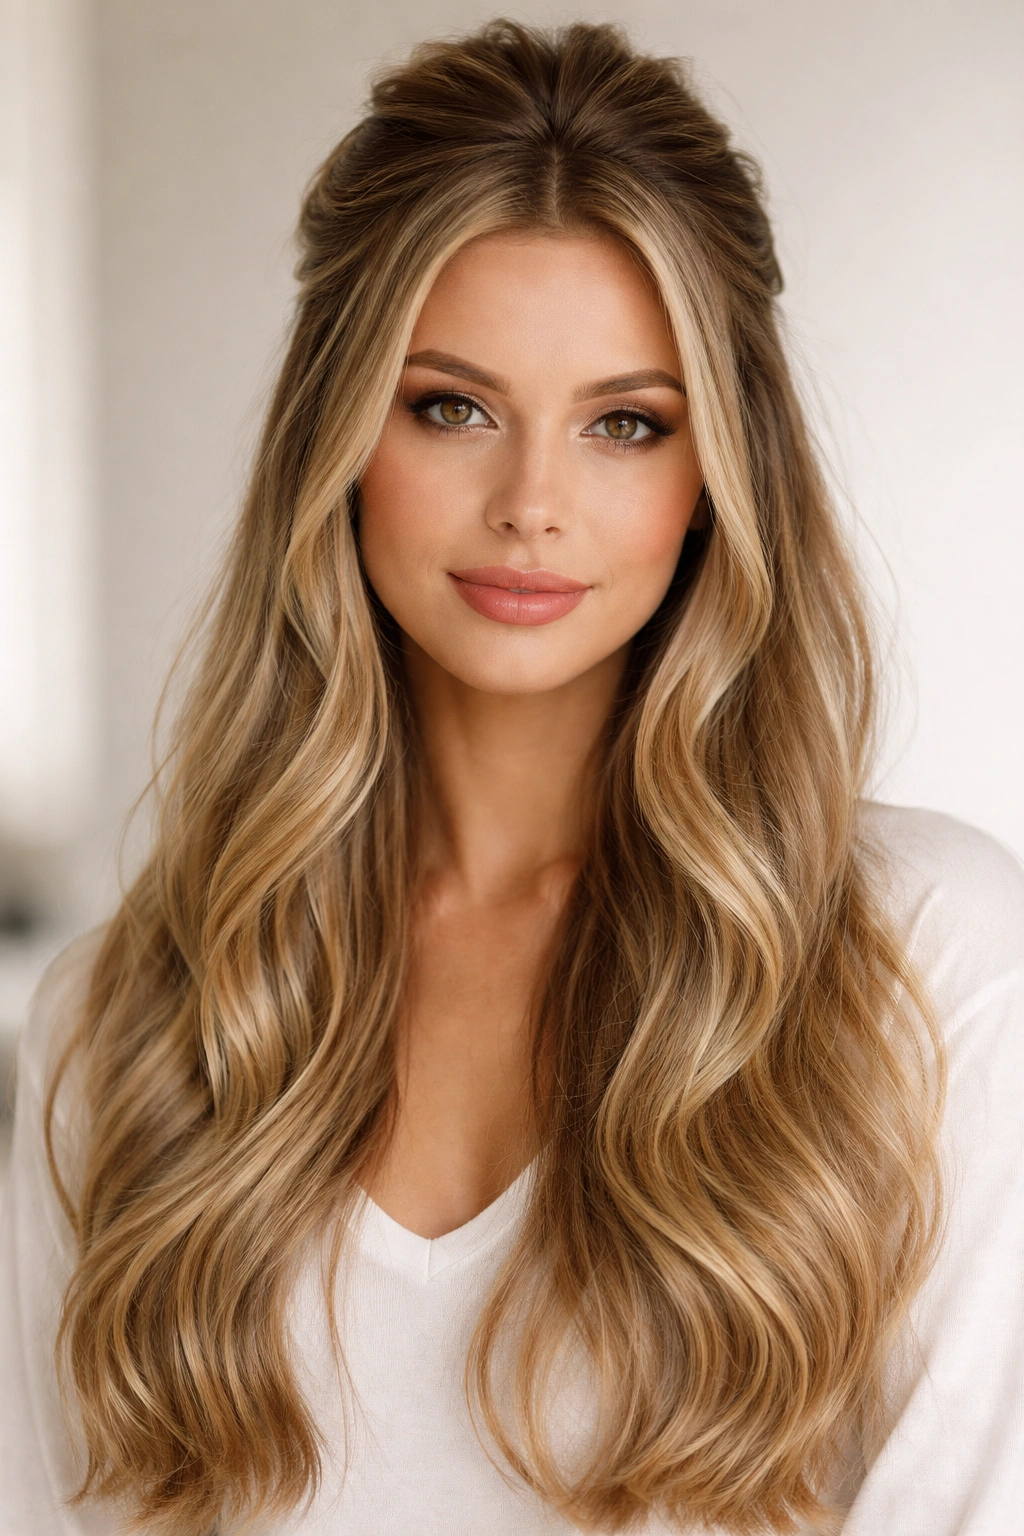
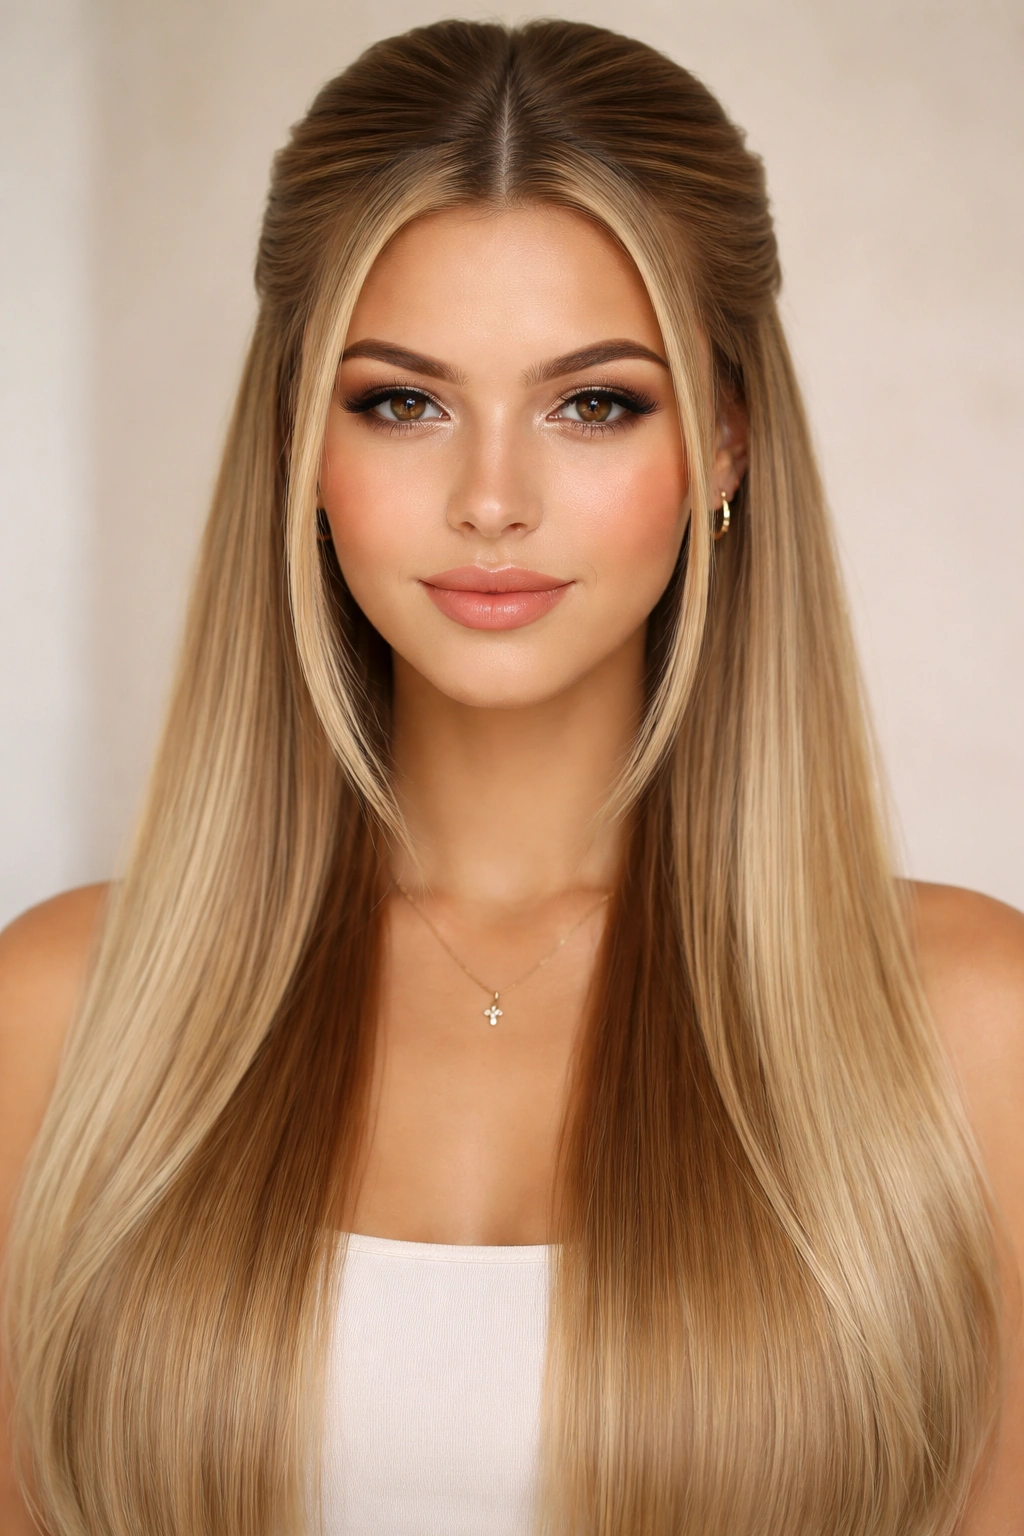
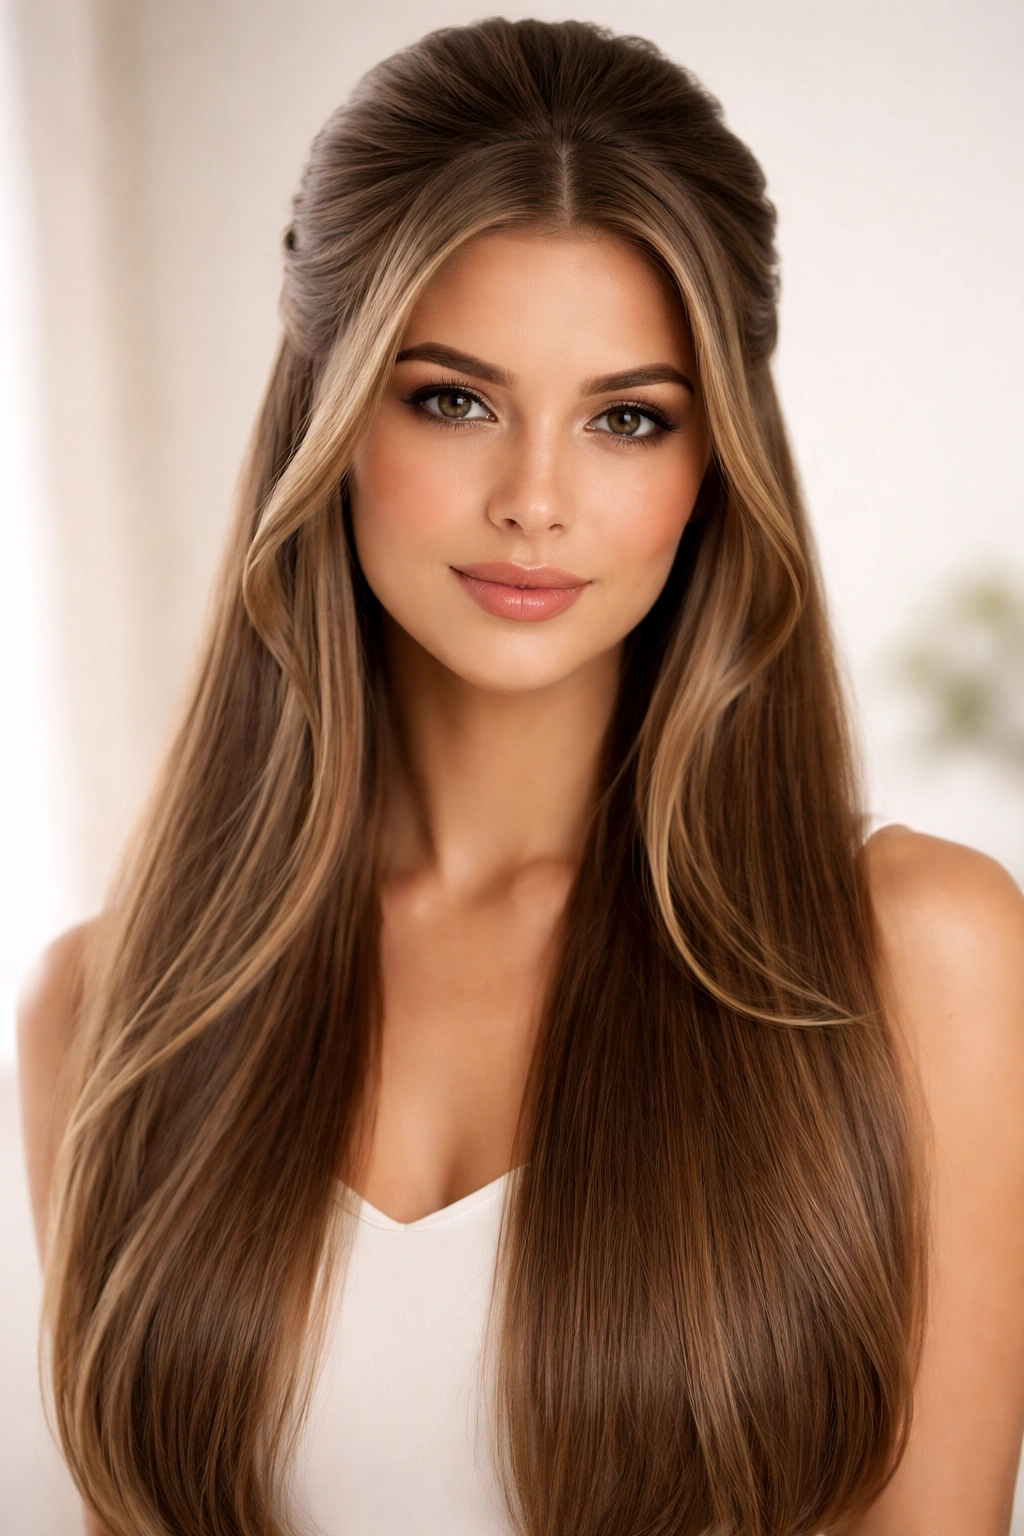
Half-up half-down hairstyles strike the perfect balance between putting your hair back and letting it flow freely—a practical choice that doesn’t sacrifice style. For those with long, straight hair, the possibilities are particularly stunning. Straight hair naturally catches light and creates clean, sharp lines that make this versatile style category shine in ways that other hair textures sometimes struggle to achieve.
The beauty of half-up half-down styles lies in their adaptability. Whether you’re heading to the office, a casual weekend gathering, a wedding, or just a regular Tuesday, there’s a half-up half-down approach that works. You can keep things minimal and polished, add texture and volume, incorporate braids, weave in accessories, or play with layers and movement. The front sections frame your face while the length moves freely down your back—it’s the kind of hairstyle that feels effortless while still looking intentional and put-together.
Long, straight hair is particularly forgiving for this style family because the texture already provides a clean canvas. You don’t need to fight curls or manage excessive frizz. Instead, you can focus on the architecture of the style itself—the placement of sections, the tension of the hold, the way the crown sits, whether you add a twist, a braid, a knot, or keep it simple and sleek. The following twenty styles each offer their own personality and wear-ability.
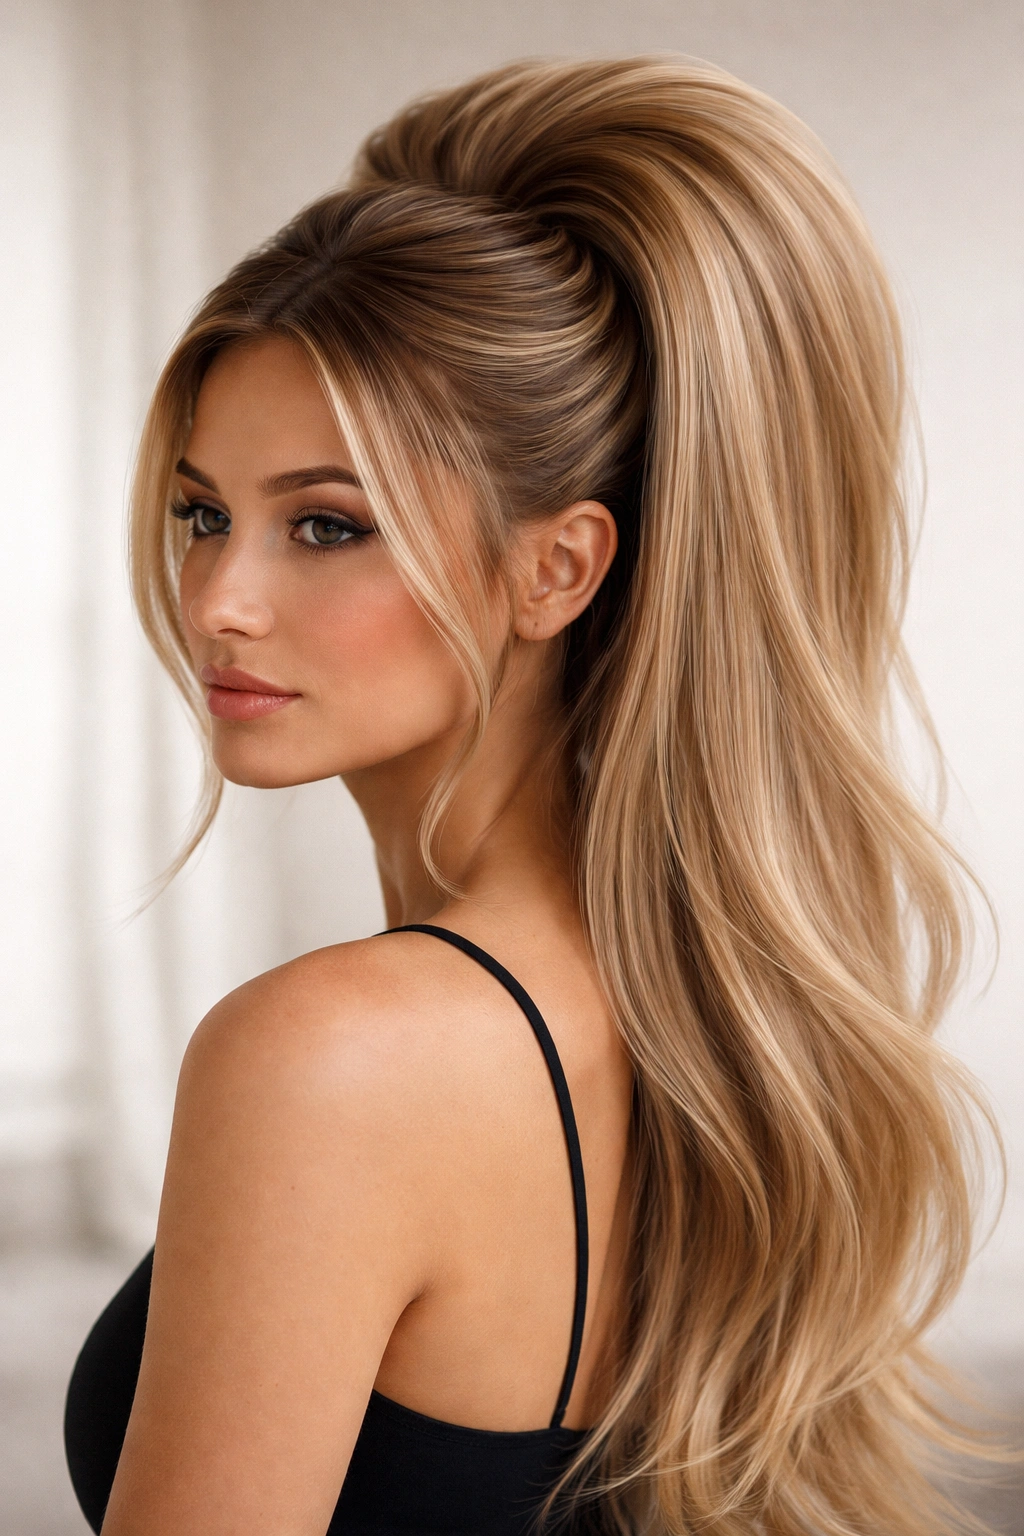
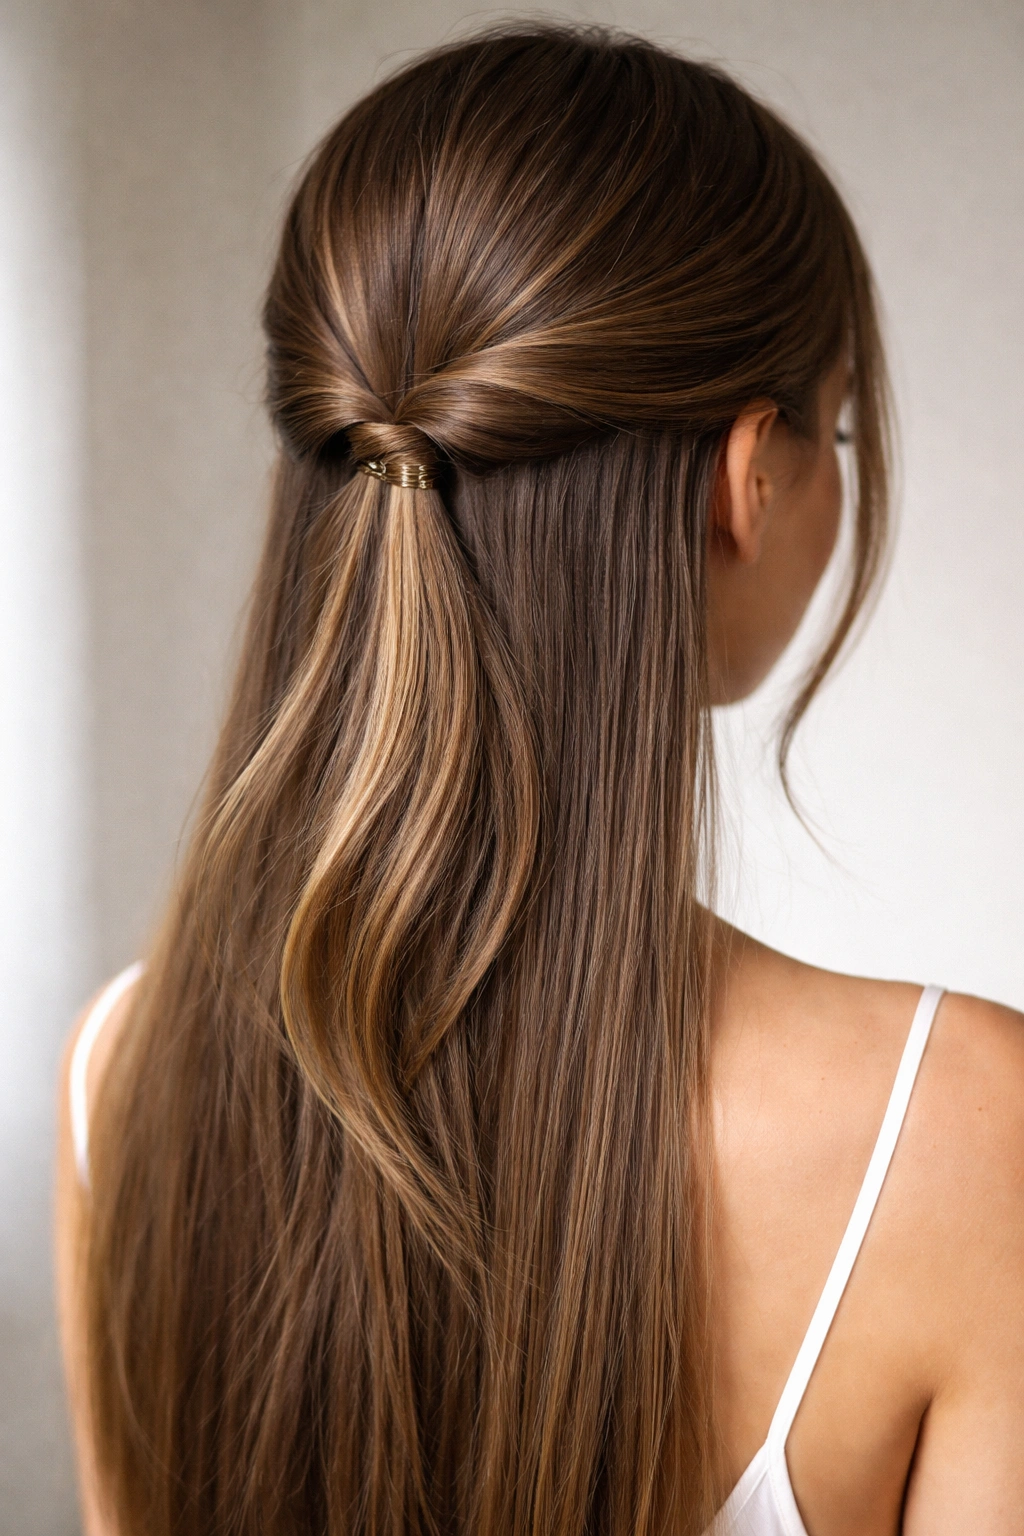
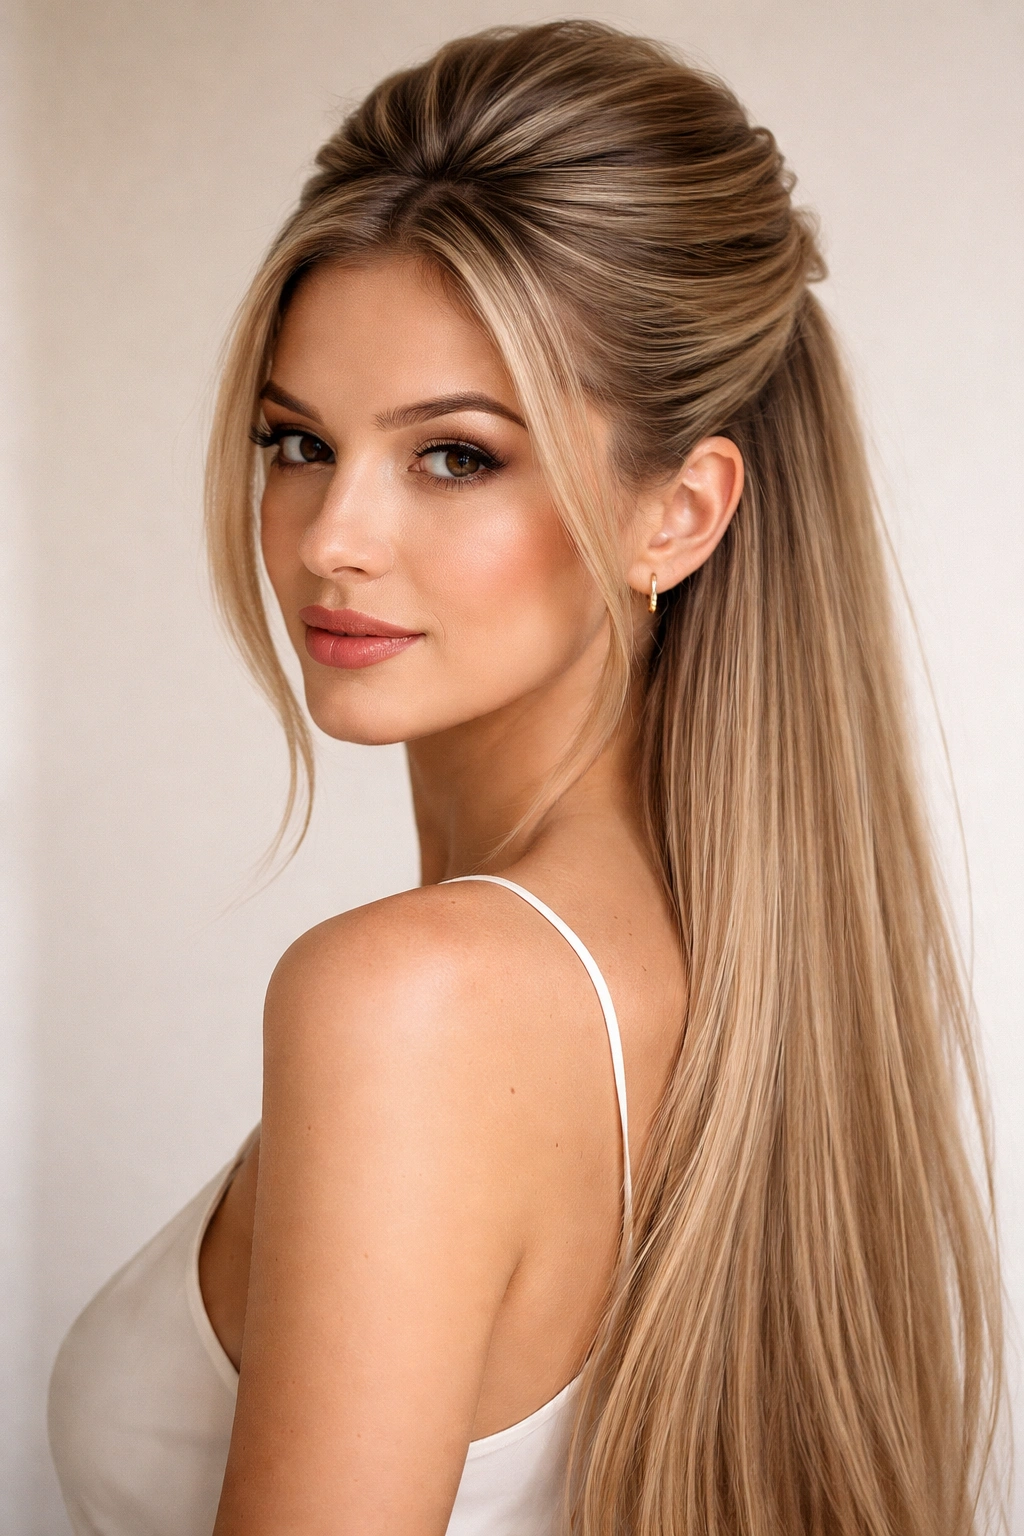
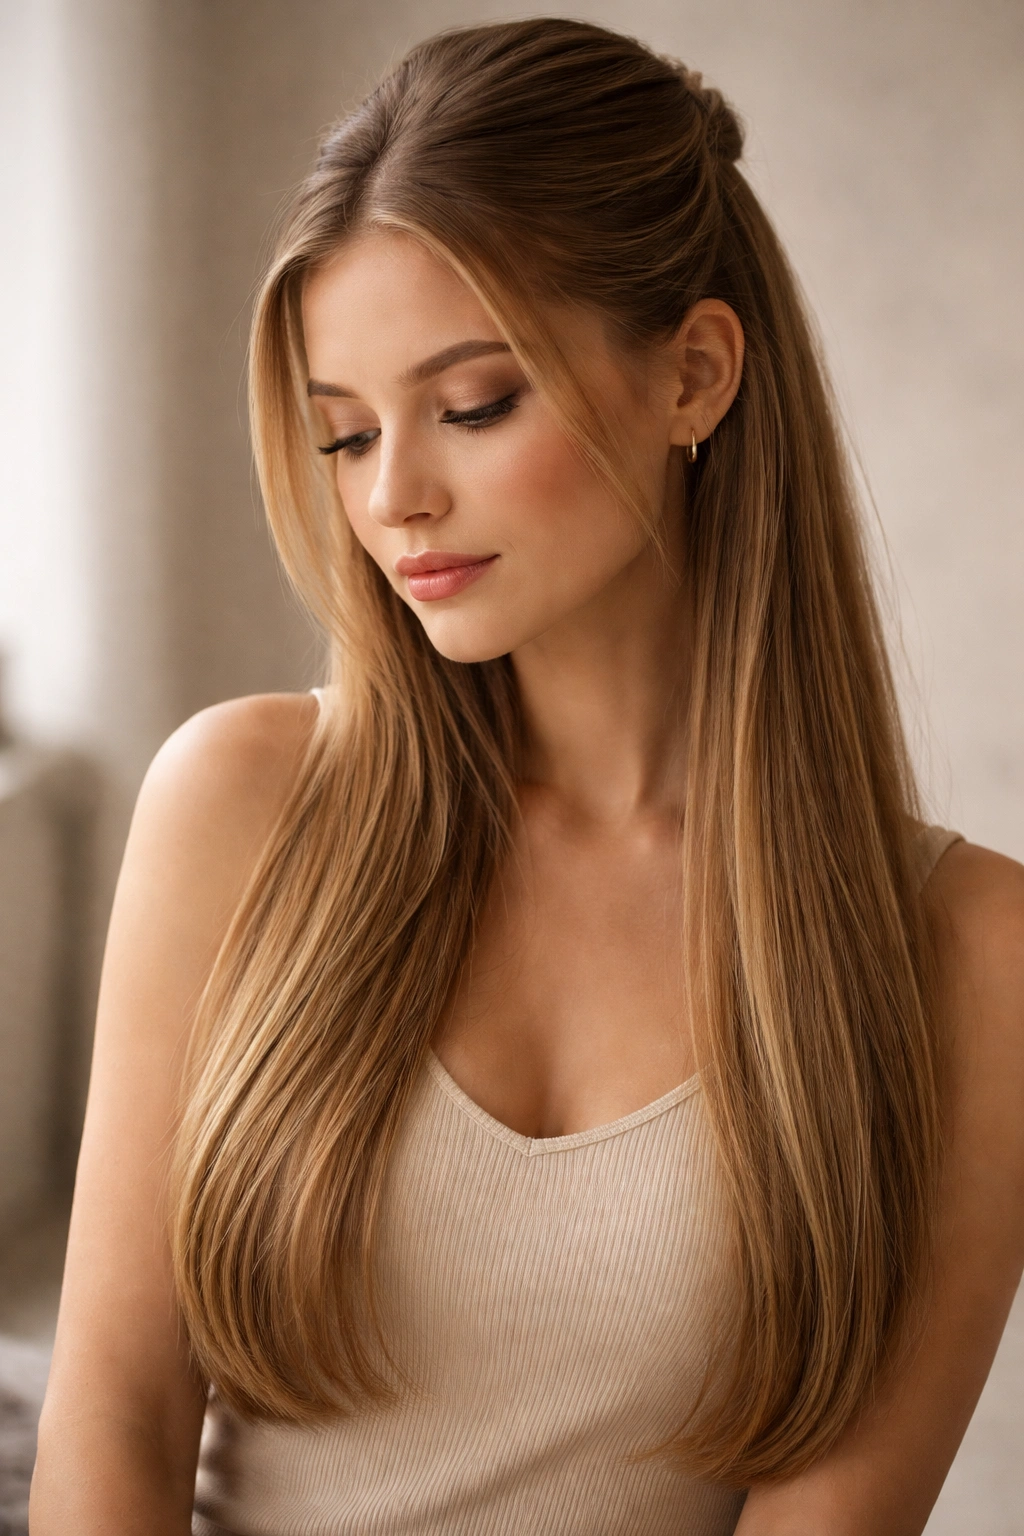
1. The Classic Sleek Ponytail
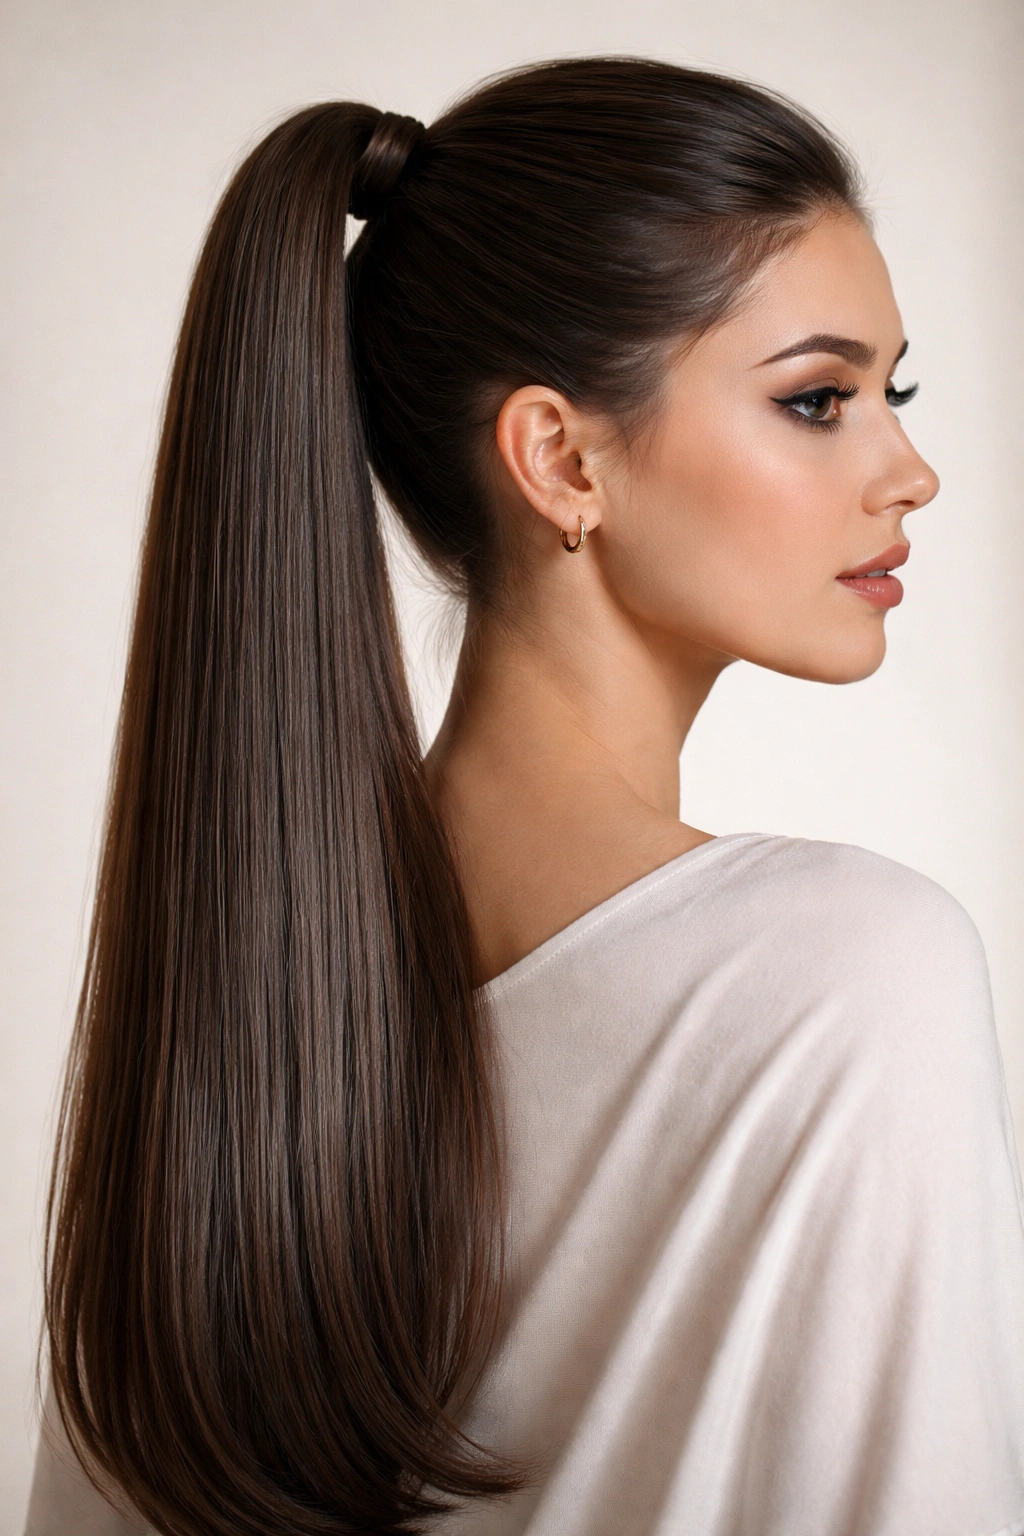
The most recognizable version of the half-up half-down look starts with taking a section of hair from each side of your head and securing it at the crown with a hair tie. This style is timeless for a reason—it’s clean, immediately professional, and takes less than two minutes to create.
Why It Works for Straight Hair
Straight hair holds this style beautifully because there’s no texture to fight against. The sleekness you naturally have becomes the style’s greatest asset, creating mirror-like reflections and a polished appearance. The clean lines make even a simple ponytail look intentional and refined rather than like you just grabbed your hair on the way out the door.
How to Get the Look
- Brush your hair smooth from front to back, creating a sleek canvas
- Take sections from slightly above your ears and brush them backward toward the crown
- Secure with a thin elastic at the back of your crown, pulling it tight for a neat, collected look
- If desired, release one small section from the front on each side to frame your face slightly
- Smooth any flyaways with a lightweight smoothing serum
Pro tip: Use a clear elastic or one that matches your hair color to keep the focus on the style rather than the hair tie.
2. The Twisted Half-Up Style
This version adds subtle dimension to the classic by introducing a gentle twist to the sections before securing them. It takes the basic half-up concept and elevates it with just a touch of movement and texture.
What Makes It Special
The twist creates the illusion of more volume and dimension without requiring backcombing or teasing. For straight hair, which can sometimes read as flat when worn too simply, that subtle twist is the small detail that transforms the look from basic to deliberately styled. It’s an easy upgrade that requires almost no additional skill beyond the classic style.
How to Create This Style
- Start with smooth, brushed hair
- Take a section from one side of your head starting at your temple
- Twist that section loosely as you move it back toward the crown
- Repeat on the opposite side, twisting in the same direction for symmetry
- Meet both twisted sections at the crown and secure with a hair tie
- Gently pull at the twisted sections to add a bit of texture and loosen them slightly
- Smooth the front pieces around your face with a comb
Pro tip: Twist the sections loosely rather than tightly for a more relaxed, intentional appearance.
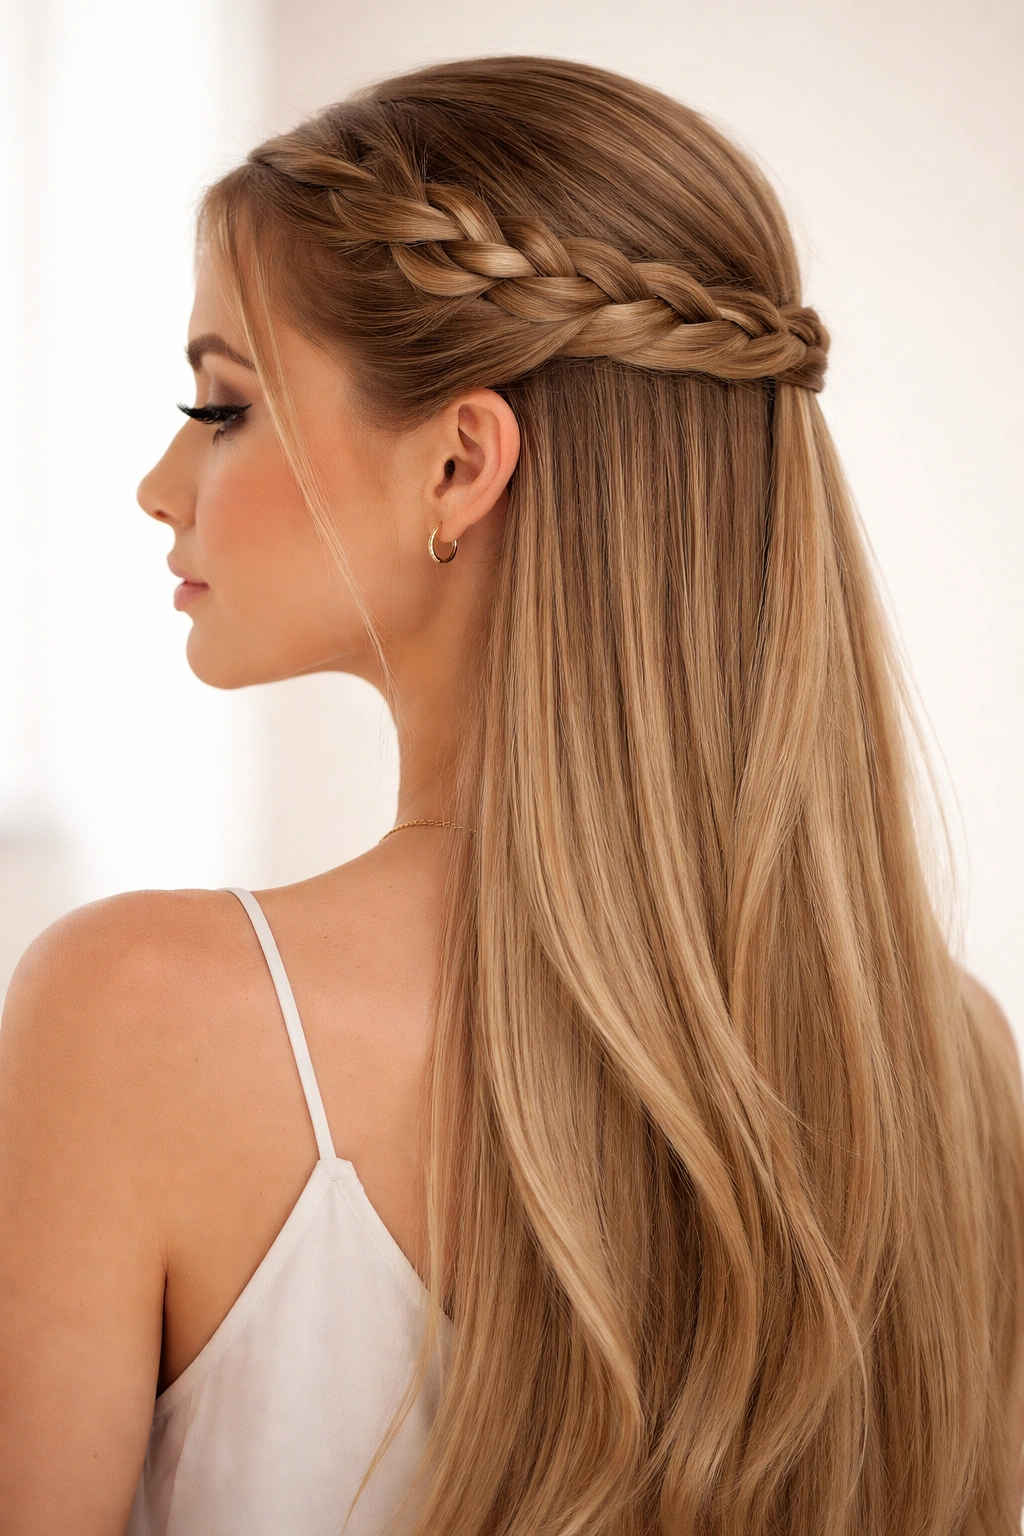
3. The Double Braid Half-Up
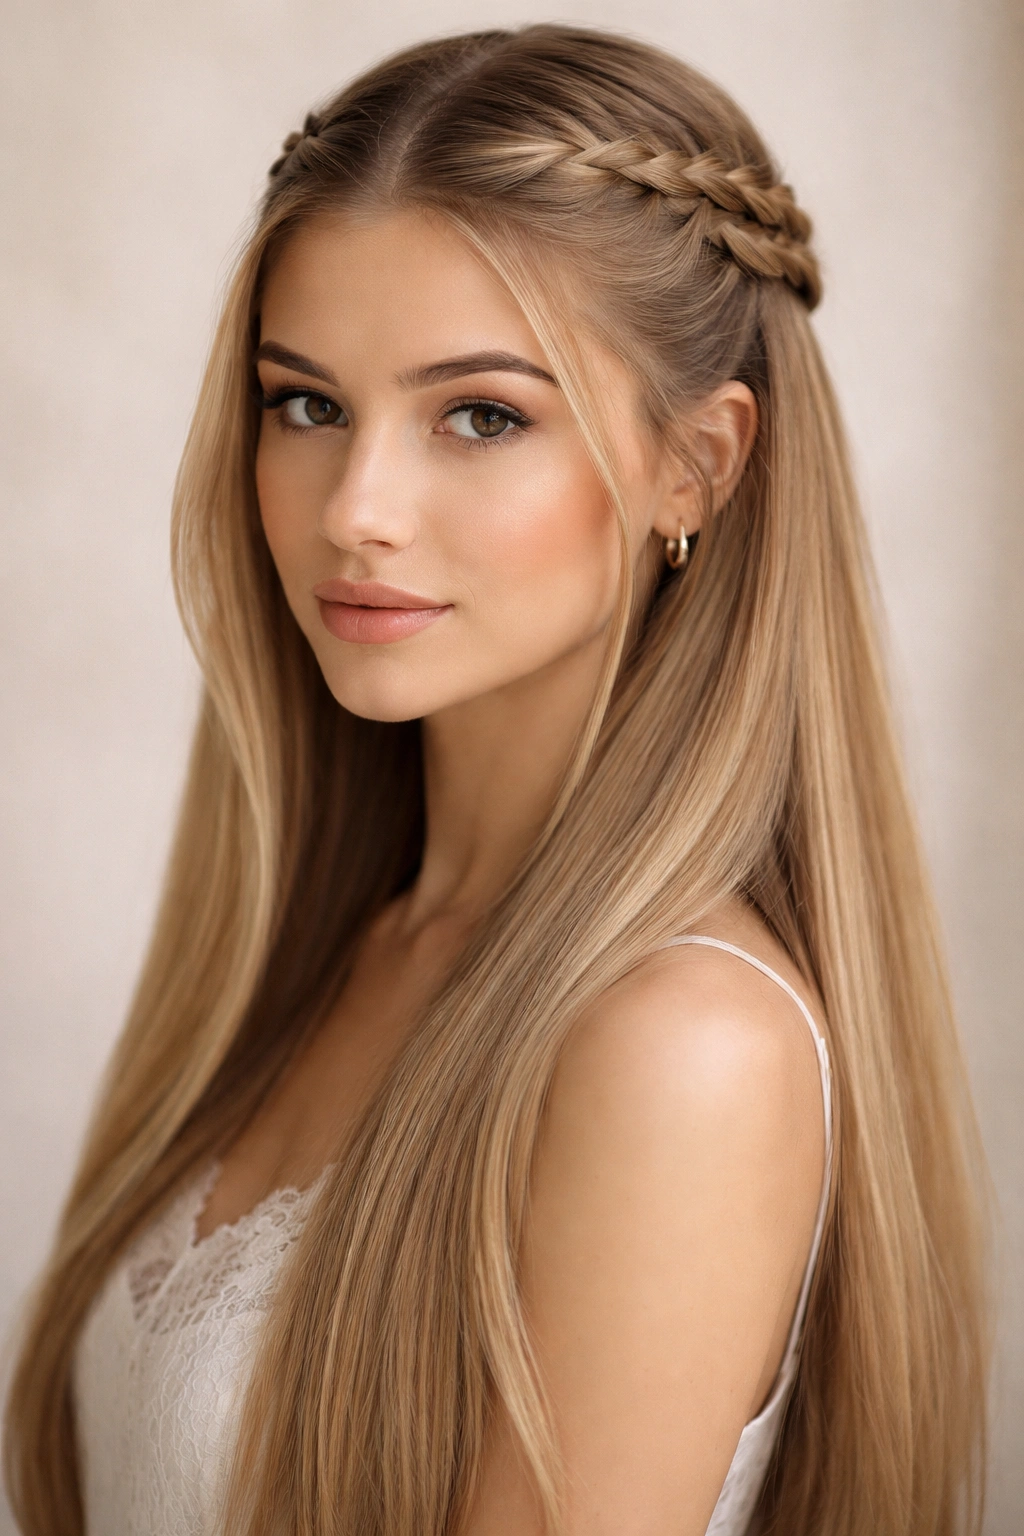
This style incorporates two braids instead of simple sections, creating a more textured and visually interesting crown detail. It’s the style choice for when you want to look like you actually spent time on your appearance.
Why Braids Elevate the Look
Braids automatically suggest intention and effort, even when they’re not particularly complicated. A simple three-strand braid done on each side of your head says “I put thought into this” in a way that a simple twist sometimes can’t quite match. The texture of the braid also breaks up the uniform sleekness that very long, straight hair can sometimes project.
Steps to Execute the Style
- Divide your hair into two sections with a center part or side part, depending on your preference
- Starting from near your temple on one side, create a three-strand braid working backward toward the crown
- Repeat on the opposite side, braiding in the same direction
- Secure both braids at the crown with a single elastic or two small elastics clipped together
- Gently pull at sections of each braid to add texture and width
- Leave the rest of your hair down and smooth for contrast
Pro tip: Braid slightly loosely rather than tightly for a softer, more flattering look that frames the face better.
4. The Side-Swept Half-Up
Instead of a symmetrical style where sections are equal on both sides, this version sweeps more hair from one side and creates a half-up arrangement that skews toward one shoulder. It’s inherently more romantic and asymmetrical.
The Appeal of Asymmetry
Asymmetrical styling draws the eye and creates visual interest through imbalance rather than matching perfection. For long hair, which can feel visually heavy, the asymmetry of this style prevents the look from feeling too formal or severe. It’s softer and more approachable than its symmetrical cousins.
How to Style It
- Brush your hair smoothly, creating a deep side part
- Take a larger section from the fuller side of the part
- Sweep this section back and across toward where you want to secure it (not quite at the center crown, but slightly to the opposite side)
- Secure with a hair tie
- Leave the smaller section from the lighter side of the part down and framing your face
- Leave the back length completely down
Pro tip: This style looks especially good with a curved bobby pin that mimics the sweep, used to secure the hair tie rather than a standard elastic.
5. The Voluminous Crown Ponytail
This style adds height and fullness at the crown, creating a more dramatic and eye-catching version of the classic half-up. It requires a tiny bit of backcombing but pays off with a noticeably more dimensional appearance.
Building Volume Without Damage
You don’t need teasing or heavy backcombing to achieve volume. Instead, gently backcomb just the roots of the sections you’ll be securing at the crown, then smooth the surface layer with your brush. This technique adds height at the base while keeping the hair looking smooth and healthy on the surface.
Steps for This Elevated Look
- Take sections from slightly lower and further back than you normally would for a half-up
- Gently backcomb the roots of these sections at the crown using a fine-tooth comb
- Smooth the surface layer with your brush
- Pull the sections up and back, gathering them at the crown with height and fullness
- Secure with a hair tie
- Smooth any flyaways and add face-framing pieces if desired
Pro tip: Use a smoothing serum or light hairspray on the surface to keep flyaways in place while the backcombing underneath creates the volume foundation.
6. The Half-Up with Loose Waves
This style combines the structured top half with loose, flowing waves in the bottom half, creating contrast and movement. It bridges the gap between sleek and romantic styling.
Texture Contrast on Straight Hair
When you add waves to the lower half of long, straight hair, the difference between the smooth top and the textured bottom becomes pronounced and flattering. The waves catch light differently than the straight sections, creating dimension. The overall effect is more interesting than straight hair alone, without requiring your entire head to be wavy.
Creating the Waves
- Style your half-up in your chosen method (twist, braid, or simple sections)
- Take a 1-1.5 inch section of hair from the bottom half
- Using a curling iron or wand set to a medium heat (around 350-375°F), wrap the section around the barrel
- Hold for 2-3 seconds, then gently release
- Repeat this process on all the lower hair, alternating which direction you wrap the sections for natural-looking waves
- Let the waves cool for a minute, then gently finger-comb through them to loosen and blend
Pro tip: Cool waves hold their shape much better than warm ones, so let them set for at least a minute before touching or styling further.
7. The Sleek Low Half-Up
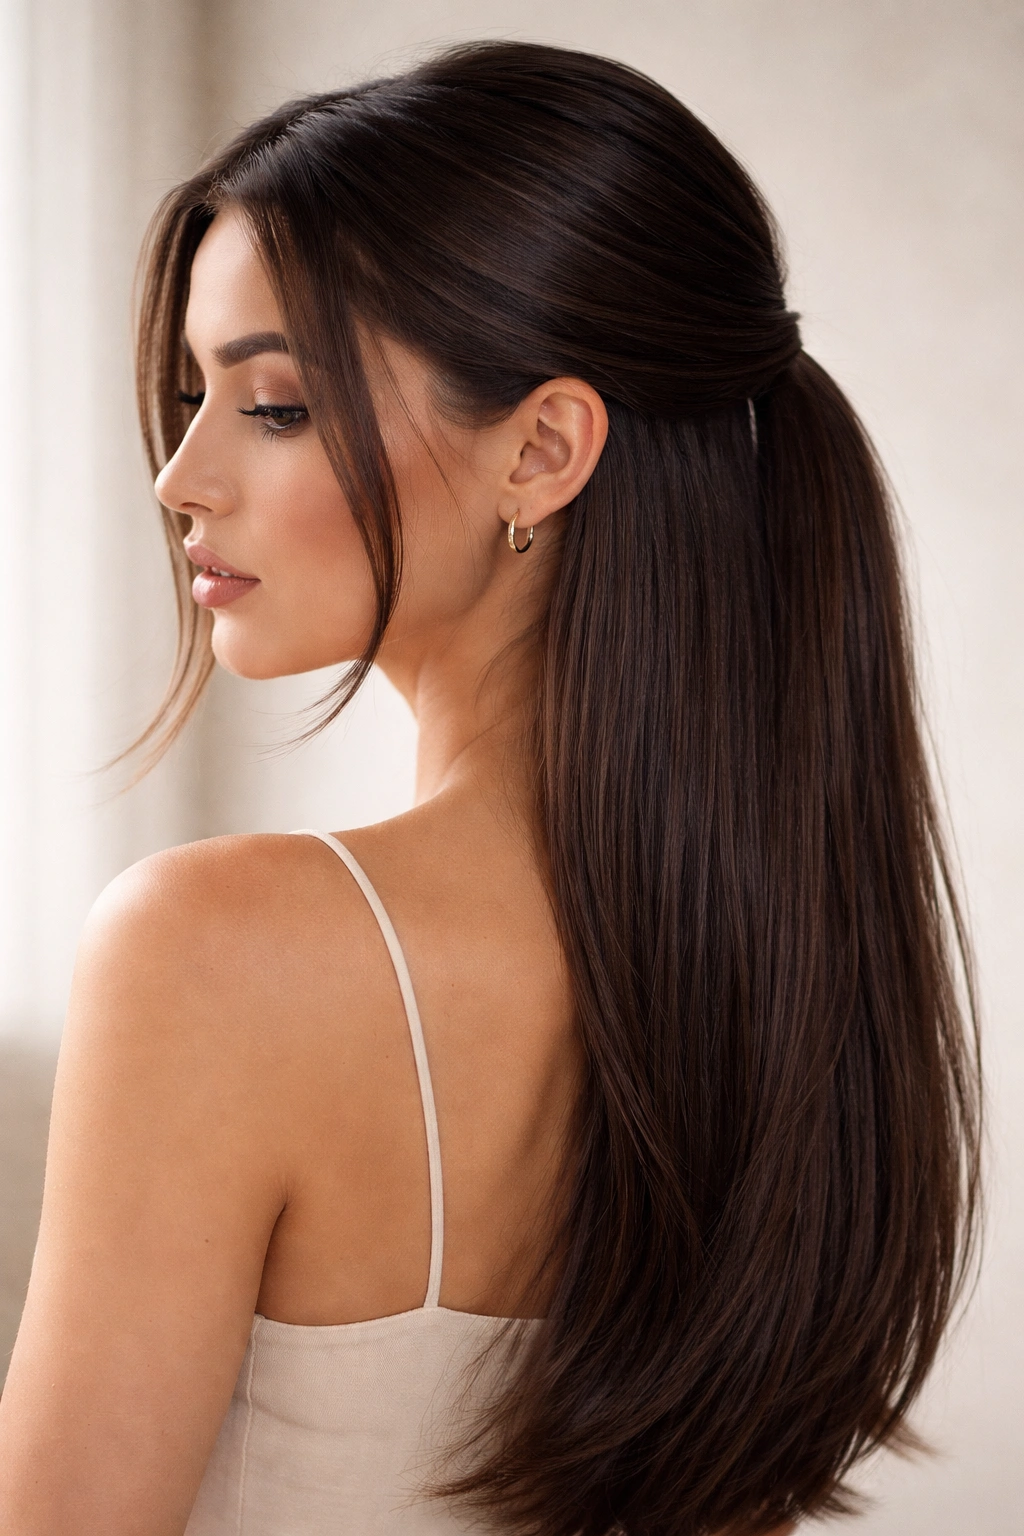
This version places the ponytail lower, at the nape of the neck rather than the crown, for a more relaxed and modern feel. It’s somehow both sophisticated and casual at the same time.
Why Lower Positioning Changes Everything
Dropping the securing point lower on the head automatically makes a style feel less formal and more contemporary. It also helps long hair look less heavy because you’re distributing the visual weight differently. The lower placement also frames the face differently, leaving more of the front face visible.
How to Achieve This Style
- Brush your hair smooth
- Take sections from your temples, about ear-level or slightly below
- Sweep these sections back and down to the nape of your neck
- Secure at approximately the middle-back of your head, lower than a typical crown placement
- Leave all the hair in front free and face-framing
- Smooth everything with a fine-tooth comb
Pro tip: This style works especially well with a decorative hair claw or barrette instead of a standard elastic—it adds visual interest and catches light.
8. The Hidden Elastic Half-Up
This style uses bobby pins instead of an elastic to secure the half-up section, hiding the hair tie completely for a seamless, almost sculptural appearance. It’s more complex to execute but worth the effort for special occasions.
The Invisible Technique
By using bobby pins instead of an elastic, you can tuck the securing pins within the hair itself, creating the illusion that the top section is held in place by structure alone. This technique requires practice but creates a surprisingly sophisticated result.
Steps to Perfect This Method
- Create your chosen style (braids, twists, or smooth sections) working toward your securing point
- Instead of using an elastic, take one bobby pin and insert it horizontally through your sections
- Add 2-3 more bobby pins in the same area, crisscrossing them slightly for security
- Tuck all the pin ends beneath the hair you’re securing so they’re hidden
- Gently smooth the surface hair to further conceal any visible pins
- Use a light hairspray to keep everything in place
Pro tip: Practice this technique a few times before an important event—it takes coordination to position pins securely while keeping them hidden.
9. The Half-Up with Hair Accessories
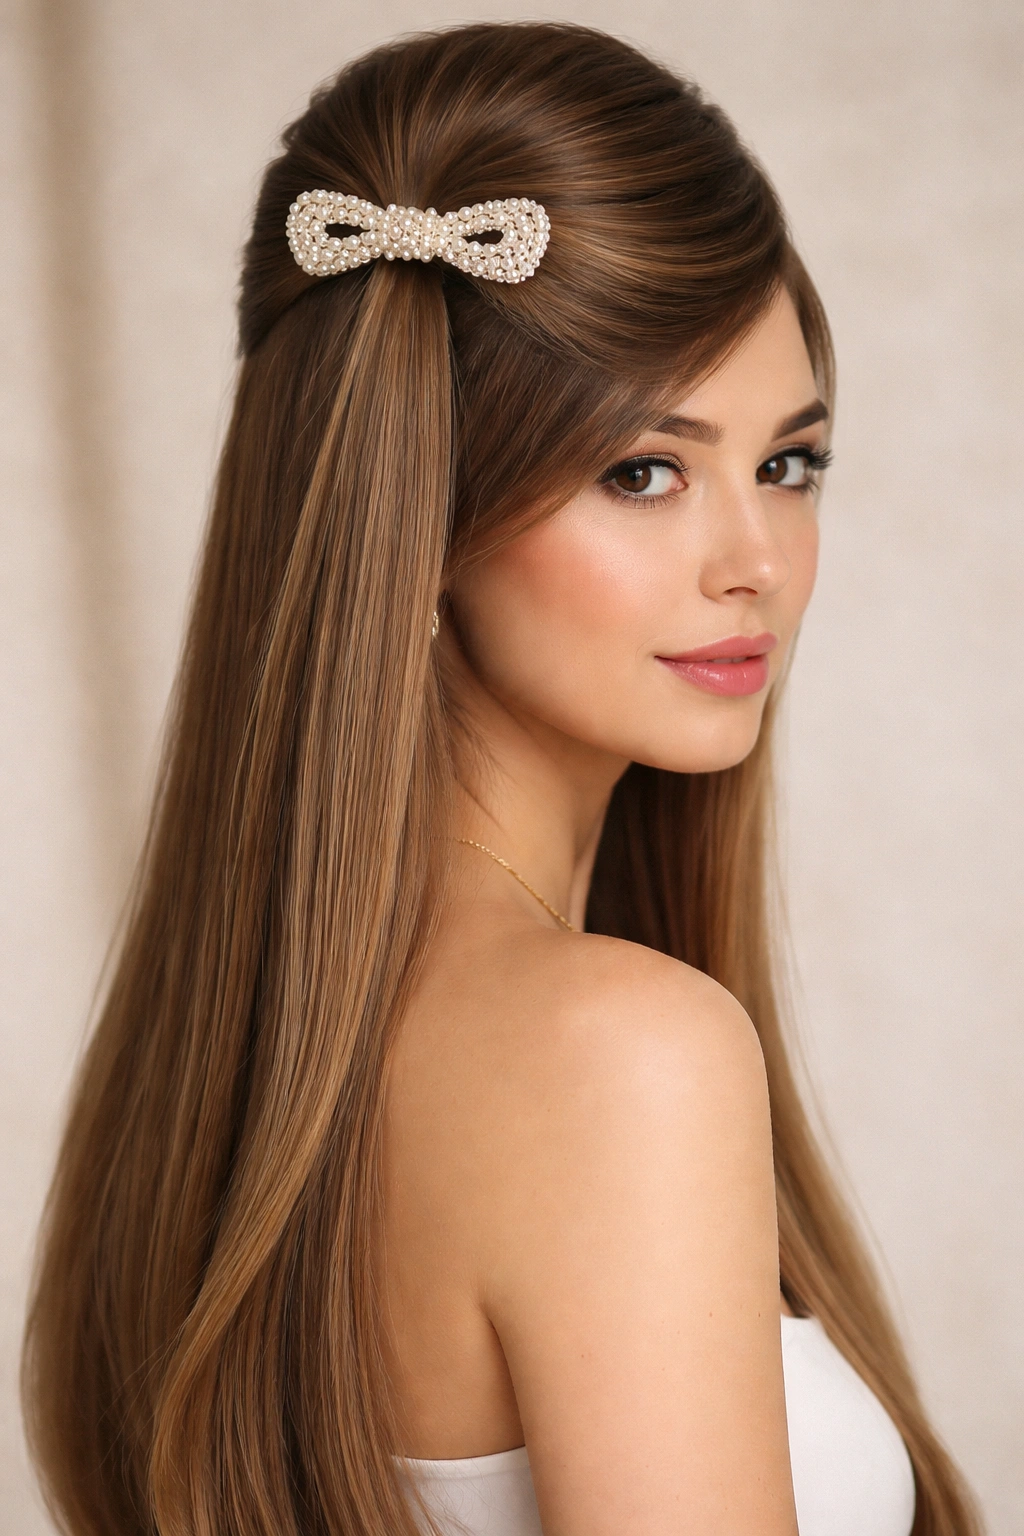
This style keeps the focus on an attractive hair accessory—a pearl clip, a silk bow, a decorative comb, or an embellished barrette—that replaces a standard elastic and becomes the focal point of the entire look.
Making Accessories Do the Work
When you choose a beautiful accessory to secure your half-up, the accessory itself becomes the statement. This approach means you can keep the hair itself very simple—just a basic section or gentle twist—and let the accessory shine. It’s an efficient way to elevate your styling without adding complexity.
How to Style with Accessories
- Gather your half-up section using your chosen method (twist, braid, or smooth sections)
- Instead of securing with an elastic, use a decorative clip, comb, or barrette appropriate for your hair thickness
- Make sure the accessory is positioned securely—you may need to backcomb slightly at the securing point for grip
- Smooth any flyaways and position the accessory so it catches light
- Step back and check that the accessory sits level and looks intentional
Pro tip: Heavier accessories work better on hair with some texture or hold; for very smooth straight hair, use light hair clips or silk bows that won’t slip.
10. The Braided Crown Half-Up
This style creates a more elaborate crown effect by braiding a section completely around the back of the head before joining it with more hair for the final half-up. It’s more intricate but doable for home styling.
The Visual Impact of a Crown Braid
A braid that curves around the back of your head rather than running straight back creates a more dimensional, special-occasion appearance. The curved path of the braid adds movement to the top of the head and looks intentionally styled in a way that reads as “professional hairstyle” rather than “just pulled back.”
How to Create This Look
- Take a section of hair from one temple and begin braiding backward, but angle your braid toward the back of your head rather than straight back
- Continue braiding, gradually incorporating small sections of hair from the back as you go, creating a curved path
- When your braid reaches the opposite side of your head (near your opposite ear), finish the braid and secure it temporarily with a small elastic
- Take sections of your remaining loose hair and join them with the braided section, securing everything together at your chosen anchor point
- Gently loosen the braid sections for a softer appearance
Pro tip: Use bobby pins to tack the braid against your head as you create it—this keeps it in the position you want and creates a more elegant curve.
11. The Pinned Sections Half-Up
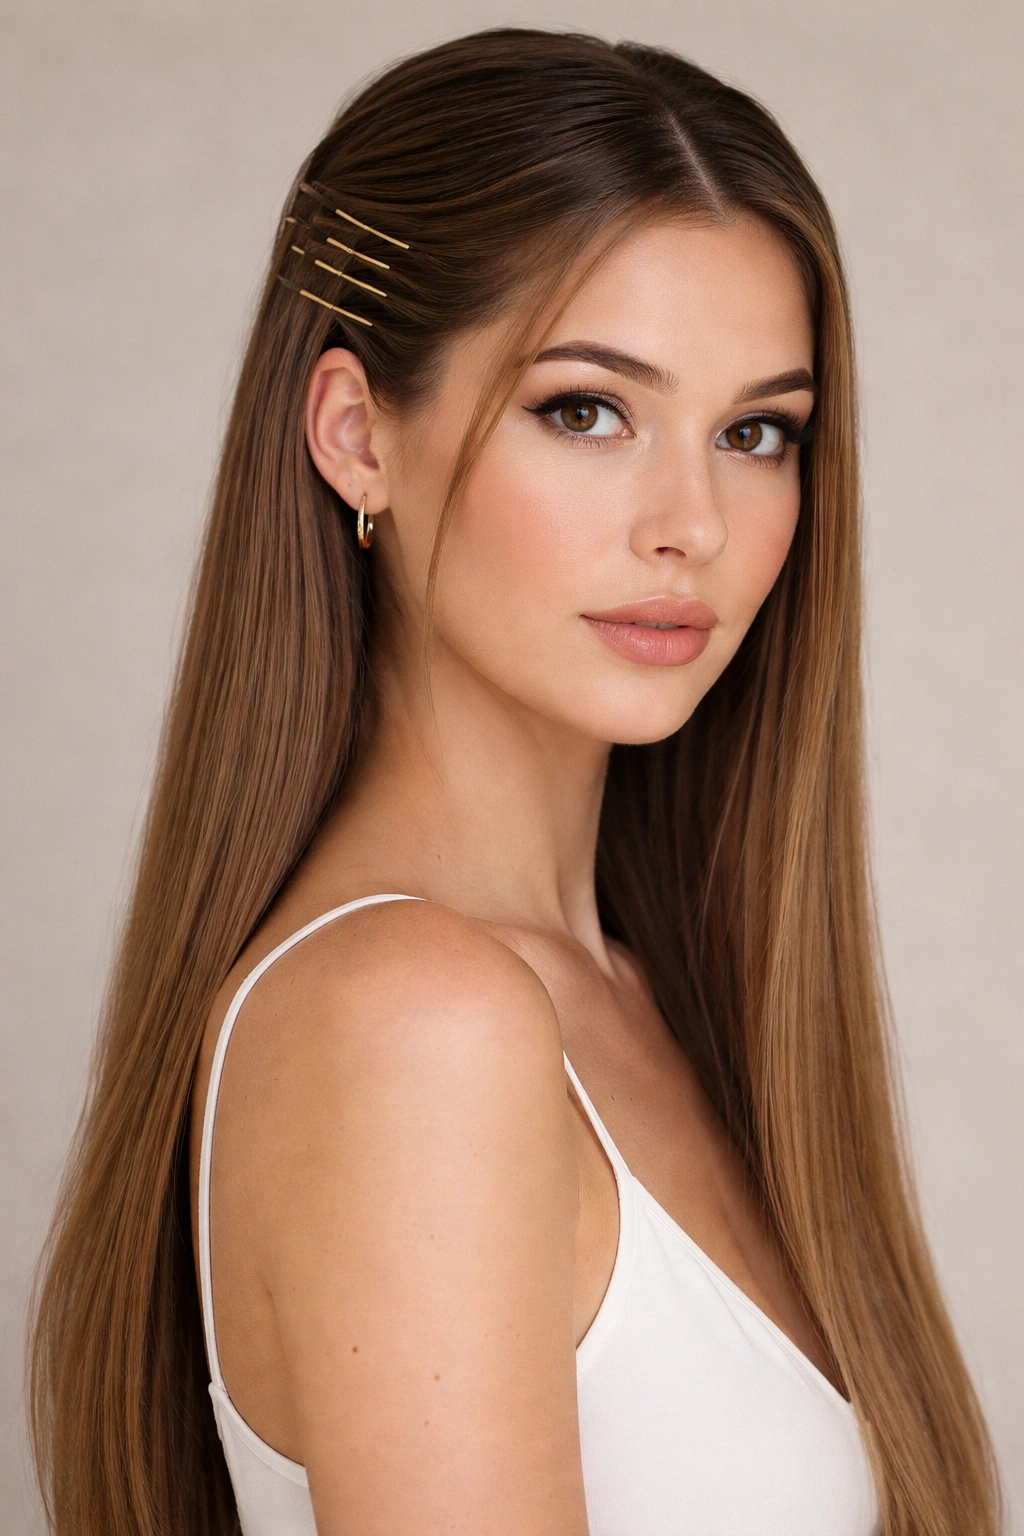
This style uses bobby pins to secure individual smooth sections against your head rather than gathering them into a ponytail, creating a more sculptural, architectural look. It’s particularly flattering and modern.
Why Pinning Rather Than Tying Works
When you pin sections to your head rather than securing them at a point, you’re creating a more structured, intentional appearance. The sections become part of the overall line and shape of your head rather than being visually separate. It’s a more sophisticated approach that reads as genuinely styled.
Steps for Pinned Sections
- Brush your hair very smooth
- Take a section from your temple on one side
- Pull it back and position it where you want it to sit on your head
- Use 2-3 bobby pins to secure it flat against your head in that position
- Repeat on the opposite side, mirroring the placement
- Smooth any flyaways and ensure all pins are hidden beneath the hair
- Use a light hairspray for longevity
Pro tip: Match your bobby pin color exactly to your hair color—even dark pins become visible on light hair or vice versa.
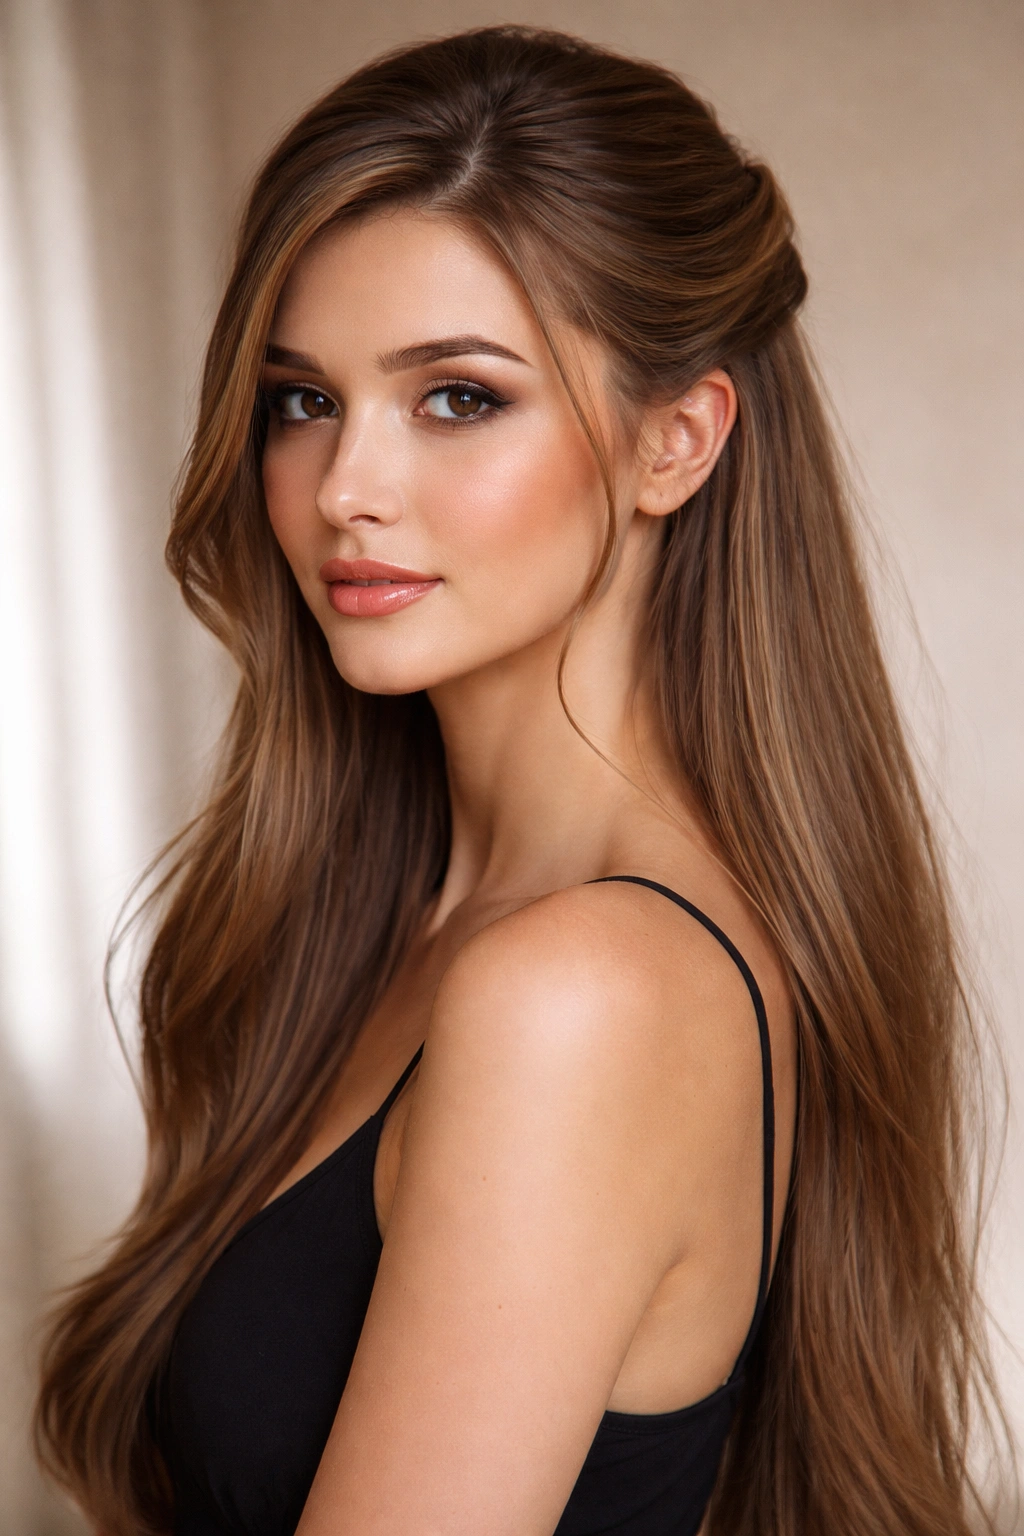
12. The Half-Up Half-Down with Face-Framing Layers
This style keeps extra-long layers in the front completely down while securing the middle and back sections, creating movement and dimension around the face. It’s flattering and modern.
Strategic Layering Placement
If your hair has longer layers in the front, you can use those to your advantage by deliberately keeping them out of your half-up arrangement. The contrast between the pinned sections and the floating front layers creates visual interest and frames your face beautifully without requiring you to intentionally create layers.
How to Style It
- Identify your longest front layers—these will stay down completely
- Take sections starting behind your front layers, from roughly your temples back
- Create your chosen half-up style (braids, twists, or smooth sections) using only the hair behind the front layers
- Let your front layers hang freely, framing your face completely
- The contrast between the textured or gathered top and the smooth front layers creates an intentional, flattering look
Pro tip: Add a slight wave to the face-framing layers to increase dimension and prevent the style from looking too severe.
13. The Twisted and Pinned Half-Up
This combines the twisted half-up technique with pinning instead of tying, creating a style that’s more textured than a simple pin arrangement but more secure than a loose twist.
The Best of Both Methods
Twisting your sections creates texture and visual interest. Pinning them rather than tying them keeps that texture contained and structured against your head. The result is a style that looks soft and textured but also polished and intentionally styled—an excellent balance.
Creating This Hybrid Style
- Take a section from one temple and twist it loosely as you direct it backward
- Instead of continuing the twist all the way to a gathering point, use bobby pins to attach the twist to your head at your desired height
- The twist should be attached flat against your head, with the pin hidden within the twist itself
- Repeat on the opposite side
- Gently tease the twisted sections slightly to add texture and width
- Smooth flyaways with a fine-tooth comb
Pro tip: Looser twists are easier to pin and create a softer, more flattering appearance than tight twists.
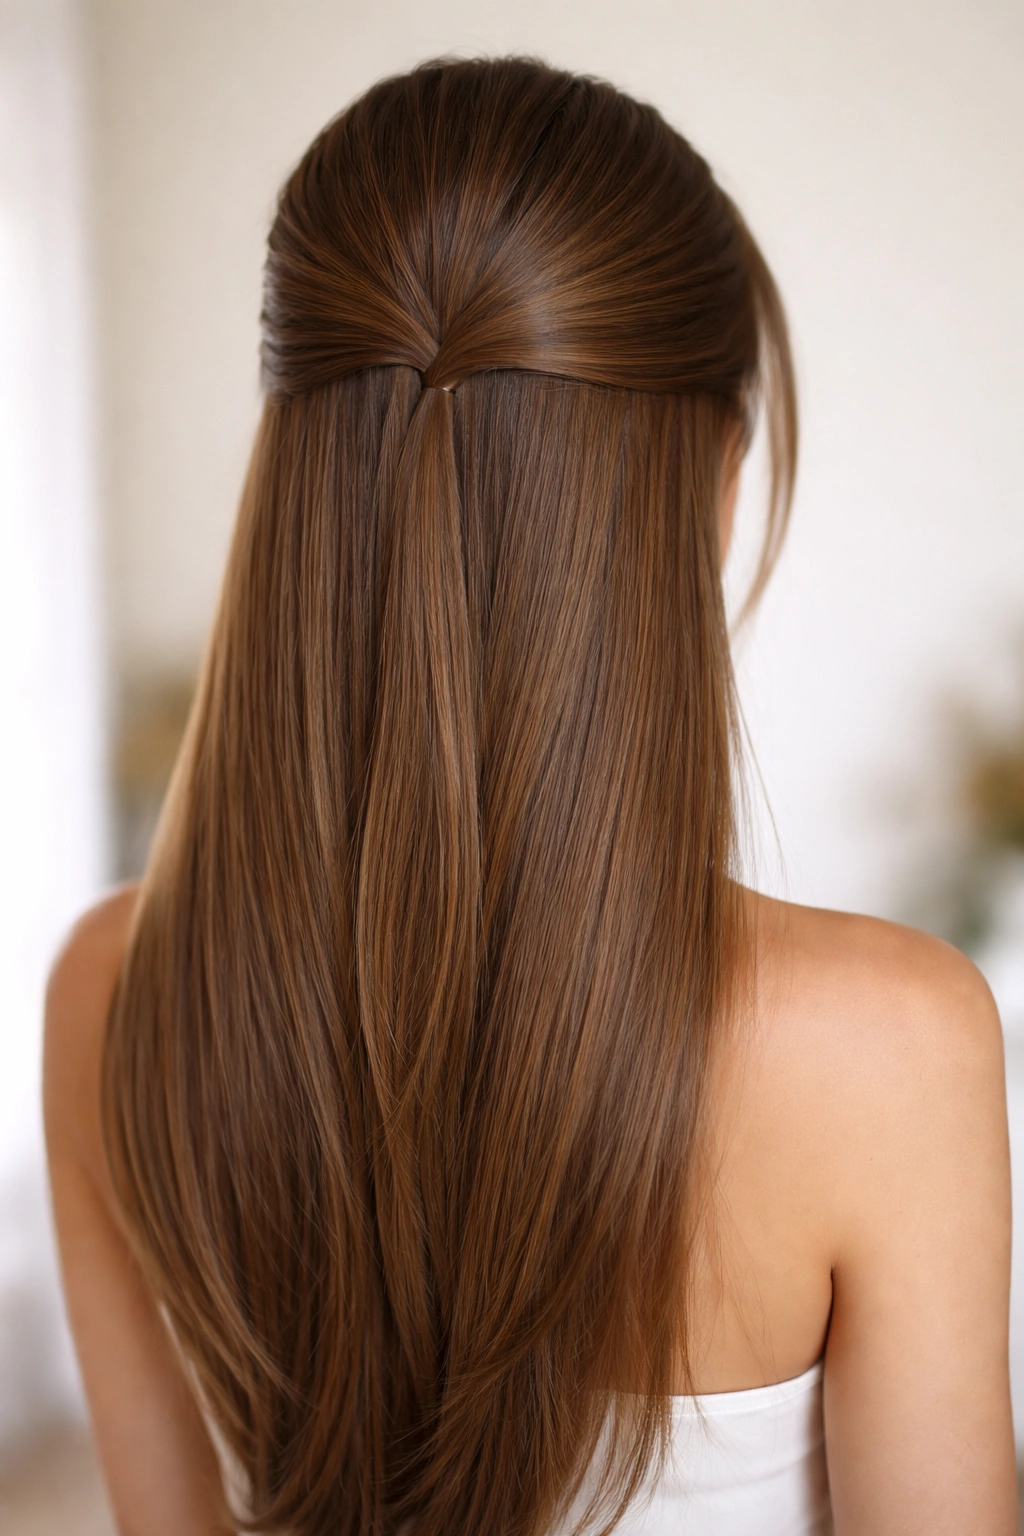
14. The Middle-Parted Half-Up
This style uses a deep middle part to create complete symmetry, with equal sections taken from each side. It’s formal, balanced, and particularly flattering for oval or heart-shaped faces.
The Power of Symmetry
A perfectly symmetrical style, especially with a middle part, reads as formal and intentional. There’s something inherently polished about perfect balance—it’s the choice for events where you want to look clearly well-groomed and carefully styled. For straight hair, which naturally divides cleanly, this style is particularly effective.
How to Execute Perfect Symmetry
- Create a middle part from your forehead all the way to the nape of your neck
- Take equal-sized sections from each side, starting at your temples
- Brush each section smoothly straight back
- Meet both sections at the crown and secure with a single elastic or matching pair
- Make sure both sides are symmetrical by checking them in the mirror
- Use a fine-tooth comb to smooth everything perfectly
Pro tip: Use a tail comb to create your middle part—the fine tip ensures a straight, precise line that’s essential for symmetrical styling.
15. The Side-Parted Half-Up with Texture
This style combines an off-center side part with texture added to the gathered sections, creating visual interest through both the parting and the textured secure point. It’s more complex than a simple side-parted half-up.
Layering Visual Interest
By adding texture at the secure point of an already-asymmetrical style, you create multiple layers of visual complexity. The side part draws the eye one direction, while the texture in the gathered hair draws attention to the crown—it’s a more dynamic, visually engaging look.
Steps to Achieve This Style
- Create a deep side part, deeper than you’d normally wear it
- Take sections from both sides of the head, making the section from the fuller side larger
- As you gather these sections, gently backcomb the roots for volume
- Secure at the crown with your chosen method (elastic or pins)
- Gently loosen and tease the top sections to add volume and texture
- Leave the side-parted sections in front of your face fully down and smooth
Pro tip: Backcomb only the roots, not the entire section—this creates volume where you need it without making the hair look matted or damaged.
16. The Low Twisted Half-Up with Loose Ends
This style places two loose twists lower on the head, at the nape level, and leaves the ends of those twists visible rather than tucking them away. It’s trendy and modern while remaining elegant.
Modern Asymmetry
By leaving the twisted ends visible and loose, you’re creating a style that’s purposefully imperfect in a way that reads as intentional and current. It’s not quite a full ponytail but more structured than just loose twists—it’s the hybrid approach that speaks to contemporary styling preferences.
How to Create This Look
- Take a section from one side of your head, roughly ear-level
- Twist this section and direct it down and back toward the nape of your neck
- Secure this twist with a bobby pin at approximately the lower back of your head
- The twist itself ends below where you pinned it, leaving the twisted ends visible and loose
- Repeat on the opposite side with a second twist
- Leave all the hair below the twists completely down and smooth
- You should have two visible twisted “tails” hanging from your pinned twists
Pro tip: Secure this style with bobby pins rather than an elastic so you can hide the securing point and let the twisted ends take visual focus.
17. The Pulled-Back Half-Up with Volume at Crown
This style uses careful pulling and pinning to create maximum volume right at the crown, making the head appear fuller and the face appear smaller. It’s a flattering, intentional look.
Strategic Volume Placement
Volume directly at the crown changes the proportions of your entire head and face. It makes your face appear more delicate and draws the eye upward. This technique is particularly effective for those who prefer a more feminine, rounded silhouette to their styling.
Creating the Volume
- Take sections from your temples and brush them straight back
- Before securing, use bobby pins to create a slight cushion or platform at your crown by crossing pins at the exact secure point
- Pull your sections over this pin platform as you secure them
- The sections will rest on the cushion created by the pins, pushing them up slightly
- Gently lift and smooth the crown sections to maximize perceived volume
Pro tip: Use thin, bobby pins that match your hair color—they’ll provide structural support without being visible.
18. The Polished Half-Up with Face-Framing Swoop
This style takes a basic half-up and adds strategically positioned pieces that swoop around the face, creating a softer, more romantic frame. It’s particularly flattering and works for both casual and formal occasions.
Soft Face-Framing
Rather than leaving random pieces down, this style deliberately positions certain sections to swoop around your face in a flattering way. The swooping pieces create movement that draws attention to your features and adds dimension to your styling.
How to Achieve This Look
- Create your base half-up in your preferred style (classic sections, twist, or braid)
- Take one small section from each side at approximately cheekbone level
- These sections should not be part of your gathered half-up—they’re separate pieces that stay down
- Let these sections fall naturally, framing your face
- Optionally, gently wave these framing pieces with a curling iron for added movement
- The swooping effect comes from their natural fall position
Pro tip: Hair closer to the scalp naturally falls forward more, so position your face-framing pieces near the roots for the best swooping effect.
19. The Half-Up with Sleek Low Bun End
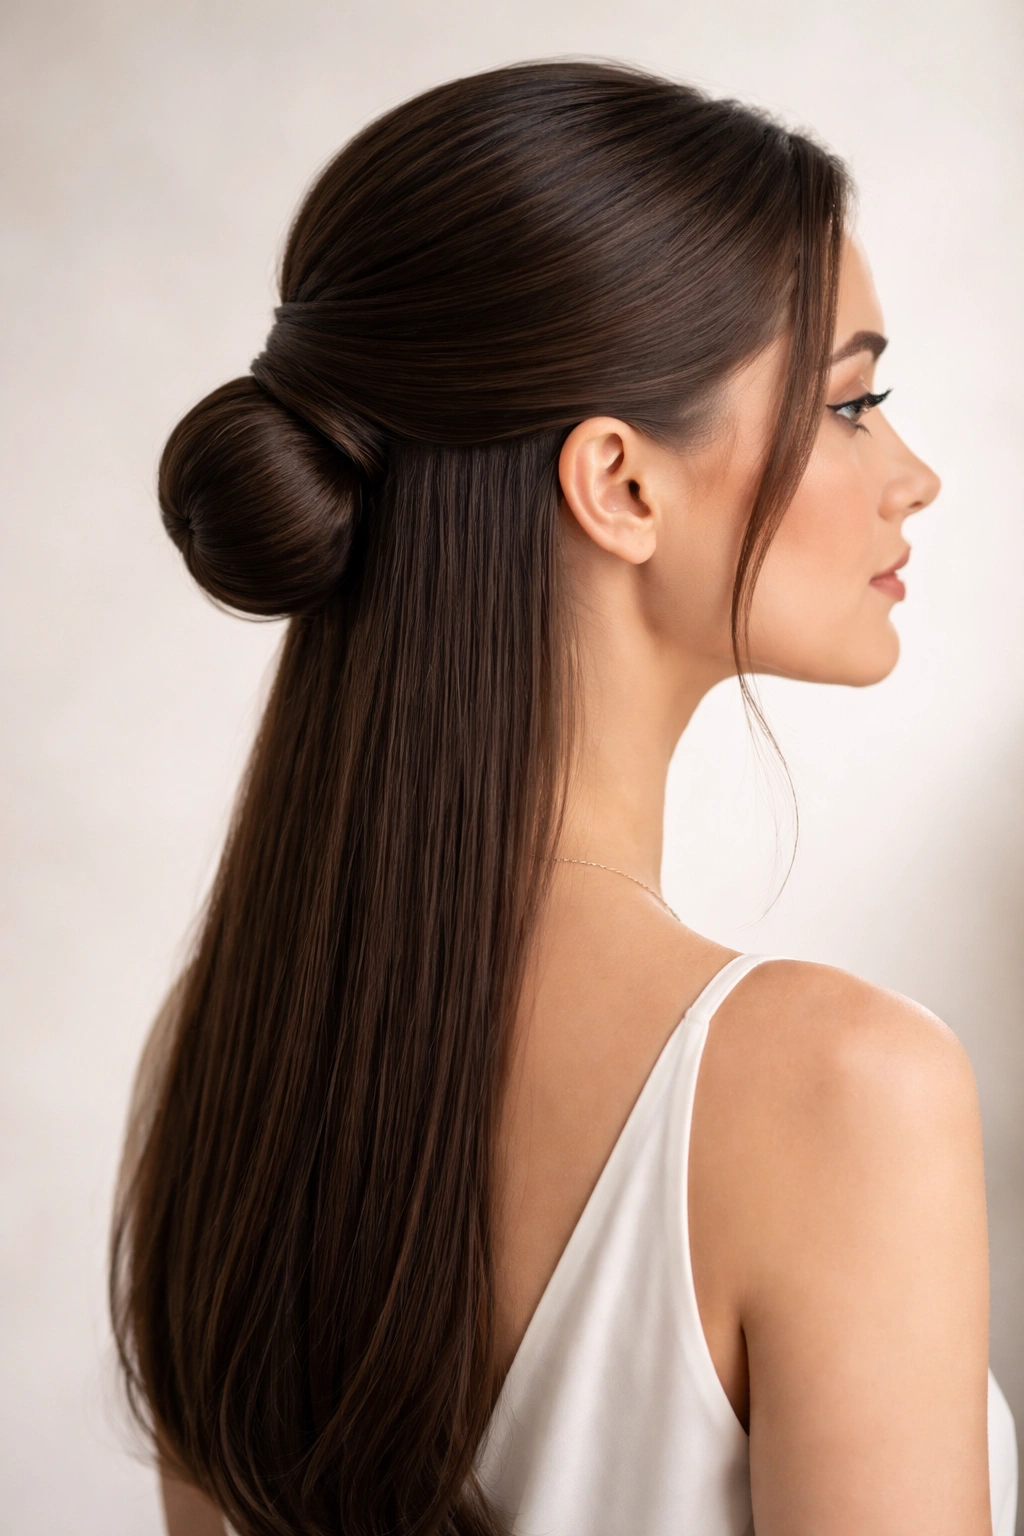
This style gathers the half-up sections and then continues gathering the remaining loose hair into a low bun, creating a style that’s technically a bun but retains half-up styling because it’s secured at the nape rather than at the crown. It’s sophisticated and works for professional settings.
The Hybrid Appeal
This style gives you the benefit of a half-up’s visual lightness while still containing all your hair. It’s practical for work, active environments, or any situation where you want your hair completely controlled but don’t want a severe pulled-back appearance.
Steps for This Combined Style
- Create your half-up arrangement at the crown using your preferred method (braids, twists, or smooth sections)
- Gather all the remaining loose hair along with the half-up sections
- Twist or braid this combined section loosely
- Wrap it around itself to form a low bun at the nape of your neck
- Secure with bobby pins, tucking the end within the bun
- Gently loosen the bun sections for a relaxed appearance
Pro tip: Secure this style with bobby pins rather than a hair tie—pins allow you to control exactly where the bun sits and create a more polished appearance.
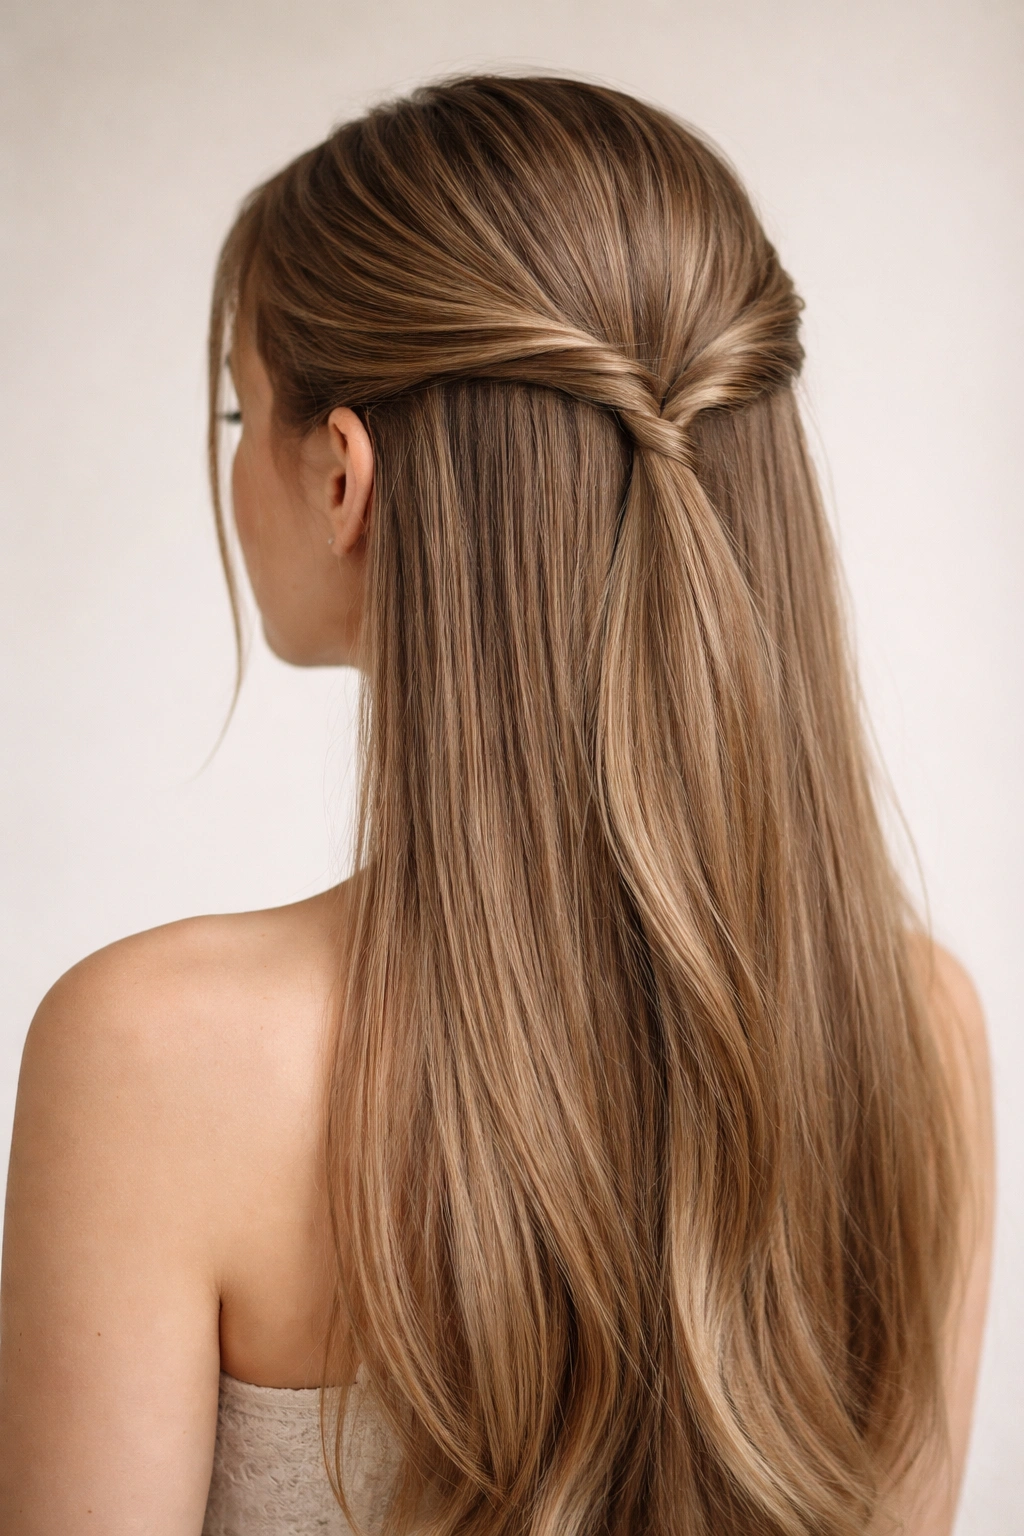
20. The Minimalist Half-Up Knot
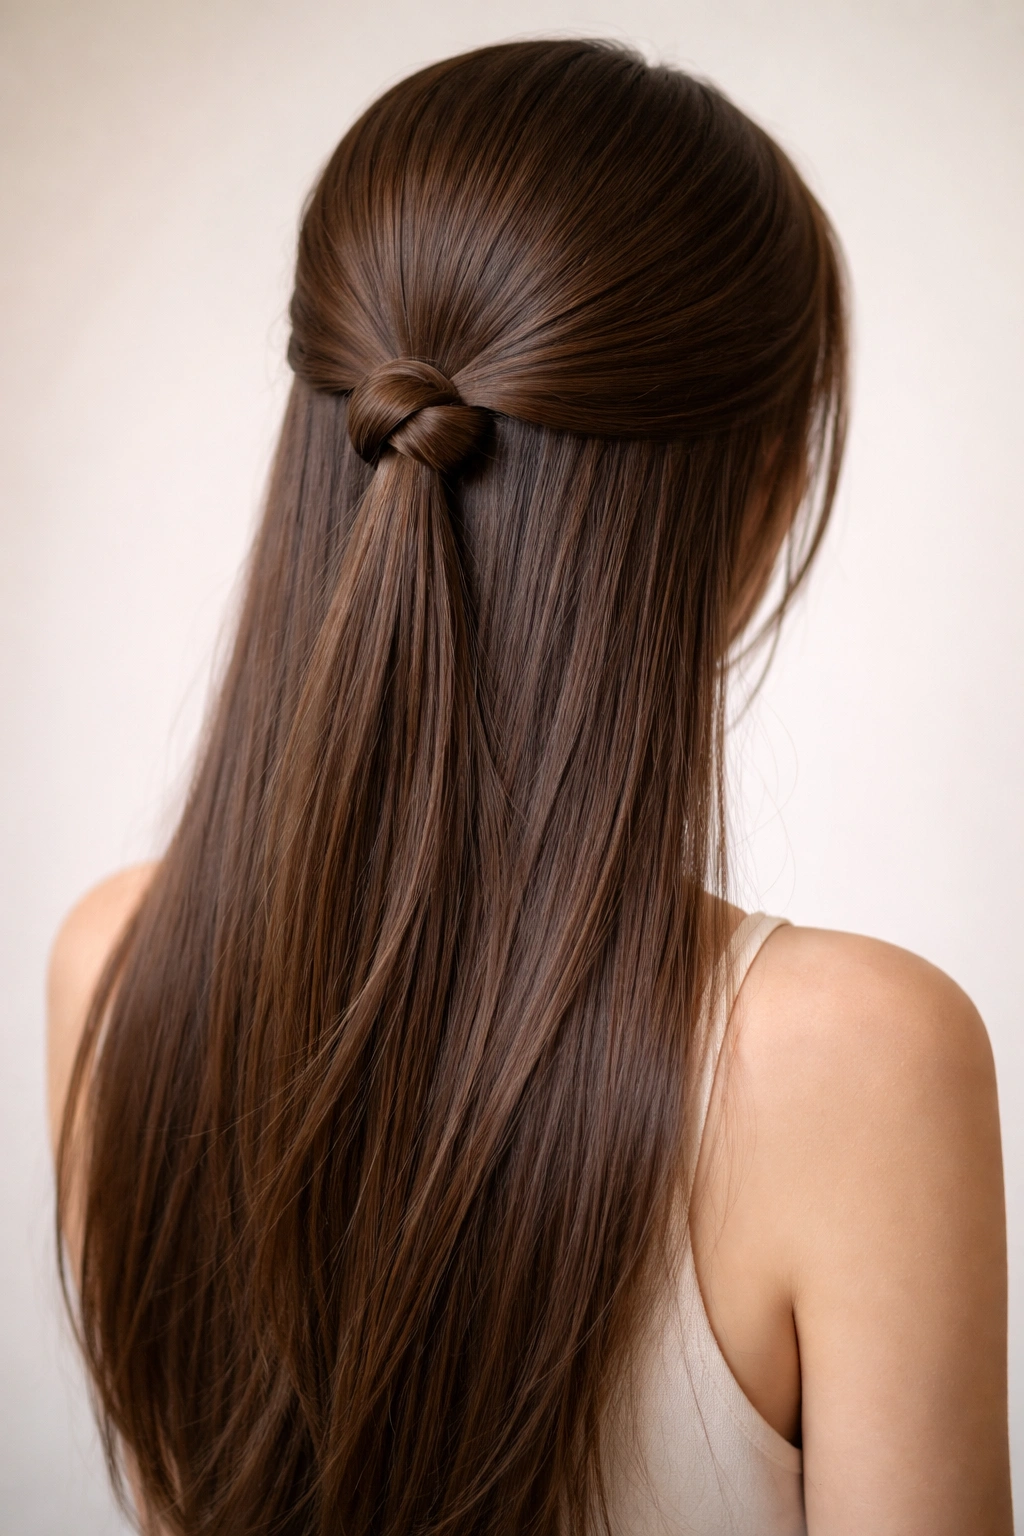
This final style uses a simple knot instead of a ponytail or braid to secure the half-up sections, creating a modern, sculptural appearance. It’s elegant and surprisingly easy to execute.
The Modern Simplicity
A knot is more interesting visually than a simple elastic-secured section, but it’s also simpler to execute than a braid. This style represents the sweet spot between minimal effort and maximum visual impact—the kind of styling choice that makes you look effortlessly put-together.
How to Create the Knot
- Take your half-up sections and gather them at your securing point as though you were creating a ponytail
- Instead of using an elastic, take the gathered hair and tie it into a simple knot, just like you’d knot a string
- Pull the knot snug and position it exactly where you want it to sit
- Use 2-3 bobby pins to secure the knot in place, pinning through the knot itself
- Smooth any flyaways with a fine-tooth comb and light hairspray
- The knot itself becomes the visual focal point of the style
Pro tip: This technique works best when your gathered sections are smooth and sleek rather than textured—the knot shows better definition against smooth hair.
Final Thoughts
The magic of half-up half-down styling lies in its flexibility and forgiving nature. Whether you’re reaching for the absolute simplest version—just two sections and a hair tie—or investing time in something more intricate like a braided crown arrangement, you’re working with a proven formula that flatters most people and works across settings from casual to formal.
Long, straight hair is genuinely advantageous for these styles. You don’t have to fight your texture, work around curls, or battle frizz to achieve a polished look. Instead, you can focus entirely on the architecture of the style itself—where the sections sit, how they’re secured, what texture or movement you add, whether you incorporate accessories. That simplicity is actually a luxury.
The best approach is to experiment with the styles that appeal to you most. Some will feel immediately comfortable and wearable; others might require practice before they feel natural. Pay attention to which styles make your face feel framed beautifully and which ones make you feel confident—those are your go-to choices. The remaining styles in your repertoire then become options for when you want something different or are dressing for a specific occasion.