Half up half down styles are one of those rare hairstyles that somehow feel both effortlessly casual and intentionally polished at the same time. But throw a hat into the mix, and suddenly you’re navigating territory that most people avoid — the assumption being that hats flatten hair, ruin your style, and make the whole effort feel pointless. Here’s what actually happens: the right half up half down style paired with the right hat can create something genuinely stunning. The half-up section keeps your hair off your face and adds shape and structure, while the loose bottom half moves freely and creates volume that actually complements a hat rather than fighting against it.
The beauty of combining half up half down hair with hats is that you’re not choosing between two looks — you’re creating a complete, coordinated aesthetic. Whether you’re styling for a day at the beach, a country music event, a casual outdoor adventure, or just because you want your hair to feel intentional while staying practical, these combinations work harder than either element would alone. A half up half down style actually becomes easier to manage under a hat because the tension from the updo keeps everything secured in place, and the secured portion won’t slide around as you move or as the hat shifts slightly throughout the day.
What makes these pairings so effective is understanding that different hat styles work with different half up techniques. A structured fedora pairs beautifully with sleek, defined updos, while a soft beanie wants something more textured and tousled. A wide-brim hat can handle big, voluminous waves in the down section, while a baseball cap works best with minimal bulk where the hat band sits. Once you understand these relationships, you can mix and match confidently.
1. Half Up Twist with a Wide-Brim Hat
The half up twist is your secret weapon when you want something that looks sophisticated without looking like you spent three hours on your hair. Take a section from each side of your face at about temple height and twist each section loosely toward the back of your head — don’t make these tight, clinical twists. Instead, let them be slightly undone, almost romantic in their imperfection. When both twists reach the back, gently cross them over each other and secure with bobby pins that match your hair color. Leave the rest of your hair down in soft waves or natural texture.
Why This Works With a Wide-Brim Hat
A wide-brim hat has serious visual weight, so you need an updo that feels equally intentional but not heavy. The twisted sections create just enough definition and structure at the crown that your face isn’t completely swallowed by the hat’s brim. The relaxed, undone quality of the twists keeps the overall look feeling approachable rather than formal — you look like you casually grabbed a hat, not like you planned this outfit three days ago.
How to Style It Perfectly
Start with second-day hair or texture spray for grip, since slicked-back hair will cause the twists to slide. Take the sections from your temples and keep them loose — if you twist too tightly, they’ll show under the hat brim. Secure with just 2-3 bobby pins; too many will create bumps under the hat. Leave at least 4-5 inches of hair down below the twist line so there’s real volume and movement in the bottom section. The waves or curls in the down section should have some dimension; flat, straight hair makes the bottom half feel limp in contrast to the structured top.
Pro tip: If your hair is very fine or slippery, mist the twist section lightly with texturizing spray before twisting — it gives the hair something to grip to.
2. Half Up Braid with a Structured Hat
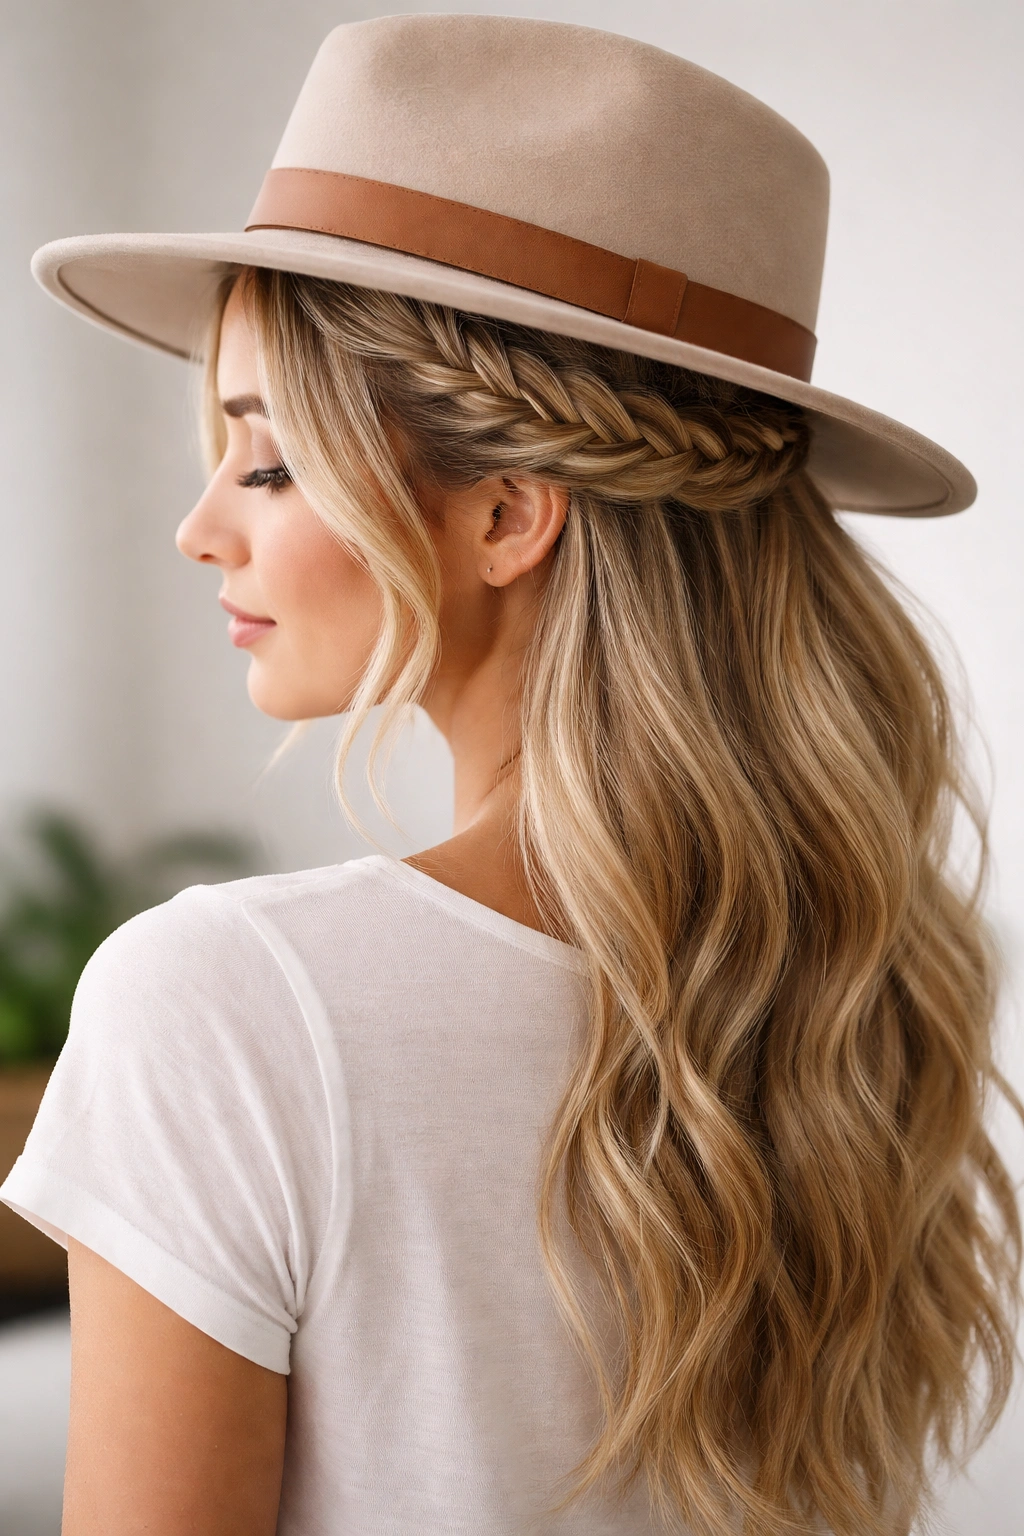
Braids instantly elevate a half up half down style because they add visual interest and texture that reads as intentional and put-together. For this one, take a section from one side of your part and create a simple three-strand braid that runs from your temple toward the back of your head. Don’t braid all the way to the ends; stop about 2-3 inches before you’d normally finish, leaving the tail loose. Bring that loose tail to the back of your head and secure it along with the rest of your hair using bobby pins. The braid should run diagonally across the back of your head rather than down the center.
Why Braids Work Best With Structured Hats
A structured hat like a felt fedora, a straw boater, or a wool hat needs an updo that has enough visual presence to balance it. A braid is perfect because it creates a defined line and texture that reads intentionally styled. The braid itself becomes part of the overall aesthetic — it’s not hidden under the hat; it’s visible as part of the arrangement. Structured hats tend to have clean lines and defined shapes, so they pair beautifully with the ordered, geometric quality of a braid.
Creating a Braid That Photographs Well
Three-strand braids look best when they’re slightly loose — if you braid too tightly, the braid compresses and looks thin and severe. Keep gentle tension throughout, pulling just enough to keep the strands together but not so much that you’re basically strangling your hair. As you braid, gently pull out the edges of each strand ever so slightly after you’ve completed the braid, which softens it and creates a fuller, more romantic appearance. This is called pancaking the braid, and it makes an ordinary braid look intentionally styled rather than functional.
Worth knowing: If your hair is very straight, create the braid on hair that has some texture — either from waves or from spritzing with sea salt spray. Braids slide apart faster on completely straight hair and look less substantial.
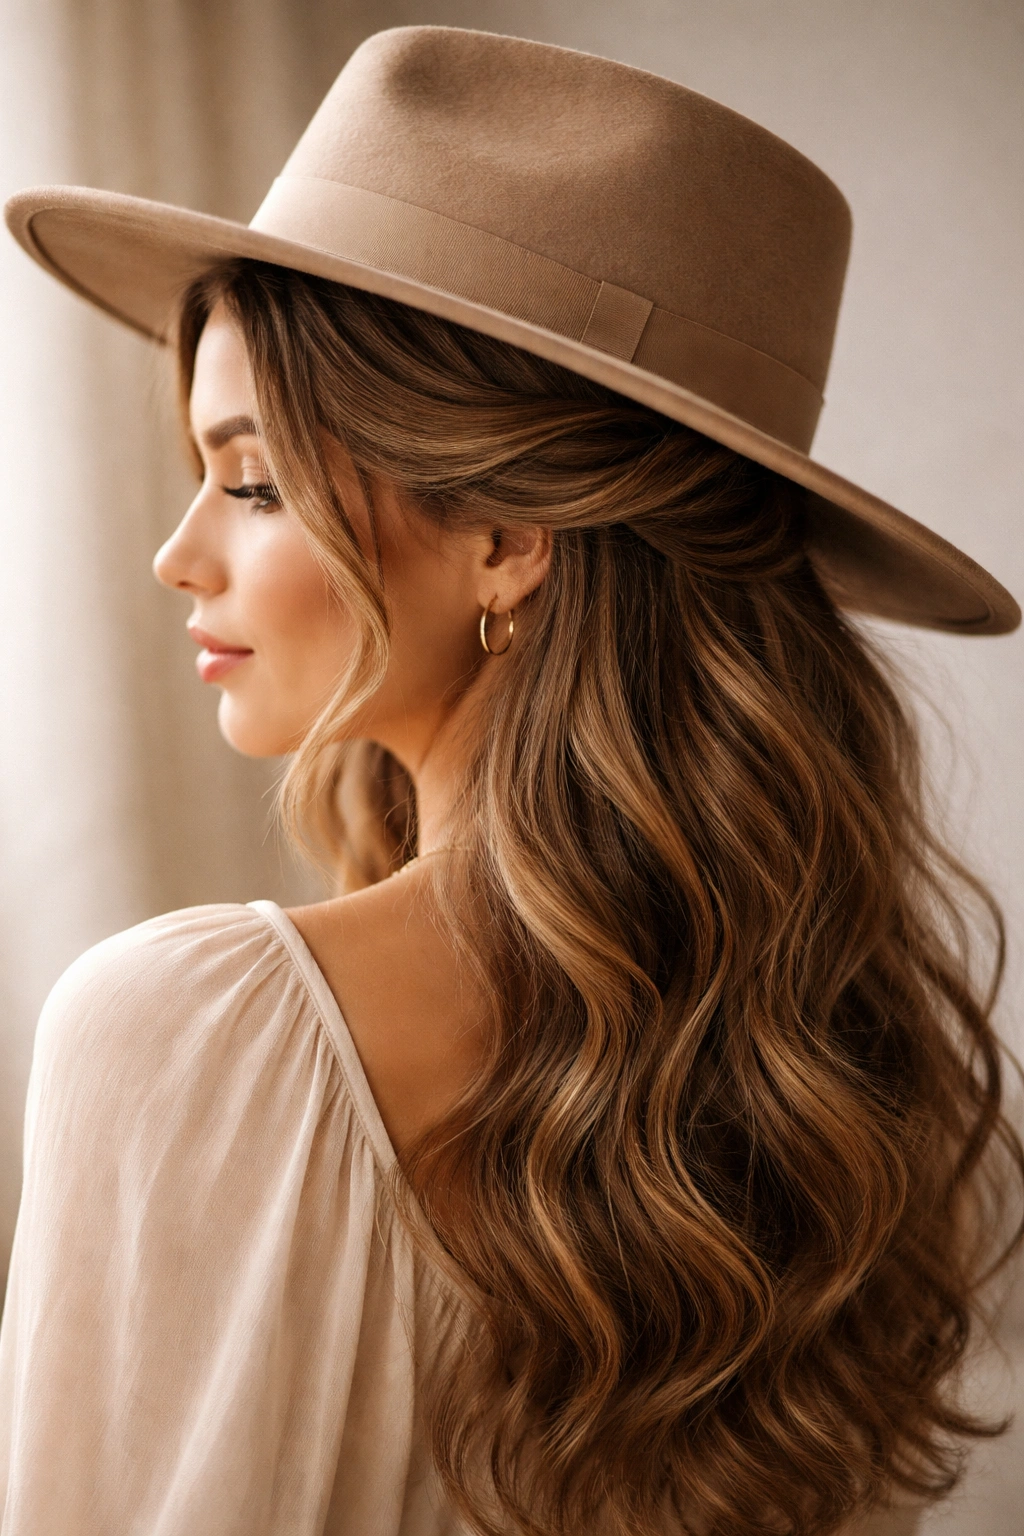
3. Half Up with Curls and a Fedora
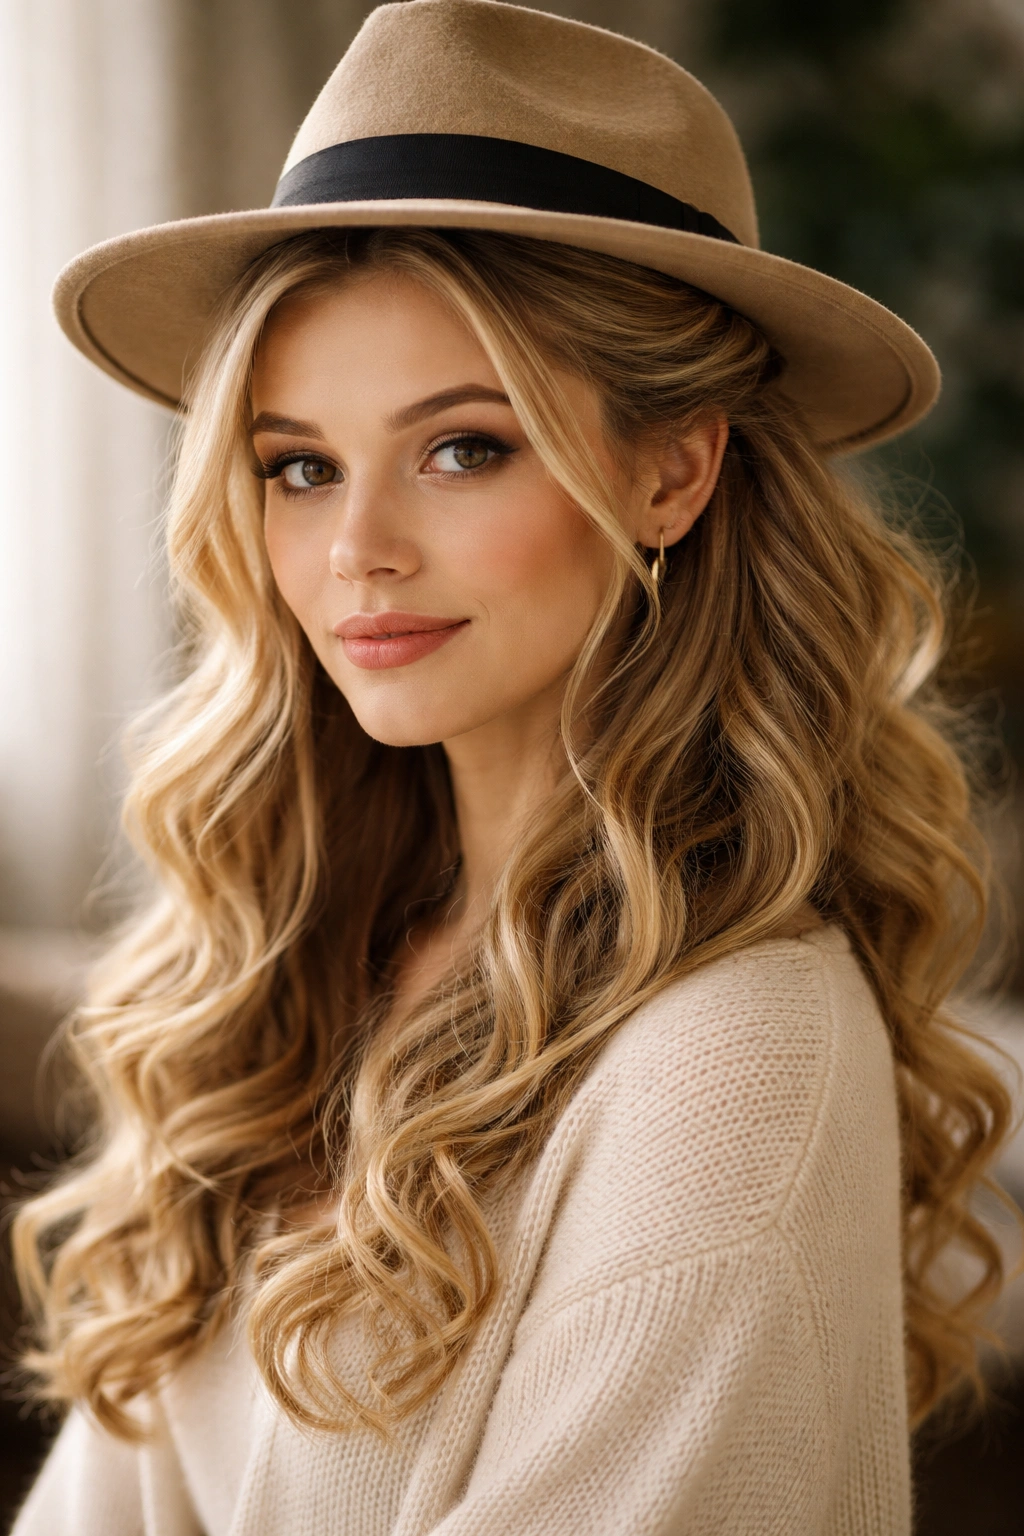
This combination has serious sophistication baked in because both elements are inherently stylish. Create loose, romantic curls throughout your entire head using a curling iron, wand, or overnight methods. Once your curls are set and slightly cooled (they’ll hold better), take a section from above each ear and bring them toward the back of your head. Instead of braiding or twisting, simply gather these sections together and pin them in place, leaving the back section loose and full of bouncing curls.
The Psychology of Curls and Hats
Curls add movement and personality to hair in a way that makes a structured hat feel less severe. A fedora by itself can feel demanding and formal, but pair it with soft, bouncy curls and suddenly it feels like you’re having fun with fashion. The curls in the loose section should have enough spring and dimension that they visibly move when you do. This counteracts any severity that a structured hat might bring, creating a balanced, effortless-looking aesthetic.
Making Curls Last All Day Under a Hat
The key to curls surviving under a hat is preparation. Before you pin up the section, apply a light hairspray to your curls — not enough to create a crunchy texture, just enough to give them staying power. Use bobby pins that match your hair color when securing the top section, and use at least 3-4 pins so the weight is distributed and the pins won’t pop out when you put the hat on. When you put the fedora on, position it so it sits just above the pinned section rather than directly on top of it; this prevents the hat from crushing your curls at the crown. As you wear the hat throughout the day, check periodically and gently adjust the brim slightly so you’re not creating a permanent indentation.
Pro tip: Don’t put your hat on immediately after pinning; give the curls 5-10 minutes to fully set so they’re less likely to compress.
4. Half Up Ponytail with a Baseball Cap

This is the formula for genuinely wearable everyday style that doesn’t require you to wake up extra early. Create a half up ponytail by gathering hair from the temple sections and the crown into a clear elastic. You can rough it up slightly with a teasing brush to create crown volume, but keep it relatively relaxed and natural-looking. Leave the rest of your hair down and straight, wavy, or curled depending on your texture.
Why Baseball Caps Make This Easy
Baseball caps are incredibly forgiving when it comes to hair because the brim sits at just the right distance from your head to work with pulled-back sections. The ponytail sits perfectly in the space where a baseball cap naturally falls, and the bill keeps the ponytail from looking too severe. This combination reads as sporty and casual, which is exactly the vibe a baseball cap is designed to project. The half up section creates enough lift that your face doesn’t feel completely shadowed by the bill.
Keeping Everything in Place While Active
If you’re wearing this combination for any kind of activity — running errands, light exercise, being outdoors in wind — start with your half up ponytail secured with a clear elastic, not a decorative one. Clear elastics are easier to tighten without damaging hair, and they won’t slip as easily. Once your ponytail is secure, put your baseball cap on and position it so the bill is at the angle you like. The weight and structure of the cap will actually help secure your ponytail by keeping gentle tension on it throughout the day.
5. Half Up with Layers and a Sun Hat
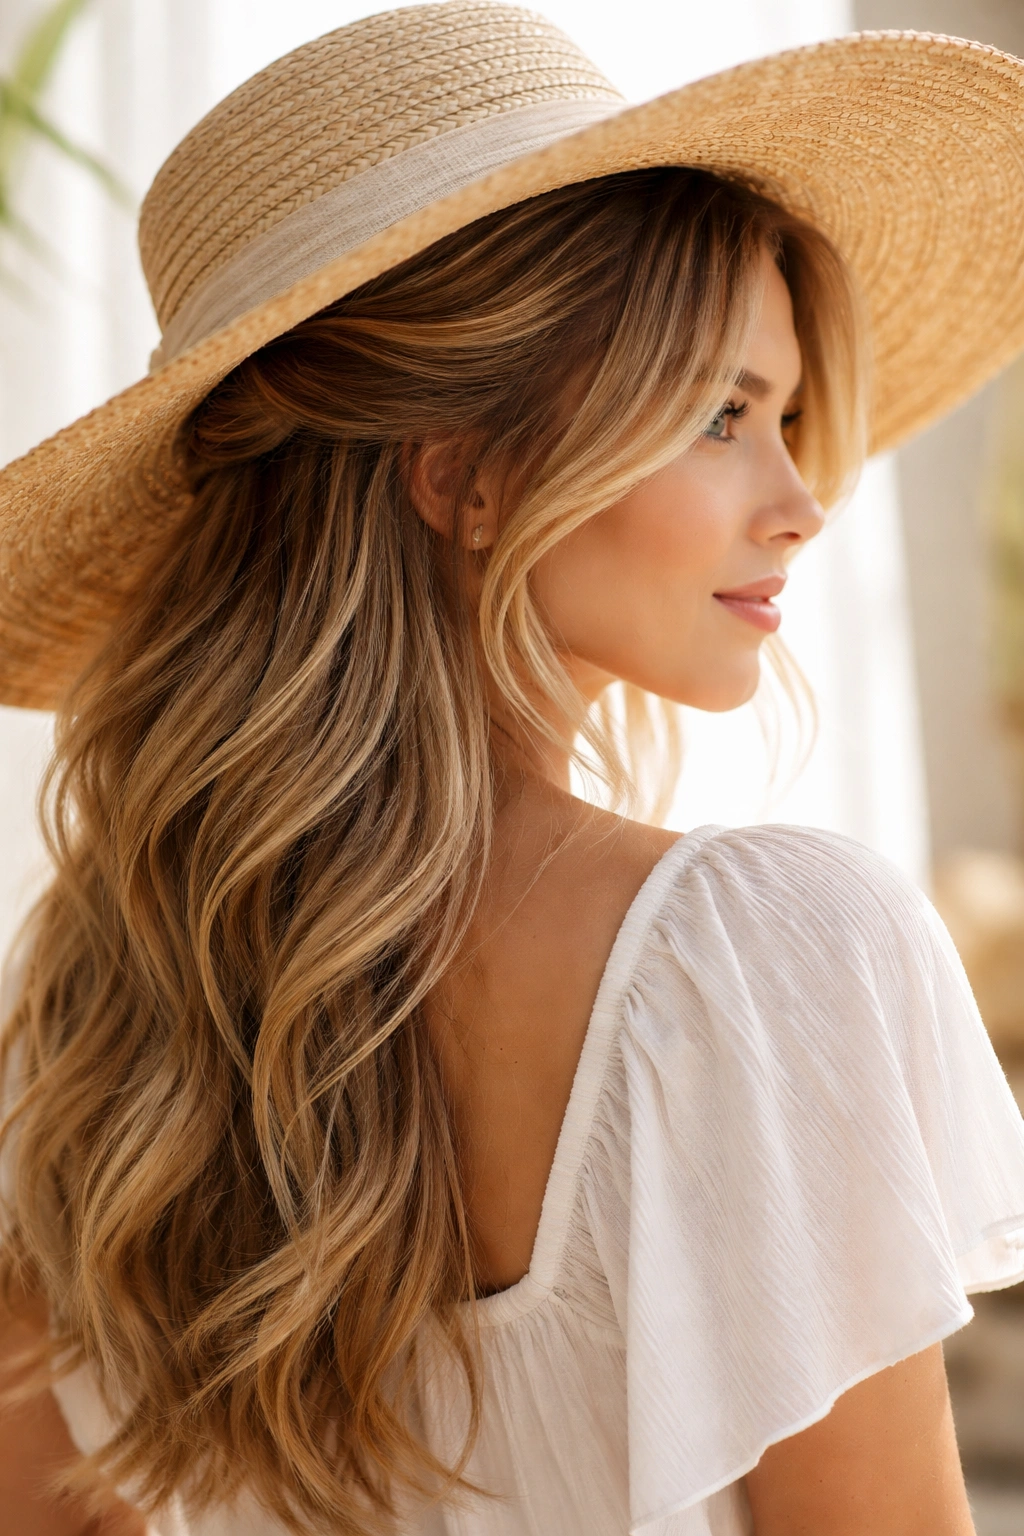
Sun hats are among the most flattering hat styles because they’re typically large and soft, creating a romantic, vacation-ready aesthetic. Work with your existing layers or create dimension in your hair using a texturizing product. Bring sections from either side of your face to the back, but instead of creating a defined braid or twist, keep it loose and piecey. Secure these sections and let the layered portion of your hair flow freely below. Your layers should catch light and move independently, creating the impression of volume and texture.
Building Dimension Into Your Style
Layered hair naturally looks better in this combination because each layer moves slightly differently, creating visual interest and movement. If your hair is all one length, you can fake layers by using a texturizing spray and creating loose waves or curls. The movement in the bottom section is what makes this pairing work — a sun hat is soft and romantic, so your hair should feel equally loose and flowing. This isn’t the time for sleek, controlled styling; embrace the idea that your hair will move with the breeze.
Securing Layers Under a Large Hat
Large sun hats create more air circulation around your head, which means your hair will move more. This is generally a good thing, but it means you need to secure your half up section very carefully. Use 4-5 bobby pins rather than just 2-3, and consider using bobby pins on both sides of the crown, not just the back. This distributes the weight and prevents the entire section from sliding as you move. Alternatively, use a hair claw clip for the half up section, which provides more grip than elastic and won’t let strands slip out.
Worth knowing: Sun hats typically have softer structures than other hat styles, so avoid creating too much bulk in your updo. Heavy, complicated updos will show as lumps and bumps under a soft hat. Simpler is better here.
6. Half Up Knot with a Wool Hat
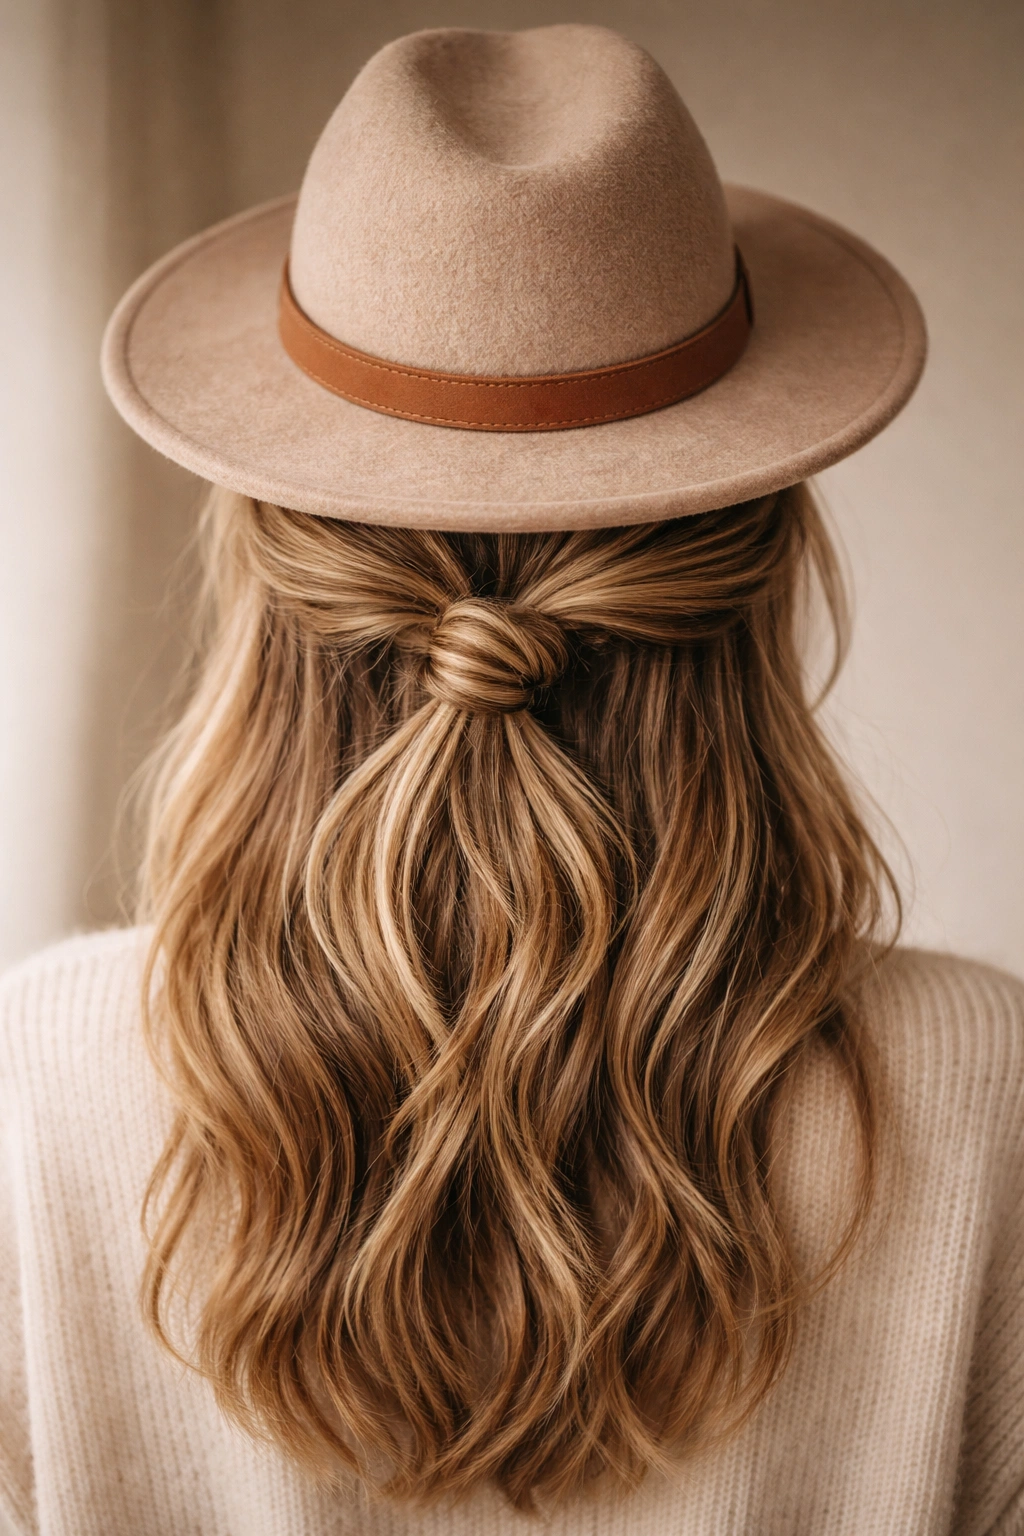
A half up knot is an incredibly underrated updo that feels modern and interesting without being complicated. Take a section from each side of your head at about ear height and bring them to the back. Instead of twisting or braiding, tie them into a knot — an actual knot, like you would tie a rope. Pull the knot slightly to loosen it and soften it, then secure the tails of the knot with bobby pins. Leave the rest of your hair down and natural.
Why Knots Feel Fresh and Current
Knots are having a moment in hairstyling because they feel deliberately styled but not overdone. They read as a style choice rather than a default, which gives them inherent interest. Paired with a wool hat, a knot creates a modern, intentional aesthetic that suggests you know your own style. Wool hats have a cozy, grounded quality, and a knot feels equally grounded and real — not ethereal or overly romantic.
Making the Knot Secure
The key to a knot that doesn’t come untied throughout the day is pulling the knot relatively tight before you secure it with pins. Some people make the mistake of creating a very loose, floppy knot thinking it looks better, but loose knots unravel. Create your knot with decent tension, then gently pull at the edges to make it look intentionally relaxed rather than accidentally sloppy. Once the knot is formed, secure it with at least 3 bobby pins inserted at different angles so the knot won’t slip or rotate.
7. Half Up with Pins and a Cowboy Hat
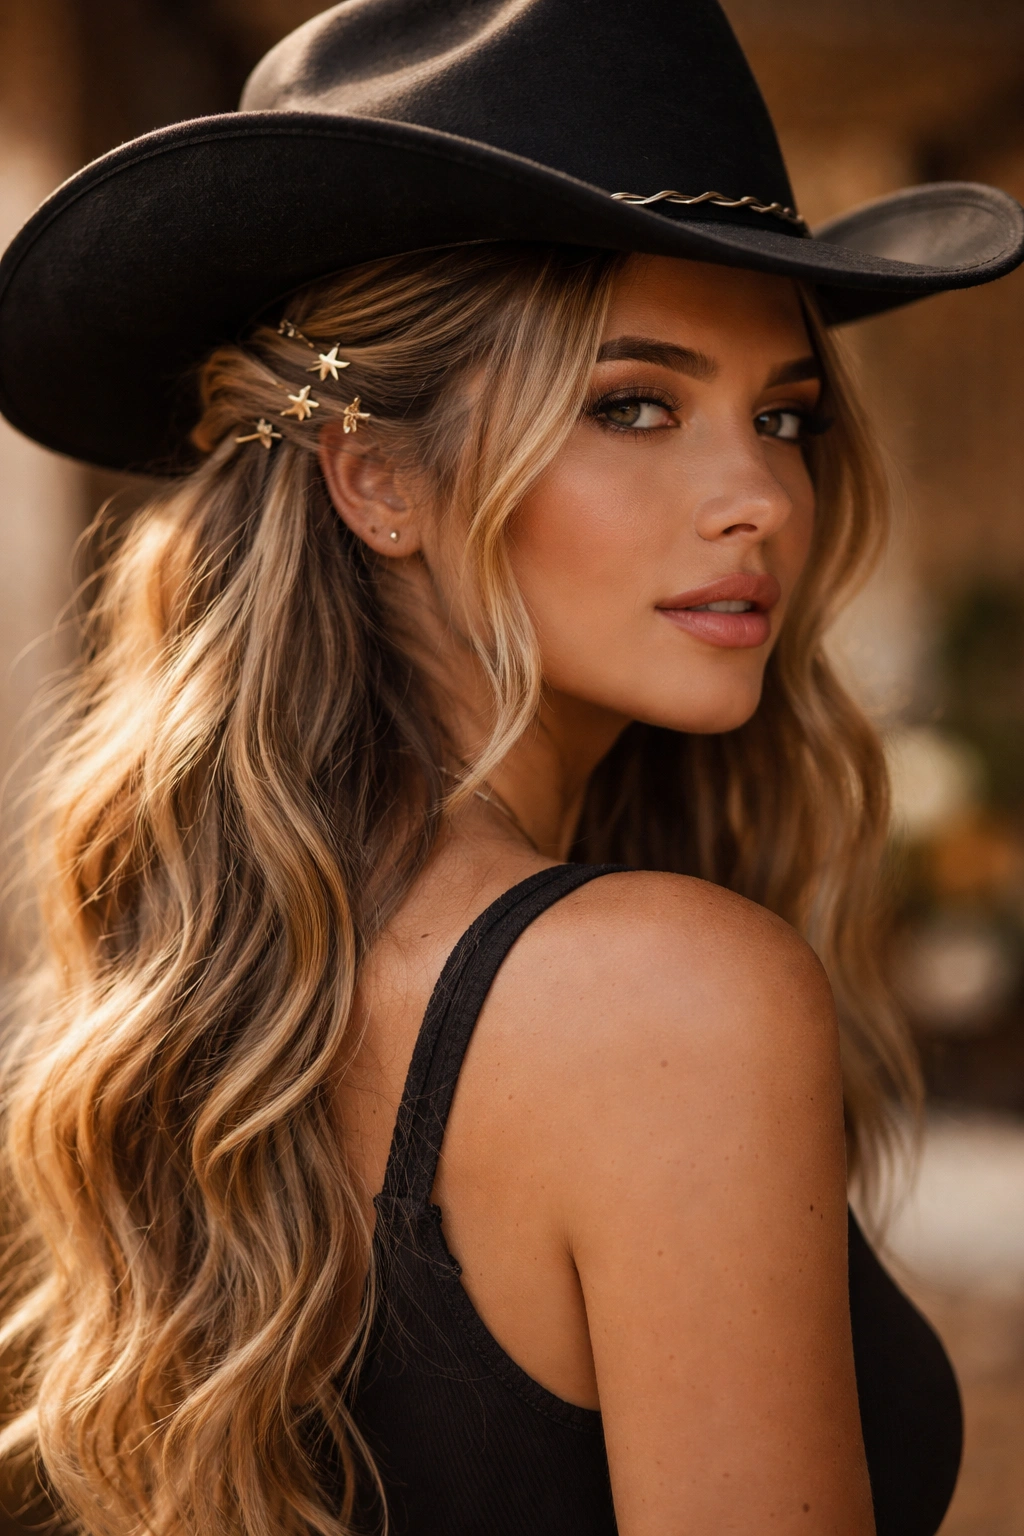
Cowboy hats are a statement piece, so your hair needs to complement that statement without competing with it. Create a half up section by gathering hair from the temples and crown, then secure it with decorative bobby pins or hair pins. You can use golden pins, silver pins, tortoiseshell pins, or even pearl-studded pins — the decoration becomes part of the overall look. Leave your hair down in loose waves or curls that coordinate with the relaxed, slightly undone aesthetic a cowboy hat projects.
Coordinating Hair Accessories With a Cowboy Hat
A cowboy hat typically coordinates with Southwestern, country, or Western-inspired aesthetics, so your hair accessories should echo those vibes. Metallic hair pins feel modern and work beautifully, while anything too delicate or dainty will feel out of place. Choose pins that are visible and intentional rather than hidden. You can use 3-4 pins arranged in a small cluster at the back of your half up section, or space them out around the crown for more visual interest.
Creating the Right Hair Texture
Cowboy hats look best with hair that has substance and texture. Sleek, flat hair will look limp and disappointed under a cowboy hat. Create waves or curls in your down section, and add some texture to your half up section using a texturizing spray or dry shampoo. Your hair should look like it has lived a life and has stories to tell — the kind of hair that looks good in a cowboy hat is generally the kind that looks good in anything.
8. Half Up Bubble Braid with a Beanie
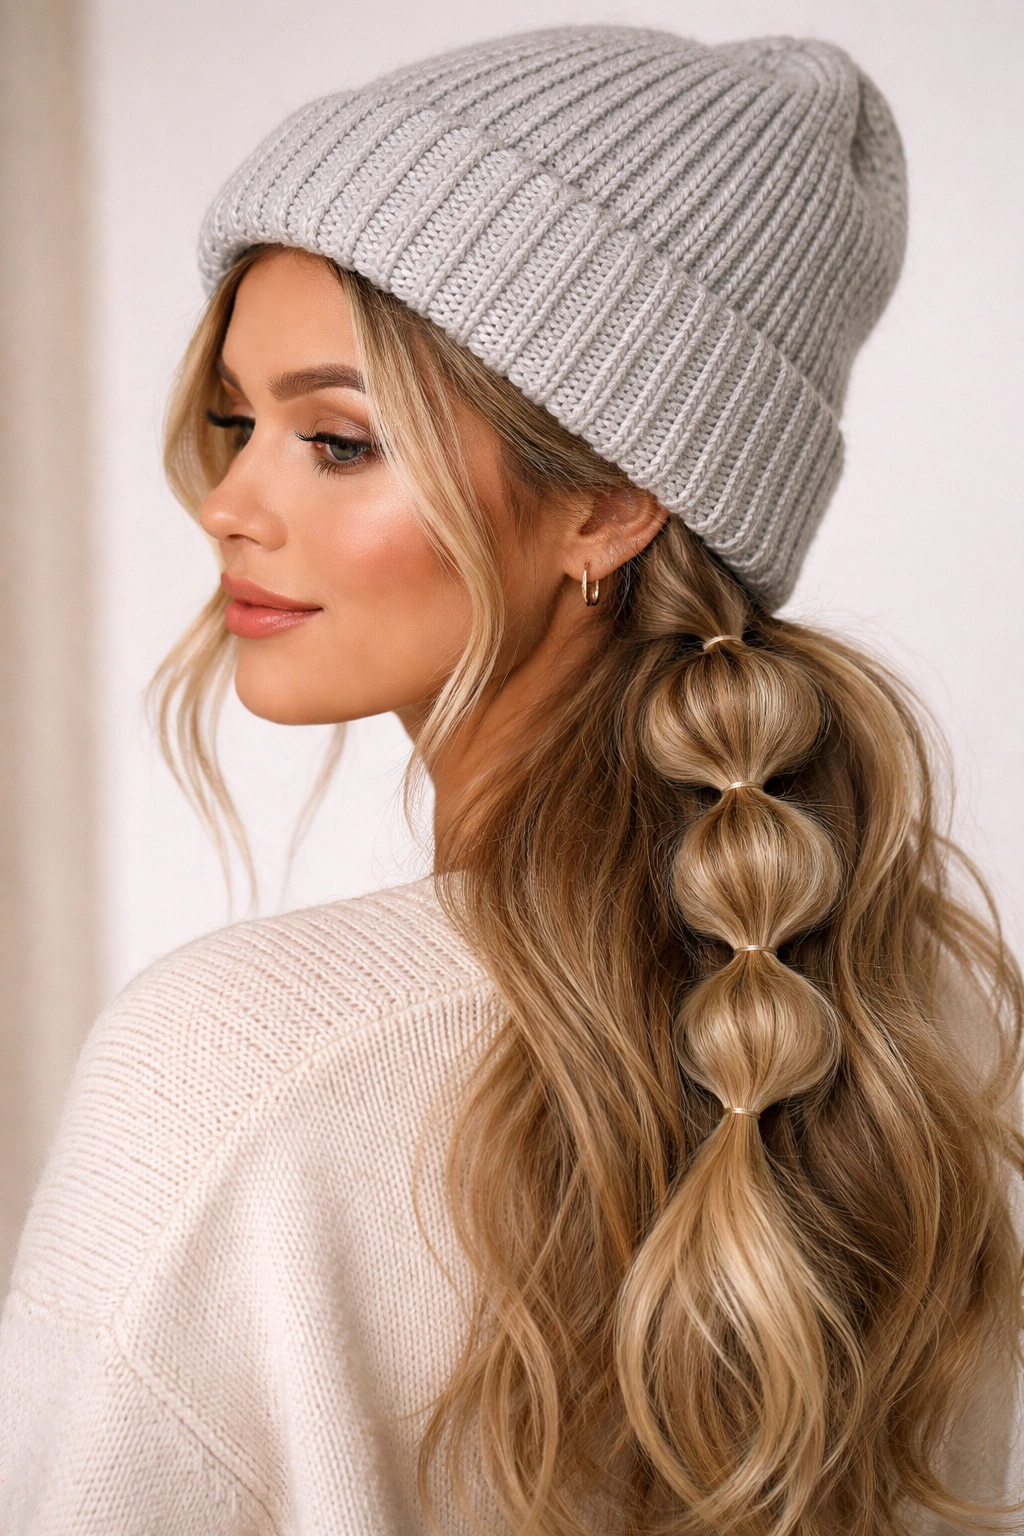
A bubble braid is a playful, eye-catching updo that feels youthful and fun without being immature. Create a standard ponytail from your half up section, then divide that ponytail into 4-5 sections with clear elastics spaced about 2 inches apart. Gently puff out each section between the elastics to create bubble-like segments. The more you puff, the more dramatic the bubble effect. Leave the tail of the ponytail loose and flowing.
Why Beanies Need Interesting Updos
Beanies are inherently casual, so a simple, boring half up section might feel underdeveloped. A bubble braid adds visual interest and personality that makes the overall look feel intentional and put-together. The bubbles create dimension and texture that’s visible even when you’re wearing a beanie — the bubbles won’t be completely hidden; they’ll create subtle shape under the hat. This visual interest keeps the overall look from feeling too basic.
Securing Bubble Braids Under a Beanie
Bubble braids require more bobby pins and elastics than simpler updos, so make sure everything is very secure before you put a beanie on. Test the security by gently tugging on different parts of the braid to make sure nothing moves. Once you’re confident it’s secure, put your beanie on and position it so it sits just above your bubble braid rather than directly on top of it. This prevents the beanie from compressing the bubbles and destroying the shape. Your goal is to have the bubbles creating subtle shape inside the beanie, not completely flattened.
Pro tip: Create bubble braids on hair that has some texture or grip. Sleek, slippery hair will cause the sections to slide out of their elastics throughout the day.
9. Half Up with Face-Framing Waves and a Bucket Hat
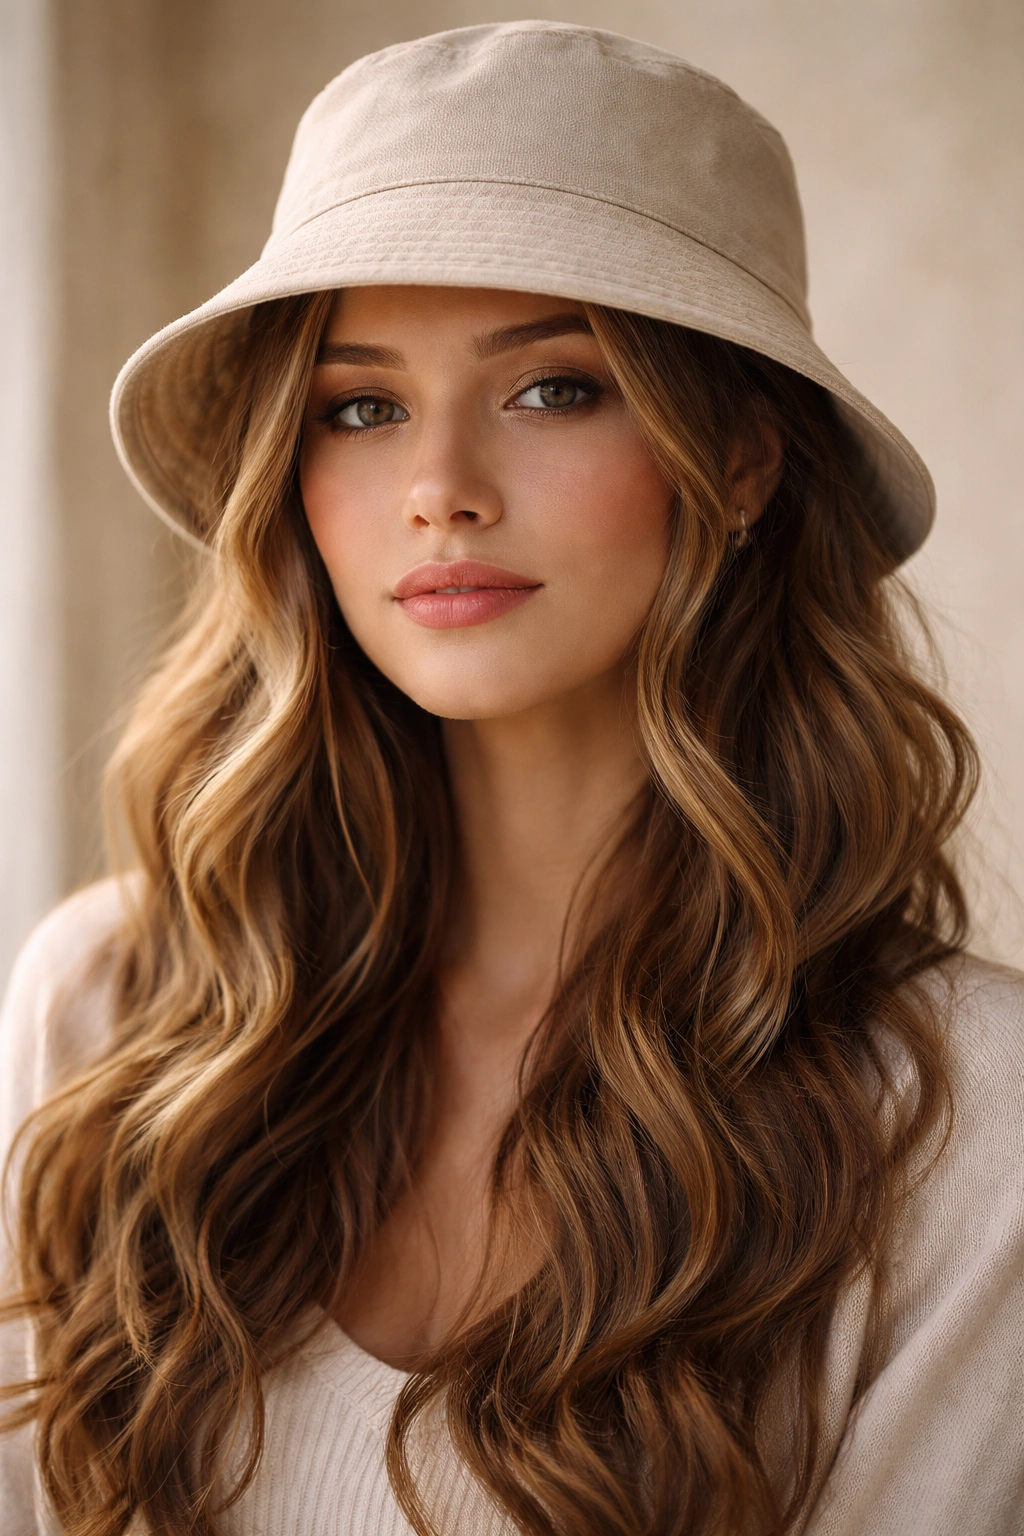
Bucket hats are having a real moment because they’re both practical and surprisingly stylish. For this pairing, create soft, romantic waves throughout your entire head. Then, from the temple area, take pieces of hair and bring them back toward the crown, securing them with bobby pins that match your hair. The face-framing pieces should be left loose and visible in front — these are what give the style its definition and personality.
Making Waves Work Under a Bucket Hat
Waves need to be relatively set and structured to survive under a bucket hat, because bucket hats fit more closely to the head than wide-brim styles. Use a curling iron or wand to create your waves, and apply a light hairspray while the waves are still warm so they set properly. The waves in the down section should be visible and bouncy even after you’ve been wearing the hat for a few hours. Face-framing pieces are essential in this combination because they’re what prevent your face from looking completely shadowed by the hat brim.
Creating Visual Balance
Bucket hats have a lot of visual weight because they’re structured and create a distinct silhouette around your face. Your hairstyle needs to have enough presence and movement to balance that weight. Waves accomplish this because they create visual softness and movement. The face-framing pieces accomplish this because they break up the solid line created by the hat’s brim. Together, these elements create a balanced, intentional look rather than a face that’s gotten lost under a hat.
10. Half Up Dutch Braid with a Visor
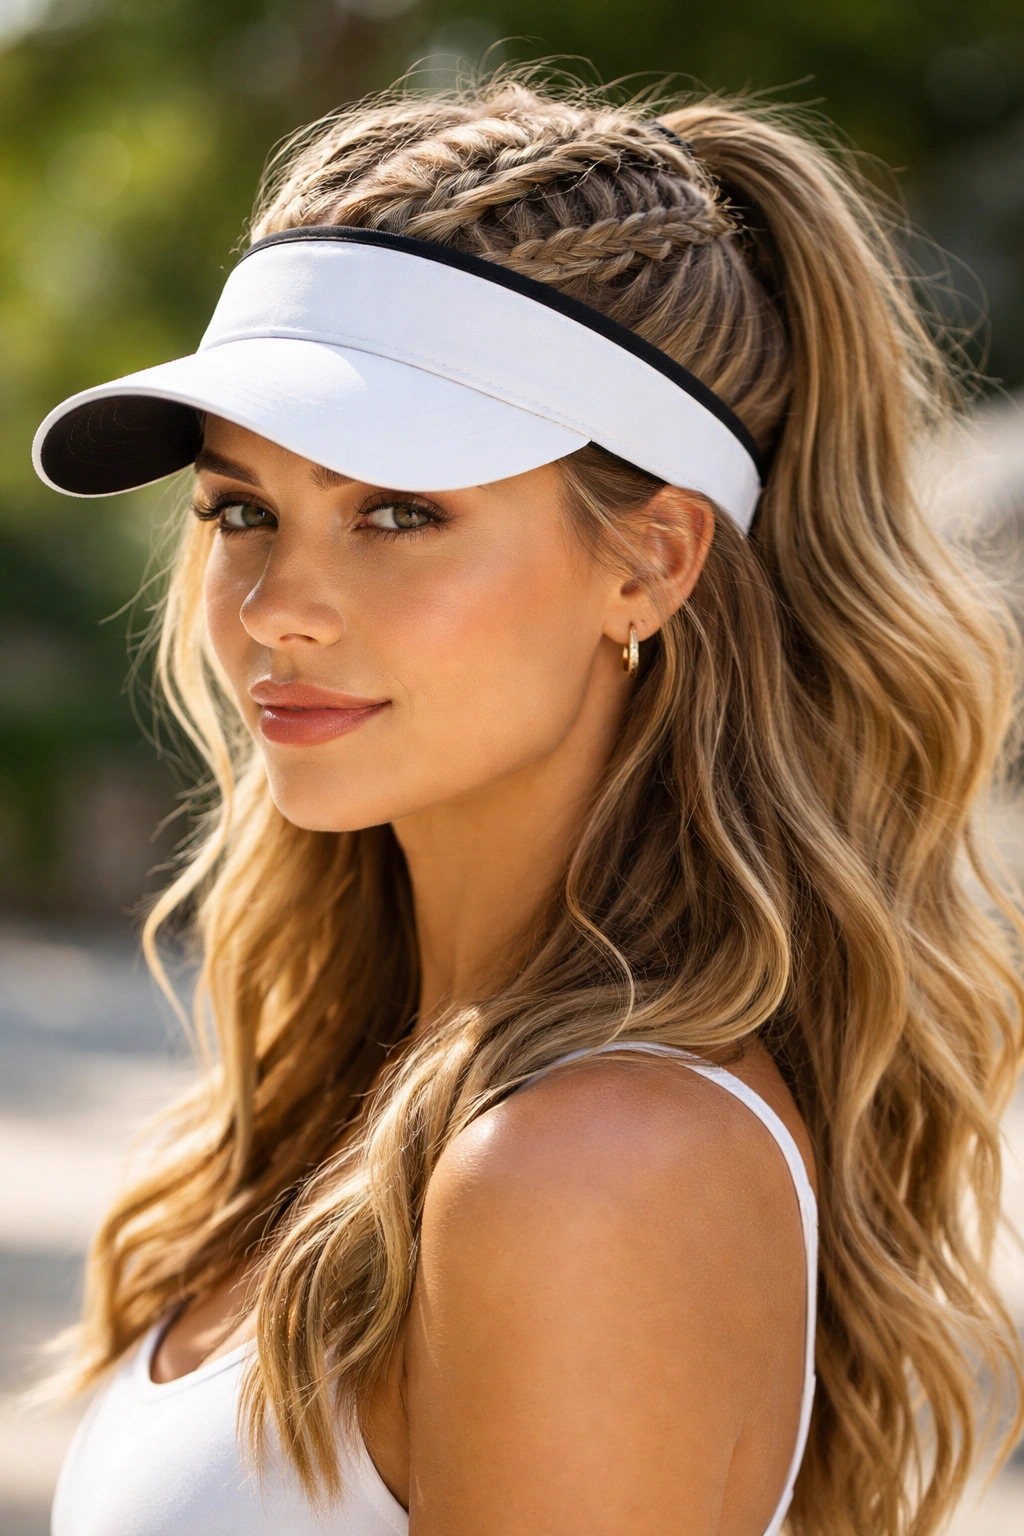
A Dutch braid is similar to a regular braid but it sits on top of your head rather than lying flat, creating more visual prominence and a sporty, active vibe. Create a Dutch braid from one side of your part, running it toward the back of your head. You can stop the braid at the back or continue it down to your neck, depending on how much visual impact you want. Secure the braid and leave your hair down in waves or natural texture.
Why Visors Pair With Dutch Braids
Visors are sporty and forward-facing, so they need an updo that has movement and dimension rather than something that looks sleek or formal. A Dutch braid is perfect because it creates a raised, 3D effect that’s visually interesting from every angle. The braid sits at the crown where a visor won’t flatten it, and it creates enough visual interest that the overall look feels intentional and put-together. This pairing says you’re active, stylish, and aware of current trends.
Making a Dutch Braid Stand Out
Dutch braids have the advantage of being naturally visible because they sit on top of the hair rather than lying against the scalp. This means you don’t need to worry as much about them disappearing under your visor — some of the braid will remain visible and striking. Create the braid with slightly loose tension so it looks romantic and intentional rather than tight and severe. Pancake the braid by gently pulling the outer edges of each strand, which creates a fuller, more visually impressive braid.
11. Half Up with Ribbon and a Fascinator
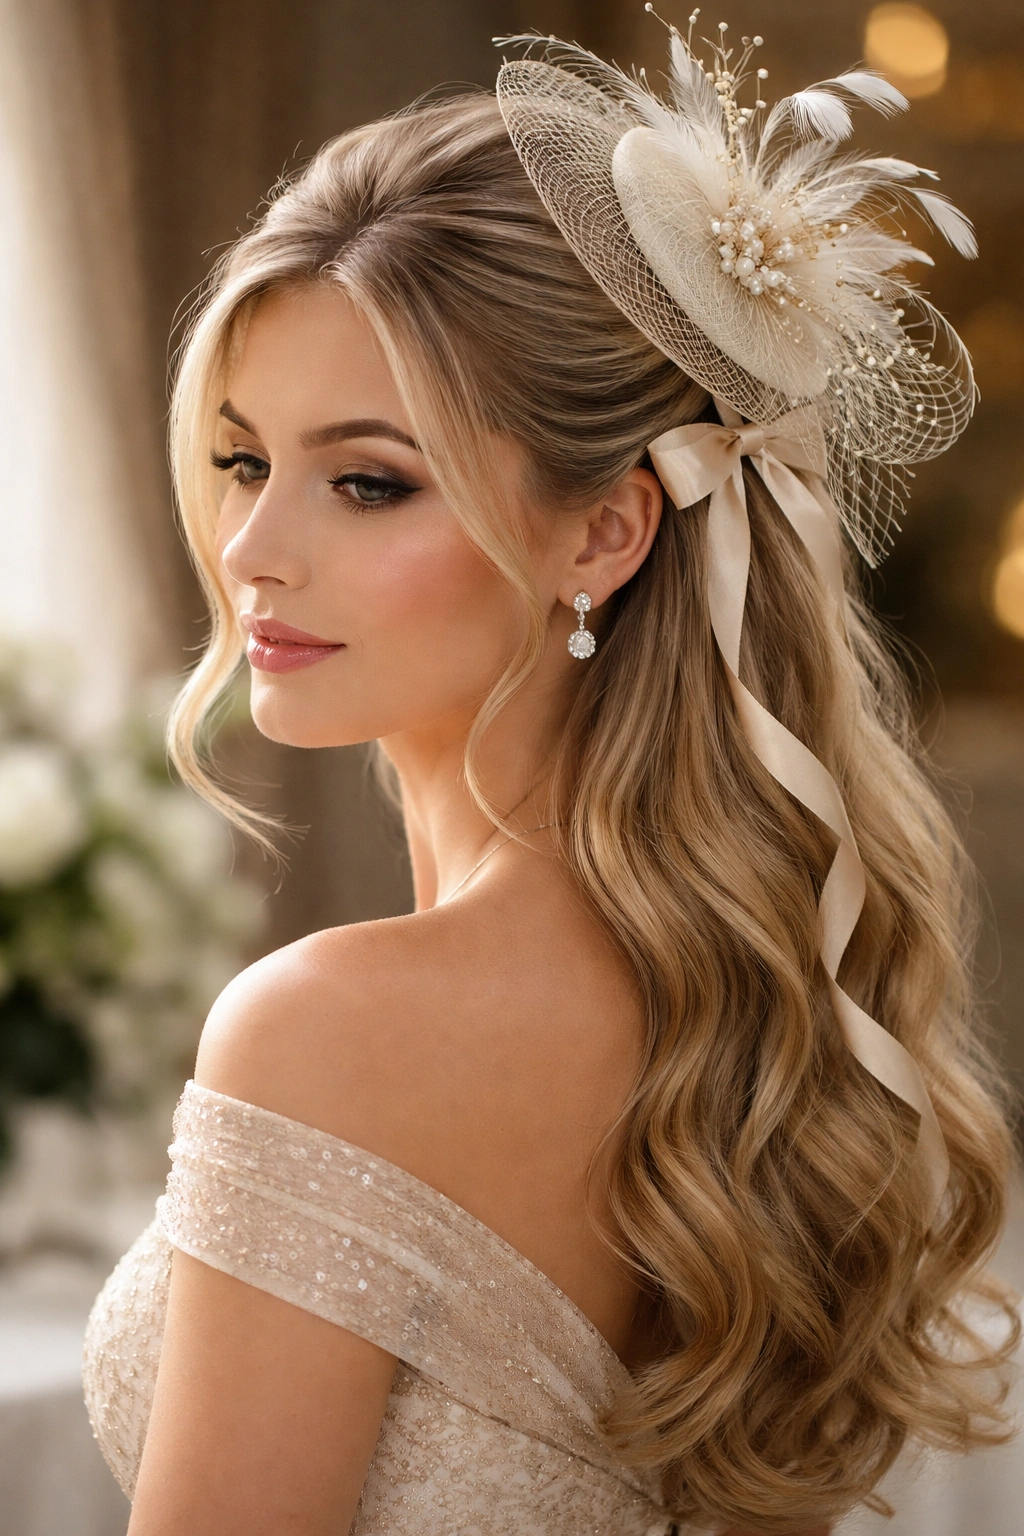
A fascinator is a small, decorative hat accessory that sits on a portion of your head, typically one side. This pairing is more formal and occasion-appropriate — think weddings, garden parties, or special events. Create your half up section and weave a thin silk ribbon through the section as you secure it. The ribbon becomes the visual focus, creating a delicate, intentional aesthetic. Your down section should be waves or curls that look polished and coordinated.
Understanding Fascinators and Hair
Fascinators require hair that’s styled in a way that gives them something to sit on and coordinate with. A simple half up section is perfect because it creates a focal point where the fascinator can nest. The fascinator itself becomes part of your hair styling — it’s not separate from it. Choose a ribbon color that coordinates with your fascinator or the overall aesthetic you’re creating. Metallic ribbons work well for event styling, while satin ribbons create a more romantic, traditional look.
Creating Formal Polished Waves
For occasion styling like this, your waves need to look intentionally set and polished. Use a curling iron to create consistent waves throughout your down section, and use a strong-hold hairspray to keep them in place throughout the event. Your half up section should look neat and intentional, with the ribbon and fascinator integrated thoughtfully. This is not the time for loose, undone styling — occasion wear benefits from a more controlled, polished approach.
Worth knowing: Fascinators are typically secured with a comb, clip, or headband attachment. Make sure your half up section is secure enough to support the weight of the fascinator without sagging throughout the event.
12. Half Up Crown Braid with a Cloche Hat
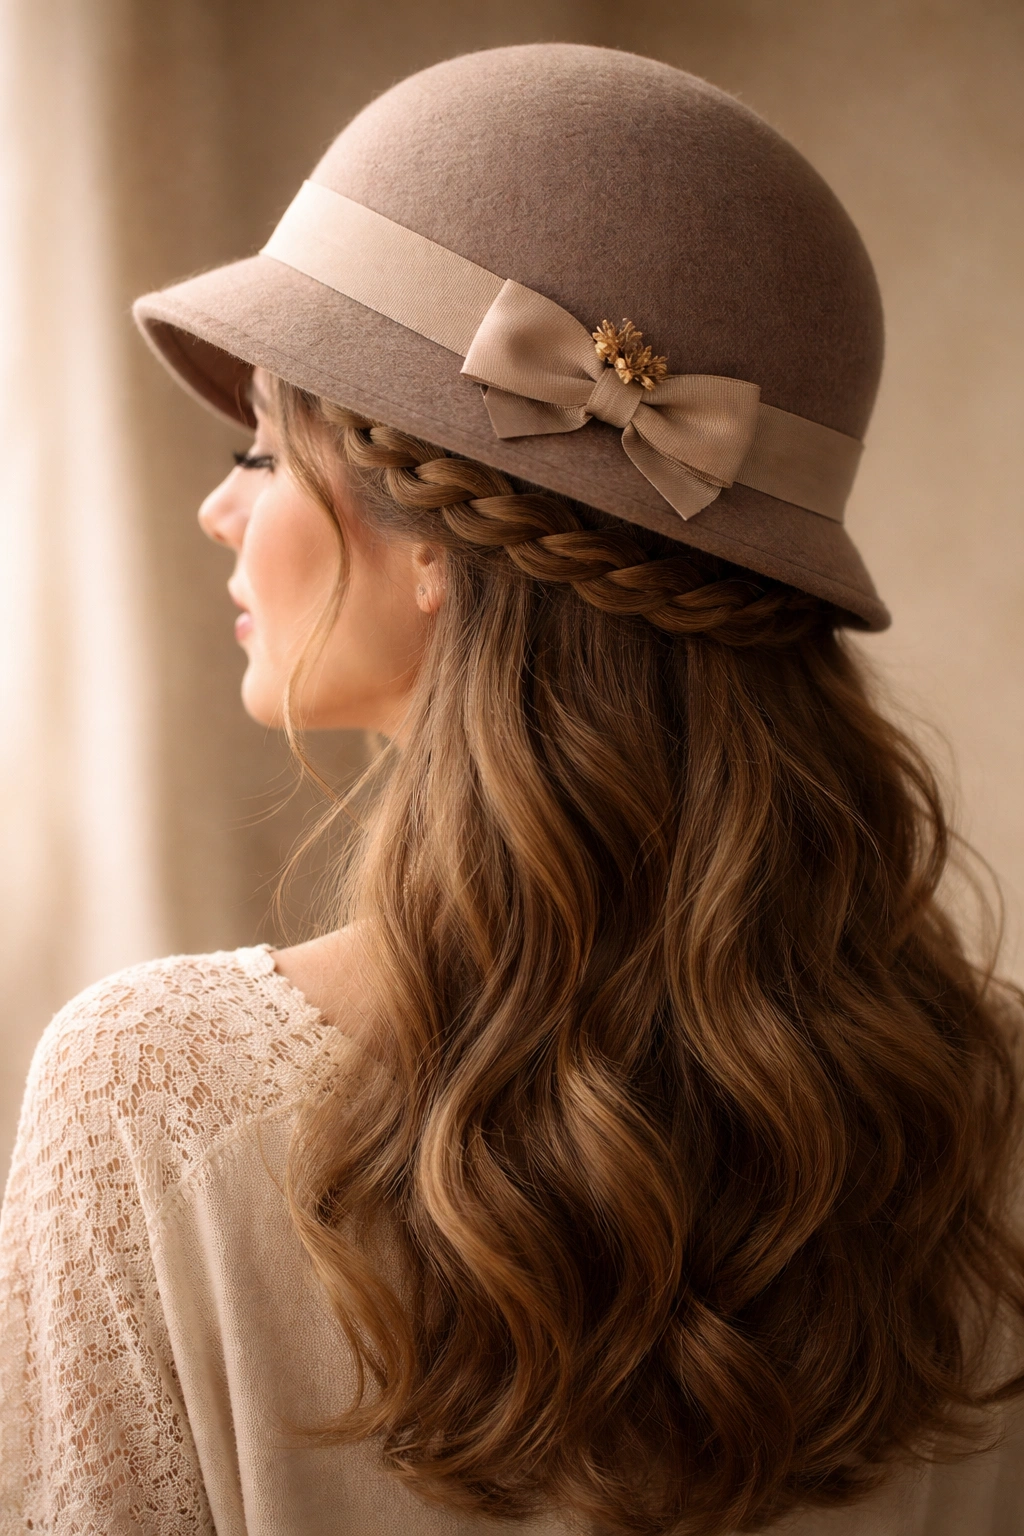
A cloche hat is a vintage-inspired, structured hat that sits relatively close to the head and creates a retro aesthetic. A crown braid is a braid that runs across the crown of your head like a halo, making it perfect for occasion styling or vintage-inspired looks. Create a crown braid by starting on one side of your head above your ear and braiding toward the opposite side. The braid should curve gently across the crown rather than running in a straight line. Secure the braid and let the rest of your hair down or in soft curls.
Building the Vintage Aesthetic
A cloche hat has serious vintage vibes, so your hair should coordinate with that aesthetic rather than feeling modern and current. A crown braid reads as classic and vintage, which pairs beautifully. The braid should be relatively tight and neat rather than loose and undone — vintage styling tends to be more controlled and polished. Your down section can be waves or curls, but they should look intentionally set rather than casual and tousled.
Creating a Braid That Works With a Cloche
Cloche hats sit relatively close to the crown, so your braid needs to be positioned in a way that won’t be completely flattened by the hat. Position your crown braid so it runs slightly lower than the highest point of the crown, allowing the cloche to sit comfortably without crushing the braid. Test this positioning before you fully commit to the styling. The braid should be visible along the sides of your head even when you’re wearing the cloche.
13. Half Up with Undercut and a Snapback
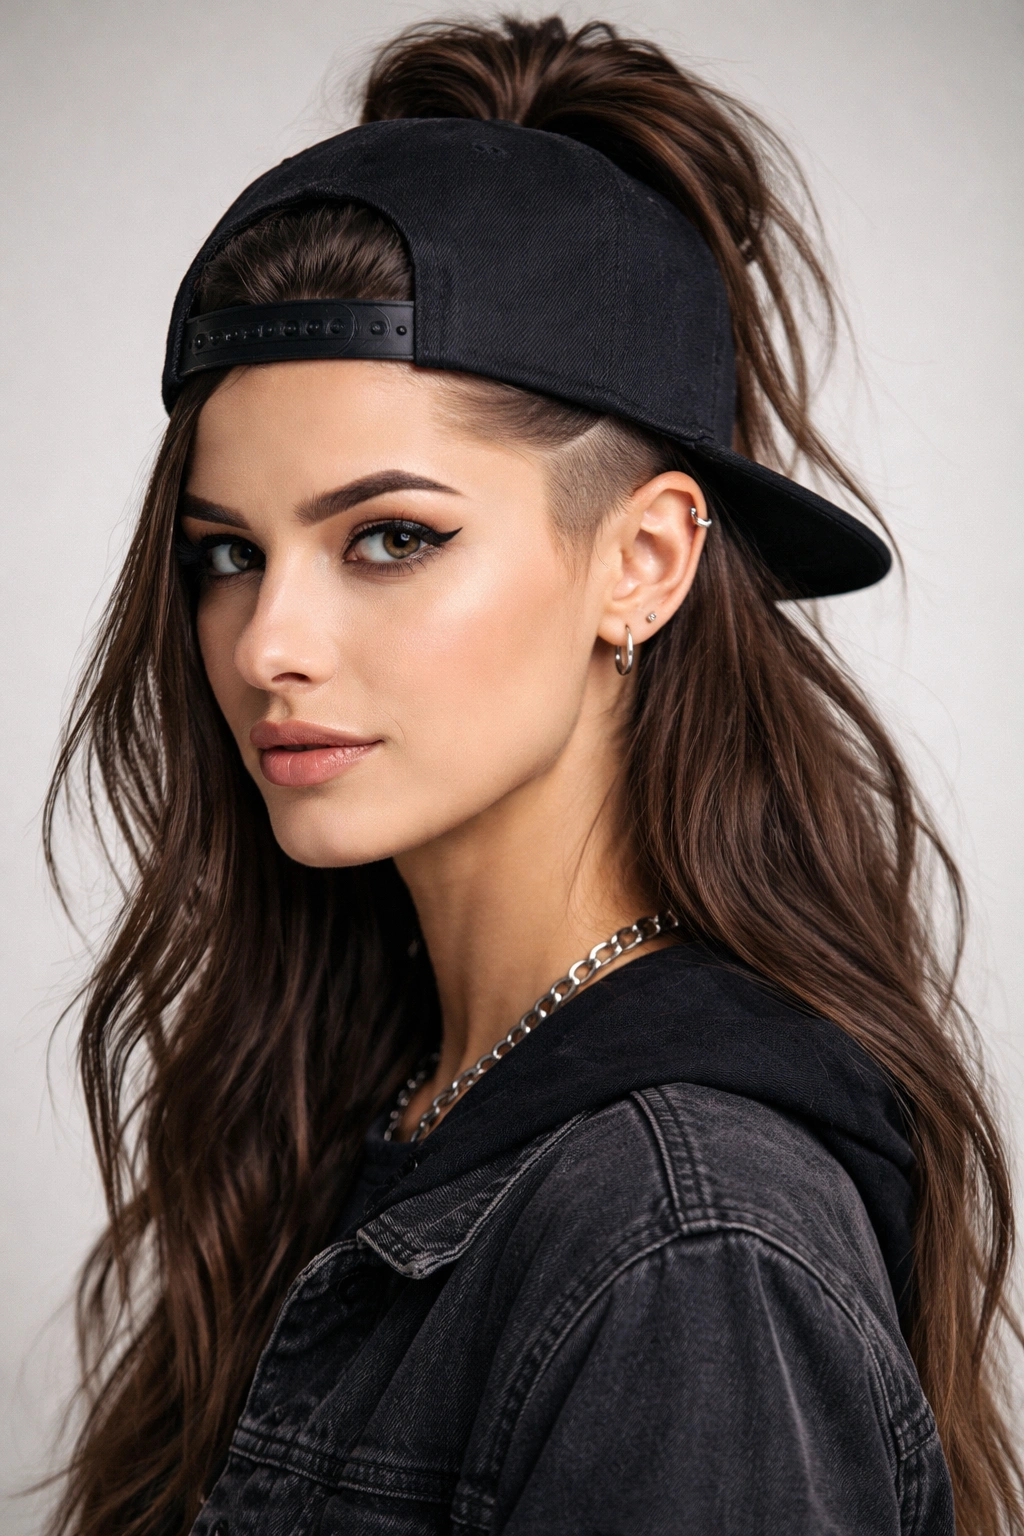
An undercut is a shaved or very short section on the lower part of your head that’s hidden when your hair is down. When you pull your hair into a half up style, the undercut becomes visible, creating an edgy, modern contrast. Create your half up section and secure it, revealing the undercut underneath. Your down section should cover the top of the undercut, creating visual interest and an intentionally styled look.
The Edge Factor of Undercuts and Snapbacks
Snapbacks are casual, sporty, and slightly edgy. An undercut adds even more edge to the overall aesthetic. Together, these elements create a look that says you’re stylish, confident, and willing to take risks with your hair. The undercut gives you a focal point — something visually interesting that makes the overall styling feel deliberate and thought-out. This is an approach for people who want their styling to make a statement.
Maintaining Your Undercut While Growing It Out
Undercuts require maintenance because the shaved section grows back relatively quickly and starts to look scraggly after a few weeks. If you’re planning to style with an undercut visible, make sure your undercut is freshly trimmed or shaped so it looks intentional and clean rather than like you forgot to get a haircut. The contrast between your down section and the undercut should be striking and clear.
Pro tip: Undercuts work best with darker hair because the contrast is more visible. If you have very light blonde hair, consider having your stylist add some color variation to the undercut or shave it closer so the contrast is still apparent.
14. Half Up Textured with a Straw Hat
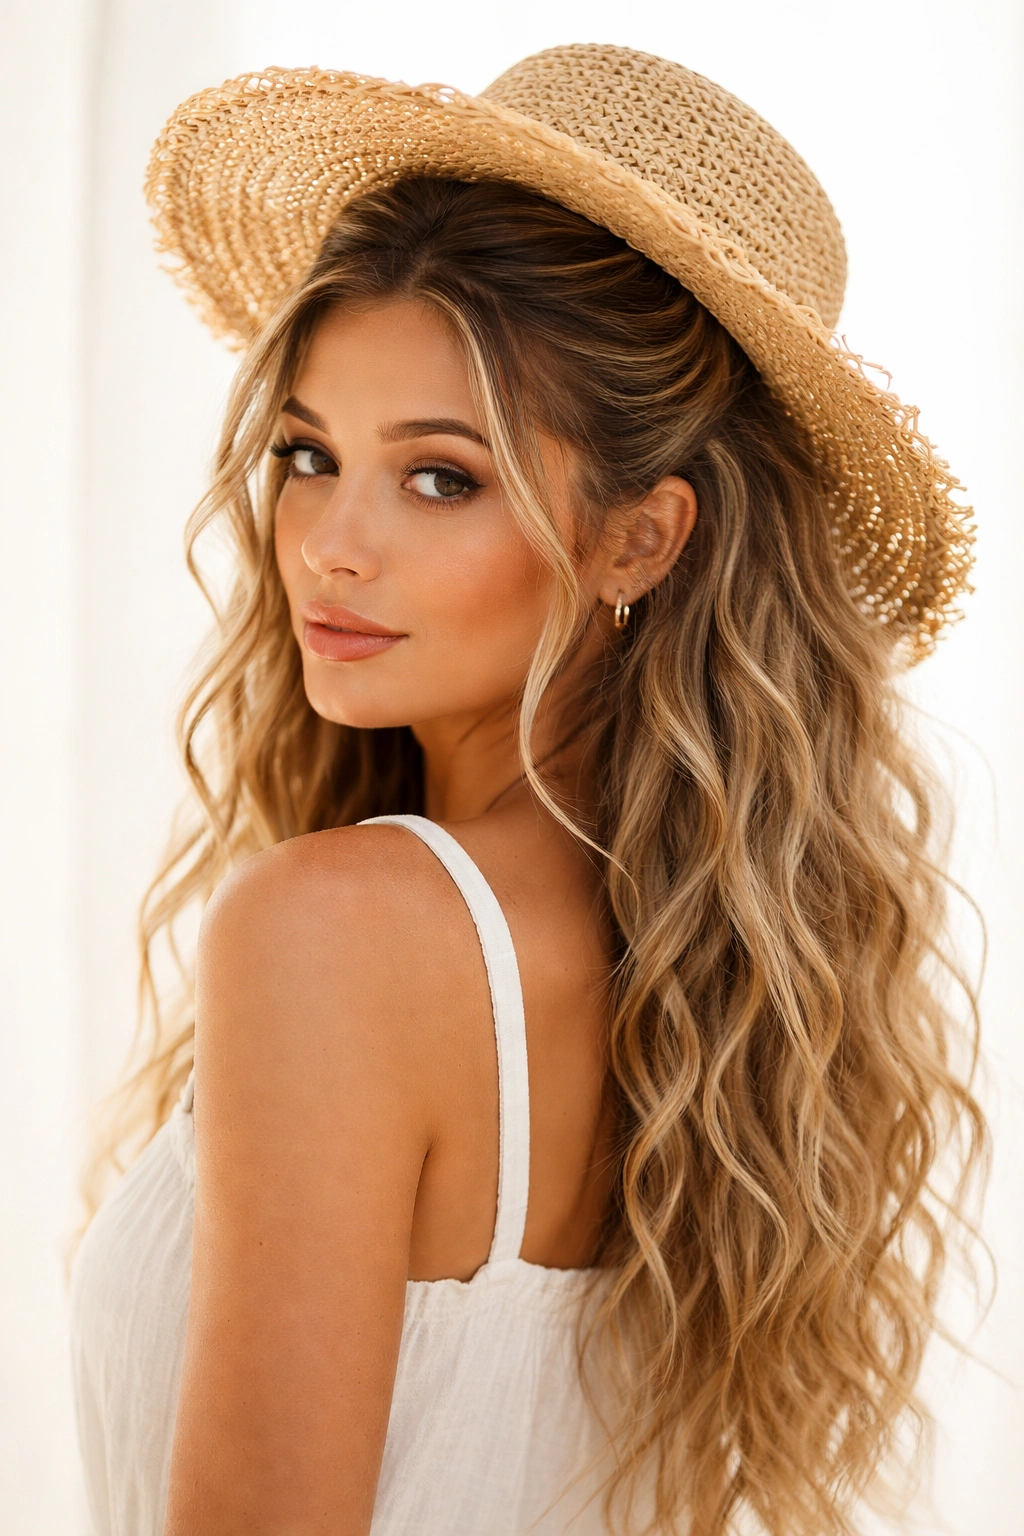
Textured hair styles — think crimped, wavy, or heavily curled throughout — pair beautifully with straw hats because both elements have an organic, natural feel. Create a half up section using texture spray or a texturizing product to add grip and substance to your hair. Your entire head should have texture and movement, from the up section to the down section. This creates a cohesive, intentional aesthetic where every part of your hair contributes to the overall vibe.
Building Texture Into Your Style
Texture spray is your friend here. Apply it to your roots and mid-lengths before you create your half up section, which will give your hair grip and prevent things from sliding. Create waves or use a texturizing product to give your entire head dimension and movement. The texture should feel intentional rather than accidental — this is a styled look where you’ve deliberately chosen to embrace texture rather than smooth, sleek hair.
Pairing Texture With a Straw Hat
Straw hats have natural texture and an organic quality that coordinates beautifully with textured hair. Sleek, smooth hair can feel too polished and formal next to a casual straw hat, but textured hair feels like a natural partner. This combination reads as effortlessly stylish — like you grabbed a hat and your textured hair just naturally coordinated with it. In reality, of course, you’ve intentionally styled the texture, but that’s the beauty of this pairing: it looks easy even though it’s put together.
15. Half Up with Accessories and a Trucker Hat
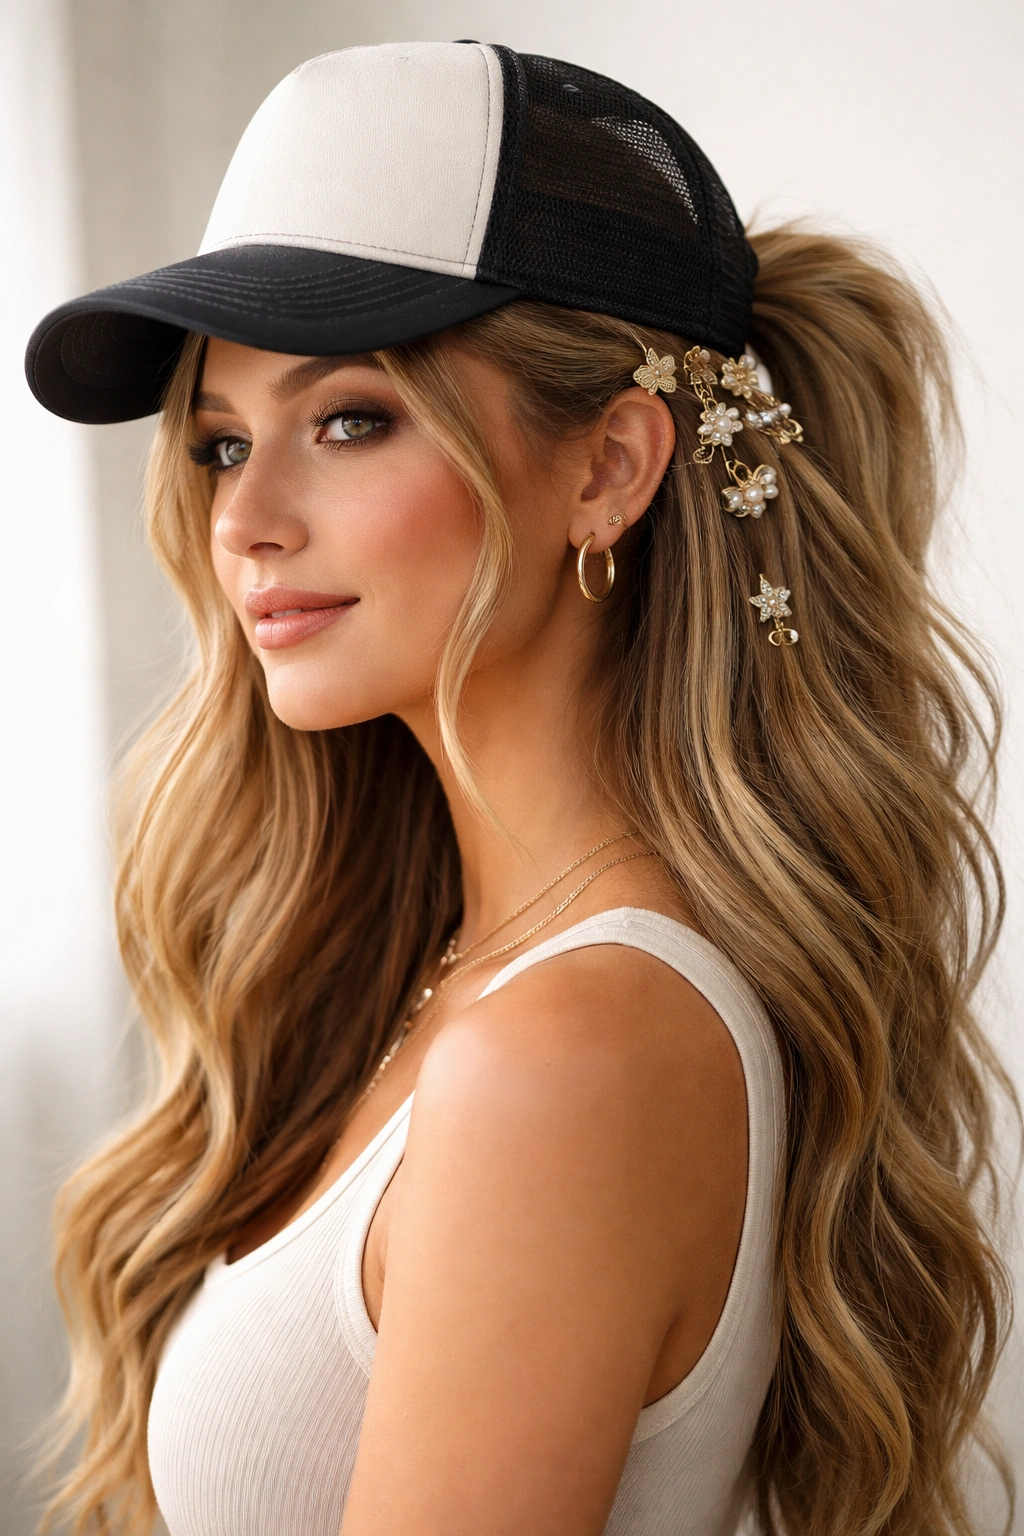
A trucker hat is a specific style of baseball cap with a mesh back panel, creating a casual, sometimes ironic or playful vibe. For this styling, create a half up section and embellish it with hair accessories — clips, pins, scrunchies, or even small hair claw clips. Your accessories become the star of this styling, creating visual interest and personality. Leave your hair down and relatively simple so the accessories can be the focal point.
Making Accessories Feel Intentional
Hair accessories can feel accidentally childish or intentionally fun depending on how you style them. The key is choosing accessories that reflect your personal aesthetic and coordinating them thoughtfully. If you’re wearing silver metal clips, use multiple silver clips rather than mixing metals. If you’re wearing a colorful scrunchie, choose one that coordinates with your trucker hat or overall outfit. The accessories should feel like a deliberate style choice, not like you grabbed whatever was in your drawer.
Combining Multiple Accessories
When you’re wearing multiple hair accessories, positioning is everything. Don’t scatter them randomly; group them in a small cluster at the back of your half up section or arrange them in a line across your crown. This creates visual cohesion and makes the accessories feel intentional rather than like you’ve accidentally acquired them throughout the day. Too many accessories spread throughout your head can look chaotic; grouped together, they look curated.
Pro tip: Coordinate your trucker hat and hair accessories intentionally. If your hat has a particular color or aesthetic, choose accessories that echo those vibes. Turquoise clips would be perfect with a turquoise trucker hat, while rainbow clips work best with neutral hats.
Final Thoughts
The magic of combining half up half down styles with hats is that you’re not sacrificing one look for another — you’re creating something that feels complete and intentionally styled. Each of these fifteen combinations brings a different vibe, from sporty and casual to polished and occasion-appropriate, which means there’s genuinely something here for every situation you find yourself in.
What makes these pairings work is understanding that a half up section creates structure and prevents that flattened-hair-under-hat feeling, while the down section maintains movement and personality. The hat becomes an accessory that enhances the hairstyle rather than a necessity you’re grudgingly tolerating. Once you nail the positioning — placing your hat so it sits at the right height relative to your half up section — everything else falls into place.
The real takeaway is that hair and hats don’t have to be enemies. With the right combination, they’re collaborators in creating a look that’s both practical and genuinely stylish. Start with the combination that appeals to you most, and feel free to adapt it based on your hair texture, the hat you love, and the occasion you’re dressing for. Your half up half down style with a hat should feel like an expression of your personal style, not a compromise you’re making.