


Crown braids are having a moment, and for good reason—they’re elegant, romantic, and look infinitely more sophisticated than their difficulty level suggests. But here’s the thing most tutorials skip: crown braids look different on short hair, and that’s actually an advantage. While longer hair can sometimes look heavy or overdone with a crown braid half up style, shorter lengths hit a sweet spot where the braid becomes the focal point without overwhelming your face or neck. The crown braid half up half down style lets you keep volume and movement at the crown while securing just enough hair to feel polished, and it works beautifully whether your hair is chin-length, shoulder-length, or a textured pixie-lob hybrid.
What makes this style so versatile for shorter hair is the sheer number of ways you can adapt it. You can go romantic and loose, sleek and modern, playful and undone, or even edgy with unexpected colors or textures. The crown braid isn’t just one look—it’s a framework that changes completely based on braid tightness, where you position it, what you do with the remaining half-down hair, and whether you go for one braid, two, or a hybrid style. We’re walking through 12 distinct versions of the crown braid half up half down, each one different enough to feel like a completely new style, so you can find the version that matches your hair type, your face shape, your personal style, and the occasion.
Why Crown Braids Work Beautifully on Short Hair
Short hair has a reputation for being limiting when it comes to intricate styles, but that reputation is completely unfair. The reality is that crown braids actually showcase better on shorter lengths because every detail of the braid itself becomes visible—there’s no long hair disguising loose sections or uneven weaving. On short hair, a crown braid reads immediately as intentional and elegant, even when it’s deliberately undone or textured.
The half-up half-down format is especially smart for shorter hair because it creates visual interest at the crown without the weight or heat damage of a full updo. You get the gathered, polished feel of a styled look paired with the effortless movement of wearing your hair down. This matters more on shorter hair because the placement of the braid directly influences how much volume you maintain at the crown and how much face-framing you preserve—both crucial for a flattering short-hair style.
Short hair also holds braids longer than longer hair does. A braid worked into chin-length or shoulder-length hair stays intact through washing, sleeping, and daily movement better than a braid in waist-length hair simply because there’s less weight and less length to create stress points. This means you can actually wear your crown braid half-up style for multiple days without it falling apart, which is a genuine practical advantage.
The Physics of Crown Braids on Shorter Hair
A crown braid creates a halo effect by wrapping braided sections around the head, starting at one side and ending at the other. When your hair is shorter, the braid sits closer to your scalp, which means you see the actual architecture of the braid more clearly—no hair covering it up, no length hiding sections. This is why braid quality matters so much more on short hair. A loose, textured crown braid reads as bohemian and intentional on short hair; the same loose braid on longer hair sometimes reads as sloppy.
The half-up format creates a natural division point at roughly ear level, and that division point feels different depending on your hair length. With short hair, you’re gathering maybe 30-40% of your total hair into the crown braid, leaving the rest to fall freely. This creates more contrast and definition than you’d see with longer hair, where half-up styles can sometimes feel like they’re not doing much visual work.
Short Hair Textures and Braid Hold
Textured or curly short hair holds braids differently than straight short hair. With curls or waves, a crown braid tends to grip better because the texture gives the braid something to hold onto; you’ll need fewer bobby pins and the braid will last longer without slipping. With straight, fine short hair, you may need to texturize first or use a light hairspray before braiding to give the braid grip. This isn’t a limitation—it’s just the reality of working with different hair types, and it’s worth knowing before you start.
1. The Classic Loose Crown Braid Half-Up
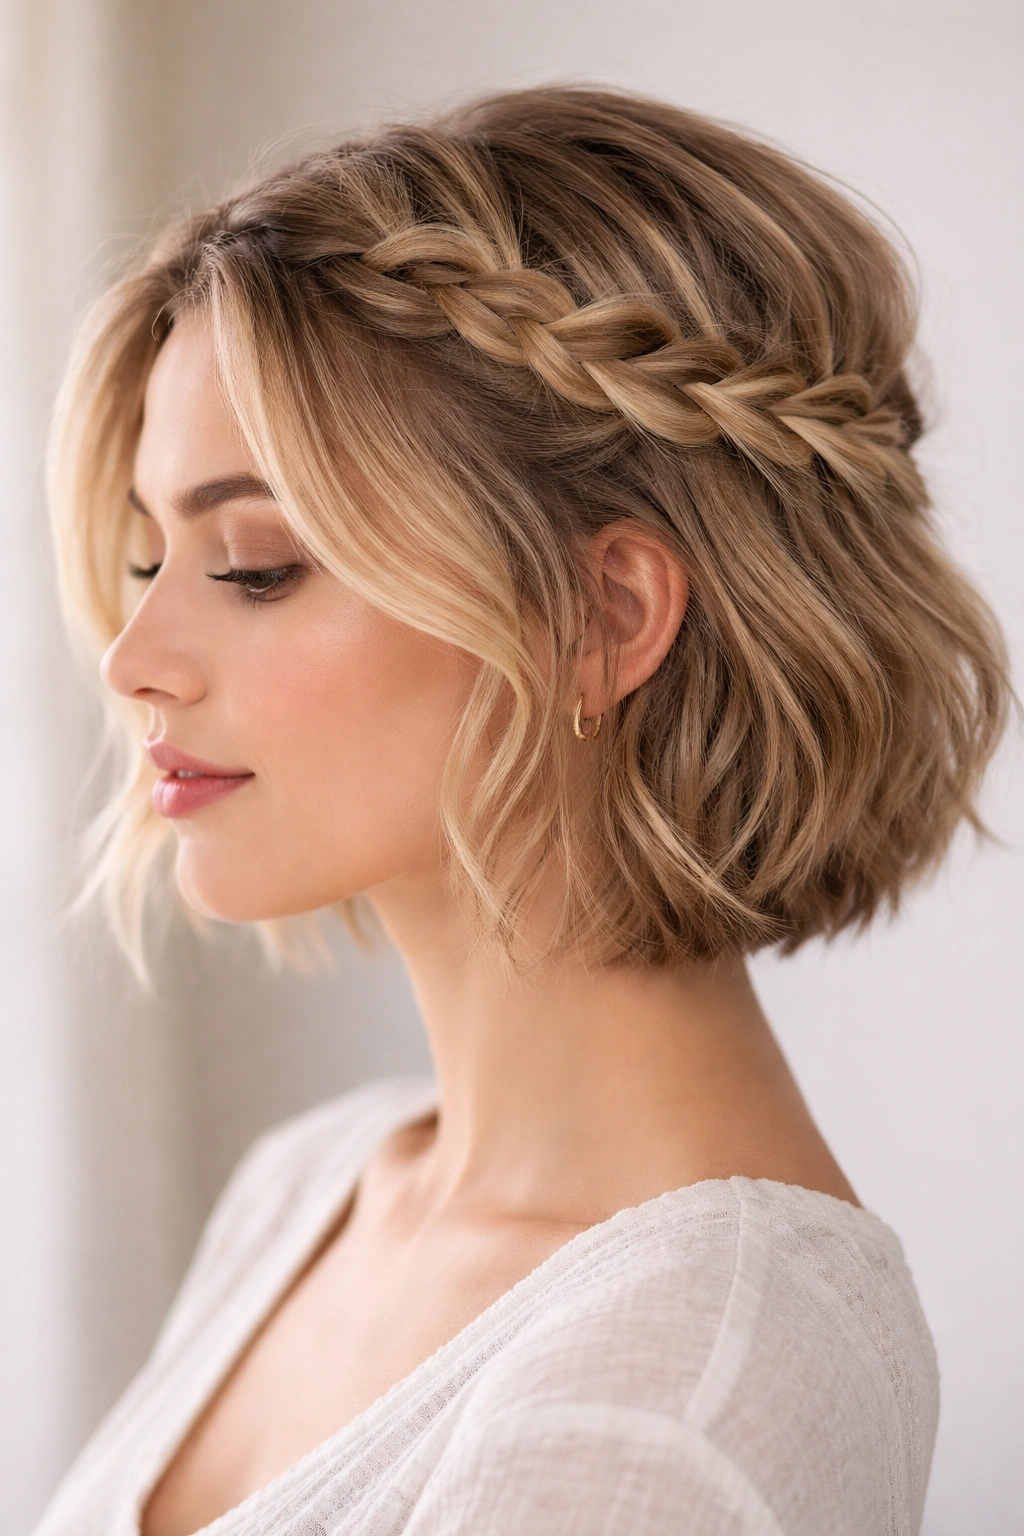
The classic version is the place to start if you’ve never attempted a crown braid before, and it’s the version that works with virtually every short-hair type and texture. This style takes a three-strand braid, starts it at one temple (just above your ear), wraps it around the crown of your head, and pins it behind the opposite ear. The braid itself is intentionally loose and textured—not tight, not neat—so it looks romantic and undone rather than formal.
Why This Version Works for Short Hair
Loose braids read as effortless and modern, which suits short hair perfectly because short styles already have an inherent sense of movement. When you keep the crown braid loose, it plays up that movement instead of fighting against it. The loose texture also creates volume at the crown without needing any backcomb or teasing, since the braid itself sits airy and fluffy rather than sleek and smooth.
How to Create This Look
- Brush your hair smooth and part it slightly off-center
- Take a three-strand section of hair at your temple (about 2 inches wide)
- Begin a basic three-strand braid, but deliberately keep it loose—don’t pull the strands tight as you cross them
- As you braid around the crown toward the opposite side, gently pull the edges of each section to make the braid wider and airier
- Once you reach the opposite temple, secure the braid with a bobby pin that matches your hair color
- Leave the remaining half of your hair loose and let it fall naturally
- Use a light texturizing spray to add grip and make the braid feel more deliberately undone
Pro tip: If you’re working with straight hair and your braid feels slippery, mist the hair with a texturizing spray or light hairspray before you start braiding—this gives the strands something to grip onto and keeps the braid from sliding down throughout the day.
2. The Double Crown Braid Half-Up
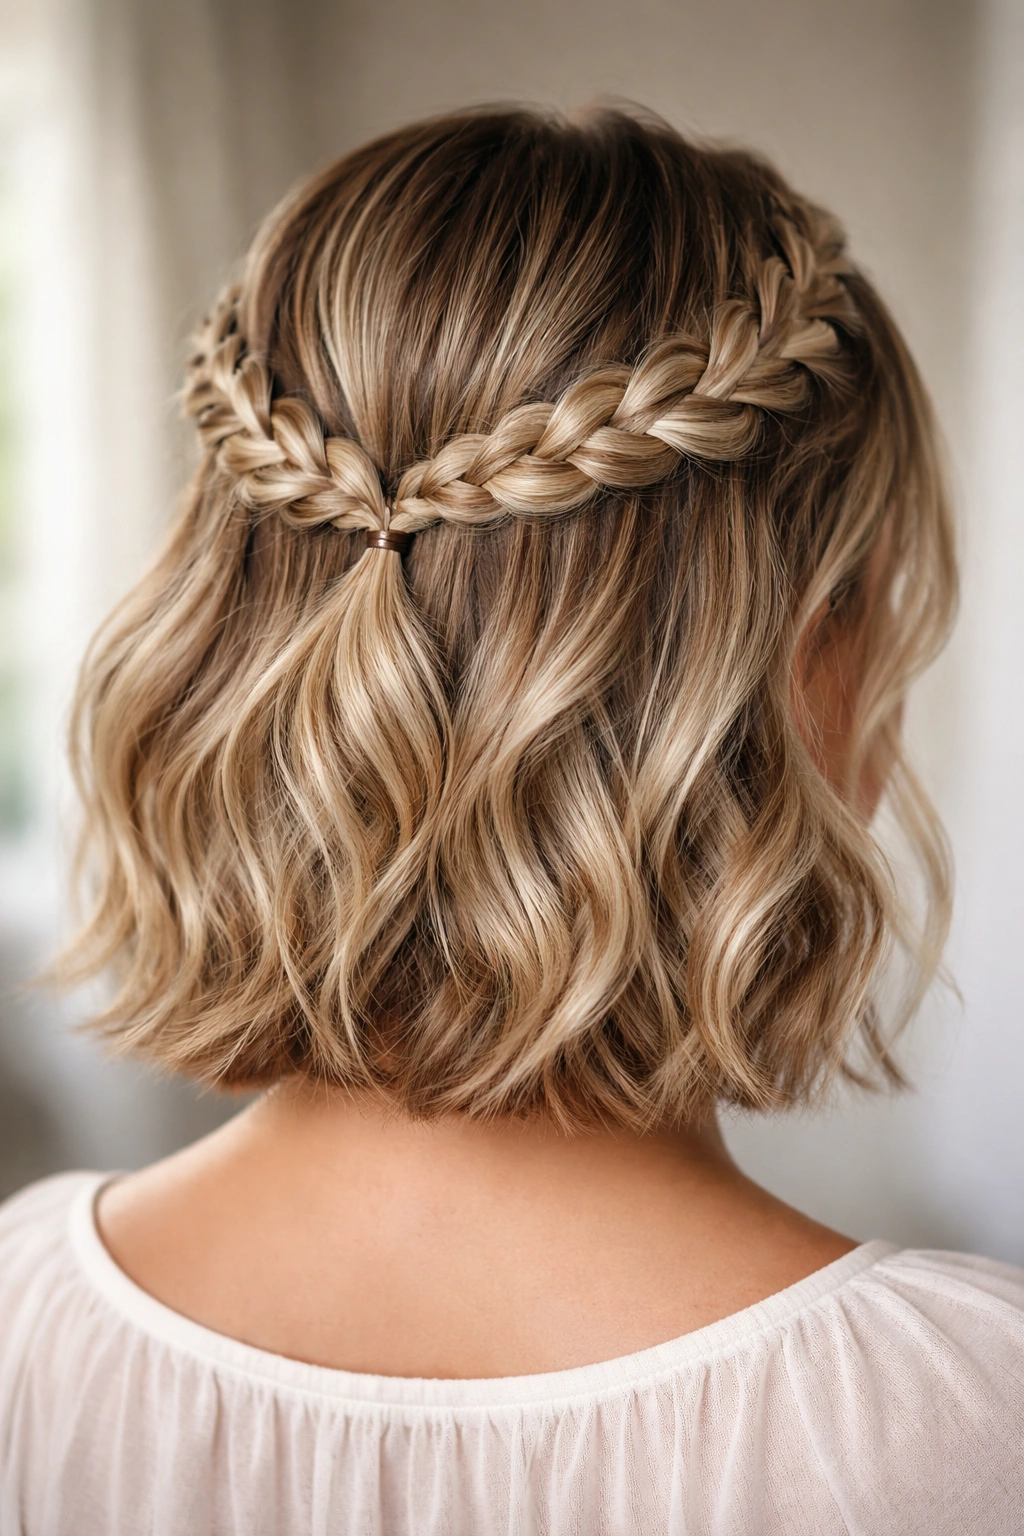
This version uses two matching braids instead of one, creating a more graphic, intentional-looking style. You’ll take a section of hair above each ear and braid both sides simultaneously, meeting both braids at the back center of your head and securing them together. This double braid version reads more polished and structured than the single crown braid, and it’s perfect for occasions where you want something that looks obviously styled rather than casually undone.
Why Two Braids Change Everything
Two braids create symmetry, which automatically reads as more intentional and put-together than one braid. On short hair, where proportions matter more, two matching braids also balance your face better—they frame it evenly rather than pulling to one side. The visual weight of two thin braids feels lighter than one thicker crown braid, which suits finer or thinner short hair beautifully.
Styling This Look
- Create a center or slightly off-center part
- Take a section about 2 inches wide above your right ear and begin a three-strand braid
- Simultaneously, take a matching section above your left ear and begin an identical braid
- Braid both sections loosely toward the back center of your head, keeping the tension and tightness identical on both sides
- Once both braids reach the center back, twist or braid them together briefly, then secure with bobby pins
- Let the remaining hair fall loose—this creates a soft frame around the face while keeping the braided crown looking structured
Worth knowing: The two-braid version is easier to keep symmetric if you use a mirror or ask someone to help you with initial placement. It’s worth taking an extra minute to get the braid placement matched; asymmetrical braids can look intentionally edgy, but unintentionally off-balance looks unpolished.
3. The French Crown Braid
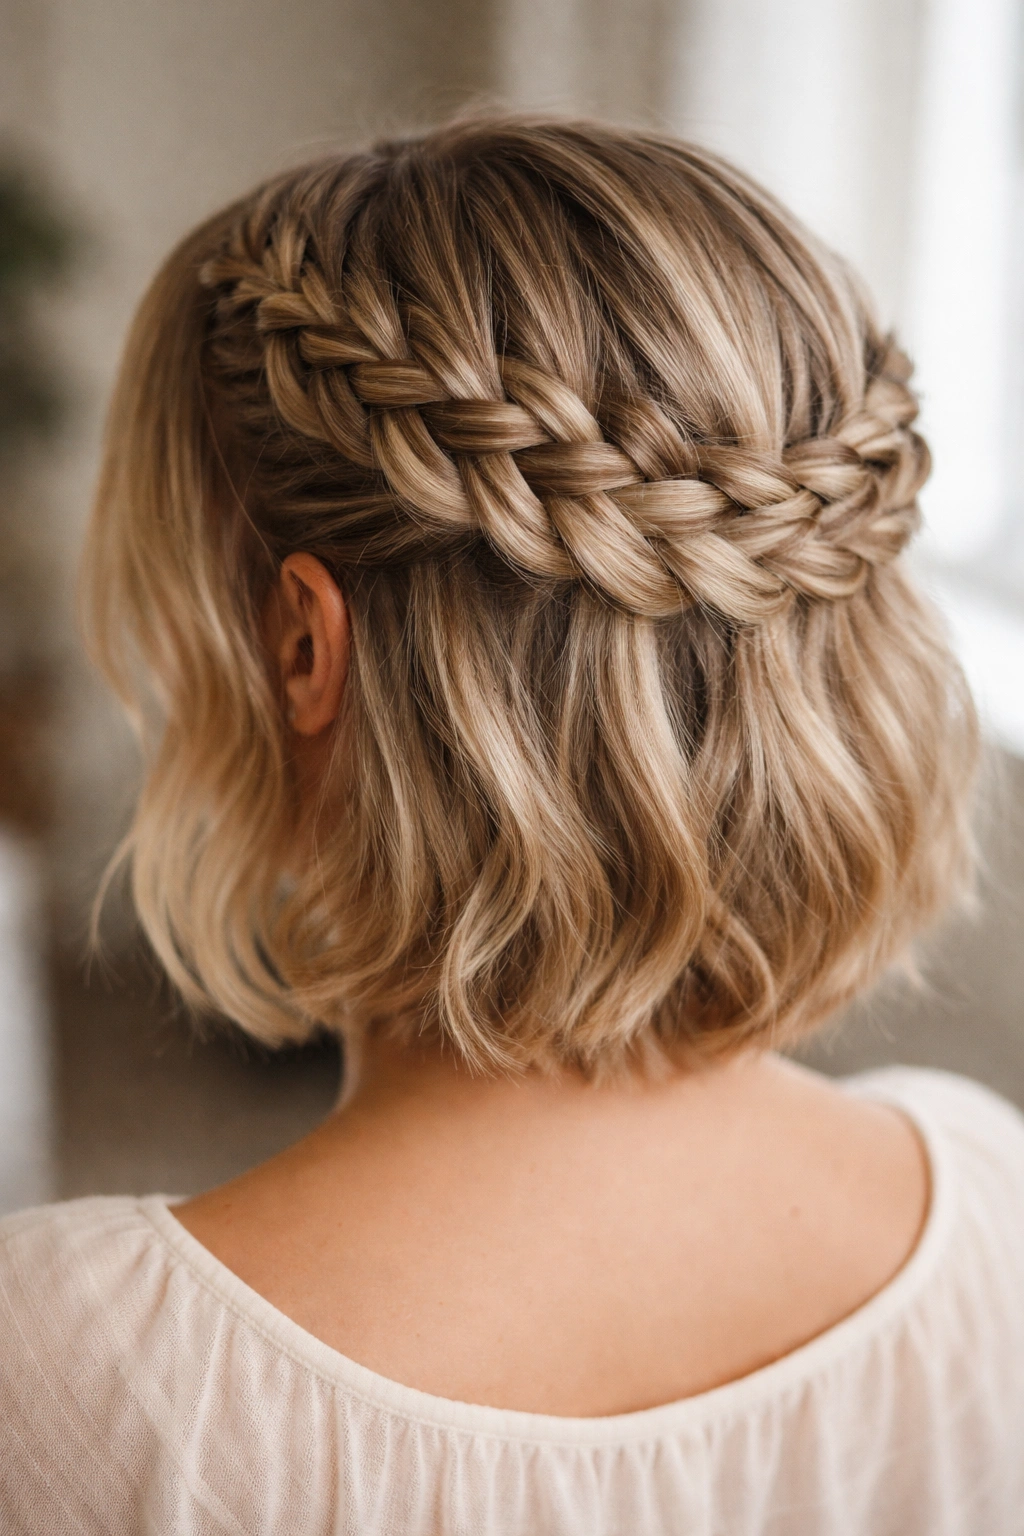
A French crown braid pulls hair into the braid as it wraps around the crown, creating a more secured, sculptural look than a three-strand crown braid that sits on top of the head. Starting at the nape of your neck or behind one ear, you add hair to the braid as you work upward and around the crown, incorporating loose sections as you go. This version is more formal and structured than loose crown braids, and it works beautifully for short hair that tends toward fine texture or slippery strands.
The Key Difference From Regular Crown Braids
Instead of braiding pre-selected sections separately and laying the braid on top of the crown, French crown braiding weaves hair into the braid as it forms. Think of it like a French braid that travels around your head rather than down the back of it. This means the braid is built into your hair rather than sitting on top of it, creating more hold and a more finished appearance. On short hair, this matters because there’s less surface area to work with—French braiding secures the braid more effectively so it doesn’t slip throughout the day.
How to Execute This Version
- Start at the nape of your neck on one side, taking a small three-strand section
- Begin a French braid, adding small sections of hair from around the crown as you braid upward and across the back of the head
- Continue adding hair as you work the braid around to the opposite side
- Once you’ve incorporated enough hair and the braid has made its way around the crown, finish with regular three-strand braiding to secure the end
- Pin the braid end behind the opposite ear
- Gently pull the braid slightly to create texture and dimension
Pro tip: French braids require more precision than regular crown braids. If you have fine or slippery hair, apply a dry texture spray to your roots before starting so the sections you’re adding to the braid have grip.
4. The Braided Pigtail Half-Up
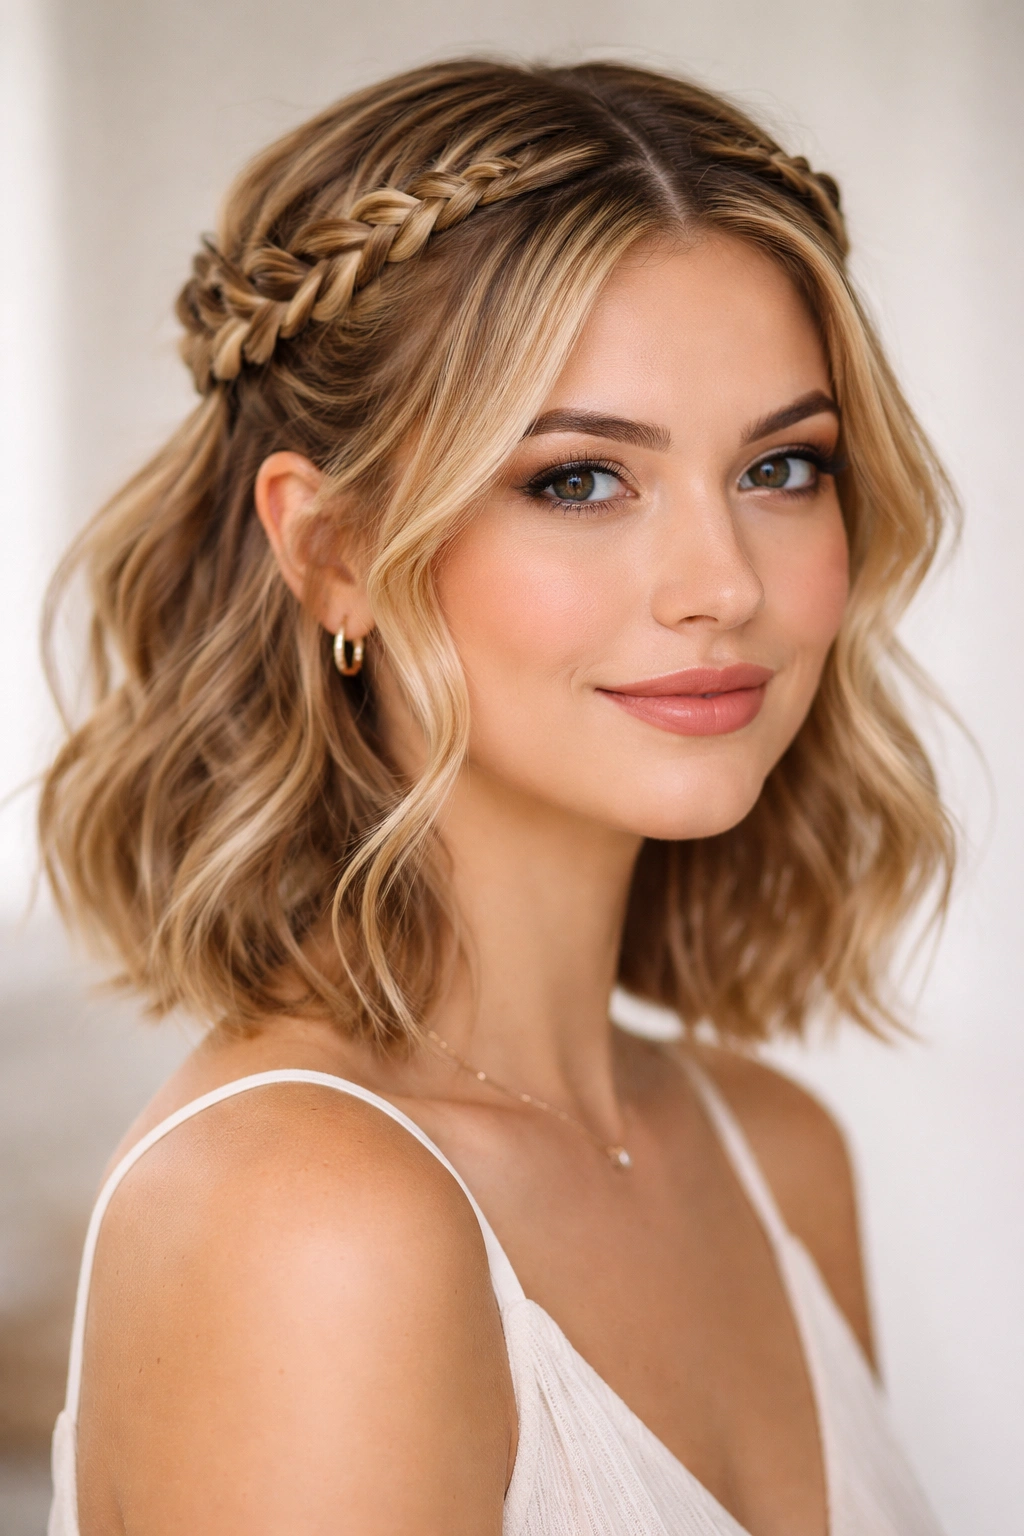
This playful version combines the sweetness of pigtails with the sophistication of a crown braid. Instead of one crown braid, you create two separate crown braids positioned higher on the head, meeting in the center back and secured together. The result reads somewhere between playful and polished—it has the fun energy of pigtails but the elegance of crown braiding. This style is perfect for short hair because it adds visual interest at the crown without feeling juvenile or unrefined.
When This Style Works Best
The braided pigtail half-up reads wonderful for casual occasions, creative dates, music festivals, or any time you want something that looks intentional and a little bit fun without being overly formal. On short hair, two separate crown braids also create more texture and visual movement than one single braid, which can be especially appealing if your hair is very straight or fine.
Creating the Braided Pigtail Look
- Create a center part
- Take a section of hair about 2 inches wide directly above your right ear
- Braid this section loosely, but instead of bringing it straight back to the center, angle the braid slightly toward the very top-back of your head
- Do the same on the left side, angling that braid to match the first
- Both braids should meet at the very back center of your crown
- Secure both braids together with bobby pins, letting them overlap slightly or sit side-by-side depending on your preference
- Leave the remaining hair loose for a playful, textured frame
Quick facts about this style:
- Works wonderfully with straight, wavy, and curly textures
- Creates a higher visual “crown” than single crown braids, which suits round or square face shapes
- Takes about 5-10 minutes once you’ve practiced it a few times
- Reads more polished if you use texture spray and keep the braids deliberately loose
5. The Twisted Crown Variation
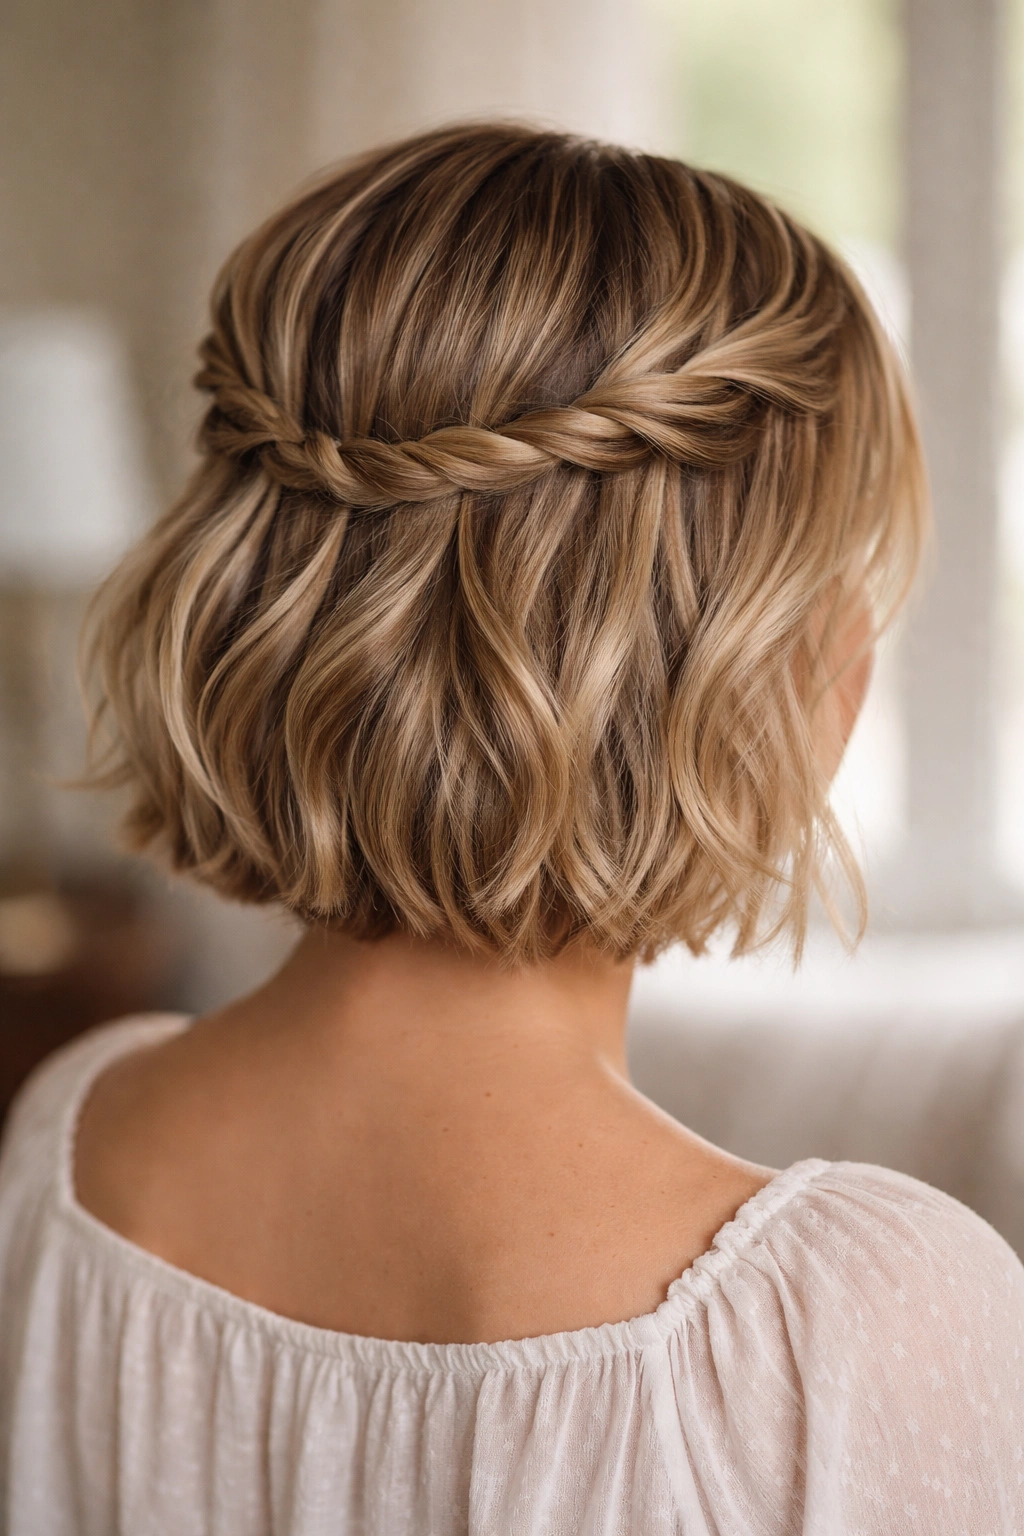
For those times when you want the visual of a crown braid without actually braiding, the twisted crown uses two simple twists instead of braids. Take sections of hair from above each ear and twist them (rather than braid them) around the crown, meeting in the back center. Twists are much faster than braids, they work equally well on short hair, and they read just as intentional and styled. This is your move if you’re short on time but want something that looks thoughtfully put-together.
Why Twists Are Underrated
A twisted crown reads just as polished as a braided crown, but it takes roughly half the time and requires zero braiding skill. On short hair, where you’re probably not working with masses of hair to begin with, two simple twists travel around the crown beautifully and hold just as well as braids, especially if you use bobby pins and light hairspray.
The Twisted Crown How-To
- Brush your hair back gently and separate a section above your right ear (about 2-3 inches wide)
- Twist this section loosely as you move it toward the back center of your head
- Repeat on the left side, creating a matching twist
- Secure both twists at the back center with bobby pins
- Pull the twists gently to create texture and dimension
- Leave the remaining hair down and loose
Insider note: Twists hold better on hair with natural texture or with a light application of dry texture spray beforehand. If you have very straight, slippery hair, use one bobby pin per side rather than relying on tension alone.
6. The Half-Braided Half-Twisted Crown
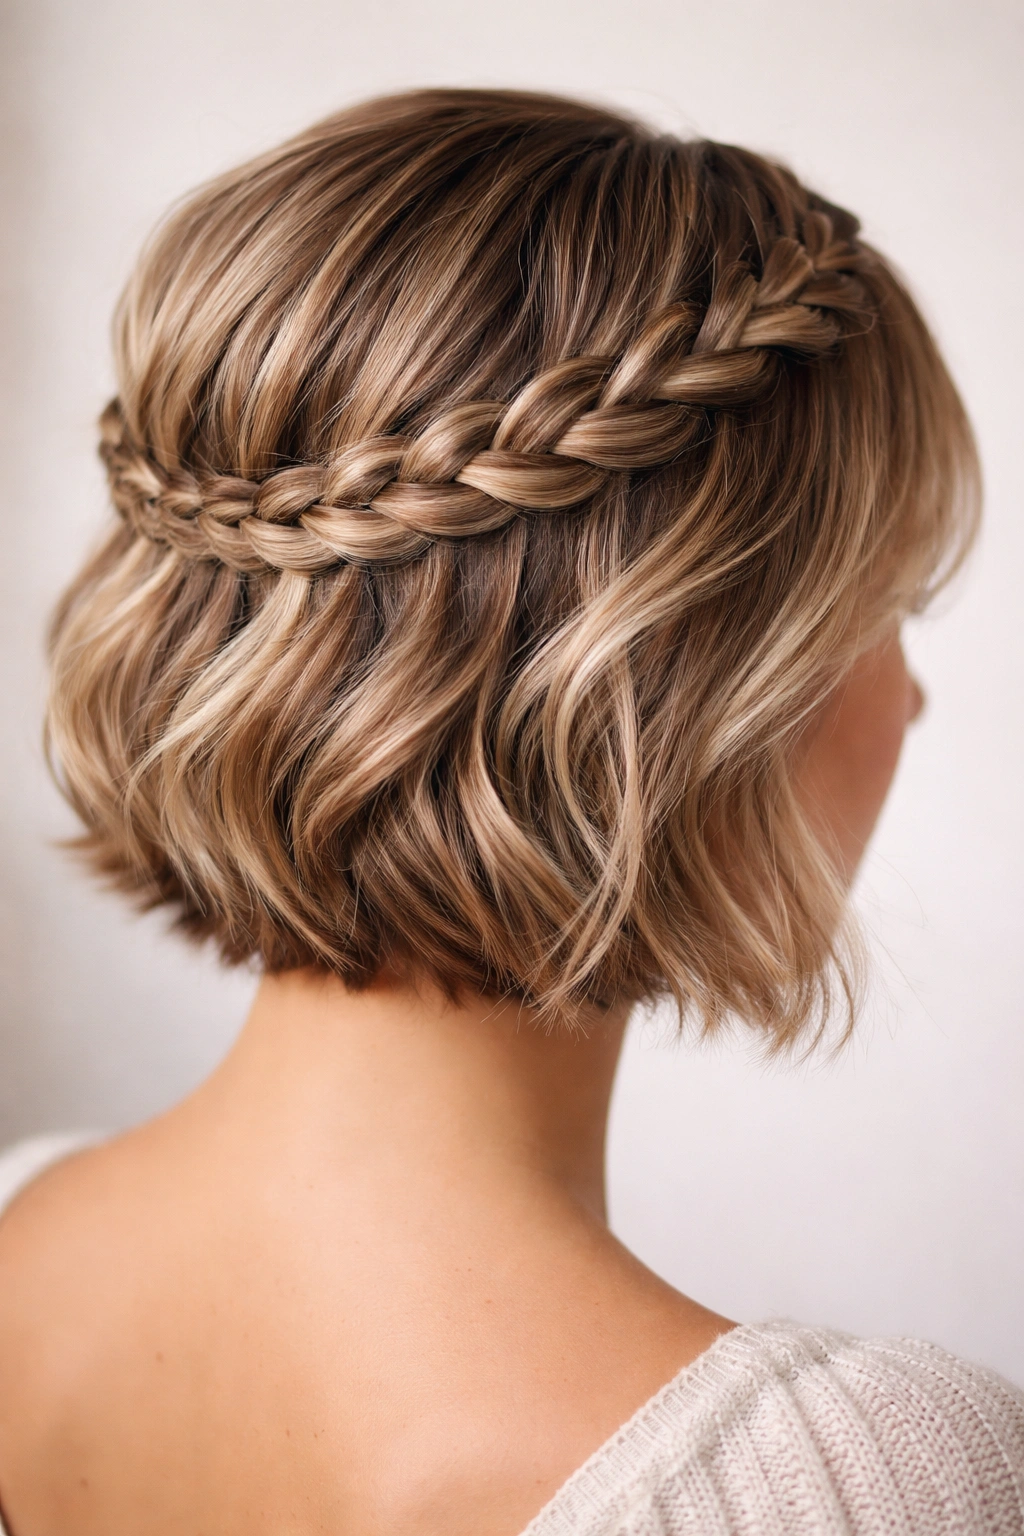
This hybrid style combines braiding and twisting, creating visual variety and depth. One side of the crown might be braided while the other is twisted, or you might braid the bottom half of each crown section and twist the top half. This version works beautifully for short hair because it creates complexity and interest without requiring twice the effort—it looks more involved than it actually is. The mix of textures (braid weave alongside twisted strands) reads immediately as thoughtfully designed rather than randomly assembled.
The Visual Appeal of Mixed Techniques
Mixing braids and twists creates a more dynamic, interesting silhouette than either technique alone. The braid has a geometric, interlocking pattern while the twist is smoother and rounder—putting them side-by-side creates contrast that catches light and draws the eye. On short hair, where you’re working with defined proportions, this contrast matters. It prevents the crown from looking flat or one-dimensional.
How to Build This Hybrid Style
- Take a section above your right ear
- Braid this section loosely for the first inch or so
- Switch to twisting the same section for the remaining length as you bring it toward the back center
- Repeat on the left side, mirroring the first side perfectly
- Secure both sections together at the back center with bobby pins
- Add texture and dimension by gently pulling sections throughout
What to know: This style requires a moment of planning—you need to decide in advance where your transition from braid to twist will happen on each side. Make it symmetrical for a polished look, or intentionally asymmetrical if you want something edgier and more artistic.
7. The Fishtail Crown Braid Half-Up
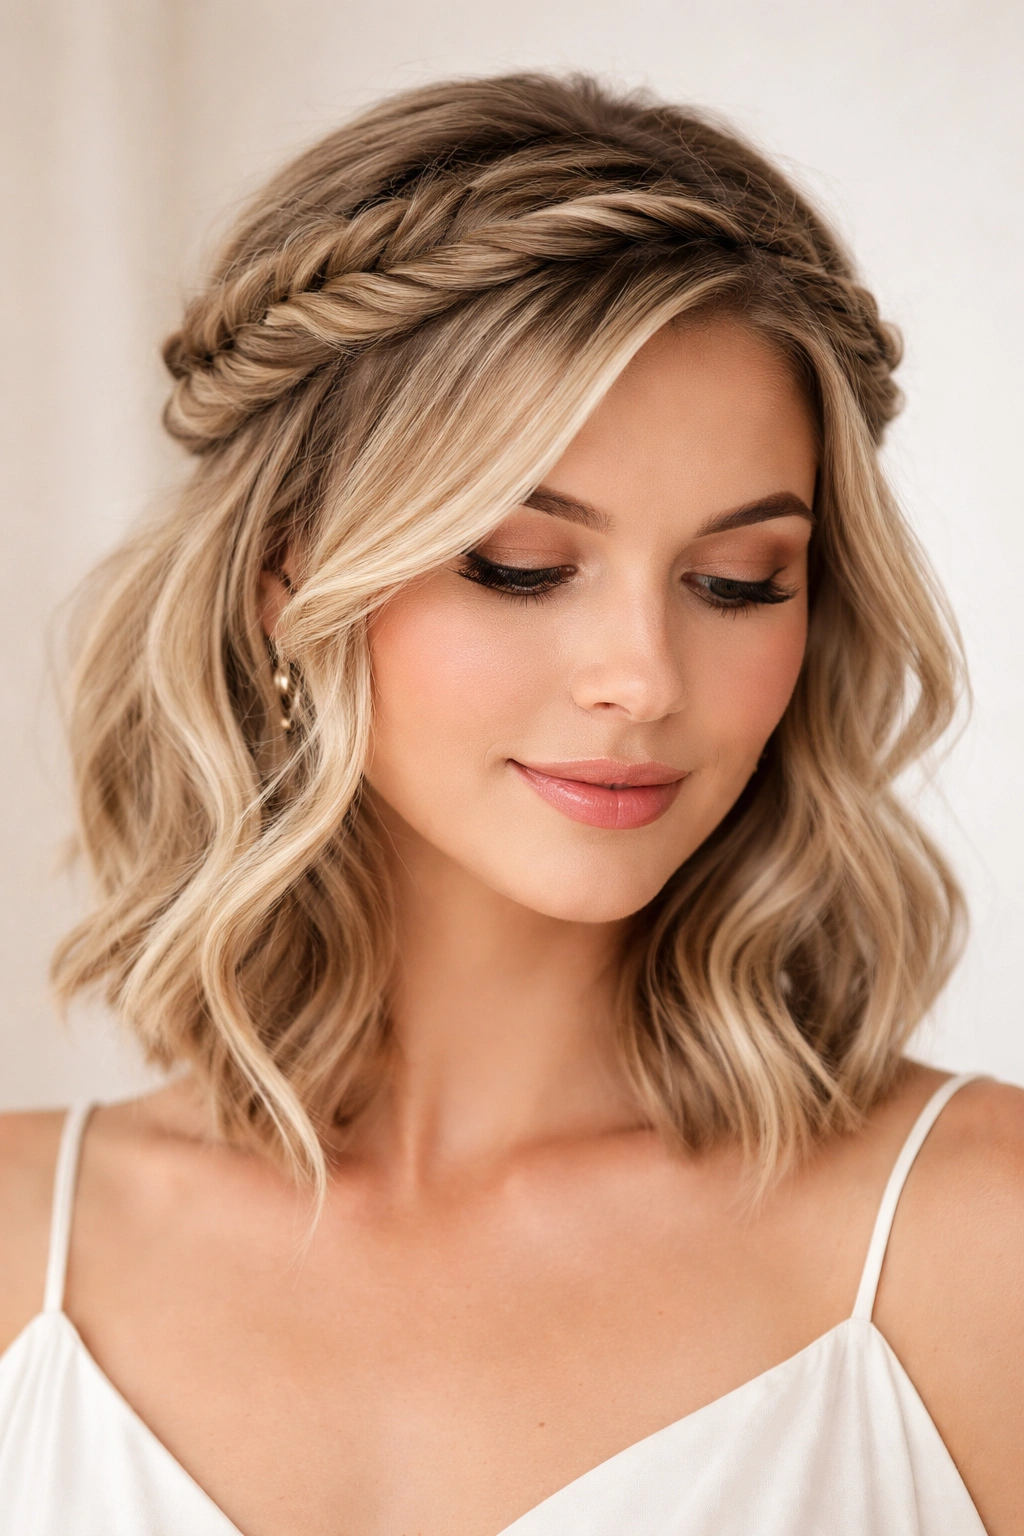
For those who love the look of a crown braid but want something that photographs differently and reads more intricate-looking, the fishtail crown braid is your answer. A fishtail braid uses only two strand sections instead of three, creating a finer, more delicate texture than a traditional three-strand crown braid. The fishtail version takes a touch longer to create, but the result is so visually interesting that it feels more special—perfect for occasions where you want to look like you invested real effort into your style.
What Makes Fishtail Braids Special
Fishtail braids create a more intricate, finer pattern than three-strand braids, making them look more complex and detailed without requiring more skill once you understand the technique. On short hair, the delicate pattern of a fishtail becomes even more visible, creating a stunning focal point at the crown. Fishtail braids also feel lighter and more modern than traditional braids, which suits contemporary short-hair styles beautifully.
Creating a Fishtail Crown Braid
- Take a section of hair at your temple and divide it into two strand sections (not three)
- Take a thin piece of hair from the outside of the right strand and cross it over to meet the left strand
- Take a thin piece of hair from the outside of the left strand and cross it over to meet the right strand
- Continue alternating, taking thin outside pieces and crossing them to the opposite side
- As you practice, this motion becomes rhythmic and gets faster
- Work the fishtail across the crown toward the opposite ear, then secure with a bobby pin
- Leave remaining hair loose, and gently pull the braid to create texture
Pro tip: Fishtail braids are actually easier on short hair because you have less total length to work with, so your hands don’t get tired. Start practicing fishtail braids on short-haired friends or family members if you can—the shorter length makes it a gentler learning experience.
8. The Jeweled or Accessorized Crown Braid
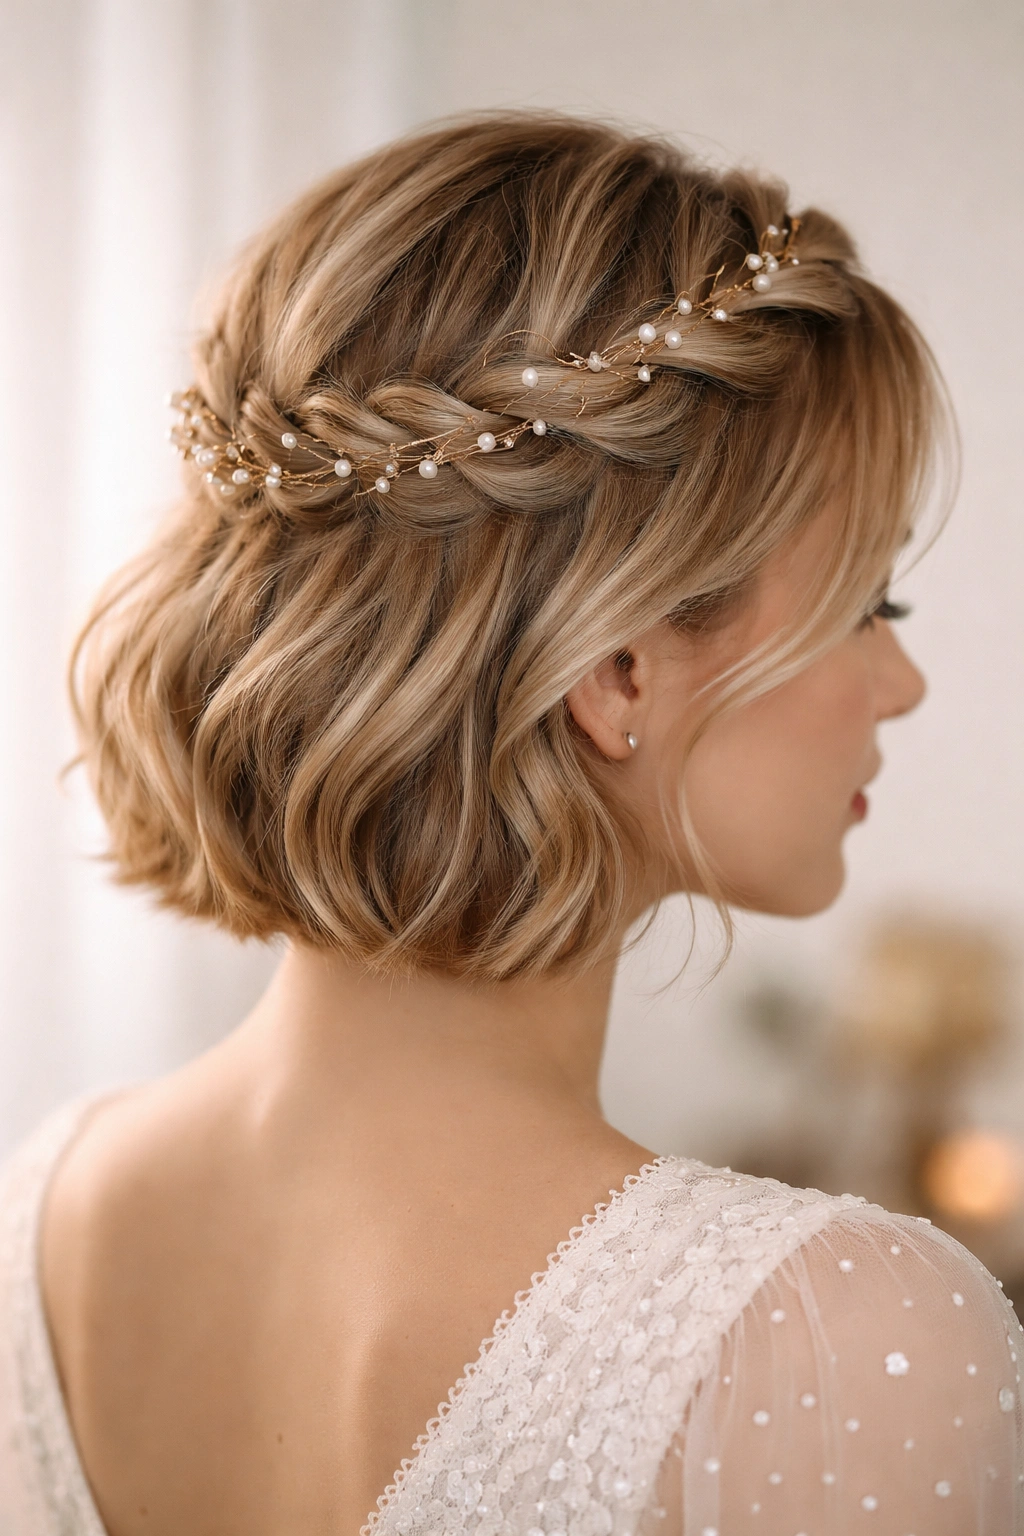
This version takes your basic crown braid and elevates it with intentional accessories. You might weave a thin ribbon, a piece of colored string, or a metallic cord directly into the braid as you work it, or you might add small bobby pins with pearls or crystals along the braid once it’s complete. You could also tuck small flowers into the braid, add decorative hair clips at the pin point, or use metallic hair clips to fasten the braid in a way that’s visibly intentional rather than hidden. This version transforms a simple crown braid into something that reads as ceremonial, special-occasion, or fashion-forward.
Choosing the Right Accessories
The key is choosing accessories that feel intentional rather than chaotic. A single colored ribbon woven throughout the braid is elegant. A handful of tiny pearl bobby pins tucked into the weave reads delicate and refined. A thin metallic cord creates a modern, edgy vibe. Small fresh flowers or greenery (real eucalyptus or baby’s breath, or high-quality faux versions) create a romantic, ethereal feeling. The accessory itself should be thin enough that it doesn’t add bulky weight to your short hair, but visible enough that it reads as a deliberate style choice.
Styling With Accessories
- Create your crown braid using any of the techniques above
- As you work the braid, weave your chosen accessory (ribbon, cord, string) directly into the strands
- Once the braid is complete and pinned, you can add additional decorative bobby pins or clips along the length
- Choose metallic finishes that complement your natural hair color (gold for warm tones, silver for cool tones)
- If using flowers, tuck them into the braid or behind the bobby pins just before you wear it
Worth knowing: Delicate accessories work best on short hair—chunky beads or heavy clips can overwhelm the proportion of short hair and look costume-y rather than intentional. Let the braid itself remain the star; the accessory is just an accent.
9. The Sleek Braided Crown Ponytail Hybrid
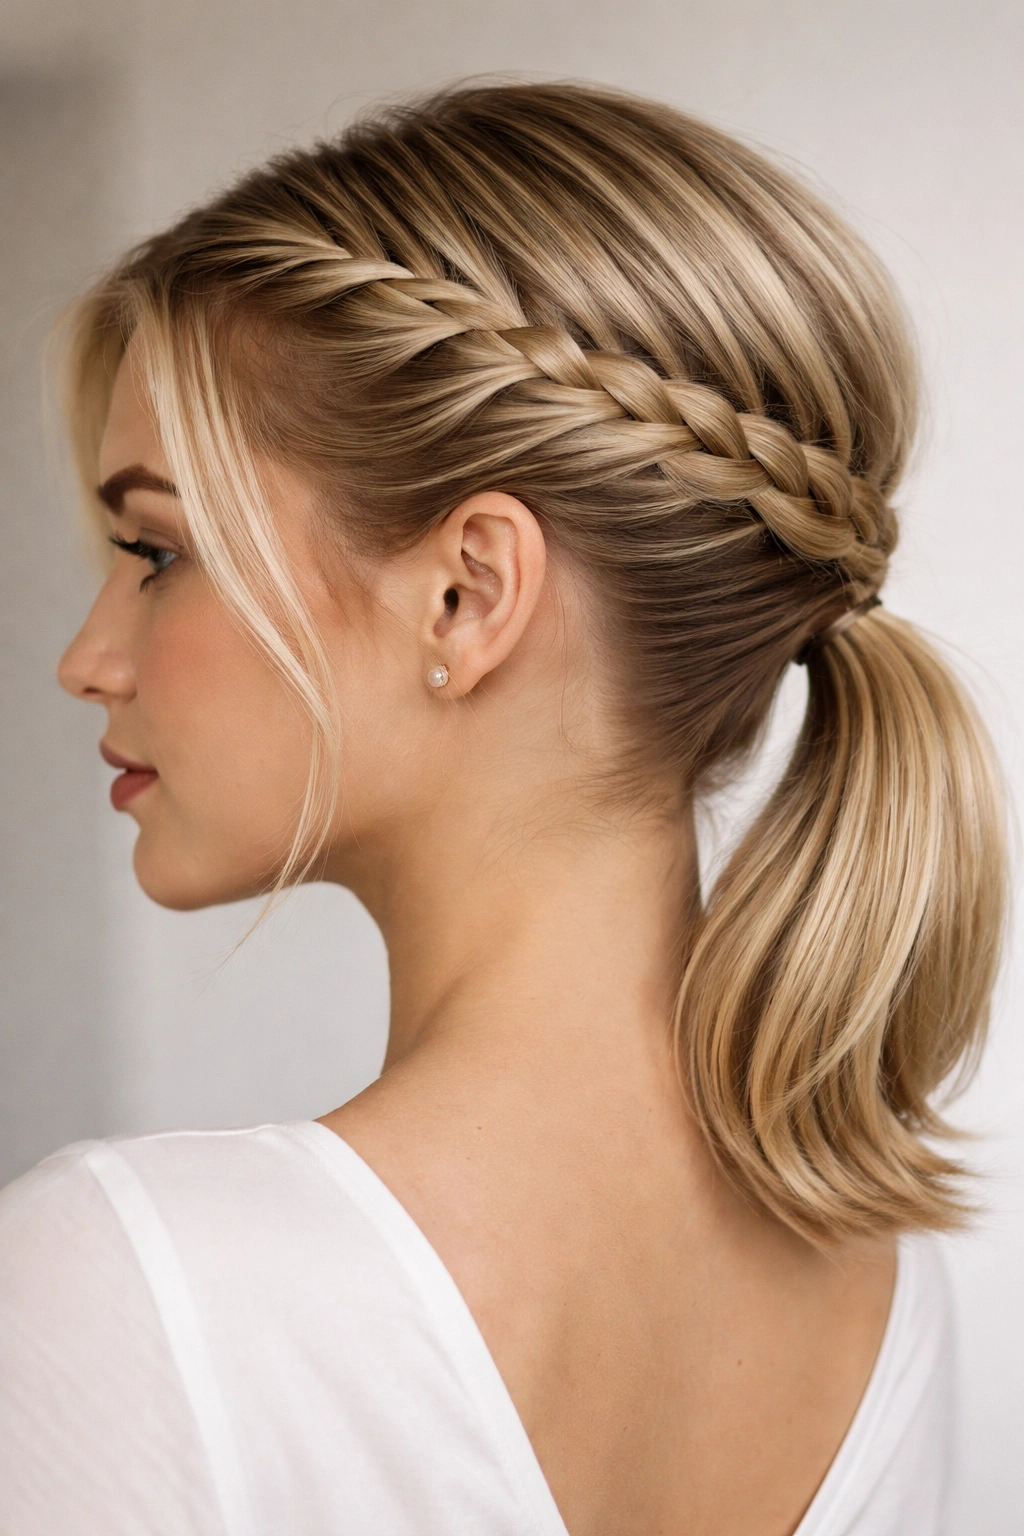
This version blurs the line between a half-up style and a full updo. You create a crown braid that wraps partially around the head, but instead of leaving the remaining hair completely loose, you gather it at the back with the crown braid and secure everything together into a low ponytail or bun. The crown braid becomes the decorative top half of an updo, while the gathered bottom half reads modern and refined. This version is perfect for short hair that’s thick enough to gather into a small ponytail, and it works beautifully for occasions where you want something that feels more formal than half-up but less heavy than a full updo.
Why This Hybrid Works on Short Hair
The hybrid format lets you have the best of both worlds—the elegance of an updo and the face-framing softness of half-up style. Because you’re not dealing with masses of long hair, the final ponytail or bun stays proportional to your head rather than looking overstuffed. On short hair, everything compresses nicely, creating a polished, put-together look without the weight.
Building the Braided Ponytail Updo
- Create a crown braid using any of the methods above
- Once the braid reaches the back center, instead of pinning and releasing the remaining hair, continue gathering that hair
- Combine the braided section with the loose hair and gather everything together into a low ponytail at the nape of your neck
- Secure the ponytail with an elastic that matches your hair color
- You can leave the ponytail as-is for a sleek look, or twist it into a low bun and pin it for more height and dimension
- Use bobby pins to blend the crown braid’s pin-point into the ponytail base
Quick facts:
- Works beautifully for work settings, formal events, or any time you want a polished updo without the heaviness
- Takes about 10-15 minutes total
- Reads more modern and interesting than a simple ponytail because of the crown braid detail
- Holds especially well because you’re securing both the braid and the ponytail with separate anchors
10. The Textured or Crimped Crown Braid
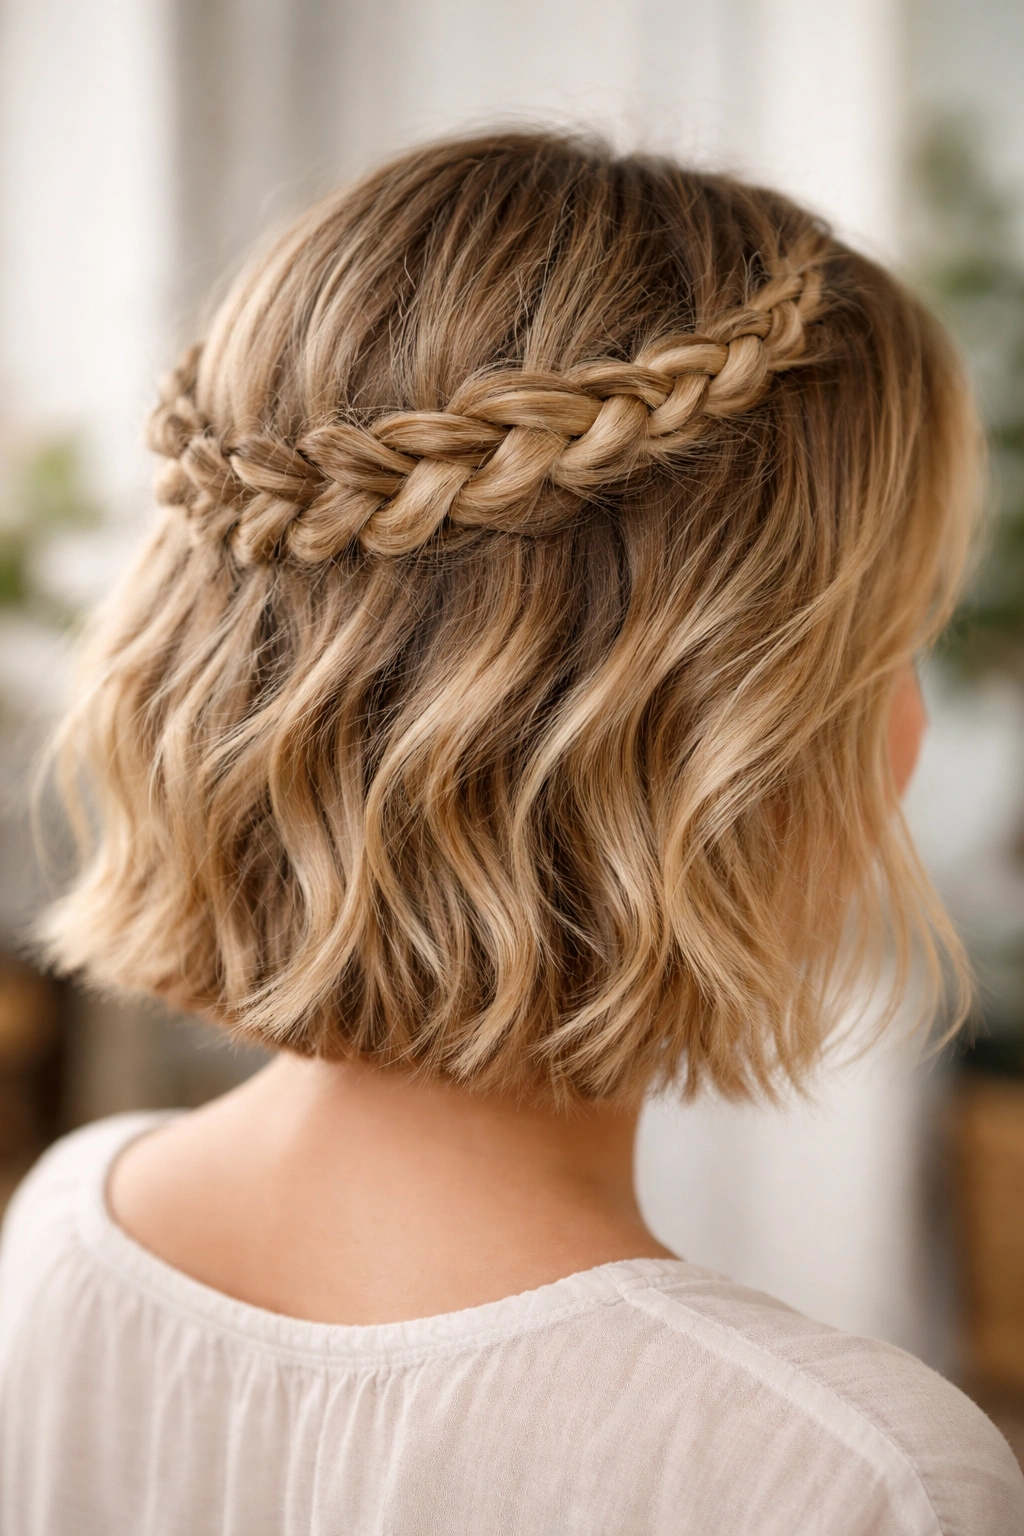
Before you even start braiding, prepare your short hair with texture—use a curling iron to add waves, use a dry texture spray and backcomb to add volume, or use a crimping iron for defined texture throughout. Then create a crown braid (using any of the basic techniques) on top of this textured base. The pre-textured hair looks fuller and airier when braided, and the final crown braid feels more voluminous and interesting. This version is especially brilliant for fine or thin short hair, where adding texture before braiding creates more visual impact and helps the braid hold longer without slipping.
Texture Prep Methods for Short Hair
- Curling iron waves: Take small sections and curl loosely away from the face, creating soft waves. Let them cool before braiding.
- Backcomb and texture spray: Mist your roots with texture spray, gently backcomb the crown area, and smooth the surface layer. This creates internal volume.
- Crimping iron: Use a small crimping iron on the inner crown sections for defined, lasting texture. This method holds longest but requires the most time.
- Salt spray: Mist damp short hair with sea salt spray and scrunch to create natural texture, then let it dry fully before braiding.
Creating the Crown Braid on Textured Hair
- Prepare your texture using any method above
- Work your crown braid sections directly into the textured hair
- The texture gives the braid more grip, so it will hold much longer without slipping
- You’ll need fewer bobby pins because the texture itself provides holding power
- Gently pull the braid to enhance the texture and create more dimension
- Use a light hairspray to lock everything in place
Pro tip: Texture prep takes about 5 extra minutes but extends your crown braid’s lifespan from 4-6 hours to 8-12 hours, making it worth doing if you want your style to last through a full day or evening.
11. The Reverse Crown Braid
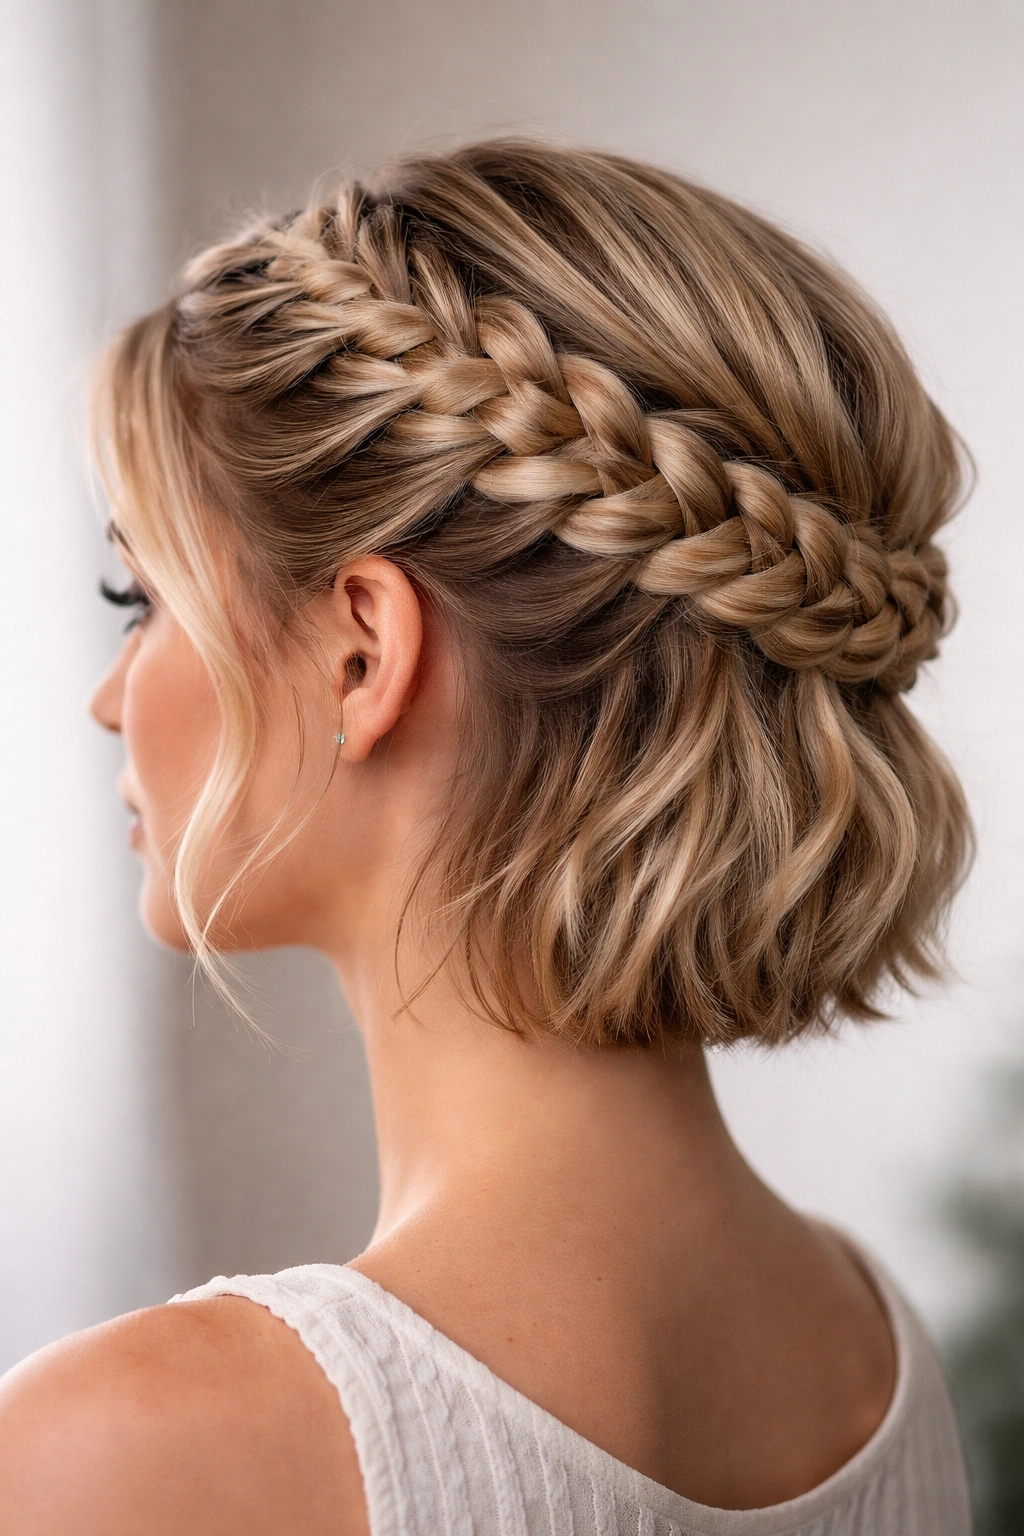
Instead of starting your braid at the temple and working toward the back of the crown, the reverse crown braid starts at the nape of the neck and works upward and around toward the front. This version reads completely different from a traditional crown braid—it’s edgier, more unexpected, and creates a distinct visual pattern. A reverse crown braid works beautifully on short hair because the direction of the braid becomes more visible when it’s worn shorter, creating a graphic quality that longer hair sometimes obscures.
Why Reverse Changes the Whole Aesthetic
Working the braid in the opposite direction creates a different pattern in how the sections cross each other, and it frames the face differently. A reverse crown braid tends to create more visual movement around the sides of the face and draws the eye downward rather than upward. This works beautifully if you want to elongate a round face or soften a square jawline, making reverse crown braids as much about flattery as they are about novelty.
How to Create a Reverse Crown Braid
- Start at the nape of your neck on one side
- Take a small three-strand section and begin braiding
- Instead of working the braid around the crown, work it upward and slightly forward, angling toward the opposite side of your head
- Continue braiding as you move upward and across, roughly following your natural hairline
- Once the braid reaches the opposite side (roughly where your temple is), secure it with bobby pins
- Leave all remaining hair loose and textured
- This braid should sit lower than a traditional crown braid, and the angle should feel distinctly different
What to know: The reverse crown braid is easier if you have straight hair and can clearly see the braid as you’re creating it. If you have curly or textured hair, use a mirror or ask for help initially—it’s harder to judge angles and placement without visual reference.
12. The Multi-Strand or Dutch Crown Braid
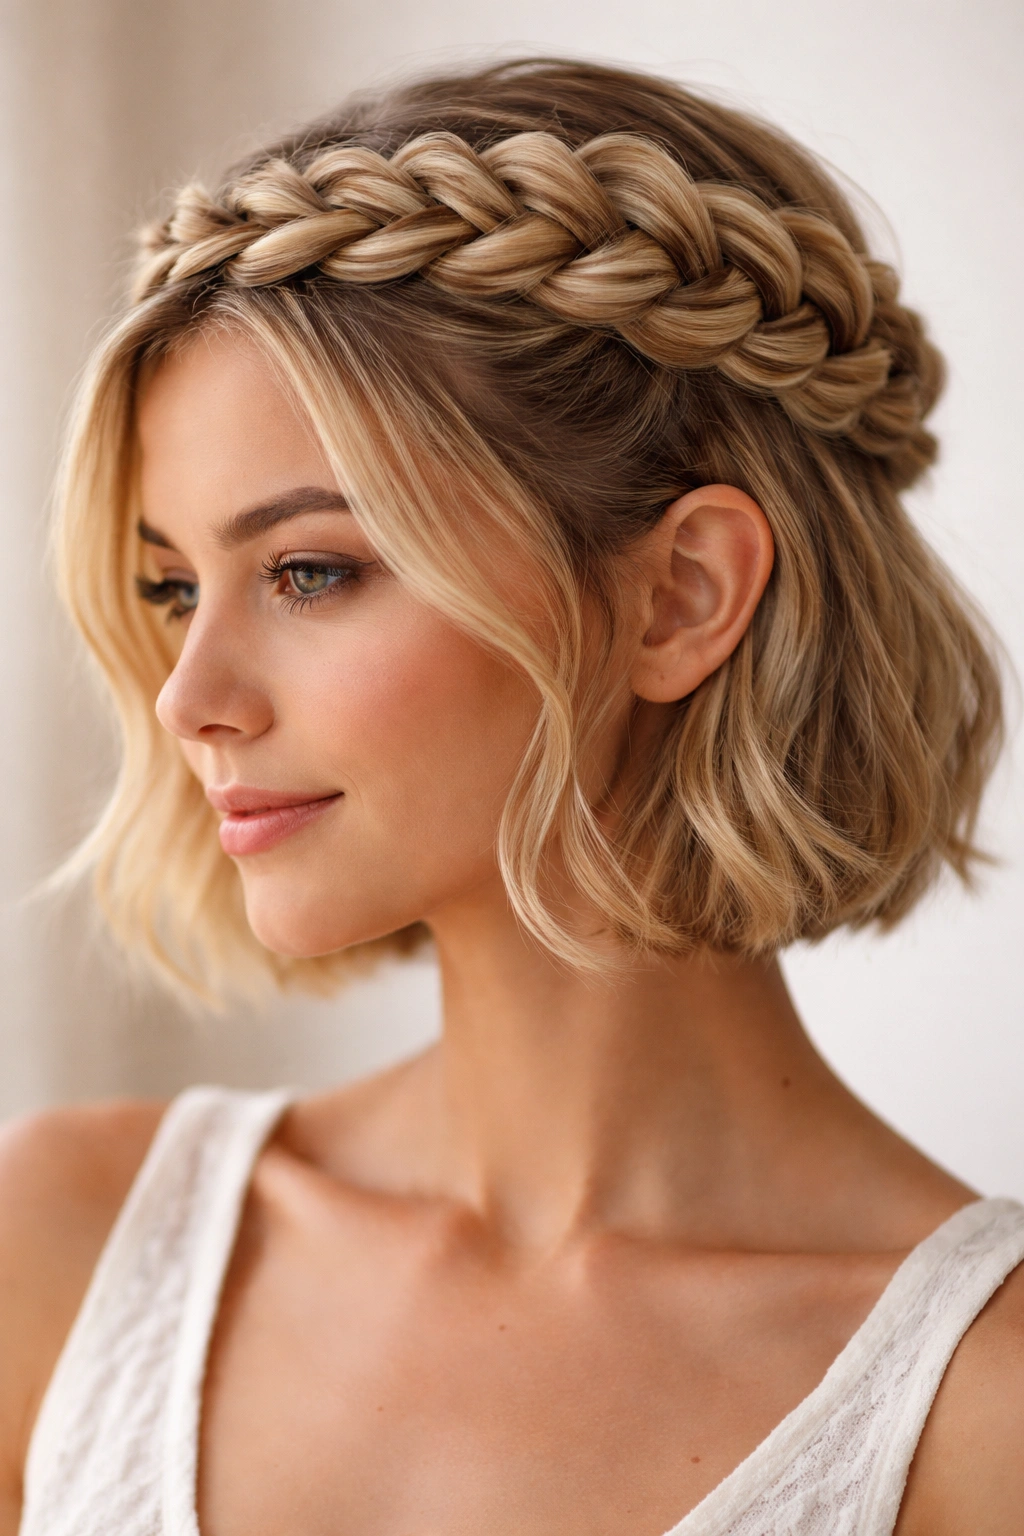
For your final crown braid variation, try a Dutch braid (also called an inside-out or reverse French braid), which creates a raised, textured appearance that sits on top of the scalp. A Dutch crown braid uses the same wrapping principle as a standard crown braid, but the braiding technique creates a braid that pops off the head visually rather than sitting flat. This version requires practice and precision, but the result is stunning—the braid looks thick, dimensional, and deeply textured in a way that regular crown braids sometimes don’t. On short hair, where the braid is highly visible, the dimensional quality of a Dutch crown braid really shines.
The Dutch Braid Technique Explained
A Dutch braid reverses the crossing pattern of a regular three-strand braid—instead of crossing strands over one another, you cross them under. This creates a braid that sits raised and textured on the scalp. When you apply this technique to a crown braid format, you get a braid that reads more complex and visually interesting than a standard three-strand crown braid.
Creating a Dutch Crown Braid
- Start at one temple with a three-strand section
- Begin a Dutch braid by crossing strands under rather than over as you cross them
- As you move across the crown toward the opposite temple, maintain the Dutch braid technique throughout
- Pull gently on the braid edges to create more texture and dimension
- Secure at the back with bobby pins
- Leave remaining hair loose and cascading
Pro tip: Dutch braids require more hand strength and coordination than regular braids, so don’t expect to nail it on your first try. Practice on a day when you’re not planning to wear the style out—get the technique down first, then worry about wearing it publicly. Once you’ve got it, Dutch crown braids become faster and easier with each attempt.
Essential Tools and Products for Crown Braid Success
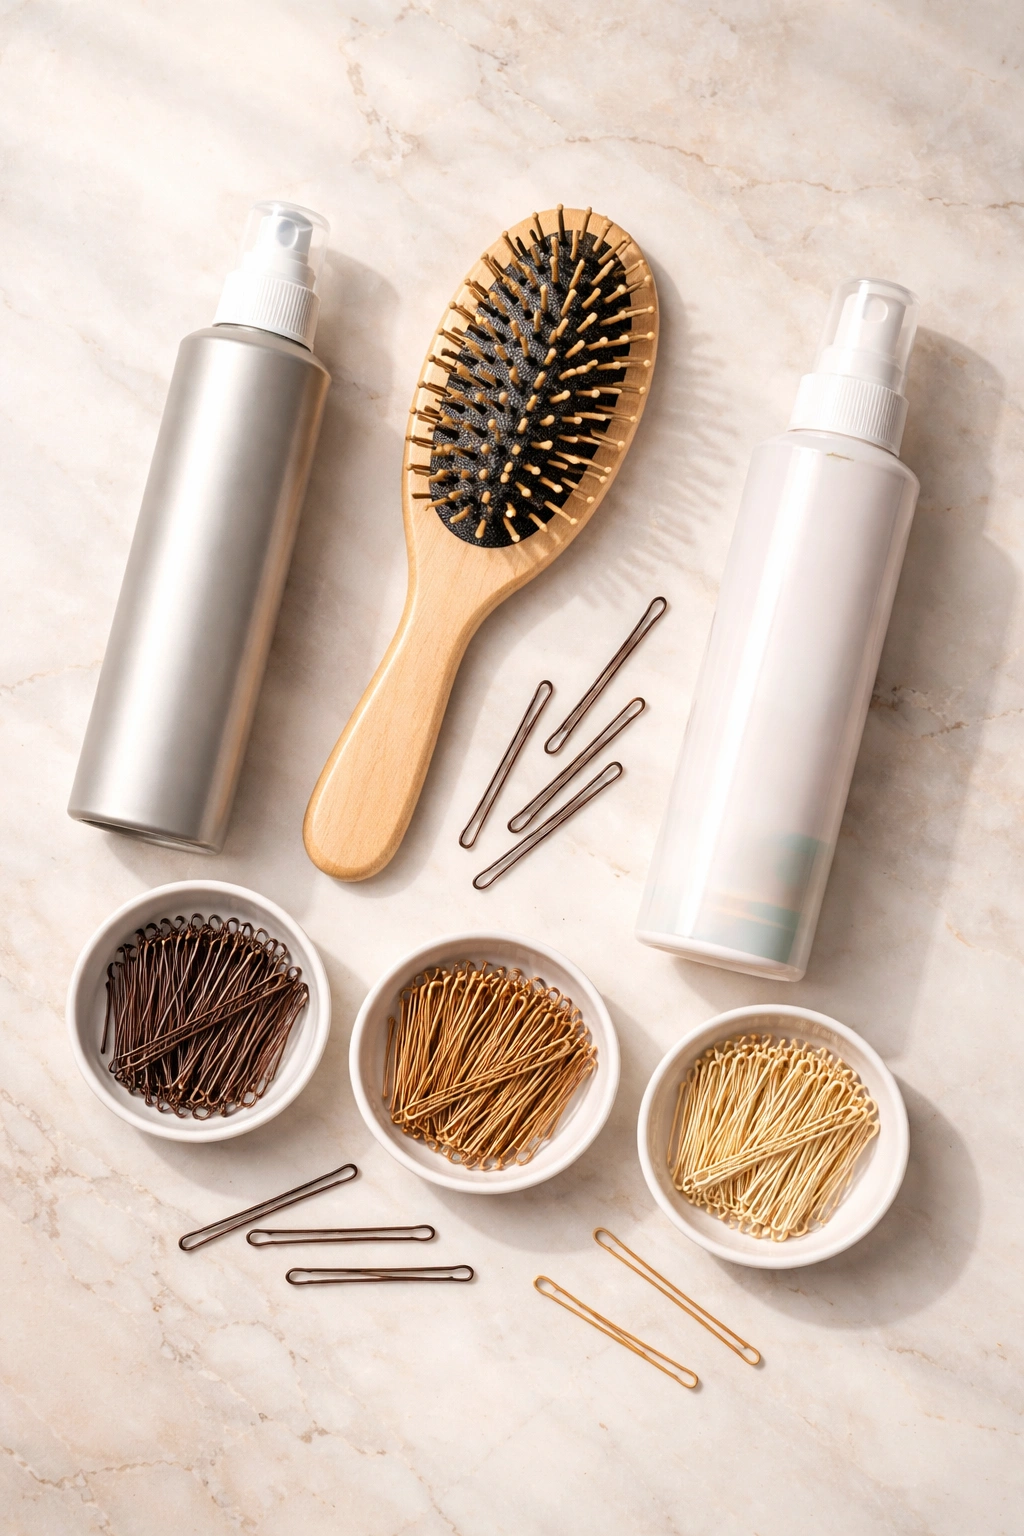
No matter which crown braid variation you choose, having the right tools makes the process infinitely easier and helps your braid last longer. The basics are simple: bobby pins in your hair color, a light texture spray, a good brush or comb, and optionally some lightweight holding spray. The texture spray is probably the most important product you’ll invest in. It changes everything about how your hair behaves during braiding—it gives the strands grip so they don’t slip, it helps the sections stay separated as you work, and it makes the final braid feel intentionally textured rather than sleek.
Choose bobby pins that match your natural hair color—brown for dark hair, blonde for lighter hair, black for very dark or dyed hair. This seems like a tiny detail, but visible bobby pins completely undermine an otherwise polished crown braid. You want the braid itself to be the star, not bobby-pin placement. For short hair, you typically need 2-4 bobby pins to secure a crown braid, depending on how thick your hair is and how tightly you’ve braided.
A light texture spray is genuinely transformative for short-hair crown braiding. Applied to dry hair before you start braiding, it gives each strand grip without making hair feel sticky or stiff. Good options include dry texture sprays (like sea salt sprays or texturizing powders) rather than heavy mousses or creams. Apply it to your roots and crown area specifically, not your entire head, to avoid product overload.
Finally, a fine-tooth comb or small paddle brush helps you separate sections cleanly when you’re starting your braid. For short hair, a comb is usually better than a brush because you have less hair to detangle and a fine comb gives you more precision with smaller sections.
Mastering the Technique: Critical Tips for Short-Hair Crown Braid Success
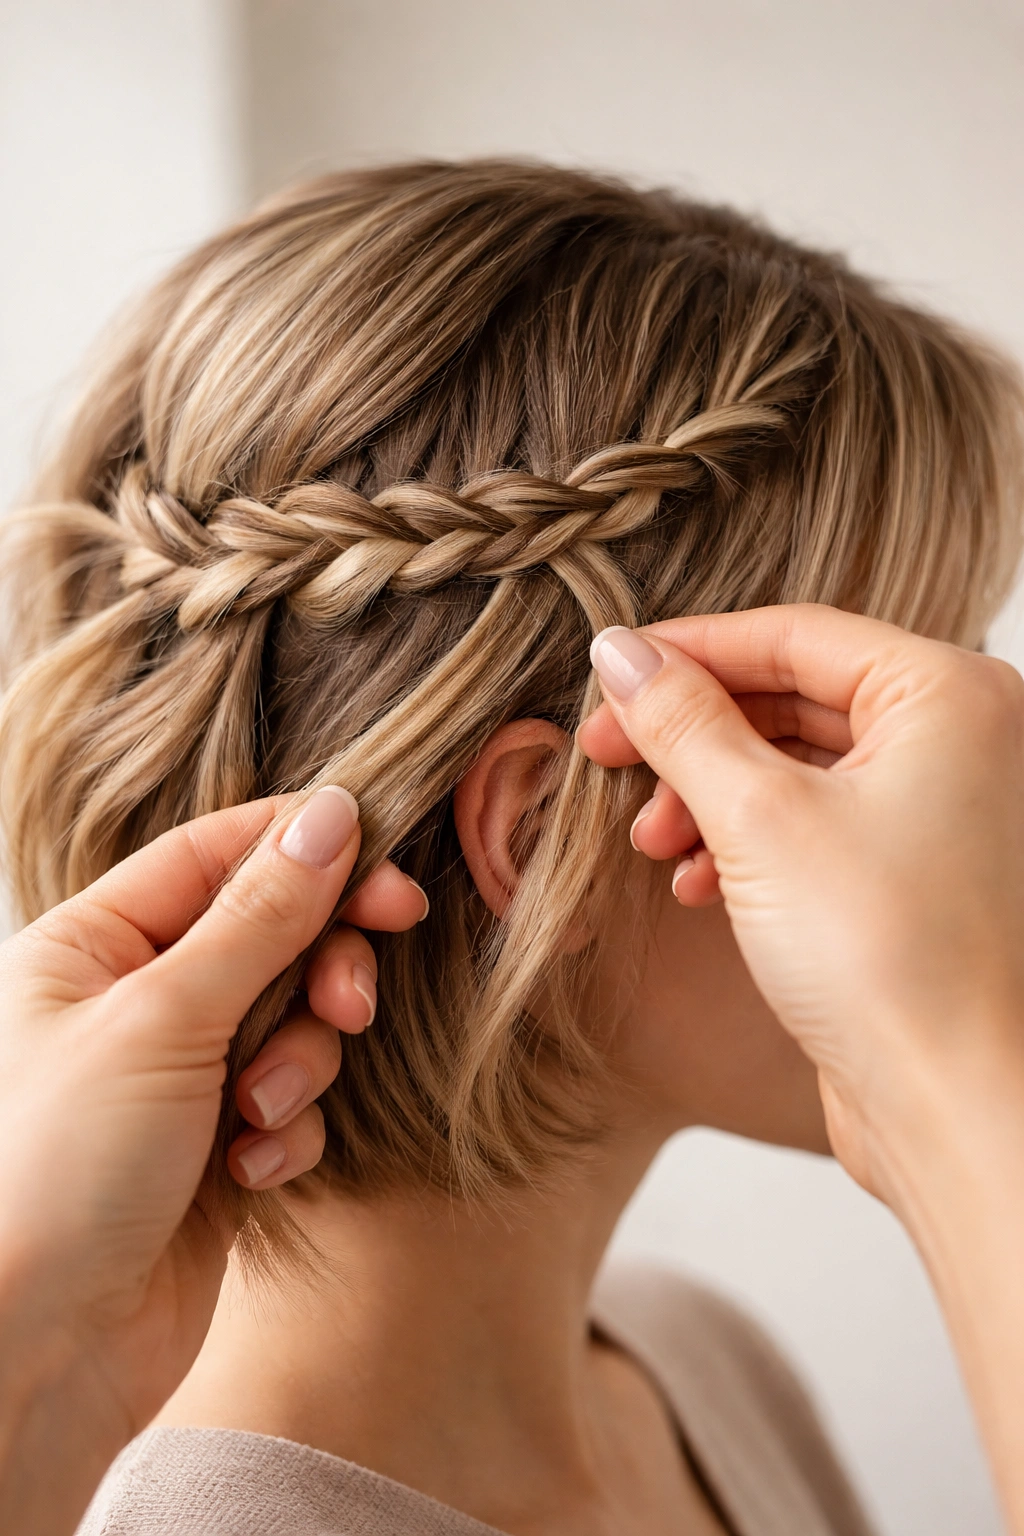
Creating a beautiful crown braid on short hair has its own rhythm and set of techniques that differ from what you’d do with longer hair. The most important shift is thinking about tension differently. With longer hair, tension builds naturally as the weight pulls the braid taut. With short hair, you’re creating that tension yourself, so you need to be more deliberate about keeping sections tight without pulling so hard that you create breakage or discomfort.
Start your braid slightly loose and then tighten as you go. Take your first section of hair at the temple, begin a very loose three-strand braid, and then as you work your way around the crown, gradually increase the tension slightly. This prevents the tight, uncomfortable feel that comes from braiding short hair too snugly from the start, and it lets the braid settle into a natural, comfortable tension as it works its way around your head.
Keep your sections consistent in size—don’t start with a thick braid section and taper it to something thin halfway through. Consistent sections create a braid that looks intentional and balanced, while inconsistent sections read chaotic or rushed. For short hair, aim for sections about 2-3 inches wide when you start, depending on how much total hair you have.
The other critical technique is the gentle pull-and-texturation you do once the braid is braided and pinned. A tight, neat crown braid looks formal and done-up; a gently pulled, slightly textured crown braid looks modern and intentional. Once your braid is complete and secured, go back through it and gently pull out small sections along the braid length, creating a looser, fuller appearance. This single step transforms a braid from “looks like I followed a tutorial exactly” to “looks like I styled my own hair with expertise and intention.”
Styling Tips, Variations, and Personal Adaptations
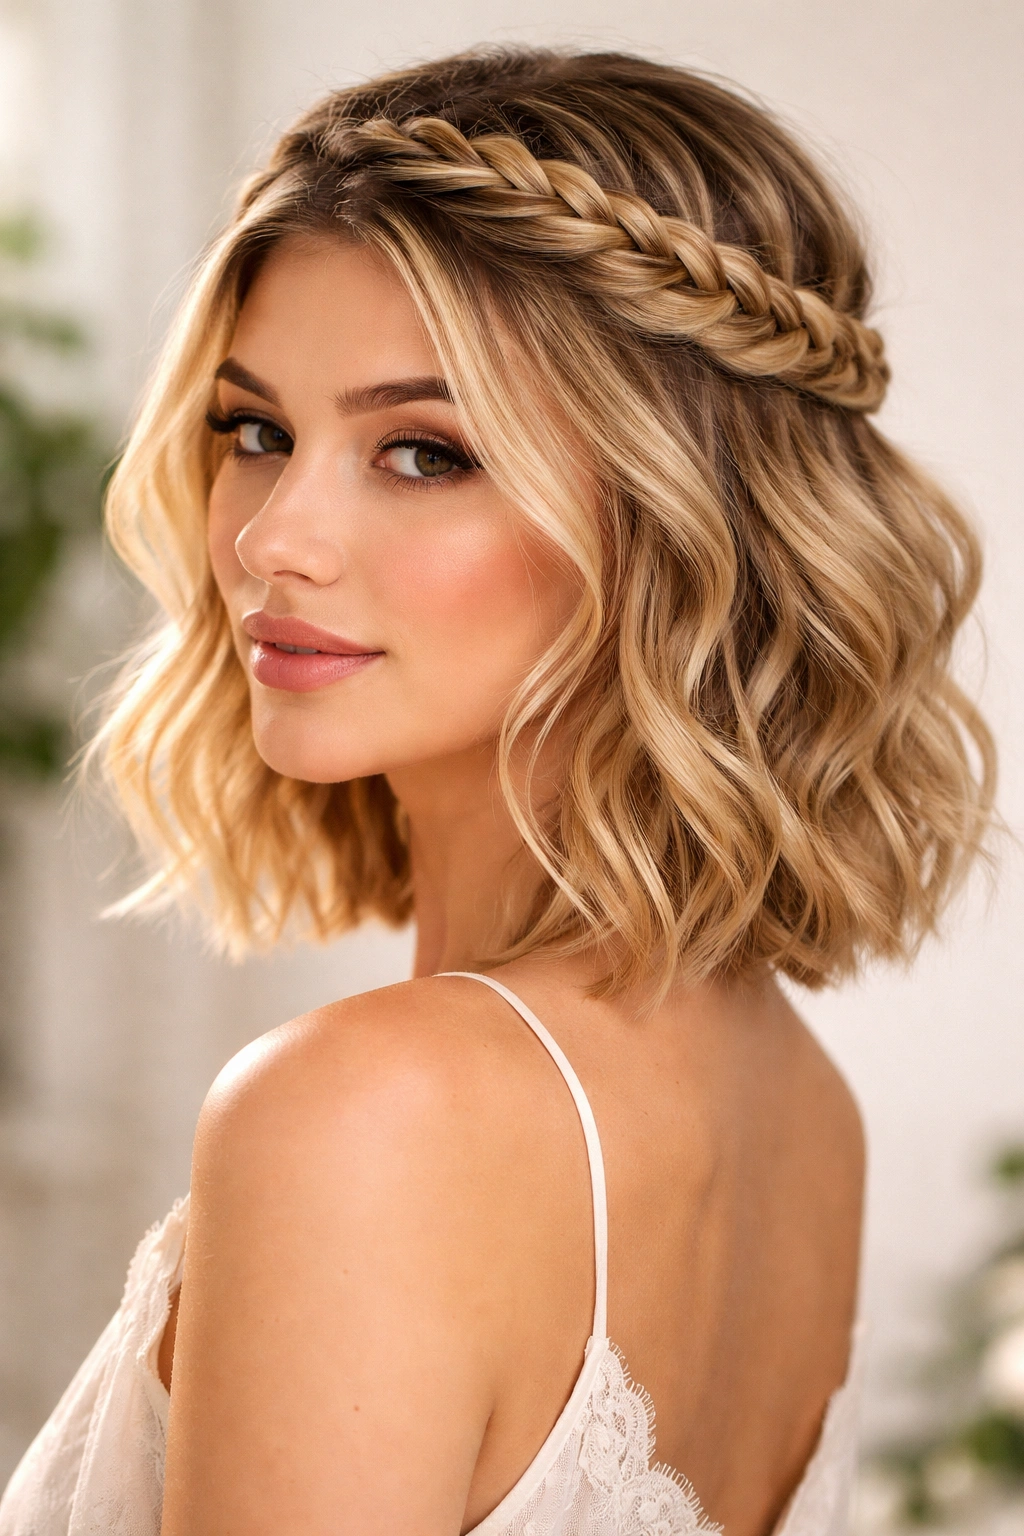
Crown braids pair beautifully with specific finishing touches that make the entire style feel polished and considered. If you’re leaving your hair down, add a wave or loose curl to the bottom half using a curling iron—the texture at the bottom balances the detailed work at the crown, creating a cohesive, intentional look. If you’re wearing the crown braid with completely straight, smooth bottom hair, the contrast can feel a bit disconnected; pairing braid detail with texture below creates harmony.
Face-framing also matters with crown braids on short hair. Some of the best crown braid styles include a few pieces left out at the temple or around the face to soften the look and prevent it from feeling too pulled back or severe. These face-framing pieces work especially well if they’re left slightly textured or loosely waved—they catch light and create movement that balances the structured braid.
Consider your specific short-hair cut when choosing a crown braid variation. If you have a blunt bob, the clean lines pair beautifully with a sleek, more structured crown braid. If you have a textured, choppy cut, embrace looser, messier crown braid variations that match the cut’s inherent movement. If you have a pixie cut or very short layers, you might not have enough length for a traditional crown braid, but you can create a smaller braided crown using just your front sections and the hair around your crown, braiding it in place of styling elsewhere.
Short hair also gives you the freedom to change your crown braid style frequently because braiding doesn’t cause the damage that other hot-tool styling does. You can wear a crown braid one day, sleep on it and wear it differently the next day, or switch styles every single day if you want. Take advantage of this—it’s one of the genuine perks of shorter hair that many people overlook.
Common Mistakes and How to Prevent Them
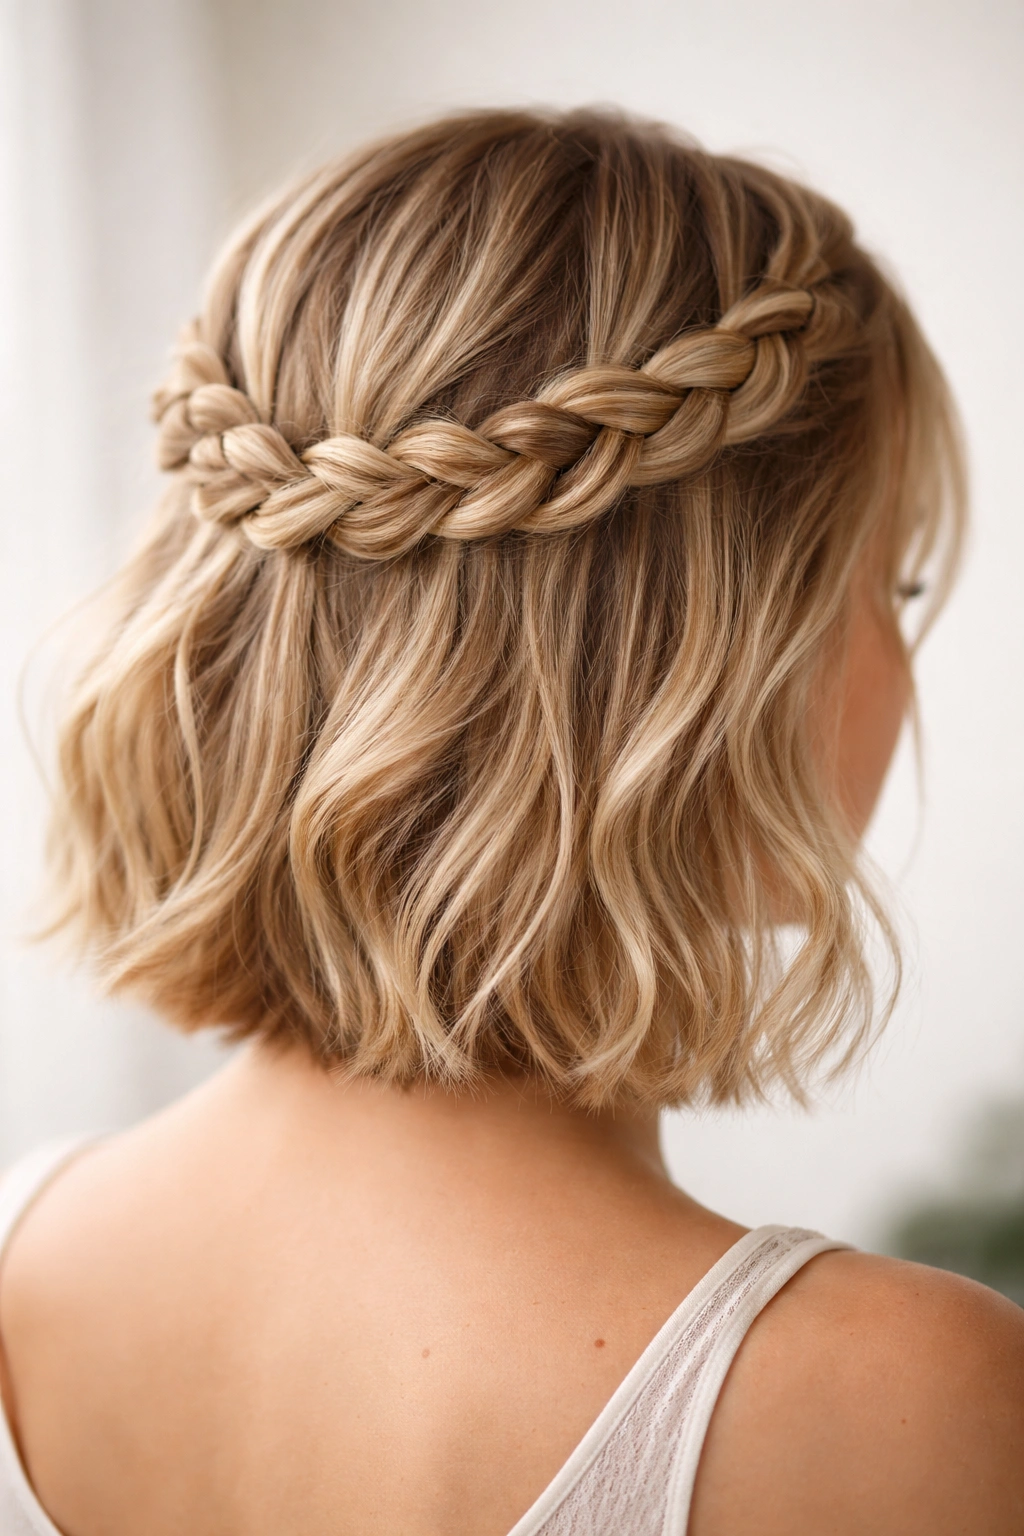
The most common mistake people make with crown braids on short hair is braiding too tightly out of fear the braid will slip or fall apart. Ironically, too-tight braiding actually weakens your hair and creates more stress on your scalp, plus it looks harsh and dated rather than intentional and modern. Braid at a medium tension, secure with bobby pins, and trust that this combination will hold all day. The texture spray you applied before braiding is doing the work of keeping sections in place, so you don’t need the braid itself to be vice-gripping-tight.
Another mistake is leaving the crown braid completely flat and neat without adding any texture afterward. While some occasions call for sleek, polished braids, the modern aesthetic usually favors deliberately undone-looking braids. After you’ve pinned your crown braid, spend 30 seconds gently pulling at the sides of the braid to create texture and dimension. This small step completely changes the vibe from “formal, structured updo” to “casual, sophisticated short-hair style.”
Not considering your face shape when positioning the crown braid is another common issue. A crown braid that sits too high can emphasize height and elongate the face, which flatters some face shapes and doesn’t work for others. A crown braid that sits lower, closer to the nape of the neck, creates a shorter visual line and can balance longer face shapes. Play with placement to see what feels right for your specific face proportions.
Finally, using too much product or the wrong products will weigh down short hair or make the braid look greasy and overdone. A light texture spray and a light finishing spray are all you need. If you use heavy mousse, thick pomade, or excessive hairspray, your braid will look dull, feel stiff, and might even slip because the hair is too slick. Less product is always better with short hair—you’re working with a smaller surface area, so products accumulate faster.
Final Thoughts
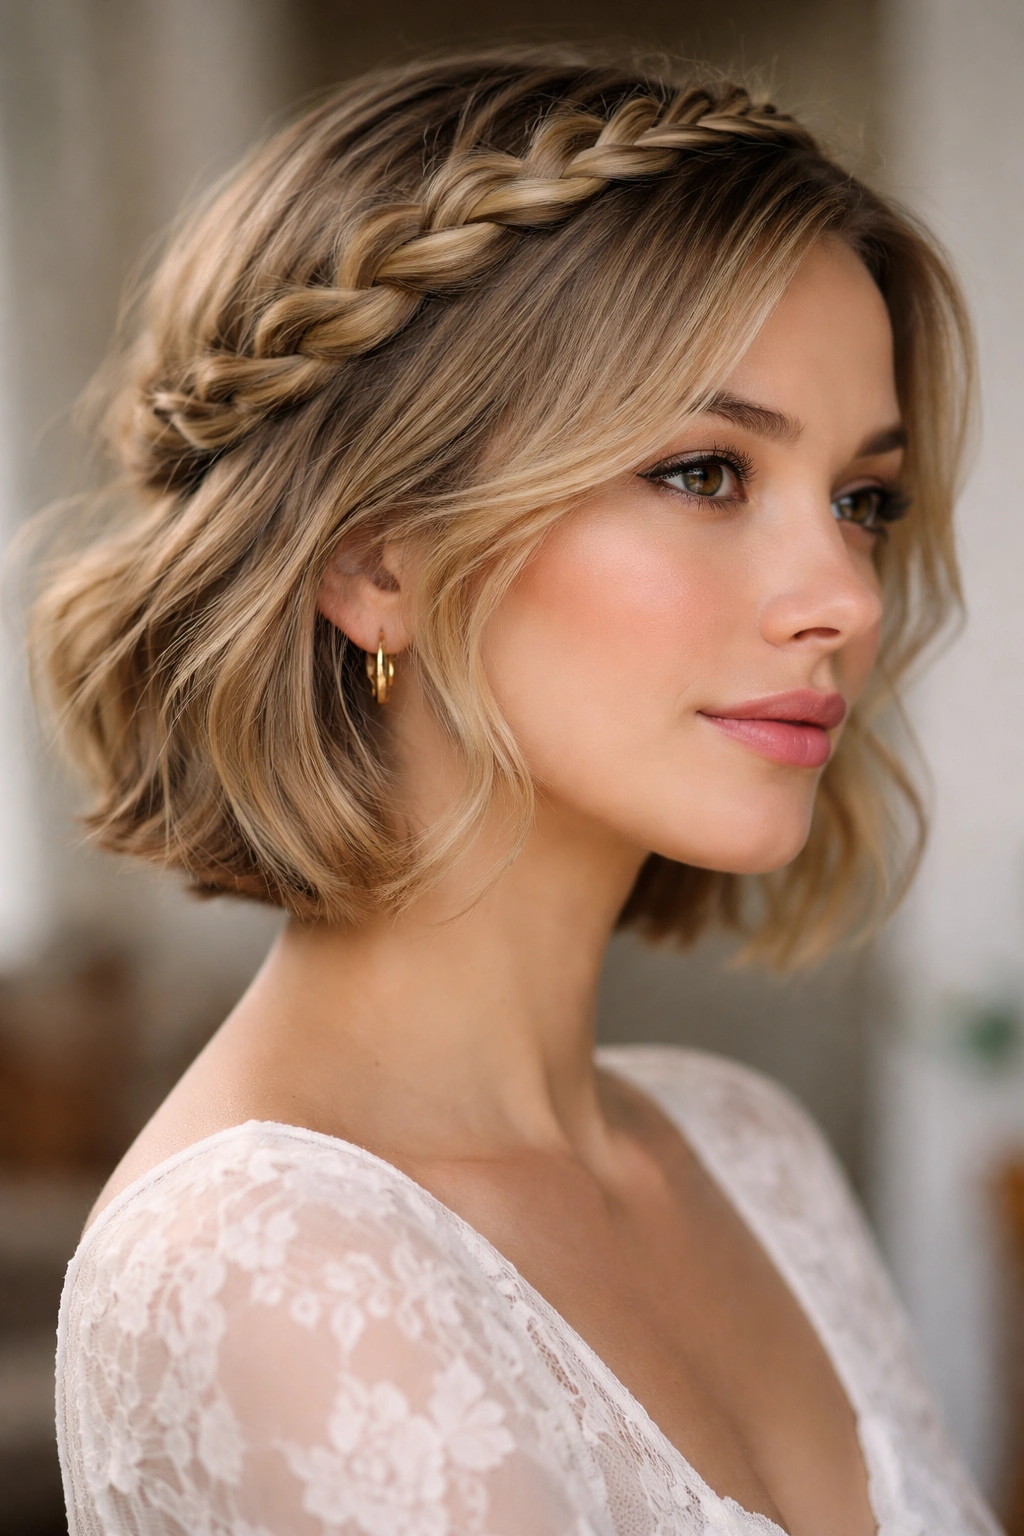
Crown braids on short hair are genuinely one of the most versatile, flattering, and achievable styling techniques available to you, and the sheer number of variations means you can wear them day after day and create a different aesthetic each time. Whether you go for loose and romantic, sleek and modern, playful and textured, or formal and structured, the crown braid framework adapts to what you need and what your hair type supports.
The real advantage of short-hair crown braids is how visible they are—every technique choice shows, every braid detail reads clearly, and the entire style registers as intentional rather than accidental. This means the effort you put into mastering these techniques pays off visibly in a way that sometimes doesn’t happen with longer hair. Once you’ve practiced a few times and got your technique down, crown braid styling becomes fast, intuitive, and genuinely enjoyable rather than frustrating.
Start with the basic loose crown braid, practice that until it feels natural, then branch out into variations that appeal to you—whether that’s the playful double crown braids, the modern Dutch braid, the romantic fishtail variation, or the practical twisted version. Your short hair is actually the ideal canvas for learning and perfecting these styles, so embrace the crown braid half-up format as one of your signature style options. Once you own this technique, you’ll reach for it constantly, and you’ll have the confidence to adapt it to any occasion and any mood.