Claw clips have become a wedding hair game-changer, and half up half down styles offer the perfect balance between romantic elegance and practical wearability. Unlike rigid updos, these styles keep your hair down while securing just enough volume at the crown or sides, creating that effortlessly sophisticated look every bride (and guest) dreams of. The beauty of using a claw clip for this purpose is its versatility — it works beautifully on virtually any hair texture, holds well throughout a full day and evening of celebration, and looks intentionally polished rather than overdone.
A half up half down claw clip style is genuinely achievable whether you’re working with fine, thin hair or thick, textured waves. The clip does the heavy lifting work while allowing your length to move freely, which means you get volume without the weight of a traditional updo. You can dress it up with formal styling or keep it relaxed and tousled for an undone vibe — the same basic technique adapts to match any wedding aesthetic, from black-tie formal to garden casual.
What makes claw clips especially smart for wedding days is their staying power. A quality clip secures hair without needing excessive pins, backcombing, or products, which means less stress on your hair and fewer touch-ups needed between the ceremony and reception. The clip itself becomes a styling detail worth showcasing — whether you choose something simple and metal, ornate and jeweled, or even something matching your wedding theme.
1. The Romantic Twisted Half Up
This style starts with two small sections of hair at the temples, which you gently twist away from the face and secure together at the crown with a claw clip. The rest of your hair falls in loose waves or curls below, creating a frame that looks intentionally romantic without feeling stiff or overly formal.
Why It Works for Weddings
The twisted sections add visual interest and hold without requiring you to section off too much hair. The twisting motion creates a sense of movement and elegance that photographs beautifully from every angle. This style works especially well if you have medium to thick hair and want something that feels both classic and slightly modern.
How to Achieve It
- Start with lightly curled or wavy hair — run a curling iron through sections before you begin
- Take a section of hair about 2 inches wide from one temple, twist it loosely away from your face
- Take a matching section from the opposite temple and twist it the same direction
- Secure both twisted sections together at the crown using a claw clip positioned at an angle
- Leave the back and lower sides completely down, allowing them to fall in their natural wave pattern
- Use a light hairspray to keep the twists from unraveling, but avoid heavy product that would weigh them down
Pro tip: Twist your sections loosely rather than tightly — loose twists photograph better and feel more romantic than neat, controlled twists.
2. The Sleek Low Ponytail Hybrid
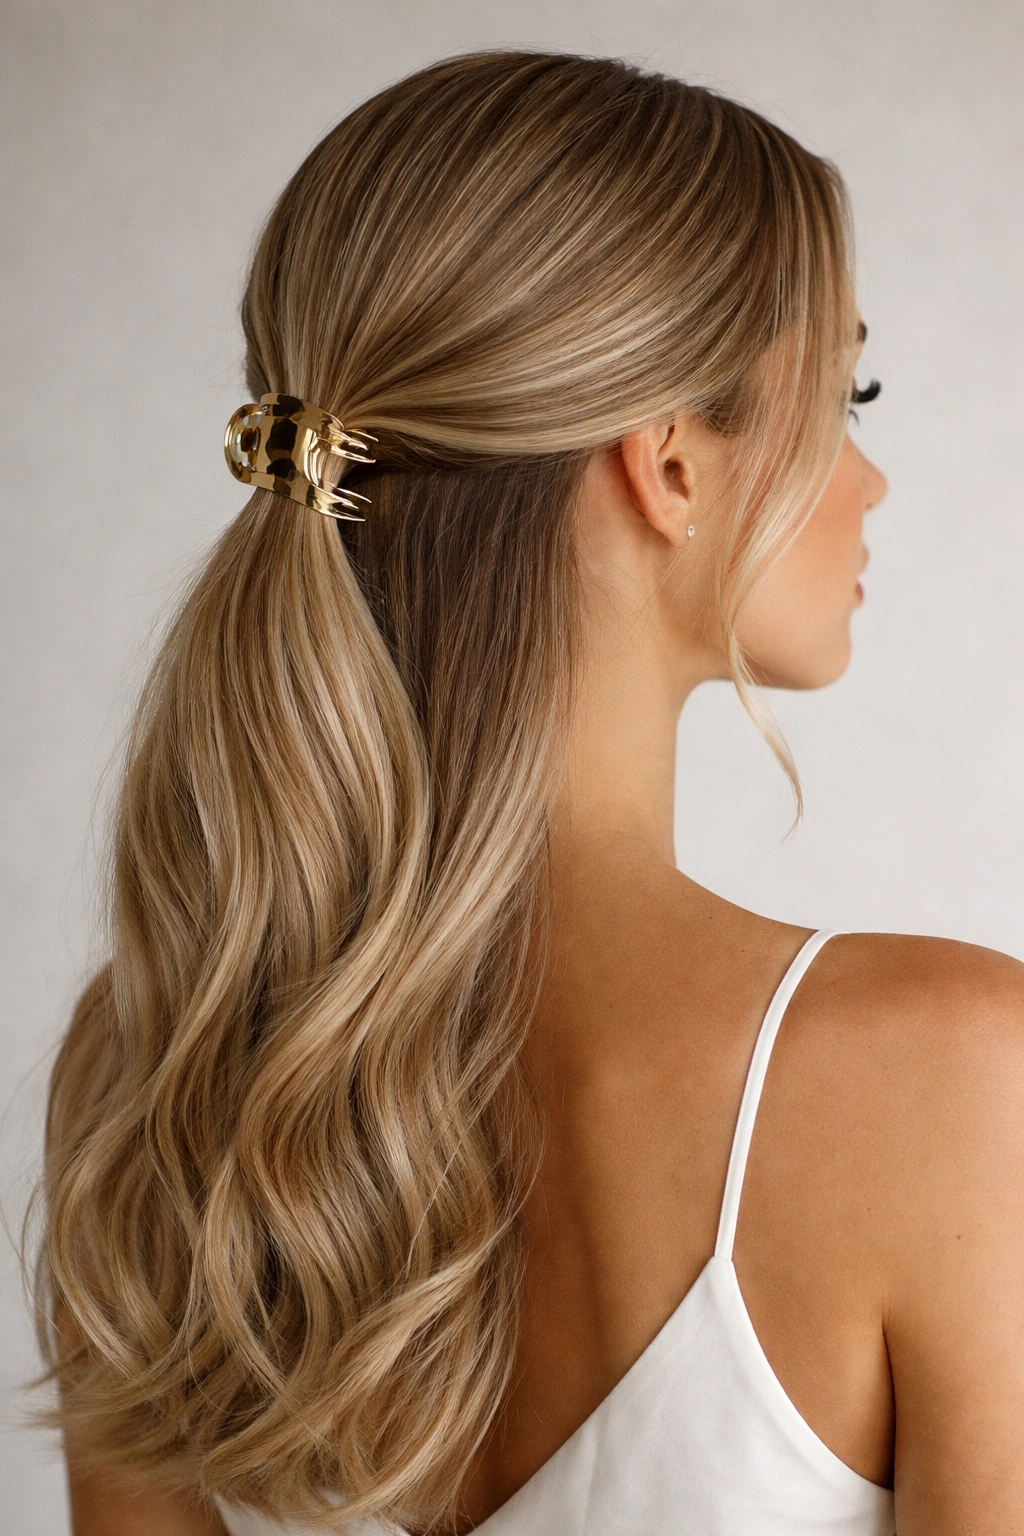
This is the style to choose if you want polish and sophistication without traditional updo formality. You’re creating a low ponytail at the back using a claw clip, but you’re only securing about one-third of your hair, leaving the remaining two-thirds to flow down freely and partially cover the clip.
Why It Works for Weddings
This style bridges the gap between a full updo and completely down hair — it keeps hair off your shoulders and neck while maintaining length and movement. It’s extremely practical for warm weather weddings and photographs with clean lines. The hybrid approach feels modern and intentional, not like you couldn’t decide whether to do your hair up or down.
How to Achieve It
- Brush your hair into a smooth base, or apply a light texturizing spray for grip
- Gather the top and back sections (roughly from your crown to the base of your neck) into one hand
- Position them lower rather than centered — aim for just above the nape of your neck
- Secure with a claw clip, making sure the sides and lower sections flow freely around it
- Use a fine-tooth comb to smooth the secured section slightly while keeping the released hair textured
- Consider leaving two small pieces loose at the front to frame your face
Worth knowing: This style works beautifully with statement claw clips because the clip is positioned low enough that it’s visible and becomes a design feature.
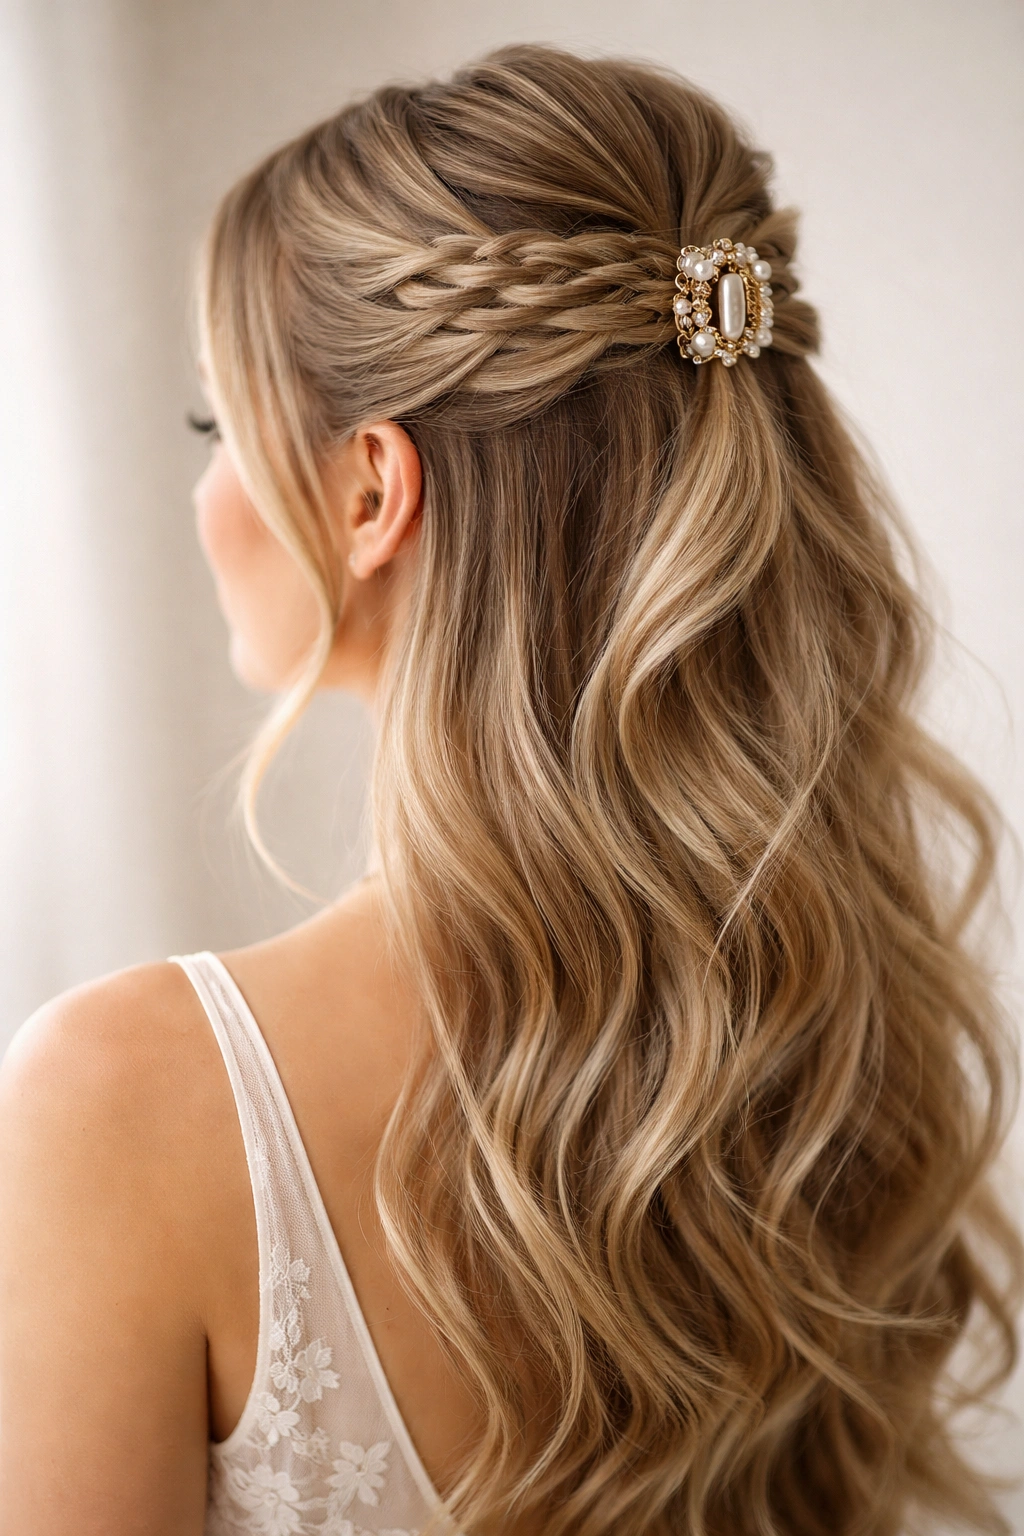
3. The Braided Crown Section
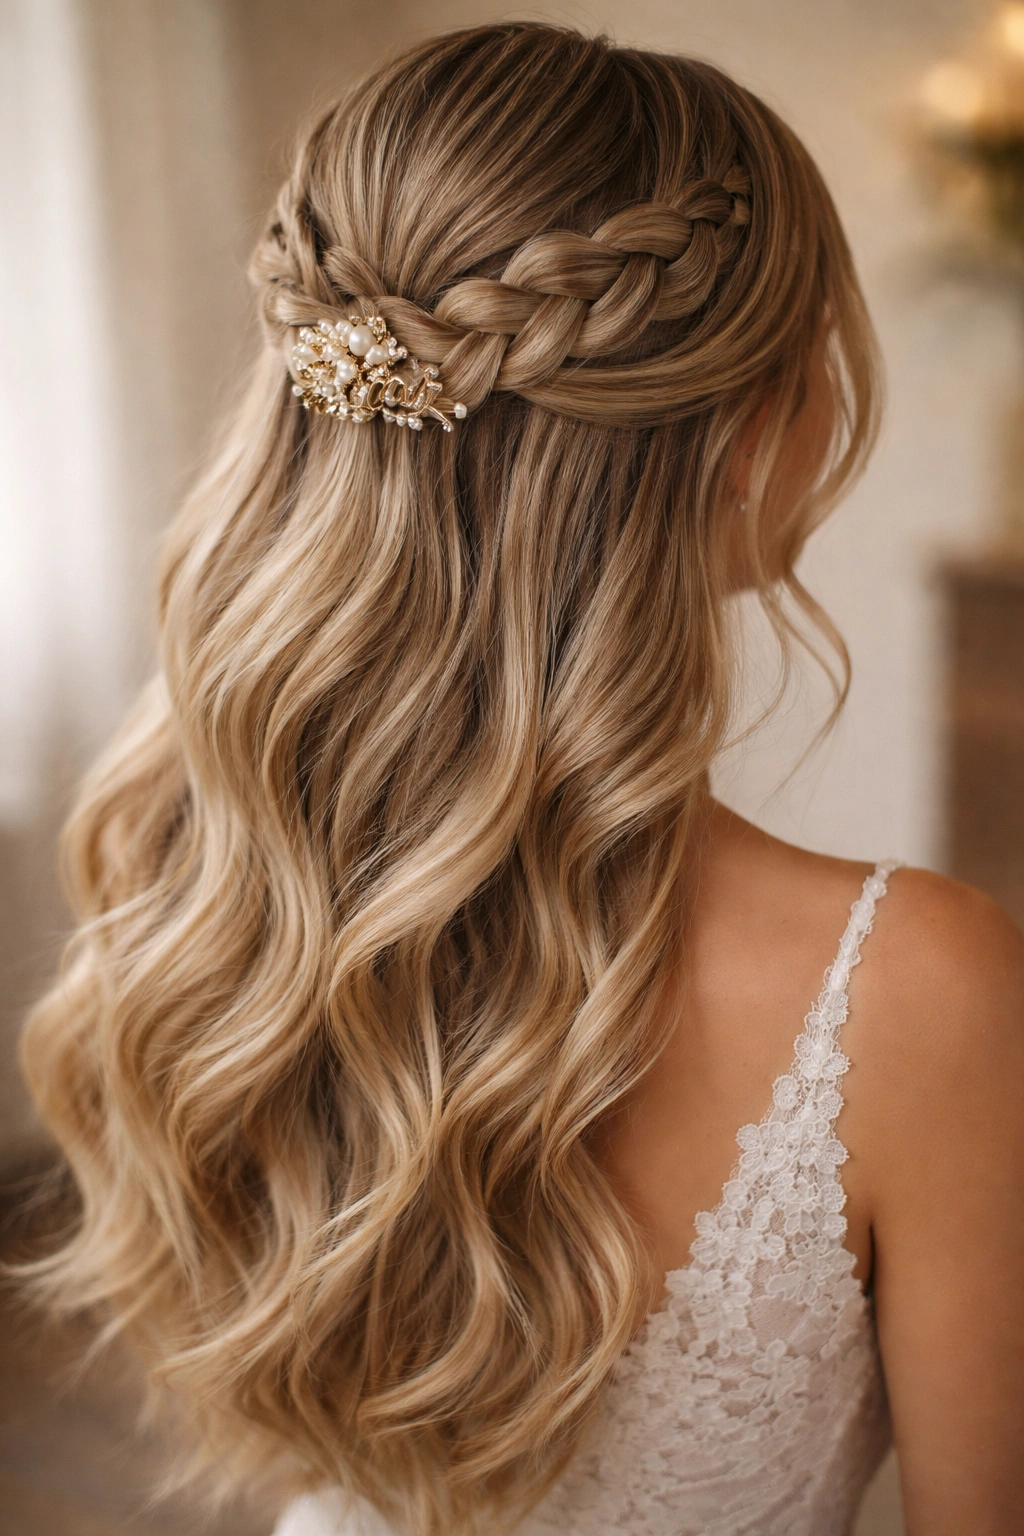
Start by creating a small French braid or Dutch braid using the hair at the crown, then secure the braided section with a claw clip while allowing the rest of your hair to flow freely. The braid adds texture and refinement without requiring complex sectioning.
Why It Works for Weddings
Braids instantly read as more formal and intricate than they actually are. A single braid requiring just basic braiding skills creates a visual impact that makes your half up half down style feel like you spent hours getting ready. The braid also helps hold the clip secure, so you’re getting both visual and functional benefits.
How to Achieve It
- Section off hair from your forehead back toward your crown (about 3 inches wide)
- Begin a French or Dutch braid at your hairline, pulling hair from both sides as you braid
- Braid only to about the middle of your head, where you’ll position the claw clip
- Secure the braid at its end with the claw clip, tilting it slightly for visual interest
- Let the unbraided section flow freely, mixing with the braided section for blended texture
- Tease the braided section slightly before clipping for a fuller appearance
Pro tip: A Dutch braid (braiding under rather than over) photographs more dimensionally than a French braid.
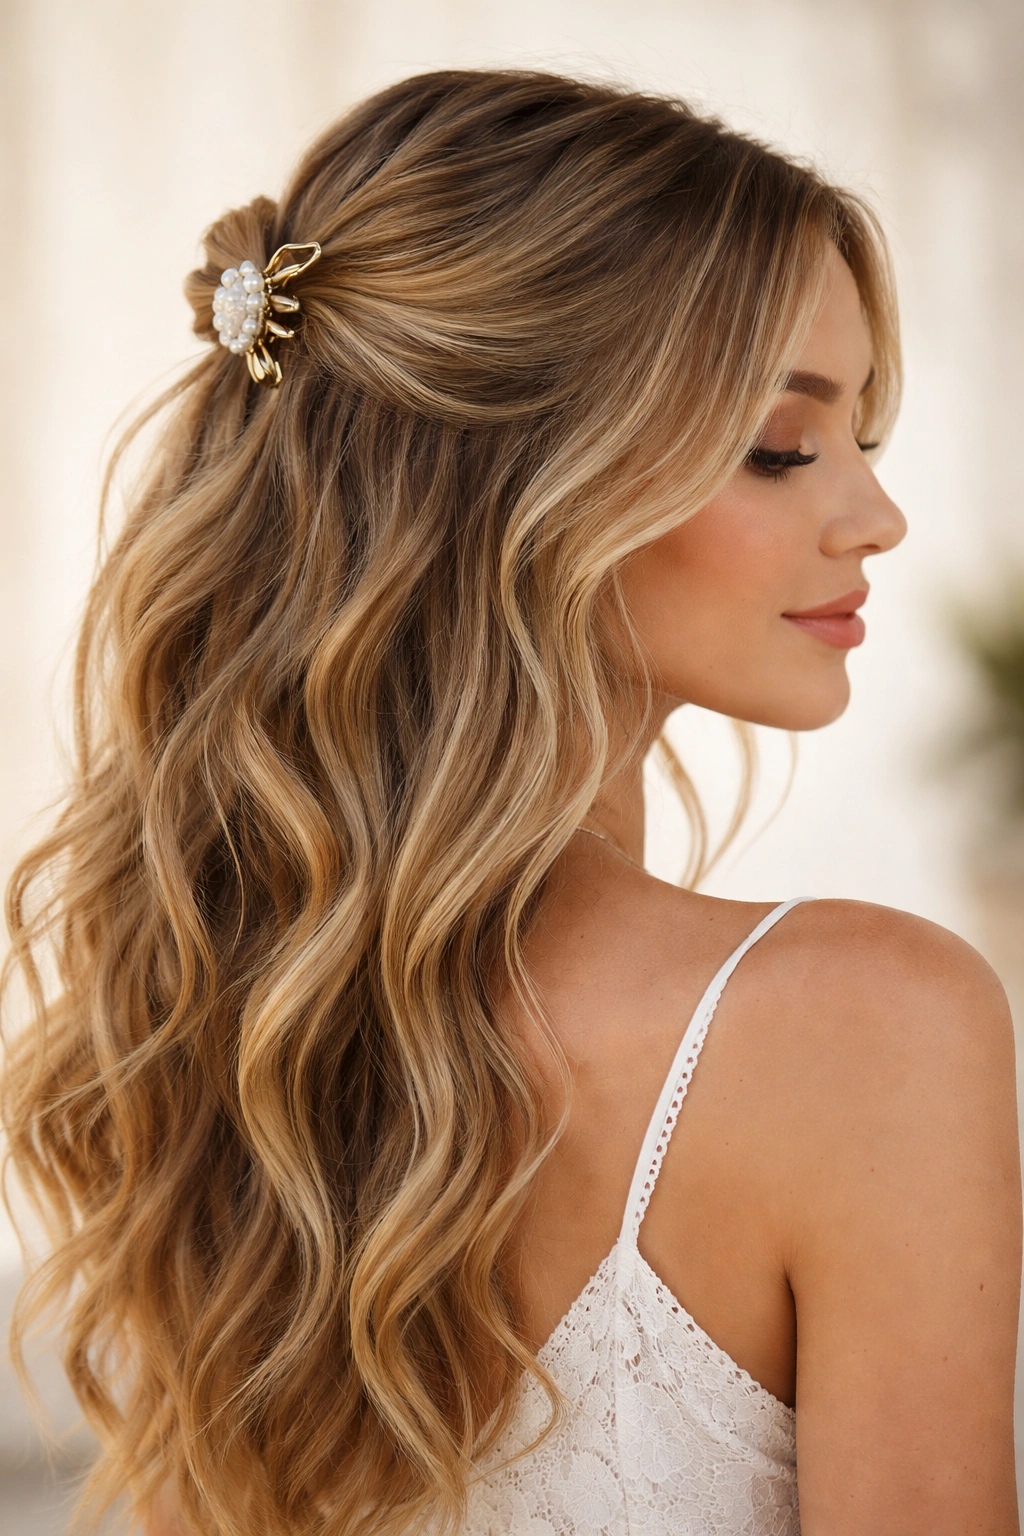
4. The Cascading Waves
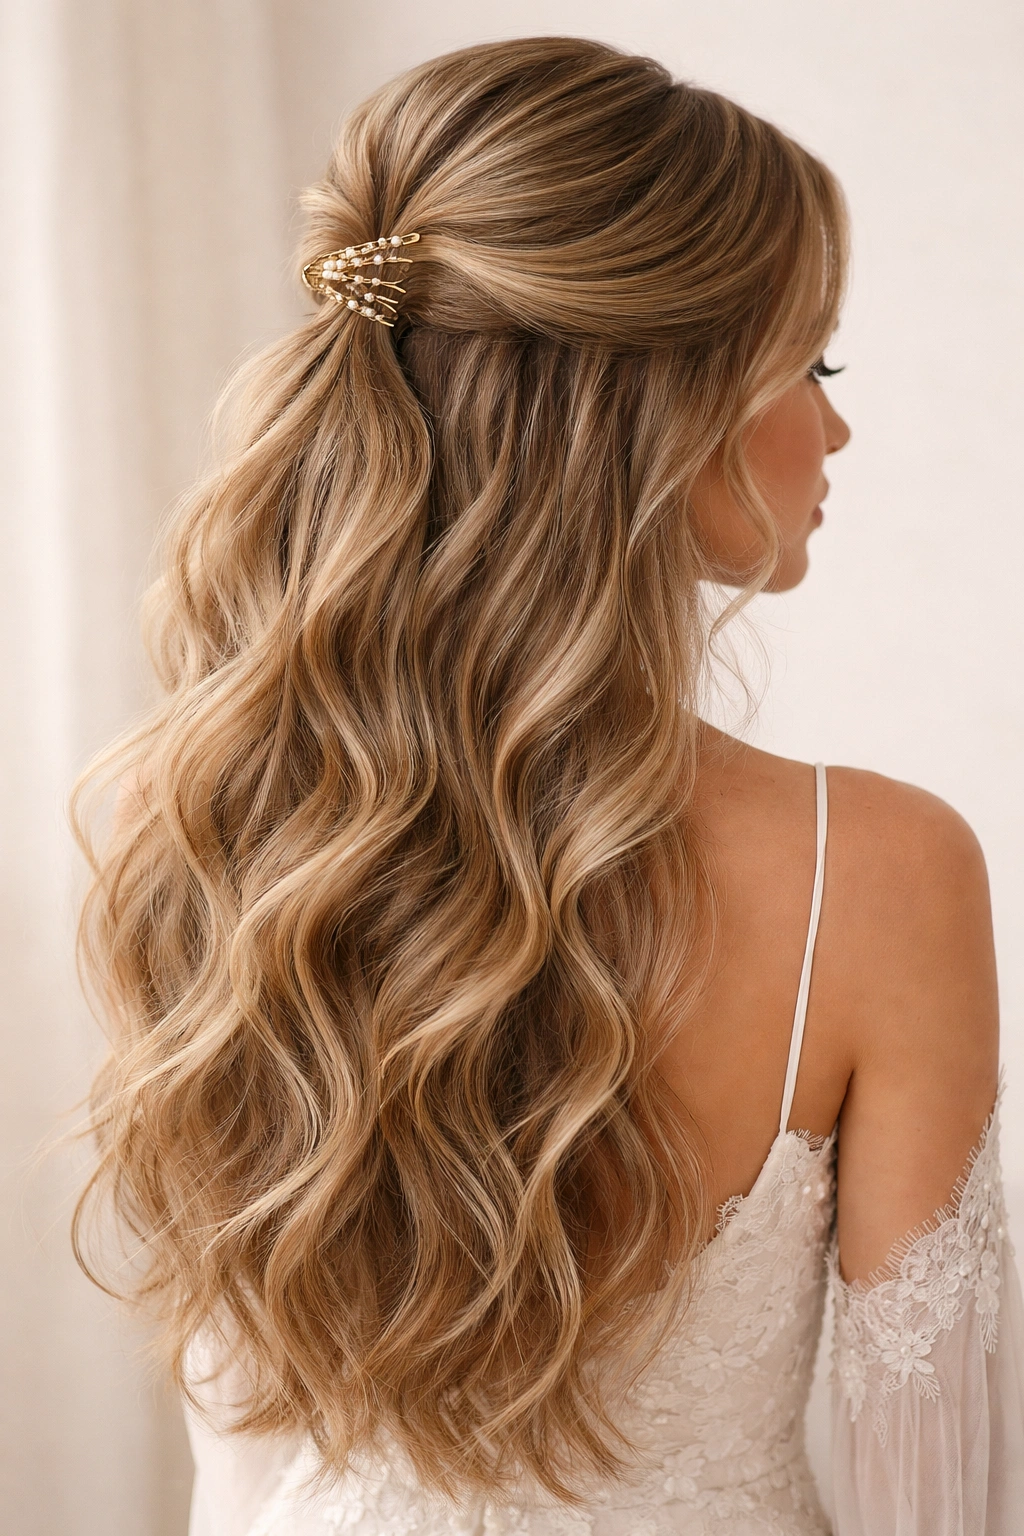
This style uses multiple soft waves throughout the secured section, creating a cascading effect that makes the half up half down look fuller and more textured. You’re not creating one monolithic section — instead, you’re building visual interest through layered waves.
Why It Works for Weddings
The cascading wave effect is undeniably romantic and feminine. It feels effortlessly beautiful rather than overly constructed. This style works particularly well for brides with longer hair (shoulder-length or beyond) because the cascade effect requires enough length to create distinct visual waves.
How to Achieve It
- Curl your entire head with a one-inch curling iron, curling each section away from your face
- Once fully curled and cooled, gently run your fingers through the curls to break them into waves
- Gather the top two inches of hair at your crown and secure with a claw clip
- As the claw clip secures the hair, some waves should fall naturally in front of and around the clip
- Tease the clip area gently with a fine-tooth comb for volume
- Ensure waves fall in front of your shoulders on both sides, creating that cascading effect
Worth knowing: This style benefits from a texturizing spray applied before curling — it helps waves hold their shape throughout the day.
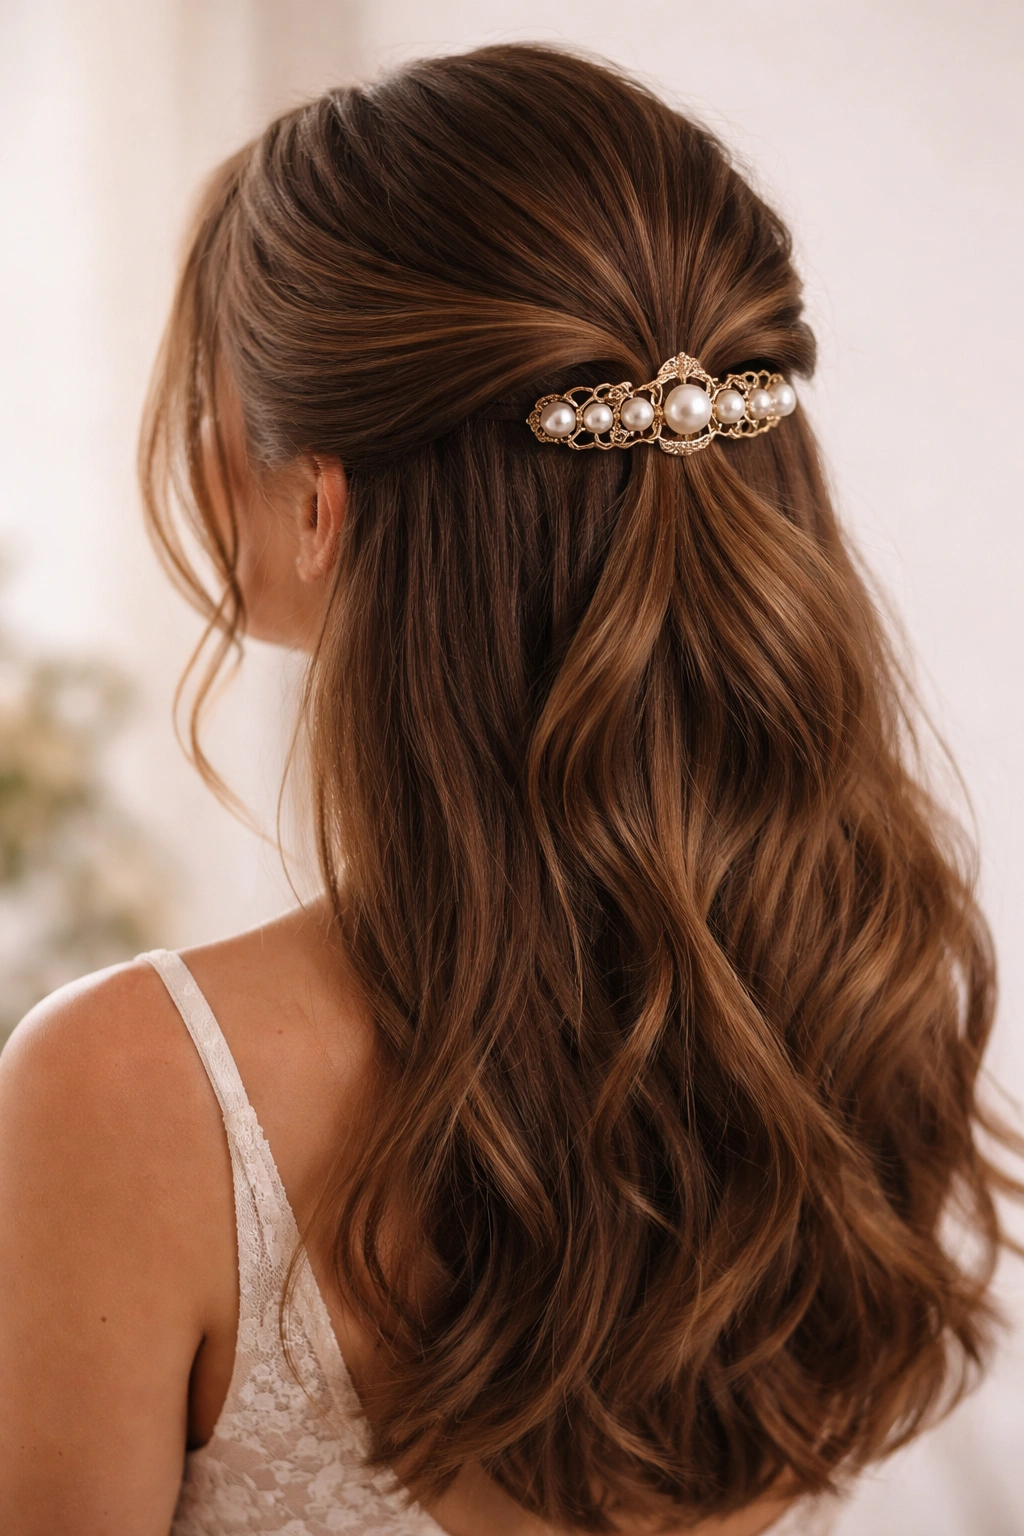
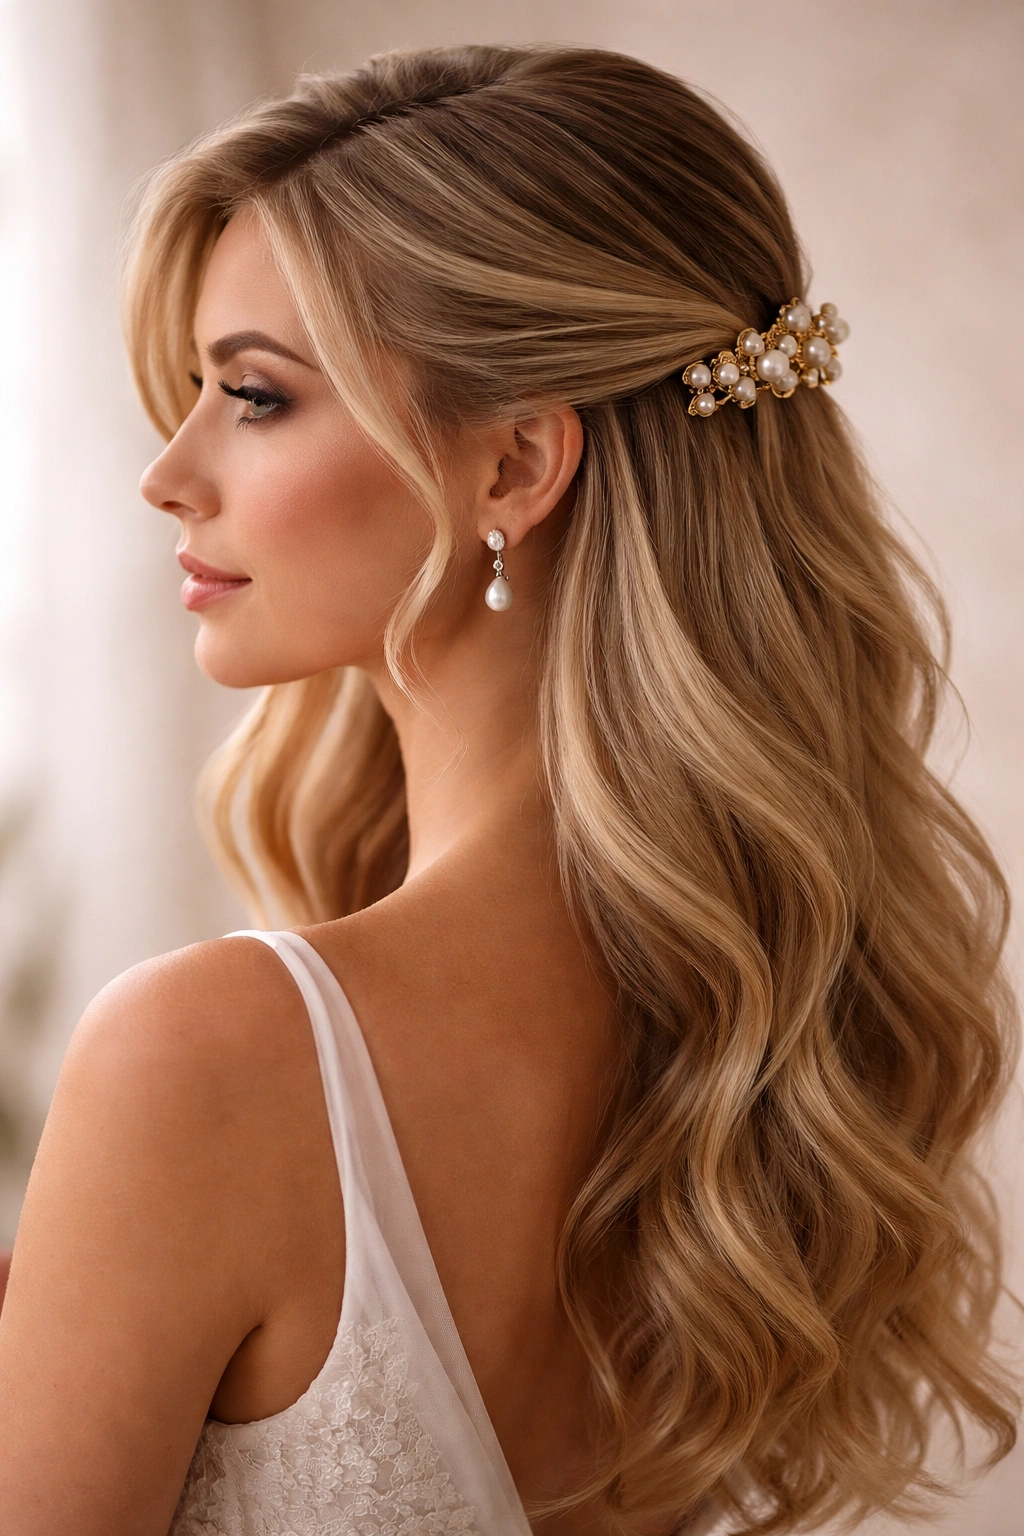
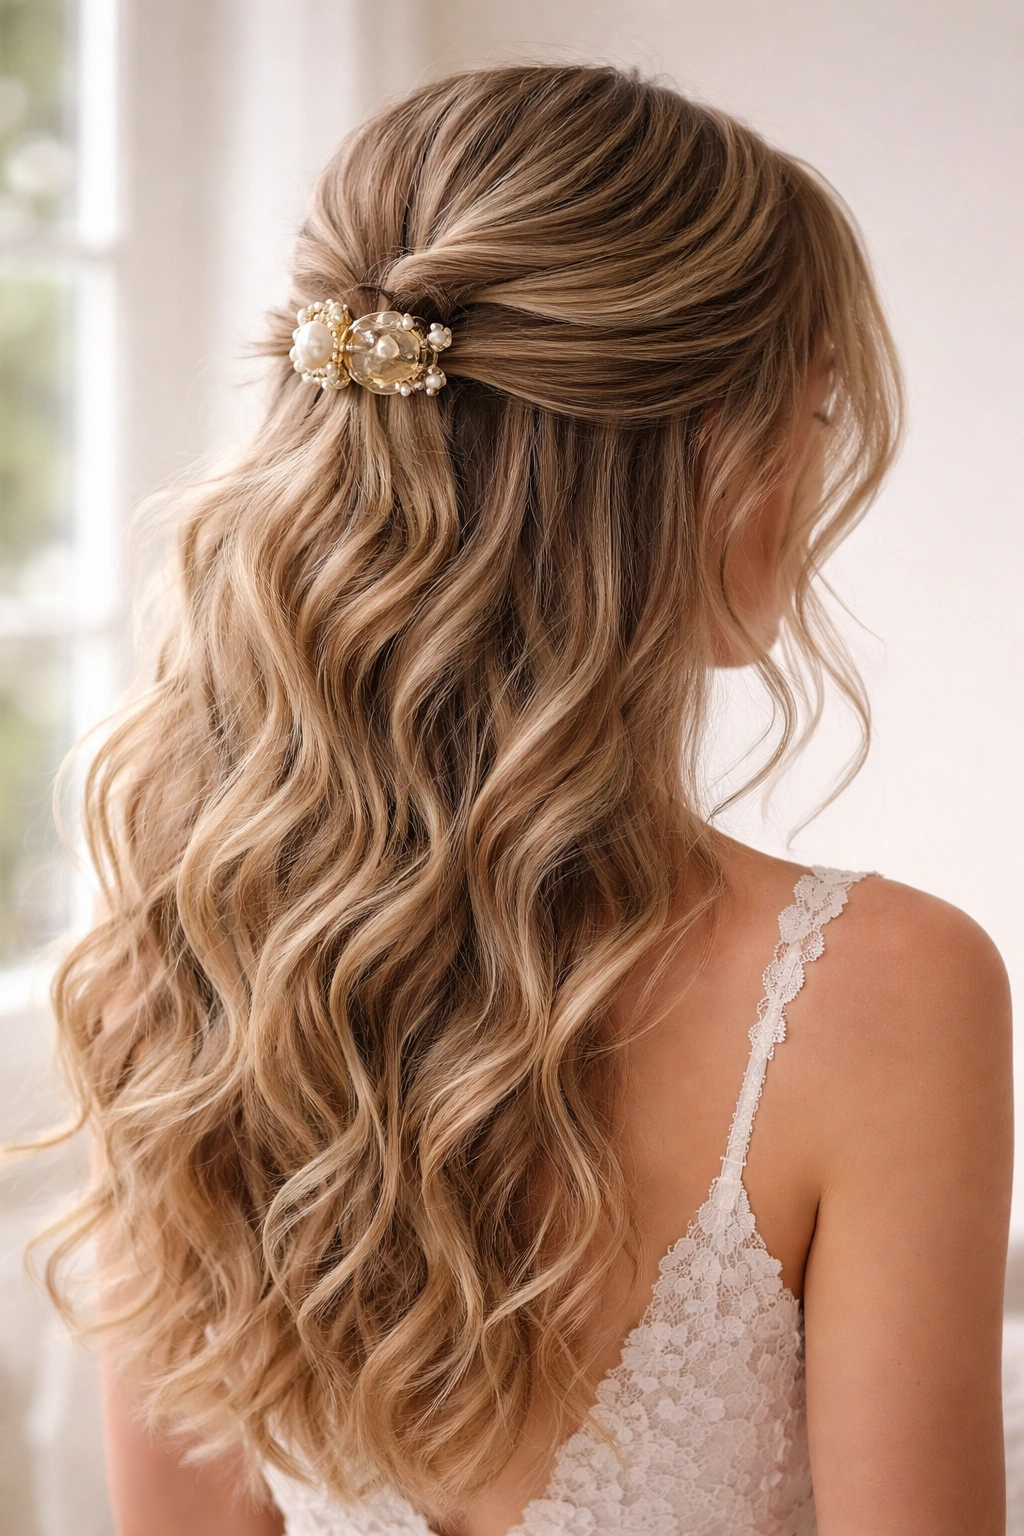
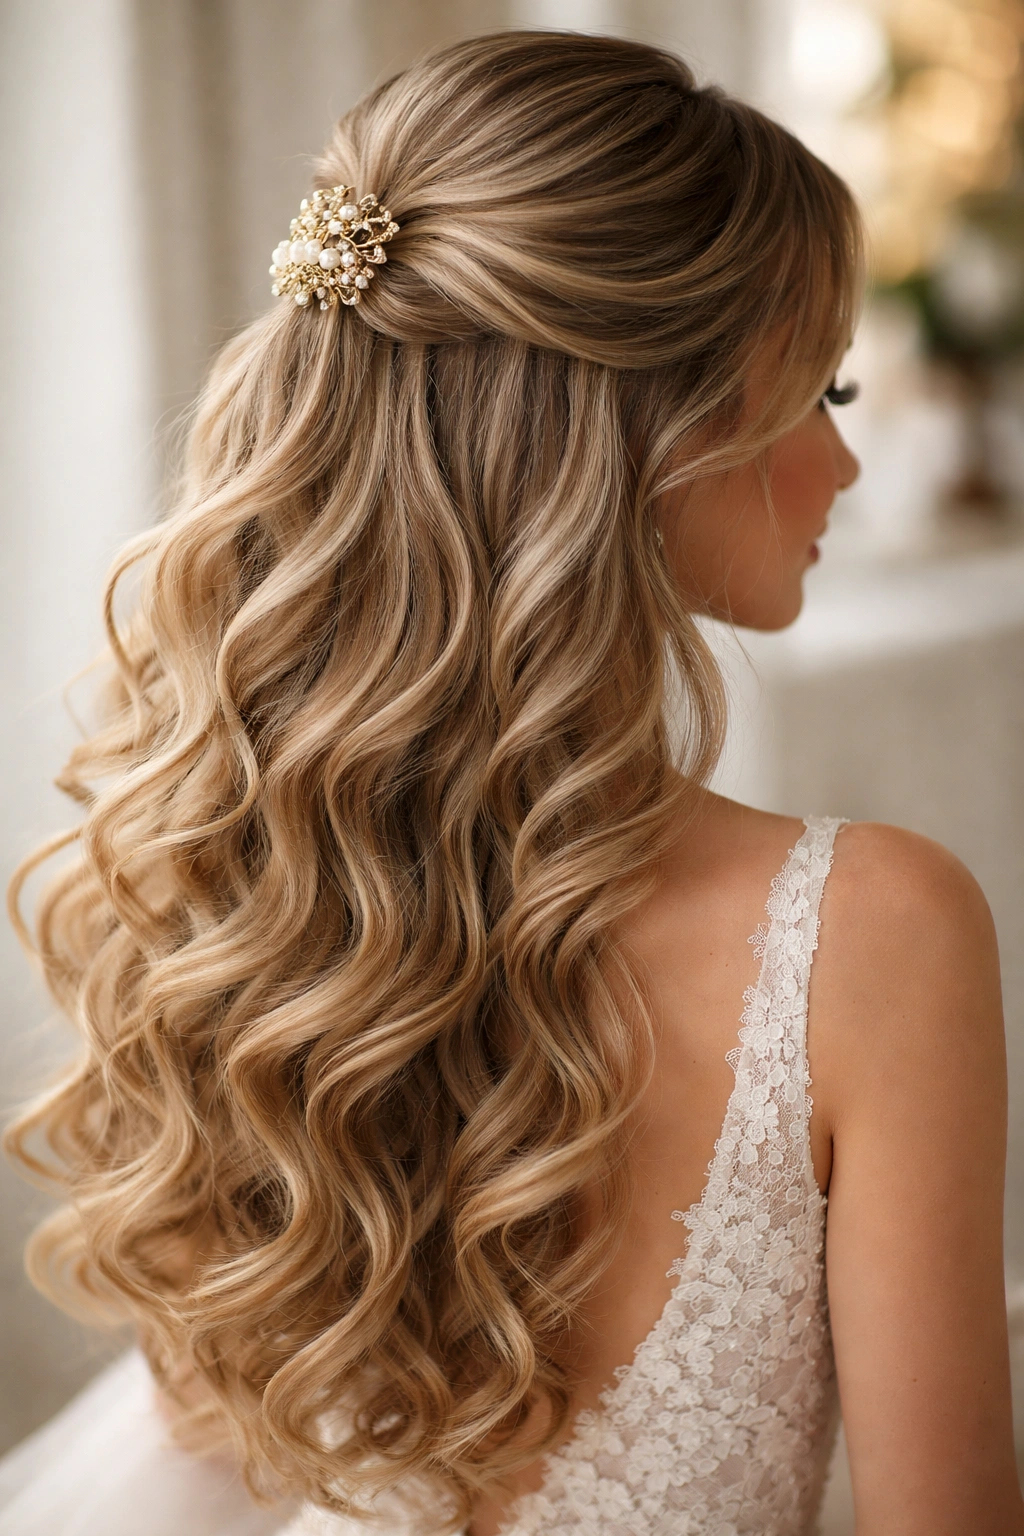
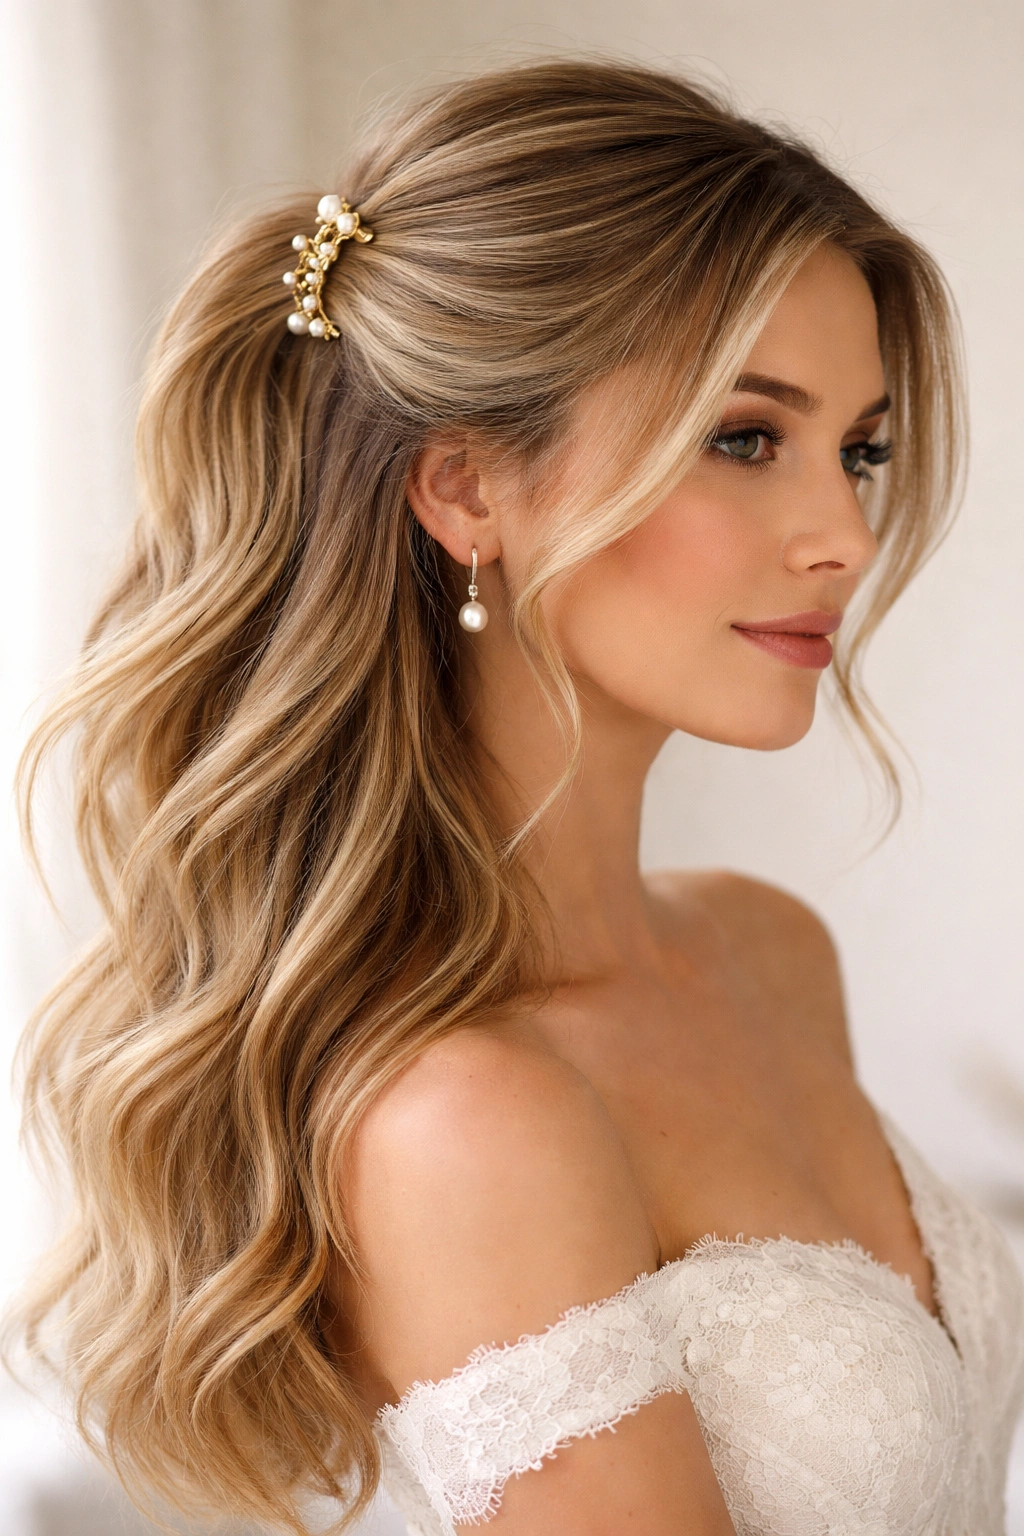
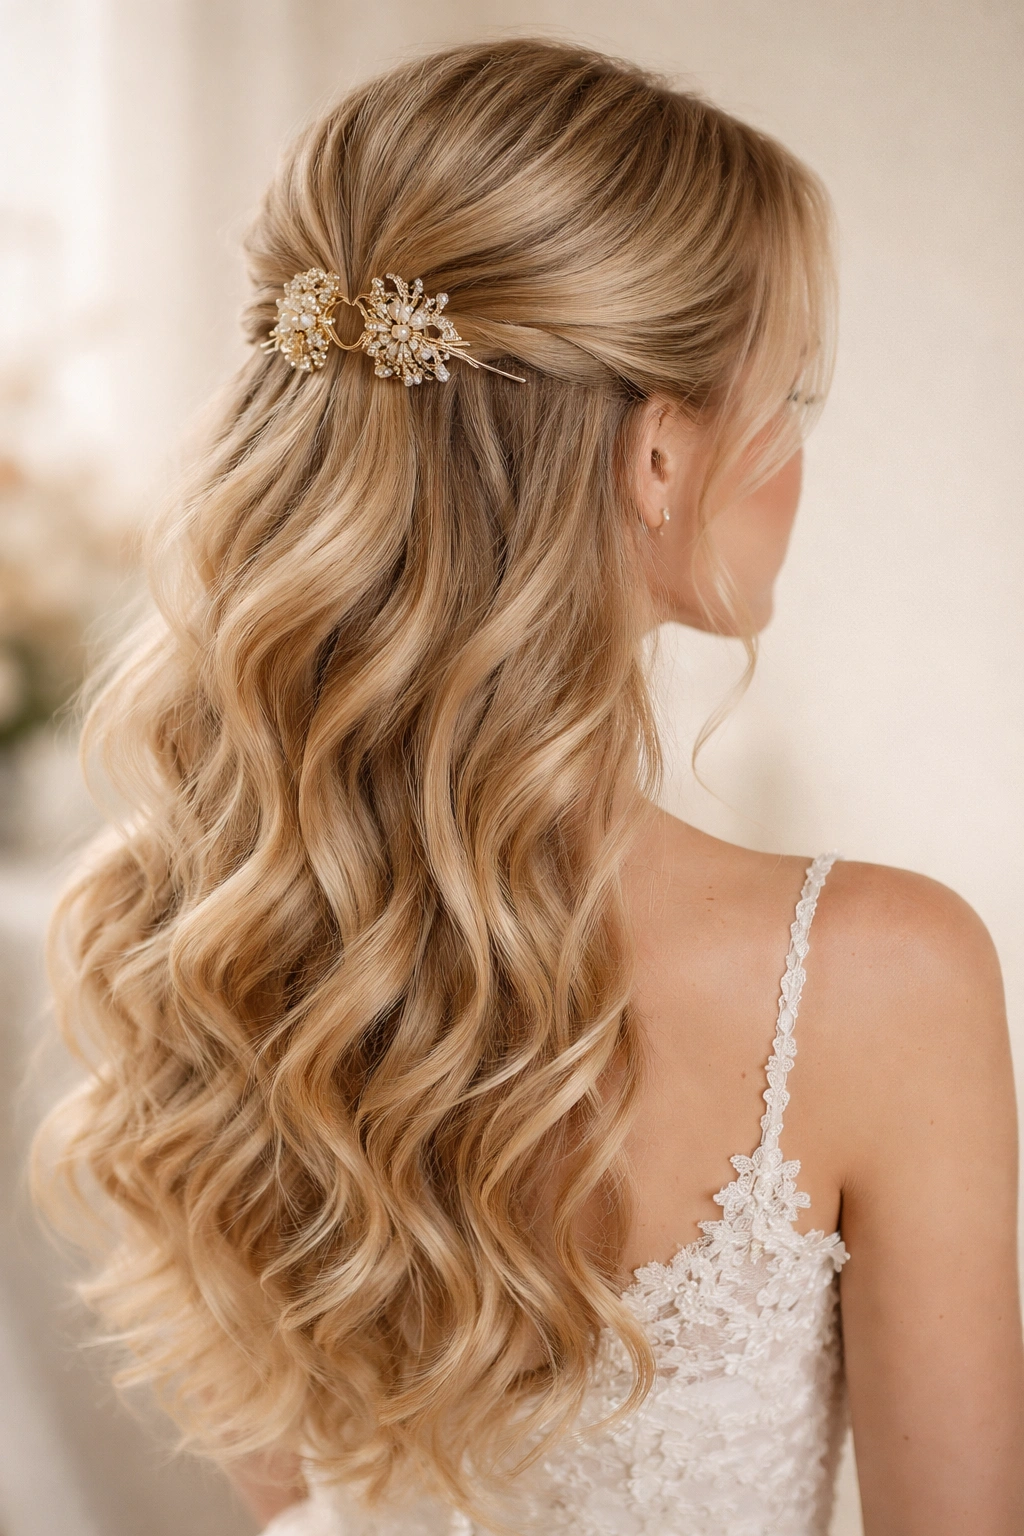
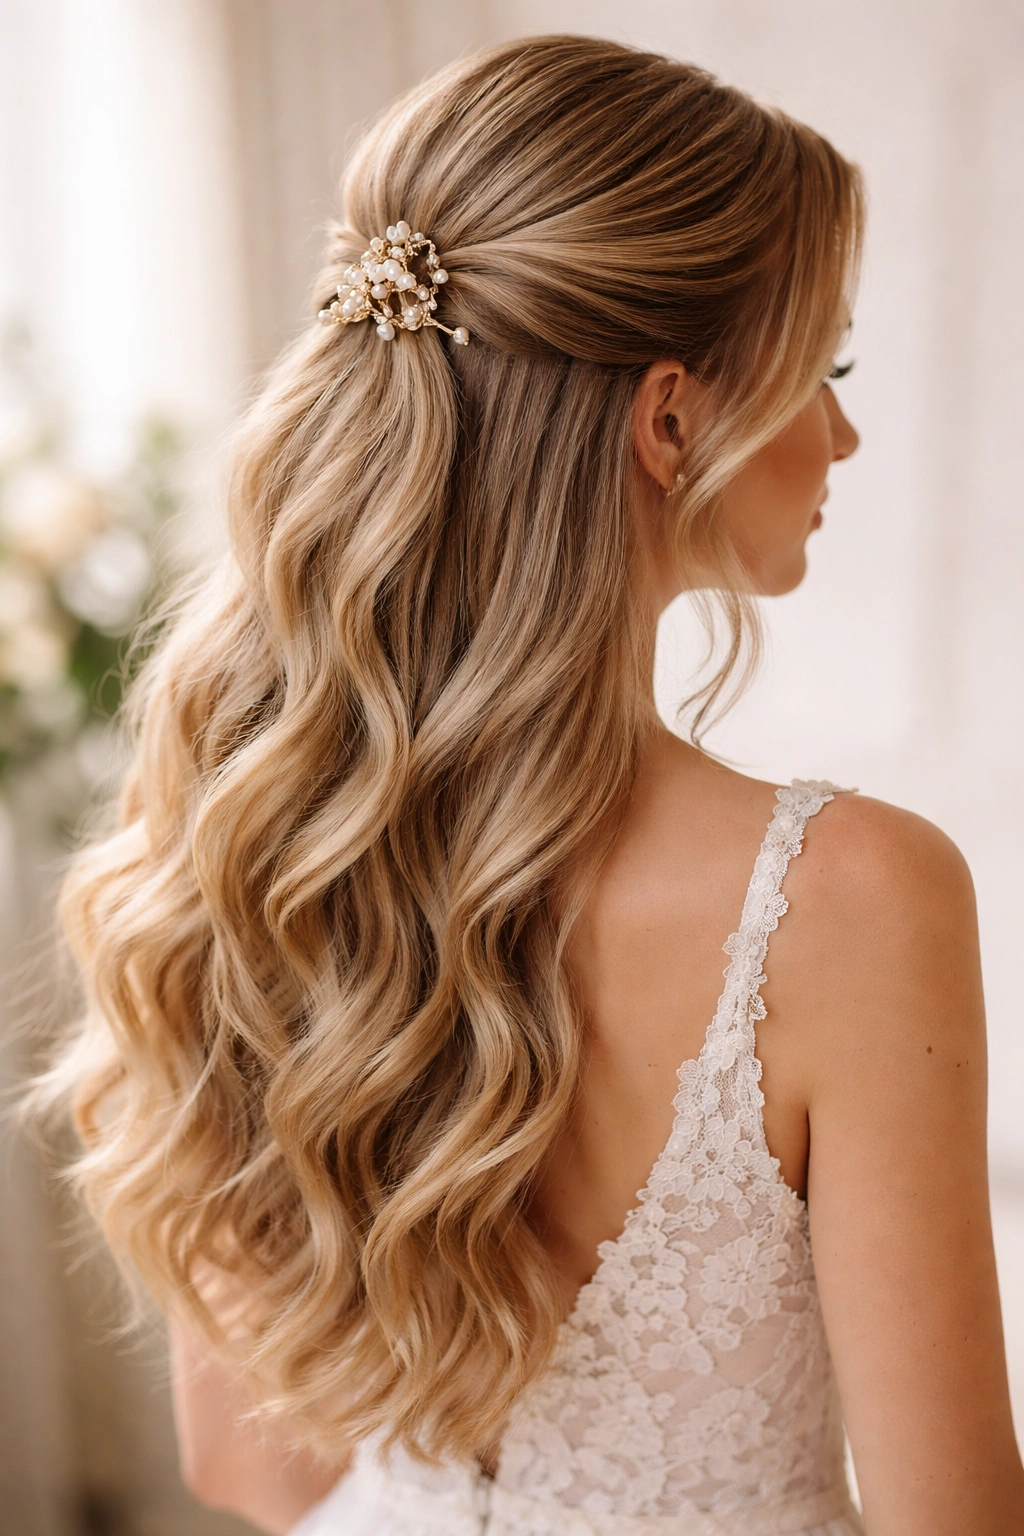
5. The Pearl-Studded Elegance
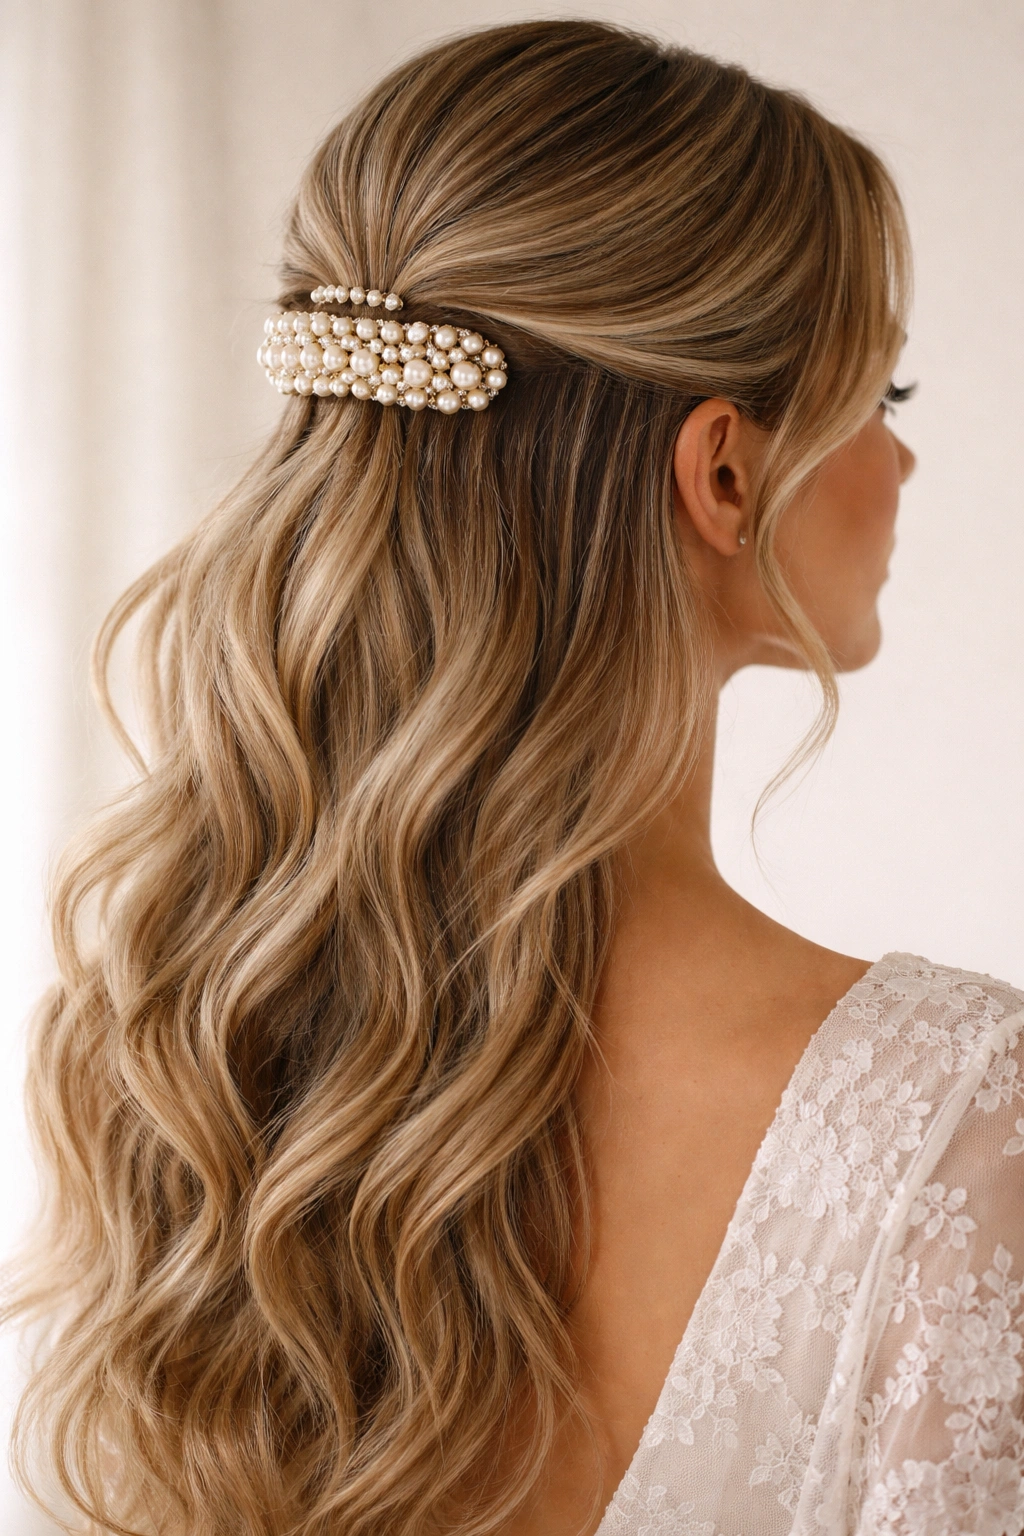
Choose a pearl-embellished or jeweled claw clip and make it the star of your styling. The clip itself becomes your hair accessory, so you can keep the rest of your styling simple and elegant, letting the clip’s detail shine.
Why It Works for Weddings
Ornate claw clips instantly elevate a simple half up half down style into something that feels bridal and special. When you’re letting your hair down but want it to feel intentional and formal, a gorgeous clip does that work for you. This approach is perfect if you love your hair texture and want to showcase it while keeping the crown area polished.
How to Achieve It
- Style your hair in soft waves or curls throughout — nothing too complicated
- Create a simple half up half down by securing the top section with your pearl or jeweled claw clip
- Position the clip at the crown center or slightly off-center, depending on where the design looks best
- Leave the sides and back completely natural and textured
- Keep the overall look simple so the clip remains the focal point
- Ensure your hairstyle complements the clip rather than competing with it
Pro tip: If your wedding dress has intricate details or beading, choose a simpler claw clip so your whole look doesn’t feel overdone.
6. The Vintage-Inspired Rolled Section
This style uses a rolled section of hair rather than a twist or braid. You’re taking the top section and rolling it back toward the crown, then securing it with a claw clip to create a polished, vintage-feeling style that works beautifully for classic or garden wedding aesthetics.
Why It Works for Weddings
Rolled sections feel inherently formal and intentional — they read as deliberate styling choices rather than hair that happened to get clipped up. This style photographs gorgeously because the rolled texture creates clean lines and dimension. It’s especially flattering for brides who want a style that feels both romantic and clearly styled.
How to Achieve It
- Start with smooth, lightly waved hair
- Take the section of hair from your crown and smooth it back with your hands
- Roll this section away from your face (toward the back of your head) to create a barrel-like roll
- Hold the roll in place with your fingers and slide a claw clip underneath, securing the roll
- Position the clip horizontally so it supports the entire rolled section
- Leave the lower sections completely down, possibly teasing them slightly for volume
Worth knowing: Smooth hair rolls look most polished — use a smoothing serum and a fine-tooth comb to eliminate flyaways before rolling.
7. The Side-Swept Statement
Instead of securing hair at the center crown, sweep the top section to one side of your head and secure it with a claw clip positioned at your ear or just behind it. This asymmetrical approach feels modern and flatters most face shapes by creating a defined side.
Why It Works for Weddings
Side-swept styles are wildly flattering because they contour your face and draw attention to your features in a subtle way. The asymmetry feels intentional and stylish. This approach works beautifully for brides who want sophistication without the traditional centered crown style.
How to Achieve It
- Take the top section of hair on the larger side of your part (or create a new side part if desired)
- Smooth this section to the opposite side of your head using a fine-tooth comb
- Secure it with a claw clip positioned behind your ear or at the side of your head
- Allow the lower sections to fall freely, creating a side-swept frame
- Keep some shorter pieces loose at your temples on the forward-facing side for a softer appearance
- Consider back-combing the secured section for subtle volume
Pro tip: This style photographs beautifully from your “good side,” so position yourself deliberately for your bridal portraits.
8. The Textured Boho Waves
Create loose, undone-looking waves throughout your entire head, then secure just the top section with a claw clip. The key is making everything look effortlessly tousled, as if you didn’t spend hours styling but somehow ended up perfectly camera-ready.
Why It Works for Weddings
Boho waves feel romantic, relaxed, and timelessly beautiful. This style works for virtually any wedding aesthetic, from rustic and garden-inspired to beach and destination weddings. The textured approach is also forgiving — slight imperfections in the waves actually add to the authentic, undone feel.
How to Achieve It
- Apply a texturizing spray to damp hair to create grip for waves
- Use a one-and-a-half-inch curling iron to create loose waves throughout your entire head
- Curl sections away from your face, and alternate curling sections of the same strand in different directions for varied texture
- Once cooled, run your fingers through the curls repeatedly to break them into soft waves
- Gather the top section loosely and secure with a claw clip
- Tease the crown area gently for volume and fullness
Worth knowing: Boho waves typically look better slightly undone — so resist the urge to smooth everything perfectly. Flyaways and slight messiness are part of the aesthetic.
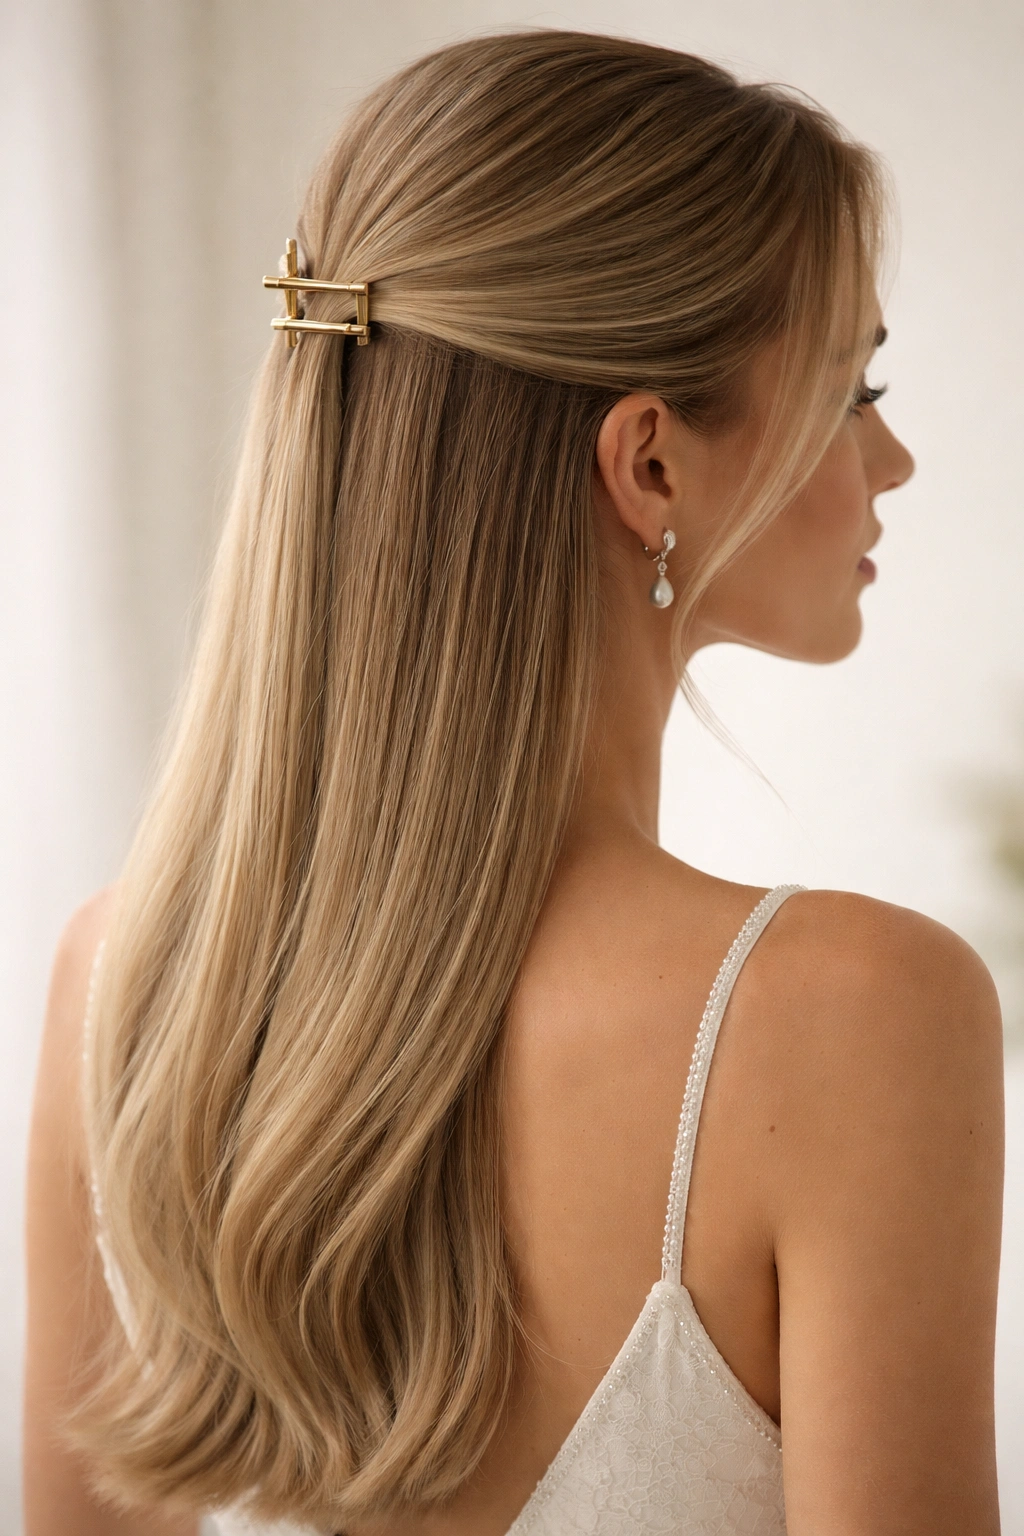
9. The Sleek Geometric Placement
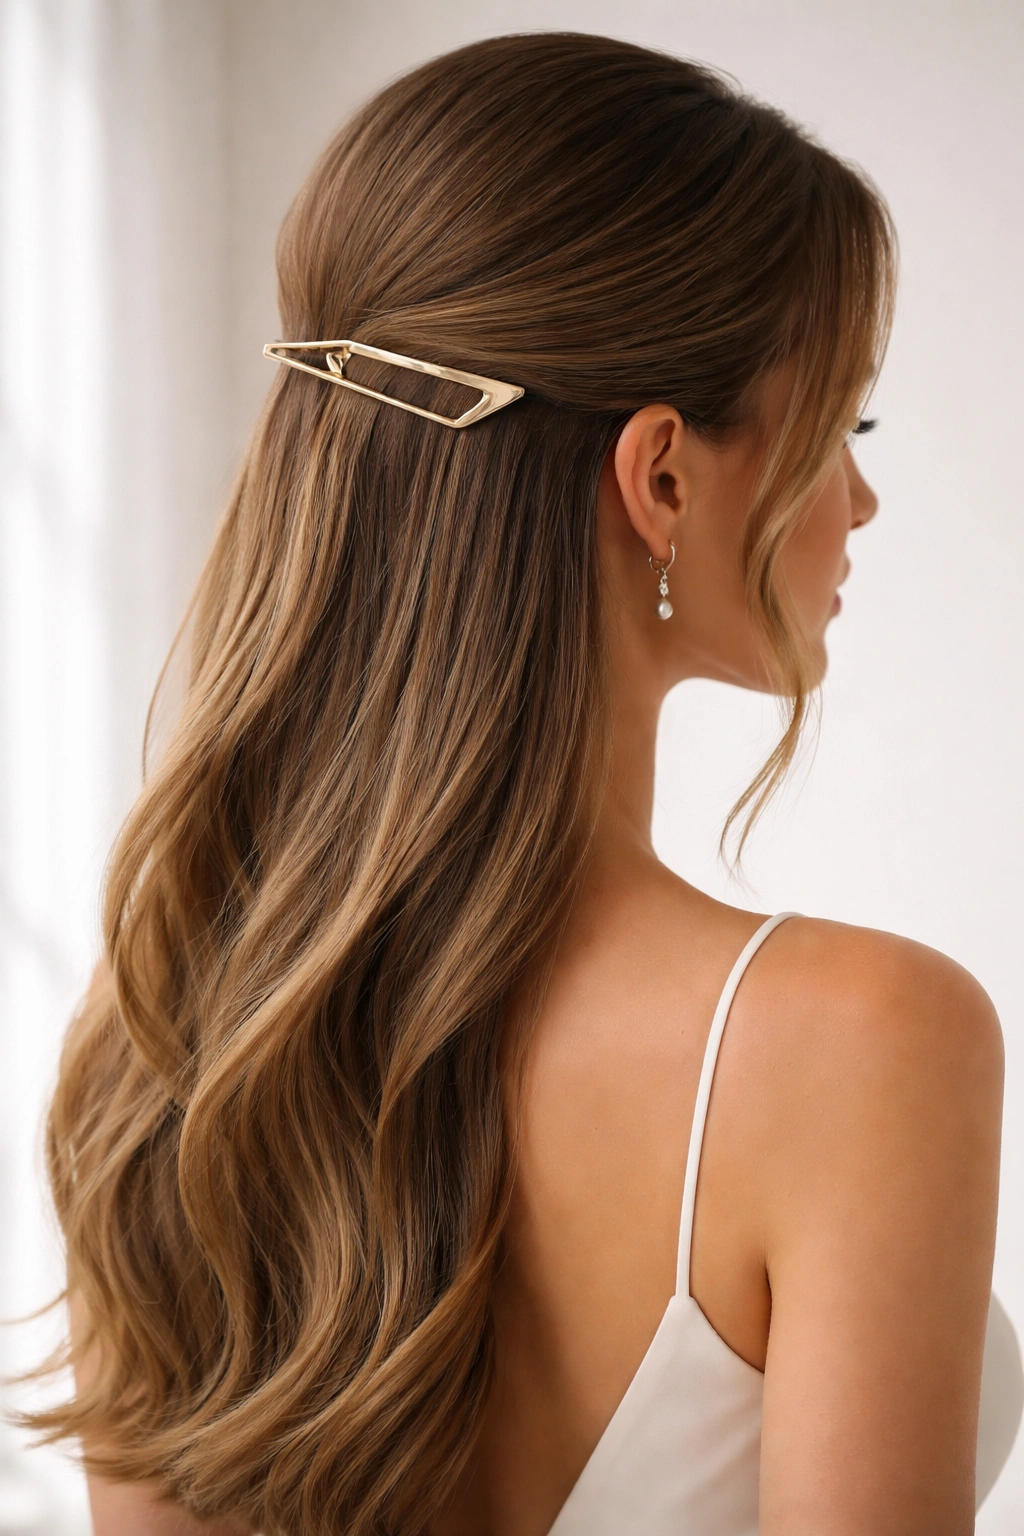
Position your claw clip in an unexpected geometric way — horizontal along the back crown, diagonal across one side, or even centered but elevated higher than traditional placement. The geometry becomes part of the style’s visual interest.
Why It Works for Weddings
This approach works beautifully for modern, minimalist, or unconventional weddings. By placing the clip asymmetrically or at an unusual angle, you create visual interest and sophistication. It shows intentionality and works especially well with modern or architectural claw clip designs.
How to Achieve It
- Decide on your geometric placement — this could be horizontal across the entire crown, diagonal from one temple to the opposite side, or vertically along the back
- Style your hair with soft waves or curls for texture
- Section the hair according to your geometric plan rather than traditional half-up placement
- Secure with a claw clip positioned at the angle that creates your desired geometry
- Ensure the placement is balanced and intentional, not accidental-looking
- Use minimal product so the hair’s natural texture shows through
Pro tip: Modern claw clips with strong lines or metallic finishes look especially striking with geometric placement.
10. The Double-Section Clip Style
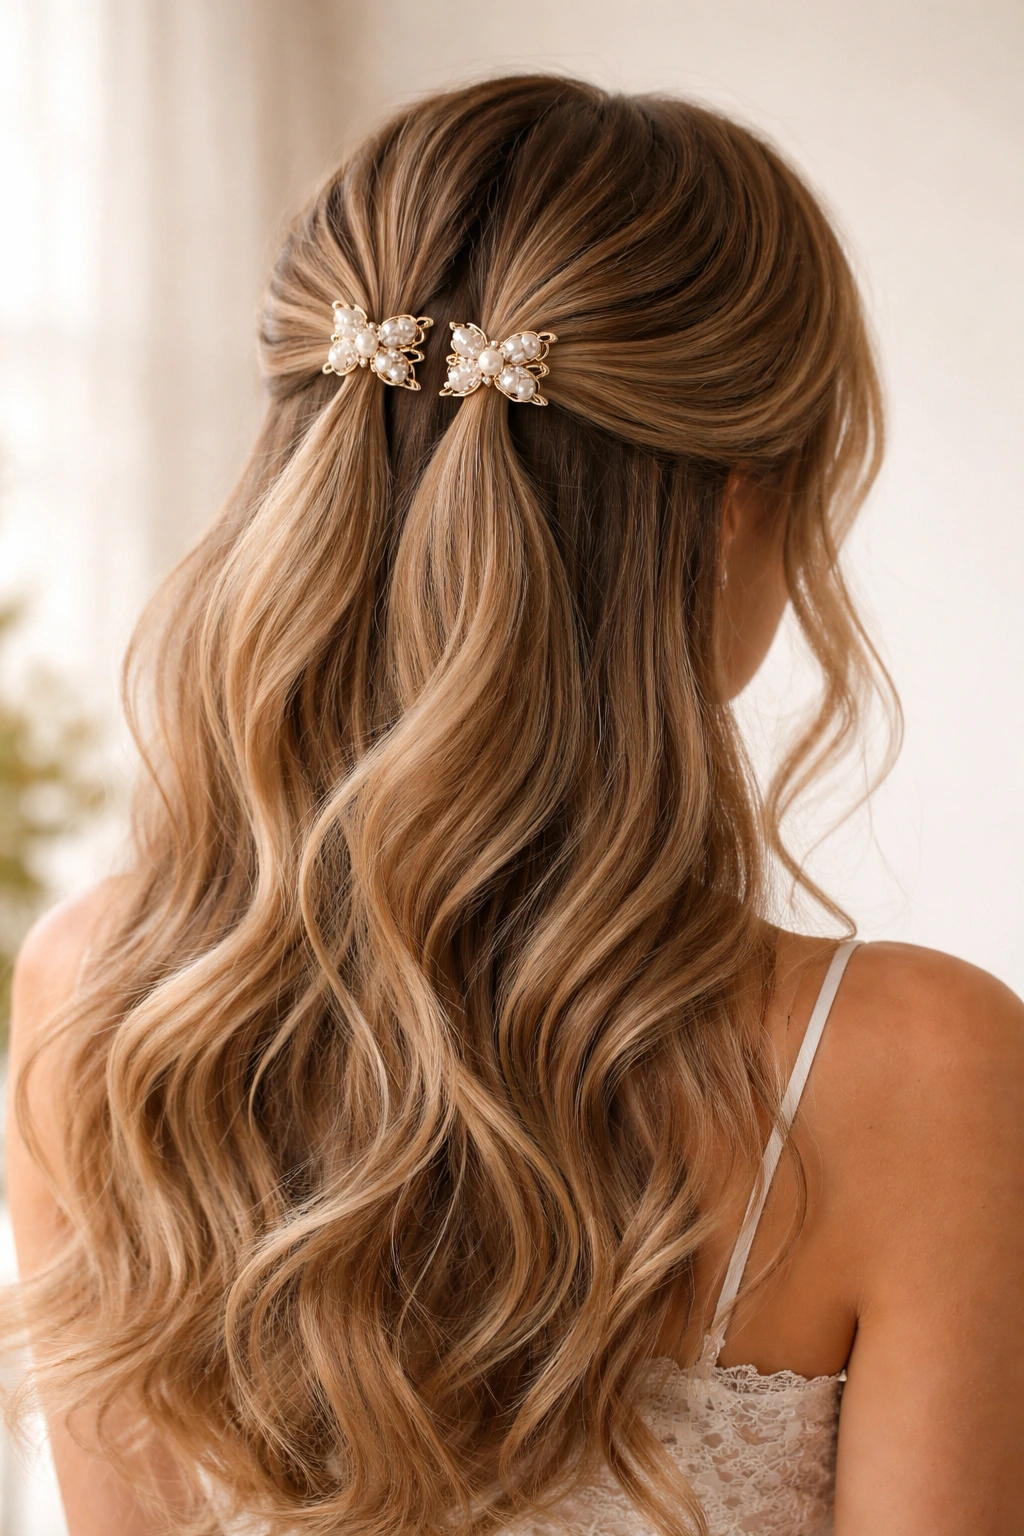
Secure two separate small sections of hair with two claw clips positioned close together (or even overlapping slightly) at the crown. This creates maximum hold and visual interest without requiring you to gather a large amount of hair.
Why It Works for Weddings
The double-clip approach offers both security and style — your hair stays put throughout an evening of celebration while looking intentionally designed. This works beautifully for fine or thin hair that might not hold well with a single clip securing too much hair. It also allows you to use two coordinating clips for added visual interest.
How to Achieve It
- Take a section of hair from just above one ear, about 2 inches wide
- Take a matching section from above the opposite ear
- Position both sections at the crown, overlapping them slightly
- Secure both with claw clips positioned close together or with slight overlap
- Let the rest of your hair flow completely freely around the clips
- The two clips together should look intentional, not like you needed backup clips for security
Worth knowing: Matching or coordinating clips look more intentional than mismatched ones — or deliberately go contrasting for a bold statement.
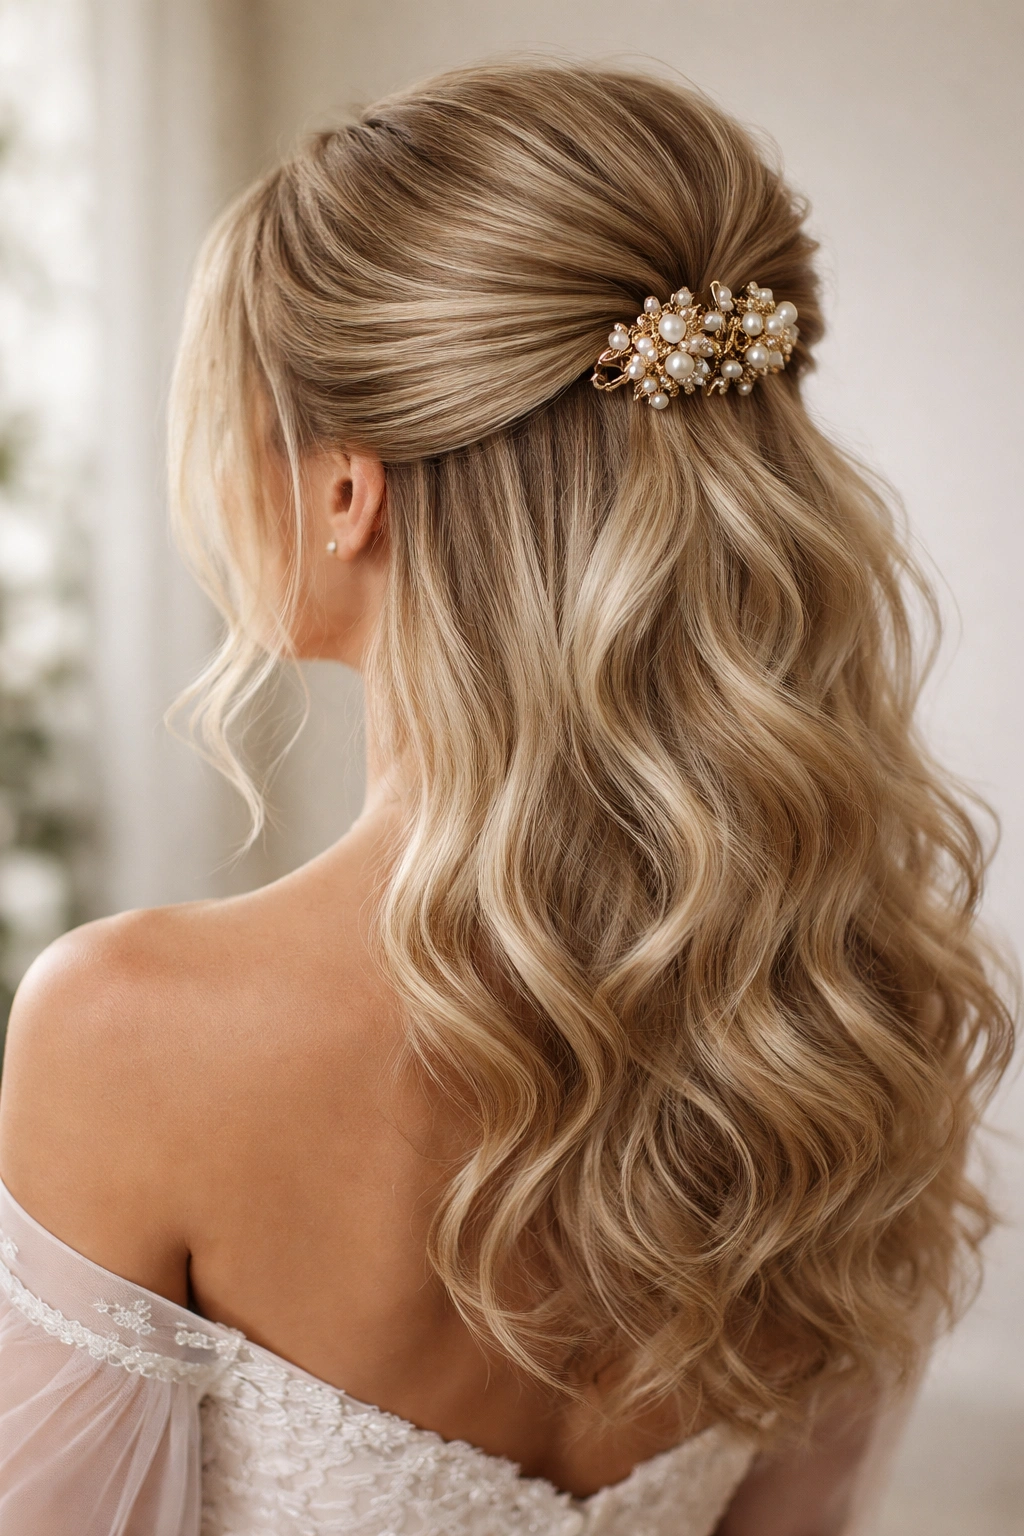
11. The Soft Romantic Curls
Curl your entire head with soft, romantic curls, then secure the top section in a gentle half up style using a claw clip. The curls throughout your hair create softness and romance, and the clip keeps the crown area polished without fighting against the curl pattern.
Why It Works for Weddings
Soft curls are quintessentially romantic and bridal. By combining them with a half up half down approach, you get maximum volume and romance. This style is forgiving because curls naturally hide imperfections and create a fuller appearance. It works beautifully for any wedding aesthetic but especially romantic, garden, or classic themes.
How to Achieve It
- Use a one-and-a-quarter-inch curling iron to curl sections of hair, wrapping each section fully around the barrel
- Curl away from your face, and make sure each curl is tight and complete before releasing
- Allow curls to cool completely before running your fingers through them
- Once fully cooled, gently finger-comb the curls to soften them into romantic waves
- Secure the top section with a claw clip — the curls will grip the clip naturally
- Lightly tease the crown area for additional volume and dimension
Pro tip: Soft romantic curls hold better with a light hairspray applied before curling — apply it section by section as you curl.
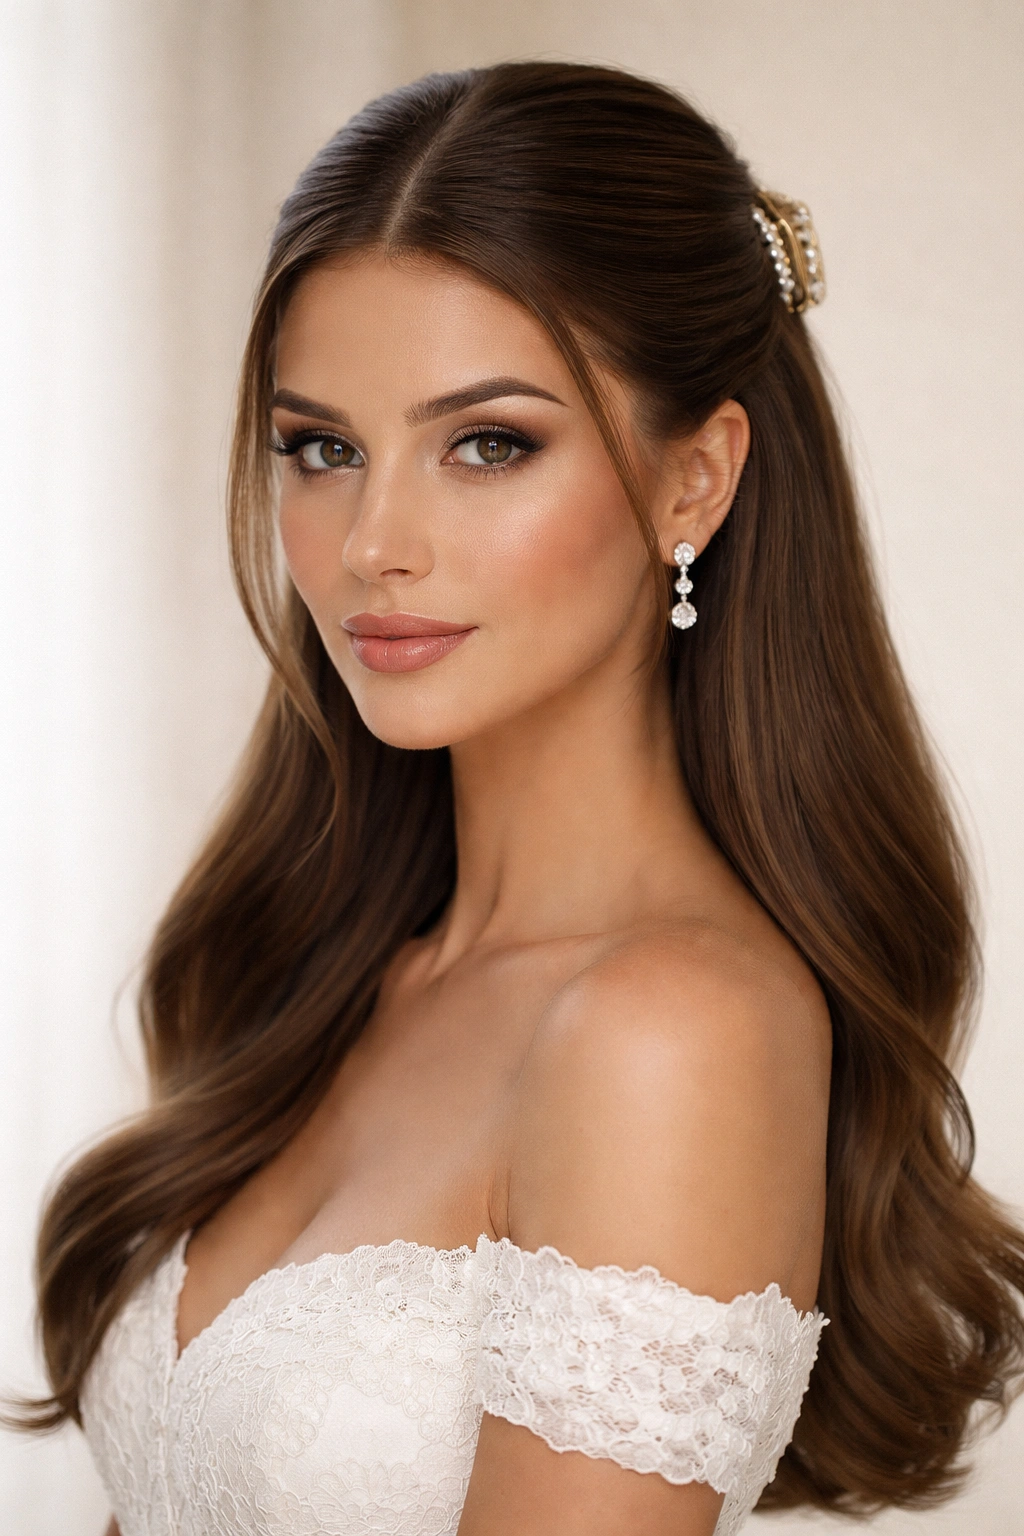
12. The Elegant Minimalist
Keep everything intentionally simple: smooth hair, a small secured section, and a sleek claw clip. This refined approach works beautifully for brides who want polish and sophistication without visual fussiness.
Why It Works for Weddings
Minimalist styling is timeless. It photographs beautifully because there’s nothing distracting — just you, clean lines, and understated elegance. This approach works especially well for modern weddings, black-tie formal events, or brides who want to showcase their facial features and dress without hair competing for attention.
How to Achieve It
- Blow-dry your hair smooth and straight, or use a flat iron for sleek, polished texture
- Apply a smoothing serum to eliminate flyaways
- Take a small section (about one inch) from the crown area
- Secure it with a minimalist claw clip — metal, sleek, unadorned
- Leave everything else completely down and smooth
- Use minimal product — you want shine and smoothness, not texture or volume
Worth knowing: Minimalist styles demand very healthy, shiny hair since there’s nothing to hide imperfections. Invest in a good shine serum.
13. The Voluminous Crown Section
Create maximum volume at the crown and sides by back-combing and teasing the top section before securing with a claw clip. This creates a dramatic half up half down style that looks full and statement-making.
Why It Works for Weddings
Volume at the crown is inherently flattering — it creates proportion and drama without being overdone. This style works beautifully for brides with smaller frames or narrower shoulders, as the crown volume balances facial proportions. It’s also perfect if you have fine or thin hair and want to create the illusion of fullness.
How to Achieve It
- Apply a volumizing spray to the roots of your crown area
- Back-comb or tease the top section of hair using a fine-tooth comb, creating maximum volume
- Gently smooth the outer layer slightly with the comb so it looks intentionally voluminous rather than messy
- Gather this voluminous section and secure with a claw clip
- Keep the lower sections smooth or gently waved for contrast
- Use a light hairspray to hold the volume without weighing it down
Pro tip: Back-comb at the roots rather than throughout the length — this creates natural-looking volume rather than a matted appearance.
14. The Asymmetrical Placement
Divide your hair into an asymmetrical part and secure more hair on one side than the other with your claw clip. This creates an intentionally unbalanced look that feels modern and thoughtful.
Why It Works for Weddings
Asymmetry photographs beautifully and feels intentionally styled. This approach works especially well for brides who want something distinctly different from traditional centered styling. It’s flattering for most face shapes when you position the larger side on your better side.
How to Achieve It
- Create a deep side part, much more pronounced than a typical part
- Style your hair with soft waves or curls throughout
- Secure more hair on the smaller side with your claw clip, positioned higher
- Let the larger side with more hair flow freely and cover one shoulder
- The result should look intentionally asymmetrical, not like you missed clipping some hair
- Use the clip as a design feature — position it where it’s visible and becomes part of the style
Worth knowing: Asymmetrical styles make a statement, so ensure you’re comfortable being noticed and standing out from more traditional guests.
15. The Woven Section Style
Create a look that combines elements of a braid with a half up half down by weaving small strands throughout the top section before securing with a claw clip. This creates texture and visual interest without requiring you to master complex braiding.
Why It Works for Weddings
Woven sections feel intricate and handcrafted. They add visual interest and texture that photographs beautifully without being overly formal or complicated. This style is achievable for anyone who can braid, making it accessible while still looking elevated.
How to Achieve It
- Take the top section of hair at your crown
- Divide this section into three parts
- Weave a thin strand of hair over and under these parts, working from your hairline back
- Continue weaving to create an intricate pattern within the section
- Once the section is fully woven, secure it with a claw clip
- Leave the lower sections completely free and wavy
- Gently tease the woven section for subtle volume
Pro tip: Use a thin strand for weaving rather than incorporating full sections — this creates delicate detail rather than looking overly complex.
16. The Tousled Beachy Waves
Create that sun-kissed, been-at-the-beach-all-day texture throughout your hair, then secure the top section with a claw clip for a relaxed, undone bridal look.
Why It Works for Weddings
Beachy waves are effortlessly romantic and work beautifully for destination weddings, beach ceremonies, or any bride who wants a relaxed approach. This style is also forgiving of imperfection — slight flyaways and undone texture are actually part of the look’s charm.
How to Achieve It
- Apply a sea salt spray to damp hair
- Create loose waves using a curling iron or by braiding damp hair overnight
- Once waves are set, run your fingers through repeatedly to create tousled texture
- Gather the top section loosely — don’t smooth it at all
- Secure with a claw clip, allowing some texture to fall around it
- Let the lower sections remain completely textured and undone
- Use a light, flexible hairspray that won’t make waves look stiff
Worth knowing: Beachy waves tend to fall apart throughout the day if not secured properly — use a clip that grips well, even if you prefer a “relaxed” aesthetic.
17. The Formal Sleek and Polished
This is the approach for the most formal weddings or traditional bridal styles. Everything is smooth, shiny, refined, and strategically positioned — the claw clip secures a perfectly smooth section at a centered crown position.
Why It Works for Weddings
Formal sleek styling reads as classic bridal beauty. It photographs beautifully in all lighting, it’s timeless and won’t look dated in five years, and it works with virtually any wedding dress. This style prioritizes polish and sophistication above all else.
How to Achieve It
- Start with a professional blow-out or smooth your hair completely with a flat iron
- Apply a smoothing serum and shine spray for maximum polish
- Part your hair down the center or create your preferred part
- Gather the top section at your crown using a fine-tooth comb — ensure absolute smoothness
- Secure with a sleek, minimal claw clip in silver, gold, or tortoiseshell
- Make sure the sides are completely smooth and no texture disrupts the polish
- Pin any loose pieces using bobby pins hidden beneath the clip
Pro tip: Formal sleek styles look best when you get a professional blowout the day of the wedding — you can’t achieve this level of polish on your own easily.
18. The Ethereal and Delicate
Combine everything: soft curls, delicate twists, a positioned claw clip, and loose, flowing sections. This is the ultimate romantic, feminine, multi-dimensional half up half down style.
Why It Works for Weddings
Ethereal styles feel dreamy and romantic. They’re the hairstyles that brides remember years later when they look at wedding photos. This approach uses multiple techniques to create depth and visual interest from every angle.
How to Achieve It
- Curl your entire head with soft, romantic curls
- Create two small twisted sections from your temples
- Secure these twisted sections with a claw clip at the crown center
- Allow curls to cascade around and below the clip
- Use subtle highlights or dimensional color (if applicable) to add to the ethereal effect
- Tease the crown area gently for volume without looking messy
- Ensure flyaways are minimized but not aggressively smoothed — soft texture is part of the look
Worth knowing: Ethereal styles often require touch-ups during a long wedding day — work with your hairstylist to learn how to gently re-tease and re-pin sections if needed, or have them on call for mid-day adjustments.
Final Thoughts
Claw clip half up half down wedding styles offer remarkable versatility, combining the romance of down hair with the polish and practicality of secured sections. Whether you’re drawn to romantic curls, sleek elegance, boho texture, or minimalist refinement, there’s a claw clip approach that matches your wedding vision and personal style. The clip itself becomes part of your styling rather than just a functional tool — it’s a chance to add intentional detail and polish to your bridal look.
The most important thing is choosing a style that makes you feel confident and beautiful. Have your hairstylist practice your chosen style at a trial appointment, taking note of how long it lasts throughout a full day and which adjustments keep it looking fresh. Consider your dress neckline, your venue, your hair texture, and your personal comfort level — the best wedding hairstyle is one that you’ll love in photos and feel amazing wearing in person. With a quality claw clip and any of these approaches, you’ll have a hairstyle that holds beautifully while looking intentionally designed and undeniably bridal.