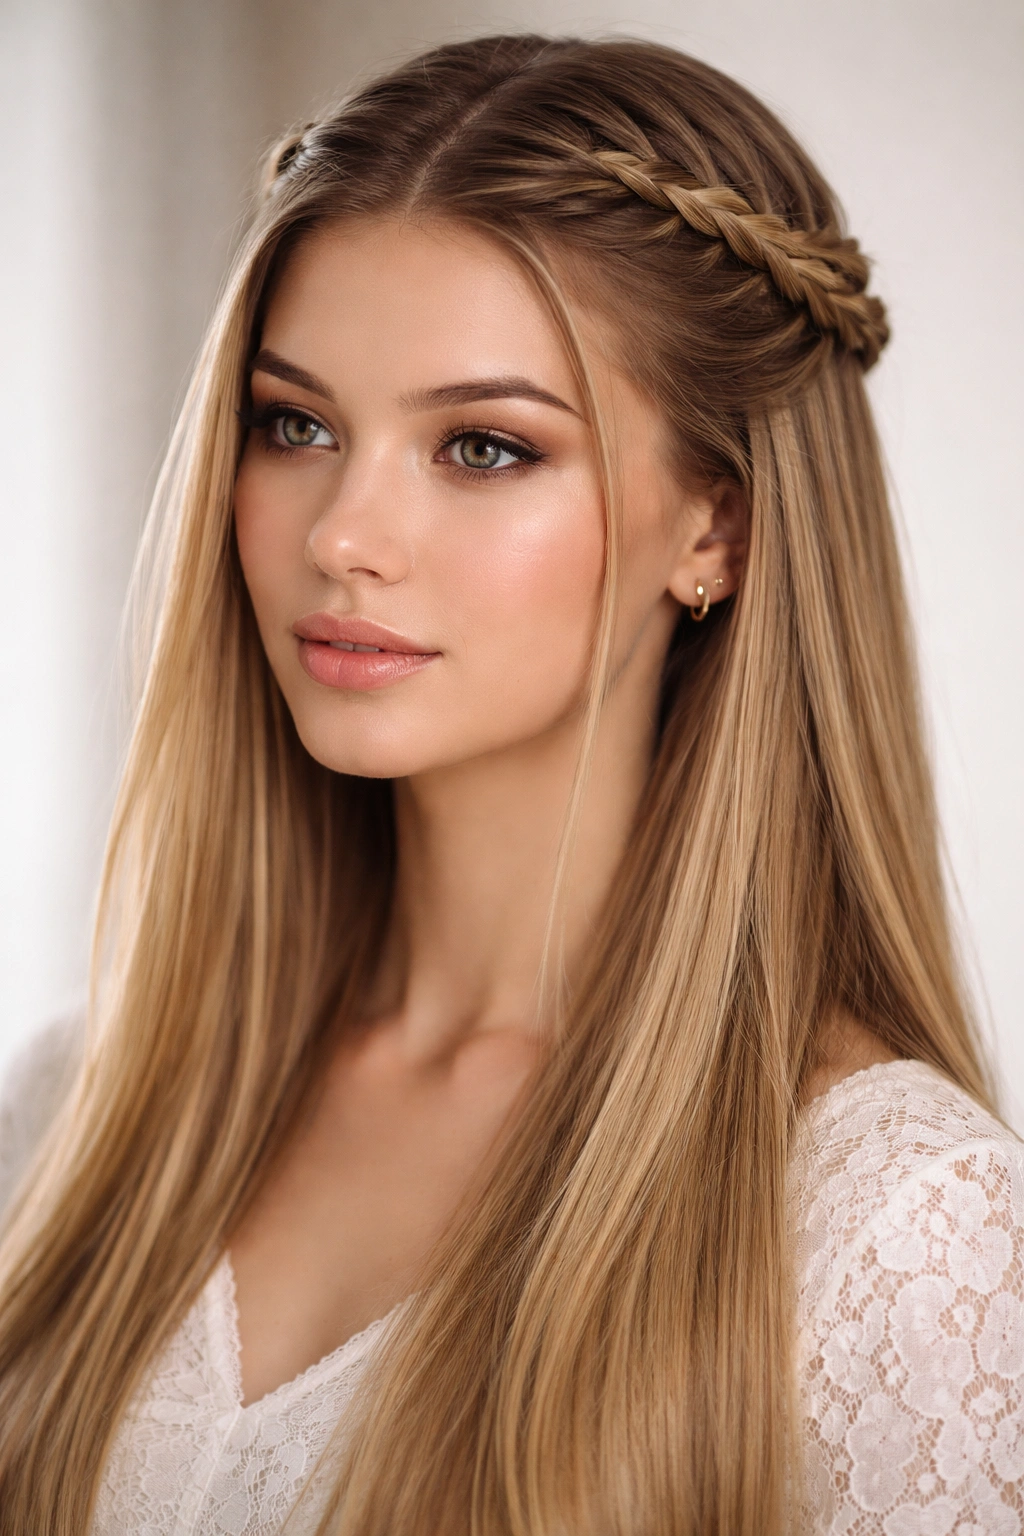
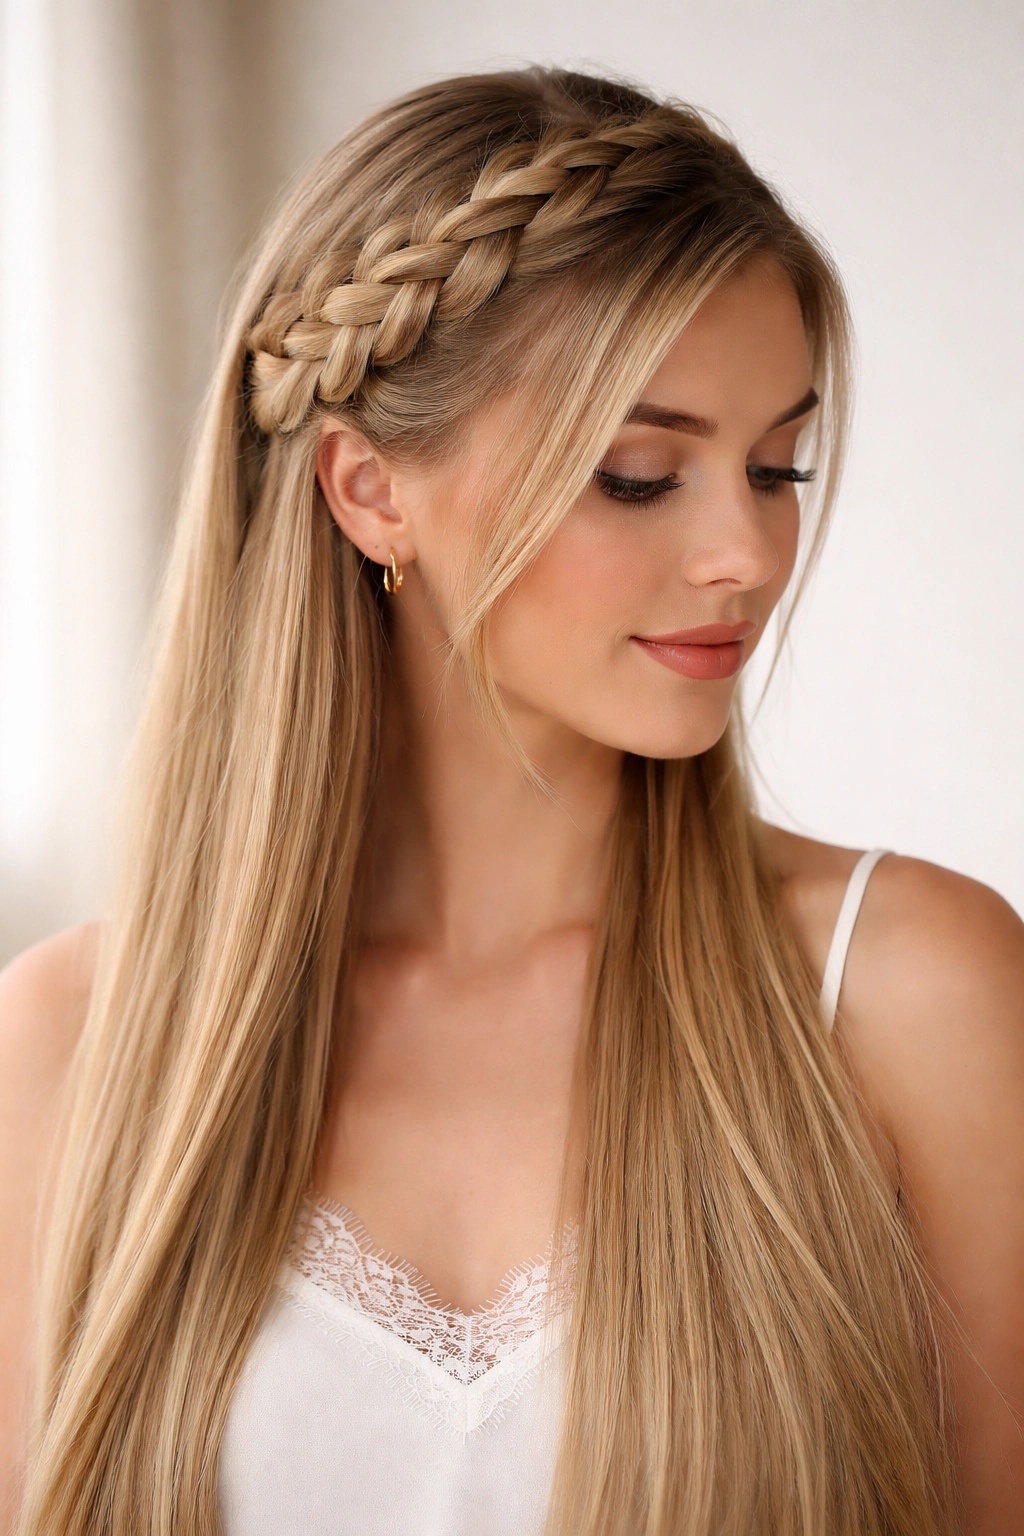
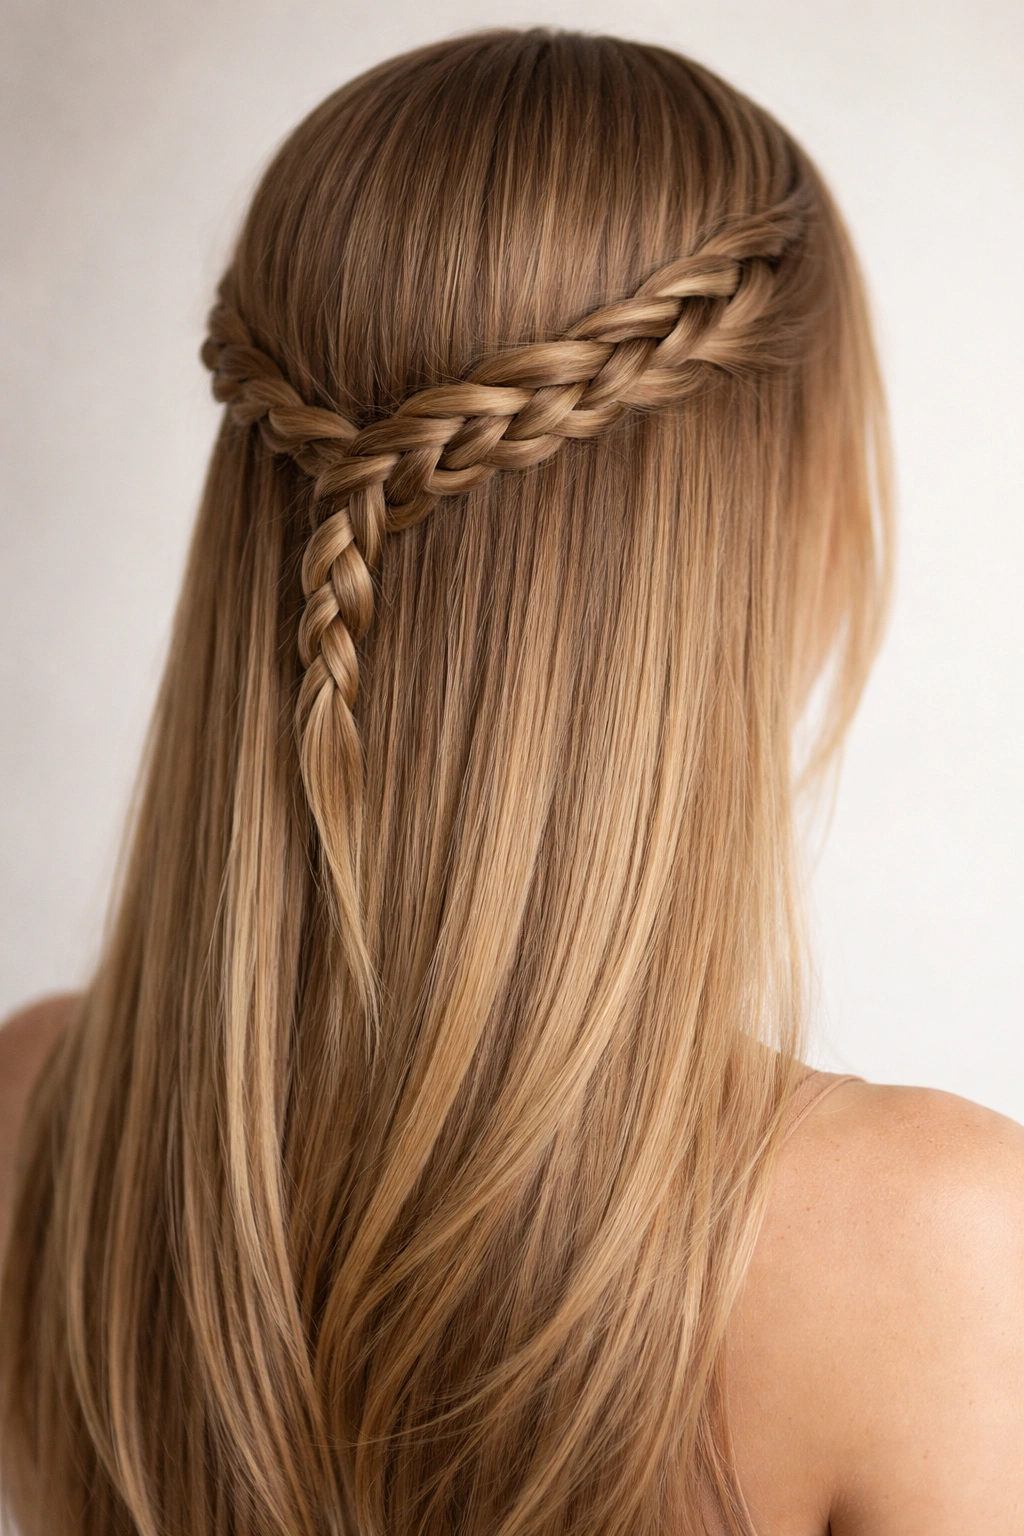
Straight hair offers a pristine canvas for intricate braiding techniques, and the crown braid half up half down style has become one of the most flattering, versatile looks available. Unlike wavy or curly textures where braid definition can sometimes blur together, straight hair showcases every weave, twist, and architectural detail of a crown braid with striking clarity. Whether you’re preparing for an everyday occasion, a special event, or simply want to elevate your usual hair routine, mastering different crown braid variations gives you endless options to refresh your appearance without committing to a full updo.
The beauty of a crown braid half up half down style lies in its perfect balance—it’s romantic and polished enough for formal settings, yet casual and approachable enough for daily wear. The half-up construction keeps hair off your face and neck while allowing the remaining length to flow freely, creating dimension and visual interest. For those with straight hair, this style becomes even more manageable because straight strands hold their shape naturally, meaning your braid stays crisp and defined throughout the day without the need for constant adjustments or touch-ups.
What makes crown braids particularly special is their adaptability. You can interpret the style in countless ways: tight and sophisticated, loose and romantic, asymmetrical and modern, or woven with complementary textures. The technique works across different hair lengths, from shoulder-length to waist-length, and flatters most face shapes when positioned thoughtfully. Real talk—if you’ve ever felt intimidated by braiding, the crown braid half up half down style is actually an excellent gateway technique because it uses fundamental braiding methods but looks far more complex and impressive than the execution requires.
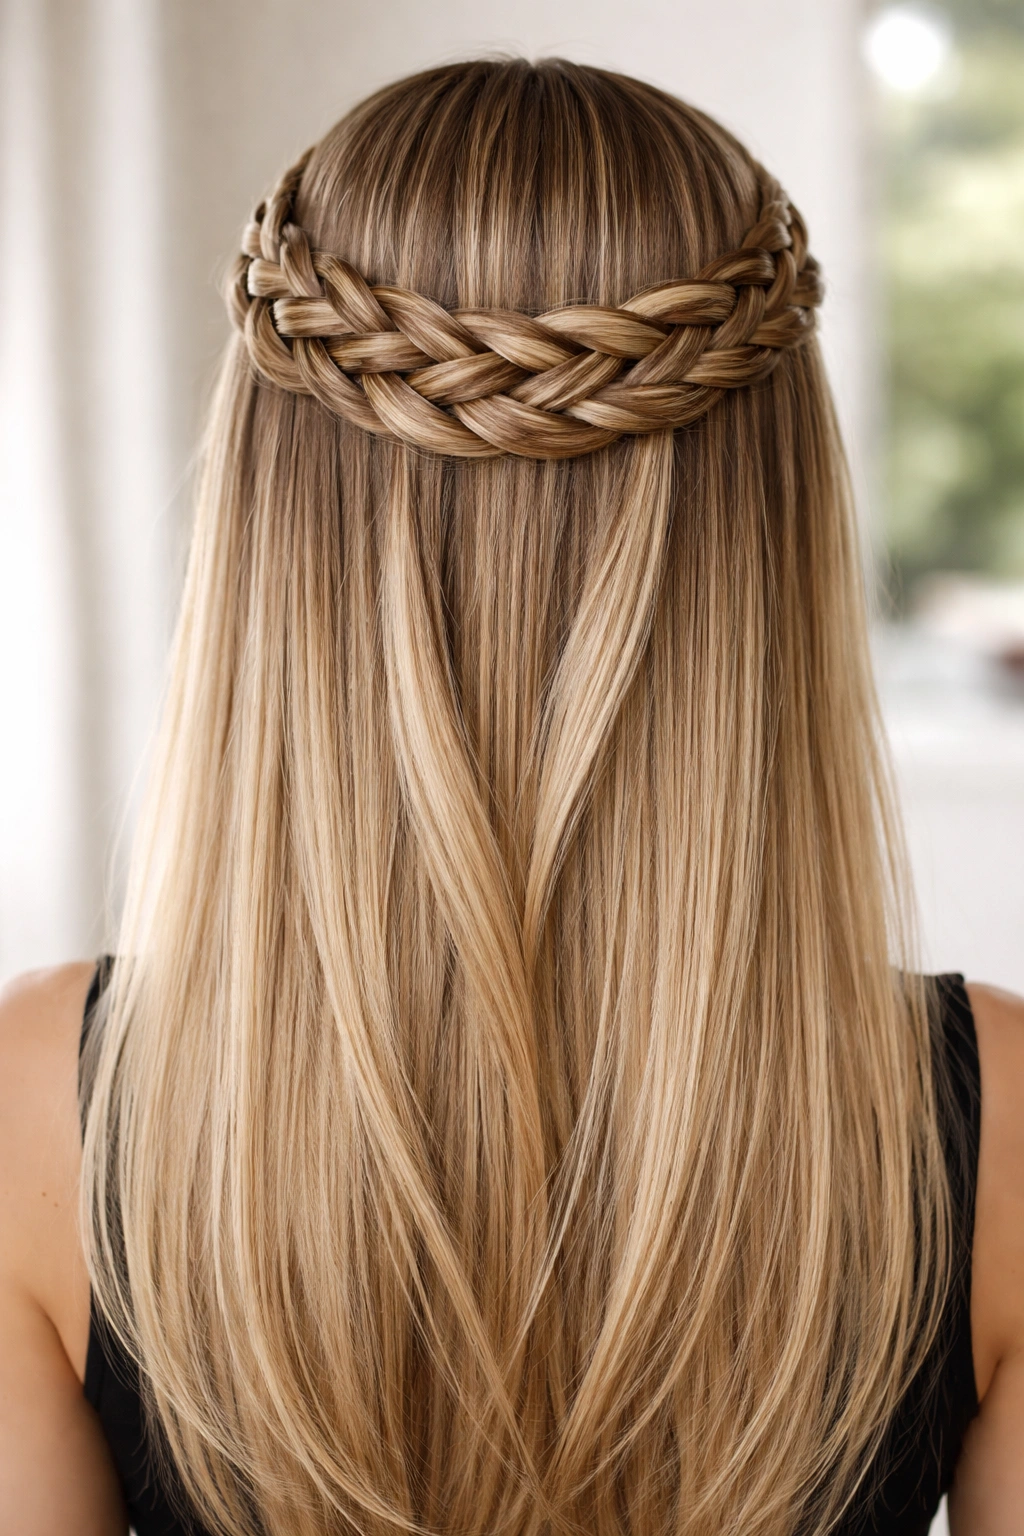
1. Classic Centered Crown Braid
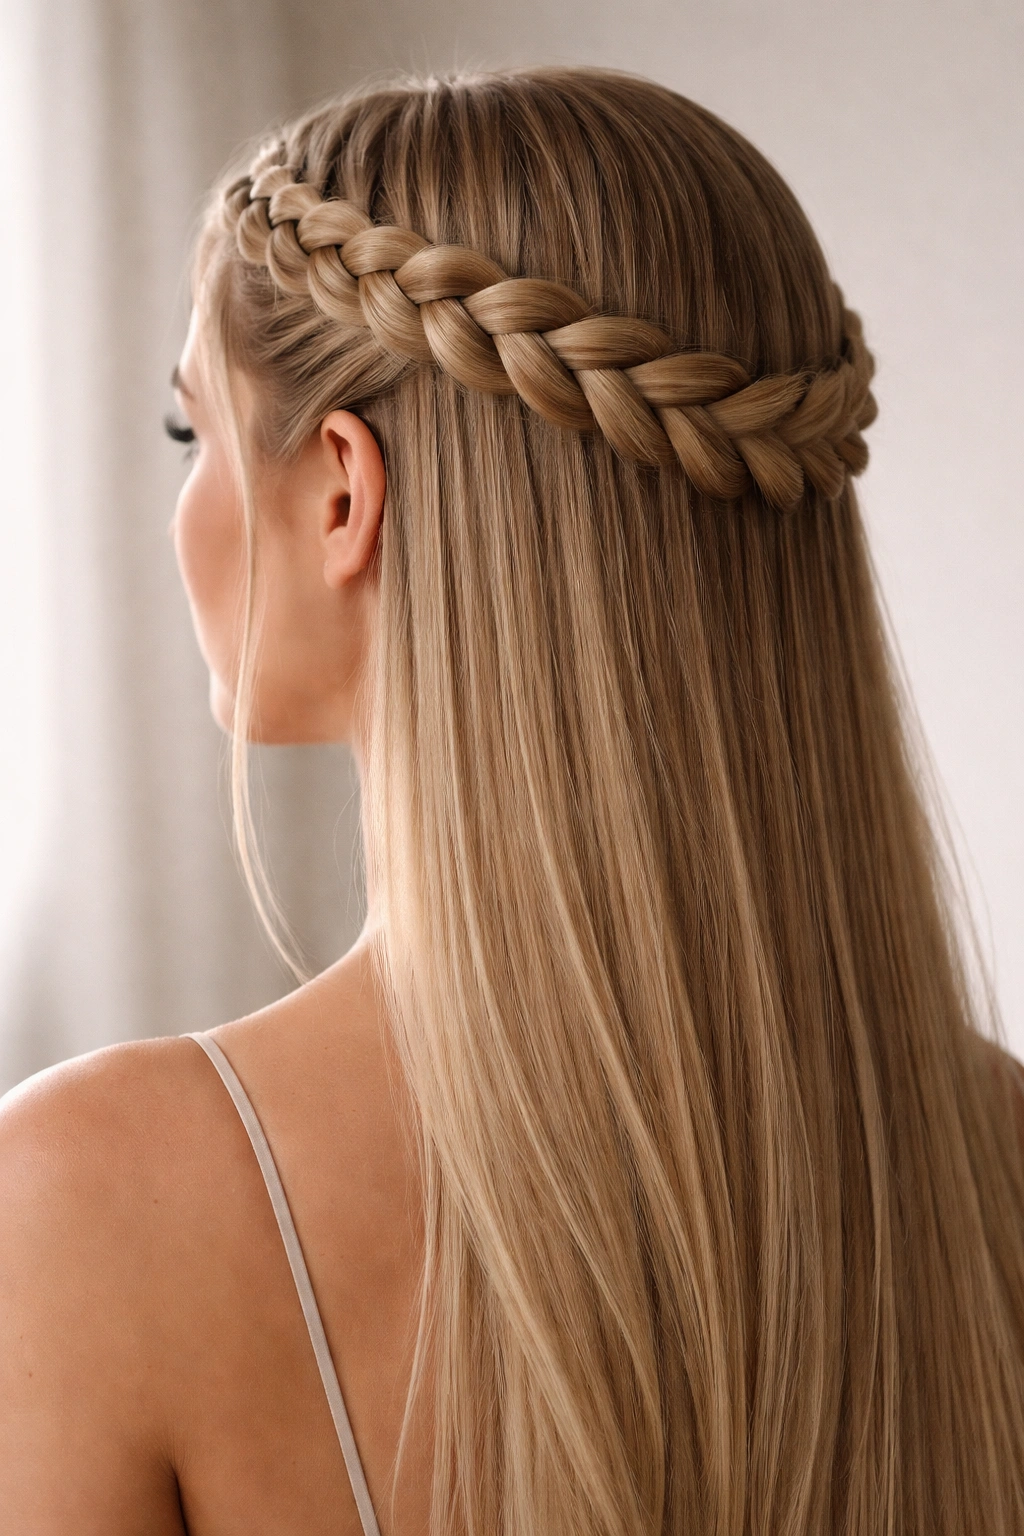
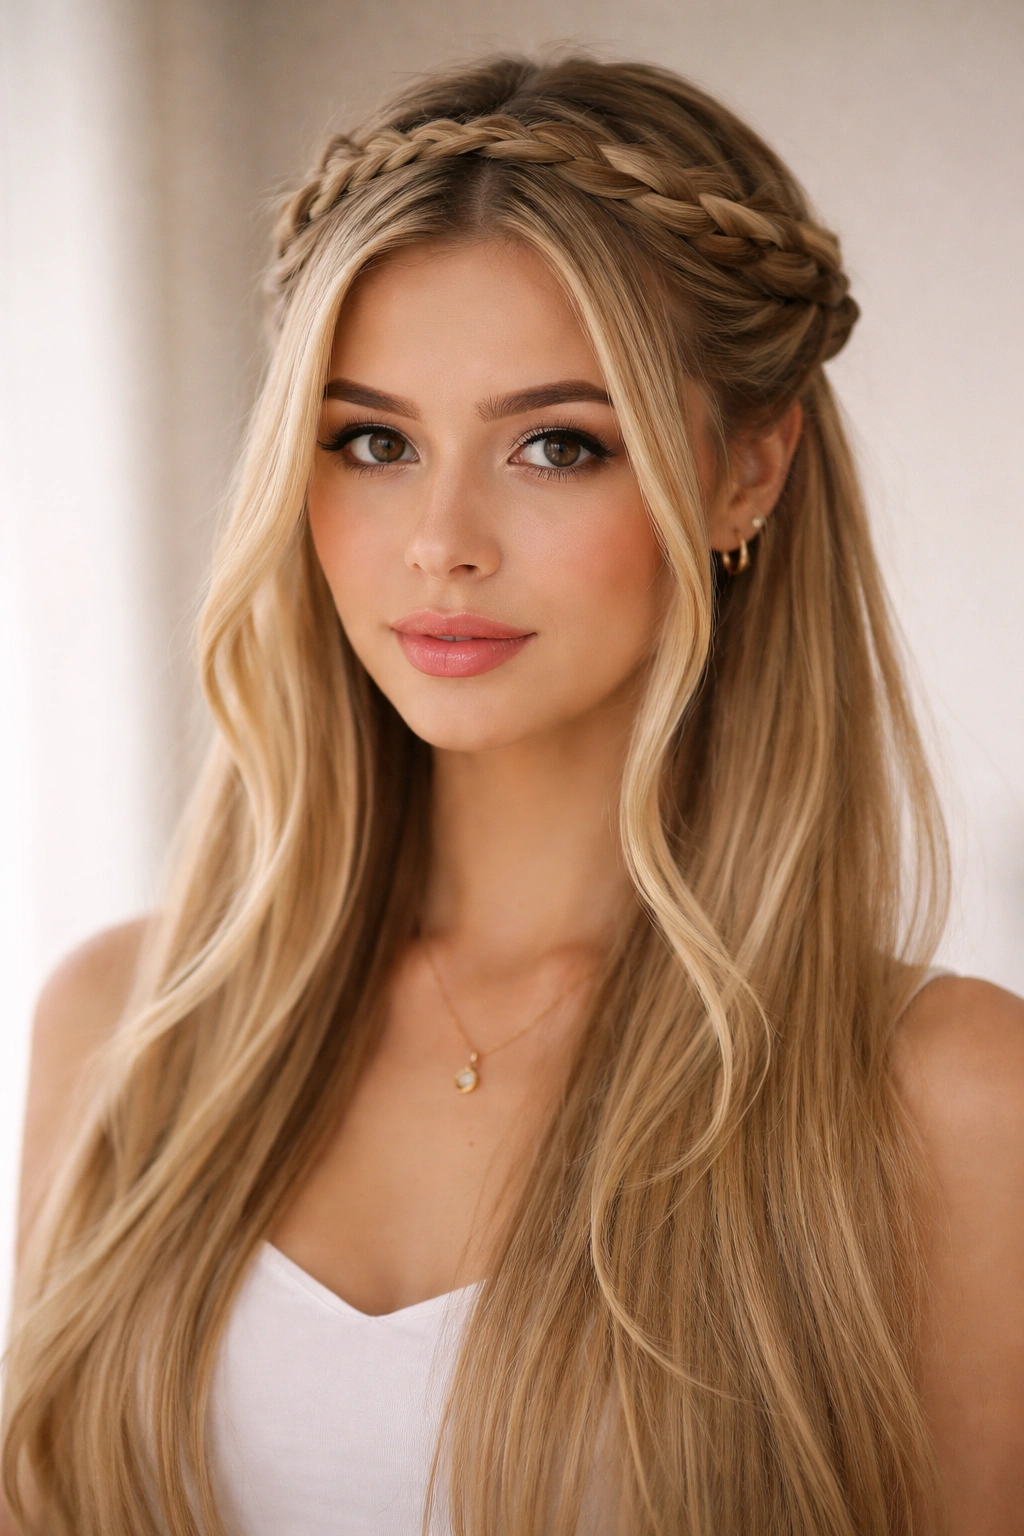
The centerpiece of any crown braid collection, the classic centered version runs from one side of your head, across the back like a halo, and down to the opposite side. For straight hair, this style shines because the strands maintain their sleek appearance while the braid structure remains perfectly defined from every angle. The technique works beautifully whether you’re prepping for work, heading to a dinner date, or attending a casual gathering.
How to Build the Foundation
Start by creating a deep side part on whichever side feels more natural to you. Clip up the top section of hair on the deeper side—this is your half-up portion that will get braided. Beginning at the deeper side near your temple, take a three-strand braid and start weaving, gradually incorporating small sections from the top of your head as you move toward the back. The key with straight hair is to keep your braid tension consistent; straight strands show every inconsistency in tightness, so aim for a medium tension that feels comfortable but remains secure. Continue braiding around the back of your head, mirroring the same motion on the opposite side until you reach your other temple.
Finishing Touches for Polished Perfection
Once your braid reaches the opposite temple, secure it with a small elastic band that matches your hair color. The bottom section of hair—the half-down portion—drapes naturally below, creating that signature half-up silhouette. For added sophistication, you can gently tease the secured braid slightly to add texture and dimension, which photographs beautifully and adds visual interest even in professional settings. A light hairspray mist ensures your straight strands don’t fall out of place, particularly around your face where flyaways can undermine an otherwise polished look.
Best Occasions and Styling Notes
This style works equally well for casual Fridays at the office, weekend brunch, or more formal occasions when paired with appropriate clothing and accessories. The centered crown braid complements most face shapes and works with both longer straight hair and medium-length straight styles. If you want to elevate it further, slightly curl the bottom half-down section with a large-barrel curling iron to create soft waves that contrast beautifully with the structured braid.
2. Twisted Double Crown Braid
Double crown braids create visual drama and sophisticated texture by incorporating two distinct braided pathways that frame your face from both sides. This variation feels more intricate than a single centered braid, yet uses identical fundamental techniques—making it perfect for those ready to level up their braiding skills. On straight hair, the twin-braid effect creates an undeniably polished, almost royal aesthetic.
Creating Balanced Symmetry
Begin with your hair down and create a center part from your forehead straight back to your crown. On each side, take a section of hair from your temple and begin a three-strand braid, angling it slightly backward and upward as you move toward the crown. The magic happens when you incorporate hair gradually from the top sections as you braid—this creates that crown-like wrapping effect. The symmetry matters here, so spend a moment ensuring both braids maintain similar thickness and follow parallel paths. For straight hair, you’ll notice immediately if one braid sits higher or tighter than the other, so go slowly and check your work frequently in a mirror.
Securing and Blending
Once both braids meet at the back crown area, secure them together with a single elastic band or bobby pins, depending on your preference. Some people enjoy keeping the braids separate by securing each one individually, which creates a more defined double-braid look. Others prefer to merge them into one unified braid below the crown, which adds length and presence to the style. Straight hair makes both approaches look intentional and neat, so choose based on the final effect you prefer.
Customizing the Look
The beauty of the double crown braid is how easily you can customize it. Tease the braids very gently after securing to add texture and soften the lines, creating a more romantic version. Alternatively, keep everything sleek and smooth for a modern, structured aesthetic. You can also weave ribbons through each braid before securing them, which adds color, texture, and visual interest—particularly effective for events where you want to make a memorable impression.
3. Dutch Crown Braid with Soft Waves
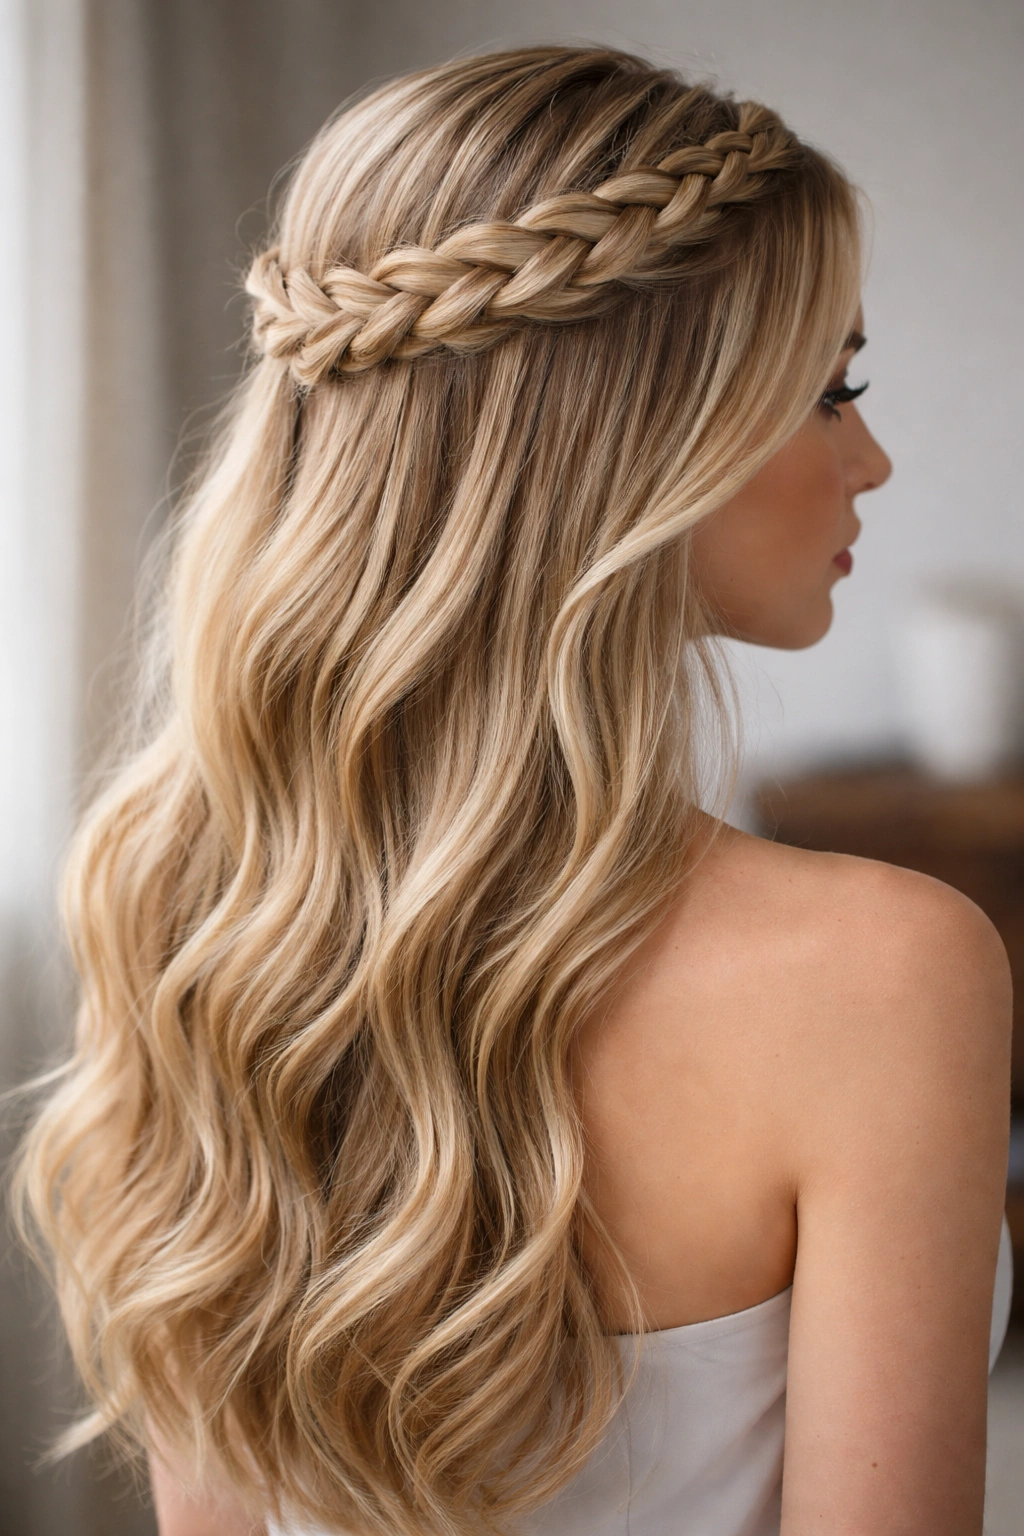
The Dutch braid—where you braid under rather than over sections—creates a raised, dimensional effect that photographs gorgeously and adds significant visual impact to a half-up style. When executed on straight hair, the Dutch braid sits prominently above the head’s surface, creating an almost 3D appearance that flat-weave braids can’t achieve. This style bridges the gap between intricate-looking and genuinely wearable, making it perfect for occasions where you want to look special without spending hours at a salon.
Understanding the Dutch Braid Technique
Instead of the traditional over-and-under motion of a standard three-strand braid, you’ll cross strands under each other, which causes the braid to push upward and create a raised effect on top of your hair. Start at one temple and begin your Dutch braid, gradually pulling in sections from the crown area as you work your way back. The technique feels counterintuitive initially if you’ve only mastered traditional braids, but once you establish the rhythm, it becomes meditative and natural.
Positioning for Maximum Impact
For a half-up half-down version, position your Dutch braid starting from one side, across the crown, and finishing at the opposite side—exactly like a classic crown braid but with that elevated appearance. On straight hair, the contrast between the dimensional braid and the sleek remainder of your hair creates striking visual definition. The braid should sit roughly two to three inches back from your hairline, which frames your face beautifully without pulling uncomfortably tight.
Creating the Soft Wave Contrast
The true magic of this style emerges when you curl the bottom half-down section into soft waves using a large-barrel curling iron. The structured Dutch braid contrasts beautifully with loose, romantic waves, creating a look that feels both modern and timeless. Use a wave-holding spray before curling to ensure the waves last throughout your day, and arrange the curled sections so they frame your face and cascade over your shoulders. This combination of tight, raised structure with loose, flowing texture is endlessly flattering.
4. Fishtail Crown Braid Hybrid

The fishtail braid uses just two sections instead of the traditional three, creating a delicate, intricate-looking weave that feels distinctly different from standard braids. When incorporated into a crown braid half-up style, the fishtail technique creates an almost lace-like appearance that’s particularly effective on straight hair, where the fine detail work shows clearly. This style sits at the sweet spot between “I spent an hour getting ready” and “actually quite achievable in fifteen minutes.”
Breaking Down Fishtail Mechanics
A fishtail braid begins by dividing a section of hair into two parts. You then take a thin piece from the outside of one section and cross it over to join the opposite section, then repeat on the other side, creating a braided pattern that looks significantly more complex than it actually is. The key to a successful fishtail is keeping the thin pieces relatively consistent in size—straight hair shows variations clearly, so slow down and maintain even sections.
Integrating Into a Crown Style
Starting at one temple, create a fishtail braid while gradually incorporating sections from the top and back of your head, working across toward the opposite side like you would with a traditional crown braid. The fine, intricate weave of a fishtail creates a more romantic, delicate aesthetic compared to a thicker three-strand braid. This makes the fishtail particularly lovely for weddings, date nights, or any occasion where you want to appear effortlessly elegant.
Styling and Texture Enhancement
Once secured at the opposite temple, you can gently tease the fishtail braid very lightly to add dimension and soften the appearance—a technique called “pancaking” that makes thin braids look fuller and more textured. The bottom half-down section can remain straight for a sleek aesthetic or be curled gently for added femininity. Fishtail braids work beautifully with decorative bobby pins or small hair clips placed strategically along the braid’s length, adding subtle sparkle or color without overwhelming the style.
5. Asymmetrical Crown Braid
Breaking from perfect symmetry, the asymmetrical crown braid positions the braid off-center, creating a modern, slightly edgy aesthetic that photographs exceptionally well and feels distinctly different from centered styles. This approach works beautifully on straight hair because the clean lines of your hair make the asymmetrical positioning feel intentional rather than accidental. If you prefer a less formal, more fashion-forward appearance, this variation is your ideal choice.
Establishing Your Off-Center Positioning
Rather than starting at your temple and braiding across to the opposite side, you’ll braid from one side and allow it to drift slightly toward the back, creating an angled rather than parallel pathways. Begin your braid at one temple and weave it across the back of your head, but angle it so it ends lower on one side than the other—perhaps finishing at the opposite ear rather than the opposite temple. This asymmetrical path creates visual interest and movement that pulls the eye in unexpected directions.
Incorporating Additional Texture Elements
With the main braid positioned asymmetrically, you have real freedom to enhance the style creatively. Leave a few face-framing pieces undone on the side where your braid starts, which softens the overall look and adds dimension to your face frame. On the opposite side, you might secure the braid end and allow longer hair to flow down that side, or use bobby pins to create a small twisted detail. The asymmetry gives you permission to break traditional rules, which often results in the most interesting and personalized styles.
Best Face Shapes and Hair Lengths
Asymmetrical styles work particularly well for those with longer straight hair—shoulder-length or longer—because you have enough hair volume to create real visual interest on both sides despite the off-center positioning. If your face is more angular or you have a stronger jawline, consider positioning the thicker braid on the opposite side of your face to create subtle balance. For rounder faces, positioning the braid on one side and allowing longer waves to flow down the opposite side creates lengthening lines that are deeply flattering.
6. Crown Braid with Face-Framing Pieces
Sometimes the most impactful styling choice is what you deliberately don’t braid. By leaving strategic face-framing pieces undone and styled separately, you soften the overall structure of a crown braid and add softness that draws attention to your eyes and cheekbones. This variation is especially effective for straight hair because the contrast between the neat braid and the deliberately loose pieces becomes more pronounced and intentional-looking.
Strategic Piece Placement
Before beginning your crown braid, identify which sections you want to leave out as face-framers. Typically, you’ll want one or two small sections on each side of your face—usually around one to two inches wide each. Secure these sections temporarily with small clips or elastics so they don’t accidentally get incorporated into your braid. Then proceed with your crown braid as normal, working around these reserved sections. Once your braid is complete and secured, release the face-framing pieces and style them separately.
Styling Your Undone Pieces
The face-framing pieces can be styled in numerous ways depending on the overall look you’re going for. Curl them with a one-inch curling iron for romantic waves that frame your face, or straighten them and tease slightly at the roots for modern dimension. Some people prefer to twist these pieces loosely and pin them behind the ear, creating a soft sculptural element. Others loop them into tiny braids that mirror the crown braid’s texture. The straight texture of your hair makes whatever choice you select look polished and intentional.
Creating a Cohesive Overall Aesthetic
The face-framing pieces should feel like a deliberate style choice rather than sections you forgot to braid. This means styling them with the same attention you give the main braid—they’re part of your complete look, not an afterthought. If your crown braid is tight and structured, your face-framers might be softly curled for contrast. If your crown braid is loose and romantic, your face-framers should echo that vibe. On straight hair, this intentional coordination creates a polished, editorial quality that elevates the entire style.
7. Half-Twisted Half-Braided Crown
This creative hybrid style combines two distinct techniques in a single crown pathway: a twisted section and a braided section. The variation in texture and visual interest makes this style feel more intricate than it truly is, perfect for those seeking something distinctive without requiring advanced braiding skills. On straight hair, the transition between twisting and braiding becomes a notable design element that adds sophistication.
Understanding the Two-Technique Approach
A twist involves taking two sections and wrapping them around each other, which creates a smooth, rope-like appearance. A braid involves three or more sections woven together, creating a thicker, more textured look. By combining both techniques in a single crown pathway, you create visual variety and movement. You might braid the first half of your crown and twist the second half, or alternate between short braided and twisted sections throughout.
Execution and Timing
Begin at one temple and decide where your technique will transition. If you’re braiding first, create your three-strand braid while incorporating sections from your crown, working to your midpoint. At the transition point, switch to a two-strand twist, continuing to incorporate hair as you work toward the opposite side. The twist will look visibly different from the braid, and on straight hair, this difference is beautifully clear. Secure at the opposite temple with a single elastic that blends with your hair color.
Creating Intentional Visual Interest
The beauty of this hybrid approach is that the technique change feels like a deliberate design choice. You can emphasize this by gently pancaking (teasing) one technique more than the other, creating visible texture variation. Some people add a decorative pin or clip right at the transition point, turning what could feel like an accident into an intentional design feature. The bottom half-down section can be styled simply or curled, depending on whether you want the braid-twist hybrid to be the focal point or part of a more overall textured look.
8. Bohemian Loose Crown Braid
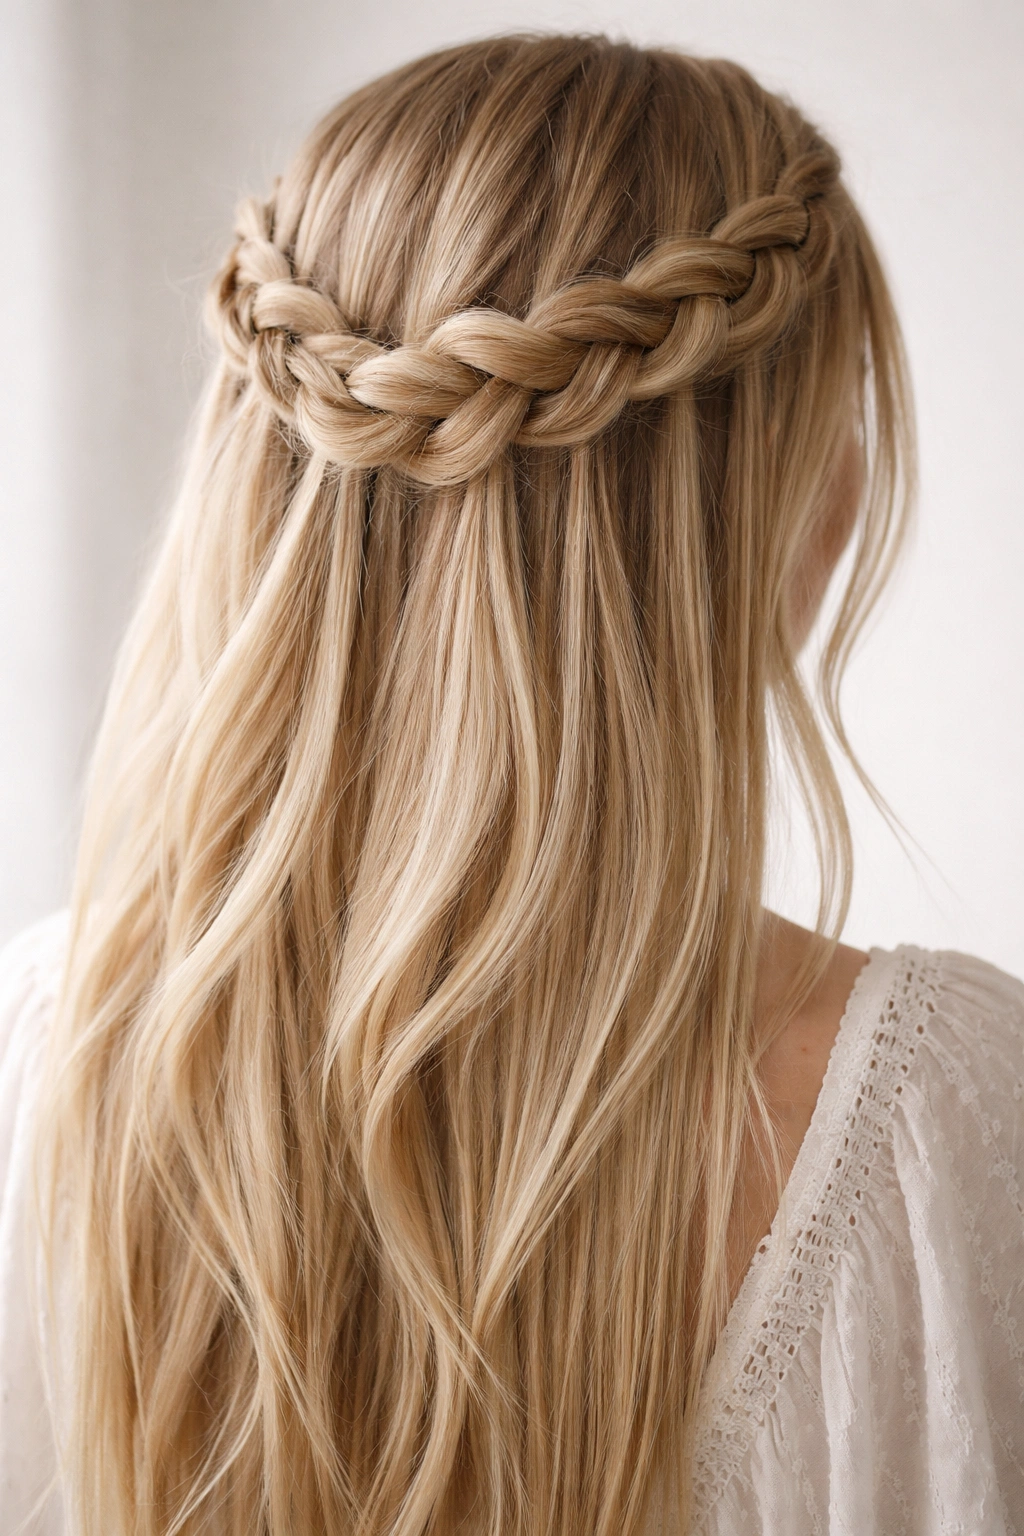
The bohemian approach prioritizes romance and texture over precision, creating a deliberately undone, effortlessly beautiful aesthetic that paradoxically requires intention and technique to execute well. This crown braid variation works wonderfully on straight hair because the texture of the braid becomes more apparent when gently loosened, and your hair’s natural sleekness provides a sophisticated backdrop for the soft, intentional messiness.
The Art of Planned Looseness
Begin your crown braid using any technique you prefer—three-strand, Dutch, or fishtail all work beautifully. However, rather than keeping tension consistent throughout, work with slightly looser tension from the beginning, allowing the braid to feel airy and organic. As you incorporate sections, pull them in slightly thicker than you might otherwise, giving the braid extra volume and presence. Once secured, the real work begins: gently pancake the braid by carefully pulling at the edges and middle sections, fluffing and loosening the structure to create that intentionally tousled appearance.
Balancing Structure and Softness
The key to a successful bohemian crown braid is ensuring it still looks intentional rather than simply sloppy. The braid should be loose enough to feel romantic and undone, but structured enough that the braiding pattern remains visible and clear. On straight hair, you’ll find this balance more easily because loosening a braid on straight strands creates obvious visual texture change, while the overall smoothness of your hair prevents the look from appearing unkempt.
Complementary Styling Elements
A bohemian crown braid pairs beautifully with soft, beachy waves in the bottom half-down section. Create these waves with a large-barrel curling iron and a wave-holding spray, then gently tousle them with your fingers to match the braid’s relaxed energy. You can weave small flowers, greenery, or delicate ribbons through the loosened braid for added romance, particularly effective for outdoor events, garden parties, or weddings with a bohemian aesthetic. The straightness of your base hair ensures even loose, textured elements look curated rather than chaotic.
9. Sleek Pulled-Back Crown Braid
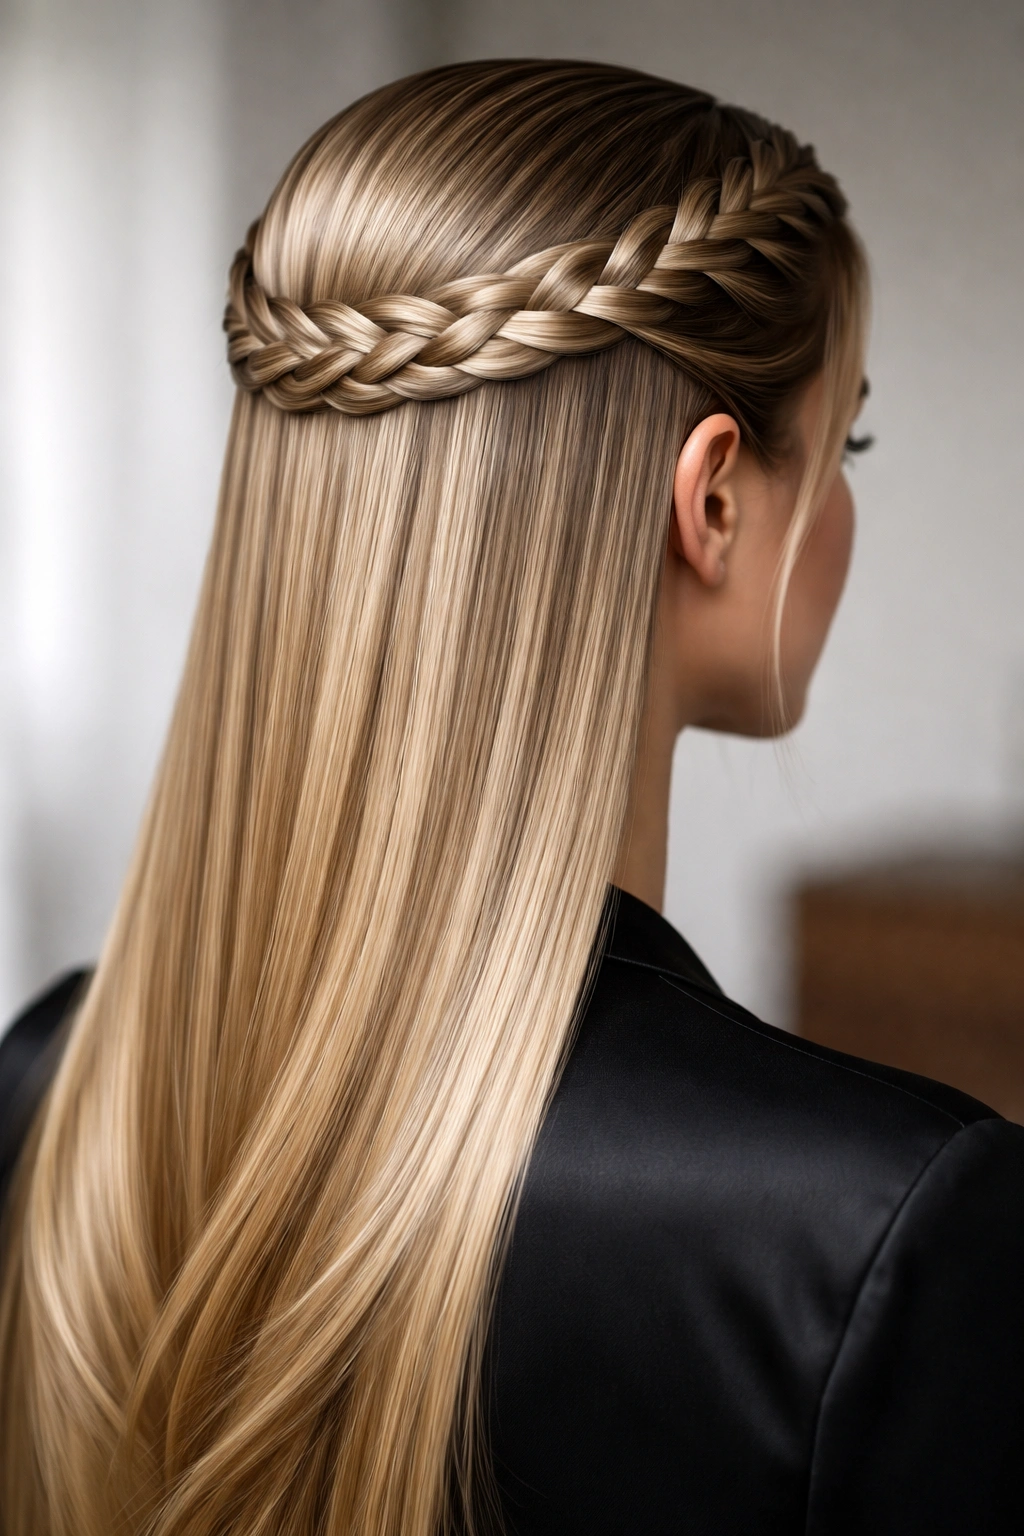
When precision and polish are your priorities, the sleek pulled-back crown braid delivers maximum sophistication with zero apology for its structured aesthetic. This variation keeps every element tight, smooth, and perfectly controlled—ideal for professional settings, formal events, or whenever you want to project polished competence. Straight hair is the ideal texture for this approach because it naturally supports sleek styling without requiring heavy products or constant smoothing.
Achieving Maximum Smoothness
Begin by smoothing your hair back with a fine-tooth comb and a light smoothing serum or styling cream. Start your crown braid with moderately tight tension from your first section, aiming for consistency throughout. Straight hair is your advantage here; you’ll immediately notice any bumps or loose sections, allowing you to adjust as you braid. Incorporate sections deliberately, ensuring each addition is smooth and sits flush against your head without creating lumps or uneven texture.
Securing for All-Day Hold
Once your braid reaches the opposite side, secure it firmly with an elastic band, then smooth any flyaways around your hairline using a small brush and light hairspray. For maximum hold throughout a long day or event, consider pinning the braid down with bobby pins placed strategically under the braid where they won’t show. The bottom half-down section should be sleekly smooth as well—use a flat iron to ensure complete straightness if needed, particularly if you have any natural texture or wave to your hair.
Professional and Formal Applications
The sleek pulled-back crown braid works beautifully for job interviews, business presentations, formal dinners, or any setting where you want your appearance to communicate competence and professionalism. Pair this style with minimal jewelry and a polished makeup look for maximum impact. For formal events like black-tie occasions, consider adding subtle embellishments like small diamond-shaped bobby pins or a delicate comb, which catches light beautifully without appearing costume-like.
10. Crown Braid with Ribbon or Accessory
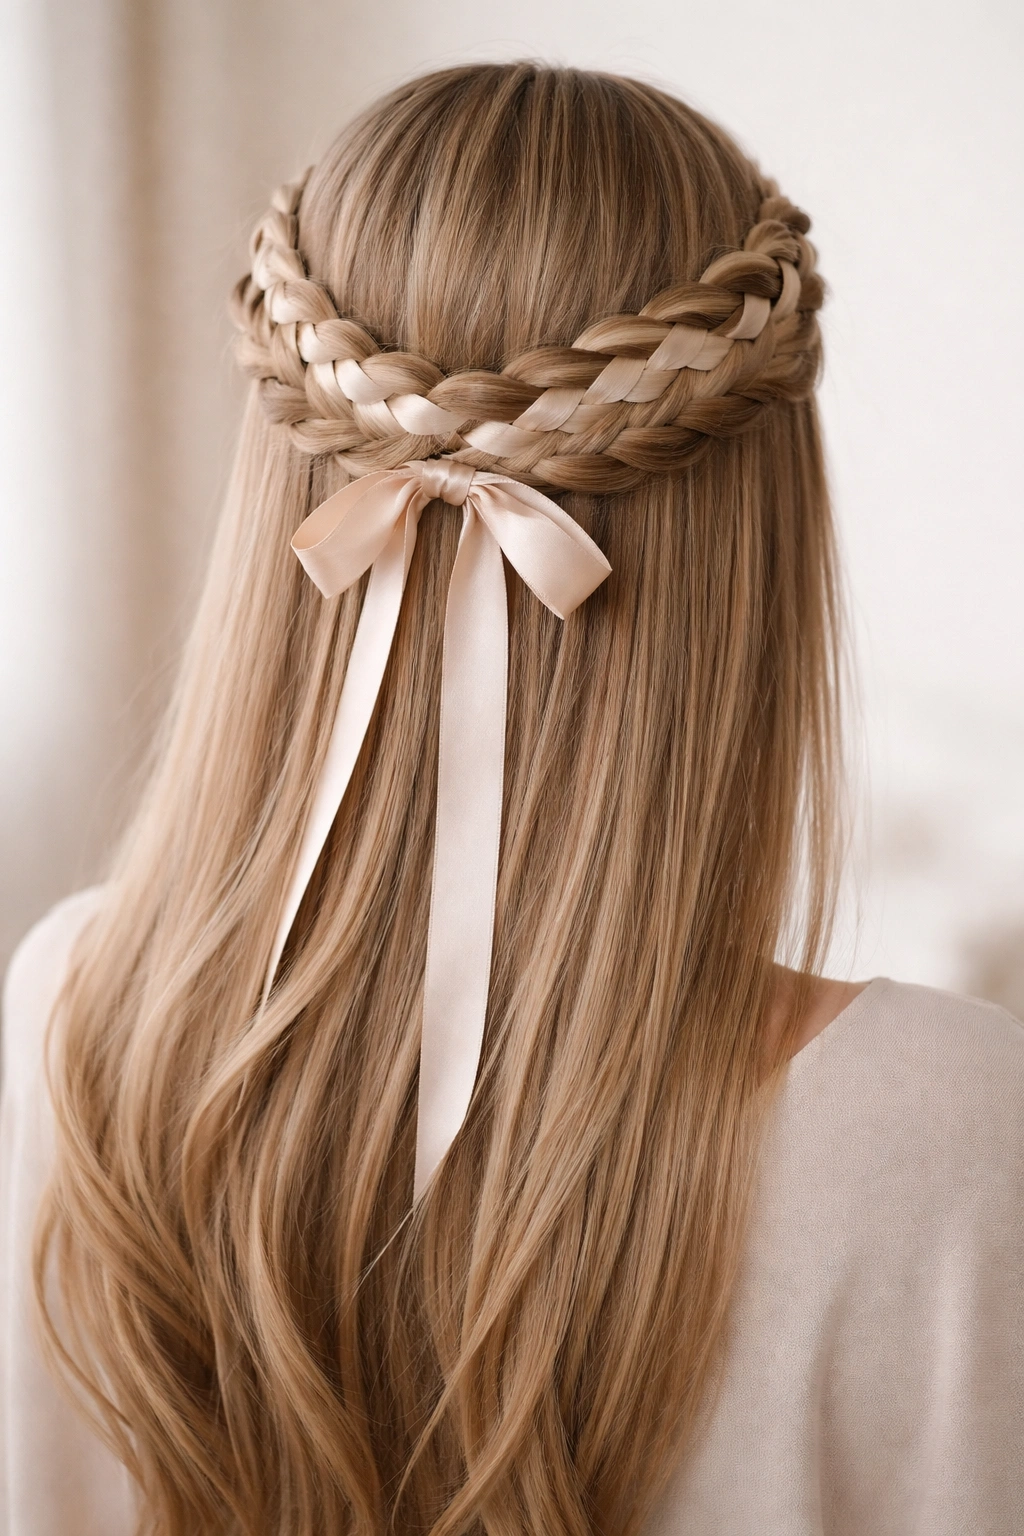
Weaving ribbon, beads, or other decorative elements through your crown braid transforms a classic style into something uniquely personalized and visually striking. This approach works exceptionally well on straight hair because decorative elements stand out clearly against the sleek backdrop, and the braid’s defined structure provides the perfect foundation for embellishment. Whether you’re preparing for a special occasion or simply wanting to add playful personality to your everyday style, this variation offers genuine creative freedom.
Choosing and Preparing Your Accessory
Ribbons work beautifully with crown braids—satin ribbons create elegance, while grosgrain or burlap ribbons add texture and visual interest. You can also use thin chains, beaded strands, or even artificial flowers tucked throughout. Before beginning, prepare your chosen accessory by anchoring one end to a small section of hair near where you’ll start braiding, or by incorporating it into the first braid section. This ensures the accessory stays securely woven throughout rather than sliding out halfway through.
Integration Techniques
As you braid, incorporate your chosen accessory by weaving it alongside the hair sections. You might wrap the ribbon around each braid section as you create it, or simply let it flow through the braid naturally. The exact method depends on your accessory choice—a thin ribbon weaves easily through the braid sections, while a thicker element might sit more on top of the braid, creating dimensional visual interest. Straight hair makes whatever technique you choose look intentional because the defined braid structure clearly showcases how the accessory is incorporated.
Securing and Styling the Finished Effect
Once your braided accessory reaches the opposite temple, secure both the braid and the accessory together with a matching or contrasting elastic band. You can either cut the accessory to match your braid end or allow it to extend further down your hair for added visual flow. For weddings or formal events, choose accessories in metallics, pearls, or jewel tones that complement your clothing and overall aesthetic. For casual occasions, ribbons in fun colors or patterns add playful personality while maintaining a polished appearance.
11. Multi-Strand Woven Crown Braid
For those ready to tackle advanced braiding techniques, the multi-strand crown braid elevates complexity by using four, five, or even more strands instead of the traditional three. This technique creates an intricate, architectural appearance that looks undeniably impressive and works beautifully on straight hair, where each strand’s individual path remains visible. While this variation requires more practice and concentration, the payoff is a style that generates genuine compliments and turns heads.
Building Foundational Multi-Strand Skills
A four-strand braid divides your hair into four equal sections instead of three. Rather than simply weaving sections over and under, you’ll follow a pattern: take the far-right section, cross it over the next section, under the next, and over the last. Then move to the far left and repeat the pattern. Five-strand braids follow similar logic but with additional sections. Practice these patterns on loose hair first—sitting down with a friend or practicing while watching tutorials builds the muscle memory you need for success. Straight hair is forgiving because sections stay in place, allowing you to focus on pattern rather than fighting texture.
Incorporating Into Crown Positioning
Once you’ve mastered your chosen multi-strand technique, apply it to a crown braid pathway. Start at one temple and begin your multi-strand braid while gradually incorporating sections from your crown, working toward the opposite side. The added strands create a thicker, more textured braid that commands visual attention. On straight hair, the intricate woven pattern shows clearly from every angle, making this style particularly photogenic.
Creating the Maximum Impact
Multi-strand braids look their absolute best when gently pancaked after securing, which adds dimension and makes the intricate weaving pattern even more apparent. The bottom half-down section can remain simple and straight to let the crown braid take center stage, or be styled to match your braid’s level of intricacy. This style shines at weddings, special events, or whenever you want to demonstrate genuine skill and attention to detail in your presentation.
12. Edge-Hugging Crown Braid
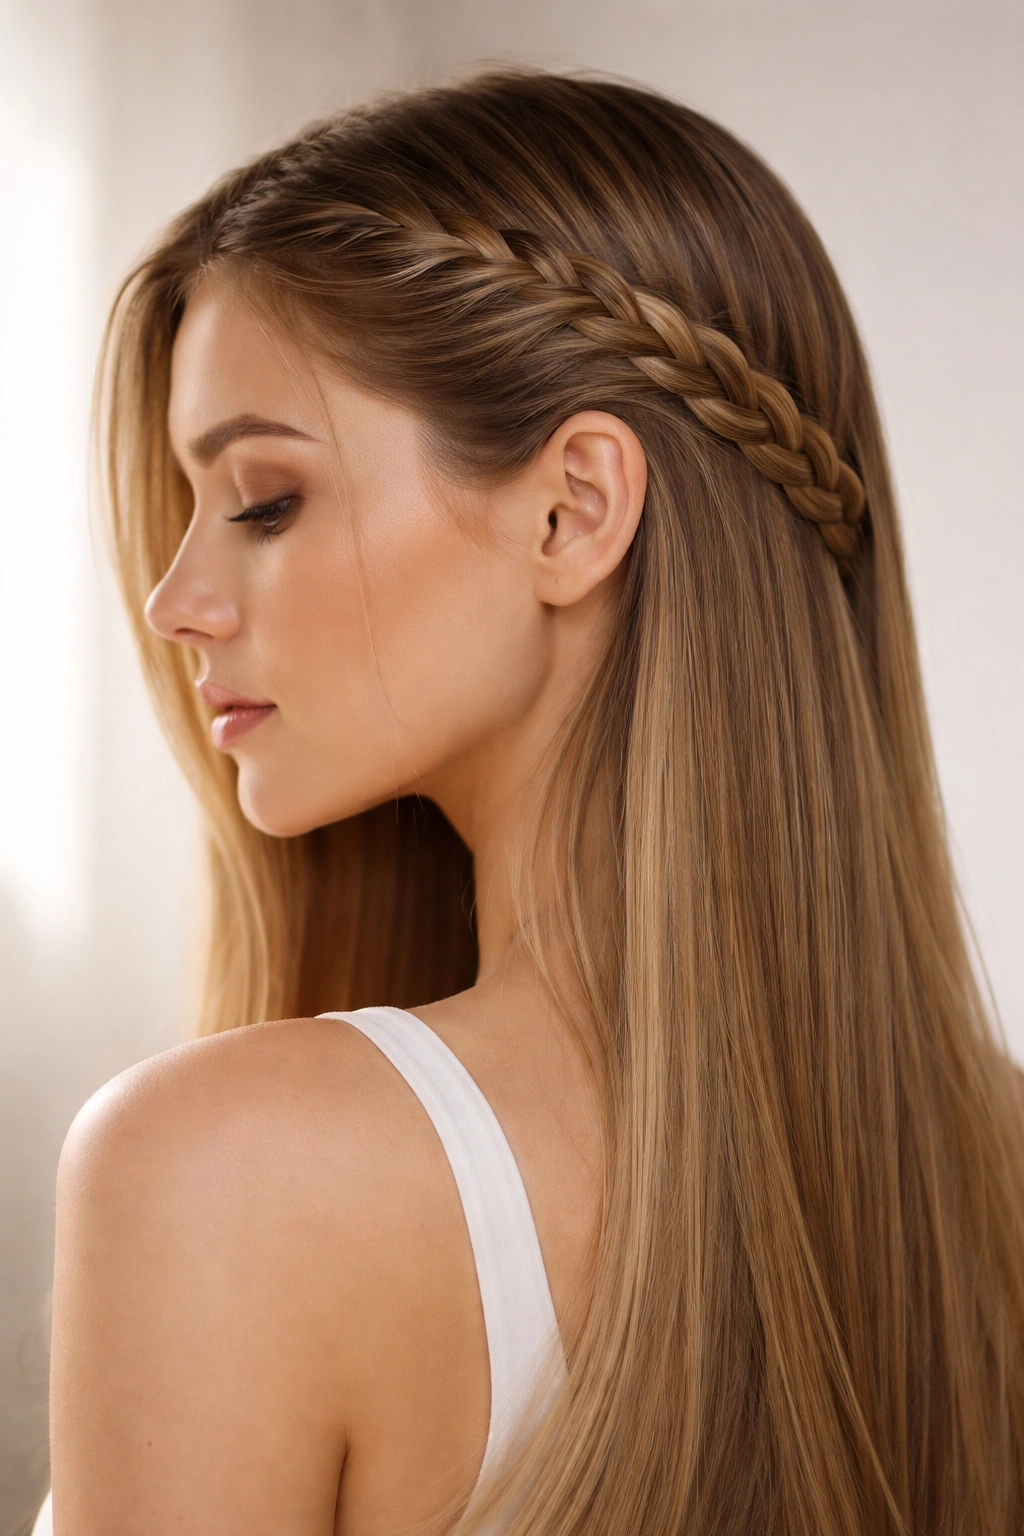
This modern, edgy variation hugs the perimeter of your head more closely than traditional crown braids, starting further back near your ears and creating a frame that emphasizes your face shape. Rather than running across the very top of your crown, an edge-hugging crown braid follows your natural hairline and ear area, creating a more contemporary aesthetic. On straight hair, this positioning becomes a notable design element that photographs beautifully and feels distinctly different from centered approaches.
Mapping Your Edge-Hugging Pathway
Instead of starting at your temple, begin your braid behind and slightly above your ear on one side. Following the natural curve of your head, work the braid backward and around, maintaining a consistent distance from your hairline. The braid should sit low enough that it follows the natural shape of your head from the side view, but high enough to keep hair off your neck and shoulders. This positioning creates a more sculpted, modern appearance compared to braids that run across the top of your head.
Technique and Tension Consistency
Because you’re working around curved surfaces rather than straight pathways, pay particular attention to tension consistency. You want the braid to sit securely without pulling uncomfortably, particularly around your ears where tight tension can become painful during long days. Incorporate hair gradually and smoothly, ensuring each addition feels natural and secure. Straight hair works beautifully here because you can see exactly how the braid sits against your head, making adjustments as needed.
Styling Variations and Occasions
An edge-hugging crown braid can be executed sleekly and modernly for contemporary events, or loosened and pancaked for a softer, more romantic effect. The lower positioning creates a flattering frame for most face shapes, particularly those wanting to emphasize their eyes and cheekbones. This style works wonderfully with side-swept bangs, full curtain bangs, or face-framing pieces, all of which can be styled independently from the braid. The bottom half-down section can flow naturally straight for a sleek look, or be curled for added dimension and movement.
Final Thoughts

Crown braid half-up half-down styles represent one of the most versatile, flattering approaches available for styling straight hair, offering options that range from everyday-wearable to genuinely show-stopping. What makes these styles so powerful is their adaptability—the same fundamental technique transforms entirely based on your choice of tension, incorporation method, and finishing touches. Whether you’re drawn to classic centered braids, bohemian looseness, modern asymmetry, or intricate multi-strand complexity, straight hair provides the ideal canvas for executing your chosen style with precision and polish.
The beauty of mastering these variations is that you develop genuine braiding confidence and understanding. Once you understand how to create a basic crown braid, every adaptation becomes intuitive rather than intimidating. You’ll find yourself naturally improvising variations based on your mood, occasion, and how much time you have available. Some days a sleek, polished braid is your answer; other days you want loose, romantic texture; still other days you’re ready to show off with an advanced multi-strand technique.
Remember that practice genuinely does make perfect with braiding. Your first attempts might feel clumsy or uneven, particularly if you’ve never braided before. But each time you practice, your hands develop better muscle memory, your tension becomes more consistent, and the process feels less concentrated and more meditative. Start with whichever style appeals to you most and practice it multiple times before moving to variations. Straight hair is forgiving in that it clearly shows what’s working and what needs adjustment, making it an excellent learning texture. Within a few weeks of regular practice, you’ll find these styles becoming second nature—quick enough for morning preparation yet impressive enough to feel genuinely special.