Half-up half-down hairstyles have become a staple of bohemian beauty, and for good reason. This versatile look sits perfectly at the intersection of romantic and practical — you’re pulling back enough hair to frame your face while leaving the rest down for movement and flow. What makes boho half-up styles so appealing is their effortless-looking elegance; they work equally well for everyday wear, festivals, special occasions, and everything in between. The beauty of mastering these styles is that once you understand the fundamentals, you can mix and match techniques, add accessories, and adapt them endlessly based on your hair texture, length, and the vibe you’re going for.
Whether you’ve got thick, curly hair or fine, straight strands, boho half-up half-down styles are incredibly forgiving and customizable. The bohemian aesthetic itself is all about that “undone” quality — slightly messy, romantically tousled, adorned with unexpected details like flowers, ribbons, or metallic clips. That means you don’t need perfect precision or advanced styling skills to pull these off. In fact, the slightly imperfect, lived-in look is exactly what makes them boho. The styles below range from quick five-minute versions you can throw together on a busy morning to more elaborate options that feel polished enough for special occasions. Each one can be dressed up or down, and all of them work beautifully with the natural texture and movement of your hair.
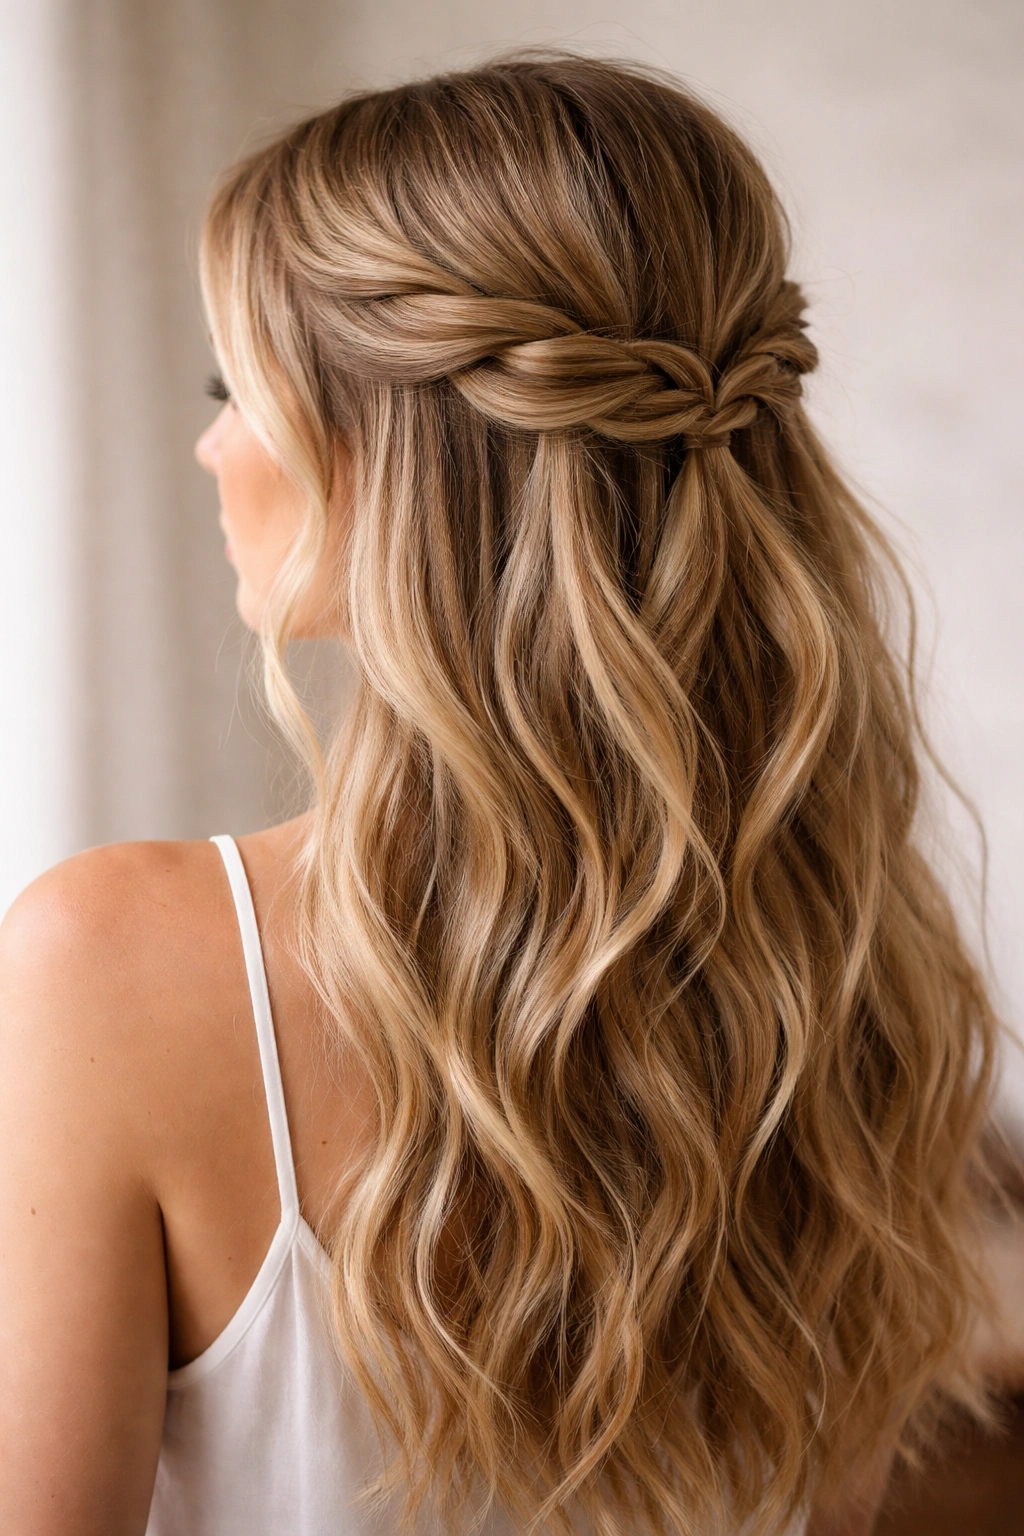
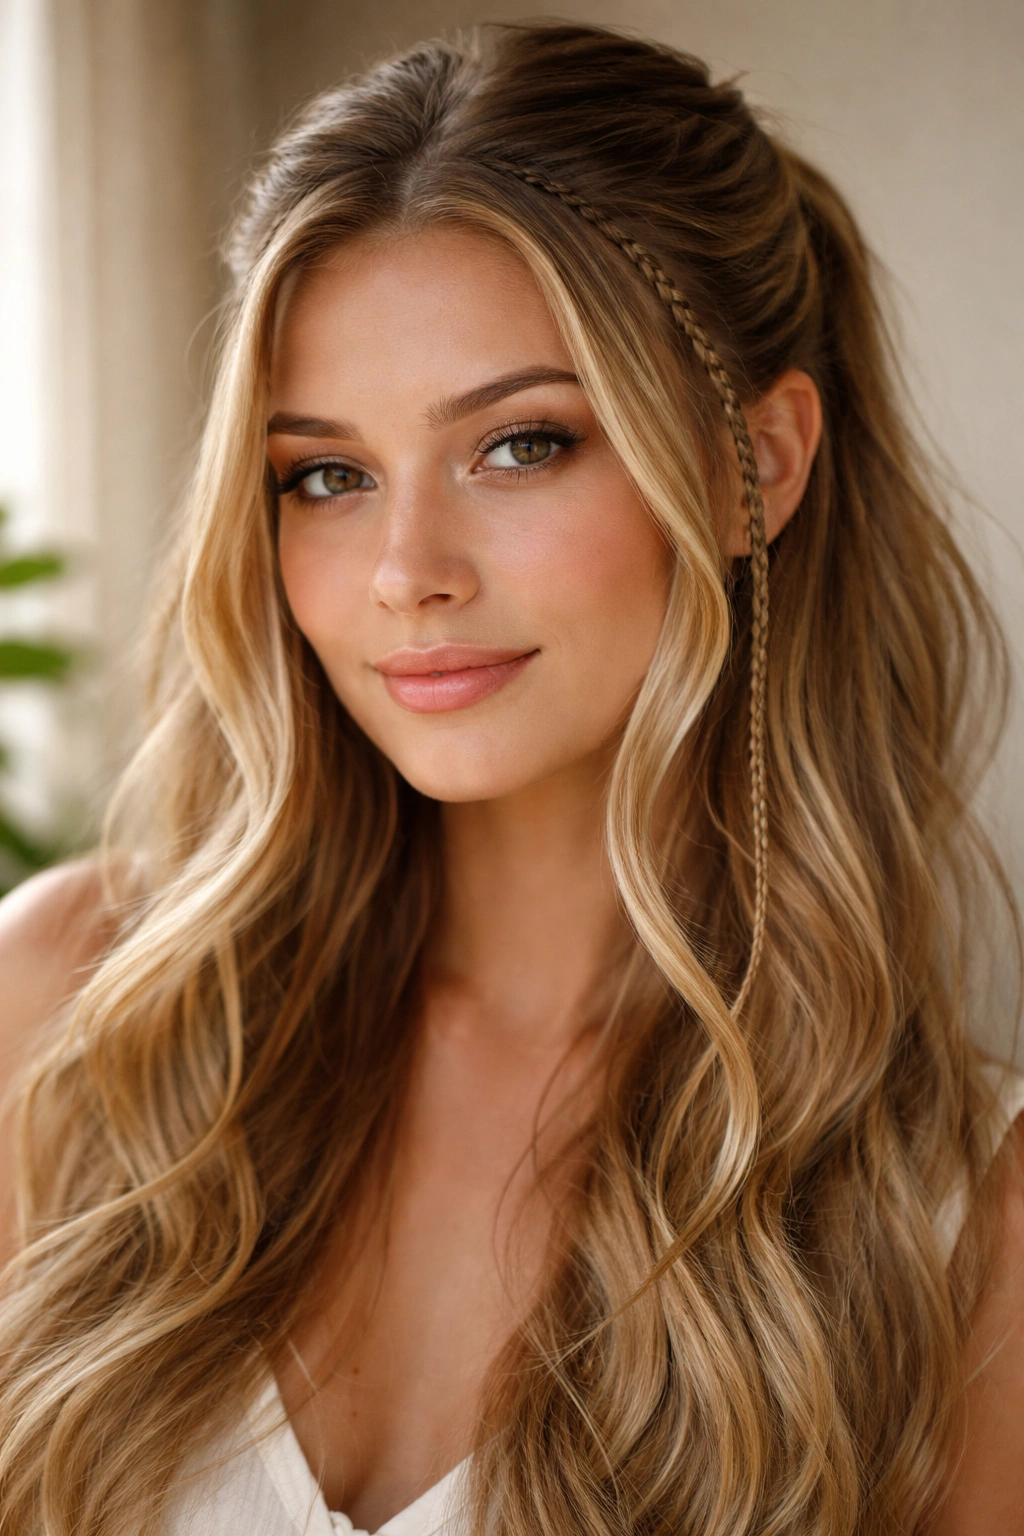
1. The Classic Twisted Crown Half-Up
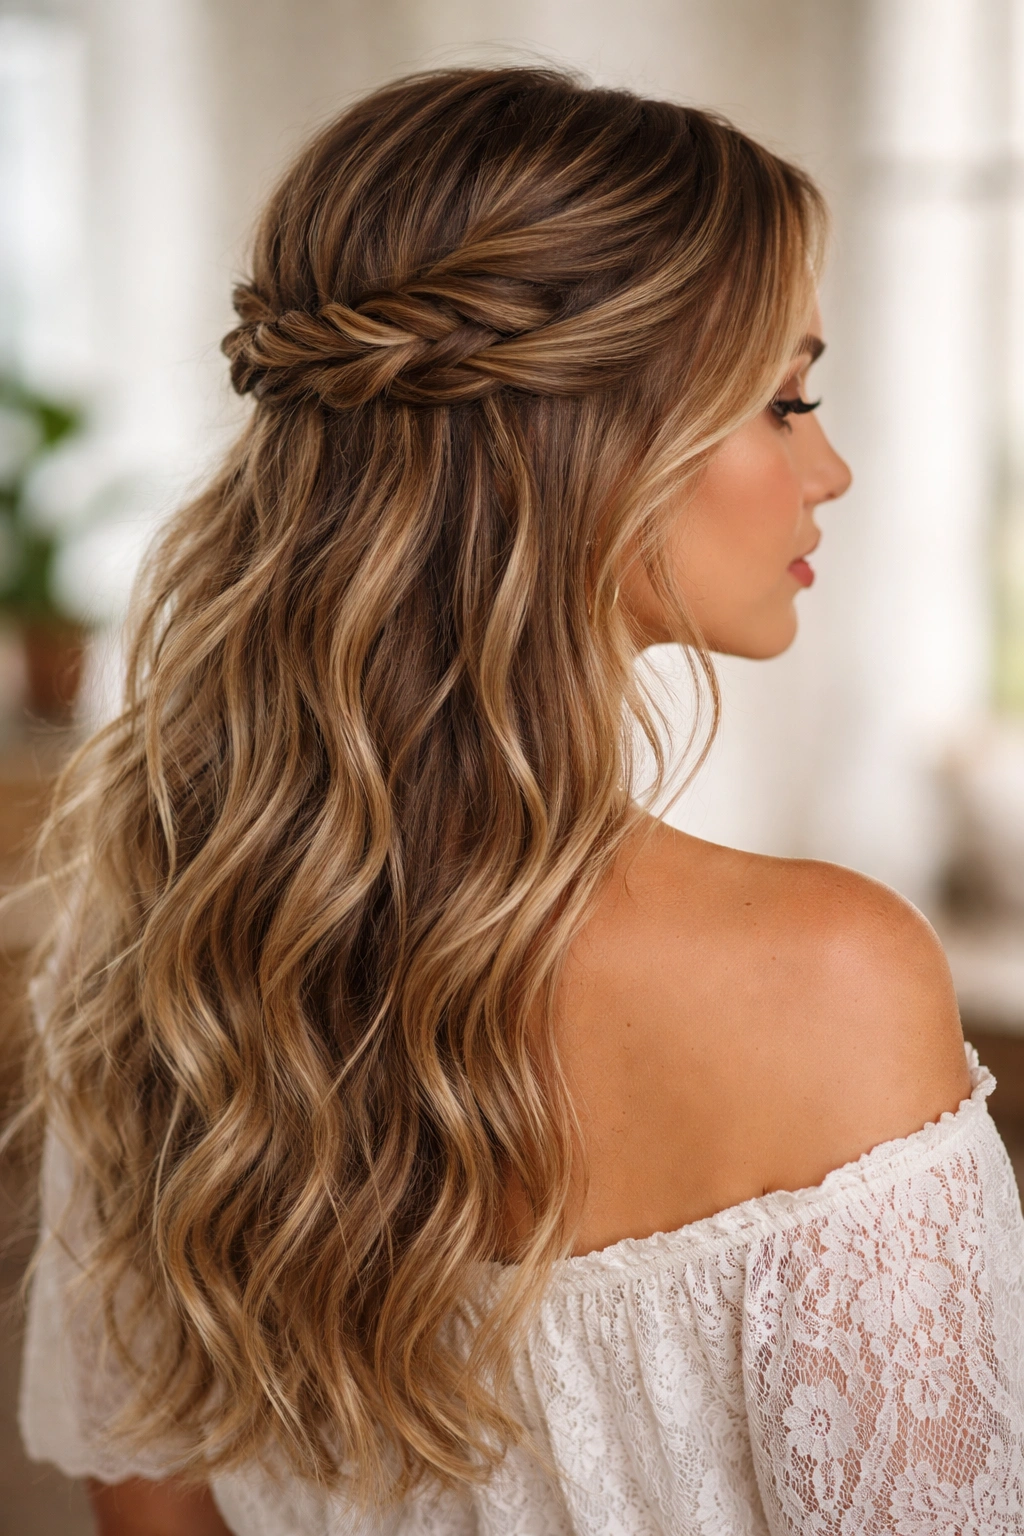
This is the foundation of many boho styles and probably the easiest place to start if you’re new to half-up looks. You’re taking a section of hair from each side of your head, twisting them gently, and securing them at the back of your head with bobby pins or a small elastic. The beauty of this style is that the twists don’t need to be tight or perfect — in fact, a slightly loose, undone twist looks more romantic and bohemian than something perfectly groomed.
Why This Works So Well
The twisted crown is forgiving because imperfection actually enhances the boho aesthetic. Loose strands and slight messiness aren’t flaws in this style — they’re features. The twists create a visual frame for your face while keeping hair out of your way, and they work on virtually every hair type and texture.
How to Create It
- Start with hair that’s been lightly textured (don’t wash it the day of; second-day hair holds twists better)
- Take a section of hair from one side of your head, about 2 inches back from your temple
- Twist loosely as you move back toward the crown; don’t aim for a tight, structured twist
- Secure the twist at the back with a bobby pin tucked underneath so it’s hidden
- Repeat on the other side, bringing both twists to meet at the center back
- Gently pull the twists slightly to loosen and soften them (this creates that intentional undone look)
Pro tip: Use a fine mist hairspray before you start if your hair is slippery — it helps the twist hold without making it stiff.
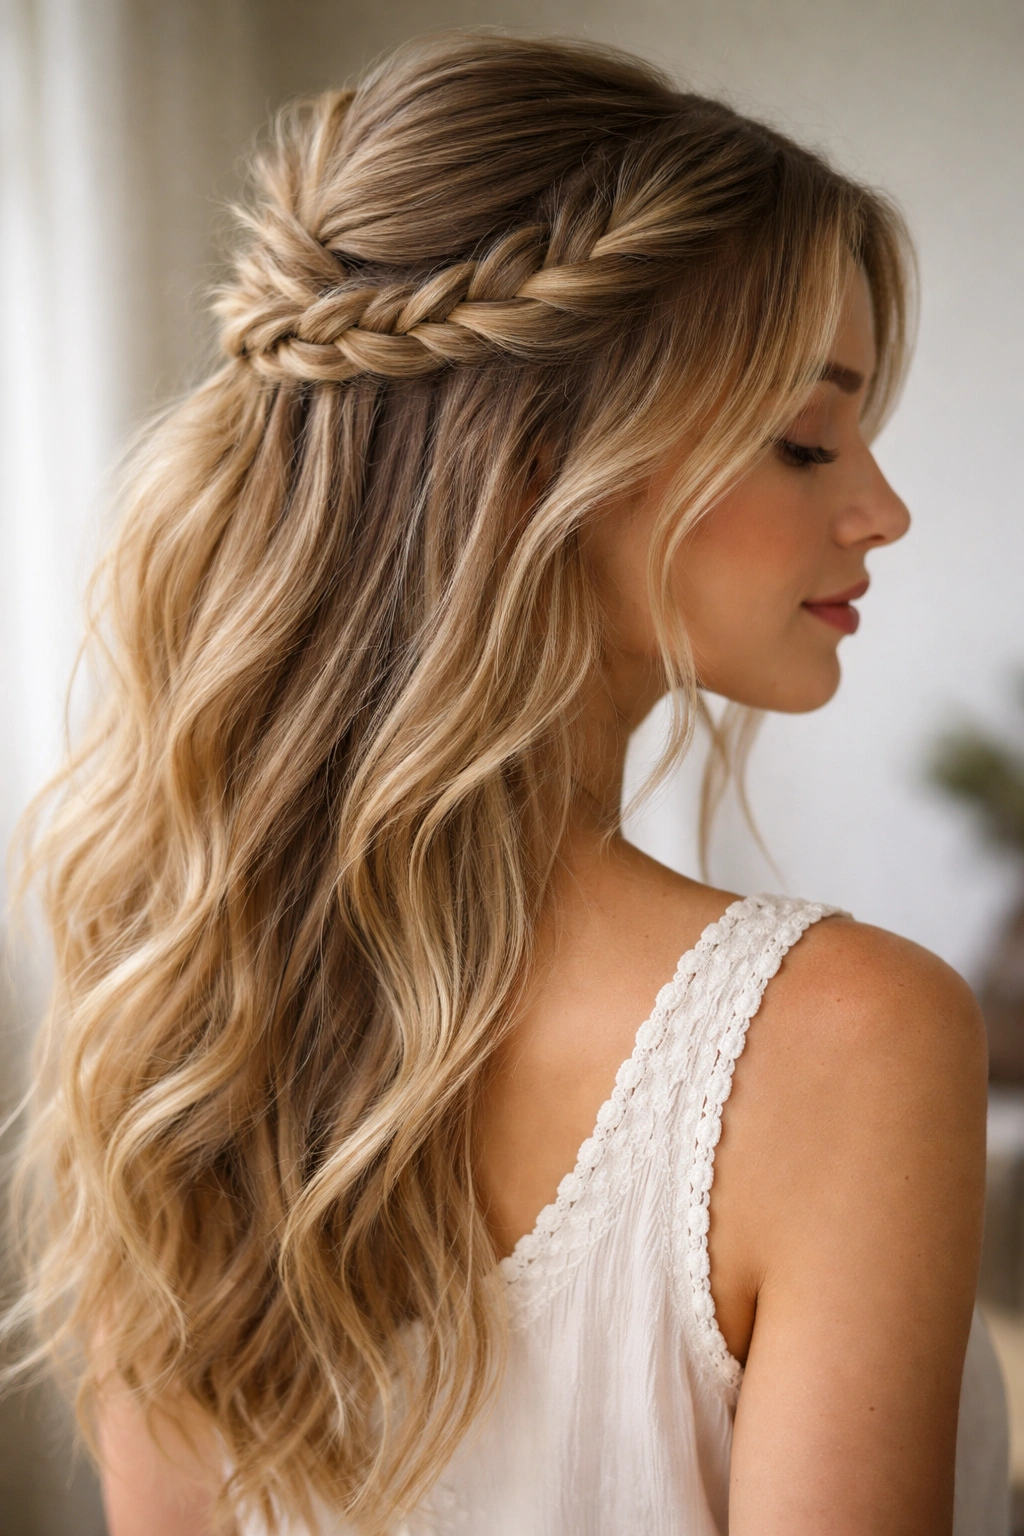
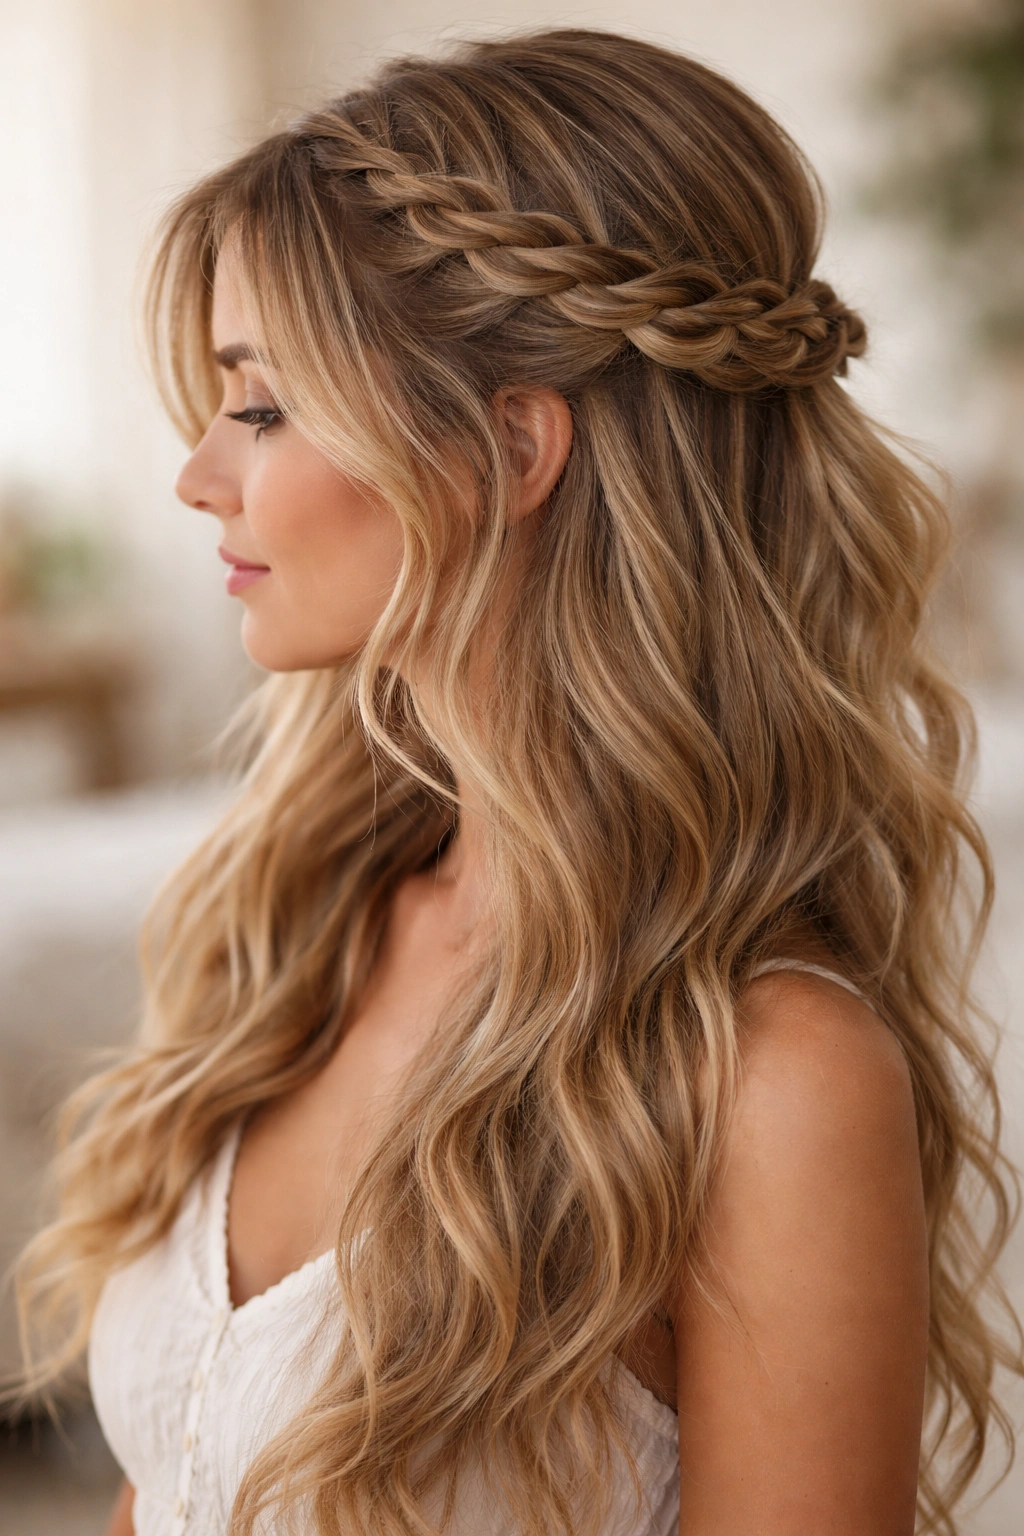
2. Braided Half-Up with Loose Waves
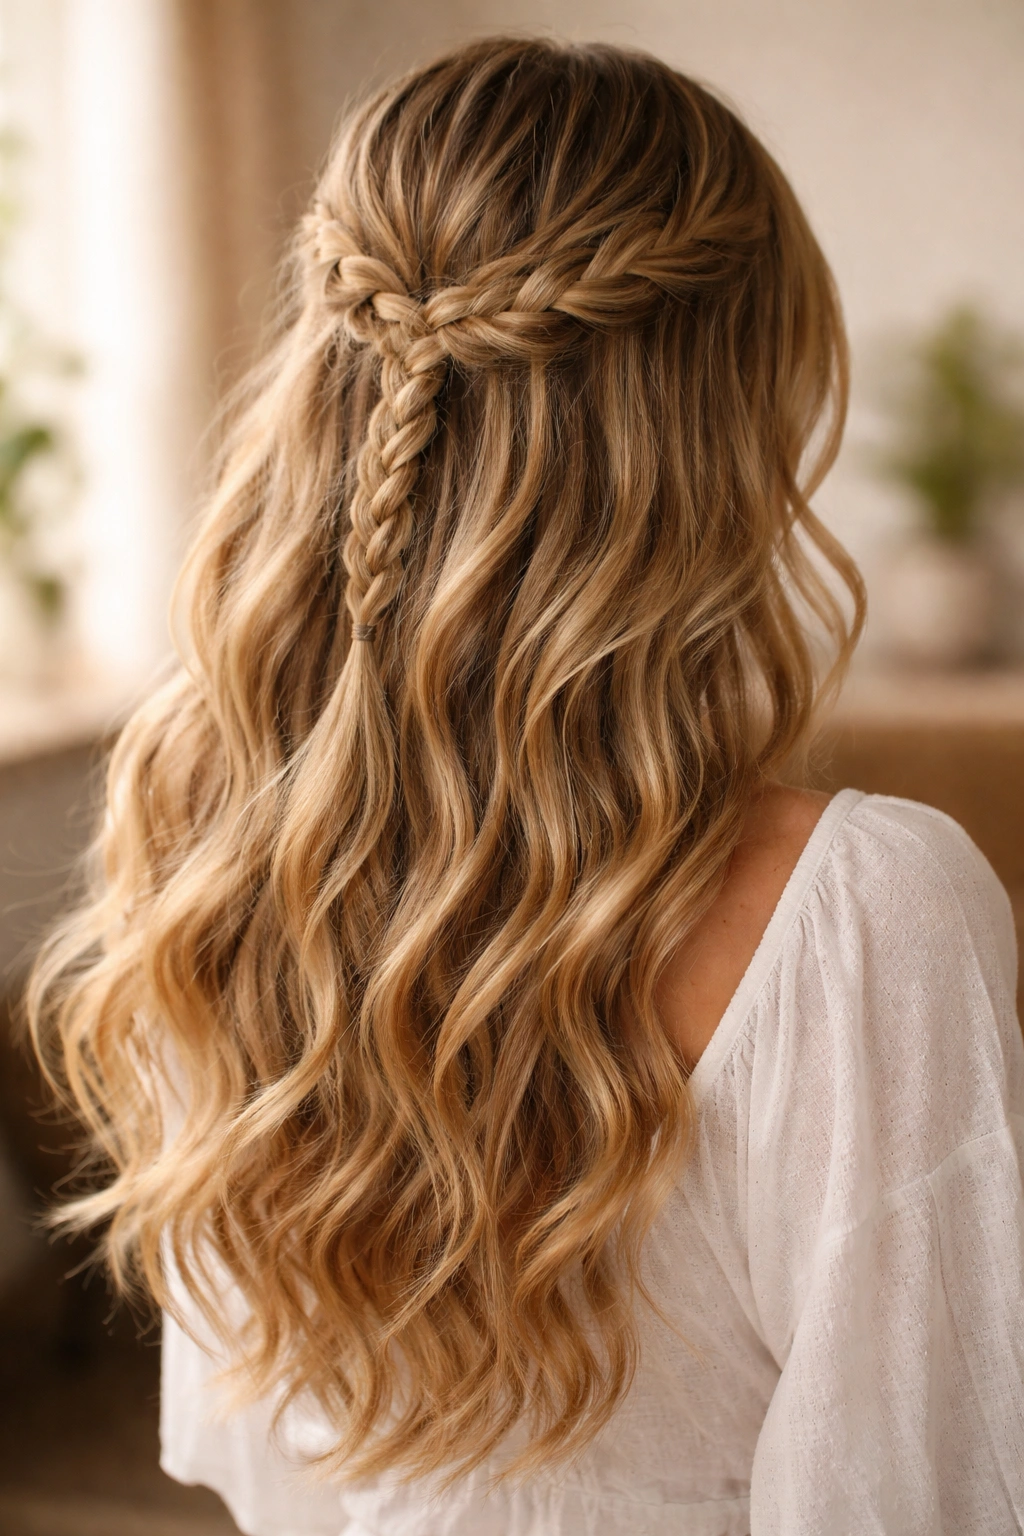
This style combines the structure of a braid with the romanticism of loose waves cascading down. You’re taking a section from the crown and braiding it — whether that’s a classic three-strand braid, a loose Dutch braid, or a fishtail — and then securing it at the back of your head. The half-up element means your lower hair remains down in soft waves, creating a dreamy, romantic silhouette.
The Boho Braid Difference
Standard braids can read as polished or athletic, but boho braiding is deliberately loosened. After you braid, you gently pull and tease the braid strands to make it wider, softer, and more textured. This creates visual interest and that signature “I didn’t spend an hour on this” vibe that’s essential to boho style.
Steps to Achieve This Look
- Brush hair and create loose waves if you have straight hair; if your hair is naturally wavy, just work with that texture
- Starting at the crown center, take a section of hair about 3 inches wide
- Create a loose three-strand braid down the center back of your head (or use a Dutch braid if you want it to stand out more)
- Once braided, gently pull each section of the braid outward to loosen it; pull harder on one side to create asymmetry
- Secure the braid end at the nape of your neck with a bobby pin
- Leave the rest of your hair down in waves, tucking a few strands around the braid base to make it look less structured
Worth knowing: If your braid feels too tight as you’re doing it, you’re braiding too tightly. Boho braids should feel loose and slightly rough as you create them.
3. The Sleek Side-Swept Half-Up
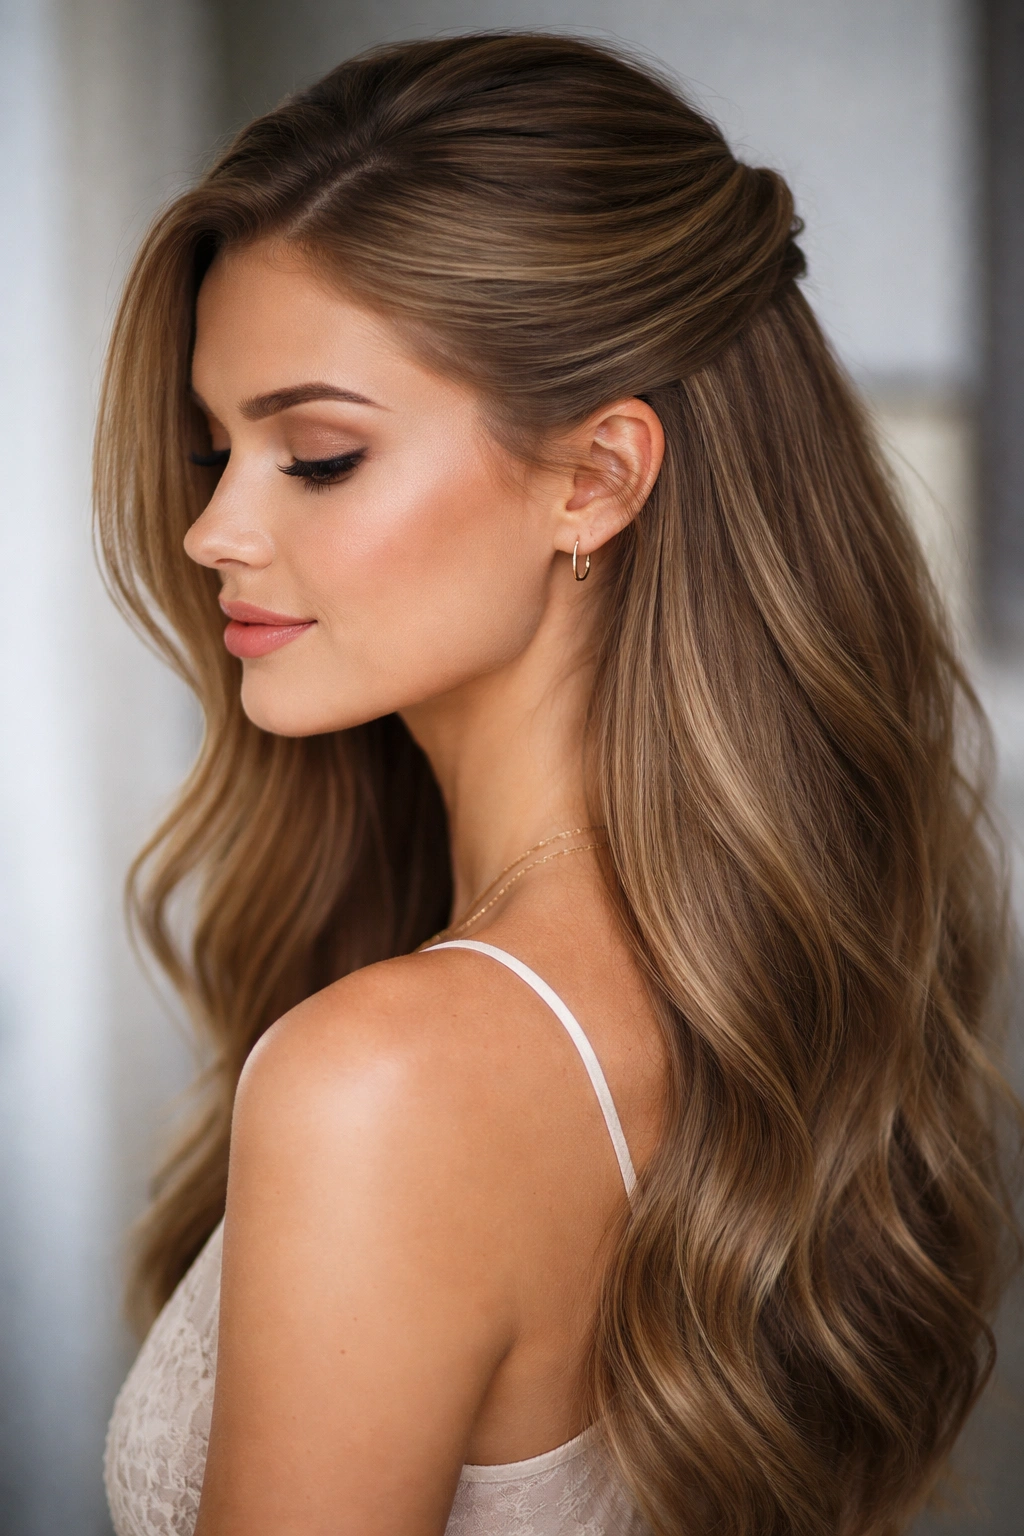
For those moments when you want boho but also need a touch of sophistication, the side-swept half-up delivers. You’re sweeping hair from one side, twisting or braiding it slightly, and pinning it to the back of your head, leaving one side of your face more exposed. This creates asymmetry, which is inherently more interesting and bohemian than a perfectly centered style.
Why Asymmetry Matters in Boho Styling
Symmetry feels formal and structured; asymmetry feels natural and artistic. By sweeping more hair from one side, you’re creating movement and visual interest. The exposed side of your face is a focal point, and if you’re wearing makeup or have great cheekbones, this style puts them on display.
Creating the Sweep
- Take a larger section of hair from one side (about a quarter of your hair, or more if you like)
- Either twist or loosely braid as you move toward the back of your head
- The path should curve slightly around the back of your head, not going straight across
- Pin securely at the back, tucking the ends underneath if they’re visible
- Leave the other side completely down and loose
- You can tease or wave the down side for more drama, or leave it sleek depending on your mood
Insider note: This works especially well if you have a good side (yes, everyone does) — you get to show it off while keeping the other side softly framed by hair.
4. Flower Crown Half-Up with Loose Curls
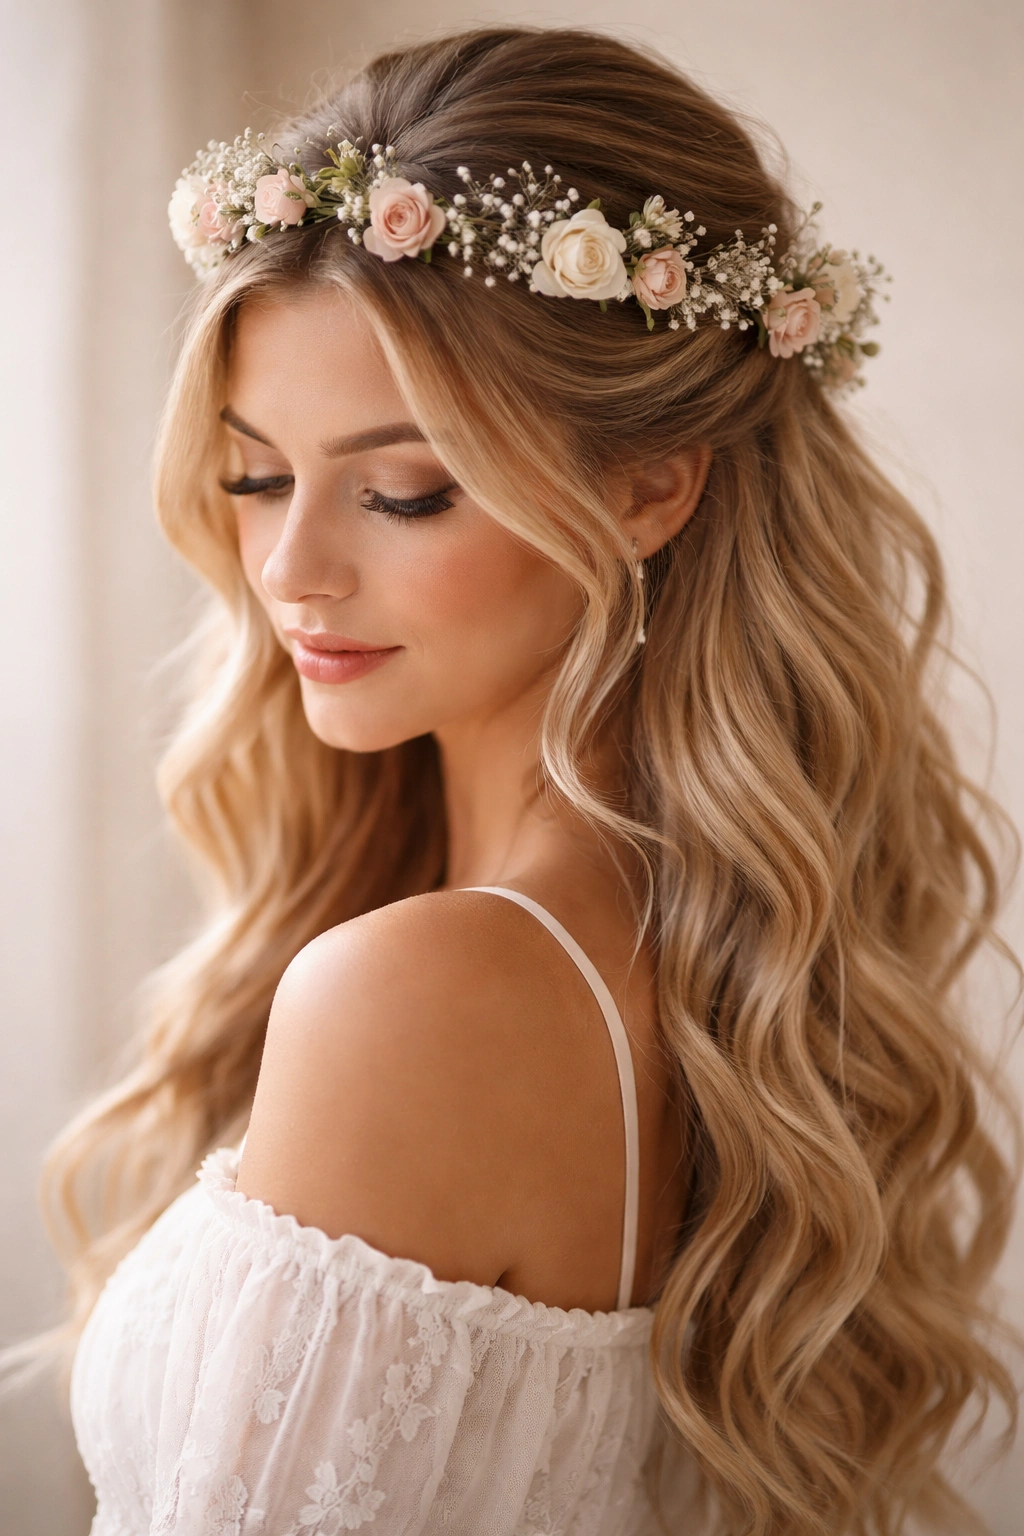
This is where boho truly shines. You’re doing a simple half-up style and then weaving flowers — real or faux — directly into the hair at the crown line. Fresh flowers like baby’s breath, eucalyptus, small roses, or wildflowers create a romantic, ethereal vibe that’s perfect for special occasions, but faux flowers work beautifully too and last all day.
Choosing Your Flowers
Real flowers create the most romantic look but will wilt after a few hours. Faux flowers in silk or velvet are surprisingly stunning and last indefinitely. Mixed greenery (eucalyptus, ruscus, or even leather leaf fern) adds texture without overwhelming the style.
How to Build This Look
- Create a basic half-up style using a ponytail holder or bobby pins
- Take your flower stems and tuck them directly into the base of the half-up, securing with bobby pins as needed
- Arrange the flowers so they’re nestled into the hair, creating a natural-looking crown
- If using real flowers, wrap the stems with florist tape so they don’t scratch your scalp
- Leave the lower hair in loose waves or curls for maximum romanticism
- You can also weave individual flowers or small clusters throughout the crown area instead of creating one focal point
Pro tip: Hold flowers in place with bobby pins tucked horizontally into the hair, not vertically — they’ll be more secure and less likely to shift.
5. The Messy Top Knot Half-Up Hybrid
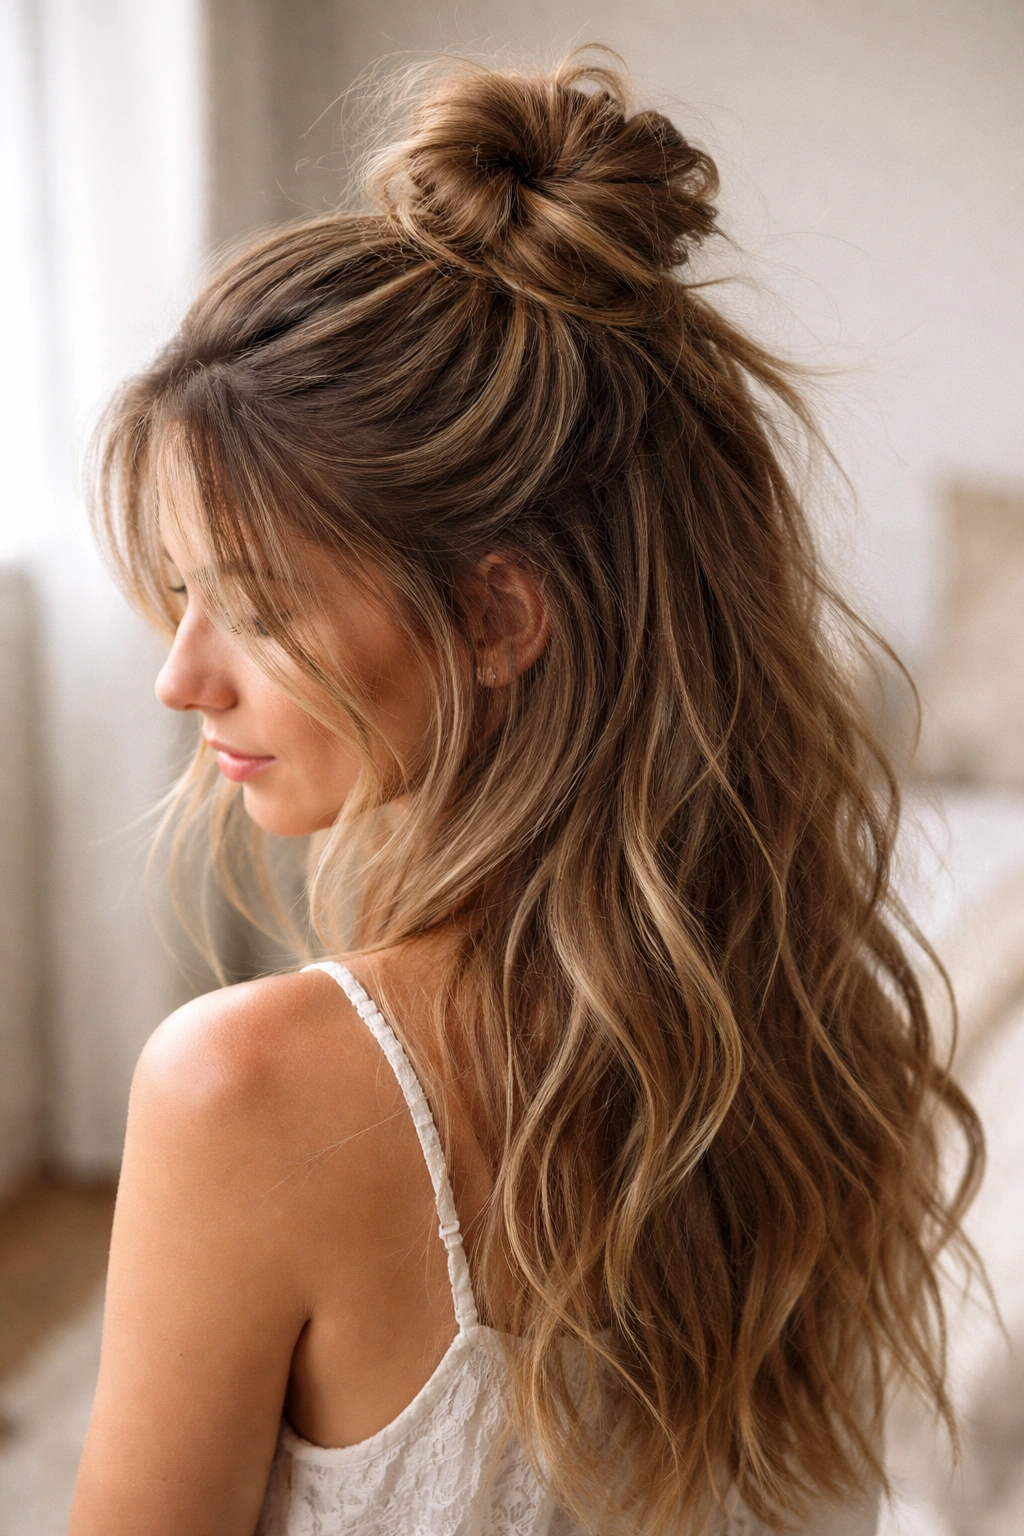
This style splits the difference between a half-up and a top knot, giving you maximum texture and boho appeal. You’re gathering the top half of your hair into a loose, imperfectly styled knot right at your crown, leaving the underneath layer and the back down. The result looks intentionally undone and works beautifully on all hair types.
Building Texture and Softness
The key to this style is not making it tight or sleek. You want flyaways, loose pieces, and a soft, bulky shape. This isn’t the yoga-class top knot; it’s the I-just-woke-up-like-this version.
Construction Steps
- Gather the top third to half of your hair at your crown (exactly where you’d start a ponytail, but don’t make a tight elastic)
- Gently twist this section as you coil it upward, creating a loose spiral
- Wrap the coil around itself to form a knot shape, leaving it deliberately loose and textured
- Secure with bobby pins inserted in multiple directions so they hold but don’t flatten the knot
- Pull out face-framing pieces from around the knot
- Leave the back and sides completely down, and encourage waves or curls in those sections
Worth knowing: Second-day, slightly textured hair is your friend here. Clean, freshly-washed hair is too slippery to hold this style without a lot of product.
6. Ribbon-Woven Half-Up Braid
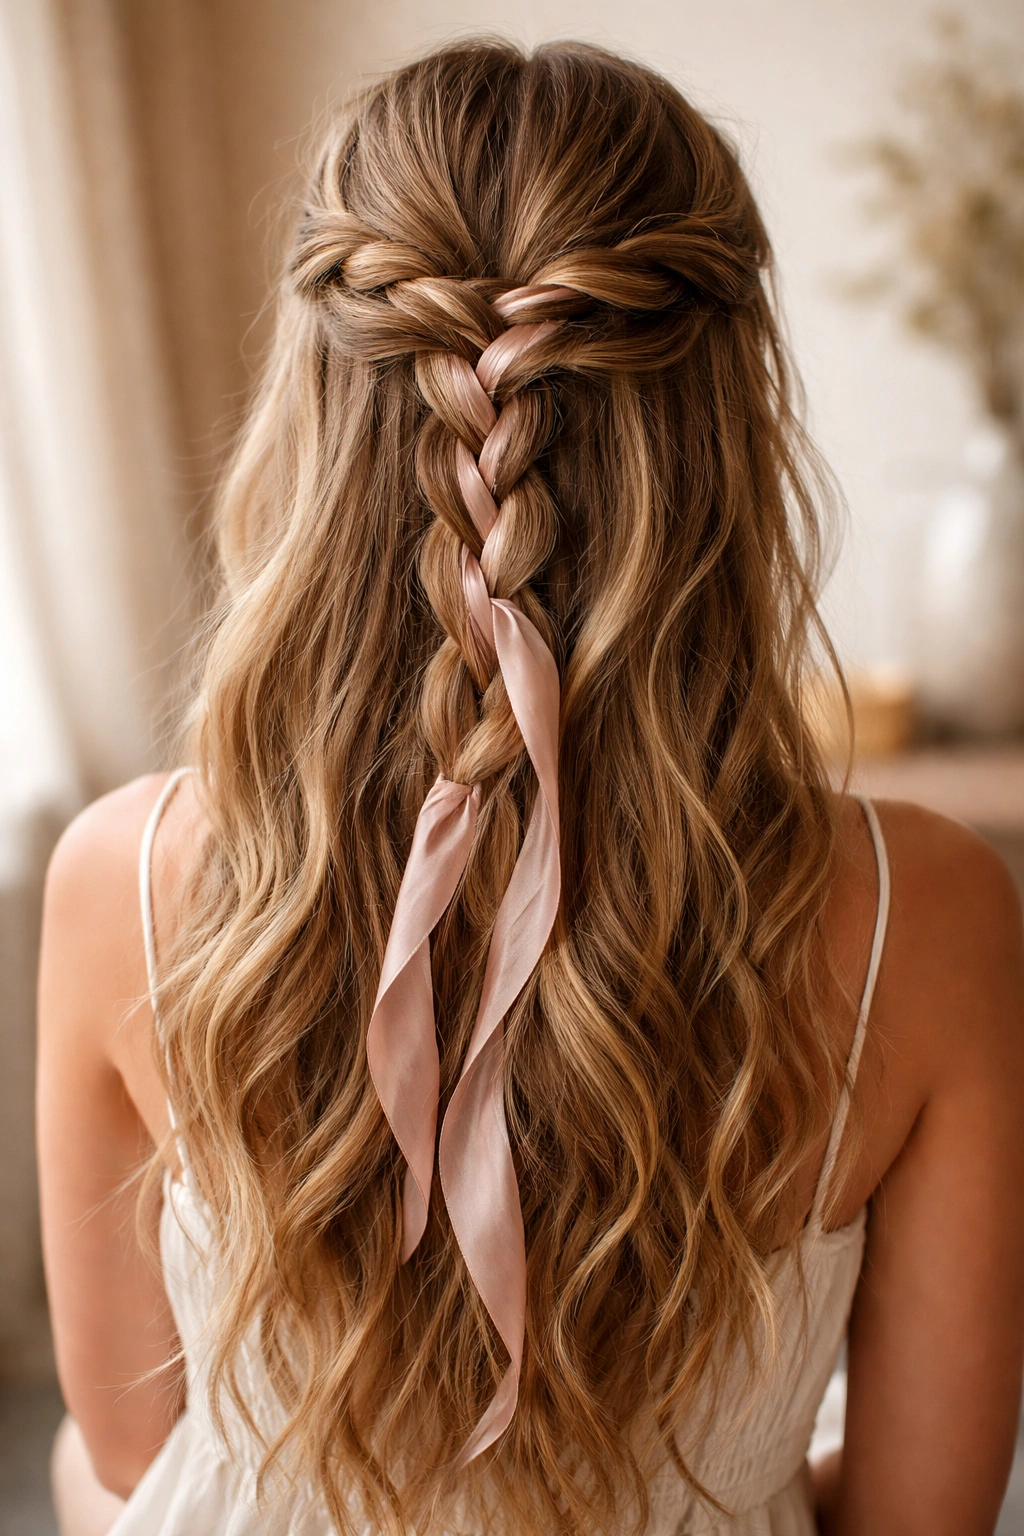
Weaving a ribbon through a half-up braid elevates the whole look instantly. You’re creating a standard or loose braid down the center back, but as you braid, you’re also weaving a silk ribbon, twine, or metallic cord through the sections. This adds color, texture, and a handmade-looking detail that’s quintessentially boho.
Selecting Your Ribbon
Silk ribbons in jewel tones, blush, cream, or gold work beautifully. Velvet ribbons add richness. Even leather cord or suede lace can work for an edgier boho vibe. The ribbon doesn’t need to match your hair color perfectly; it can complement your outfit, your skin tone, or the overall color palette you’re creating.
How to Weave It In
- Secure a ribbon to the base of your braid with a small elastic or bobby pin
- Create a loose three-strand braid, but instead of using three sections of hair, use two sections of hair and one section of ribbon
- Braid as normal, making sure the ribbon winds visibly through the braid
- You can also braid hair normally and then weave a ribbon through afterward by threading it gently
- Secure the braid end and the ribbon end together at the back of your head with bobby pins
Pro tip: Use a ribbon about 12-18 inches long, secured at the top so you have length to work with as you braid down.
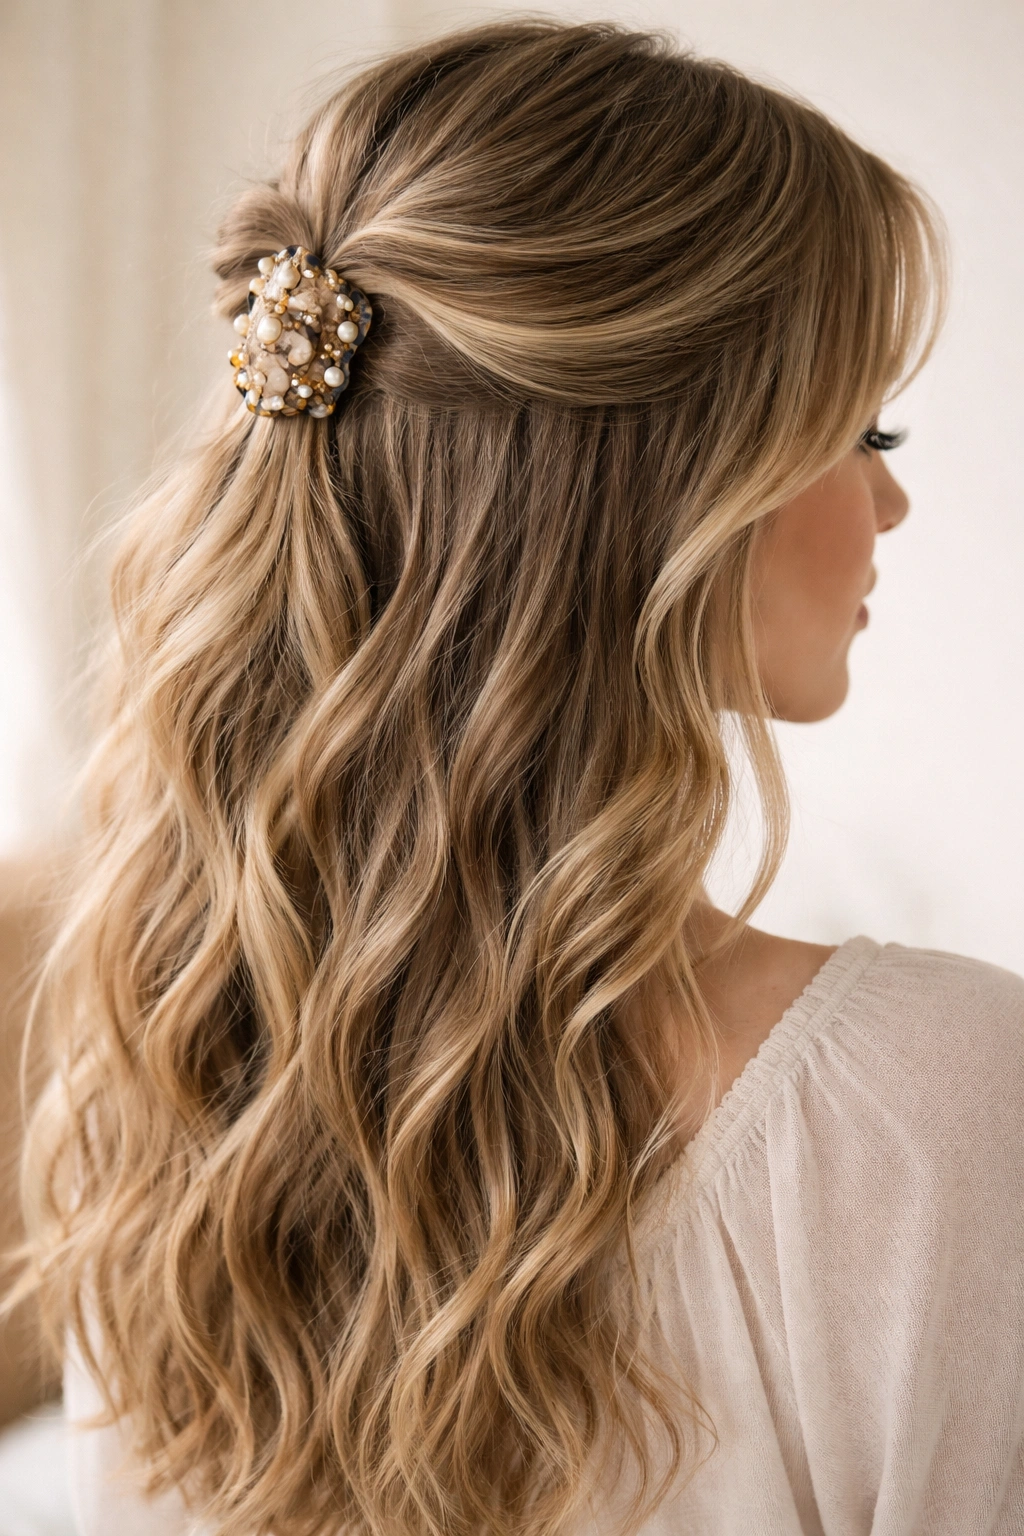
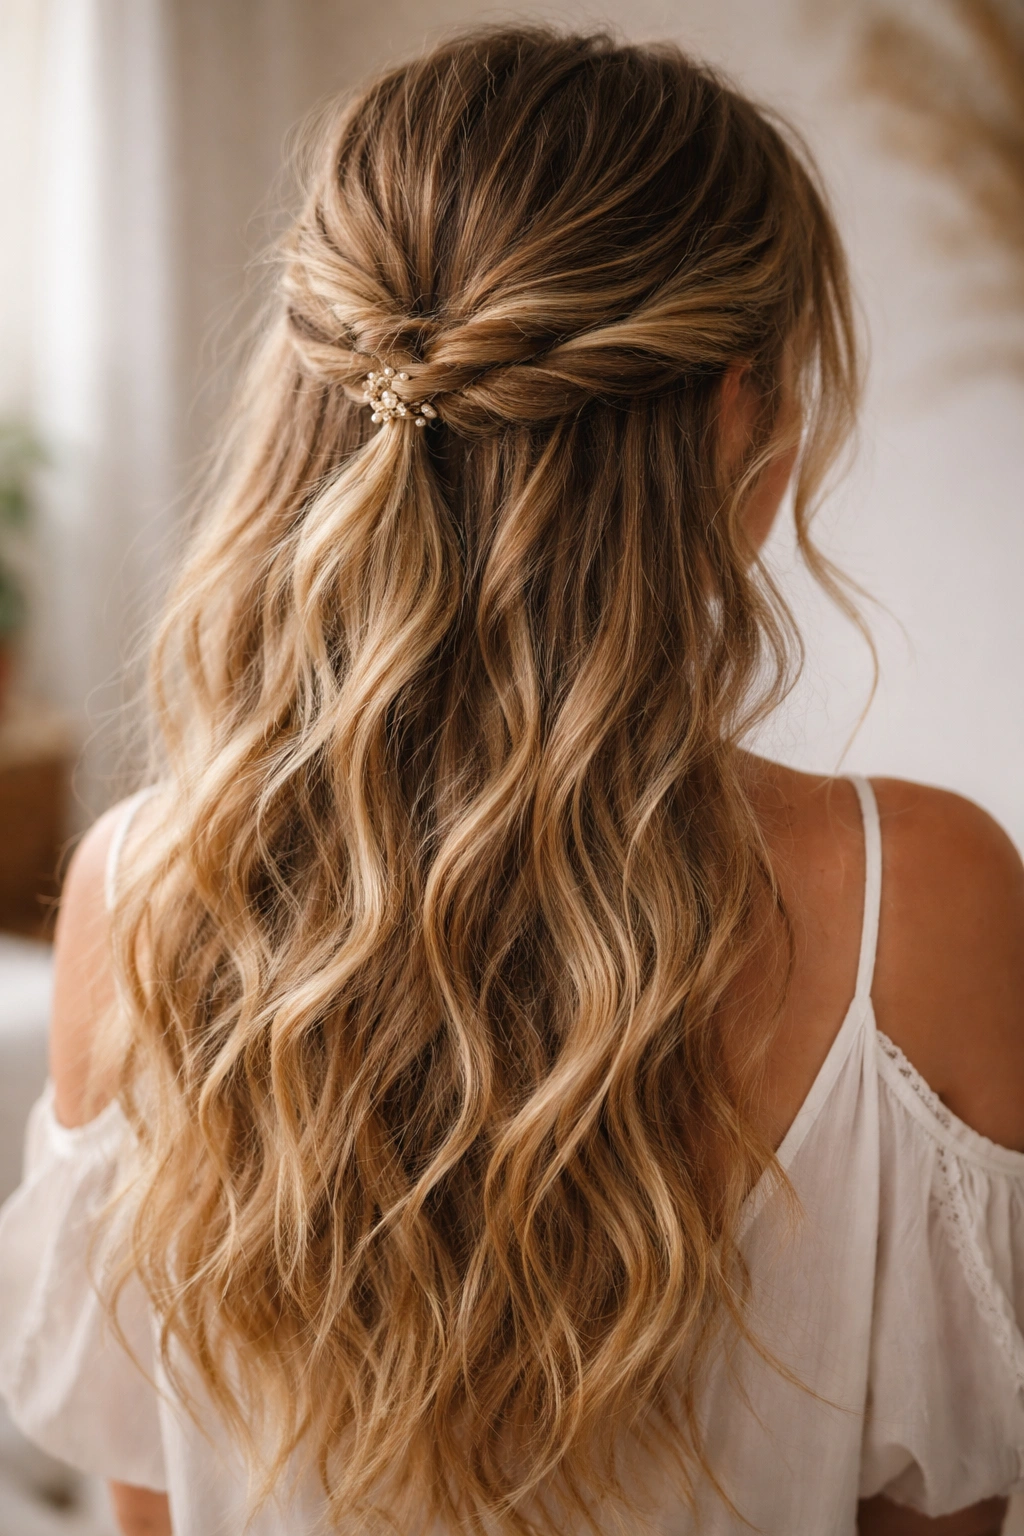
7. The Twisted Half-Up with Pearl Hair Clips
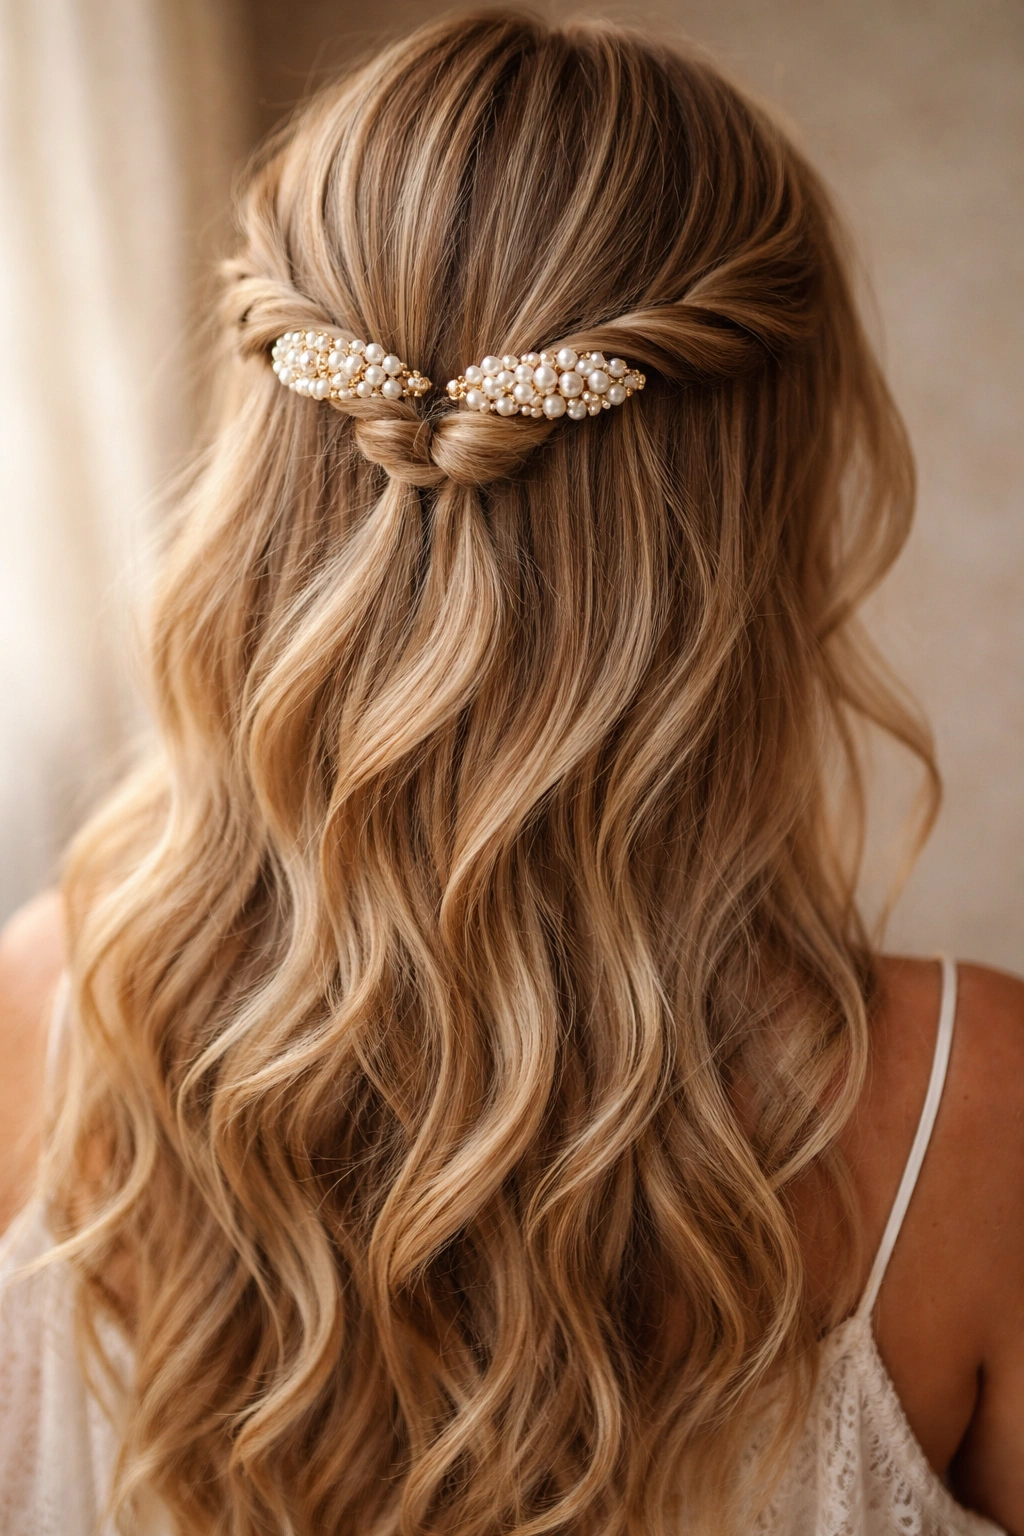
This style is simple but elevated — you’re doing basic twists on either side of your head and securing them with pearl hair clips instead of bobby pins. The pearl clips (gold, silver, or rose gold) catch the light and add a subtle luxury detail that feels both romantic and modern.
Why Accessories Transform a Simple Style
Hair clips, pins, and accessories are boho’s secret weapon. They turn a basic hairstyle into something that feels intentional and styled without adding complexity. Pearl clips are especially effective because they feel delicate and feminine while still being visible and decorative.
Creating the Clipped Look
- Take a section of hair from one temple and twist gently back toward your crown
- Instead of a bobby pin, secure with a pearl clip — slide the clip through the twist so the pearls are visible
- Repeat on the other side with another matching or complementary clip
- You can cross the twists over each other at the back for extra visual interest
- Leave all your lower hair down in whatever texture suits your mood
Insider note: You can layer clips — use one functional bobby pin to secure the twist, then place a decorative clip just above it for visual pop.
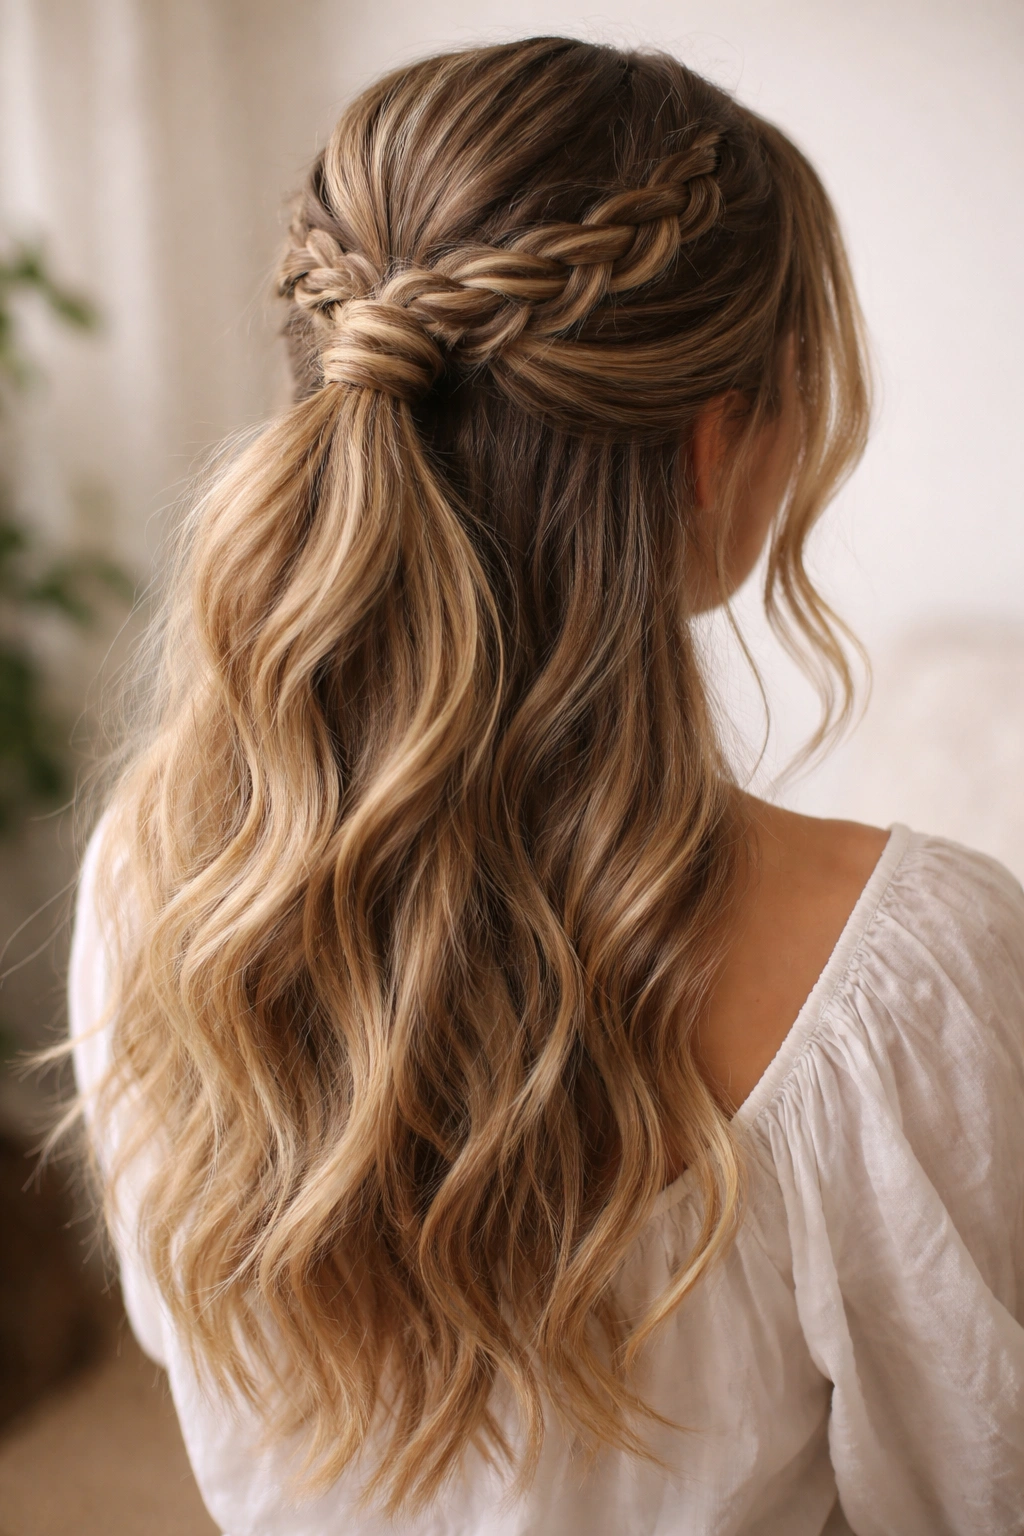
8. Braided Crown with Braided Half-Up
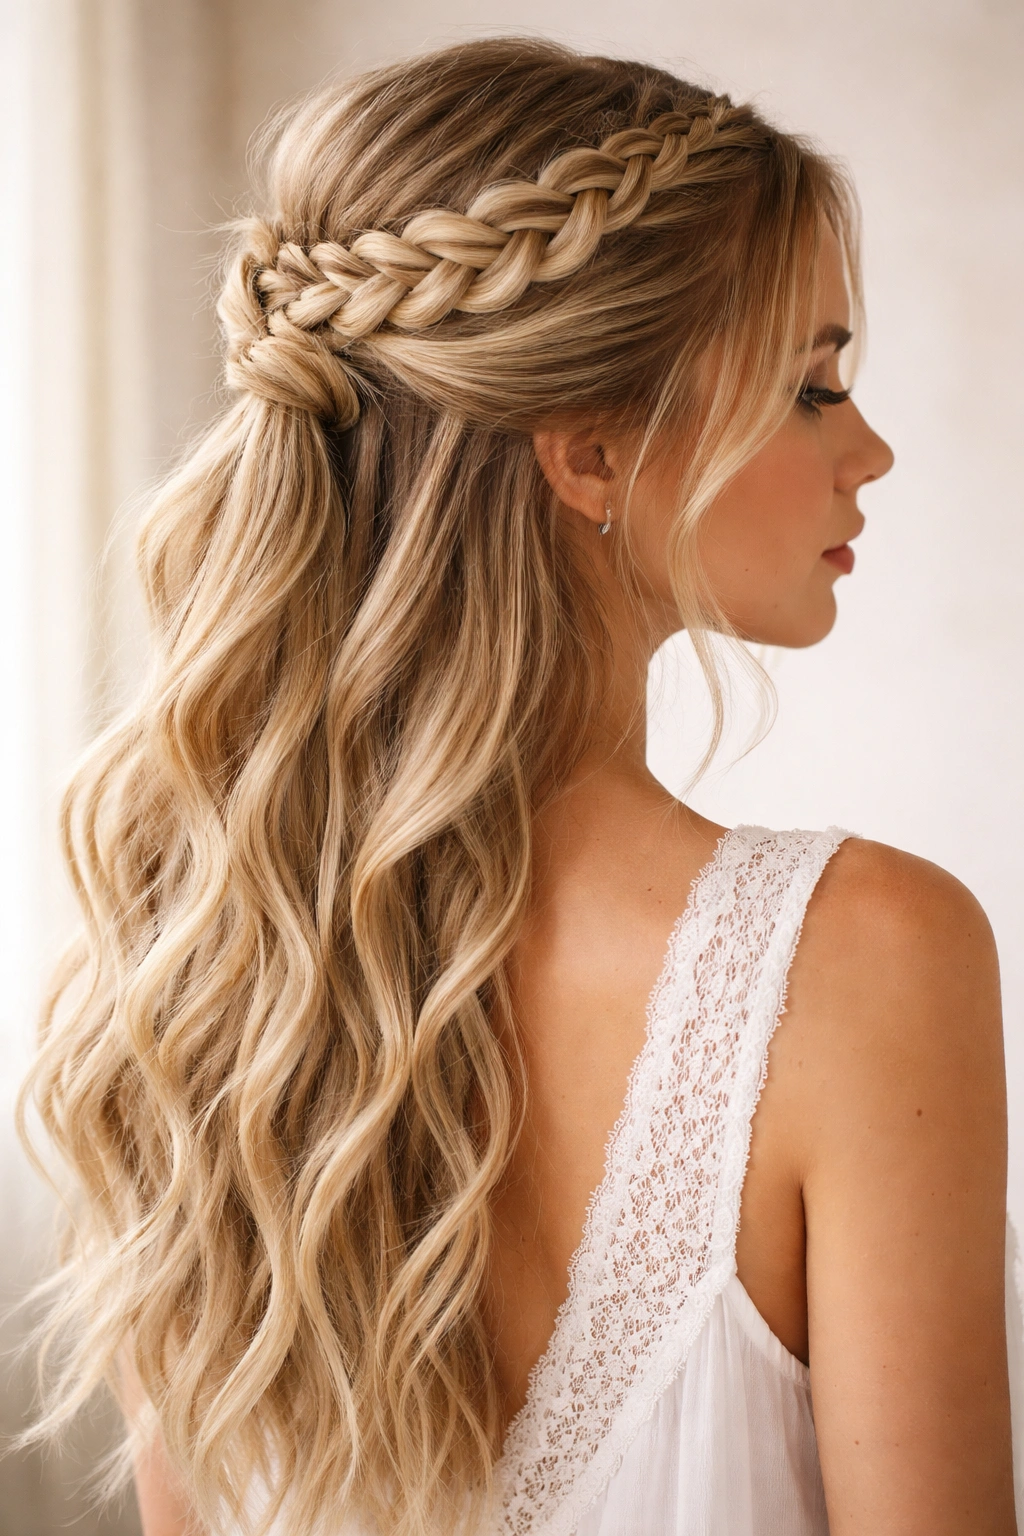
This is for days when you want maximum braid action. You’re creating a Dutch or fishtail braid that runs along your hairline from one side to the other (like a halo), and then pulling the braided hair back into a half-up ponytail. It’s intricate-looking but actually quite manageable, especially on second-day hair.
Understanding This Style’s Architecture
The first braid acts as a headband, creating structure and a point of visual interest. The half-up element keeps it from feeling too tight or overwhelming. It’s a style that works equally well for a festival, a special occasion, or just a day when you want your hair to feel special.
Step-by-Step Construction
- Part your hair on one side (or down the center — your preference)
- Starting from one side of your hairline, create a Dutch braid (reverse three-strand braid) that follows your hairline and curves around the back of your head
- The braid should end at the other side of your hairline, roughly at ear level on that side
- Once the halo braid is complete, gather the remaining hair (both from the braid line and from below) into a half-up ponytail at the back of your head
- Secure with an elastic, and gently loosen the halo braid to give it a softer appearance
- You now have a braided frame with a half-up ponytail inside it
Pro tip: This style benefits from a light texture spray applied before you start braiding — it gives you more grip.
9. The Soft Side Braid Half-Up
A side braid pulled back into a half-up creates a romantic, swept-back look without feeling overdone. You’re braiding from one side, bringing it back to the center, and securing it with the rest of your half-up. This style works beautifully on all hair lengths and is surprisingly easy to master.
Why Side Braids Feel Effortlessly Boho
A side braid naturally has asymmetry built in, which is inherently more interesting than a centered style. It also frames one side of your face beautifully and creates a soft, romantic silhouette. The braid becomes a design element that guides the eye.
Creating the Swept Look
- Take a section of hair from one side of your head, starting near your ear
- Create a loose three-strand or fishtail braid and angle it back toward the center of your head
- Bring the braid to where you’d naturally do a half-up, securing it with the rest of your half-up ponytail
- Gently loosen the braid by pulling the sides to widen it
- The remaining lower hair stays down, either wavy, curly, or straight depending on your preference
Worth knowing: This style is easier if you start the braid lower (around ear level) rather than at your temple — it gives you more hair to work with.
10. Twisted Half-Up with Metallic Hair Wrap
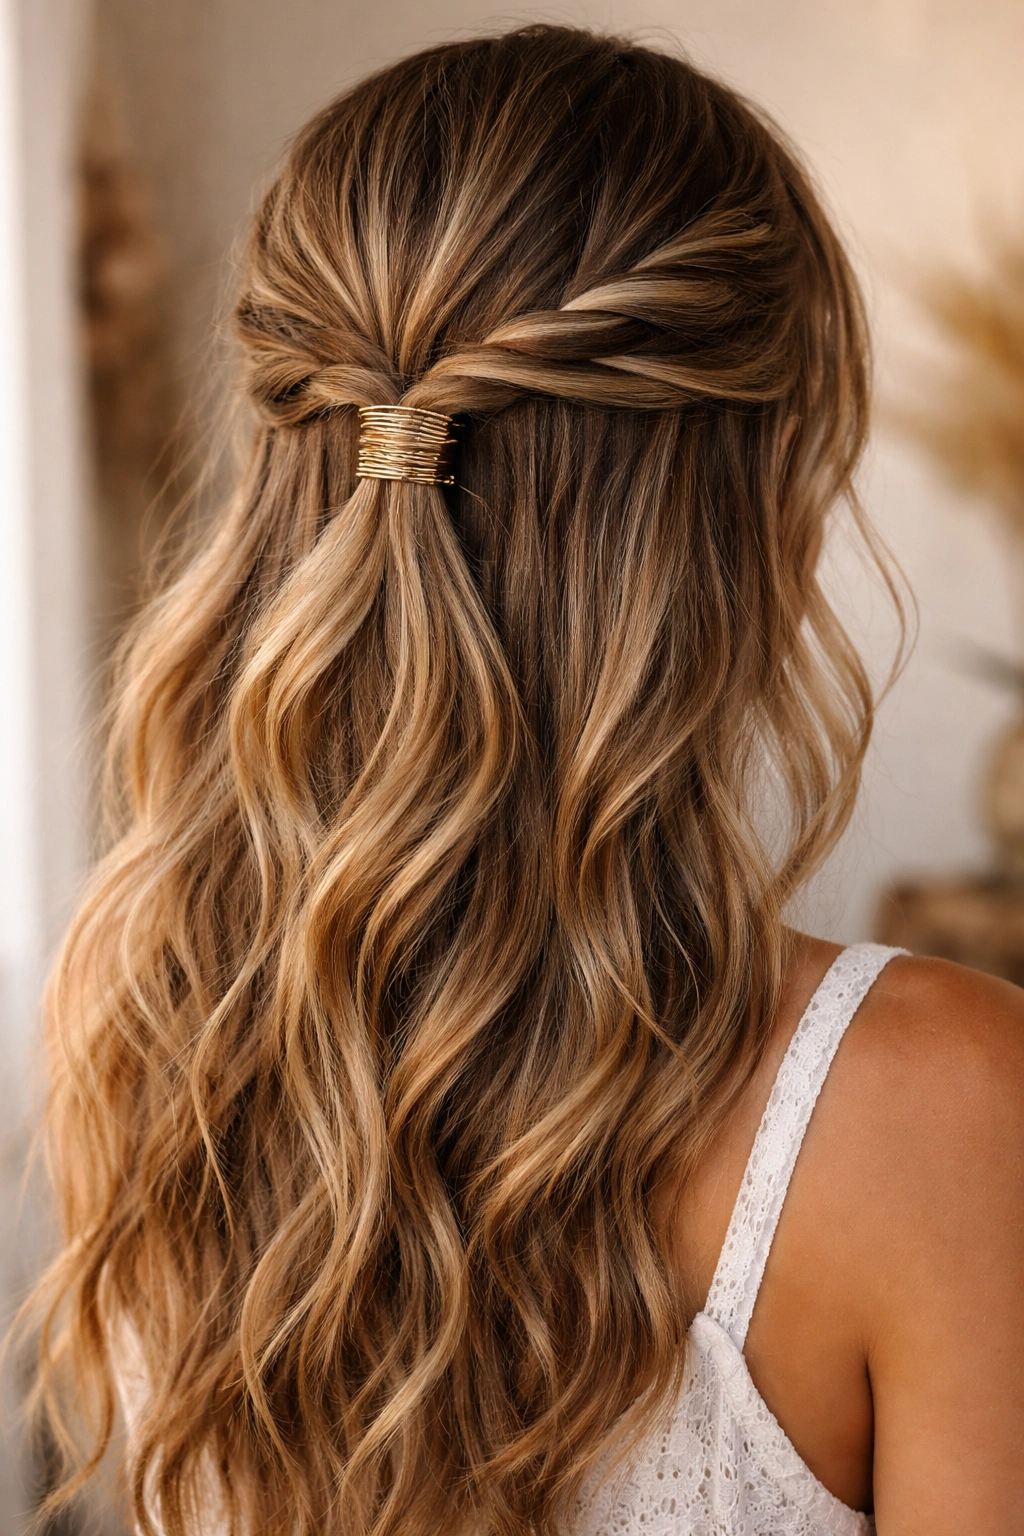
This is a boho style with a modern edge. You’re doing simple side twists and then wrapping a thin metallic cord, gold wire, or decorative thread around the base of your half-up. The metal catches light beautifully and adds an unexpected element that feels both artisanal and contemporary.
Choosing Your Metal Wrap
Gold cord or thread is classic and romantic. Silver feels cooler and more modern. Copper or rose gold bridges the two aesthetics. You can find decorative wraps and cords at craft stores or online, and they typically cost just a few dollars.
How to Execute This
- Do your basic twisted half-up (take a twist from each side and secure at the back)
- Take your metallic cord and wrap it tightly around the base of your half-up, just where the elastic is sitting
- Wrap around 3-5 times so it’s visible but not overwhelming
- Tie off the cord ends and tuck them underneath the half-up so they’re hidden
- For extra boho flair, let some of the cord ends dangle slightly (just an inch or two)
Pro tip: You can also wrap the cord around your half-up ponytail holder itself before putting it in, which looks cleaner and more intentional.
11. Loose Waves Half-Up with Claw Clip
This might be the easiest style on this list, and it’s also one of the most effective. You’re creating loose, flowing waves throughout your hair and then using a decorative claw clip to secure a half-up section. Tortoiseshell, pearl, or metal claw clips are having a major moment and they’re incredibly photogenic.
Why This Works in Boho Context
Claw clips are slightly retro, which adds to the boho appeal. They’re visible and decorative, so they become part of the aesthetic rather than disappearing into your hair. This style looks effortlessly put-together while requiring minimal effort.
The Simple Steps
- Curl or wave your hair throughout using a curling iron, wand, or heat-free method
- Gather a section of hair from the crown area and smooth it back slightly
- Use a claw clip to secure the section at the back of your head (or off-center for more interest)
- Leave all your lower hair down in loose waves
- You can tease the crown slightly where the clip is to add texture and volume
Insider note: Tortoiseshell clips work with virtually any hair color, making this one of the most universally flattering styles.
12. The Double-Twisted Half-Up
This style involves two layers of twists for a more intricate look that’s still quite simple to execute. You’re doing one set of twists closer to your hairline, and a second set below that, both meeting at a central point at the back of your head. It creates visual complexity and dimension without being complicated.
Layering for Depth
By doing multiple twists instead of one, you’re creating texture and visual interest. This style photographs beautifully and looks polished without looking formal. It’s that sweet spot where it looks like you spent more time on your hair than you actually did.
Construction Method
- Take a thin section of hair from one side, close to your temple, and twist back toward your crown
- Secure this with a bobby pin at the center back
- Below that twist, take another section of hair from the same side and create a second twist
- Bring this second twist back and secure it with the first twist, so they’re intertwined
- Repeat the entire process on the other side
- The result is a layered, textured half-up with visual depth
Pro tip: Make sure your twists are loose enough to see the texture — tight twists look polished rather than boho.
13. Bubble Half-Up Ponytail
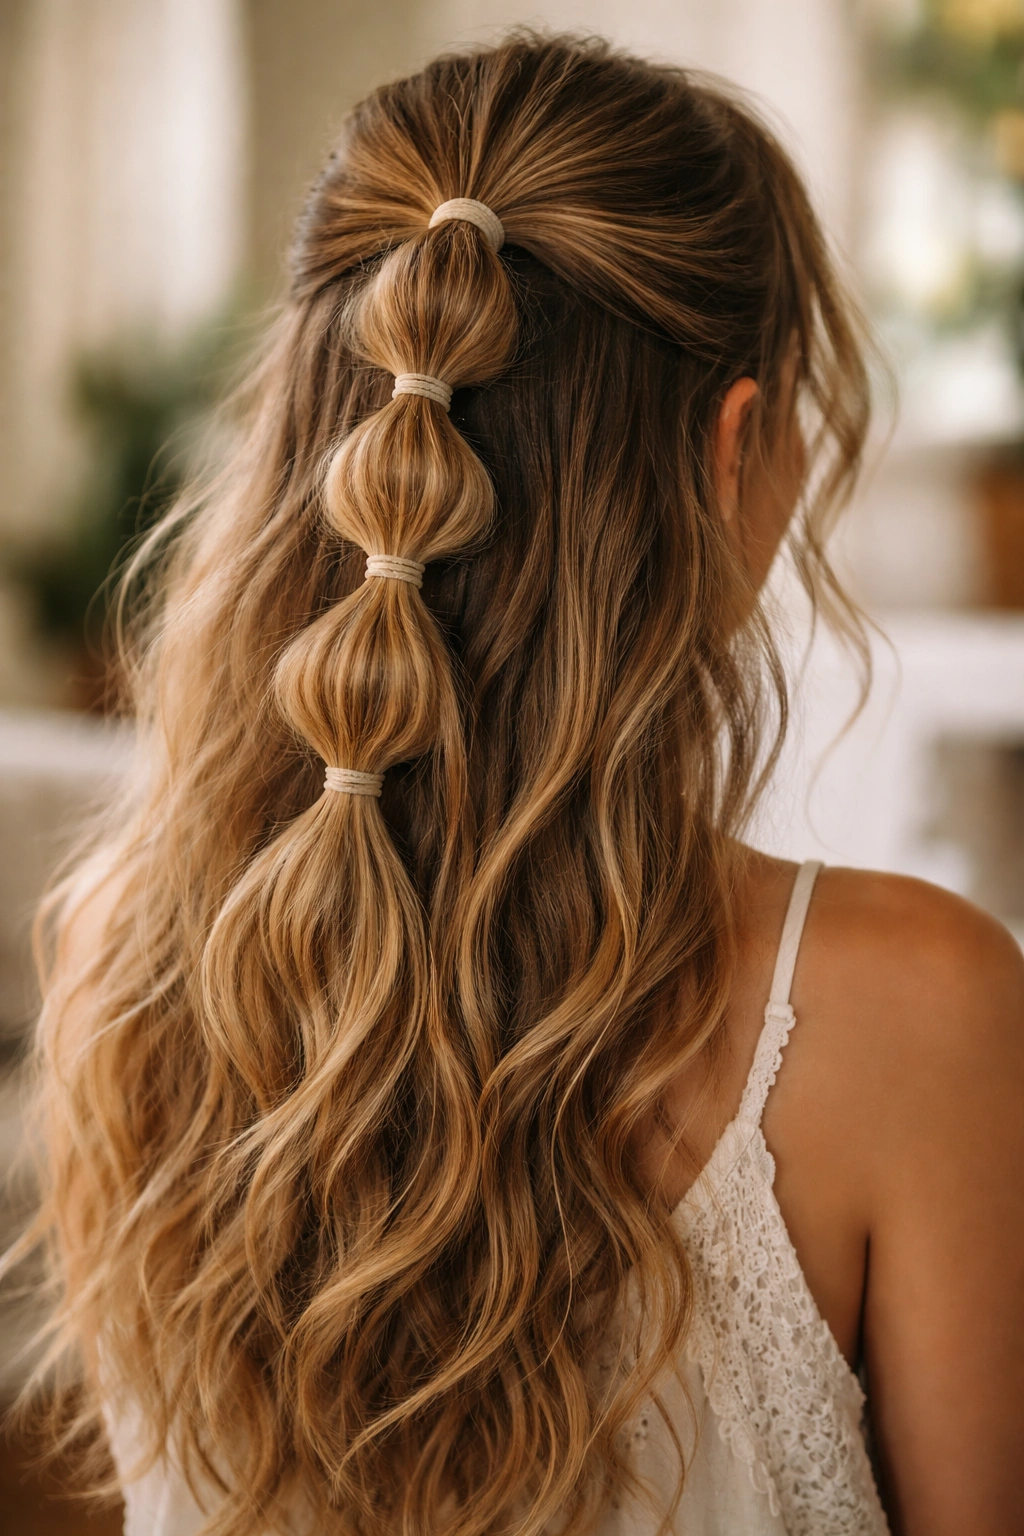
This playful style involves creating a ponytail with multiple sections divided by clear elastics, creating a “bubble” effect. It’s more whimsical than some styles on this list, but it’s absolutely boho and works beautifully on all hair types. The bubbles can be tight or loose depending on the vibe you want.
When Bubble Ponytails Work Best
This style is fun for casual settings, creative events, or when you want something eye-catching but still practical. It works on wavy, straight, and curly hair alike. You can make the bubbles deliberate and structured, or loose and organic.
Creating the Bubble Effect
- Gather the top half of your hair into a ponytail at your crown (don’t make it too tight)
- Secure with a clear elastic
- About 2-3 inches down from the first elastic, secure another clear elastic, gathering the hair in between
- Continue adding elastics down the length of the ponytail, spacing them 2-4 inches apart
- Gently pull each bubble section outward and upward to create a fluffy, voluminous look
- Leave the remaining hair below the last bubble down in waves or curls
Worth knowing: This style holds better if you use a light texture spray first — it gives the hair something to grip as you pull the bubbles.
14. Half-Up Braided Ponytail
This combines the structure of a braid with the versatility of a half-up ponytail. You’re braiding a section of hair from the crown down, and then gathering that braid with the rest of your half-up at the back of your head and securing it into a soft ponytail. It’s one style that reads as both casual and intentional.
Why This Hybrid Style Works
You get the visual interest of a braid, the practicality of a half-up, and a bit more structure and polish than a basic half-up braid. It’s a style that works for work, play, and everything in between.
Building the Braid Ponytail
- Starting at your crown center, create a loose braid down the center back of your head (about 6-8 inches long)
- Stop braiding before you get to the nape of your neck
- Gather the braid together with the remaining loose hair from your sides and back
- Secure everything into a ponytail at the back of your head with an elastic
- Gently loosen the visible braid to add texture and softness
Pro tip: You can secure the ponytail lower (at the nape) or higher (mid-back) depending on the look you want — lower feels more casual, higher feels more polished.
15. Side-Swept Waterfall Braid Half-Up
A waterfall braid is one of the most romantic braiding styles, and when you incorporate it into a half-up, you get maximum boho impact. You’re creating a braid that drops sections of hair as it goes (like a waterfall), eventually securing it into a half-up ponytail. It looks intricate but is easier than you’d think.
Understanding the Waterfall Mechanism
As you braid, you release one strand from the braid and let it fall loose, replacing it with a new strand. This creates the waterfall effect. The released strands frame your face beautifully and create a soft, romantic aesthetic.
How to Execute It
- Starting at one temple, create a three-strand braid that angles back toward your crown
- As you braid, release one strand each time you cross (letting it fall loose) and replace it with a new strand of hair from the side
- Continue this pattern, moving back toward the center of your head
- Once you reach approximately the center back, gather the remaining braid with your other half-up hair and secure into a ponytail
- The waterfall effect should create soft, frame-around-face strands
- Leave your lower hair down in loose waves
Insider note: This style is easier than a traditional waterfall braid because you’re not trying to create a complete circle — you’re just getting it to the back of your head.
16. Twisted Half-Up with Hair Sticks or Pins
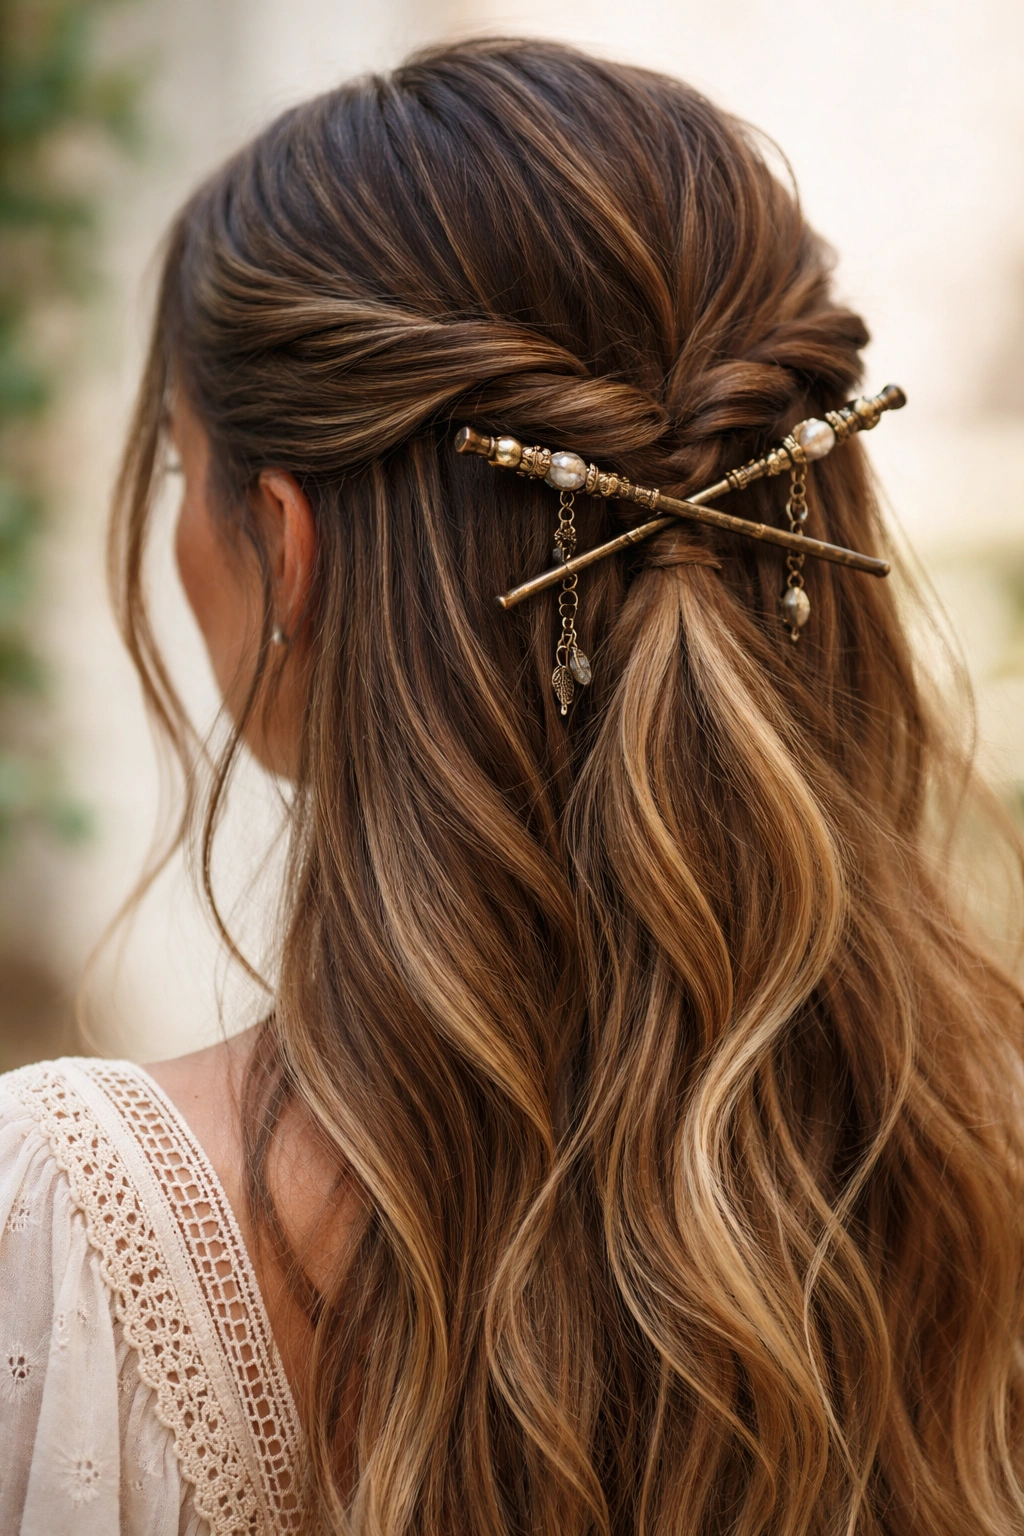
Hair sticks and decorative pins are having a major moment, and they’re perfect for boho styling. You’re doing a basic twisted half-up, but instead of securing with bobby pins, you’re using a pair of decorative hair sticks to run through the twist. This looks incredibly artistic and feels more intentional than a standard half-up.
The Appeal of Hair Sticks
Hair sticks feel handcrafted and artisanal, which is the essence of boho. They’re also functional art — beautiful enough to be a design element. You can find them in wood, metal, ceramic, or decorated with stones.
Using Hair Sticks Correctly
- Create your basic twisted half-up, but don’t secure with bobby pins yet
- Take a pair of decorative hair sticks and run them horizontally through the base of your twists, crossing them as they go through
- The sticks should run through the hair at the center back of your head, holding the twists in place
- Adjust the sticks so they’re balanced and symmetrical (or asymmetrical, depending on your preference)
- The twists should be held securely, and the sticks themselves should be visible and decorative
Pro tip: Make sure your twists are thick and textured enough to hold the sticks securely — thinner twists might slip.
17. Romantic Half-Up with Delicate Hairline Braids
This ethereal style involves creating tiny, delicate braids right at your hairline on either side of your face, and then pulling these small braids back into your half-up. The result is incredibly romantic and works beautifully in photographs.
The Delicate Detail That Makes the Difference
These hairline braids don’t need to be long or thick. They’re just small accents that frame your face and add a detail-oriented boho vibe. It’s one of those styles that looks way more complicated than it actually is.
How to Create It
- Take a very small section of hair right at your hairline on one side (about the thickness of a pencil)
- Create a tight, small three-strand braid that runs along your hairline toward the back
- Secure the braid end with a tiny clear elastic
- Repeat on the other side with another hairline braid
- Gather both small braids with your other half-up hair and secure everything into your half-up ponytail
- The small braids should frame your face prettily
- Leave lower hair down in waves or curls
Worth knowing: These small braids are easier on hair that has a bit of texture or a day or two of natural oils — they hold better than freshly-washed hair.
18. Textured Half-Up with Wispy Face-Framers
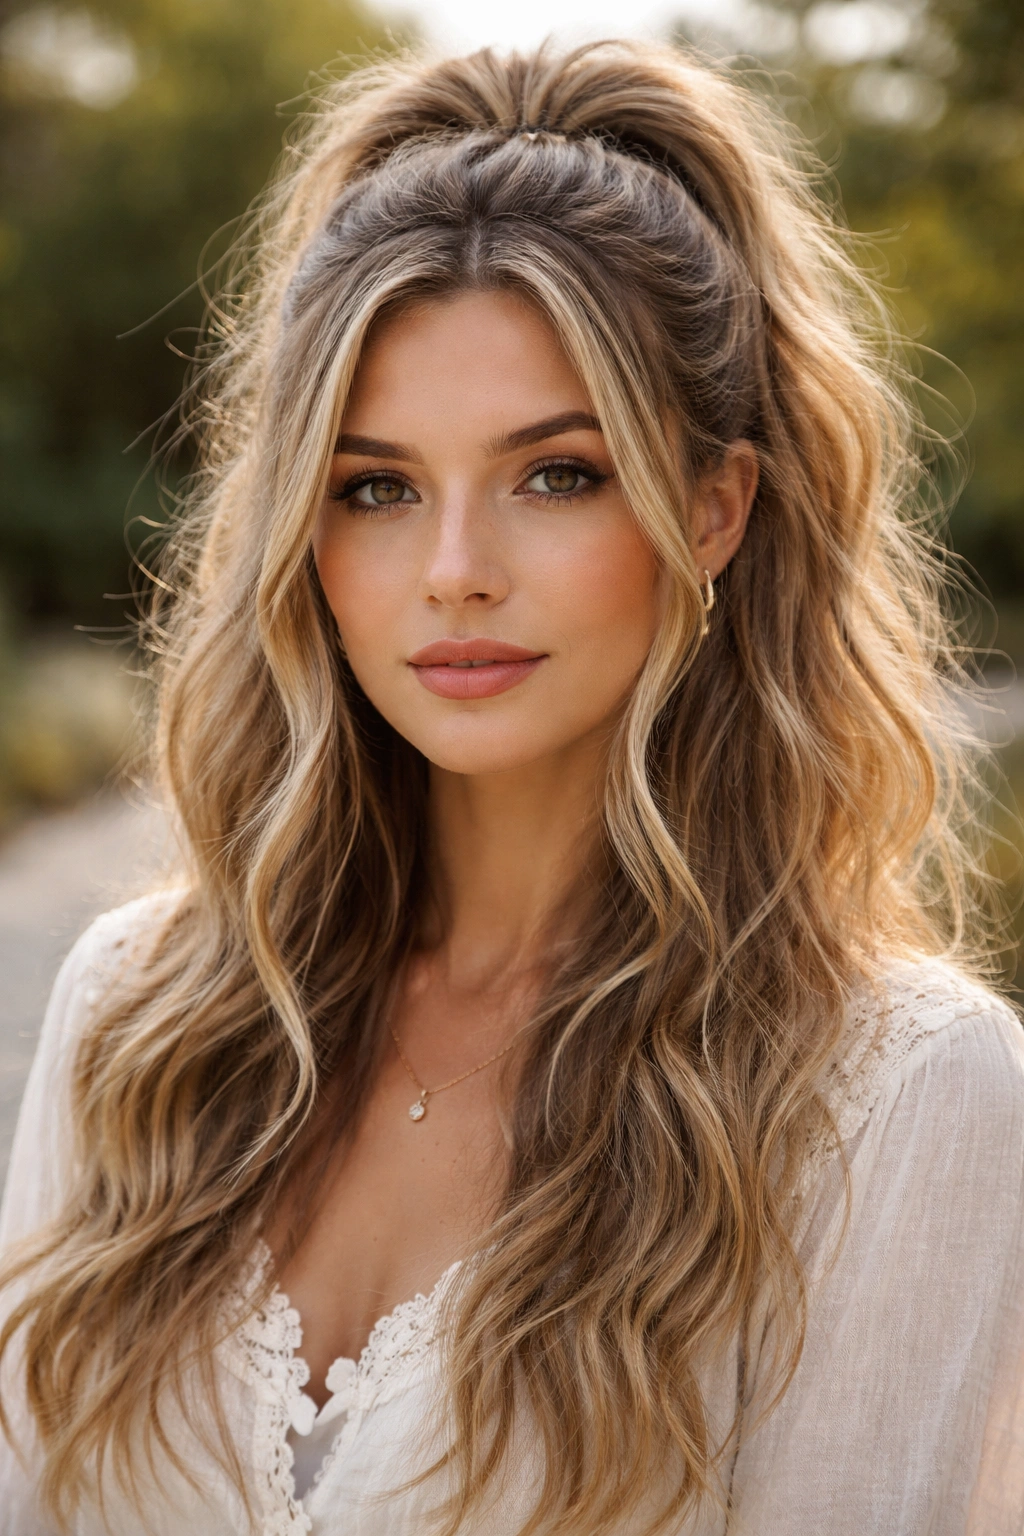
This is the ultimate easy-boho style: you’re gathering the top half of your hair into a half-up ponytail and then strategically pulling out a few face-framing pieces. The result should look naturally tousled, with just the right amount of intentional messiness. Texture is everything here.
Why Simplicity Can Be the Most Boho
Sometimes the most bohemian look is the one that requires the least effort. A half-up with face-framers reads as effortlessly romantic — like you didn’t try too hard, you just naturally look this good. That’s the boho dream.
Creating the Intentionally Imperfect Look
- Gather your hair at the crown into a half-up ponytail, but don’t make it super neat or tight
- Deliberately pull out a few strands from around your face on both sides (one behind each ear, one or two near your temples)
- Tease these face-framing pieces slightly with a brush or your fingers to add texture
- You can curl these pieces with a curling iron for extra dimension, or leave them wavy
- The rest of your hair should be wavy or curly, creating an overall textured appearance
- A light texture spray keeps everything soft and undone-looking without being stiff
Pro tip: The key to this style is not over-perfecting it. Crooked ponytail? That’s better. Loose pieces? That’s the goal. Bumpy hair that looks like you haven’t brushed it? Absolutely perfect.
Final Thoughts
The beauty of boho half-up half-down styles is that they’re infinitely customizable and forgiving. You can start with any of these eighteen styles and adapt them based on your hair type, the occasion, your mood, and whatever accessories or products you have on hand. The fundamental principle of boho styling — that romantic, slightly undone, artfully imperfect aesthetic — ties them all together.
What makes these styles work is that they’re not about precision or perfection. A slightly crooked braid, loose flyaways, and uneven twists aren’t flaws to fix — they’re features that add to the boho charm. Whether you’re doing something as simple as a twisted crown or as intricate as a waterfall braid, the goal is always to look effortlessly beautiful. Practice a few of these styles when you have time and patience, and soon you’ll be able to pull off any of them in just a few minutes. Your half-up half-down options are now endless.