French braids have become a staple of modern wedding aesthetics, and when combined with the romantic half-up half-down silhouette, they create a hairstyle that feels both polished and effortlessly elegant. The beauty of this approach lies in its versatility — whether you’re going for classic romance, bohemian whimsy, or modern sophistication, a French braid half-up half-down style can be tailored to match your wedding vision, dress, and personal style.
What makes these styles so effective for weddings is how they balance structure with movement. The braid section keeps hair off the face and neck, creating a clean, intentional look that photographs beautifully, while the released hair below flows freely, adding softness and dimension. This combination flatters nearly every face shape and works with virtually any wedding dress aesthetic — from traditional white gowns to colored dresses and unconventional styles.
The key to executing these styles lies in understanding the fundamentals of French braiding, the importance of texture and prep, and how to integrate wedding-appropriate accessories like pins, combs, flowers, and ribbons. Throughout this guide, you’ll discover twelve distinct interpretations of the French braid half-up half-down theme, each with its own character, application techniques, and moment-appropriate styling suggestions.
1. Classic Romantic French Braid Half-Up
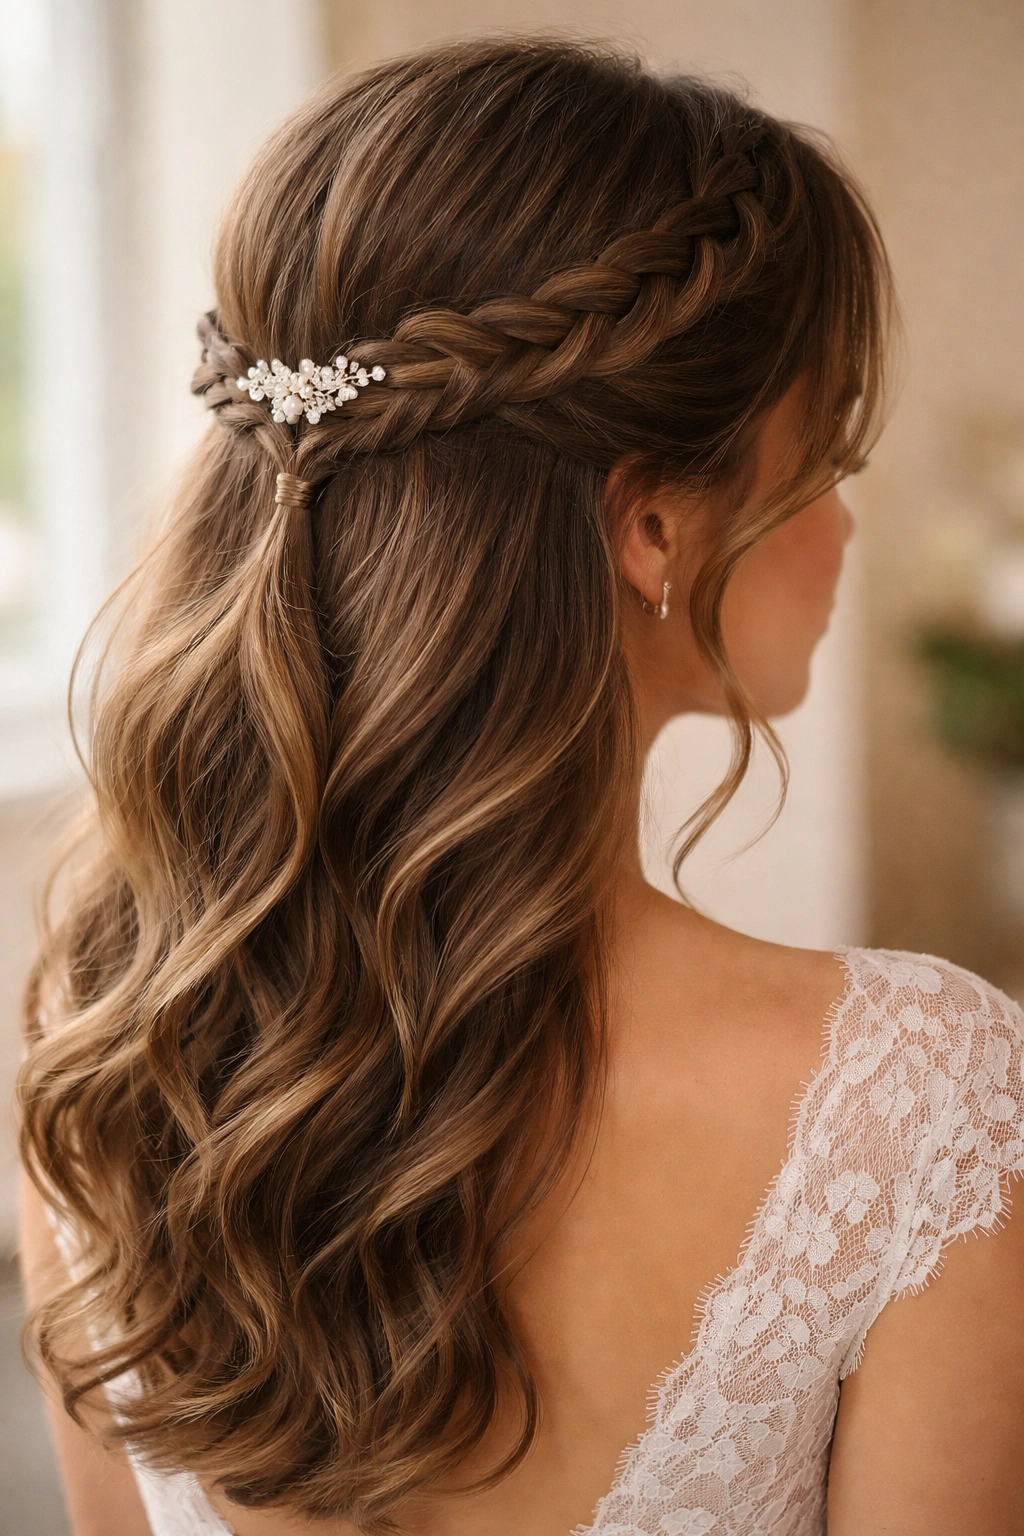
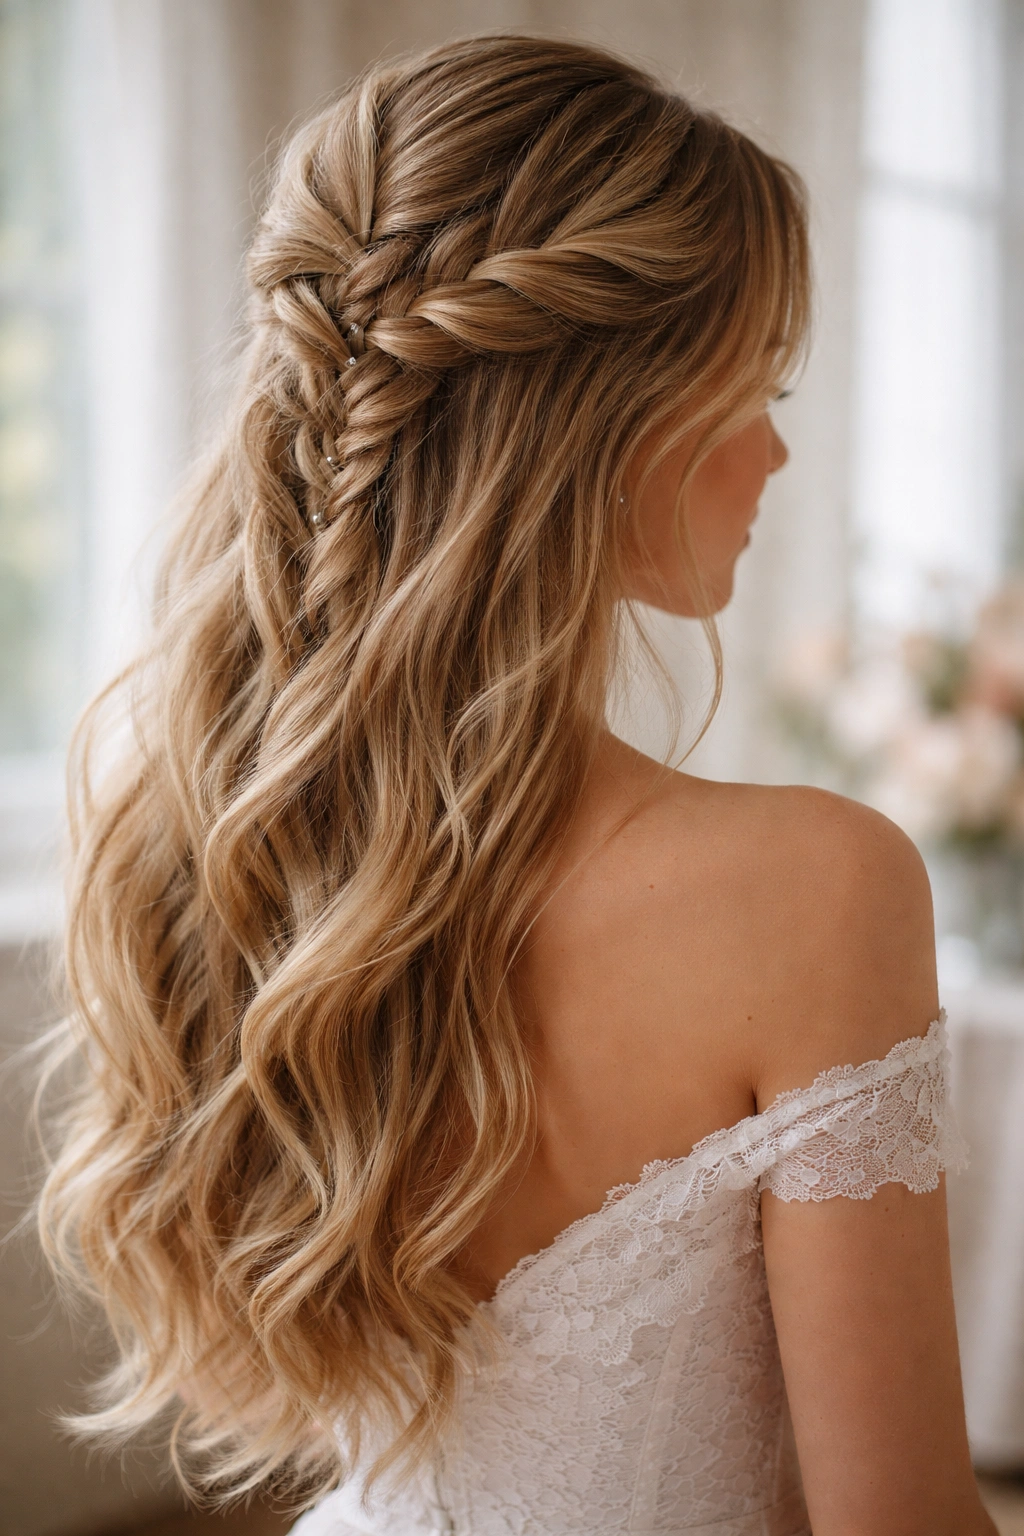
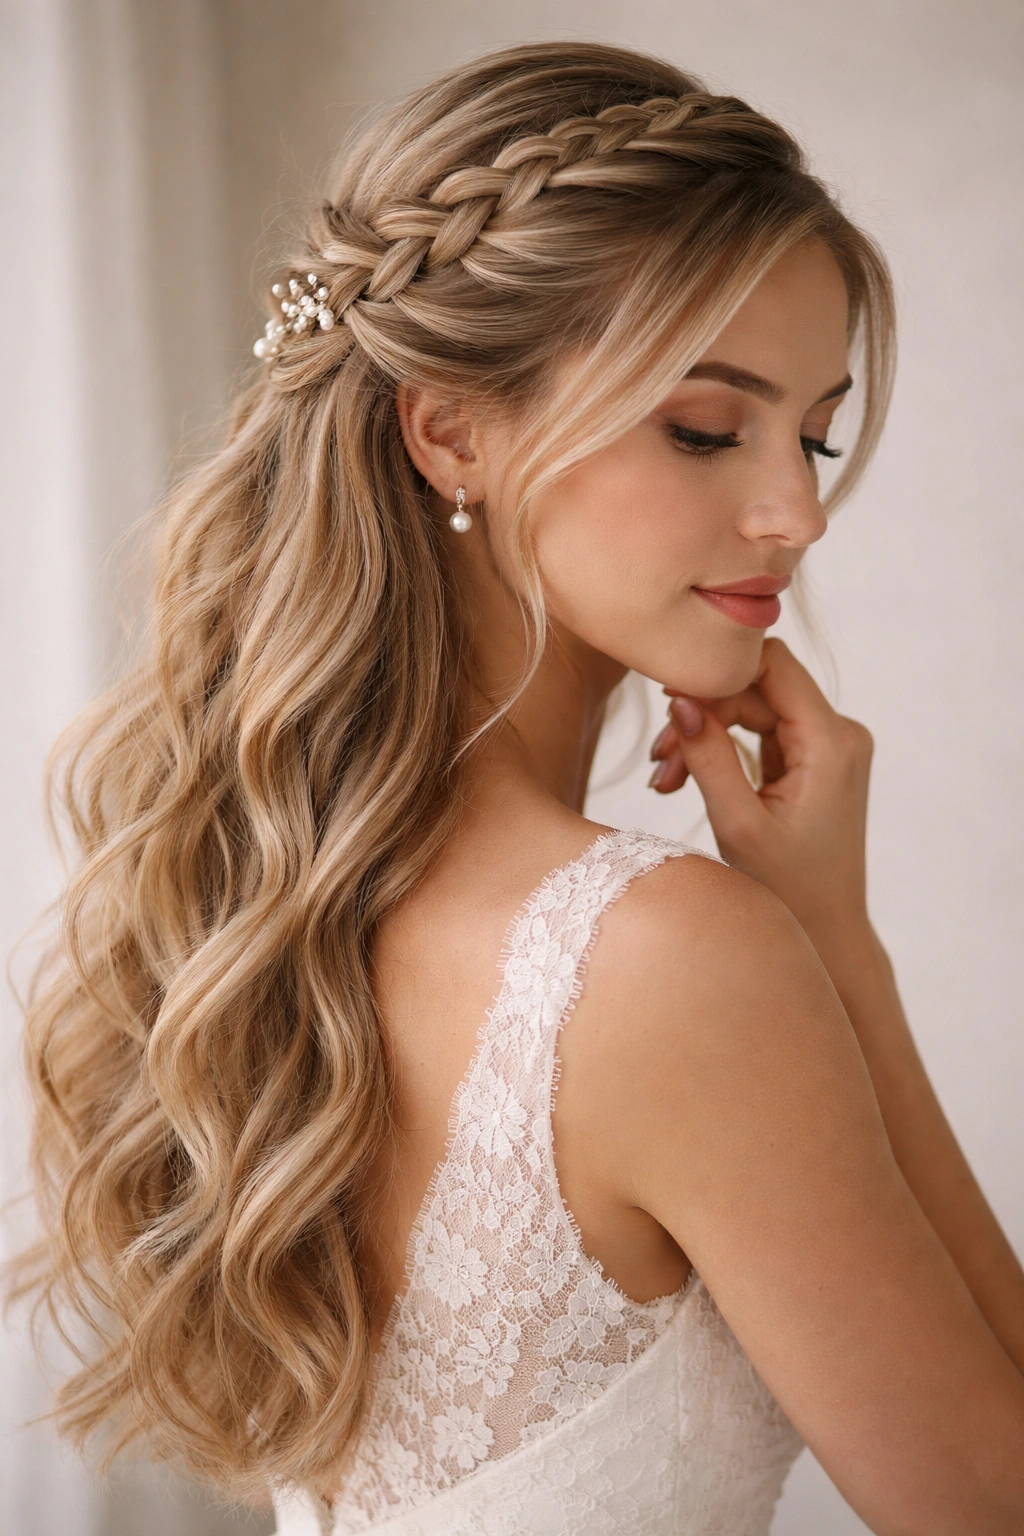
This is the epitome of timeless bridal elegance — a single, centered French braid that travels from one side of the head to the other, gathering hair as it goes, then secured at the back with an elegant clip or pin. The style feels intentional without appearing overly intricate, making it ideal for traditional weddings, garden ceremonies, or any bride who prefers understated sophistication.
Why It Works for Weddings
The centered French braid creates a natural frame for the face while maintaining an air of effortless refinement. This style photographs exceptionally well from all angles, which matters when you’re capturing moments from multiple photographers and guests’ phones throughout the day. The single braid also tends to hold beautifully through a full day of celebration without requiring midday touch-ups, making it practical alongside its aesthetic appeal.
How to Achieve It
Start with textured, slightly wavy hair — either day-old waves or waves created with a curling iron before braiding. Section off the top half of your hair horizontally from ear to ear. Beginning at one temple, start a standard French braid by crossing sections over one another and continuously incorporating new hair as you move back toward the opposite ear. Keep the braid snug but not uncomfortably tight; wedding-day comfort matters. Once you’ve incorporated all the top-section hair, secure the braid at the center back of the head with a decorative clip, comb, or bobby pins concealed beneath released hair.
Pro Tips for Long-Lasting Perfection
Use a light-hold hairspray on the braided section before and after completing it — this locks texture in place without creating stiffness. If your hair tends to slip or won’t hold a braid well, backcomb the section you’re about to braid for extra grip. Consider having your stylist practice this style at a trial appointment; French braiding takes finesse, and knowing exactly how tight to braid ensures comfort throughout your wedding day.
2. Double French Braid Half-Up with Delicate Twists
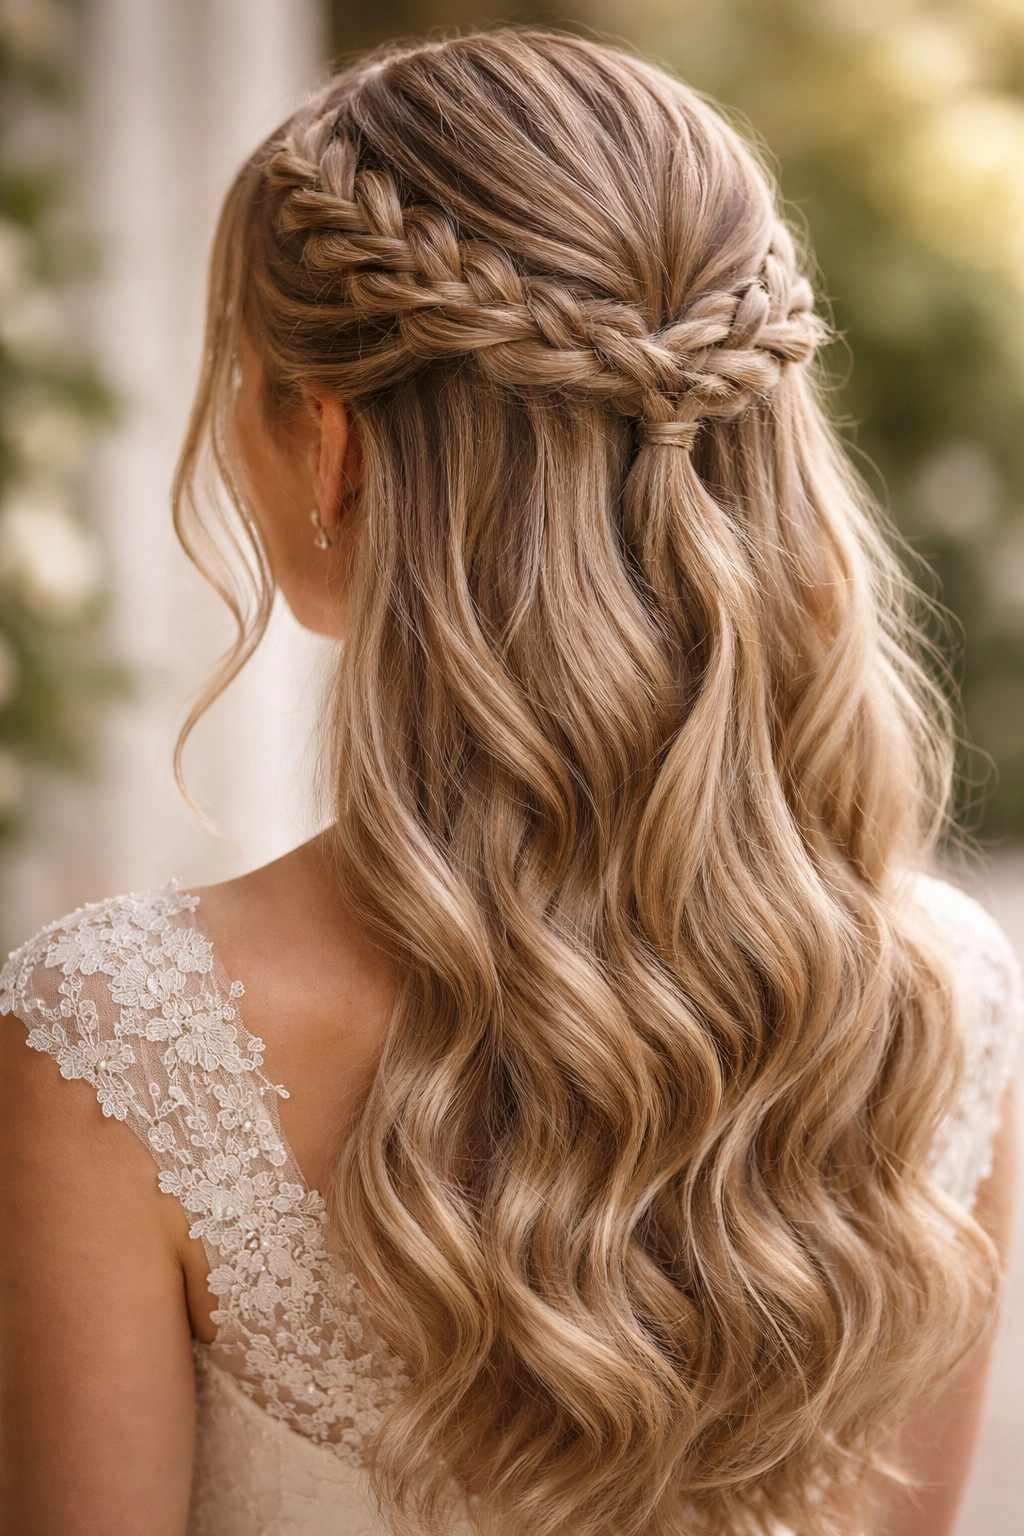
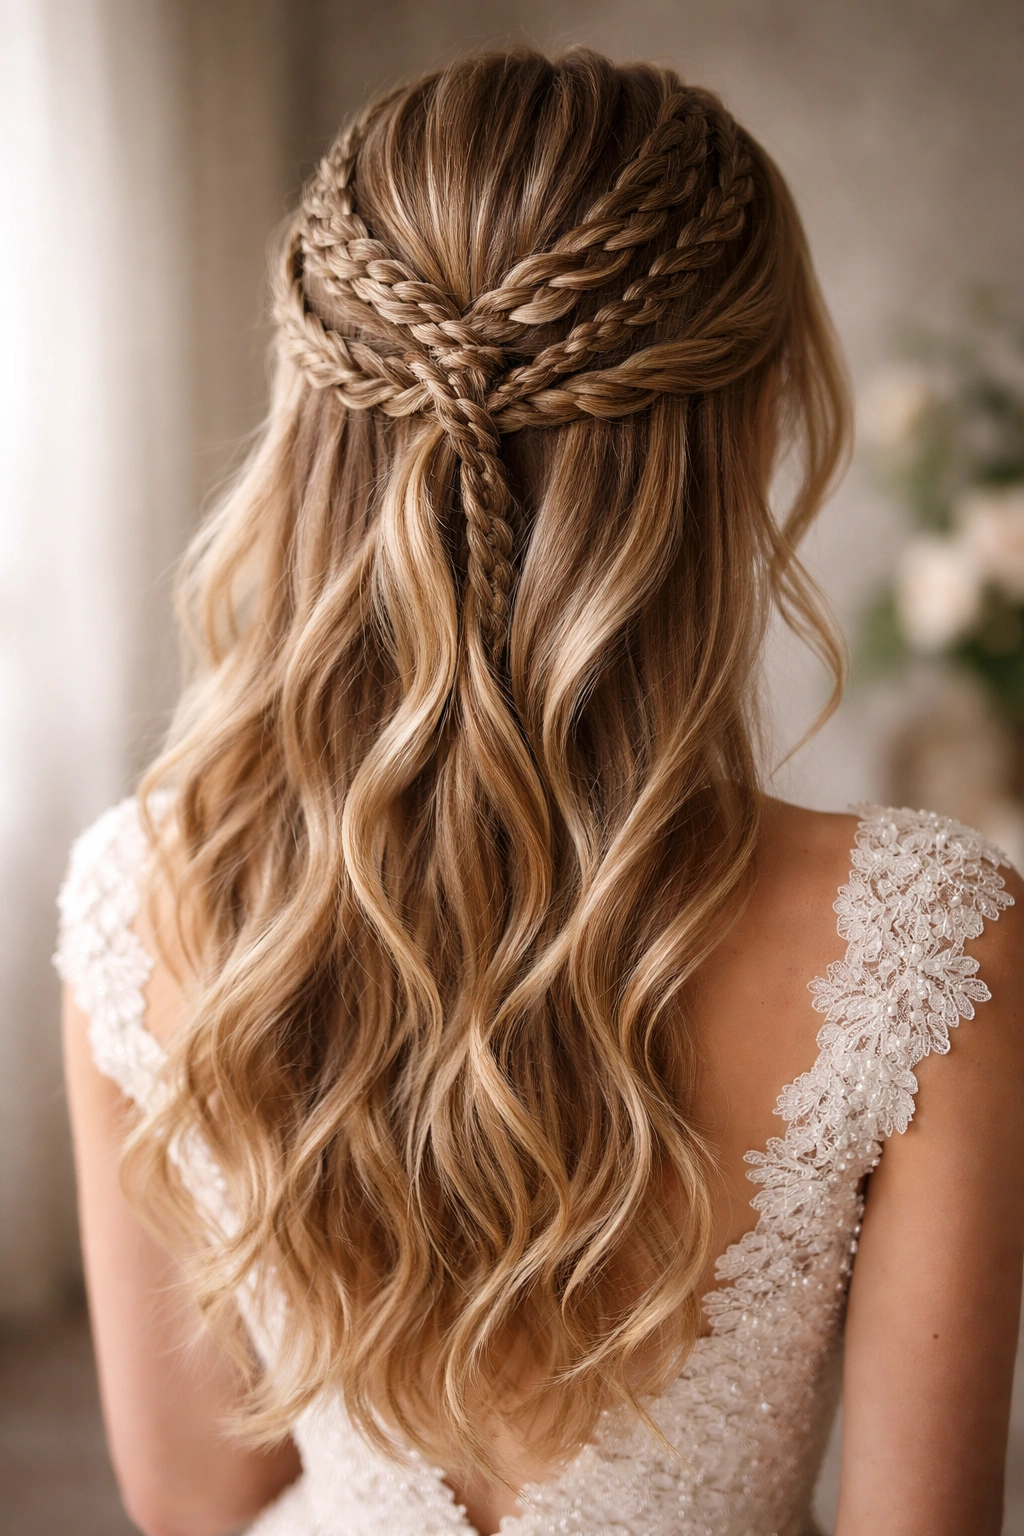
For brides who want more visual interest and dimension, this style features two French braids running parallel from the temples toward the center back, where they meet and merge into a single secured section. It’s more intricate than a single braid but remains wearable for a full day without excessive styling demands.
Visual Impact and Wow Factor
Double braids create immediate impact — the symmetry feels architectural and intentional, while the parallel pattern draws the eye upward and emphasizes facial features. This style photographs exceptionally well in both close-ups and full-body shots, as the braids create compelling visual lines that add depth to images. The style reads as more elevated than a single braid while still feeling romantic rather than overly constructed.
Step-by-Step Technique
Section the hair down the center of the scalp from forehead to the back of the head, creating two equal halves. On one side, begin a French braid at the temple, angling it slightly toward the center back of the head. Repeat on the opposite side, ensuring both braids travel at approximately the same pace. As each braid reaches the center back, gently merge them together by weaving the final sections of one braid into the other, or secure both braids side by side using coordinating clips. Gently pull on each braid section to loosen and add volume — this creates the softness that keeps the style romantic rather than severe.
Styling Variations
Thin, delicate ribbons can be woven through each braid by threading them as you go, or added after braiding by gently tucking them under braid sections. Small baby’s breath flowers or spray roses can be tucked into the braids for a garden-wedding aesthetic. Pearl bobby pins placed along the outer edge of each braid add subtle sparkle without overwhelming the style.
3. Textured French Braid Half-Up with Waves
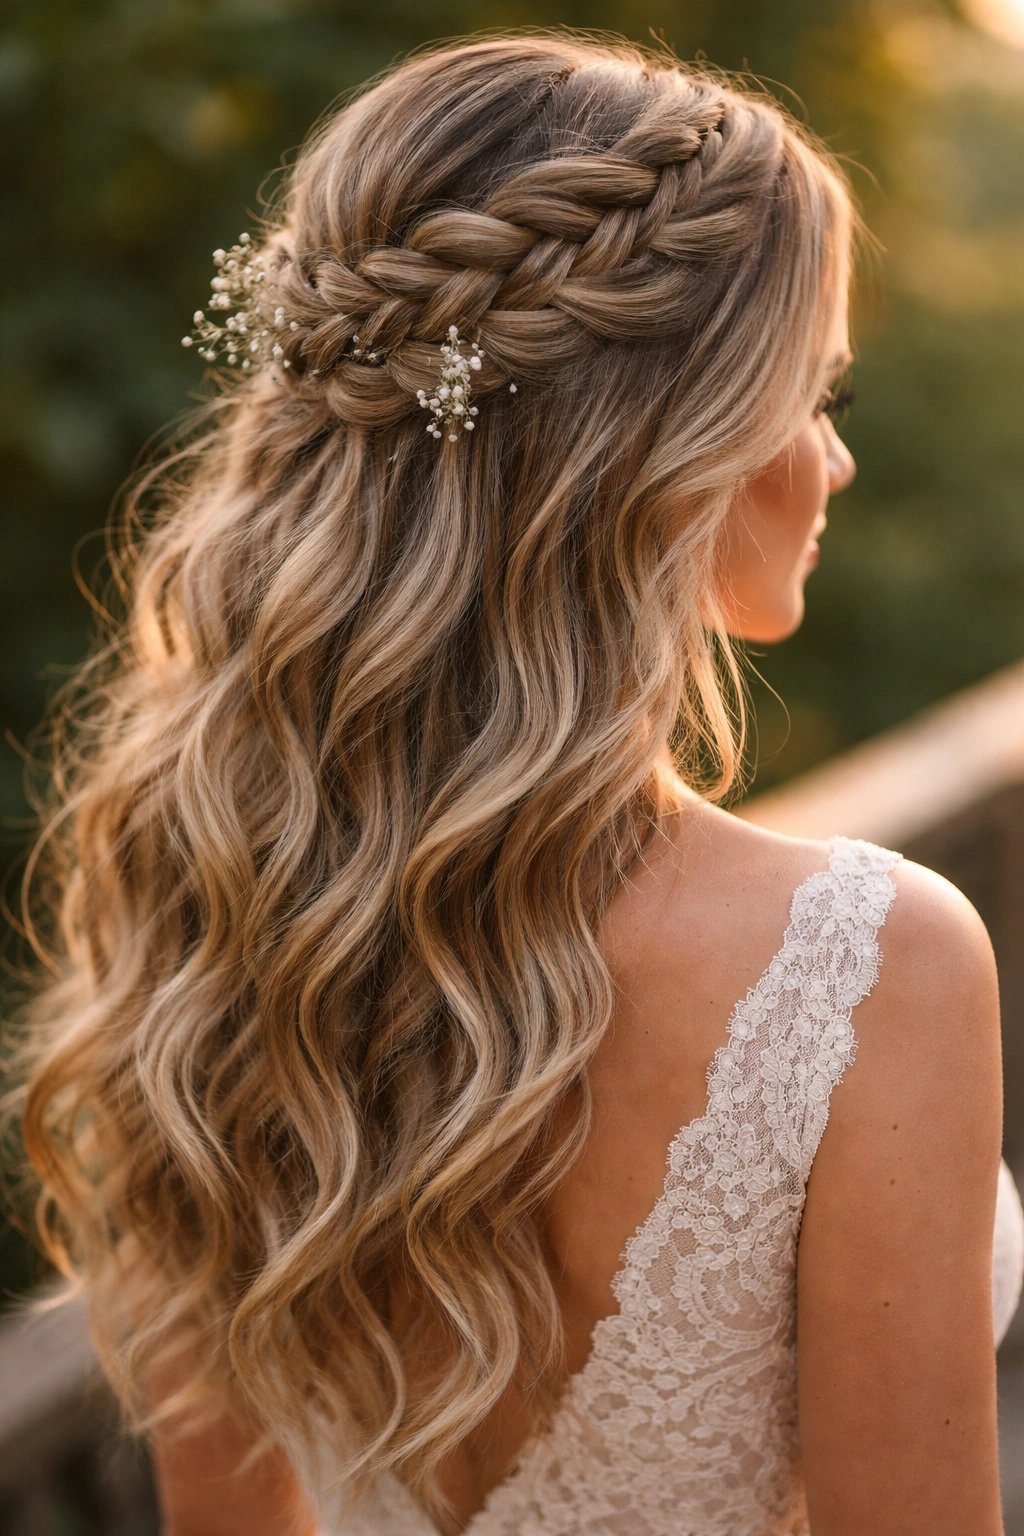
This version begins with intentionally wavy, texturized hair throughout, which creates a softer, more romantic appearance than a crisp braid alone. The combination of structured braiding with deliberately undone waves below creates beautiful contrast and feels modern-romantic rather than formal.
Creating the Perfect Texture Foundation
Start styling 30 to 45 minutes before the wedding if possible, allowing texture time to set. Use a curling iron to create loose waves throughout the entire head, working in 1.5 to 2-inch sections and leaving the curl wrapped around the iron longer than you normally would — this creates deeper, longer-lasting waves. Alternatively, use a waving iron (also called a crimper) to create subtle texture throughout, which photographs beautifully and provides excellent grip for the braid. Don’t fully brush out the waves; instead, use your fingers to gently separate and loosen them, creating a lived-in texture that feels romantic.
Braiding into Textured Hair
French braiding textured hair feels different than braiding straight hair — the texture grips differently and naturally wants to puff outward. This is the goal. As you braid, don’t pull the sections tight. Instead, braid loosely, then deliberately pull on the outer edges of each braid section to create volume and undone texture. This process, called “pancaking” the braid, makes it appear fuller and softer. The result reads as intentionally romantic rather than accidentally messy.
Why This Works for Wedding Photos
Textured, undone styling holds better through hours of movement and humidity compared to sleek, tight styles. The combination of structure and texture is photogenic from every angle — overhead shots show the braid detail, while profile shots showcase the waves flowing over the shoulder. This style remains stunning from dusk into evening light, when softer, less-defined styling often photographs better than crisp structures.
4. French Braid Half-Up with Floral Crown Integration
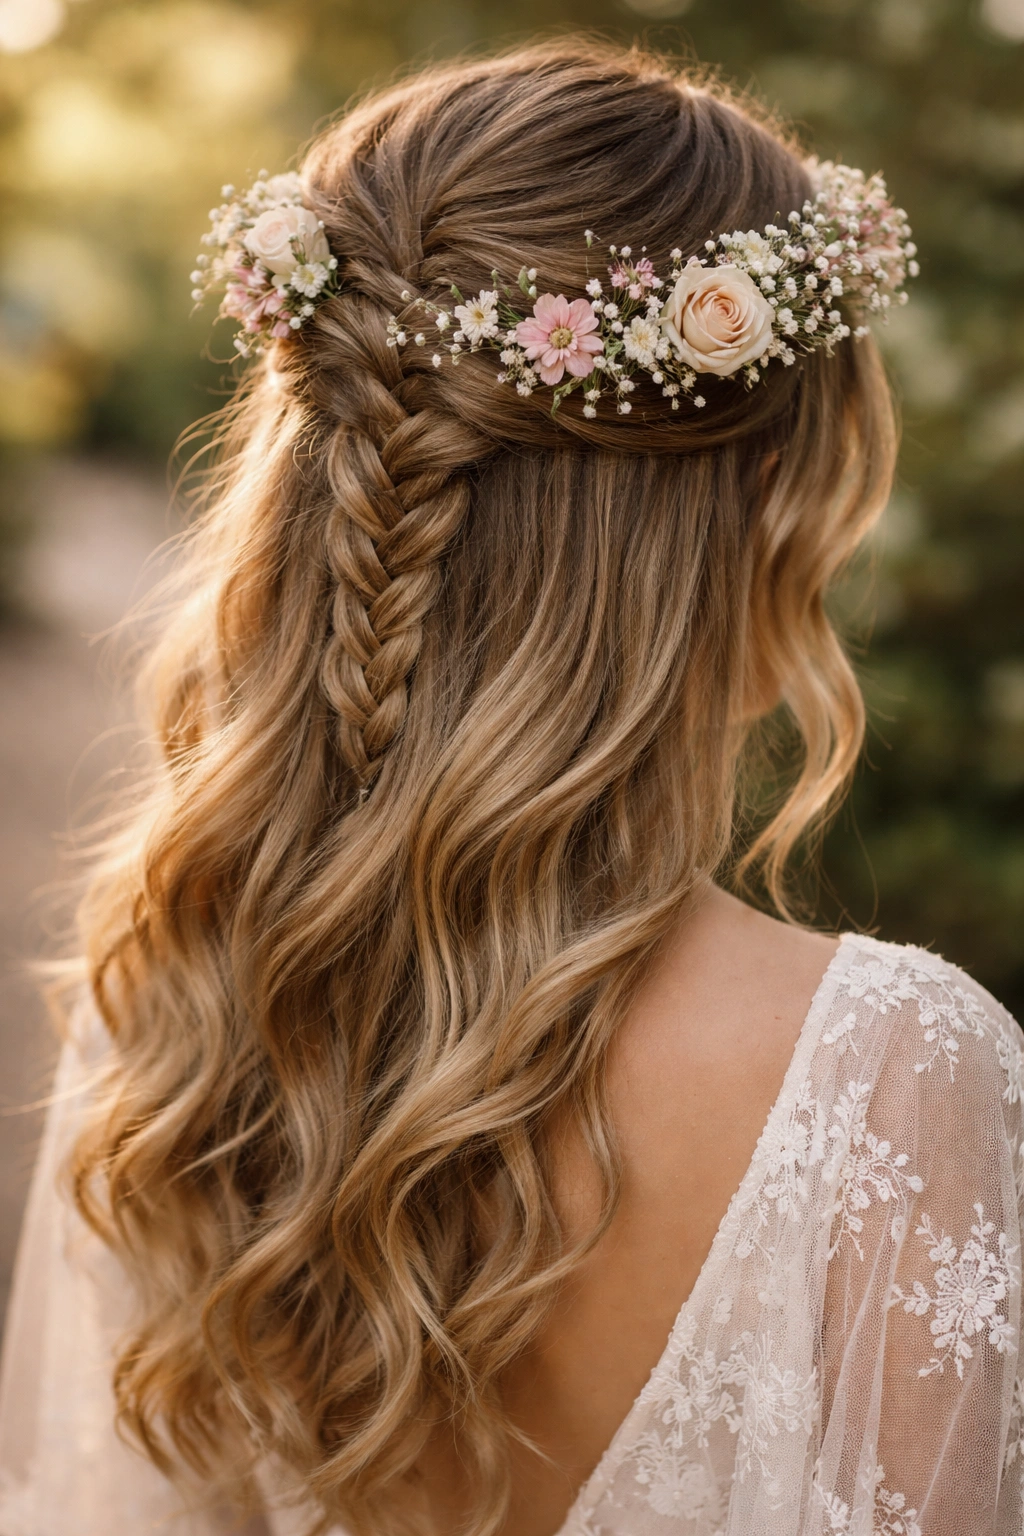
This style combines a French braid with a floral crown or circlet of flowers, creating a whimsical, garden-inspired aesthetic perfect for outdoor ceremonies, boho weddings, or brides who want a statement piece. The flowers sit atop the half-up section where the braid secures, creating an integrated rather than afterthought appearance.
Designing the Integrated Look
Work with your florist to design a crown that coordinates with your bouquet and complements your overall aesthetic. The crown should be lightweight enough to sit comfortably for hours and sturdy enough to stay in place amid movement and occasional wind. Avoid overly heavy arrangements that pull on the hair; instead, opt for distributed weight across the crown’s entire circumference. The braid should be positioned so the crown sits just above where the braid is secured — the flowers essentially crown the secured section, becoming part of the overall design.
Securing Everything Securely
Start by braiding the half-up section exactly as you would in the classic romantic style, but don’t fully secure it yet. Instead, gather the braided section and loosely clip it, leaving enough slack to slide the floral crown into place underneath. Once the crown is positioned, secure the braid fully, anchoring through both the braid and the crown’s base. Use bobby pins or small clips to ensure the crown doesn’t shift during the ceremony or reception — have a backup bobby pin or clip nearby in case of emergency.
Floral Choice and Longevity
Fresh flowers like spray roses, ranunculus, and waxflower tend to hold up better throughout a full day than delicate varieties like garden roses. If your wedding is outdoors or in a warm venue, consider preserved flowers or high-quality silk flowers in the crown itself, reserving fresh flowers for your bouquet. The combination of fresh and preserved often looks more seamless than all silk or all fresh, especially in photographs.
5. Twisted and Braided Half-Up Hybrid Style
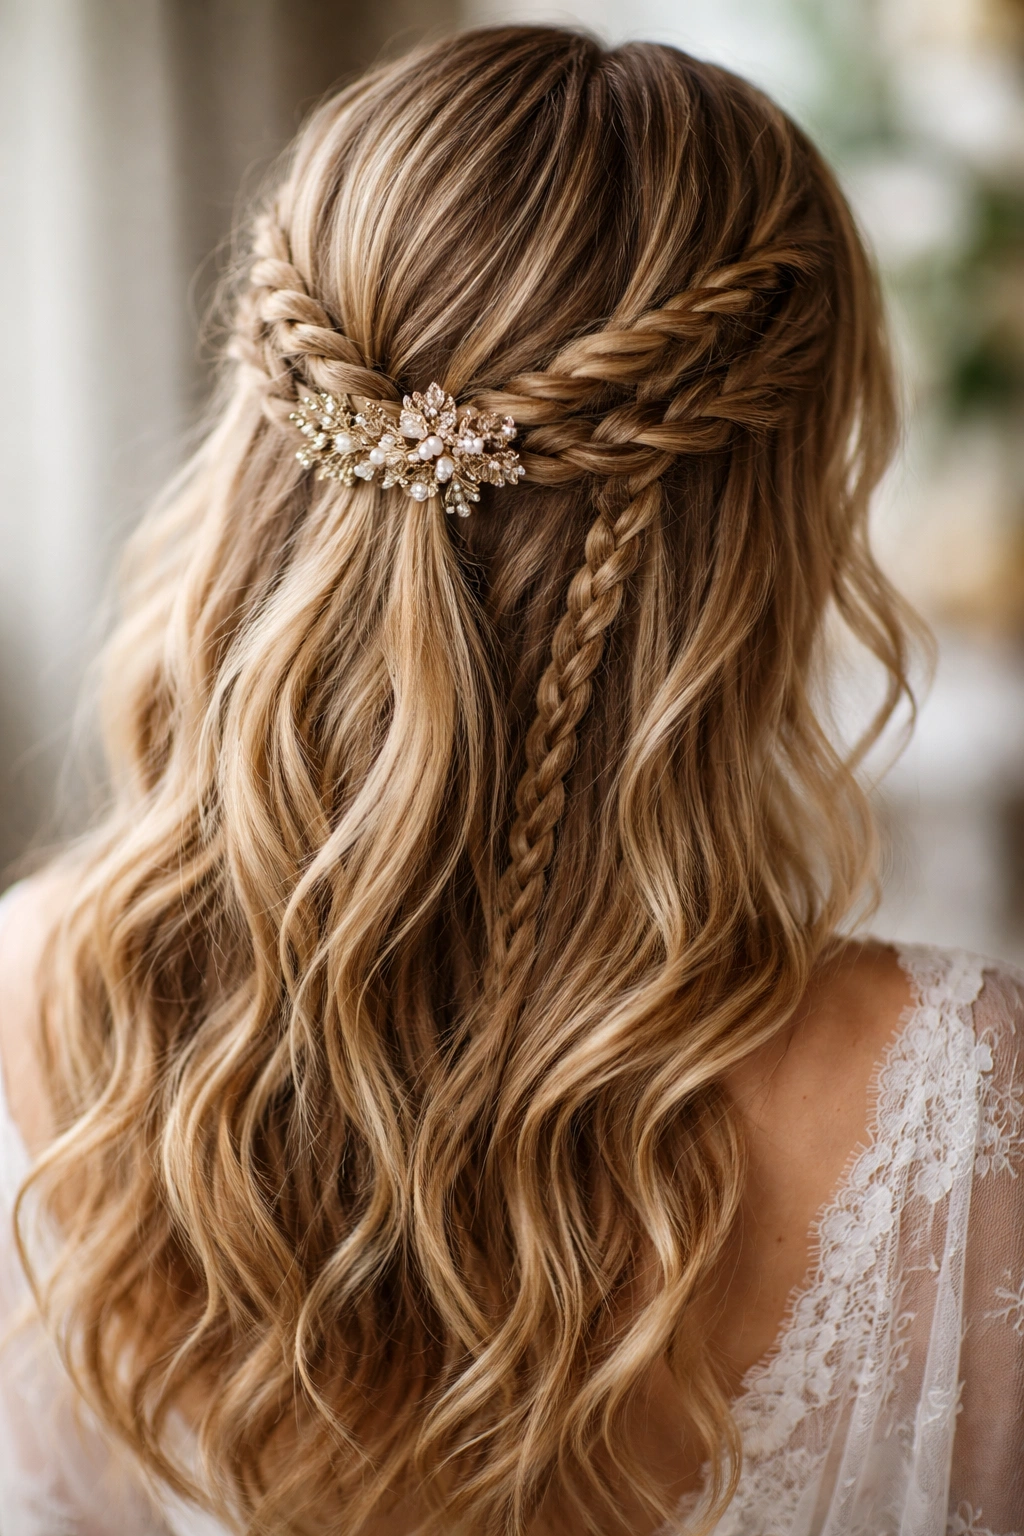
This style blends French braiding with loose twists, creating a more relaxed, artfully undone appearance than a traditional braid. It works beautifully for brides who want the sophistication of a half-up style without the structured formality of a full braid.
Combining Braids and Twists for Visual Interest
Start by creating one or two twists on either side of the part, running them back toward the center. A twist is simpler than a braid — you’re just twisting two sections of hair around each other — and it creates a lighter, more casual look. Combine these twists with one or two small French braids woven in between, allowing the entire arrangement to have organic, irregular spacing rather than perfect symmetry. The result feels like you spent hours artfully arranging your hair, when in reality the technique is simpler than a traditional double braid.
Securing the Hybrid Arrangement
Bring all the twisted and braided sections together at the center back, securing them with a single decorative clip or elastic covered with a thin strand of hair. The security of this arrangement depends on hairspray — use it liberally before combining sections and again after everything is pinned into place. The slight structural chaos of this style means it’s more prone to loosening than a traditional French braid, but that’s also part of its charm.
The Modern Appeal
This style photographs beautifully in candid shots, where the slightly undone quality reads as romantic and genuine rather than overly styled. It’s ideal for brides who want visible effort and intention in their hair but don’t want the look to feel rigid or overdone. The style also works well on various hair lengths and textures, adapting beautifully whether your hair is thick, fine, wavy, or straight.
6. Side-Swept French Braid Half-Up
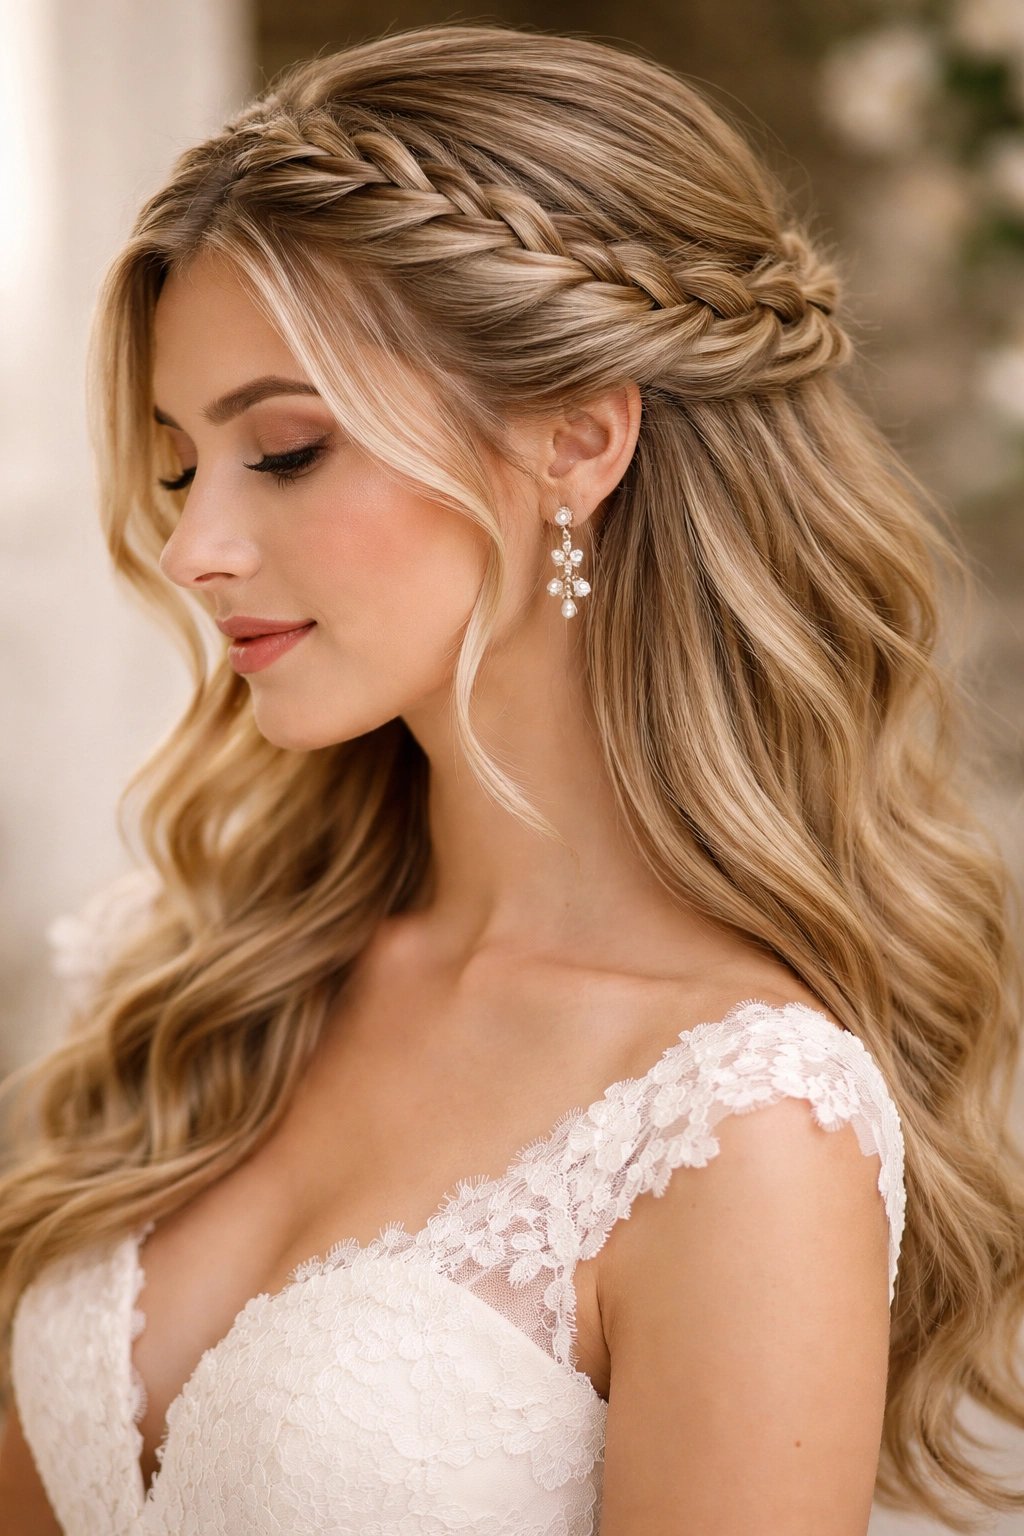
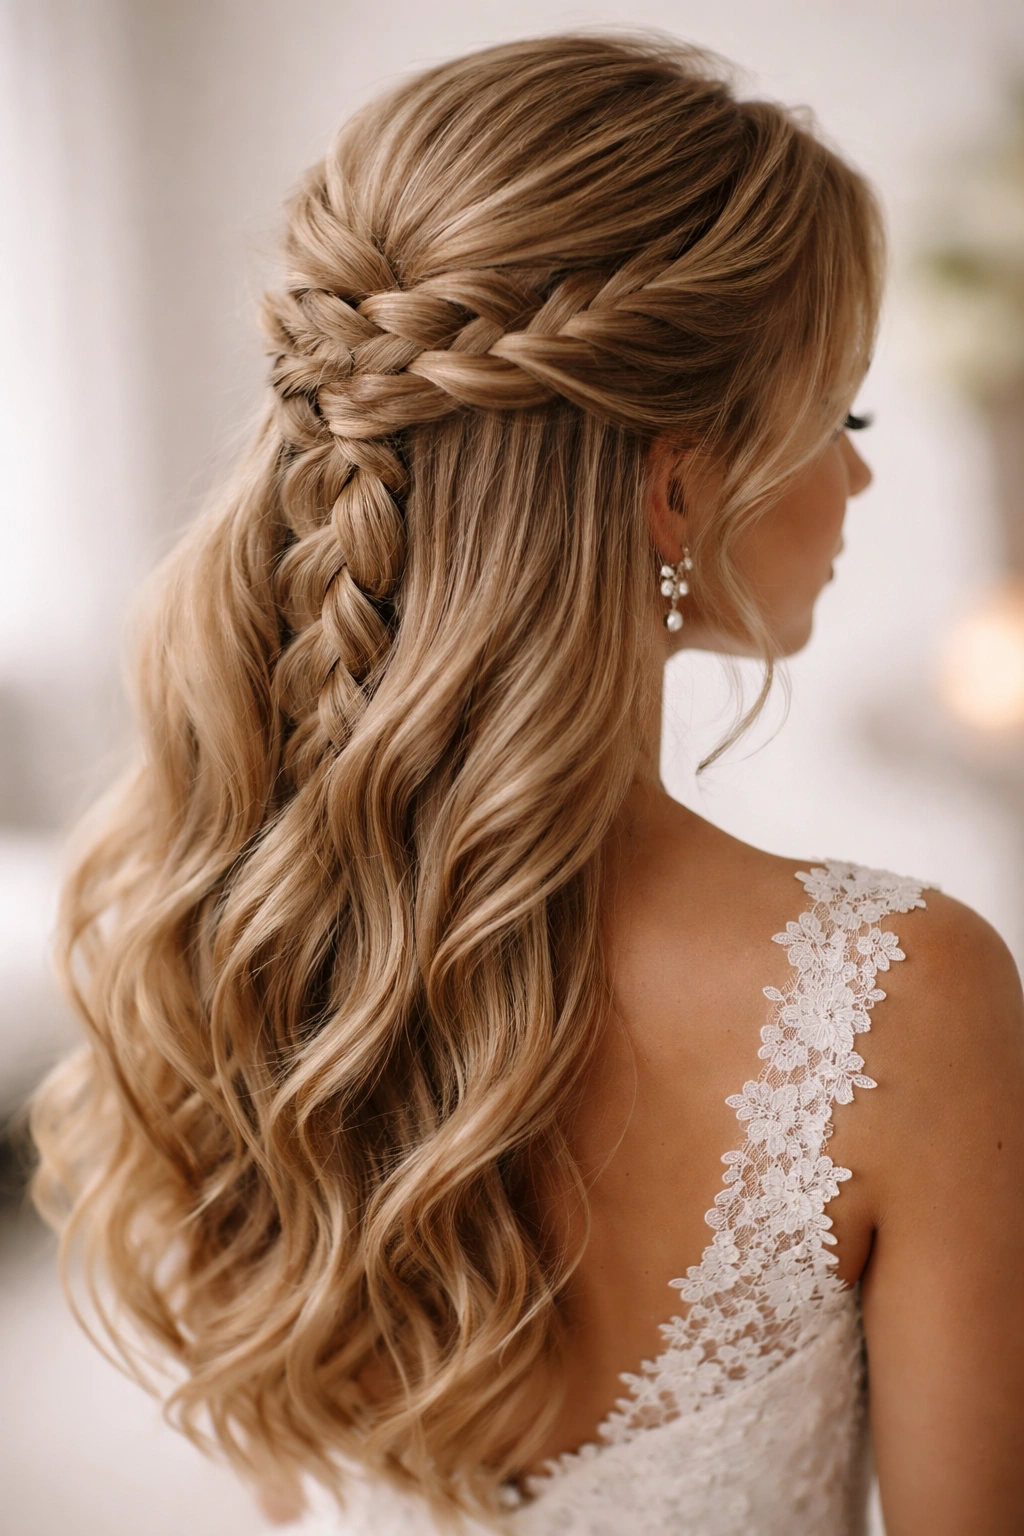
Instead of a centered braid, this style features a French braid that begins at one temple and sweeps diagonally back toward the opposite side of the head, creating an asymmetrical, elongating effect. The result is romantic, modern, and incredibly flattering on most face shapes.
Why the Asymmetrical Angle Works
A diagonal braid creates visual lines that draw the eye in a specific direction, often making faces appear longer and more defined. This works particularly well for round or square face shapes, where the diagonal line creates flattering angles. The asymmetry also feels more modern and less formal than centered styling, making it ideal for contemporary weddings or brides with less traditional aesthetics.
Creating the Diagonal Path
Part your hair slightly to one side of center, depending on which direction you want the braid to sweep. Begin the French braid at the temple on the heavier side of the part, then angle each braid section to travel diagonally back and slightly across the head. The key is deciding your endpoint before you start — most side-swept braids end somewhere at the back-opposite side of the head, roughly where you’d find the opposite ear if you drew a line straight back. Secure the braid there, allowing the remaining hair to fall forward over the shoulder on the braided side, creating a sweeping silhouette.
Styling Complementary to the Angle
Let longer sections of hair frame the face on the unbraided side, creating asymmetrical face-framing. Consider pulling a piece or two of framing hair forward and gently wrapping it around your finger to create a soft wave that falls alongside your cheek. The overall effect should be directional and intentional, with the braid guiding the viewer’s eye in one graceful movement rather than distributed equally across the head.
7. Fishtail French Braid Half-Up Elegance
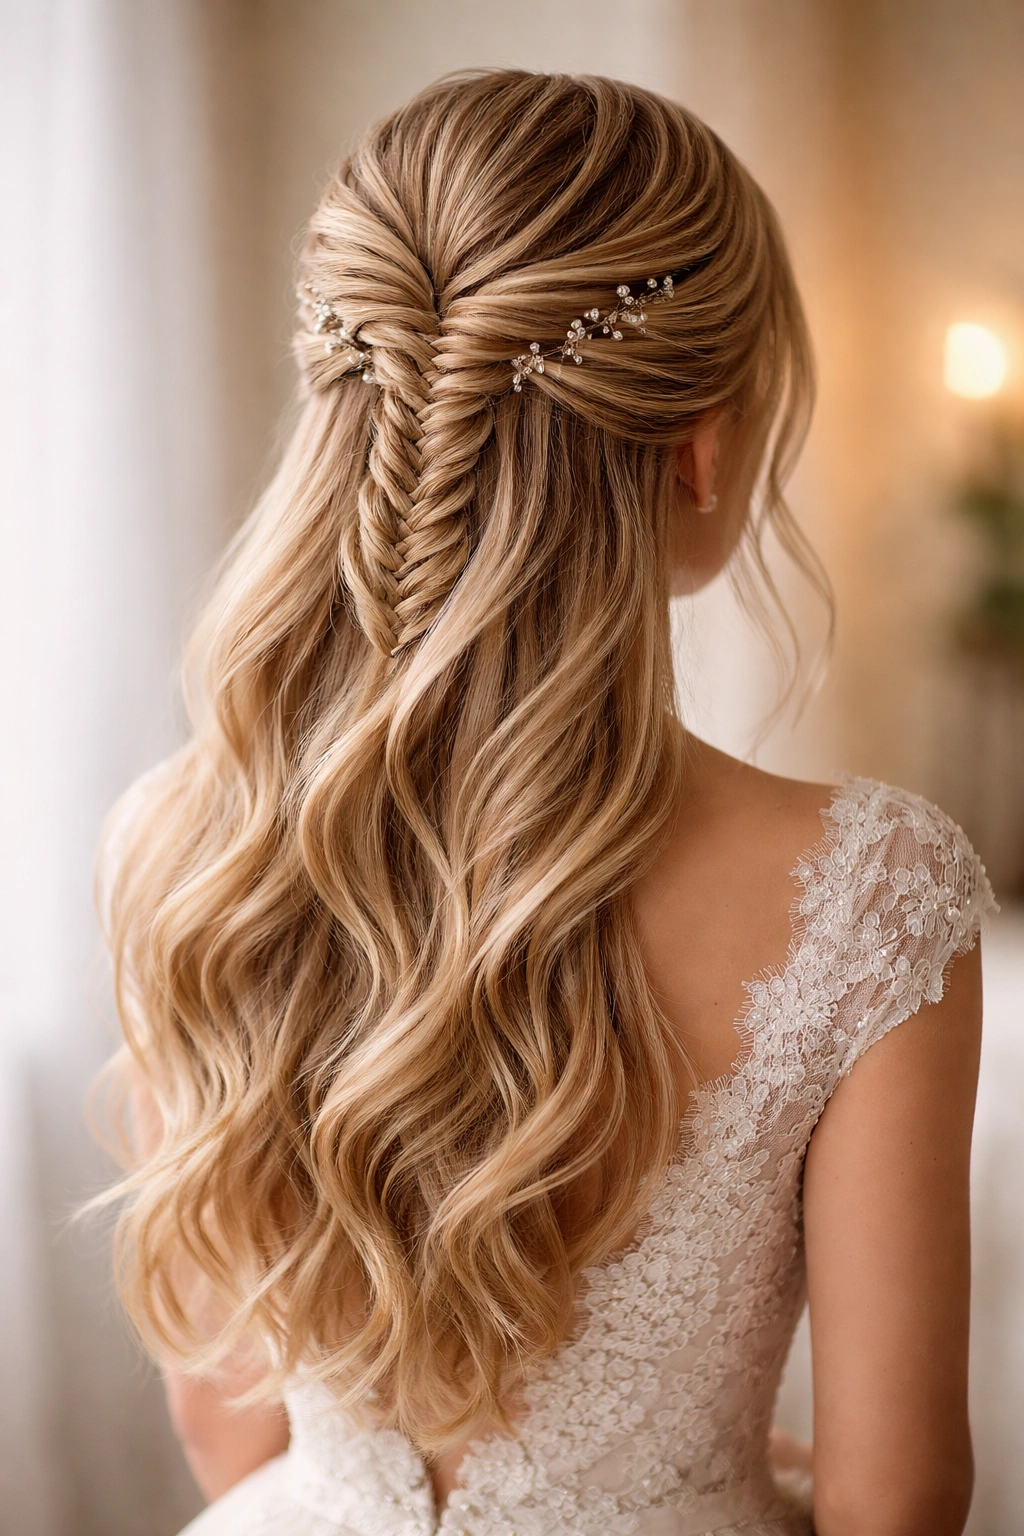
A fishtail braid is technically distinct from a traditional French braid — it uses a different interlocking technique that creates a more delicate, intricate texture. When incorporated into a half-up style, it reads as sophisticated and refined, perfect for formal or black-tie weddings.
Understanding Fishtail Braiding
A fishtail braid uses only two sections instead of the three used in a traditional French braid. You take a tiny section from the outer edge of one side, cross it over to the opposite side, then repeat on the other side, creating a braid that appears more intricate and fine than a standard three-section French braid. The result has a distinctive herringbone-like texture that catches light beautifully and photographs with exceptional definition.
Integrating into Half-Up Styling
You have two options: create a full fishtail braid using only the top half of your hair (so the entire braided section is fishtail rather than French), or create a traditional French braid and finish with fishtail sections as you near the securing point. The second approach is easier for most people and creates a gradient effect — structured French braiding near the top transitioning to the more delicate fishtail texture at the back. Both approaches work; choose based on your comfort level and styling time available.
Making It Wedding-Day Worthy
Fishtail braids require slightly more grip than French braids, so texture preparation is essential. Waves or texture spray applied before braiding ensures the braid holds without appearing loose or unfinished. Gently pancake the finished braid to add volume and prevent it from appearing too thin or delicate. You want the fishtail to read as intentionally intricate, not accidentally sparse.
8. French Braid Half-Up with Hair Comb Accent
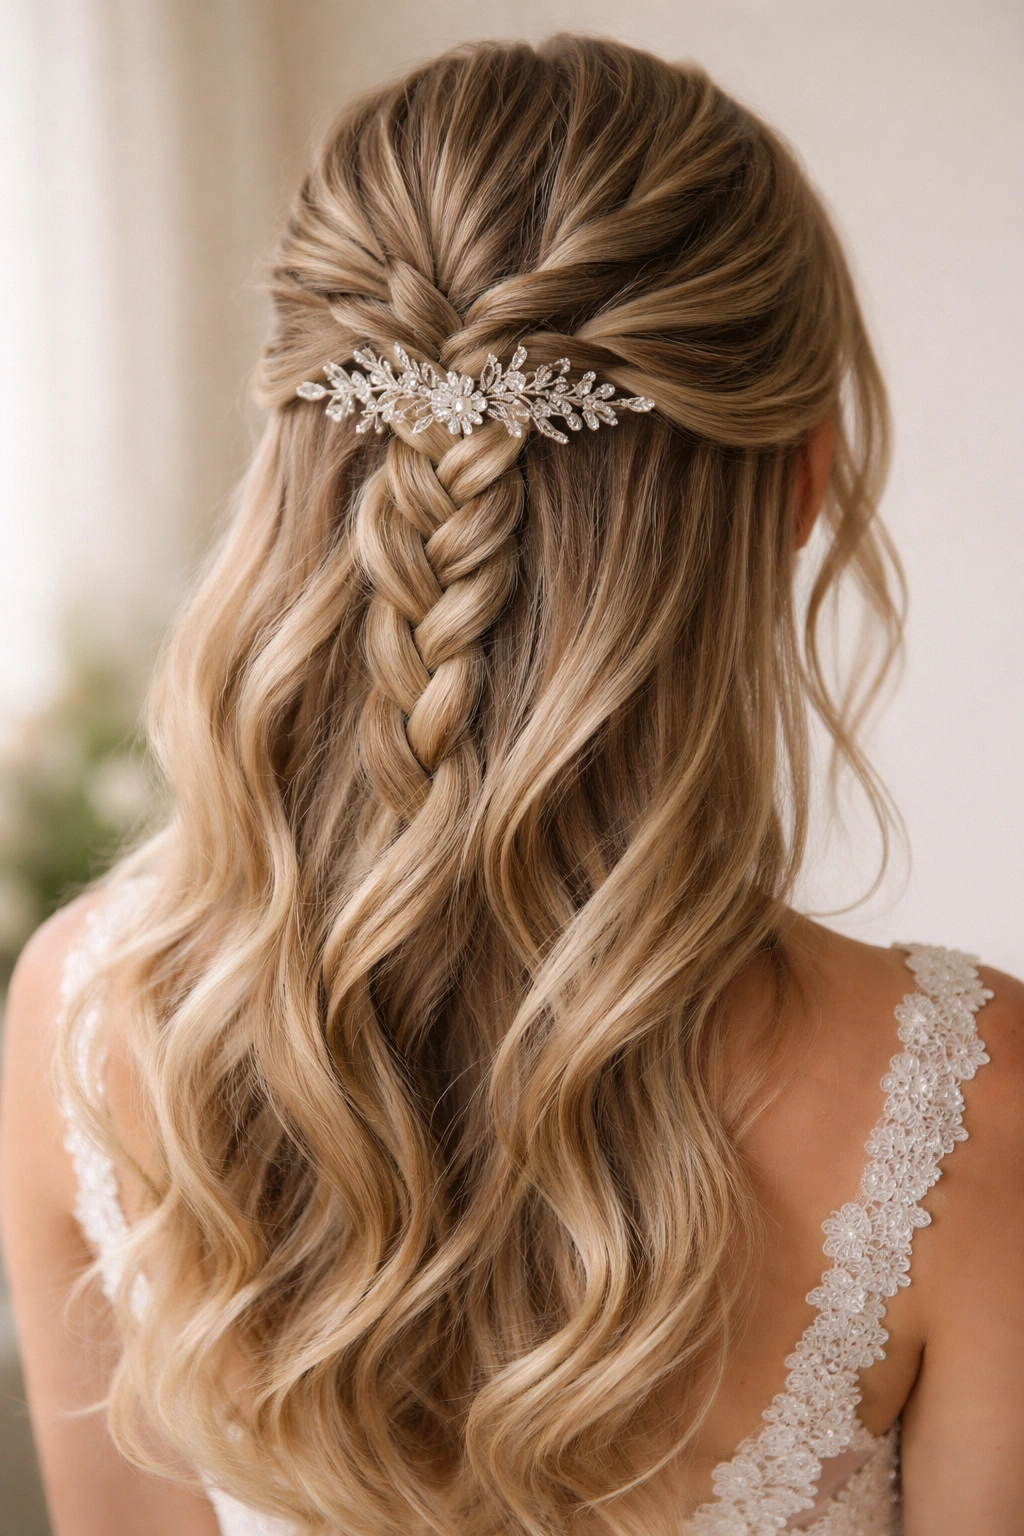
This style pairs a French braid half-up with a statement hair comb positioned at the securing point or throughout the braided section itself. The comb serves both functional and aesthetic purposes, anchoring the style while adding elegance through design and sparkle.
Choosing the Right Hair Comb
Bridal hair combs range from delicate and minimal to elaborate statement pieces. Consider your overall aesthetic — if your dress is embellished, a minimal comb lets the dress shine while still securing your hair. If your dress is simple, a more ornate comb can serve as your statement accessory. Size matters too; a comb should be proportional to your head and the volume of your hair. Fine hair suits smaller combs, while thick or voluminous hair can carry larger designs.
Positioning for Maximum Effect
A hair comb can be positioned in several ways. The most common is at the center back where your half-up section is secured — the comb’s base holds the braid in place while the decorative portion sits visible atop the secured hair. Alternatively, position the comb slightly forward, allowing the braid to flow around and partially over it. Some brides prefer positioning the comb off-center for an asymmetrical, romantic look. Test placement at your styling trial to determine what works best with your hair volume and face shape.
Security and All-Day Wear
Even decorative combs need backup. Use bobby pins or small clips to secure the comb’s base, ensuring it won’t shift during dancing or movement. Have a spare comb or securing pins available during the reception. Combs with wider bases typically hold more securely than delicate designs with narrow anchors; if you love a delicate design but worry about security, ask your stylist about reinforcing options.
9. Loose Romantic French Braid Half-Up
This style prioritizes romance and softness over structure. It uses a French braid as the foundational element but loosens it extensively through pancaking and texture, creating a braid that looks almost like a loosely gathered ponytail with braiding woven throughout.
Achieving the Intentionally Undone Look
Begin with deeply textured, wavy hair — the waviness is crucial because it prevents the braid from appearing sloppy or poorly executed. Create a French braid using loose, relaxed tension, resisting the urge to make it tight or neat. Immediately after braiding, go through each braid section and deliberately pull on the edges, creating ruffles and volume. This pancaking process transforms a controlled braid into something that feels romantic and organic. Continue pulling until the braid appears approximately twice its original width.
Pairing with Delicate Details
This style pairs beautifully with minimal hair accessories — perhaps a single delicate bobby pin, a strand of pearls threaded through the braid, or a subtle hair vine. Avoid statement combs or heavy accessories, which would clash with the soft, undone aesthetic. Fresh flowers tucked into the loosened sections of the braid work wonderfully, as do thin silk ribbons gently woven through.
Why This Reads as Romantic Rather Than Messy
The key lies in intentionality. The braid structure remains visible beneath the loosened sections, showing that this look is purposefully styled rather than accidentally disheveled. The textured hair throughout reinforces the intentional aesthetic. Photographers love this style because it captures beautifully in both sharp focus and soft-focus shots — the braid detail reads clearly in close-ups, while the overall softness translates to romance in wider shots.
10. Multi-Braid French Half-Up Statement
This bold style incorporates three or more French braids woven together in the half-up section, creating a dramatic statement piece that reads as intricate and artistic. It’s ideal for brides who want their hair to be a standout feature and don’t mind a style that requires skilled execution.
Planning the Braid Architecture
Before styling, decide how you want the multiple braids to relate to each other. One approach: create three thin braids that run parallel and merge at the back. Another: create braids that start at different points (one at each temple, one at the center part) and converge at the center back. Yet another: create braids that twist around each other, rather than running parallel. Each approach creates different visual effects — experiment with a stylist to determine what suits your vision.
Execution and Timing
This style requires either professional styling or significant practice. If you’re planning to wear this style, schedule multiple trial appointments to ensure your stylist can execute it comfortably and efficiently on your wedding day. Multi-braid styles typically take 45 minutes to an hour to complete, so plan your timeline accordingly. Prepare your hair with light texture and texture spray — the more grip your hair has, the easier the stylist’s job and the better your braids will hold.
Making It Sustainable for Hours
Multiple braids require excellent security at the anchoring point. Use multiple bobby pins, small clips, and possibly a small elastic band concealed beneath the braids. Hairspray applied throughout the styling process and once more after completion ensures maximum hold. The advantage of multiple braids is that if one section loosens slightly, the others support it, so the overall style remains intact even if perfection shifts slightly as the day progresses.
11. French Braid Half-Up with Ribbon or Pearl Threaded Detail
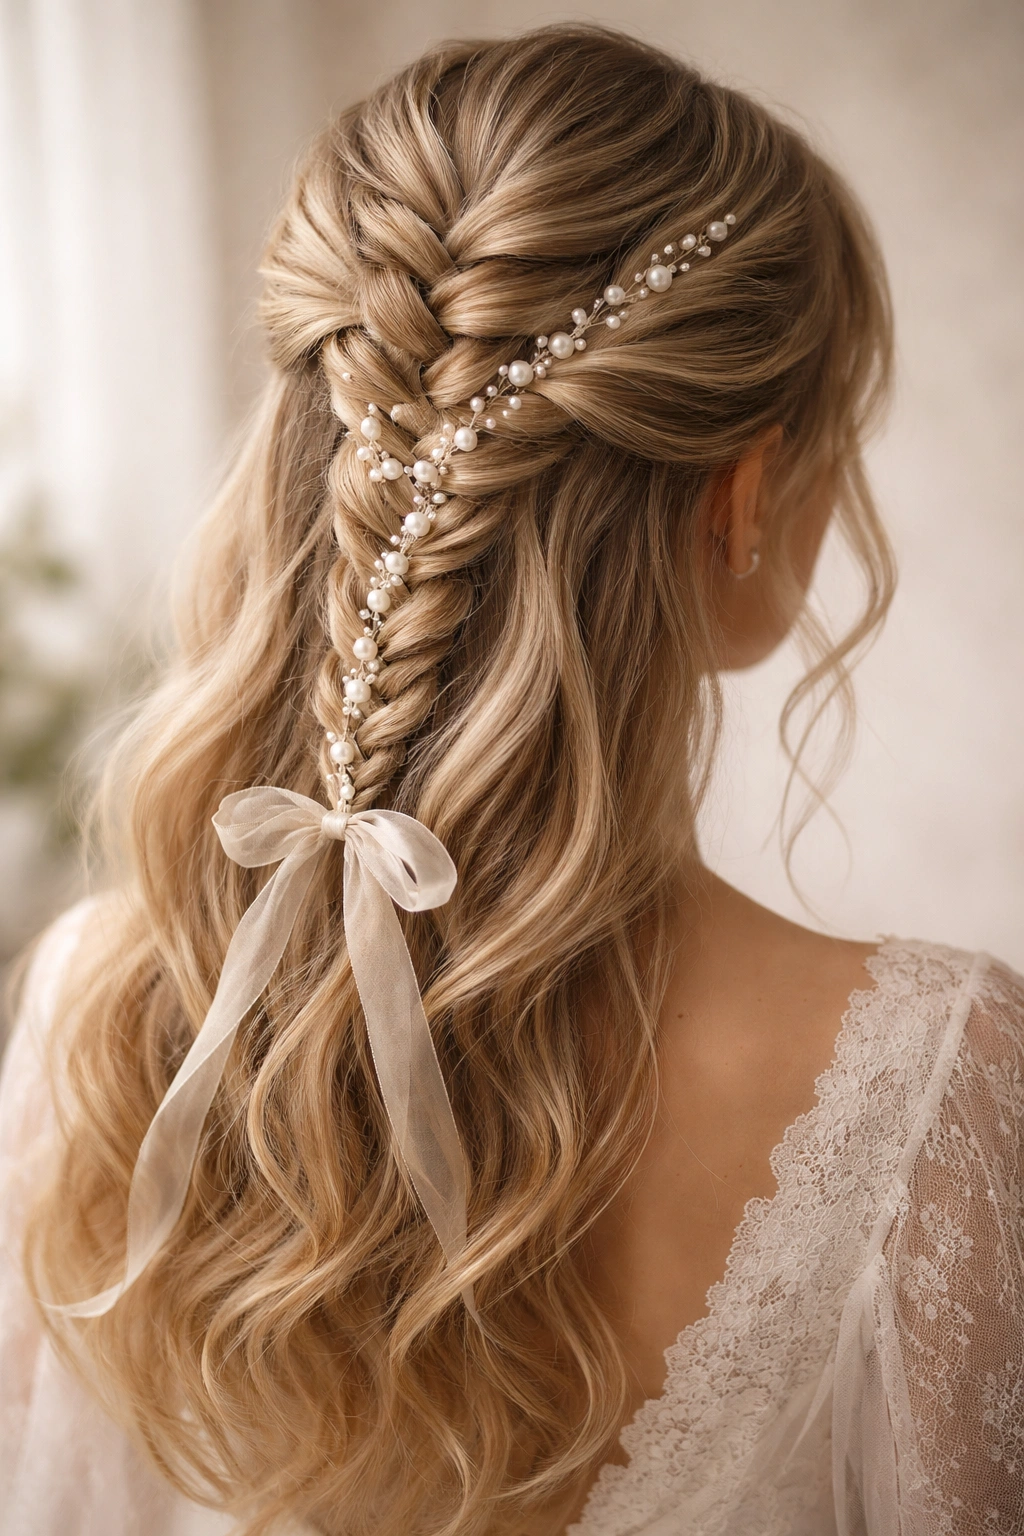
This elegant style incorporates a ribbon or strand of pearls woven directly through the French braid, creating dimension and sparkle without requiring additional accessories. The ribbon or pearls become part of the braid structure itself, which feels seamless and intentional.
Threading Ribbon Through the Braid
Begin braiding as normal, but incorporate the ribbon as you go. Thread it through one section of the braid as you’re creating the braid pattern — essentially treating it like a fourth strand being woven in. Choose ribbons that coordinate with your color palette; ivory, champagne, blush, and white ribbons work with most bridal aesthetics, though colored ribbons work beautifully for non-traditional weddings. The ribbon catches light throughout the day, creating subtle sparkle that photographs beautifully.
Using Pearl Strands for Subtle Luxury
Fine pearl strands or beaded chains create an elevated look with minimal visual weight. Thread them through the completed braid by gently lifting sections and sliding the pearls underneath, or incorporate them as you braid if you’re comfortable multitasking while creating the braid. Pearl details read as quietly luxurious rather than overtly sparkly, making them ideal for formal, traditional weddings where overt embellishment would feel out of place.
Securing the Threaded Elements
Ensure whatever you’re threading is securely fastened at both ends. Tie ribbon ends to the base of your half-up section where everything secures, so the ribbon can’t slip out during the day. For pearl strands, check that the clasp is secure and that no loose pearls can fall out. If using temporary threading (like pearls just placed, not permanently attached), have backup pearls or ribbon nearby in case any slip during the reception.
12. Low French Braid Half-Up with Volume
This style places the half-up securing point lower on the back of the head — approximately at the crown or slightly lower — creating the illusion of more fullness at the top of the head. It works beautifully for brides with finer hair or those who want maximum volume appearance.
Creating the Illusion of Volume
Begin the French braid higher on the head than you would for a traditional half-up, allowing it to travel a longer distance before being secured. This extended braid path gives the braid more room to collect hair, which you then fluff and pancake for maximum appearance of volume. The lower securing point also means more hair remains released, which creates additional fullness and movement. Visually, this style makes even moderately thick hair appear luxuriously voluminous.
Teasing and Backcombing for Extra Fullness
Before braiding, lightly backcomb the top section of hair at the crown, then smooth the surface layer over top. This creates a cushion of texture that adds height and volume. Repeat this process throughout the braided section as you work — backcomb small sections before incorporating them into the braid, then smooth the surface. The backcombing creates texture that resists falling flat while remaining invisible because the surface layer appears smooth.
Securing Without Losing Height
Use bobby pins or small clips rather than a thin elastic, which can compress the hair and lose height. Position pins so they anchor the braid without pressing down on the cushioned texture underneath. Some stylists prefer using a small claw clip at a slight upward angle, which helps maintain the illusion of height. Hairspray applied before and after teasing, before and after braiding, and once more upon completion ensures your volume holds throughout the entire wedding day and into evening celebrations.
Final Thoughts
French braid half-up half-down styles offer remarkable versatility for weddings, adapting beautifully to different venues, dress codes, personal aesthetics, and face shapes. The key to choosing your style lies in considering not just how it looks, but how it makes you feel and how it photographs in your specific lighting conditions and venue.
Schedule at least one trial appointment with your stylist before your wedding day — this allows you to see how your specific hair behaves when styled, identify any modifications needed for your comfort and hair type, and confirm timing. Bring photos or descriptions of styles that appeal to you, but trust your stylist’s expertise in adapting them to your hair and face shape. The best wedding hairstyle isn’t necessarily the one that looks perfect on someone else; it’s the one that makes you feel beautiful and confident while photographing well and holding comfortably through your entire celebration.
Remember that your hairstyle should feel like an extension of your overall aesthetic, not something that requires constant adjustment or makes you feel self-conscious. A great braided half-up style should feel secure enough that you forget about it and simply enjoy your day.