Half up half down hairstyles occupy a special place in formal styling—they strike that perfect balance between polished elegance and relaxed sophistication that works for weddings, galas, proms, and upscale events. Unlike a fully swept-up style, a half up half down look keeps face-framing strands loose, which softens your features and photographs beautifully under any lighting. For medium-length hair, this length hits the sweet spot: long enough to create volume and texture in the gathered section, yet short enough that the remaining half still has movement and presence. Medium hair gives you serious styling freedom that longer hair sometimes lacks—you can experiment with twists, braids, and intricate pinning techniques without fighting excessive weight or bulk.
The challenge isn’t figuring out whether to wear your hair half up half down to a formal event—the challenge is choosing which of the many variations will make you feel most confident walking into the room. Each style creates a subtly different vibe. Some feel romantic and delicate. Others project strength and refinement. A few land somewhere in between, offering understated glamour that works equally well at a black-tie wedding or a sophisticated dinner party. Your choice depends on your dress neckline, the formality level of the event, and how much time you’re willing to spend styling beforehand.
What makes medium hair particularly forgiving for these styles is that even if your technique isn’t perfect, the overall effect still reads as intentional and polished. The length works with you rather than against you, and most of these styles can be customized for different hair textures—from straight to wavy to curly. Whether you’re delegating this to a professional stylist or doing it yourself the morning of, the variations below cover everything from classic and timeless to modern and dramatic.
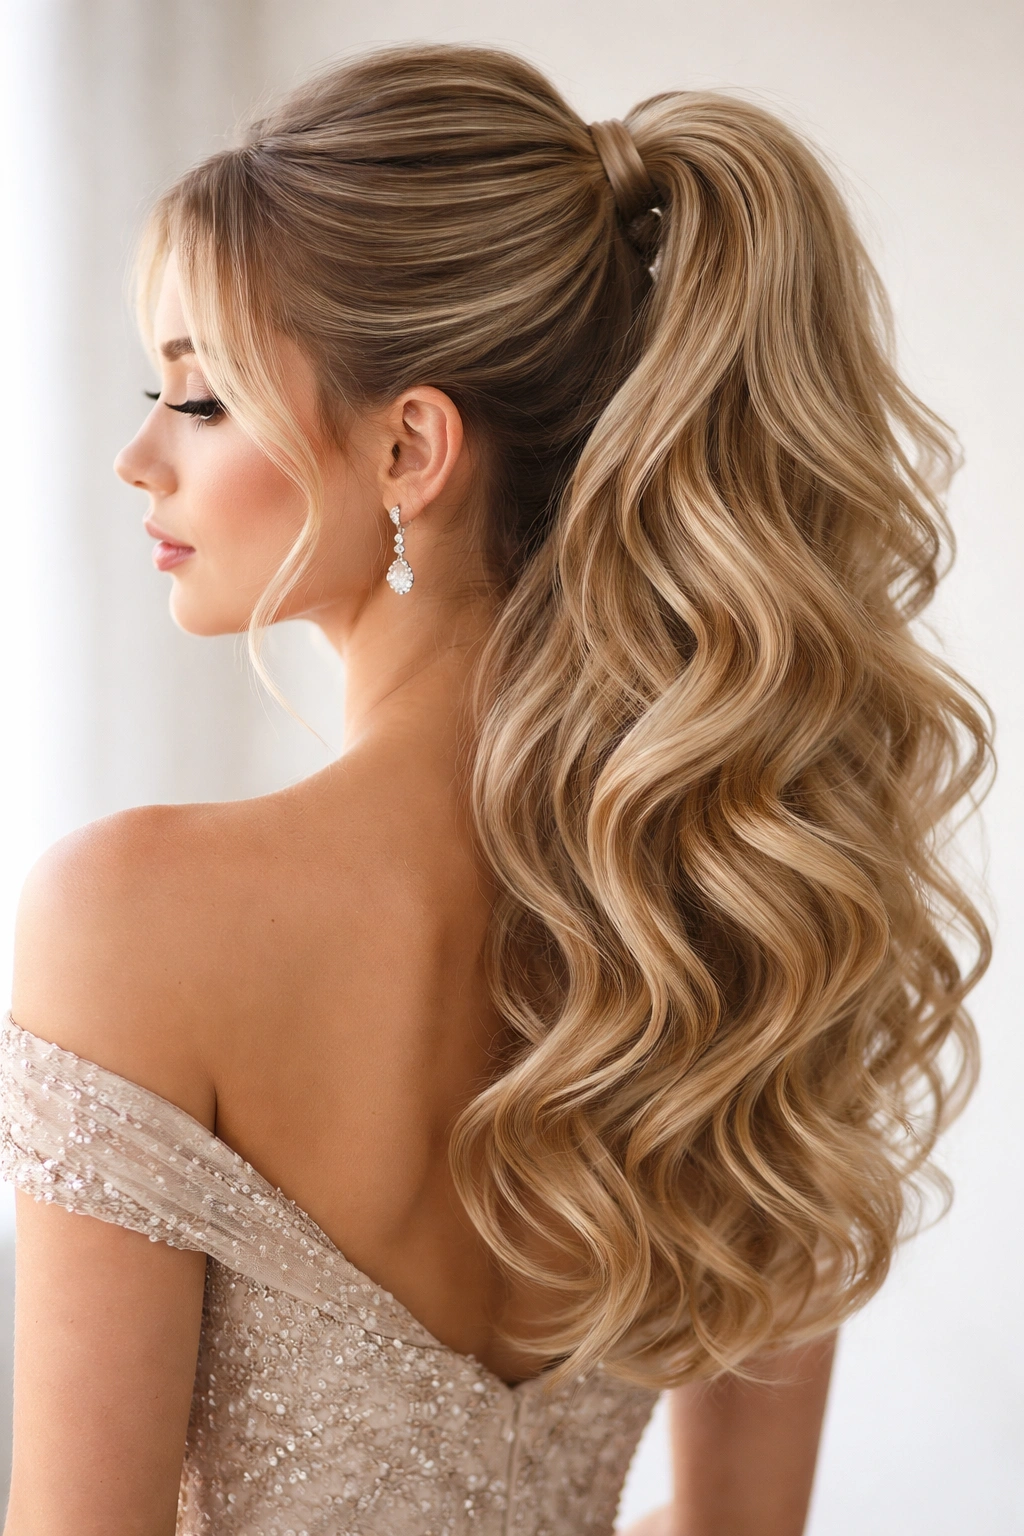
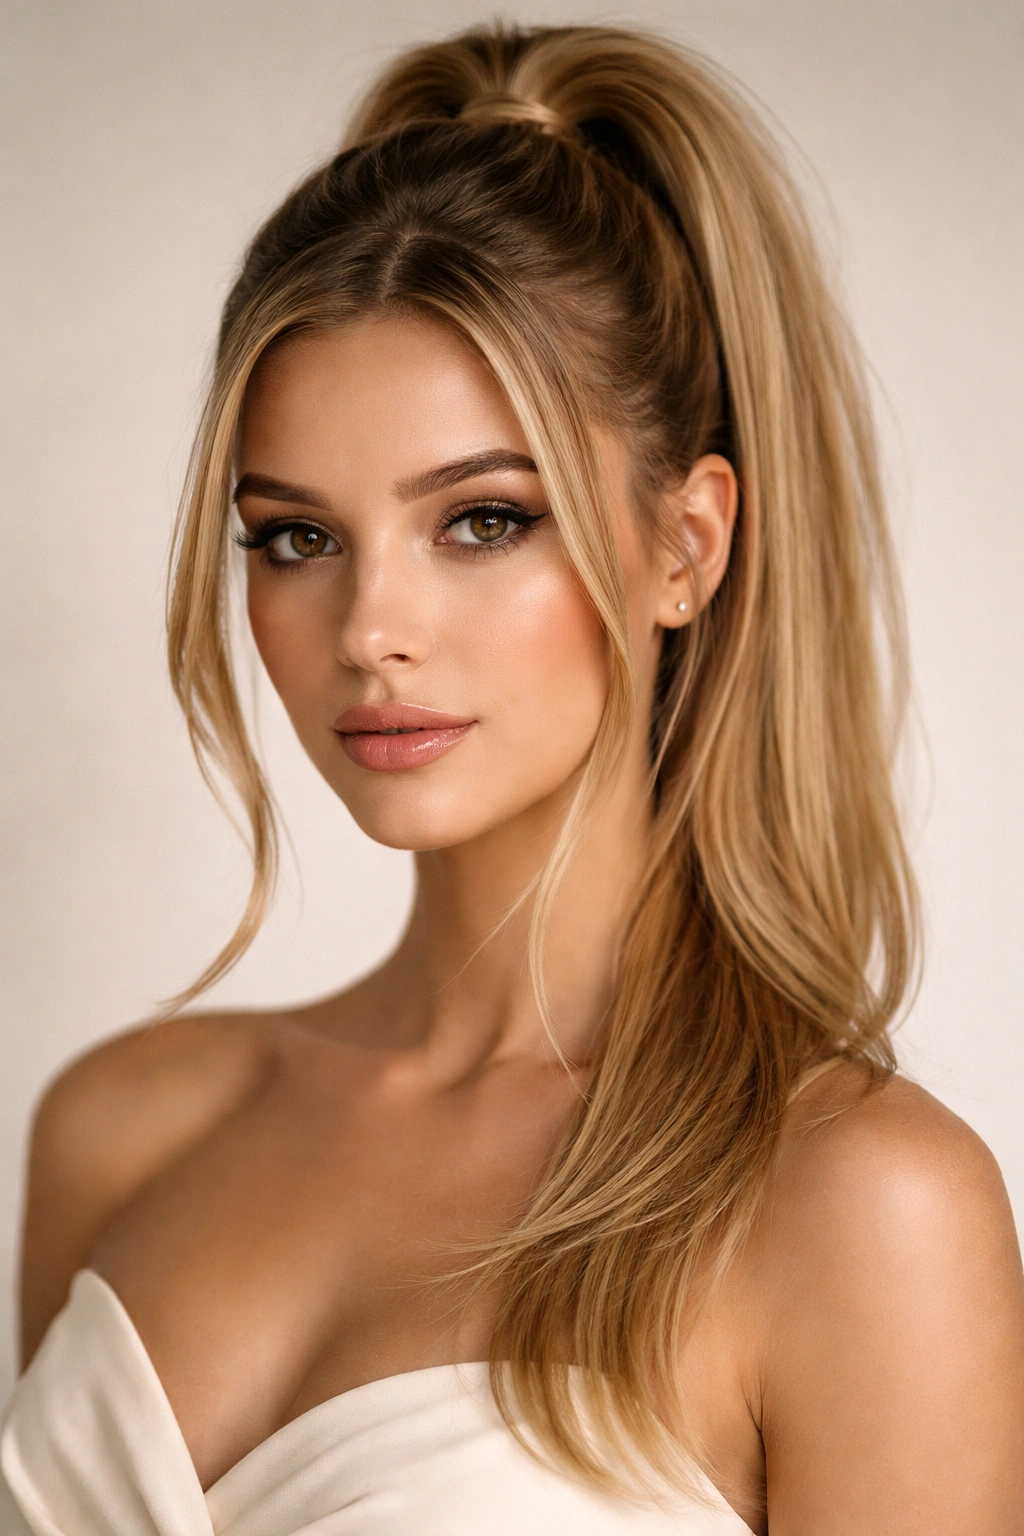
1. The Sleek High Ponytail with Face-Framing Layers
This style pulls the upper half of your hair into a tight, high ponytail while leaving face-framing pieces out on both sides. The key to making it feel formal rather than casual is the precision of the smoothness—each strand in the ponytail sits perfectly in place, and the released face-framing layers are long enough to graze your jawline or shoulders.
Why This Works for Formal Events
The high ponytail instantly reads as polished and put-together, while the loose waves around your face prevent it from feeling severe or overly austere. This style elongates your neck and face, which is why it photographs exceptionally well for formal events. It also keeps hair completely off your shoulders if you’re wearing a strapless or illusion neckline dress.
How to Achieve It
- Apply a smoothing serum or anti-frizz cream to damp hair before blow-drying
- Blow dry with a paddle brush, directing the crown straight up for volume at the back
- Use a fine-tooth comb to smooth any flyaways at the hairline and temples
- Gather the upper half at the crown and secure with an elastic band
- Take a thin section from the ponytail, wrap it around the base to conceal the elastic, and pin the wrapped section underneath
- Curl or wave the face-framing pieces and the ponytail itself for added dimension
Pro tip: A metallic hair clip or delicate pins threaded through the wrapped base section adds subtle glamour without overwhelming the style.
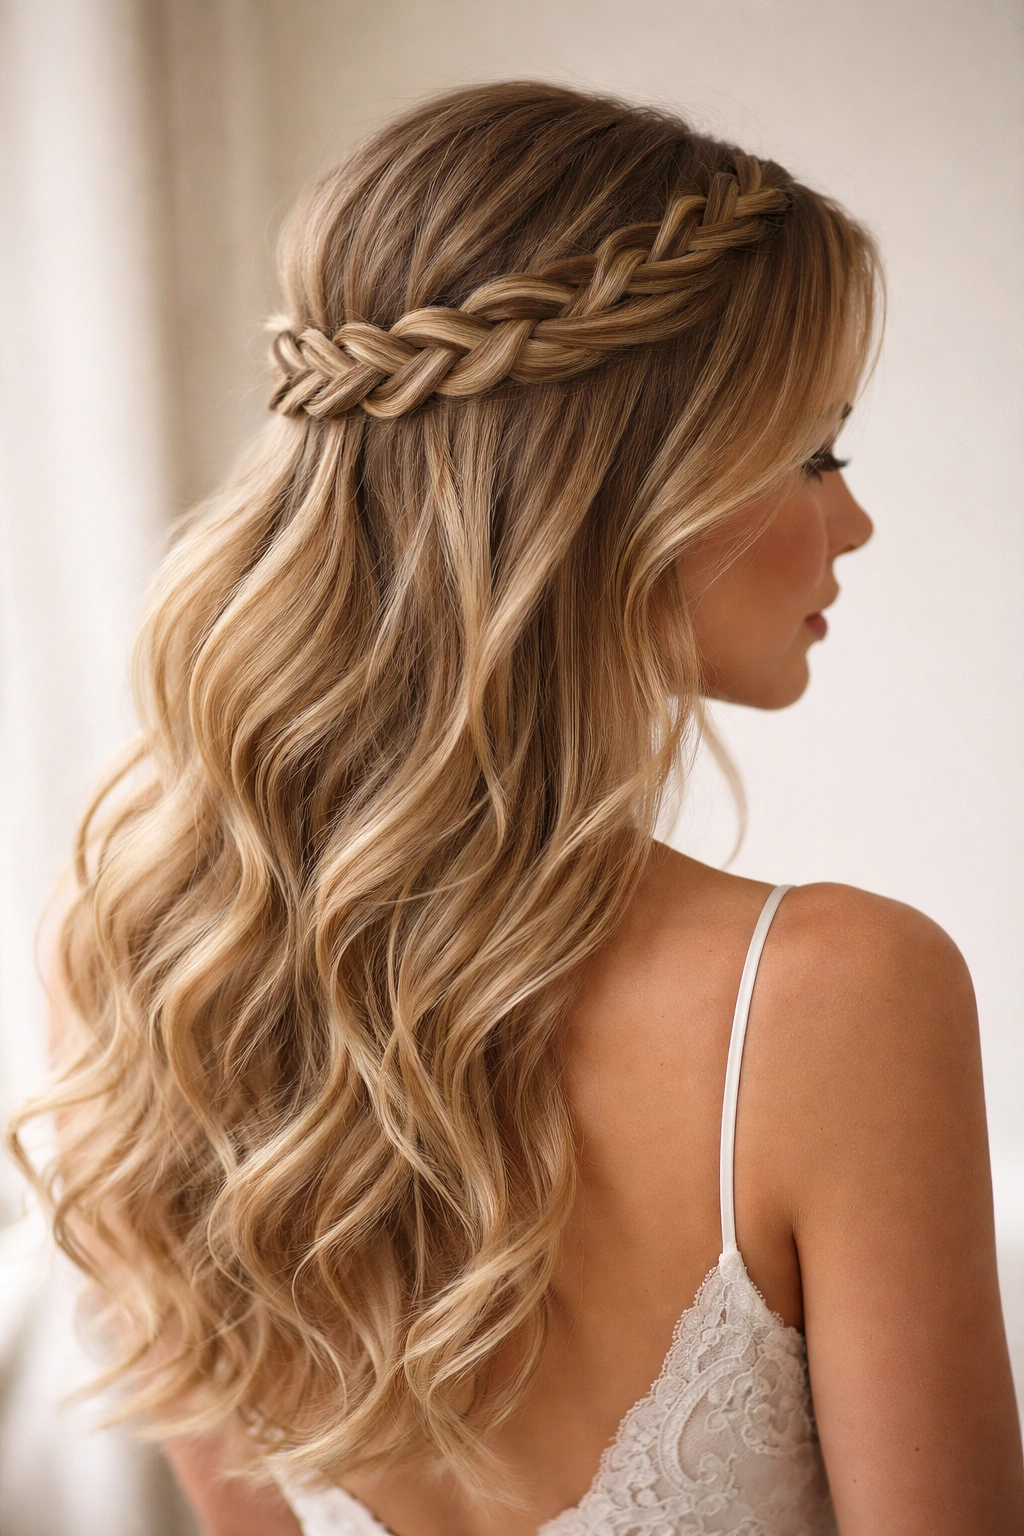
2. The Romantic Braided Crown
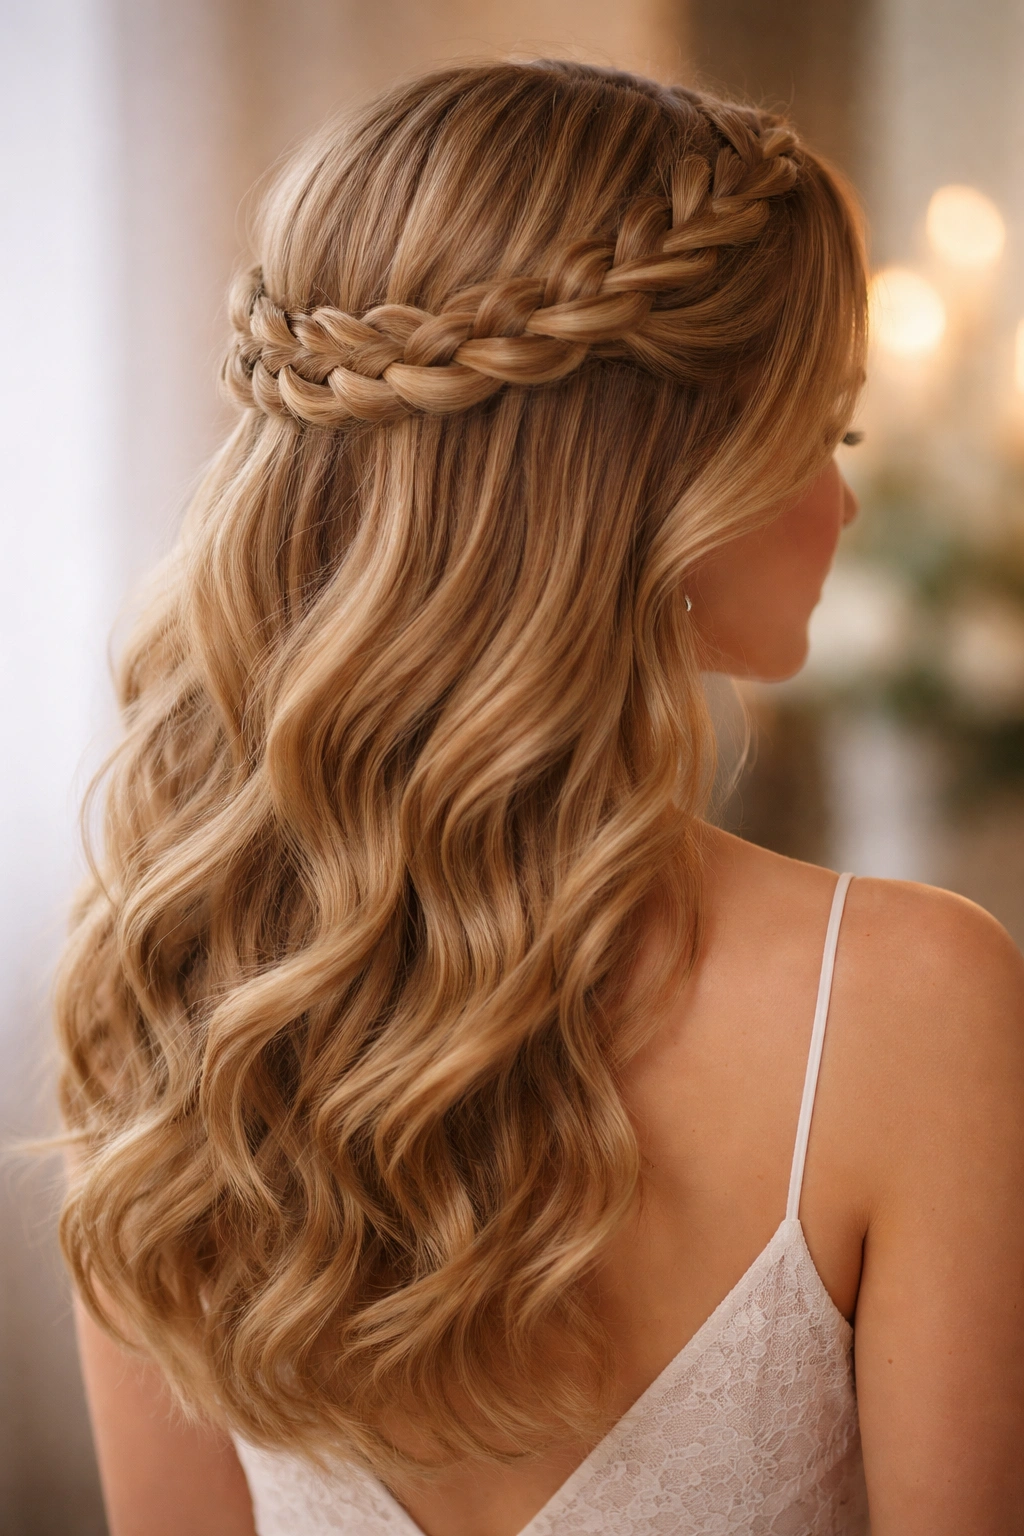
A crown braid wraps around the back of your head, gathering hair as it goes, while the remaining half falls in soft waves down your back. This style feels distinctly romantic and works beautifully with updos that aren’t completely pinned—the braid acts as the primary styling element while the lower half adds movement and softness.
The Visual Impact of Crown Braids
Crown braids create an ethereal, almost royal quality to your appearance. They work especially well with formal gowns that have intricate back details, since the braid itself becomes a design feature. The braid also serves a practical purpose: it prevents shorter, framing pieces from falling into your face as you move through the event.
How to Execute This Style
- Begin the braid at one temple, incorporating hair as you move toward the back of your head
- Continue braiding across the back, and finish the braid at the opposite temple
- Gently pull and tease the braid sections to make it appear fuller and more romantic
- Leave the lower half loose and curl or wave it for texture
- Secure the end of the braid with a small elastic that matches your hair color
- Tuck the braid’s end into the upper half of hair and pin it securely in place
A delicate pearl pin or hairpin can be threaded through the braid for added elegance if desired.
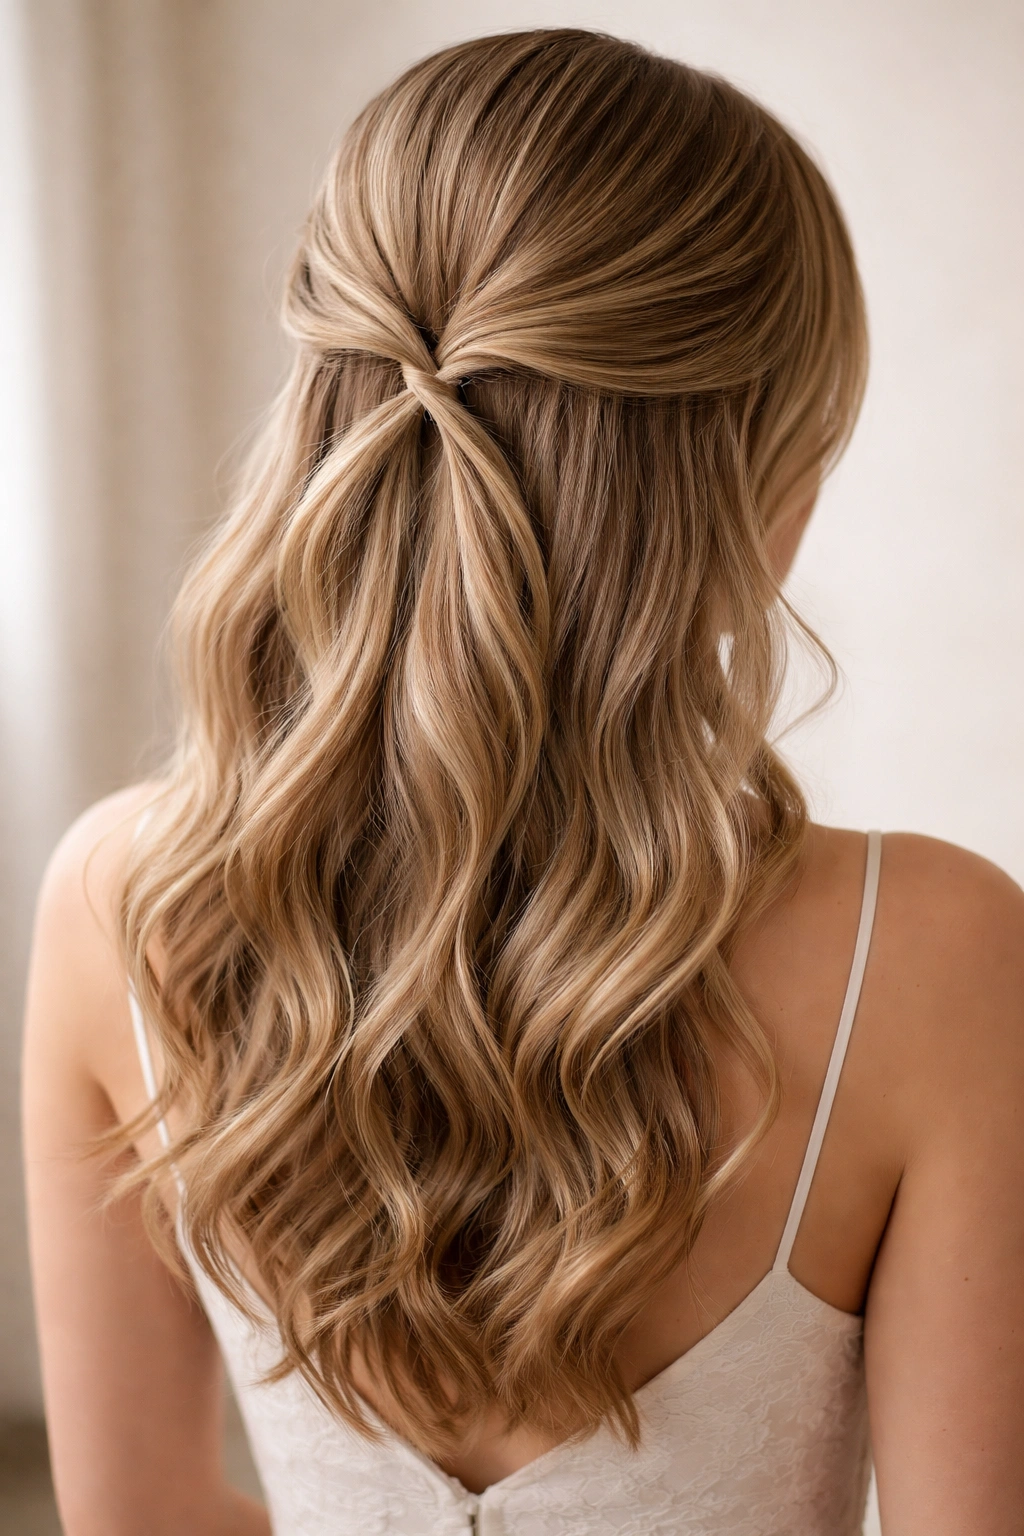
3. The Twisted Side Sweep
Both sections of hair—the gathered upper half and the loose lower half—incorporate soft twists rather than braids. One primary twist gathers from behind one ear and spirals across the back of your head, while the opposite side remains loose with coordinating twists woven through the lower section. This asymmetrical approach feels modern and dynamic while maintaining formal polish.
Why Twists Feel More Contemporary
Twists read as more relaxed and current than braids, though they’re equally elegant. They also suit different hair textures better than braids do—twists work beautifully on straight, wavy, and curly hair without requiring as much precision. The movement of a twist also creates visual interest that a simple gathered section might lack.
Building the Twisted Side Sweep
- Start at the temple on one side and create a thin twist, incorporating small sections of hair as you twist
- Twist around the back of your head toward the opposite side
- Secure the twist at the back with bobby pins that match your hair color
- Leave the other side completely loose, or add 1-2 decorative twists in the lower section
- Curl the entire lower half for soft waves and dimension
- Ensure the pins are invisible by tucking them completely beneath the twisted sections
Worth knowing: A light texture spray applied before twisting helps the twist hold all evening without feeling stiff or overly product-heavy.
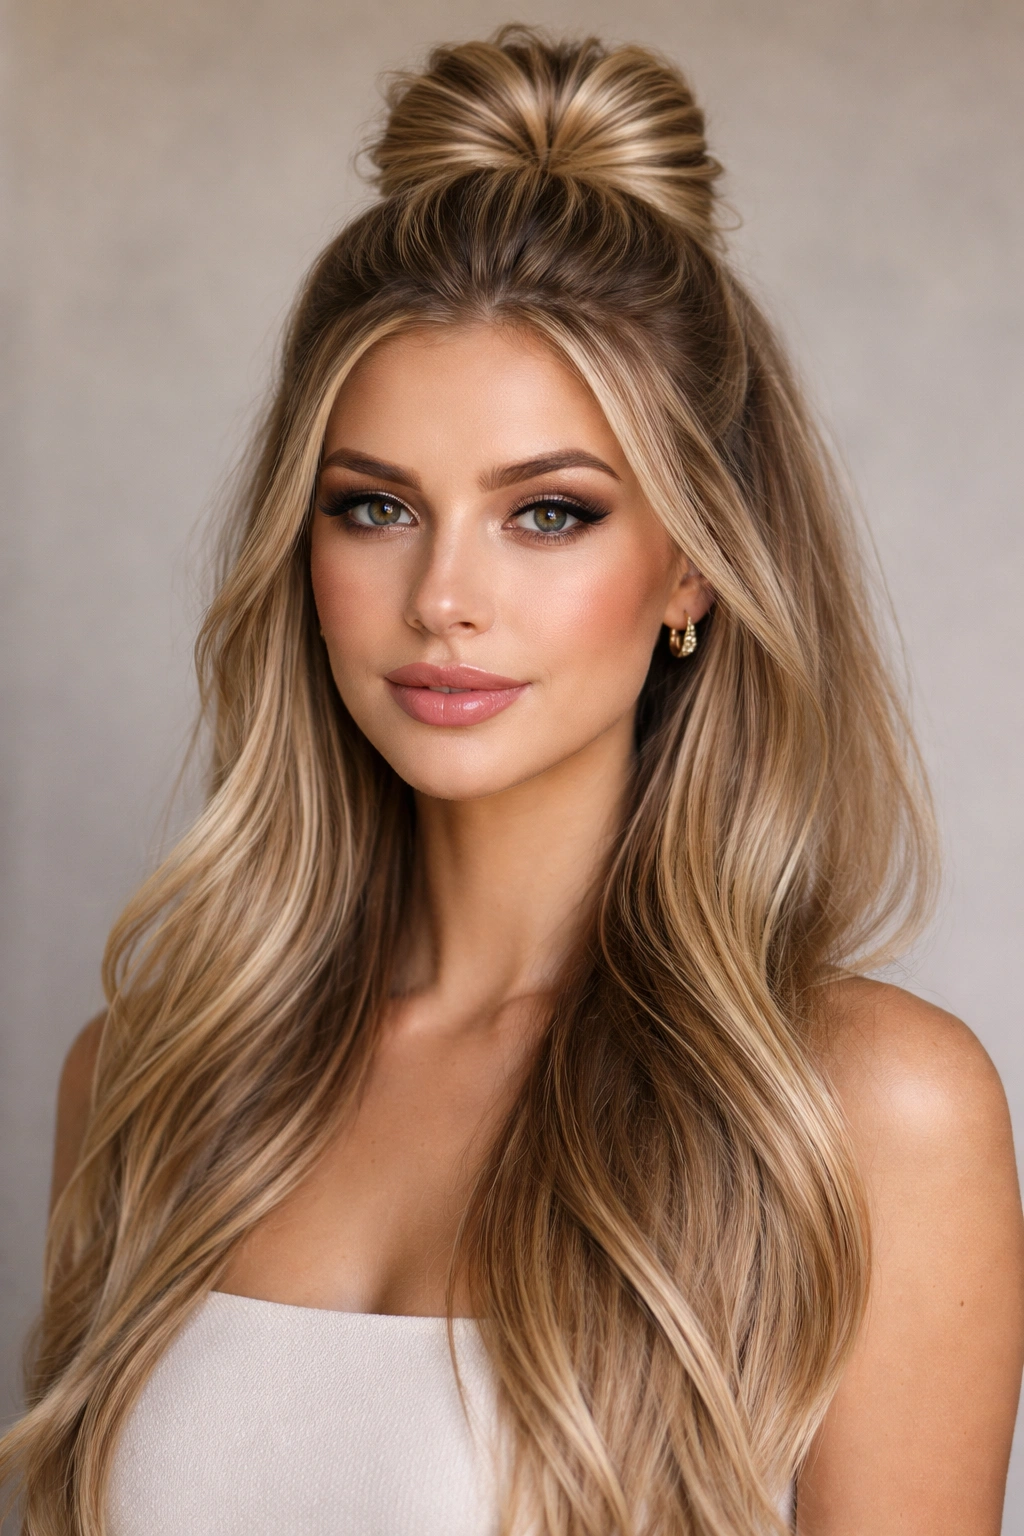
4. The Voluminous Messy Bun with Loose Waves
Gather the upper half of your hair into a deliberately imperfect, textured bun at the crown, leaving substantial waves loose below. This style succeeds because it’s intentionally undone-looking at the top while maintaining sophistication. The bun should appear full and lived-in, not tight and precise.
Creating Purposeful Imperfection
The messy bun works for formal events because the looseness of it prevents the style from feeling stuffy or overly done. The contrast between the gathered, textured bun and the smooth, loose waves creates visual depth and movement. This approach works especially well if you have naturally wavy or thick hair that resists being styled into a pristine bun.
Steps to the Messy Bun
- Blow-dry your hair with texture and slight wave throughout using a round brush or curling iron
- Gather the top half of your hair at the crown, leaving the lower half completely free
- Twist the gathered section loosely and wrap it around itself to form a bun shape
- Secure with bobby pins, leaving some texture and pieces intentionally loose and face-framing
- Don’t smooth it—this style depends on visible texture and loose pieces
- Curl the lower half in soft waves if it isn’t already textured
- Finish with a light hairspray that allows movement
The bun should feel substantial but relaxed, like you threw it together effortlessly even though you actually spent time perfecting that imperfect look.
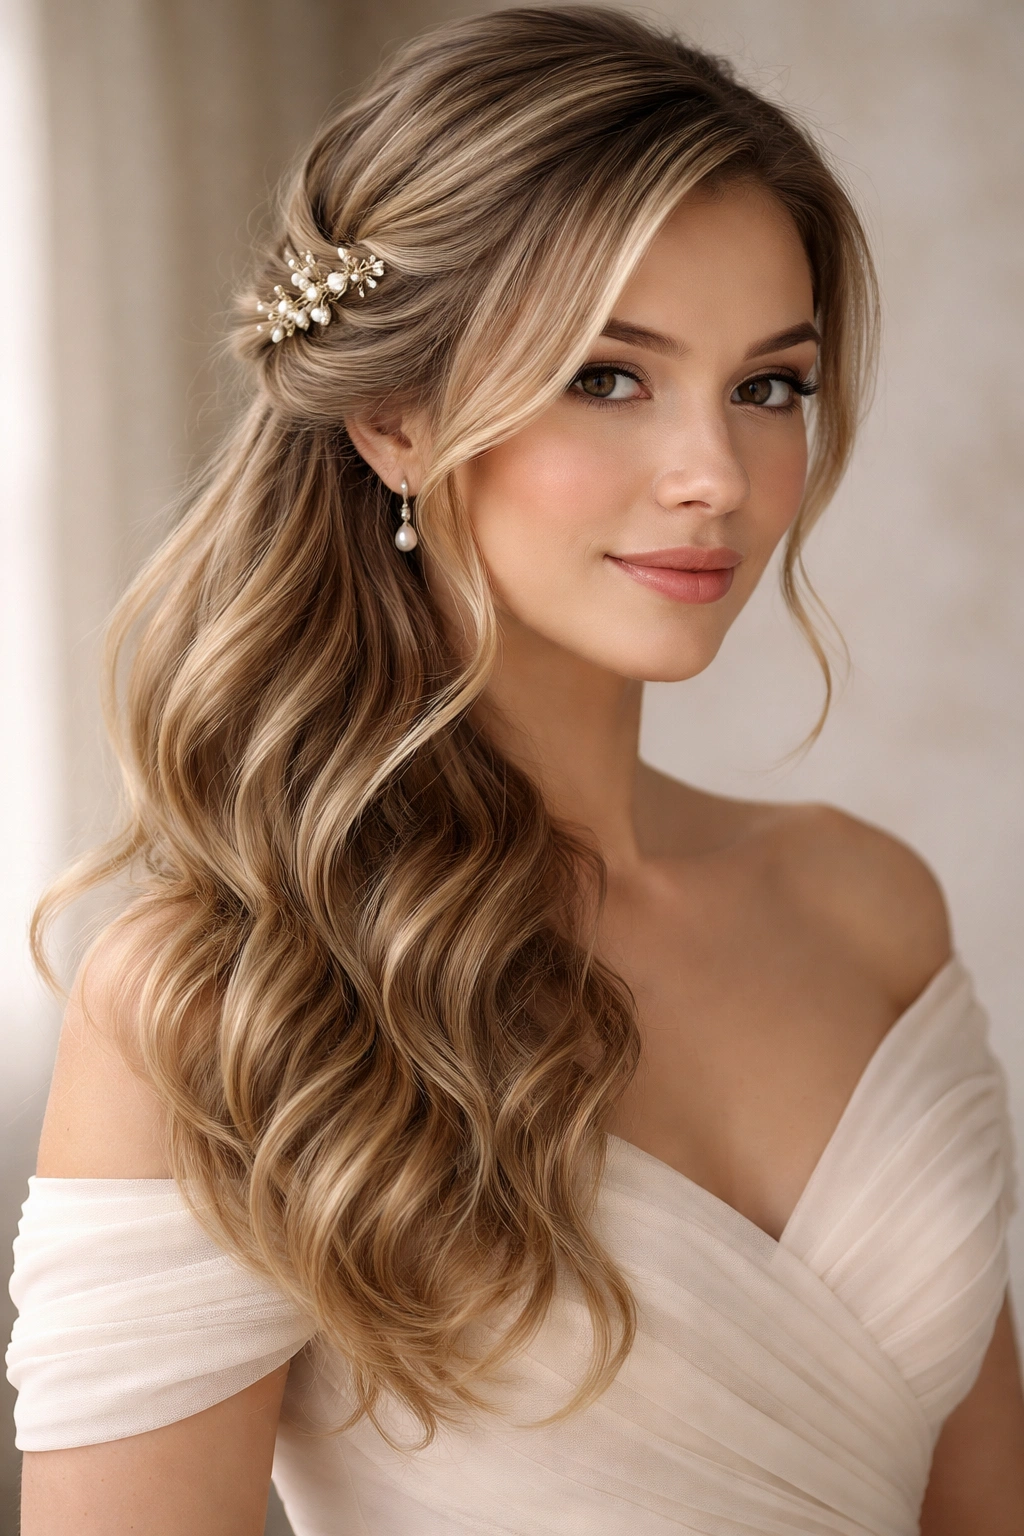
5. The Pearl-Pinned Elegance
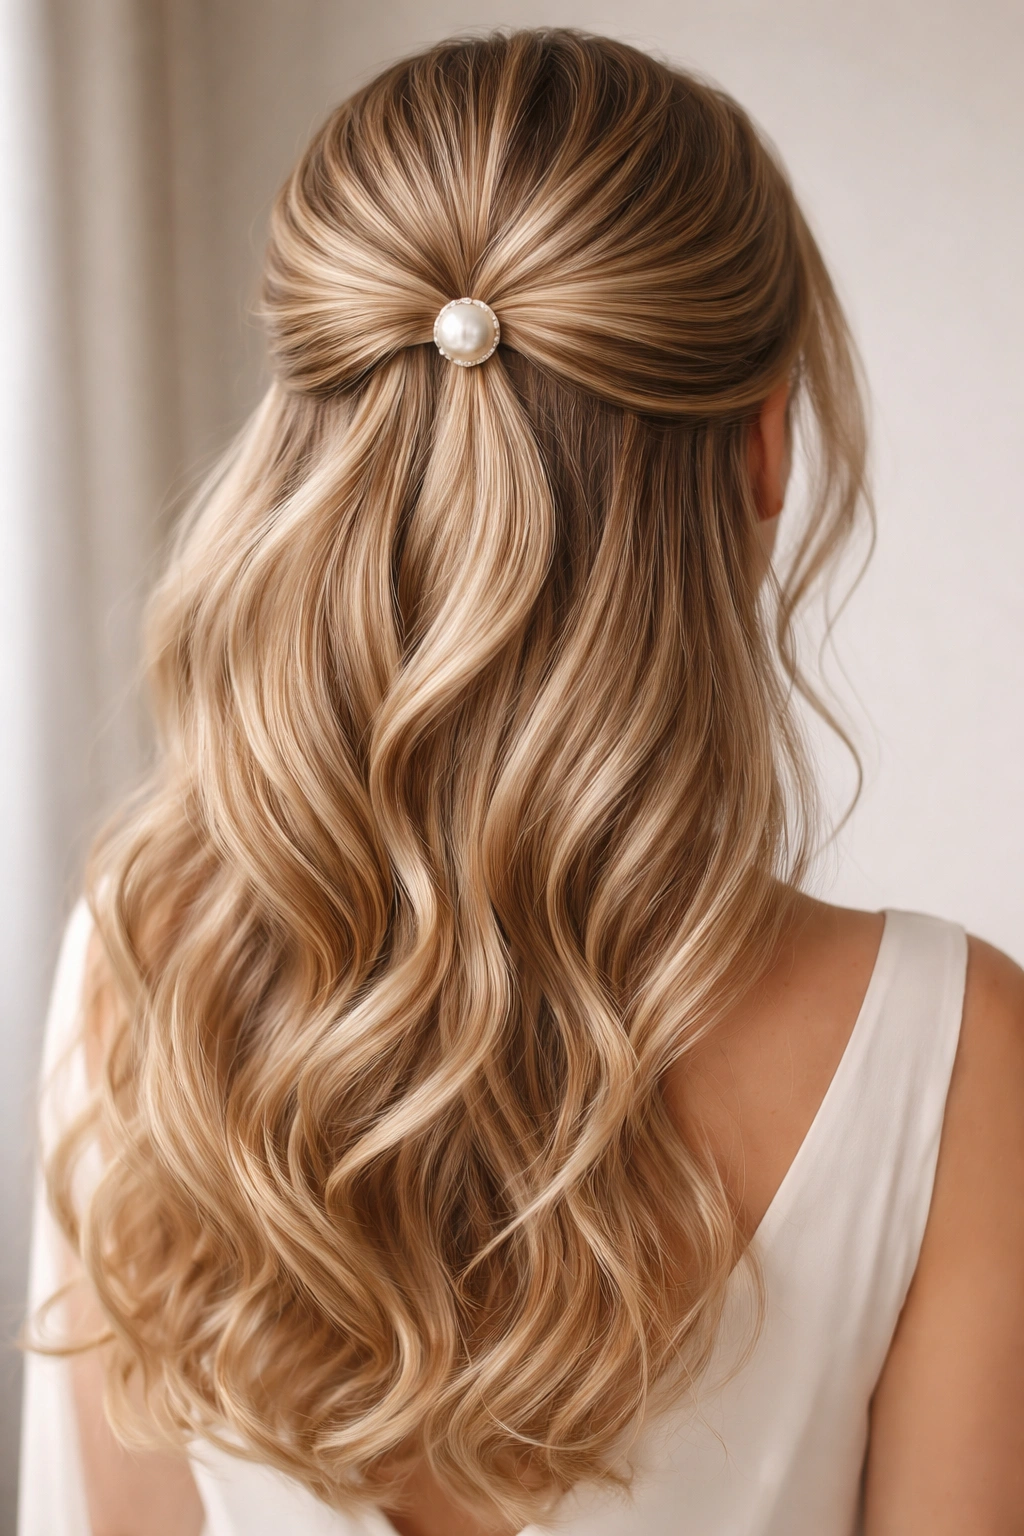
A simple gathered section at the crown is secured with an ornate pearl pin or vintage-style hair comb, creating instant formality. The lower half remains loose and can be curled, waved, or worn straight depending on your preference. What makes this style feel especially formal is the decorative element—the pin or comb itself becomes jewelry for your hair.
The Power of a Single Accessory
A beautiful hair pin can elevate an otherwise simple half-up style into something notably elegant and intentional. Pearls specifically add classical refinement that reads as appropriate for white-tie events, galas, and formal weddings. The key is choosing a pin that feels substantial enough to justify an entire styling decision but not so massive that it overwhelms your proportions.
How to Style Around a Pearl Pin
- Gather the upper half of hair at the crown and secure with a clear elastic first
- Position your pearl pin horizontally across the base of the gathered section
- Insert the pin through the gathered hair and against your scalp for stability
- Arrange the loose, gathered hair around the pin so the pin becomes a visible focal point
- Leave the lower half loose and style according to your dress and preference
- The upper gathered section can be left smooth or gently teased for texture
Pro tip: If your pin is particularly beautiful, keep the lower half simple—either sleek waves or straight hair—so the pin remains the focal point rather than competing with other styling elements.
6. The Romantic Dutch Braid Half-Up
A Dutch braid (inverted French braid) runs from one side of your head to the other, gathering hair throughout its path. The braid sits visibly on top of your hair rather than tucked underneath, making the braid itself a design statement. The lower half flows free in soft waves or curls, creating a distinctly romantic, almost fairytale appearance.
Why Dutch Braids Feel Special for Formal Wear
Dutch braids have visual presence—they’re impossible to miss because they sit on top rather than beneath your hair. This makes them ideal for formal events where you want your styling to be noticed and appreciated. The braid also creates texture and dimension that prevents the entire look from feeling flat or one-dimensional.
Creating the Dutch Braid Half-Up
- Section off the area you want the braid to occupy (one side to the other, roughly starting at temple height)
- Begin the Dutch braid at one temple, braiding away from you (reverse of a traditional French braid)
- Incorporate hair as you braid toward the back and across to the other side
- Gently pull sections of the braid to make it fuller and more visually interesting
- Secure the braid’s end at the back or tuck it into the gathered section and pin
- Leave the lower portion of hair loose and curl it generously
- Consider weaving a thin strand of ribbon through the braid for added elegance if desired
The Dutch braid naturally frames your face while gathering your hair, creating flattering dimensions for virtually any face shape.
7. The Cascading Curl Half-Ponytail
Gather the upper half into a loose, high ponytail, but instead of securing the ponytail tightly, create a cascading effect where the gathered hair flows down your back in loose, coordinated curls. The lower half remains loose and curly, creating a unified, flowing wave pattern throughout the entire style.
The Visual Flow of Cascading Curls
This style works because it creates a cohesive silhouette—there’s no sharp divide between the gathered section and the loose section. Instead, everything flows together in one continuous, undulating wave pattern. The gathered ponytail acts more as an anchor for styling than as a contained, separated section.
Achieving the Cascading Effect
- Blow-dry with a curling iron to create consistent curls throughout all your hair
- Section the upper half and gather it with a clear elastic, but don’t pull tightly
- Take a small section from the ponytail and wrap it around the elastic base to conceal it
- Allow the ponytail to fall and blend with the lower half of curls
- Make sure the curls throughout are uniform in size and direction for a cohesive look
- Finish with curl-defining spray that provides hold without crunchiness
This style photographs beautifully because the curls catch light and create movement and dimension from every angle.
8. The Minimalist Side Part with Sleek Twist
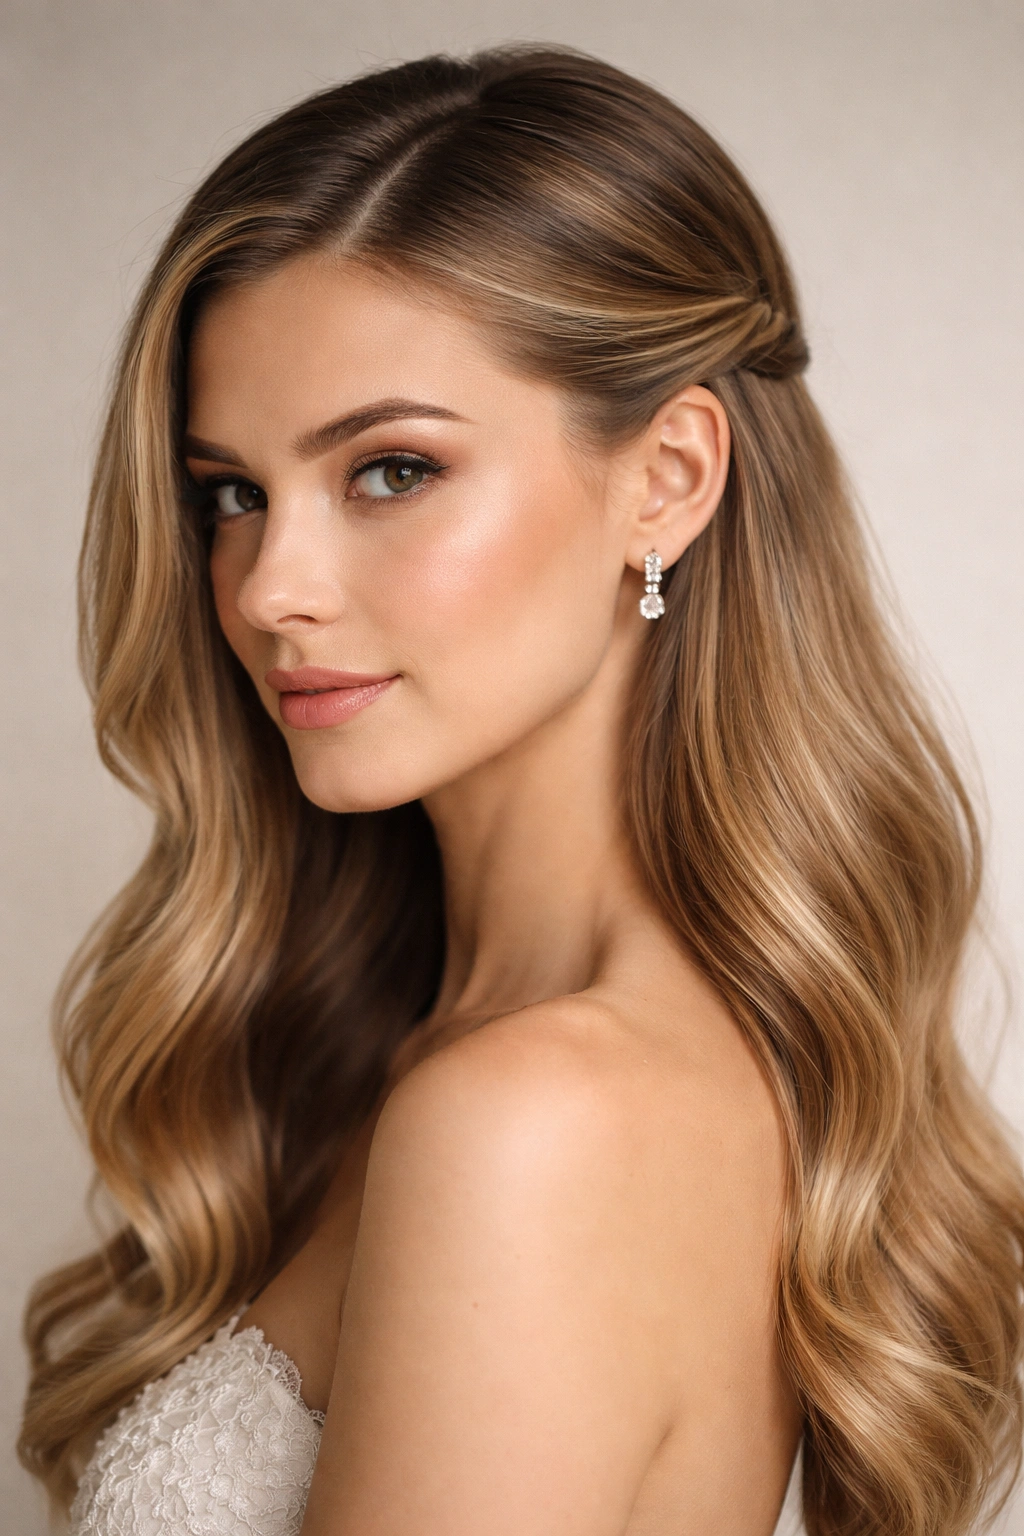
A sharp side part runs from your hairline to the crown, and the smaller side is twisted and secured behind your ear, creating a half-up effect that’s subtle and modern. The larger side falls completely loose, creating an asymmetrical silhouette that feels contemporary and refined. This works especially well for straight or slightly wavy hair where sleekness is an asset.
Modern Minimalism in Formal Styling
Not every formal style needs to be elaborate or heavily textured. A minimalist approach—clean lines, intentional asymmetry, precise technique—can feel just as formal and often reads as more sophisticated. This style suits sleek, architectural formal wear and works beautifully if you’re wearing a one-shoulder or asymmetrical dress.
Creating the Minimalist Twist
- Use a fine-tooth comb to create a distinct side part, starting at your natural part line
- Apply smoothing serum to the smaller side to ensure it appears sleek
- Twist the smaller side smoothly, starting near your ear
- Secure the twist behind your ear or just below it with bobby pins that match your hair
- Leave the larger side completely loose, either straight or with subtle waves
- Ensure no flyaways are visible—this style depends on precision and clean lines
- A simple, understated ear cuff or earring on the twist side complements the look
Worth knowing: This style works best when you have naturally straight or nearly straight hair, as waves can disrupt the minimalist aesthetic.
9. The Braided Halo Half-Up
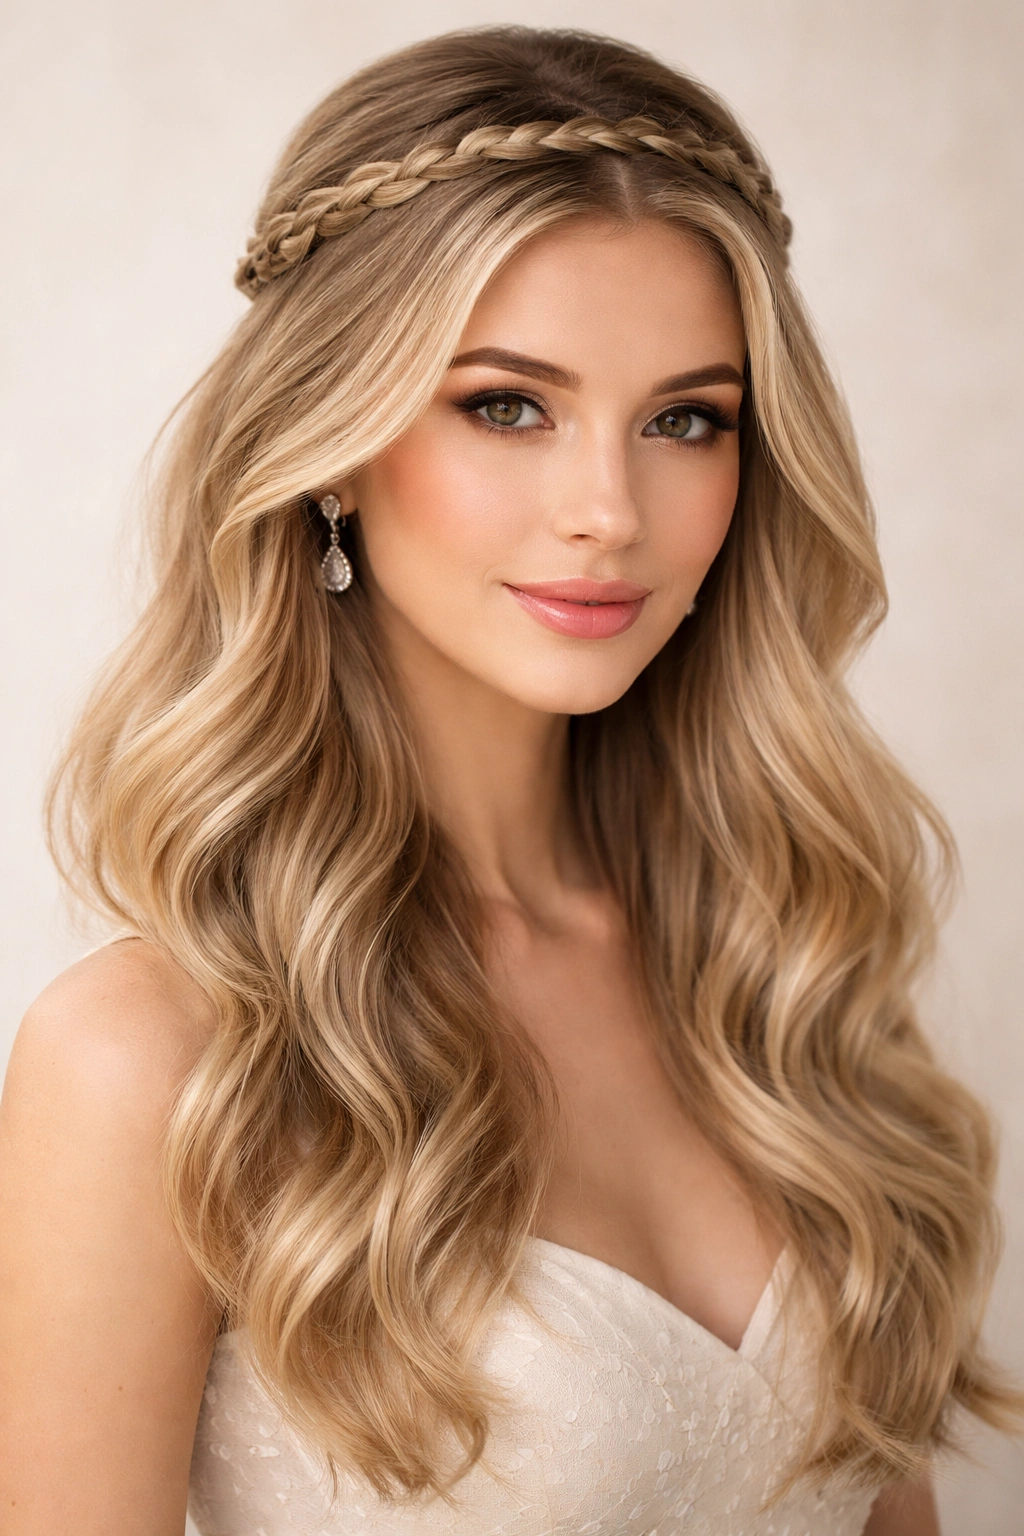
A thin braid circles the top of your head, creating a halo effect, while the entire lower half remains loose in waves or curls. The braid serves as the only gathered element, so it should be delicate and refined rather than chunky. This style evokes both classic and romantic vibes and works especially well for formal daytime events like brunches or garden ceremonies.
The Romantic Power of Halo Braids
A halo braid creates an immediate sense of delicacy and femininity without requiring extensive pinning or a fully gathered updo. The braid frames your face beautifully and, if executed with a thin, graceful braid, doesn’t overwhelm medium-length hair. This style reads as both romantic and effortless, which is exactly what formal styling should feel like.
How to Braid a Halo Half-Up
- Start with loosely waved or curled hair for texture
- Begin a thin three-strand braid at one temple
- Braid around the back of your head, positioning it where a tiara would sit
- Continue braiding to the opposite temple
- Secure the braid’s end and tuck it behind your ear or into the opposite side’s hair
- Pin the braid securely with bobby pins placed every 1-2 inches
- Leave the entire lower half loose and flowing
- Smooth any flyaways at the hairline for a polished appearance
The braid should appear almost like a crown, so positioning matters—place it higher for a more whimsical feel, or lower for a more grounded, classical look.
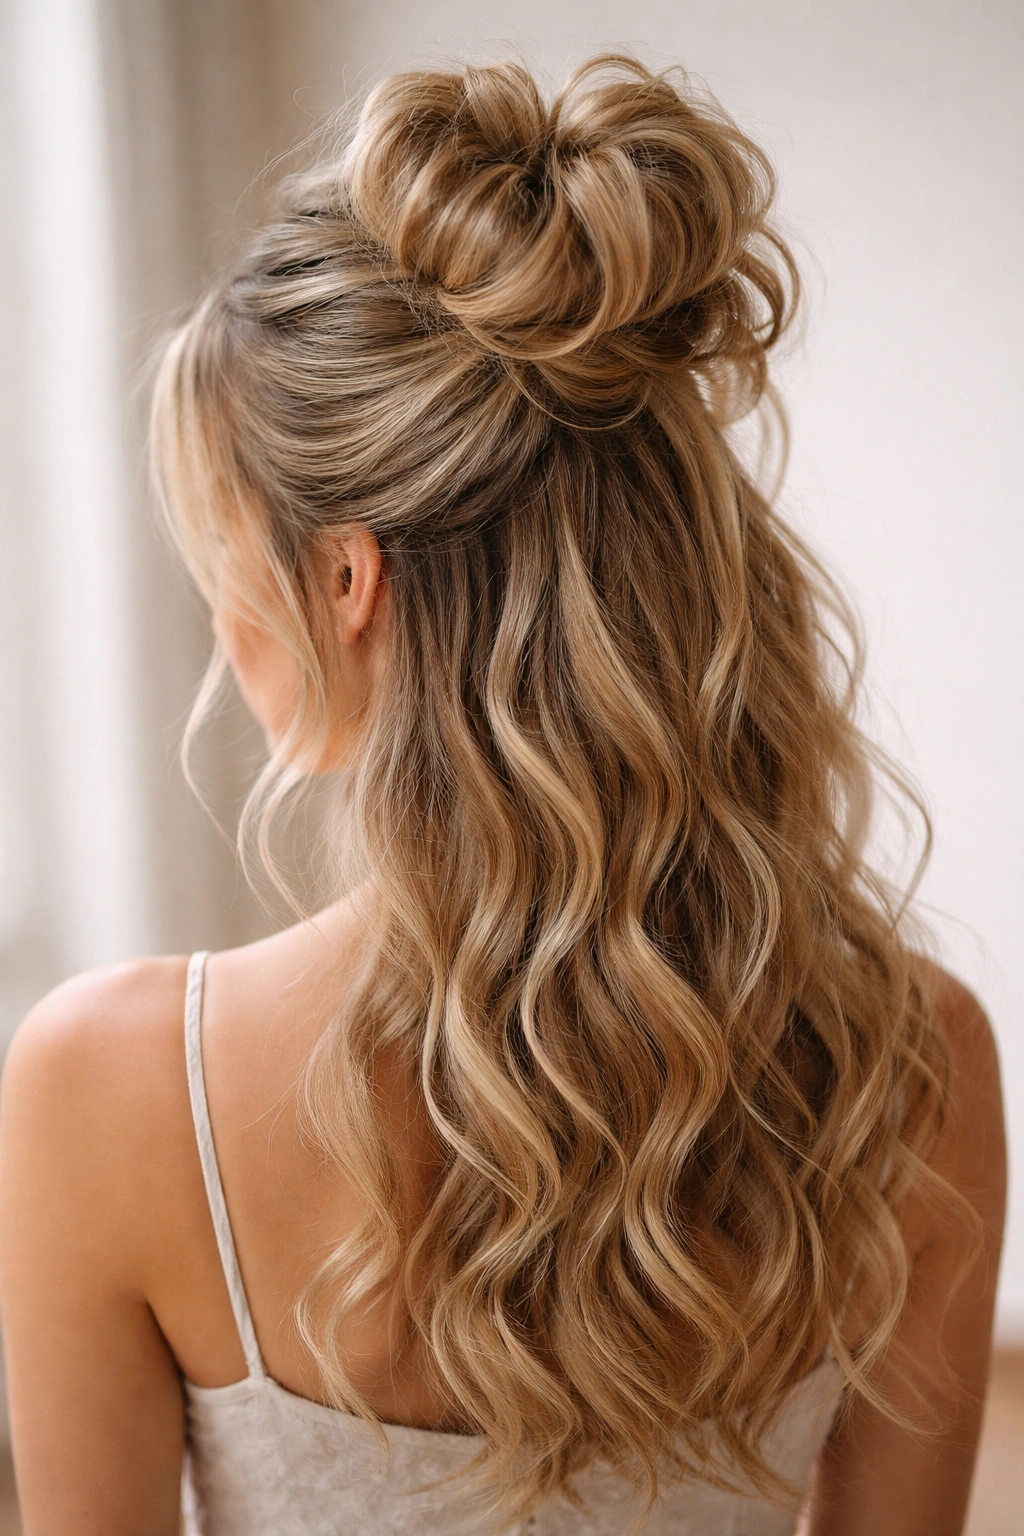
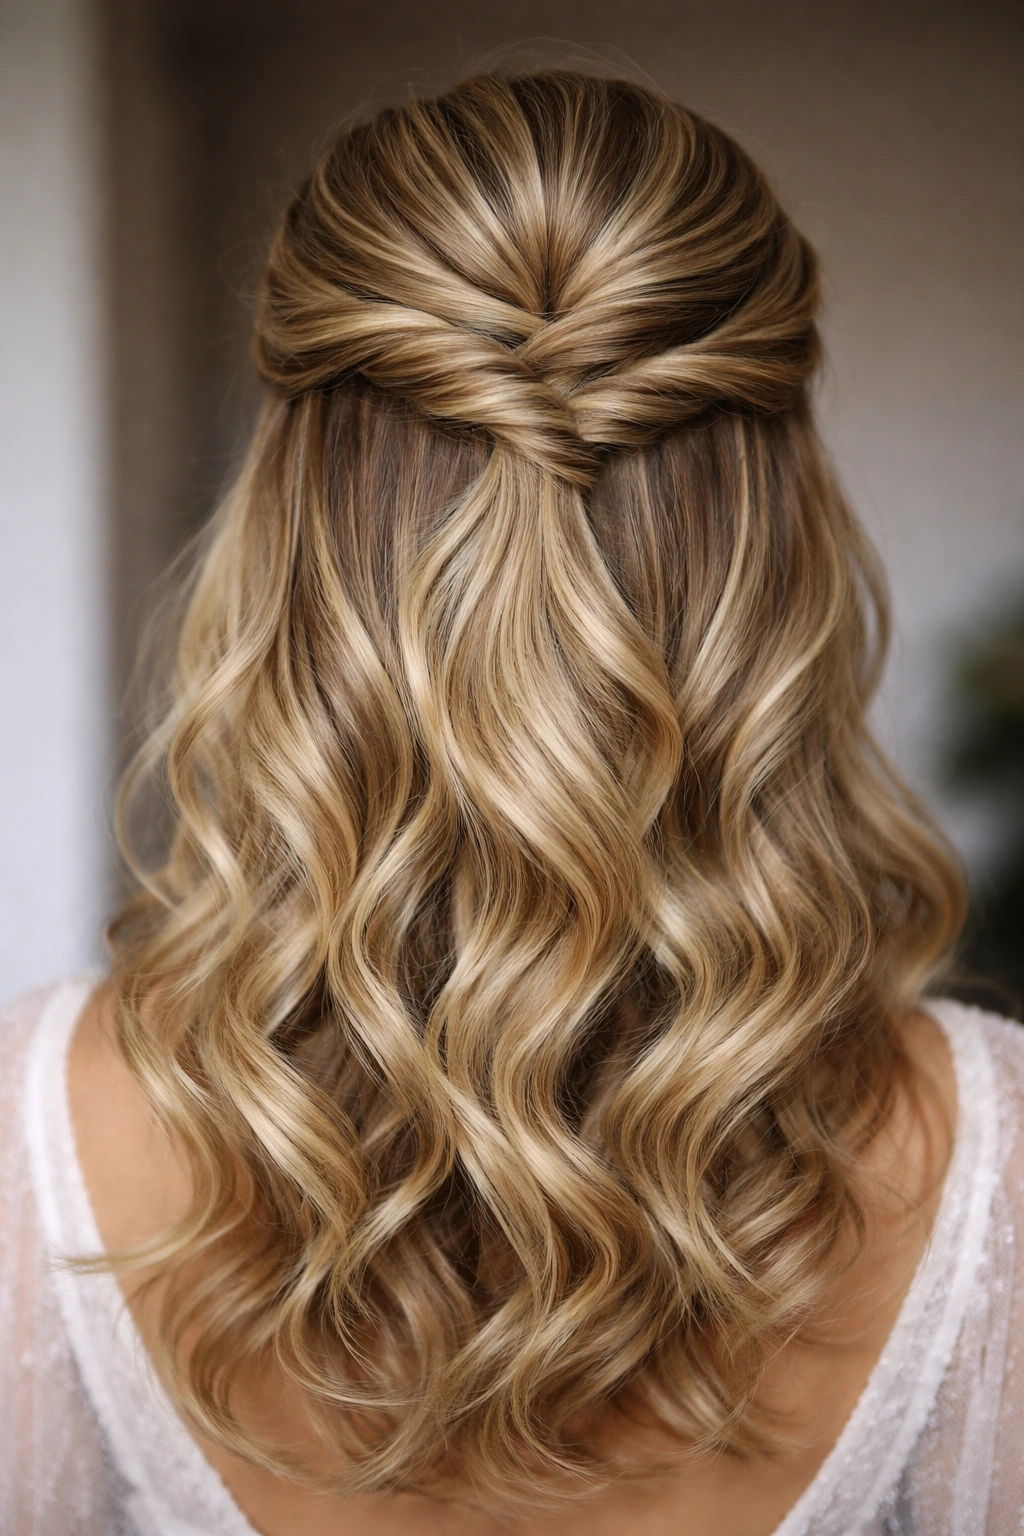
10. The Textured Top Knot with Straight Waves Below
A gathered, textured knot sits at the crown—similar to a messy bun but shaped into a tighter, more defined knot—while the lower half flows in smooth, straight waves or subtle waves. This creates an intentional contrast: deliberate texture at the top, refined smoothness below. The knot should look substantial and structured, not wispy.
Contrast as a Styling Strategy
The pairing of a textured, somewhat undone top section with sleek waves below creates visual interest and prevents the overall look from feeling monotonous. The contrast also makes both elements appear more refined—the texture looks intentional rather than accidental, and the waves look more deliberately smooth by comparison.
Building the Textured Top Knot
- Create texture throughout your entire head using a curling iron or texture spray
- Gather the upper half at the crown and twist it loosely
- Wrap the twisted section around itself, creating a knot shape
- Secure with multiple bobby pins, leaving some texture visible rather than smoothing it down
- Straighten or lightly wave the lower half with a flat iron
- Ensure the knot sits high and looks substantial
- Use a strong-hold hairspray to maintain the knot’s shape throughout the event
The contrast between a deliberately imperfect knot and perfectly smooth waves reads as intentional styling rather than a style that couldn’t decide what it wanted to be.
11. The Crisscross Wrap Half-Up
Two thin sections of hair, taken from either side of your head, wrap and crisscross across the back of your head before being secured together. The effect is more intricate than a simple gathered half-up but less formal than a full updo. The lower half remains loose and wavy, framing your face with soft movement.
Creating Intricate Detail Without Going Full Updo
This style occupies the perfect middle ground between simple and complex. It has enough detail to feel intentional and elegant, but it doesn’t require the time commitment or precision of a full updo. The crisscross element creates visual texture and sophistication that a simple gathered ponytail might lack.
How to Execute the Crisscross Wrap
- Take a thin section from behind one ear and gently twist or braid it
- Take a corresponding thin section from the opposite side
- Cross the two sections behind your head, creating an X shape
- Continue to the opposite sides of your head, wrapping around
- Secure all ends together at the back with bobby pins
- Gently tease the crossed sections to make them more visible and textured
- Leave the lower half completely loose in soft waves or curls
- Ensure each section is pinned securely so the style holds all evening
The wrapped sections should be visible but not so heavy that they overwhelm the overall silhouette.
12. The High Crown Twist with Volume
Two thick twists, one starting from each side of your head, meet and intertwine at the crown before being secured in a gathered, voluminous section. The twists should appear full and textured, and the gathered section at the crown should have visible bulk. The lower half flows in loose, full curls that complement the volume above.
Building Volume as a Formal Style Strategy
Volume reads as formal and deliberately styled, especially when it’s strategically placed at the crown. This style works beautifully for events where you want your hair to be a notable design element of your overall look. The high placement also elongates your neck and face, which is flattering in photographs and in person.
Creating the High Crown Twist
- Tease your entire head lightly for texture and grip
- Create one thick twist starting behind one ear, incorporating hair as you twist upward
- Create a corresponding twist on the opposite side
- Bring both twists to the crown and secure them together with bobby pins
- Gently pull and tease the twists to increase their visual volume
- Gather the upper section into a voluminous, textured cluster
- Leave the lower half in full curls or waves
- Finish with a strong-hold hairspray that allows slight movement
The goal is for the crown to appear noticeably fuller and higher than your natural hairline, creating a balanced silhouette with the loose curls below.
13. The Pearl Braid Half-Up
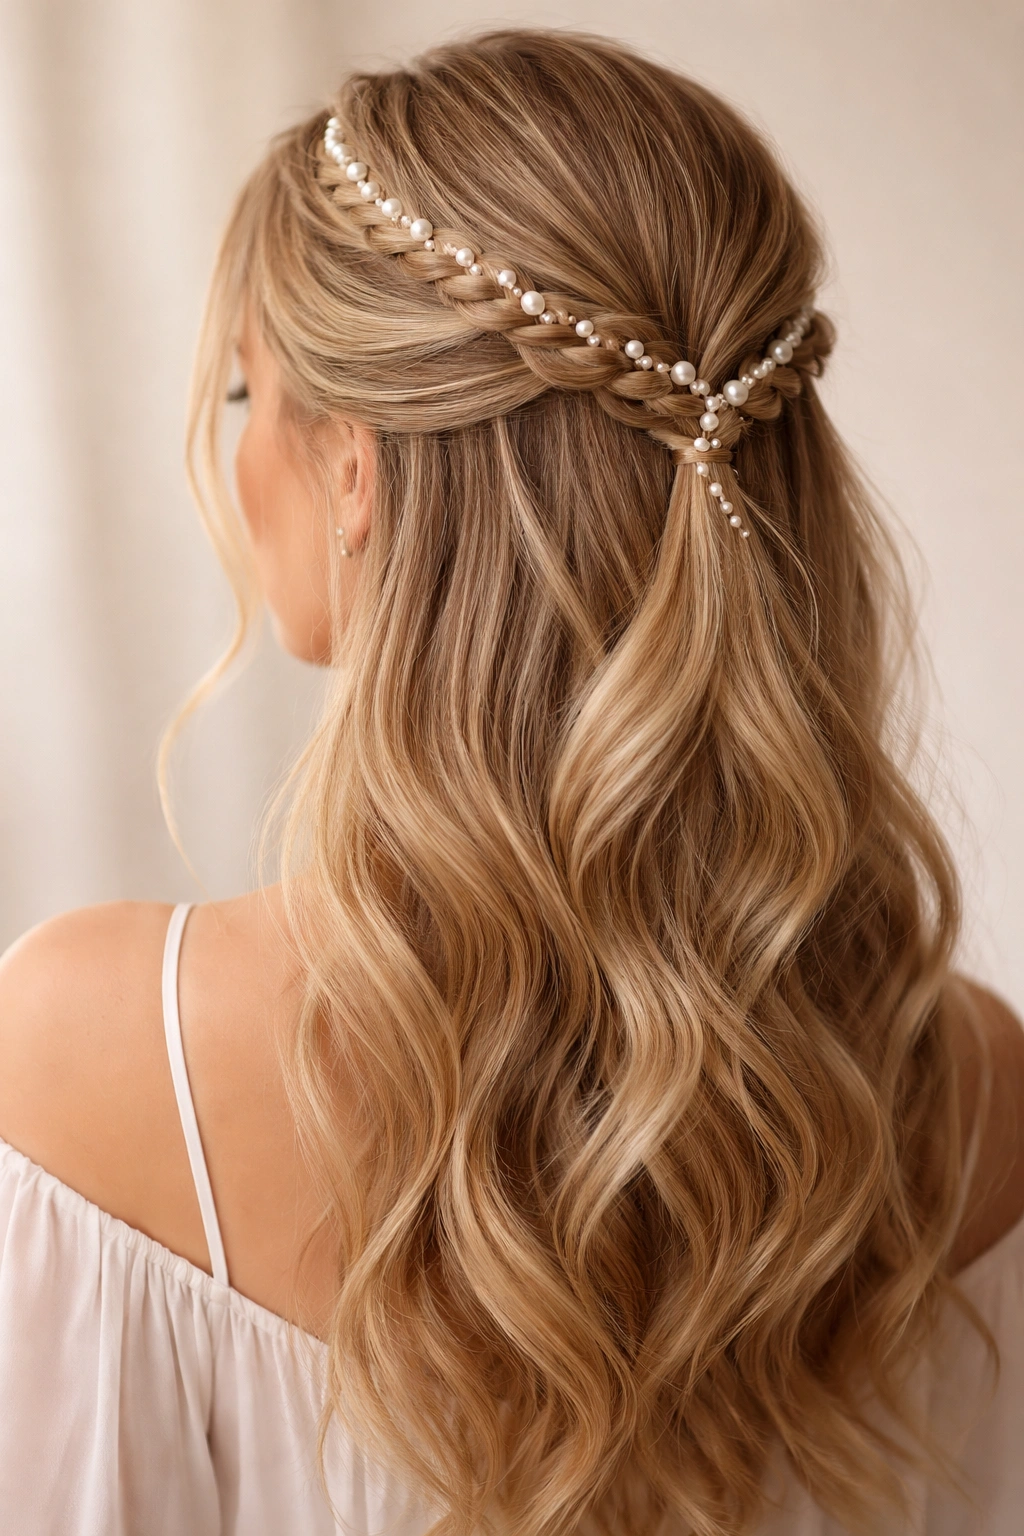
A thin, delicate French braid is woven with a strand of pearl beading or thin ribbon threaded throughout, creating a decidedly formal, jewelry-like braid. The braid gathers the upper half of hair, while the lower half remains loose and wavy. The pearl threading transforms a standard braid into a statement-making accessory.
Braid as Jewelry in Formal Styling
Threading pearls or ribbon through a braid elevates it from a simple hairstyle to an actual accessory. This approach is perfect for formal events where you want to incorporate jewelry into your hair styling without wearing a tiara or heavy pins. The threading also adds visual interest and catches light beautifully in photographs.
How to Weave Pearls Through a Braid
- Use a thin strand of pearls or pearlescent ribbon for this technique
- Begin a French braid at one temple or the crown
- Hold the pearl strand alongside the braid sections
- Incorporate the pearls throughout the braid by weaving them in and out with the braid sections
- Secure the braid’s end at the back or to the opposite side with bobby pins
- Keep the pearl strand visible and let it wrap around the back of your head
- Leave the lower half loose in soft waves
- Ensure the braid is tight enough that the pearls don’t shift but loose enough that the pearls remain visible
This style works best when you keep the lower half relatively simple—smooth waves rather than elaborate curls—so the pearl braid remains the focal point.
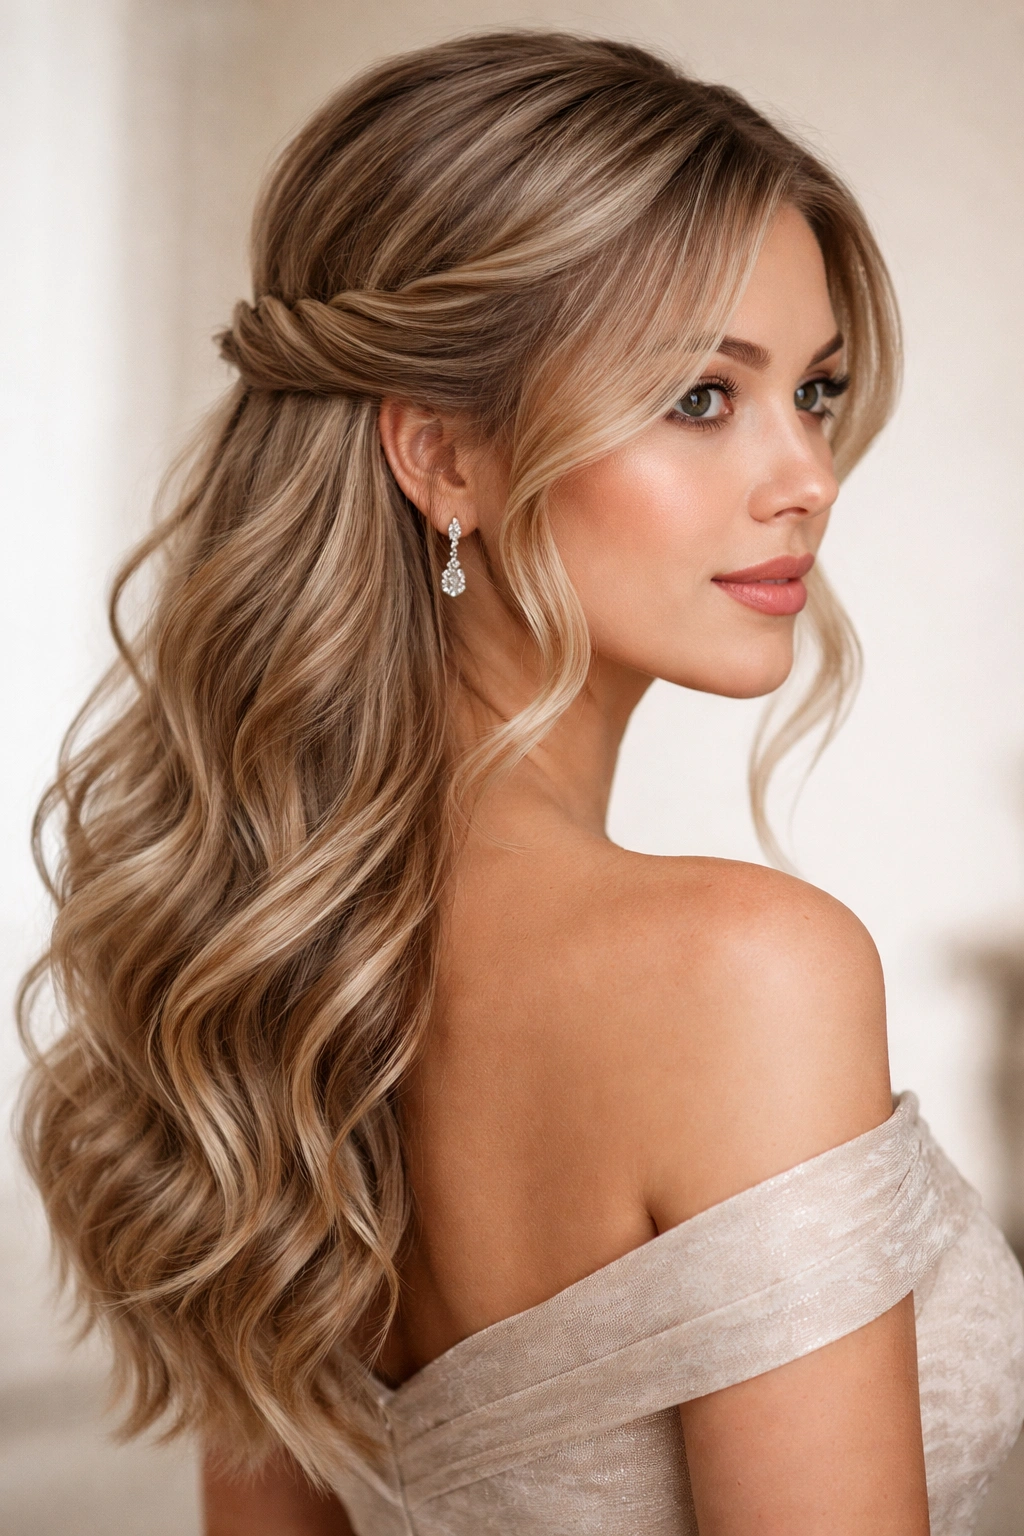
14. The Side-Swept Romantic Wave
Hair is gathered loosely to one side rather than at the center of the crown, creating an asymmetrical silhouette. The gathered section is lightly twisted and secured with a delicate pin or comb, while the majority of your hair falls in soft waves across the opposite shoulder. This feels less structured than a true half-up and more romantic in its approach.
Asymmetry as Elegance
An asymmetrical half-up style feels more romantic and slightly more casual than a centered version, which is perfect for formal events that want to skew romantic rather than strictly traditional. The side sweep also creates beautiful angles for photographs and frames one side of your face while showing the other side clearly.
Creating the Side-Swept Look
- Blow-dry your hair in loose waves throughout
- Section off the hair that you want to gather (roughly one-third to one-half)
- Gently twist this section and secure it to one side with a pin or delicate elastic
- Leave the opposite side completely loose to fall across your shoulder
- Arrange the loose waves so they cascade naturally across your chest and shoulder
- Ensure the gathered side is secured firmly enough to hold all evening
- Consider leaving a few face-framing pieces loose on the gathered side for softness
This style is particularly flattering on faces with good cheekbone definition, as it showcases one side of your face clearly.
15. The Sleek Low Half-Ponytail with Ornamental Clip
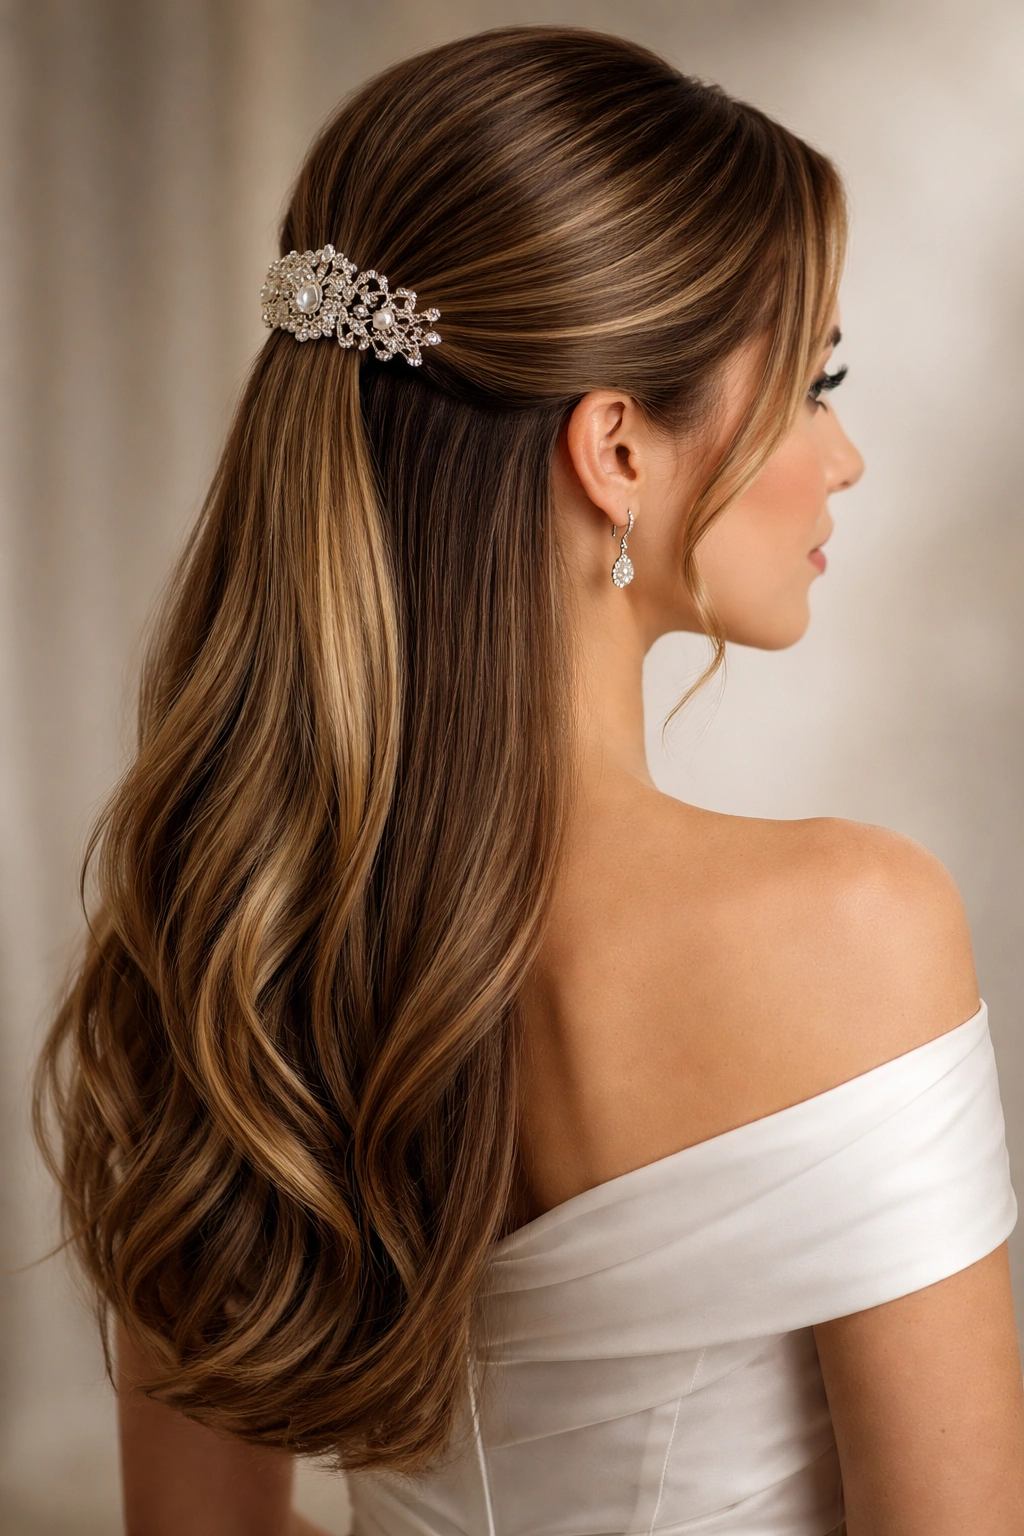
A low half-ponytail gathered at the base of your crown is secured with an ornamental clip or jeweled comb rather than an elastic band. The lower half flows loose and is either straightened or given subtle waves. The ornament becomes the styling focal point, so it should be beautiful and substantial enough to justify showcasing.
The Impact of a Single Ornamental Element
Unlike the pearl-pinned elegance, which uses a pin to secure the gathered hair, this style showcases the ornament visibly at the base of the ponytail. The ornament is the primary design element, so it needs to complement both your dress and your overall aesthetic. This approach works beautifully with formal gowns that have minimal hair accessories or jewelry.
Building the Low Half-Ponytail with Ornament
- Gather the upper half of hair at a lower position than a typical high ponytail
- Position the ornamental comb or clip at the base where the elastic would normally sit
- Insert the comb fully through the gathered hair section
- Ensure it’s secure and won’t shift as you move
- Leave the lower half loose and either straighten it with a flat iron or give it subtle waves with a curling iron
- Smooth any flyaways and ensure the clip is visible rather than hidden
- Keep the rest of your styling simple so the clip remains the focal point
The position of the clip matters—it should sit low enough to feel formal but high enough that it’s clearly visible and not hidden beneath overlying hair.
16. The Braided Lace Detail Half-Up

A delicate lace-like braid is created using a four-strand or five-strand braiding technique, creating a more intricate, elegant braid than a standard three-strand version. This braid gathers the upper half of hair, while the lower half remains loose and wavy. The multi-strand braid creates visible texture and visual interest that reads as deliberately detailed.
Complex Braiding Techniques for Formal Impact
A lace braid or four-strand braid reads as more sophisticated and intentional than a basic three-strand braid, but it’s not so complicated that it requires professional execution. The increased number of strands creates a naturally wider, more visually substantial braid that photographs beautifully. This technique works especially well if you have medium to thick hair.
How to Create a Lace or Four-Strand Braid
- Start with textured, slightly wavy hair for grip
- Begin the braid at one side, taking four sections of hair instead of three
- Braid by crossing the outer sections toward the center alternately
- This creates a naturally wider, more intricate-looking braid than three strands
- Continue braiding to the opposite side or across the back
- Gently pull the braid sections to make the braid appear fuller and more lace-like
- Secure at the back and leave the lower half in waves or curls
- Ensure the braid is visible and not flattened against your head
A four-strand braid can be intimidating if you’ve never tried it, but it becomes intuitive once you understand the crossing pattern.
17. The Romantic Waterfall Half-Up
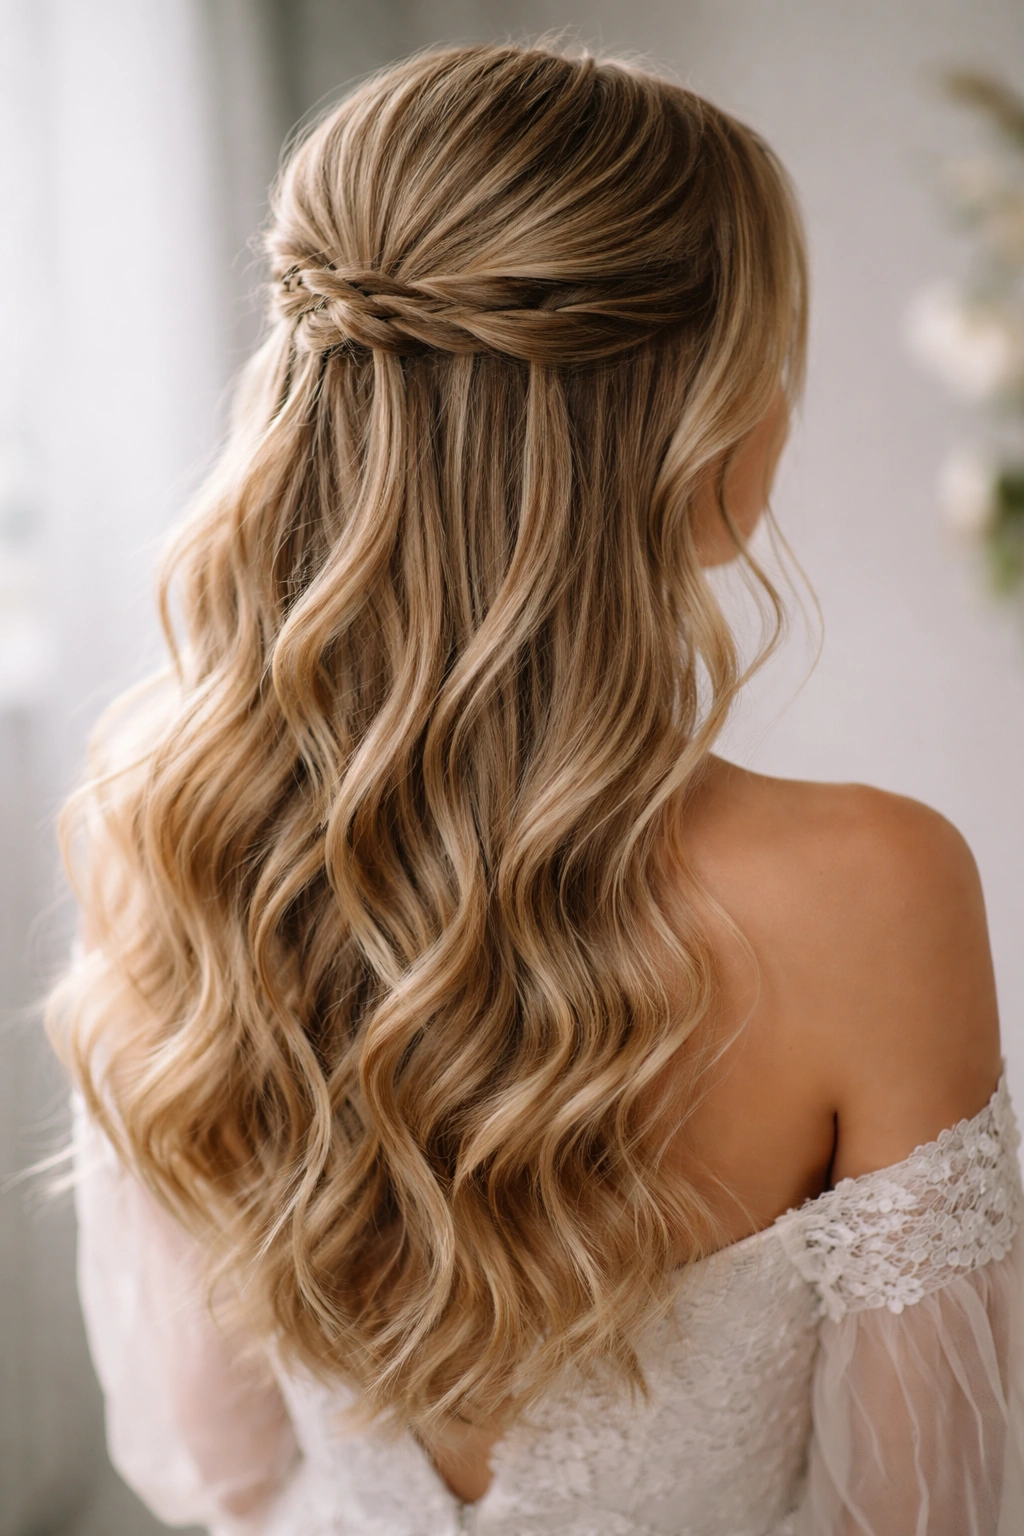
A section of hair is gathered and secured, but several thin strands are left loose and allowed to cascade down from the gathered section, creating a “waterfall” effect. The remaining lower half also falls loose, creating a unified flow of cascading waves and strands. This style feels romantic and whimsical while maintaining formal polish.
The Waterfall as a Styling Metaphor
A waterfall braid or waterfall half-up creates the visual impression of continuous movement and flow. Strands are released at intervals, creating a dimensional, dynamic effect rather than a static gathered section. This approach works beautifully for formal events where you want to feel romantic and elegant without appearing overly constructed or rigid.
How to Create a Waterfall Effect
- Gather the upper half of hair as you normally would
- Rather than securing it tightly, secure it loosely with an elastic that will be less visible
- Take 3-4 thin sections from the gathered hair and let them cascade down your back
- Pin the gathered section securely so it doesn’t slip, but keep the cascading strands loose and flowing
- Alternatively, create a waterfall braid, releasing thin strands periodically throughout the braid
- Curl or wave the lower half generously so the cascading strands blend with the loose hair
- Ensure the transition between gathered and loose sections is seamless
The waterfall effect works best when the cascading strands match the texture and curl pattern of the lower half, creating visual continuity.
18. The Twisted Crown with Statement Earring
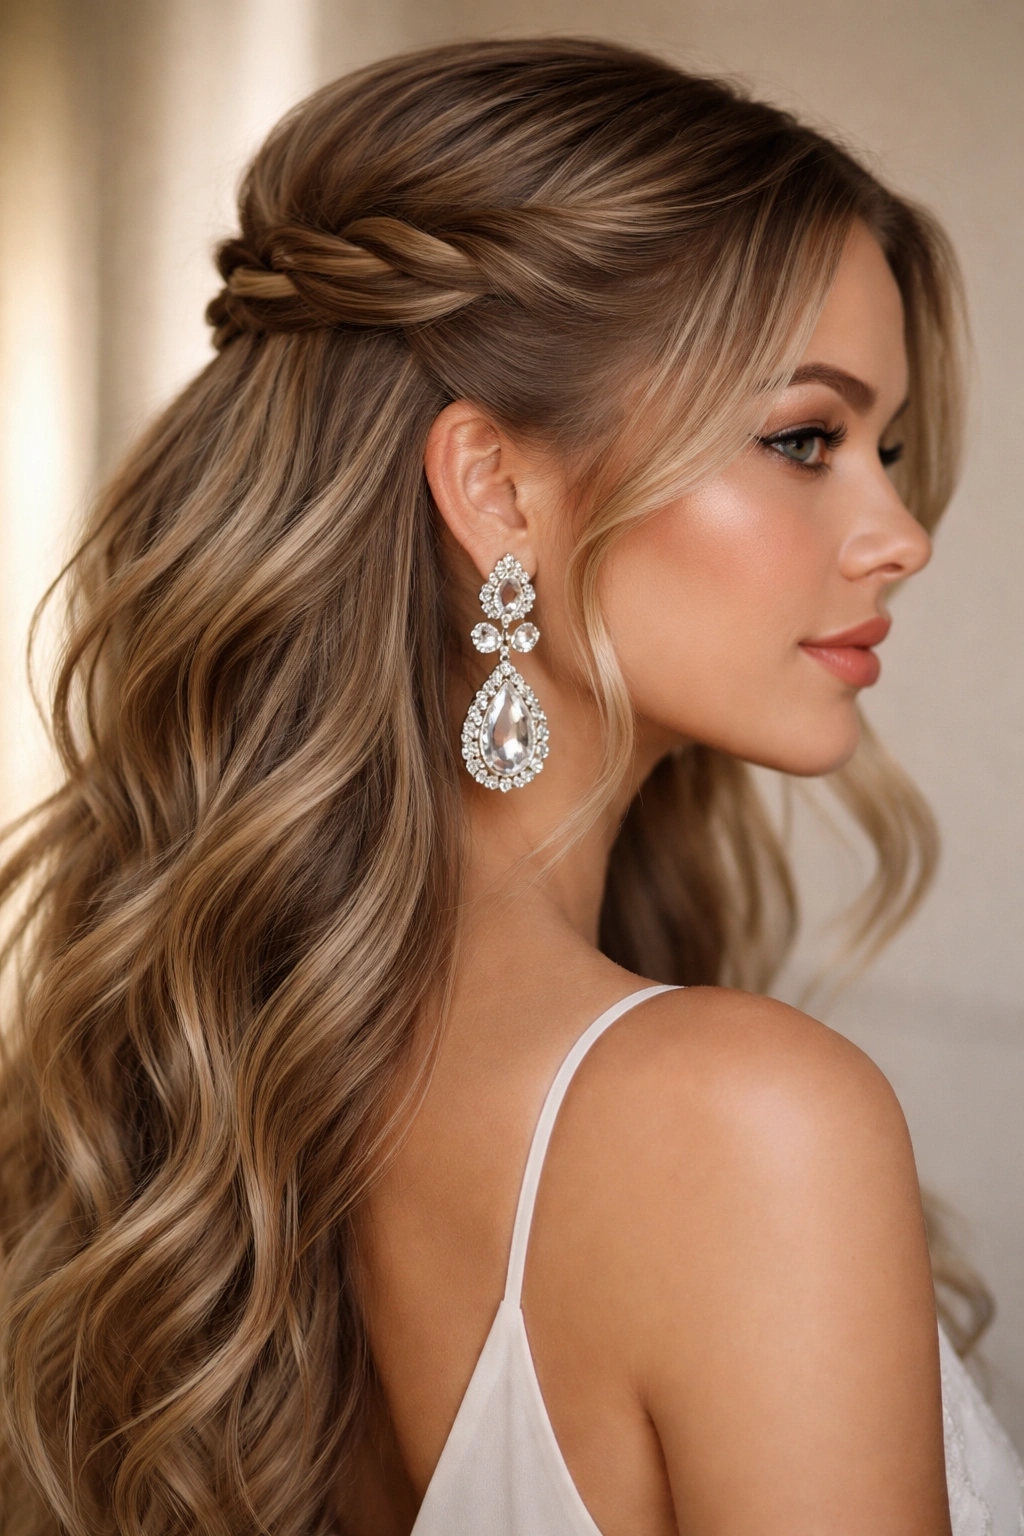
Twin twists wrap from both sides of your head around toward the crown, where they’re secured together, creating a gathered half-up that reads as more modern than traditional. The lower half remains completely loose in smooth waves or curls. This style is streamlined enough to feel current while maintaining formal elegance, and it showcases statement earrings beautifully by keeping hair off the ears.
Showcasing Jewelry Through Hair Styling
A half-up style that pulls hair behind the ears creates the perfect canvas for statement earrings or delicate studs. The styling doesn’t compete with your jewelry—it complements it by creating a clean line from the twisted crown to the ear. This approach is particularly effective if your formal gown or your event requires jewelry to be visible and prominent.
Creating the Twin Twist Crown
- Create one twist starting at the temple on one side, incorporating hair as you twist upward and backward
- Create a corresponding twist on the opposite side
- Bring both twists to meet at the crown or just behind it
- Secure both twists together with bobby pins, ensuring they’re anchored tightly
- Leave the lower half completely loose—the clean, uncomplicated lower half balances the twisted crown
- Smooth any flyaways at the hairline and temples
- Ensure your earrings are visible and not obscured by the twists
This style is particularly flattering if you have delicate ears or beautiful earrings that deserve to be shown off.
19. The Soft Bubble Half-Ponytail
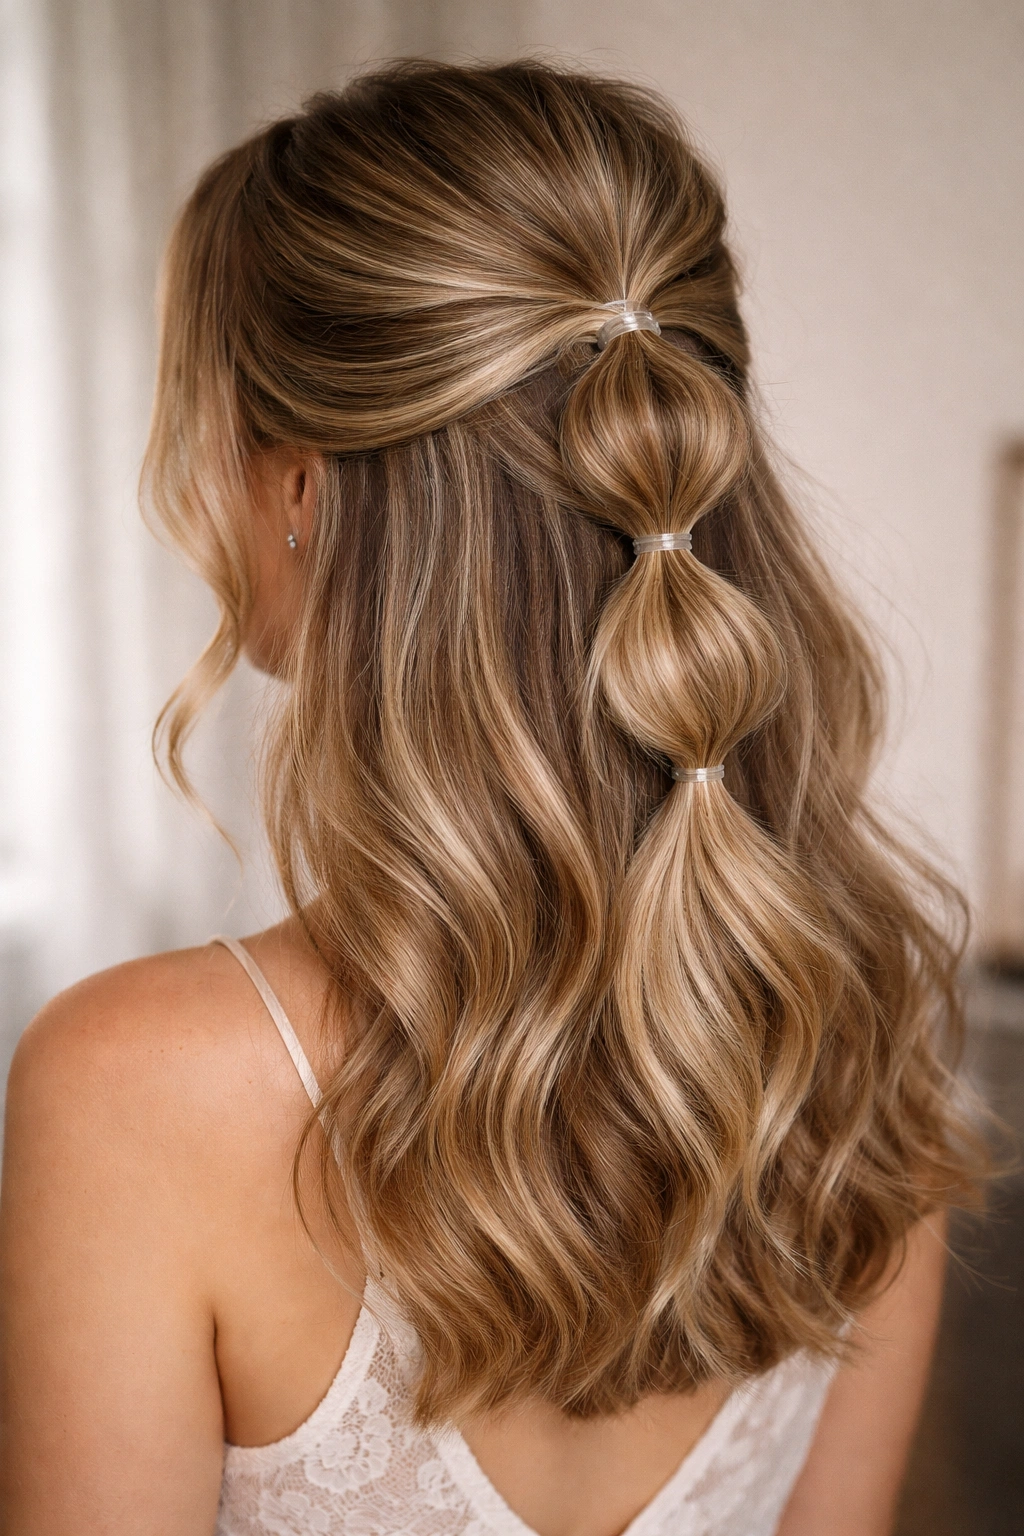
A high half-ponytail is created with a soft, diffused gathered section rather than a tight, sleek one. The ponytail is then subdivided into 2-3 smaller bubbles using additional elastic bands, creating a segmented, textured appearance while keeping the overall look romantic and soft. The lower half remains loose and wavy.
Textured Gathering as a Modern Approach
Rather than a smooth, tight half-ponytail, a soft, bubbled version feels more contemporary and playful while remaining entirely formal-appropriate. The bubble effect creates visual texture and dimension and works especially well with medium hair that has natural wave or volume. This style reads as deliberately styled without appearing overly formal or severe.
How to Create a Bubble Half-Ponytail
- Gather the upper half loosely and secure with a clear elastic
- Instead of tightening it, leave it soft and slightly diffused
- About 2-3 inches below the first elastic, add a second elastic band
- Gently fluff out the hair between the two elastics to create a “bubble” effect
- Add a third elastic another 2-3 inches down if desired
- Tease slightly between each elastic to enhance the bubble appearance
- Fluff the tail section and blend it with the loose lower half
- Curl or wave the entire lower half generously
- Finish with a light hairspray that allows movement
The bubbles should appear distinct but not severe—they’re a textural element, not a rigidly segmented style.
20. The Romantic Flower Pin with Loose Waves
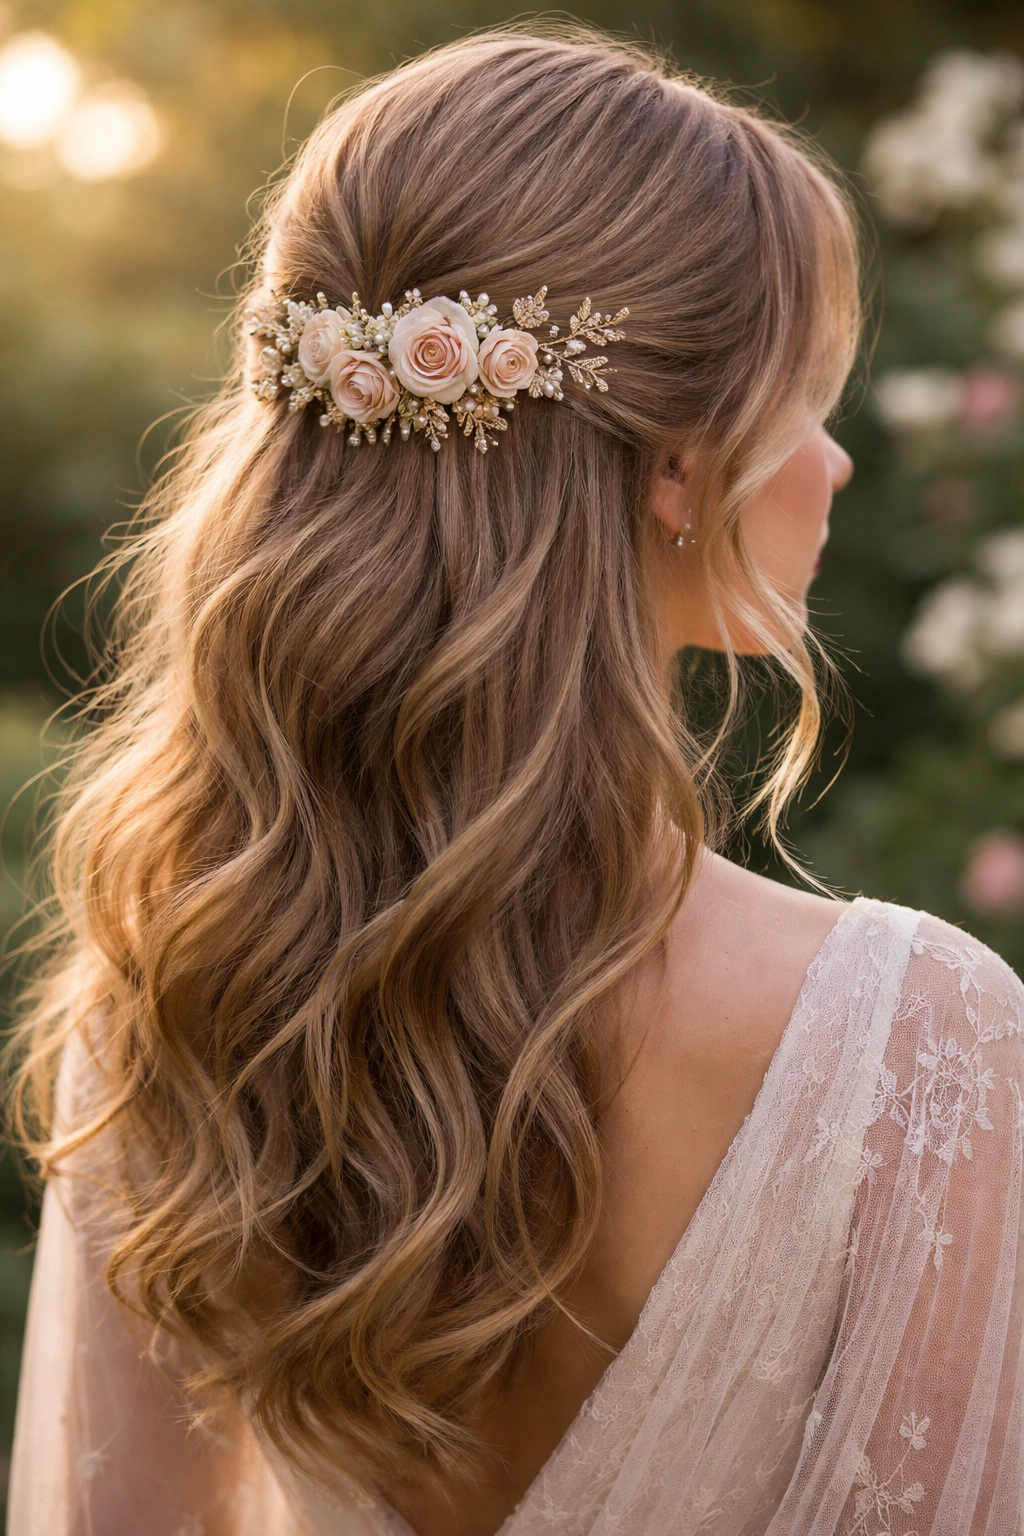
The upper half of hair is gathered gently at the crown and secured with a decorative flower pin or floral comb, creating a romantic, garden-inspired look. The flower pin becomes the only visible securing element, making it the focal point. The lower half flows completely loose in soft waves or curls, often with a few face-framing pieces left out intentionally from the gathered section.
Floral Elements in Formal Styling
A flower pin or floral comb brings an inherently romantic, garden-inspired quality to any formal hairstyle, making it perfect for spring or garden weddings or any event with a romantic dress code. The flower itself acts as both a functional securing device and a decorative accessory, so you don’t need additional jewelry or pins competing for attention.
Creating the Flower Pin Look
- Gather the upper half of hair loosely at the crown
- Secure initially with a clear elastic to ensure the hair doesn’t slip
- Position your flower pin or comb across the gathered section at the front
- Insert the pin deeply so it anchors all the gathered hair securely
- Allow the gathered hair to fluff slightly around the pin for a soft, romantic appearance
- Leave 1-2 longer pieces on either side to frame your face
- Curl or wave the entire lower half in soft, romantic waves
- Ensure the flower is clearly visible and not hidden beneath other hair sections
The beauty of a flower pin is that it photographs gorgeously and creates an instantly romantic aesthetic without requiring elaborate pinning techniques.
Final Thoughts
Each of these twenty styles offers something distinct—from minimalist and modern to deeply romantic and ornate. The beauty of a half-up half-down format is that it refuses to commit entirely to formality, maintaining a sense of ease and movement while still reading as intentional and polished. Medium hair length gives you the freedom to experiment across all these variations without worrying that your hair is too short to gather or too long to manage effectively.
The best formal half-up style for you depends on several factors: how much time you’re willing to spend on styling, your natural hair texture and thickness, the formality level and dress code of your event, and honestly, how you want to feel. If you’re happiest feeling romantic and soft, gravitating toward braids and loose waves makes sense. If you prefer feeling polished and controlled, sleek twists and precise gathering will serve you better. Neither approach is more “formal” than the other—they’re just different expressions of formal elegance.
Don’t hesitate to practice whichever style calls to you before the actual event. Most of these techniques become significantly easier and faster the second or third time you attempt them. A YouTube tutorial running in the background can transform a technique from confusing to intuitive in minutes. Your hair will thank you for the practice, and you’ll walk into your formal event feeling confident that your styling is exactly what you intended it to be.