Straight hair is a canvas for some of the most polished, statement-making hairstyles out there, and half-up half-down braided styles sit right at the intersection of casual and intentional. There’s something undeniably appealing about these styles — they keep hair out of your face while leaving the length flowing free, and the braids add instant texture and visual interest to even the straightest, sleekest hair. The beauty is that straight hair actually holds braids beautifully. Because the strands are uniform and smooth, braids sit cleanly without the frizz and texture that can sometimes make them feel chaotic. The challenge, though, is preventing that too-polished, too-tight look that can read more prom than everyday.
The real skill with braiding straight hair is understanding tension. You want the braid tight enough that it holds its shape throughout the day without slipping, but with just enough gentle looseness that it doesn’t look painful or artificial. That gentle, undone quality — sometimes called “lived-in” — is what transforms a braid from pretty into genuinely stunning. Add to that the fact that half-up styles work for every occasion (weekend errands, work meetings, date nights, special events), and you’ve got a styling category that deserves serious exploration. Whether you’re looking for something intricate and intricate, romantic and soft, modern and sharp, or playful and fun, braided half-up half-down styles deliver.
These fifteen styles run the full spectrum. Some feature delicate, wispy braids, others showcase chunky, bold plaits. Some sit at the crown, others begin lower. Some use a single statement braid, others weave multiple smaller ones together. Each one works with straight hair’s natural strengths — the way light catches a clean braid, how smoothly the strands blend together, the almost sculptural quality of well-executed braid work.
1. The Classic French Braid Half-Up
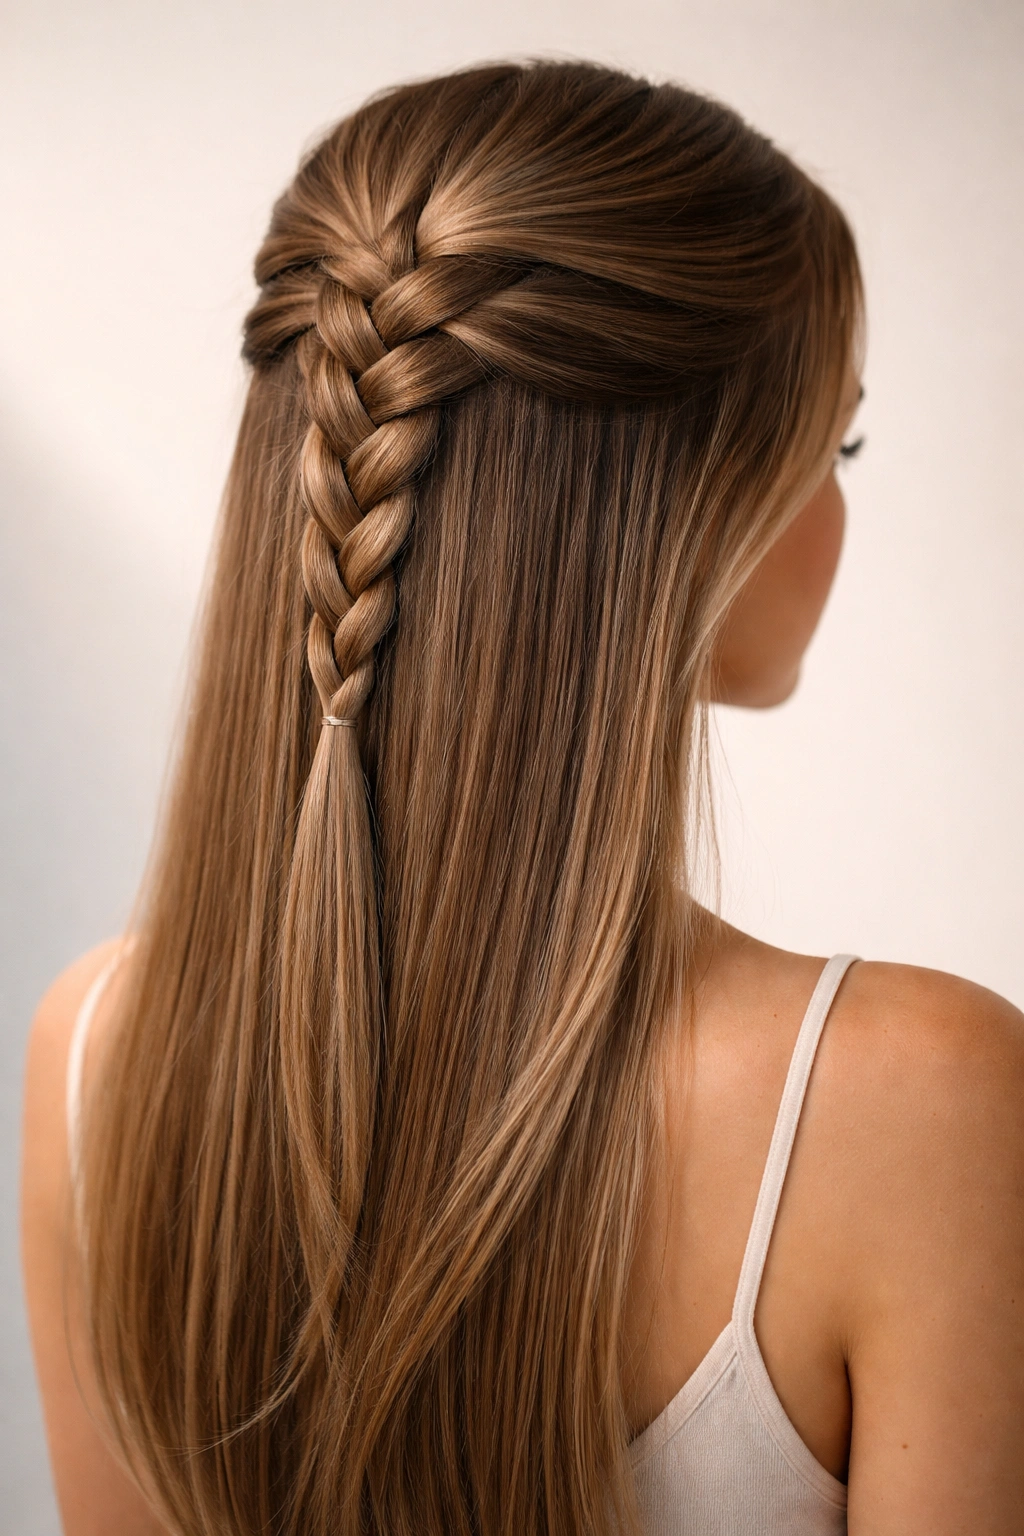
The foundation of every braided half-up style starts here — the French braid pulled from the crown backward, then secured with the bottom half of your hair left loose. What makes this work so well on straight hair is that the French braid’s three-strand structure creates clear visual definition against smooth strands. Start by taking a section of hair about two inches wide from your center part at the very crown of your head. Divide it into three equal sections and cross the right section over the middle, then the left section over the middle, just like a regular braid. But here’s the key: as you cross each section over, pick up a thin section of loose hair from the right side of your head and add it to the right section before crossing it over.
Why It Works for Straight Hair
Straight hair holds the braided structure cleanly without texture or frizz hiding the braid’s beautiful pattern. Each strand stays visible, making the dimensional work of the French braid actually shine. The braid looks intentional and polished from the moment you finish it, with no waiting for texture to settle or movement to happen.
How to Style It Perfectly
- Begin at your crown and braid straight back toward the nape of your neck, adding hair as you go
- Stop braiding once you reach the nape, then gather all your hair into a half-up ponytail at the back center of your head
- Secure with a clear elastic, bobby pins, or a decorative hair clip
- For texture, gently tease along the part line before you begin braiding, or use a light texturizing spray on damp hair before styling
- Finish with light hairspray to hold the braid’s shape without making it look stiff
Pro tip: If your straight hair slides easily, braid slightly damp hair rather than completely dry. Damp hair has just enough grip to hold the braid structure without creating frizz.
2. The Double Dutch Braid Half-Up
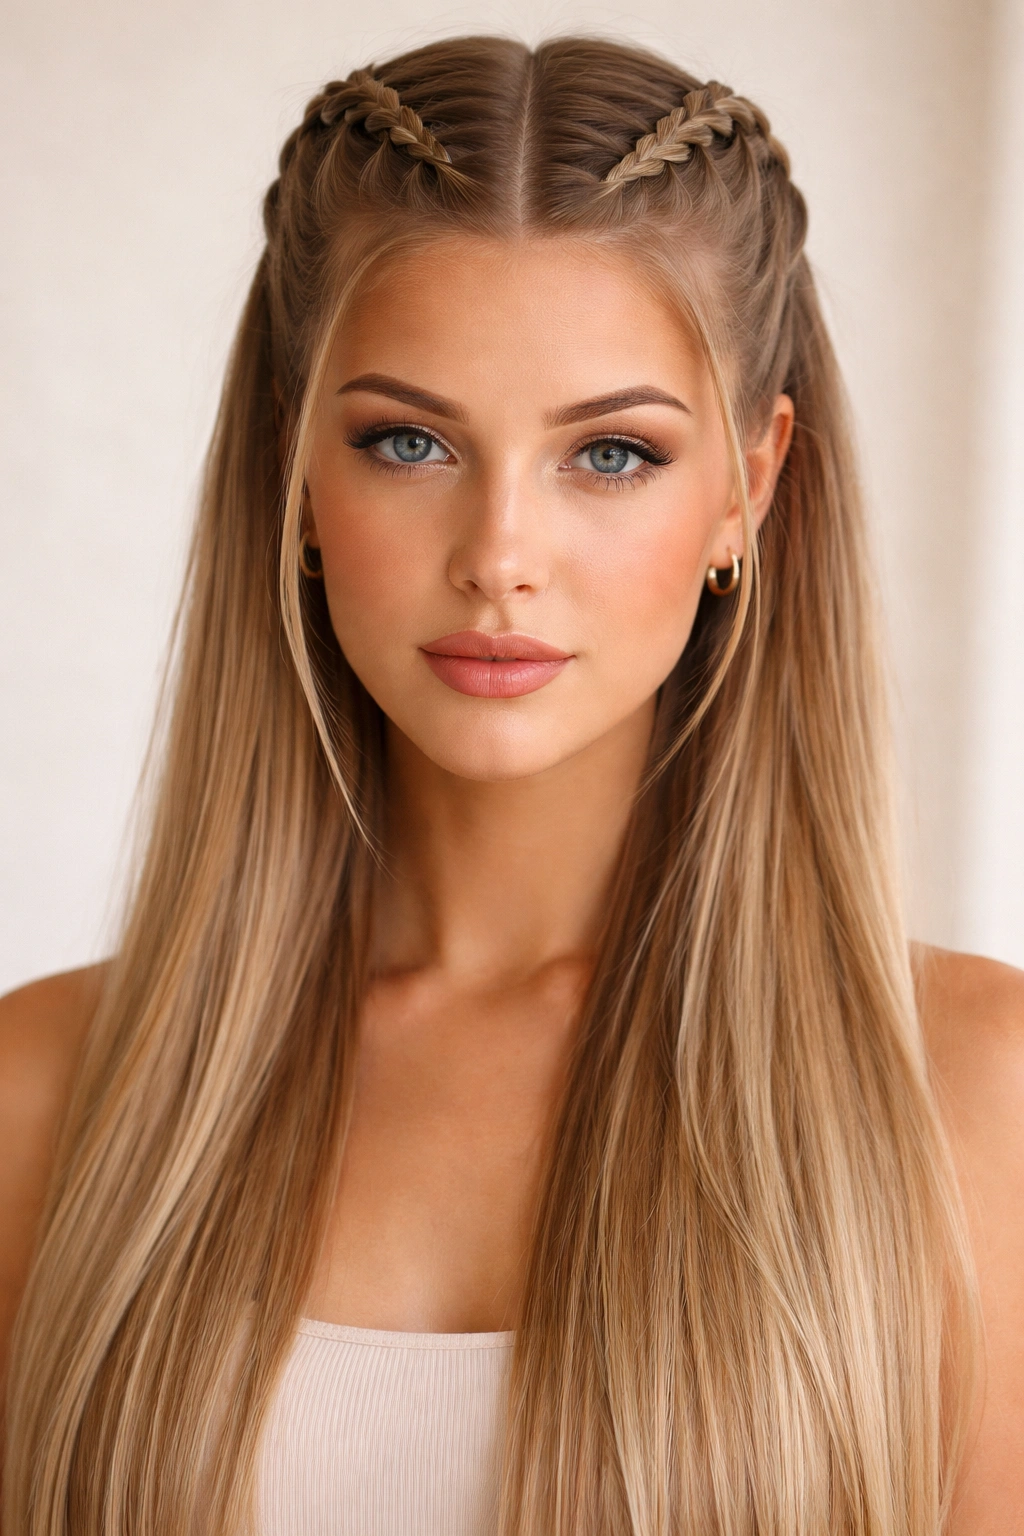
Two Dutch braids (which are French braids done in reverse — you cross sections under rather than over) create symmetry and a distinctly modern look. This style reads younger, fresher, and a bit more playful than a single center braid. Start by creating a clean center part from your forehead all the way to the nape of your neck. On the right side of the part, take a small section of hair at your temple and begin a Dutch braid, crossing strands under rather than over. Do the same on the left side, starting an identical Dutch braid at your left temple. Both braids should move diagonally back toward the nape of your neck.
Why It Works for Straight Hair
Two symmetrical braids maximize the visual impact and create clear focal points on both sides of your face. Straight hair’s lack of natural texture means these braids sit boldly and cleanly, creating a strong graphic line that actually looks more intentional on sleek hair than on textured hair.
Styling Tips for Perfect Symmetry
- Divide your hair into two equal halves with a precise center part using a rattail comb
- Make sure both braids start at exactly the same height on each side — using your ear as a reference point helps
- Keep tension even on both braids so they progress at the same rate and meet at the same point at the back
- Secure both braids together into a single half-up ponytail at the nape, or cross them over each other and pin them individually for a more intricate look
Do this: Gently pull and loosen the braids slightly after securing them. Straight hair can look almost too neat, so softening the braid’s edges adds dimension and prevents that overly controlled appearance.
3. The Twisted Crown Half-Up

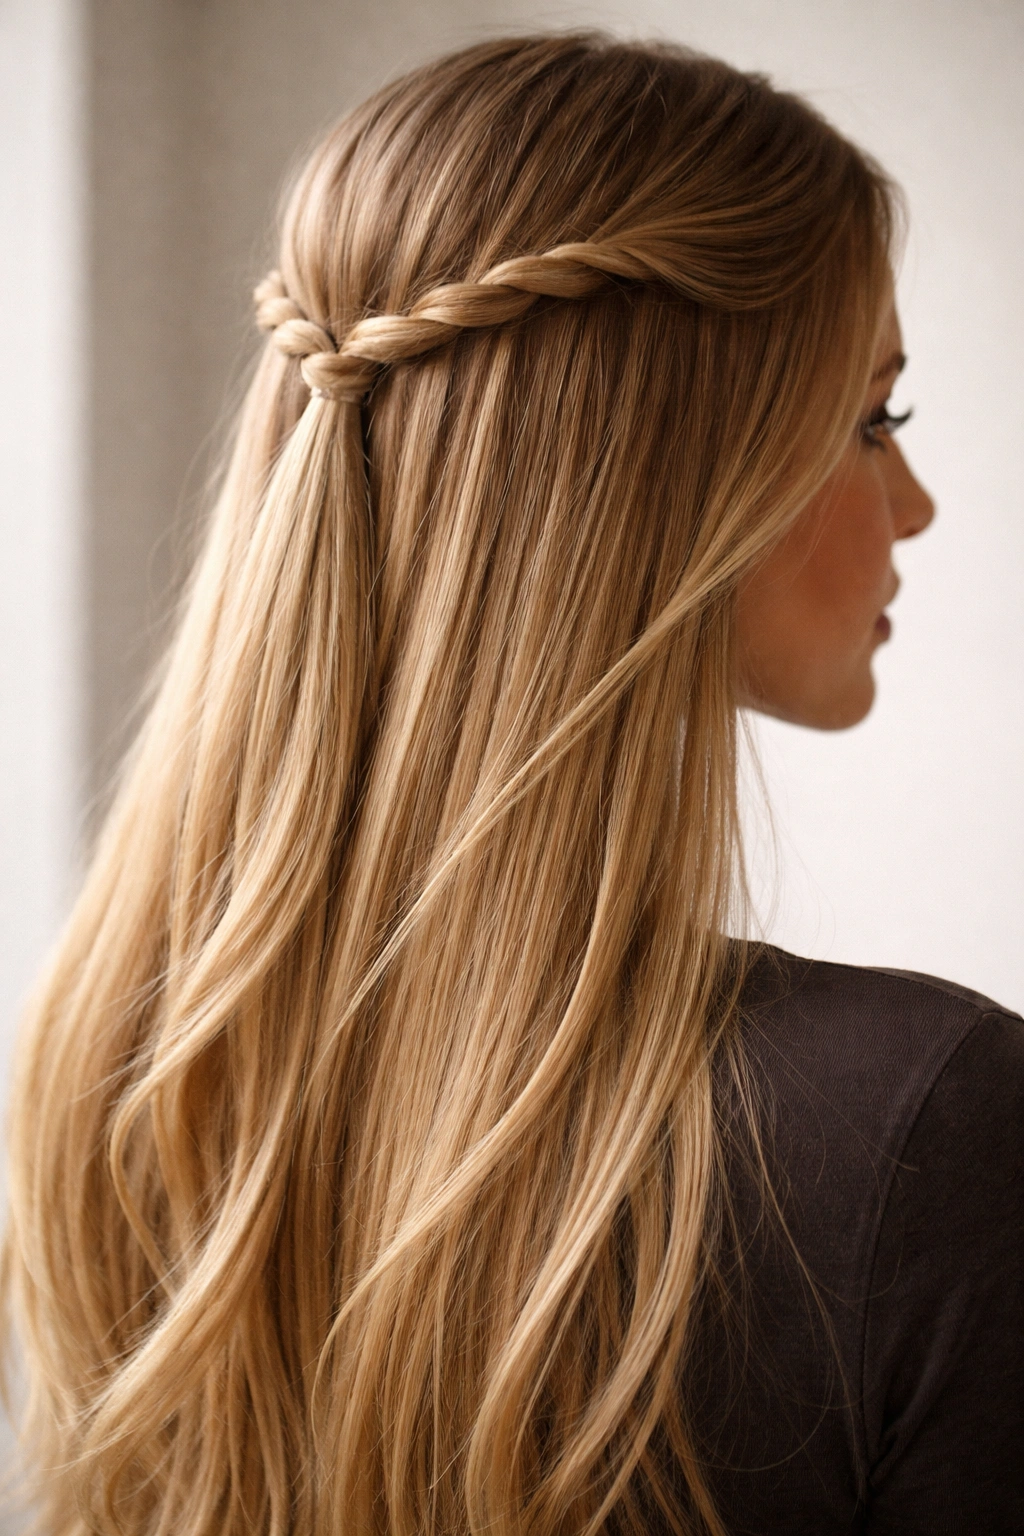
Not technically a braid, but a twisting technique that creates a similar visual effect and is often simpler to execute on straight hair. Start with a section of hair at one temple and twist it as you would rope, moving that section back and adding thin pieces of loose hair into the twist as you go. When you reach the opposite side of your head (usually around your ear), you’ve created a twisted band that frames your face. Gather this twist with the rest of your hair and secure the half-up ponytail below.
Why This Style Shines on Straight Hair
Twists are actually more forgiving on straight hair than braids because the rope-like structure is less likely to show bumps or imperfections. Straight hair’s smoothness makes twists look seamless and polished. You also get the visual texture and interest of a braid without the technical precision required.
How to Make It Hold All Day
- Twist tightly enough that the structure is clearly visible, but not so tight that you’re pulling hair from the root
- As you add sections of hair to your twist, make sure each new section is picked up cleanly from the main mass of hair
- Secure the final half-up ponytail with an elastic wrapped multiple times, or use bobby pins hidden beneath the hair for an invisible hold
- Use a light hold hairspray on the twist itself to keep the twisted structure from slowly unraveling throughout the day
Worth knowing: Twists actually photograph better than braids on straight hair because the light catches the smooth twisted sections differently, creating more dimension in photos.
4. The Rope Braid Half-Up
A rope braid uses only two sections of hair instead of three, and it creates a distinctly different visual texture than a traditional braid. Section off your half-up portion from your crown, then divide that section into two equal halves. Twist each half clockwise (or both in the same direction), then wrap one twisted section around the other counterclockwise. As you do this, pick up small sections of loose hair and add them to each twisted section. The result is a braid-like structure that’s thinner and more delicate than a French braid, with a spiral appearance.
Why Rope Braids Flatter Straight Hair Especially
The two-strand structure creates a tighter, more compact braid than a three-strand braid, which actually looks more refined on sleek, straight hair. The spiral pattern adds movement and visual interest without the bulk of a thicker braid. Rope braids also look intentional and modern — they feel like a more sophisticated choice than a basic three-strand braid.
The Technique That Makes or Breaks It
- Keep tension even on both twisted sections so they wrap around each other neatly
- Add new hair sections only to one side — typically the back side as you work backward
- The braids can look messy if you’re not careful, so work slowly and keep your sections even
- Secure gently; rope braids hold beautifully with minimal product, so a light hairspray is usually enough
Insider note: Rope braids work especially well on very straight, fine hair because the thinner structure feels proportionate to delicate strands, whereas a chunky French braid might overwhelm fine hair.
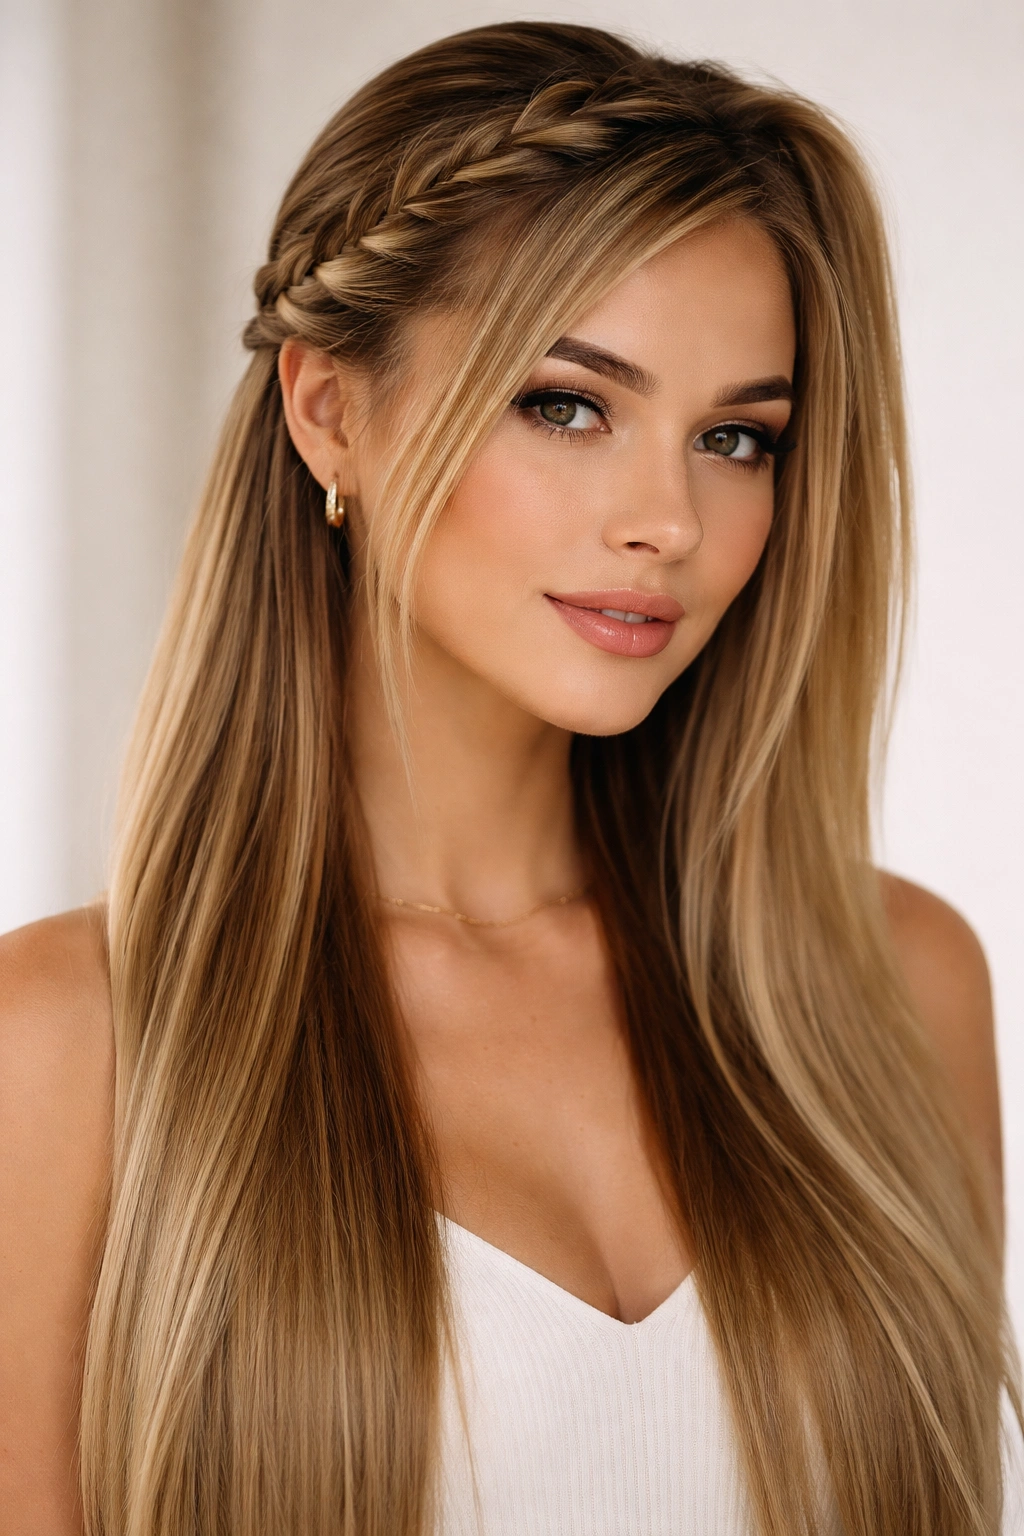
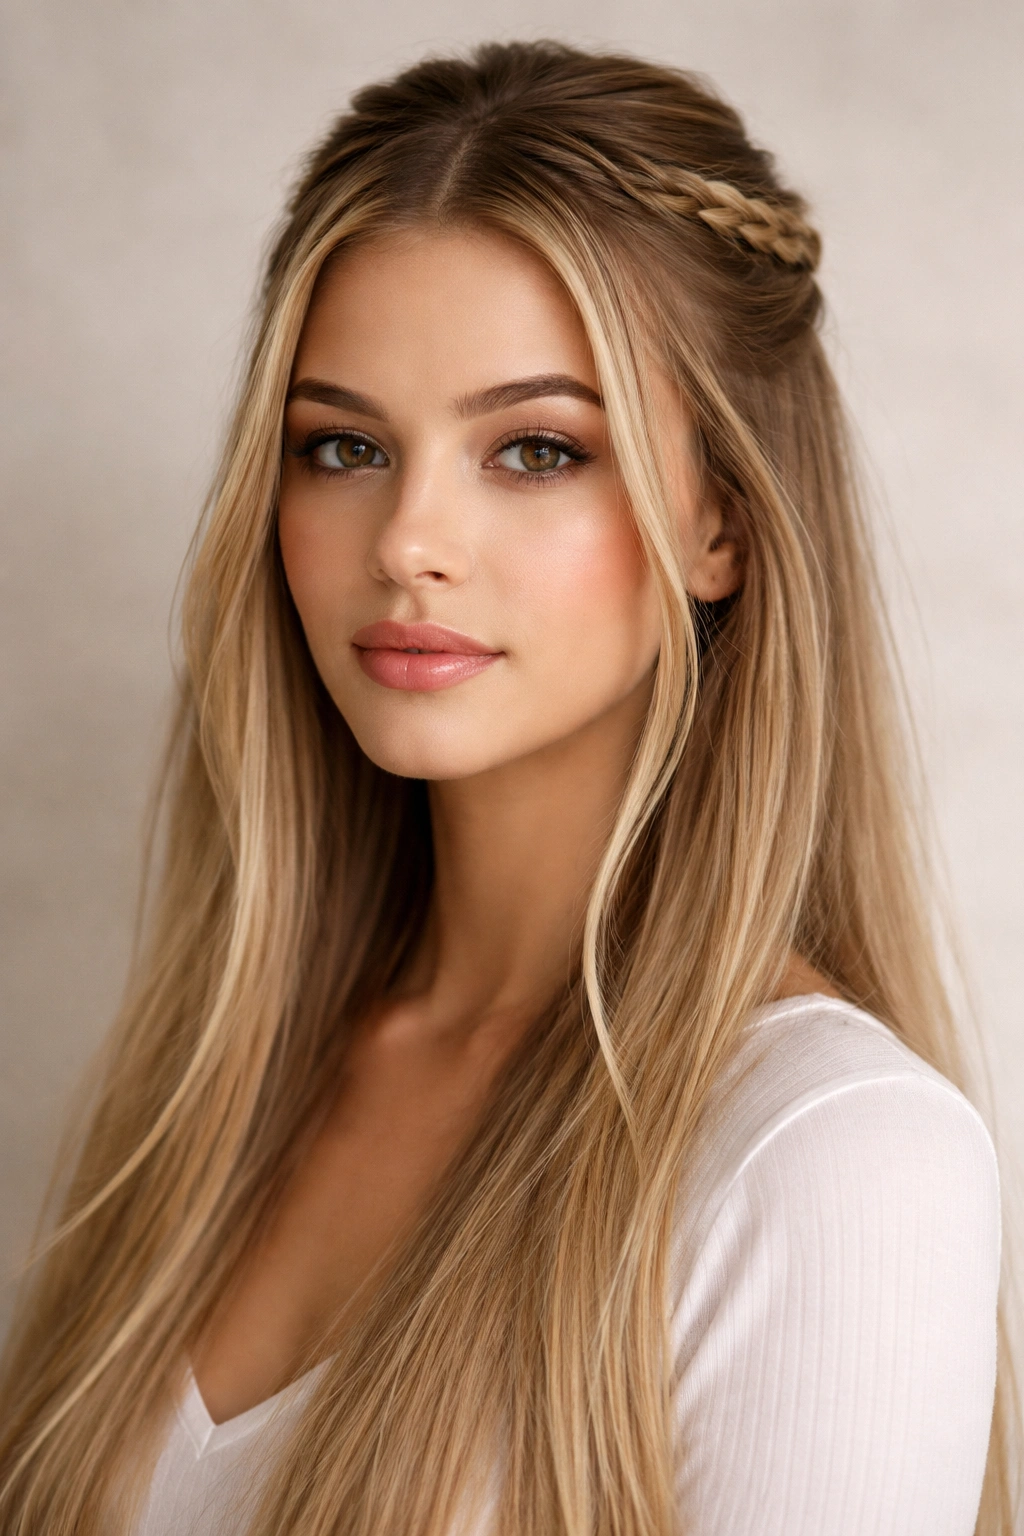
5. The Halo Braid Half-Up Variation
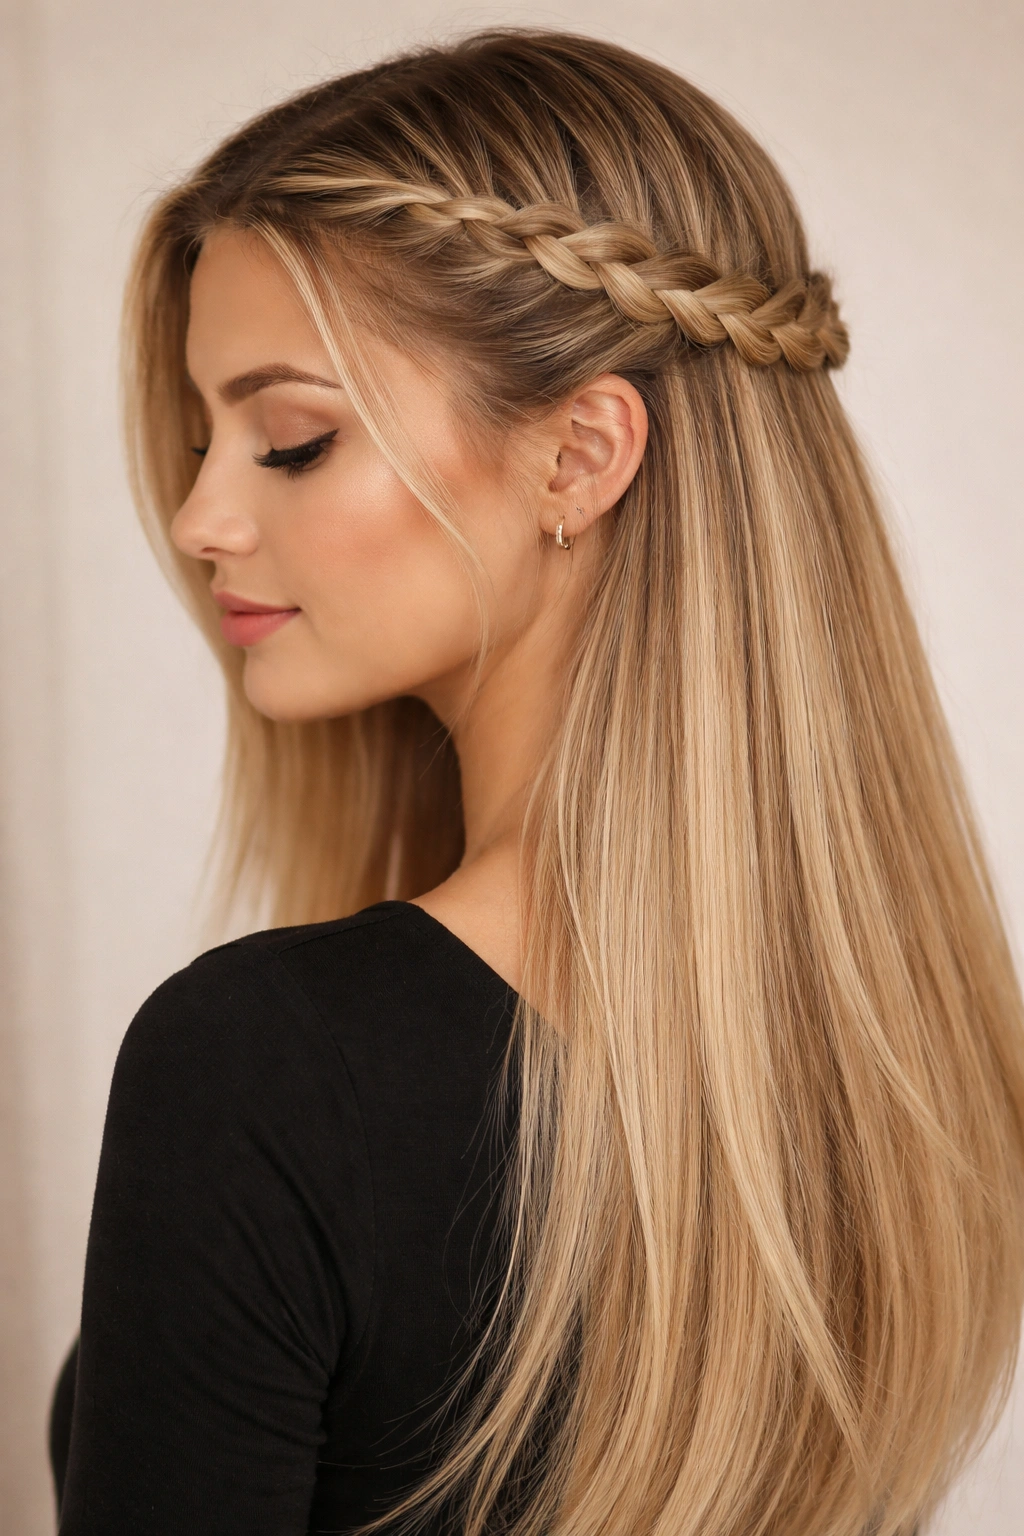
Take the concept of a halo braid (which typically runs around the entire head) and adapt it for a half-up style. Instead of braiding all the way around, start a French braid at one temple, bring it diagonally back toward the opposite side, and stop around the level of your ear on the back. Leave the bottom half of your hair completely loose. This creates the effect of a partial halo — a braid that frames your face and curves around the back without being a full crown.
Why Straight Hair Makes This Look Effortless
Halo braids require smooth, unified hair to look clean, and straight hair delivers exactly that. The braid’s curve is more visible and polished on straight hair. There’s no texture to interrupt the line of the braid, so even a simple three-strand braid reads as intentional and elegant.
How to Perfect This Specific Style
- Start at your right temple (or left, depending on preference) with a small, neat section
- Braid diagonally backward and slightly upward, moving toward the opposite side of your head
- Stop the braid around the level where your ear meets your head on the back side
- Secure the braid’s end with a small clear elastic or bobby pins hidden within the braid
- Leave all bottom hair completely loose and smooth
Do this: Curl the loose bottom section away from your face with a large-barrel curling iron or straightening iron. The contrast between the geometric braid and soft waves in the bottom section creates a beautiful balanced look.
6. The Fishtail Braid Half-Up
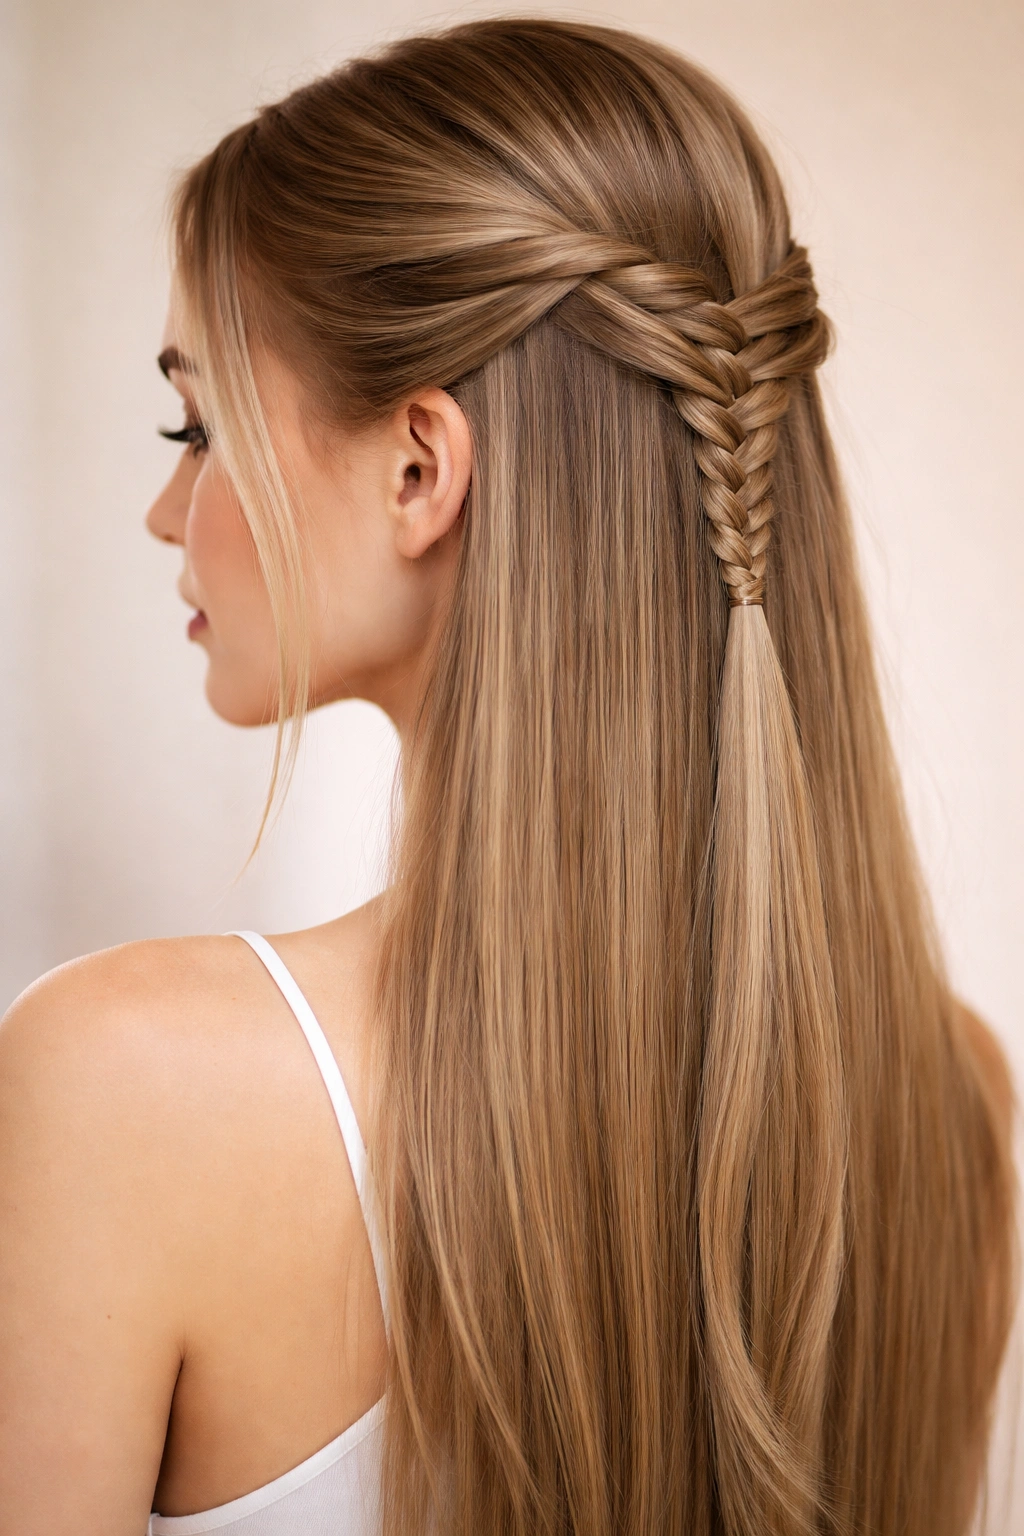
Fishtail braids look intricate and complicated, but they’re actually based on a two-section technique that’s almost meditative once you get the rhythm. Divide your half-up section into two parts. Then, take a tiny piece of hair from the outside edge of the right section and cross it over to the left section. Take a tiny piece from the outside edge of the left section and cross it to the right. Keep alternating, using very thin outer strands. The result is a braid that looks delicate, intricate, and far more complicated than it actually is.
Why Fishtail Braids Suit Straight Hair Perfectly
Straight hair shows off the intricate weaving pattern of a fishtail braid in ways that textured hair sometimes can’t. Each thin strand stays visible and separated, creating a lace-like appearance. On straight hair, fishtail braids look almost art-deco — geometric and refined.
The Rhythm You Need to Master
- Keep your sections even and your movements consistent
- The fishtail braid actually holds better than you’d expect because of all those tiny interlocking strands
- Don’t worry if the first few inches look messy — fishtail braids get cleaner as you continue and establish rhythm
- For straight hair, you can braid tighter than you might with textured hair; the braid won’t look overwhelming
Pro tip: If your fishtail braid looks too neat and polished, gently pull the outer edges to loosen and widen it. This softens the look and prevents it from feeling too structured for everyday wear.
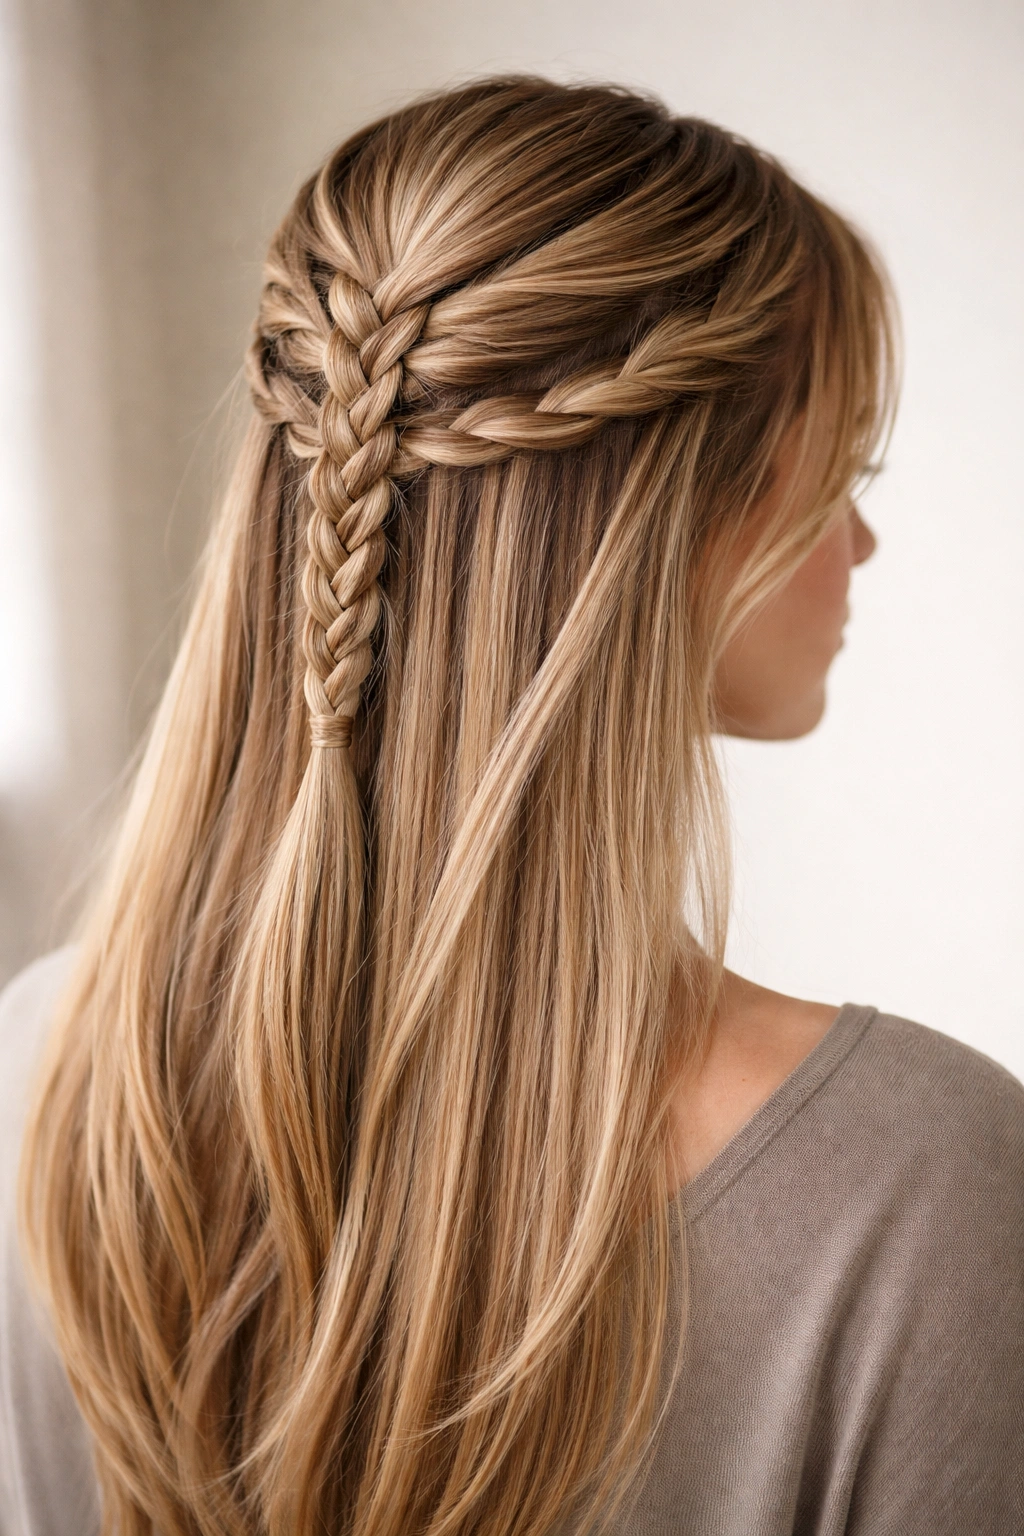
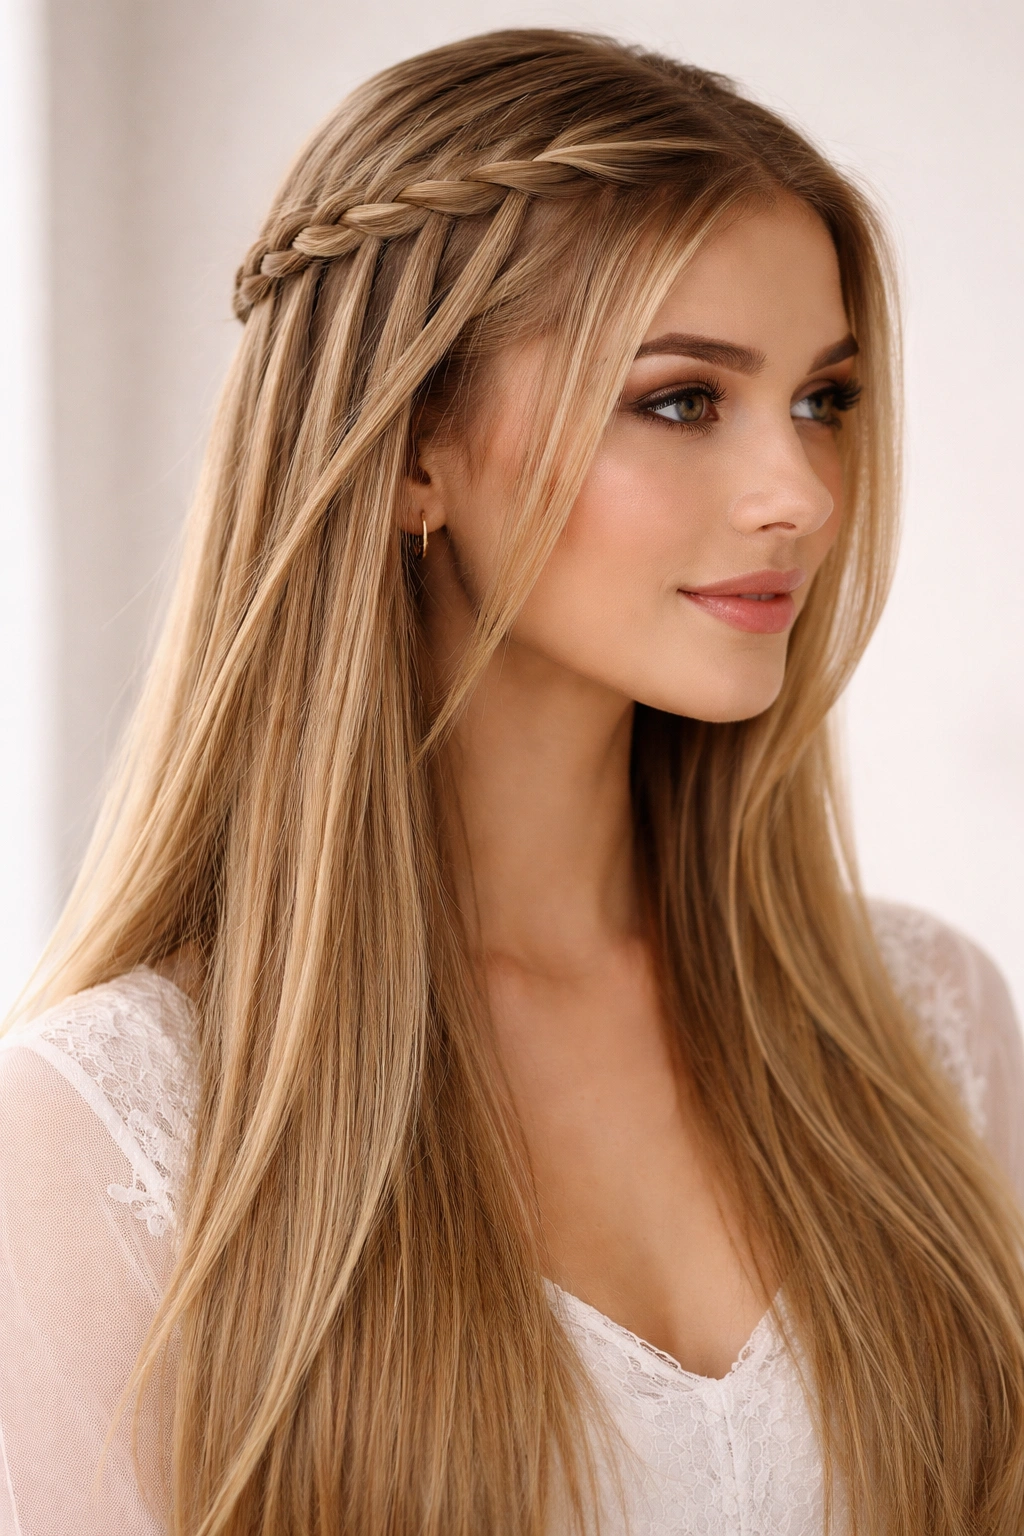
7. The Waterfall Braid Half-Up
A waterfall braid is a French braid with a twist — literally. As you braid, instead of continuously adding hair back into the braid like a normal French braid does, you let sections fall free. This creates the illusion of a braid with flowing strands cascading down from it, like water falling. Start at your temple with a French braid technique, but each time you complete a crossing, drop the outermost strand and pick up a new strand from below. The dropped strands fall loosely, creating that waterfall effect.
Why Waterfall Braids Look Especially Romantic on Straight Hair
The falling strands create a wispy, ethereal quality that’s emphasized by straight hair’s smooth texture. You get the structure and intentionality of a braid combined with the softness and flow of loose hair. It’s one of the few styles that feels both polished and romantic simultaneously.
How to Execute the Waterfall Effect
- Begin with a small section at your temple and start a three-strand braid
- After each crossing, drop the outermost strand completely and pick up a new strand from the hair below your braid
- The dropped strands will naturally fall and create the “waterfall”
- Continue this pattern as you move diagonally back toward the opposite side of your head
- Secure the main braid into a half-up ponytail with the loose strands flowing free below
Worth knowing: Waterfall braids photograph beautifully and work for both casual and formal occasions. The romantic quality makes them especially popular for weddings and date nights.
8. The Bubble Braid Half-Up with Braided Sections
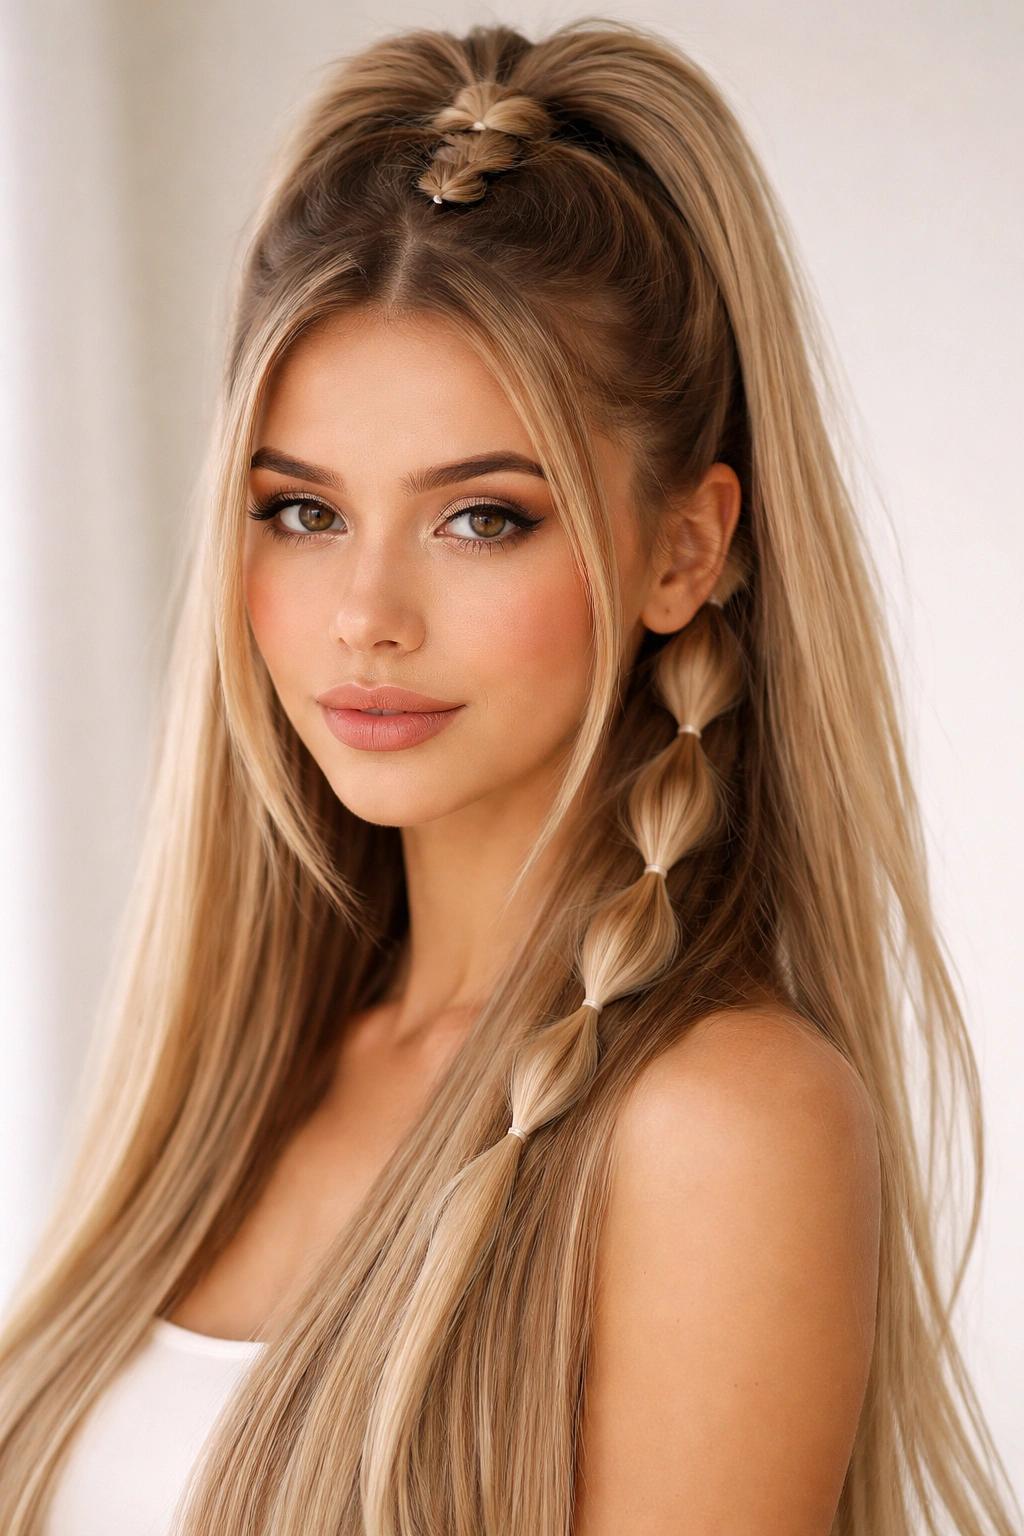
Bubble braids are a playful, contemporary style where you create a ponytail, then divide it into sections and use elastic bands to create “bubbles” of puffed-out hair between sections. For the braided half-up version, create your half-up ponytail as usual, then braid only the upper portion of the ponytail. Below the braid, leave the hair loose and create bubble sections with small clear elastics. This gives you the structured element of the braid combined with the fun, textured look of bubbles.
Why This Works on Straight Hair
Straight hair creates very clean bubble shapes when sectioned with elastics. The bubbles are visible and distinct, not lost in texture or waves. The braid contrasts beautifully with the smooth bubbles below, creating visual interest and dimension.
How to Build Clean Bubble Sections
- Create your half-up ponytail and secure it firmly with an elastic
- Braid the top 3-4 inches of the ponytail using a three-strand, fishtail, or Dutch braid
- Below the braid, divide the remaining ponytail length into sections (usually 3-4 sections work well)
- Place an elastic at the end of each section, then gently pull and fluff each section to create the bubble
- For maximum bubble effect, tease slightly within each section before securing
Insider note: This style is surprisingly easy to execute and looks far more complicated than it actually is. It’s a great choice for anyone who wants visual impact without spending hours on styling.
9. The Side-Swept Braided Half-Up
Instead of braiding straight back from your crown, start a braid at one side of your head and sweep it diagonally across toward the opposite side. You might start at your right temple and bring the braid toward the left side of the back of your head, or start at the crown on one side and sweep it across diagonally. The key is the diagonal movement, which creates an asymmetrical, modern look. Secure the braid into a half-up ponytail on the opposite side from where you started.
Why Asymmetry Flatters with Straight Hair
Asymmetrical styles can actually look more interesting and intentional on straight hair than symmetrical ones, because straight hair’s clean lines emphasize the geometric quality of the asymmetry. A side-swept braid draws attention and creates visual movement that prevents a style from feeling too static or formal.
How to Get the Angle Just Right
- Decide which side you’re starting on and which side you want the ponytail
- Begin your braid on the starting side, about an inch back from your temple
- As you braid, gradually angle the braid direction toward the opposite side, moving diagonally backward
- By the time you reach the nape of your neck, you should be positioned to secure the ponytail on the opposite side from where you started
- Use bobby pins to anchor the base of the braid if needed
Do this: Curl the bottom section of your hair away from your face. The curved waves at the bottom contrasted with the diagonal braid create a sophisticated, polished silhouette.
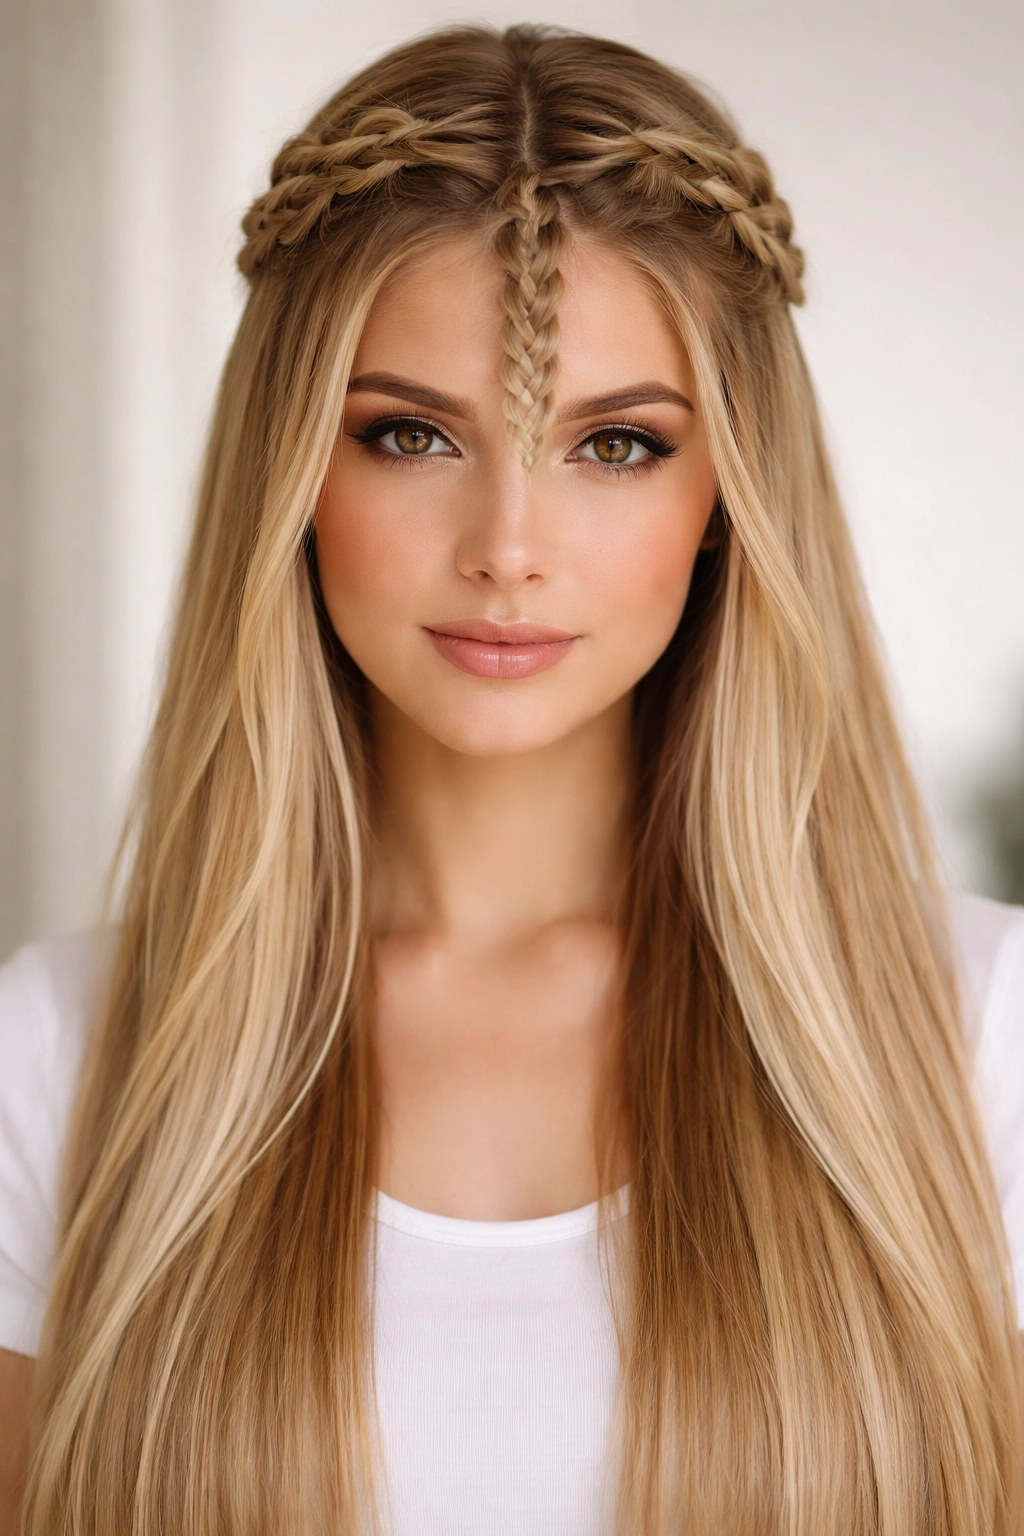
10. The Multiple Micro Braids Half-Up
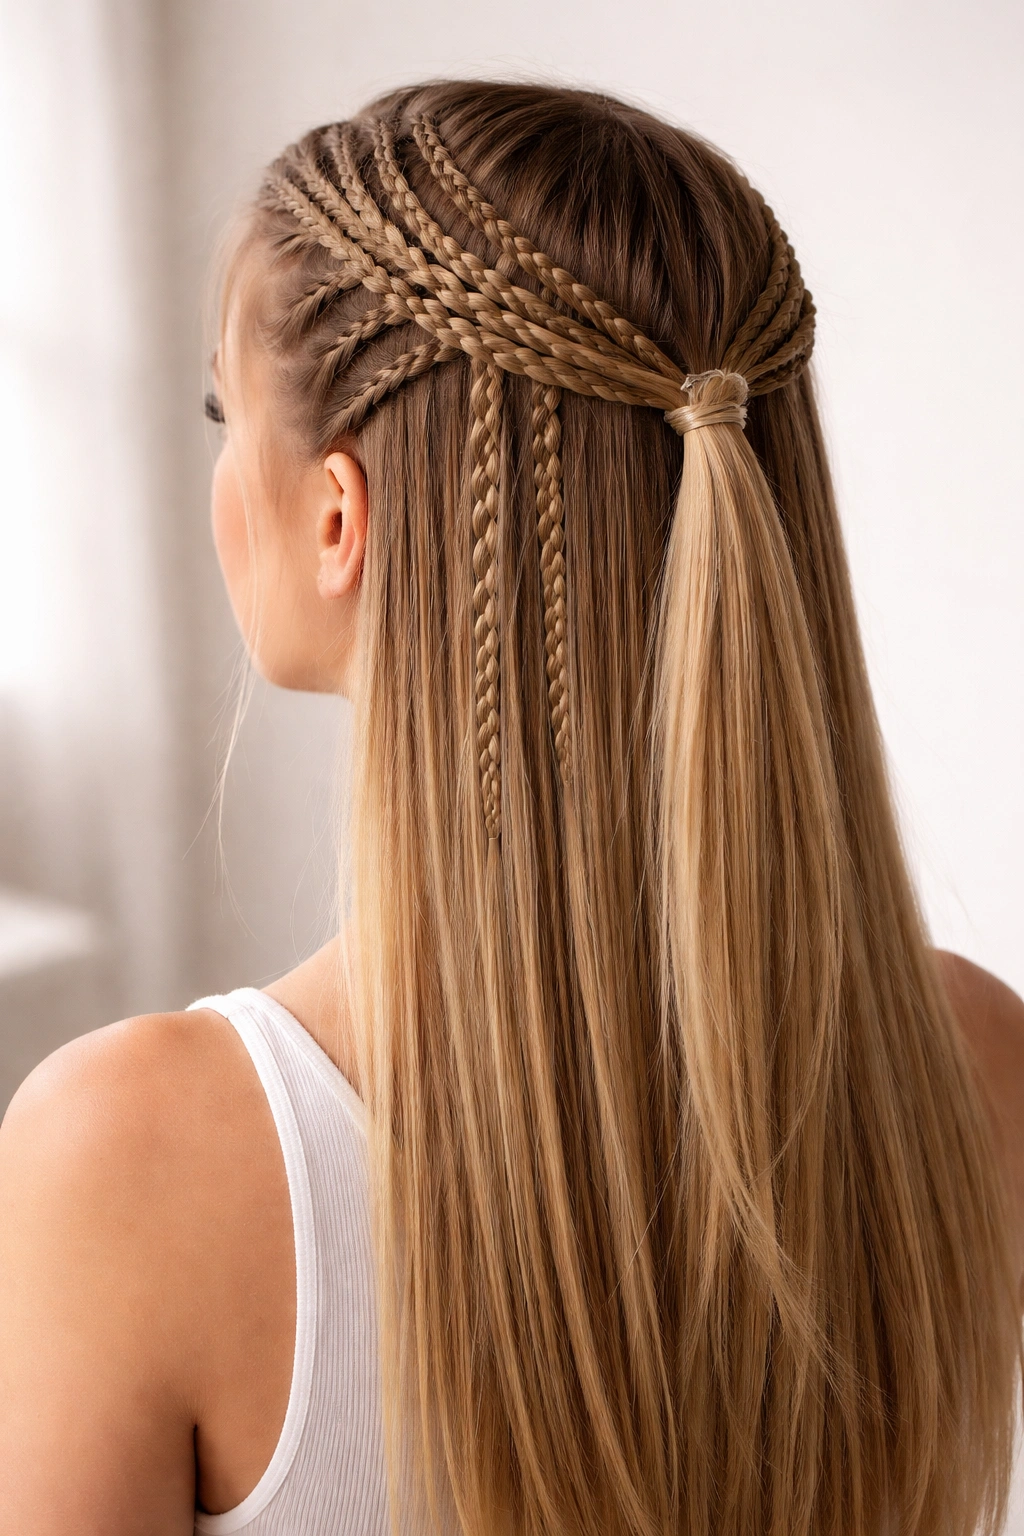
Instead of one statement braid, create several thin, delicate braids within your half-up section and secure them all together into a single ponytail. You might do three, four, or five thin braids, each about half an inch wide, positioned at varying heights and angles across the crown. They can be three-strand, fishtail, or rope braids — the style matters less than the overall effect of multiple delicate lines.
Why Micro Braids Maximize Visual Interest on Straight Hair
Each braid is visible as its own distinct element. Straight hair keeps each tiny braid crisp and clean, so you end up with a hairstyle that feels intricate and textured despite your hair’s natural smoothness. This is a style that looks genuinely complicated and artistic, even though it’s just multiple simple braids.
The Approach to Spacing and Symmetry
- Map out where you want each braid before you start — they can be symmetrical or asymmetrical
- Make sure each braid is proportionate in width; if one is noticeably thicker or thinner, the overall look feels unbalanced
- Consider varying the types of braids you use — mixing three-strand and fishtail braids adds visual complexity
- Braid from crown toward the nape, gathering all the braid ends together in a half-up ponytail
- You can secure them together in one ponytail or cross-pin them individually for a more intricate look
Pro tip: This style is perfect if you find one large braid feels too formal or overwhelming, but you still want that braided structure and texture.
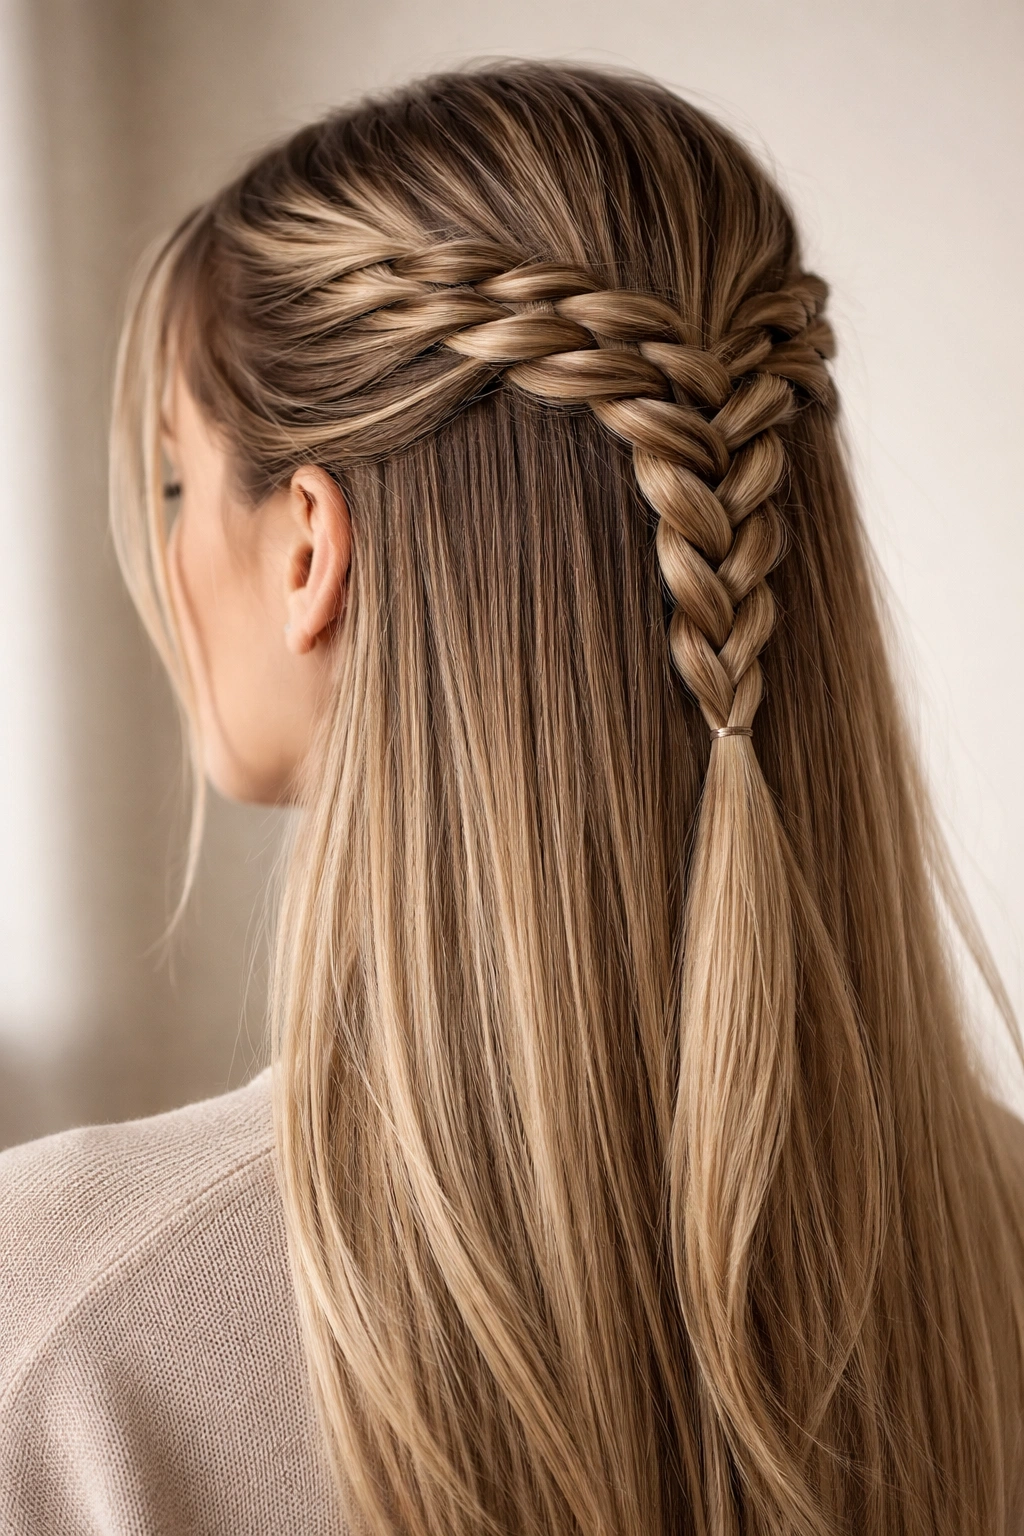
11. The Braided Crown with Center Waterfall
Combine two braiding techniques in one style: create a complete crown braid (a braid that runs around the perimeter of your head like a halo), then add a center waterfall braid down the middle of your head from your crown to the base of your ponytail. The crown braid frames your face and the back of your head, while the center waterfall adds a vertical line of interest down the middle. Gather everything into a half-up ponytail at the back.
Why This Complex Style Works on Straight Hair
The layering of two separate braids is much clearer on straight hair. You can see both the crown braid and the center braid as distinct elements, creating a multi-dimensional look. On textured hair, the two braids might blend together visually; on straight hair, they remain distinct and striking.
How to Build This Two-Braid System
- Start with a crown braid: begin at one temple and braid around the perimeter of your head, adding hair as you go (like a French braid around the hairline)
- Secure the crown braid’s end temporarily with a bobby pin at the opposite temple
- Then start a separate waterfall braid down the center of your head from your crown
- Once both braids are complete, gather all hair into a half-up ponytail, incorporating both braid ends
- This style takes patience, but the result is striking
Worth knowing: This is a statement style best reserved for special occasions or times when you want to make a real impact with your hair. It’s not an everyday style, but it’s absolutely stunning.
12. The Braided Half-Up with Face-Framing Pieces
Create a half-up braided style, but intentionally leave two thin sections of hair unbraided on either side of your face to frame it. Start your braid slightly back from your temples, leaving those face-framing pieces completely loose. You can braid the rest in whatever pattern you prefer — French, Dutch, fishtail, whatever works for you. The face-framing pieces remain loose and can be worn straight or gently curled. Secure the braid into a half-up ponytail, and those loose pieces fall naturally along your cheekbones.
Why Face-Framing Works Especially Well with Straight Hair
Straight, loose pieces frame the face cleanly and elegantly without any distracting texture or frizz. They create softness around the face while the braid keeps the rest of your hair controlled. This is a style that feels polished but not overly done.
How to Keep Those Pieces in Place
- Before you start braiding, section off a thin piece from each temple and secure them temporarily out of the way with a small clip
- Create your braided half-up as usual, starting the braid slightly back from where those loose pieces begin
- Once the braid is secured in a ponytail, release the face-framing pieces
- For a softer look, gently curl the loose pieces with a curling iron, allowing them to have slightly more movement than the rest of your hair
- If the pieces slip behind your ear throughout the day, use a small bobby pin hidden near the ear to anchor them forward
Insider note: This is one of the most flattering variations for face shape because the loose pieces soften the face while the braid keeps everything else controlled and intentional.
13. The Braided Half-Up with Ribbon or Thread Accent
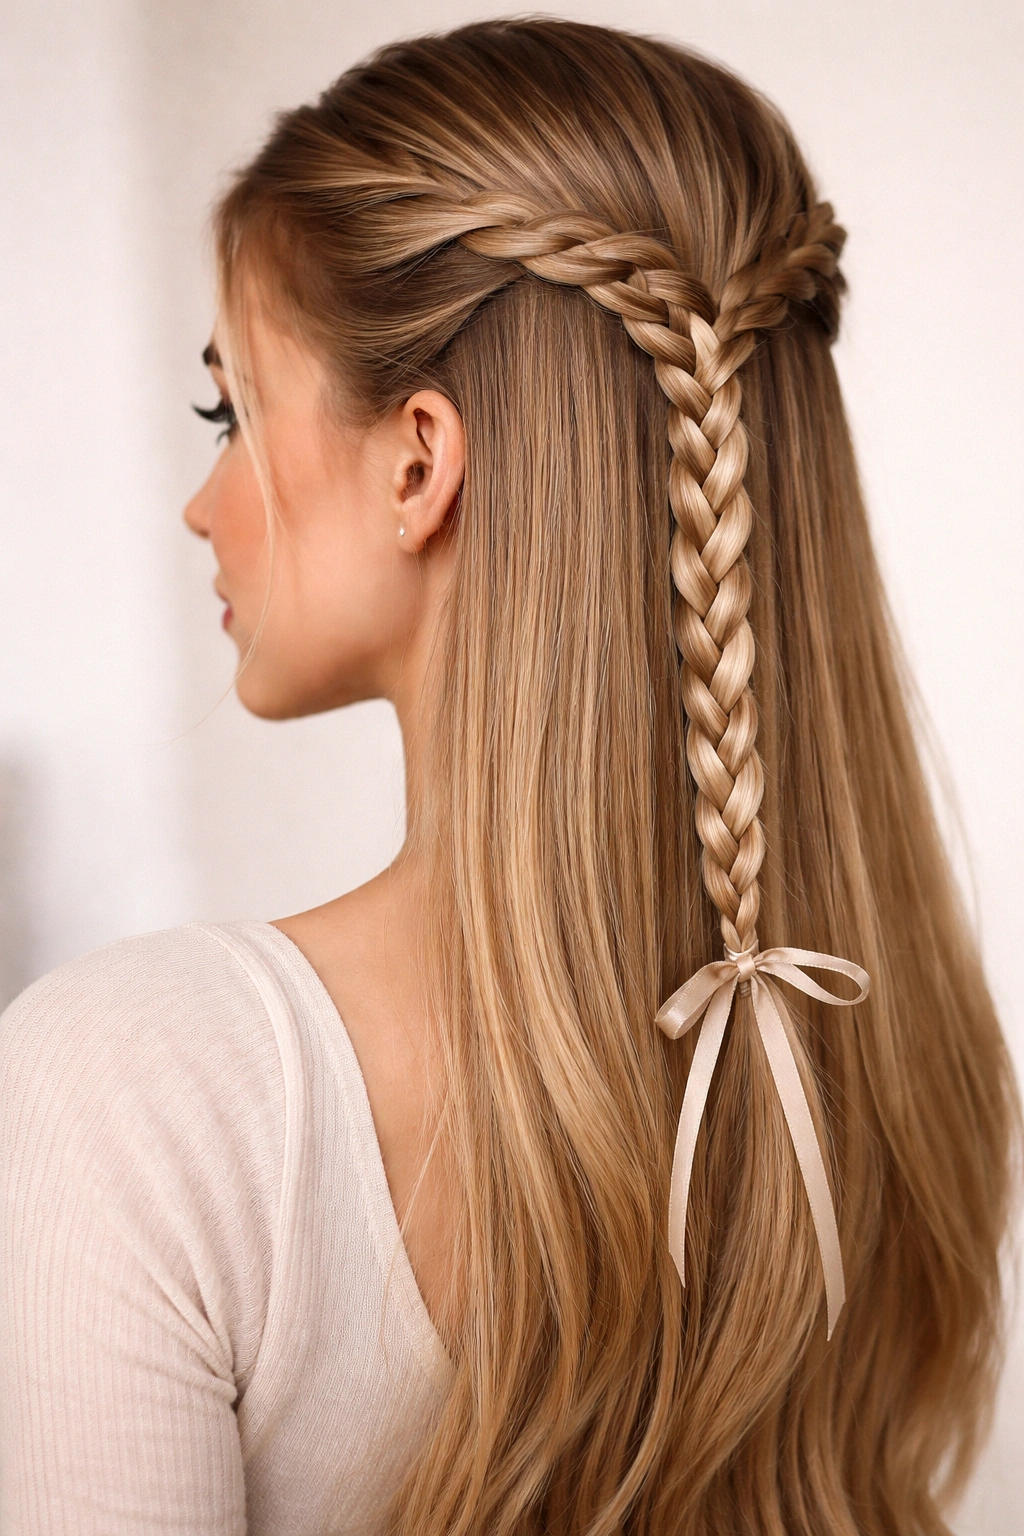
Take any basic braided half-up style and weave a thin ribbon, decorative thread, or even a thin section of contrasting-colored synthetic hair through the braid. You can run it through the entire length of the braid for a bold statement, or just through the visible upper portion. Satin ribbons, silk threads, metallic accents, or even delicate chains create entirely different moods. This turns a simple braid into a customized, personalized style.
Why This Technique Transforms Straight Hair
Straight hair keeps the accent material visible and prominent. The smooth hair background makes the ribbon or thread stand out clearly without competing with texture. You can see exactly how the accent material intertwines with the braid, creating visual interest and allowing for personalization.
How to Weave Ribbon or Thread Cleanly
- Choose a ribbon or thread about 1/4 inch wide (thinner is often better for elegance)
- Before braiding, secure one end of the ribbon to the beginning of your hair section with a bobby pin or elastic
- As you braid, weave the ribbon through the braid alongside one of the three sections
- Keep tension consistent on the ribbon so it doesn’t bunch or slip
- Secure both the braid and ribbon together at the end with an elastic or clip
- Trim excess ribbon or thread and hide the ends beneath the ponytail
Do this: Use a color that contrasts subtly with your hair color — silver or gold threads work universally, but you can also match your outfit or choose a complementary shade for impact.
14. The Reverse Braided Half-Up (Braid Under Instead of Over)
A Dutch braid, done in reverse, creates a braid that sits on top of your hair rather than nestled into it. Instead of crossing sections over the center, you cross them under. The result is a raised, three-dimensional braid that sits prominently on your hair rather than becoming part of the hair structure. Use this technique for your half-up style, and the braid becomes a bold, sculptural element. This works beautifully as a single statement braid or as multiple braids.
Why Reverse Braids Pop on Straight Hair
The three-dimensional quality of a reverse braid is most visible on straight hair because there’s no natural texture to compete with it. The braid literally sits on top of the hair, creating shadow and dimension that’s much more pronounced than it would be on wavy or curly hair. It’s a bold, modern look that feels current and intentional.
The Technique Adjustment You Need
- Instead of crossing sections over the center, you cross them under
- This feels slightly counterintuitive at first, but once you establish the rhythm, it’s just as easy as a regular braid
- The resulting braid naturally sits raised on the scalp
- The braid will look slightly looser and more dimensional than a traditional braid, which is exactly the point
- For maximum impact, gently pull the sides of the braid to widen it and emphasize its three-dimensional quality
Pro tip: Reverse braids work especially well on straight hair with thickness or volume. If you have very fine, thin hair, a reverse braid might feel like too much visual weight on top.
15. The Braided Half-Up with Twisted Sections
Combine braiding and twisting within a single style. Create a half-up section, then divide that section into segments. Braid some segments and twist others, alternating or mixing as you like. For example, you might create a French braid down the center with twisted sections on either side, or alternate inch-thick sections of braid and twist. All the braided and twisted elements secure together into a single half-up ponytail. The variation in texture creates visual interest and complexity.
Why Mixed Techniques Maximize Impact on Straight Hair
By combining braid and twist, you create visual variety that prevents the style from feeling monotonous. Straight hair’s uniformity means that creating variety through different techniques is especially valuable. The mix of twisted and braided sections creates dimension and complexity that reads as intentional and artistic.
How to Plan Your Braid and Twist Sections
- Divide your half-up section into segments before you start (this helps you stay organized)
- Decide which segments will be braids and which will be twists — symmetry works, but asymmetry feels more modern
- Work slowly through each segment, focusing on keeping tension consistent across all of them
- Secure all the braided and twisted sections together into a single ponytail at the back
- The contrast between braid and twist will be more visible if you gently loosen both, emphasizing their different structures
Worth knowing: This is a style where imperfection actually works in your favor. If one twist is slightly looser or one braid slightly tighter, it adds to the artisanal, handmade quality of the overall look.
Final Thoughts
Braided half-up half-down styles offer endless possibilities, and straight hair is genuinely the ideal canvas for showing off braid work. The smooth texture lets every detail read clearly — the weaving pattern of a fishtail, the dimensional quality of a reverse braid, the delicate intricacy of micro braids. What makes these styles work, though, isn’t just the hair type; it’s understanding that straight hair benefits from intentional loosening and softening. A braid that’s too tight on straight hair can look severe, but a braid that’s gently pulled and loosened reads as effortlessly polished.
The real magic is in recognizing that you don’t need to choose between control and softness. These fifteen styles prove that you can keep your hair structured and intentional while still maintaining a sense of ease and movement. Whether you choose a classic French braid, go bold with multiple micro braids, add romantic waterfalls, or combine techniques in creative ways, you’re working with a foundation that handles braids beautifully.
The best approach is experimentation. Try one style, notice what feels comfortable and what reads well in photos, then tweak it. Add a ribbon, loosen the braid slightly, adjust where you start or stop the braiding. Your straight hair is remarkably forgiving — it won’t punish you for small adjustments the way some hair types might. Embrace that freedom, and you’ll find the braided half-up style that feels authentically yours.