Half up half down ponytails have become a styling staple because they strike that perfect balance—polished enough for professional settings, relaxed enough for everyday wear, and endlessly adaptable to your hair type and personal style. Whether you’re working with straight, curly, wavy, or textured hair, there’s a half up half down variation that’ll work for you. The beauty of this style lies in its versatility: you can dress it up with intricate braids and decorative accessories, keep it effortlessly casual with a simple ponytail base, or play around with texture, height, and volume to match your mood and occasion.
What makes the half up half down ponytail so popular isn’t just its aesthetic appeal—it’s genuinely practical. You get the polish of pulling your hair back without committing to a full updo, and you keep plenty of hair down to frame your face and show off length. This means less strain on your scalp than a traditional high ponytail, which some people find more comfortable for all-day wear. The style also works across age groups and hair textures in ways that many other trends don’t, making it a true universal favorite.
The versions below range from five-minute styles you can throw together before heading out the door to more intricate designs that take a bit longer but deliver serious impact. Each one includes the specific techniques and tips that actually make a difference when you’re standing in front of your mirror trying to recreate what you saw online. You’ll find styles that work best on second-day hair, options for fine or thick hair, and creative twists that’ll help you feel like you’re switching up your look without actually cutting anything off.
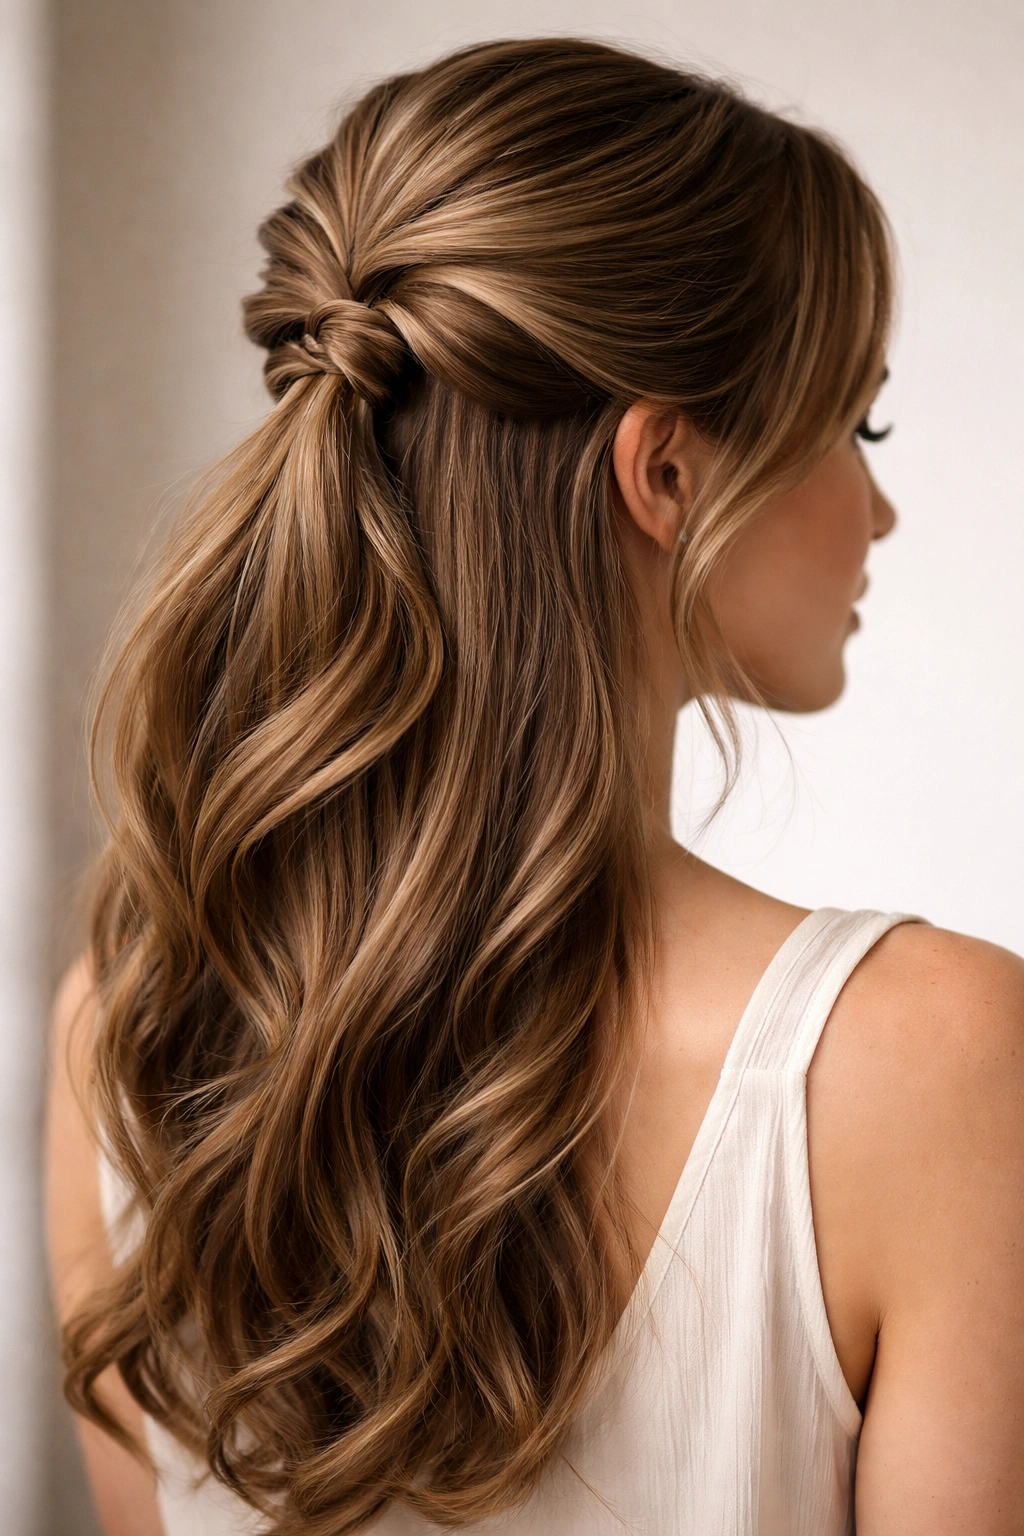
1. The Classic Twisted Half Ponytail

This is the version that started it all—simple, elegant, and somehow works for nearly every occasion and hair type. You’re taking a section from each side of your head, twisting them gently as they travel toward the back, then securing them together at the crown or just slightly lower depending on your preference and hair length. The twists add just enough visual interest that it doesn’t look like you threw your hair up carelessly, even though the whole process takes maybe three minutes.
Why This Works for Everyone
The twisted half ponytail is forgiving because the twist movement naturally helps grip and hold your hair in place, so you don’t need a ton of teasing or texture to make it work. Whether you have fine, slippery hair or thick, voluminous hair, the twisting action creates enough friction to keep everything secure without pulling uncomfortably tight. The style flatters most face shapes because the twisted sections frame your face gently without the harshness of a completely pulled-back look.
How to Perfect Your Technique
- Start with clean or second-day hair—either works equally well, though second-day hair tends to hold the twist more easily
- Section off roughly a two-inch section from your right temple, then repeat on the left side
- Twist each section loosely as you guide it toward the back of your head; don’t aim for perfection, a relaxed twist looks better than a tight, controlled one
- Meet both twisted sections at the back and secure with a small elastic or a bobby pin if you prefer an invisible hold
- Gently pull at the twisted sections to make them slightly looser and fuller—this makes the style look more intentional and polished
Pro tip: Use a texturizing spray or dry shampoo before twisting if your hair feels slippery; it gives the twist something to grip without making your hair look or feel dirty.
2. The Braided Half Ponytail
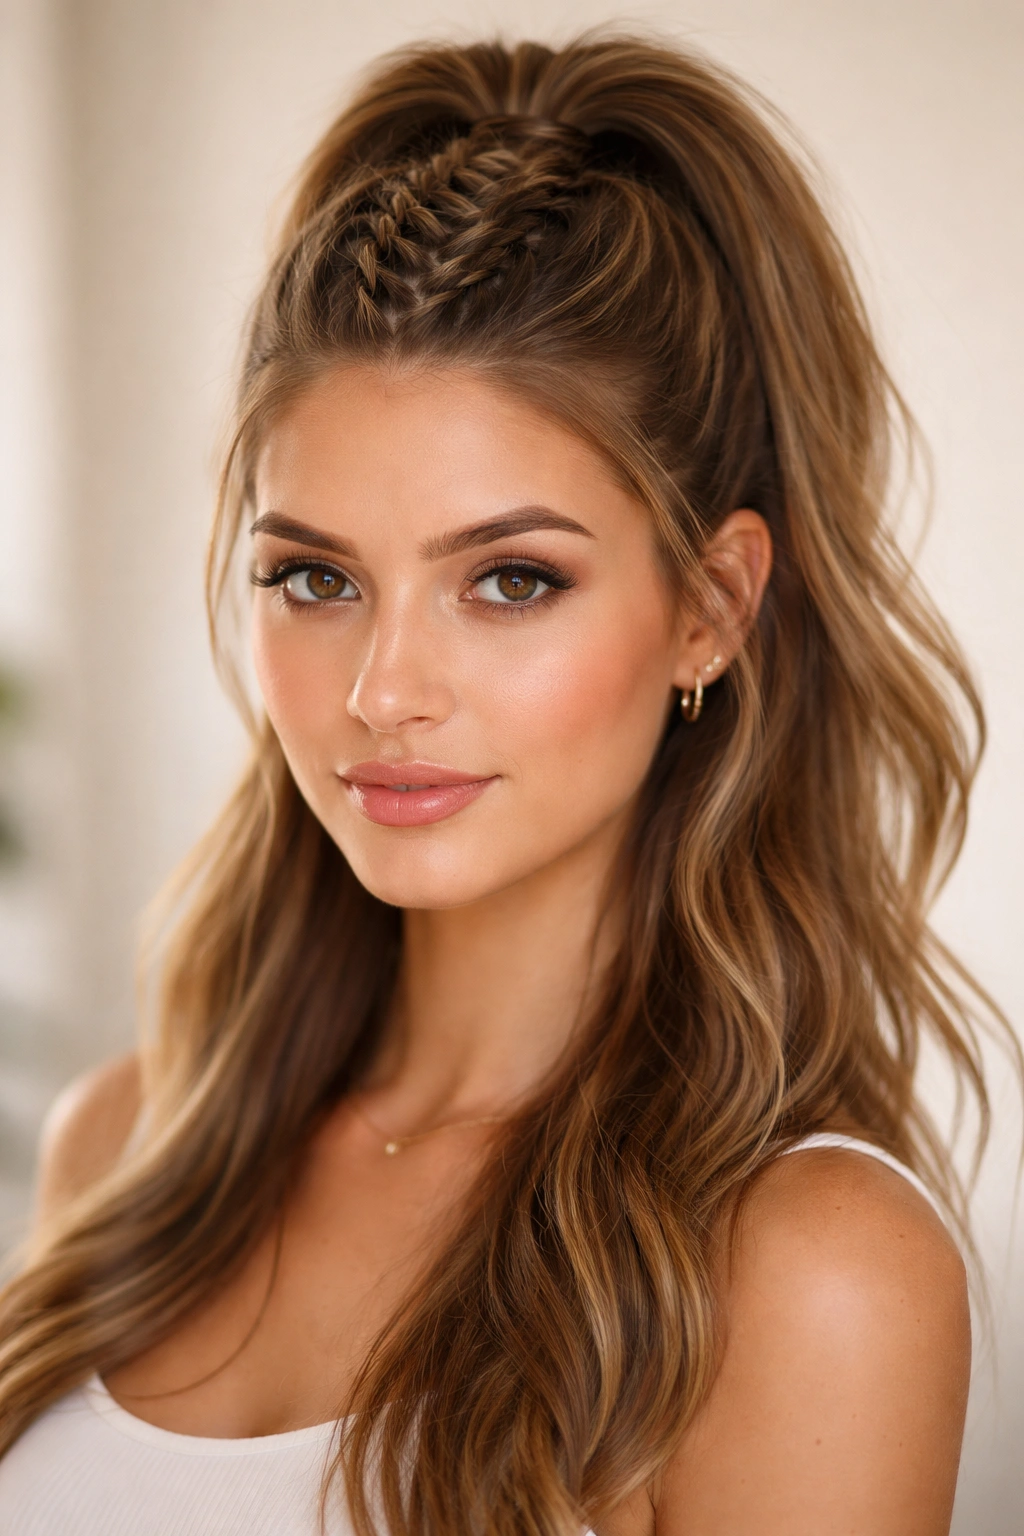
Once you graduate from simple twists, braids open up a completely different dimension of half up half down styling. You can do a single braid down the middle of your head, double braids that hug both sides, or even a more intricate Dutch braid (which sits on top of your hair and looks especially dimensional). The braids gather at the back and combine into one ponytail base, so you get texture, movement, and a decidedly more polished vibe than the twisted version.
Why Braids Take It Up a Notch
Braids create visible texture and detail that immediately reads as “intentional styling”—there’s no mistaking this for a thrown-together look. The braid structure also adds grip and hold without needing excessive products, so your style lasts longer throughout the day. Braids work beautifully on all hair textures and they actually show up even better on wavy, curly, or textured hair because the contrast between the braid structure and the surrounding hair creates more visual depth.
Braid Variations to Try
- Single center braid: French braid or Dutch braid down the middle from your hairline to the crown, then add the remaining hair into a ponytail below the braid end
- Double braids: Start a braid on each side of your head at temple level, twist them toward the back, and secure both braids together into one ponytail base
- Reverse French braid: Creates a more textured, dimensional look because the braid sits on top of your hair rather than being pulled under; works gorgeously on wavy or curly hair
- Loose, relaxed braid: Tighter braids look neat and formal, but loose braids that you gently pull apart afterward have a softer, more romantic feel
Worth knowing: If you struggle with braiding, start with a simple three-strand braid rather than attempting French or Dutch braids when you’re learning. Once you have the basic three-strand braid down, the other braid styles become much easier.
3. The Half Ponytail with Face-Framing Layers
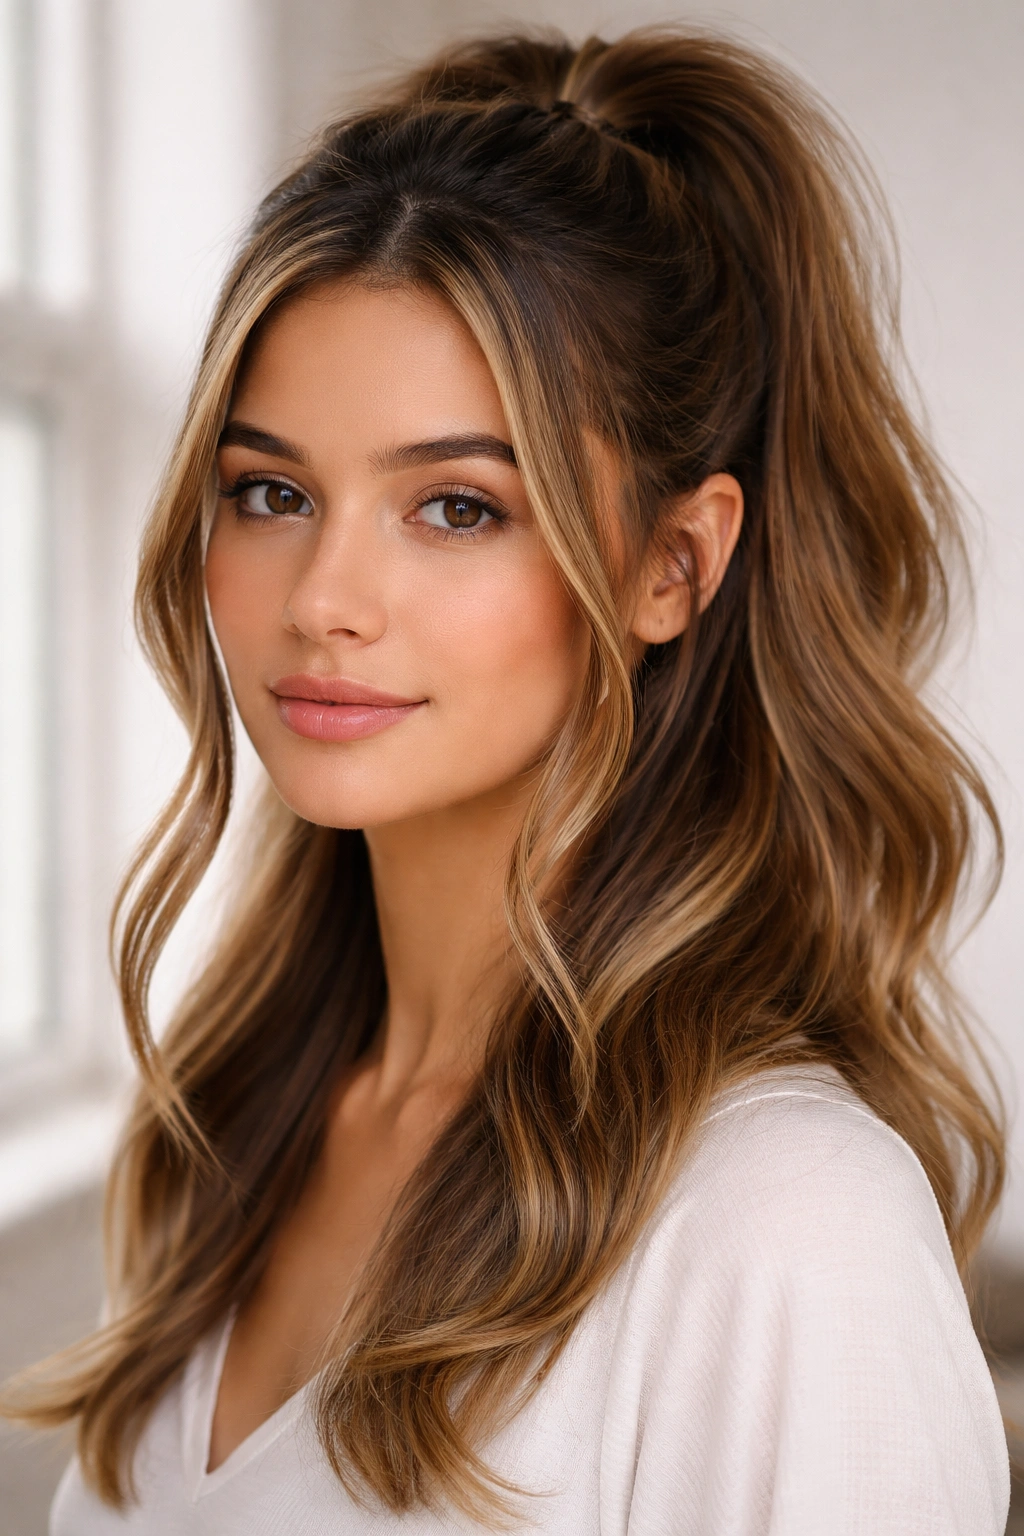
This version specifically addresses the fact that some people don’t want their entire face area pulled back—they’d rather have some softness and dimension right around the face. You’re creating the traditional half up half down base, but intentionally leaving slightly longer, strategically positioned pieces loose to frame your face. These pieces can be straight, curled, or texturized, and they instantly soften the overall look while adding flattering dimension.
Why Face-Framing Pieces Change Everything
Even if you have a full, thick mane of hair, pulling too much of it back can actually make your face look longer or wider depending on your face shape. Face-framing pieces create visual interruption that breaks up the proportion of your face, making the style more flattering overall. These loose pieces also give you something to do with your hands and hair throughout the day if you want to fidget with them—they move naturally and don’t feel restricting the way a fully secured ponytail sometimes does.
How to Create Perfect Face-Framing Pieces
- After you’ve secured your half ponytail, release two small sections just in front of your ears—about a half-inch to one-inch thick depending on how much framing you want
- Leave these sections completely unsecured or very loosely clipped so they can move freely
- Curl these sections with a curling iron for added softness, or leave them straight if you prefer a sleeker look
- For extra dimension, tease these front pieces slightly at the roots before securing the rest of your ponytail
- Throughout the day, these pieces will naturally fall and frame your face; that’s exactly the look you want
Insider note: If your hair is very straight and slippery, the face-framing pieces might slide back into your ponytail throughout the day. Secure them with a tiny bobby pin clipped horizontally behind your ear so it’s completely hidden but keeps them in place.
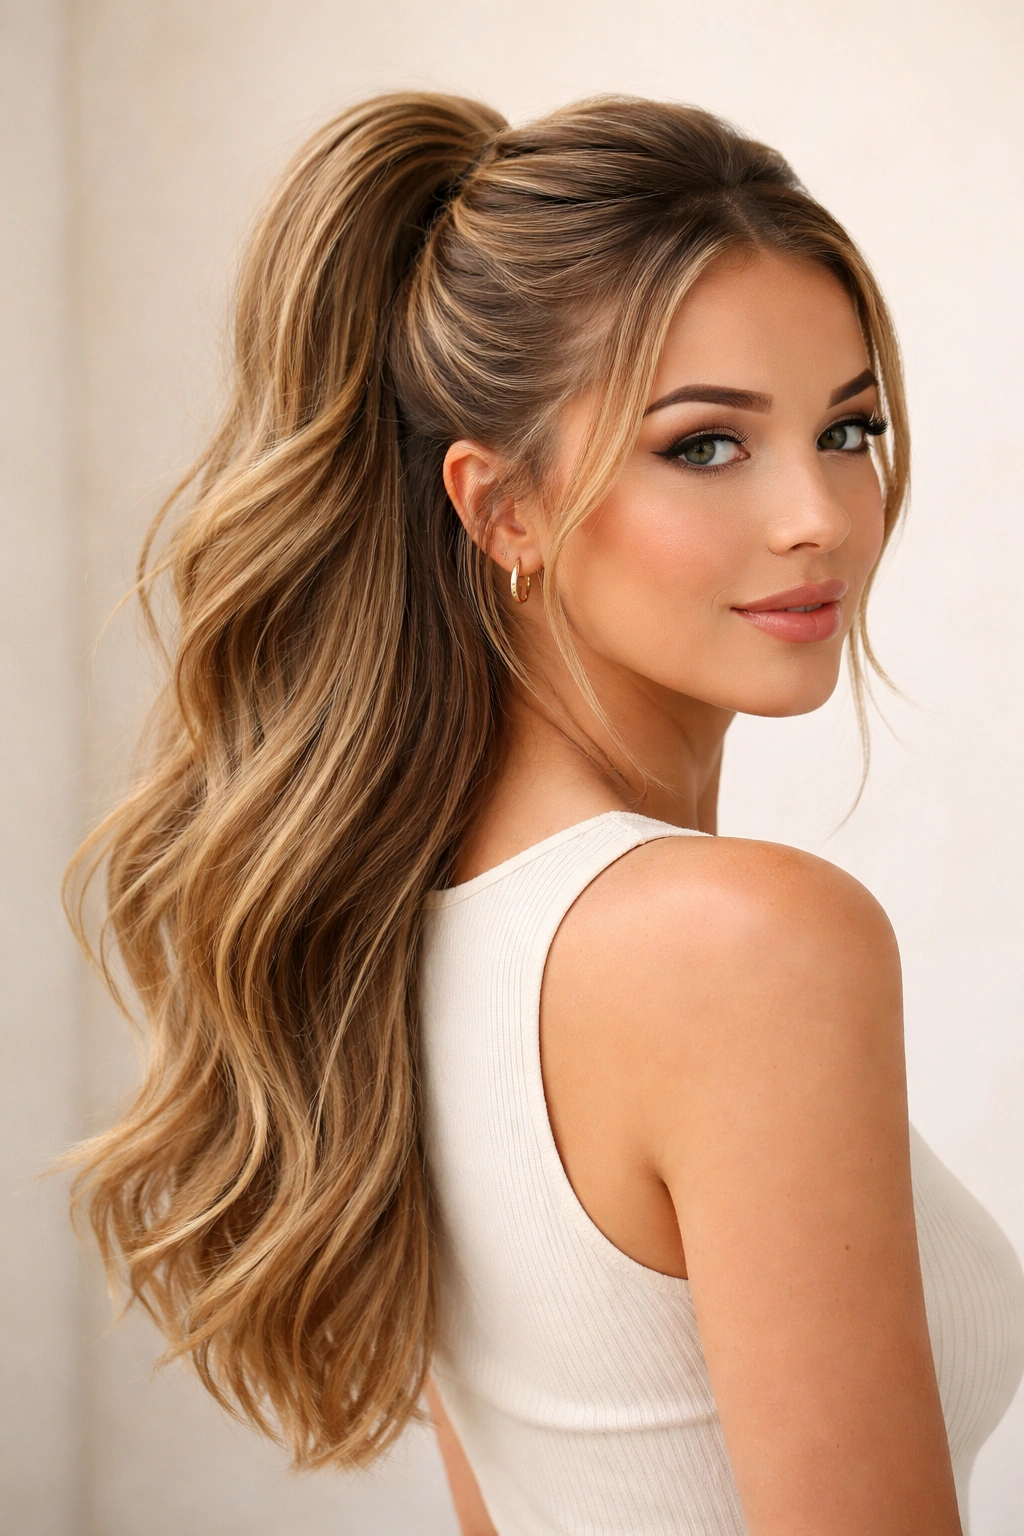
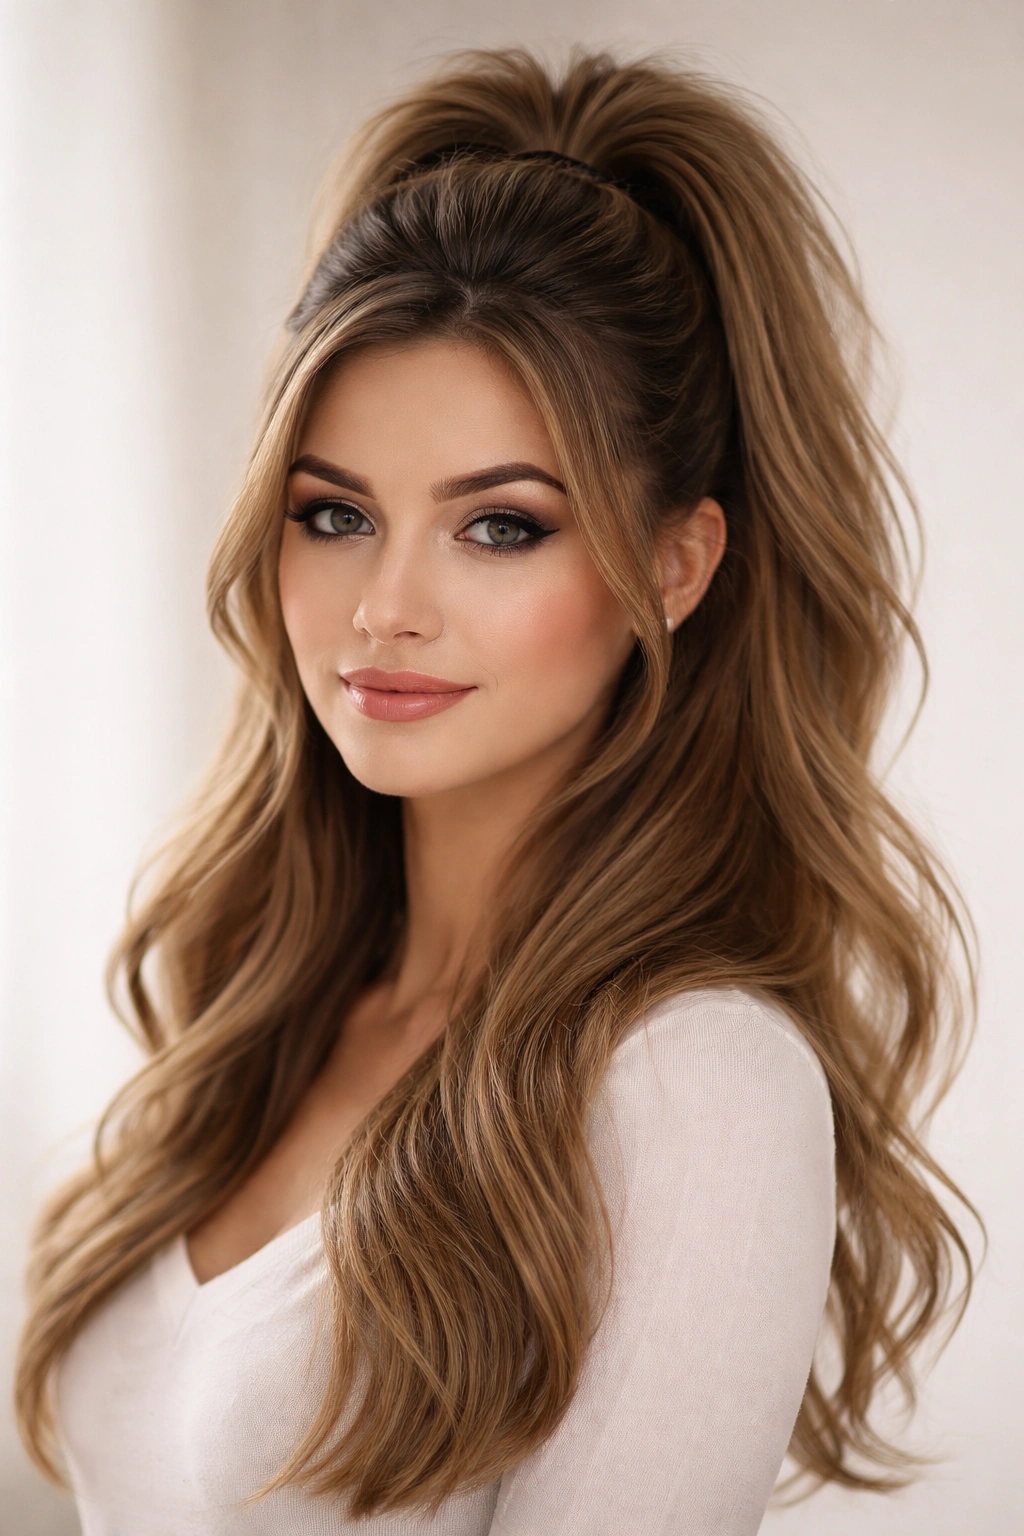
4. The High Sleek Half Ponytail
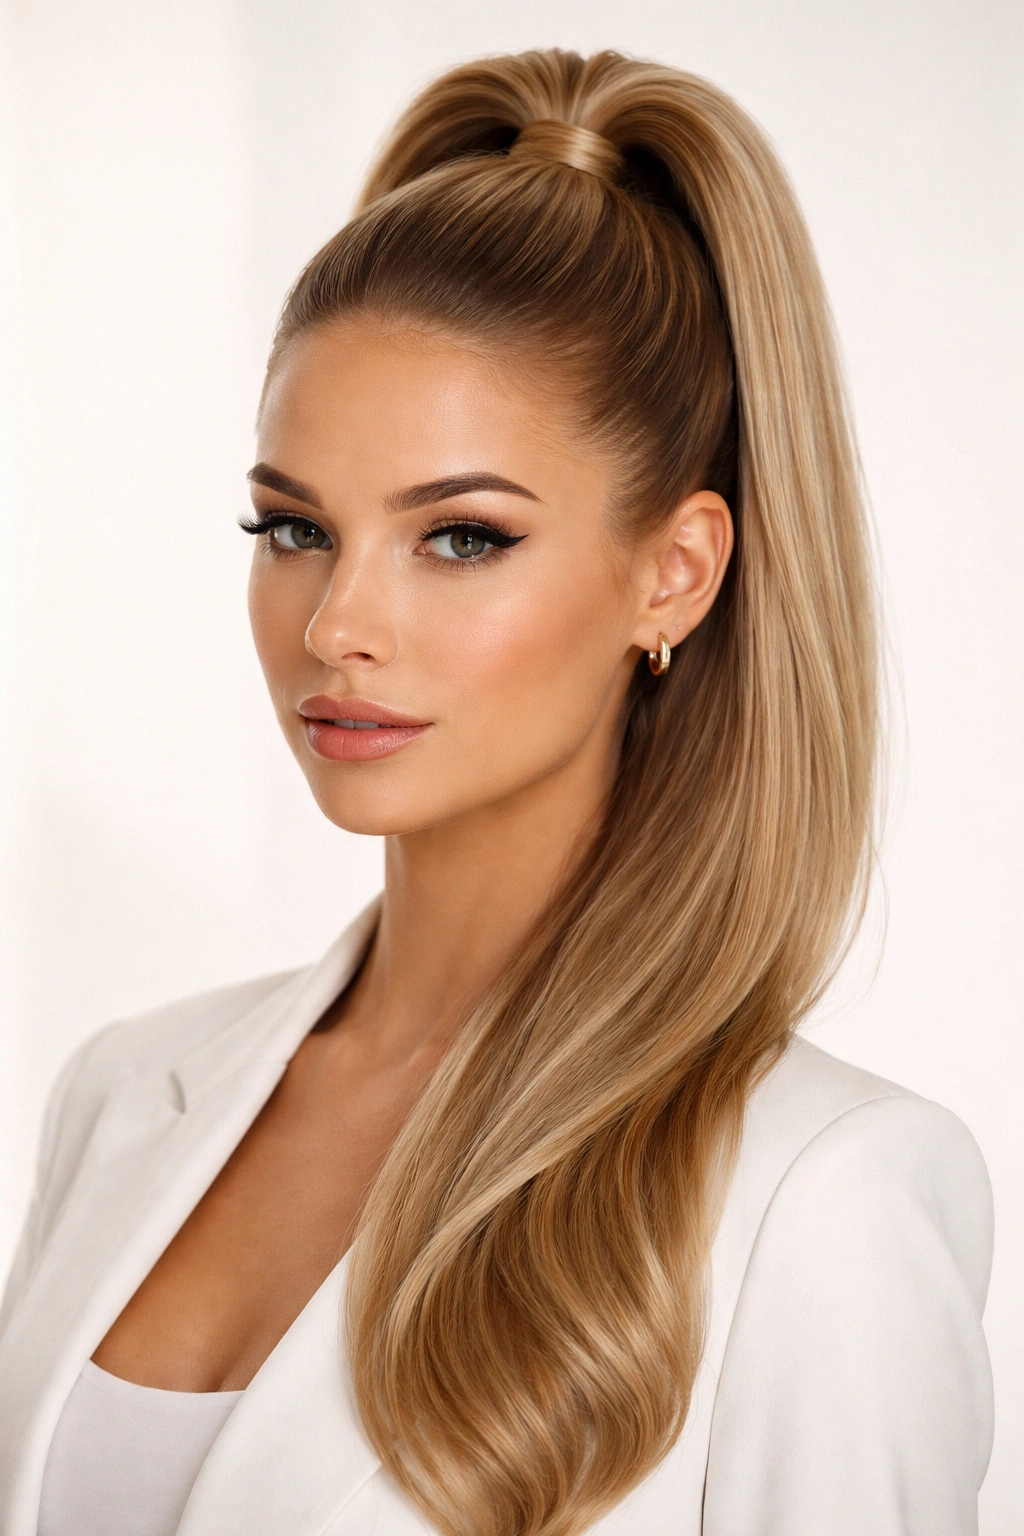
When you want maximum polish and a style that screams “put-together,” a high sleek half ponytail delivers. You’re pulling the back portion of your hair extremely high on your head—almost to the crown—and securing it with absolute precision. The key to making this work is making sure your hair is smooth and shiny, often with styling gel or smoothing cream applied to keep flyaways under control and everything looking intentional.
Why High Ponytails Convey Confidence
There’s something about a sleek, high half ponytail that instantly makes you look polished and intentional. This style is especially flattering if you have good bone structure or a long neck, as it emphasizes both. The height and tightness also make it excellent for keeping hair completely off your face, which is perfect for days when you’re feeling the skin-conscious approach to styling. It’s popular for professional settings, formal events, and athletic activities where you need zero hair movement.
Steps to Achieve Sleek Perfection
- Apply smoothing serum or anti-frizz cream to damp hair before blow-drying, focusing on the top and sides where you’ll be pulling hair back
- Blow-dry your hair completely smooth using a paddlebrush or flat paddle brush, directing the brush downward to smooth the cuticle
- Use a fine-tooth comb to brush the top and sides of your hair extremely smoothly, then apply a light gel or smoothing cream to these sections
- Gather hair from about the temples backward and secure extremely high and tight with a small elastic
- Use a fine-tooth comb to smooth any flyaways, then finish with a light hairspray to keep everything locked in place
- If you see any bumps or loose pieces around your hairline, use bobby pins to secure them invisibly
Pro tip: Invest in a high-quality elastic—cheap elastics pull and damage hair, while quality elastics with silicone coating slide onto your hair without causing breakage.
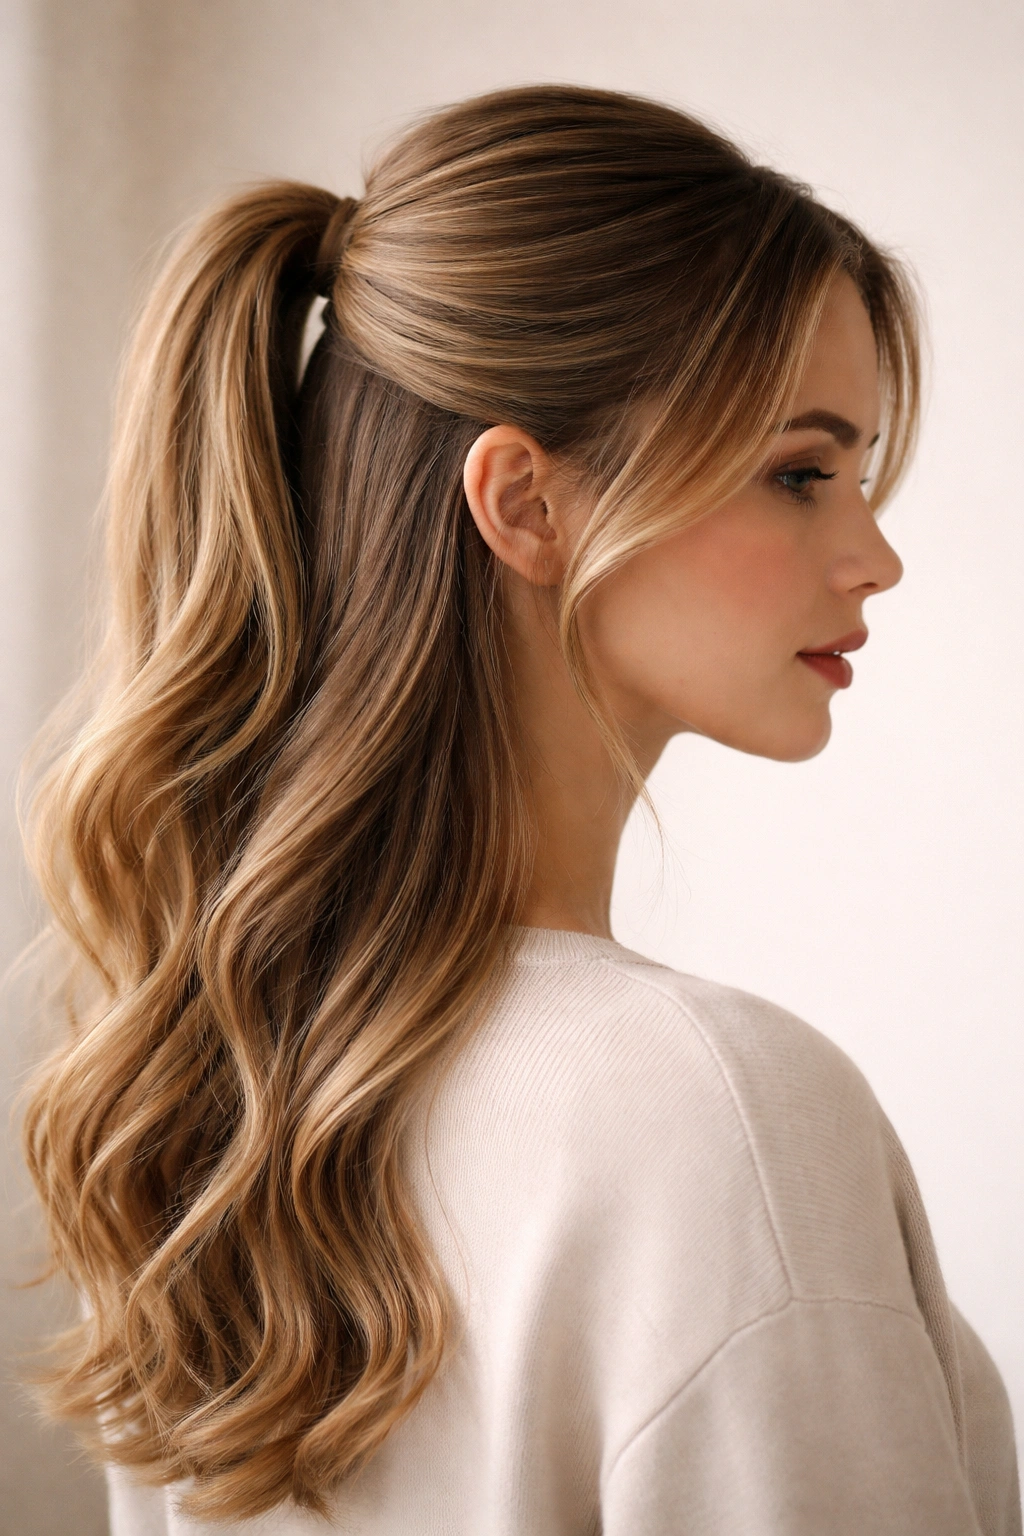
5. The Textured Half Ponytail for Wavy Hair
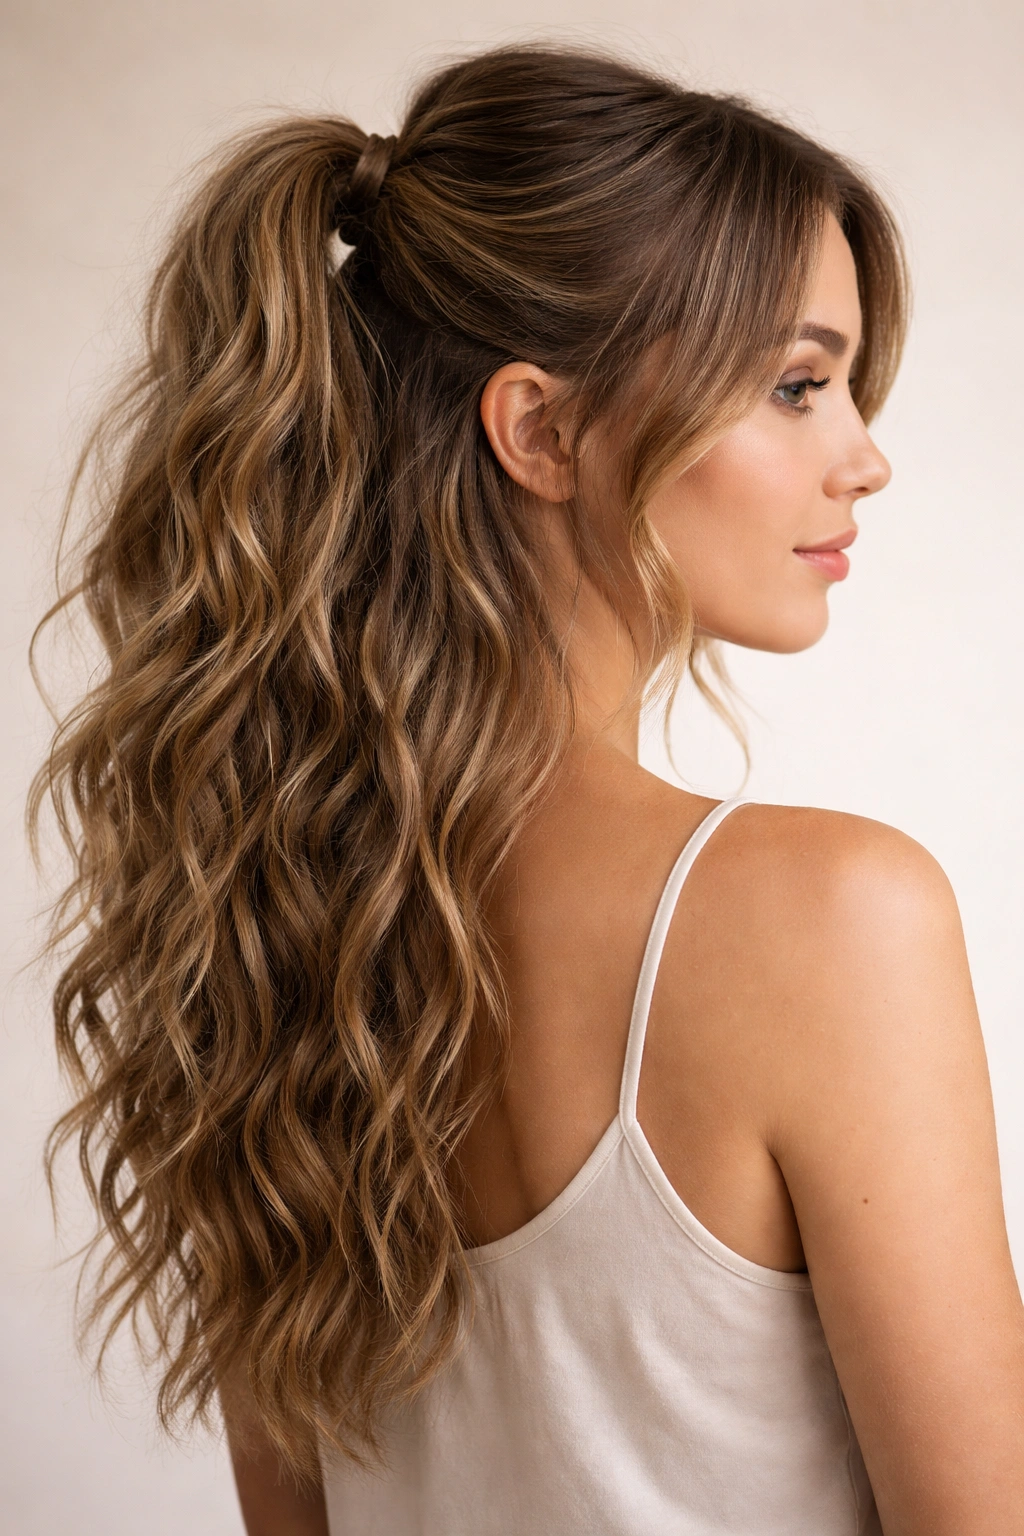
If you have naturally wavy or textured hair, a half ponytail that celebrates that texture rather than fighting it will always look better. You’re working with your hair’s natural pattern instead of trying to smooth it into submission, which saves time and product, and actually looks more intentional and current. The waves and texture of the loose hair below the ponytail base show off your curl pattern beautifully, while the gathered section at the back adds structure.
How Texture Changes the Whole Vibe
Textured half ponytails feel more relaxed and modern than sleek versions, and they suit most casual and semi-professional settings perfectly. The texture actually adds volume that makes even thin hair appear thicker, and it requires far fewer products and styling tools than trying to create smooth, sleek waves artificially. Wavy and textured hair also holds the half ponytail shape longer throughout the day because there’s natural grip between the twisted or braided sections and the surrounding hair.
Creating Perfect Texture in Your Half Ponytail
- Use a salt spray or texture spray on damp hair before air-drying or diffuser-drying to enhance your natural wave pattern
- If you have naturally straight hair but want this textured look, use a curling iron or waves on the bottom half of your hair to create dimension
- When pulling your hair into the half ponytail base, don’t aim for absolute smoothness; slight bumps and texture in the gathered section look more intentional
- After securing the ponytail, gently pull and tease the gathered section to create more volume and dimension in that area
- Diffuser-dry the loose hair hanging down to enhance waves, or simply air-dry and let gravity do the work
Worth knowing: This style looks even better on day-two or day-three hair because the texture has set in and feels more defined and intentional than freshly-washed hair.
6. The Double-Ponytail Half Updo
This one looks intricate but is shockingly easy once you understand the technique: you’re creating one half ponytail, then creating a second, smaller ponytail using the hair from the first ponytail as the base. It sounds confusing, but the result is a style with incredible dimension and visual interest that looks like you spent an hour styling when you actually spent ten minutes.
Why Stacking Creates Visual Drama
The double ponytail creates instant dimension and texture because you’re essentially layering the hair in your half ponytail. The bottom ponytail becomes fuller and more structured, while the top ponytail sits slightly higher and looser. This creates a deliberately undone, effortlessly styled appearance that reads as very current. The technique also works beautifully to add volume to fine hair, since you’re essentially creating a layered base that makes everything look fuller.
How to Create a Double-Ponytail Half Updo
- Create your first half ponytail as usual, securing it with an elastic at the crown or just below
- Take the elastic of your first ponytail and pull it down about two to three inches, creating a loose bubble or poof of hair above it
- Now use a second elastic to create a ponytail from that point downward, using the hair from your first ponytail plus any remaining loose hair at the back of your head
- Gently pull and fluff both sections to create dimension and softness
- If you want extra impact, curl or wave the sections of hair and the loose bottom ponytail to add texture
Pro tip: If you’re concerned about your elastics being visible, use clear elastics or elastics that match your hair color, then cover them with a small section of hair wrapped around the elastic and secured with a bobby pin.
7. The Sleek Ponytail with Decorative Clip
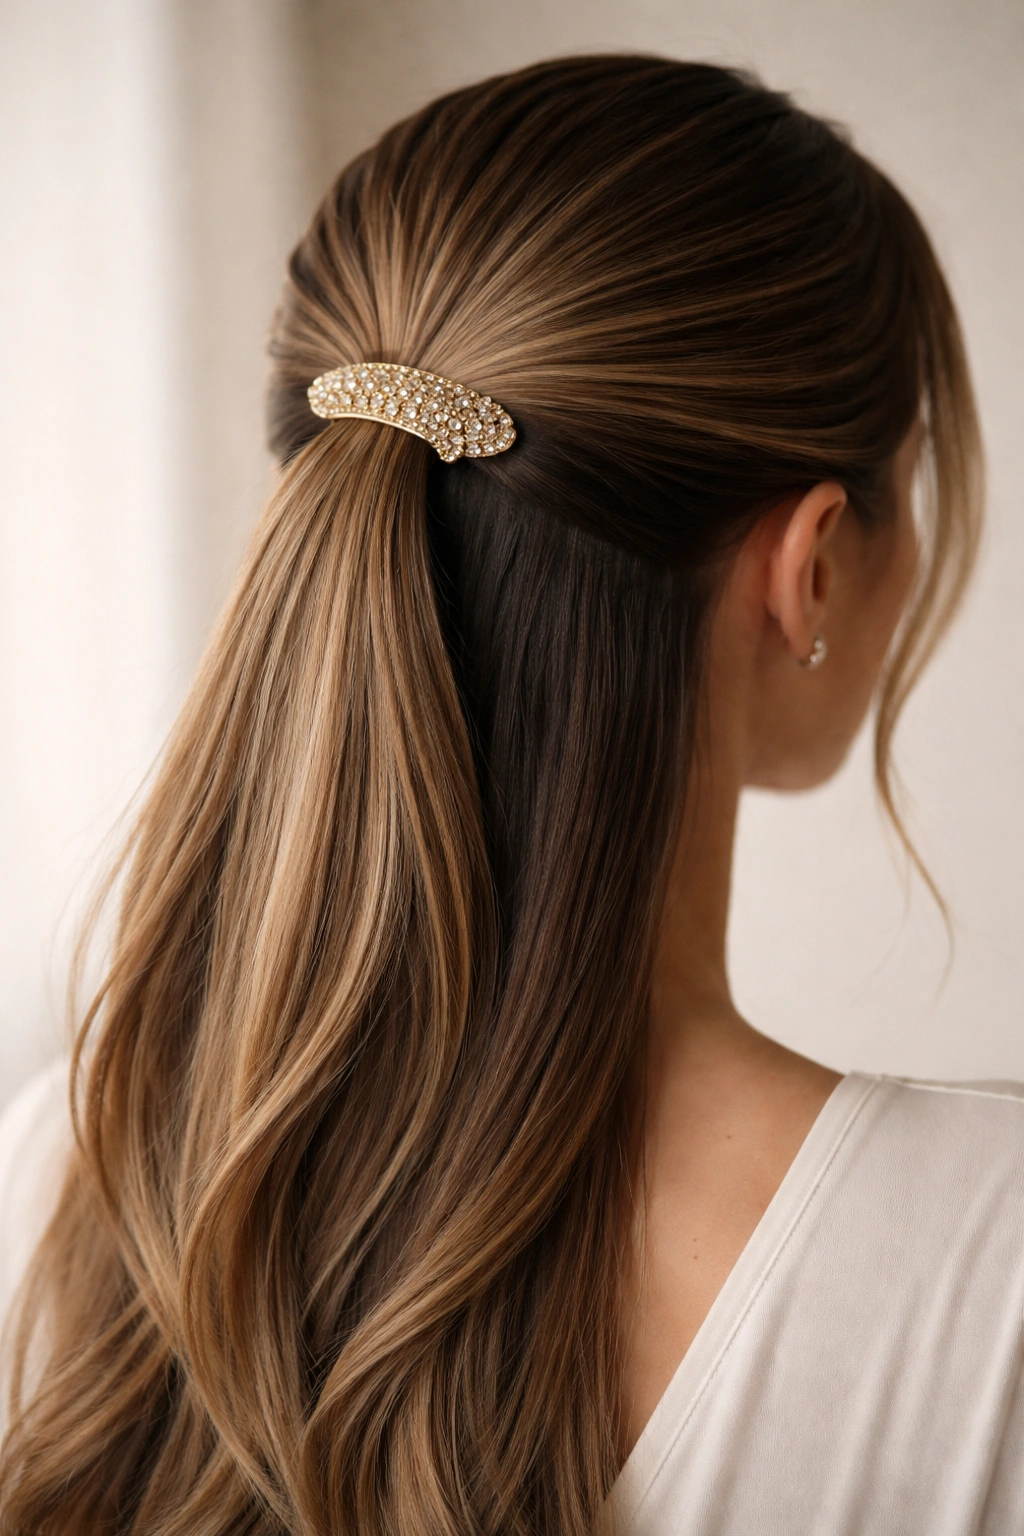
Sometimes the easiest way to elevate a basic half ponytail is to add a statement accessory that does all the visual heavy lifting. A decorative clip, claw clip in a pretty color, ornate bobby pin, or hair jewel secures your ponytail while adding instant polish and personality. You can keep the actual ponytail simple and let the accessory be the star, or create a slightly more textured base if you want multiple elements of interest.
Why Accessories Transform a Basic Style
A well-chosen accessory immediately makes a basic style feel intentional and curated. You can change your entire look just by swapping the accessory—a tortoiseshell clip gives you boho vibes, a metallic clip feels edgy, a pearl-covered clip reads as elegant. Accessories also serve a practical purpose: they secure your ponytail more effectively than a single elastic and distribute the tension across a wider area, which means less stress on your hair and scalp.
How to Style with Accessories for Maximum Impact
- Start with a basic half ponytail secured with a small elastic—you want the base secure but subtle
- Slide your decorative clip over the elastic, positioning it to hide the elastic completely
- If your clip has a slightly loose or decorative quality, you can use bobby pins hidden under the ponytail to ensure it stays exactly where you want it throughout the day
- For a more intentional look, position the clip slightly off-center or at a slight angle rather than perfectly straight
- If you’re using a statement claw clip, consider the thickness and weight—thicker clips need very secure elastics underneath them
Insider note: The claw clips come back around every few years, and they’re genuinely useful for half ponytails. They grip better than elastics alone and distribute tension more evenly across your scalp, making them better for everyday wear.
8. The Messy Bun Half Ponytail
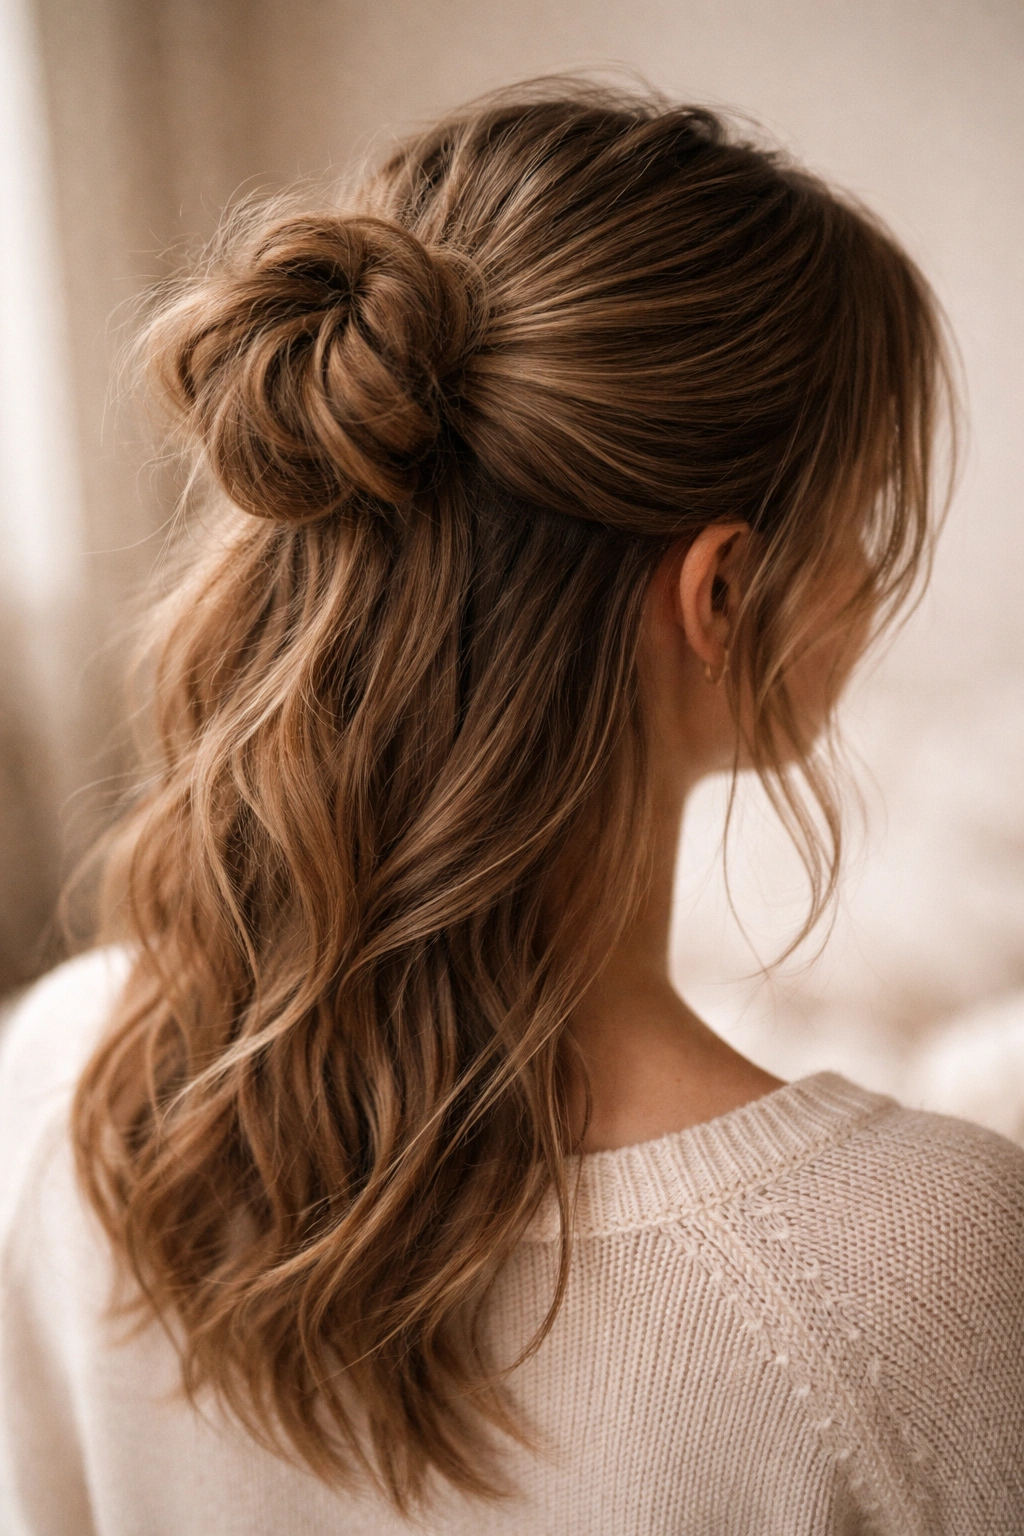
This style takes the relaxation factor to the maximum—you’re creating a half ponytail base, then twisting or loosely braiding the secured ponytail and wrapping it into a messy, intentionally imperfect bun at the nape of your neck. It looks effortlessly thrown-together while actually being more structured and secure than it appears. Perfect for days when you want your hair off your face but aren’t in the mood for polish.
Why Messy Buns Feel Modern and Approachable
A properly constructed messy bun reads as deliberately styled rather than actually messy, which makes it appropriate for more settings than you might think. The style is incredibly comfortable because it sits lower on your head and distributes weight evenly, and the looser structure means less tension on your scalp than a tight bun would create. Messy buns also hide imperfect hair days beautifully—slightly oily roots, skipped hair washing, uneven texture all actually work in your favor here.
Creating an Intentionally Imperfect Bun
- Create your half ponytail at the crown, but don’t make it too tight—you want it secure enough to hold but loose enough to work with
- Twist or loosely braid the ponytail section, or simply tease it for volume and texture
- Wrap the twisted/braided/teased section into a loose circular bun at the nape of your neck
- Use bobby pins to secure the bun, inserting them horizontally and at different angles rather than all in one direction
- Gently pull and separate sections of the bun to create a fuller, more dimensional, intentionally undone appearance
- Pull a few shorter pieces loose around your face and neck for extra softness and that “just rolled out of bed” vibe
Pro tip: This style actually looks better if your hair is slightly textured or has been in braids overnight—the texture gives the bun more grip and dimension than perfectly smooth hair would.
9. The Curved Half Ponytail
Instead of gathering your half ponytail sections straight back, you’re taking a curved path from front to back, almost creating an S-curve or gentle arc with the hair you’re pulling up. This creates a more dimensional, flattering base and works especially well if you have a longer or rounder face. The technique requires just slightly more precision than a standard half ponytail, but once you understand the motion it becomes second nature.
Why Curves Flatter More Than Straight Lines
A curved path of gathered hair follows the natural contours of your head better than pulling everything straight back, which can sometimes create an unflattering, top-heavy appearance. The curve also creates visual interest and dimension—it’s not just a static gathered section but an actual design element that frames your face. This style photographs beautifully because the curved element adds movement and sophistication to even a simple base style.
How to Execute the Curved Technique
- Start with a small section just above your right temple
- Instead of moving straight back toward the center, curve your section backward and slightly inward, following the shape of your scalp
- Repeat on the left side, mirroring the curve you created on the right
- Gather both curved sections at the back and secure with an elastic
- The gathered section should sit slightly lower and more off-center than a traditional half ponytail, which is intentional
- You can curl the loose hair or add texture to emphasize the curved element further
Worth knowing: This technique works especially well with longer hair because the length shows off the curve better. With very short hair, the curve becomes harder to see.
10. The Half Ponytail with Volume at the Crown
This version specifically addresses the common concern that pulling hair back can sometimes make your face look heavy or your head look flat. You’re creating a half ponytail but intentionally building volume at the crown, sometimes through teasing, sometimes through the way you gather and position the hair. The extra height and dimension at the crown rebalances your overall proportions and works for most face shapes.
How Volume Changes Your Face Shape
Adding height at the crown elongates your overall face proportions, which is flattering for most people. Even if you’re not naturally volumizing your hair, creating strategic volume at the crown when you pull a half ponytail makes you look fresher, more awake, and more put-together. The volume also makes fine hair appear thicker and gives you a style that stands out rather than lying flat against your head.
Building Volume Without Damaging Your Hair
- Before creating your half ponytail, blow-dry your roots with your head tipped forward to build natural volume
- Use a round brush or paddle brush on the crown area to direct hair upward and away from your scalp
- Once you’ve dried, gently tease or backcomb just the roots of your crown area—you’re not aiming for visible teasing but for grip that holds volume
- Create your half ponytail as usual, but pull it slightly higher than you normally would to emphasize the crown volume
- Use bobby pins to secure the crown area once you’ve positioned your ponytail, making sure the roots stay lifted
- A light hairspray applied to the crown before teasing and after securing helps lock everything in place
Pro tip: You can get instant crown volume by blow-drying your hair in the opposite direction of how it naturally falls, then flipping your head back to original position. The volume from the reverse direction stays in place when you move back.
11. The Sleek Braided Half Ponytail
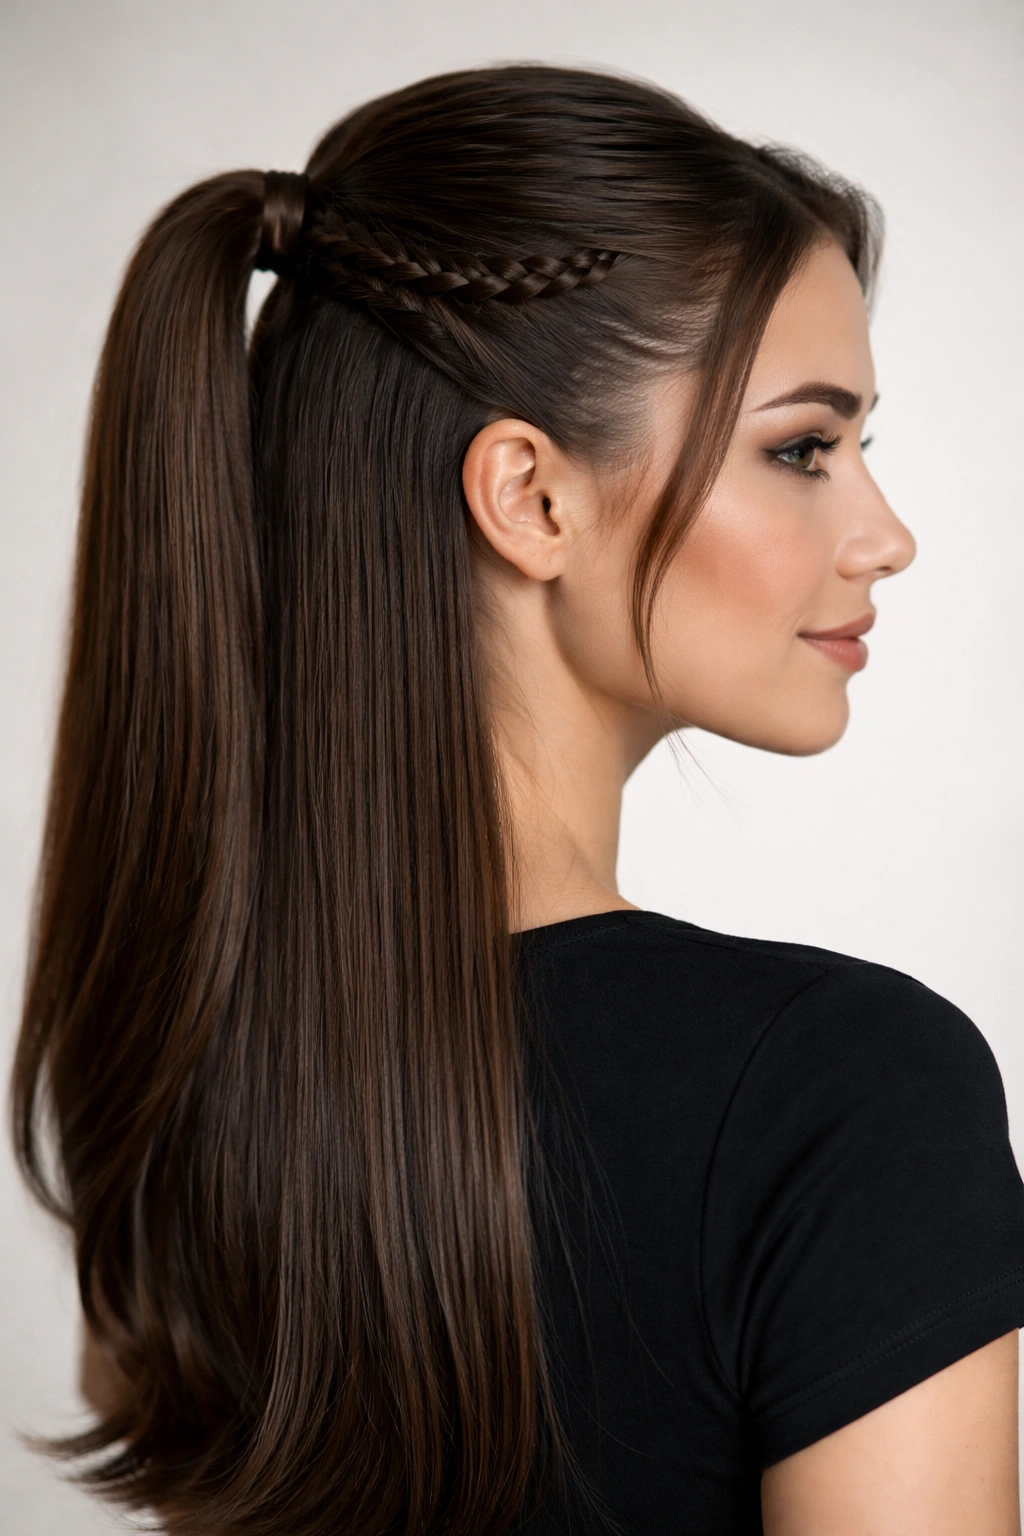
This style combines the polished, precise quality of a sleek ponytail with the textured interest of a braid. You’re creating a French braid or Dutch braid on one or both sides of your head, pulling everything back in a sleek, tight gather, and securing it into a smooth, controlled ponytail. It reads as professional and intentional without being overly fussy, making it perfect for work, formal events, or any situation where you want maximum polish.
Why This Combination Works So Well
Braids add immediate visual interest and texture detail that elevates a basic sleek ponytail. The braid structure also helps secure and grip your hair, so your style holds stronger and longer throughout the day without needing extra products. This style particularly suits longer hair and works beautifully on all hair textures, though it shows up differently depending on whether you have straight, wavy, curly, or textured hair—all of which can look stunning.
Creating a Sleek Braided Half Ponytail
- Apply smoothing serum to damp hair and blow-dry completely straight and smooth
- Create a French braid or Dutch braid from one or both temples, pulling the braid tightly and keeping it smooth as you work
- Guide the braid(s) toward the back of your head, making sure the braid sits flat against your scalp with no bumps
- Gather the braided sections at the back along with any remaining loose hair and secure with a small elastic
- Smooth the finished ponytail with a paddle brush and seal flyaways with a light hairspray
- For extra polish, wrap a small section of hair from the ponytail around the elastic and secure with a bobby pin to hide the elastic completely
Worth knowing: This style requires hair to be completely dry and smooth for the sleek effect to work. If you’re working with naturally curly or textured hair, you may want to straighten it first for this particular style.
12. The Half Ponytail with Twisted Sides

This variation specifically plays with the idea of twists—but instead of twisting down toward the back, you’re twisting the sides and then gathering everything at the back. It’s essentially a hybrid of the simple twisted half ponytail and a more structured style. The effect is slightly more intentional-looking than a basic twist while still remaining quick and relatively easy to execute.
Why Side Twists Create Flattering Dimension
Twisting specifically the sides of your face before gathering creates a soft frame that’s very flattering. The twist catches light and creates shadow and dimension that makes your face look more sculpted and interesting. This style also works beautifully on most face shapes and is especially flattering if you prefer a softer style but still want your hair pulled back.
Executing Twisted Sides Perfectly
- Section off your hair starting from one temple, taking a slightly thicker section than you would for a simple side twist
- Twist this section as you move it toward the center back of your head—the twist should be visible but not tight
- Repeat on the other side, mirroring the thickness and tightness of your first twist
- Gather both twisted sections at the back along with any remaining loose hair
- Secure with an elastic, then gently pull and separate the twisted sections to make them fuller and more intentional-looking
- You can leave the gathered section as a simple ponytail or continue to the next step for added interest
Pro tip: If your hair is very fine or slippery, dampening the sections you’re about to twist with a light texture spray will help the twist grip and hold better.
13. The Half Ponytail with Looped Sections
This style creates deliberate loops or waves within the gathered section, making it look more intricate and styled than a basic ponytail. You’re essentially creating small sections within your ponytail base and pinning or tying them into curved loops that add dimension and texture. It’s more time-intensive than some other styles, but the result is definitely eye-catching and photogenic.
Why Looped Sections Feel Special
Looped sections create dimension that reads as intentional styling. The loops catch light differently depending on how you position them, creating visual interest and movement. This style works beautifully for special occasions, celebrations, or any time you want your hair to be a true design element rather than just pulled back practically. It also works well for longer hair, where you have enough length to create noticeable loops.
How to Create and Position Loops
- Create your basic half ponytail as usual, securing with an elastic
- Take small one-inch sections of your ponytail and curve each section into a loop, securing each loop with a bobby pin
- Vary the size and direction of your loops for a more organic, intentional look
- Some pins can be hidden within the loops, while others positioned on top can actually be decorative elements
- You can create loops all the way down the length of your ponytail or just at the crown area depending on the look you’re going for
- Pull and tease the loops gently to make them fuller and more dimensional
Worth knowing: This style is best attempted on longer hair where you have enough length to create visible loops. Very short ponytails won’t have enough hair to loop.
14. The Romantic Half Ponytail with Curls
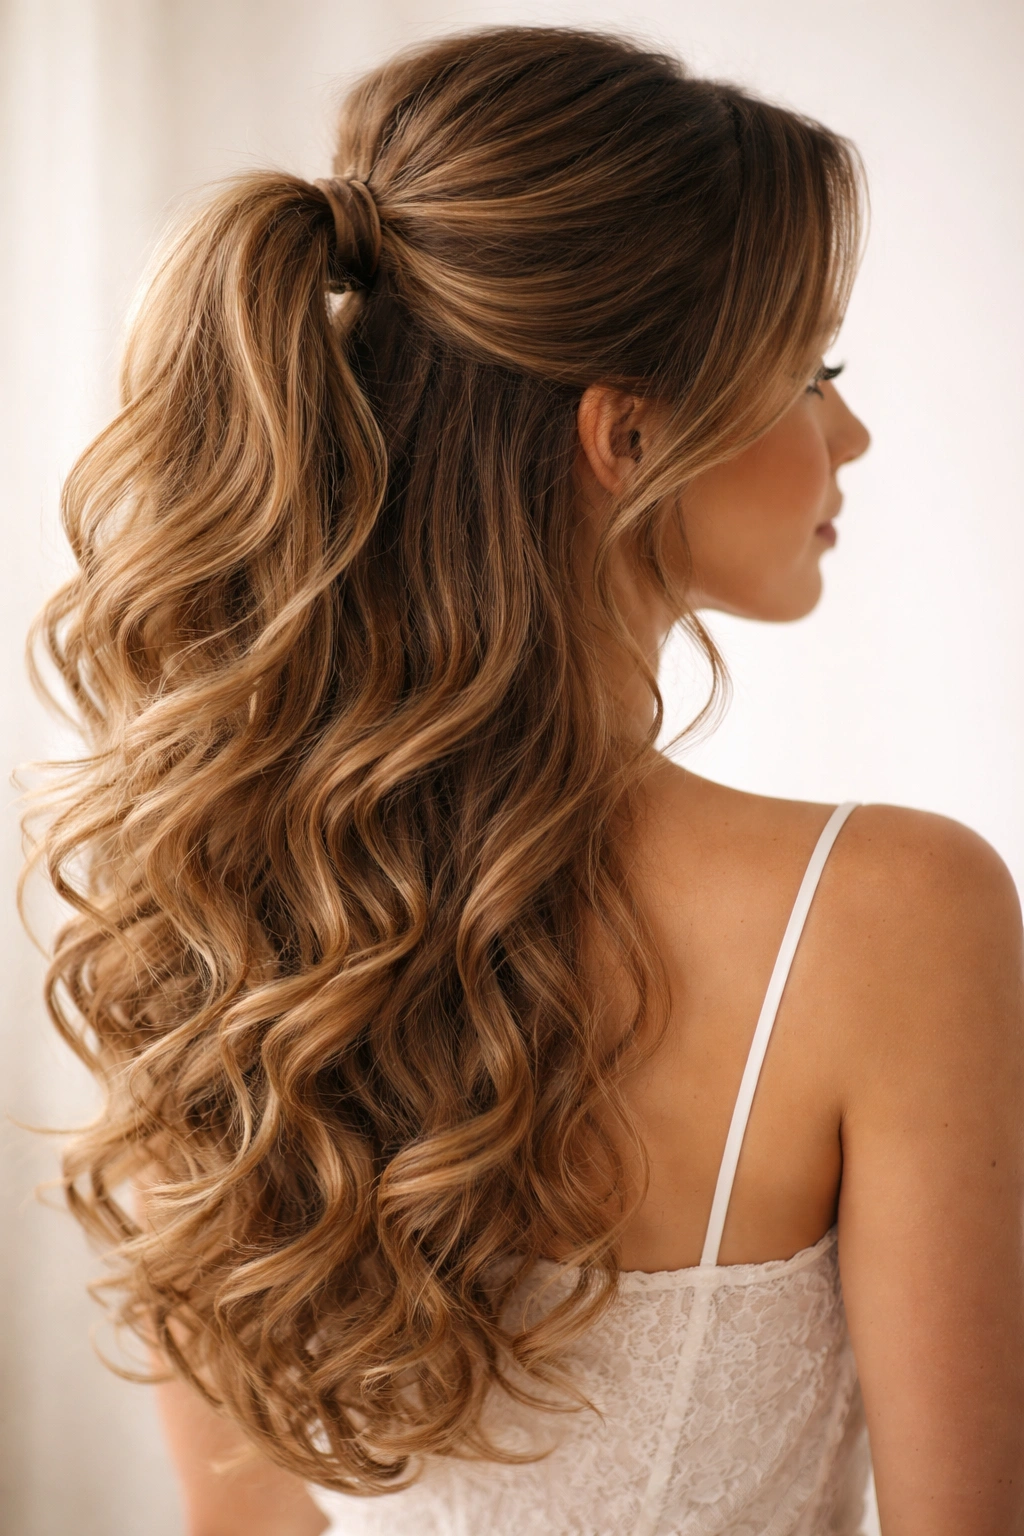
This version takes everything soft about a half ponytail and amplifies it through strategic curling. You’re creating the basic half ponytail structure, then using a curling iron or curling wand to add flowing, romantic curls throughout the loose hair and sometimes the gathered section. The result is a style that feels dressy and special without requiring an elaborate technique.
How Curls Elevate Any Half Ponytail
Curls add instant dimension, volume, and movement that transforms a basic half ponytail into something much more elevated. Even very simple gathered sections look special once you add curls. Curls also work beautifully on all hair types and textures—straight hair shows off the curl pattern clearly, while naturally curly hair gets extra volume and definition. This style is perfect for date nights, celebrations, or any time you want a more dressed-up version of your everyday style.
Creating Romantic Curls in Your Half Ponytail
- Create your half ponytail as usual, keeping it slightly looser than you would for a more casual style
- Using a 1.25-inch or 1.5-inch curling iron, curl sections of the loose hair away from your face, holding each curl for about 15-20 seconds
- You can also curl the sections of hair that are gathered in your ponytail base if you want extra texture and volume
- Once all curls are complete, gently run your fingers through them to create more relaxed, flowing waves
- Apply a medium-hold hairspray to set the curls and make sure they last throughout the day
- For extra romance, let a few curled sections frame your face loosely
Pro tip: Curling on a half-dry rather than completely dry hair helps the curls hold better and last longer throughout the day.
15. The Sleek Low Half Ponytail
Sometimes the most elegant version is also the simplest: a sleek, smooth half ponytail positioned low on the back of your head rather than at the crown. Everything about this style is controlled and intentional—smooth hair, precise positioning, and minimal embellishment. It reads as extremely sophisticated and works for nearly every formal or professional setting.
Why Low Half Ponytails Feel Elegant
There’s something about the positioning of a low ponytail that immediately reads as elegant and thoughtful. The low placement also makes this style comfortable for all-day wear because it doesn’t create excessive tension at your crown. This style flatters most face shapes, and the lower positioning is especially flattering if you prefer more face-framing or have a longer face shape.
Creating a Sleek, Polished Low Ponytail
- Blow-dry your hair completely straight and smooth using a paddle brush, directing hair downward to smooth the cuticle
- Apply anti-frizz or smoothing cream to the sections where you’ll be gathering hair
- Take sections from just above your temples and curve them gently back toward the nape of your neck—lower than a traditional half ponytail
- Gather these sections at the very low back of your head and secure with a small, high-quality elastic
- Use a fine-tooth comb to smooth any flyaways and apply a light hairspray to lock everything in place
- Optionally, wrap a small section of hair around the elastic and secure with a bobby pin to hide the elastic completely
Insider note: This style requires completely smooth, straight hair for the intended effect, so it works best if you have naturally straight hair or don’t mind spending time on blow-drying and smoothing.
Final Thoughts

The half up half down ponytail is endlessly adaptable, which is exactly why it’s remained a go-to style across different eras and for different occasions. Whether you’re reaching for the ultra-sleek version on a Monday morning at work, playing with braids and twists on a weekend, or adding curls for a special event, you’ve got a technique that works specifically for what you need in that moment. The real advantage of mastering several variations is that you can adapt based on your hair type, the time you have available, and the vibe you’re going for.
The best version of a half ponytail is honestly the one you’ll actually wear, which is why experimenting with different gathering points, textured versus sleek bases, and various accessories is so important. You might discover that curved ponytails flatter your face better than straight ones, or that loose braids feel more comfortable for all-day wear than tight twists. These personalized preferences matter more than any specific technique.
Start with the variations that appeal to you most and practice them a few times until the motions become automatic. Once you can execute a basic half ponytail without thinking, adding complexity becomes much easier. You’ve got fifteen solid styles to work through, which means you can literally have a different half ponytail every day of the week for two weeks, and then start rotating and creating your own hybrid versions based on what you’ve learned.