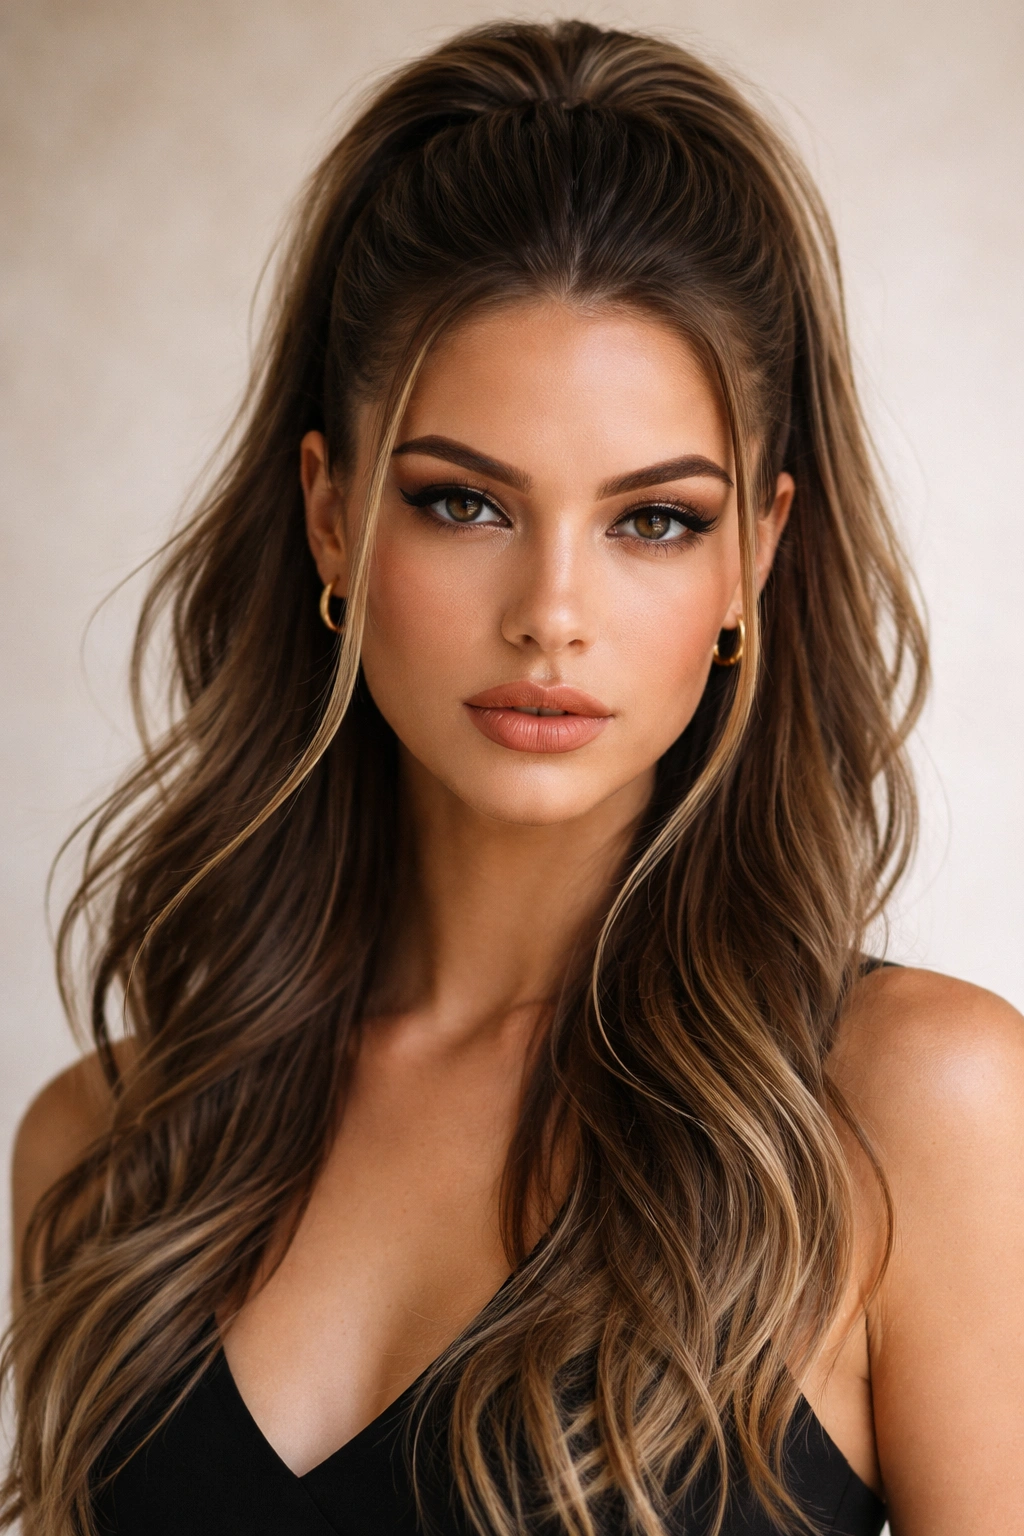
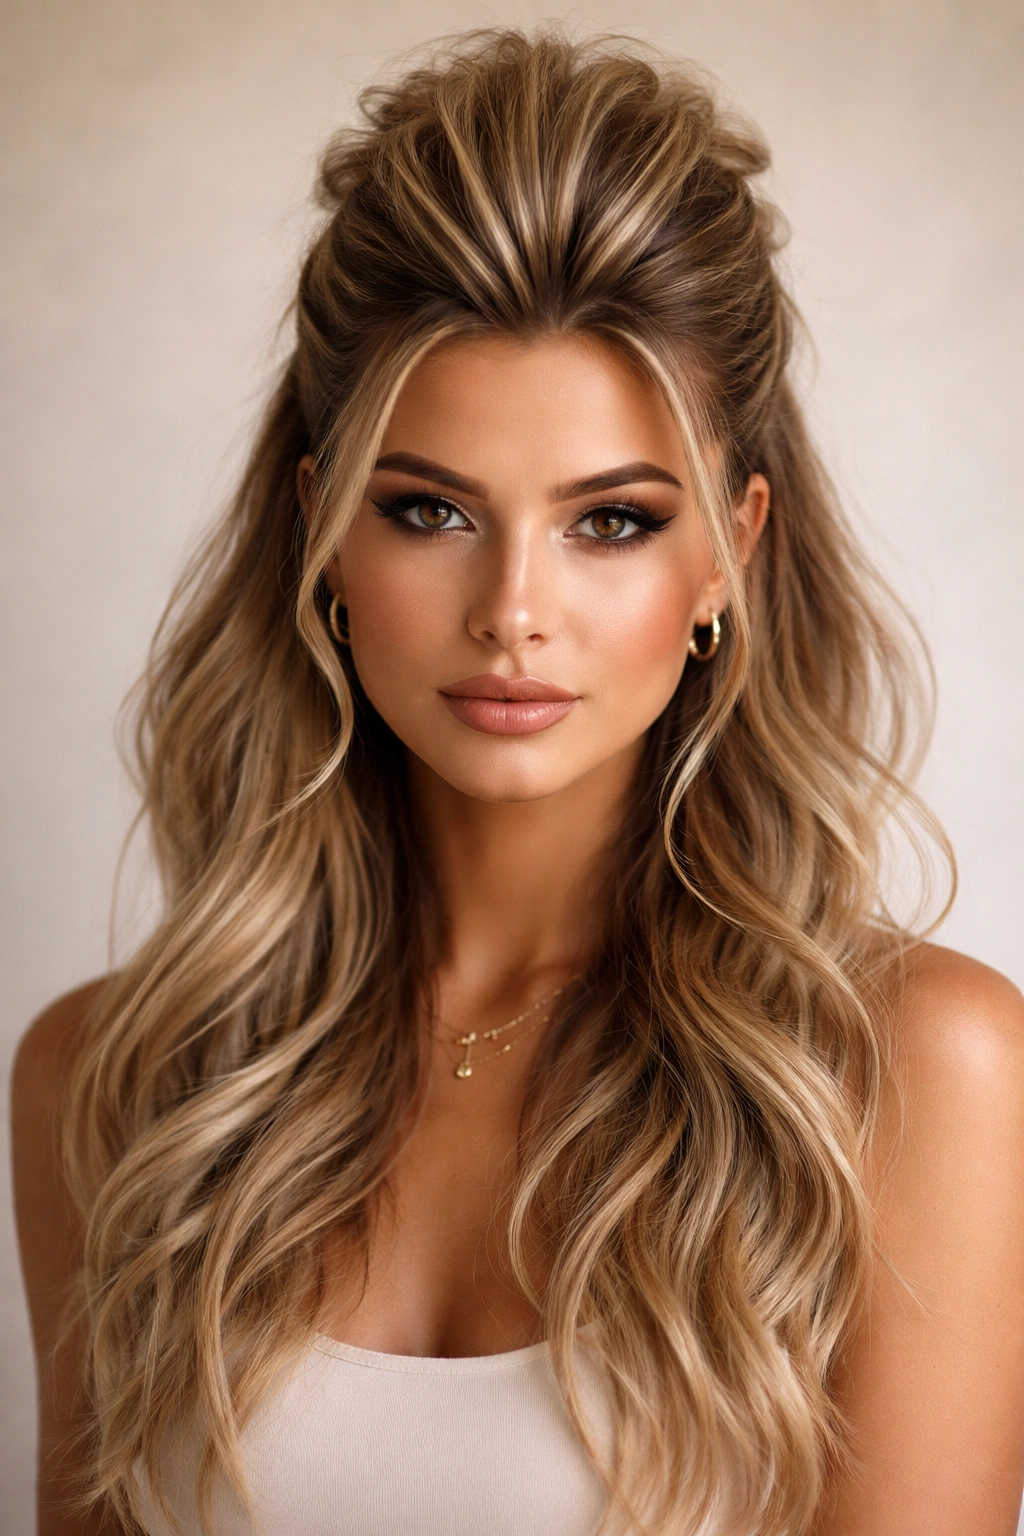
Half up half down styles have become the ultimate go-to for anyone who wants the best of both worlds—volume and movement where it matters, with face-framing strands that soften your features and add dimension. But the classic, polished version? That’s just the beginning. When you lean into edgier interpretations, you unlock a completely different energy: textures that look intentionally undone, unexpected braids, sleek contrasts that feel modern and bold, and structured elements that command attention. These aren’t your mom’s half-up styles—they’re for people who want their hair to reflect attitude alongside elegance.
The beauty of edgy half up half down styling is that it bridges the gap between casual and refined. You can wear these looks to a night out, a creative workspace, a festival, or anywhere you want to express that you’re not following the ordinary rules. Texture and contrast are what make these styles feel edgy rather than sweet—think mixing smooth sections with deliberate mess, adding geometric parts, playing with asymmetry, or using unexpected pinning techniques that show the structure rather than hiding it.
What makes these styles work so well is the versatility hidden inside them. Whether you have stick-straight hair, natural waves, thick curls, or anything in between, there’s an edgy half up interpretation built for your texture. And here’s what most people don’t realize: the edgier the look, the more forgiving it actually is. Slight imperfections, a few loose pieces, and undone sections don’t ruin the style—they’re literally part of what makes it work.
Let’s dive into the specific styles that bring real edge to this classic format.
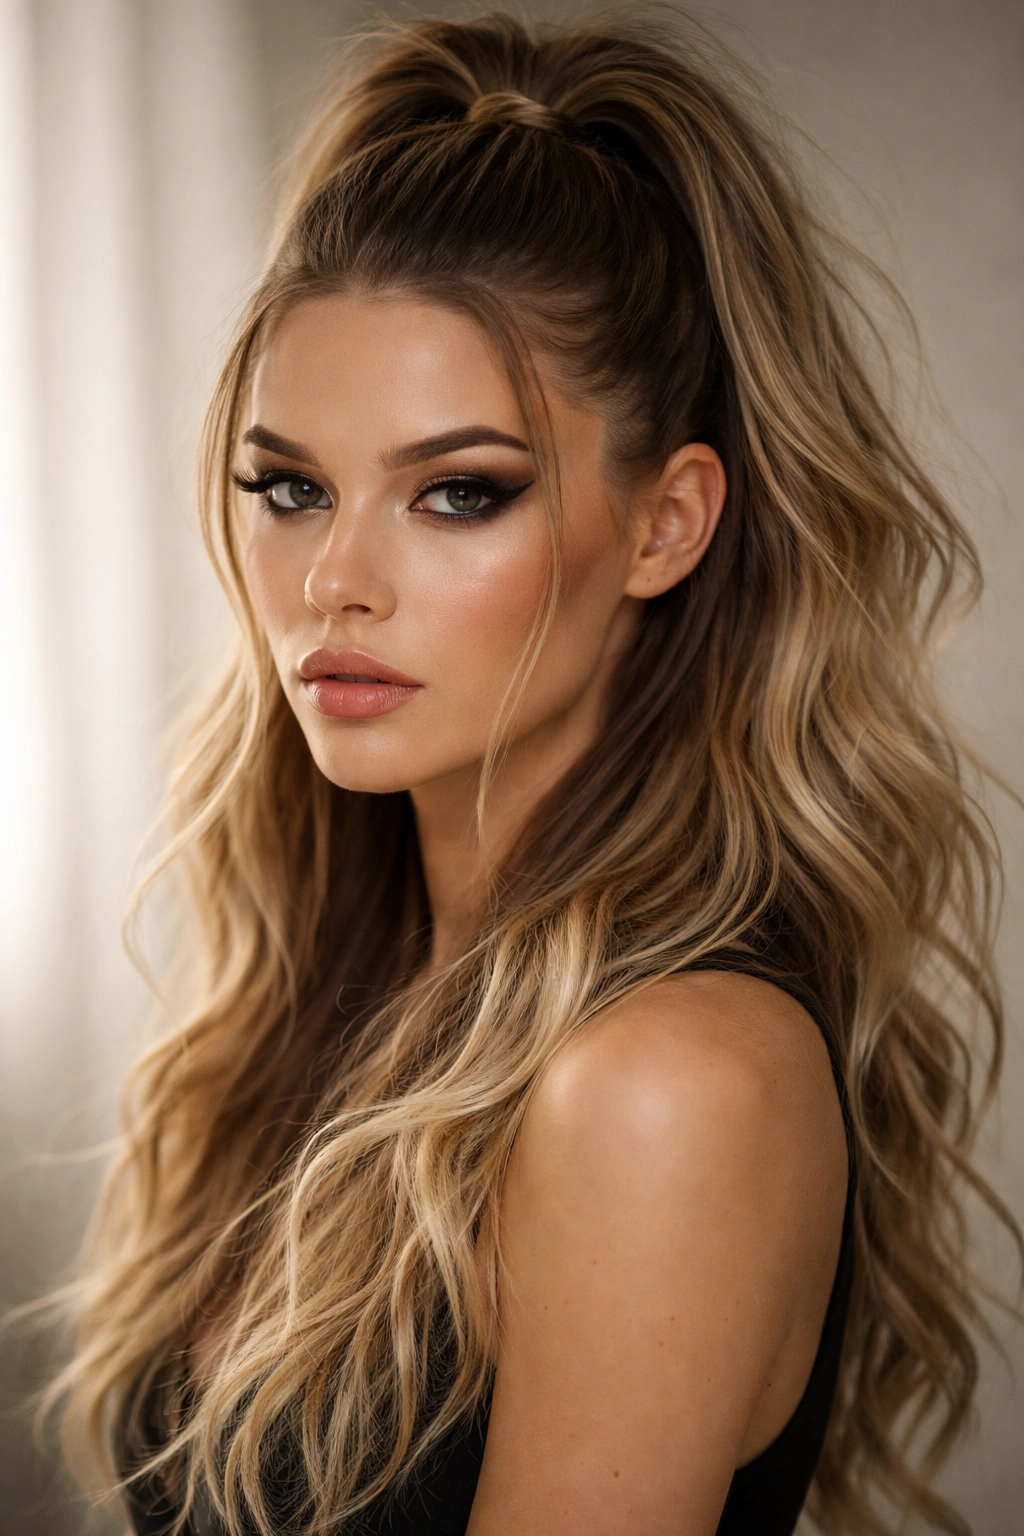
1. Textured Waves with Sleek Pinned Section
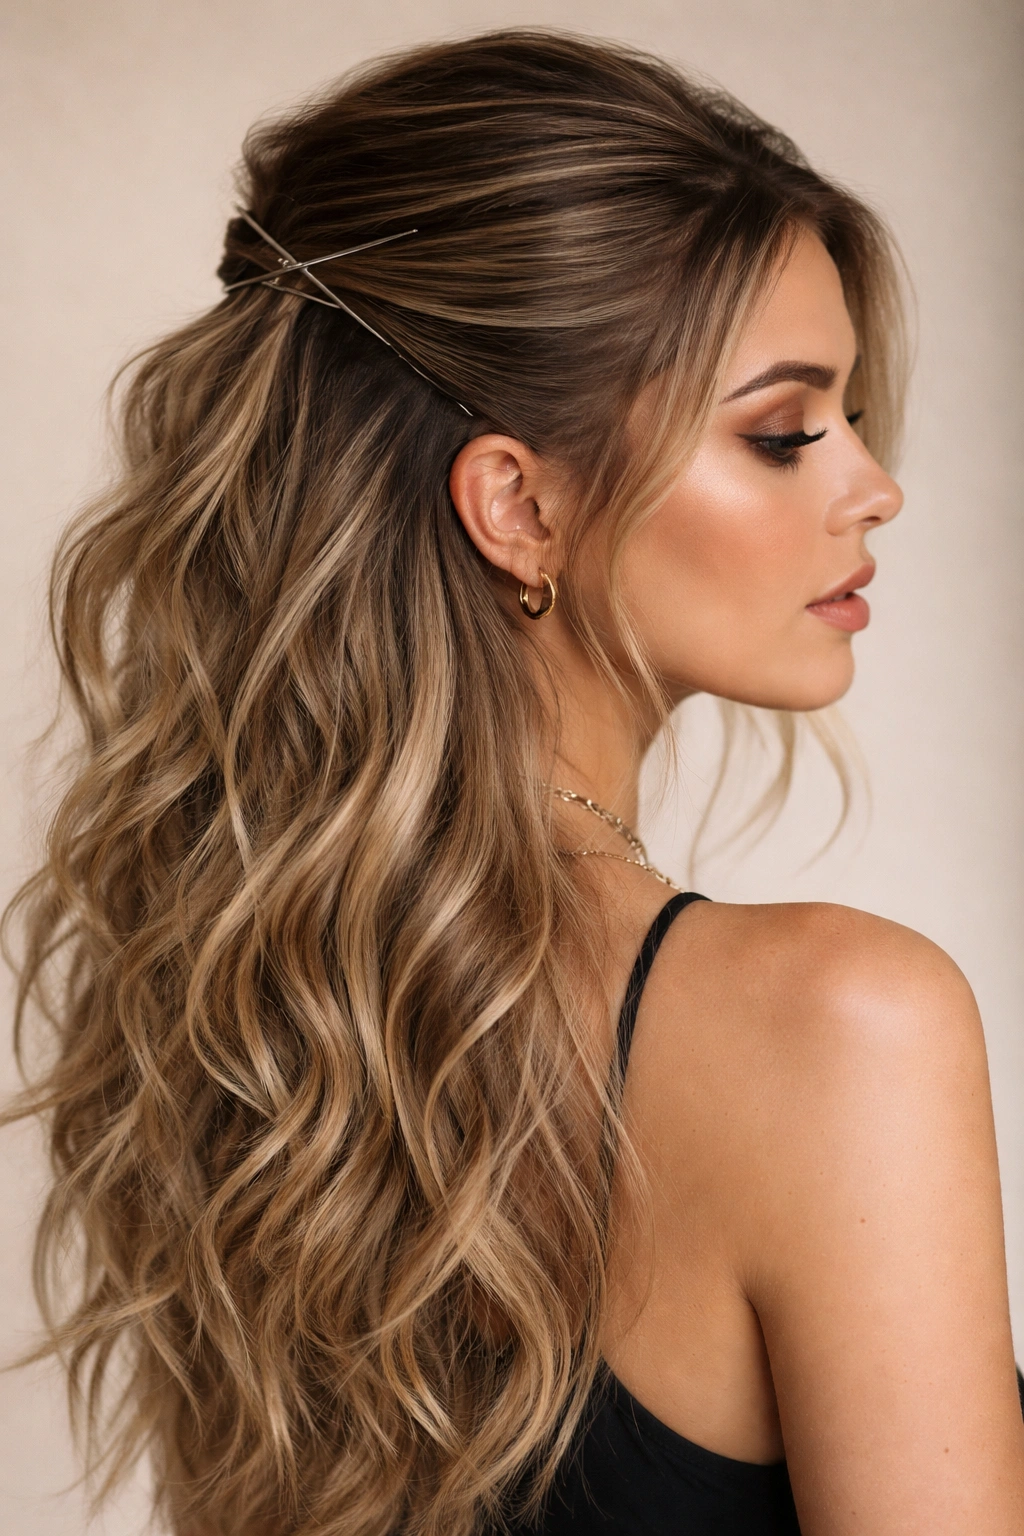
This style pairs intentionally disheveled waves throughout with a dramatically sleek, tight section secured at the back of your head. The contrast between the two textures creates immediate visual impact—messy and polished living in perfect tension. It’s the hairstyle equivalent of wearing a leather jacket over an elegant dress.
Why This Look Commands Attention
The power of this style lies in the deliberate contradiction. Your lower hair gets full, tousled waves with movement and depth, while the upper section pulled back is smooth and controlled. This creates a visual hierarchy that draws eyes upward, making your face feel more prominent and defined. The sleek pinned section also keeps hair off your shoulders and neck, giving the waves more room to breathe and preventing the whole look from feeling heavy.
How to Build the Style
Start with textured waves throughout your entire head using a curling iron or by sleeping in braids the night before. Once your waves are set and have some texture, take a section from each side of your head starting at ear level and bring them toward the back. Smooth these sections as much as possible with a fine-toothed comb or your fingers and secure them with bobby pins hidden underneath. Leave the back section slightly loose and tousled—don’t pull every hair perfectly flat. The front waves should frame your face with wild abandon while the back section provides the edgy restraint.
Pro tip: Texture spray applied to your waves before pinning actually makes the sleek section easier to work with, as it gives you just enough grip to smooth without creating flyaways.
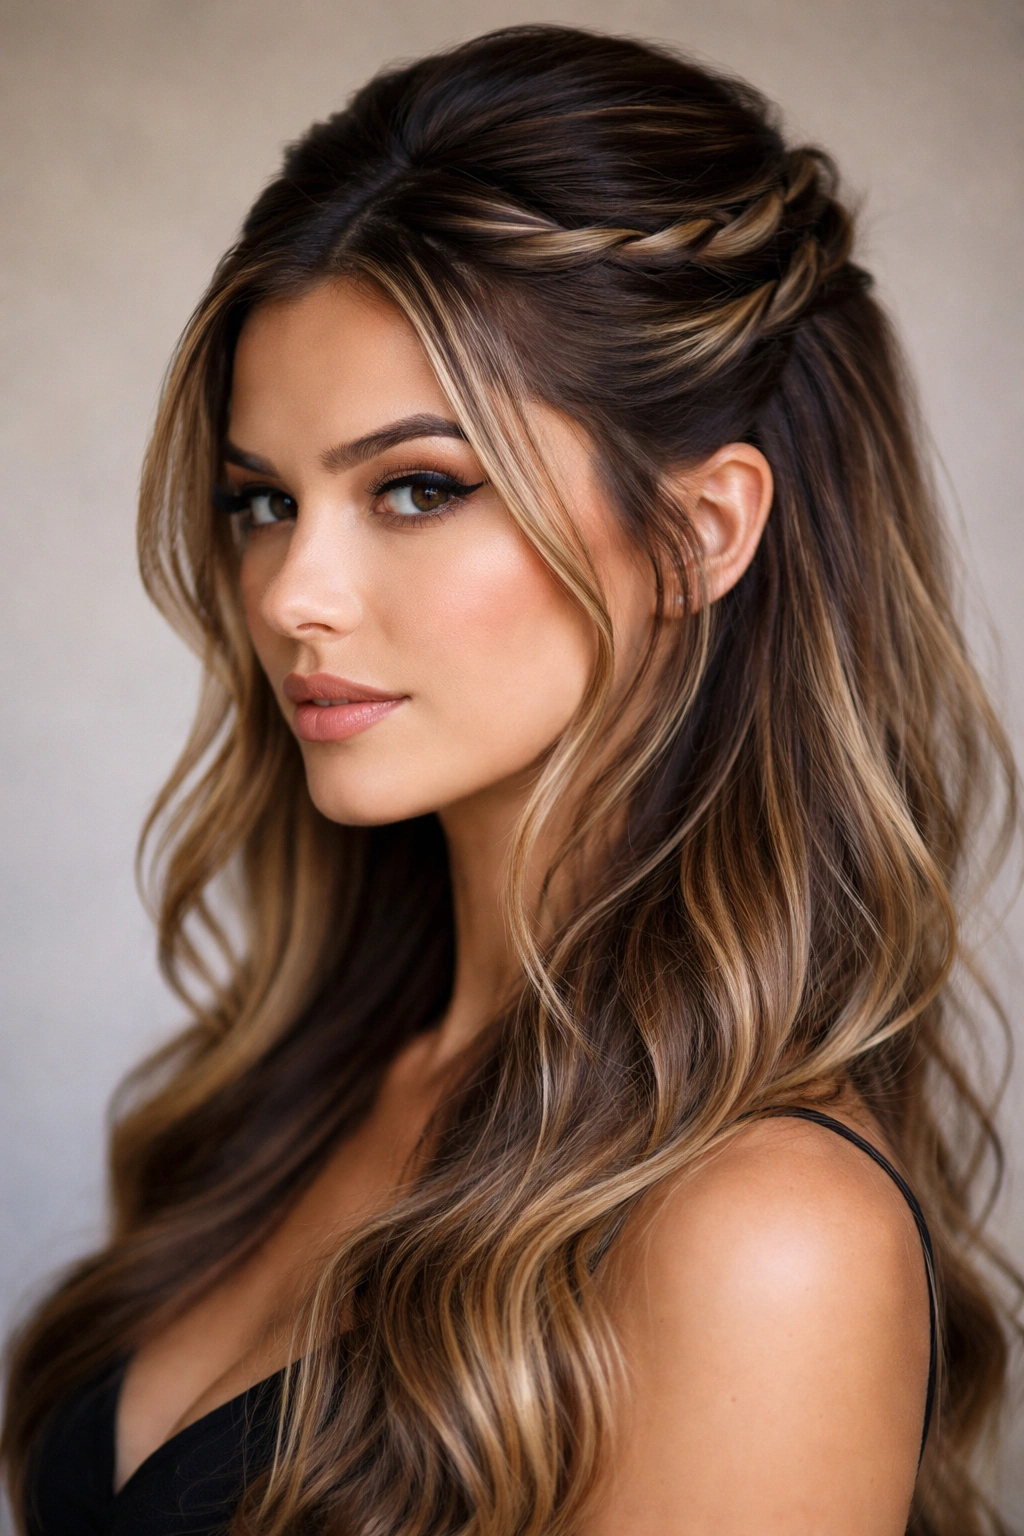
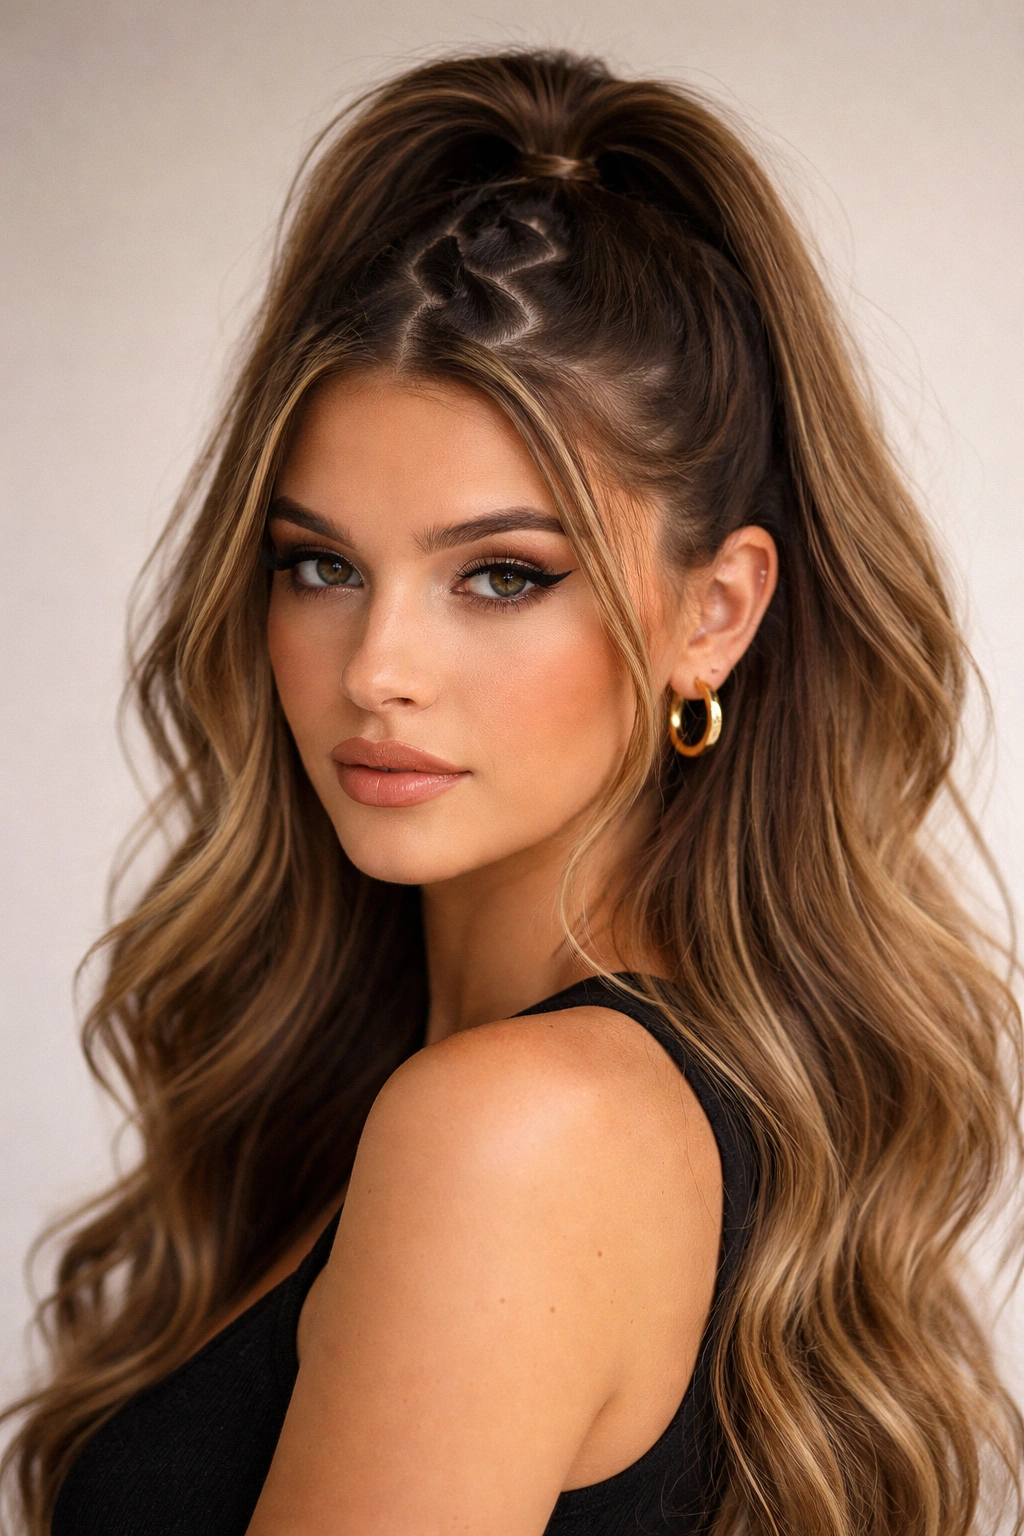
2. Braided Crown Half Up Style
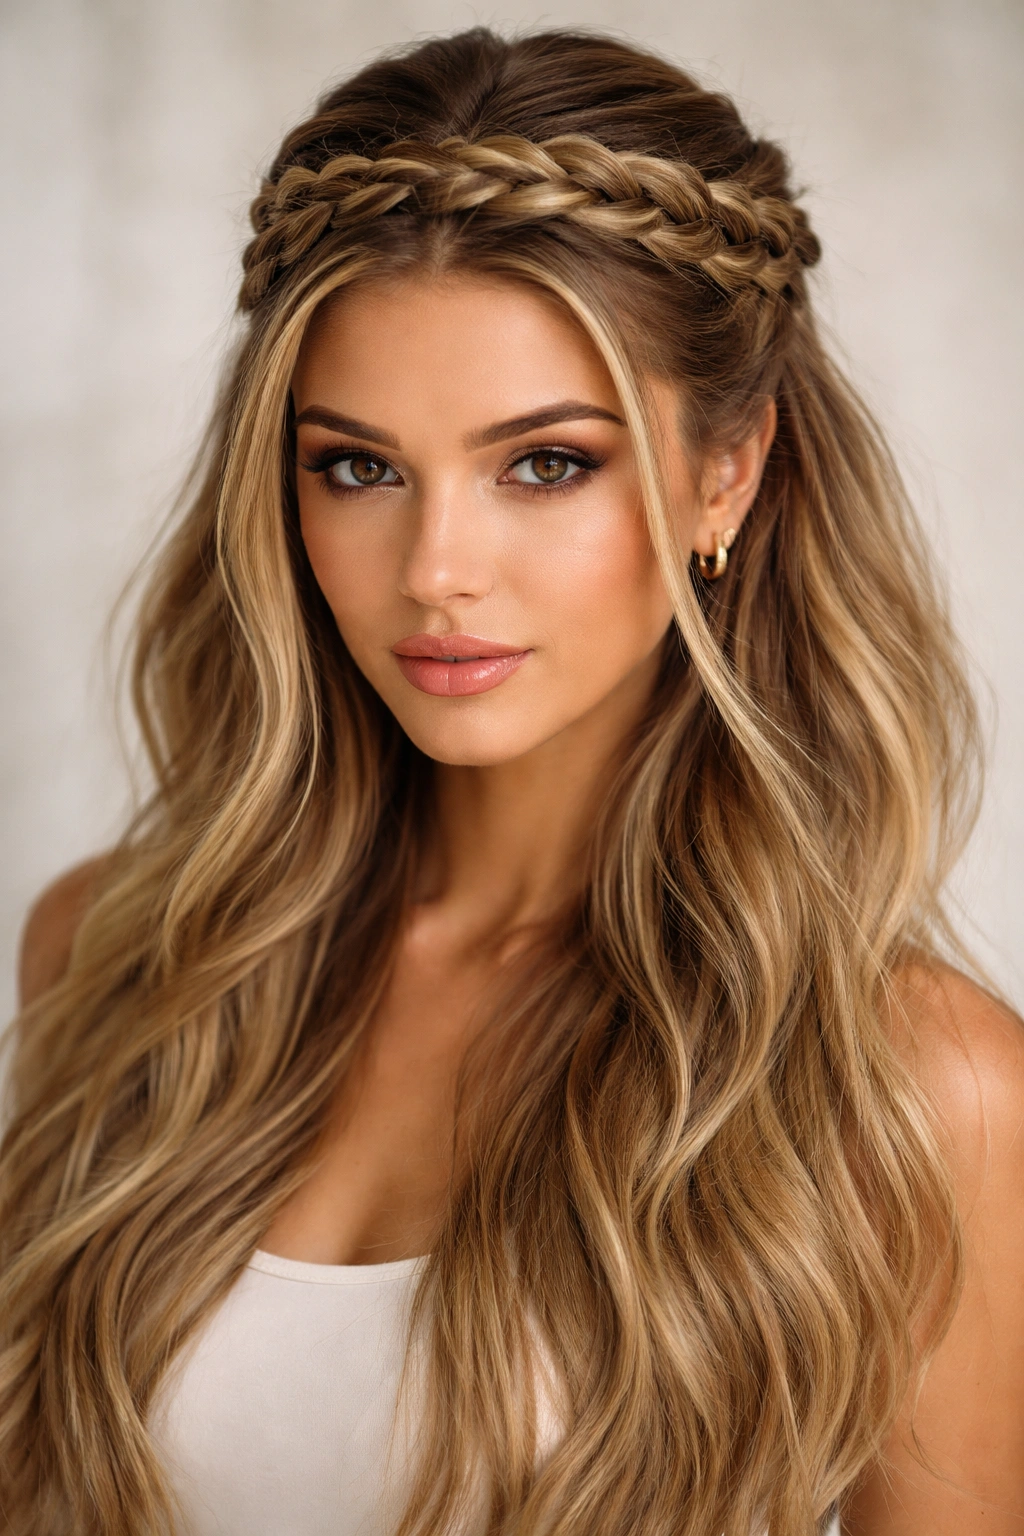
Imagine a braid that starts at one ear, travels across the top of your head like a crown, and anchors a half-up half-down section at the back. This style screams romance with an edge because braids typically read as feminine, but crowning your head with one while leaving the bottom half loose and flowing creates an unexpectedly bold silhouette.
What Makes the Braided Crown Different
A traditional braid might feel too delicate on its own, but when you integrate it as the holding mechanism for a half-up style, it becomes the focal point rather than a supporting detail. The braid itself becomes architectural—it’s not just decoration, it’s doing real structural work. This shift in function transforms how the style reads. Suddenly you’re not wearing a pretty braid; you’re wearing a braid that looks confident enough to hold everything in place.
Technique for Maximum Edge
Start by taking a thick section of hair from one temple and begin a Dutch braid (braid that sits on top of the hair rather than underneath) moving toward the back of your head. Once you reach the opposite ear or slightly past it, transition to a regular three-strand braid and incorporate the top section of your half-up portion into the braid itself. Secure the braid with bobby pins and then gather and secure the full half-up section with the braid as the anchor. This creates a unified, sculptural look that feels intentional and modern rather than ornamental.
Worth knowing: Dutch braids automatically give you more visible texture and detail than a standard French braid, which is why they read as edgier even when they’re technically the same braid family.
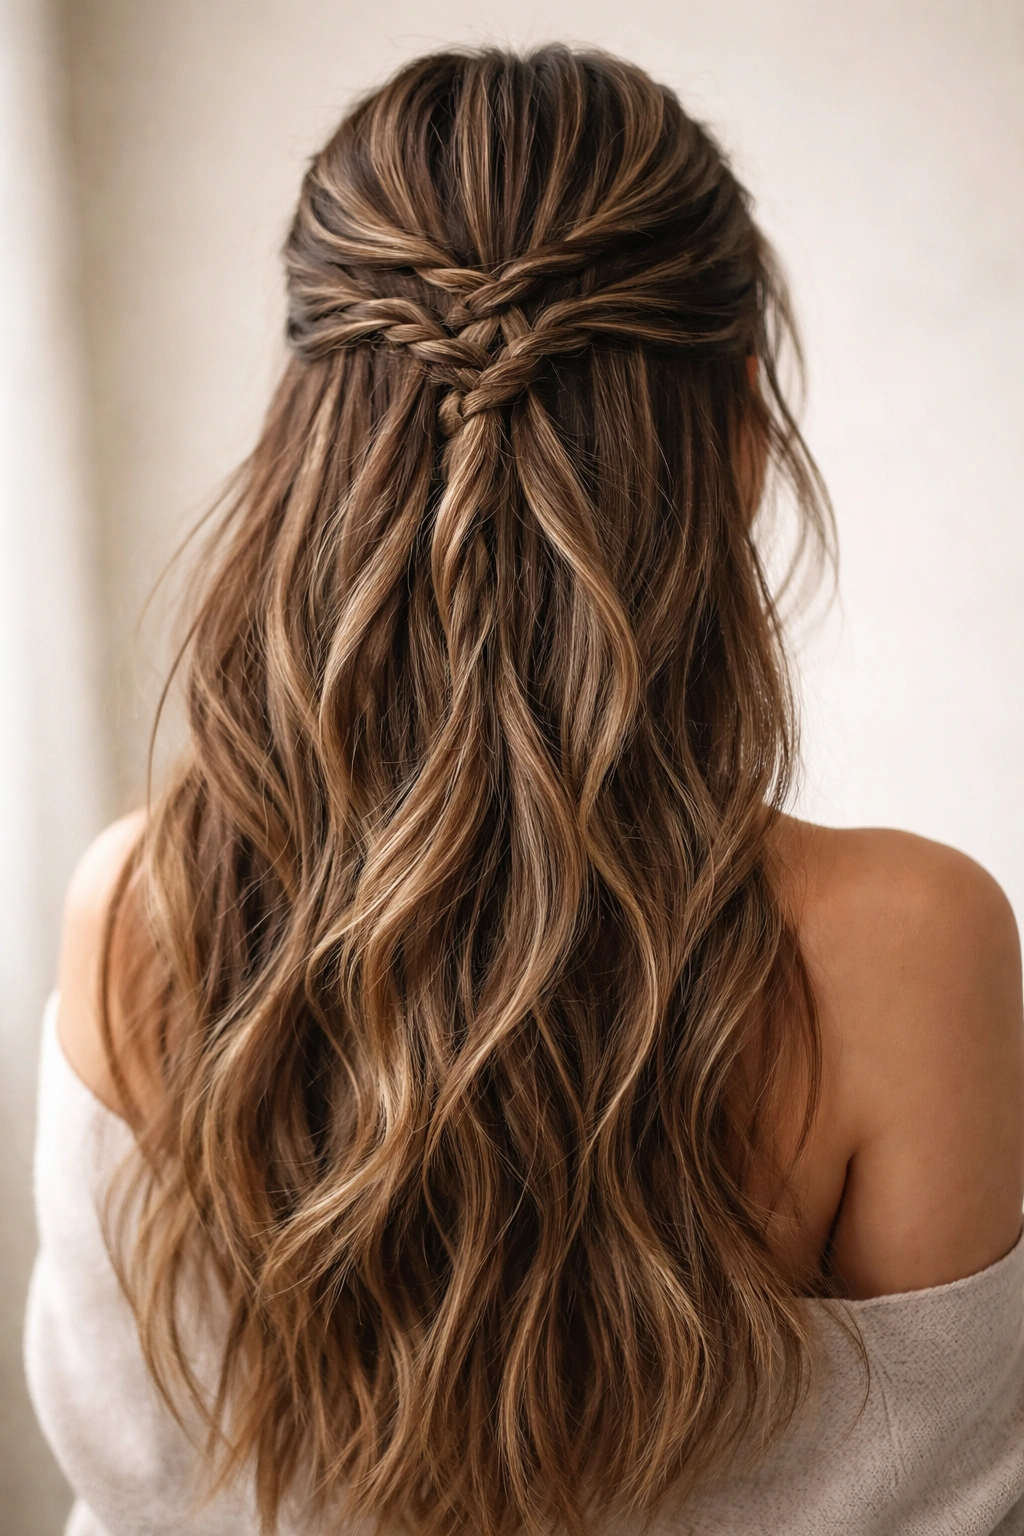
3. Twisted Knot at the Back
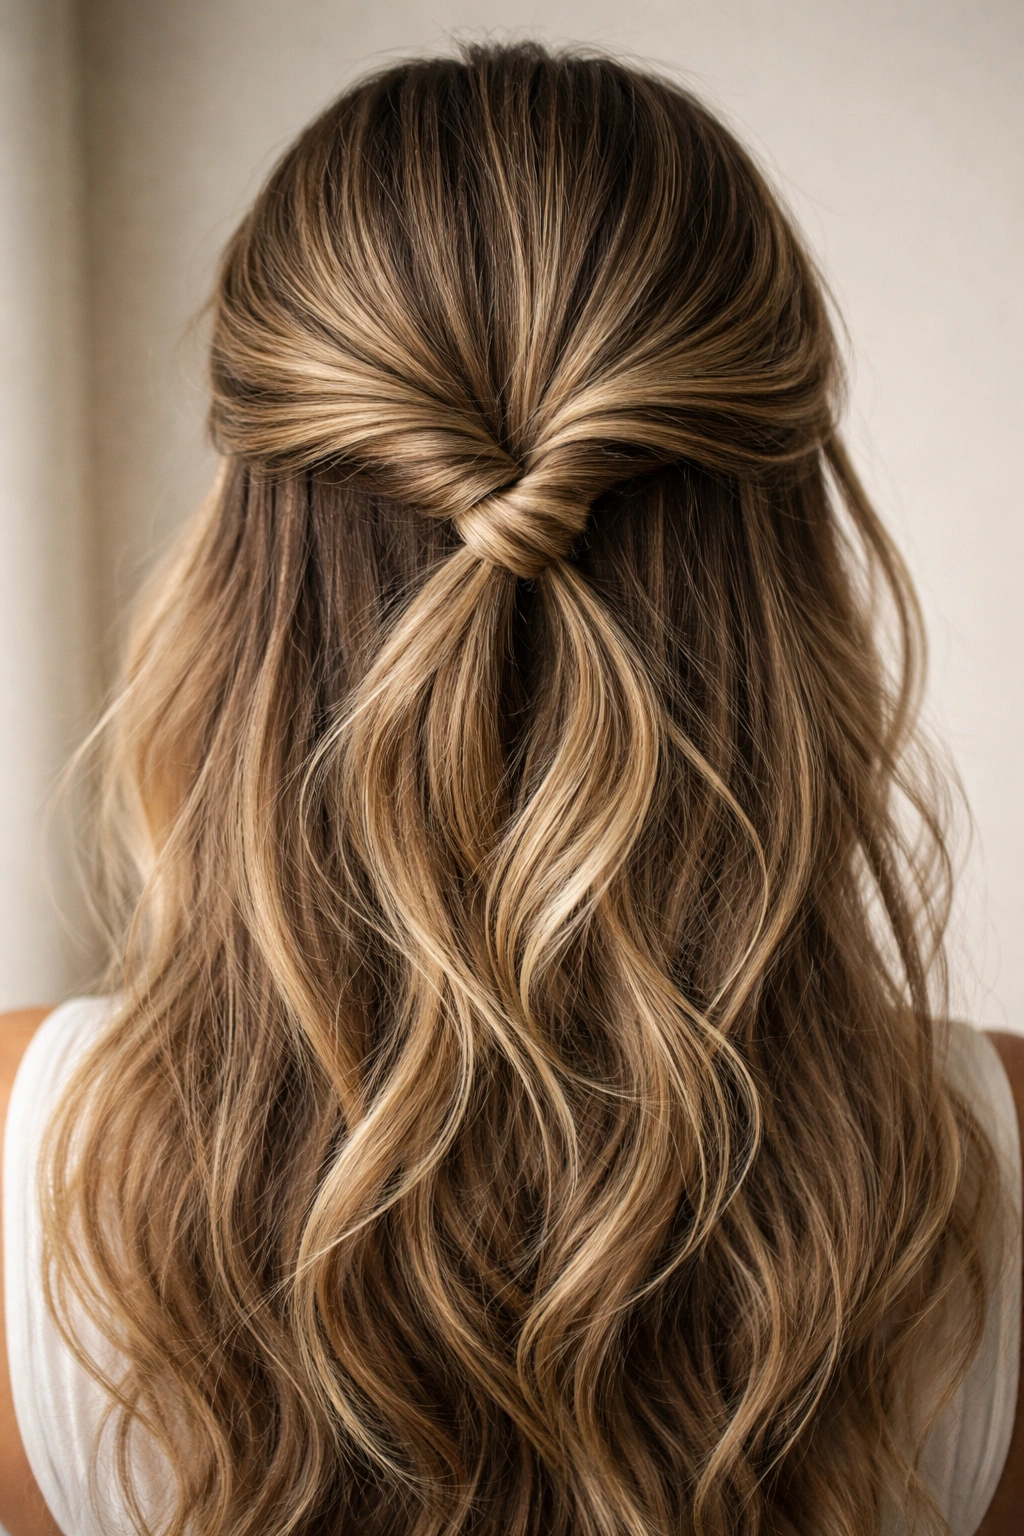
Rather than using a standard ponytail holder or pins, this style creates a literal knot from two twisted sections at the back of your head, using the knot itself as the anchor point for your half-up. The twists create a graphic, almost architectural element that makes the style feel intentionally artful.
The Unexpected Visual Power
A twisted knot reads differently than a bun or a secured ponytail because it’s visible and sculptural. You’re not hiding your securing method—you’re making it part of the design. This transparency is what gives the style an edgy, unafraid quality. It says you’re confident enough in the technique that you don’t need to conceal it. The twists themselves catch light differently than braids, creating a subtle shimmer and texture that photographs beautifully.
Creating the Twisted Knot Effect
Take a section from one side of your head at ear level and twist it loosely toward the back, going counterclockwise. Simultaneously, take an equal section from the other side and twist it clockwise toward the back. Where these two twists meet at the nape of your neck, cross one over the other and then wrap them around each other once or twice to create a knot shape. Secure with bobby pins hidden underneath, leaving the twists slightly loose and textured on top. The rest of your hair stays down and loose below the knot, creating that half-up half-down silhouette.
Insider note: This style actually becomes easier to execute if your hair is slightly textured or has some grit to it. Completely clean, slippery hair can slide apart—a light texture spray applied the morning of helps tremendously.
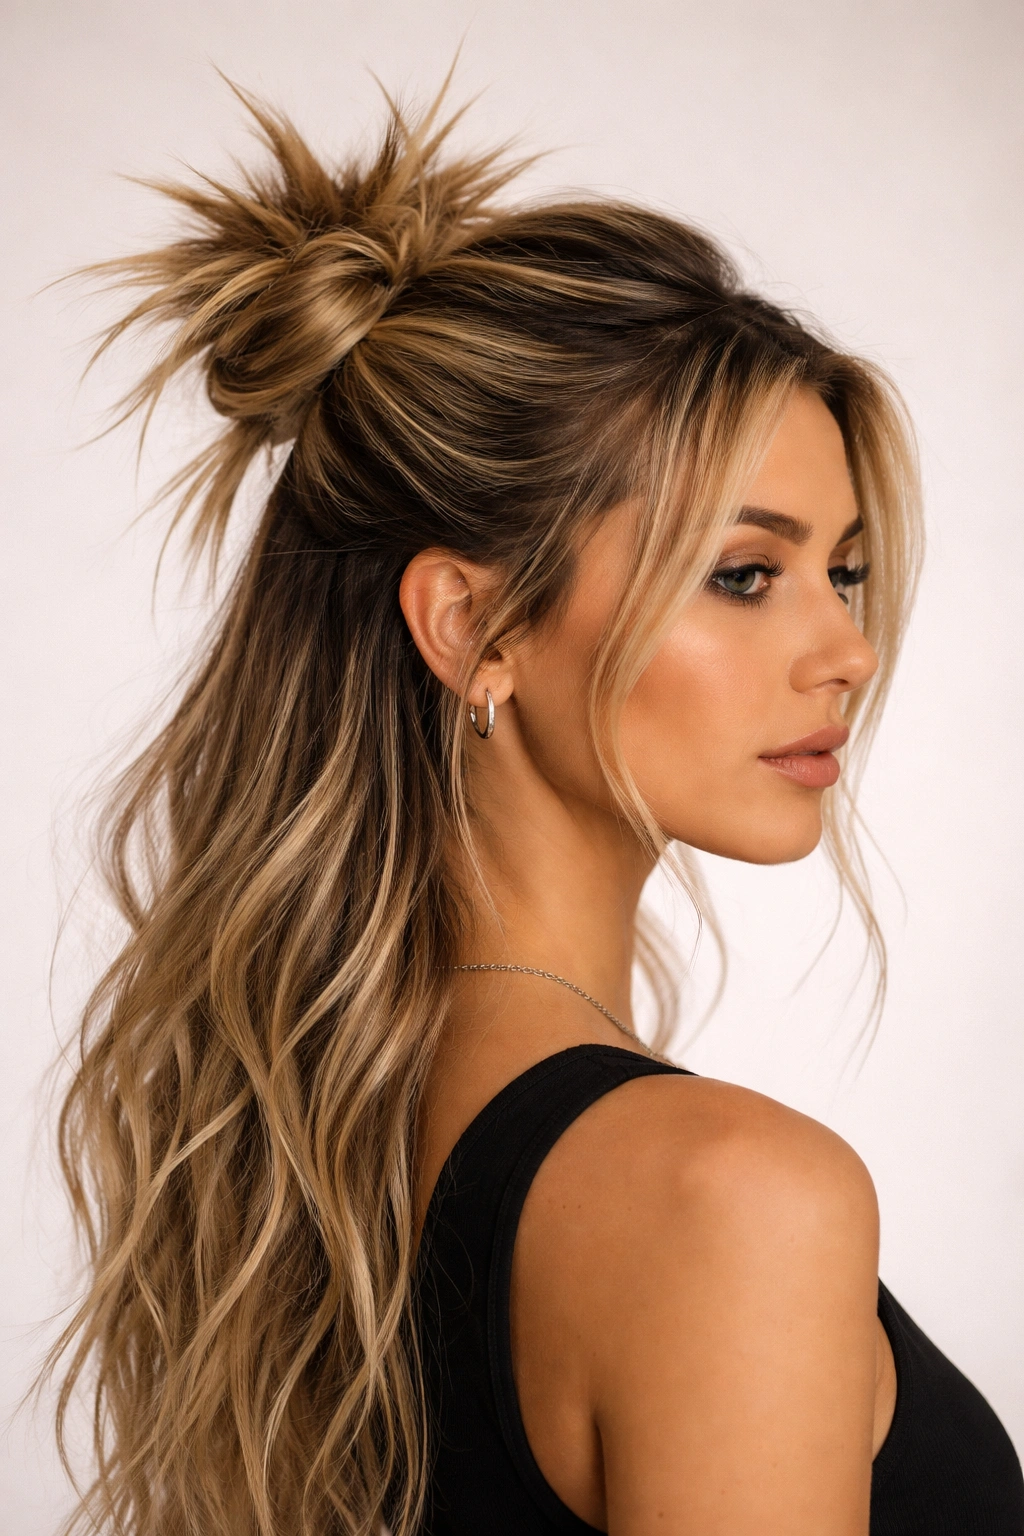
4. Messy Bun Half Up Half Down
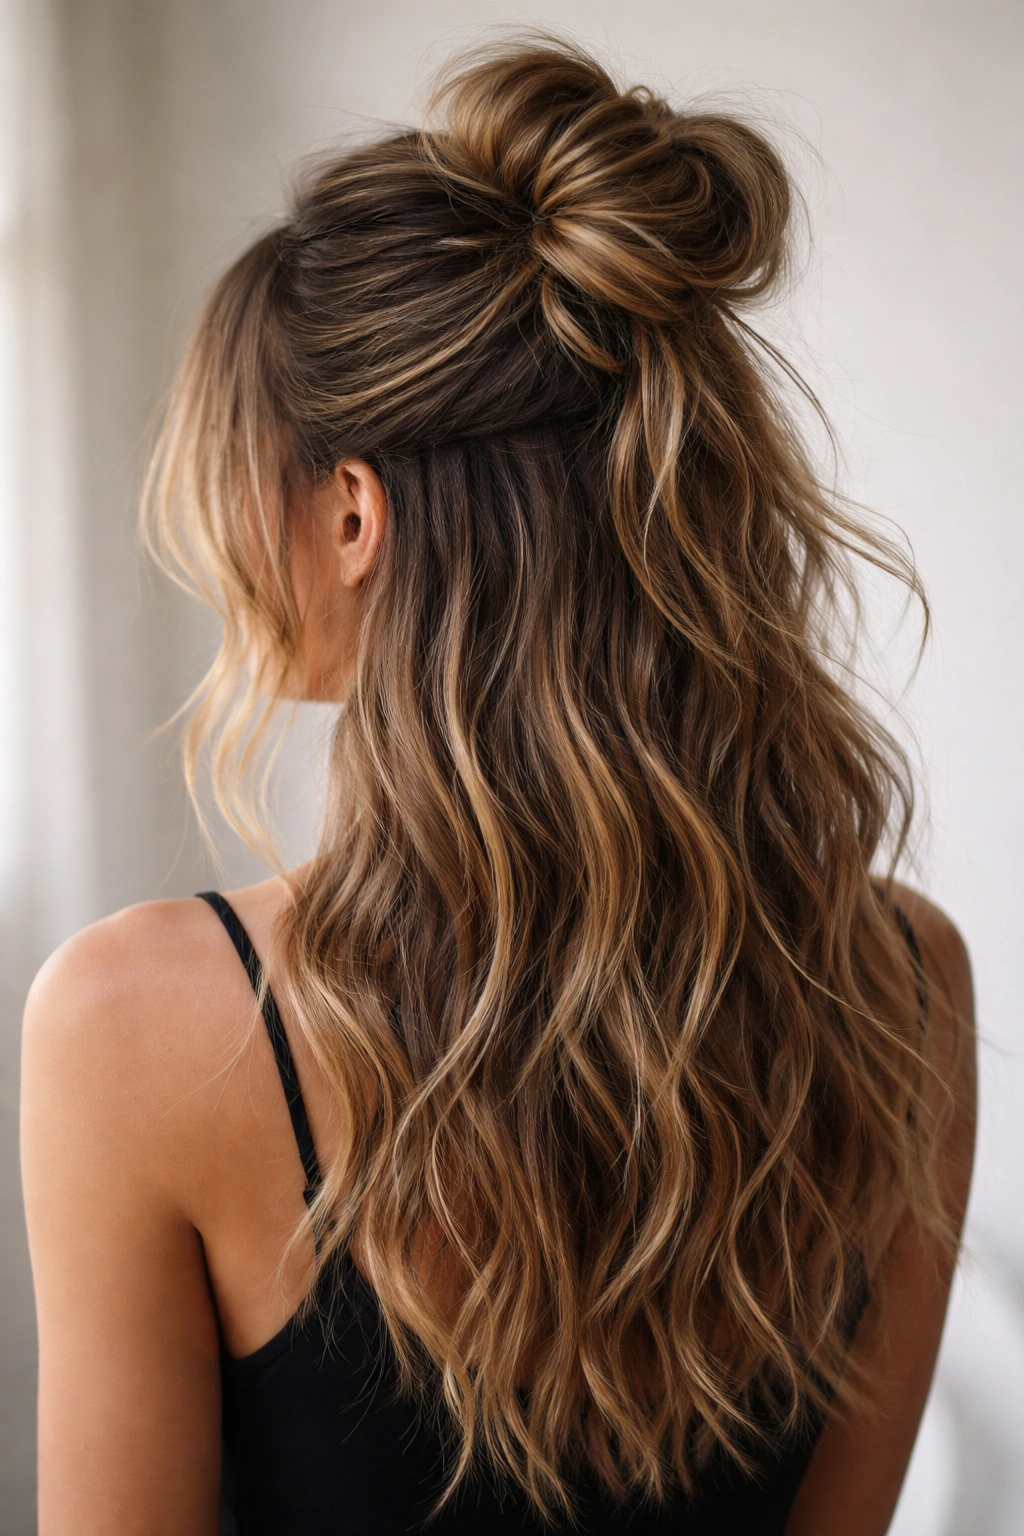
Here’s where edgy meets undone: a genuinely messy, imperfectly formed bun that’s secured at the back of your head while waves or texture cascade below it. The key is that this bun isn’t trying to be tidy—it’s intentionally loose, with pieces escaping in every direction.
Why Intentional Messiness Reads as Edgy
There’s a psychological shift that happens when you choose messy rather than accidentally becoming messy. A sloppy bun that happened by accident looks unkempt; a sloppy bun that you deliberately styled reads as cool, confident, and trend-aware. The difference is in the intentionality. Your hair is artfully undone, not just undone. You pulled pieces out on purpose; you left texture and volume deliberately loose.
Building the Deliberately Imperfect Bun
Tease the top and back sections of your hair at the roots to create volume and texture. Gather these sections loosely at the back of your head—don’t pull them tight. Twist the gathered section loosely, then wrap it around itself to form a bun shape, securing with bobby pins but leaving it deliberately loose and irregular. Pull out face-framing pieces and a few sections from the bun itself, working them gently to create movement and texture. The lower half of your hair should flow completely loose, either straight, wavy, or with its own texture intact.
Pro tip: Using a dry texture spray on your bun before you even start styling helps every section hold its place without looking helmet-head stiff. The spray gives grip without shine, which keeps the look grounded rather than precious.
5. Slicked Back Half Up with Face-Framing
Take the concept of slicked-back hair (which reads urban, edgy, and fierce) but execute it as a half-up style. The top section is pulled back smooth and tight, creating an architectural frame around your face, while the lower hair flows loose with its own texture. This creates the best of both worlds: bold visual impact and the flow of longer hair.
The Graphic Impact of Extreme Control
Slicked-back styling works because the smoothness emphasizes facial features and bone structure. When you pair that with the softness of loose waves below, you’re creating a visual conversation between two opposing forces: restraint above, freedom below. The contrast makes both elements more powerful. Your face becomes the focal point, framed by that sleek control, and your hair gets to breathe and move below the ears.
How to Achieve Maximum Sleekness
This style demands product. Apply a smoothing cream or lightweight gel to damp hair, focusing on the top section. Using a fine-toothed comb or a soft brush, smooth all hair back from your hairline, working the product through with each stroke. Once you reach the back of your head, gather the top section (roughly from ear to ear) and secure with bobby pins or a small elastic, positioning it low enough that you’re creating actual half-up half-down separation. The front pieces? Leave them face-framing—you’re not pulling those back. Style the lower hair with waves or leave it straight, depending on your preference.
Worth knowing: The sleeker you pull the top section, the more important it is to leave some face-framing pieces loose. Two or three small sections around your face soften the severity and prevent the style from looking too severe or costume-y.
6. Double Twisted Half Up Style
Instead of one twist anchoring your half-up, use two independent twisted sections positioned side by side, each secured separately. This creates a doubled-up visual that’s graphic and intentional, giving the style immediate visual complexity and perceived effort (even though it’s actually quite simple).
The Sophistication of Double Structure
A double-twisted style reads as more intentional and technically executed than a single twist. It gives the impression that you’re skilled with your hands and comfortable with slightly more complex styling. The two twists create a frame for the top of your face and head, drawing focus upward while maintaining the flow of your lower hair. This style has real presence without being overwrought.
Executing the Twin Twist Technique
Create a deep side part. Take a thick section of hair from one side starting at the part and twist it loosely toward the back of your head. Secure with a bobby pin. Take an equally thick section from the other side of the part and twist it the same direction (matching the first twist), also securing at the back. Position these twists so they’re parallel and close to each other, creating a symmetrical frame. Leave the rest of your hair down and loose, or add waves for additional texture. The two twists become the visual anchor while everything else floats free below.
Pro tip: Using two bobby pins per twist instead of one (one at the crown anchor point and one halfway down the twist) prevents slipping and keeps the twists looking intentionally placed rather than accidentally in position.
7. Sleek Ponytail with Loose Waves
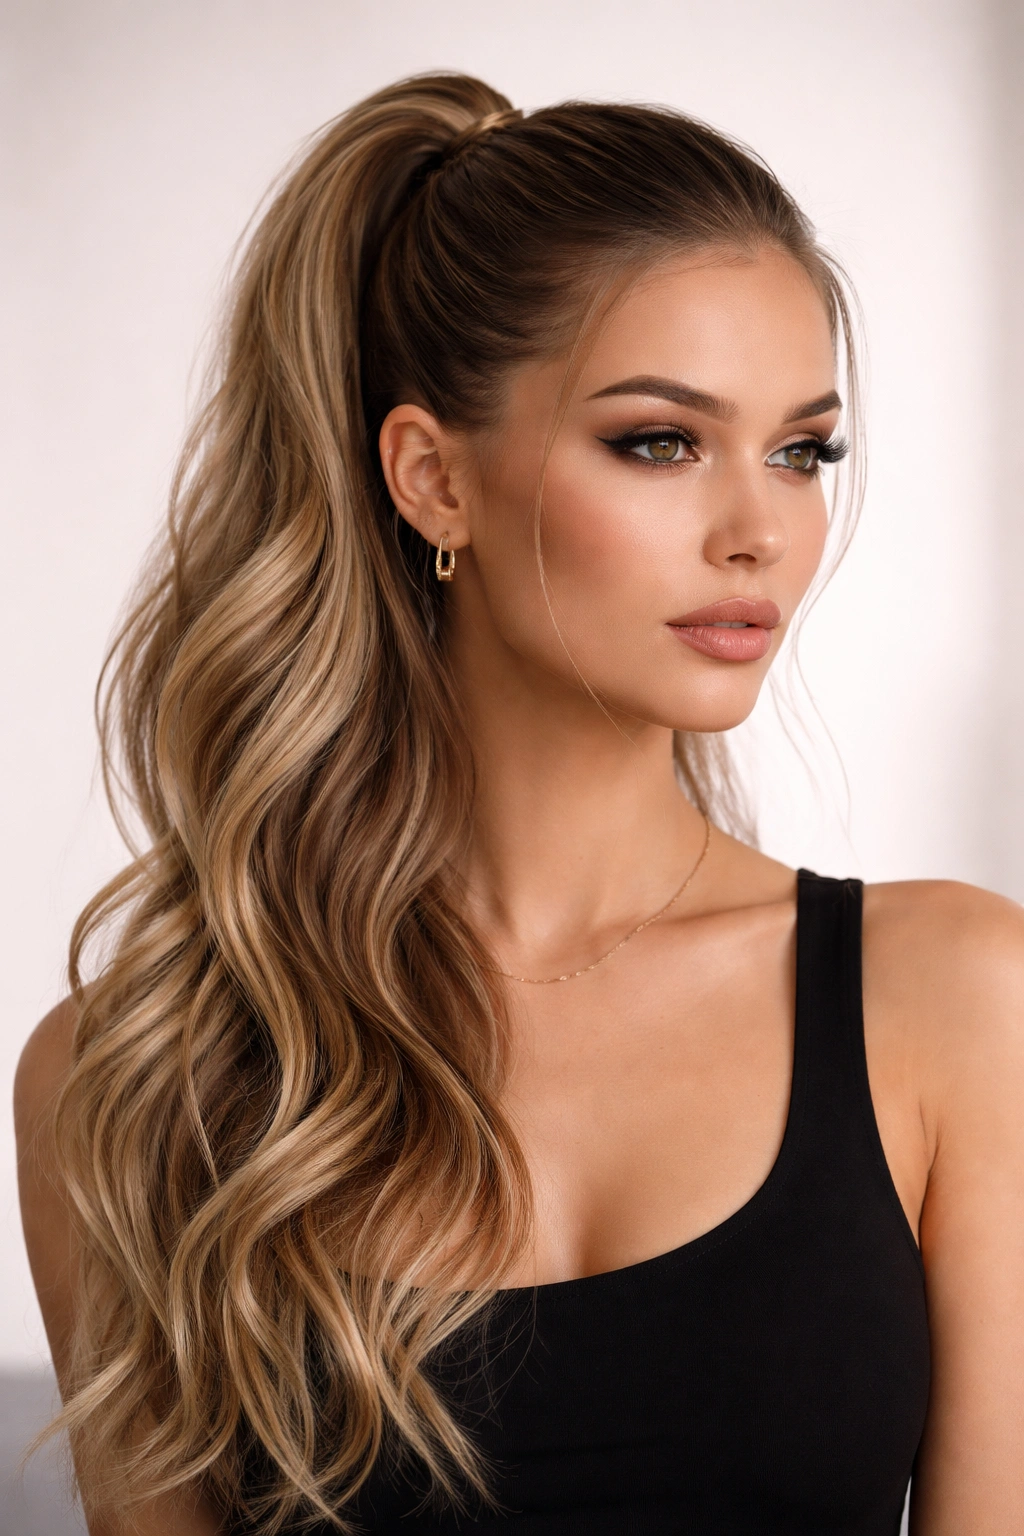
This is arguably the most wearable edgy half-up style because it plays with proportions rather than texture—a dramatically tight, slicked-back upper section paired with flowing, romantic waves. The contrast creates edge without requiring texture work or complicated braiding.
Why Proportion Creates Edge
Most people think edge comes from texture or unconventional colors or structure. But proportion is equally powerful. A pulled-back section that’s quite small compared to your loose lower hair creates a silhouette that feels modern and confident. You’re not trying to be balanced; you’re intentionally creating visual imbalance, which is inherently more interesting than symmetry.
Building the Style with Precision
Smooth your entire head with a lightweight smoothing product. Create a clean, precise part—either center, deep side, or even a geometric zig-zag if you’re feeling bold. Slick the upper portion back firmly using a fine-tooth comb and product, creating a very smooth, tight finish. Secure at the nape of your neck with bobby pins positioned so you’re creating a small, controlled anchored section. Leave the lower portion completely loose and create soft waves using a large barrel curling iron or by braiding damp hair and leaving the braids in overnight. The waves should have movement and dimension, contrasting sharply with the sleekness above.
Worth knowing: This style is forgiving because any flyaways in the slicked section actually reinforce the edgy aesthetic—they show you were precise about the technique but not obsessive about perfection.
8. Layered Braid Half Up
Rather than a single braid anchoring your half-up, use two or three thin braids positioned close together in the back section, creating a layered, woven effect. This style requires genuine technical skill to execute (or at least appears to), which is part of why it reads as edgy.
The Visual Complexity of Multiple Layers
Layered braids create depth and movement that a single braid can’t achieve. They’re more visually interesting to look at and they create more texture and shadow play, especially under light. When you use layered braids as the anchor for a half-up style, you’re immediately elevating the perceived complexity and intentionality of your look. This isn’t a simple, sweet style—this is someone with real hair skill.
Technique for Flawless Layered Braiding
Section the top portion of your hair into three areas: left, center, and right (or just two if you prefer). Create a thin braid from each section, working from the roots toward the back of your head. Position these braids close to one another—nearly touching or with just a half-inch of space between them. Secure all three braids together at the back with bobby pins, positioning them so they form a unified anchoring element. Pull gently on each braid to slightly loosen the structure and create more texture. Let the lower portion of your hair flow loose, either straight or with waves.
Pro tip: If you’re not confident braiding, use a braid tool or practice one braid at a time until you build consistency. Watching tutorial videos at half-speed helps most people master the three-strand braid within a few practice sessions.
9. Zigzag Part Half Up Style
Create a sharp, exaggerated zigzag part running from your hairline to the back of your head, then use this part as the guide for your half-up section. The zigzag part becomes a graphic design element that makes the entire style feel modern, intentional, and bold.
The Graphic Power of Sharp Lines
A zigzag part immediately reads as edgy because straight lines and geometric shapes feel more avant-garde and fashion-forward than rounded, organic lines. This part style is purposeful—you can’t accidentally create it—which is part of what gives it impact. It’s a confident statement saying you’re willing to be noticed and you’re comfortable with unconventional styling.
Creating the Zigzag Part
Use the pointed end of a rattail comb to create a sharp, defined zigzag part from your hairline back to the crown. Make the zigzags exaggerated and clear rather than subtle—the bolder they are, the stronger the visual impact. Once your part is created, take the section on one side of the zigzag and gather it at the back of your head, smooth it, and secure with bobby pins. This creates a half-up effect where the other side flows completely loose. The zigzag part becomes the unifying design element that makes the whole look feel intentional and graphic.
Worth knowing: You can enhance the zigzag part by using a light smoothing product or pomade along the line, which makes it appear more defined and graphic—almost like you’ve drawn it on with precision.
10. Spiky Bun Half Up Half Down
Create an aggressively textured, strategic bun anchoring your half-up, with pieces pulled and pushed to create literal spikes and pointed sections. This takes the messy bun concept further into deliberate architectural territory.
When Messy Becomes Sculpture
A spiky bun occupies a fascinating middle ground between carefully crafted and seemingly random. The spikes look edgy and unconventional, but they’re actually created through deliberate pulling and positioning. This style works for people who want their hair to reflect their personality as something bold, slightly rebellious, and unafraid of being a little rough around the edges.
Crafting the Spiky Bun Anchor
Tease heavily at the crown and back to create massive volume and texture. Gather this teased section loosely at the back of your head and form it into a bun shape without attempting to smooth or control it. Secure with multiple bobby pins, then strategically pull sections of the bun outward, creating distinct spikes and protrusions. Don’t aim for uniformity—vary the direction and length of each spike to create that architectural, almost punk-rock feeling. Leave the lower portion of your hair completely loose, and add texture to it if your hair is straight.
Insider note: A light hairspray mist applied after you’ve created your spikes keeps them positioned throughout the day without making your hair feel stiff or helmet-like.
11. Side Sweep Half Up with Undercut
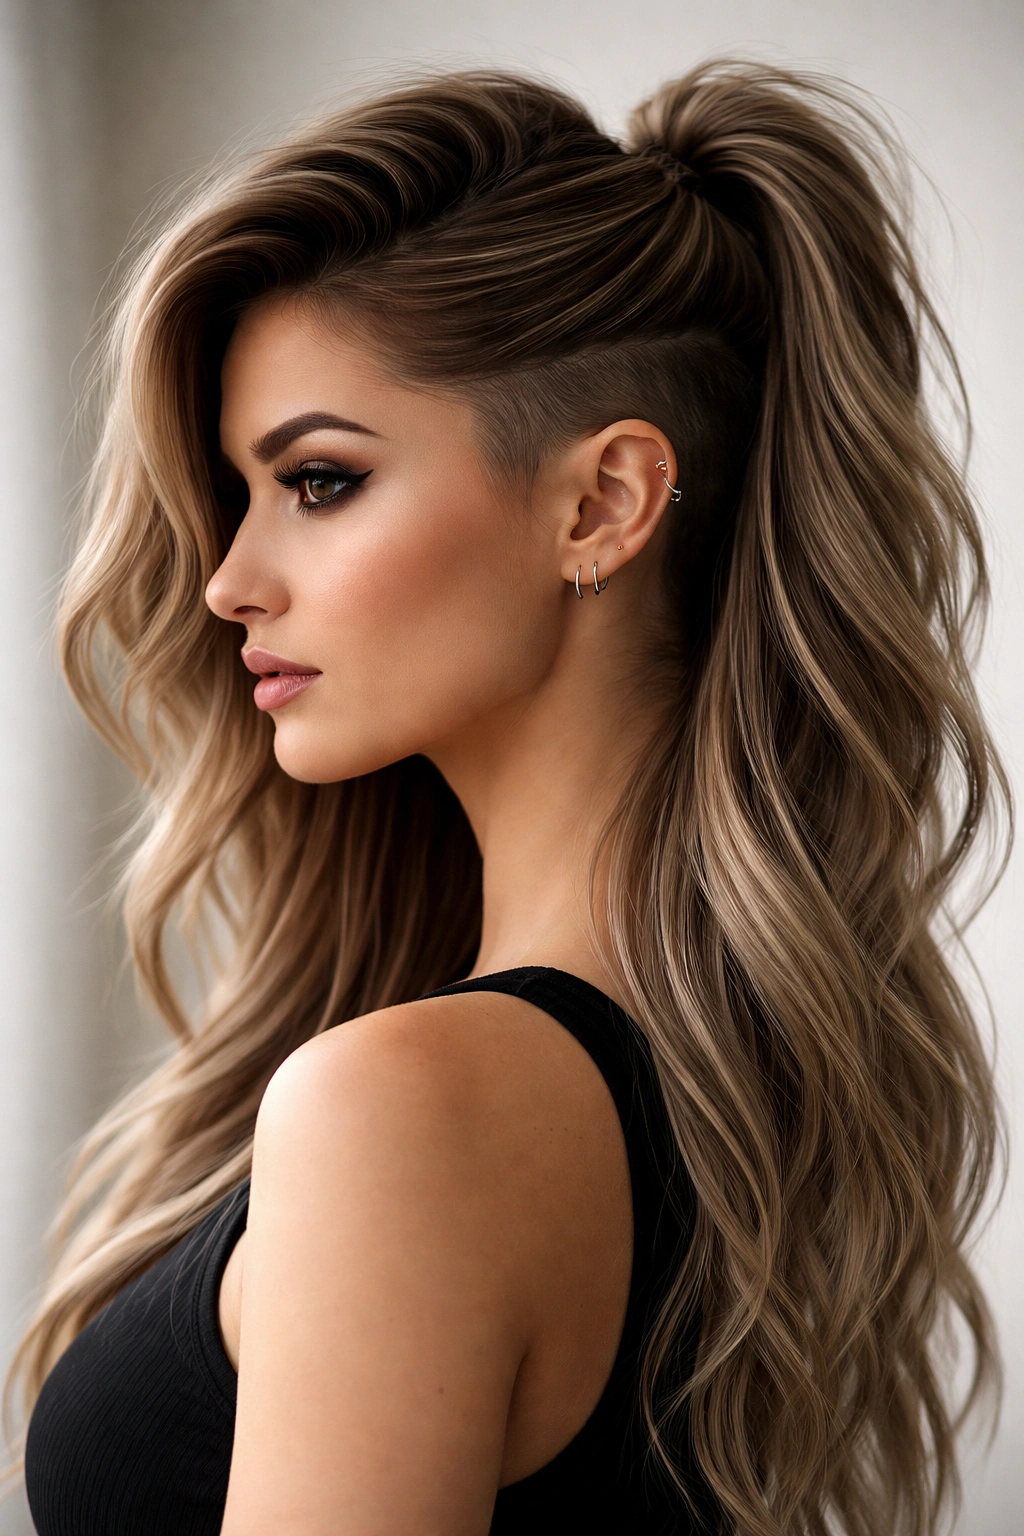
Create a dramatic side-swept half-up by pulling a large section from one side of your head all the way across and securing it at the opposite side, then reveal shorter, undercut sections that contrast with the longer hair. This style requires some shorter layers or an undercut to truly work, but the payoff is serious edge.
The Confidence of Showing Different Lengths
An undercut or shorter inner layers aren’t just practical—they’re a style choice that reads as bold. When you secure a half-up style that reveals these shorter sections, you’re intentionally drawing attention to that detail. It’s a statement that says you’re comfortable with unconventional texture variation and you’re not trying to hide shorter lengths—you’re featuring them.
Building the Side Sweep
Create a deep, exaggerated side part. Take a thick section of hair from the longer side and pull it all the way across your head toward the shorter side, sweeping it so it travels over the crown. Secure this swept section at the base of the shorter side with bobby pins, positioning it so the shorter layers are visible and create a deliberate contrast against the longer hair that’s been swept across. Leave the rest of your hair loose and textured. The side-swept security point becomes a design element itself rather than something to hide.
Pro tip: This style is infinitely more striking if your shorter sections actually have a defined cut with clear layering—rather than just thin pieces, aim for actual textured layers or a defined undercut.
12. Faux Hawk Half Up Half Down
Take the concept of a faux hawk—a textured, voluminous line running down the center of your head—and execute it as a half-up style, with the faux hawk anchored at the back by a half-up secure point rather than being one continuous rooster-tail effect.
The Statement-Making Power of Center Volume
A faux hawk is inherently bold because it puts volume and attention directly down the center of your head. When you execute this as a half-up style with loose lower hair, you’re creating a style that reads bold without being completely severity-forward. You’re getting the drama of a faux hawk’s center-focused volume with the flexibility and movement of half-up styling.
Creating the Architectural Center Line
Tease heavily along a center line from your hairline to the back of your head, focusing your teasing specifically down the middle and leaving the sides smoother by comparison. Work texture spray into the teased section and piece it slightly so it stands away from your scalp, creating that characteristic faux-hawk texture. Once the center line has maximum volume and definition, gather and secure the teased section at the back of your head with bobby pins, positioning the secure point low enough that you’re creating actual half-up half-down separation. The sides should remain relatively smooth, creating dramatic contrast with the voluminous center.
Worth knowing: A faux hawk reads better when the volume is somewhat undone rather than slicked into a perfect line—that slightly rough, textured look is what makes it edgy rather than costume-y.
Final Thoughts
Edgy half up half down styles prove that you don’t need to choose between boldness and wearability, between texture and elegance, between statement-making and practicality. These styles work specifically because they embrace contradiction—they pair opposing elements (sleek and messy, controlled and loose, structured and flowing) and let both elements shine. The edginess isn’t about being outrageous; it’s about being intentional, confident, and willing to show your hair-styling skill rather than hiding the technique.
The best edgy half-up style for you depends on your hair texture, your comfort level with styling complexity, and what kind of edge resonates with your personal aesthetic. Some of these styles look best on people with longer hair and the ability to create distinct separation between top and bottom sections. Others thrive on shorter lengths or specific textures. Start with whichever style’s technique feels most aligned with what you can realistically execute, then build from there as your confidence grows. And remember: slight imperfections, flyaways, and pieces that escape are actually built into what makes these styles work. That’s not failure—that’s authenticity.