Half-up hairstyles have become the unofficial uniform of modern bridesmaids—and for good reason. They strike that perfect balance between polished and approachable, offering the elegance of an updo without the severe, pulled-back severity that can feel dated or unflattering on certain face shapes. When you combine that half-up silhouette with the relaxed softness of a bun, you get something genuinely magical: a style that photographs beautifully, holds through hours of celebration, and actually feels comfortable enough to wear all day.
The beauty of a half-up half-down bun specifically lies in its versatility. Whether the wedding calls for bohemian romance, modern minimalism, or timeless glamour, there’s a version of this style that fits. You can dial up the drama with intricate braids and volume, or keep it effortlessly understated with loose waves and a soft bunch of hair gathered at the crown. The style works equally well for outdoor garden ceremonies and formal ballroom receptions, and it genuinely flatters different hair types and face shapes in ways that many bridesmaids-specific updos simply don’t.
What makes these styles especially bridesmaid-friendly is their built-in practicality. The down portion keeps hair from feeling uncomfortably tight during a long ceremony, and the half-up bun section stays secure enough to hold through dancing, mingling, and all those inevitable hair-tossing moments in photos. You’re not stuck choosing between beauty and comfort—this style delivers both. Let’s explore twelve variations that range from romantic and soft to sleek and editorial, so you can find the perfect match for your bride’s vision and your own style.
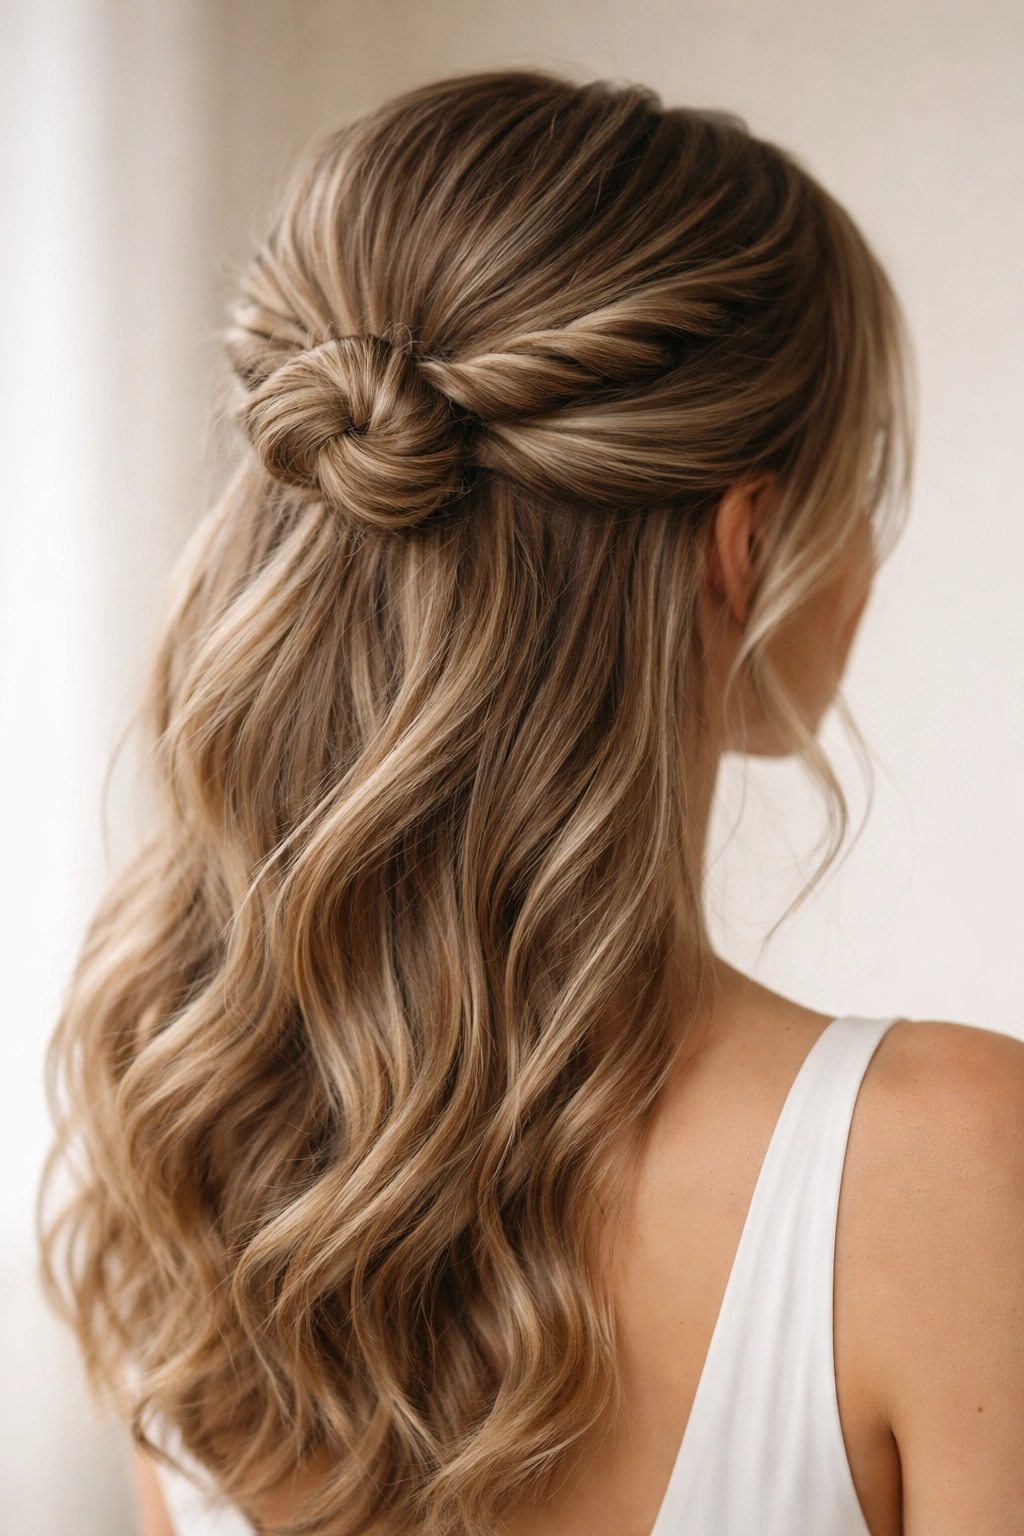
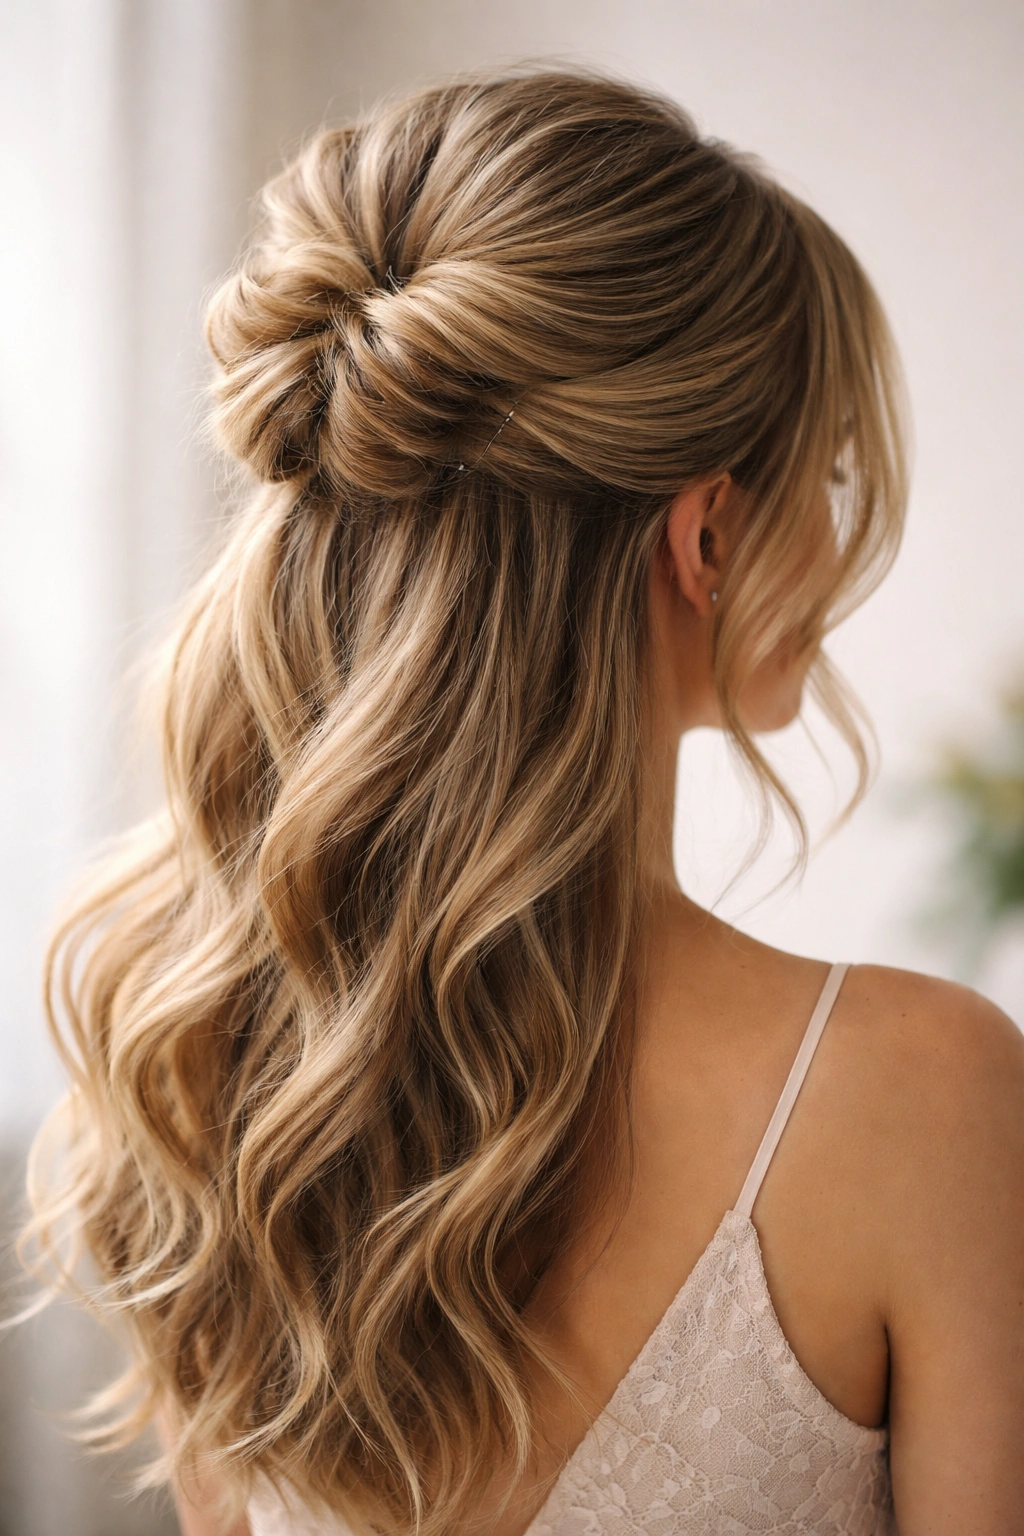
1. Classic Half-Up Half-Down Bun with Twists
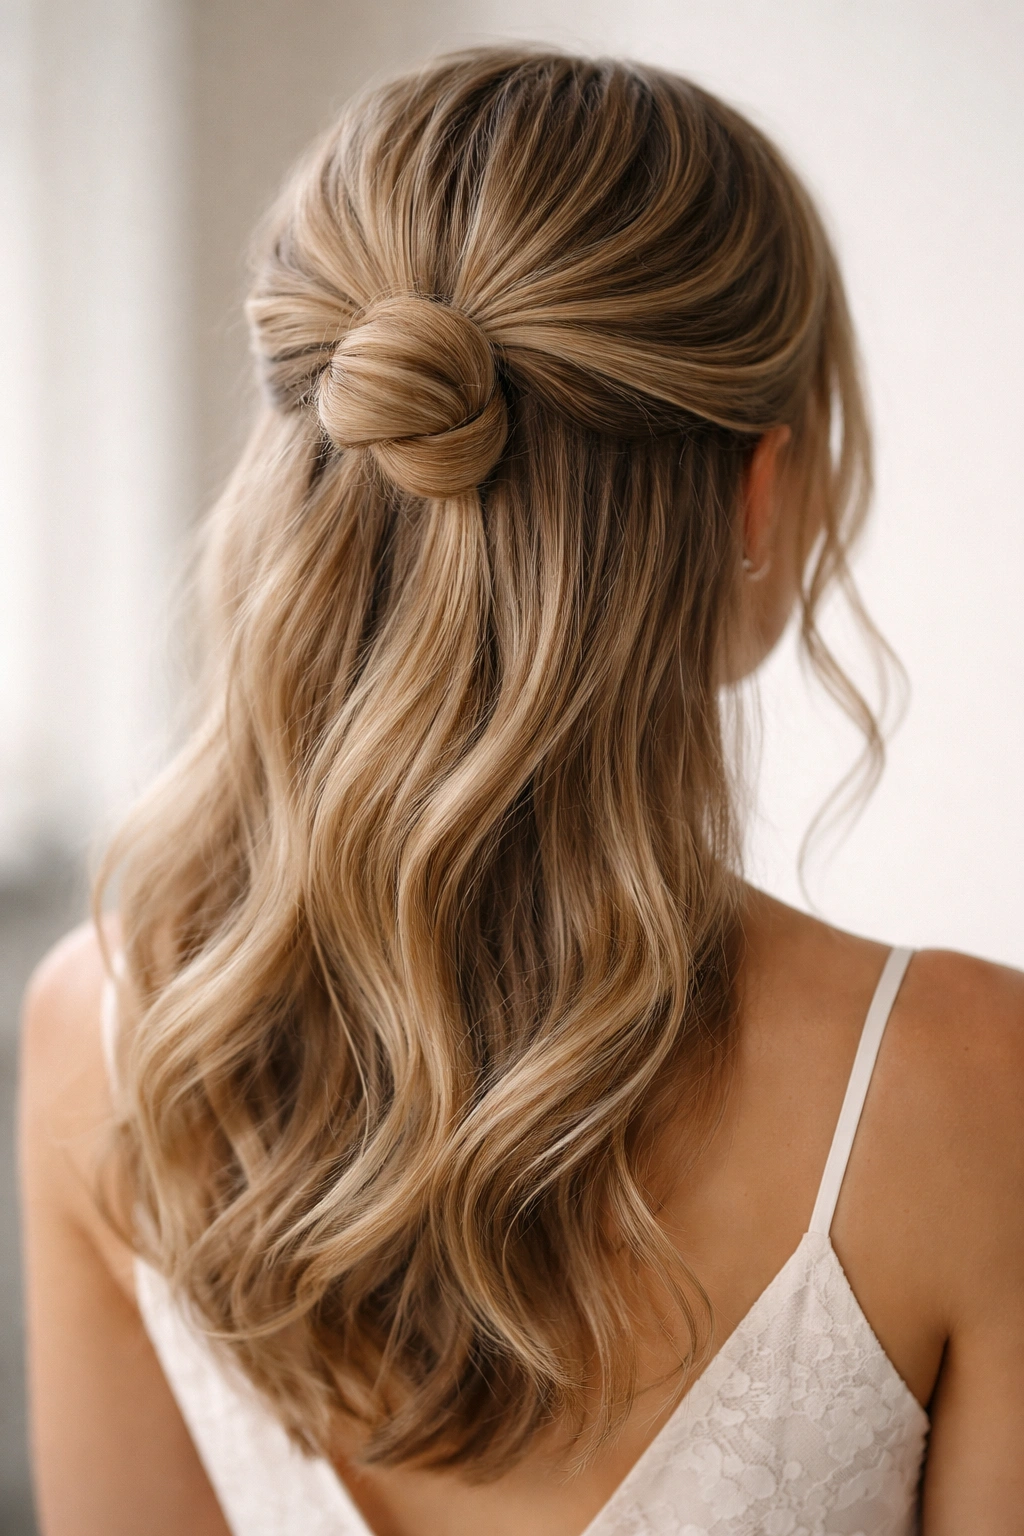
This is the bridesmaid hairstyle that works in virtually any wedding setting. The style starts with separating the upper portion of your hair from ear to ear, then twisting each side gently before bringing both twists together at the crown and wrapping them into a soft, rounded bun. The result feels both refined and relaxed—sophisticated enough for formal ceremonies but casual enough that it doesn’t scream “I’m clearly in a wedding.”
Why This Style Stands Out
The genius of this approach lies in how the twists create a naturally enhanced sense of volume and movement even before you form the bun itself. Rather than gathering hair straight back, the twists add texture and dimension that photographs beautifully from every angle. The bun sits at a flattering height, usually an inch or two above where your crown naturally peaks, which means it doesn’t pull uncomfortably tight but still feels intentionally styled rather than accidentally pinned up.
What Makes It Work for Different Hair Types
- Fine hair: Use texturizing spray beforehand and backcomb gently through the crown area to create grip for the twists and bun—this prevents the whole thing from sliding down throughout the day
- Thick or curly hair: This style is your friend because the volume your hair naturally carries gets channeled into a actually-full-looking bun rather than getting flattened
- Straight hair: Consider using a texture spray or light waving iron on the down portion to prevent that slicked-back appearance that can look severe on bone-straight hair
- Medium-length hair: This style works beautifully as long as you have at least 4-5 inches past your shoulders, since the bun needs enough length to create actual volume
Pro tip: Don’t aim for perfect twists—slightly loose, uneven twists actually look more intentionally romantic than tight, symmetrical ones.
2. Romantic Low Bun with Loose Waves

For the bridesmaid who wants maximum softness and movement, this style places the bun lower—essentially at the nape of your neck or just slightly above—and pairs it with deliberately loose, piece-y waves through the bottom section. The effect is almost effortlessly elegant, like you threw your hair up in approximately two minutes but somehow managed to look deliberately styled.
The Art of Intentional Looseness
The key distinction here is that looseness is built into the design, not a side effect of time or dancing. Before gathering the upper section into a bun, you’ll want to softly wave the entire lower portion using a large-barrel curling iron or a straightening iron bent to create waves. These waves get tousled and separated with your fingers—never combed smooth—so they read as intentionally textured rather than frizzed.
Styling Details That Make the Difference
- Bun position: Aim for that lower placement (two inches above your shirt collar) to create the most romantic silhouette—it also tends to be more comfortable for sitting through long ceremonies
- Wave size: Loose waves mean using a 1.5-inch or larger barrel; the goal is soft bends, not tight ringlets
- Texture spray application: Use a light hand with texturizing spray—you want grip and hold, not a crunchy feel that reads as over-done
- The foundation: This style actually works better with slightly day-old hair that has some natural texture and oil; freshly washed hair can be too slippery to hold waves effectively
Worth knowing: This style tends to feel more bridal and less bridesmaidy, which some brides love as a way to keep the wedding party feeling elevated without being dressed identically to the bride.
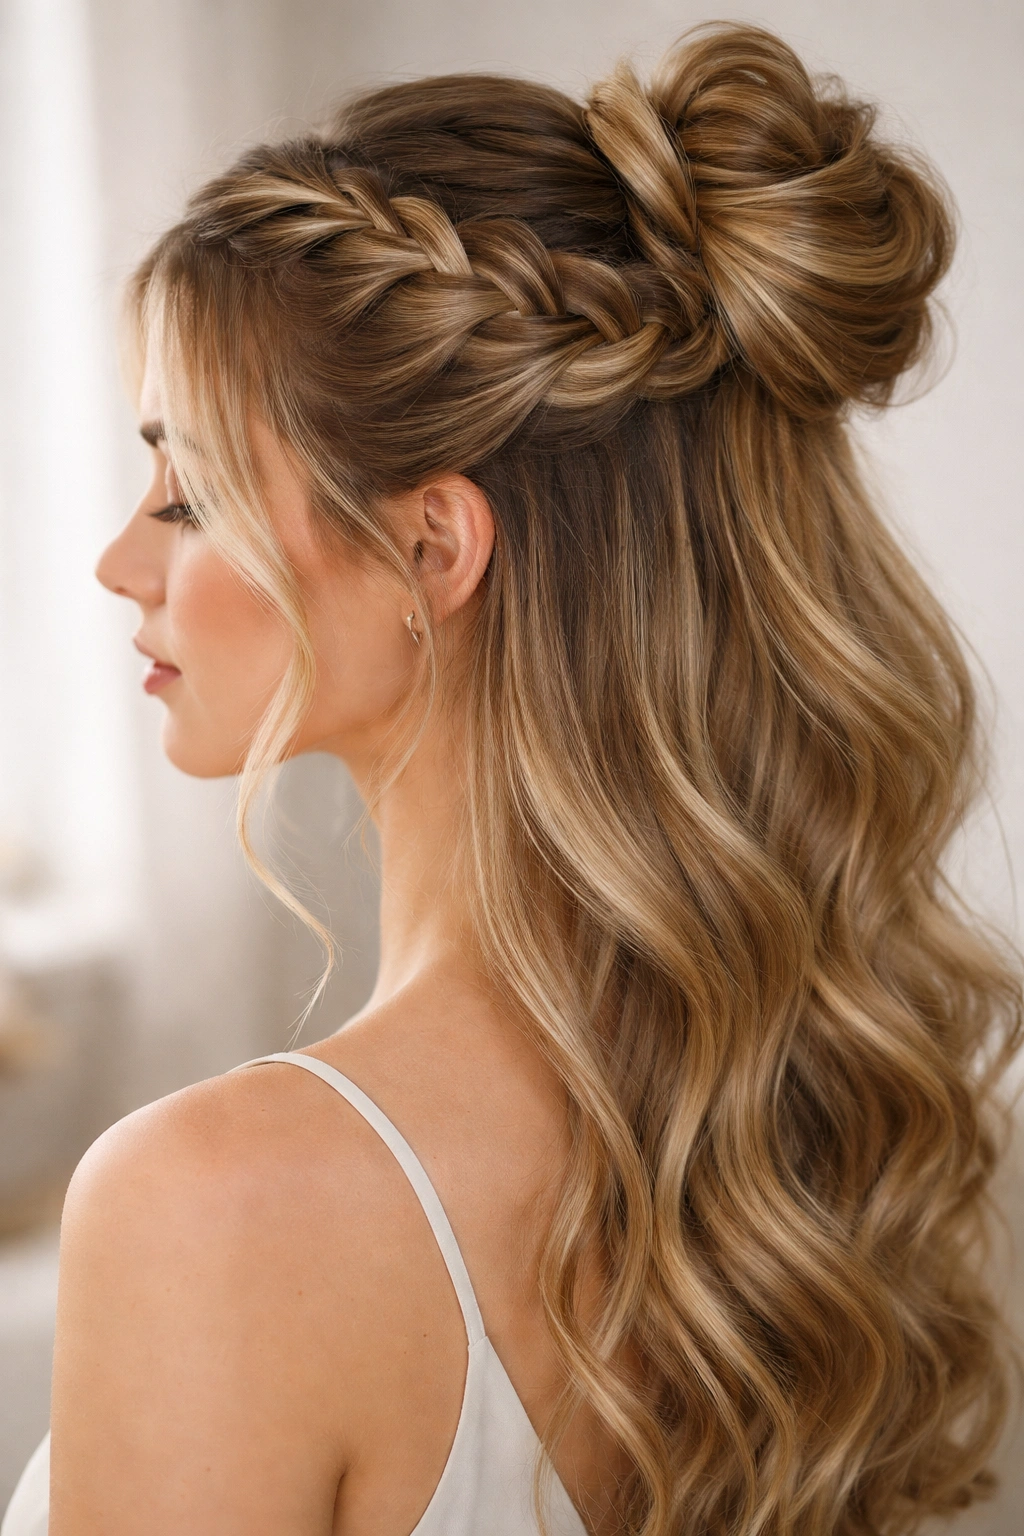
3. Braided Half-Up Bun with Face-Framing Pieces
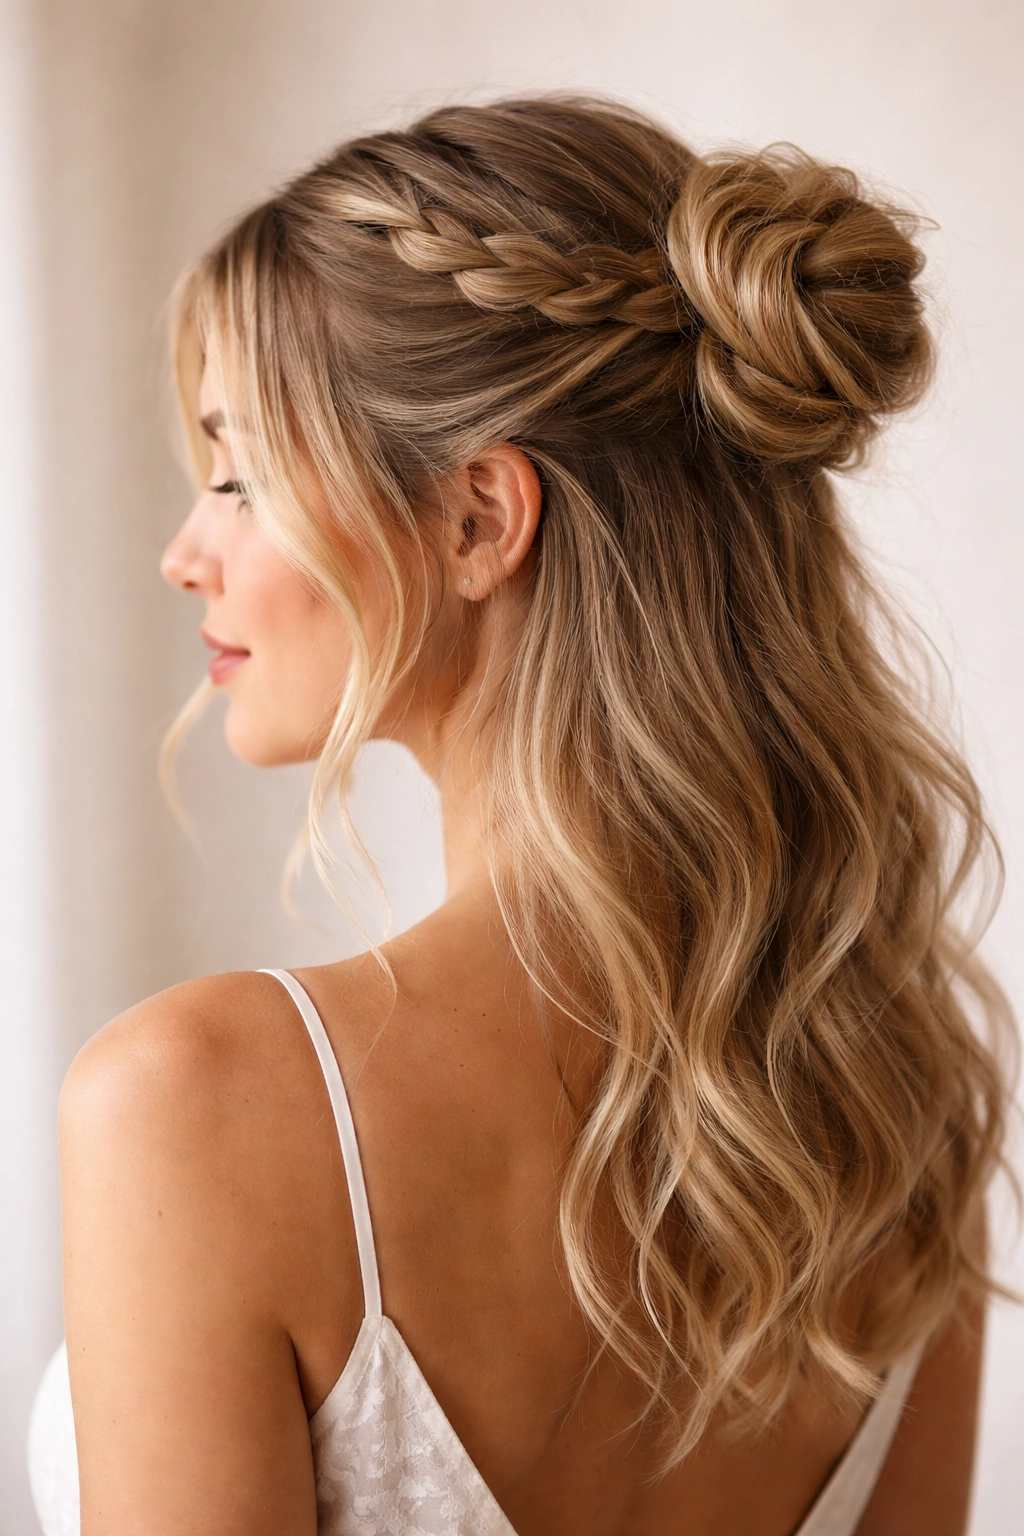
This version introduces the elegance of braid-work without committing to a full braided updo. A Dutch braid, French braid, or simple three-strand braid starts at one temple, follows the curve of your head toward the back, and feeds into the bun at the crown. Delicate wispy pieces frame the face on both sides, softening what could otherwise feel overly structured.
Braid Techniques That Create Visual Interest
A Dutch braid (where you braid under rather than over, creating an inverted, dimensional look) tends to photograph more dramatically than a standard French braid and creates a more textured appearance that catches light beautifully. If braiding feels intimidating, a simple three-strand braid offers similar elegance with less technical demand. The braid doesn’t need to be perfect—slight imperfections and looseness actually enhance the romantic quality.
Creating Intentional Face-Framing
- Placement strategy: Leave a thin section of hair unbraided at both temples, about 1-1.5 inches wide on each side
- Wave the face-framers: Use a straightening iron or curling iron to create soft waves in these pieces—they should curve gently forward onto your face rather than lying flat
- Pin for hold, not visibility: Tuck bobby pins behind the braid itself so they disappear; the goal is secure hold without visible hardware
- Texture before braiding: Lightly wave or curl your entire head of hair before starting the braid; hair with texture holds braids better and creates a softer final appearance
Insider note: Ask your stylist to slightly underbraid on purpose—meaning leaving the braid a bit loose and airy—rather than creating a tight, perfect braid; the soft, slightly undone braid reads as far more sophisticated and romantic.
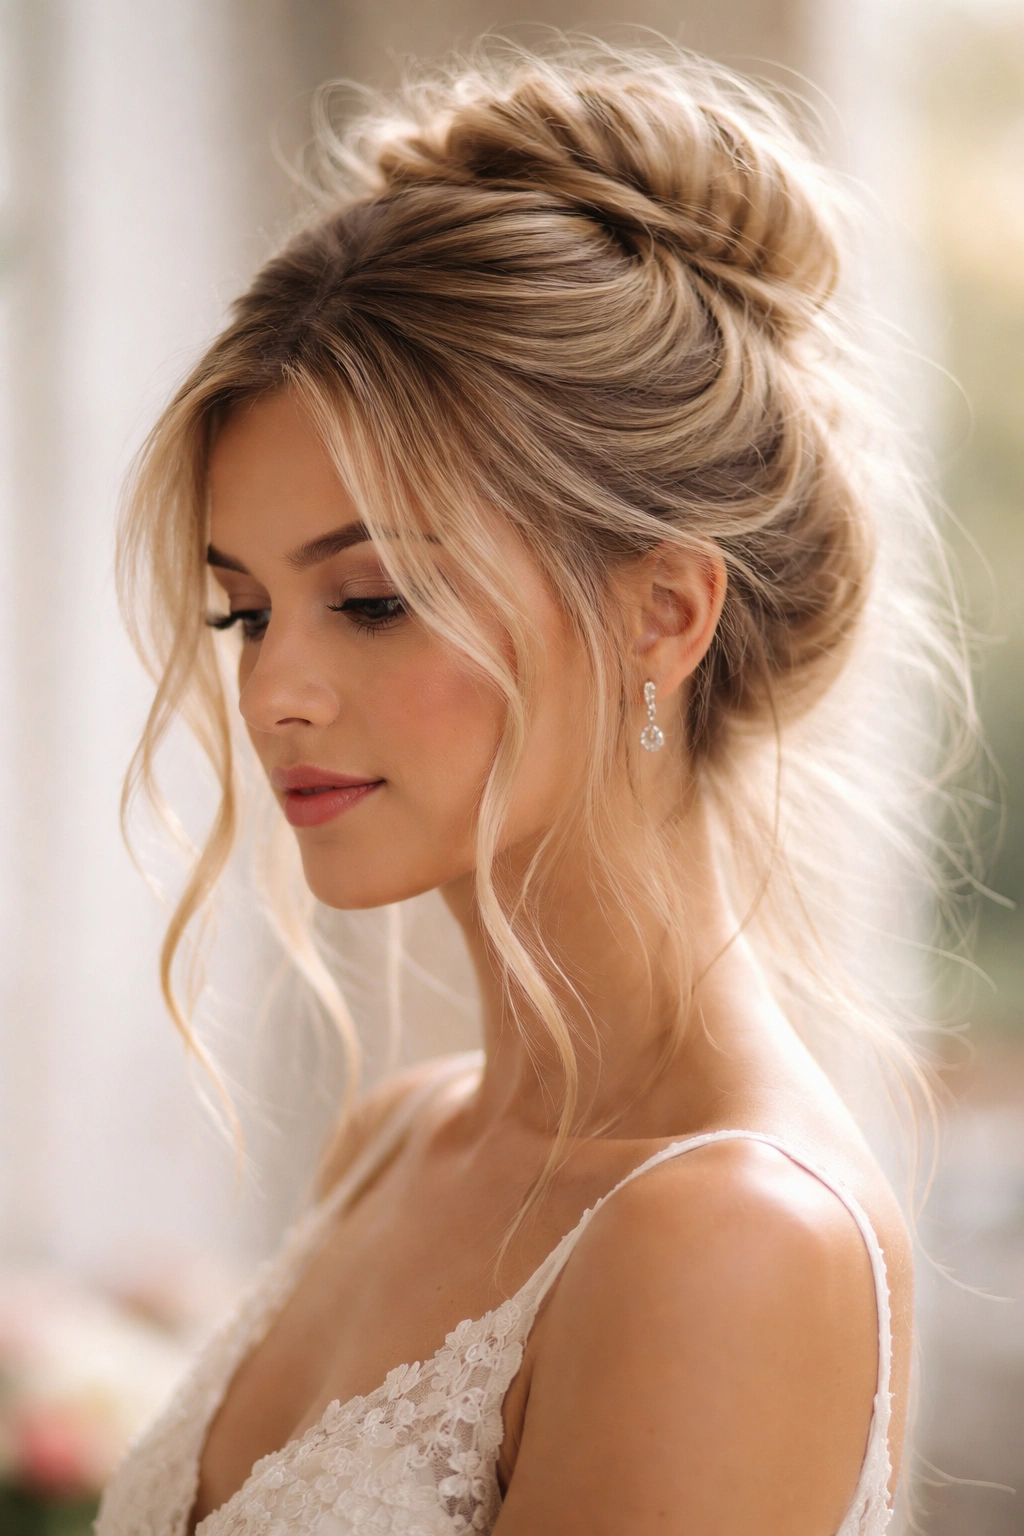
4. Sleek High Bun with Half-Up Detail
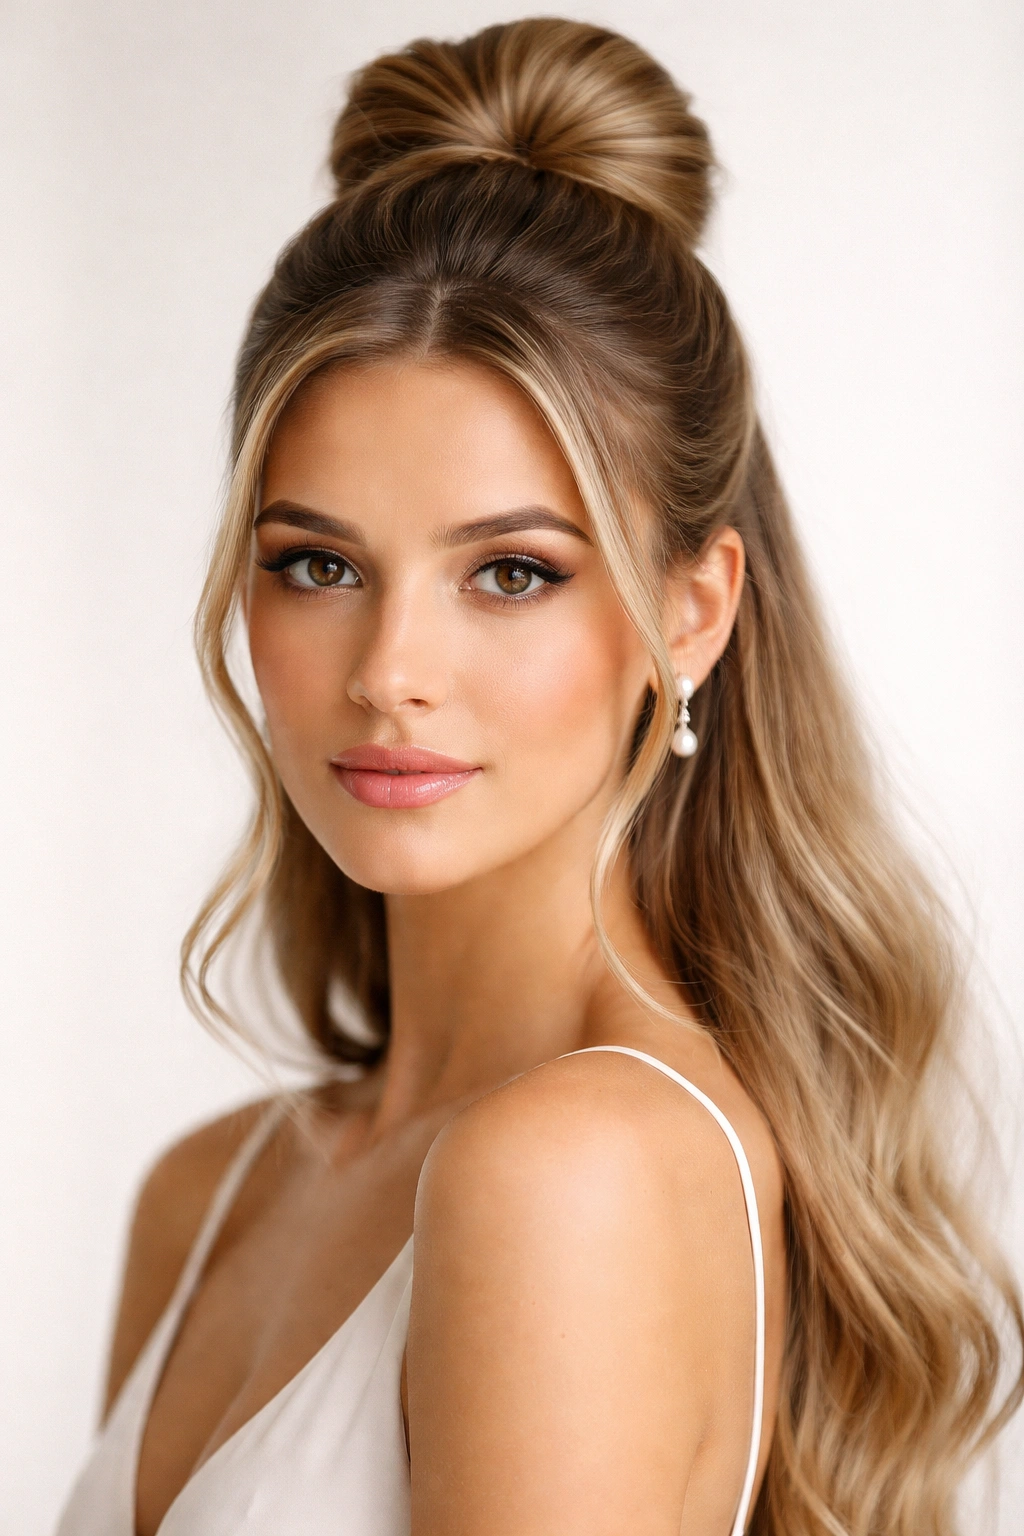
For weddings where the vibe is modern, minimal, or editorial, this style trades romance for refined polish. The half-up section is gathered very tightly and smoothly, creating a sleek, almost architectural quality. The bun itself sits high on the crown—closer to the actual top of your head rather than the back—and is wrapped so neatly that it reads as intentionally geometric rather than accidentally gathered.
Achieving True Sleekness
Sleekness requires preparation that goes beyond basic smoothing. Starting with very smooth, straight hair (achieved with a straightening iron if necessary), you’ll apply a smoothing serum or anti-frizz cream that sits on the surface of the hair rather than being absorbed. This creates actual shine and hold simultaneously. A boar-bristle brush used firmly creates smoothness that looks intentional rather than slicked-down, and a light mist of hairspray helps lock everything into place before you even begin gathering the bun.
The Bun Assembly for Maximum Definition
- How to wrap: Divide your gathered hair into 2-3 sections and wrap each section tightly around the base of your ponytail, pinning as you go, rather than doing a simple twist and tuck; this creates a more defined, compact bun
- The finish: Smooth the entire surface with your brush one final time, then set with firm-hold hairspray; the goal is a bun so smooth it looks almost like a glossy knot
- Hair texture selection: This style looks most striking with hair that’s naturally straight or has been pressed completely straight; wavy or curly hair tends to read as deliberately undone rather than intentionally sleek when paired with this bun style
- Bobby pin concealment: Use bobby pins that match your hair color, and pin horizontally (parallel to your scalp) rather than vertically; this keeps them from catching light and becoming visible
Pro tip: A light shine spray applied after the bun is complete elevates the whole look; it catches light in photos and reads as beautifully groomed rather than greasy.
5. Textured Half-Up Messy Bun
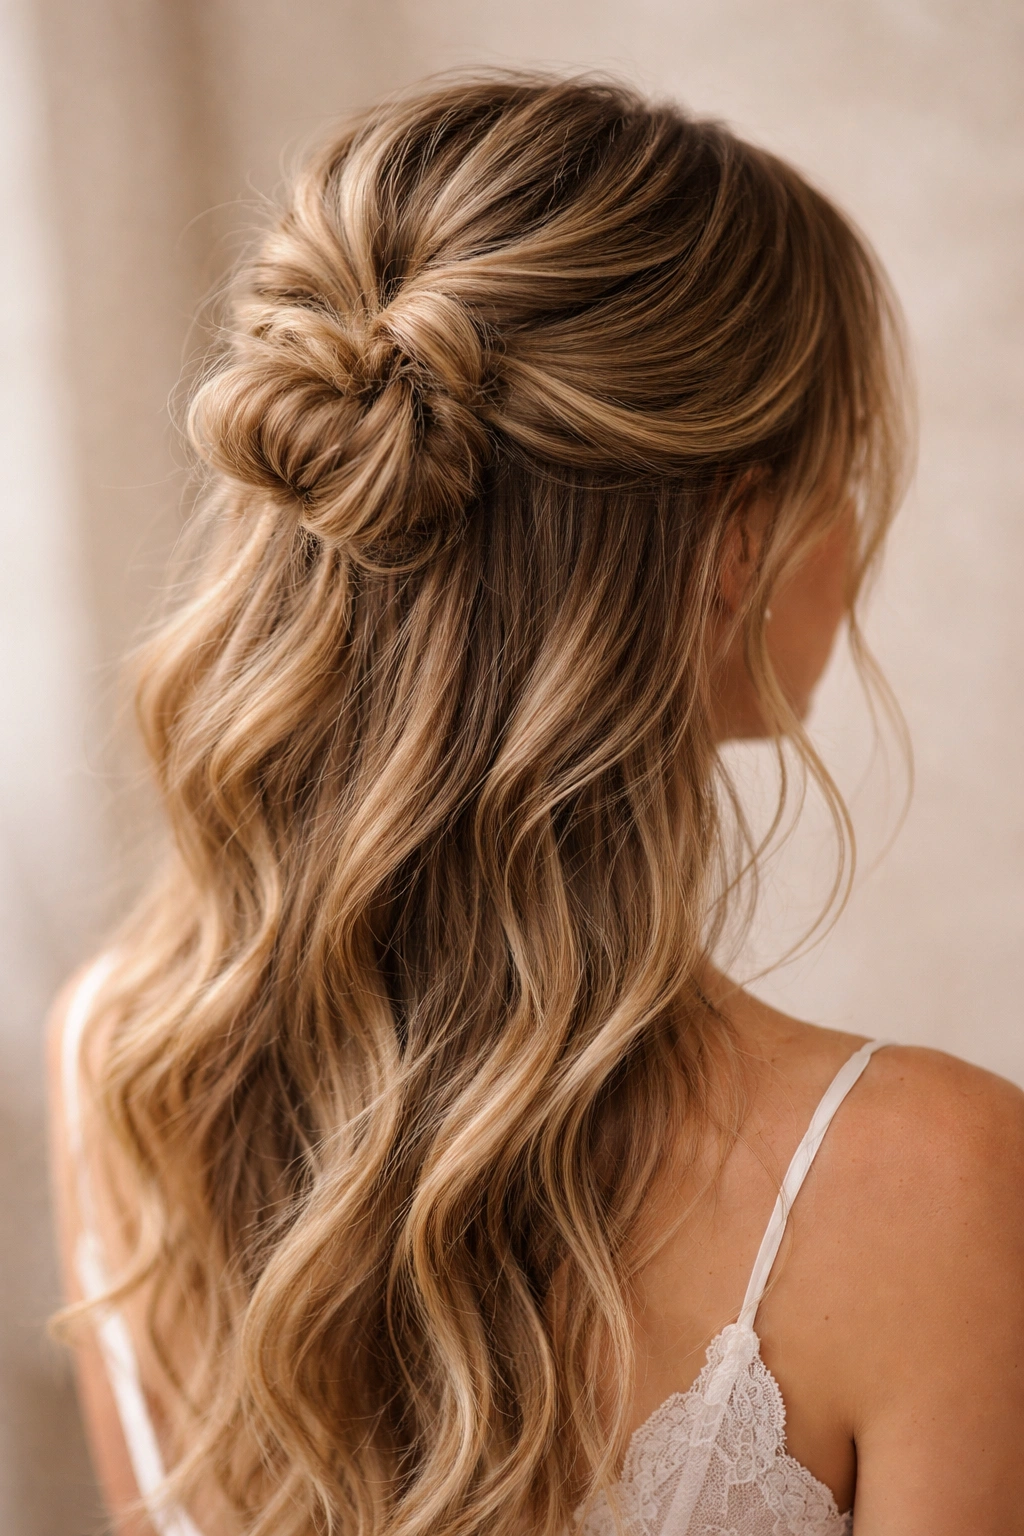
This is the bun for bridesmaids who prefer the deliberate carefully-curated-but-still-looks-undone aesthetic. Despite the name, creating an effective messy bun actually requires planning and intention. You’re not grabbing random pieces—you’re strategically creating a bun that looks soft and loose while remaining structurally sound enough to last through a full wedding day.
Building Intentional Texture
The foundation for this style is hair with real texture built in beforehand. Use a curling iron to create loose waves or spirals throughout your entire head—not tight curls, but soft, dimensional bends that catch light. These waves should be slightly separated and tousled, never combed smooth. The messiness that makes this bun work is actually smooth, soft waves that have been teased apart, not frizz or actual tangles.
Constructing the Bun Framework
- Gathering method: Rather than creating a tight ponytail first, use your fingers to gather the upper section more loosely, creating a soft grouping at the crown that already has a somewhat undone quality
- Volume placement: Concentrate your hair gathering toward the top and sides of your crown, leaving the very center slightly looser; this prevents the bun from looking like a tight sphere and instead creates an organically asymmetrical shape
- Pin strategically: Use multiple bobby pins (5-7 for longer or thicker hair) positioned at different angles to create hold without visible structure; the pins should anchor the hair but still allow it to maintain soft, loose curves
- Finishing detail: Pull a few delicate pieces free around the perimeter of the bun and wave them gently with a straightening iron or curling iron
Worth knowing: This style photographs beautifully in natural light and actually looks more bridal in its softness than many tighter updos; many brides specifically request this aesthetic for their entire wedding party.
6. Twisted Crown Half-Up Bun
For a style that reads as more intricate than it actually is to execute, a twisted crown offers the sophisticated visual of detailed hairwork without requiring serious braiding skills. Instead of a braid down the back, two rope twists start at your temples, follow the curve of your head, and meet at the crown where they feed into a soft bun.
Creating Flawless Rope Twists
Rope twists are deceptively simple: separate a section of hair into two pieces and twist one around the other, repeatedly, maintaining tension so the twist stays defined. Unlike braids, there’s no weaving involved, just pure twisting. The real skill is keeping both twists even in thickness and twist tightness, which makes the finished style read as intentional rather than accidentally created. Practicing this technique 2-3 times before the wedding day eliminates any nervousness on the actual event.
Design Elements That Elevate the Style
- Twist thickness: Aim for rope twists that are about 0.5-0.75 inches thick; overly thin twists disappear, while very thick ones can look cartoonish
- Tension consistency: Maintain even tension throughout both twists so they look like they were created with intention rather than improvisation
- Bun position: Let both twists feed into a bun positioned at your crown rather than lower; this shows off the entire twisted detail
- Hair texture prep: Lightly wave your hair beforehand or use a texturizing product; completely straight hair can make rope twists look flat and one-dimensional
- Pin visibility: Hide bobby pins within the twists themselves and bun, using dark pins that blend with your hair color
Pro tip: Practice the twists a few times wearing them before the wedding day so you understand how much time they require and how they feel on your head; this eliminates day-of surprises.
7. Double Bun Half-Up Style

For a statement hairstyle that’s genuinely unique, the double bun half-up takes the concept beyond the single-bun standard. Rather than one bun at the crown, you create two smaller buns—one slightly higher than the other, positioned closer to the center of your crown rather than to the back. The result is modern, playful, and surprisingly elegant when executed with intention.
Positioning Both Buns for Harmony
The key to making double buns read as sophisticated rather than costume-y is size and spacing. Both buns should be relatively compact (not enormous) and positioned close enough together that they read as a cohesive unit rather than two separate accidents. Typically, you’d place one about an inch higher and slightly to one side, with the second positioned just below and slightly to the other side, creating a loose diagonal or diagonal-ish orientation.
Technical Execution for Visual Balance
- Section division: Divide your gathered upper section into two halves (left and right, or top and bottom) and create a separate ponytail for each bun before wrapping
- Bun size: Aim for buns that are roughly 1.5-2 inches in diameter; oversized buns will read as childish rather than stylish
- Wrapping technique: Wrap each bun tightly and securely, using 3-4 bobby pins per bun to ensure they’re stable through the entire day
- Symmetry consideration: Slightly imperfect symmetry actually reads as more intentional than mirror-perfect mirroring; a tiny bit of variation looks like deliberate styling choice
- Balance in the down section: Keep the down portion’s waves or texture slightly heavier or more voluminous than you might for a single-bun style to visually balance two buns above
Worth knowing: This style photographs beautifully from behind, making it a smart choice if the photographer will be shooting the wedding party while you’re facing the bride and groom during the ceremony.
8. Boho Half-Up Bun with Delicate Curls
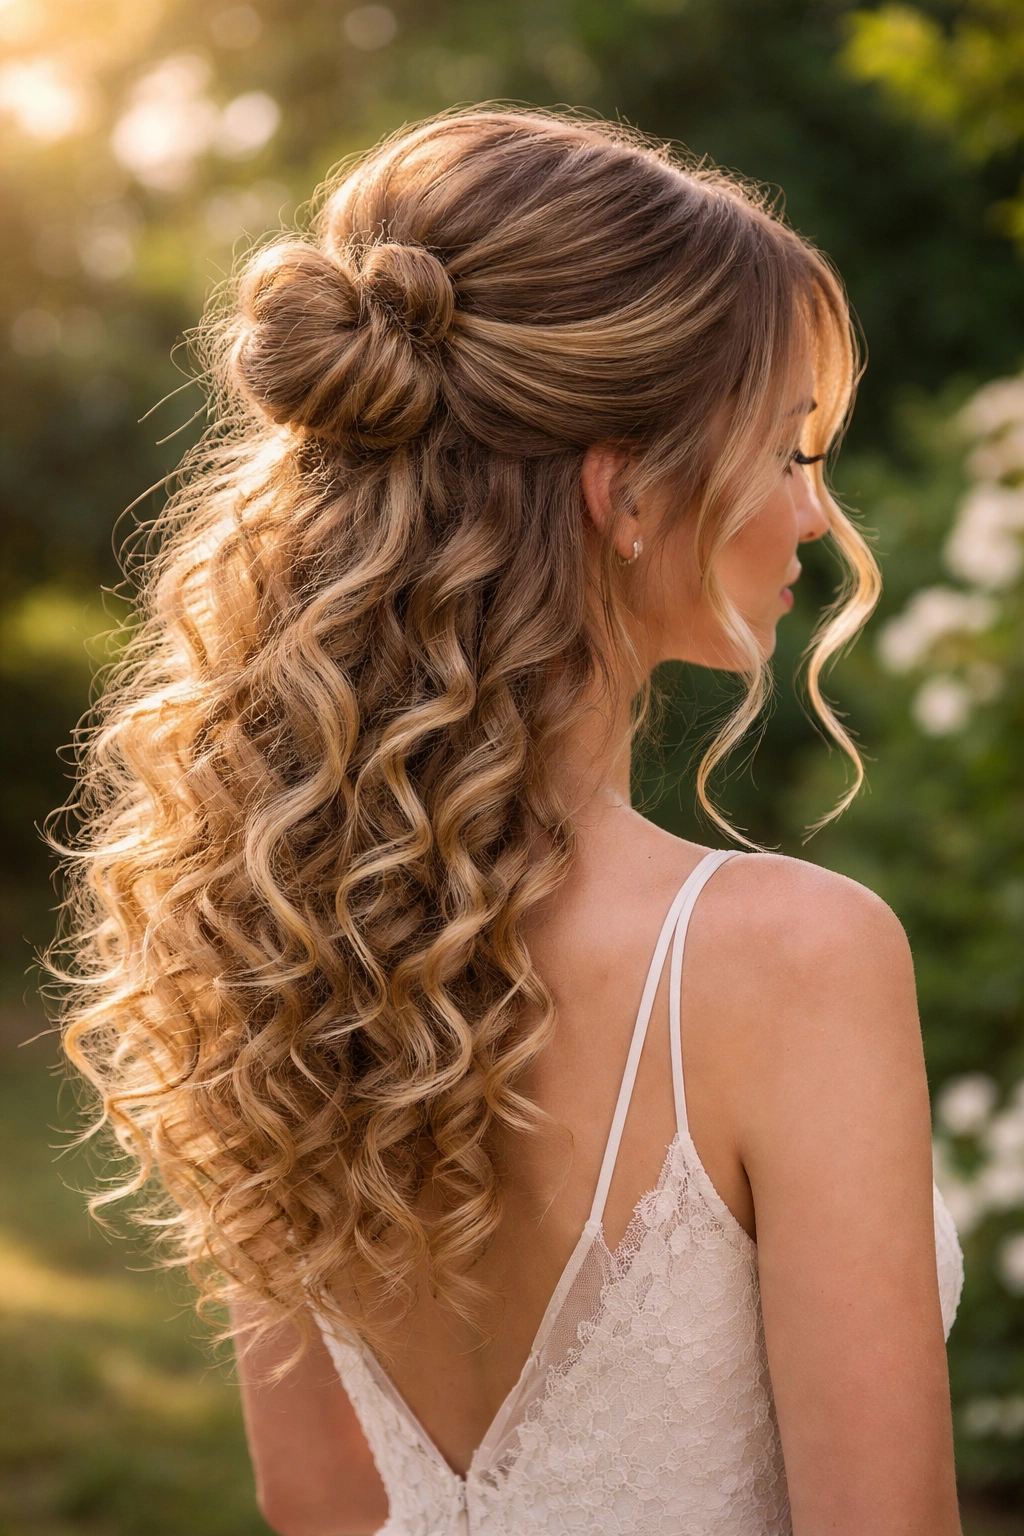
This is the bridesmaids’ style for romantic, garden, or outdoor weddings. Everything about it whispers effortless elegance: soft, defined ringlets, a bun that looks like it was gathered by the wind, and delicate wispy pieces that frame the face. Despite its romanticized appearance, achieving this look actually requires specific techniques and product choices.
Creating Defined Ringlet Curls
Rather than creating waves with a curling iron and letting them relax into soft curves, ringlet curls for this style should remain tight and defined—at least initially. Use a smaller barrel curling iron (0.75 to 1-inch barrels) and wrap sections of hair around the barrel, allowing the curl to set completely before releasing. These tight curls should then be separated and slightly loosened with your fingers, which breaks up the uniformity while maintaining the spiral shape and dimension.
Bun and Hair Assembly for Maximum Romance
- Curl prep: Curl your entire head for maximum volume and texture, paying special attention to the crown area where the bun will sit
- Bun gathering: When gathering the upper section, don’t aim for smooth or polished; let the curls bunch together naturally, creating an organically full bun
- Volume enhancement: The bun should sit high and loose, allowing ringlets to cascade both upward and downward from where it’s anchored, rather than being tightly constrained
- Face-framing pieces: Pull 2-3 very delicate curls free on each side of your face and allow them to frame your cheeks softly
- Finishing spray: Use a light-hold finish spray rather than firm-hold; the goal is hold with movement, not structured hold
Insider note: Many bridesmaids and brides love adding delicate baby’s breath or thin sprigs of eucalyptus woven through this style; the botanical elements complement the boho aesthetic beautifully.
9. Sleek Low Ponytail Half-Up Bun Hybrid
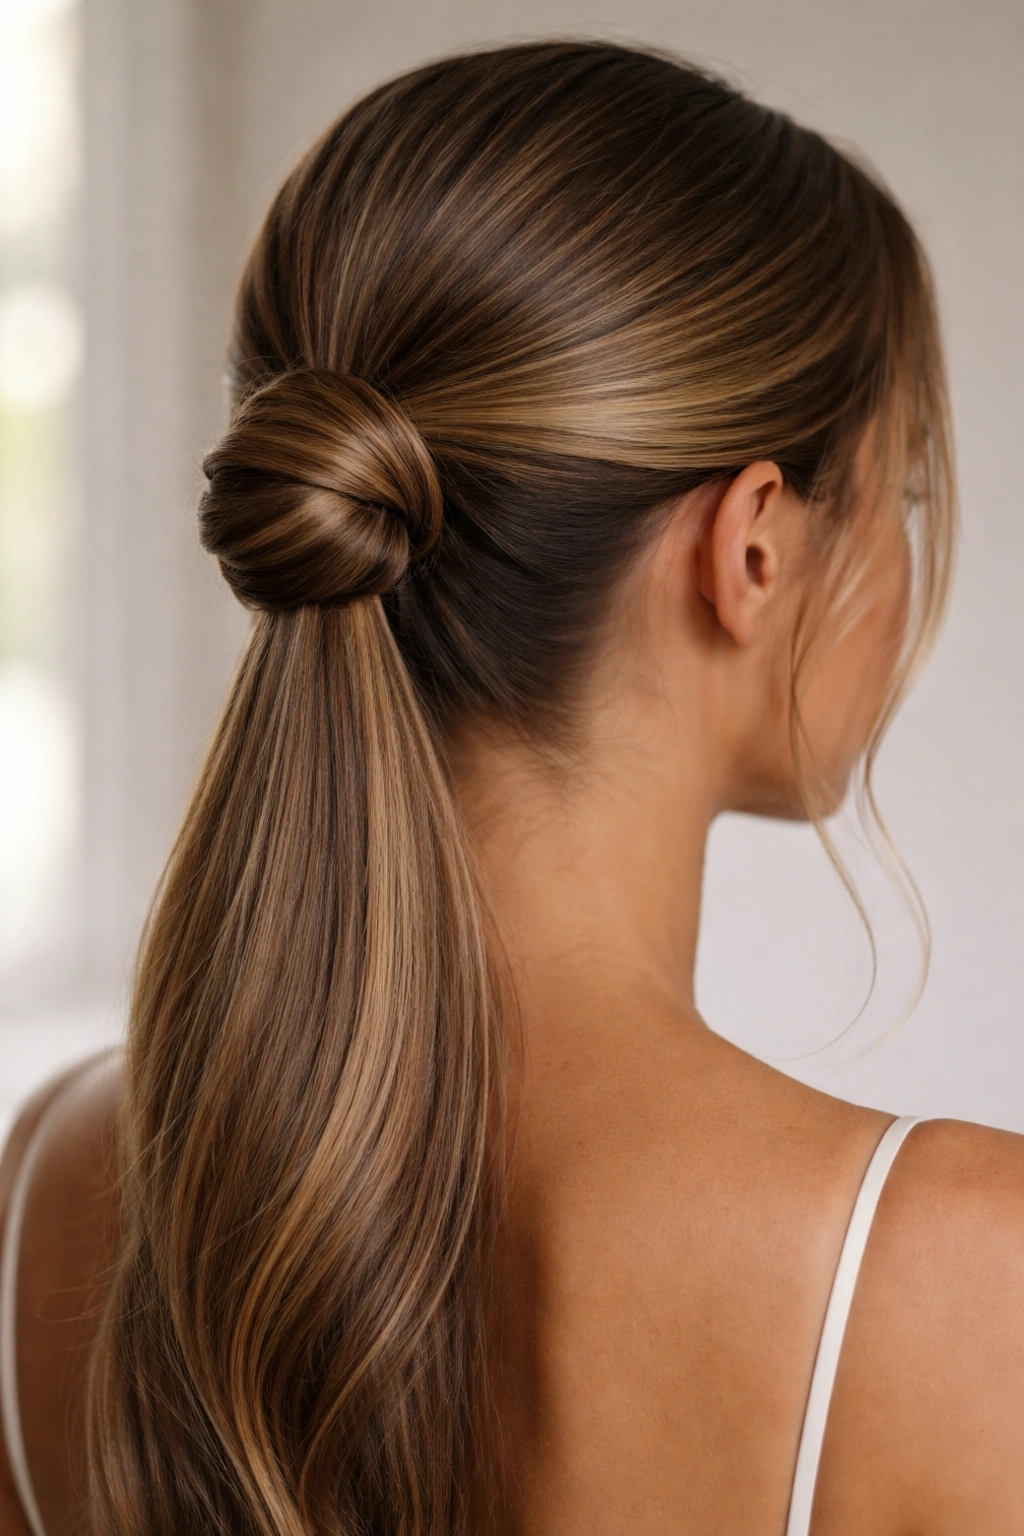
This style approaches the half-up concept from a slightly different angle: rather than gathering a traditional bun, you create a very low, sleek half-up ponytail and wrap it to create a compact, almost bun-like finish. The result reads as more modern and architectural than a traditional bun while maintaining the half-up half-down silhouette.
The Ponytail-to-Bun Conversion
Begin by gathering the upper section into a sleek, tight half-up ponytail positioned lower on the back of your head than a traditional bun would sit—roughly at the base of your skull or just slightly above. This ponytail should be gathered very tightly using a smooth rubber band or elastic. Rather than wrapping the ponytail into a traditional bun shape, wrap it into a compact, almost rope-like form that stays closer to your scalp, creating a smooth, architectural silhouette.
Styling Details for Modern Impact
- Sleekness priority: Use a smoothing serum and anti-frizz product liberally through the upper section before gathering; this style demands shine and smoothness
- Elastic choice: Use a clear or hair-colored elastic that won’t show; the goal is a seamless-looking ponytail with no visible hardware
- The wrap: Wrap the ponytail tightly around its own base using the remainder of the ponytail itself or a thin piece of ribbon; this creates a smooth, geometric finish
- Down-section styling: Keep the lower portion straight or with minimal texture; the contrast between sleek ponytail and smooth waves reads as intentional rather than unfinished
- Bobby pin placement: Pin the wrapped ponytail flat against your scalp using multiple horizontal pins that won’t show
Pro tip: This style pairs beautifully with statement earrings or an elegant hair comb worn slightly to the side, since the sleek styling doesn’t distract from accessories.
10. Dutch Braid Half-Up Bun
A Dutch braid creates a dimensional, almost sculptural braid that stands out visually compared to a standard French braid. Instead of braiding over, you braid under, which creates an inverted, three-dimensional appearance that photographs beautifully and creates a more textured, interesting profile. When fed into a bun, this braid commands attention without needing additional embellishment.
Mastering the Dutch Braid Technique
A Dutch braid uses the same sections as a French braid—three strands—but instead of crossing strand over strand, you cross each strand under the middle strand. This creates that dimensional, popped-out appearance. For bridesmaids, starting a Dutch braid at one temple or from a middle part and feeding it into a crown bun creates a striking focal point. The braid doesn’t need to be perfect; slight imperfections actually enhance the texture and dimension.
Braid and Bun Integration
- Braid thickness: For maximum visual impact, create a thicker Dutch braid (about 1-1.5 inches wide) rather than a thin, delicate one; the texture and dimension show up better in photos
- Starting point options: A braid that starts at one temple, curves across the back of your head, and feeds into a bun creates an asymmetrical, romantic silhouette; a braid that starts at a middle part and curves to the crown creates a more balanced, centered look
- Looseness factor: Slightly loose Dutch braids actually photograph better than tight, perfect braids; the looseness creates shadow and dimension
- Bun attachment: The braid should feed directly into a soft bun, with any remaining braid tail incorporated into the bun itself; this creates a cohesive look rather than a braid plus separate bun
- Texture beforehand: Even if your hair is relatively straight, light texture spray or a gentle wave beforehand helps the braid grip and maintains better hold throughout the day
Worth knowing: This style works beautifully with or without hair accessories; the braid itself is the statement, so additional embellishment is entirely optional.
11. Wispy Half-Up Bun with Wispy Tendrils
This variation prioritizes soft, romantic wisps around the face and neck, creating a style that feels decidedly bridal while remaining squarely in bridesmaid territory. Rather than gathering hair tightly, you create a bun that’s intentionally loose, with multiple pieces left out to frame the face, temples, and nape of the neck. The effect is almost ethereal—like you caught just enough of your hair to keep it somewhat in place while letting it largely escape.
Strategic Piece Placement
The difference between a messy bun and a wispy bun is intentionality. A true wispy style has specific pieces left out at planned locations: delicate wisps at both temples, soft pieces along the sides of your face, and a few longer wisps at the nape of your neck. These aren’t random—they’re positioned to frame and flatter your specific face shape while maintaining balance. The remaining hair gathers into a soft, compact bun that sits high enough to be visible but loose enough to feel relaxed.
Creating Intentional Wisps
- Wisp thickness: Each wisp should be relatively thin—maybe half an inch to an inch wide—so they read as delicate rather than chunky
- Wave or curl: Gently wave or curl these wisps separately before anchoring the rest of the bun, so they have movement and shape rather than lying straight
- Placement precision: Mark where you want wisps before you begin styling (perhaps with a small clip) so you don’t accidentally pull them back when gathering the bun
- Bun position: The main bun should sit at your crown but remain relatively loose and slightly asymmetrical, with the wisp-free section of hair feeding smoothly into it
- Hold strategy: Use lightweight bobby pins that won’t show, and anchor the bun and wisps to your actual scalp rather than creating a freestanding structure
Pro tip: Wispy buns photograph especially beautifully in soft, natural light; if the wedding includes outdoor photos during golden hour, this style will look absolutely magical.
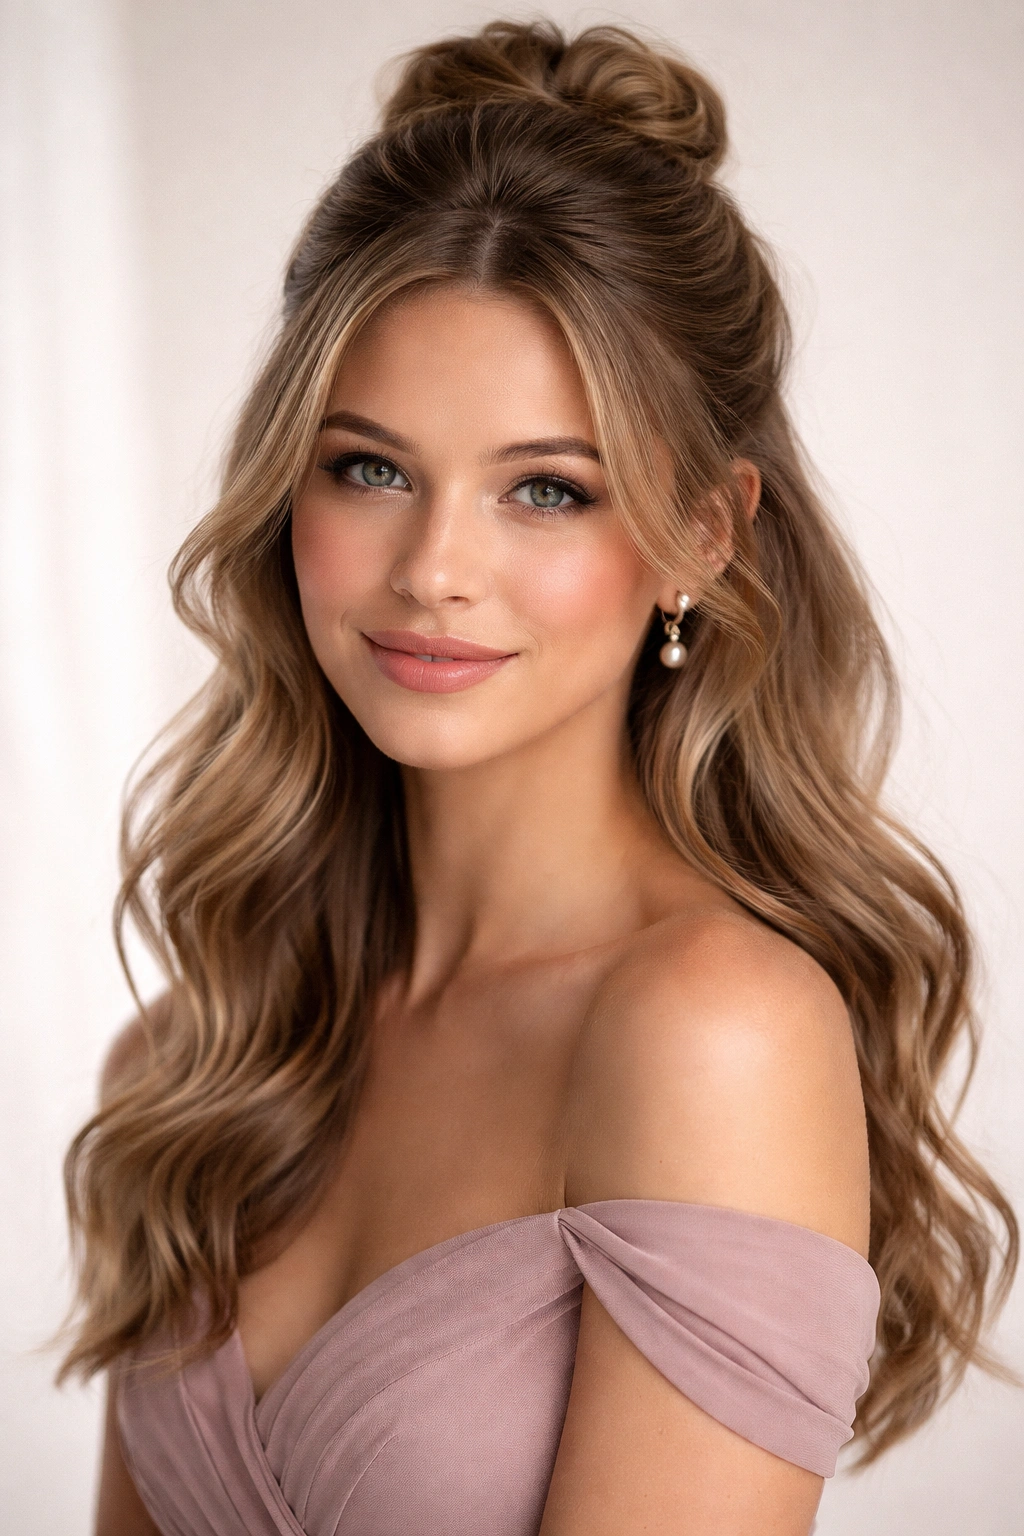
12. Pinned Half-Up Half-Down Bun with Volume
This final style focuses on creating maximum volume through strategic pinning rather than through the bun-wrapping technique. Rather than wrapping hair around itself, you use multiple bobby pins to shape the gathered section into a bun form while maintaining the maximum possible height and fullness. This approach works especially well for fine hair, shorter hair, or hair with less natural volume.
Volume-Building Through Pinning Strategy
Instead of creating a tight bun that concentrates your hair into a small, compact shape, you’ll gather your hair and use bobby pins to sculpt it into a larger, fluffier form. Think of it as pinning your hair into the shape of a bun rather than wrapping it into one. This approach maintains more of the volume and fullness that your hair naturally has, creating a bun that feels substantial rather than sleek.
Technical Details for Maximum Volume
- Backcombing foundation: Gently backcomb through your crown area before gathering, creating grip and texture that helps pins hold; this is especially crucial for fine or slippery hair
- Gathering approach: Use your fingers rather than a comb to gather the upper section loosely, allowing pieces to stand slightly away from your scalp rather than being pulled flat
- Pin placement strategy: Rather than a few well-placed pins, use 6-8 bobby pins positioned in different directions (some diagonal, some vertical, some horizontal) to sculpt the bun shape while maintaining looseness
- Height priority: Allow the bun to sit as high as possible on your crown while maintaining comfort; height makes the style read as intentional and elevated
- Softness maintenance: As you pin, gently lift and shape the hair so it maintains a soft, slightly undone appearance rather than being pulled tightly
- Wispy edges: Leave delicate wisps free around the perimeter of the bun and curl them gently; this softens the whole look and prevents a too-constructed appearance
Worth knowing: This technique actually requires slightly more practice than traditional bun-wrapping, but it creates genuinely exceptional volume for bridesmaids with fine or thin hair who find traditional buns disappointing. The visual payoff is substantial.
Final Thoughts
The magic of a half-up half-down bun lies in its flexibility to suit different wedding aesthetics, face shapes, and comfort preferences while maintaining a cohesive, intentional appearance. Whether your bride envisions romantic and soft, modern and sleek, or elaborately detailed, there’s a version of this style that works. The key is choosing the variation that aligns with both the wedding’s overall vibe and your own sense of what makes you feel confident and beautiful.
Remember that the best bridesmaid hairstyle is one that actually feels good to wear and that you feel genuinely attractive in—not something you’ll spend the day fidgeting with or worrying about. The half-up half-down bun approach naturally delivers on both fronts: it remains comfortable throughout hours of ceremony and celebration, and it photographs beautifully in ways that many bridesmaids’ hairstyles simply don’t. Whatever style you choose, give yourself time to practice it beforehand, invest in quality hair products that work specifically for your hair type, and don’t hesitate to ask your stylist questions about what will work best for the specific texture and length of your hair.