Cornrows are a beautiful and practical choice for kids, offering protective styling that keeps hair healthy while looking polished and put-together. When you combine cornrows with the half-up half-down approach, you get the best of both worlds—intricate braiding detail on top with the freedom and movement of loose hair below. This versatile styling option works for school days, special events, active play, and everything in between.
Half-up half-down cornrow styles give kids a way to express creativity and personality through their hair while keeping it manageable and off the face. Whether your child has natural texture, loose curls, or thick hair, cornrow styles can be customized to suit their hair type and personal style preferences. The half-up portion protects the braided section, which means this style can last longer than fully loose braids while still feeling fresh and age-appropriate.
Understanding the different variations available helps you choose styles that match your child’s hair texture, activity level, and personal taste. Each style below offers something distinct—from intricate geometric patterns to elegant and simple designs that work for everyday wear or special occasions.
1. Classic Center Part with Side Cornrows
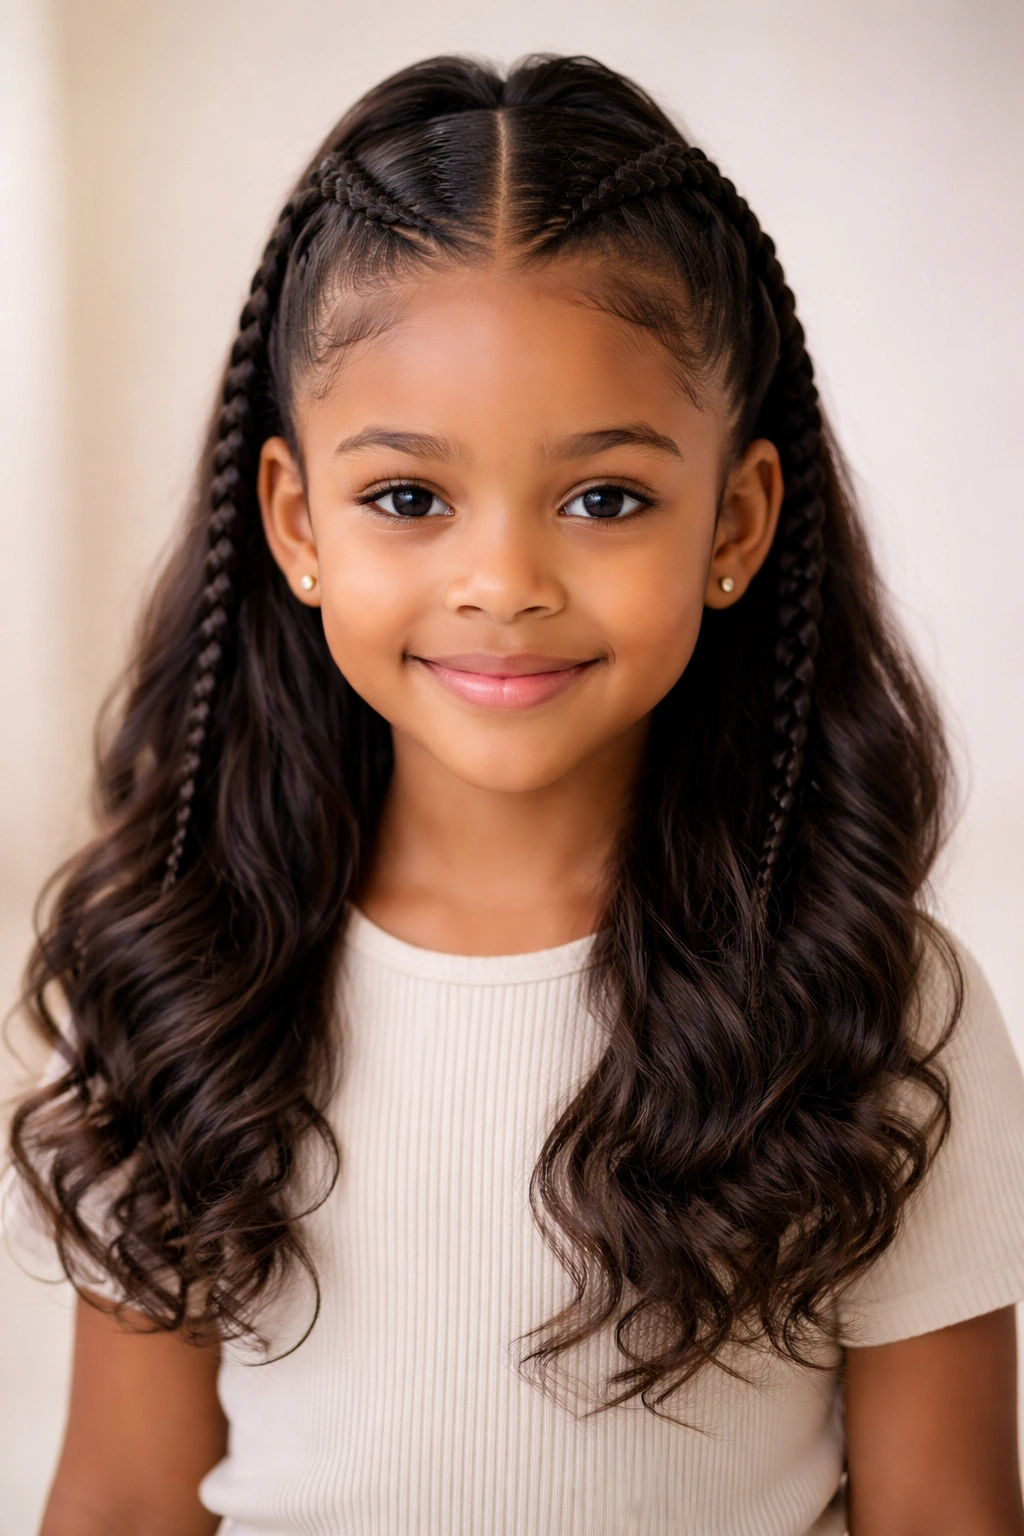
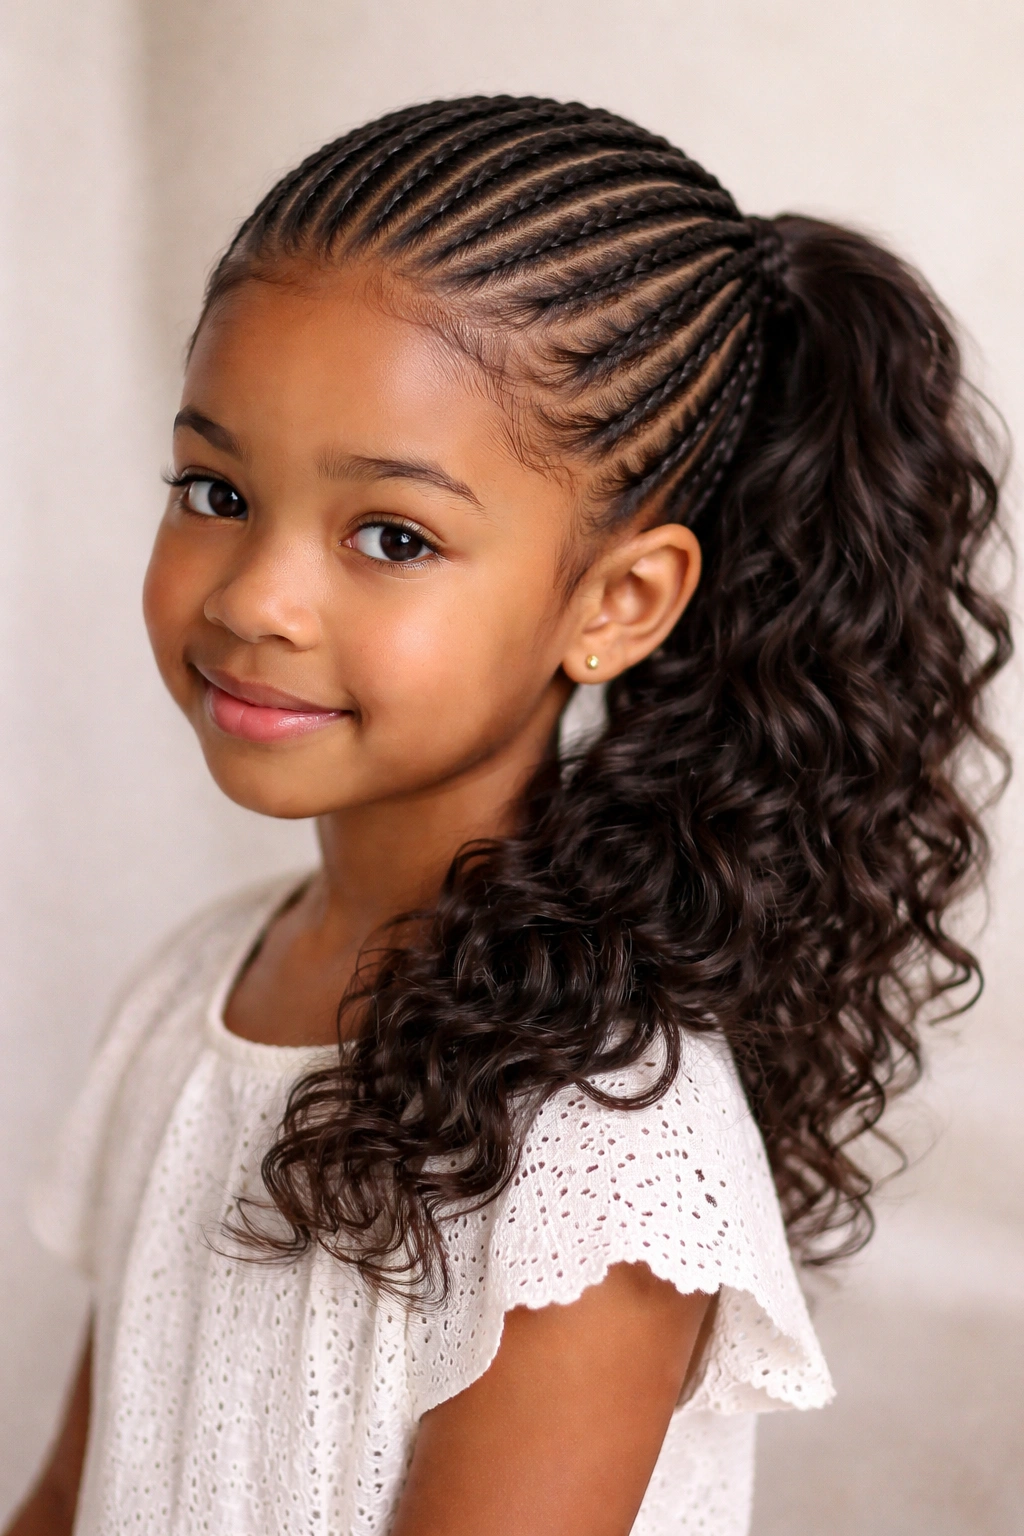
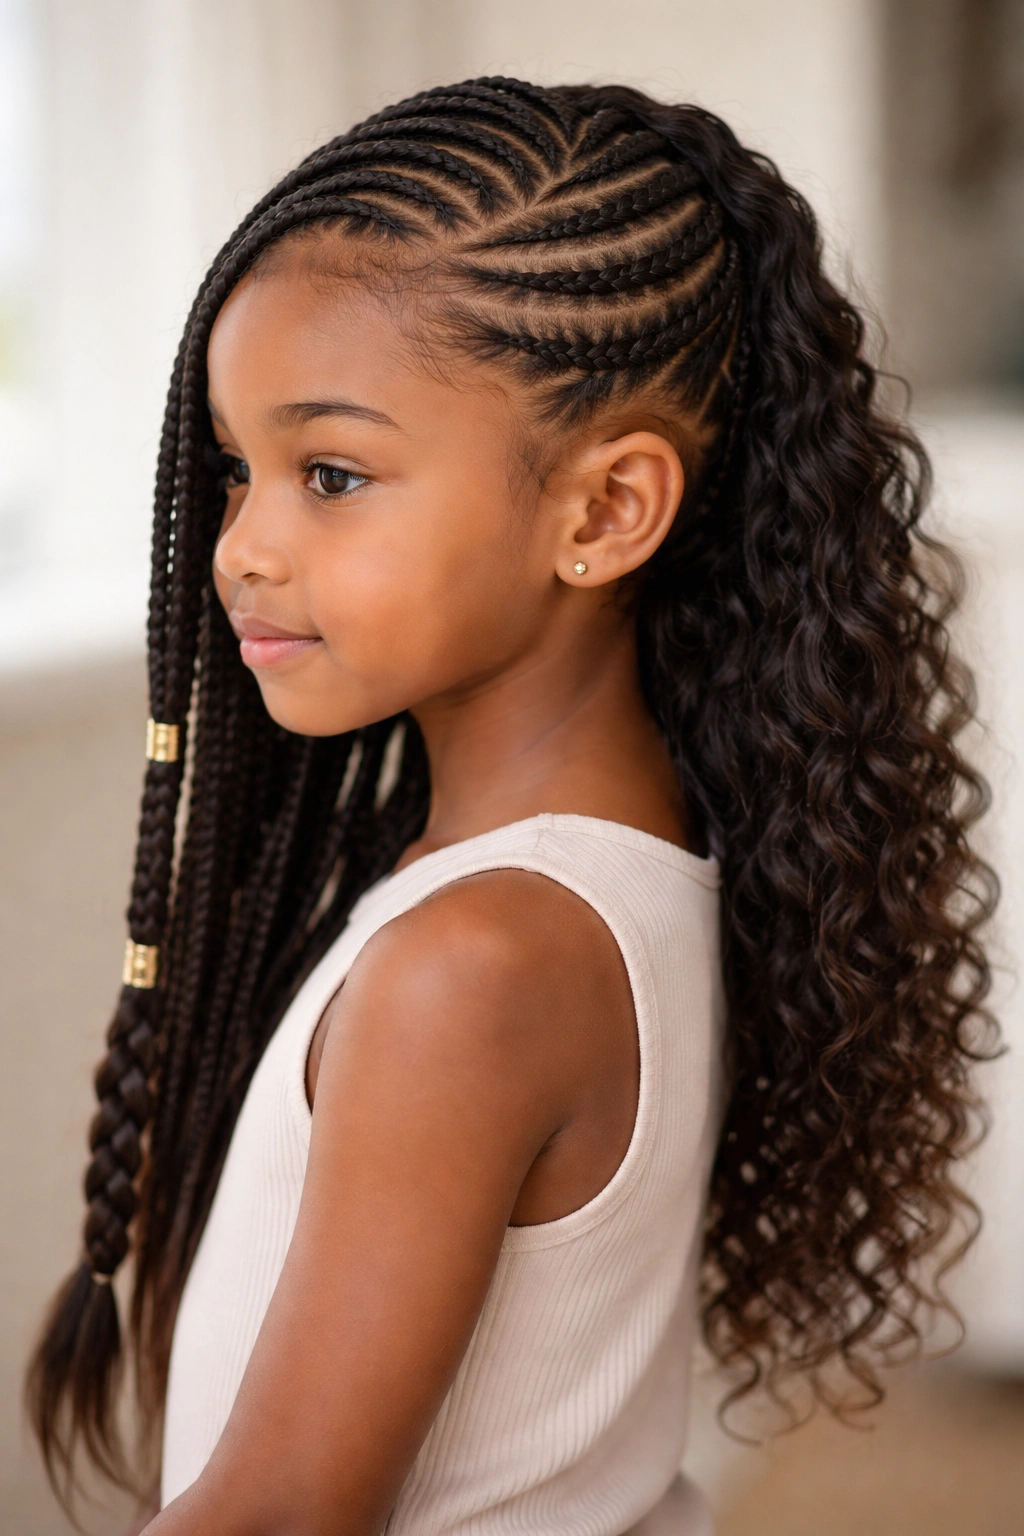
This timeless style features two thick cornrows running from the front hairline toward the back, positioned on either side of a center part. The cornrows are pinned or twisted up to meet at the crown, creating a neat half-up style while the remaining hair flows freely down the back and sides. This design works beautifully for kids with medium to thick hair and suits both casual and formal occasions.
Why This Works for Active Kids
The center part naturally divides the hair into balanced sections, making cornrows easier to execute evenly. The half-up twist keeps everything secure without relying on rubber bands or clips that can slip throughout the day. Kids can move, play, and jump without worrying about their braids unraveling.
How to Style It
- Start with a clean, moisturized scalp and detangle thoroughly
- Part hair down the center from the forehead to the nape
- Create two thick cornrows on each side, maintaining consistent tension
- Bring both braids to the crown and secure with bobby pins in a matching color
- Spray with a light hold product to keep flyaways smooth
- This style typically lasts 4-6 days with proper care
Pro tip: Use colored bobby pins that match your child’s hair color—they become nearly invisible and the style looks more polished.
2. Twisted Crown with Loose Curls
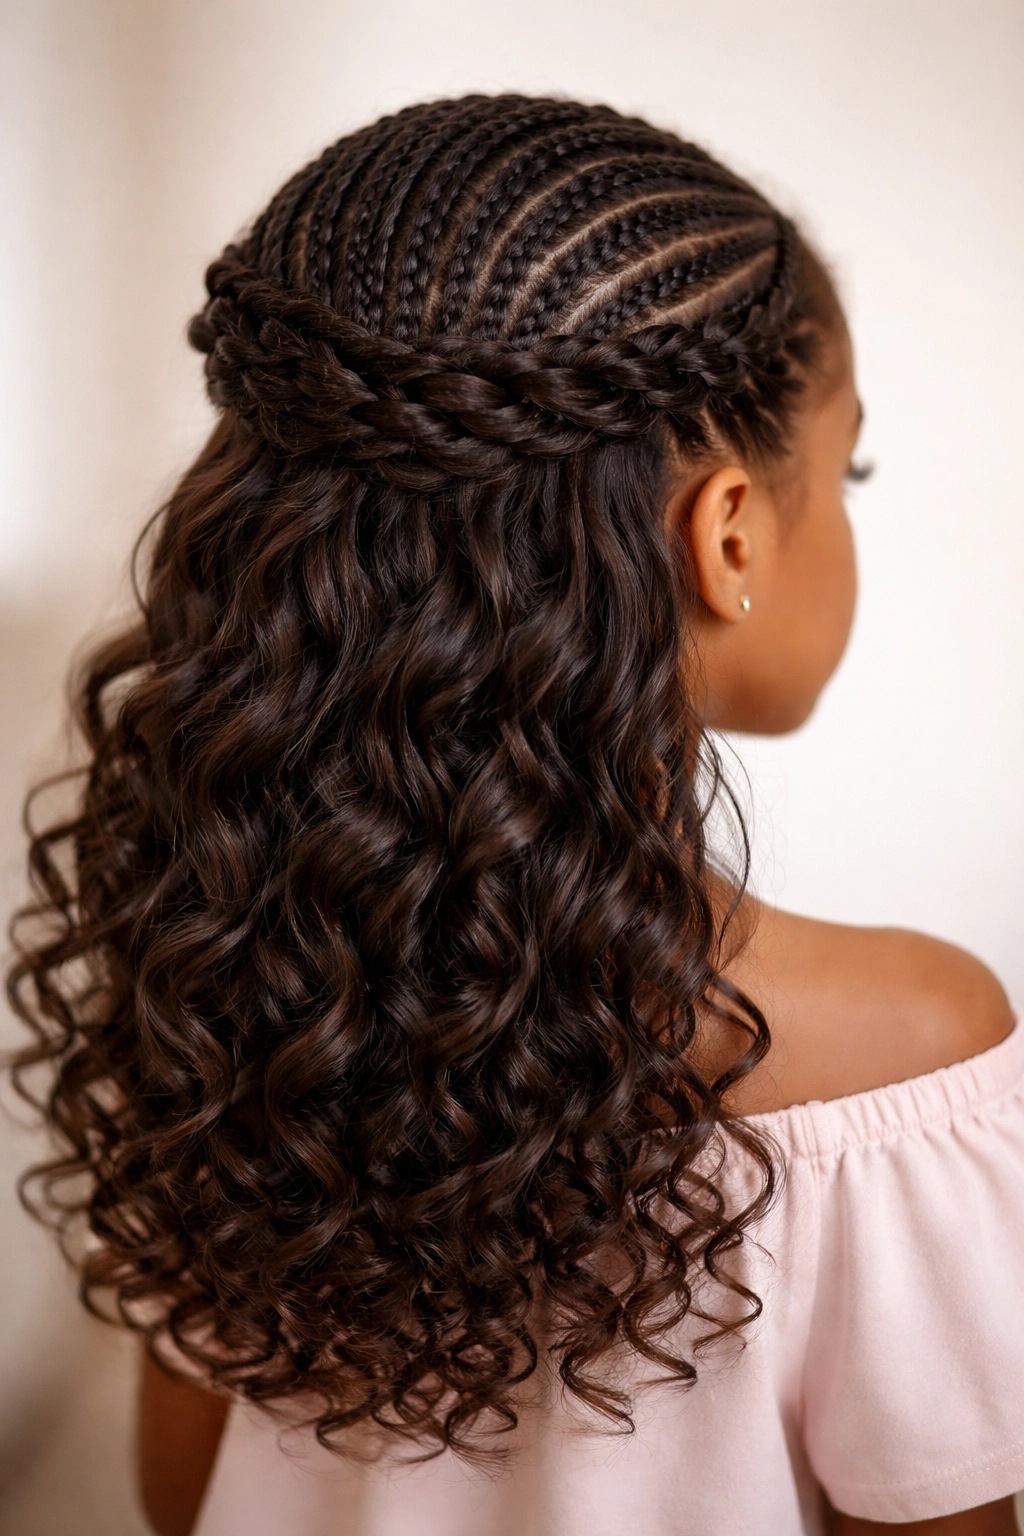
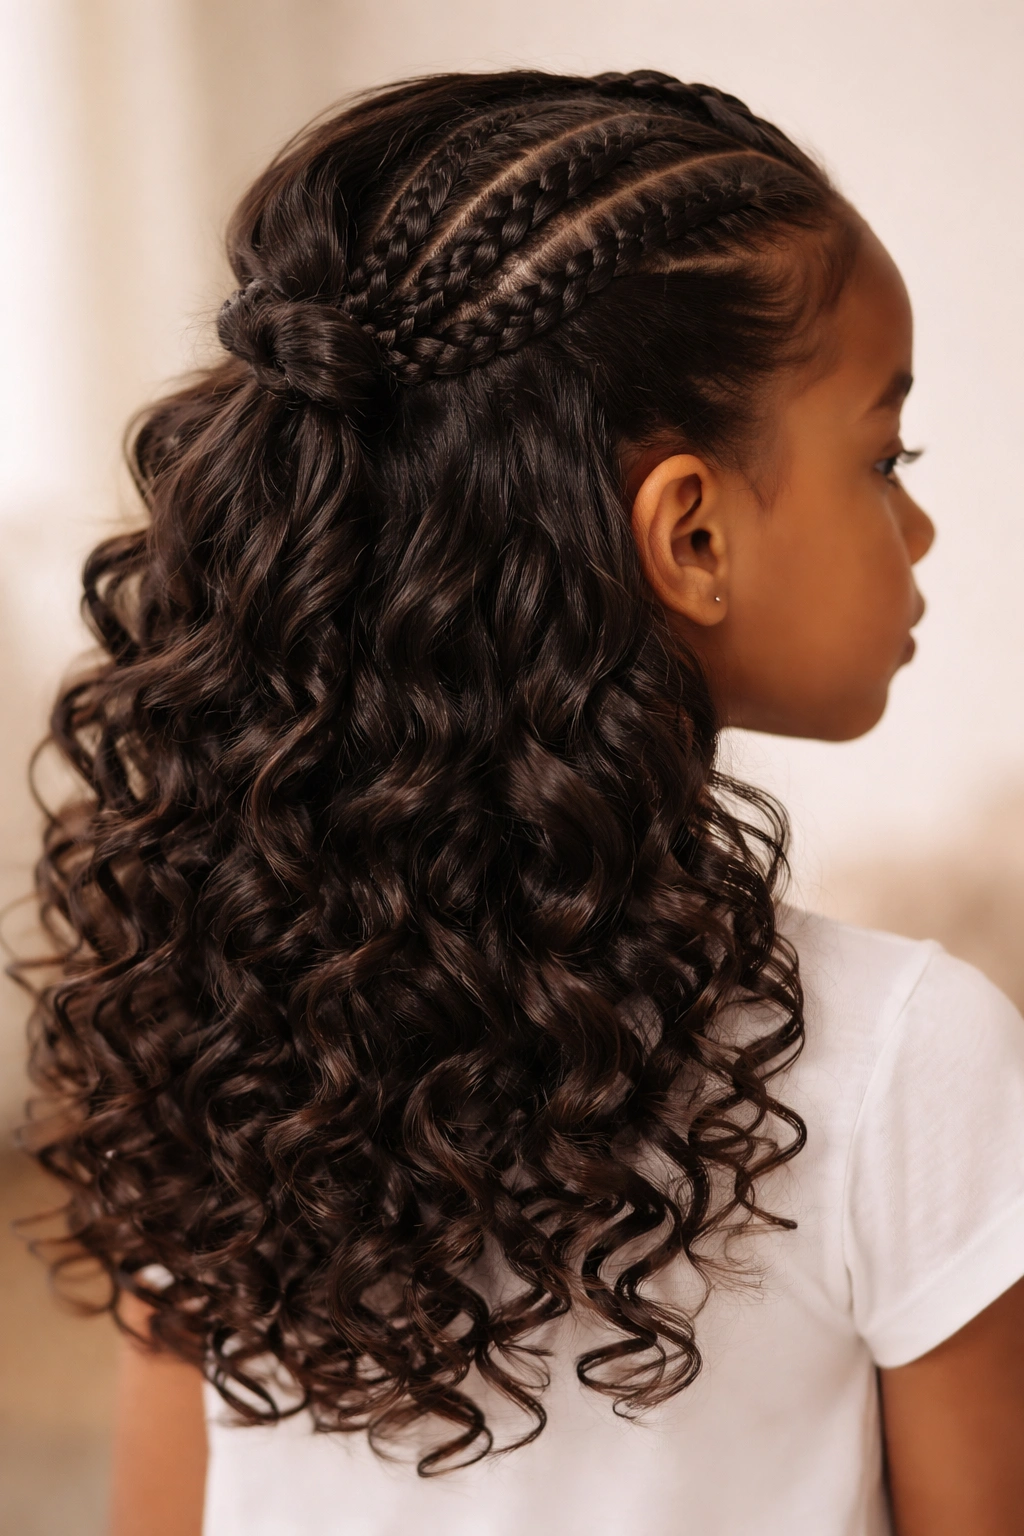
This romantic style features cornrows that spiral from the sides toward the back of the head, creating a crown-like pattern where they meet at the nape. The rest of the hair is left down in its natural texture or gently curled for added dimension and bounce. This style is perfect for special events like birthday parties, church, or family photos.
The Appeal for Special Occasions
The twisted crown detail makes an ordinary half-up style feel fancy and intentional without being overly complicated. Loose curls frame the face beautifully and give the whole look a polished, elegant appearance. This style shows off the length of your child’s hair while keeping braided portions protected.
Execution Tips
- Create 2-3 cornrows on each side of the head, angling them toward the back
- Leave 2-3 inches of hair free at the ends to create loops or curls
- Allow the braids to create a crown effect at the back before securing
- Curl or braid the loose hair gently for waves
- This style works best on hair that’s at least 10 inches long for full impact
3. Geometric Box Braids Half-Up
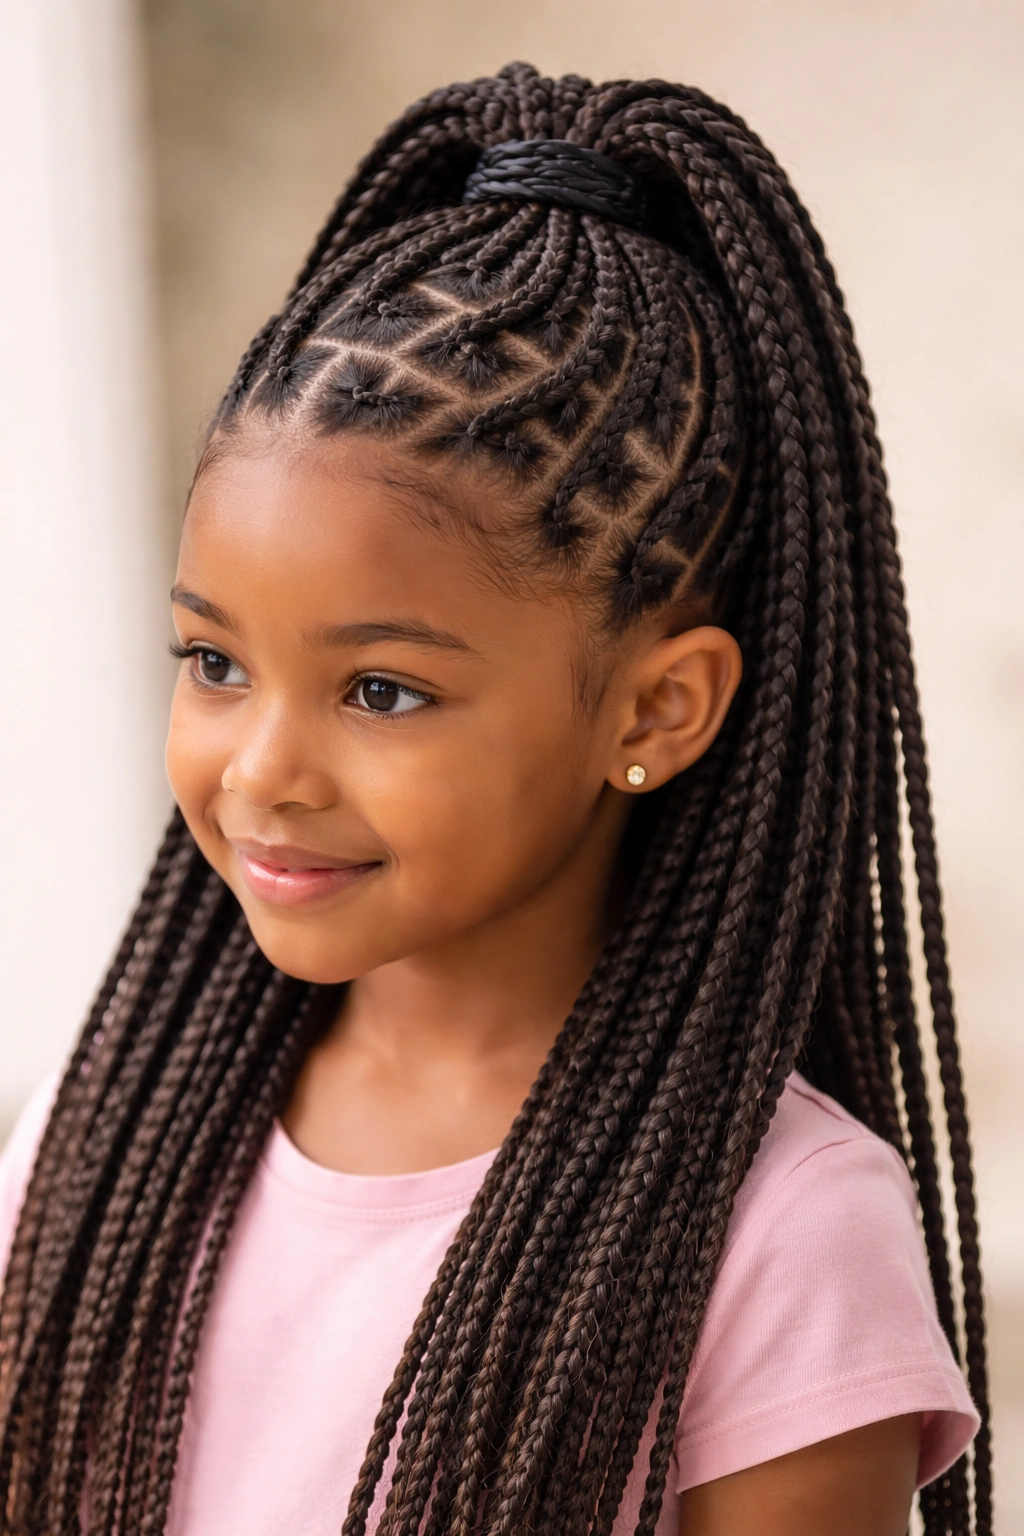
This modern style uses small to medium-sized box braids arranged in a geometric pattern across the front and crown of the head. The braids connect at the top in a half-up style while smaller braids or loose texture falls freely below. The geometric arrangement makes this style visually striking and shows off your styling skills.
Creating Visual Interest
Small box braids require more precision but create an eye-catching pattern that catches light and shows dimension. The arrangement can follow different angles or directions depending on how you want the visual movement to flow. This style appeals to kids who like bold, statement-making looks.
Styling Considerations
- Small box braids take longer to install but last 2-3 weeks
- Space braids evenly across the front section for balance
- Bring braids up to the crown and secure with bobby pins or colorful hair cuffs
- Add beads or hair jewelry to individual braids for extra personality
- This style works best for kids with at least shoulder-length hair
4. Bubble Braid Half-Up Combo
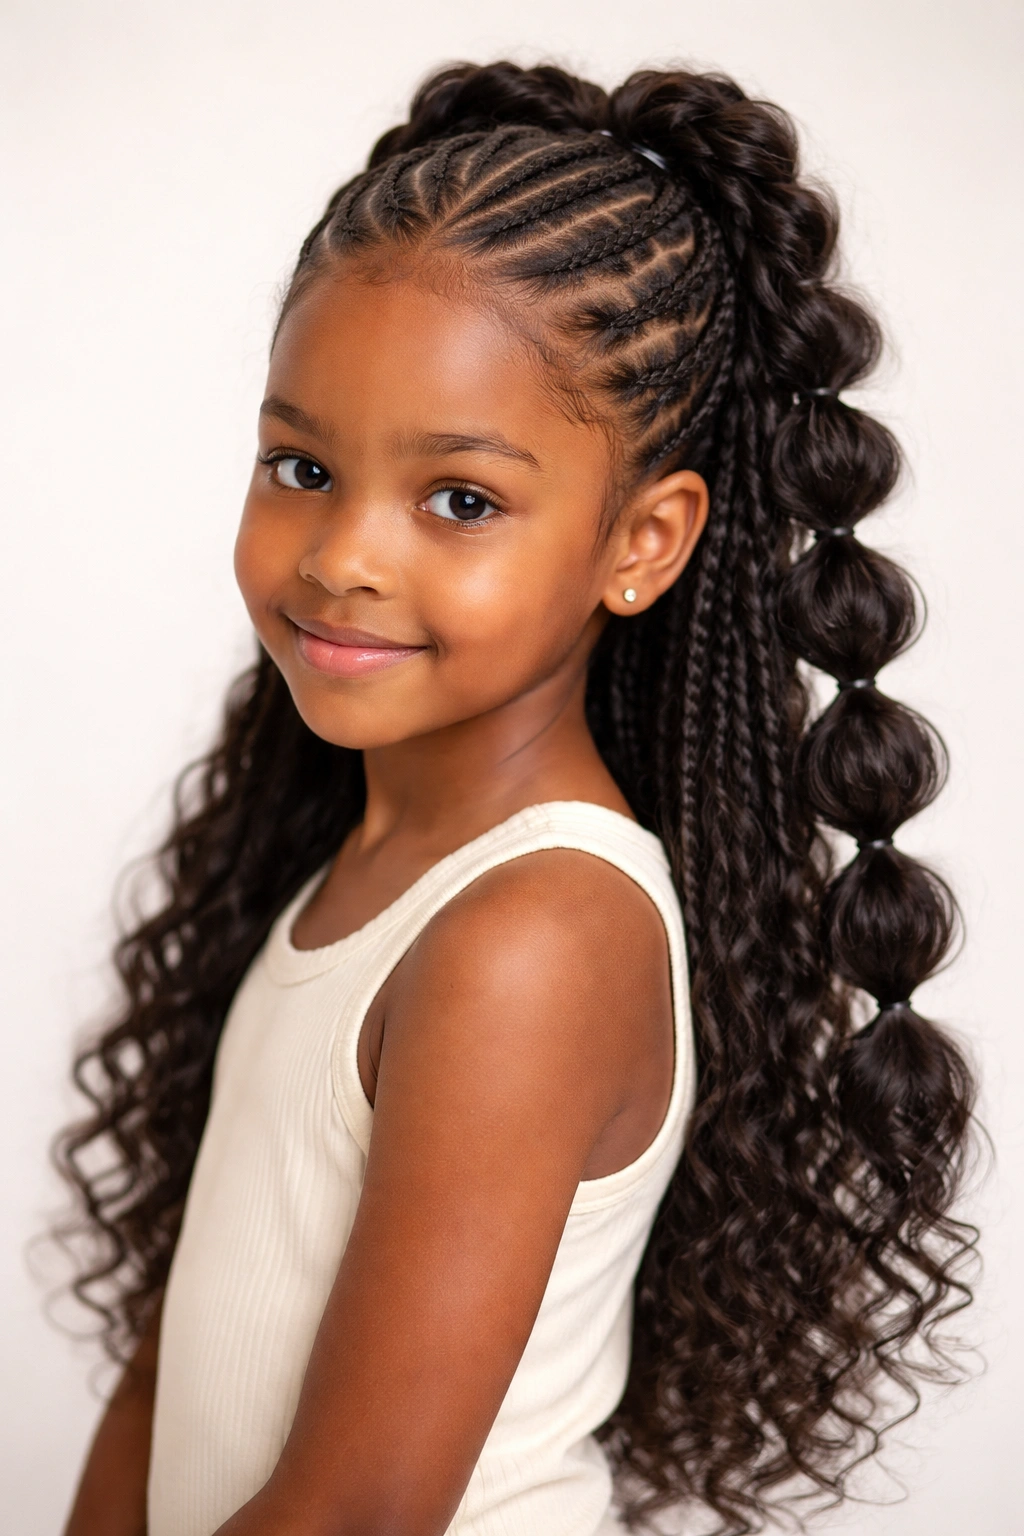
Bubble braids create playful, puffy sections by tightening different areas of a single braid to create ball-like segments throughout. When combined with cornrows in a half-up style, this creates wonderful texture contrast and visual interest. Kids absolutely love the fun, bouncy appearance of this hybrid style.
Why Kids Love Bubble Braids
The puffy segments look almost sculptural and feel distinctly different from traditional braids. Bubble braids are interactive and kids enjoy showing off the distinct sections to their friends. This style photographs beautifully and works well for school pictures or special events.
Installation Guide
- Create 2-3 cornrows from the front toward the back
- Connect them at the crown and secure with bobby pins
- Below the cornrows, create one or two bubble braids using the loose hair
- Pull sections of the bubble braid tighter to create distinct puff sections
- Finish with a light mousse or gel to keep the bubbles defined
- This style typically lasts 5-7 days depending on activity level
5. Waterfall Cornrows with Side Ponytail
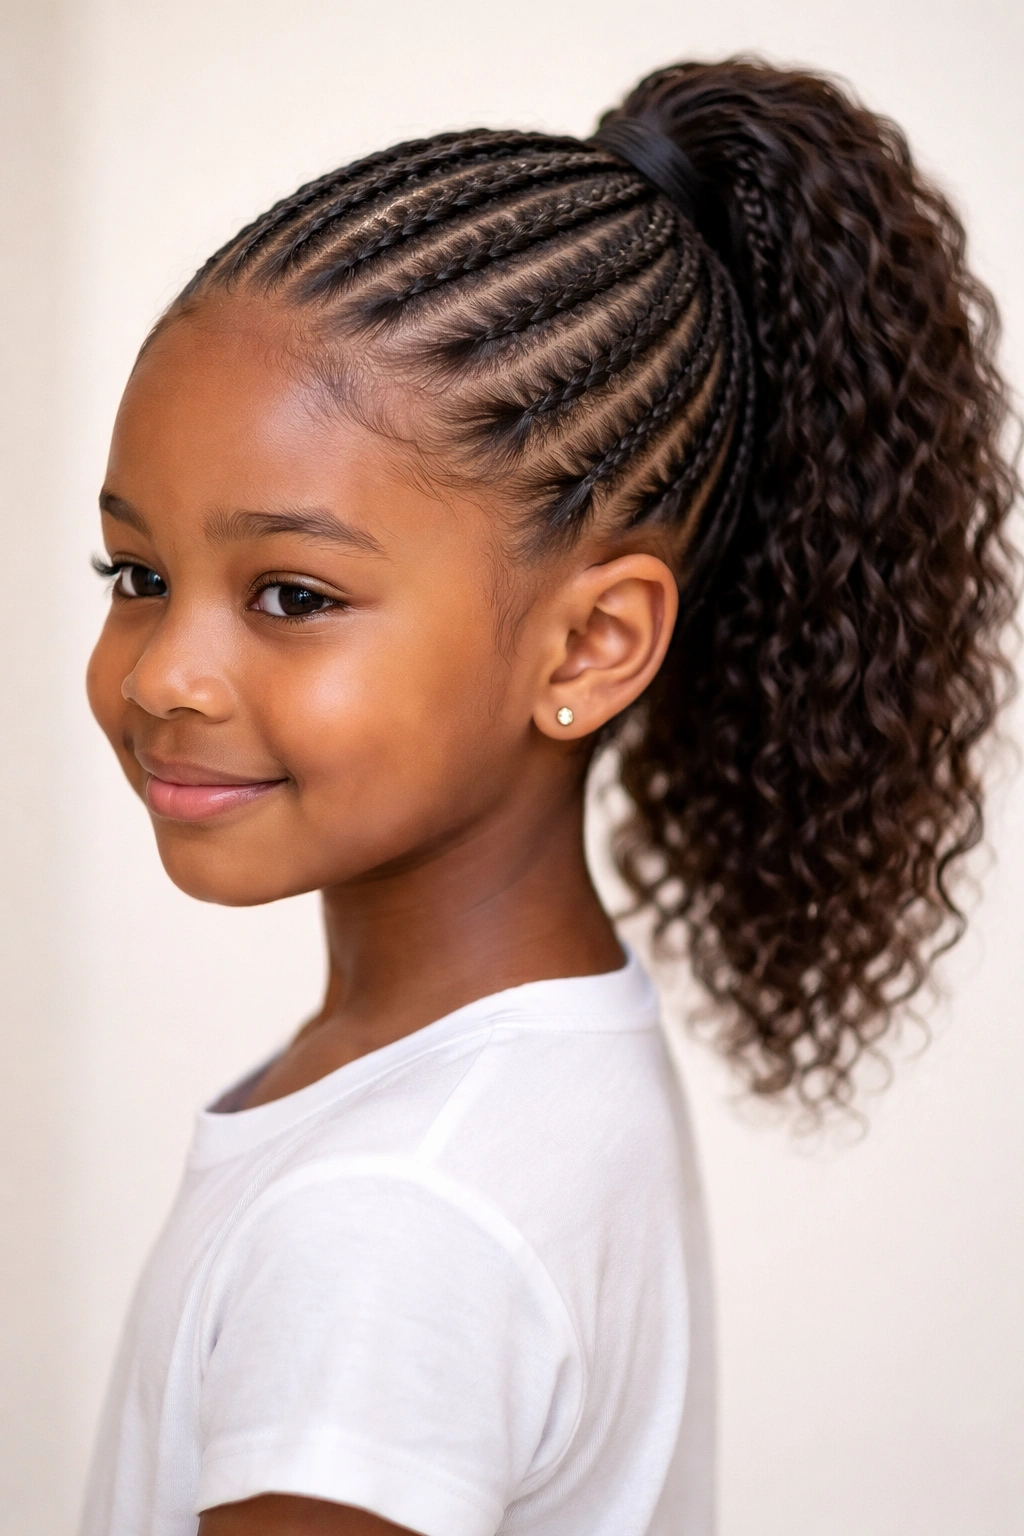
This cascading style features cornrows that start at the temples and flow diagonally toward the back of the head, creating a waterfall effect. The loose hair beneath the cornrows is gathered into a side ponytail, creating a half-up style that feels elegant yet playful. This design works beautifully for kids with textured hair and various hair lengths.
The Visual Magic of Waterfall Styles
Waterfall cornrows create the illusion of hair flowing down while maintaining the security of braids. The diagonal angle is flattering to most face shapes and creates natural dimension. Adding a side ponytail gives the loose portion structure while maintaining that half-up aesthetic.
Creating the Waterfall Effect
- Start cornrows at one temple and angle them diagonally across the crown
- Let the loose hair beneath the braids flow freely for the first few inches
- Gather this flowing hair into a side ponytail at ear level
- Secure with a colorful elastic that matches or contrasts with the hair
- Smooth any flyaways with a light gel or edge control product
- This style typically lasts 4-5 days before needing refresh
6. Starburst Crown Cornrows
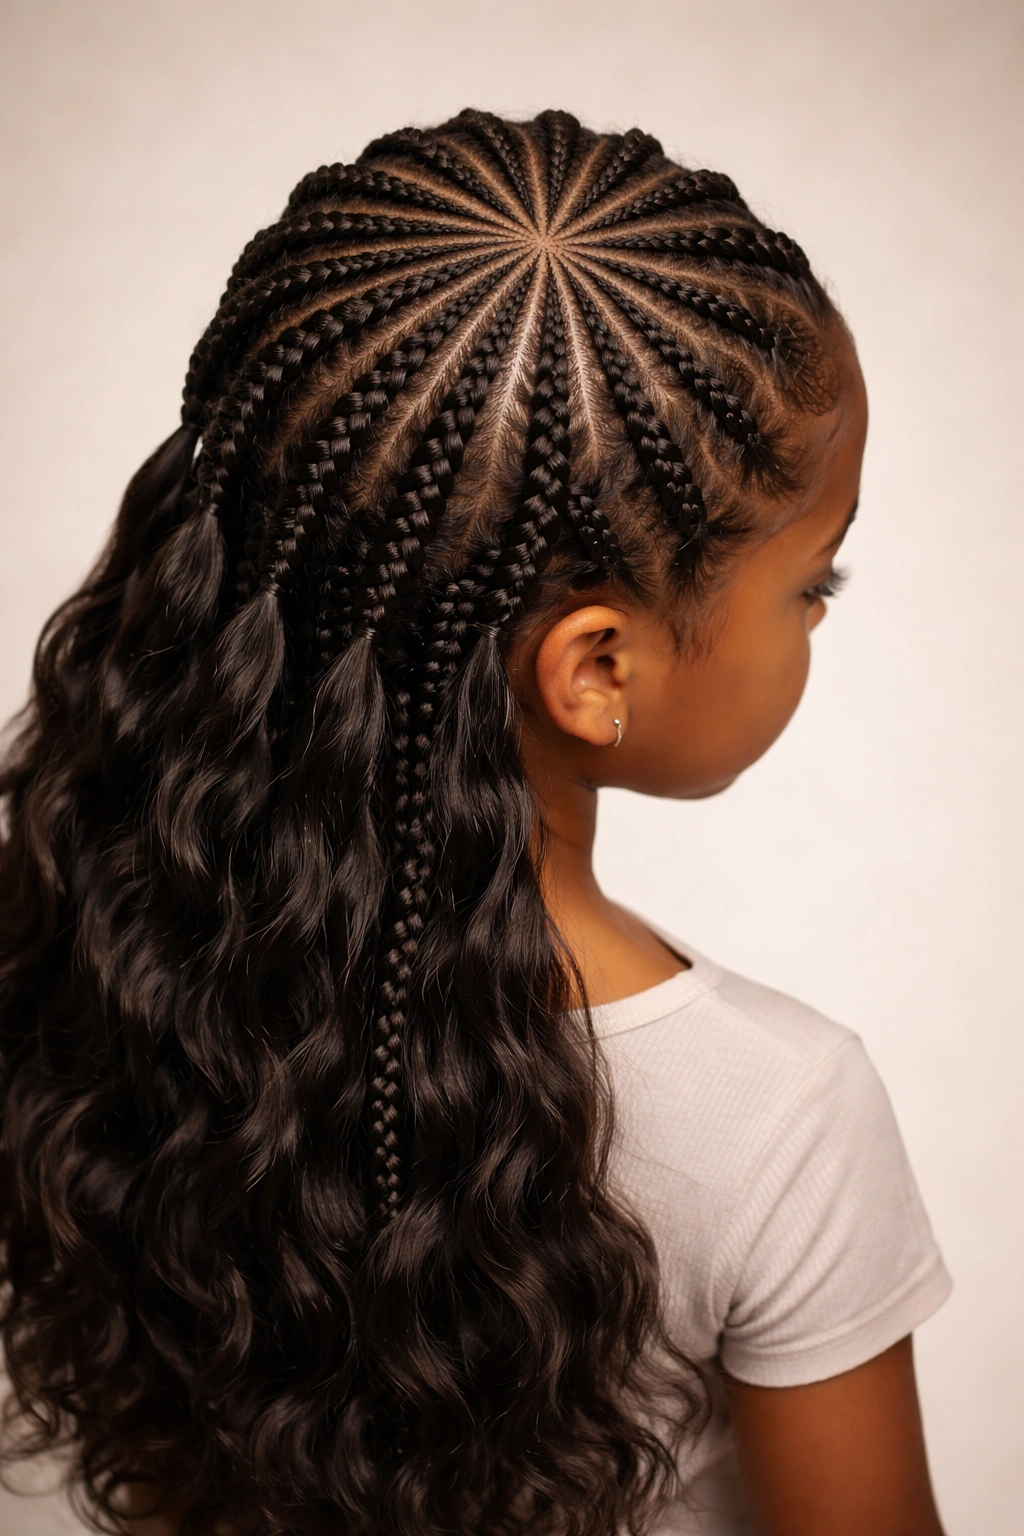
This show-stopping style features multiple cornrows radiating outward from a center point at the crown, creating a starburst or sunburst pattern. The braids meet at the center and are secured with decorative pins or clips, while the loose ends fan out below. This geometric style is incredibly eye-catching and works best for kids with thicker, longer hair.
Visual Impact and Complexity
The starburst pattern requires planning and precision but creates a stunning, gallery-quality result. This style demonstrates advanced braiding skill and makes a bold statement. Kids with this style often receive compliments from teachers, family members, and friends.
Installation Steps
- Divide the crown area into 4-8 sections (depending on hair thickness and desired intensity)
- Create cornrows from each section, starting at the roots and moving outward
- Bring all braids together at the top of the crown
- Secure with bobby pins and a decorative clip or elastic
- Let remaining hair flow freely below or continue with loose braids
- Plan 2-3 hours for installation depending on section size and braid intricacy
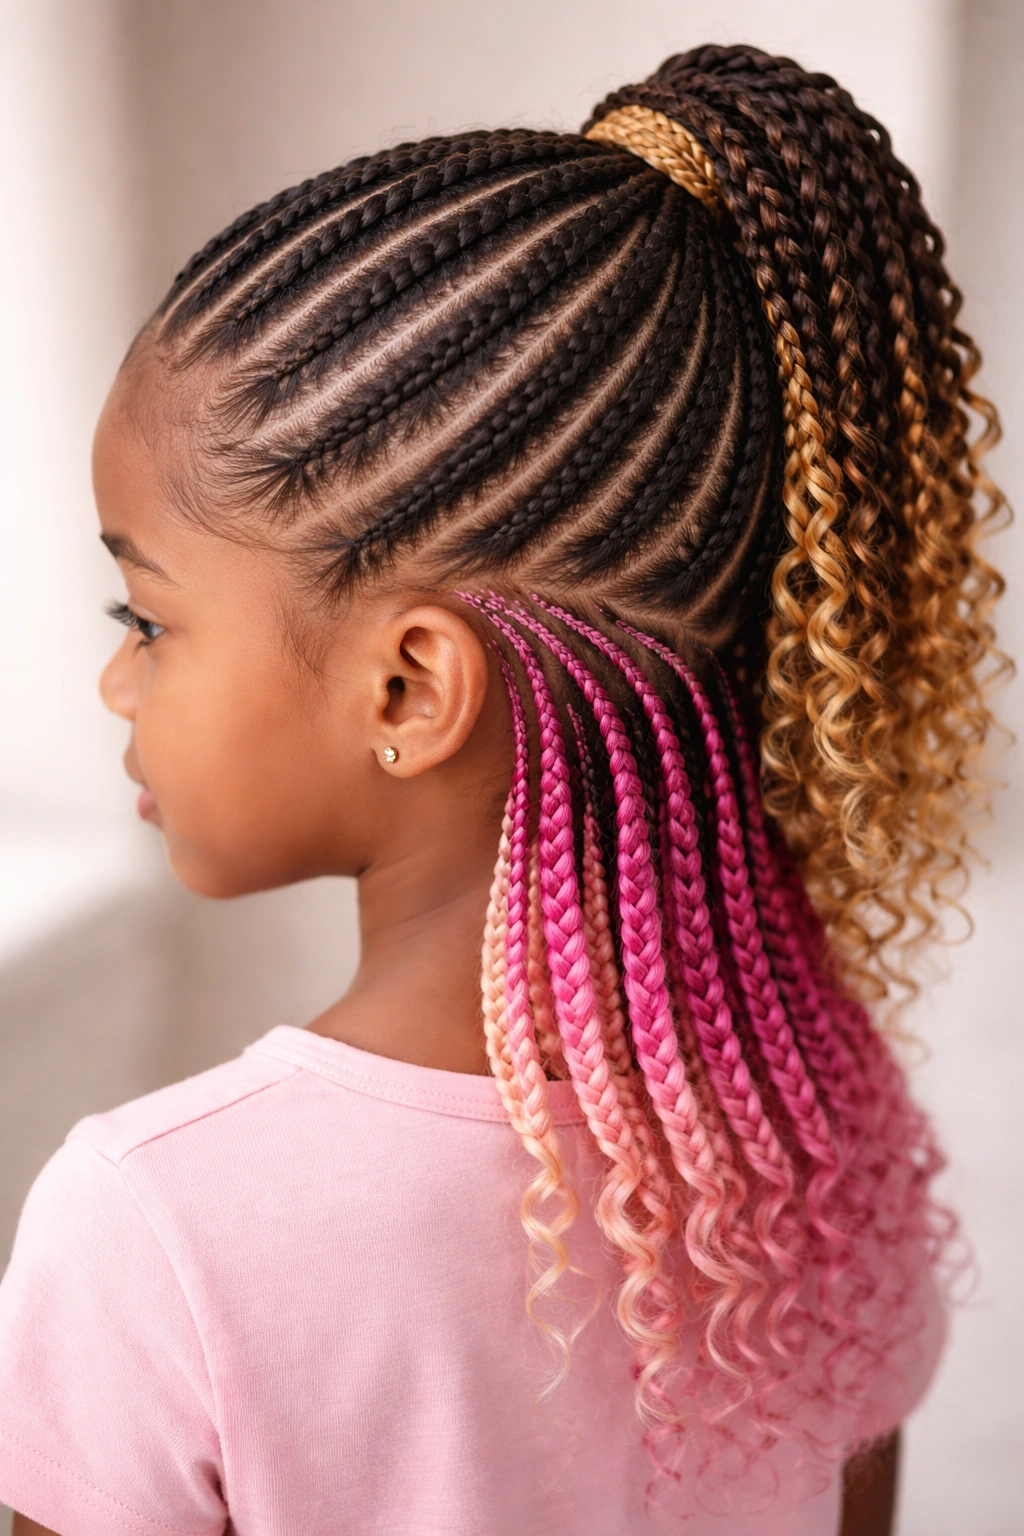
7. Two-Tone Cornrows with Color Blocking
This trendy style incorporates two distinct cornrow sections with a clear line of demarcation between them, often with contrasting braiding patterns or even temporary hair color. For example, you might create straight-back cornrows on top with curved cornrows underneath, or use extensions in a contrasting shade to create visual separation. This style is perfect for kids who love color and creative expression.
Color and Pattern Play
Two-tone designs let you experiment with color without permanent commitment by using colored extensions. The contrast between sections makes the design feel intentional and modern. This style suits kids with confident personalities who love standing out.
Color-Safe Styling Options
- Use temporary colored extensions in braids rather than permanent dyes
- Create sections with clearly different cornrow directions or sizes
- Combine tight cornrows with looser braids for pattern contrast
- Add thin tinsel-like extensions in metallic or bright colors
- This style typically lasts 1-2 weeks depending on extension quality
- Requires regular moisturizing because braids created with extensions can dry hair faster
8. Dutch Braids Half-Up with Braided Tail
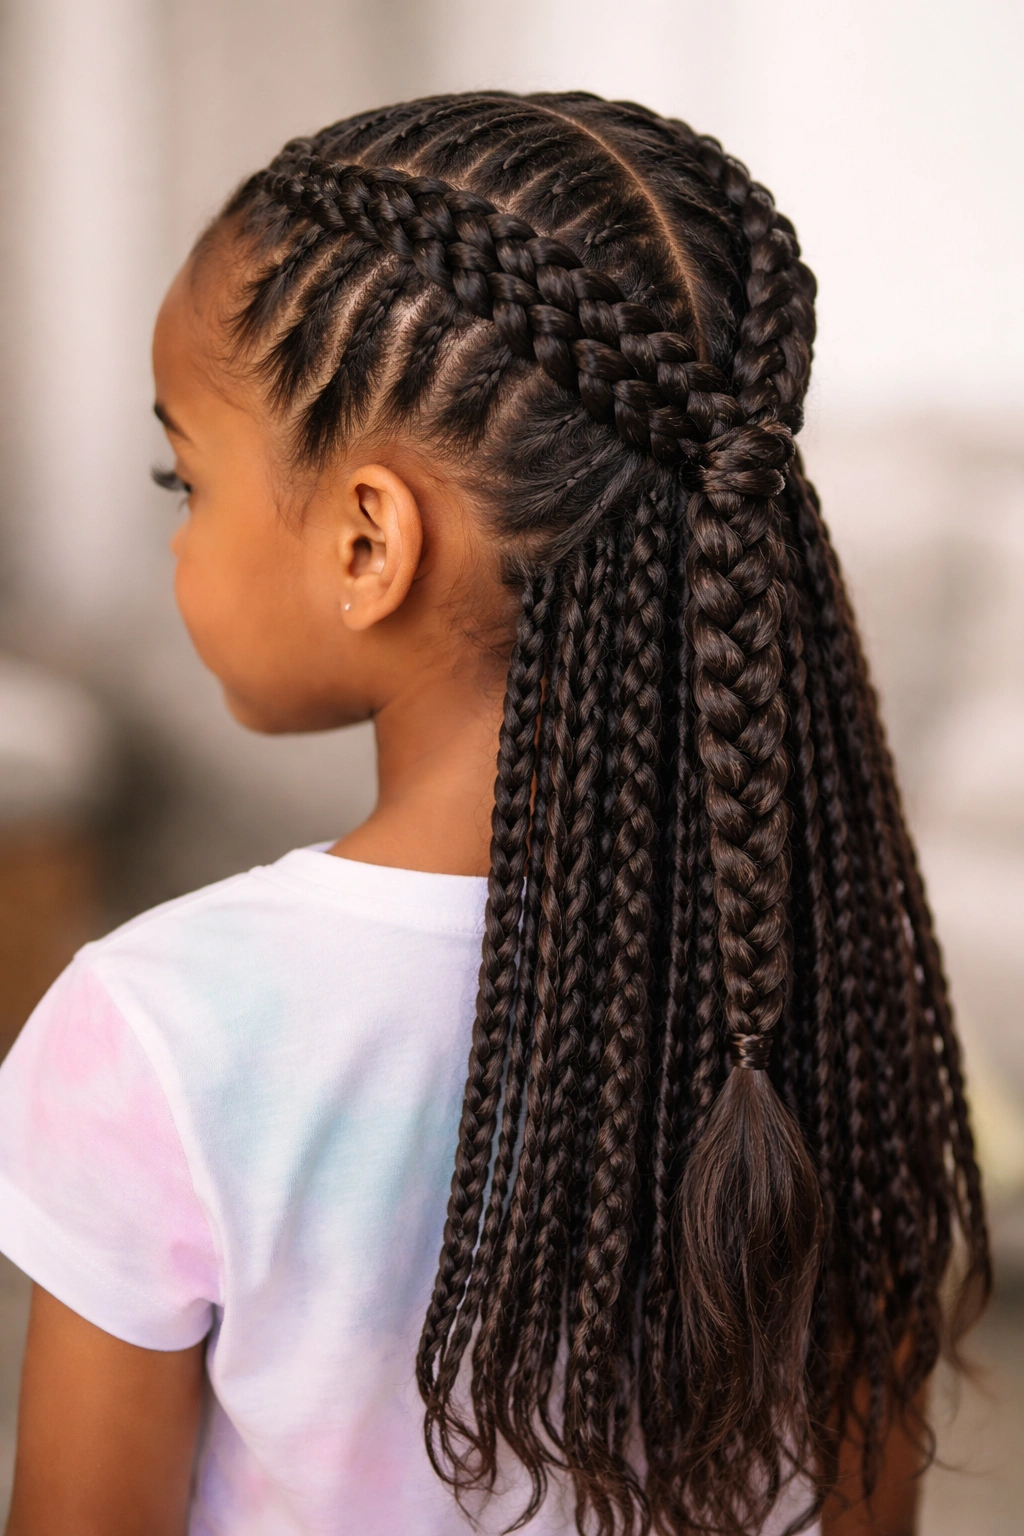
Dutch braids are reverse cornrows that create a raised, three-dimensional effect on top of the scalp. This style features two thick Dutch braids starting at the forehead and traveling toward the back of the head, connected at the crown in a half-up style. The remaining hair is braided loosely below, creating a continuous braided look from crown to ends.
The 3D Appeal of Dutch Braids
Dutch braids sit higher on the scalp and create more visual dimension than traditional cornrows. The raised effect is especially striking on kids with finer or thinner hair, as it creates the illusion of more volume. This style photographs beautifully and works well for school events.
Execution Details
- Section hair vertically from the forehead to the crown
- Create Dutch braids by crossing sections under rather than over
- Maintain even tension for consistent height throughout
- Bring both braids together at the crown and secure
- Continue braiding the loose hair below in one or more braids
- Finish with a colored elastic or decorative hair clip
- This style lasts 5-7 days and works best on hair at least 8 inches long
9. Cornrow Topknot with Twisted Sides
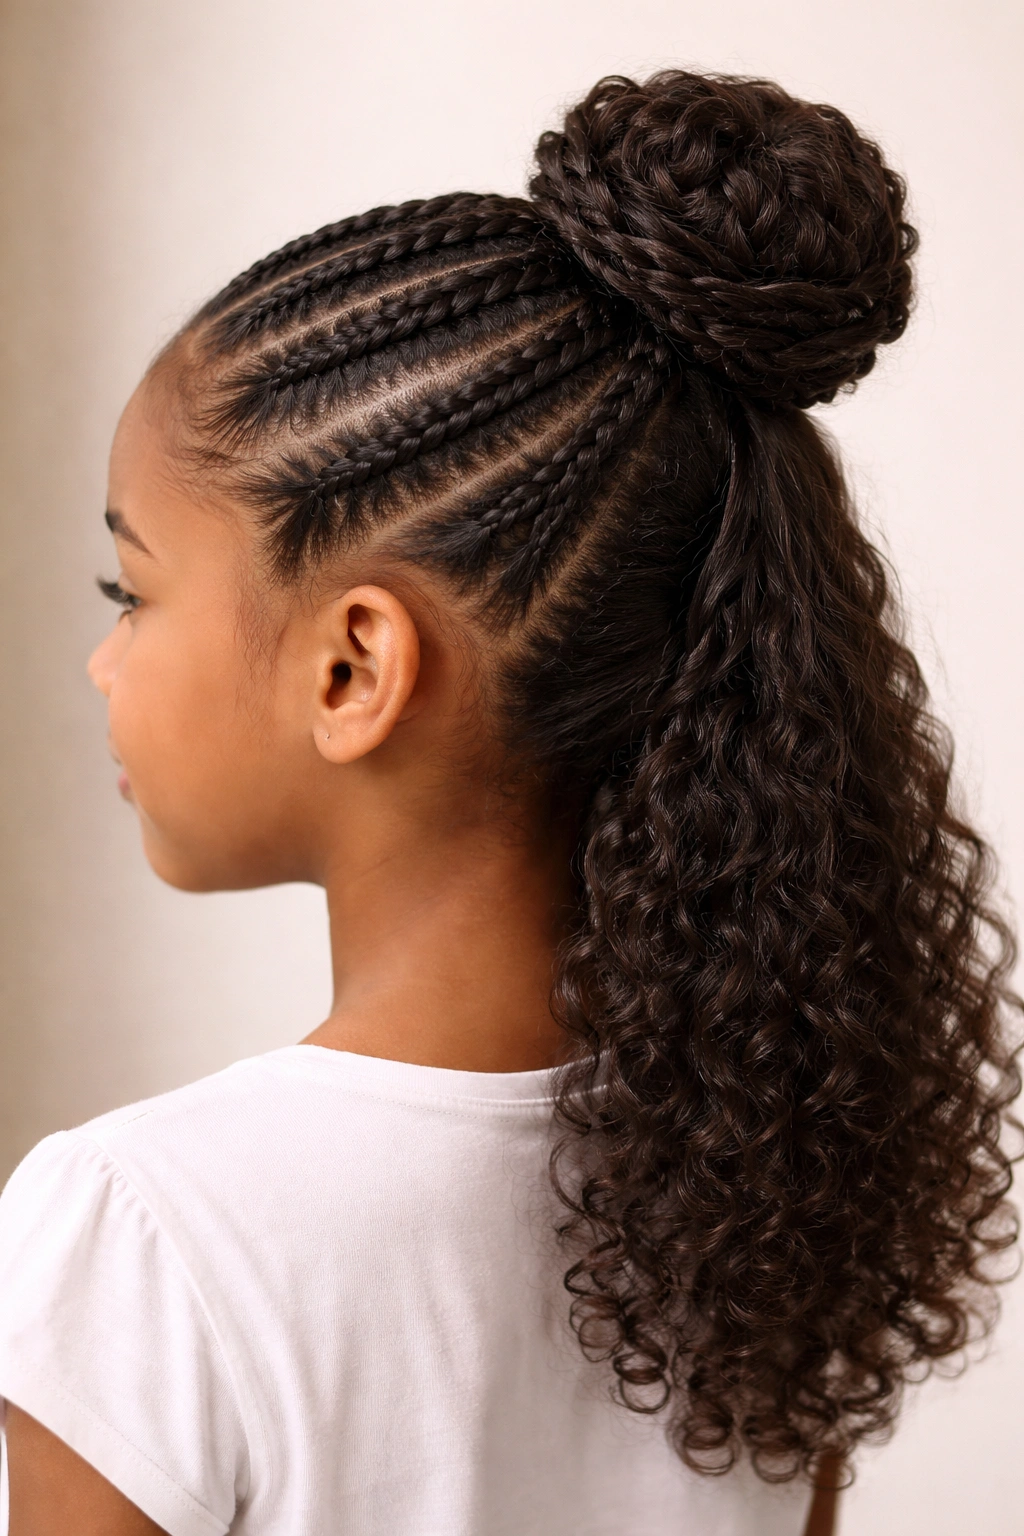
This playful style features two thin cornrows running down the sides of the head, connected at the nape, while the top section of hair is braided into a topknot bun. This creates multiple layers of interest and is perfect for kids who like their hair completely off their face. It’s ideal for sports, dance, gymnastics, or any active pursuits.
Practicality Meets Style
The complete topknot keeps all hair secured, making this style ideal for athletic activities or messy play. The side cornrows add decorative detail and visual interest without compromising functionality. Kids feel cute and sporty at the same time with this hybrid style.
How to Create It
- Create two cornrows on each side, starting at the temples
- Bring both cornrows to the nape and secure together
- Gather all remaining hair from the crown into a high ponytail
- Braid the ponytail into one thick braid
- Wrap the braid around the base of the ponytail to create a bun
- Secure with bobby pins and a light-hold mousse
- This style typically lasts 3-4 days before needing to be redone
10. Asymmetrical Cornrows with Long Braid
This artistic style features cornrows that run primarily on one side of the head, creating visual asymmetry and movement. The braids connect at the crown or ear level, and the loose hair is styled into one long, loose braid or left to flow freely on the opposite side. This modern design appeals to kids with an artistic, unconventional style.
Breaking Traditional Symmetry
Asymmetrical styles feel fashion-forward and contemporary while still protecting hair with braided sections. This design flatters different face shapes depending on which side you choose to feature the cornrows. It’s perfect for kids who like standing out and expressing individuality.
Design Considerations
- Create 2-3 cornrows on the preferred side, leaving the other side mostly loose
- Angle cornrows from the temple toward the back of the head
- Secure cornrows at the ear or behind the head depending on length
- Leave hair on the opposite side loose, braided, or gently curled
- This style works on any hair length but looks best with at least 10 inches
- Typically lasts 4-5 days before needing adjustment
11. Cornrow Feed-In with Gathered Ponytail
Feed-in cornrows are created using a special technique where extensions are added gradually along the braid, creating a smooth transition from the scalp to the extension. This style features feed-in cornrows that connect at the crown or back of the head, with the gathered loose hair secured into a secure ponytail below. This technique creates seamless, thicker-looking braids that blend beautifully with natural hair.
The Benefit of Feed-In Technique
Feed-in braids reduce stress on the scalp because tension is distributed more evenly along the braid rather than concentrated at the roots. This makes the style more comfortable for kids and safer for their hair health. The gradual extension addition creates a professional, salon-quality appearance.
Installation Process
- Begin cornrows at the hairline with just natural hair
- Gradually add extensions as you braid toward the back
- Create 2-3 thick feed-in cornrows across the head
- Gather all hair at the back into a secure ponytail
- The ponytail sits at the point where the braids end
- Secure with a colorful elastic or fabric scrunchie
- This style typically lasts 2-3 weeks with proper care
12. Reverse Cornrows with Loose Ringlets
Reverse cornrows (also called Dutch braids) are styled in a half-up configuration with loose ringlets cascading from the half-up point. This style uses at least three reverse cornrows that radiate from the front hairline toward a central meeting point at the crown or upper back. The loose hair below is styled with flexi-rods or pin curls to create defined ringlets or coils for maximum drama and style.
Glamorous and Polished
This combination of structured braids with soft, bouncy ringlets creates a balanced, sophisticated look. The reverse braids catch light beautifully and the ringlets add movement and personality. This style is perfect for special occasions like pageants, holidays, or celebratory events.
Creating Perfect Ringlets
- Create 3-4 reverse cornrows across the crown, angling toward a center point
- Secure braids at the meeting point with bobby pins
- Divide loose hair below into sections
- Roll each section on flexi-rods from the ends upward
- Leave rods in overnight or set with a light heat source
- Remove rods gently in the morning to reveal defined ringlets
- Arrange ringlets loosely around the shoulders
- This style typically looks fresh for 2-3 days before ringlets begin to relax
Final Thoughts
Cornrow half-up half-down styles offer kids the perfect combination of protective styling and creative expression. Whether you’re looking for an everyday style that lasts through the school week, a special occasion look that turns heads, or an active-play style that stays secure during sports and outdoor adventures, there’s a cornrow style to match every need and preference.
The key to successful cornrow styling is starting with a clean, well-moisturized scalp and maintaining proper tension throughout installation. Too much tension can cause discomfort and scalp damage, while too little tension means braids won’t last as long. Regular maintenance between styling—keeping braids moisturized and edges neat—extends style longevity and keeps your child’s hair healthy.
Each style in this collection can be customized further with colored extensions, decorative clips, beads, or metallic accents to match your child’s personality and preferences. Don’t be afraid to experiment with different cornrow patterns, thicknesses, and arrangements until you find the styles your child loves most. With practice and patience, you’ll develop the skills to create any of these looks at home, saving time and money while giving your child a hairstyle they’ll be excited to show off.