Tight-curl hairstyles that hold their shape are built for one thing: staying recognizable after the day has done its worst.
Humidity, scarf friction, headrests, a rough nap, a long commute — all of them can flatten a style that looked perfect near the mirror. Tight coils have memory, though, and when you work with that memory instead of fighting it, the outline lasts much longer than a loose style that depends on gravity alone.
The trick is usually not more product. It is smarter structure: a firm base, clean parting, enough stretch at the root, and a finish that dries in the silhouette you want. A curl that sets while it is still being guided tends to keep a cleaner shape. A curl that dries wherever it lands usually does not.
Some of the styles below are quick. Some take patience. All of them give tight curls a frame instead of leaving them to collapse.
1. Sculpted Wash-and-Go with a Side Part
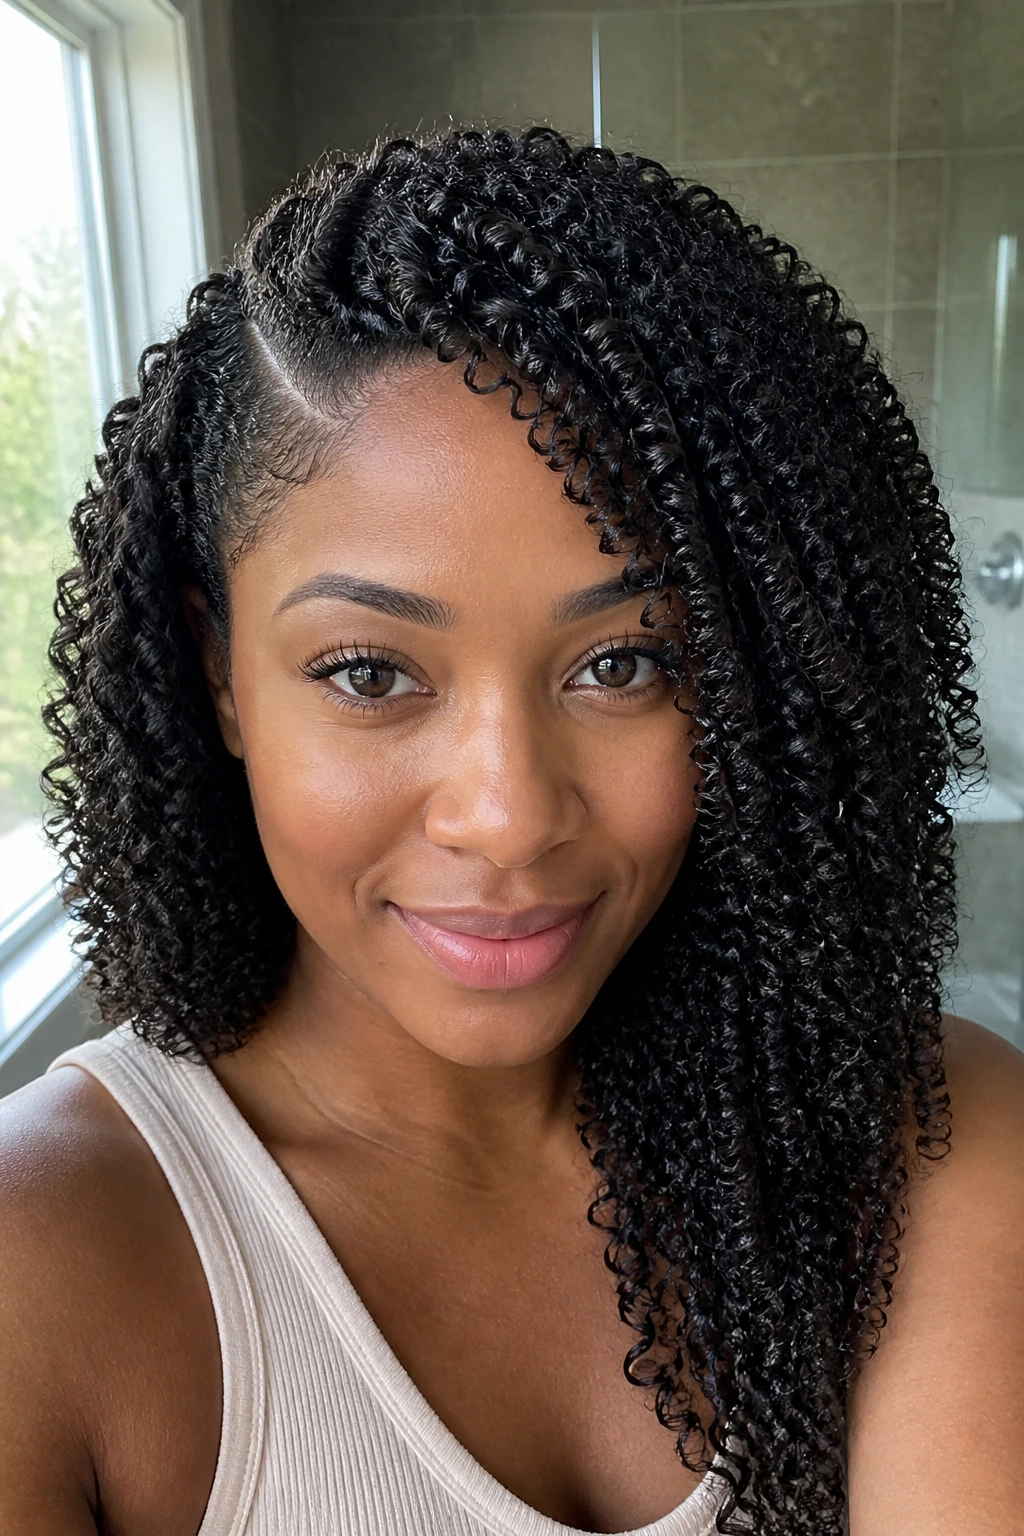
A good wash-and-go is not “messy curls, but on purpose.” It is a set. That difference matters.
The side part gives the style a visible line, which makes the whole shape look cleaner even when the curls are packed tight and springy. Add a strong-hold gel to soaking-wet hair, then let the curls clump before you touch them. If the hair dries in defined ribbons, the style keeps its shape longer and the part stays visible instead of sliding into a fuzzy cloud.
Why It Holds Shape
The part acts like a little road map for the curl pattern. Once the hair is directed to one side, the roots stop puffing up in every direction, and the silhouette becomes easier to control. That is why this style looks sharper than a center-part wash-and-go on many tight textures.
A diffuser helps, but only if you stay patient. Hover-dry the roots first, then cup the curls for a few minutes at a time. Touching too early ruins the cast, and the cast is what keeps the curl bundle intact.
Quick details:
- Use a leave-in cream under a strong-hold gel.
- Make the part while the hair is still very wet.
- Dry in sections until the curls feel set and a little crisp.
- Do not rake through the roots until the hair is fully cool.
Best move: pin the heavier side back for 10 minutes while it dries if you want the part to stay clean.
2. Tapered TWA with a Finger-Coiled Front
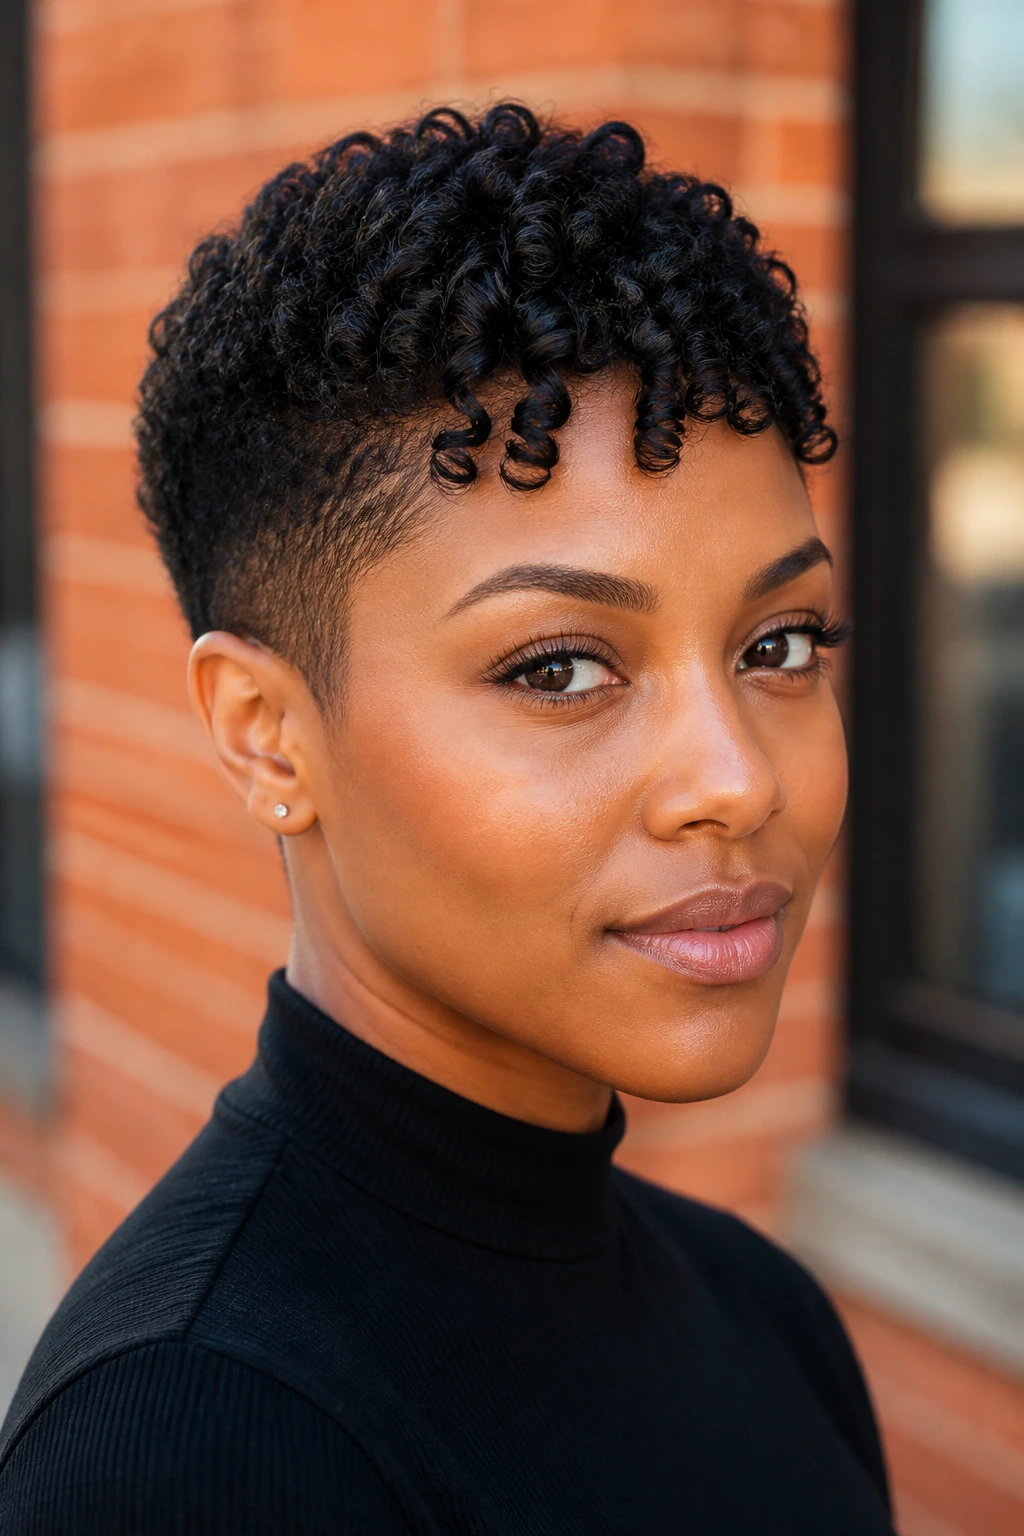
A tapered TWA gives you shape almost for free. The cut does half the work before styling even begins.
Shorter sides remove weight, so the top can stand up and stay rounded instead of slumping. A finger-coiled front adds polish where the eye goes first, which is the whole game with very short tight curls. You get structure at the hairline and softness everywhere else.
The reason this style holds up so well is blunt and practical: less length means less drag. That matters more than people think. A heavy curl stack will droop by midday; a tapered shape keeps the silhouette light, crisp, and easy to refresh with a mist bottle and a dab of cream.
I like this one for mornings when you do not want to fight the mirror. It looks deliberate even when the styling took twelve minutes.
If the front section tends to shrink up too fast, coil it on slightly damp hair and let it dry flat against the scalp for a while before fluffing. That tiny delay helps the spiral set in place instead of popping out like a spring.
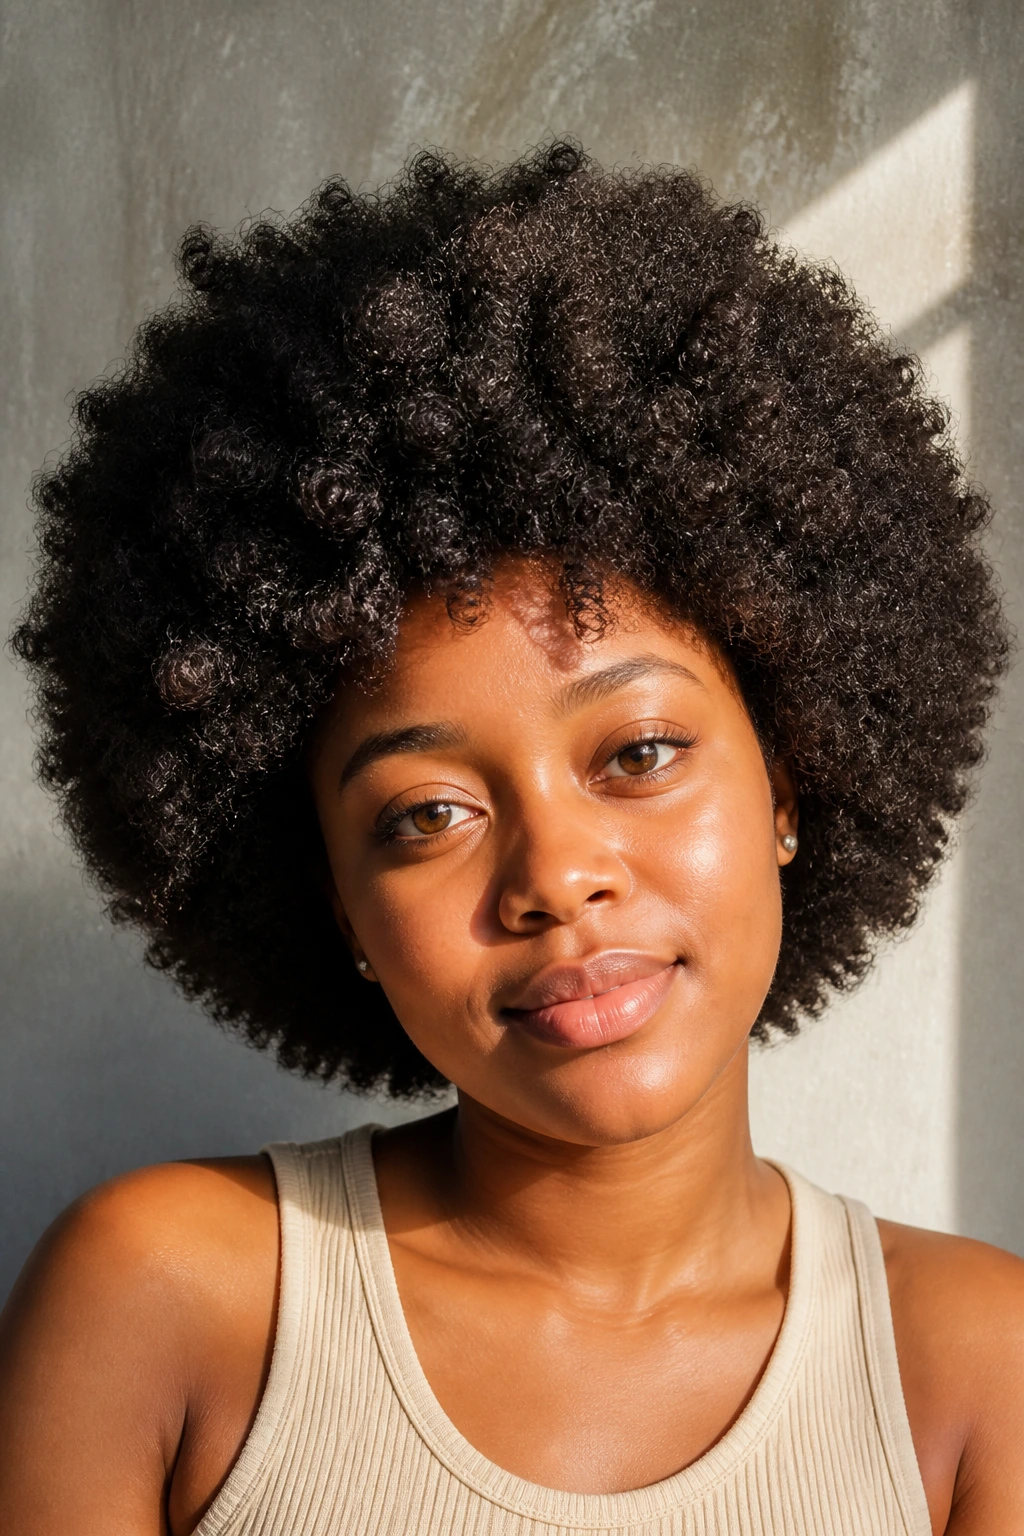
3. High Puff with a Clean Gelled Base
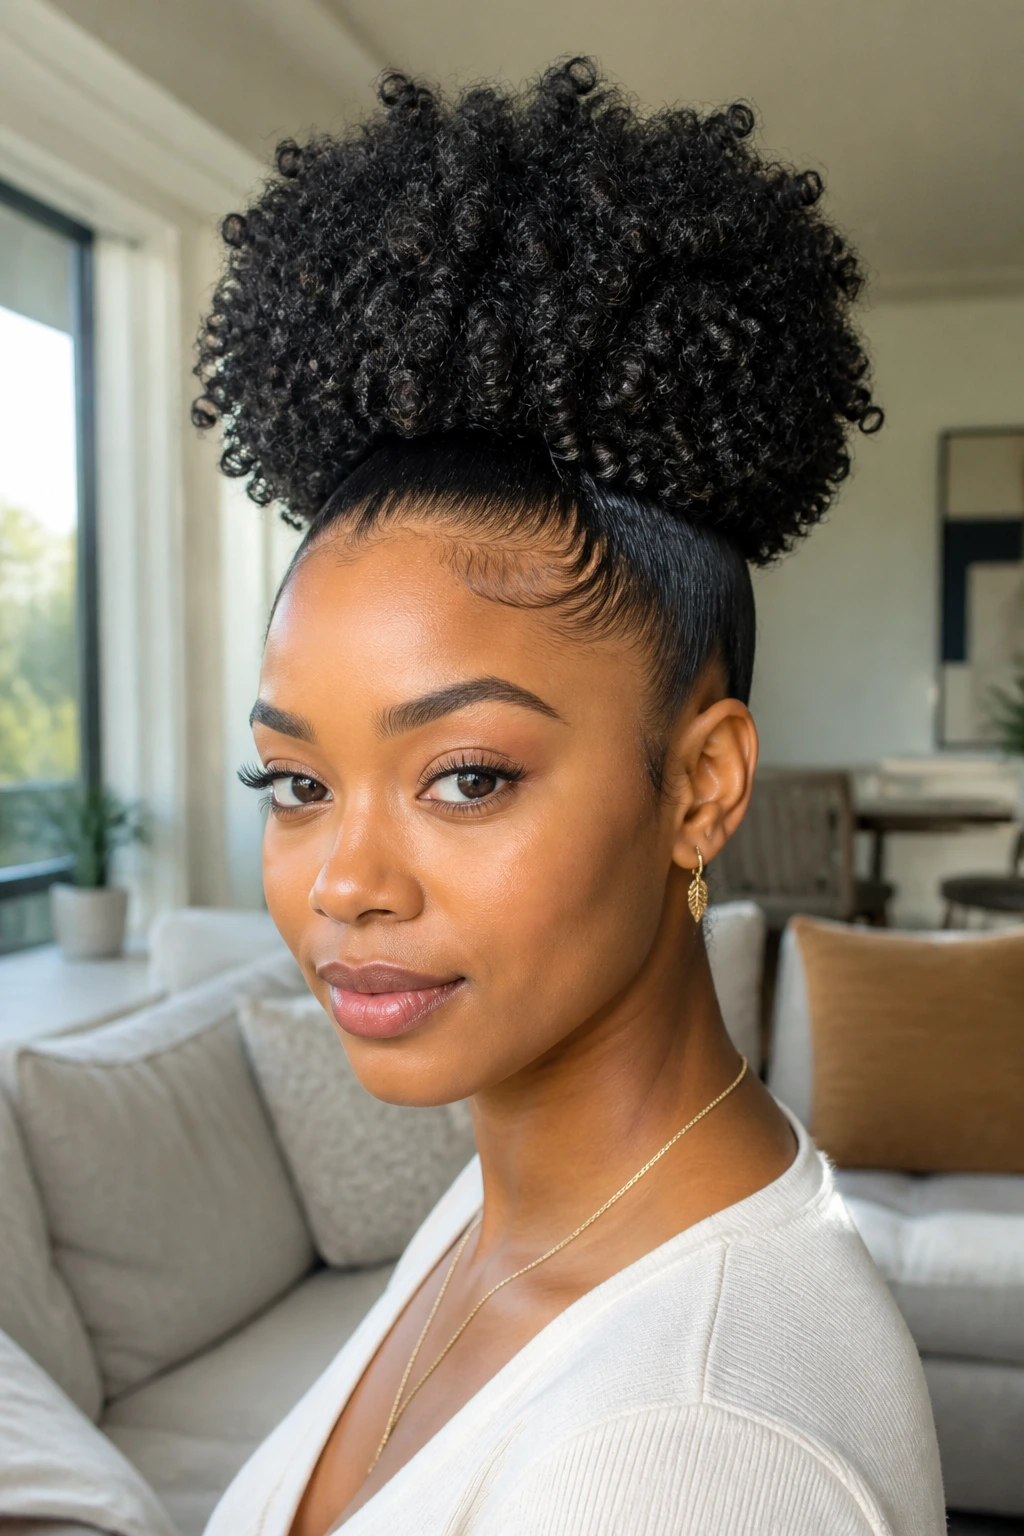
Why does a high puff hold its shape better than a loose ponytail?
Because the puff works with the curl’s own volume instead of crushing it. The base gets smoothed and anchored, then the rest of the hair rises above it like a soft crown. Tight curls are excellent at building height once they are gathered cleanly, and that height is what keeps the style from looking flat by lunch.
How to Keep It Sleek
Use a soft brush, not a hard one, and smooth the perimeter with a little gel before you tie the puff. A satin scrunchie or a gentle elastic keeps the base secure without creating a dent. If your hair is dense, placing the puff slightly higher than the crown gives the style better shape and a cleaner profile from the side.
A lot of people make the mistake of over-smoothing the puff itself. Don’t. Leave the curls full and touchable; only the base needs control. The puff should look airy, not pressed into a ball.
- Brush the edges back with a little water and gel.
- Tie the base once, then check the tension.
- Fluff the puff from the outside, not the roots.
- Finish with a light mist of shine spray if your hair looks dry.
That last step is optional. The clean base is not.
4. Crown Braid into a Curly Puff

The crown braid works like a frame, which is why this style stays neat even after a long day.
Picture the front and sides braided flat along the head while the back stays full and curly. You get control where the shape needs it most, and you keep volume where it looks best. The result is practical, but it does not look practical. That is the sweet spot.
The braid itself should not be pulled too tight. Tight enough to hold, loose enough to keep the scalp comfortable. A braid that bites into the hairline usually creates bumps later, and bumps break the clean line you were after in the first place.
This style is especially useful on second- or third-day curls that still have good definition but need a little reset. The braid hides frizz at the front. The puff gives you height at the back. The combo is sturdy without looking stiff.
Good reasons to choose it:
- It keeps curls off the face.
- It gives fine or medium-density hair a fuller-looking outline.
- It lasts through a full day without much touching.
- It works for casual days and dressier ones.
If you want a little polish, wrap one braid section with a tiny coil of hair at the end instead of a visible elastic. Small detail, big difference.
5. Chunky Twist-Out Bob
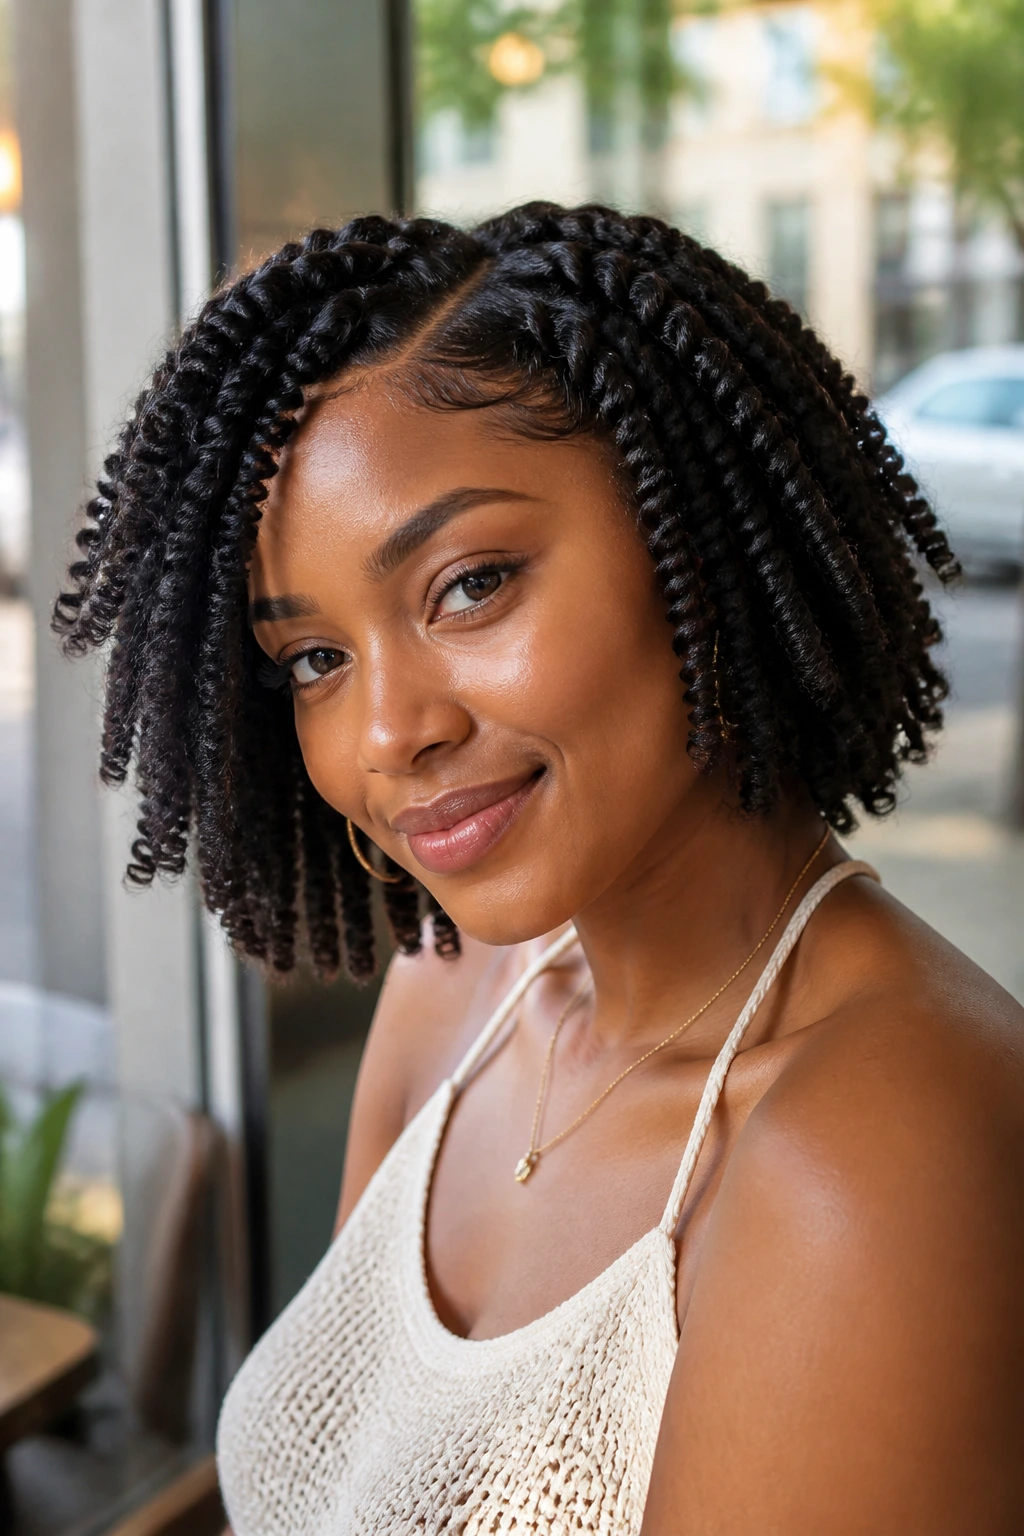
Chunky twist-outs are one of the few styles that can look soft and structured at the same time.
The reason they hold shape so well is simple: bigger twists create bigger curl groups, and bigger curl groups stay together longer. That means less frizz at the edges and a cleaner overall outline. On tight curls, a chunky twist-out can read almost like a bob even when the hair is technically longer than chin length.
The key is making the twists large enough to preserve definition, but not so large that the curl pattern collapses into a puff the second you separate it. Medium-sized sections usually work best. Let them dry all the way through — not “mostly,” not “kind of.” Fully. If the inside is still damp, the style will lose its shape fast.
I prefer separating twists with a tiny bit of oil on the fingertips. Not a lot. Just enough to stop the hands from snagging. Separate once, maybe twice, and then leave it alone. The more you keep fluffing, the faster the clean bob shape turns fuzzy.
A satin bonnet helps overnight, but it helps most when the twists are already dry and set. That sounds obvious. It still gets skipped.
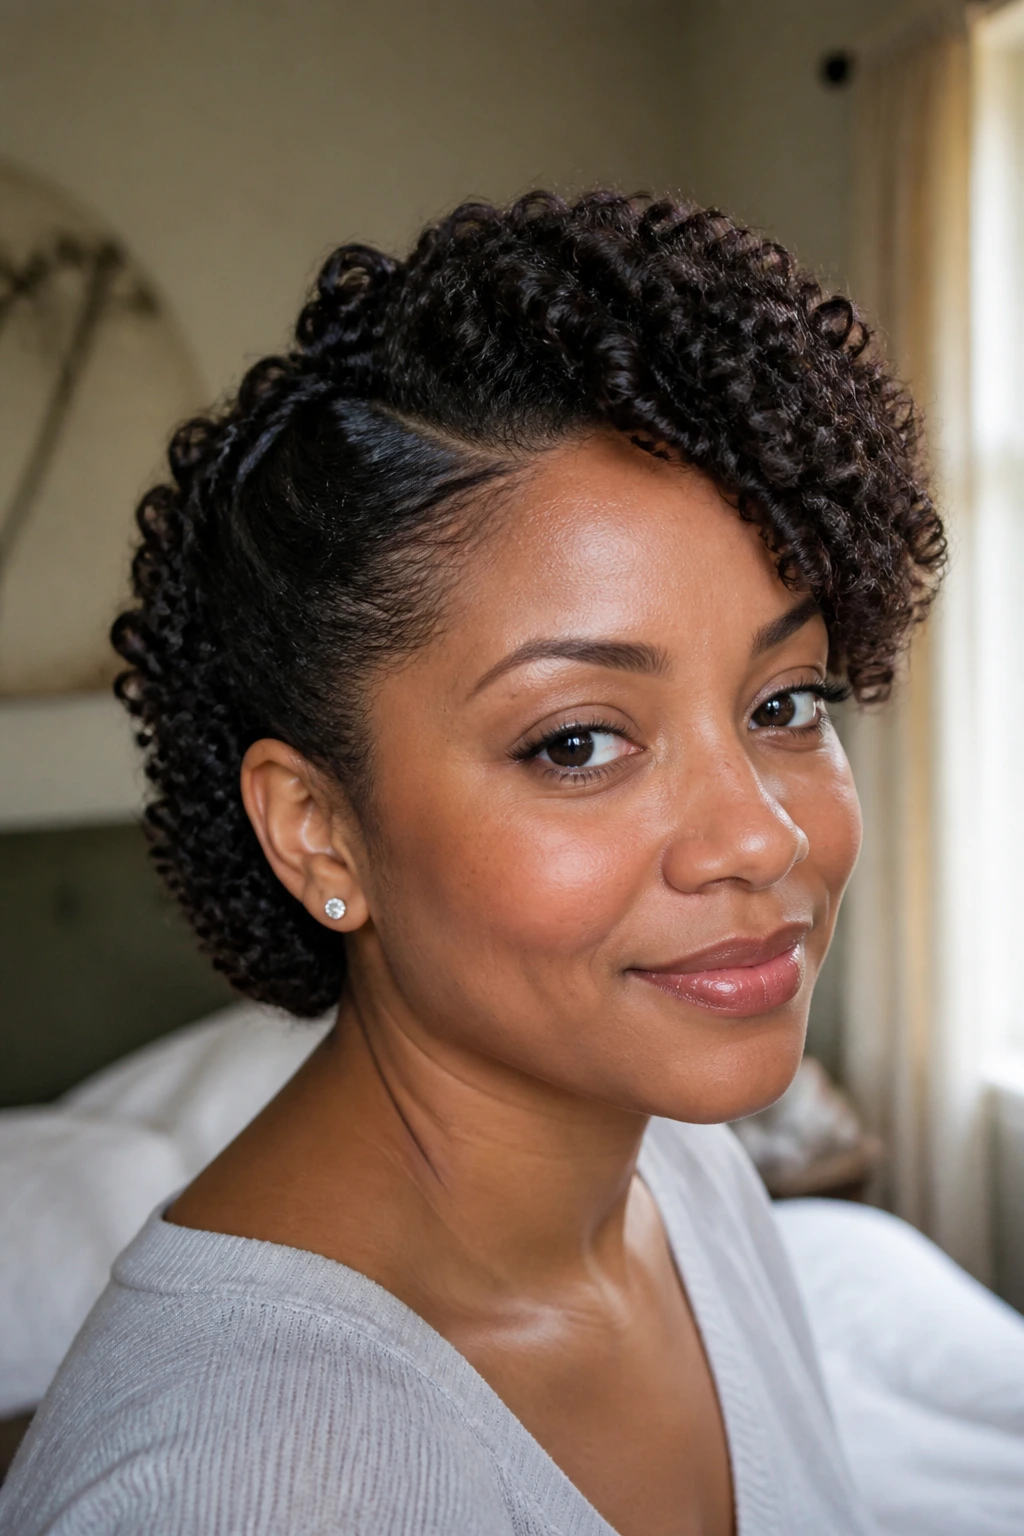
6. Bantu Knot Out with a Defined Halo
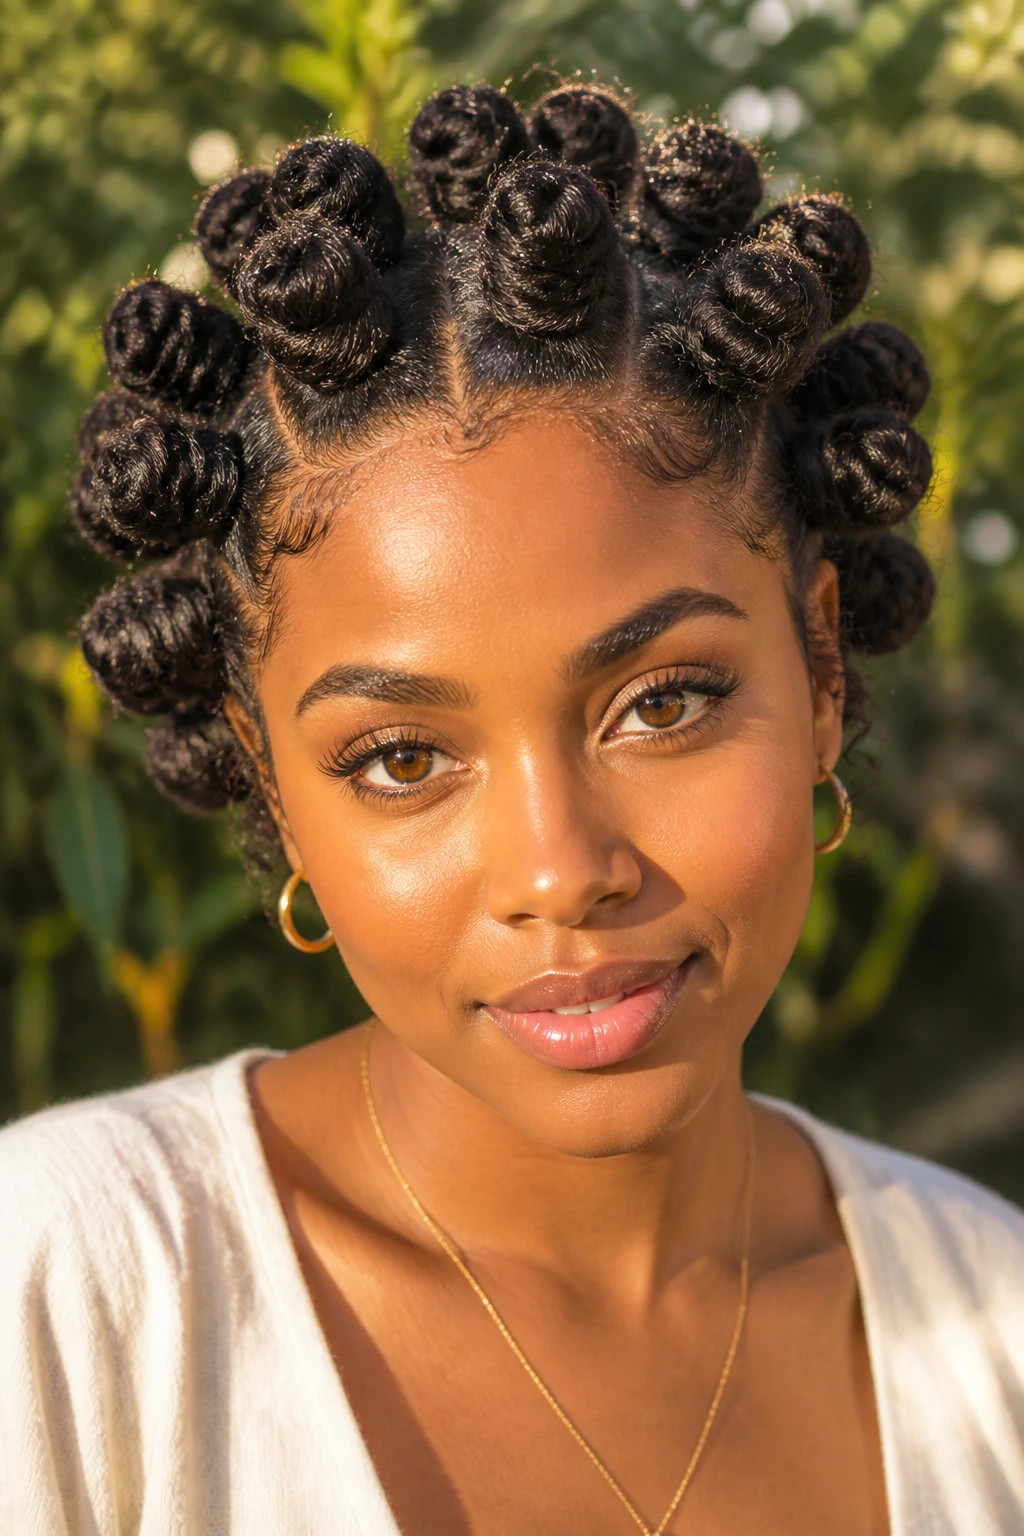
A Bantu knot out is sharper than most curl sets because it compresses the hair before it releases it.
That compression matters. Tight coils that spend time in neat knots come out with a rounder, springier bend than they usually get from loose drying. The halo around the face looks deliberate, and the shape tends to hold because each knot creates a repeatable pattern from root to end.
What Makes It Different
Unlike a twist-out, which gives you a stretched spiral, a knot out gives more of a compact curl turn. That makes the overall silhouette feel fuller near the scalp. It is one of the few styles that can make short or medium-length tight curls look almost architectural.
The number of knots changes the finish a lot. Fewer, larger knots mean bigger curl pieces and a softer outline. More, smaller knots give you tighter definition and a little more edge control around the perimeter.
If you want the style to last, set the knots on hair that is damp, not dripping. Drying them too wet is the fastest way to ruin the shape. They look cute while wet. Then they shrink unevenly and lose the neat halo effect.
This is the style I reach for when I want curls with a little drama but not a lot of daily maintenance. It does the showing off on its own.
7. Mini Twists Pulled into a Low Bun
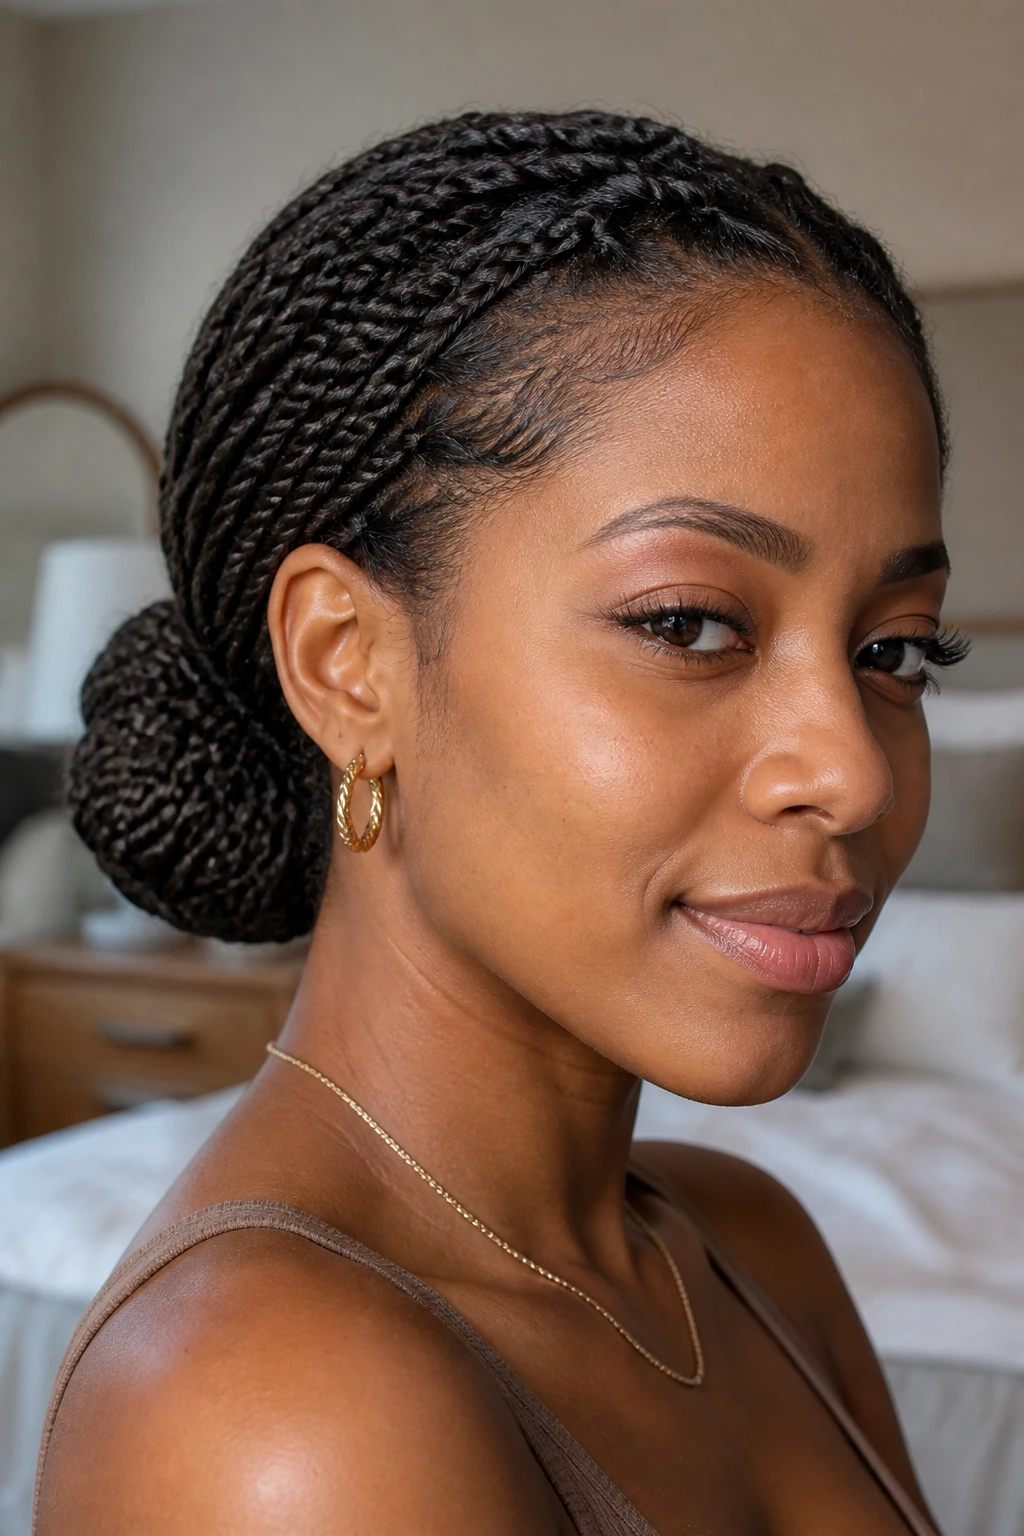
Need something tidy that does not collapse by noon? Mini twists pulled into a low bun are hard to beat.
The twist pattern gives the style memory, and the low bun keeps all that weight anchored near the nape instead of dragging the crown down. Tight curls love this setup because the twists hold their own shape even before they are gathered, which means the bun looks intentional rather than improvised.
Why the Bun Stays Put
The center of gravity is lower. That sounds technical, but the result is simple: less wobble, less sagging, fewer stray pieces fighting the outline. A low bun also hides shrinkage well, which is useful if your hair tends to puff wider than you want after a few hours.
Keep the twists small enough to stay neat, but not so tiny that the bun becomes brittle and hard to shape. A soft satin-covered elastic or a few long pins will hold the bundle in place without crushing the texture. If the ends are too bulky, tuck them under instead of forcing them through the elastic.
This style wears especially well when the parting is clean. Middle part, side part, or no part at all — pick one and commit. Half-committed parting makes the style look messy in a way that is not charming.
It is not the flashiest option. It is one of the most reliable.
8. Pineapple Updo with Wrapped Edges
A pineapple is not lazy hair.
It is a shape strategy. The curls are gathered high so the length stays off the shoulders, while the crown keeps its volume and the ends stay in loose, visible clumps. Tight curls hold this style well because the curl pattern itself does the work once the base is secure.
The trick is placement. Too low and the style turns into a flat puff. Too high and it can look strained. Aim for the top third of the head, then let the curls fall forward a little so the shape reads rounded instead of stiff. A wide satin band or a stretchy scarf keeps the base from slipping.
I like a pineapple when the curls are already dry and defined, because the style preserves what is there instead of trying to create something new. If the curls are fuzzy to begin with, the pineapple will only make that fuzz more obvious.
Use it when:
- You want a quick style that keeps curl volume.
- Your ends still look good on day two or three.
- You need a comfortable option for long wear.
- You want the hair off the neck without flattening it.
Wrapped edges or a patterned scarf can turn the whole thing from casual to finished in thirty seconds. Not bad for a style that starts with a scrunchie.
9. Half-Up, Half-Down with Clipped Sides
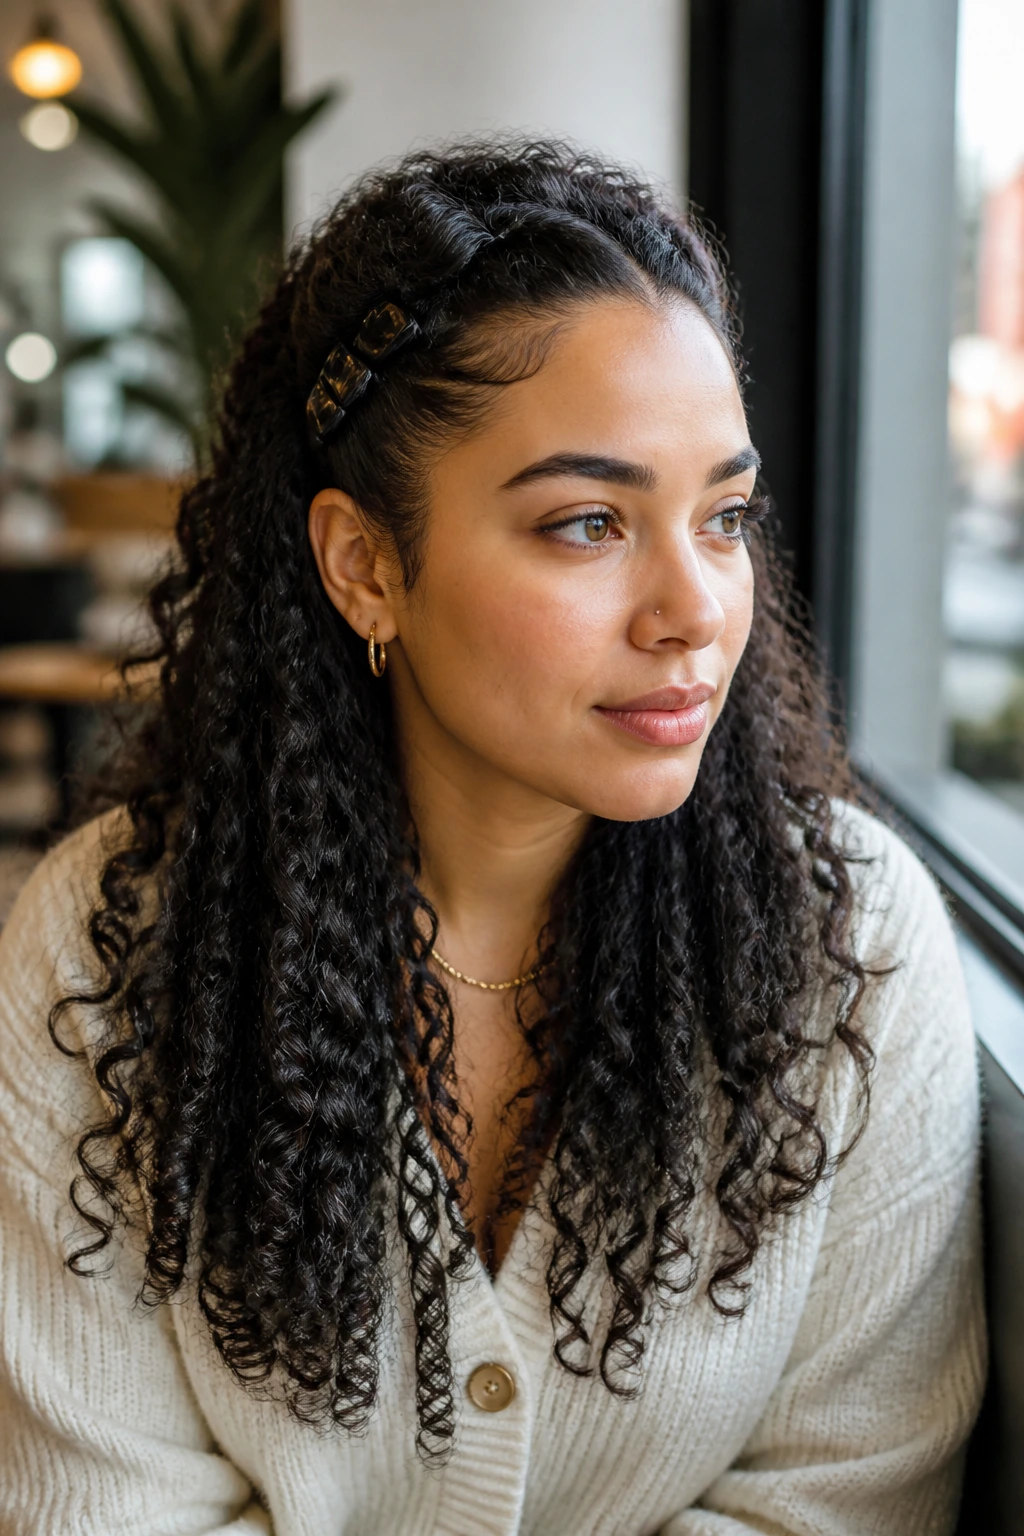
Want shape without going fully up? The half-up, half-down style gives you both.
The clipped sides keep the front controlled, and the loose back keeps the curl pattern alive. On tight curls, this matters because the shape can get wide fast if every section is left free. Pulling the top half back takes some of the bulk out of the face while still letting the lower curls show off.
Where This Style Wins
It is one of the best choices for layered cuts. Layers give the loose section movement, and the half-up piece stops the crown from spreading too far outward. The result feels balanced. You get height at the top and a softer outline at the bottom.
Use flat clips, comb clips, or small barrettes with a decent grip. Tiny decorative pins look nice, but they often fail if the hair is dense. The best clip is the one that stays put.
A little smoothing cream at the temples helps, though the point is not to slick everything down. Leave enough texture so the style still reads curly. If the top half is pulled back too tightly, the hair can start to look like it is trying to behave for a job interview it did not want.
This style holds shape because the top and bottom sections are doing different jobs. That split is the whole advantage.
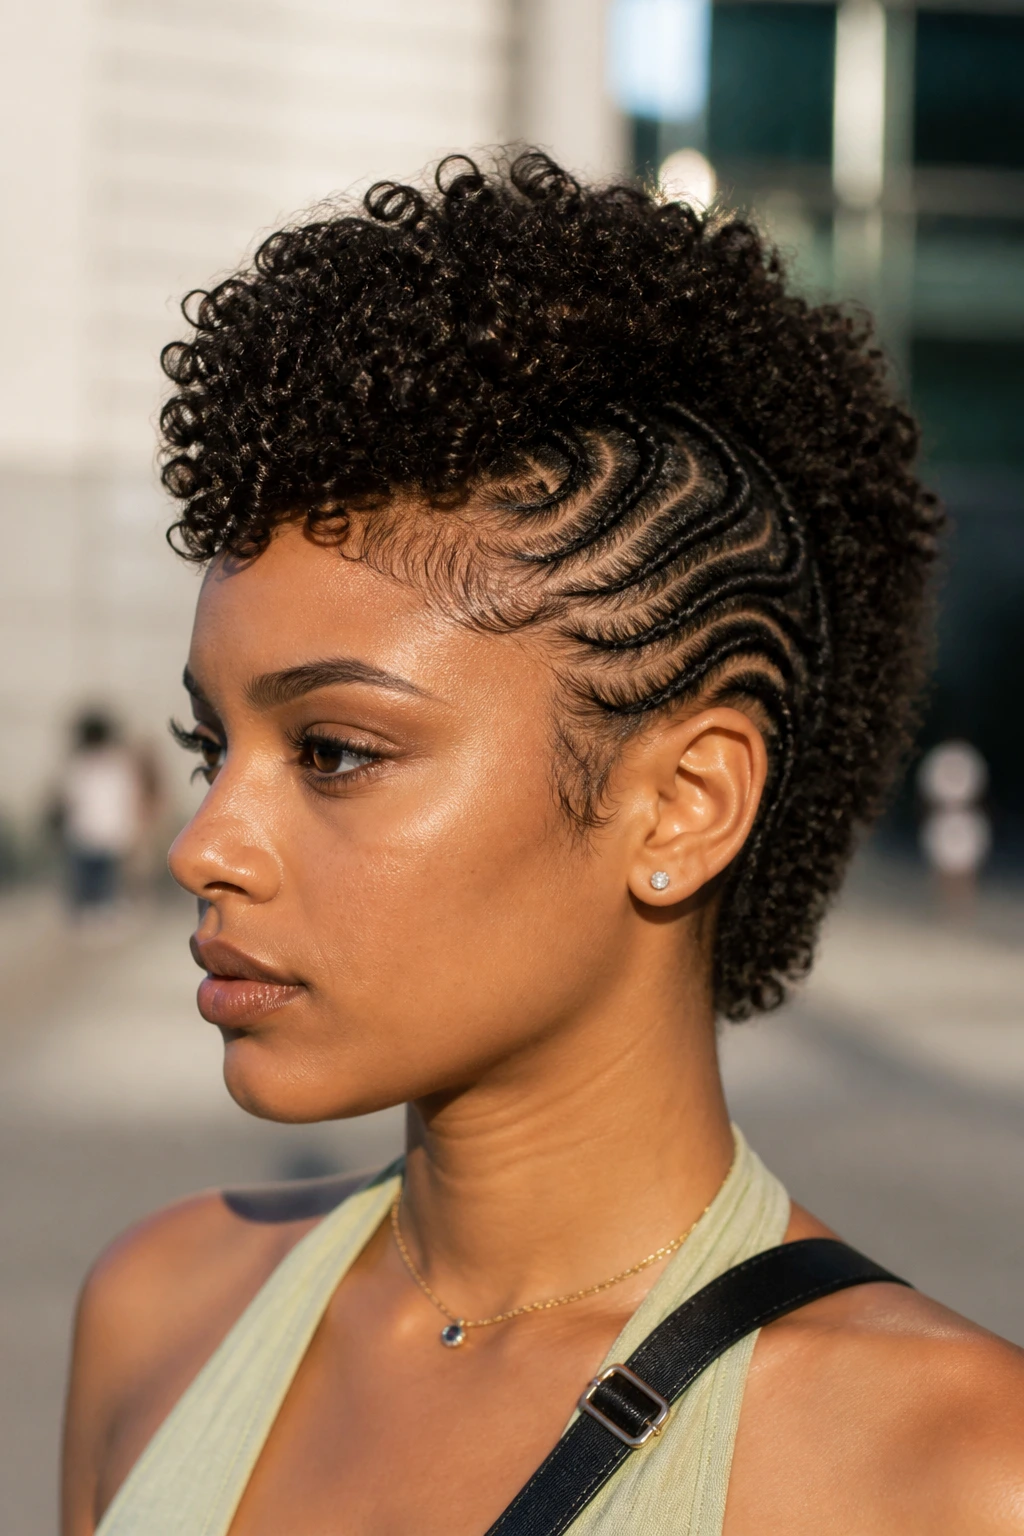
10. Flat-Twist Mohawk

A flat-twist mohawk gives tight curls a strong center line and keeps the sides under control.
That center line is the reason the style lasts. The twists lie close to the scalp, so the sides stay tidy, while the middle section rises in a ridge of curls or stretched coils. You get height without having to battle every strand into submission. Nice, clean, dramatic. Three words. No drama from the hair itself.
Start with clean parting. Really clean. If the sections wobble at the start, the whole mohawk will lean or puff unevenly. Flat twists work best on hair that has enough slip to move through the fingers, so a light leave-in plus a cream or gel blend usually makes the job easier.
- Twist the sides downward toward the nape.
- Keep the center section fuller and lightly stretched.
- Pin the ends under instead of letting them stick out.
- Finish the top with a small amount of oil on your fingertips for shine.
This style is one of those rare ones that can go casual or sharp without changing much. Swap a plain pin for a decorative one and it changes the mood fast. The shape stays the same either way.
11. Rounded Afro Picked at the Root
A rounded afro is one of the most honest styles for tight curls. It does not pretend the hair is something else.
Instead of chasing length, it builds a shape. That shape is what keeps it looking fresh. The root lift gives the silhouette height, while the ends stay undisturbed enough to hold their little curl clusters. If you pick too aggressively through the ends, the outline turns into a cloud. If you only lift at the root, the style stays round and defined.
The best version is usually set on hair that has been fully dried in its natural pattern. Some people stretch first with twists or banding. Some do not. Either way, the rounded shape comes from controlling where the volume goes, not from removing it.
A wide-tooth pick works, but a smaller pick near the temples gives more precision. Lift in short strokes and stop before you reach the ends. You want air at the root and structure at the perimeter.
I like this style because it refuses to collapse into a generic shape. It has edge. It has balance. And it lets tight curls look like tight curls, which is half the point.
12. Space Buns on Stretched Curls
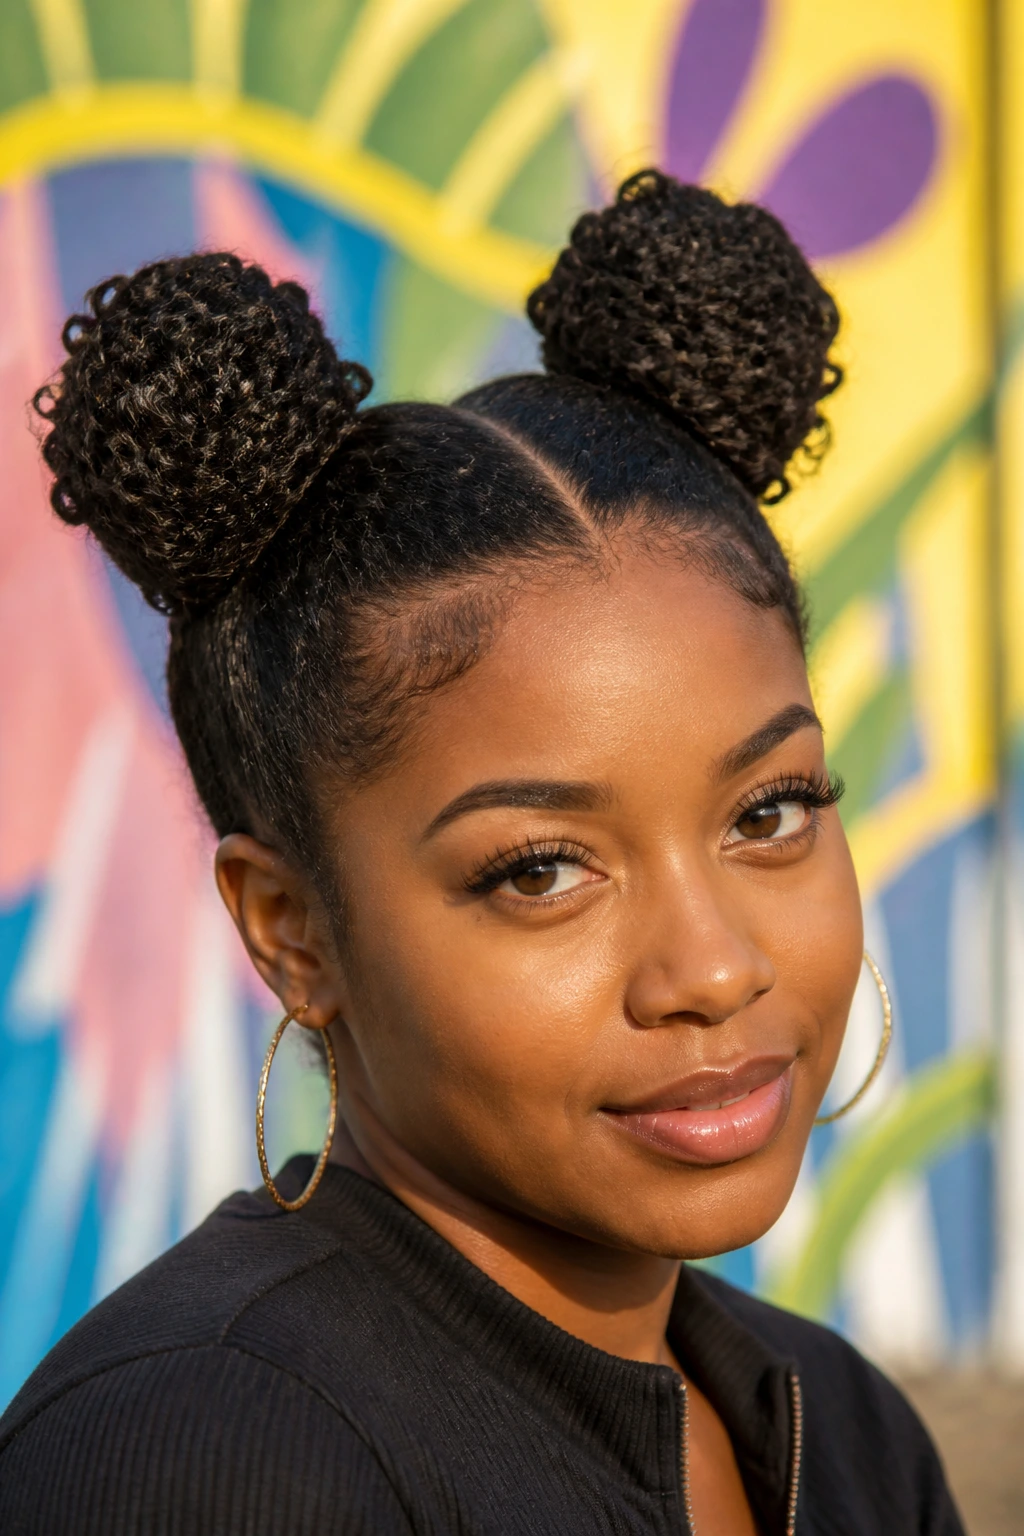
Space buns split the weight, and that is why they keep their shape better than a single heavy style.
Unlike one big puff or bun, two smaller buns give the curls separate anchor points. That means less dragging at the crown and less flattening at the back. If your hair is dense, the split also helps the style keep a cleaner outline from every angle, which is harder to do than it sounds.
Who They Suit Best
Space buns work well on stretched twist-outs, braid-outs, or blow-dried curls that still have a bit of body. Hair that is too shrunken can make the buns shrink into tiny knots, which is not the look most people want. You want enough length to wrap and enough texture to keep the buns from slipping.
A middle part keeps the symmetry neat. A slightly off-center part can soften the whole thing if the face shape needs it. Either way, the buns should sit high enough that they do not rub the neck, but not so high that they look like they were tied on in a rush.
A few bobby pins hidden under each bun help a lot. So does a light gel on the part. Not a helmet. Just enough hold to stop the hair from puffing into the part line.
This style has a playful look, but the structure underneath is serious.
13. Side-Swept Curly Roll and Tuck
There is something satisfying about a style that looks complicated but only depends on good pin placement.
The side-swept roll and tuck takes tight curls, rolls them back from one side, and hides the ends under the body of the style. That creates a smooth front arc and a fuller side sweep, which is why the shape stays neat even after a long day. The curls are still there; they are just organized.
How to Get the Most From It
Start on damp or lightly misted hair. A tiny amount of cream or gel on the front section helps the roll stay flat without getting crunchy. Then use pins along the scalp line, not through the middle of the curl clump. That little difference keeps the curl pattern intact and avoids the snaggy look that shows up when pins are jammed in too deep.
This style shines on medium-length tight curls, especially when you want something a little dressier without bringing out a whole arsenal of tools. It also works when the hairline needs a break from repeated slick-back styles. The roll gives control without pulling every strand tight.
A decorative comb or one bold pin can finish the look without changing the shape. I prefer one piece that does a clear job over five small pieces that fight each other.
14. Curly Faux Hawk with Shaped Sides
A curly faux hawk makes the most of tight curls because it keeps the sides disciplined and lets the center section do the talking.
The sides can be braided flat, pinned close, or gelled into neat curves. The center stays high, full, and textured. That separation is what keeps the style from blurring into a single puff. You get a clear silhouette from the front and a strong profile from the side. Good shape. Good attitude.
The center section should be fluffed with your fingers or a small pick, not yanked apart. You want the curls to rise, not fray. If the sides are too loose, the whole style loses that hawk shape and turns into a vague curly mound. That is exactly what this style avoids.
I find this one especially useful when the goal is polish with a little drama. It reads sharper than a regular puff and more controlled than a loose fro. It also gives short and medium tight curls more vertical presence, which is a fancy way of saying it helps the hair look intentional.
Best setup:
- Smooth the sides with gel or cream.
- Pin or braid them flat.
- Leave the center section fuller.
- Lift the center at the roots first, then shape the ends.
If a style can look bold and still survive a windy day, I pay attention.
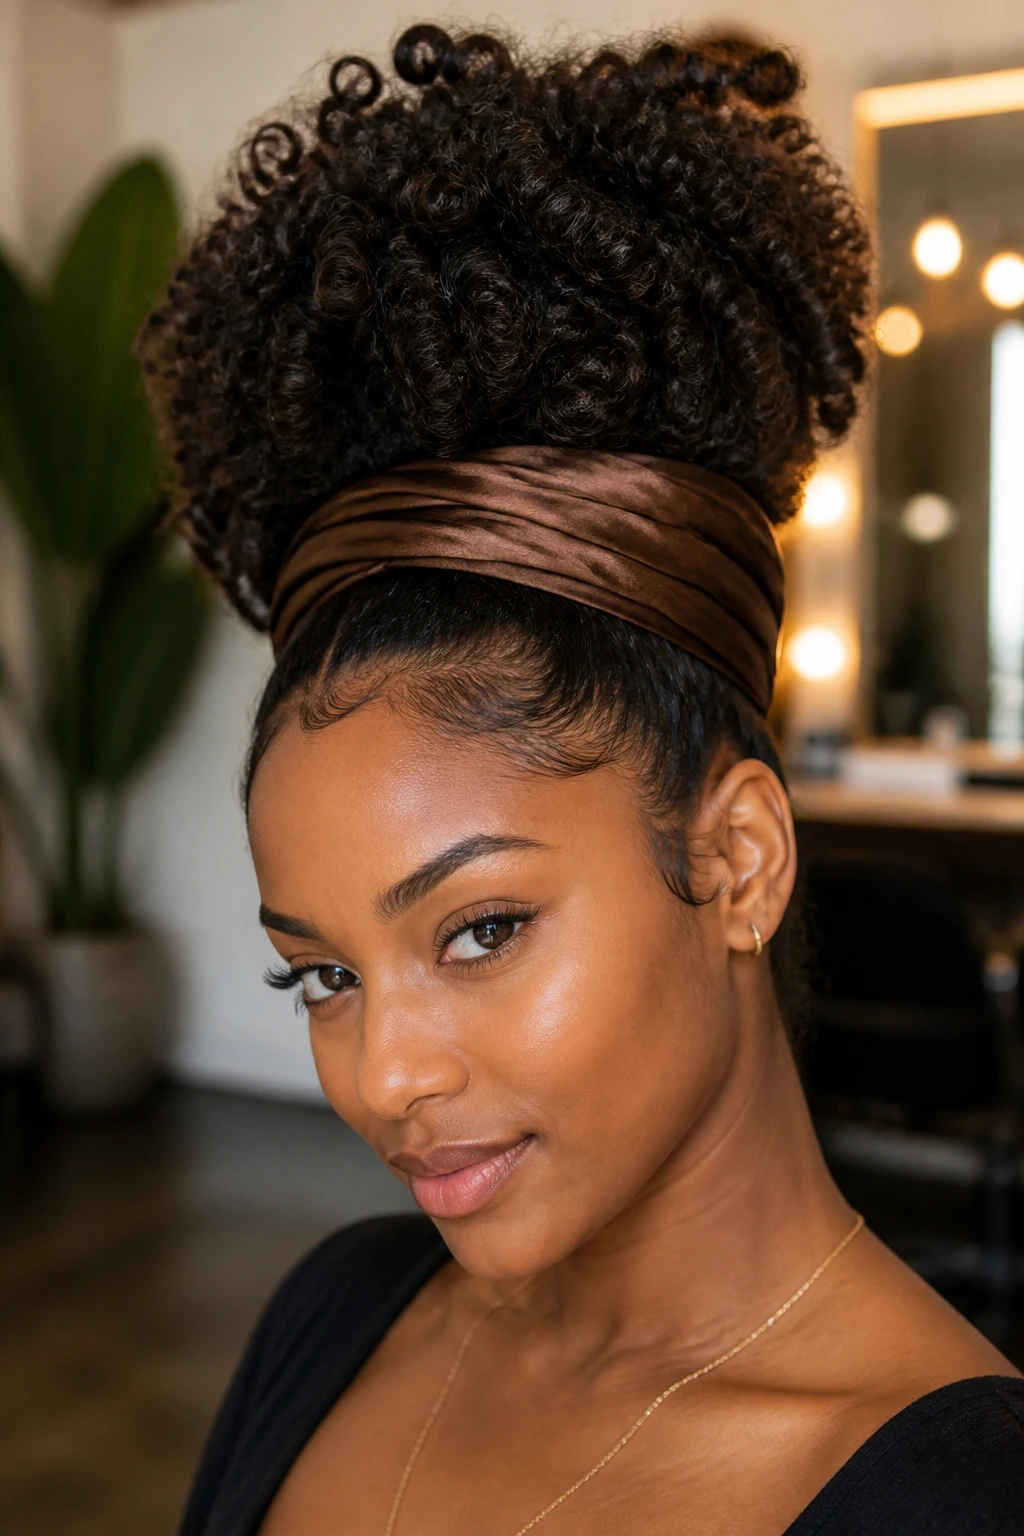
15. Scarf-Banded Puff
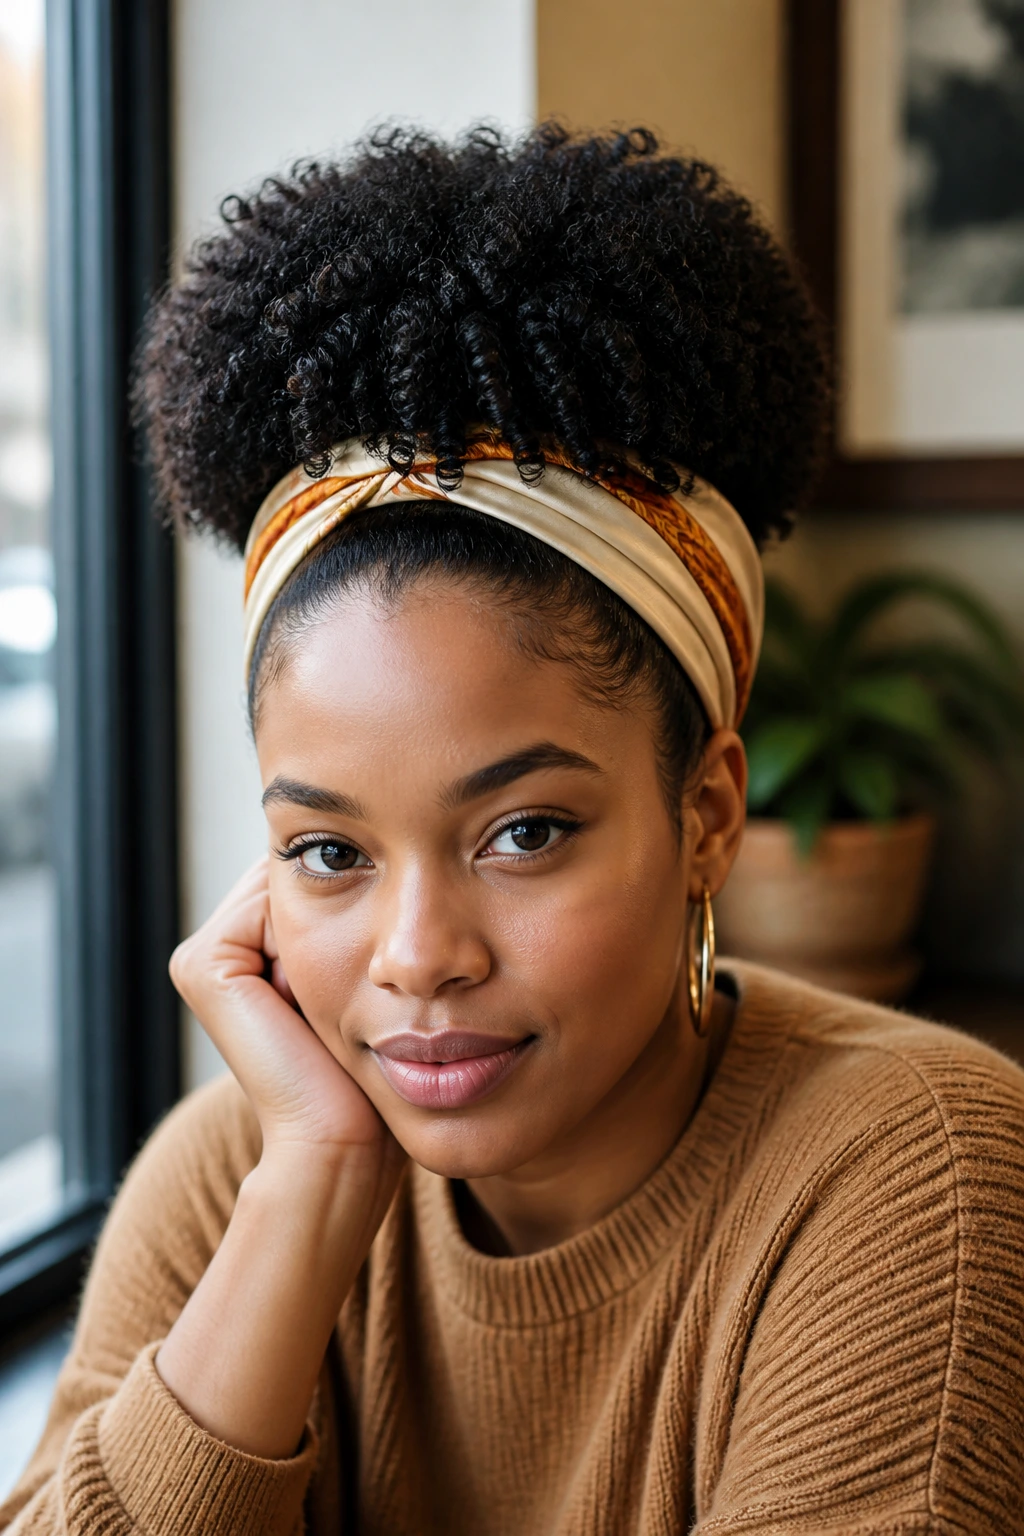
When time is short and you still want the hair to look finished, a scarf-banded puff does the heavy lifting.
The scarf gives the puff a visual frame. That frame matters because it keeps the eye on the shape instead of on stray frizz at the hairline. Tight curls already bring volume; the band just tells that volume where to sit. A wide scarf in satin, cotton, or a light printed fabric can change the whole mood, but the structure stays the same.
A clean band line at the front is what makes this work. Smooth the base first, tie the puff, then wrap the scarf so it sits flat without squeezing the edges. Too much tension gives you a headache and dents at the front. Too little tension and the scarf slips by mid-afternoon. There is a narrow middle ground here, and it is worth finding.
Small details that help
- Place the puff high enough to keep lift at the crown.
- Fold the scarf once if it feels too bulky at the forehead.
- Leave the puff itself loose and full.
- Match the scarf texture to the mood of the outfit, not the other way around.
This style is the one I reach for when the rest of the day is already full and the hair still needs to look like I meant it. That is usually the whole problem with tight curls: they hold shape beautifully when you give them one.