Busy mornings are where afro hairstyles earn their keep. If your hair sits in tight coils or a fluffy cloud of shrinkage, you already know the difference between a style that takes six minutes and one that eats your whole mirror time.
A good fast style should do three things: keep your hair off your face, make the shape look deliberate, and survive the rest of the day without constant touching. That is a modest ask. Still, plenty of styles fail because they fight the texture instead of working with it.
Most quick looks lean on the same quiet tricks: a little stretch, a clean part, one strong accessory, or a puff placed where the hair naturally wants to sit. A spray bottle, a soft brush, a pick, and a few bobby pins can carry more weight than a shelf full of products.
Perfection wastes time.
1. The High Puff That Cleans Up a Morning Fast
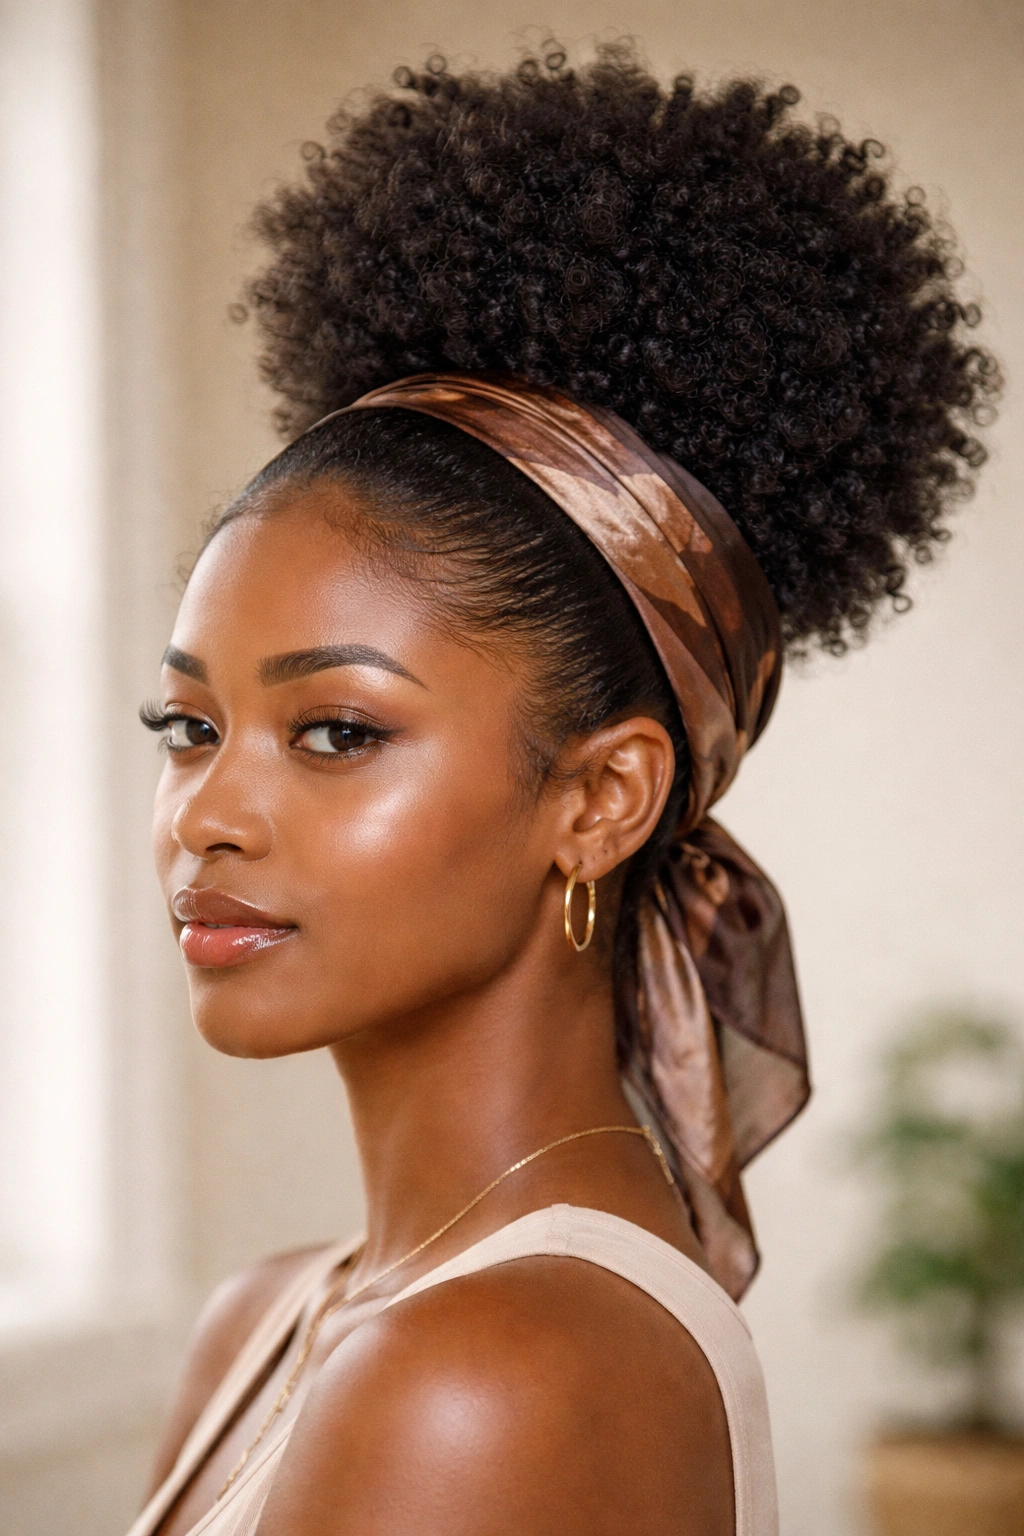
The high puff is the shirt-and-jeans of afro styles. It looks put together, it works on most lengths, and it does not ask you to section your hair into tiny little projects before coffee.
I like it because it gives your crown height without needing precision. Gather the hair upward, smooth the sides with your hands or a soft brush, and secure it with a stretched elastic or puff band. If your hair is already stretched from braids, twists, or a twist-out, the puff sits even cleaner. If not, it still works. It just looks fuller and rounder.
Why It Saves Time
- It needs one main tie point at the crown.
- It hides uneven curls fast.
- It works on hair that is stretched, day-old, or lightly damp.
- It gives shape even when the rest of the style is loose.
The trick is not to over-smooth the front. Leave a little texture. That soft edge keeps the puff from looking stiff or helmet-like. If your roots are thick, lift them with a pick once the band is in place, then stop. Too much fiddling flattens the top and makes the style look tired.
Best tip: wrap a satin scarf around the edges for 2 minutes while you get dressed. It settles flyaways without crushing the puff.
2. The Pineapple Puff for Day-Two Curls
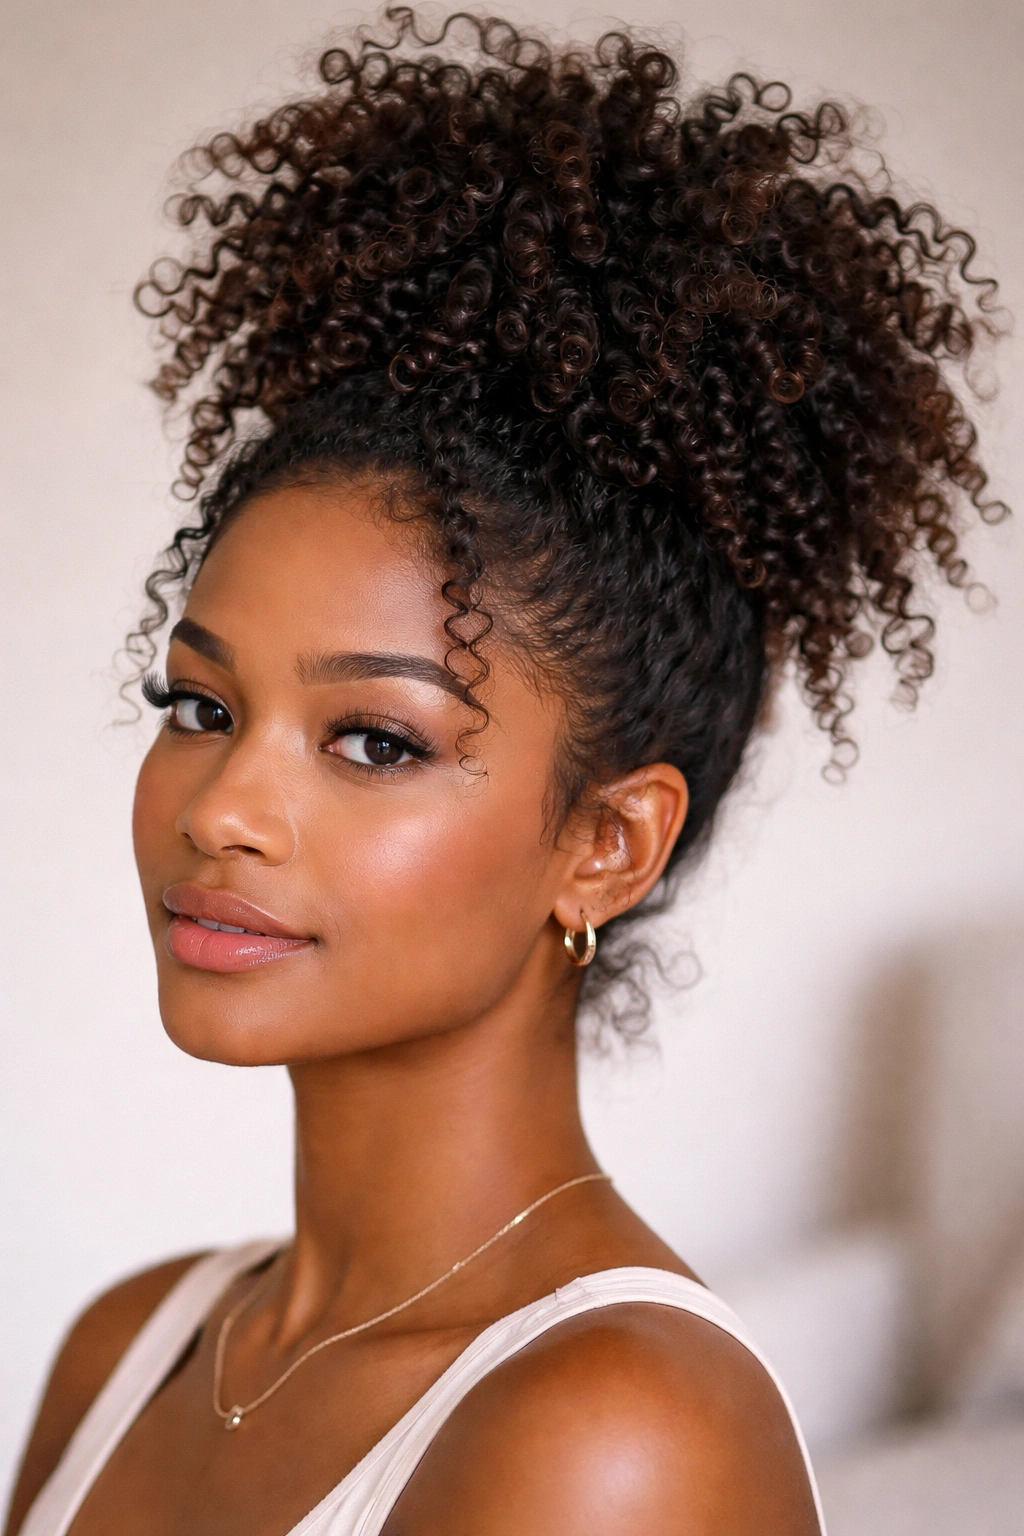
What if your curls already have some shape and you do not want to start over? That is where the pineapple puff earns its place. It is basically a high, loose gather that keeps the ends safe and the crown lifted.
This one is especially kind to a twist-out or stretched afro. Pull the hair to the top of the head, but do not drag it tight. Let the curl pattern sit upward and forward. The result is softer than a traditional puff, and it keeps the curl clump intact instead of grinding it flat against your head.
How to Keep the Shape
Use a soft scrunchie or stretchy band and stop once the hair is secured. You are not trying to make the base tiny. If the band bites too hard, the style starts looking cramped, and that is exactly what you do not want on a rushed morning.
A small puff of edge control along the hairline can help, but only if your hair usually likes it. Heavy gel is a mistake here. It makes the front hard and can leave the curl pattern at the hairline looking crunchy by lunch.
This style is best when the rest of your hair still has a little definition from the day before. If the curls are fuzzy, it still works, but the vibe becomes softer and more casual. Fine by me. Not every morning needs a polished finish.
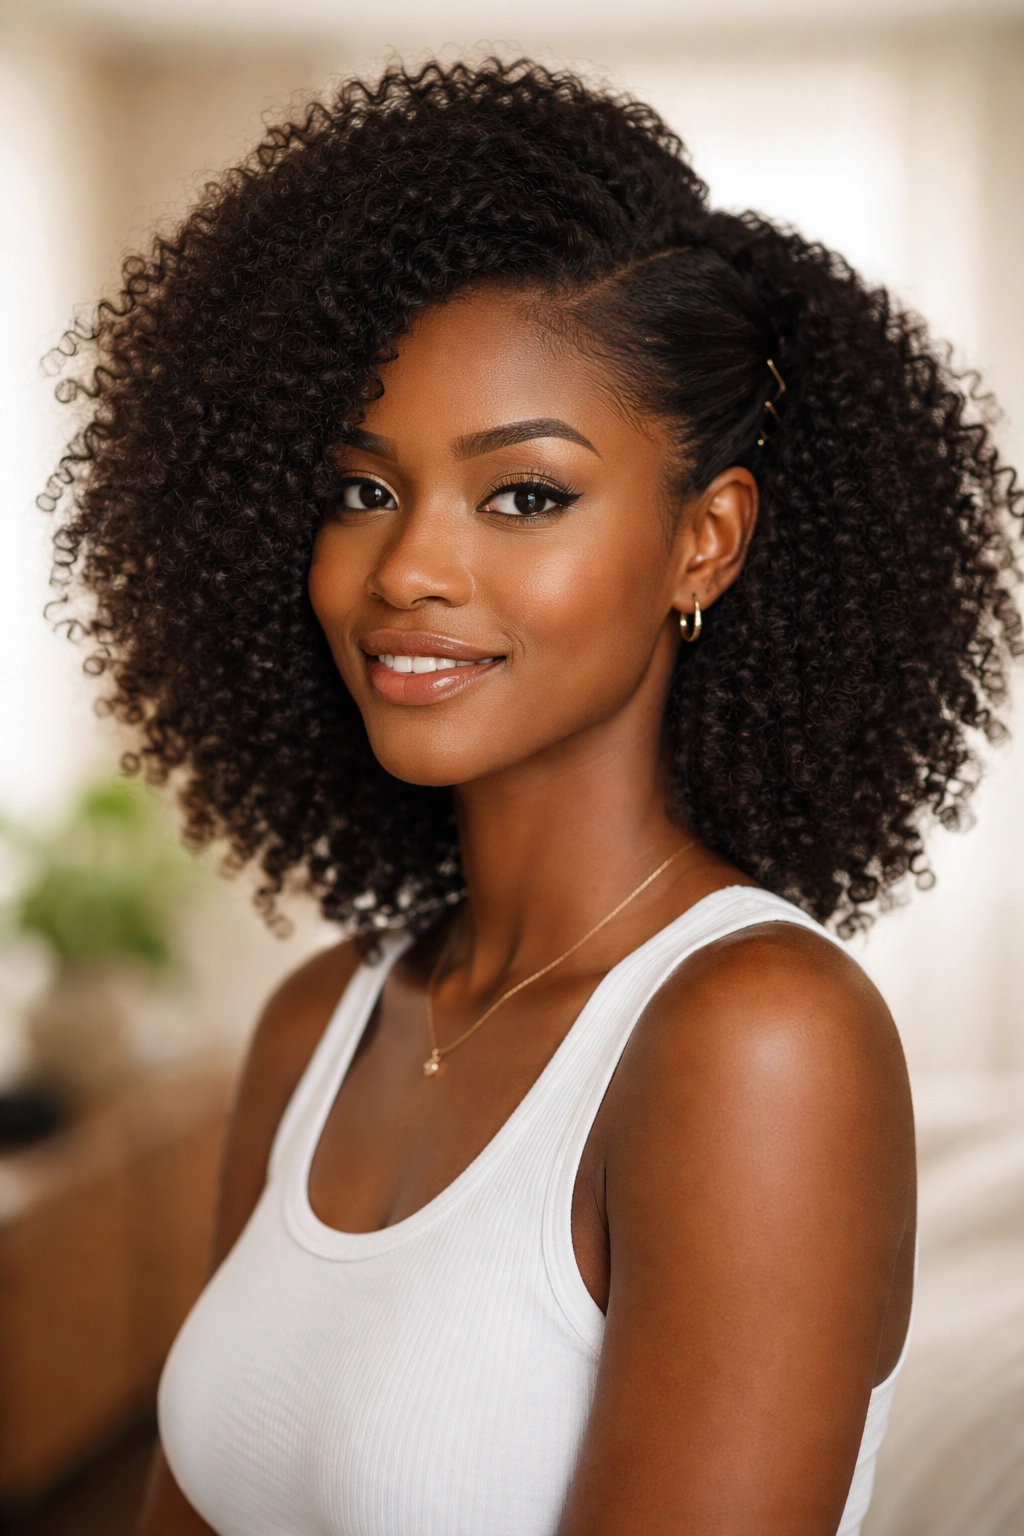
3. A Deep Side-Part Afro With Soft Volume
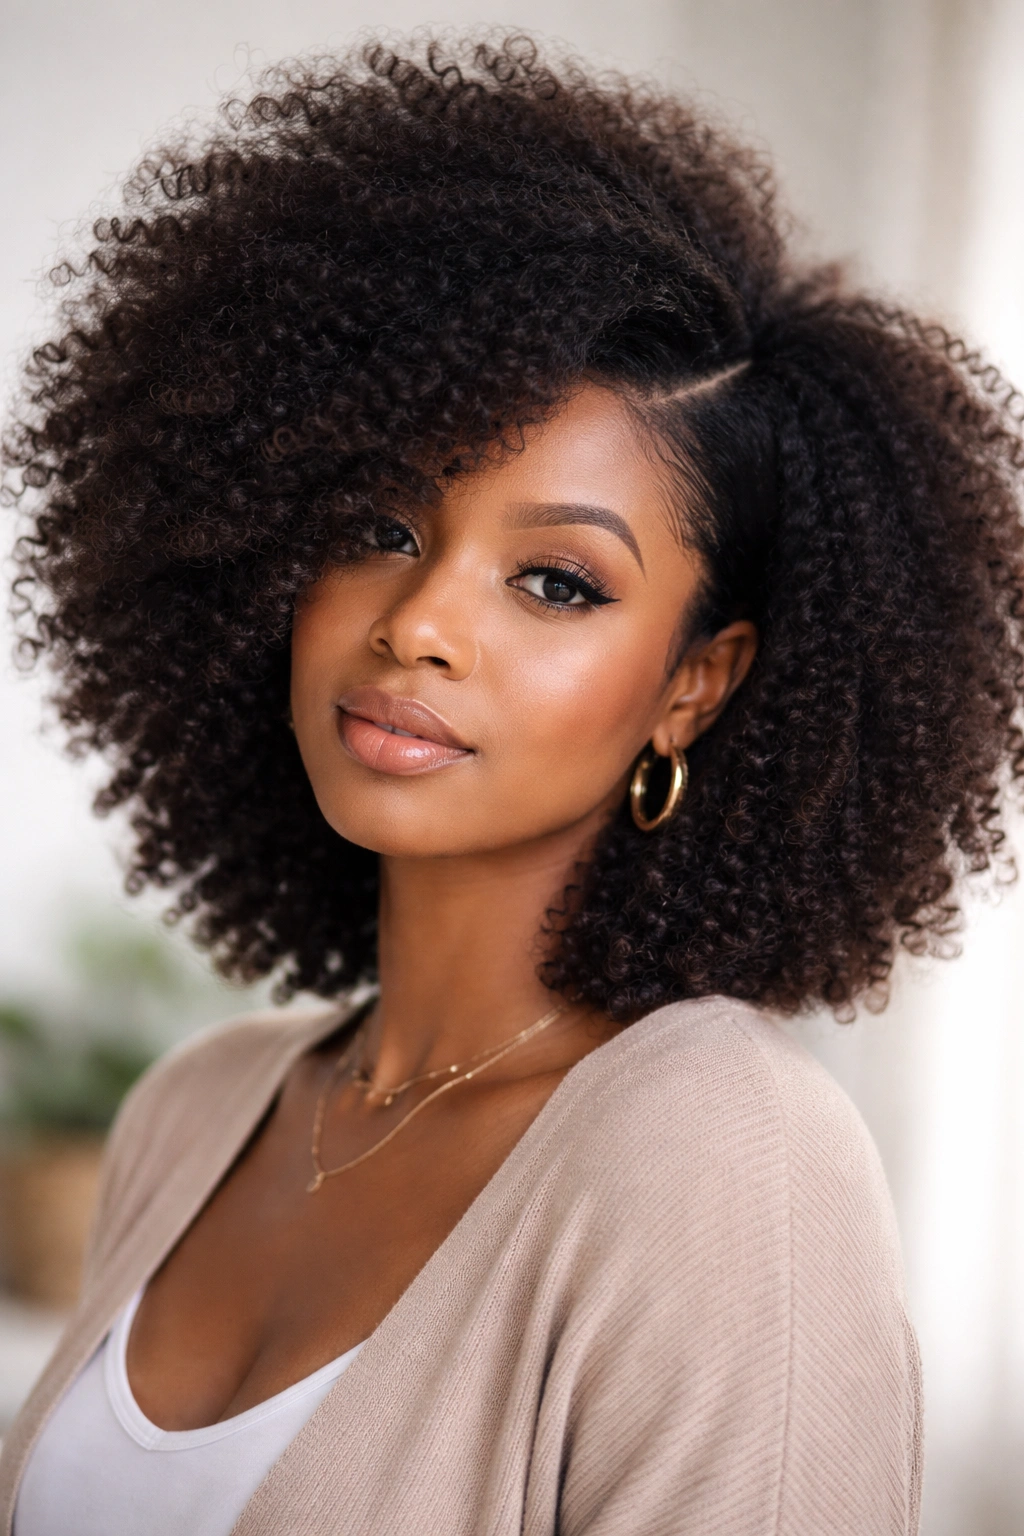
A side part does more than shift the hair. It changes the whole mood. The same puff of natural hair can look relaxed, sharp, or elegant depending on where that part lands.
Start with a clean line from the forehead back toward the crown using a rat-tail comb or the pointed end of a styling comb. Then mist the hair lightly and use your fingers to fluff the larger side. The smaller side can stay sleek against the head or tuck behind the ear with a single bobby pin. That contrast is what makes the style feel finished.
The best version of this style is not bone-straight and not too perfect. You want a part that is visible, not carved into the scalp like a ruler line. A little movement near the roots keeps the afro shape alive.
If your hair is dense, the side with more volume can almost frame the face on its own. That is useful on days when you want a style that looks intentional without pulling the hair up. It also works beautifully when you are between wash days and the crown needs a quick reset.
One good pass with a pick at the roots. That’s enough.
4. Two Flat Twists Into a Half-Up Fro
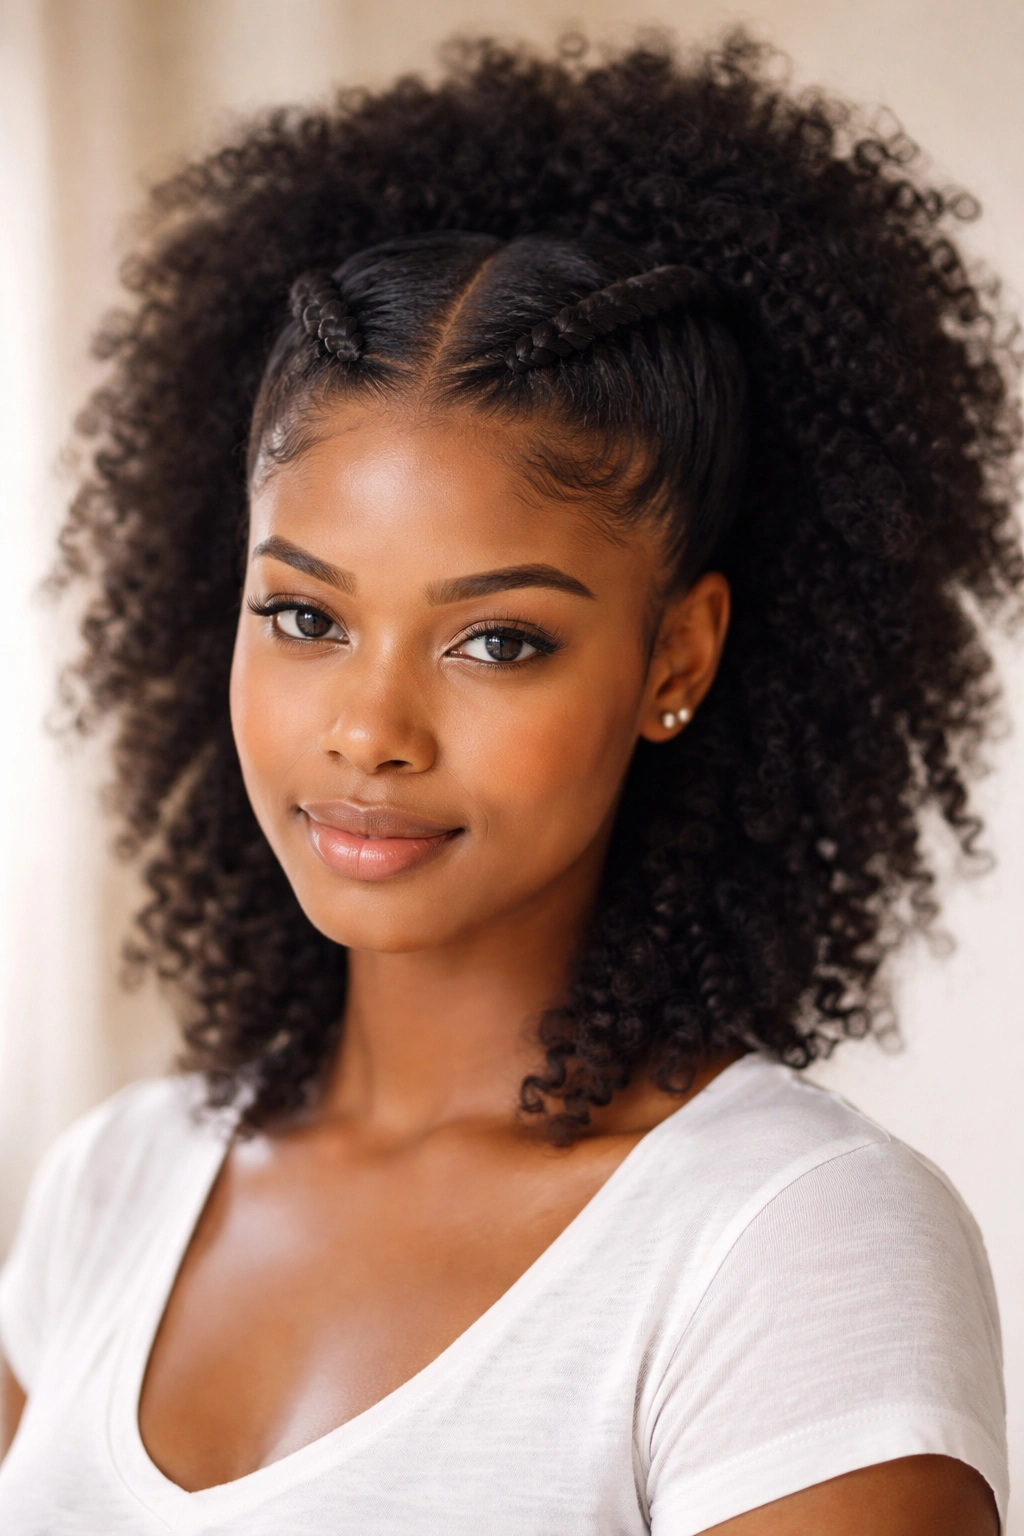
Busy mornings and full-length braiding do not always mix. Two flat twists across the front give you the look of effort without the time cost of a full protective style.
Take the front section from temple to temple, split it into two rows, and flat-twist each row back toward the crown. Clip or pin the twists where they meet, then leave the rest of the hair loose. The back keeps its volume, and the front looks tidy enough for work, errands, or a school run.
The twist detail
This style works best when the front sections are slightly damp or lightly stretched. Dry hair can frizz while you twist, especially if you rush. A small dab of leave-in on the sectioned pieces helps the twists hold shape, but do not soak them. Wet hair makes the style take longer to dry, and nobody has time for that at 7:15 a.m.
A half-up afro with twists is also one of the better choices when the hairline looks a bit wild. The twists pull attention to the center and keep the front from puffing out in odd directions.
If you want it cleaner, finish with a small clip instead of a plain pin. That tiny switch changes the whole look.
5. The Clipped-Back Crown That Takes Seconds
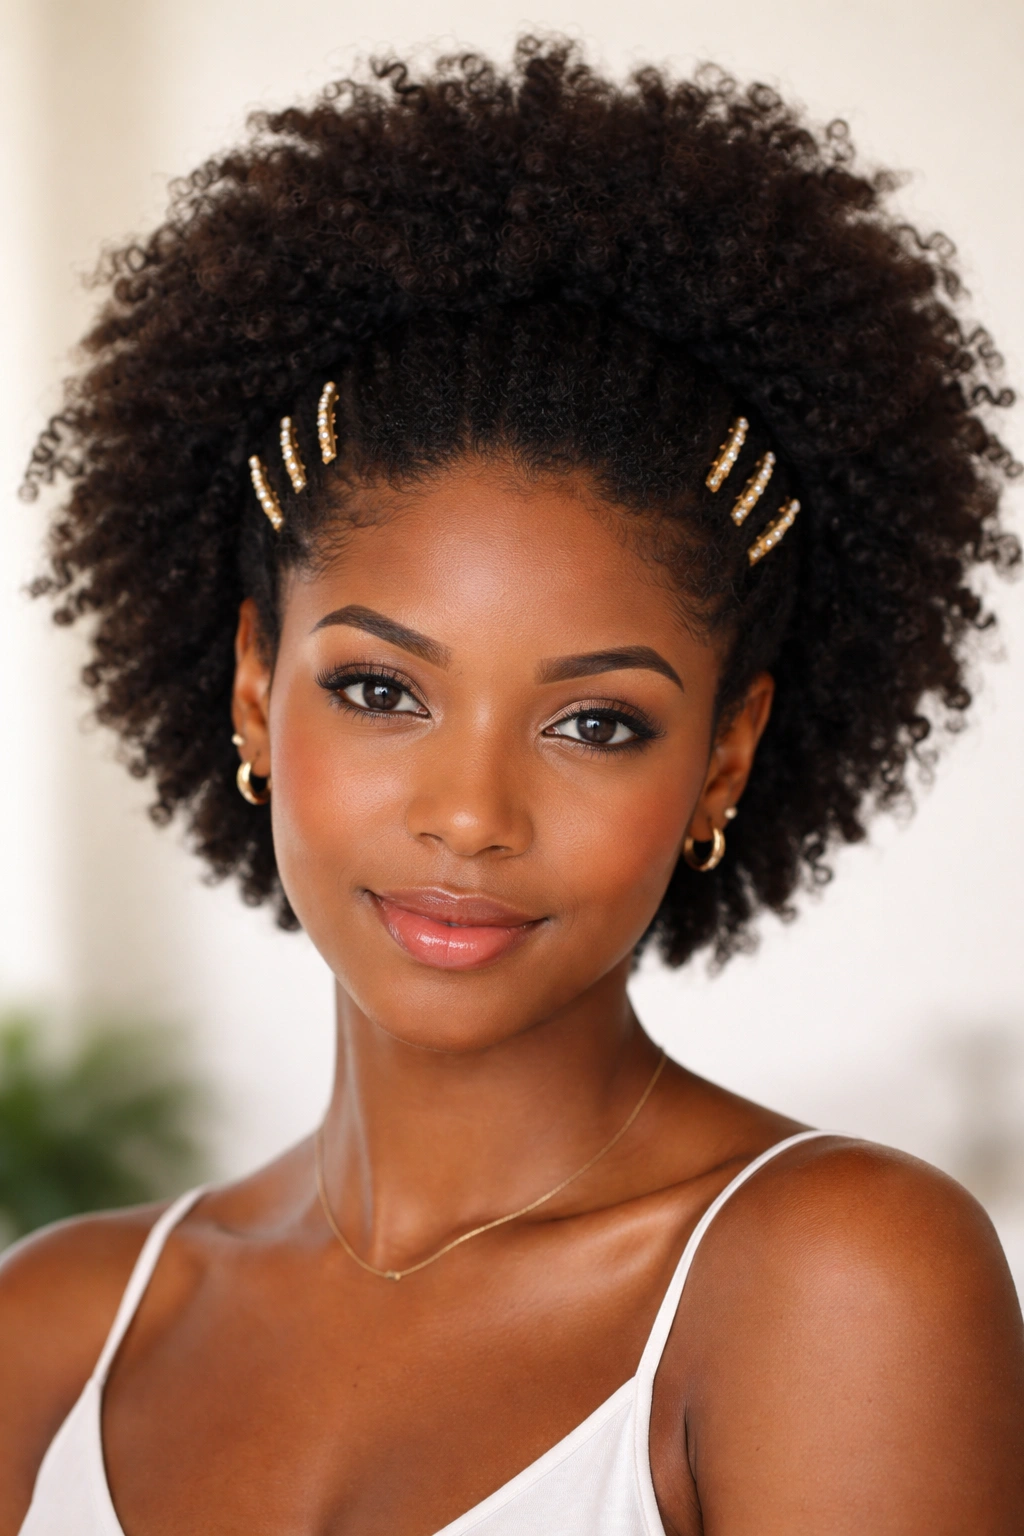
Three clips beat thirty minutes. That is the whole argument for this style, and it is a strong one.
Pull the front and side sections back just enough to open the face, then fasten them with a row of clips, barrettes, or a single wide jaw clip. Leave the crown full so the afro still has shape. The look is simple, but simple is not the same thing as lazy. Done well, it reads neat, cool, and a little deliberate.
The part I like most is the freedom. You can use gold clips, plain black pins, tortoiseshell barrettes, or tiny snap clips if that is what you have. A matching set makes it feel more styled, but even one strong clip can fix a rough front in under a minute.
This works especially well on hair that is soft at the front but still has good body in the back. If the top is too flat, fluff it first with your fingertips. If the front is too frizzy, smooth only the outer layer. Do not chase every strand. That is how a quick style turns into a long one.
A clean clip placement near the temple usually looks better than one stuck straight in the middle.
6. A Wide Headband Afro With Barely-There Tension
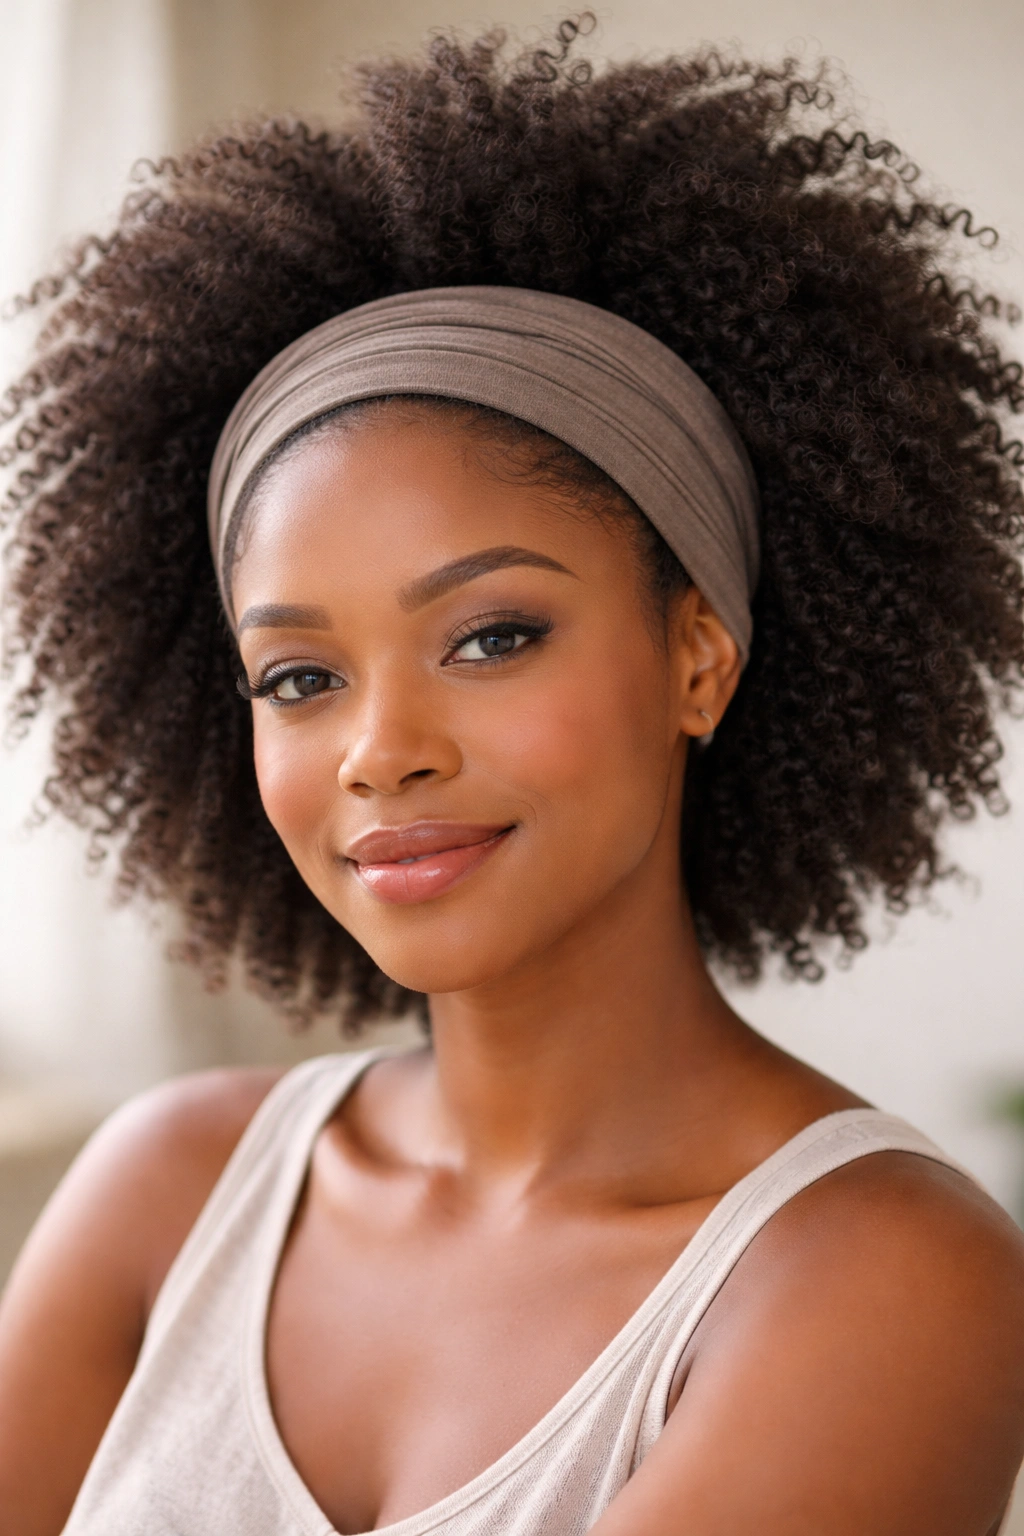
A wide headband is the lazy-morning hero people ignore too often. Unlike a skinny band that digs into the scalp, a broader one presses the hair down just enough to create shape while leaving the rest of the fro full.
Slip the band over the front hairline and push it back until it sits where it feels secure, not tight. Then pull a little volume forward above the band so the crown does not look flattened. The goal is balance. You want the top to stay airy and the sides to stay controlled.
This style works well when your edges are doing their own thing and you do not feel like wrestling them. It also pairs nicely with hair that is in between wash days, because the band takes attention away from a slightly messy front and makes the whole look feel planned.
If the band keeps slipping, the problem is usually too much product at the hairline. Wipe that area lightly with a dry cloth first. Fabric sticks better to hair that is not coated.
Best when you need low fuss
- Use a soft, wide band instead of a thin elastic one.
- Choose a fabric that does not snag.
- Keep the crown lifted with your fingers before you leave.
- Avoid placing the band too far back, or the style loses its shape.
7. The Frohawk With Pinned Sides

On mornings when the sides are doing their own thing, I reach for the frohawk. It has attitude, but it is not hard to build. That is the whole charm.
Push the side sections upward and pin them toward the center line of the head, leaving a raised strip of volume from front to back. Depending on your hair density, you might use 4 pins or 10. The idea is the same either way: sides controlled, center free.
A little styling cream at the sides helps the pins stay hidden, but do not drown the hair in product. You want grip, not shine that looks wet all day. The center ridge can stay fluffy, stretched, or a little textured, depending on what your hair gives you.
This is one of those styles that changes the whole shape of your face fast. It also makes a plain outfit look more finished without adding any more work to your morning. If you are after a cleaner line, tuck the ends of the side sections behind the pins instead of folding them into little rolls. That keeps the look sharper.
The frohawk is not subtle. That is the point.
8. A Flat-Twist Crown Around the Hairline
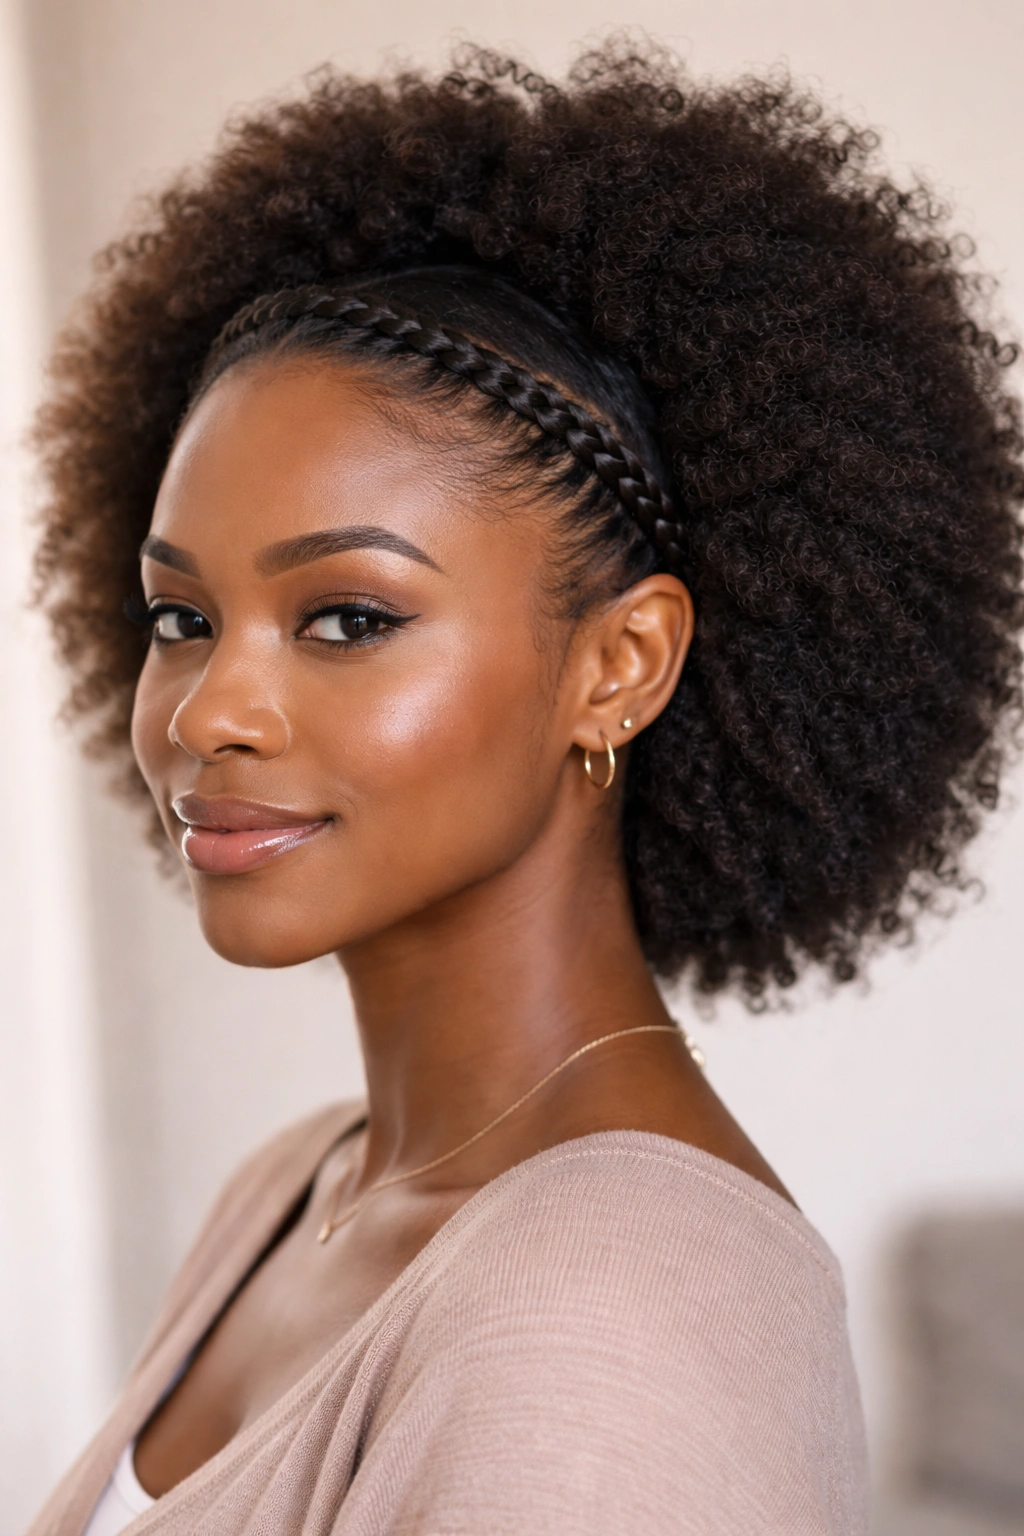
A flat-twist crown looks like you planned your morning. The good news is that you probably did not spend all that much time on it.
Take a thin band of hair around the front hairline and flat-twist it from one side to the other, then secure the end behind the ear or near the nape with pins. Leave the rest of the afro loose and full. The twist acts like a frame, and the rest of the hair does the heavy visual work.
This style is especially kind to hair that has a little stretch from the night before. The twist lies smoother, and the crown sits closer to the head without needing a lot of gel. If the hair is freshly washed and extra soft, use a little more grip at the roots so the twist does not unravel before lunch.
When to choose it
Use this one when you want the front out of your face but do not want a full-up style. It is also a nice answer to a rough hairline, because the twist naturally redirects attention.
You do need a bit of practice. Flat twists are easy once your fingers stop fighting each other, but the first attempt may look uneven. That is fine. Uneven in the back is invisible once the afro fills out.
9. Bantu Knots in Front, Volume in Back
Need the front of your hair out of the way but still want the back to stay big? Four small Bantu knots at the hairline solve the problem fast.
Section the front into small squares or triangles, twist each section tightly at the root, then wrap it into a knot and pin or tuck the end. Leave the rest of the afro loose behind it. The contrast is what makes the style work: neat front, full back.
The knots do not need to be tiny. In fact, smaller knots take longer and can feel fussy on a rushed day. Four to six medium knots across the front usually look balanced and hold better than a crowded row of tiny ones.
A little gel or twisting cream helps if your hair slips easily, but a clean part and steady finger tension matter more. Keep the sections even. If one knot is twice the size of the others, your eye goes straight to it.
This style is a good fit when you want something playful without going all the way to a full knot-out. It also gives you a built-in style for later, because the knots can come down for soft waves when the day is over.
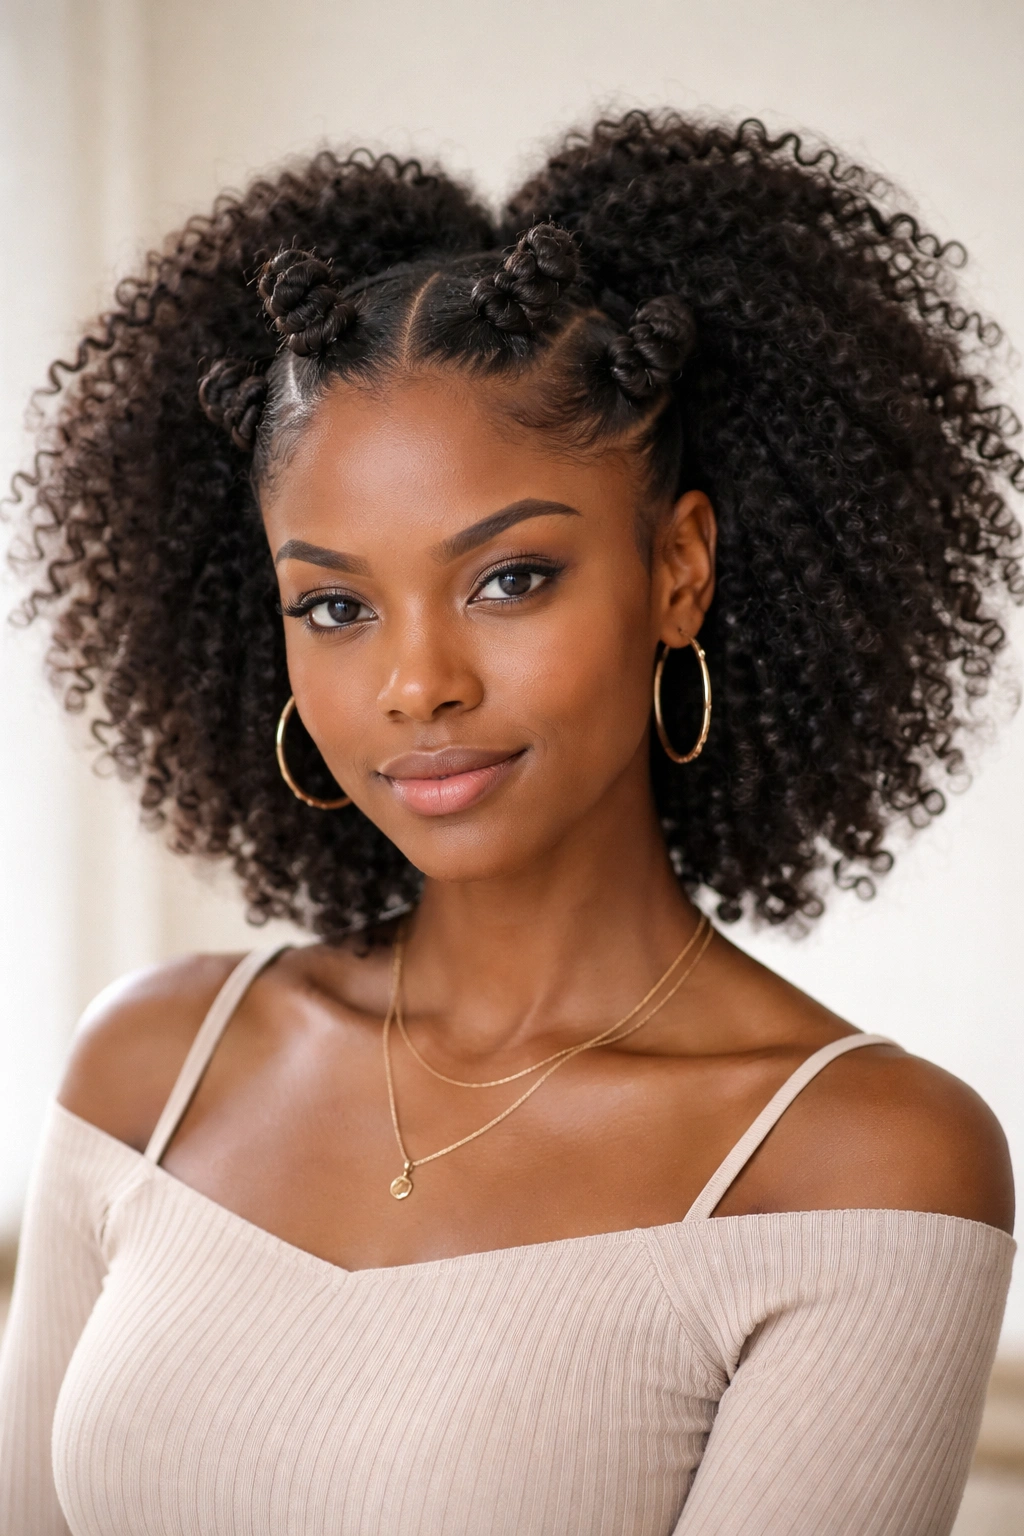
10. Two Space Buns on Stretched Natural Hair
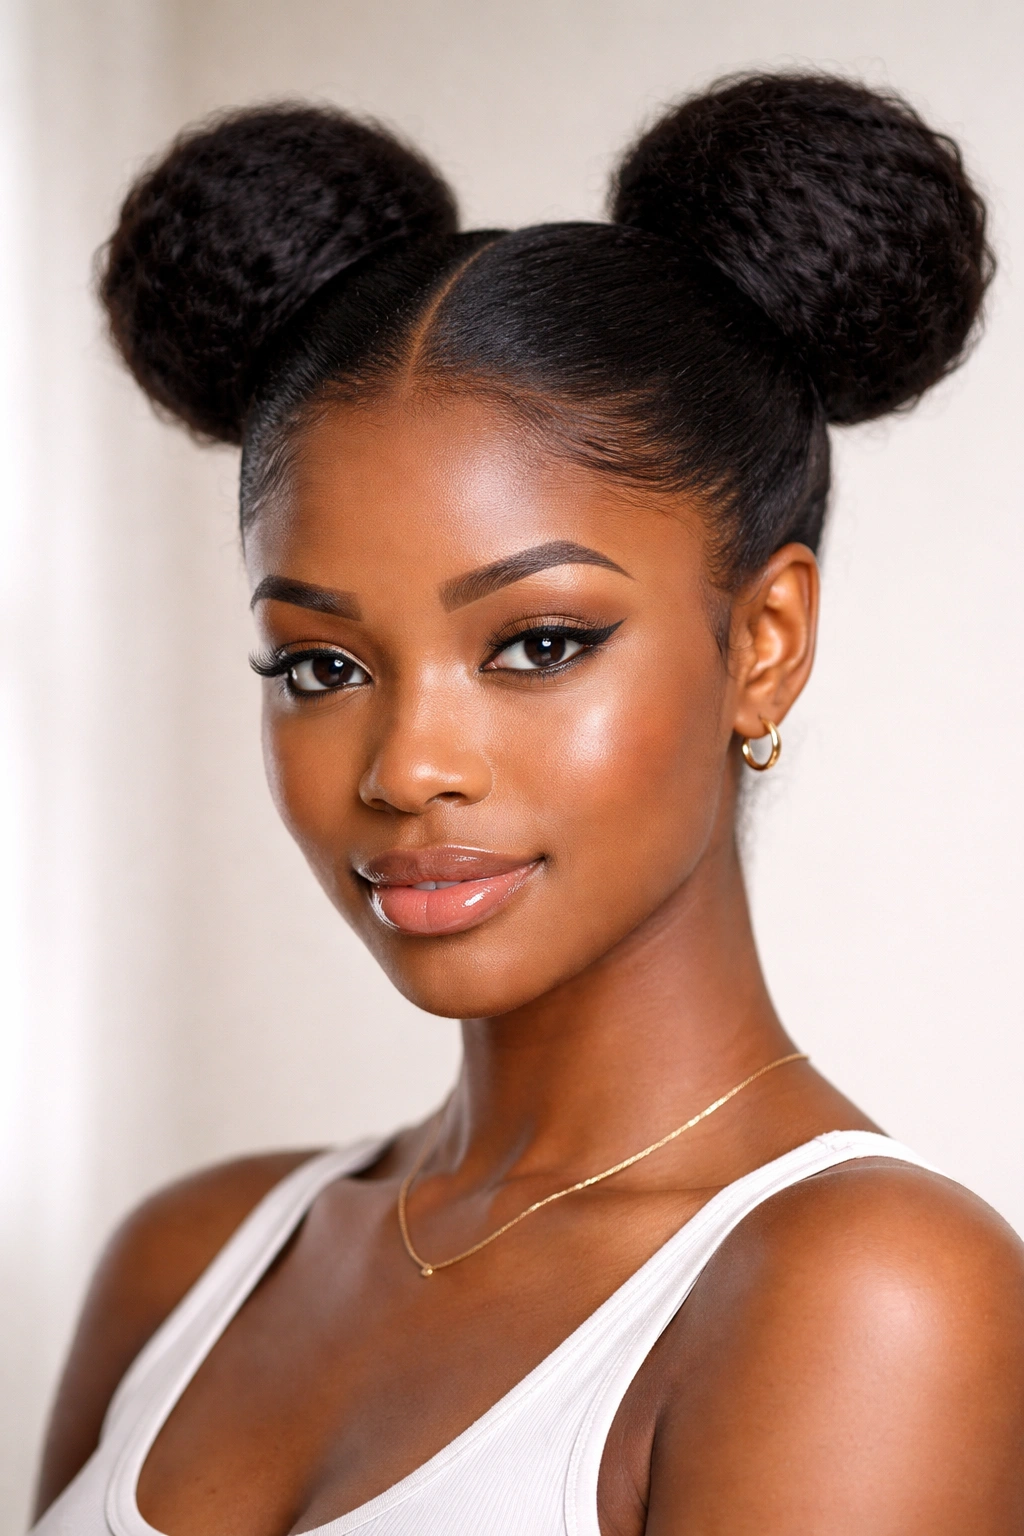
Some mornings call for a bit of fun, and two buns will do more for a tired outfit than another pair of earrings.
Split the hair down the center, gather each side high or mid-level, and twist or wrap each section into a bun. On stretched hair, the buns sit smoother and hold better. On tighter curls, they come out fuller and more playful. Either way, the shape is easy to read from across a room, which is part of why it works so well when you are late.
The key is balance. If one bun sits higher than the other, the style can look accidental instead of intentional. Use a mirror and check the profile, not just the front. That one extra glance saves you from leaving with a lopsided shape.
A few face-framing curls can soften the look if the buns feel too severe. Or keep the front clean and let the buns carry the entire style. Both versions work.
If you want less tension, do not pull the base too tight. The style should sit on the head, not cling to it. That distinction matters more than people think.
11. The Low Puff at the Nape
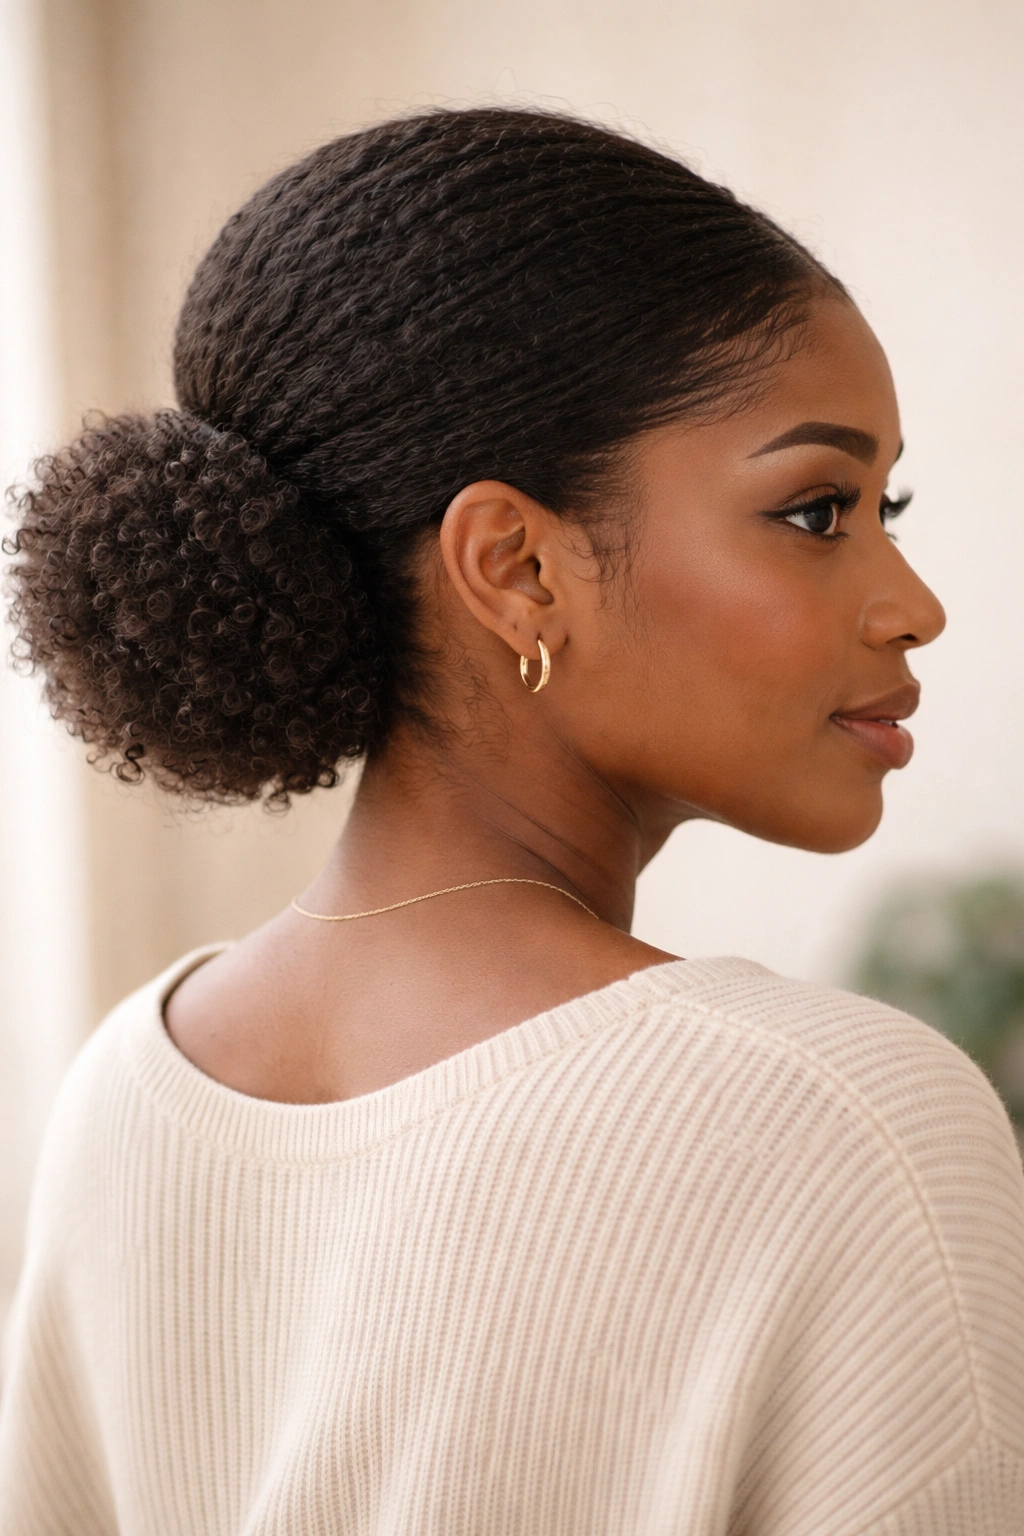
The low puff is calmer than the high puff, and sometimes that is the whole reason to choose it. It keeps the weight lower, feels gentler on the scalp, and looks polished without asking for a perfect top section.
Gather the hair at the nape with a soft band or elastic, then smooth the crown lightly with your hands. You are not trying to plaster the front down. You are just guiding it into place so the puff sits low and round. If the roots are thick, a quick lift with the pick after securing the puff gives the back more body.
Good when your roots need a break
- Works well on hair that feels tender at the crown.
- Hides a rough top section better than a high puff.
- Takes less shaping than a full updo.
- Feels steady on windy or humid days.
I reach for this one when the top of my hair is a little too soft or puffy to cooperate. It also pairs well with a side part, since the lower placement leaves room for one side to sweep across the forehead.
A low puff is not flashy. That is exactly why it belongs in a list like this.
12. The Tucked Side Sweep With Hidden Pins
Pin one side, leave the other side full. That simple split gives you a style that feels more intentional than a plain side part afro, but it still takes almost no time.
Start with a side part, then tuck the smaller side back along the temple using two or three bobby pins placed one above the other. Fluff the fuller side so it keeps volume and shape. If you want a little shine at the front, smooth a pea-sized amount of cream over the outer layer only.
This style is one of my favorites for days when the face needs a little breathing room. The pinned side opens things up, while the loose side gives the hair the space it deserves. It also handles second-day texture beautifully, because the tucked side can hide a patch that is frizzy or flat.
A clip can replace the pins if you want the look to feel more decorative. I prefer pins for a cleaner finish, but clips work fine when you want the style to show more.
The best part? It looks like you spent time choosing a shape. You did not. That is the whole fun of it.
13. Finger Coils at the Front and a Loose Fro Behind
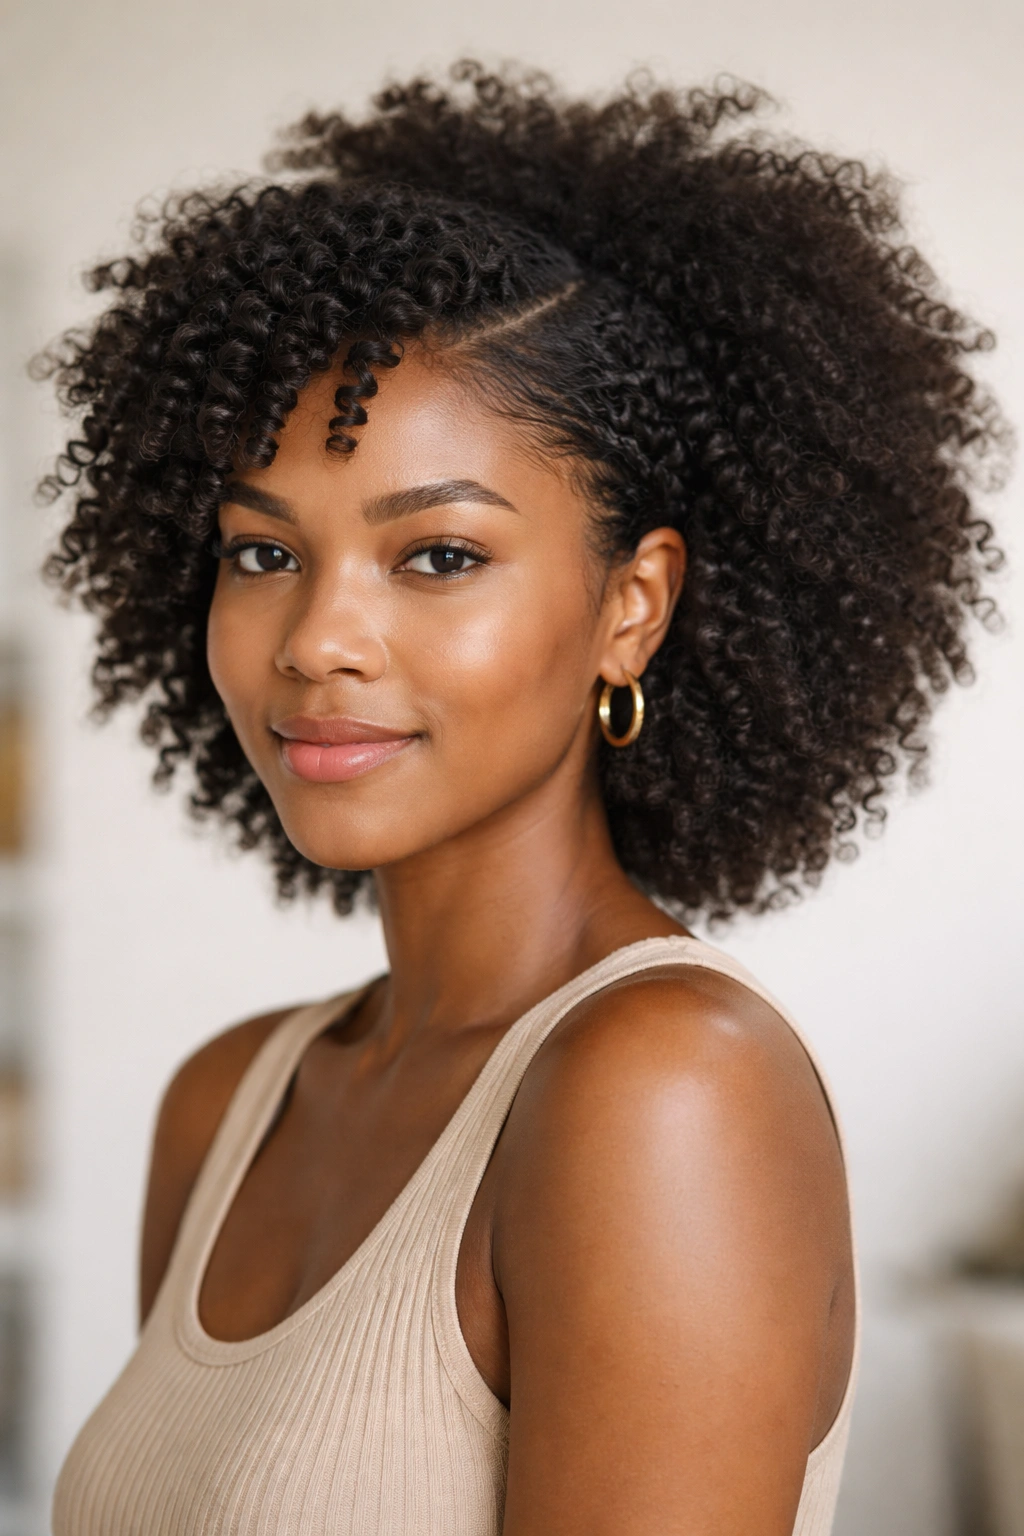
Do you have ten spare minutes? Spend them only at the front.
Take a small front section, maybe 8 to 12 pieces depending on density, and finger coil them one by one. Leave the back loose and fluffy. The coils create definition where people look first, and the rest of the hair stays soft and full behind them. It is a nice trick for mornings when you want structure without flattening the whole head.
The front coils do need a little product grip. A curl cream or light styling gel helps each coil hold its shape, but heavy product can make them look hard. Twist each strand around your finger until it springs into a tiny spiral, then release carefully. If the coil immediately unfurls, use a touch more hold and try again.
Why the front matters
The front frames the face. That is why these few coils make such a difference. Even when the back is just a picked-out fro, the defined front gives the whole style a more finished look.
If you are short on time, only coil the pieces around the temples and hairline. That smaller version still reads as intentional and is faster to maintain throughout the day. The rest of the hair can stay untouched, which is half the point.
14. A Scarf-Wrapped Puff That Hides a Rough Hairline
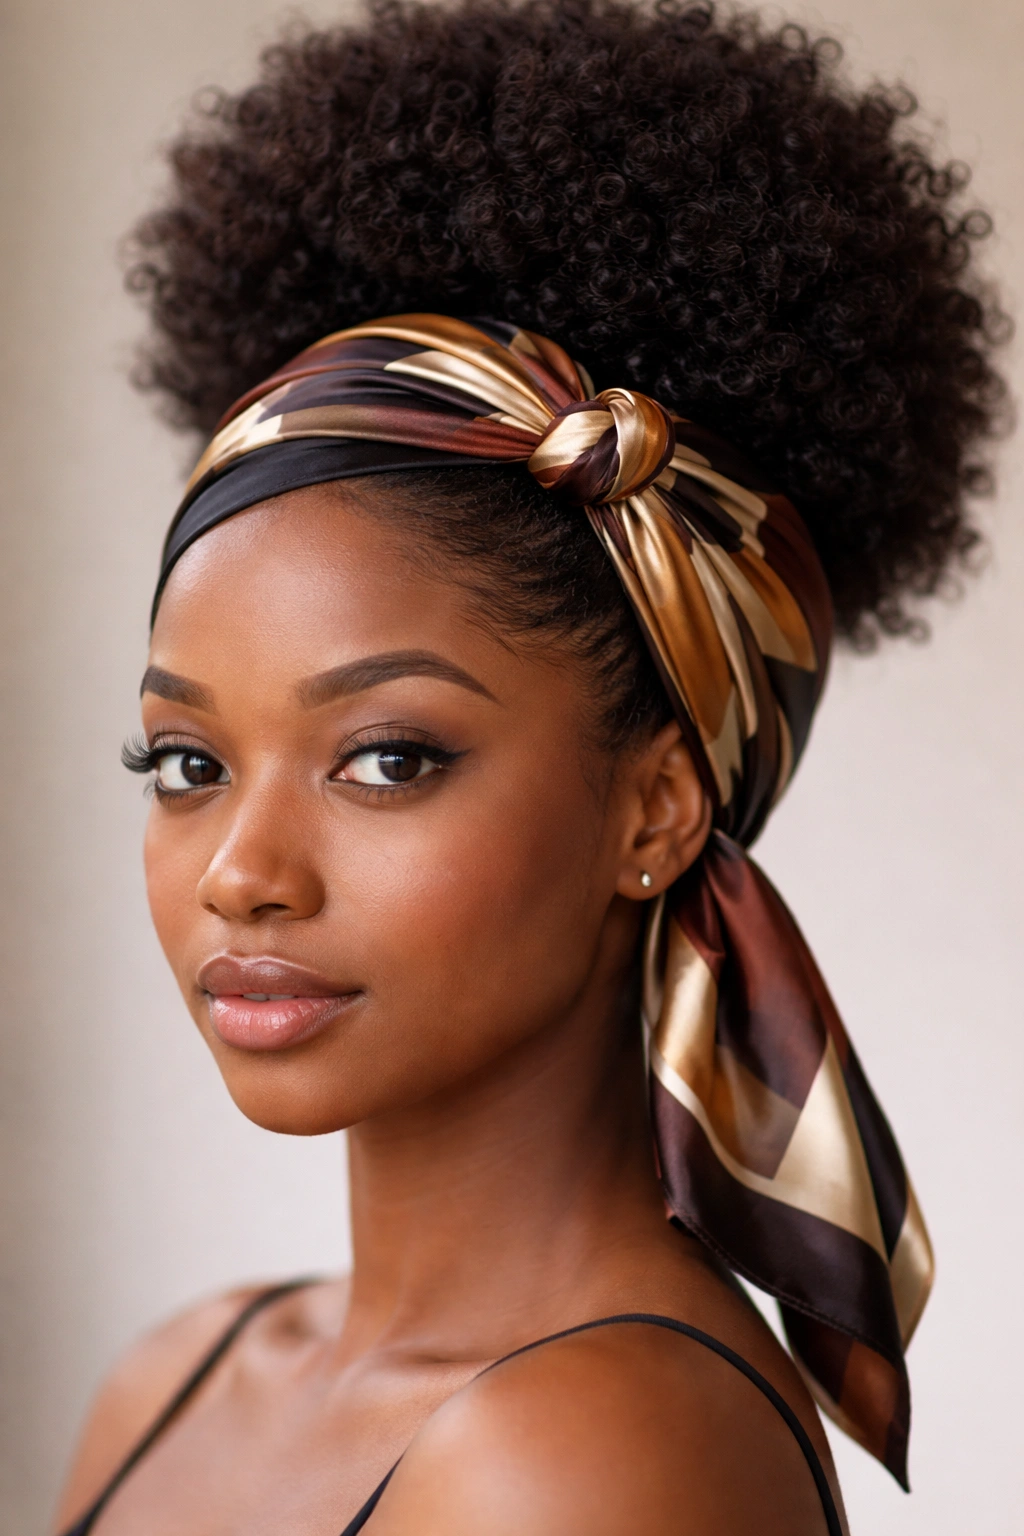
A soft scarf can rescue a rough morning faster than almost anything else. Wrap it right, and the whole style looks considered even if the curls underneath are doing their own thing.
Start with a puff, a loose fro, or even a low gathered style. Fold a satin or printed scarf into a strip about 2 to 3 inches wide, then tie it around the hairline or slightly above it. Keep the knot off-center if you want a softer look. If you place it dead center, the style can feel too stiff.
The scarf does two jobs at once. It hides the front area if it needs help, and it adds a clean line that makes the rest of the hair look fuller by comparison. That little bit of contrast matters. A plain puff with a scarf suddenly feels like a deliberate outfit piece.
I like this option when the edges are not cooperating and I do not want to fight them. A scarf removes the pressure. Literally.
Choose a fabric that slides a little but does not slip off. Too slick, and you will be adjusting it all day. Too stiff, and the tie digs in. A medium-weight satin or a soft cotton blend usually lands in the right spot.
15. The Picked-Out Afro With One Statement Clip
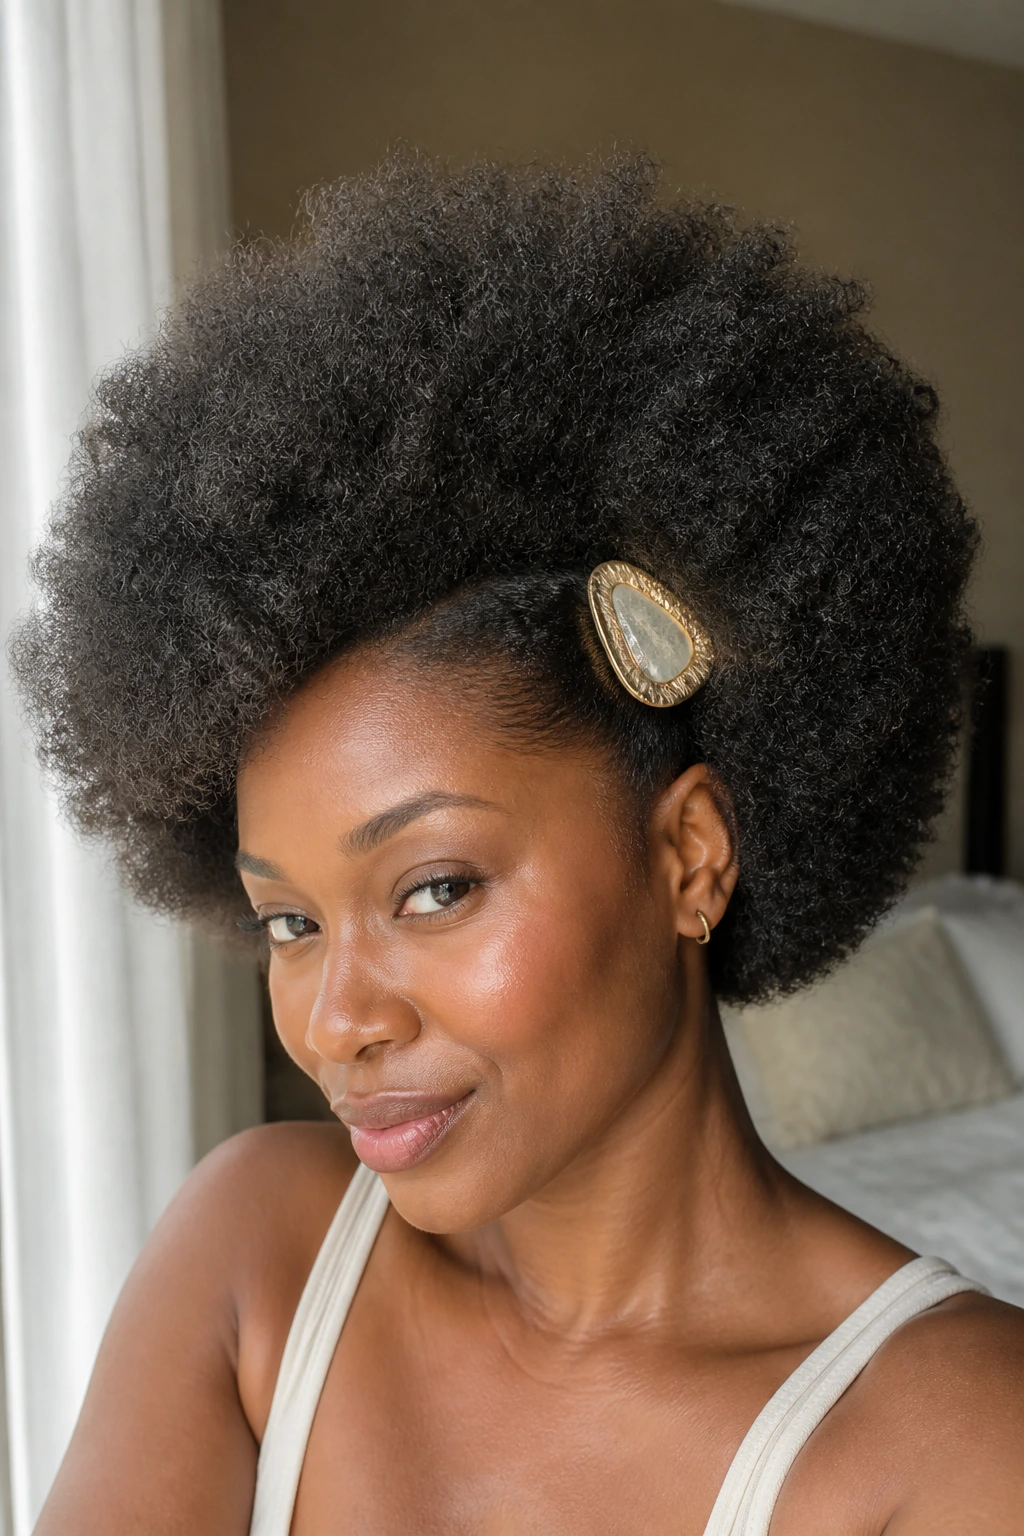
If you have a pick and one good clip, you can rescue almost any morning. That is the honest truth, and it is why this style belongs at the end of the list.
Use a wide-tooth pick at the roots to lift the afro from underneath, working around the crown and sides until the shape feels even. Then sweep one side back with a strong clip or barrette placed just above the ear. The result is not fussy. It is shape plus one detail, which is often all you need.
A picked-out fro works best when the hair is dry or nearly dry. If it is damp, the volume will collapse as it dries and you lose the whole point. Start from the roots, not the ends, and stop as soon as the silhouette looks balanced. Over-picking creates frizz in places you did not ask for.
A statement clip changes the tone fast. Gold looks dressy. Black disappears into the hair and keeps the focus on the shape. Matte tortoiseshell sits somewhere in between and usually looks good without trying too hard.
Keep the tools together. One pick, one clip, one satin scarf. That tiny setup saves more mornings than any complicated routine ever will.