Curly hair and 1950s-inspired hairstyles are a better match than most people think.
The era loved shape, shine, lift, and a little drama — all things curls already bring to the table. The catch is that vintage styling usually asks for control in one spot and softness in another, so the real skill is knowing where to smooth, where to pin, and where to let the curl pattern do the heavy lifting.
That’s why the strongest retro looks on curly hair rarely look stiff. A good set of victory rolls on coily hair has body from the start. A brushed-out pin-curl style has movement that straight hair often has to fake. And if your curls frizz the second you touch them, a satin scarf, a tail comb, and the right amount of hold can change the whole mood.
These are the looks that work with texture, not against it. Some feel polished enough for a formal event. Some are easy enough for a casual day when you still want that old-school shape. A few are forgiving on second-day curls, which, frankly, is where a lot of the best styling happens anyway.
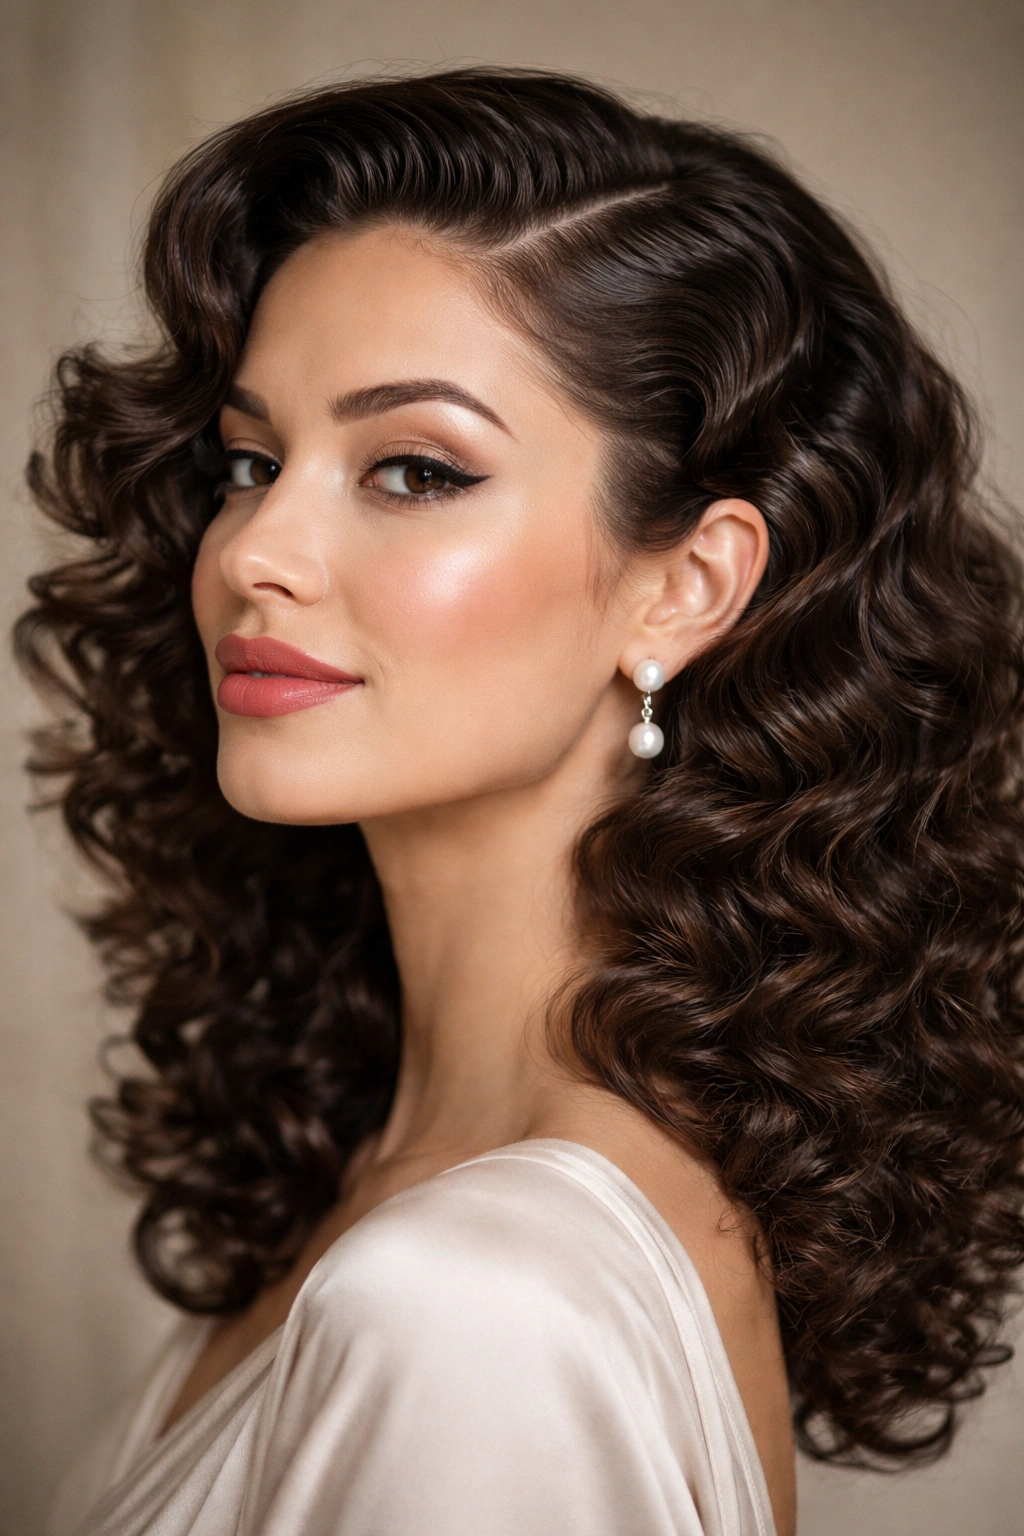
1. Victory Rolls That Start at the Hairline
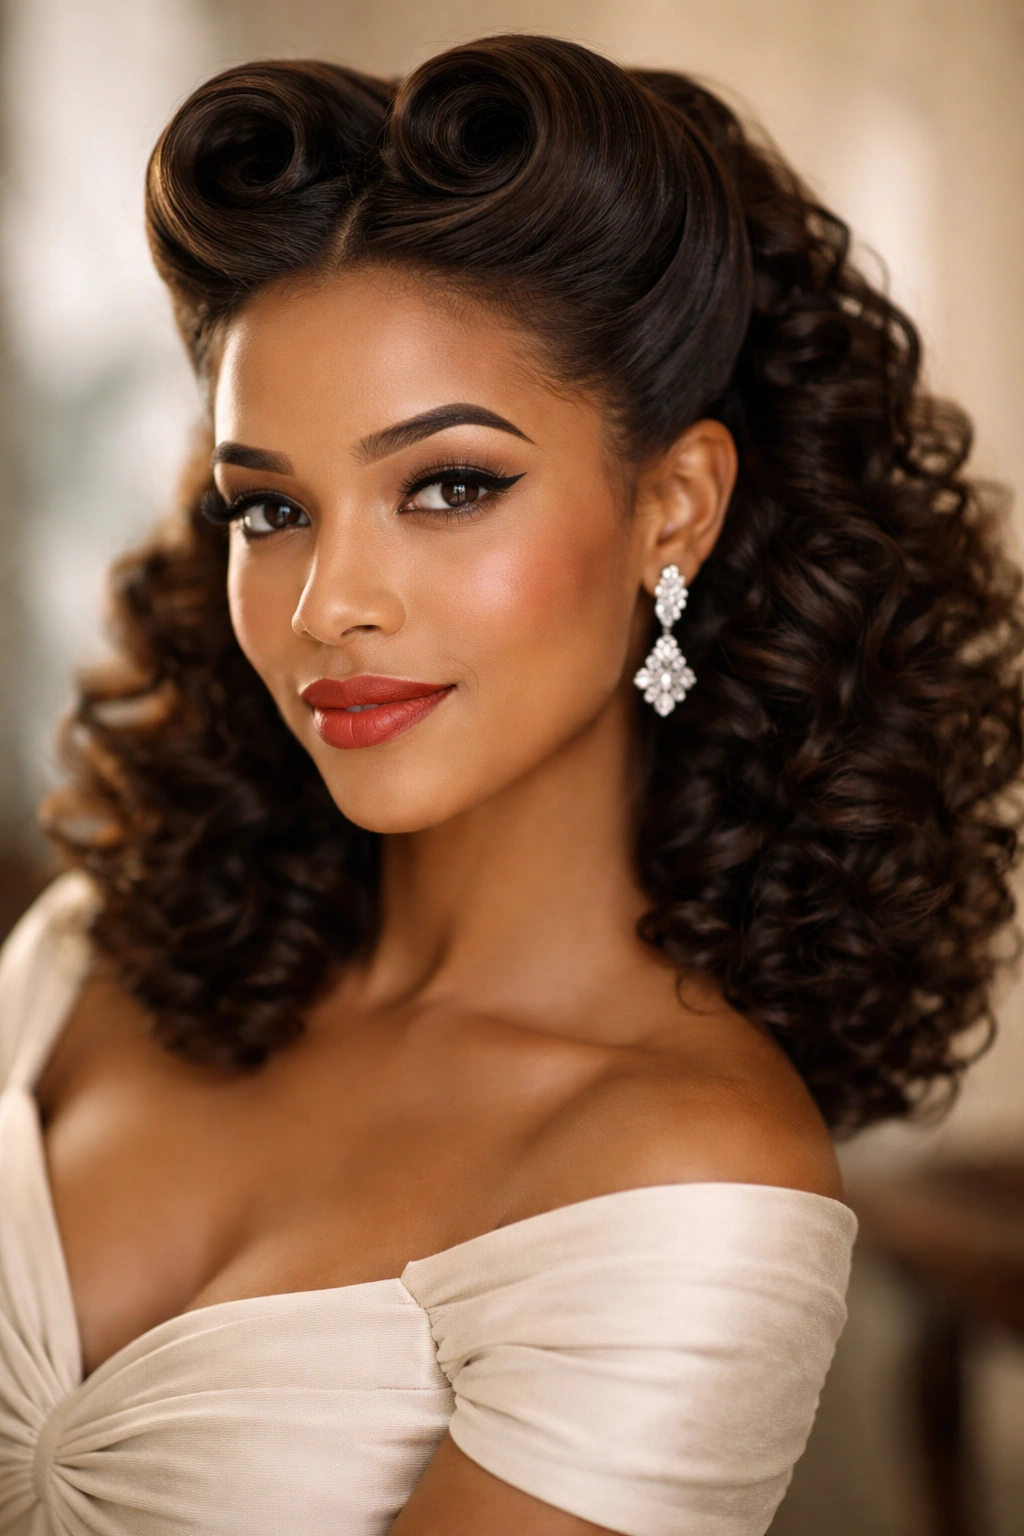
Victory rolls are the style people assume belongs to pin-straight hair, and that assumption is lazy.
Curly hair gives the rolls a built-in cushion, which is a gift, but you still need to smooth the first inch or two at the hairline so the roll reads as clean instead of fuzzy. The trick is to keep the curl pattern alive in the rest of the style. If you flatten everything, you lose the whole point.
Where to Smooth, Where to Leave Texture
Use a light mousse or setting cream on damp roots, then comb the front section back with a fine-tooth comb. Let the length and the back remain curly. That contrast is what gives the style its shape.
- Work with two front sections, one on each side of a clean center or side part.
- Roll each section inward or outward, depending on the direction your curls want to go.
- Pin the base first, then cross two bobby pins over the hidden center.
- Leave the back loose, pinned low, or tucked into a roll if you want a fuller silhouette.
The roll should look plush, not stuffed. That matters. Too much product or too much backcombing turns the whole thing into a helmet, and nobody needs that.
Best on: medium to long curls with enough front length to wrap at least once around your fingers. Tiny front sections can work too, but they need tighter pinning and a lighter hand.
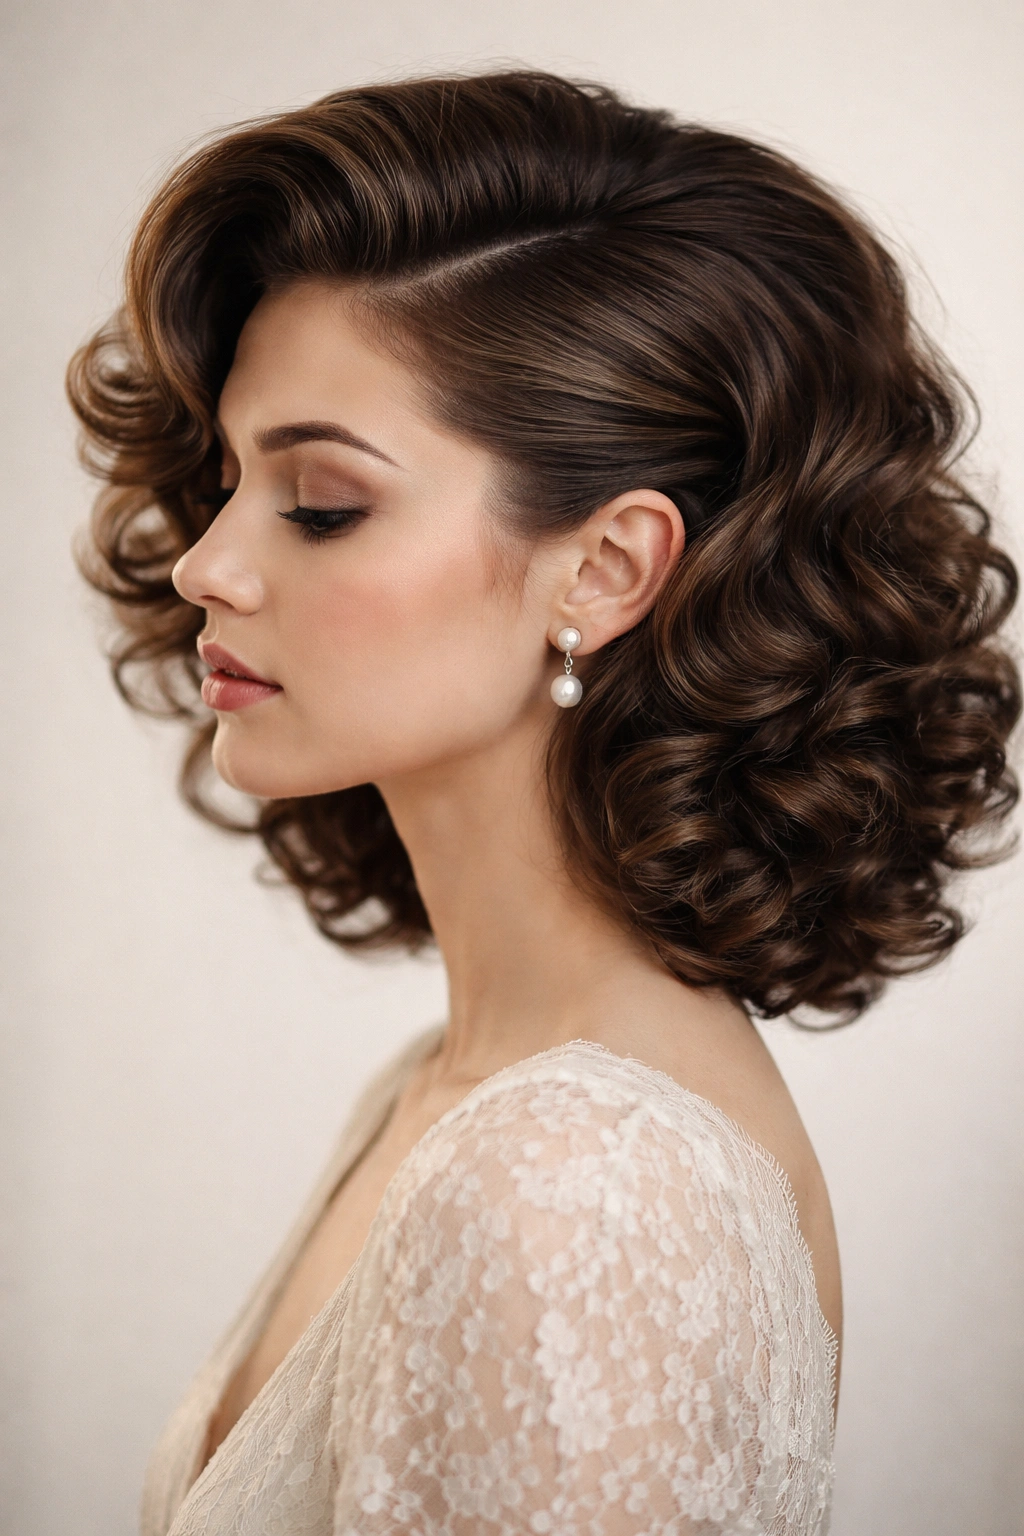
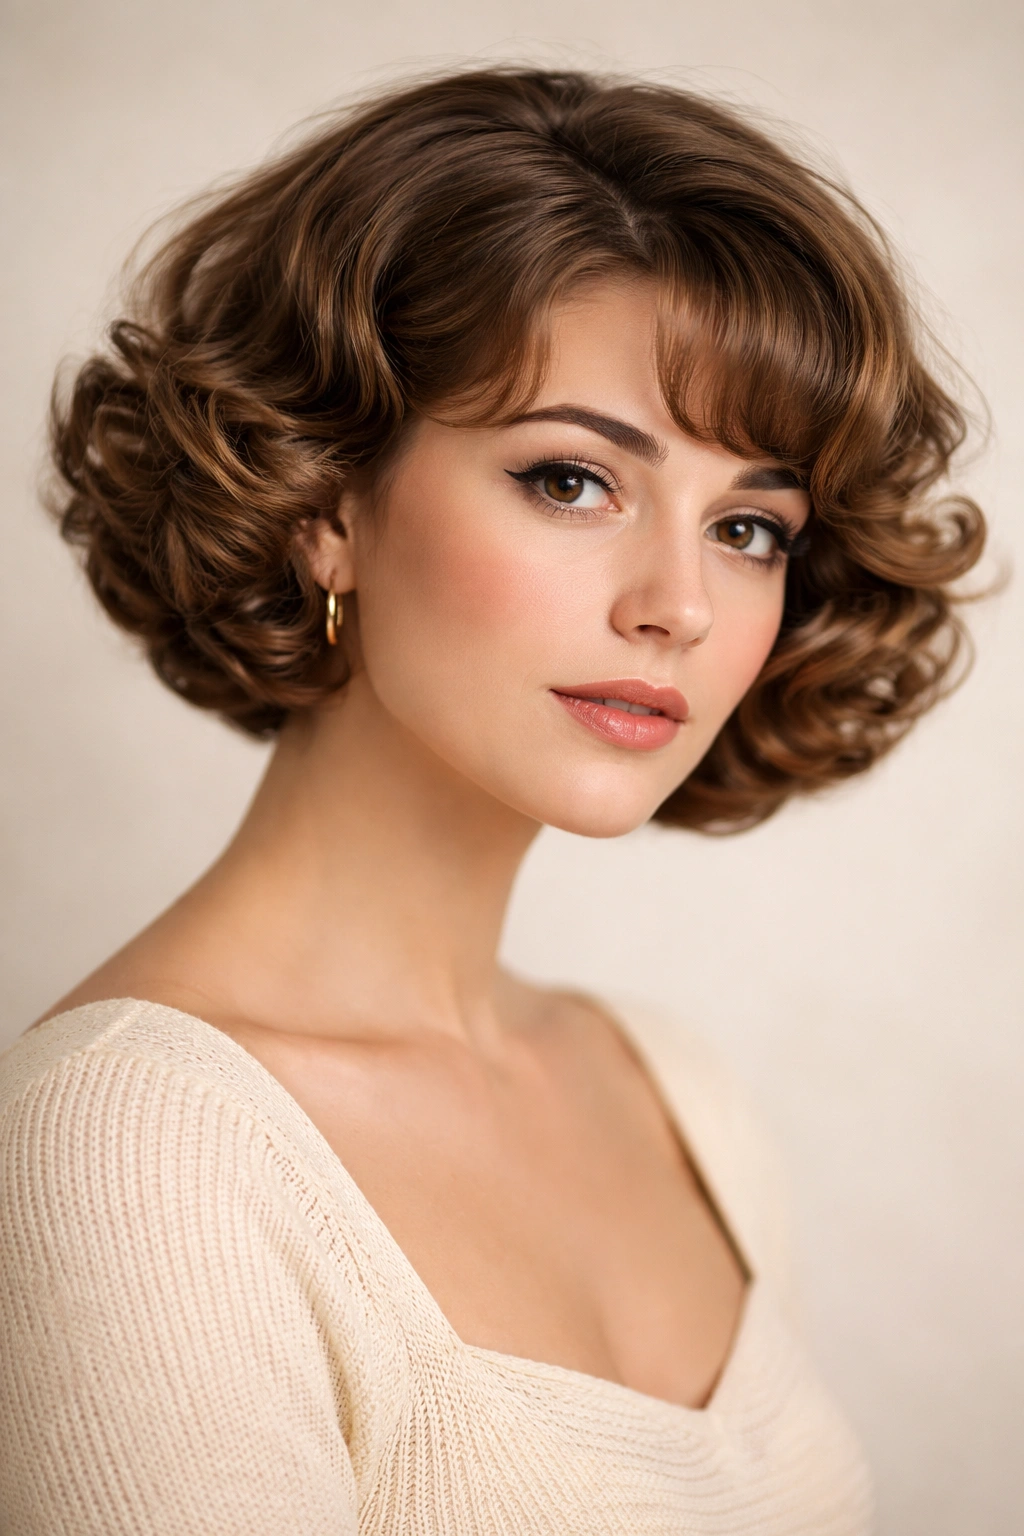
2. A Curly Faux Bob With Tucked Ends

If your curls are shoulder length or longer, a faux bob is the easiest way to fake a shorter, dressier shape without touching scissors.
It has that neat, tucked-under feel that shows up in a lot of midcentury styling, but curly hair makes it softer and less severe. The ends disappear into the nape, the top stays smooth, and the whole thing feels intentionally shaped instead of accidentally short.
The part that makes this work is the tuck. You do not want to cram every curl under the collar line. Instead, fold the bottom third of the hair upward in loose sections and pin them flat against the head. A couple of u-shaped pins help here because they hold without leaving the kind of pin marks bobby pins sometimes do.
A side part usually gives this style more character than a center part. It also helps if your curls are layered. Layers can pop out at the wrong angle, so a little shaping cream on the ends keeps the outline tidy.
This one is especially good when you want a vintage look but do not want to commit to a full updo. It feels polished, but not fussy.
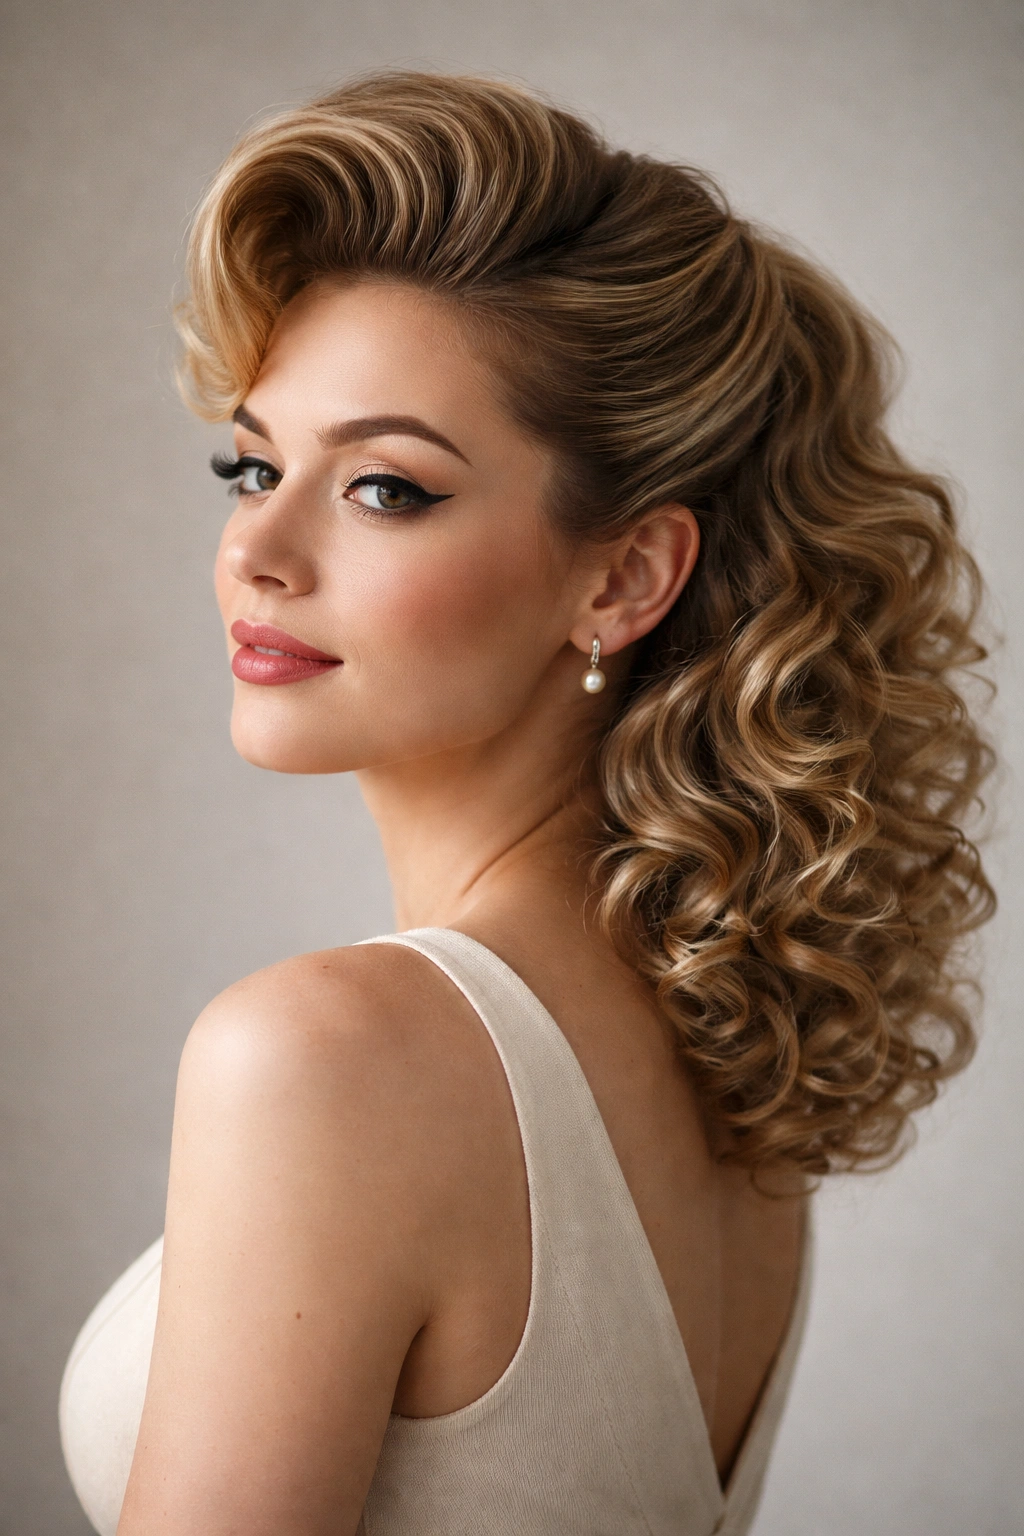
3. Pin Curls Set All Over and Brushed Soft
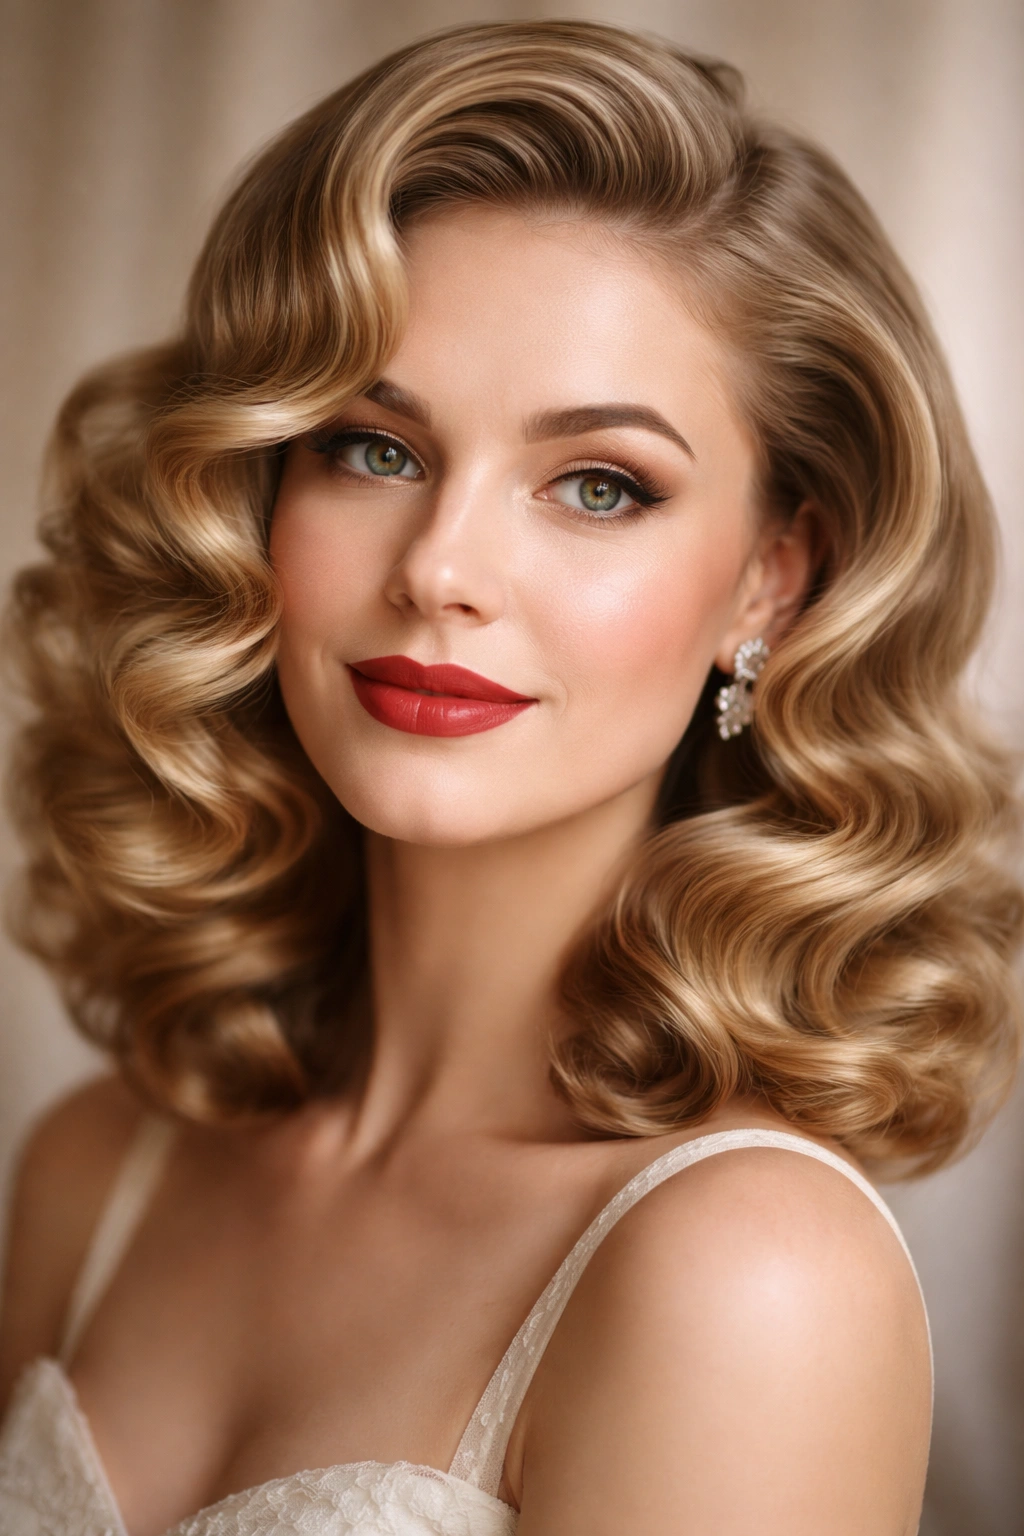
What if you want the most authentic-looking 1950s texture on curly hair?
Pin curls are the answer, though the final look does not have to feel rigid. In fact, the best version on curly hair is often brushed out into soft, controlled waves rather than left in a tight, toy-like spiral. That brushed finish is what gives the style that old salon-set feel.
How Curl Type Changes the Set
Looser curl patterns usually need smaller sections so the set holds. Tight curls can handle bigger sections, but they still need a little stretch before you pin them. If your hair is very dense, work in layers and clip the top half out of the way while you set the bottom.
- Start with damp, not dripping, hair.
- Apply setting lotion or a light foam from roots to mid-lengths.
- Wind each section flat against the head, then pin the curl in place.
- Let it dry completely before touching it. Partially dry pin curls are a mess.
Once the curls are dry, brush them gently with a boar-bristle brush or a soft paddle brush. The style should turn into a smooth wave pattern with movement, not a puffy cloud. And yes, it takes patience. No shortcut really replaces a full dry set.
The result looks expensive even when it isn’t. That’s one reason pin curls never get old.
4. Deep Side Part With Crown Volume
You do not need a full updo to look vintage.
A deep side part with crown volume can carry a 1950s mood all by itself, especially on curly hair that already has body. One side gets tucked neatly behind the ear. The other side stays fuller and falls across the forehead or cheekbone with just enough softness to feel intentional.
This is one of my favorite styles for layered curls because it uses the unevenness instead of fighting it. The side with the most hair becomes the focal point, while the tucked side keeps the shape from feeling too wide. If your face is round or square, this kind of asymmetry can be flattering without trying too hard.
Backcomb the crown lightly, not aggressively. You want lift, not a nest. Then smooth only the surface layer with a brush and pin the lower part behind the ear if it needs help staying put. A little shine spray at the end keeps the front from looking dry or frizzy under bright light.
Tiny detail, big payoff: part the hair while it’s still damp. Once curls dry in a deep side part, they tend to remember it.
5. Bouffant Height With a Low Nape Roll
The top should feel lifted, the back should feel smooth, and the ends should disappear into a tidy roll.
That’s the basic shape of a curly bouffant with a low nape roll, and it has real staying power on thicker hair. The bouffant gives you that rounded 1950s silhouette. The low roll keeps the style from turning into an inflated halo. Together, they make curls look deliberate.
Keeping the Bouffant Soft
Use a tail comb to lift the crown section from underneath, then smooth the outer layer with a brush. A little teasing goes a long way here. If you pull too hard, the hair gets fuzzy at the roots and the style starts to look tired before you leave the house.
- Tease only the hidden underside of the crown.
- Smooth the top layer with a light hand.
- Roll the lower section upward at the nape and pin horizontally.
- Use bobby pins in a crisscross pattern so the roll does not shift.
This style is dressy without being stiff. It pairs well with a sleeveless dress, a square neckline, or anything that leaves the neck open. If your curls are very tight, leave a few ends loose around the roll instead of forcing every strand under. The shape still reads correctly, and the texture looks richer.
6. Rolled Bangs With Shoulder-Length Curls
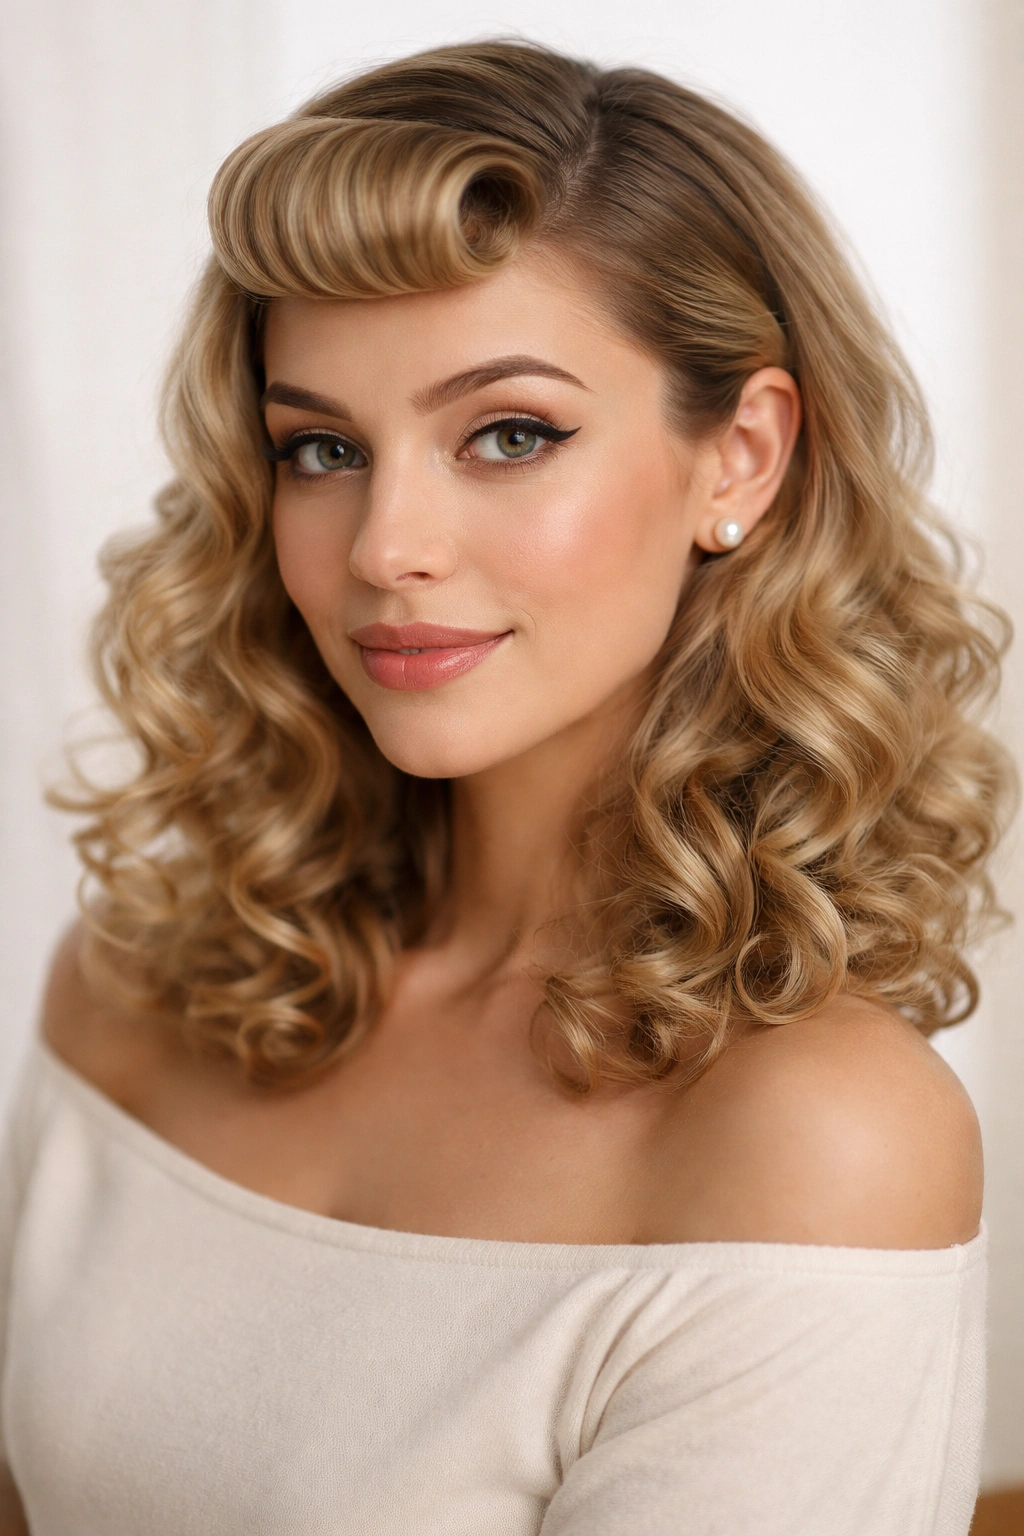
A friend with curly fringe once called this her “I need to look put together in ten minutes” style, and she was not wrong.
Rolled bangs have that neat front section that says vintage right away, while the rest of the hair stays easier and freer. On shoulder-length curls, the contrast is especially nice. The front gets control. The length gets to keep its bounce.
If your bangs are long enough to wrap once around two fingers, you can make a proper roll and pin it flat against the head. If they’re shorter, create a smaller puff or mini pompadour instead. Trying to force short curls into a big roll usually ends in frustration.
The best part is that this style does not require every curl to behave. A little asymmetry at the back is fine because the front does the visual work. You can leave the lengths down, tuck one side behind the ear, or gather the back loosely with a decorative clip.
A lot of 1950s styling looks severe in photos and softer in real life. This is one of those looks. It feels more human when the curls have a little movement.
7. A Headscarf-Tied Puff for Second-Day Curls
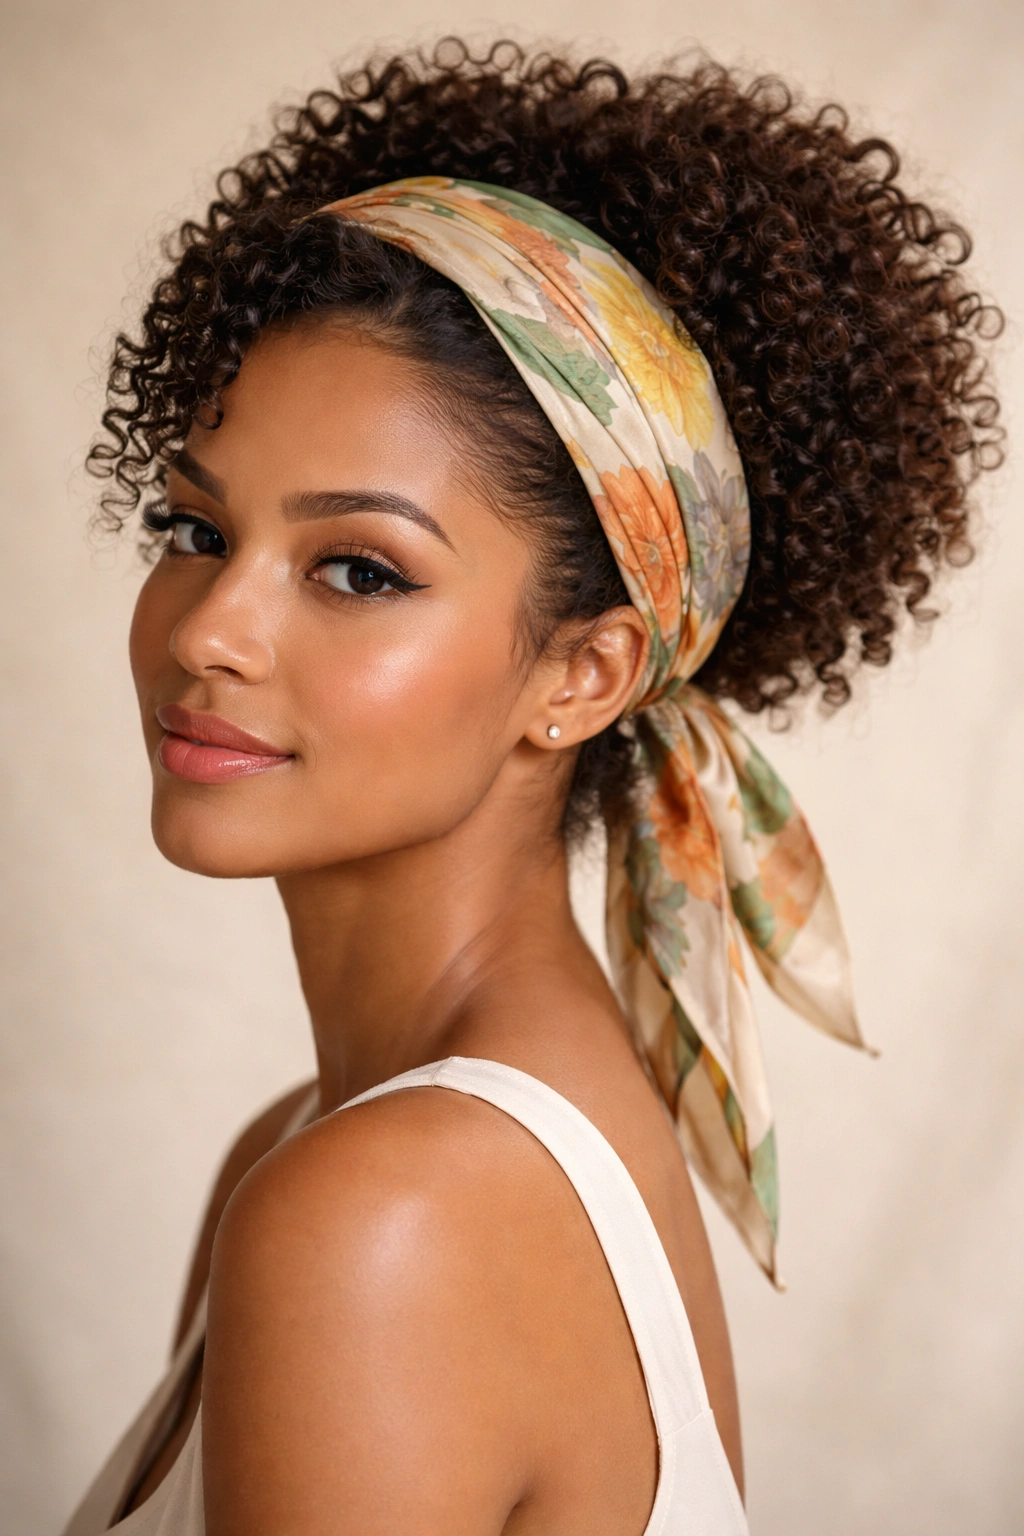
Got curls that need help more than they need washing?
A headscarf style is the kind of practical vintage look that still feels charming. It keeps the front smooth, adds a bit of color or pattern, and hides the parts of your hair that need the most help. Second-day curls are often better for this than freshly washed hair because they have more grip.
Scarves That Stay Put
Choose a scarf with enough width to anchor at the crown. Thin ties slip. Wide cotton bandanas, silk squares folded into a band, and satin scarves all work, but the material changes the feel. Cotton grips more. Satin glides more. Pick based on how much slip your hair gives you.
- Fold the scarf into a band about 2 to 3 inches wide.
- Tie it just behind the hairline, not on top of it.
- Leave the curls gathered in a puff, low ponytail, or loose roll at the back.
- Pin any stray pieces under the scarf before they puff out.
This look has a casual 1950s charm that’s easy to wear with denim, a fitted top, or a simple day dress. It also saves you from overhandling your curls, which is often the smartest move. Some styles ask for more effort than they deserve. This is not one of them.
8. A Half-Up Crown Roll With Loose Ends
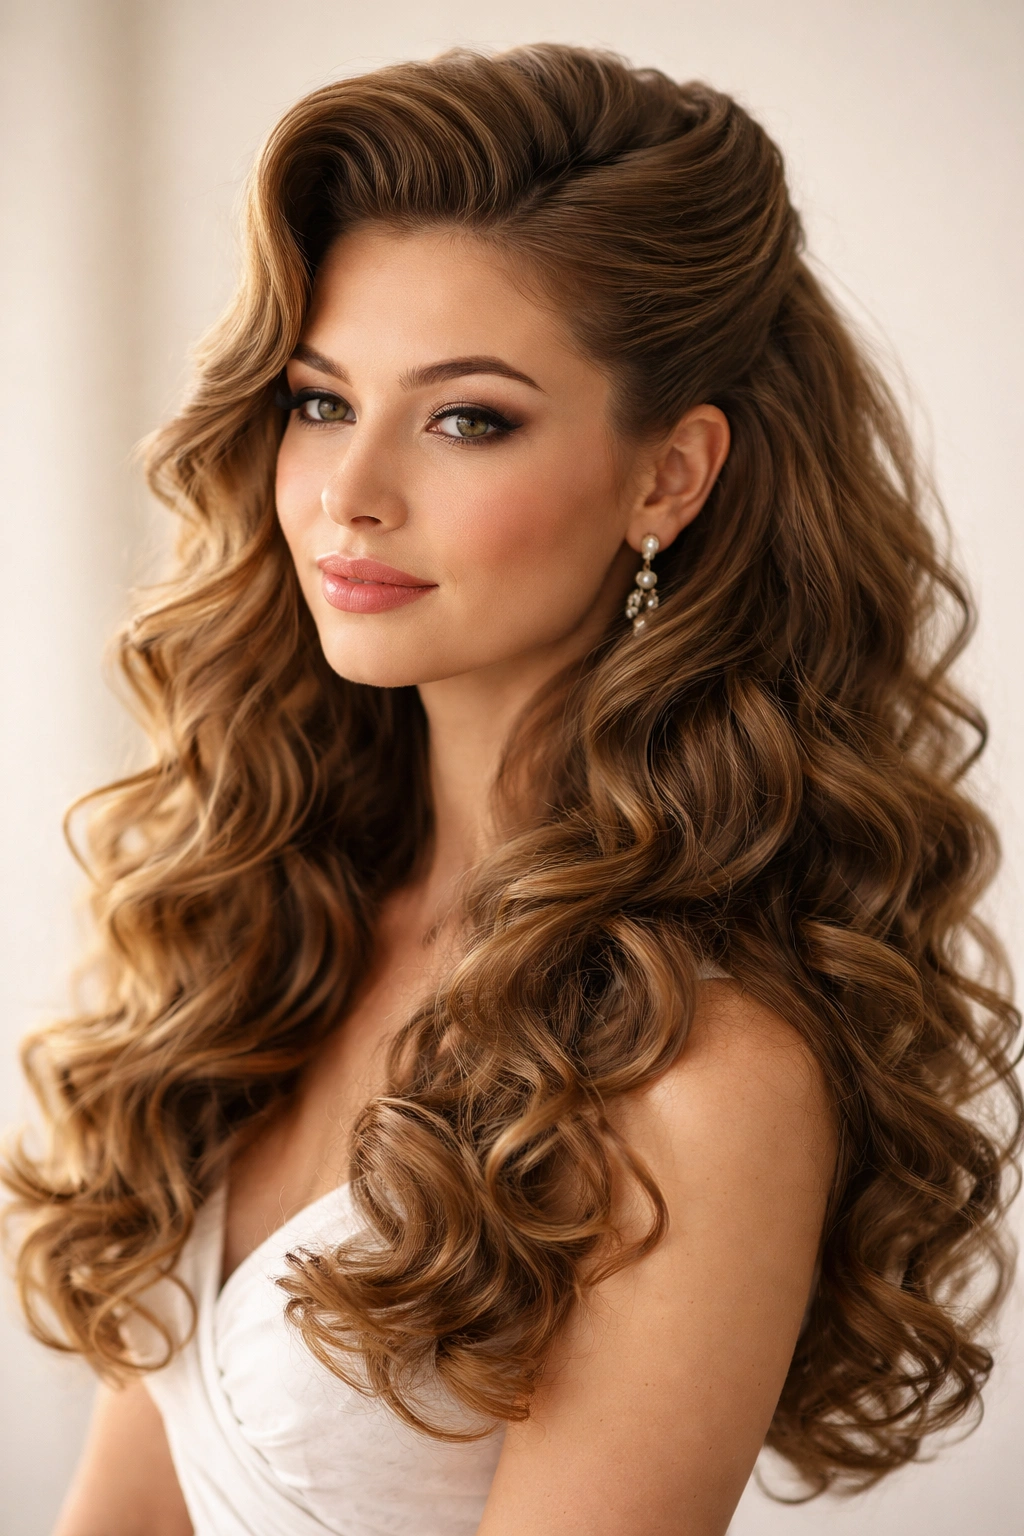
Picture a wedding guest hairstyle with volume at the crown and curls falling below the shoulders.
That’s the feel of a half-up crown roll, and it’s one of the most flattering retro shapes for long curly hair. The top section gets rolled or twisted back from the temples, then pinned across the crown. The lower half stays free, so the curls keep their length and movement.
This style has a little more softness than victory rolls and a little more structure than a plain half-up. It sits right in the middle, which makes it useful. If your curls are very thick, you may need to split the top section into two smaller rolls instead of one big one. That keeps the shape balanced and stops the pins from slipping.
A decorative comb can hide the pin line if you want a dressier finish, but I like this style best when the hardware stays hidden. The curls should look like the star, not the accessories. A touch of shine cream on the outer layer is enough to tame the frizz without flattening the body.
It’s a good one for long faces, open necklines, and anyone who likes a polished front with a freer back.
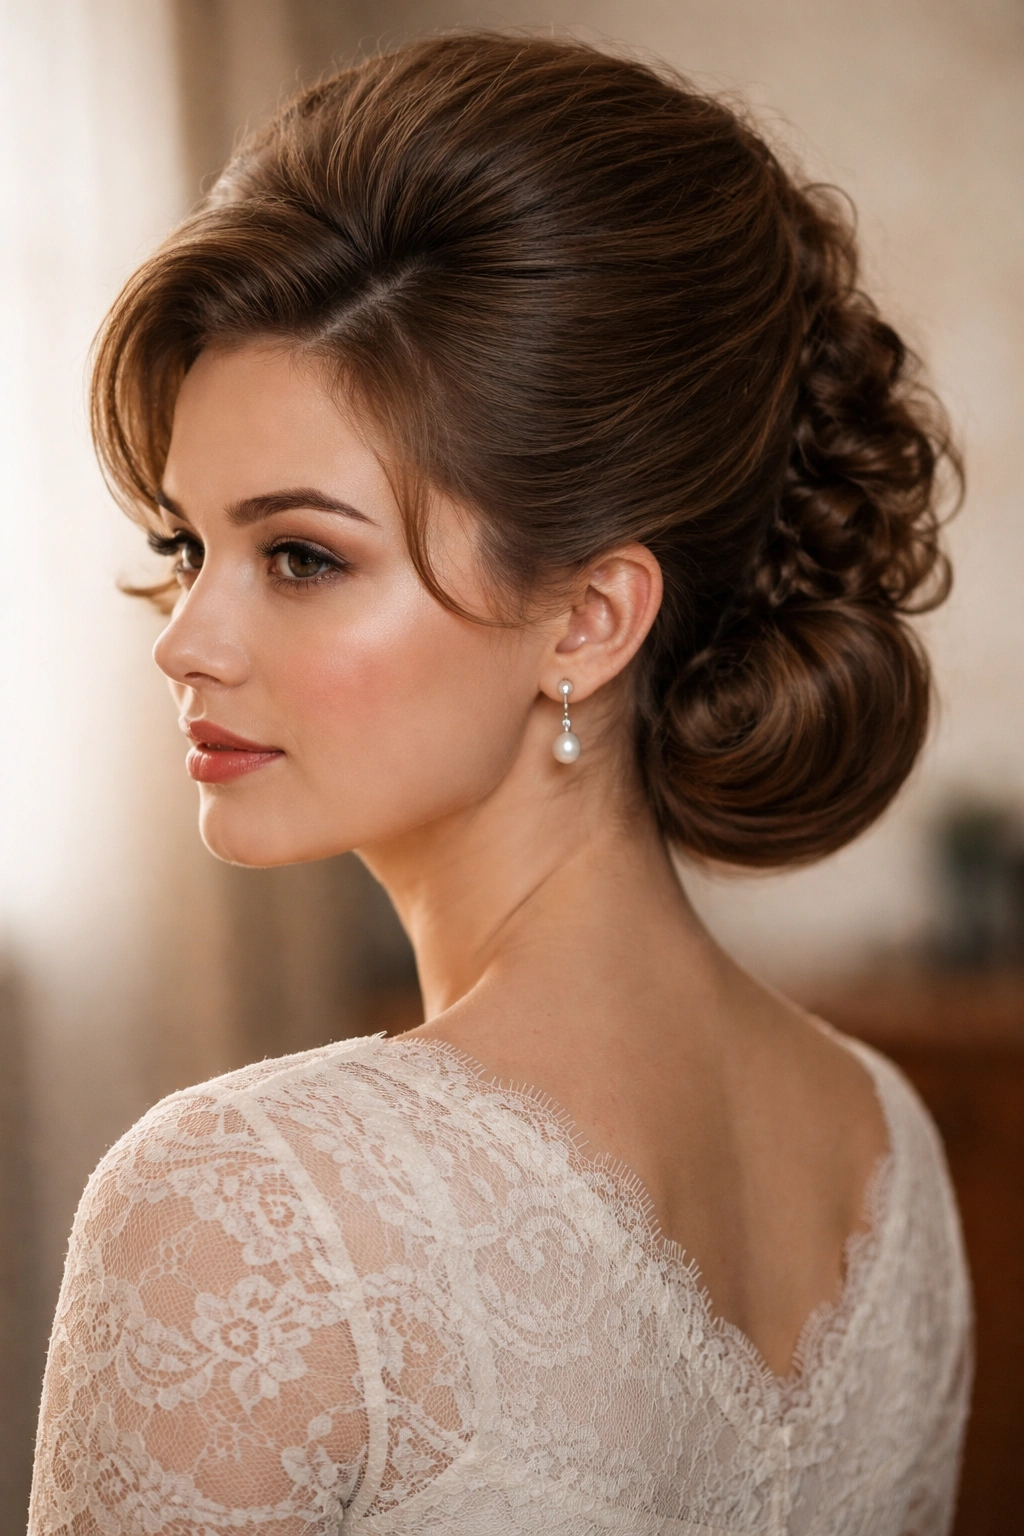
9. A Gibson Tuck at the Nape
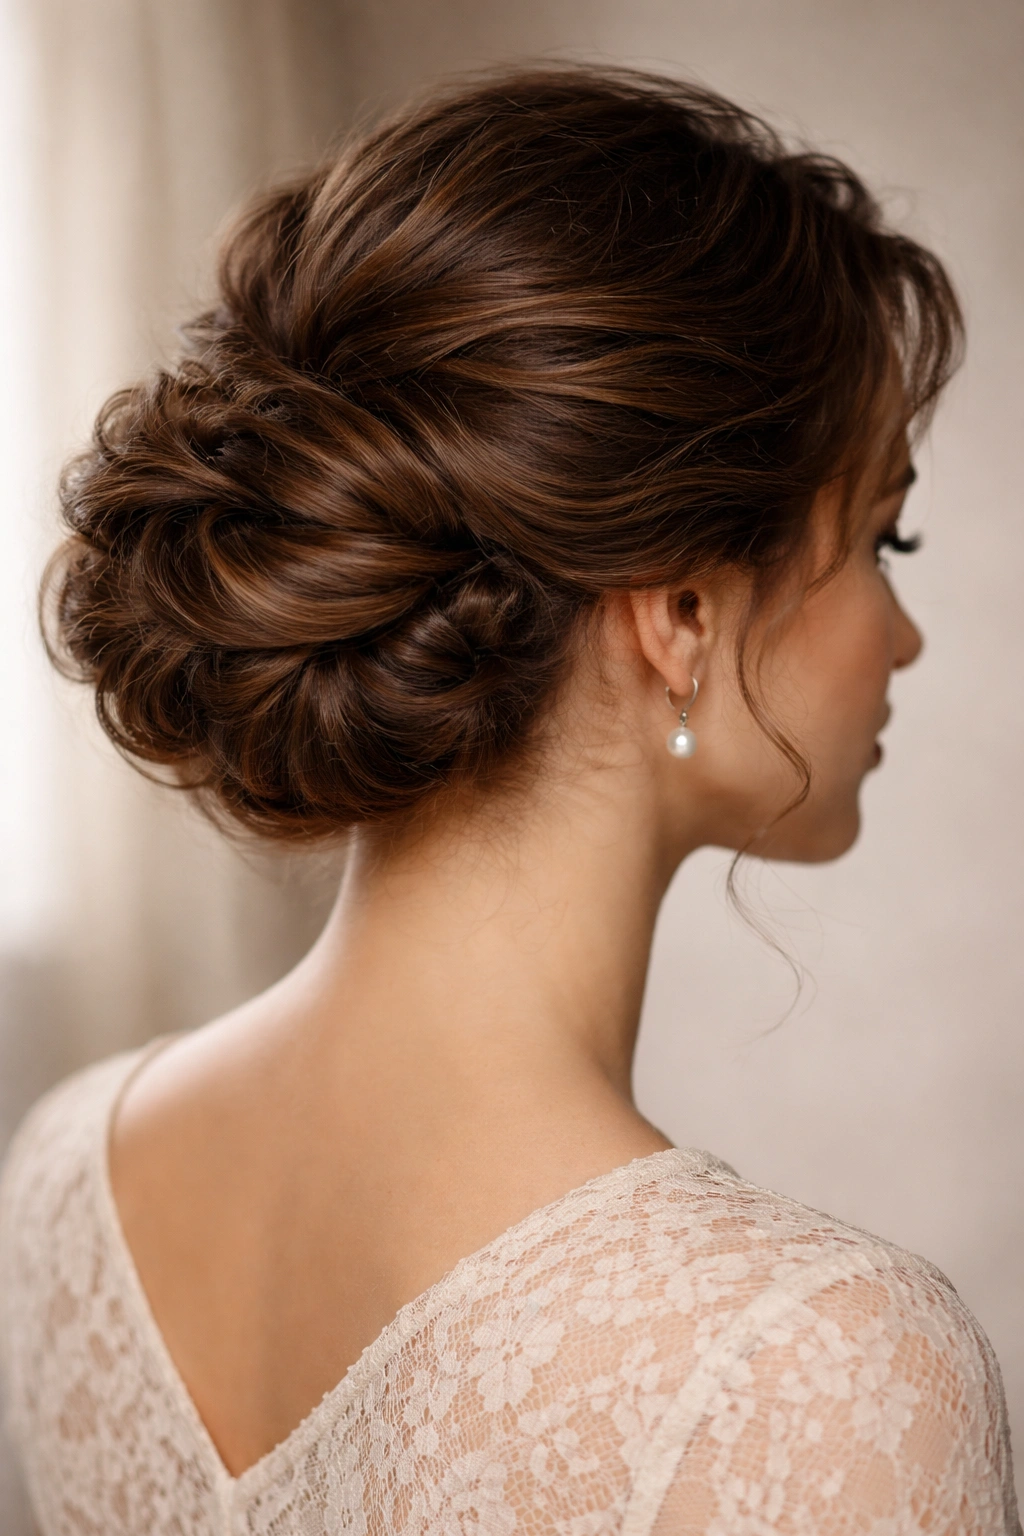
Unlike a strict chignon, a Gibson tuck keeps the shape soft.
That’s why it works so well with curly hair. You still get the classic nape roll that feels rooted in midcentury styling, but the tucked volume lets texture peek through. The result is tidy from the front and a little more interesting from the side.
The basic shape is simple: gather the hair low, fold the length upward into a roll, and tuck the ends into the pocket you’ve made at the nape. Then pin the roll into place. If your hair is thick, do it in two sections so the tuck doesn’t bulge out in the middle. If it’s fine, a hair net can help hold everything in a smooth outline.
This style looks especially good with a side part and a small lift at the crown. That gives it the right amount of old-fashioned height. A ribbon or a comb can go on top, but I prefer to keep the line clean. The tuck itself is enough.
If you want a formal hairstyle that doesn’t scream “I spent three hours on this,” the Gibson tuck does the job. Quietly. Which is part of the charm.
10. Side-Swept Finger Waves at the Temple
This is the most polished option on the list.
Finger waves have a precise, sculpted feel that reads instantly as vintage, and on curly hair they create a sharp contrast against the softer lengths. You do not need to wave the whole head. In fact, using them only at the temple or front hairline is often smarter. The detail is enough to signal the era without turning the style into costume.
How to Keep the Waves Crisp
Use strong-hold gel on damp hair, then shape the waves with a fine comb and your fingers. Clip each ridge in place and let it dry fully before you touch it. If you disturb the pattern too soon, the waves relax into an awkward blur.
- Work in small sections, about the width of two fingertips.
- Press the wave flat against the head with the comb, then curve the next ridge in the opposite direction.
- Clip each finished wave so it stays sharp while drying.
- Leave the rest of the curls loose, pinned low, or gathered into a smooth roll.
This look is best when you want the hairline to do the talking. It pairs well with statement earrings because the side-swept shape leaves the face open. It also works on shorter curly hair that cannot quite support full rolls but can still hold a little drama at the front.
The only real mistake here is rushing the dry time. Don’t. The shape is the point.
11. A High Ponytail With Teased Crown and Curled Ends
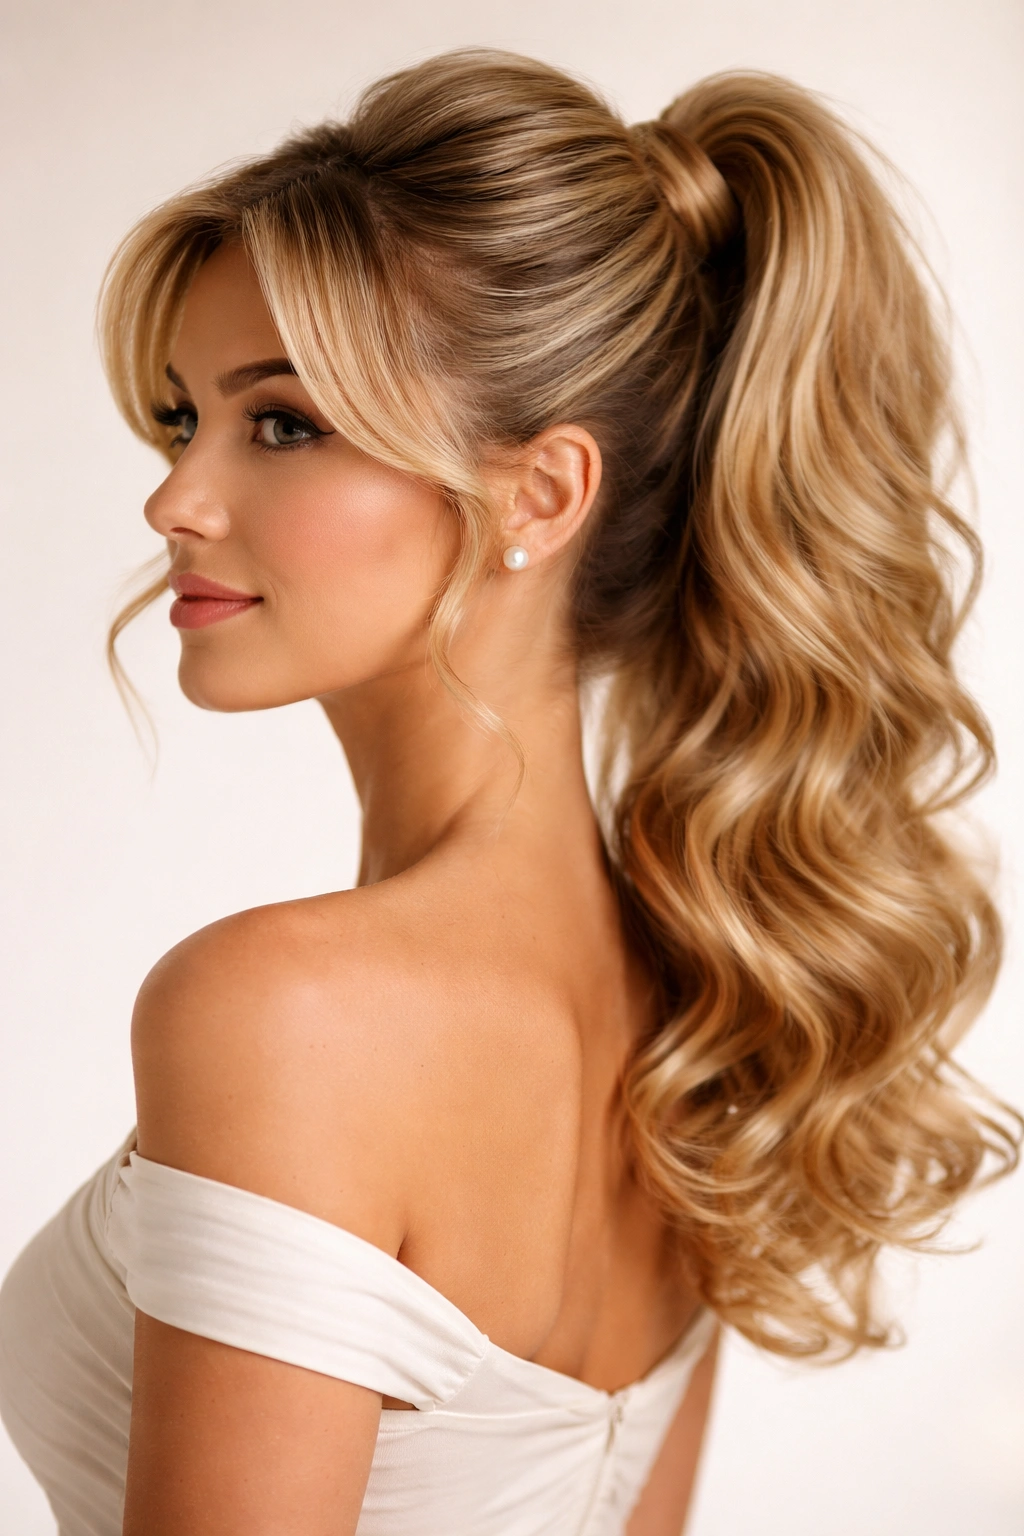
If you want something playful instead of formal, this is the one.
A high ponytail sounds simple, but the 1950s version has extra lift at the crown, a wrapped base, and enough curl definition at the ends to feel styled instead of tossed together. It has movement. It has bounce. And it keeps the face open, which is useful when you’re wearing bold lips or a structured neckline.
Start by teasing a small section at the crown, then smooth the outer layer over it. Gather the ponytail high, wrap a curl or a small section of hair around the elastic, and pin it underneath. If your curls are long, let them hang free. If they’re shorter, clip a few face-framing strands into place so the ponytail doesn’t look too bare.
This style is forgiving, which I appreciate. It works with layered curls, with fresh wash-day hair, and with hair that needs a reset between more complicated styles. A ribbon can be tied around the base if you want extra midcentury sweetness, but it’s not required.
Honestly, this is the one I’d pick for a day when I want a vintage feel without behaving like I’m headed to a costume party.
12. A Low Curly Chignon With Soft Height
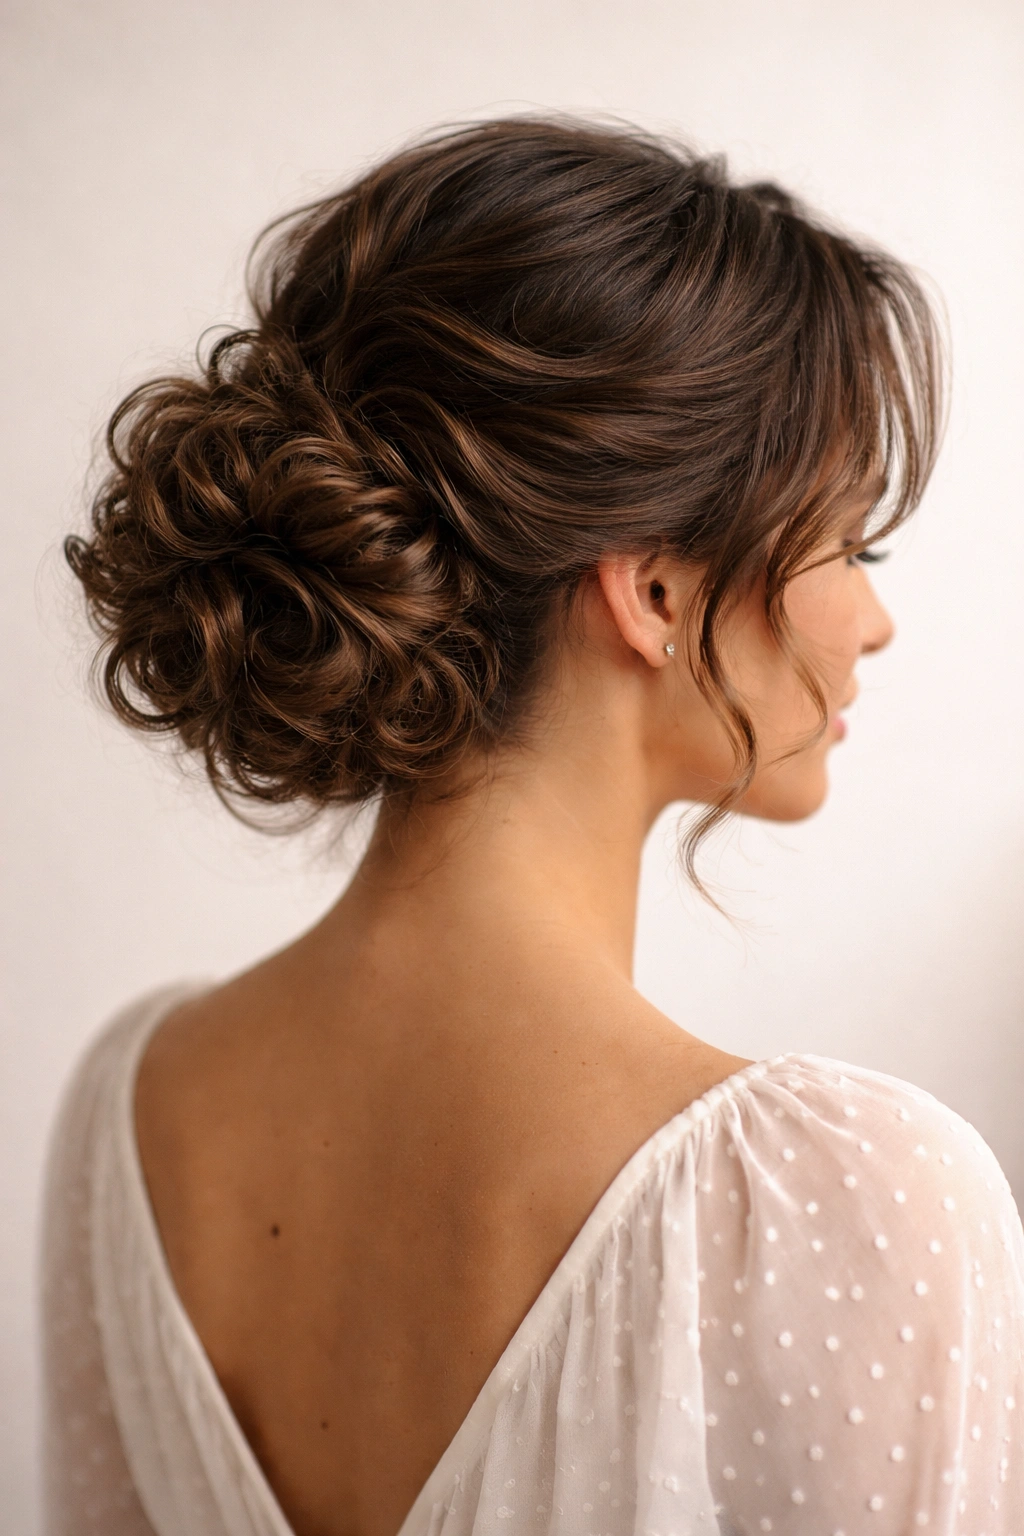
A chignon does not have to look severe.
On curly hair, a low chignon gets much nicer when you keep a little height at the crown and let the curls create softness around the bun. Without that bit of lift, the style can sit too flat and lose the 1950s shape. With it, the whole thing looks balanced and elegant in a way that feels easy, not stiff.
Gather the hair low, twist or fold it into a compact bun, and pin it near the nape. Then lift the crown slightly and smooth the outer layer so there’s a gentle dome rather than a flat top. If you have shorter layers, leave a few pieces free around the ears or neckline. They soften the outline and stop the bun from looking too formal.
This style works well for dinners, photographs, and events where you want your hair off your neck but still want some shape at the top. I like it with curls that have been stretched just a bit, since that gives the bun a cleaner outline. Very tight curls can still do it, though the bun may end up fuller and more textured.
The best part? It wears comfortably. No pulling, no constant readjusting.
13. A Front Pompadour With Free Curls in Back
The front has the drama; the back gets to be easy.
That’s the beauty of a curly pompadour. You build height in the front, usually by lifting the top section and rolling or pinning it back, then you let the rest of the curls fall loose or gather them low. The style feels bold without being complicated, which is a useful combination when your hair already has its own personality.
This works especially well on shorter curly hair, because you do not need a lot of length to create a strong front shape. A curved roll or soft lift above the forehead is enough. If you have bangs, they can be blended into the front sweep. If not, a side section can be pinned back to make the pompadour feel wider.
Keep the back simple. That’s the move. Too much activity in every section makes the style look crowded, while one strong front shape plus loose curls gives you a cleaner silhouette. A little shine spray on the top and a touch of curl cream on the ends are usually enough.
It’s a good option when you want a little edge in a retro look. Not punk. Just a little attitude.
14. A Curly Pageboy Flip for Short Hair
The ends curl under near the jaw, and the whole shape feels a little cheeky.
That’s the charm of a curly pageboy flip. It’s one of the best 1950s-inspired hairstyles for short curly hair because it uses the natural bend of the curl to create that tucked-under outline around the face and neck. You get softness at the sides, a neat finish at the bottom, and enough structure to look deliberate.
What to Watch For
This style is easier on bobs and lob-length curls than on very layered cuts. If your layers are too short, the flip can break apart at the sides and refuse to sit where you want it. A smoothing cream helps, but the cut shape matters here.
- Brush the ends inward while the hair is slightly damp.
- Clip the side sections under so they dry in a curved line.
- Tuck one side behind the ear if you want a more sculpted look.
- Finish with a light mist of flexible spray, not a crunchy shell.
The pageboy has a bit of attitude without losing polish. It feels smart. A little playful, too. If your curls like to spring outward no matter what you do, this may take a few extra pins, but the shape is worth the effort because it gives short hair a real vintage outline.
15. A Ribbon-Tied Low Ponytail With Face-Framing Pieces
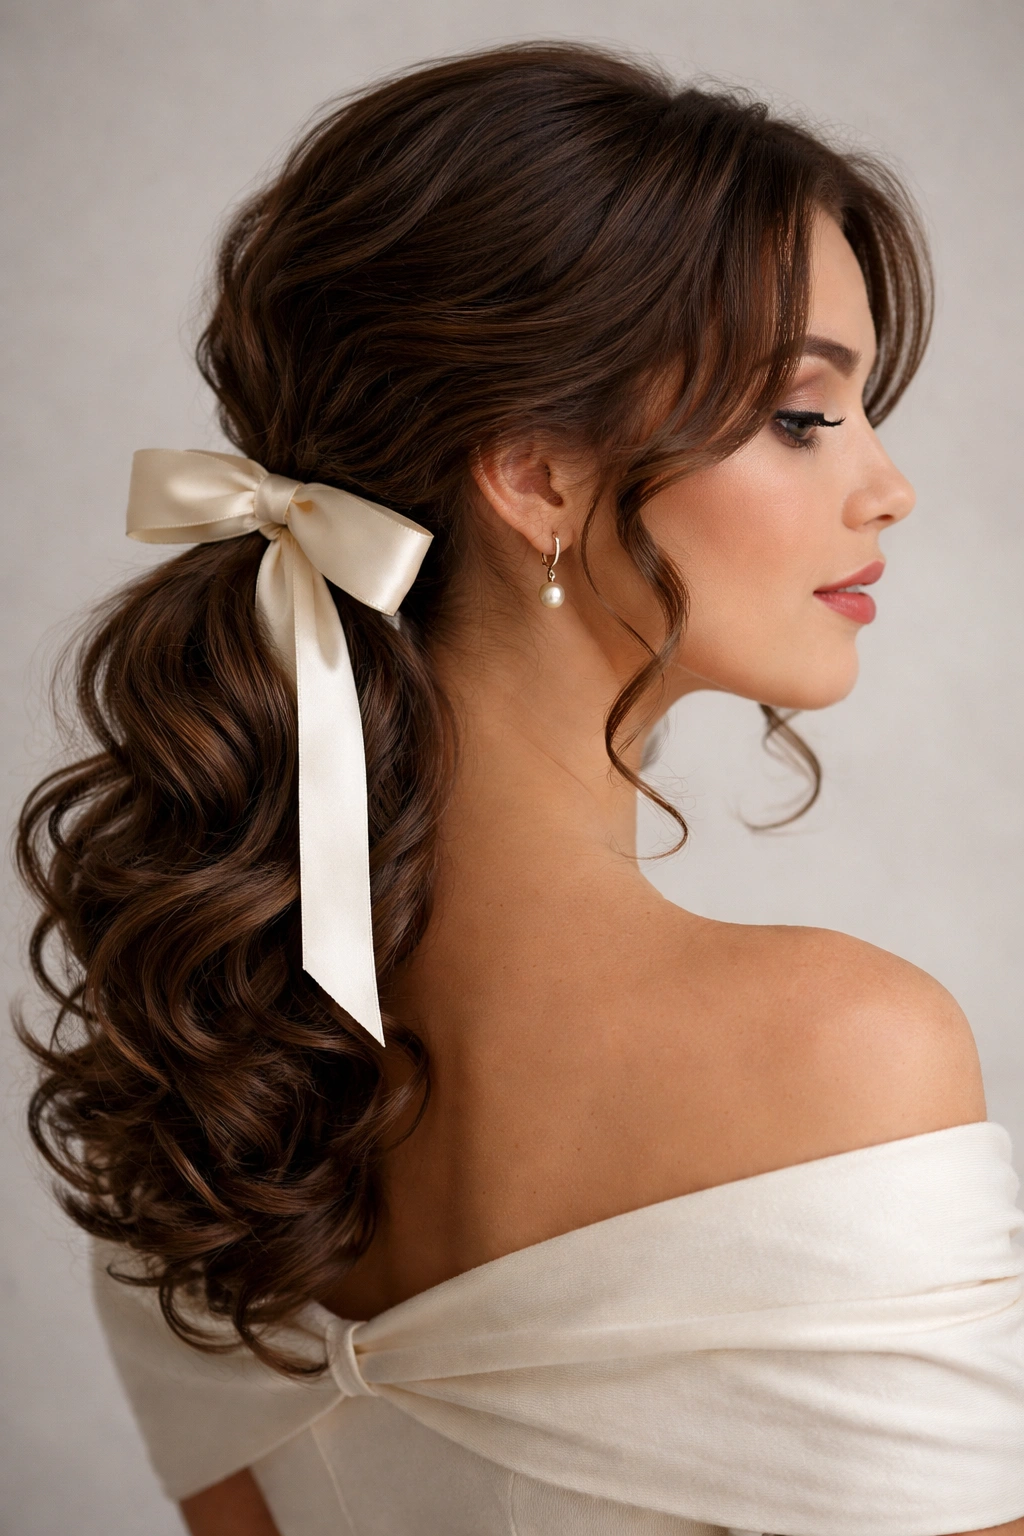
If you want a final look that feels sweet instead of stiff, finish with a ribbon.
A low ponytail tied at the nape is simple, but the 1950s version gets its character from the crown volume, the smooth front, and the ribbon covering the elastic. On curly hair, the ponytail itself can stay loose and full, which keeps the style from looking overworked. A few face-framing pieces make it softer still.
Choose a ribbon with a little body. Grosgrain holds its knot better than flimsy satin, though satin does look lovely if the ponytail isn’t too heavy. Velvet gives the style more depth in colder weather, but it can feel bulky on fine hair. Pick the ribbon based on how much presence you want on the bow.
This is one of the easiest vintage looks to wear with curly hair because it doesn’t ask you to force every strand into place. The top can be smoothed, the ponytail can stay textured, and the ribbon handles the rest. If you want extra polish, wrap a small curl around the ponytail base before tying the bow.
Honestly, it’s a nice ending because it proves the point. Retro hair does not have to be rigid to look intentional.
Final Thoughts
The smartest 1950s-inspired hairstyles for curly hair do not erase texture. They shape it. That difference matters more than any single pin, comb, or spray.
If one style looks better on your curls than another, it’s usually because the sectioning matches your length and density. Tiny front sections suit victory rolls. Thick, stubborn curls often behave better in a Gibson tuck or low chignon. Short hair tends to shine in pompadours, finger waves, and pageboy shapes. The right choice is the one your hair can hold without a fight.
Start with the style that fits your curl pattern, not the photo you’ve saved in your head. That’s where the good versions live.