Curly hair and messy buns have a complicated relationship. Pull too tight and you get a helmet. Leave too much slack and the bun slides down the back of your head by lunch.
That middle ground is where the good styles live. You want hold, but you also want the coil, the frizz, the soft halo at the edges—the things straight-hair tutorials keep trying to erase.
Messy bun hairstyles for curly hair work best when you stop fighting the texture and start building around it. A satin scrunchie, a few bobby pins, and a little root lift usually do more than a dozen mirror checks and an hour of trying to make the bun “neat.”
These 15 looks lean into that logic. Some are fast and casual. Some can pass for polished. All of them respect the curl pattern instead of flattening it into something it never wanted to be.
1. The Pineapple Messy Bun at the Crown
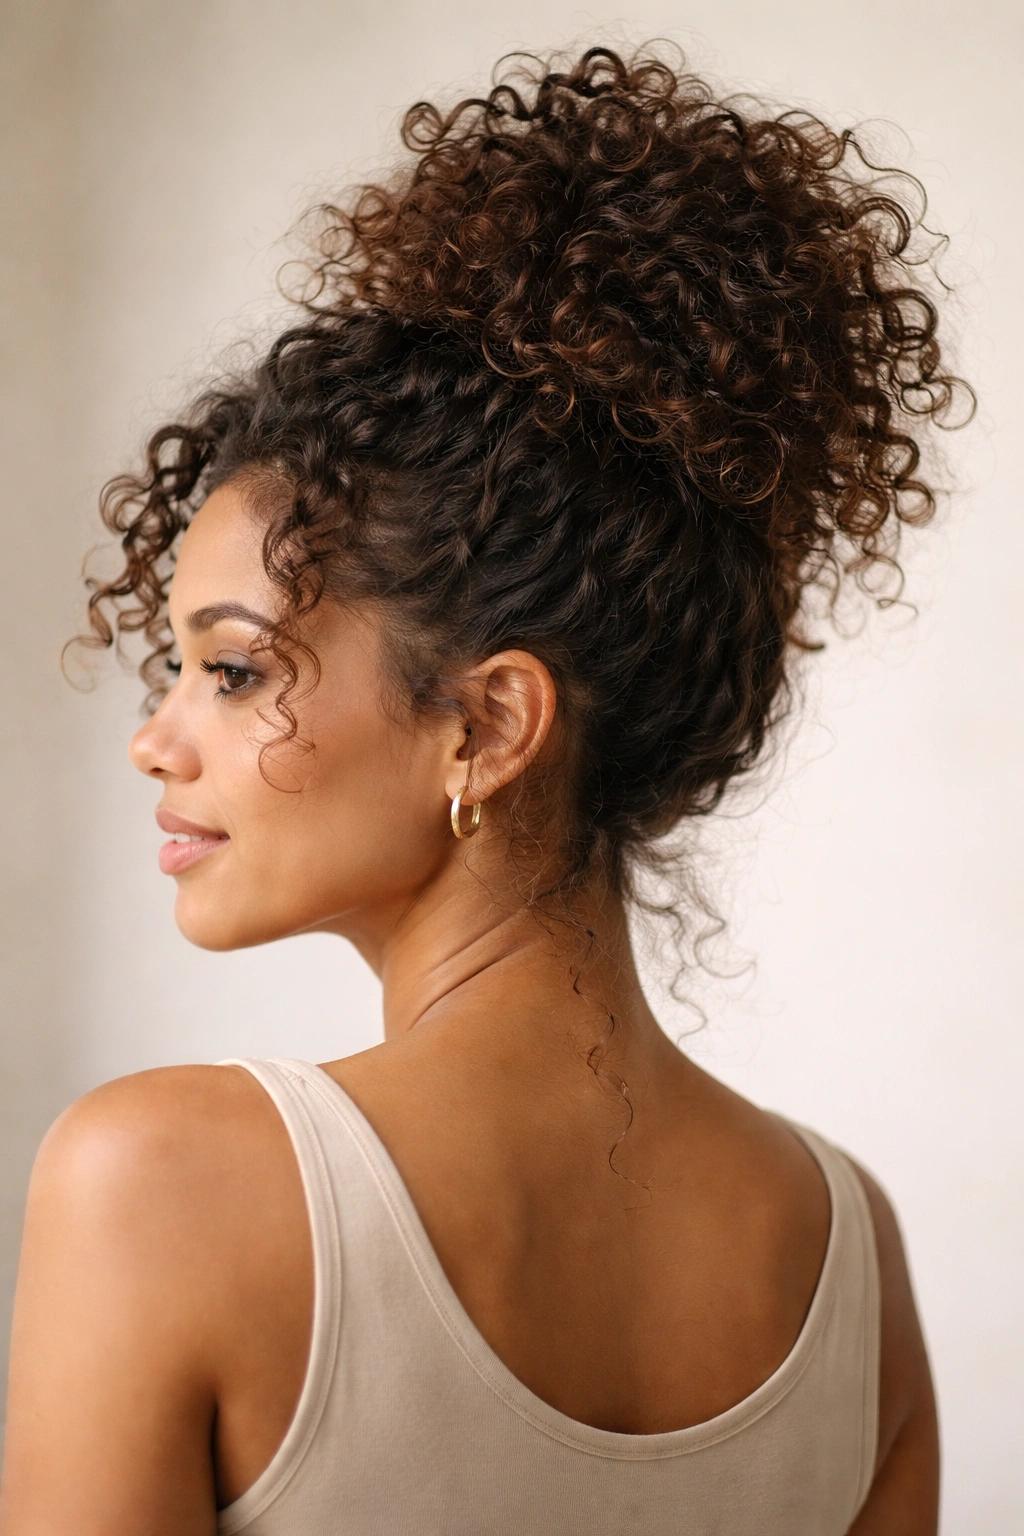
If your curls lose shape the second you gather them, start here. The pineapple bun sits high on the crown, keeps the curls lifted, and lets the ends spill in a soft loop instead of being crushed into submission.
I like this one for second-day hair, but it works on fresh curls too if you don’t over-handle them. Gather the hair loosely with your fingers, not a brush, and use a satin scrunchie or a soft coil tie. The goal is height and shape, not a dented ring around your head.
Why it works on curly hair
Curly strands already have spring, so a high placement gives the hair room to stack instead of flatten. That means less tugging at the roots and less weird puffing at the sides. The bun ends up looking intentionally loose, which is a rare win.
A little frizz at the crown is fine. Actually, it helps.
- Best for medium to long curls that can coil once or twice around the elastic
- Looks strongest on 2C to 4A curl patterns
- Use 2 to 4 bobby pins if the bun feels top-heavy
- Leave 2 or 3 face-framing spirals out so the front doesn’t look too severe
Pro tip: flip your head over before you gather the hair. It gives the crown a little lift without teasing it into a nest.
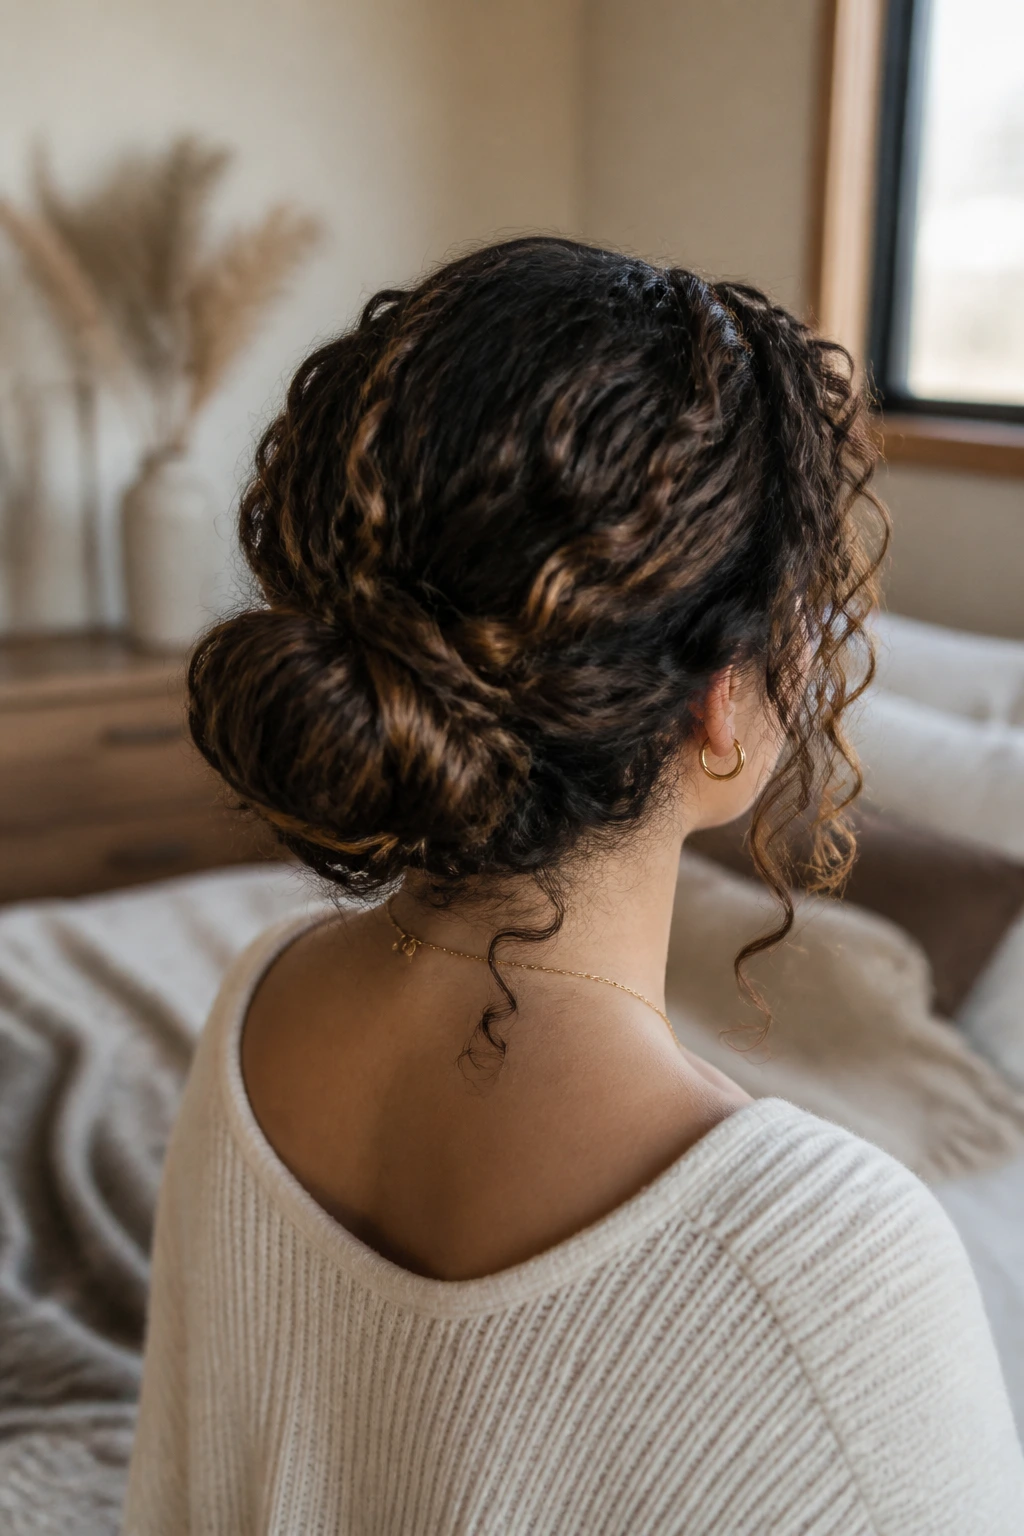
2. The Low Nape Knot That Stays Soft
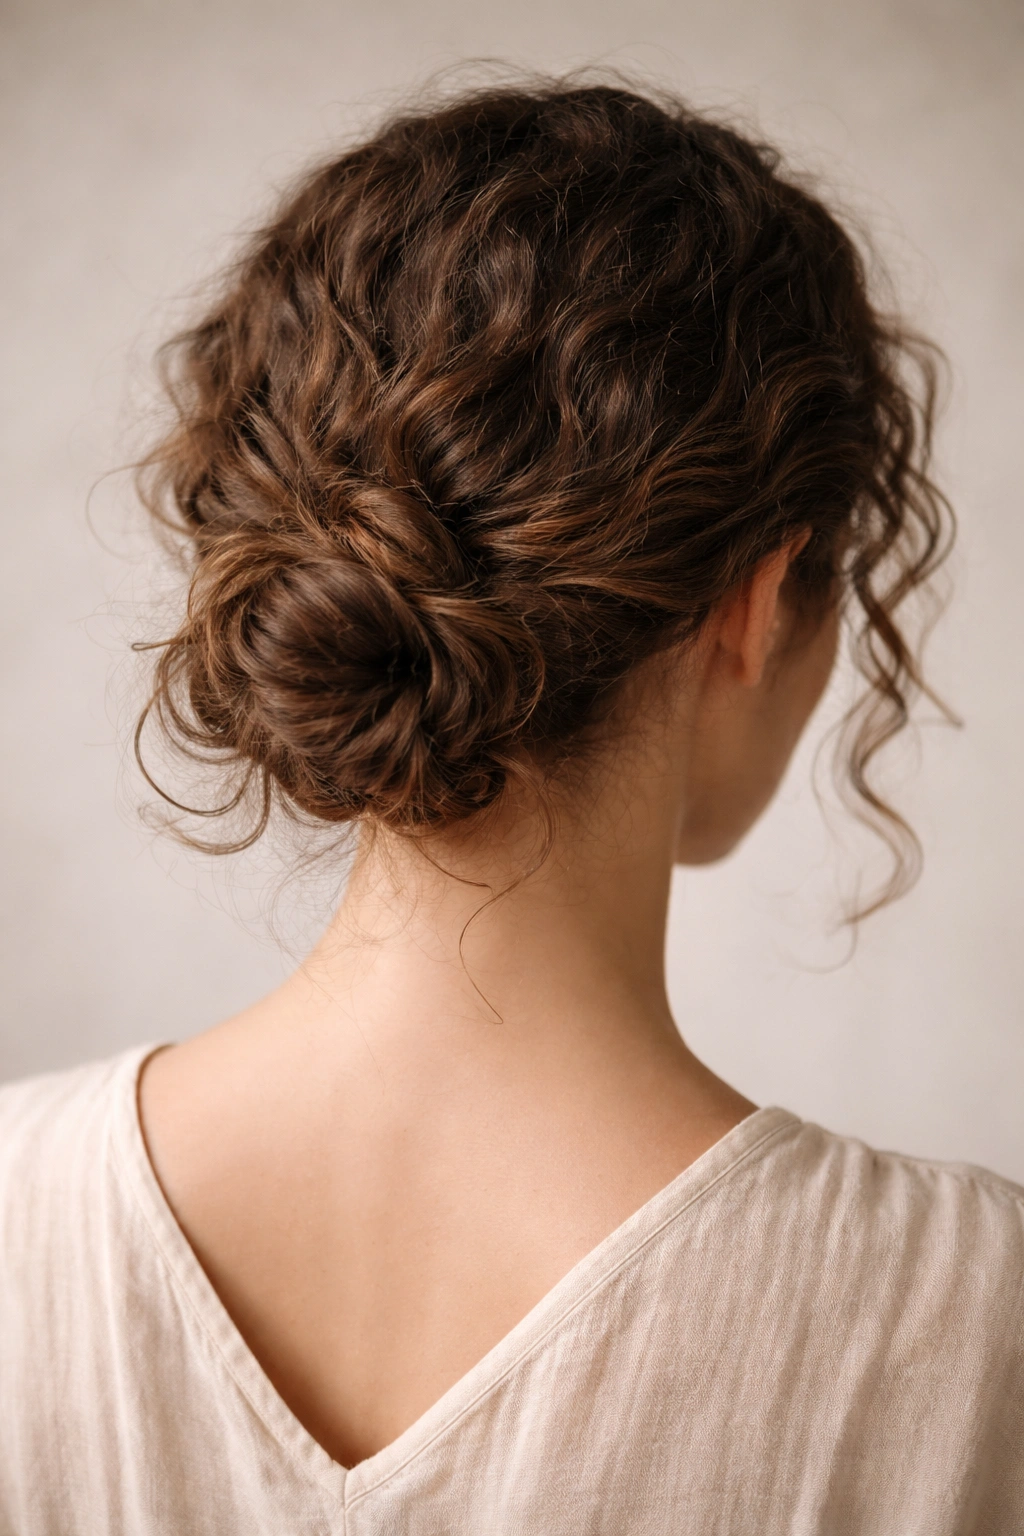
A low knot at the nape is the quietest messy bun in the bunch, and that is why I like it. It doesn’t shout for attention, but it keeps curly hair looking soft, tidy, and a little undone in the right way.
The trick is to gather the hair low and loose, then twist the length once or twice before tucking the ends under. Don’t wrap it into a tight ball. That’s how the bun turns stiff and starts fighting the curl pattern instead of working with it. A few pins placed under the knot will keep the shape secure without turning the whole style into a tight little knot of tension.
This version is especially good when your curls are already stretched out a bit and you want a style that feels calm. It also plays nicely with humid weather, because the shape stays close to the neck instead of ballooning outward. And if you have a scarf, coat collar, or high neckline to deal with, the low placement keeps everything comfortable.
One more thing: leave the front softer than you think you should. That tiny bit of looseness around the temples makes the style look human.
3. Half-Up Messy Bun With Face-Framing Curls
Need your hair out of your face but not all the way up? This one solves the problem fast. The half-up messy bun is one of the easiest curly styles to make look deliberate, because the bottom half of the hair does half the styling for you.
Pull only the top section back, starting from about the temples and moving up to the crown. Don’t grab too much. If you scoop up the whole top third of the head, the bun starts looking bulky, especially on tight curls. Twist the top section once, coil it into a loose bun, and let the ends stick out a little. That little mess is the point.
How to place the bun
Keep the bun centered between the crown and the back of the head. Too high, and it starts reading playful in a way you may not want. Too low, and it can look like you ran out of steam halfway through.
The face-framing pieces matter here. Let a few curls fall naturally around the cheekbones and temples. If they’re too springy, stretch them once with wet hands and a drop of leave-in.
- Best for shoulder-length curls and longer
- Works on day-one curls if the roots are dry
- Good for school, errands, or work-from-home days
- Use one medium scrunchie plus 2 bobby pins if the bun feels loose
4. The Braided-Base Messy Bun That Won’t Slip
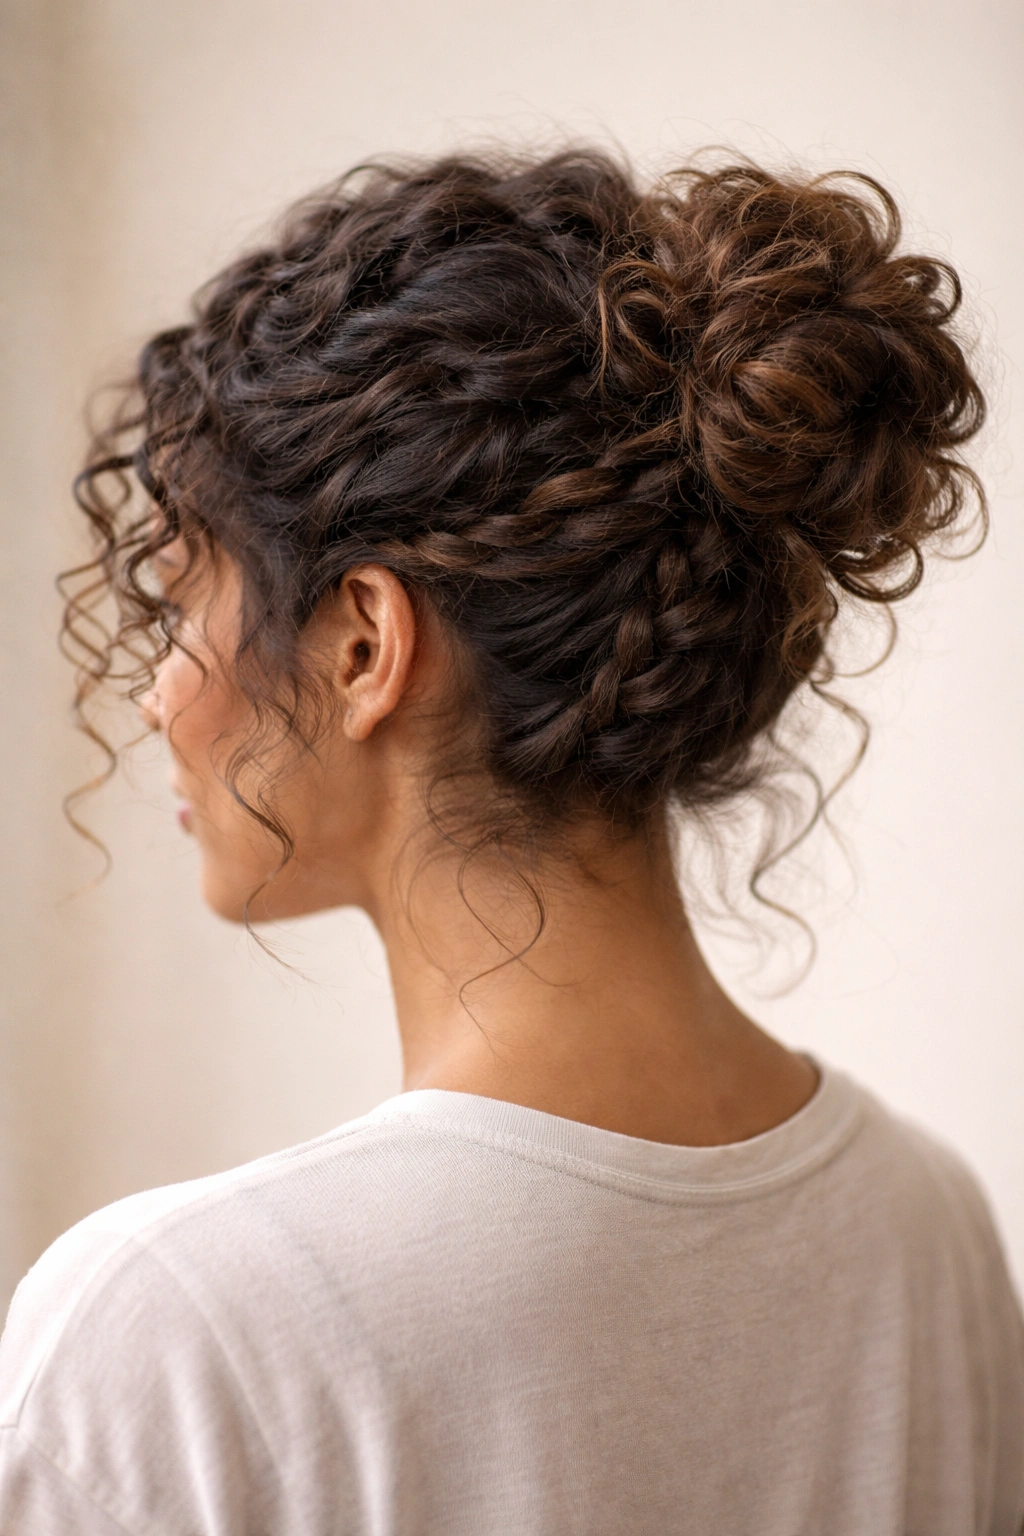
There’s a reason braided bases keep showing up in curly hair styling. Grip. Plain and simple. Curly hair can be slippery at the roots, especially if you use cream or oil, and a quick braid gives the bun something to hold onto.
Start with a loose braid at the back of the head or along one side, depending on where you want the bun to sit. Then wrap the braid into a bun and pin it down in two or three places. The braid doesn’t need to look neat. In fact, a slightly uneven braid looks better once it disappears into the bun, because the texture adds interest without making the style heavy.
I use this one when I know I’ll be moving around a lot. It holds better than a plain twist, and it gives the bun a little extra body at the base. If your curls are thick, this is a strong option because the braid compresses some of the bulk before it becomes a knot.
- Braid first, bun second
- Pin the braid close to the head so it doesn’t fan out
- Use crossed bobby pins for better hold
- Keep the ends loose if you want the bun to feel softer
A neat braid is optional. A secure base is not.
5. The Side-Swept Bun With a Deep Part
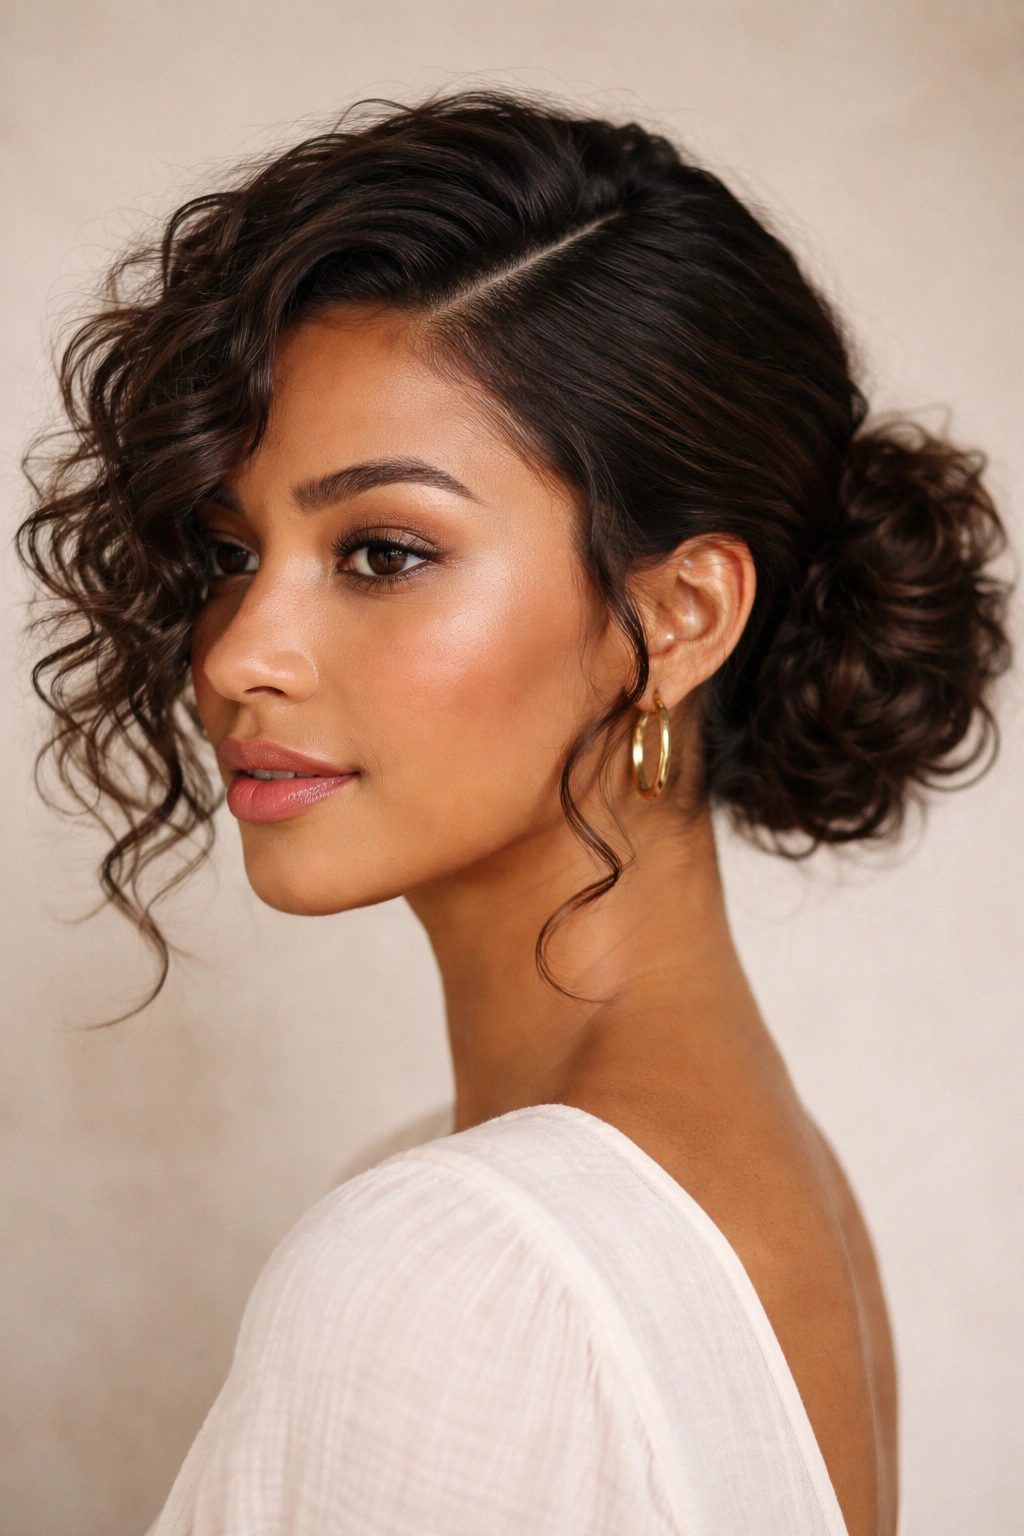
A side part changes the whole mood of curly hair. It shifts the weight, breaks up the symmetry, and gives even a messy bun a little drama without making it formal.
Start with a deep side part, then sweep most of the hair to the heavier side. Twist it into a low bun just behind the ear or slightly below it. The other side should stay softer and flatter, which sounds odd until you see it. That contrast is what makes the style work. One side has shape. The other side has glide. Together, they feel finished.
This is one of my favorite styles for curls that have already expanded a bit during the day. Instead of trying to control the volume, you redirect it. A side-swept bun also works well when the hairline is a little frizzy, because the side part hides the fact that the curls aren’t behaving in a straight line.
Use a comb only for the part if you want it cleaner. Otherwise, fingers are fine. A comb can make the part sharp; fingers make it relaxed.
And yes, a little asymmetry helps. A lot.
6. The Claw-Clip Messy Bun for Fast Styling
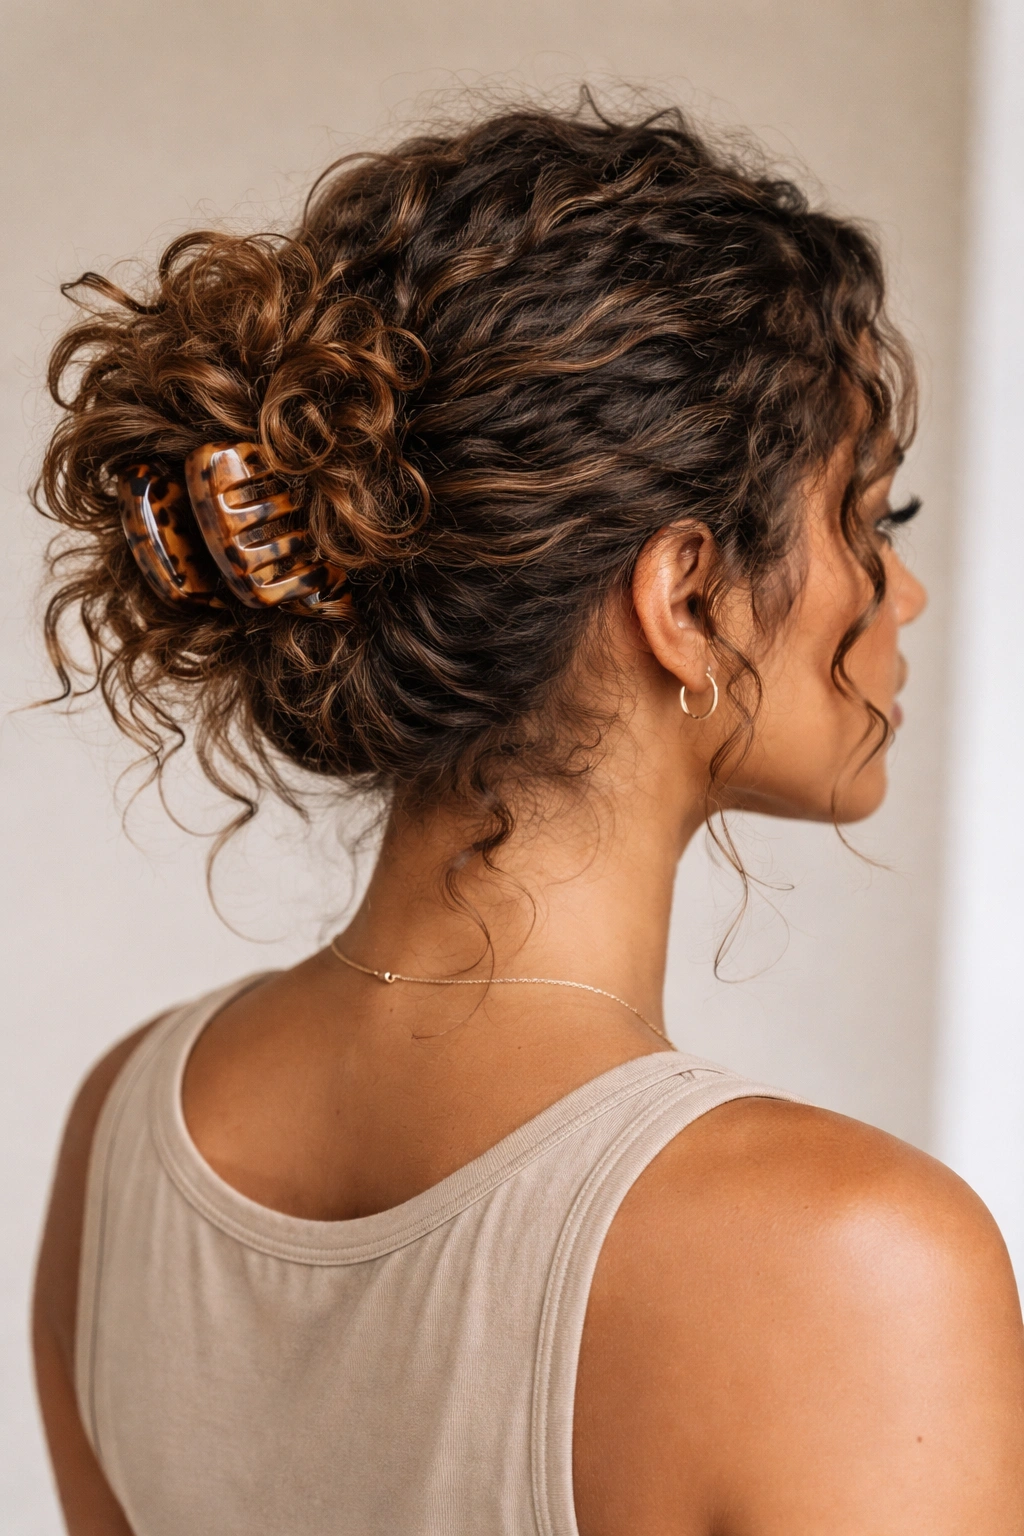
Compared with an elastic-heavy bun, a claw-clip style feels lighter on the scalp and kinder to curls that hate being stretched. It is also fast, which matters when you do not want to spend ten minutes coaxing every strand into place.
Gather the hair into a loose twist at the back or crown, fold it upward, and clamp it with a clip that has enough teeth to hold the texture. For most curly hair, a medium to large clip with a 3.5- to 4.5-inch span works better than a tiny fashion clip that looks cute and then gives up. The bun should feel pinned in place, not squeezed.
This style is best for medium-density curls and for anyone who likes the look of an undone bun but hates elastic marks. The clip lets the ends spread out, which gives the hairstyle that casual, lived-in shape people keep trying to fake with too much product. Don’t overthink the twist. A simple fold usually looks better than a complicated wrap.
Use one hand to hold the twist in place and the other to slide the clip in from below. If the clip catches only the outer layer of hair, it will slide. If it grabs enough depth, it holds.
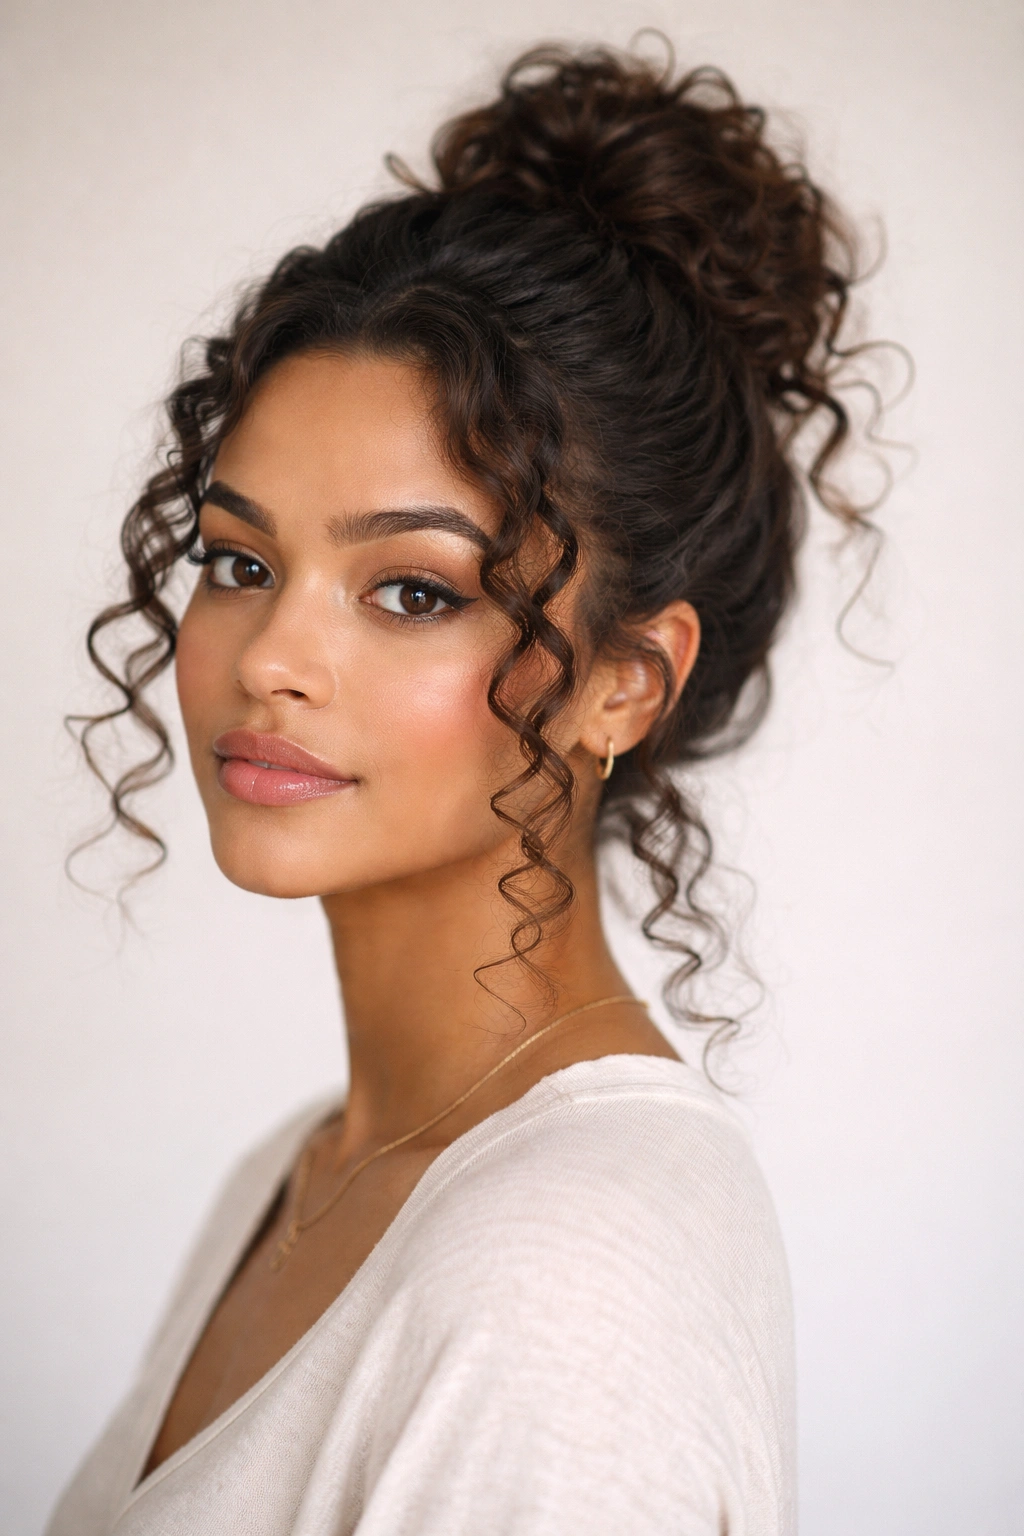
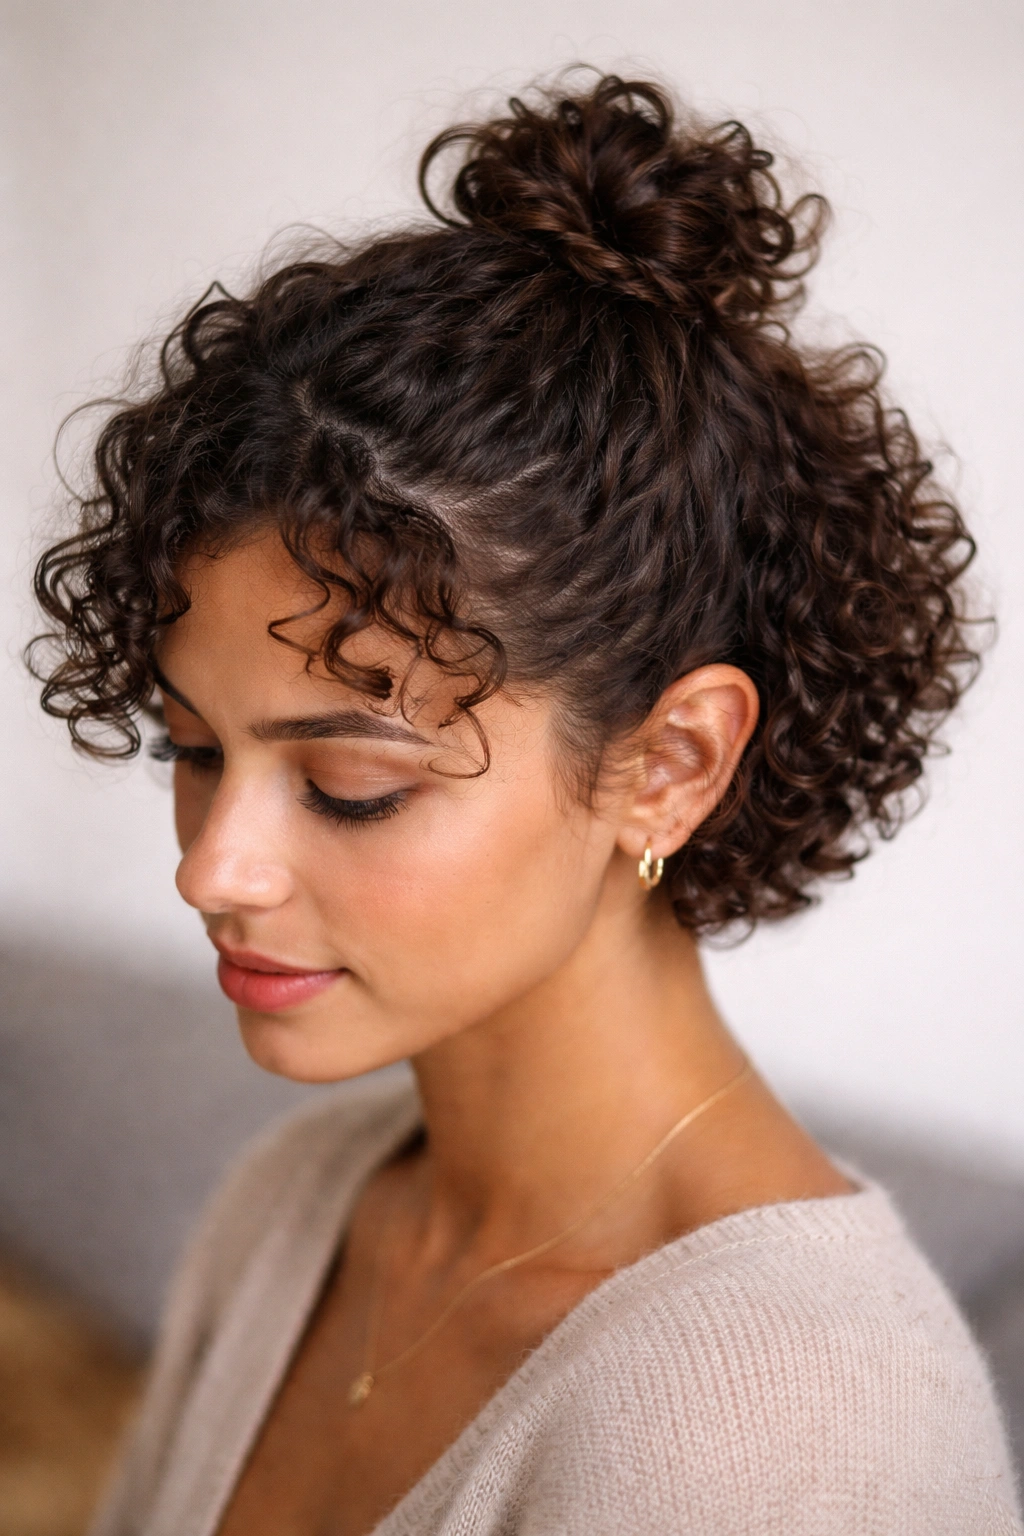
7. The Double-Twist Crown Bun That Lifts the Front
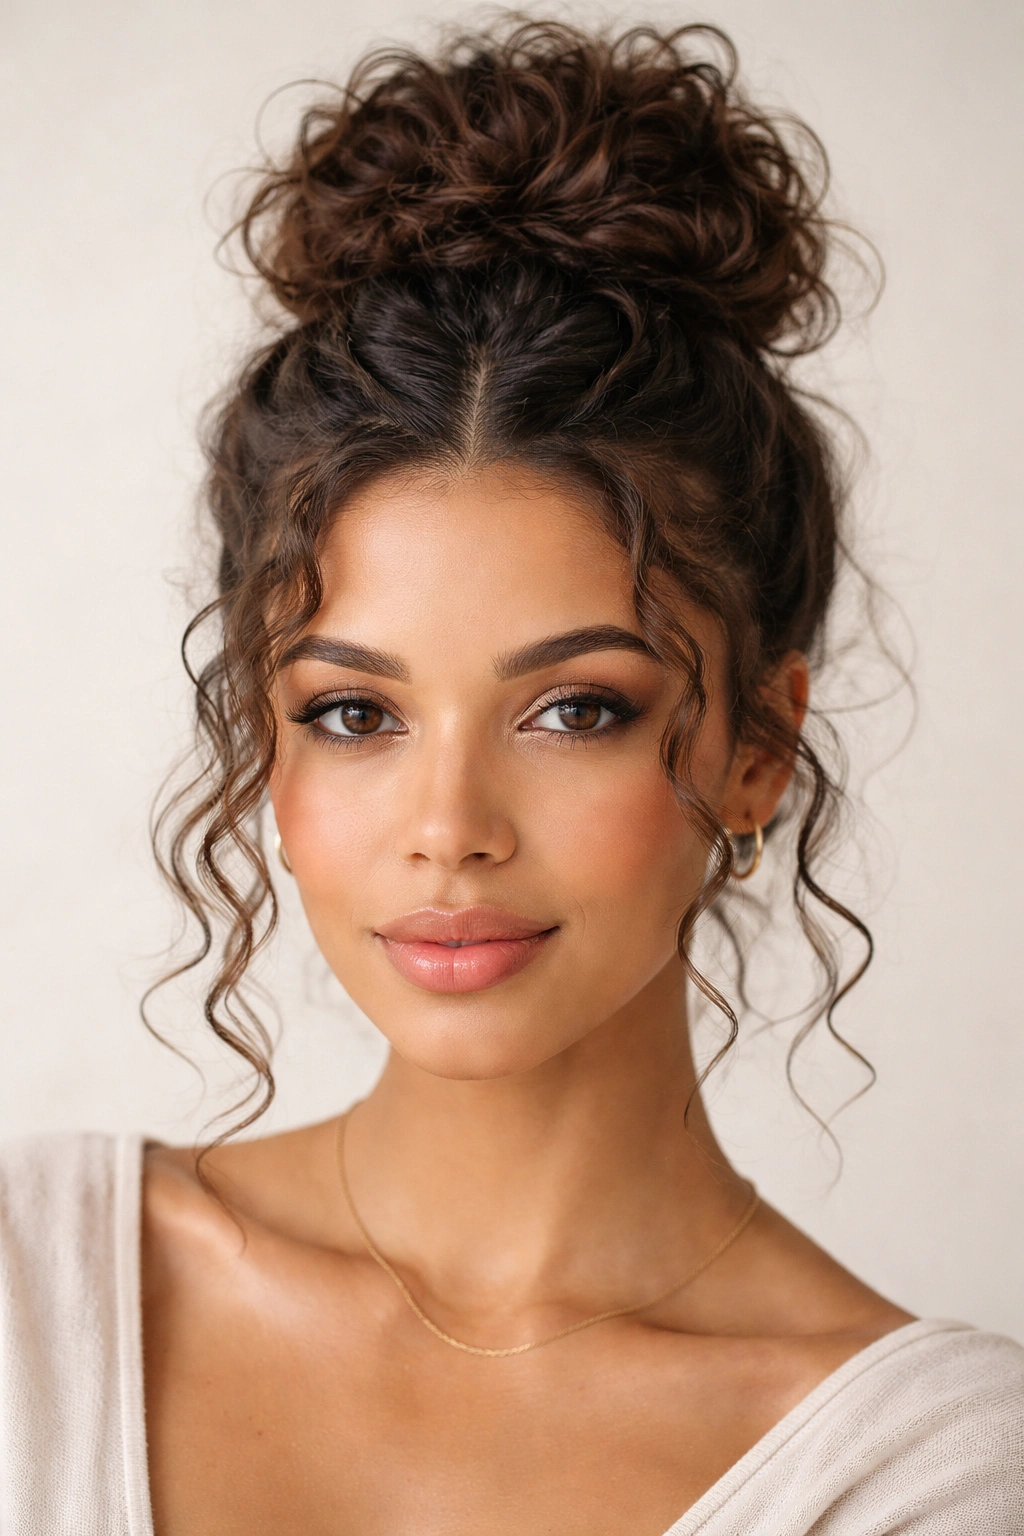
Two small twists at the front can do more for curly hair than one big bun ever will. This style pulls the hair away from the face without erasing the softness around the hairline, and that balance is what makes it feel easy to wear.
Take a section from each temple, twist them back toward the crown, and meet them at the center. Then gather the remaining hair into a loose bun where the twists meet. The front stays lifted, the sides stay smooth, and the bun sits in a way that looks like you planned it, even if you didn’t.
How to anchor the twists
Pin each twist with a bobby pin placed in the direction of the hair’s movement. Cross the pins if the hair is thick. That little X shape keeps the twist from sliding down after an hour or two.
A few things make this style look better on curly hair:
- Keep the twists loose enough to show texture
- Use a touch of gel only on the front if you want the part cleaner
- Let the bun itself stay messy while the front pieces stay controlled
- Pull up the crown slightly before pinning for extra height
This one is good for someone who wants the bun to feel half styled, half relaxed. Not too precious. Not too sloppy either.
8. The Faux-Hawk Messy Bun With Lift Through the Middle
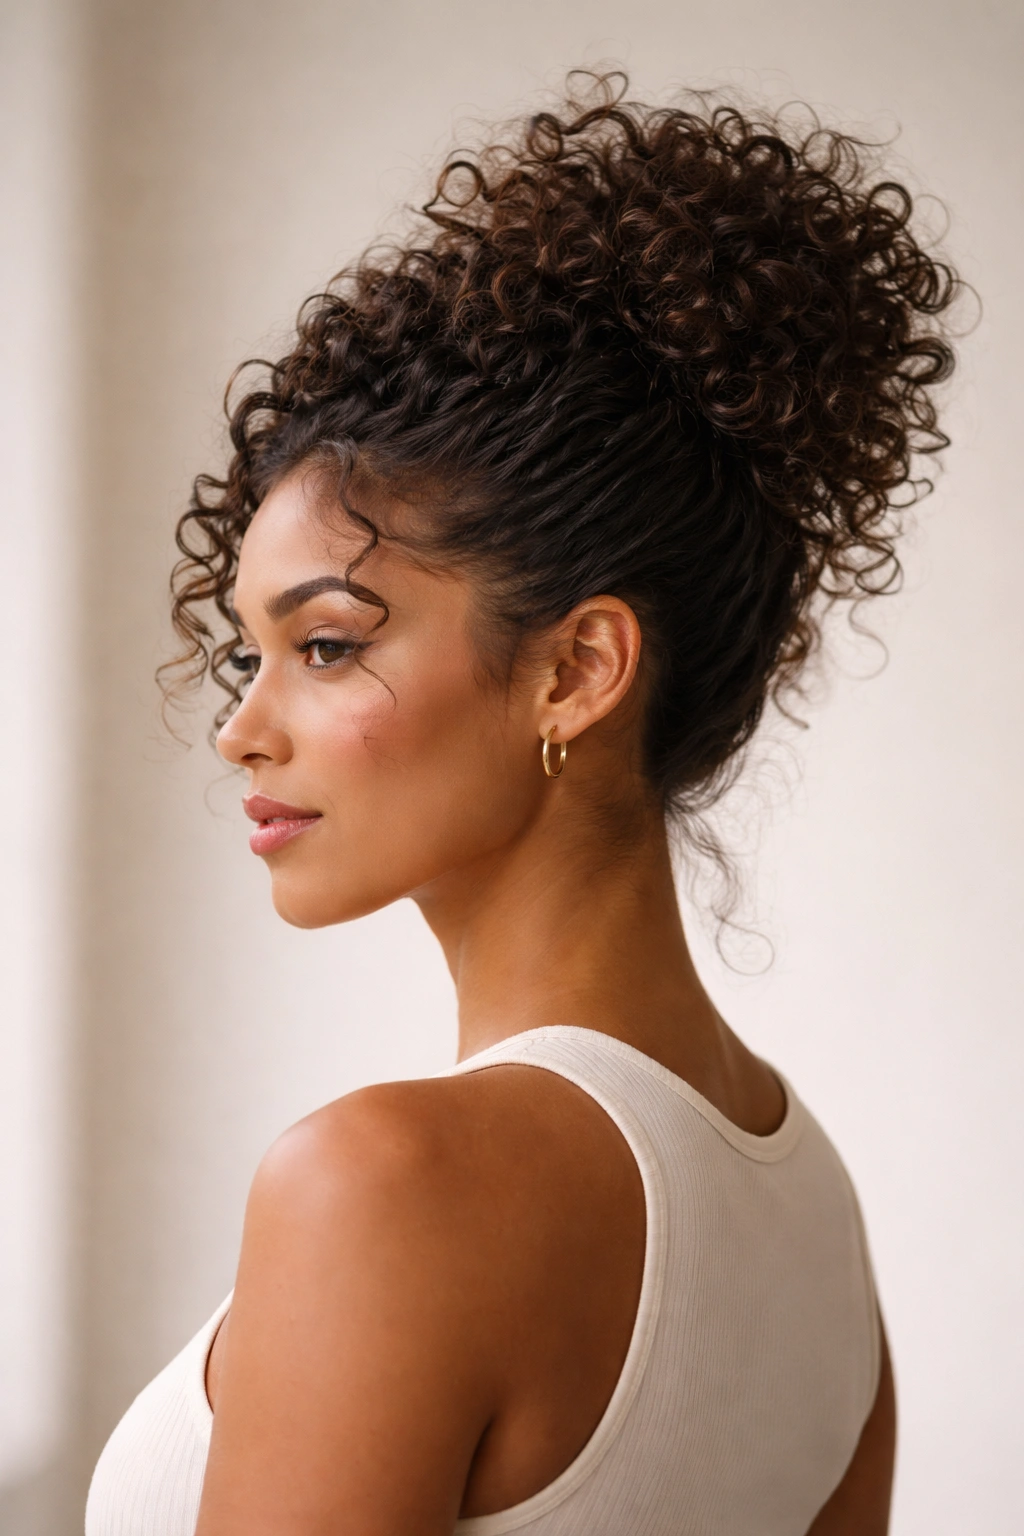
Run your hands along the sides and the middle stays high. That’s the whole feel of a faux-hawk bun on curly hair, and it works because the style uses the natural volume of curls instead of flattening it.
The sides are smoothed back a little, but not slicked. The middle section gets gathered into a raised bun that sits along the center line of the head. The result is a shape with more attitude than a standard top knot, which is exactly why people love it for curly textures. Curly hair already has height. This style just gives it direction.
I prefer this when the hair is dense or layered. Layers can fall out of a regular bun in a way that looks accidental. Here, they add to the shape. You can leave the sides softer for a looser effect, or use a small amount of cream to keep the front under control.
A lot of people think faux-hawk styles have to look edgy and sharp. Not really. On curls, the best version is softer, with the bun sitting high and the sides hugging the head just enough to show the shape underneath. That contrast is what makes it work.
9. The Scarf-Wrapped Messy Bun for a Finished Look
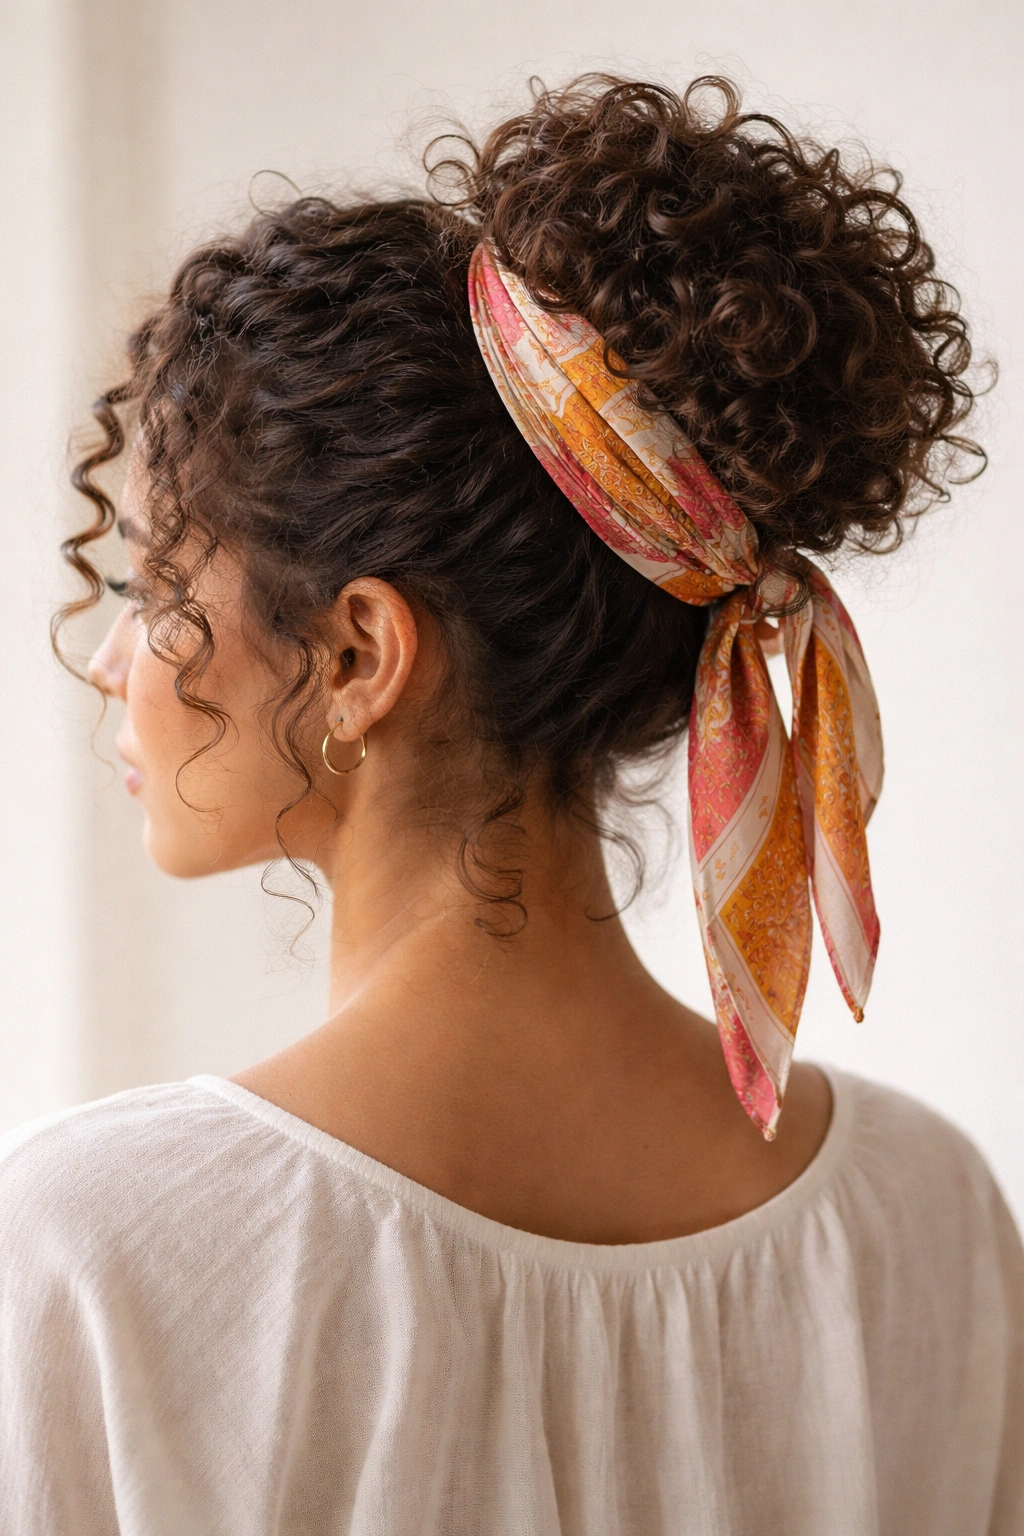
A scarf around a curly bun can fix the whole style in one move. It covers the elastic, adds color, and gives the hair a point of focus so the bun doesn’t need to look overly neat.
Fold a silk or cotton scarf into a narrow band, wrap it around the base of the bun, and knot it off to one side or at the back. Keep the knot flat. If it bulks up too much, the bun starts looking crowded. The scarf should frame the style, not fight it.
This works especially well when the hair is on its second or third day and needs a little help. The scarf distracts from frizz around the roots and makes the bun look intentional even when the texture is doing its own thing. If the bun is loose, the scarf can also help hold the shape together without another elastic. That matters on curls, because too many tight ties can leave a weird bend in the hair once you take the style down.
- Use a scarf that is about 2 to 3 inches wide when folded
- Choose smooth fabric if you want less snagging
- Tie it below the bun, not across the center
- Leave a few curls out around the face so the scarf doesn’t look too controlled
A scarf can make a messy bun feel dressed up in about ten seconds. That’s a good trade.
10. The Mini Bun for Short Curly Hair
Short curly hair can absolutely do a messy bun. It just needs a smaller target. People get stuck thinking a bun has to swallow the entire head of hair, and that’s not true at all.
Pull the top section up with your fingers and twist it into a tiny coil or knot, then pin it down close to the crown. If the hair is too short to wrap, stop trying to wrap it. Just bend the ends under and let a few pieces stick out on purpose. A mini bun that looks slightly imperfect is better than one that’s been overworked into a sad little loop.
How to keep it from shrinking
Short curls can bounce back harder than longer ones, which means the bun may tighten as it sits. A soft tie and two pins are usually enough. Anything tighter tends to pull the curl pattern flat near the roots and make the top look thin.
A few tips make this style easier:
- Use a bit of water or leave-in on the hands before gathering
- Keep the bun centered so one side doesn’t collapse
- Pin close to the scalp, not through the outer curl layer
- Leave the bottom curls loose for balance
This is one of those styles that looks much better in real life than in a flat photo. It has movement. It has attitude. And it doesn’t ask short hair to pretend it’s longer than it is.
11. The Polished Messy Bun for Work or Dinner
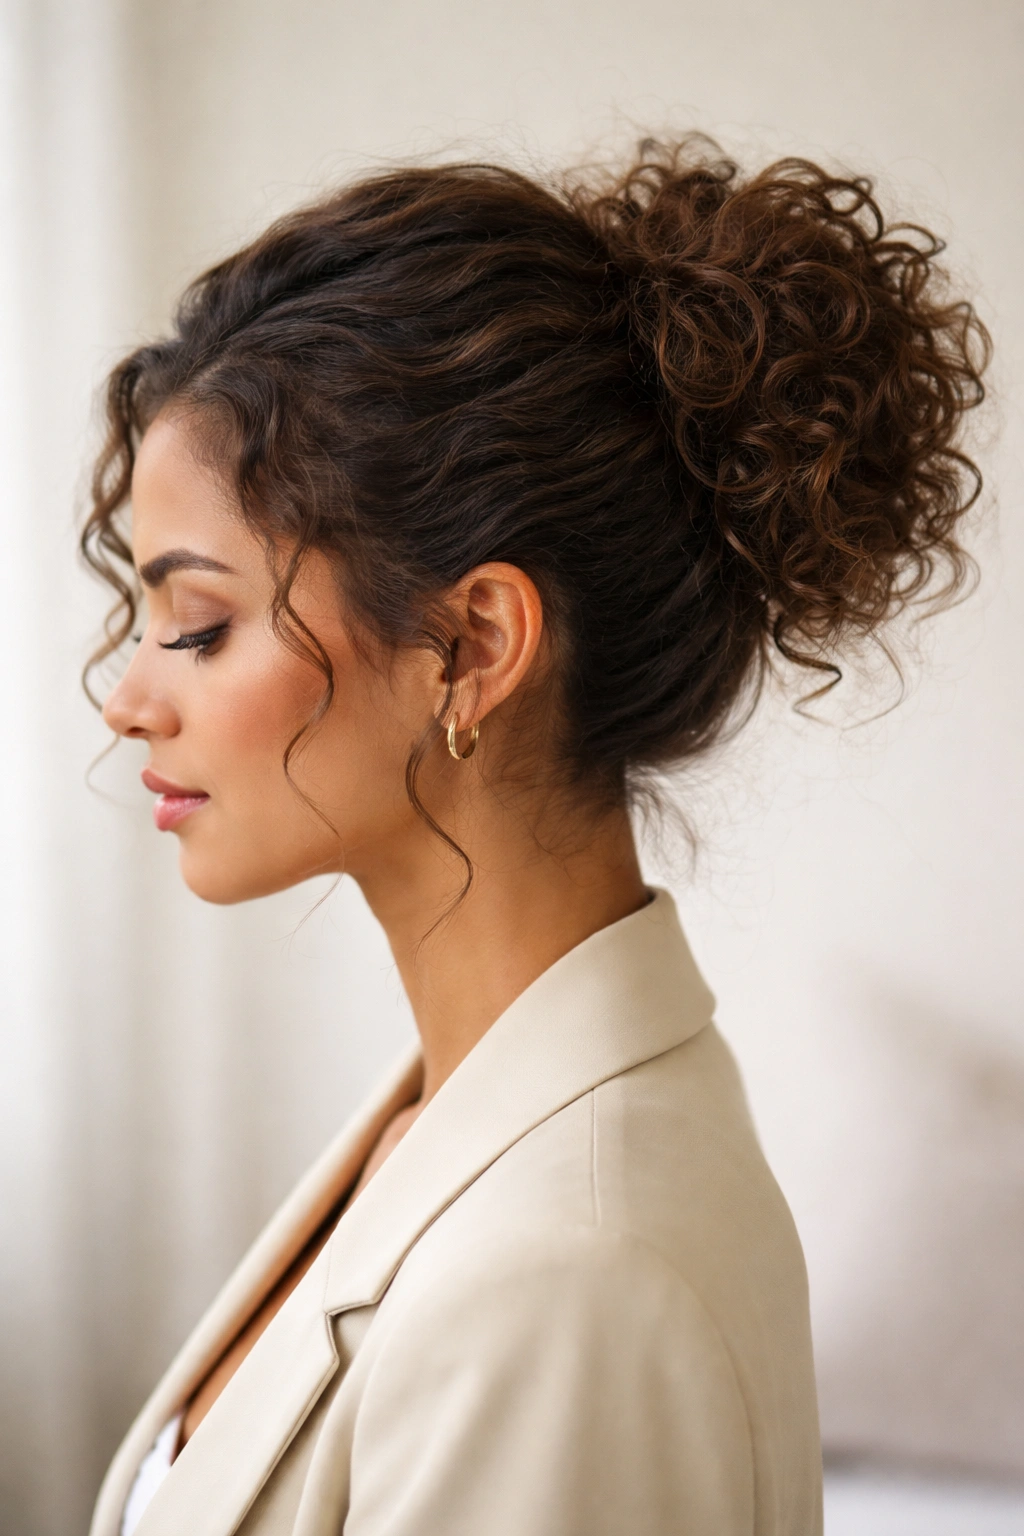
Messy does not have to mean careless. That’s the mistake a lot of bun tutorials make. On curly hair, a polished messy bun keeps the shape soft while cleaning up just enough of the perimeter to feel deliberate.
Start by smoothing the front and sides with your palms, not a brush. Then gather the hair at the back or slightly off-center and twist it into a relaxed bun. Leave the crown with a little lift. If every strand is flattened, the style loses the curly texture that makes it interesting in the first place.
This version is smart when you want the bun to pass in a more dressed-up setting. A touch of cream at the roots, a few hidden pins, and a cleaner part line make a real difference. The trick is to stop before the style gets stiff. Curly hair looks best when the edges are controlled and the body still feels alive.
One sentence matters here: do not slick the whole head down. That usually makes curly buns look harsh.
A couple of loose tendrils at the temples soften the shape. A tiny bit of frizz near the bun itself is fine. Actually, it keeps the style from looking overmanaged.
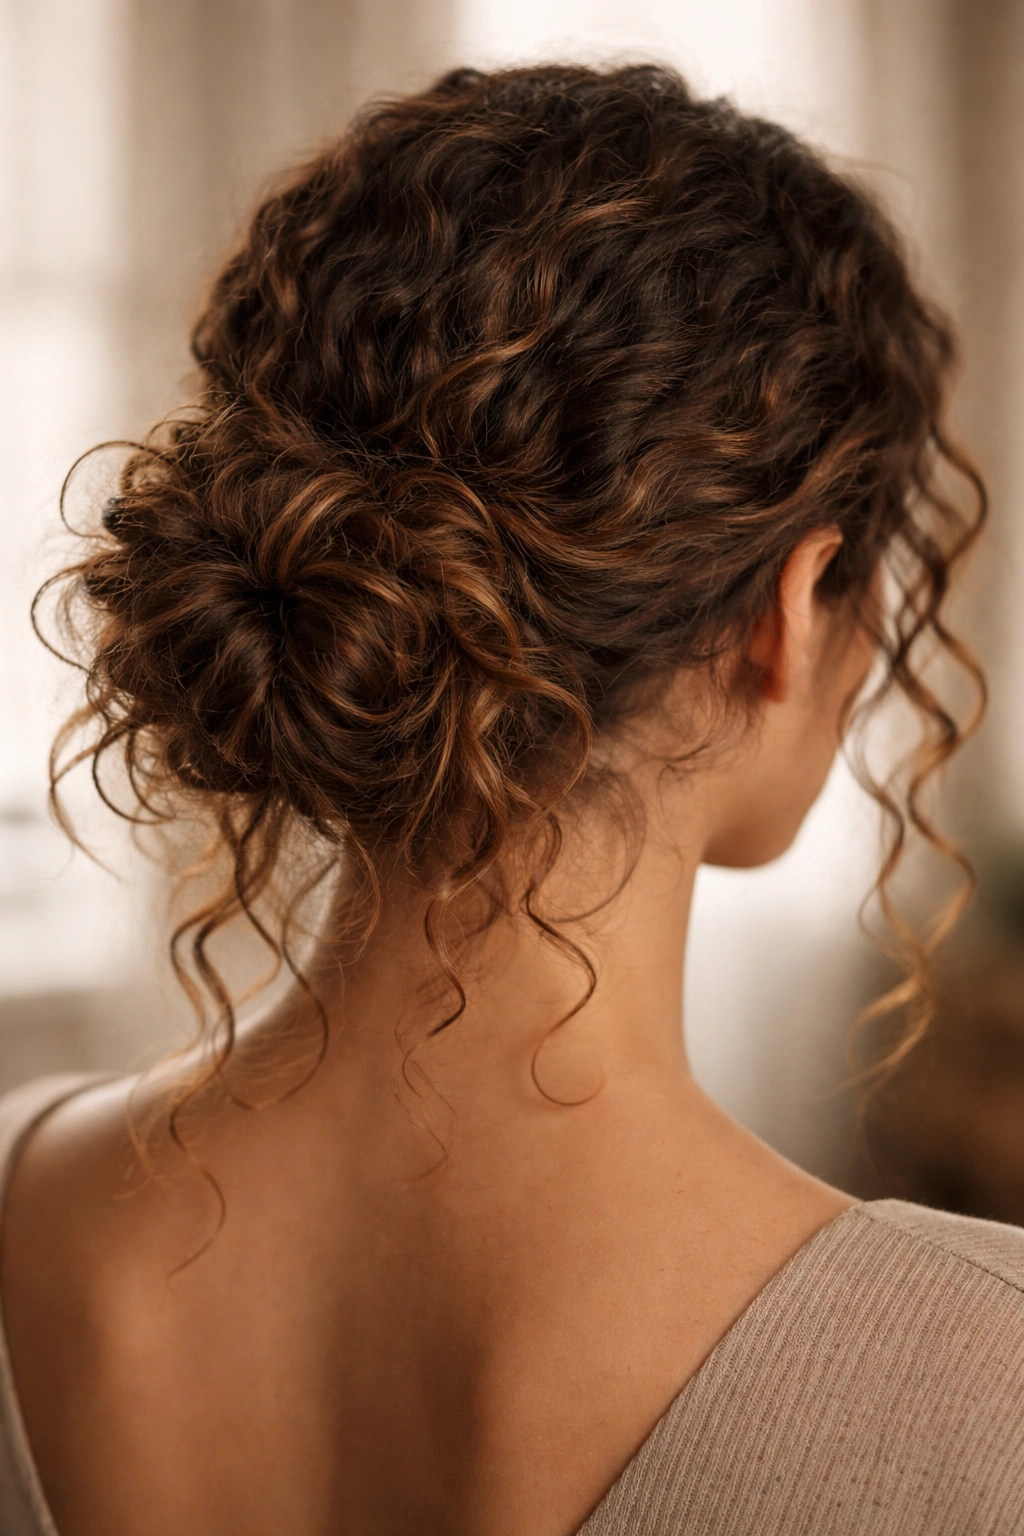
12. The High-Volume Top Knot for Thick Curls
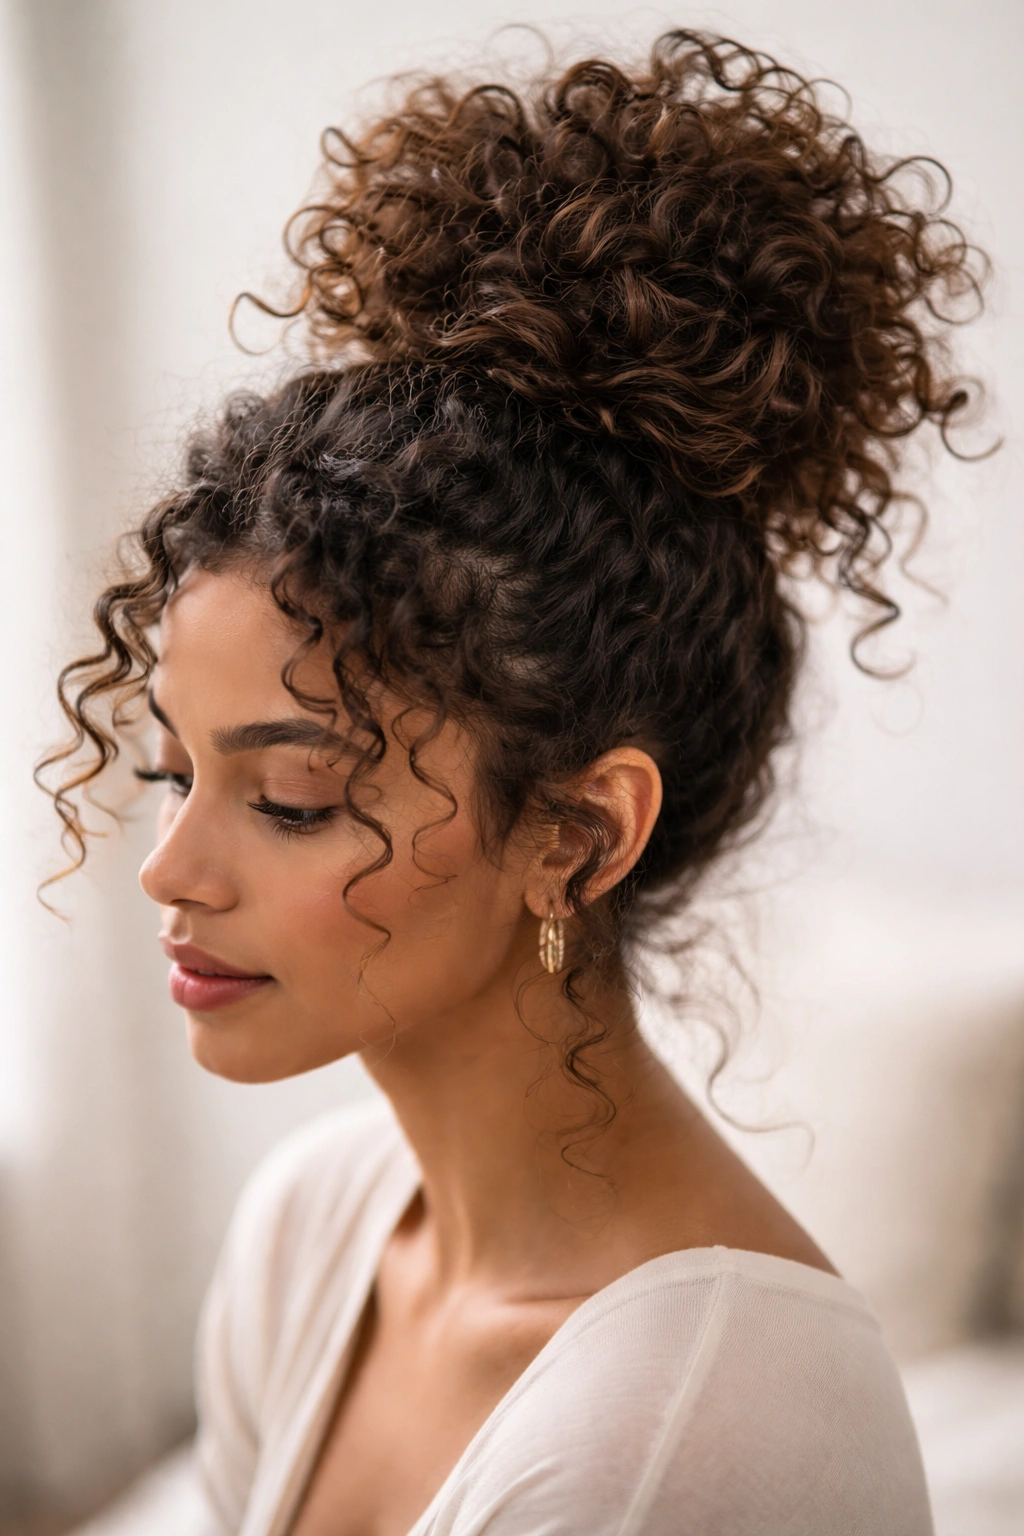
Thick curls can carry a lot of height, and a high top knot uses that instead of fighting it. Put the bun too low, and the weight drags it flat. Put it high, and the whole style wakes up.
Gather the hair at the highest point you can reach comfortably, then loop it into a loose knot. If the hair is long, don’t force every inch into the bun. Let some ends fan out. That extra volume is the point. For very dense curls, two ties can help: one to hold the base, another to secure the knot itself.
I prefer this style when the roots need lift. It has a clean line through the sides and a lot of shape at the top, which keeps the head from looking heavy. The bun itself can be scruffy, and that’s fine. Thick curls look best when they’re given room to breathe.
A top knot can also help if the curl pattern has gone a little undefined. The height makes the texture look intentional again. Use pins only where the bun feels loose; overpinning thick curls is a fast way to turn the style into a helmet.
The whole thing should feel buoyant, not cramped.
13. The Bubble-Section Messy Bun for Long Curls
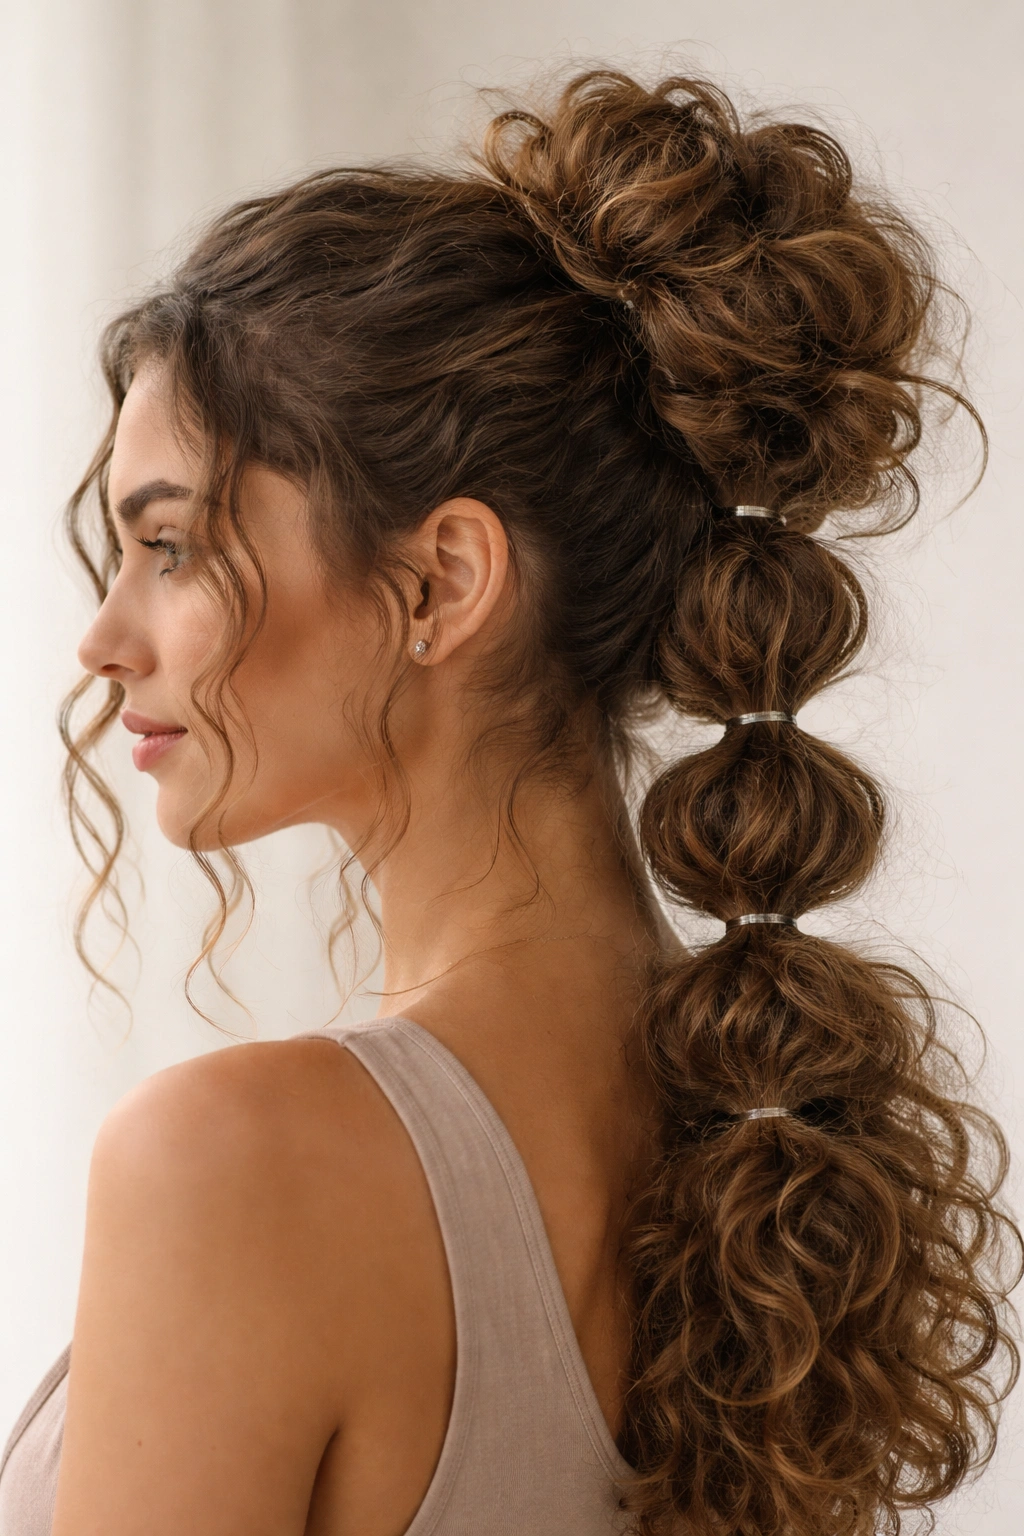
This one has a little more structure, and that is why it works. Long curly hair can sometimes get lost in a plain bun, especially if the layers start slipping out. A bubble-section bun keeps the length visible before it disappears into the knot.
Start with a loose ponytail, then add small elastics every 2 to 3 inches down the length. Gently pull each section apart so it puffs into bubbles. After that, twist the segmented length into a bun and pin it at the base. The bubbles give the style texture from the start, so the bun ends up looking fuller without needing extra teasing.
Where the bubbles go
Place the first elastic high enough to create lift at the crown, then space the rest evenly. If the elastics are too close together, the hair looks cramped. If they’re too far apart, the bun loses shape.
- Use clear mini elastics or soft snag-free bands
- Pull each section open with fingertips, not a comb
- Keep the bun loose so the bubble texture stays visible
- Leave a few curls free around the face to soften the profile
This style has a little more personality than a basic bun. It also gives long curls somewhere to go besides the bottom of your shirt.
14. The Curly Chignon With Loose Ends
A chignon sounds formal, but on curly hair it can look relaxed in the best way. The difference is in the finish: a sleek chignon tries to erase texture, while a curly chignon lets the texture show up around the edges.
Gather the hair low at the back, twist it gently, and tuck it into a compact roll. Leave a few ends out on purpose. Those loose ends are what keep it from looking too stiff. If the curls are long, let one section drape over the base instead of forcing everything in. That slight spill gives the bun movement and keeps it from feeling heavy.
This style is a good choice when you want something a little more refined than a standard messy bun. It works for dinners, events, or days when you want your hair out of the way but still want to see the curl pattern at the nape and around the face. A side part can make it feel softer. A center part makes it more balanced.
Unlike a polished bun that hides the curls, this one celebrates them in a quieter way. No drama. No stiffness. Just shape, texture, and a few curled ends doing their own thing.
15. The Low Rolled Bun You Can Reset in Minutes
If you need one curly bun that can survive a long day, a car ride, and a last-minute change of plans, make it this one. The low rolled bun is quick to put up, easy to fix, and forgiving when the curls are not behaving.
Gather the hair at the nape, roll the length upward into a loose fold, and pin the roll in place from underneath. You are not building a perfect knot. You’re building a shape that can be remade in five minutes without a mirror. That matters more than people admit.
This is the style I’d keep in the back pocket for day-three curls, humid weather, or any morning where the hair has already decided to be dramatic. It holds better if you leave a little texture at the roots and avoid too much oil near the base. If the bun starts sagging, slide one pin higher and one lower. That usually fixes it.
A few pieces can stay loose. In fact, they should. A bun that looks too tidy on curly hair often loses the thing that made it appealing in the first place.
Sometimes the best curly bun is the one that still looks good when you stop fussing with it.