A curly bun can look like you spent ten minutes or two hours. The difference is usually not the curl pattern. It’s where you place the bun, how much of the ends you tuck, and whether you fight the texture or let it do half the work.
That’s why curly bun hairstyles are such a dependable move. They keep hair off your neck, save your shape on second-day curls, and still leave enough movement to look soft instead of stiff. Straight-hair tutorials love sleekness. Curly hair usually looks better with a little air around it.
I also think people underestimate tools here. A satin scrunchie, four to eight bobby pins, a dab of curl cream, and a small edge brush can carry most of these styles. If your curls puff up when you touch them too much, gather them once, pin them well, and stop fussing. That part matters more than people admit.
Some of these buns feel polished. Some are playful. A few are the kind you throw up on a busy morning and still get asked about later. Start with the one that matches your curl density and your mood.
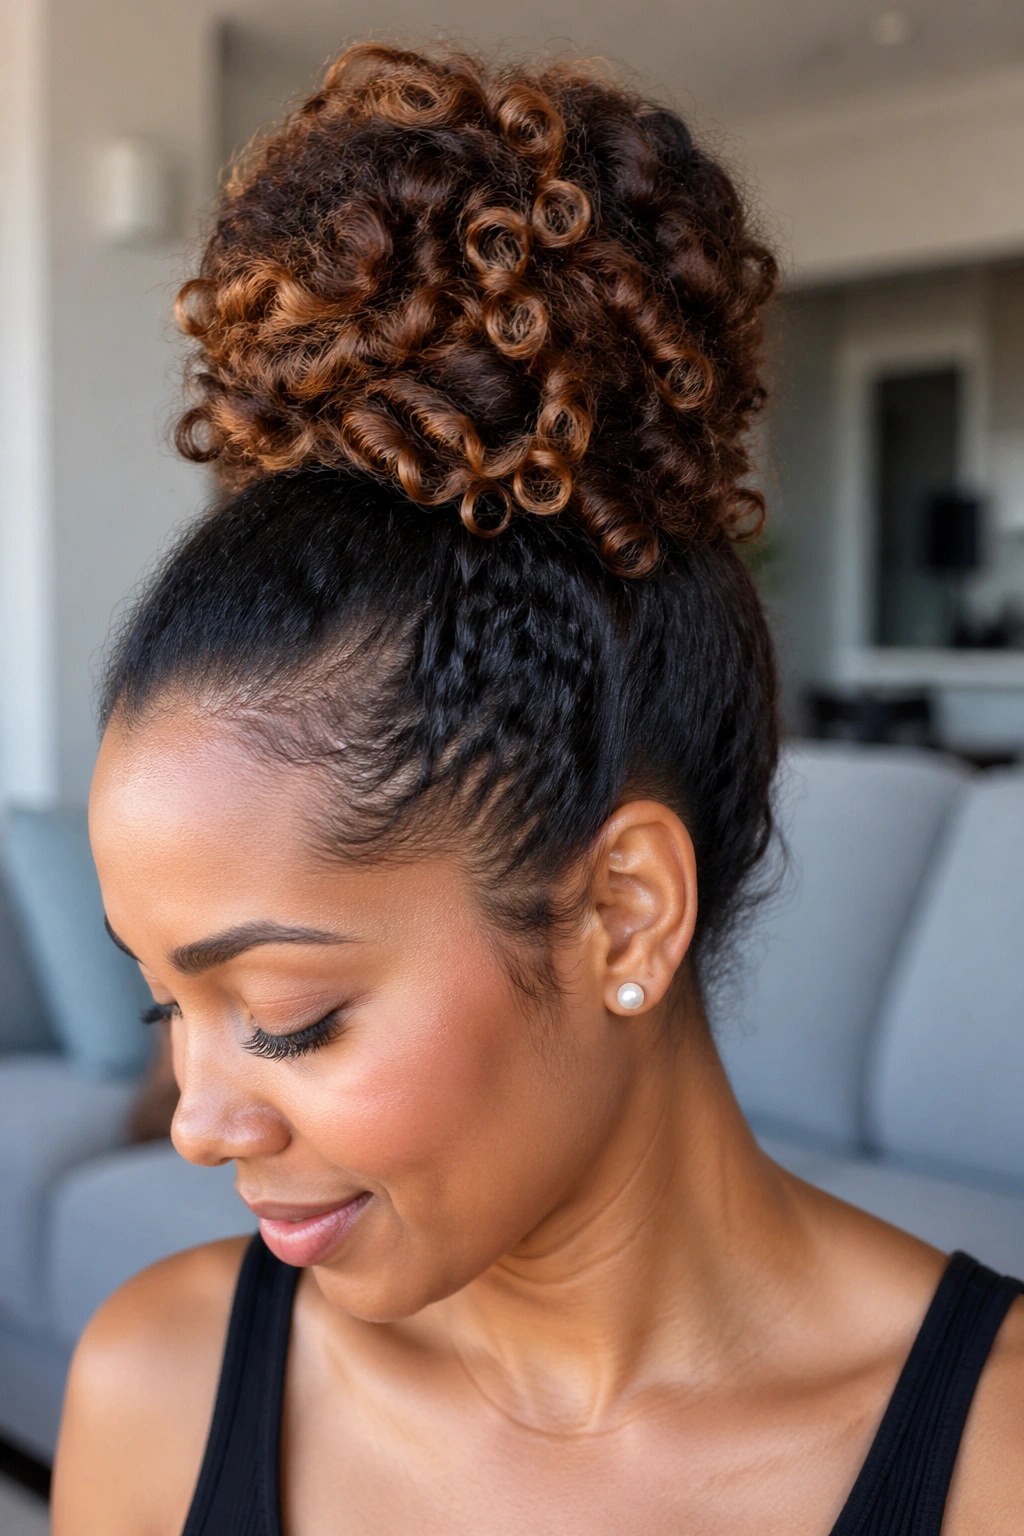
1. High Curly Pineapple Bun
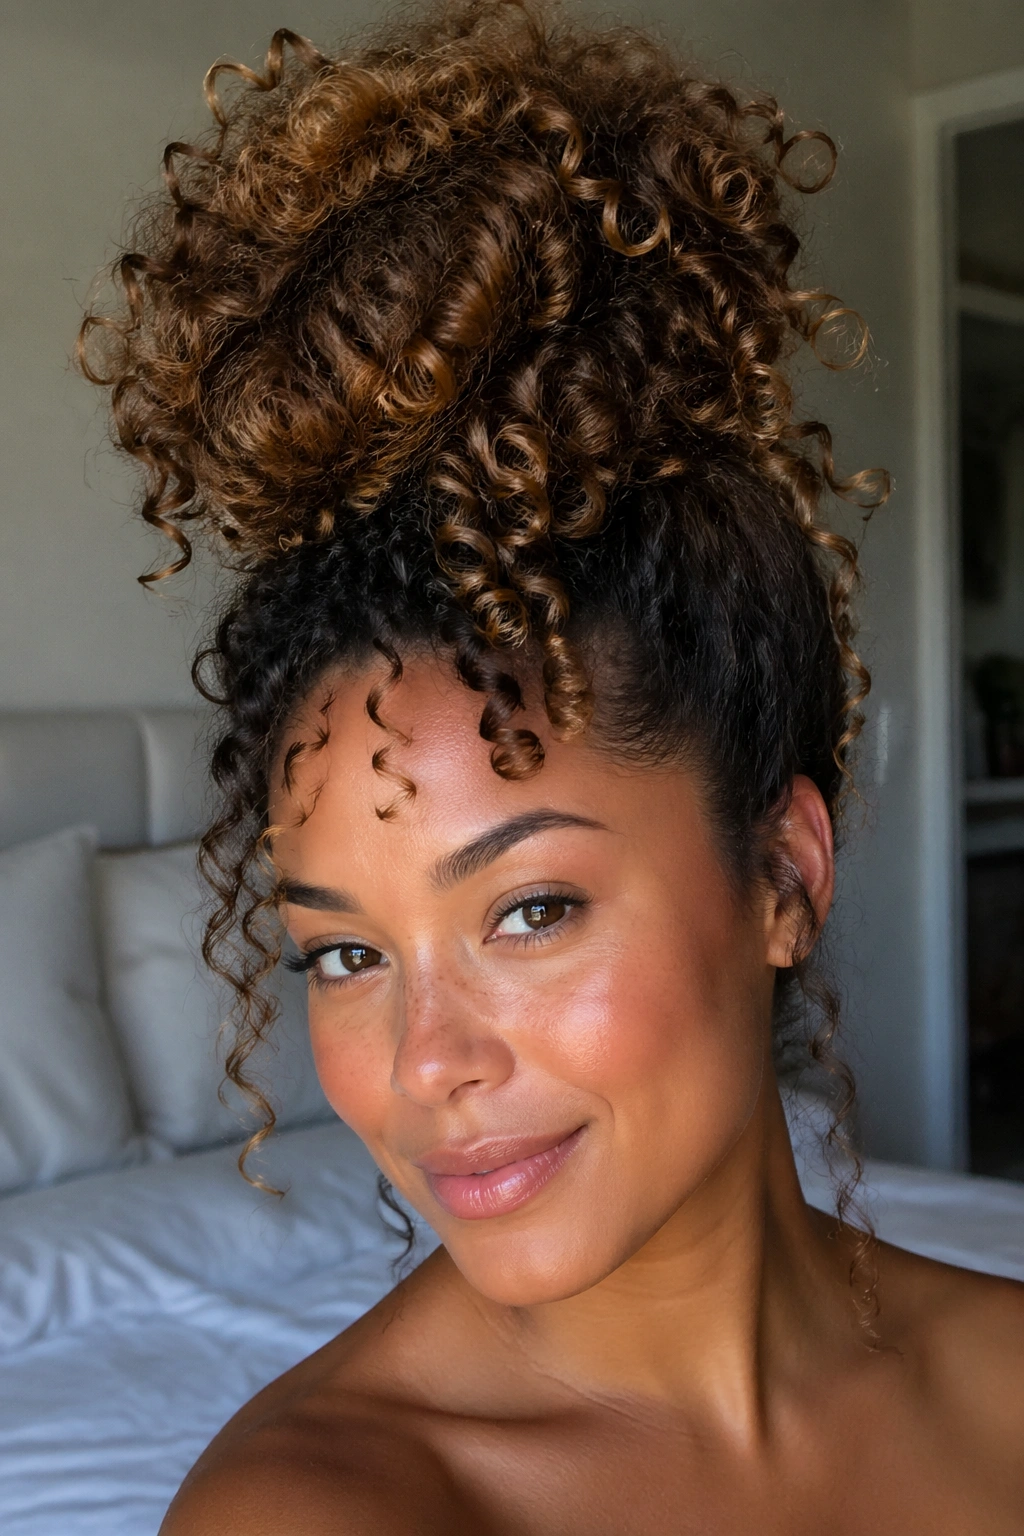
The high pineapple bun is the style I reach for when I want my curls to stay defined and still get them off my face. It sits right at the crown, so the curls can keep their bounce instead of being crushed low against the head.
The shape matters more than the neatness. Pull the hair up loosely, let the ends spill forward, and keep the sides soft rather than slicked back to the bone. That little puff at the top is what makes the style look cute instead of rushed.
This one works especially well on day-two or day-three curls, when the roots need a lift but the lengths still look good. A satin scrunchie helps a lot. So do three or four pins tucked under the bun if your hair is heavy.
It takes almost no fancy skill. And that is the charm.
2. Low Messy Curly Bun With Face-Framing Pieces
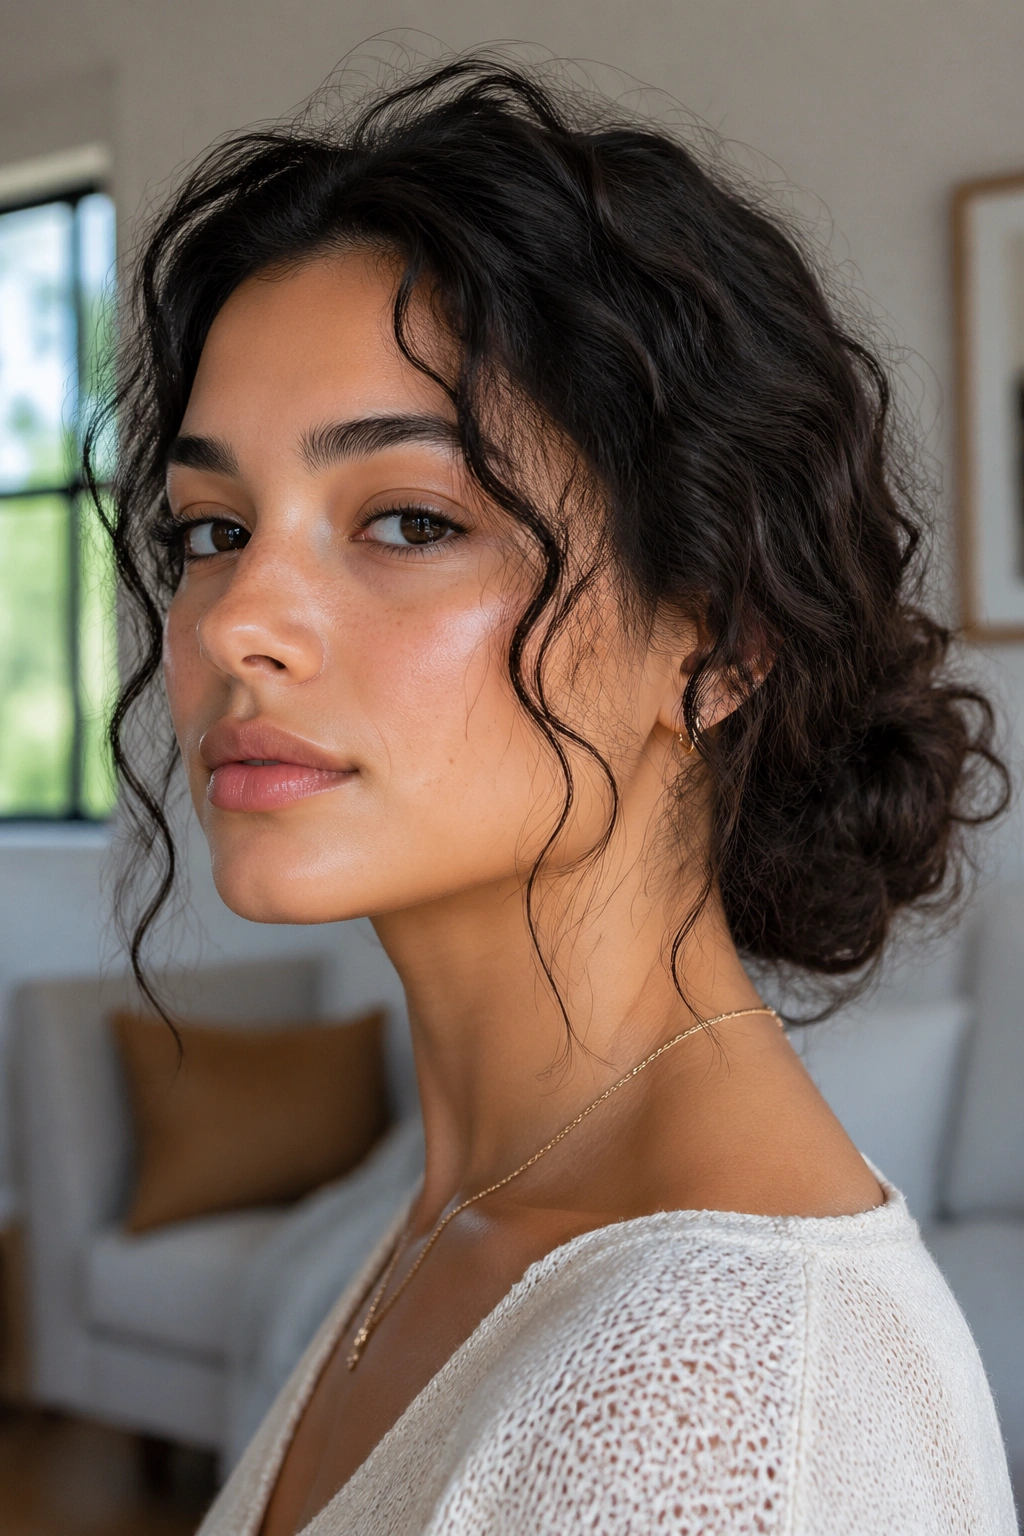
Need a bun that looks done but not stiff? This is the one. A low messy curly bun with a couple of face-framing pieces gives you that easy, lived-in shape without turning your hair into a flat knot at the nape.
Why the Loose Pieces Matter
The loose pieces do more than soften the face. They keep the whole style from looking too severe, which is a common problem with curly updos. Two pieces about 1 inch wide near the temples are usually enough. If your curls are tighter, let those pieces stay a little longer so they keep their spring.
Gather the rest of the hair low, twist it once, and pin the bun loosely so some curls can peek out. I like this style with a middle part, but a soft side part works too. It depends on how much symmetry you want.
Quick Styling Notes
- Use a light gel or cream at the hairline so the front stays neat.
- Leave the bun slightly offset rather than dead center if you want it to feel softer.
- Pin the bun from underneath so the pins disappear into the curls.
- Keep the face-framing pieces free of product if you want them to move.
Best move: don’t over-comb the top. A little texture makes the bun look intentional.
3. Half-Up Curly Top Knot
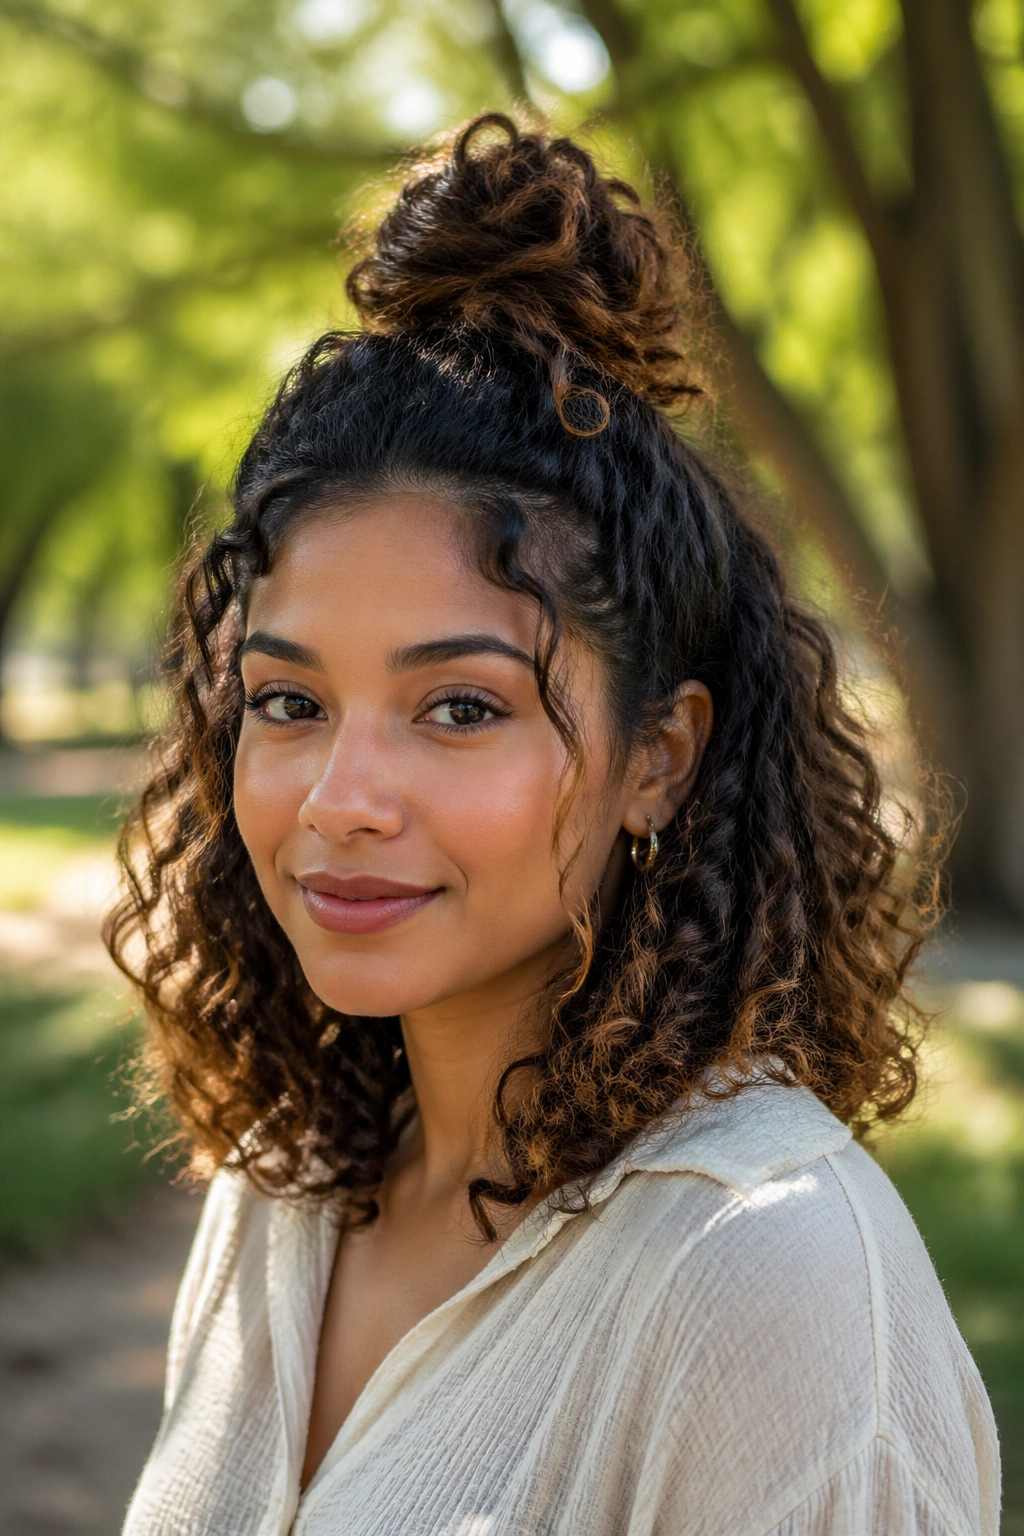
Picture this: you want your curls visible, but you also need your hair off your neck. The half-up curly top knot solves that problem cleanly. It gives you height at the crown and leaves the bottom half doing its own thing, which is exactly why it looks good on so many curl patterns.
Where to Place the Knot
Set it at the upper third of the head, not all the way back. Too low and it loses its shape. Too high and it starts looking like a cartoon bun. The sweet spot is usually where the head begins to round out at the back.
This style is great when the curls underneath are uneven or a little frizzy, because the lower section becomes part of the look instead of something you’re trying to hide. Honestly, that’s the best thing about it. It gives the curls a job.
What Makes It Work
- Leave the bottom section loose enough to show curl definition.
- Secure the top knot with a soft elastic first, then hide it with a scrunchie if you want a fuller finish.
- Pull a few small curls near the temples for shape.
- If your hair is thick, split the top section before wrapping so the knot does not turn into a heavy lump.
A good half-up bun looks casual, but it isn’t accidental. That distinction matters.
4. Sleek Curly Bun With a Smooth Hairline
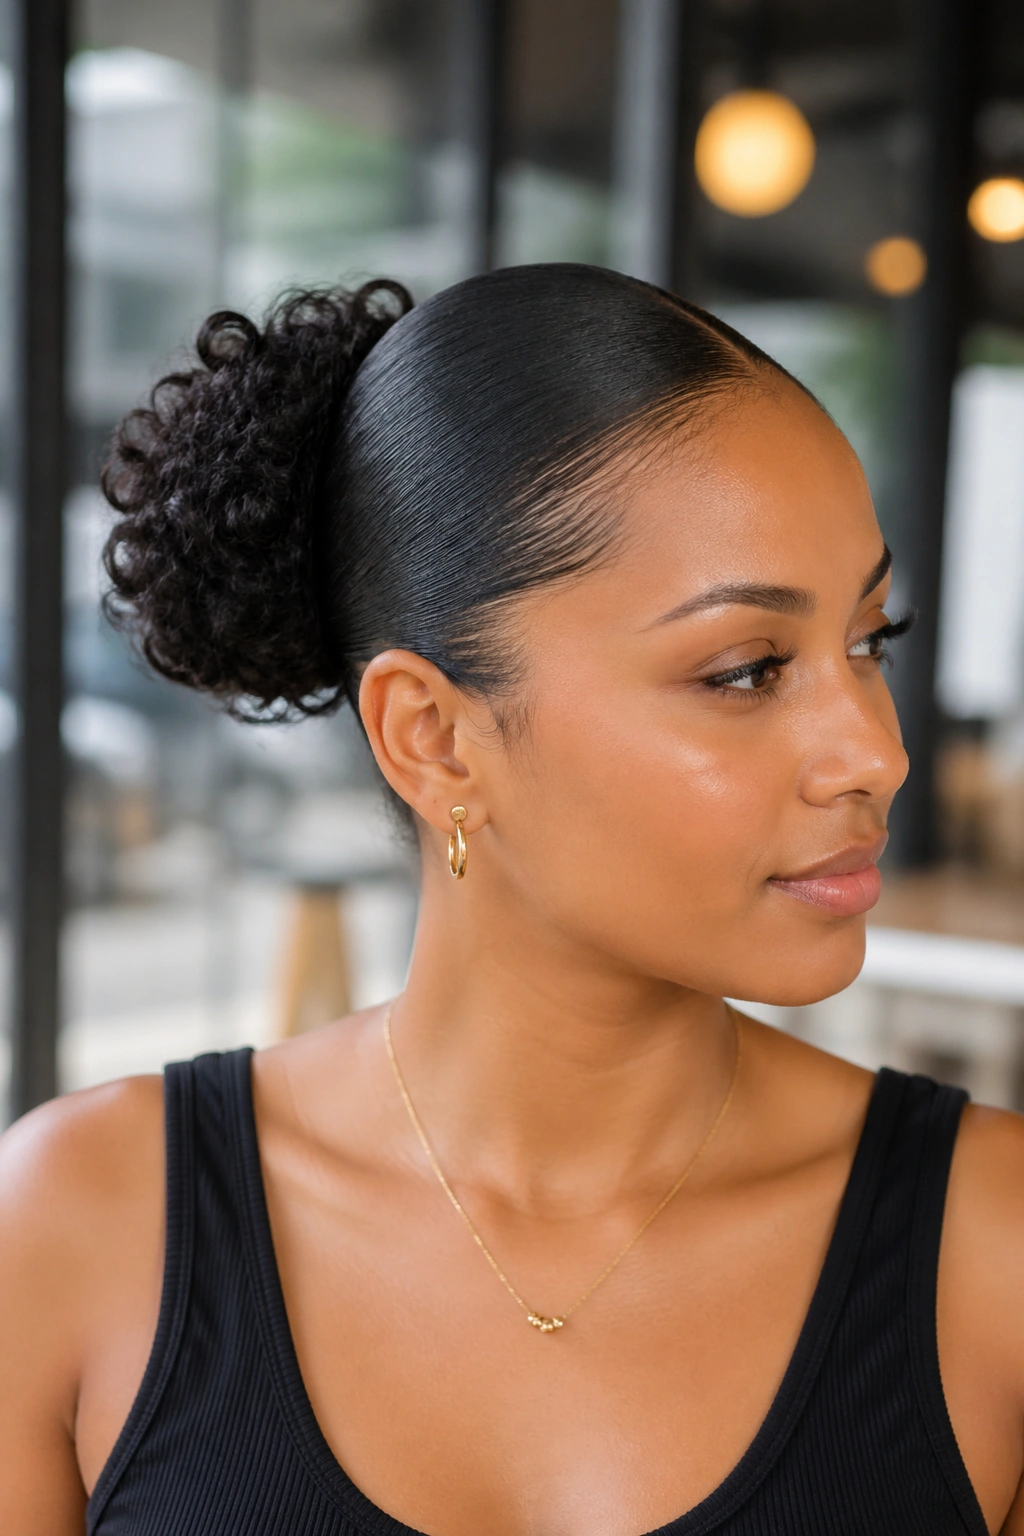
A curly bun does not have to be messy to work. In fact, a sleek version can look sharper than the fluffier styles when you need something a little more dressed up. The trick is to smooth the front and sides without stripping the back of its curl personality.
Start with a small amount of gel or styling cream at the hairline. Use a soft brush or edge brush to smooth the front from the temples back toward the crown. Then leave the bun itself with texture. That contrast is what makes the style look good.
Do not brush through the ends like you’re trying to erase the curls. That’s the mistake. You only want control where the eye lands first. The bun can stay full, dense, and slightly uneven in the best possible way.
I like this version for evenings, interviews, or anywhere you want your hair to look deliberate. It holds up well if your edges are the only part that tend to frizz. A little product goes a long way here. Too much, and the hairline starts looking wet instead of smooth.
One sentence helps: restraint wins.
5. Braided Curly Bun
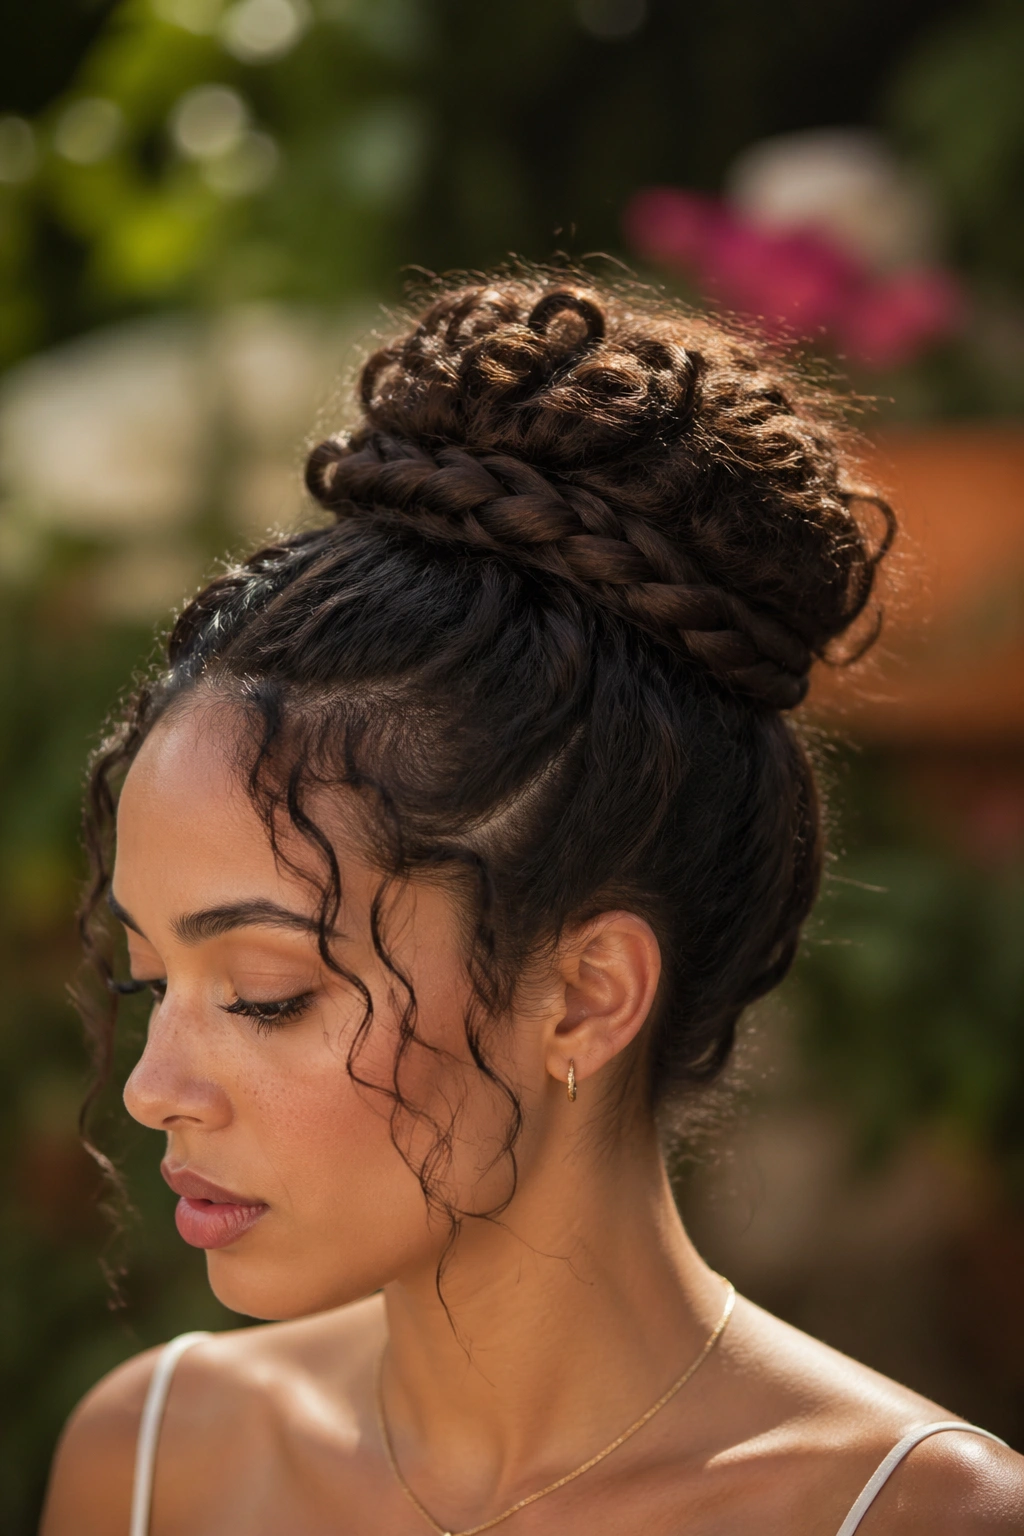
If your curls slip out of buns after an hour, braid first. That one change can save the whole style. A braided curly bun gives the pins something to grip, which means less sliding, less puffing at the roots, and less mid-day frustration.
You can braid the whole ponytail before coiling it, or do two smaller braids from the sides and wrap them into one bun. The second method looks a little more interesting, especially if you like texture around the hairline. Either way, the braid acts like a sturdy base.
The Part People Skip
The braid needs to be tight enough to hold shape, but not so tight that it flattens the crown. That balance is the difference between a bun that stays put and one that gives you a headache by lunch.
A braided bun is especially useful for thick curls or long curls that feel heavy once they’re gathered. If the ends are dry, smooth a pea-sized amount of curl cream over them before braiding so the ends don’t frizz into little halos.
This style has real staying power. And it still looks like curly hair, not a rigid updo pretending to be curly.
6. Double Space Buns for Curly Hair
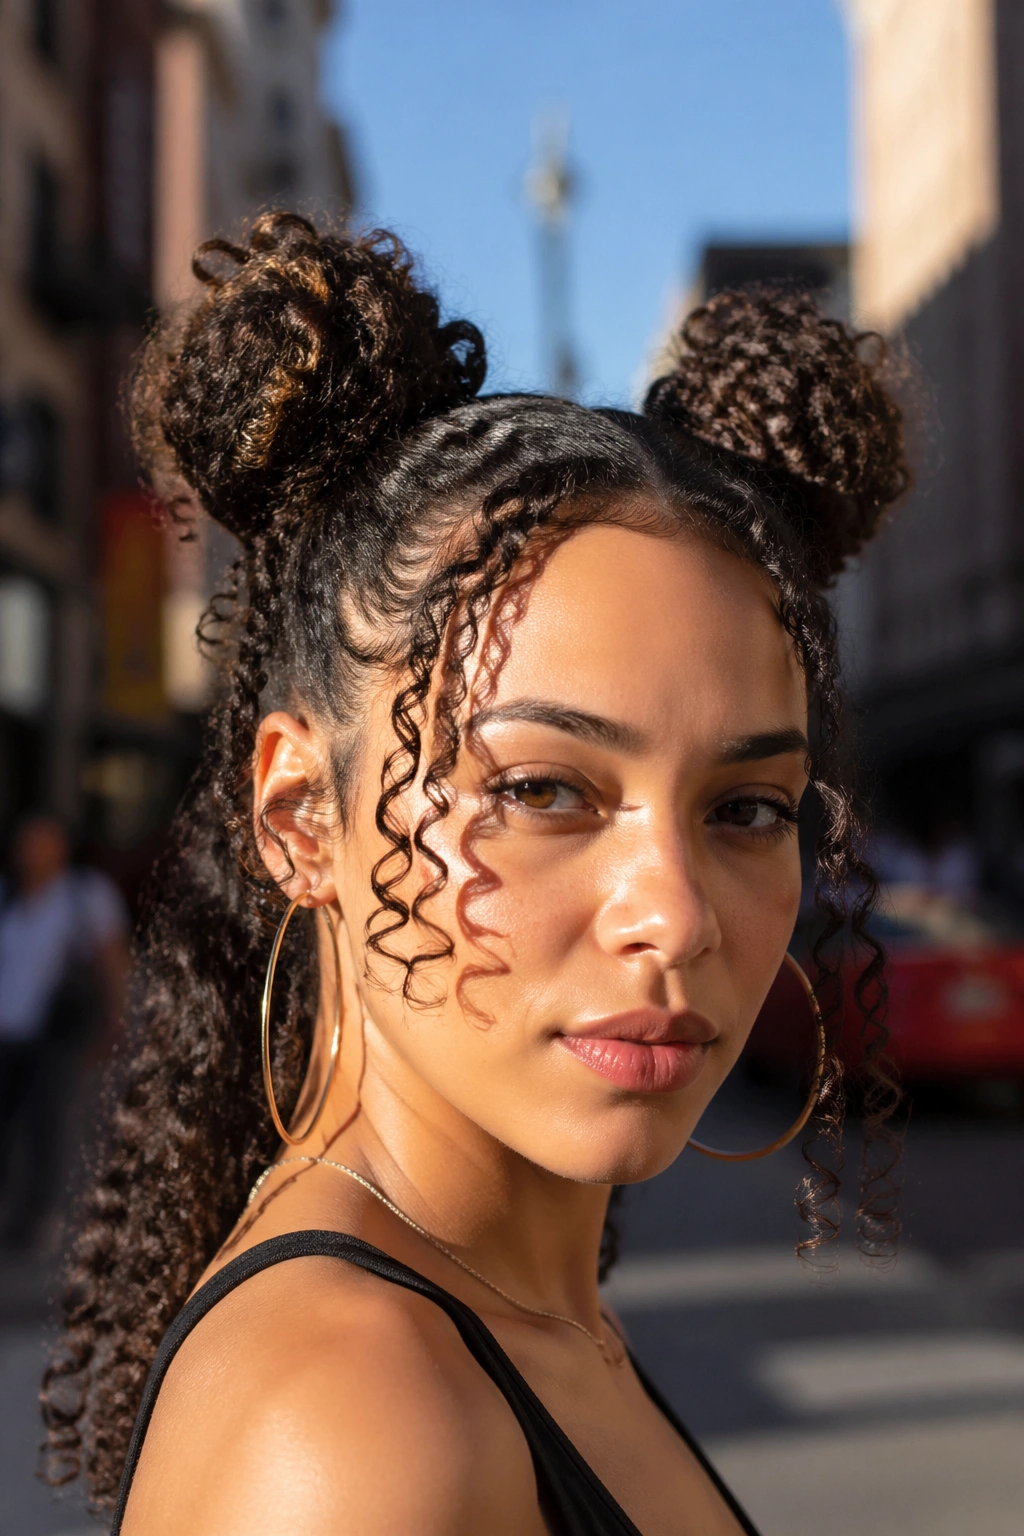
The day your curls refuse to behave, double space buns are the answer you did not know you needed. They feel playful, a little bold, and much easier to wear than a single giant bun that pulls on the whole scalp.
Space buns work best when the hair is parted cleanly down the middle. Gather each side high and slightly behind the ears, then twist each section into a loose coil. The goal is not symmetry to the millimeter. You want balance, not twin clones.
Keep Them From Looking Lopsided
- Make the middle part straight before you start.
- Use the same amount of hair on each side.
- Pin the buns from underneath so the pins vanish.
- Leave the bottom curls or ends a little messy on purpose.
That last piece matters. If every curl is forced into submission, the style loses the whole point.
I like this look for concerts, casual weekends, and any day when a normal bun feels too serious. It also works well on shorter curls because the buns can be smaller and still read clearly. Cute? Absolutely. Fussy? Not if you stop before overworking it.
7. Side Curly Bun
Why do side buns feel softer than centered ones? Because the off-center placement breaks up the shape in a way that flatters curls fast. A side curly bun pulls the eye diagonally, which gives the style a little motion even when the hair is pinned in place.
Start by shifting your part to one side or moving the bun slightly behind one ear. Then gather the hair low and twist it into a loose bun that sits just off the nape. A few curls can spill toward the shoulder. That is not a problem. That is the style.
The side placement is especially kind to round faces and square jawlines, since it softens the lines around the cheeks. I also like it on days when the roots have more volume on one side than the other. Instead of fighting that, you use it.
If you want the bun to look intentional, keep one side smoother and let the other stay a little fuller. That asymmetry gives the style its charm. A side bun can be formal, casual, or somewhere in between, which makes it more useful than people give it credit for.
8. Sock Bun for Fuller Curly Hair
A sock bun should feel plush, not packed. That’s the whole game. With curly hair, the shape can get gorgeous fast because the curls build volume around the base, almost like the bun has its own cushion.
Use a hair donut or a rolled sock in a size that matches your hair density. Too small, and the curls bunch up awkwardly. Too big, and the bun starts to look loose in a bad way. A medium ring usually works best for shoulder-length to long curls.
The nicest thing about this style is the finish. When the curls are wrapped evenly around the donut, the bun looks round and full without needing much teasing. That makes it a good choice for events when you want a cleaner shape but still want your texture visible.
A sock bun is not the fastest style in this list, and I should say that plainly. It takes a little patience to spread the curls around the ring and tuck the ends under. But once you get the hang of it, the result is worth the extra minute or two. There’s a reason this one keeps showing up.
9. Twisted Crown Curly Bun
Unlike a plain bun, the twisted crown version gives you shape before the bun even starts. That’s the part I like. The twists along the sides frame the face and make the bun look finished from the front, even if the back stays loose and curly.
Take two sections from the temples or just above the ears, twist each one back, and secure them before gathering the remaining hair into a bun at the nape or mid-back. Those twists create a soft crown effect that feels polished without becoming stiff.
What Makes It Different
- The front gets structure.
- The bun stays soft.
- The style keeps curl volume around the edges.
- It works well with medium to long curls.
I reach for this one when I want something that looks thoughtful without asking for a blowout. It’s good for weddings, dinners, or any day you want the front of your hair to look purposeful. If your curls are dense, leave the bun a little looser so it does not sit like a lump at the back of the head.
That front twist changes everything. Tiny detail. Big payoff.
10. Curly Bun With a Scarf Wrap

A scarf does more than decorate a bun. It changes the shape, hides pins, and gives the whole style a little personality without adding another layer of effort. If your curls need help holding together, the scarf can also act like a soft anchor.
Fabric Choices That Behave
- Silk or satin: slides less against curls and keeps frizz lower.
- Light cotton: gives a casual look, but can snag if the weave is rough.
- Printed twill or rayon blend: adds more structure and stays visible in the hair.
Wrap the scarf around the base of the bun once or twice, then tie it off to one side or tuck the ends underneath. Keep the knot small. A giant bow can take over the whole hairstyle, and that is not always the point.
This style is especially handy when the bun itself is a little imperfect. The scarf draws the eye to the wrap instead of every pin and loose curl. I like that honesty. It does not pretend the hair was untouched. It just makes the most of what’s there.
A good scarf bun feels easy, but it still looks like you had a plan.
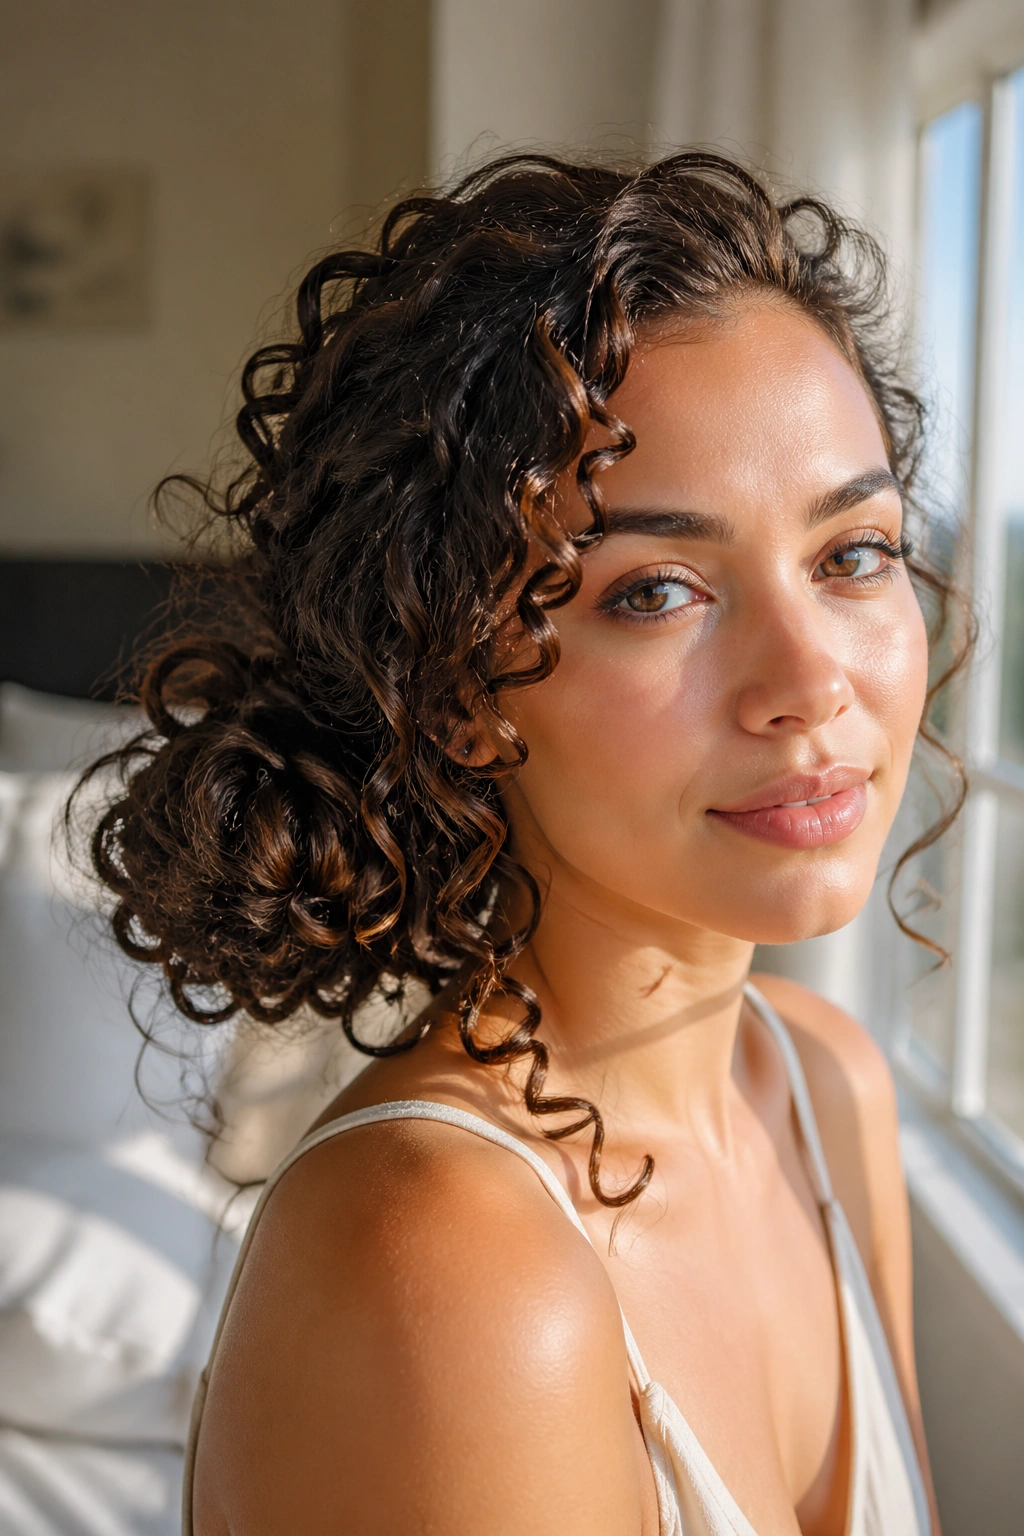
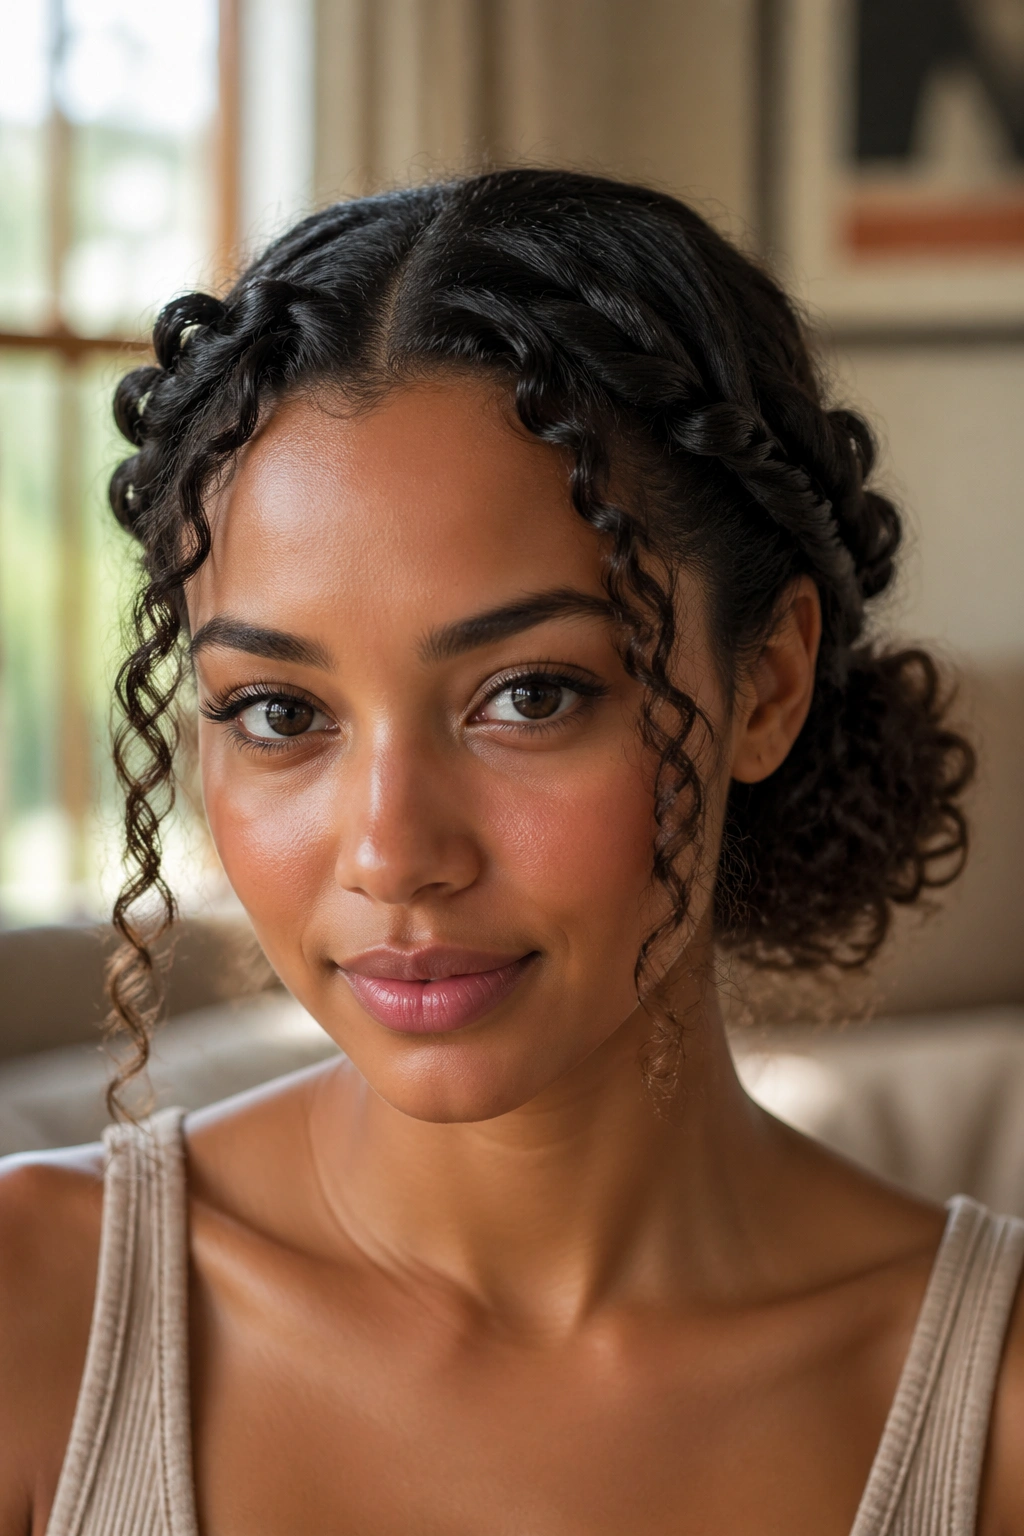
11. Curly Bun With Curly Bangs
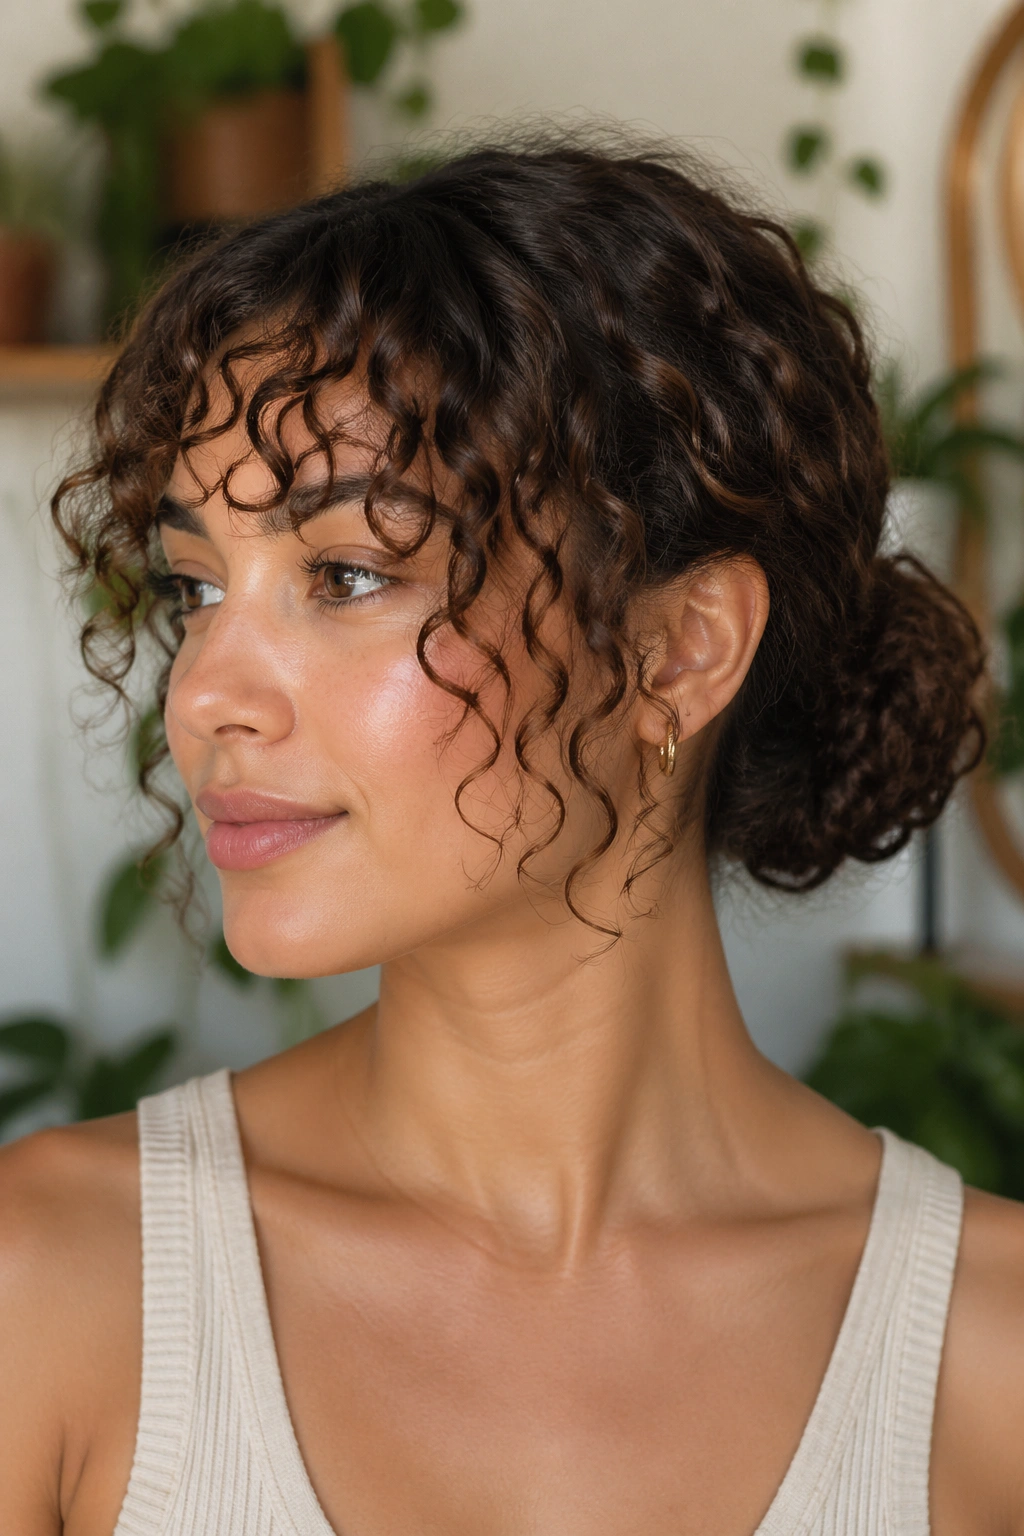
Curly bangs can make a bun feel intentional instead of accidental. That’s the big shift. Once the fringe is left out on purpose, the whole hairstyle gets more shape around the eyes and forehead, which is where people tend to notice first.
Keep the bun low or mid-height so the bangs have room to sit naturally. If the bun is too high, the front can feel crowded. If your bangs shrink when they dry, leave them a little longer than you think you need. Curly hair has opinions. It will move the way it wants.
Why Bangs Change the Whole Look
The bangs break up the forehead area, which makes the style feel softer and a little younger without leaning childish. They also help balance a fuller bun because the face has more curl activity up front.
A few things help here:
- Mist the bangs lightly with water before shaping them.
- Use a tiny bit of curl cream, not a heavy gel.
- Pin the bun away from the fringe so the pieces do not blend together.
- Let the bangs dry on their own if possible.
This is one of my favorite curly bun hairstyles when I want the face to stay visible. It feels relaxed, but it still reads as finished.
12. Low Tucked Ballerina Bun
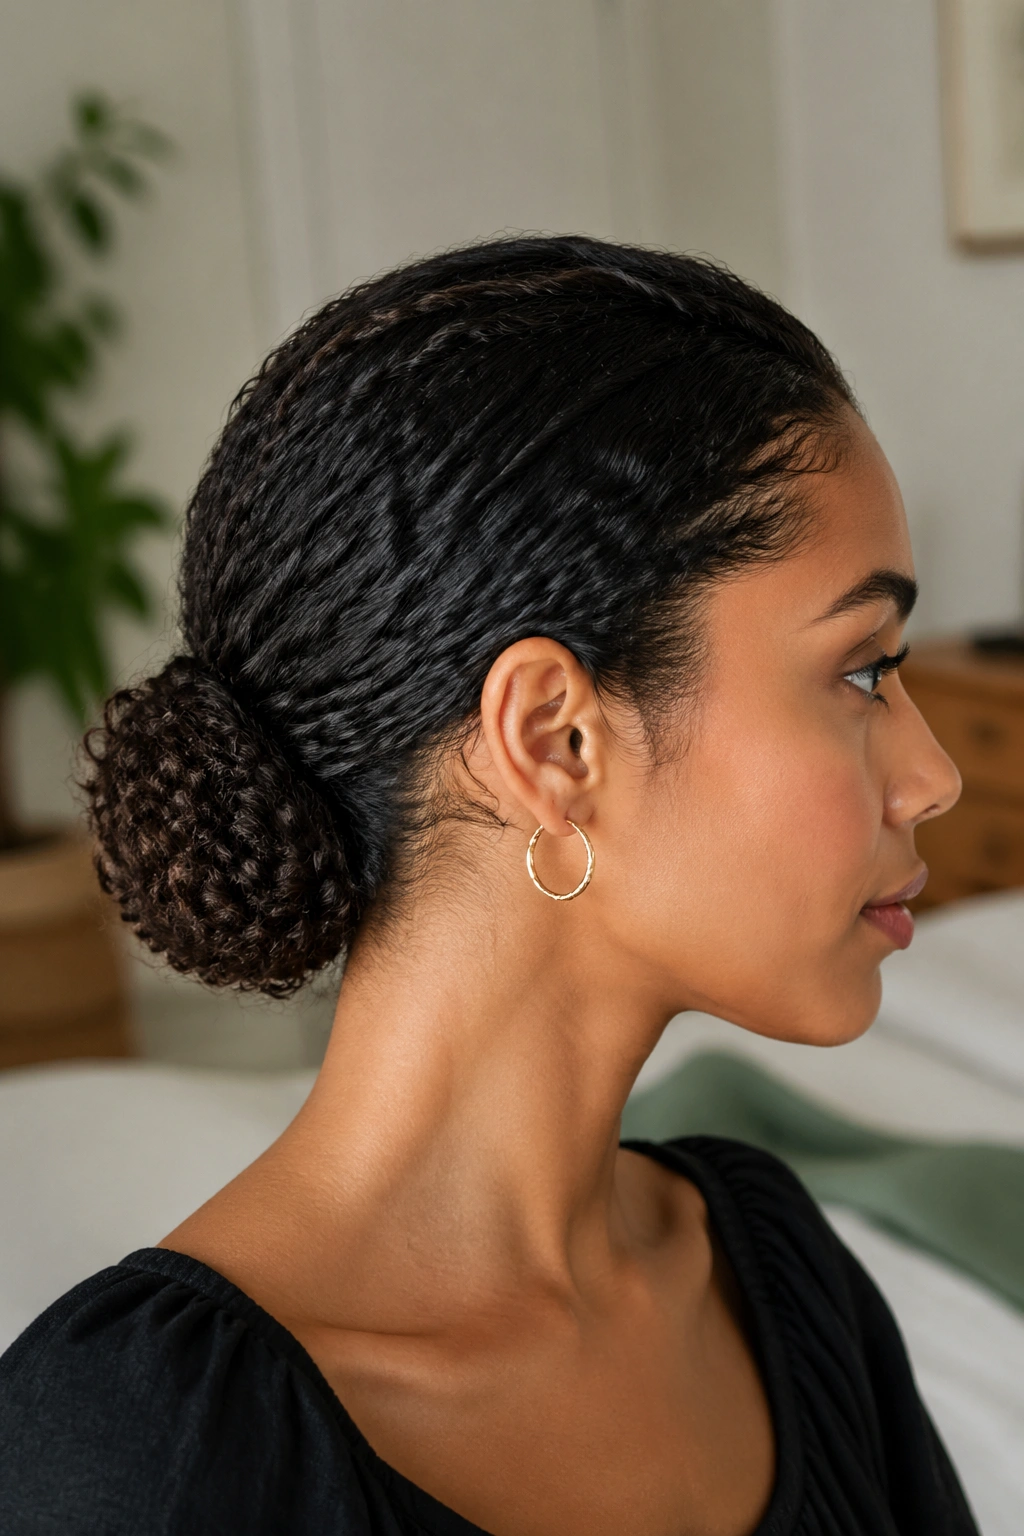
Want the cleanest bun in the group? The low tucked ballerina bun is probably it. It sits at the nape, smooths the top, and tucks the ends in so the finish looks compact without losing all trace of texture.
This bun works best when the curls have been stretched a little, either by air-drying in a looser pattern or by gently smoothing them with your hands before gathering. You do not need straight hair. You just need enough length to wrap the ends under the base.
Best Prep for This Bun
A small amount of leave-in conditioner or light gel helps keep the top sleek. Use a brush only on the outer layer if you want a cleaner finish. The back can stay softer. It should not feel like cardboard.
Pin the bun in a cross pattern so it stays secure. One pin at the top and one at the bottom often is not enough for thicker curls. Three or four pins tucked into the center hold better and keep the shape from sagging.
This style has a neat, almost formal feel, but it can still work for everyday wear if you keep the front slightly relaxed. Too perfect, and it starts to look severe. A little softness saves it.
13. Rope-Twist Curly Bun With a Claw Clip
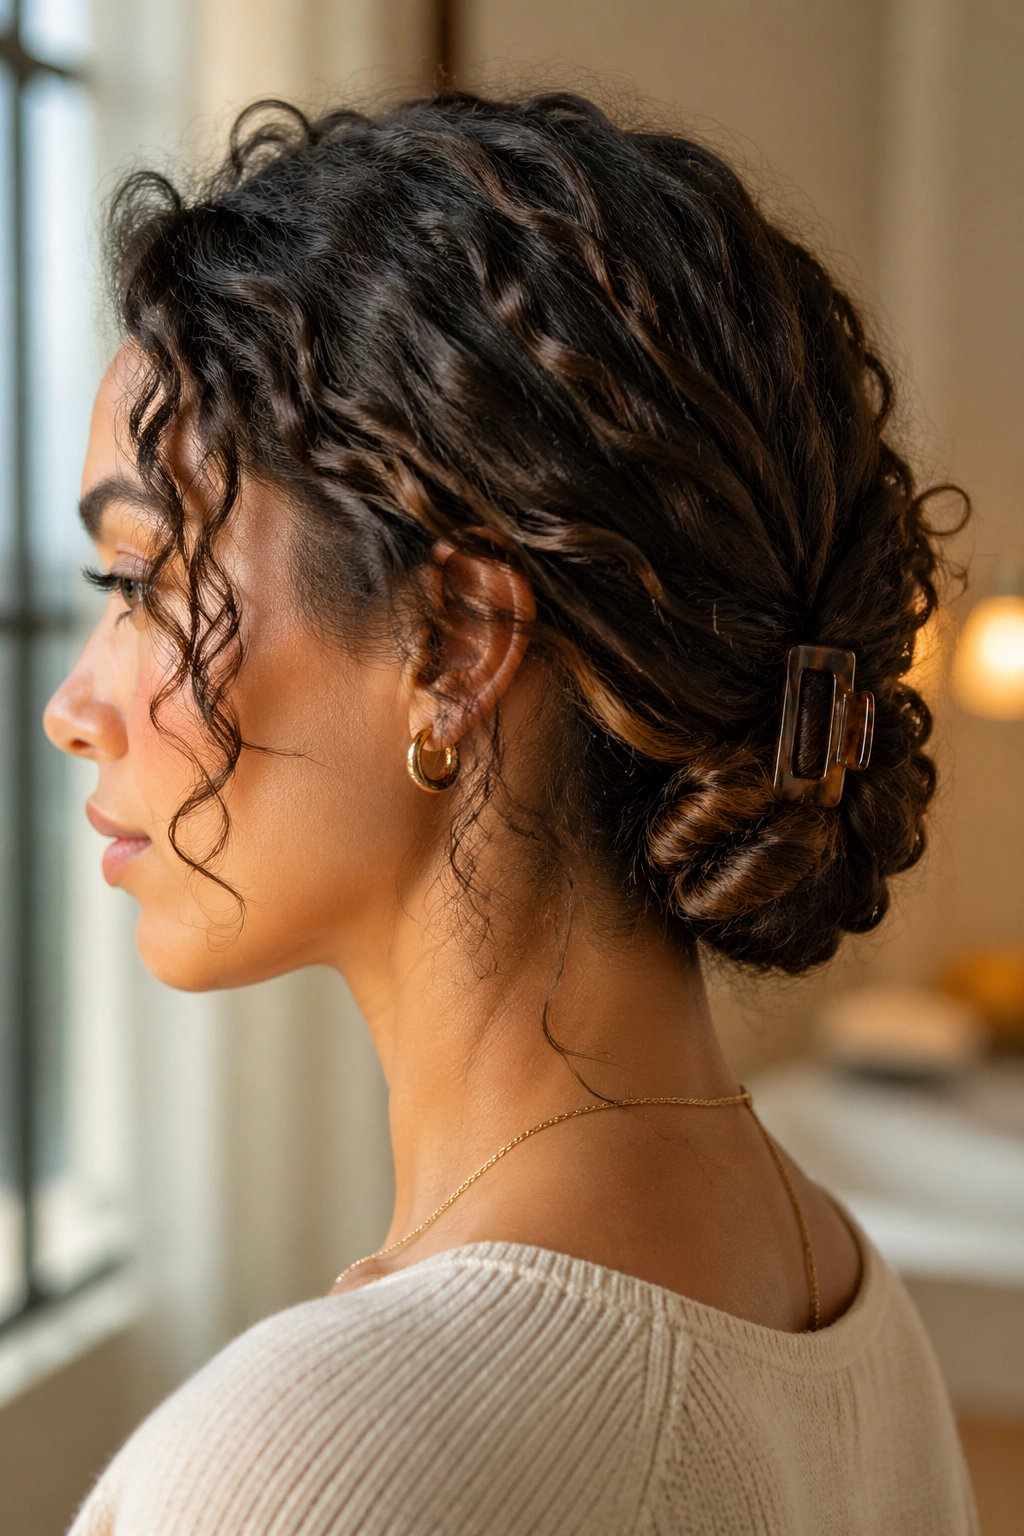
A claw clip can rescue a curly bun when your hands are tired and your patience is shorter than your hair. The rope-twist version is especially useful because the twists give the clip something firm to hold, which makes the style feel steadier than a loose grab-and-go clip-up.
Split the hair into two sections, twist each section away from the face, then wrap them together into a low bun shape. Clip it where the twists overlap. If your hair is long, fold the ends under before clipping so they do not poke out awkwardly.
Fast, but not sloppy.
That is why I like this style. It keeps the hair up without demanding a perfect round bun. You still get texture and volume, but the clip does most of the work. For thick curls, choose a larger claw clip with strong teeth. Tiny clips have a habit of surrendering halfway through the day.
This one is ideal for errand days, work-from-home days, or any time you want your curls secure without creating a headache from tight pulling. If the clip is good, the style lasts. If the clip is flimsy, forget it.
14. Pearl-Pinned Curly Bun
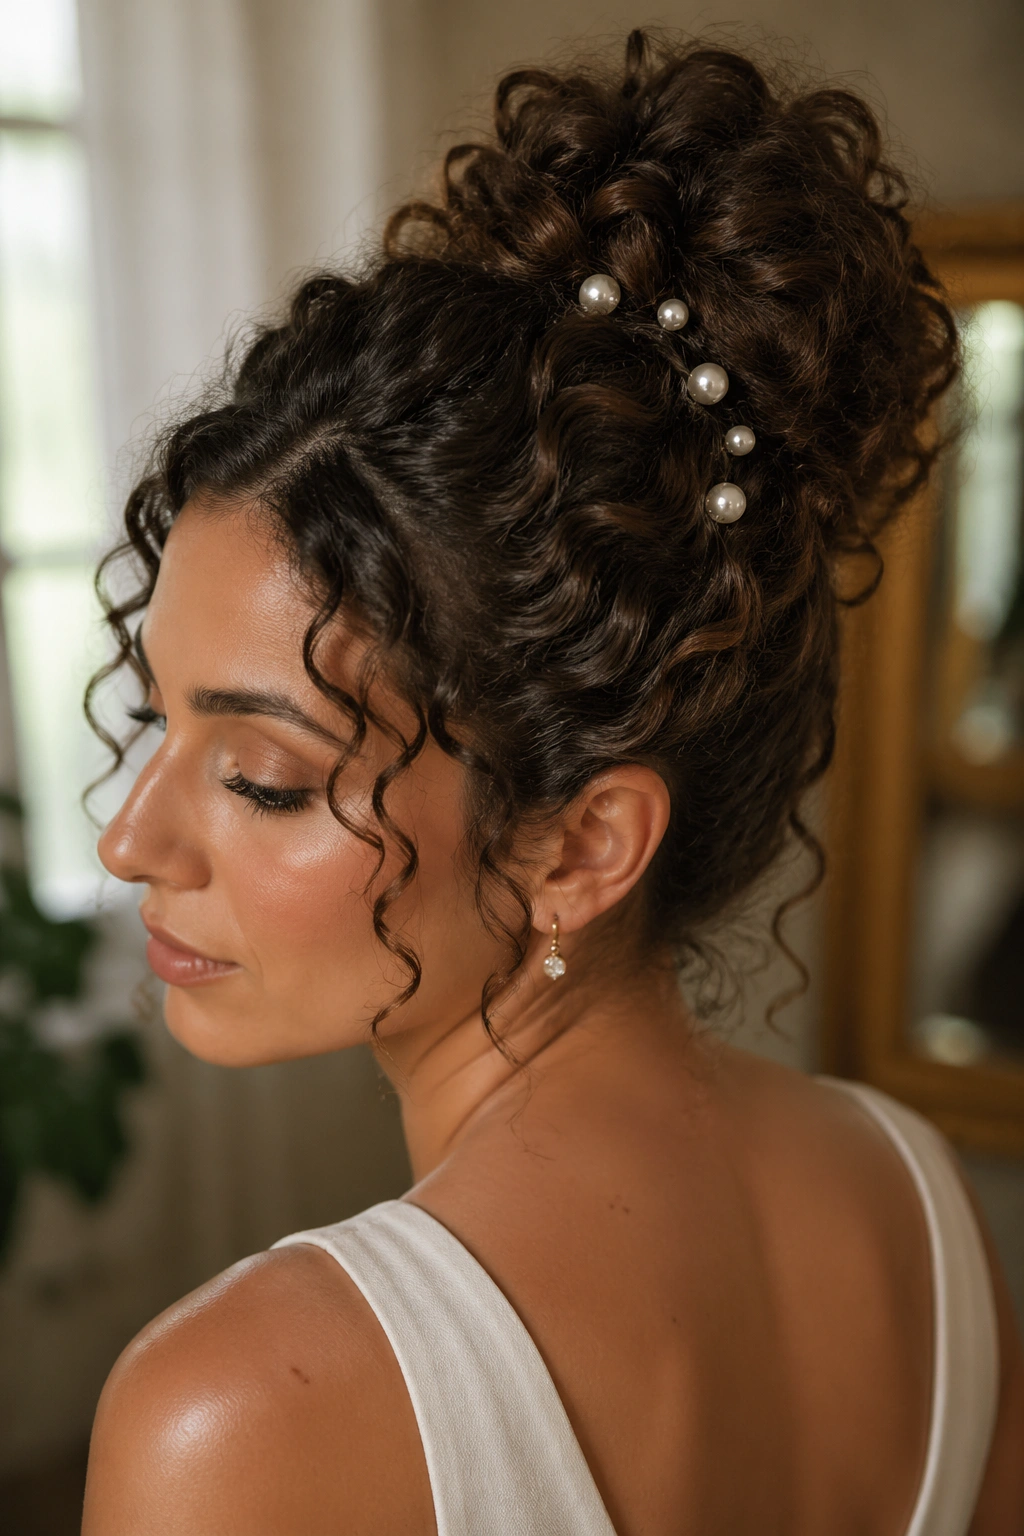
Compared with a scarf or a clip, pearl pins do the least and change the most. That’s why they’re such a smart finishing touch for curly bun hairstyles. You do not need a full set. Three to five pins is usually enough to make the bun feel dressed up.
Place the bun low or mid-height, then slide the pins into one side of the bun or scatter them in a slight curve above it. That asymmetry feels better than lining them up in a straight row, which can look stiff. Let the curls stay visible. The pins are accents, not the main event.
How to Keep It From Looking Busy
- Stick to one pin style, not three mixed together.
- Keep the rest of the hair simple.
- Use pins with a firm clasp so they do not slide.
- Space them out instead of clustering them.
This is the bun I’d choose for a dinner, a shower, or a dressy event where you want a little shine near the hair without going full formal updo. Pearl pins catch the eye in a quieter way than glitter or big clips. That makes them easier to wear. Also easier to remove, which matters more than people think.
15. Asymmetrical Curly Bun
The prettiest curly bun is not always the centered one. Sometimes the best version sits a little to one side, tilts lower on one corner, or leaves one curl cluster more visible than the other. That unevenness gives the style a human feel, and curly hair is at its best when it doesn’t look forced.
Build the bun slightly off-center and let one side stay fuller. If a few curls fall out near the nape or temple, leave them. A strict bun can make curls look boxed in. An asymmetrical bun lets the texture breathe, which is often the whole reason you picked curly hair in the first place.
This style is especially useful when your curl pattern is mixed or your length varies from layer to layer. Instead of fighting the difference, you build the shape around it. That sounds small, but it changes how the whole style sits on the head.
And honestly, this is where curly bun hairstyles stop being a category and start being personal. Some days you want a high pineapple. Some days you want a sleek nape knot. Some days you want the bun that looks a little imperfect and still gets compliments. This is that bun.