By the third day, curly hair has usually stopped looking fresh and started looking interesting. The curl pattern loosens a little, the roots lose some lift, and the hair gets enough grip that clips, pins, and braids actually stay put. That odd middle ground is exactly why third-day hairstyles for curly hair can look better than day-one styles if you pick the right shape.
A lot of curly hair advice is built around wash day, which is fine if you enjoy spending an hour with a diffuser and a prayer. Most people live in the in-between days, though. The hair is softer, a little drier, and often a little frizzier around the hairline, but the body is still there. That means you can lean into volume, tuck away the bits that are misbehaving, and work with the texture instead of fighting it.
Flat roots are not a failure. They’re useful.
What matters most on day three is balance. You want a style that keeps the crown from collapsing, lets the ends keep their curl, and does not demand a mirror-finish slick-back unless your hair is already in that mood. Some styles need length. Some need density. Some are only good if your curls have enough stretch to gather without snapping back in your hands.
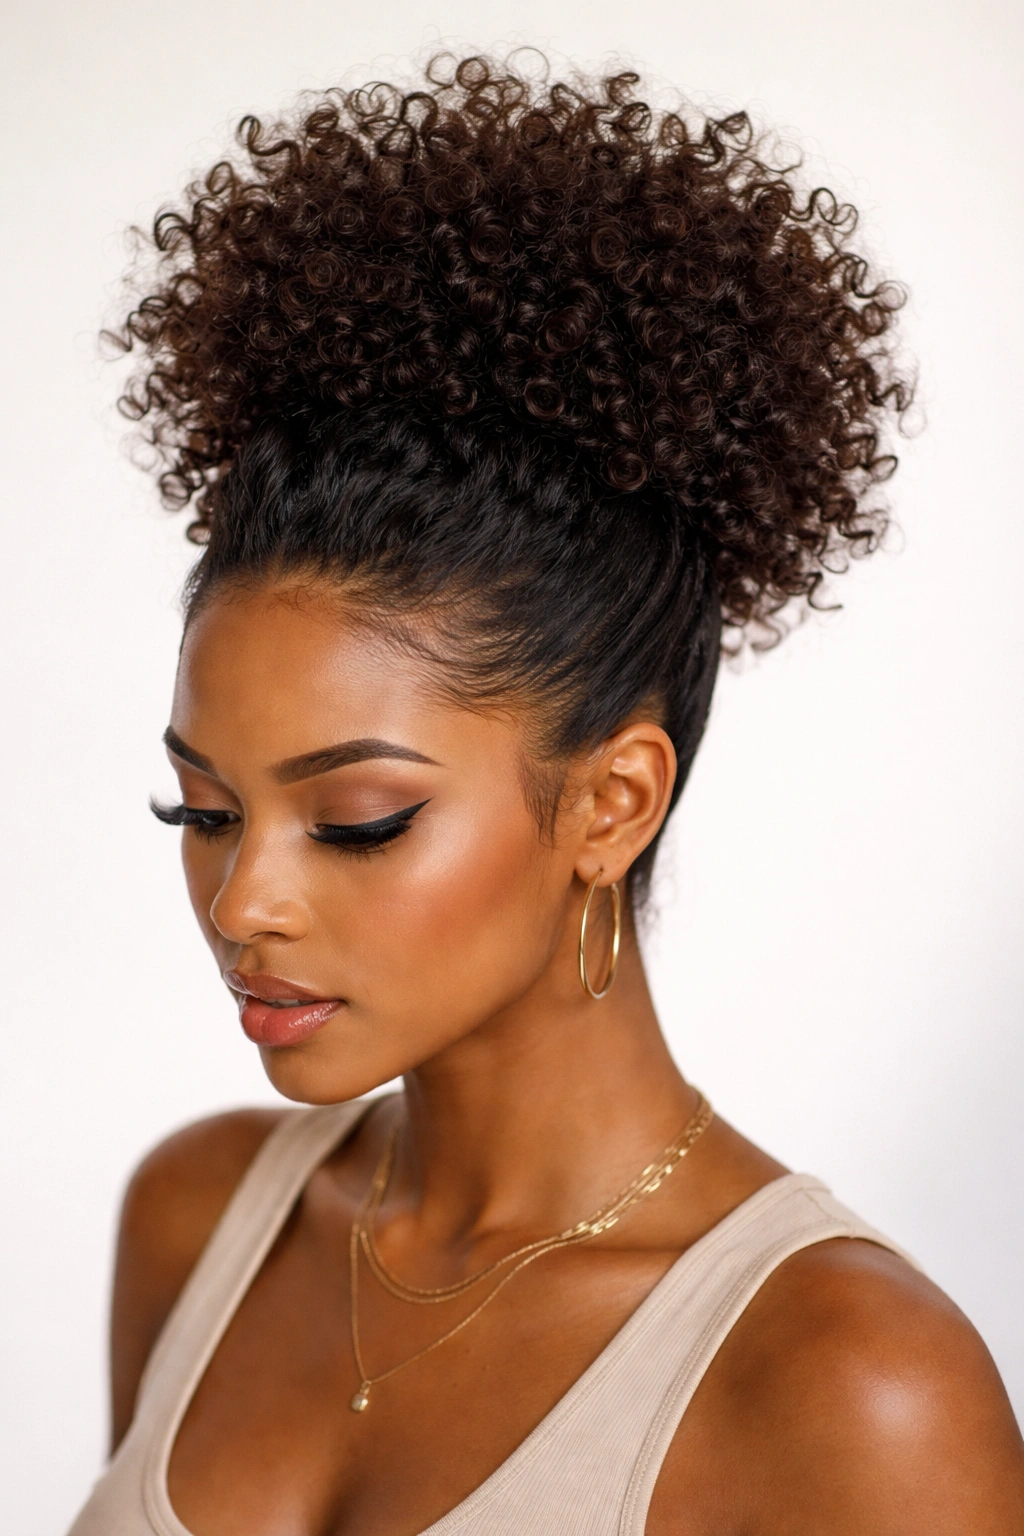
1. A High Pineapple That Still Looks Intentional
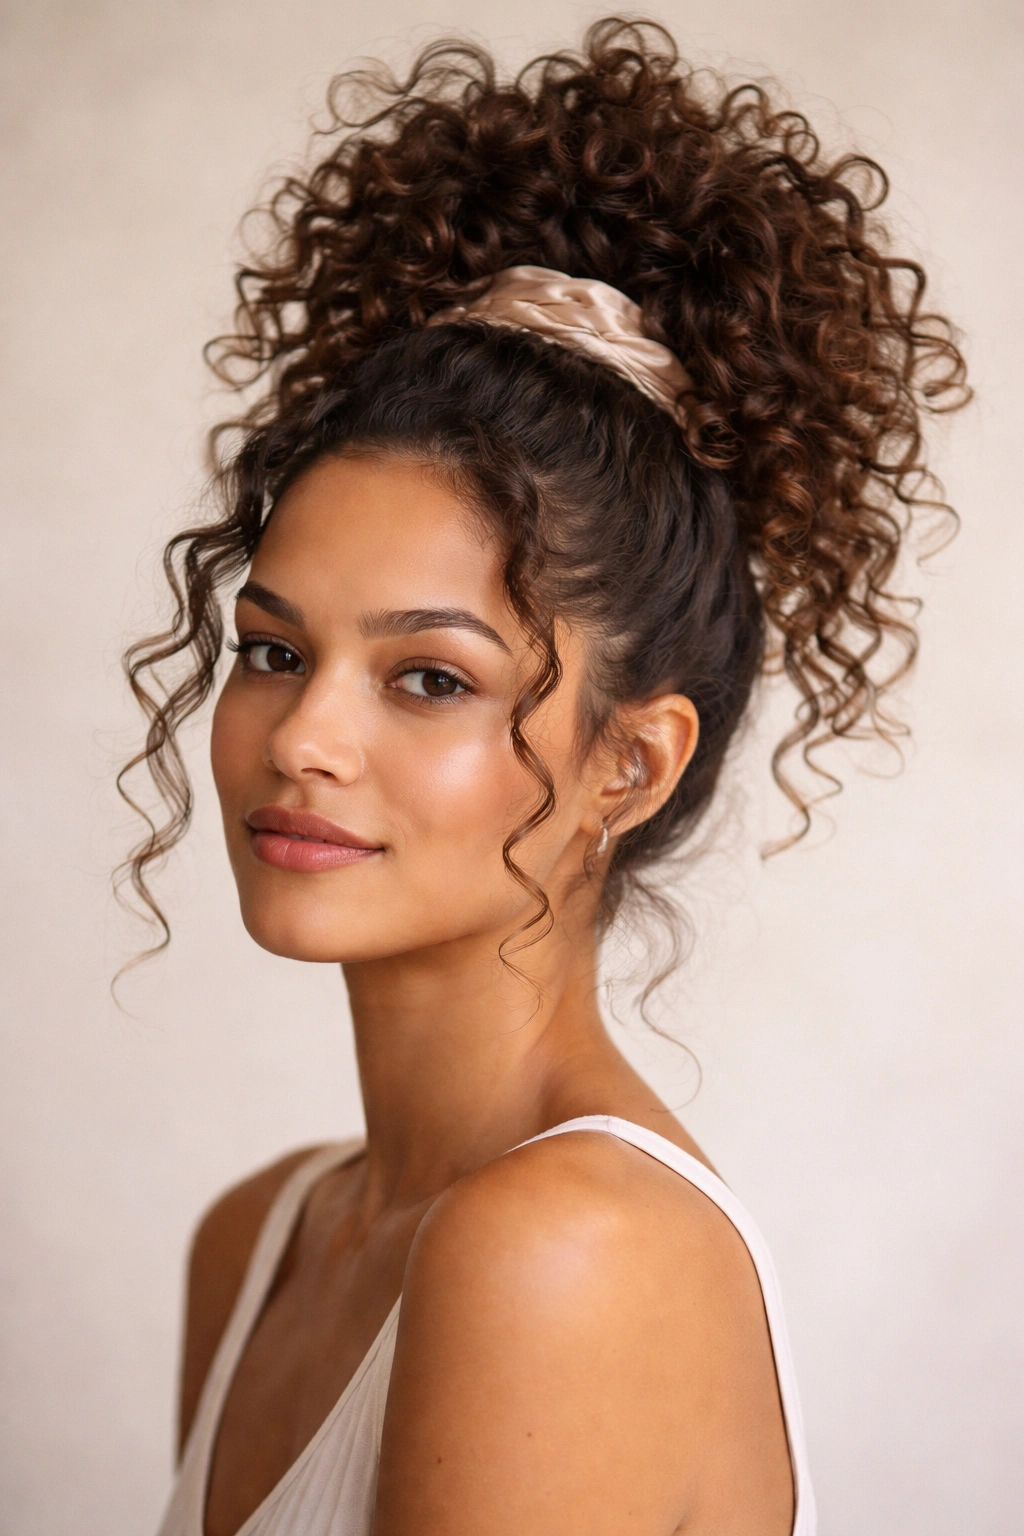
A high pineapple is the first style I reach for when curls are halfway between “cute” and “what happened here.” It works because it keeps the oldest part of the hair—the ends—tucked away while letting the newer frizz at the roots disappear into the shape. On day three, that’s a win.
Why It Works on Day Three
The pineapple is basically a high, loose ponytail placed near the front of the crown, not dead center at the back. That placement keeps your curls from getting crushed at the nape, which is where day-three hair tends to get sad and mushy. Use a soft satin scrunchie or a stretched-out coil tie so you can secure the hair without leaving a dent.
Pull the hair up with your head tipped forward, then stop before it gets too tight. You want lift, not tension. Leave a few face-framing curls out if your front pieces tend to puff up at the roots, because those loose tendrils break up the shape and make the whole style feel less severe.
What To Watch For
- Works best on medium to long curls with enough length to form a high mound.
- Great when the crown is flat but the ends still have shape.
- Skip the tight elastic. It makes a hard line and that line is hard to hide.
- If your curls are dry at the tips, smooth a tiny bit of leave-in over your hands first, then scrunch the ends once.
- A silk or satin scarf tied around the base can hide the scrunchie and make the style look more finished.
Best move: keep the pineapple a little messy. A too-perfect one starts looking like gym hair. A looser one looks deliberate.
2. The Half-Up Claw Clip Twist

Why does a claw clip look better on day three than on day one? Because third-day curls finally have enough grip to hold the shape without sliding everywhere. Fresh curls can be too soft and slippery for a clip to feel secure. Lived-in curls actually cooperate.
The trick is to gather only the top half of the hair, twist it once or twice, and set the clip vertically so it grabs the twist instead of pinching a giant lump of hair. Use an oversized claw clip if your hair is thick, because the tiny ones look cute for about ten seconds and then give up. The half-up shape lifts the crown, but the lower curls keep the style from feeling stiff.
Leave the side curls loose around the ears. That matters more than people think. Those pieces soften the line where the clipped section ends and make the whole look feel less “I ran out the door” and more “I know exactly what I’m doing.”
How to Get the Lift
Start by separating the top section from temple to temple. Don’t chase every little baby curl; a clean line is overrated here. Twist the section back once, maybe twice if your hair is dense, then open the clip and catch the twist close to the scalp. The clip should sit snug, not painfully tight.
If the crown still looks flat, lift the roots with your fingertips before clipping. Not a tease. Just a tiny bit of fluff at the base. That little bit of separation gives the clip something to hold onto.
This style is especially good when your ends still look healthy but your roots have lost their shape. That combination is common on the third day, and honestly, the half-up twist handles it better than most styles because it lets each part of the hair do what it’s already doing well.
3. A Low Loose Bun With Face-Framing Pieces
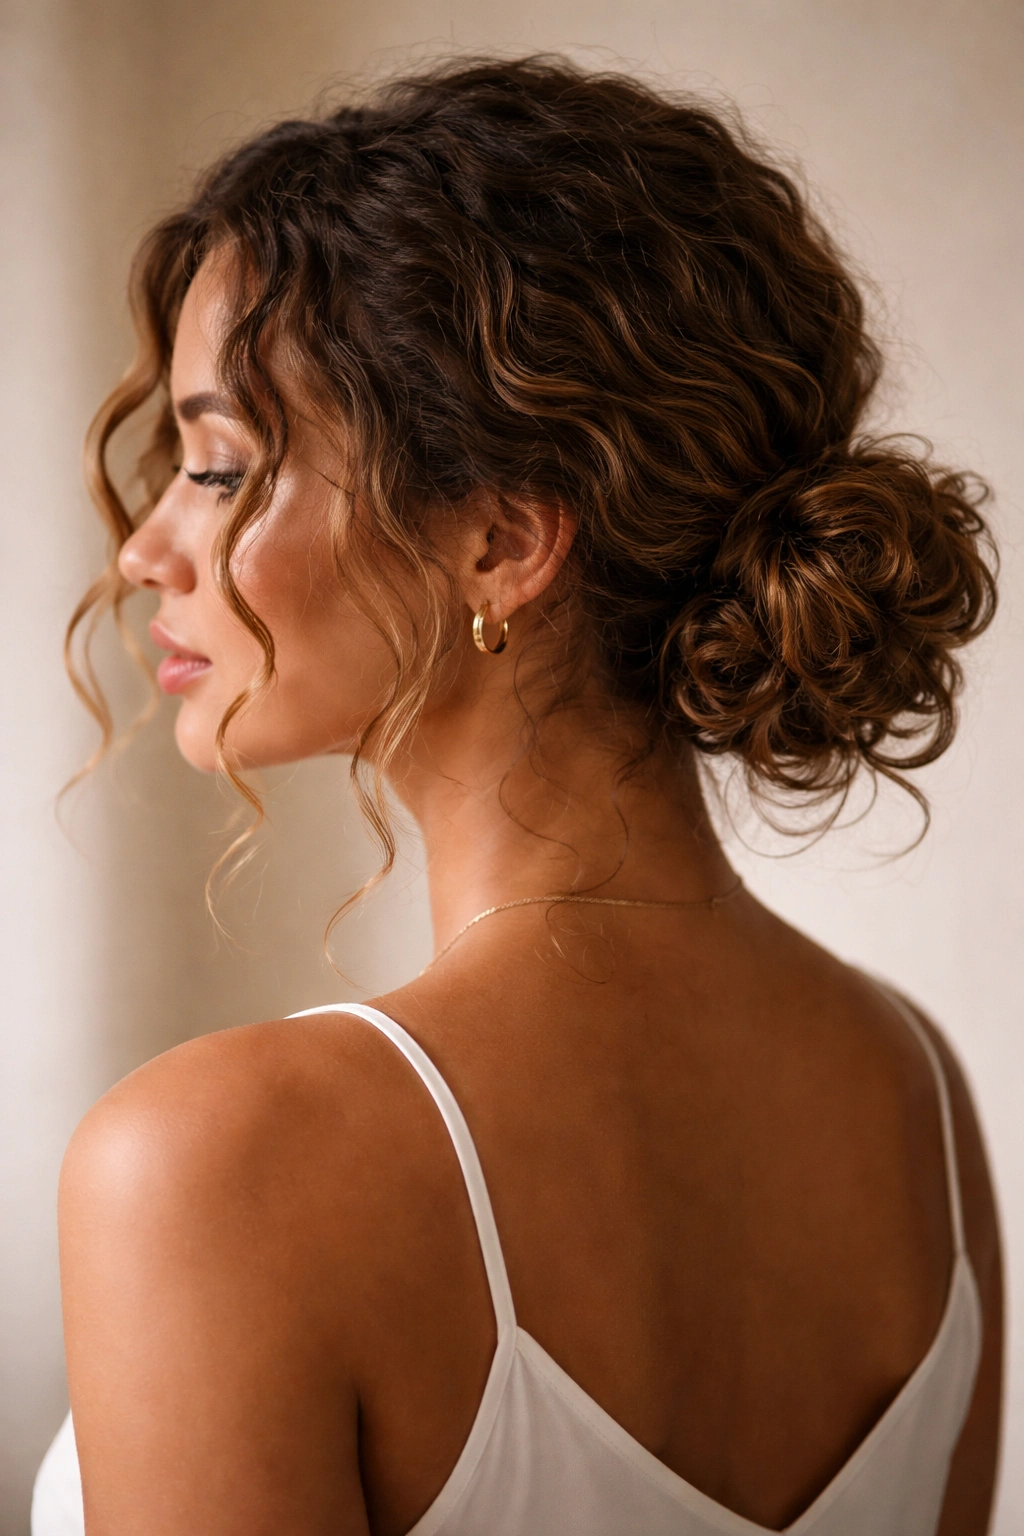
A low loose bun is the style I recommend when the hair has crossed into “needs a reset, but not a wash yet” territory. It hides frizz, keeps the ends out of the way, and still looks neat enough for work, dinner, or a long day out. It’s not fussy. That’s part of the appeal.
The best version sits at the nape, not the middle of the head. Gather the curls low and let them fold into themselves instead of trying to smooth every strand into obedience. If the bun is too polished, it starts fighting the texture. If it’s too loose, it collapses. The sweet spot is somewhere in the middle, with a few curls left free at the front and maybe one tucked loose at the back if your hair needs a little softness.
A lot of people try to solve third-day frizz by spraying more product everywhere. I don’t love that. A better move is to shape the bun first, then decide whether the face-framing curls need a touch of water, a dab of cream, or nothing at all. Sometimes the curls are fine. The hair around them is what needs help.
Leave These Pieces Out
- Two front curls near the cheekbones.
- One small curl at the nape if your bun looks too severe.
- The shortest top layers if they keep springing up anyway.
- Any curl that naturally wants to sit forward.
Small warning: don’t twist the bun so tightly that the curl pattern disappears. A loose coil pinned into place usually looks better than a hard knot with three pins fighting for their lives.
4. The Crown Braid That Hides Flat Roots
A crown braid is one of those styles that looks more complicated than it is, which is convenient because third-day hair rarely deserves extra drama. The braid sits close to the hairline and wraps around the head, so the flatter roots disappear into the design instead of standing there like a problem.
This style works especially well when your front sections have gone a little puffy and the back still has shape. The braid handles the awkward zone at the top, and the loose curls at the back keep the whole thing from looking too controlled. I like that contrast. It feels lived-in, not stiff.
The braid does not need to be tiny and neat. In fact, a slightly chunky braid is better on curly hair because the texture makes the sections easier to grip, and the fuller size blends into the rest of the hair more naturally. If your curls are slippery, wait until the roots have a little day-three grit. Fresh, soft curls are harder to braid cleanly.
One thing people get wrong: they braid too close to the hairline and end up pulling at the edges. Don’t do that. Leave a bit of space. It looks softer, and your scalp will thank you.
A crown braid is a good choice when you want your hair off your face but don’t want a full updo. It also buys you time if the rest of your curls are still good enough to wear down. That’s the real value here. You get structure on top and freedom everywhere else.
5. Double Space Buns for Thick Curly Hair
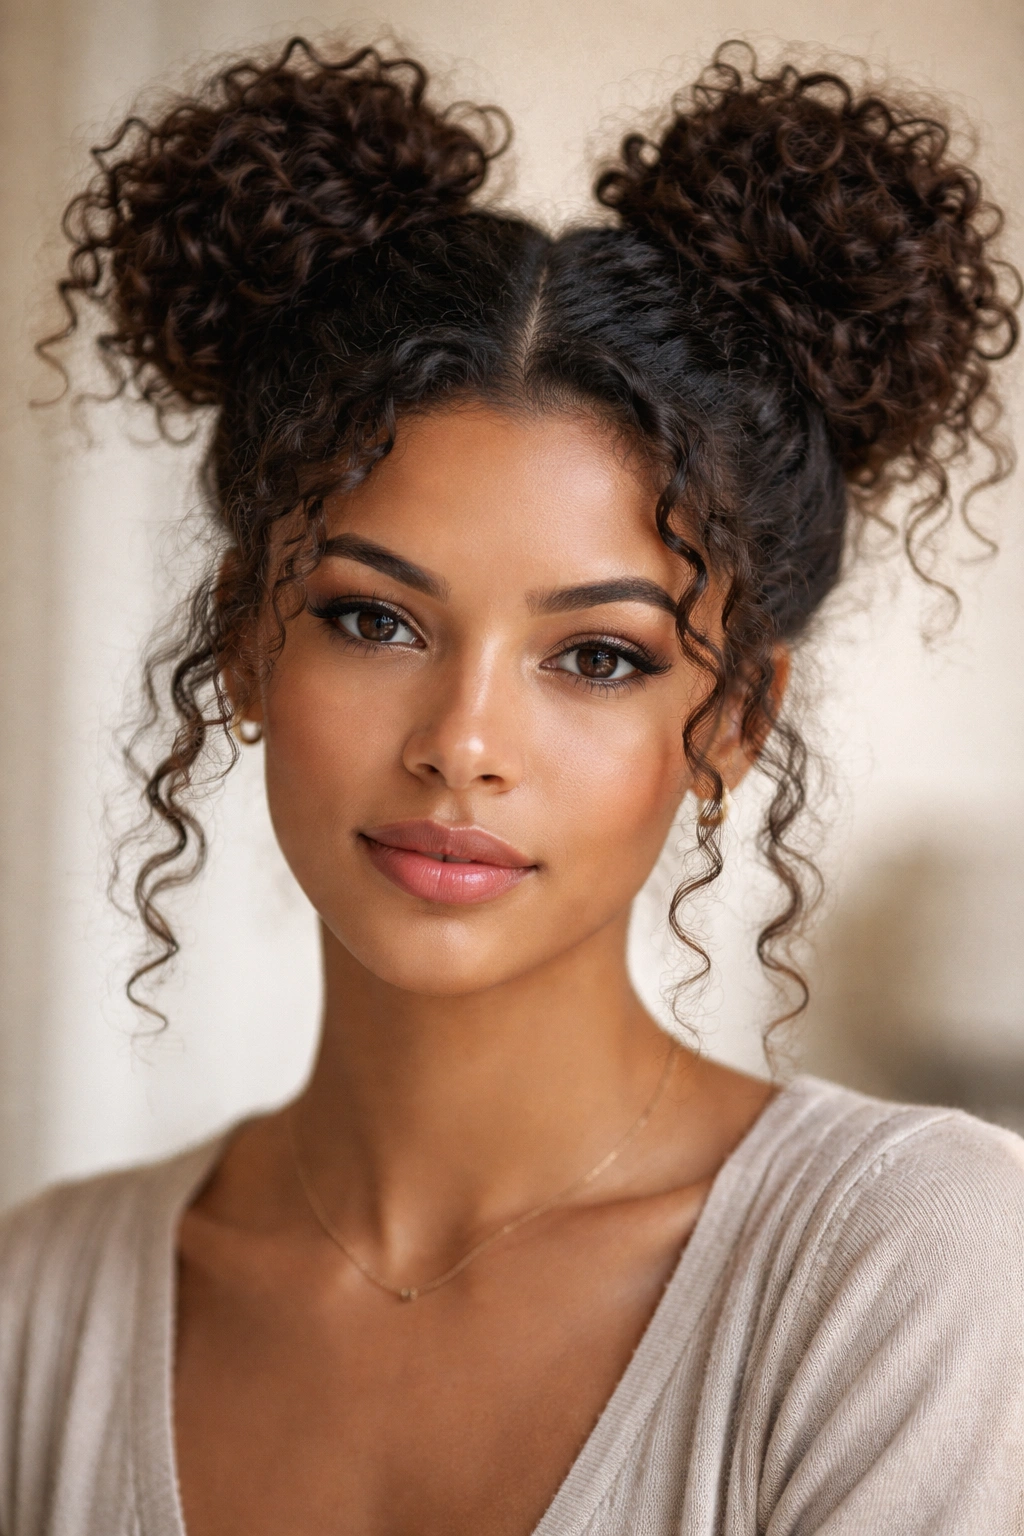
Can you wear space buns without looking like you raided a costume bin? Absolutely, if the buns are a little loose and the rest of the curls stay textured. On thick curly hair, double buns solve a simple problem: too much volume in one place. Split it into two, and the whole style becomes easier to wear.
This one works best when your hair has enough length to gather into two high sections without dragging on the scalp. Make the part clean or slightly off-center, then divide the hair and twist each section into its own bun. Don’t flatten them. You want each bun to keep some puff and irregularity, because that’s what makes them fit curly hair instead of fighting it.
The front pieces matter here. Leave a few curls out near the temples or along the cheekbones so the style doesn’t read too rigid. If your top layers are short, let them escape a little. That is not a mistake. It’s part of the look.
When Space Buns Make the Most Sense
- Your hair is thick enough that one bun feels bulky.
- The crown is flat, but the sides still have body.
- You want a style that stays put through a long day.
- Your curls are too lively for a slick updo.
- You do not want to spend 20 minutes pinning one bun into place.
Space buns can feel playful, sure, but they can also look sharp and intentional if the parts are clean and the buns sit evenly. I like them most on hair that has gone a little puffier at the roots, because the style turns that extra volume into part of the design.
6. A Deep Side Part With Decorative Clips
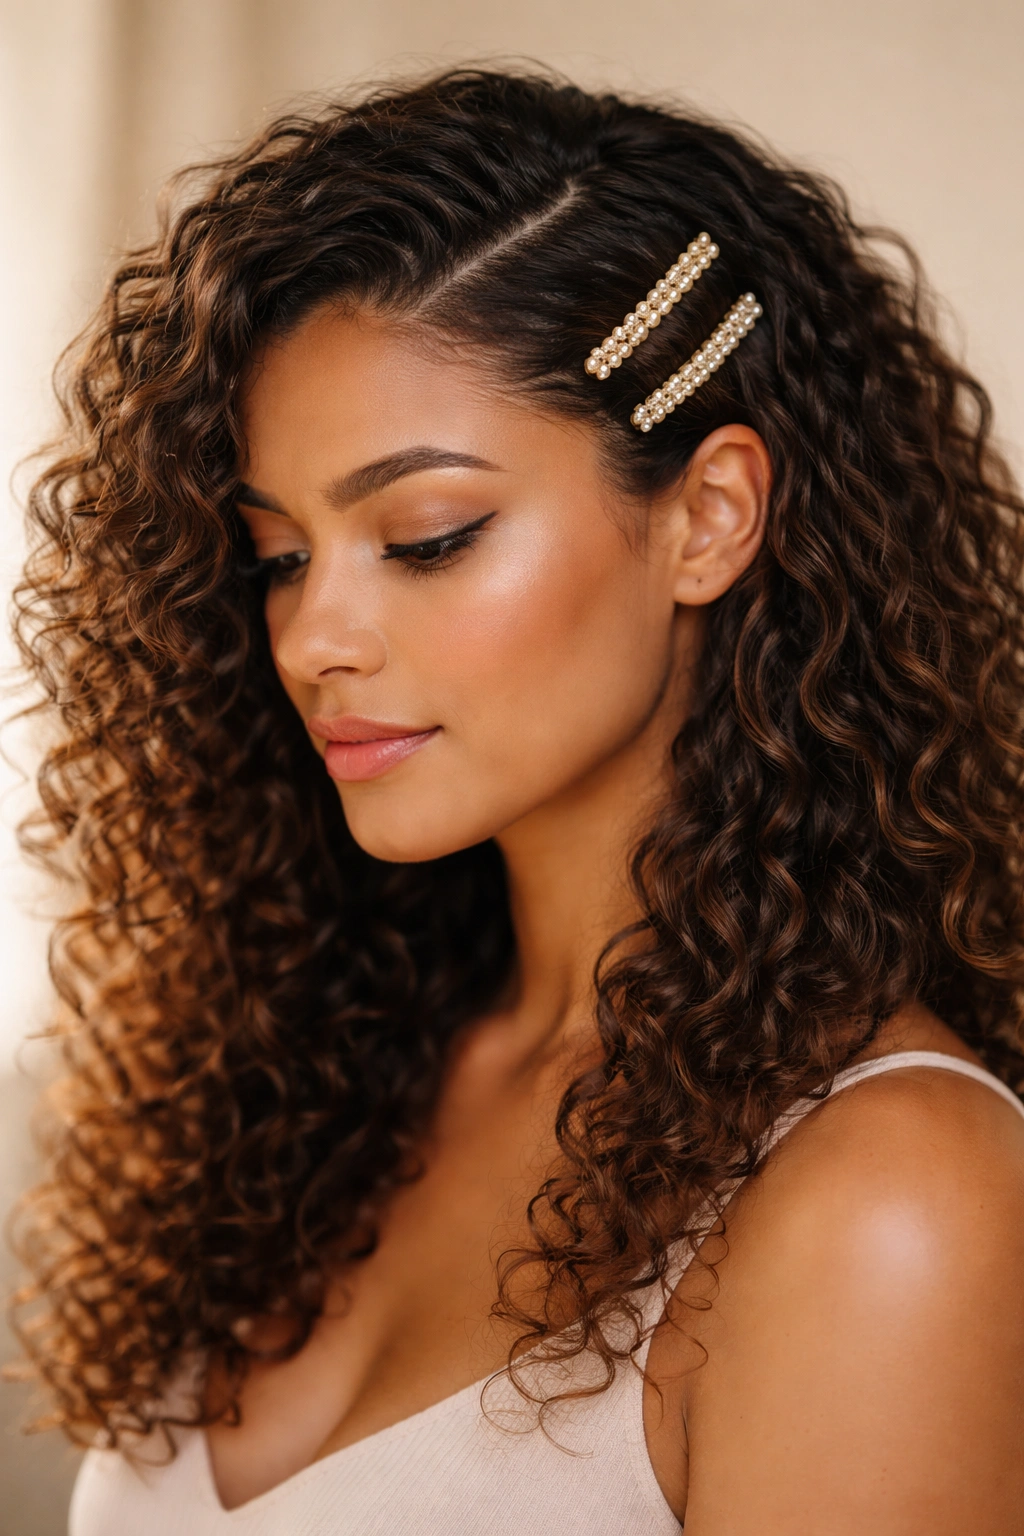
A deep side part is one of the easiest ways to rescue curls that have started to lie a little too flat at the top. Unlike a center part, which can make the crown look narrower and more tired, a side part creates instant lift on one side and gives you a better place to tuck in clips or barrettes.
The difference is small on paper and obvious in the mirror. Move the part farther over than usual, then smooth the heavier side with your hands or a soft brush. Clip one side back with a metal barrette, a pearl snap clip, or two smaller clips stacked together. That little interruption changes the whole shape of the hair.
This style is good when you want to keep most of the hair down. It does not hide the curls. It just reshapes them. If the ends are still springy, they’ll do the heavy lifting. If the roots are tired, the side part gives them a reason to stop announcing themselves.
I also like this one for mixed curl patterns. If one side of your hair always behaves better than the other, a deep part lets the stronger side carry more of the visual weight while the weaker side gets tucked and controlled. That sounds technical, but it’s really just smart styling.
Choose clips that hold. Pretty clips are fine. Weak clips are useless. If the clip slides by lunchtime, it was the wrong clip.
7. The Twisted Halo Updo
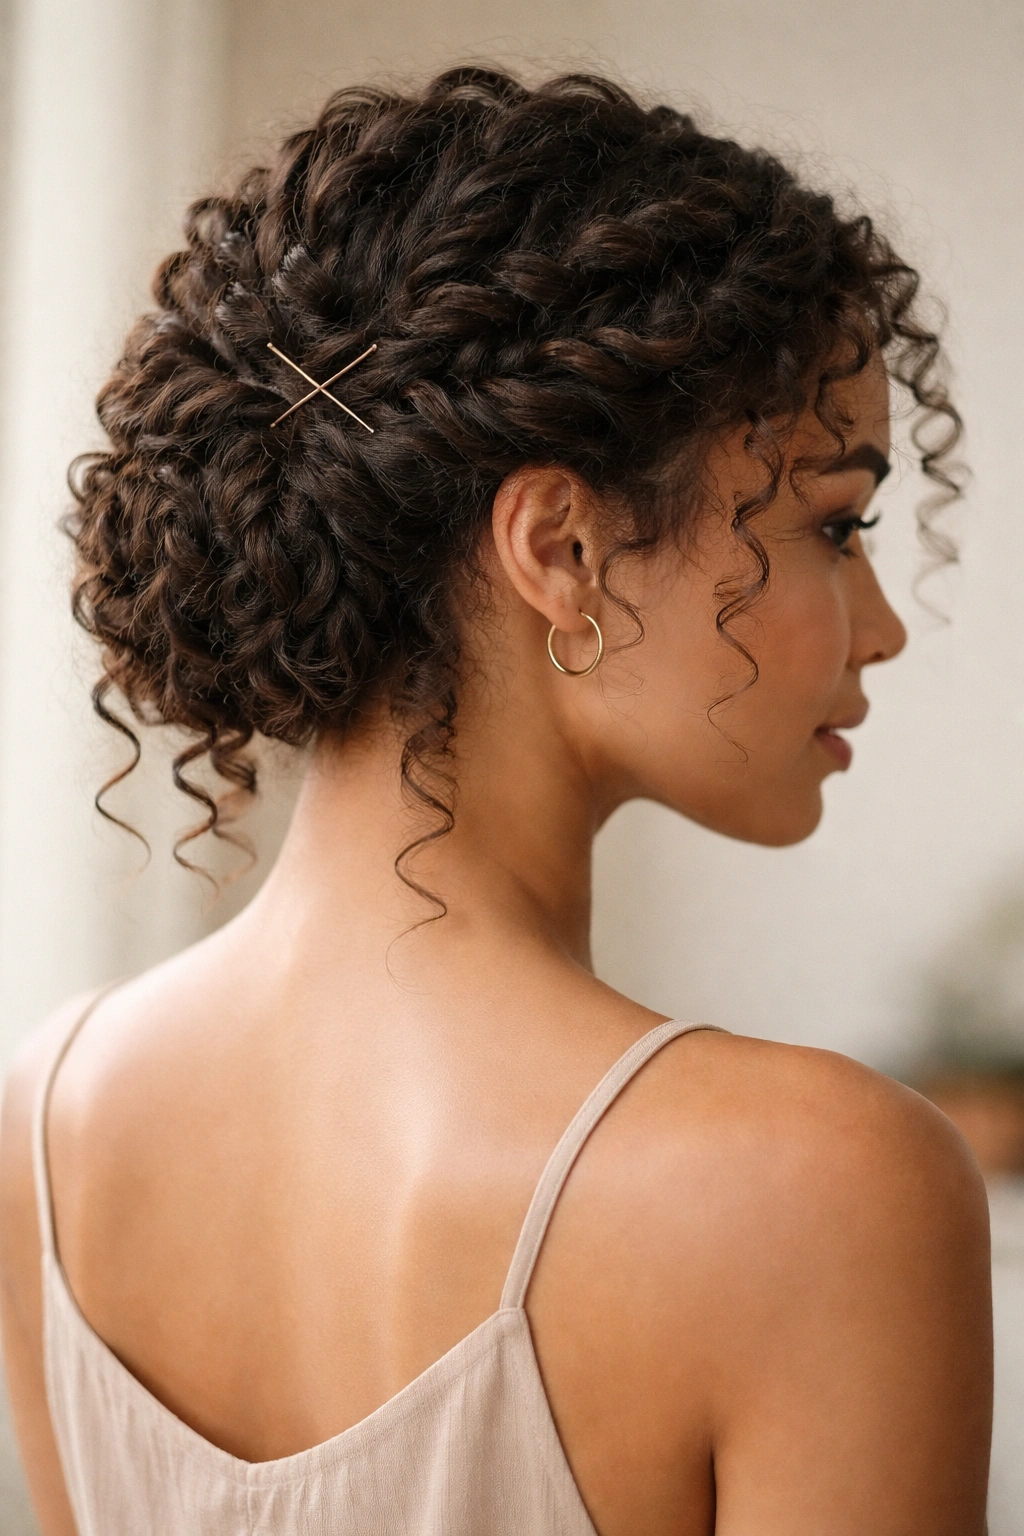
The twisted halo updo has a softer feel than a tight braid crown, and on curly hair that softness matters. You can almost feel the style sit differently: the twists rest against the head without pressing the hair flat, and the loose ends around the nape keep it from looking overworked.
Start by taking small sections from each temple and twisting them back toward the crown. Pin each twist as you go, crossing the bobby pins in an X if your hair is heavy. That helps the style stay in place without needing a pile of pins. Then let the back section stay loose or gather it low, depending on how much length you have left to work with.
Where the Pins Should Go
- Anchor the first pin right behind the twist, not through the middle of it.
- Use two pins per side if your hair is dense.
- Hide the pin ends under another curl or twist.
- Keep the twists slightly loose so the halo has some width.
What makes this style work on day three is the balance between structure and softness. Curly hair that has been worn for a couple of days tends to have a little more texture around the scalp, which helps the twists hold. At the same time, the ends often still look decent enough to leave out, so you do not need to tuck everything away.
I like this one when the front is frizzy and the back still has definition. The halo handles the front. The rest of the hair can stay in its own lane.
8. The Curly Mohawk Puff
A curly mohawk puff is one of the boldest third-day hairstyles for curly hair, and I mean that in the most practical way. It gets the sides under control, leaves the center full, and turns a rough crown into a shape on purpose. If your hair has a lot of texture, this style makes sense fast.
The center strip can be left as a puff, a series of mini puffs, or one long lifted section depending on length. Smooth the sides upward with your hands or a little gel, then pin them close to the scalp so the center ridge stays the focus. The shape should feel high and a little dramatic. Flat mohawks do not do the job.
This style is especially good when the top layer is fluffy but the sides are starting to feel wide. Pulling the sides back tightens the outline of the head and gives the curls a cleaner frame. That does not mean slick. It means shaped. There’s a difference, and curly hair usually looks better when that difference is respected.
If your hair is coily or very dense, the mohawk puff can be one of the fastest fixes for day-three bulk. It also wears well under a hood or jacket, which is more useful than people admit. A lot of cute styles fall apart the second a collar gets involved. This one usually survives.
The best part? It looks better when it is slightly uneven. Curly hair carries that kind of asymmetry well.
9. A Low Puff Wrapped With a Scarf

A low puff wrapped with a scarf feels like the curly version of putting on a good jacket. Everything gets pulled together, but the texture still shows. It’s the style I’d pick for a day when the roots are dry, the ends are still decent, and you want to look put-together with almost no fuss.
Gather the hair low at the back of the head and leave enough room for the puff to keep its shape. Then wrap a scarf, ribbon, or wide band around the base. The wrap does two jobs at once: it hides the scruffiest part of the style and gives the puff a cleaner finish. If the hair at the crown is puffier than you want, the scarf draws the eye downward.
This is a good style for coily textures, but it works on looser curls too if the hair has enough volume at the base. Don’t flatten the puff while you’re tying the wrap. That defeats the whole point. Let the hair sit up a little before you secure the scarf.
A side benefit: the scarf can cover a section of hair that is too frizzy to leave out but not frizzy enough to need a full updo. That in-between zone is where third-day hair lives most of the time.
If you want the style to last, choose a scarf with some grip. Slippery fabric slides. A cotton-silk blend or a sturdy band usually behaves better than something silky and thin.
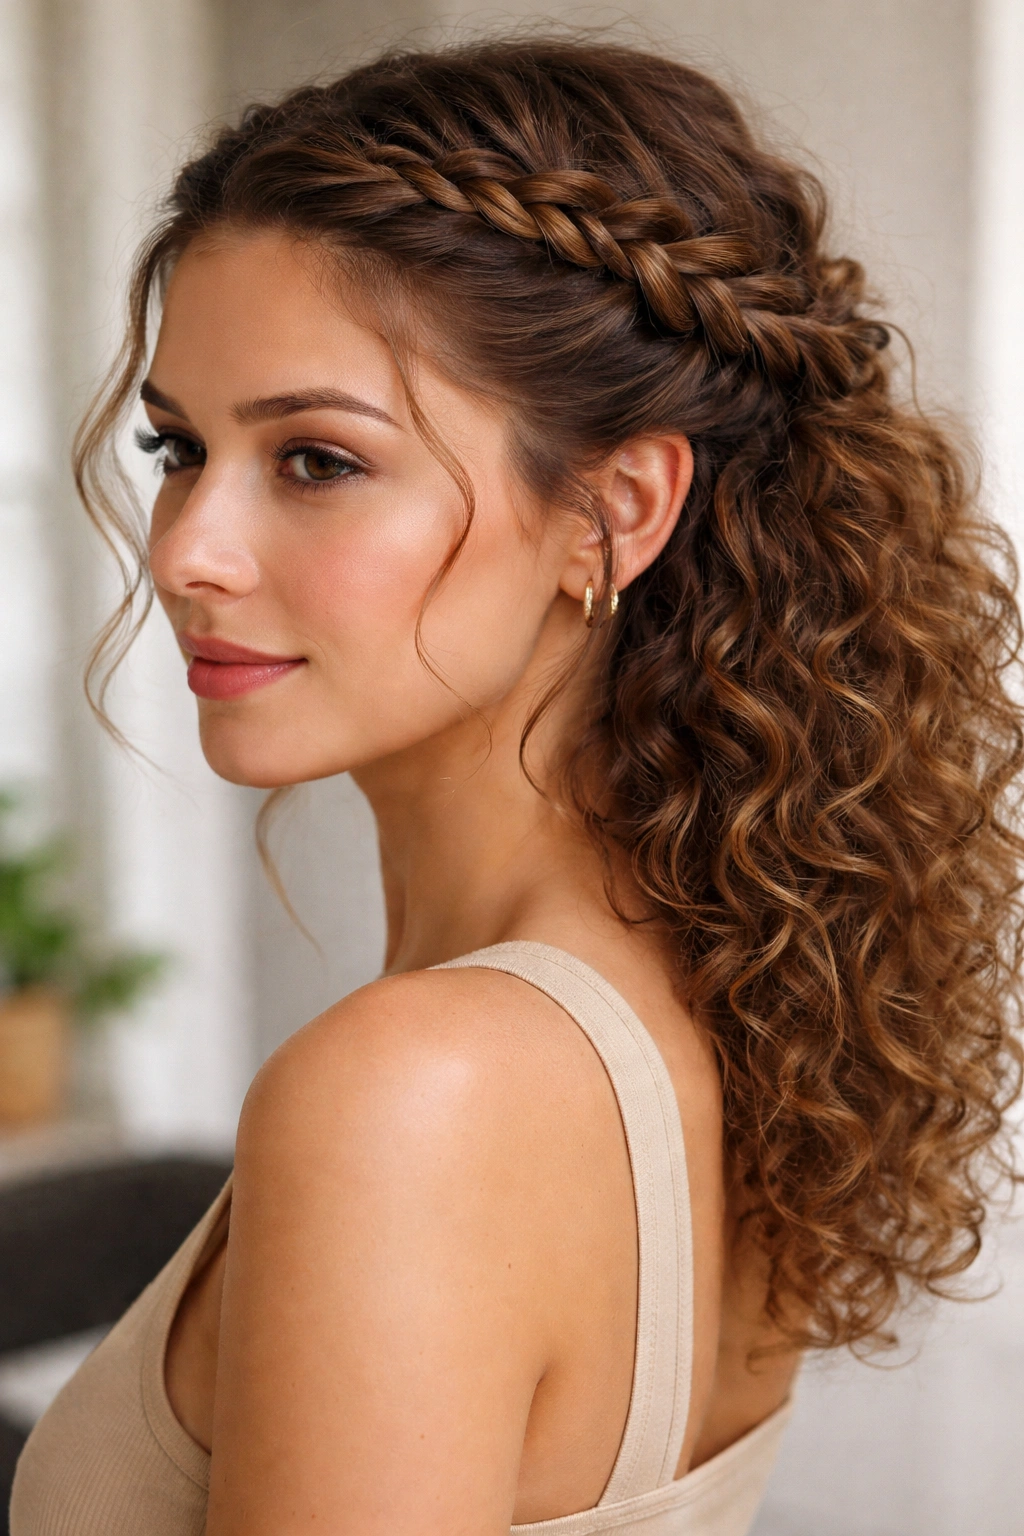
10. Braided Front Pieces With Free-Falling Curls
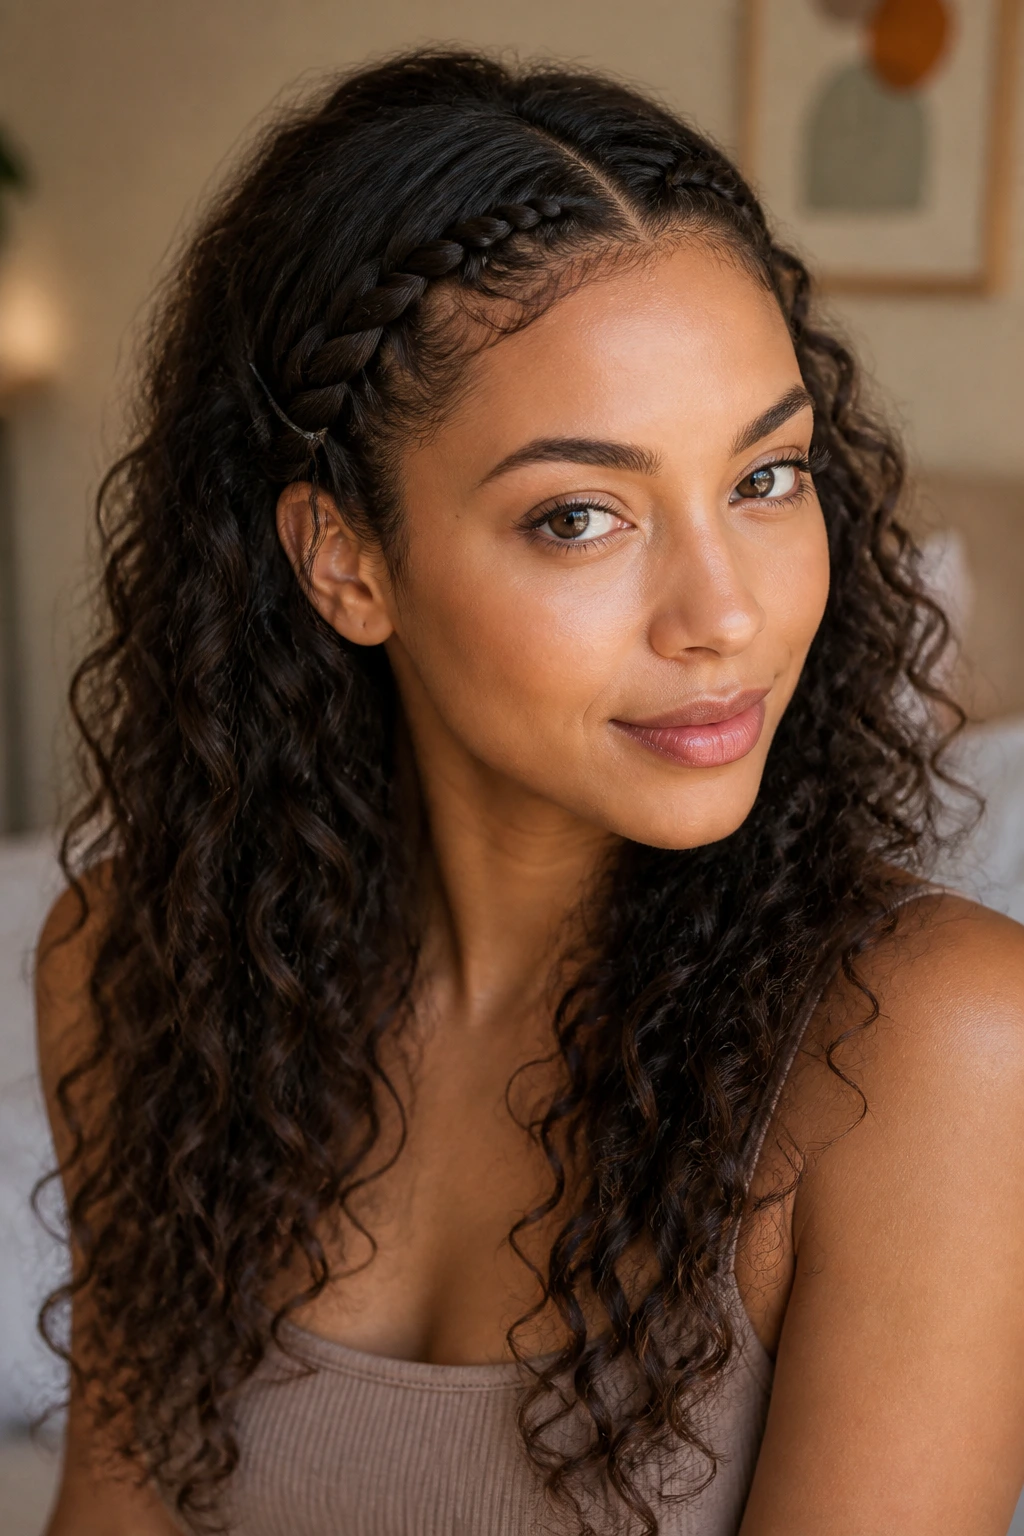
Braided front pieces are one of my favorite fixes for hair that has good length left but a messy hairline. They solve a specific problem: the front has gone fuzzy, the rest of the curls still look worth showing off, and you want the style to feel deliberate rather than hidden.
Pull back just the front section from each side and braid or twist it back toward the temples. Keep the braids small enough to sit flat, then pin or tie them behind the ear. Leave the rest of the hair loose. That contrast is the whole point. The front looks controlled, while the back gets to keep its volume and movement.
This style is different from a full half-up because it does not take over the whole head. It’s more selective. That makes it a smart choice if your curls are uneven by day three—good shape underneath, wildness at the front, enough body left to wear down.
Best For Hair That Is
- Frizzy around the face but still defined through the lengths.
- Long enough to pin a small braid behind the ear.
- Better down than up, but not ready for a full loose style.
- Too full for a plain side part.
- In need of a quick fix that still feels styled.
A little curl cream on the ends can help the loose section stay defined, but do not overload the roots. The braid should do the controlling work up front. The curls in back should look free, not coated.
This is the style I keep coming back to when I want the hair to look like hair, not an emergency. If your curls still have a good shape underneath the chaos, this one gives them the spotlight without pretending the frizz does not exist.