Middle-part hairstyles for curly hair can look sharper than people expect. A center part gives curls a spine. It splits the volume, opens up the face, and makes the whole shape feel deliberate instead of accidental.
That exposure is the part people underestimate. A clean middle part will show uneven layers, a cowlick, or roots that need a little help. It will also show off a strong curl pattern, good density, and the kind of shape that makes curls look polished without getting stiff.
The styles below use that center line in different ways. Some keep the part visible and let the curls do the talking. Others tuck, clip, braid, or pin the hair so the front stays neat while the rest stays soft and full.
Pick the one that fits your curl pattern, your length, and how much time you want to spend in the mirror.
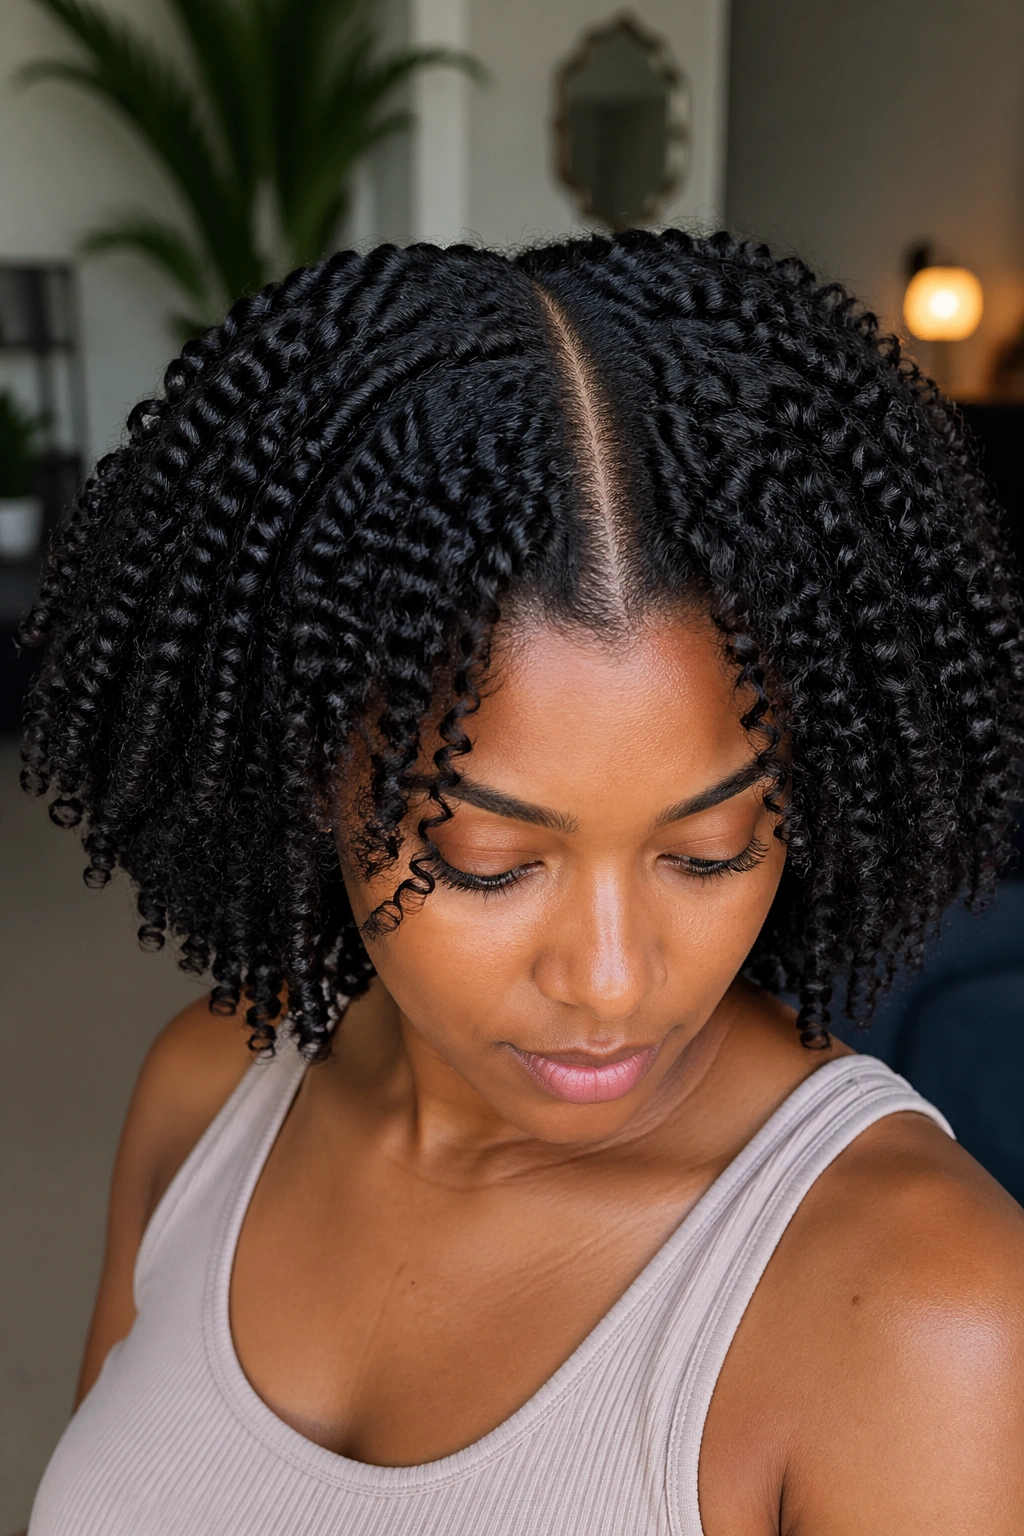
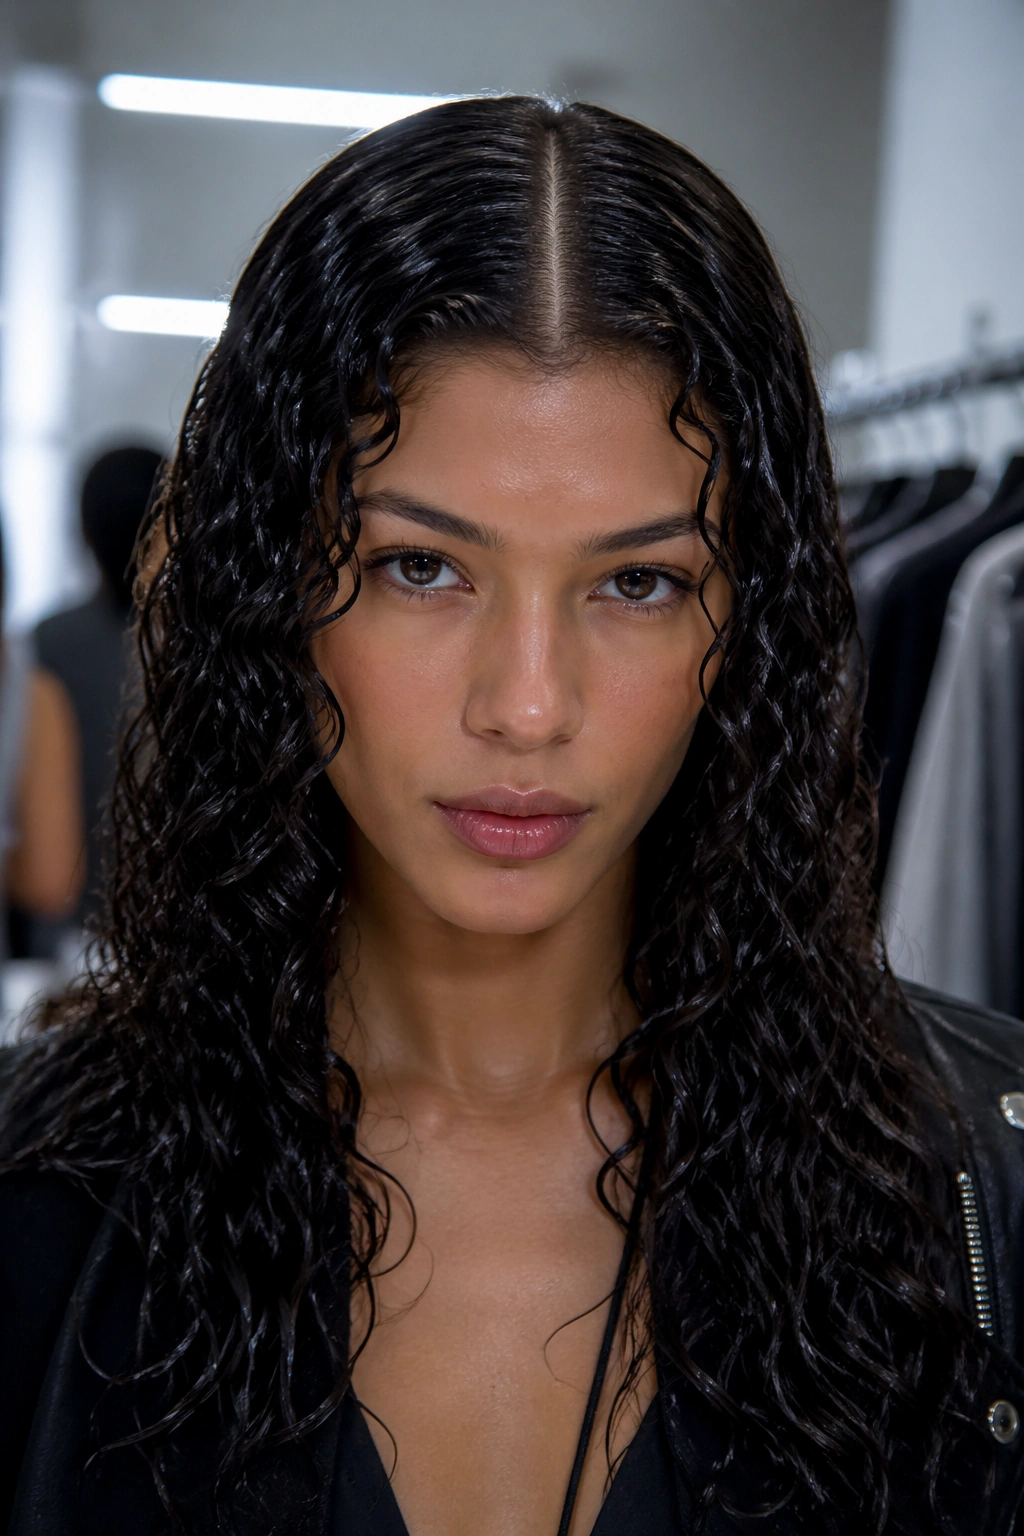
1. Classic Middle-Part Wash-and-Go
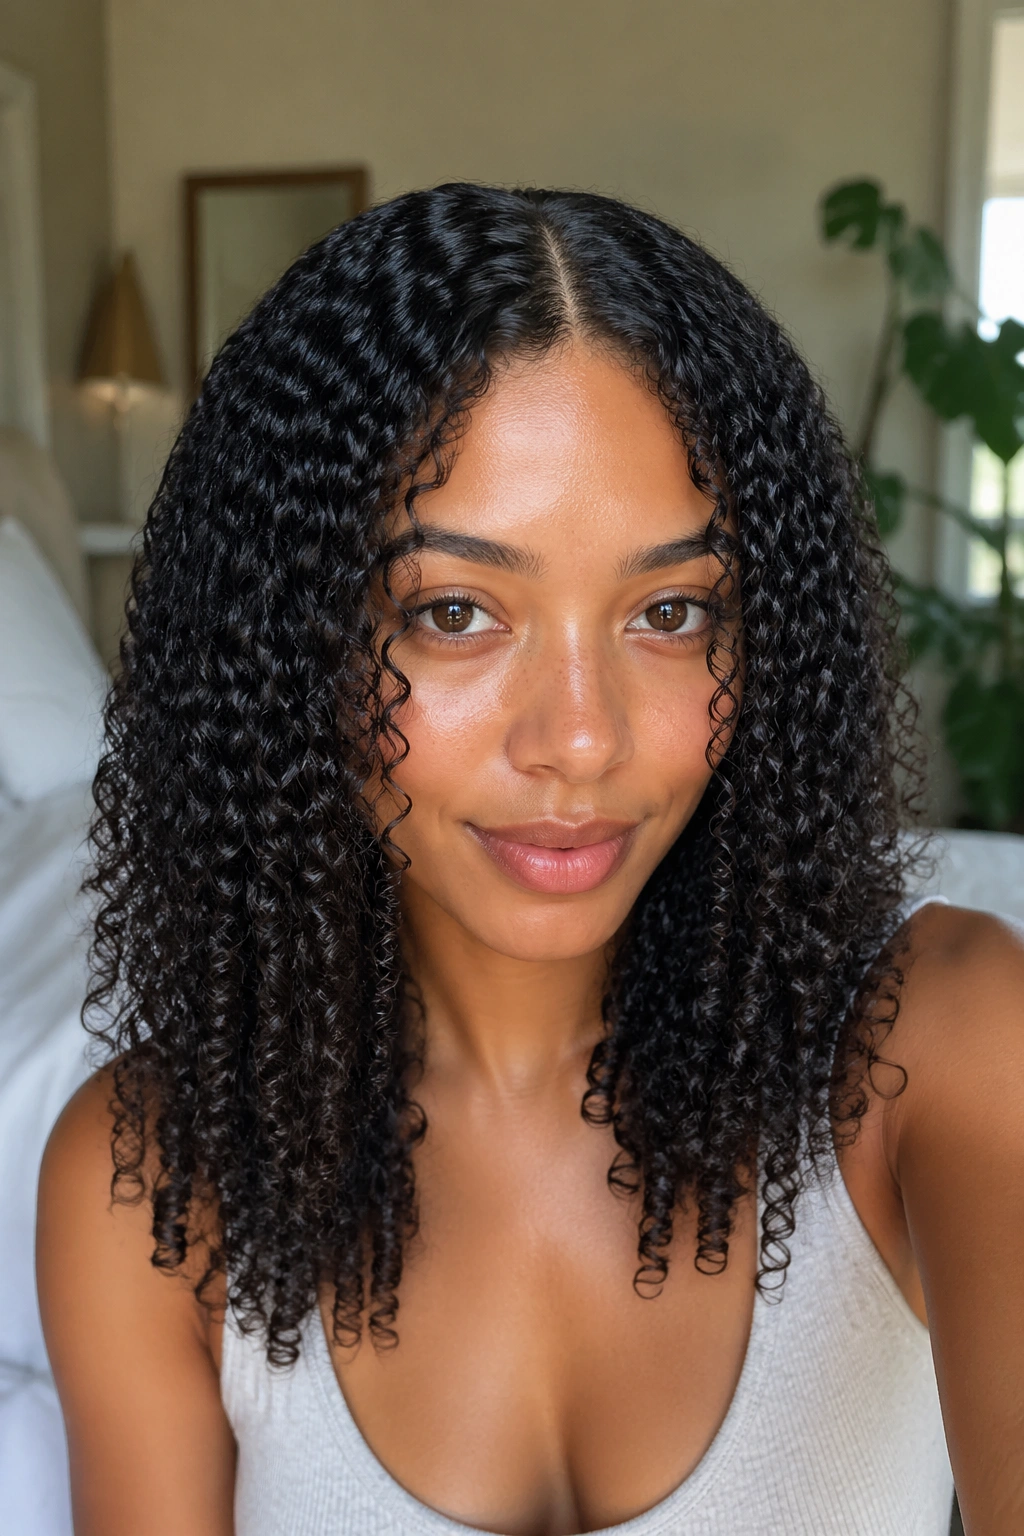
This is the baseline for a reason. A middle-part wash-and-go keeps the curl pattern front and center, which means the cut has to do its job and the styling has to be clean. When it works, it looks effortless in the best way: defined roots, soft volume, and curls that fall on both sides of the face with a nice, even shape.
Why the part matters here
A wash-and-go with a center part looks best when the part is set while the hair is still soaking wet. If you wait until the curls start clumping, the line gets messy and the top frizzes faster. Use a tail comb or your finger to draw the part from the forehead back to the crown, then leave it alone.
A good wash-and-go is not about making every curl identical. It is about letting the clumps form naturally, then giving the roots enough lift so the part does not sit flat against the scalp. If your hair tends to collapse at the crown, clip the roots up for 10 to 15 minutes while they dry.
What to use
- A light leave-in conditioner
- A curl cream or milk if your hair likes moisture
- A strong-hold gel for definition
- A microfiber towel or cotton T-shirt for gentle scrunching
- A diffuser on low heat if you need faster drying
Best tip: apply your stylers in small sections and stop touching the curls once they start forming a cast. The cast is annoying for about an hour. Then it is worth it.
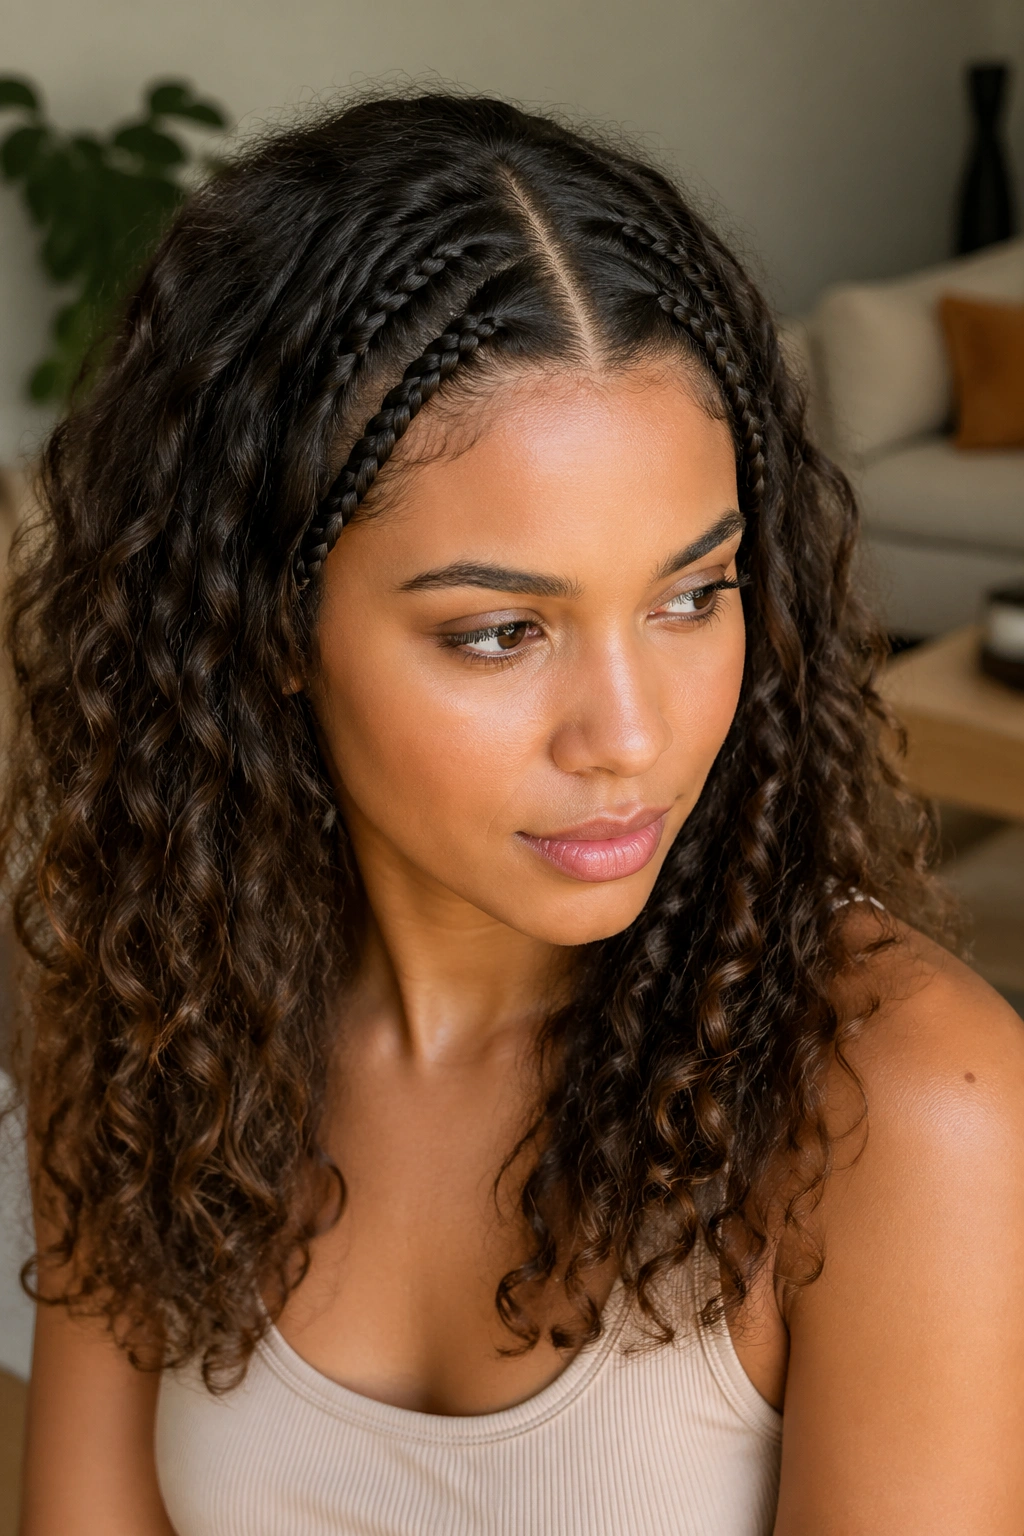
2. Curly Curtain Bangs That Frame the Center Part
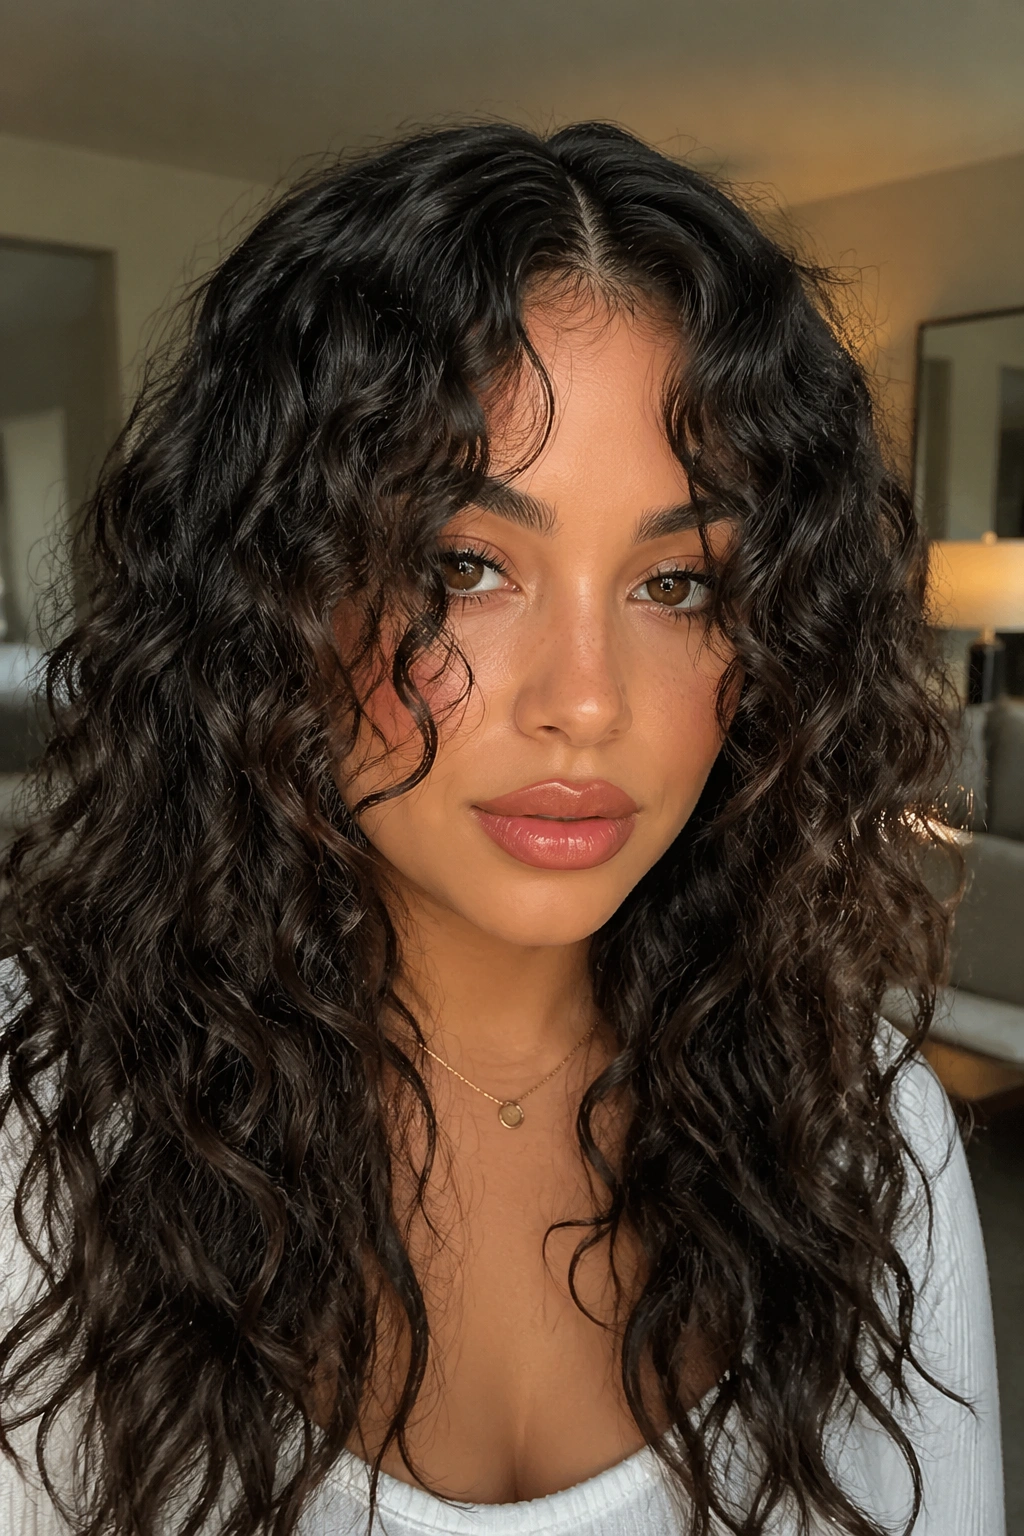
Curly curtain bangs do a lot of quiet work. They soften a middle part, break up the symmetry just enough, and make a long face, high forehead, or flat front layer feel more balanced. On curly hair, the trick is length. Bangs that look long on the cutting chair often spring up an inch or two once they dry.
Ask for the front pieces to hit around cheekbone or jaw length when dry, not wet. That little detail saves you from the too-short-bang problem, which is one of the fastest ways to end up fighting your own fringe every morning.
Where they sit
The best curtain bangs on curls are not one blunt shelf across the forehead. They taper from the part outward, with the shortest piece near the inner corner of the eye and longer pieces dropping toward the jaw. That shape lets the curl pattern move instead of puffing into a block.
If your front curls are tighter than the rest of your hair, style them separately. A little finger-coiling on each side can keep the bangs from shrinking into a different shape than the rest of the cut. Small move. Big payoff.
What makes them work
- They draw attention to the eyes
- They make a middle part feel less severe
- They hide a slightly uneven hairline if you have one
- They look good on loose waves and tighter coils
Go longer if you are unsure. Short curly bangs grow out in public.
3. Half-Up Claw Clip With Loose Curls
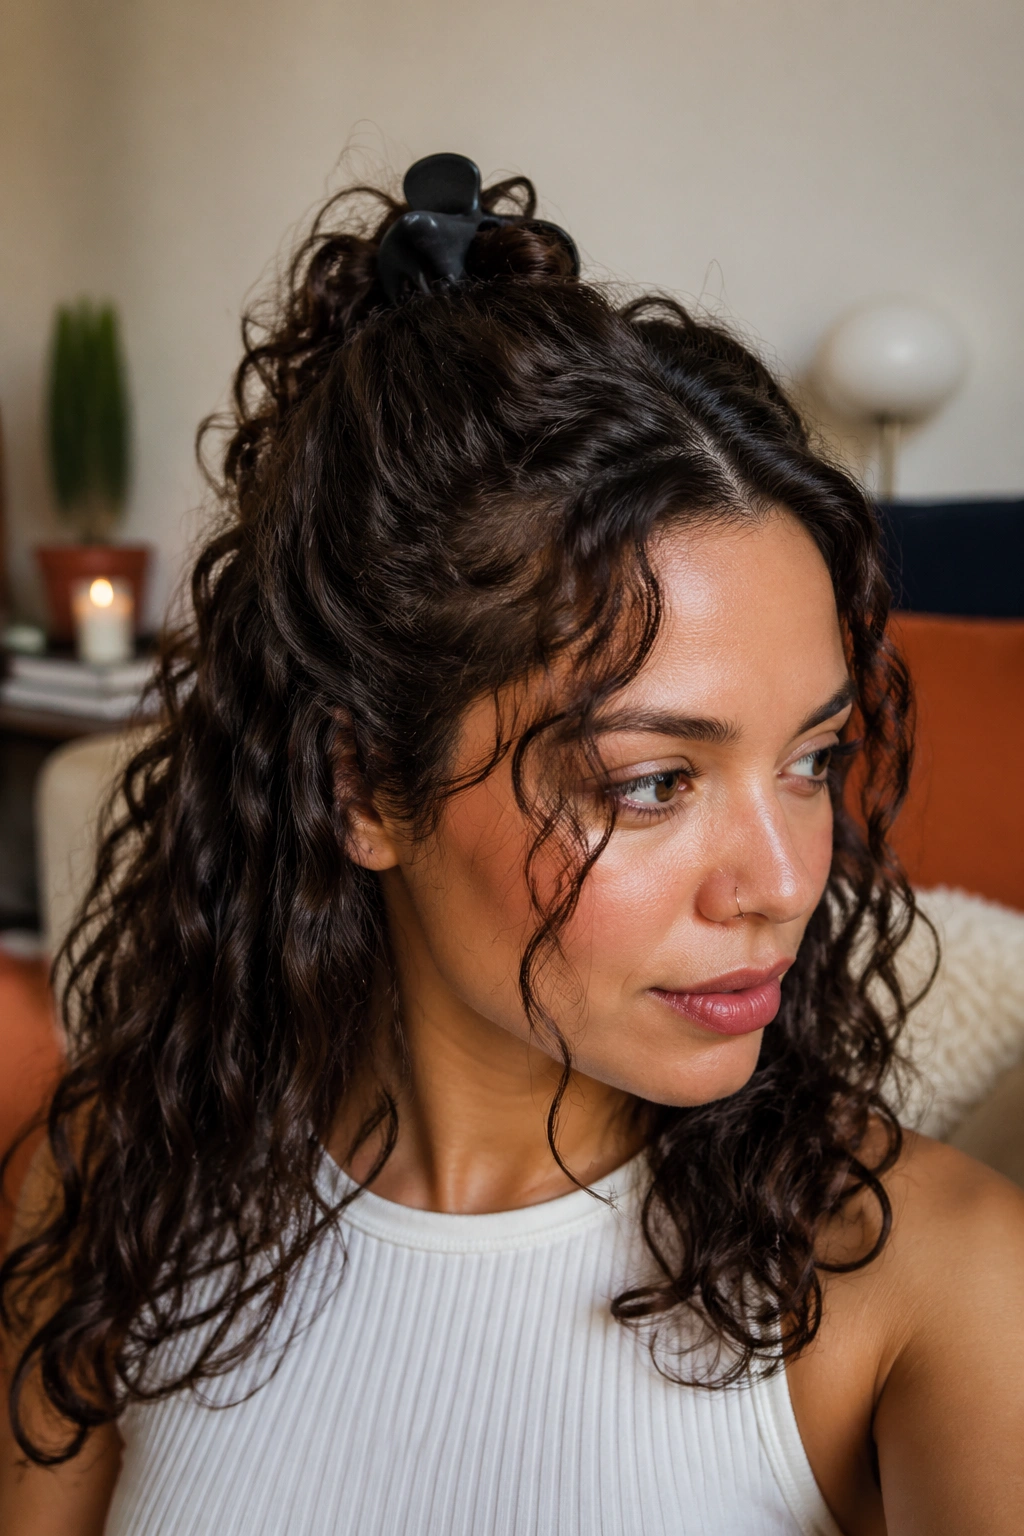
The half-up claw clip is one of those styles that saves a messy hair day without making you look like you gave up. With a middle part, it keeps the front clean and lets the curls in back stay loose, which is a nice balance if your roots are a little flat or your ends are having a better day than your crown.
It works especially well when you want your face free but do not want the weight of a full ponytail. The clip should sit just above the crown, not at the back of the head. Too low, and the style collapses. Too high, and it starts looking like an accidental updo.
Keep the part visible
The cleanest version starts with a sharp center part, then the top section gets lifted gently from both sides without disturbing the line at the front. That little gap of scalp is what makes the style read as intentional. If the roots puff up too much, smooth only the first inch near the part with a small amount of gel or styling cream.
A matte claw clip grips curly hair better than a slick plastic one. Wider teeth help too. Thin clips tend to slide out once the curl pattern starts expanding.
Good days for this style
- Day two curls
- Medium to thick hair
- Humid weather
- Long layers that need a little control
One small warning: do not pile the whole top section into the clip. Leave some curls outside the clip so the style still has movement.
4. Low Puff With a Crisp Center Part

A low puff is one of the easiest ways to make a middle part look clean on dense curly hair. It gives you shape at the back, keeps the front polished, and does not ask the curls to behave like straight hair for the sake of a sleek finish. That matters. A lot.
The look starts with a smooth part and slightly laid roots at the front, then the rest of the hair is gathered low at the nape or just above it. The puff can be round and full, or a little more stretched if your hair is longer. Either way, the part line stays visible and anchors the whole style.
What makes it different from a ponytail
A low puff keeps more texture near the base. A ponytail can pull curls tighter and make the front look severe if the elastic is too high. The puff sits lower and softer, which is easier on thick hair and usually kinder to the shape of the face.
Use gel or edge control only where you need it. If you coat every inch of the front, the hair can start to look crunchy instead of smooth. A soft brush, a satin scarf for a few minutes, and a strong elastic at the base usually do the job.
One honest note: this style looks best when the puff itself still has volume. If it gets flattened into a tiny knot, the whole thing loses its shape.
5. Curly Shag With a Center Part
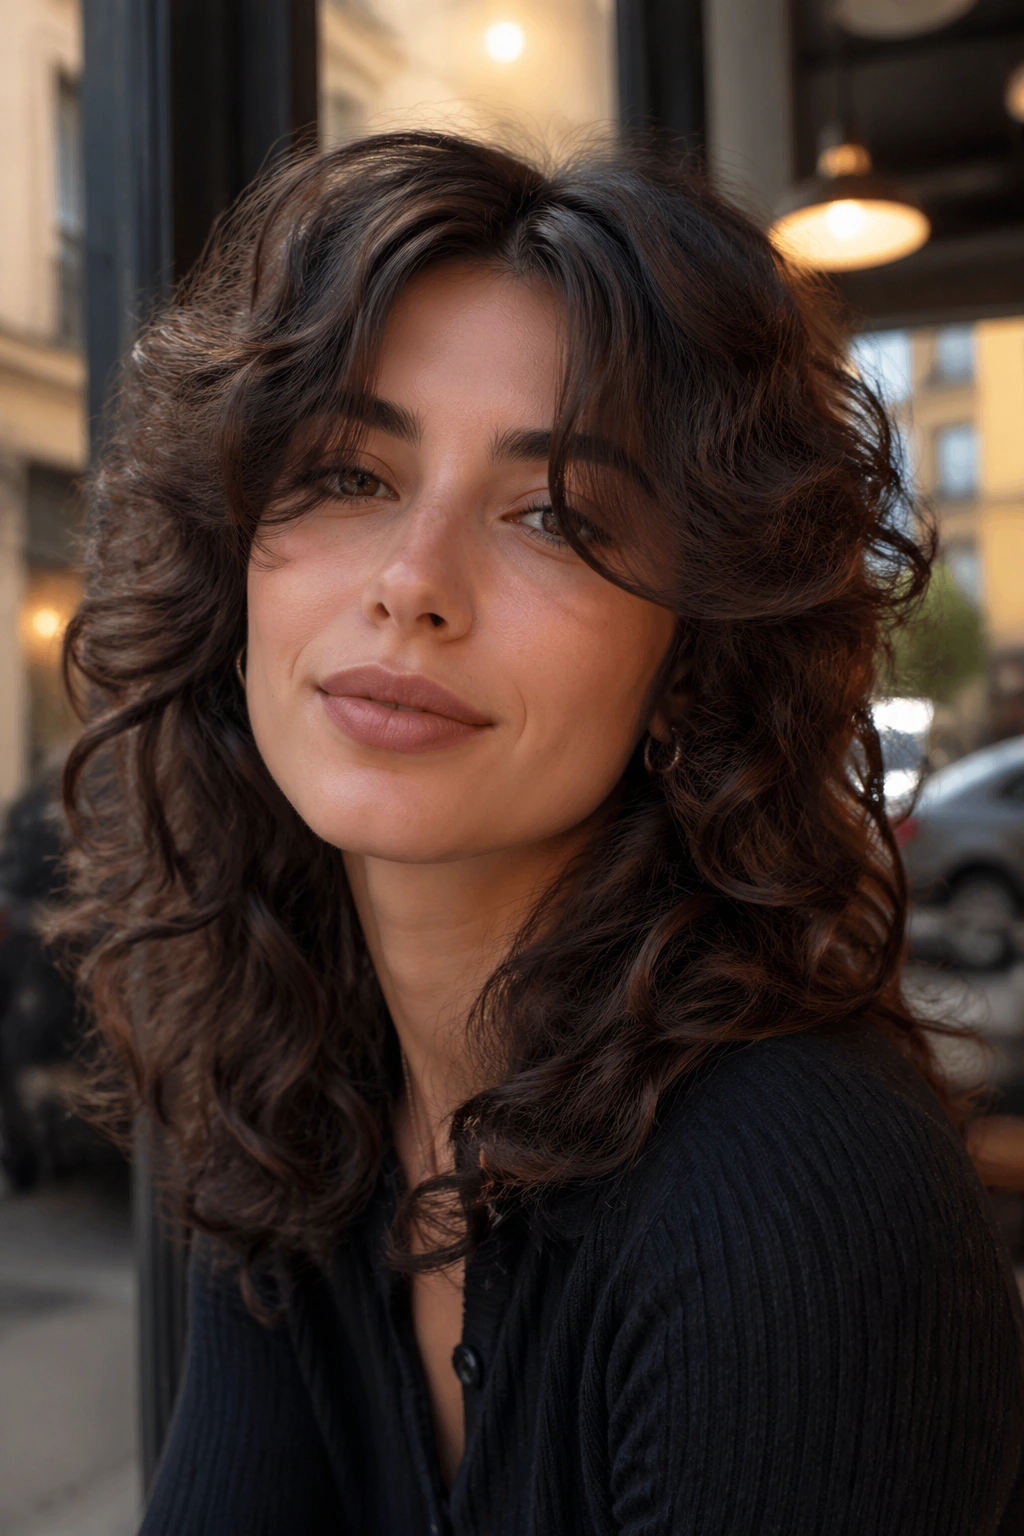
A curly shag is one of my favorite center-part cuts because it knows what curly hair wants to do anyway. The layers take weight out of the sides, give the crown more lift, and stop the shape from turning into a triangle. On a middle part, that matters even more, because the part can make bulk at the temples look twice as heavy.
This cut is not about neatness. It is about movement. The shorter layers around the face give the curls a little swing, while the longer layers keep the length from disappearing. If you like hair with personality, this is the one.
What the layers do
The top layers create height at the crown, which keeps the center part from looking too flat. The face-framing layers also make the part less severe. Without them, a center part on curly hair can sometimes read as boxy. With them, the shape gets softer and more lived-in.
What to ask for
- Dry cutting, if the stylist knows curly hair well
- Layers that start around the cheekbone or jaw
- Enough weight left in the back so the cut does not spring too high
- A shape that follows your curl shrinkage, not your wet length
If your hair is very thick, the shag can feel like a relief. If it is fine, the cut still works, but the layers need to be handled carefully so the ends do not look stringy. That part gets ignored too often.
6. Defined Twist-Out With a Sharp Middle Part
Why does a twist-out look so polished with a center part? Because the style already builds shape in neat rows, and the middle line gives those rows a clear starting point. The result is structured without looking stiff. Curls have room to fluff, but the front still feels organized.
This style works best when the twists are made on damp hair with enough product to hold the pattern, not so much that the hair turns gummy. Smaller twists give tighter definition. Larger twists make the final look softer and fuller. Pick the size based on how much separation you want at the end.
How to keep the part crisp
Set the part before you begin twisting, not halfway through. That sounds obvious. People skip it anyway. If the sectioning is sloppy, the part wanders once the twists are unraveled.
- Use a rat-tail comb for a straight line
- Clip one side away while you work
- Keep the first row of twists parallel to the part
- Let the hair dry fully before taking it down
A twist-out can fall apart fast if you rush the dry time. The outside may feel dry while the inside is still damp, and that is where frizz starts. If the roots are soft but the twist pattern feels firm, you are in the right zone.
7. Sleek Low Bun With Soft Tendrils
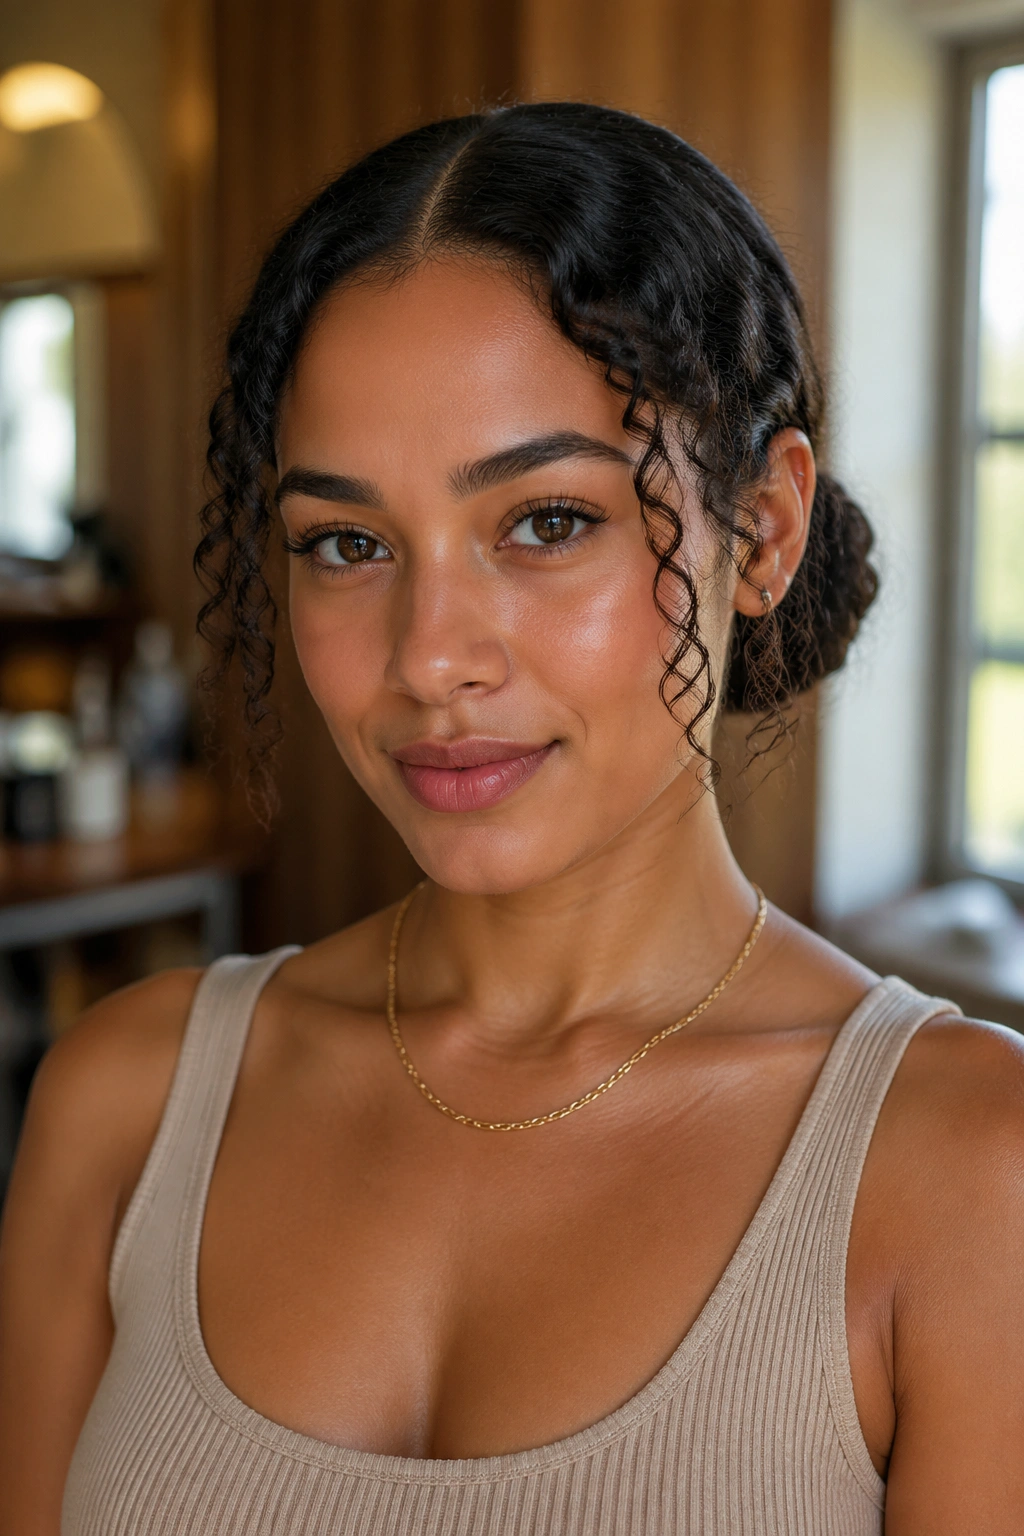
A sleek low bun with a center part gives curly hair a different kind of polish. The roots are smoothed down, the bun sits low and neat, and a few soft tendrils at the temples keep the style from looking too severe. It is one of the few updos that can feel clean and relaxed at the same time.
The key is contrast. The top should be controlled, but the curls left near the face should stay curly. If you slick everything back, you lose the point of starting with curly hair in the first place. And honestly, that would be a shame.
How to build the shape
Start with a clean part and dampen just the front section if needed. Brush the roots back with gel, then gather the hair into a low bun at the nape or slightly off-center if the head shape needs it. Pull out two or three thin curls near the ears and the front hairline.
A bun this low looks best when it is secure but not tiny. A puffed-out bun with visible coil texture feels more natural than one wrapped so tightly it looks like a ball bearing.
Useful details
- A boar-bristle brush smooths the roots fast
- A strong elastic holds thick curls better than a flimsy band
- A small styling wax helps the tendrils stay soft, not fuzzy
If you are headed somewhere formal, this is a safe bet. If you are headed to lunch in sneakers, it still works.
8. Space Buns on Curly Hair
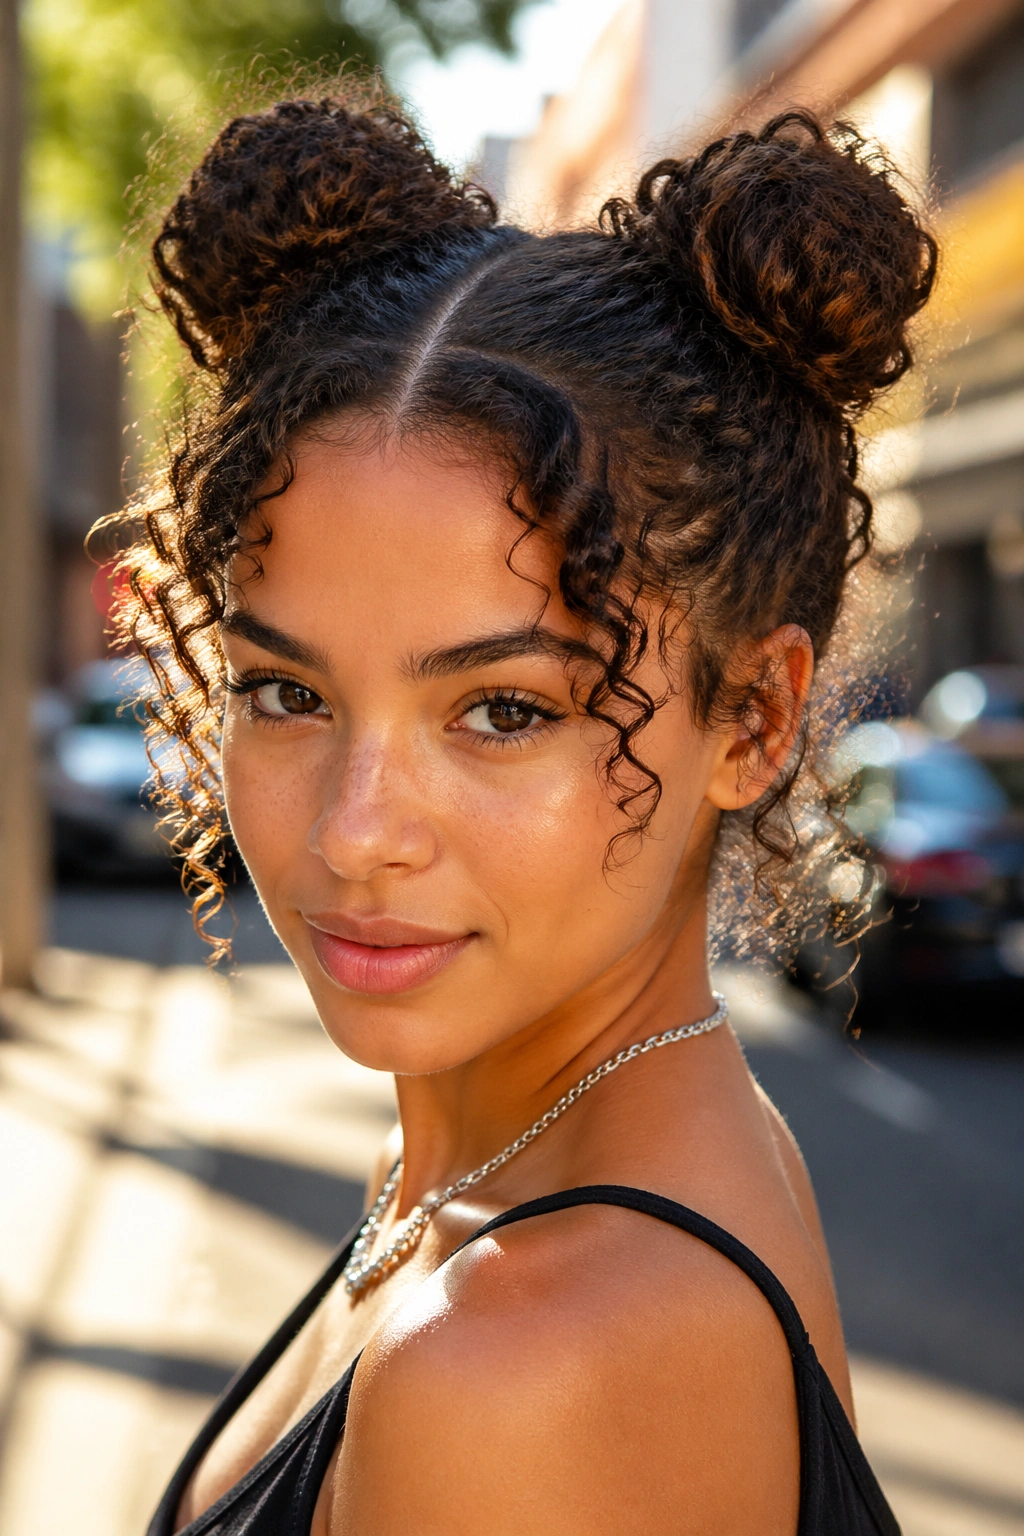
Space buns with a middle part have more range than people give them credit for. On curly hair, they can look playful, sharp, and a little undone in a good way. The part line down the center keeps the style balanced, while the two buns hold the volume up and away from the face.
The best version does not force every curl into submission. Leave some texture around the buns and a few loose curls at the front if you want the style to feel softer. If every strand is slicked back, the look gets harsher and starts to resemble a costume instead of a hairstyle.
Keeping the buns even
This is the part that makes or breaks the style. Both buns should sit at the same height, and the part should run cleanly to the back of the head before the hair splits. If one side is too large, the whole thing feels tilted. Fixing that takes about 30 seconds, which is better than walking around annoyed all day.
A little gel at the roots helps, but do not overdo it. Curly hair needs enough flexibility to coil into shape. If the front gets too stiff, the buns can tug and the part can look sparse.
Best for
- Short to medium lengths
- Loose curls and coils
- Second- or third-day hair
- Times when you want volume without full length
Space buns are not subtle. That is fine. They are supposed to have some attitude.
9. Curly Bob With a Clean Middle Part
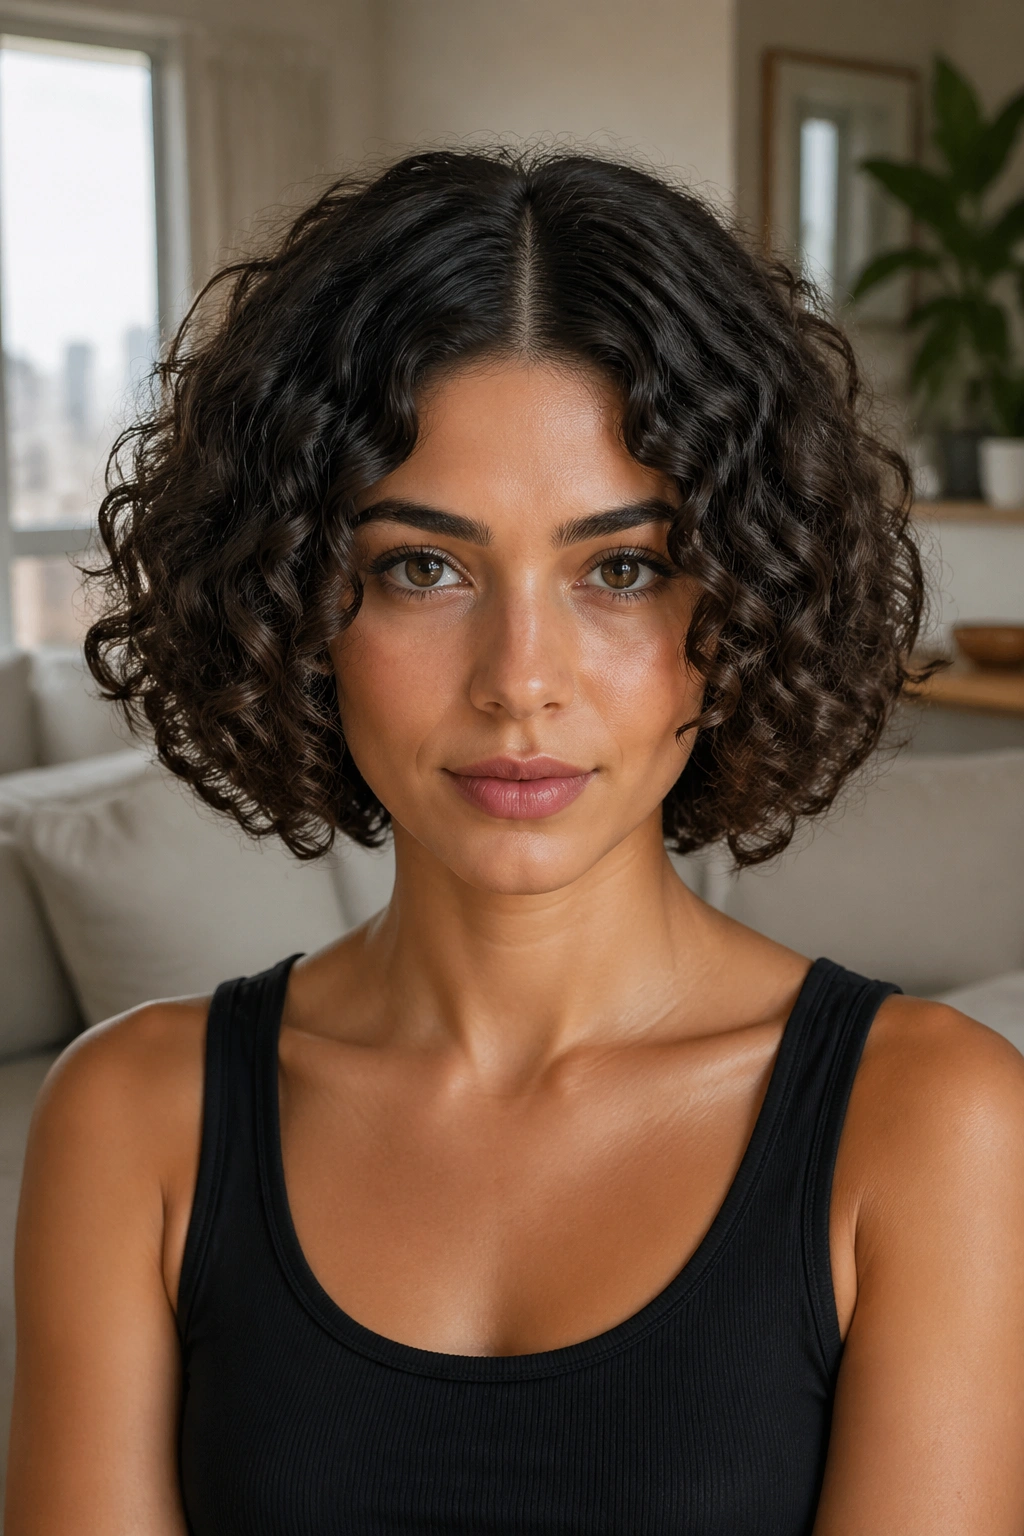
A curly bob and a center part make a strong pair. The bob gives the curls a clean boundary, and the part adds a straight line that keeps the shape from feeling too round. On jaw-length or lip-length hair, that line can make the whole cut feel sharper and more expensive-looking, even when the styling is simple.
The cut matters here more than almost anywhere else on this list. A blunt bob needs enough volume at the root to avoid looking triangular. A layered bob needs enough length left at the bottom so the ends do not stick out in strange directions. Either version can work. Both need a shape that matches the curl pattern, not the other way around.
A center-part bob also makes the face visible in a nice way. It frames the cheekbones, opens the forehead, and keeps the hair from swallowing the features. That matters when the curls are dense.
If your bob flips out at the ends, a diffuser and a little root clipping can help. If it falls too flat, the cut probably needs more body at the crown. That is a haircut issue, not a styling failure.
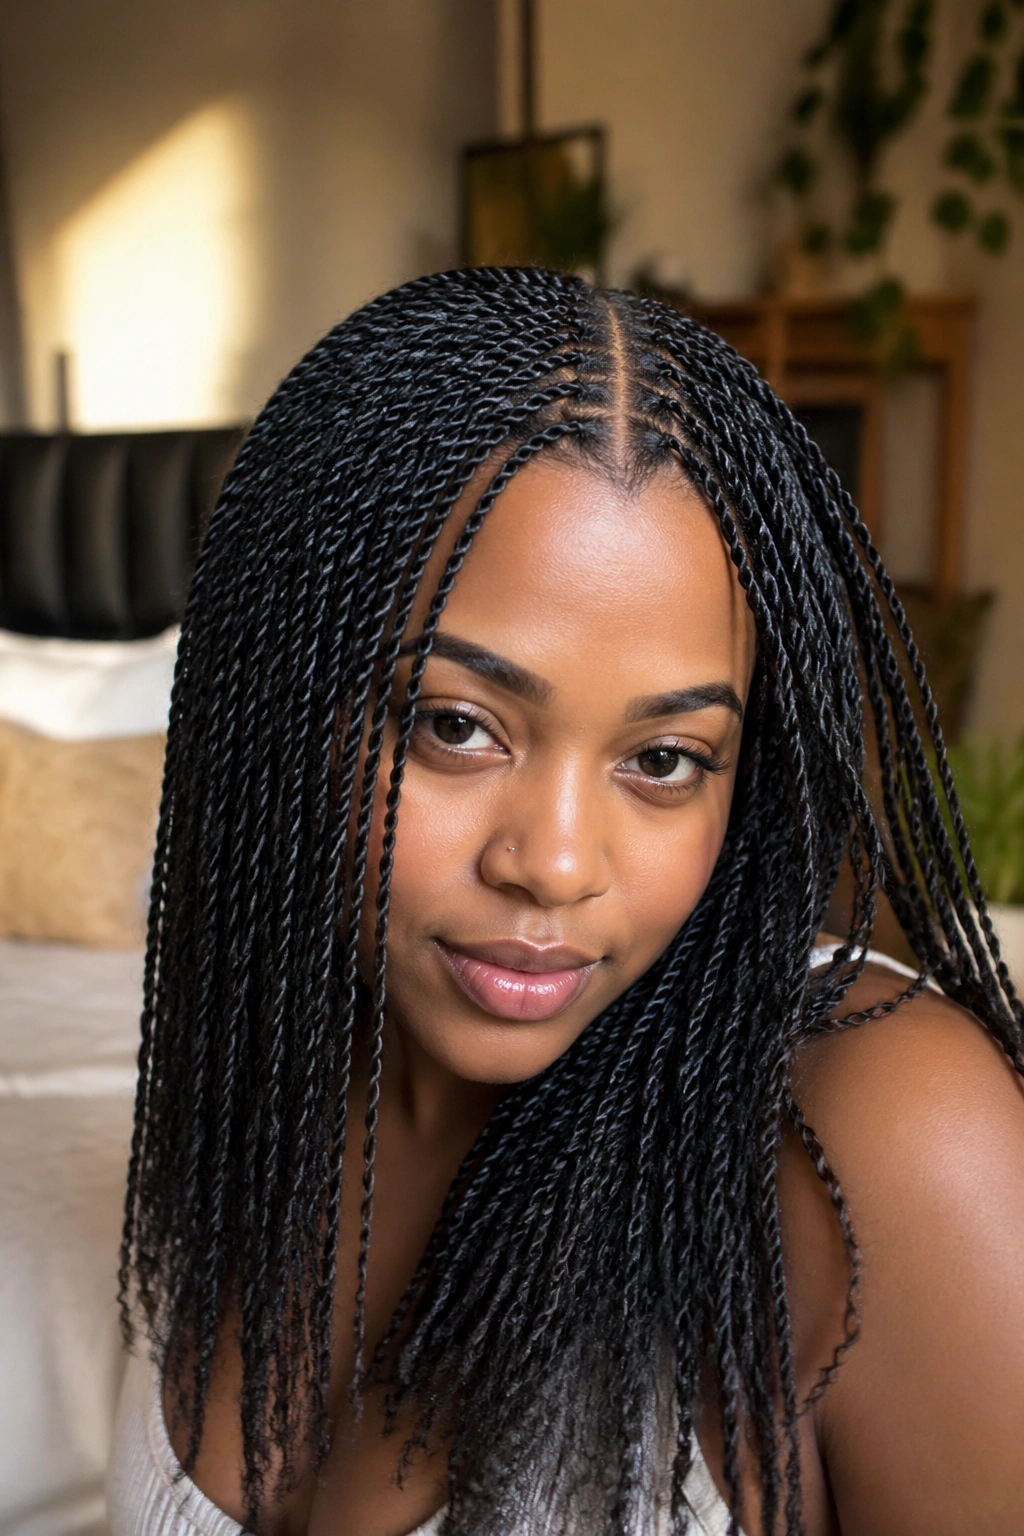
10. Face-Framing Braids From a Center Part
Two slim braids starting from a center part can change the whole feel of curly hair. They keep the front controlled, draw the eye down the part line, and make the rest of the curls feel fuller by comparison. It is one of the easiest ways to dress up loose curls without putting the whole head into a braid style.
The braids do not need to be big. In fact, smaller is often better. Thick front braids can swallow the shape of the face and make the style look heavy. Thin braids, done close to the hairline and tucked back near the temples, feel lighter and cleaner.
Why this works on curly hair
Curly hair frizzes first at the front. Braiding the front pieces protects the area that gets touched most and keeps the part visible for longer. It also gives you a little structure when the rest of the style is soft and free.
How to keep it neat
- Start on freshly parted hair
- Smooth the braid roots with a tiny bit of gel
- Braid both sides to the same point near the ear
- Leave the rest of the hair loose and defined
This style is a good bridge between casual and dressed-up. It also saves the look on mornings when the front of your curls has lost the plot.
11. High Puff With a Visible Center Part
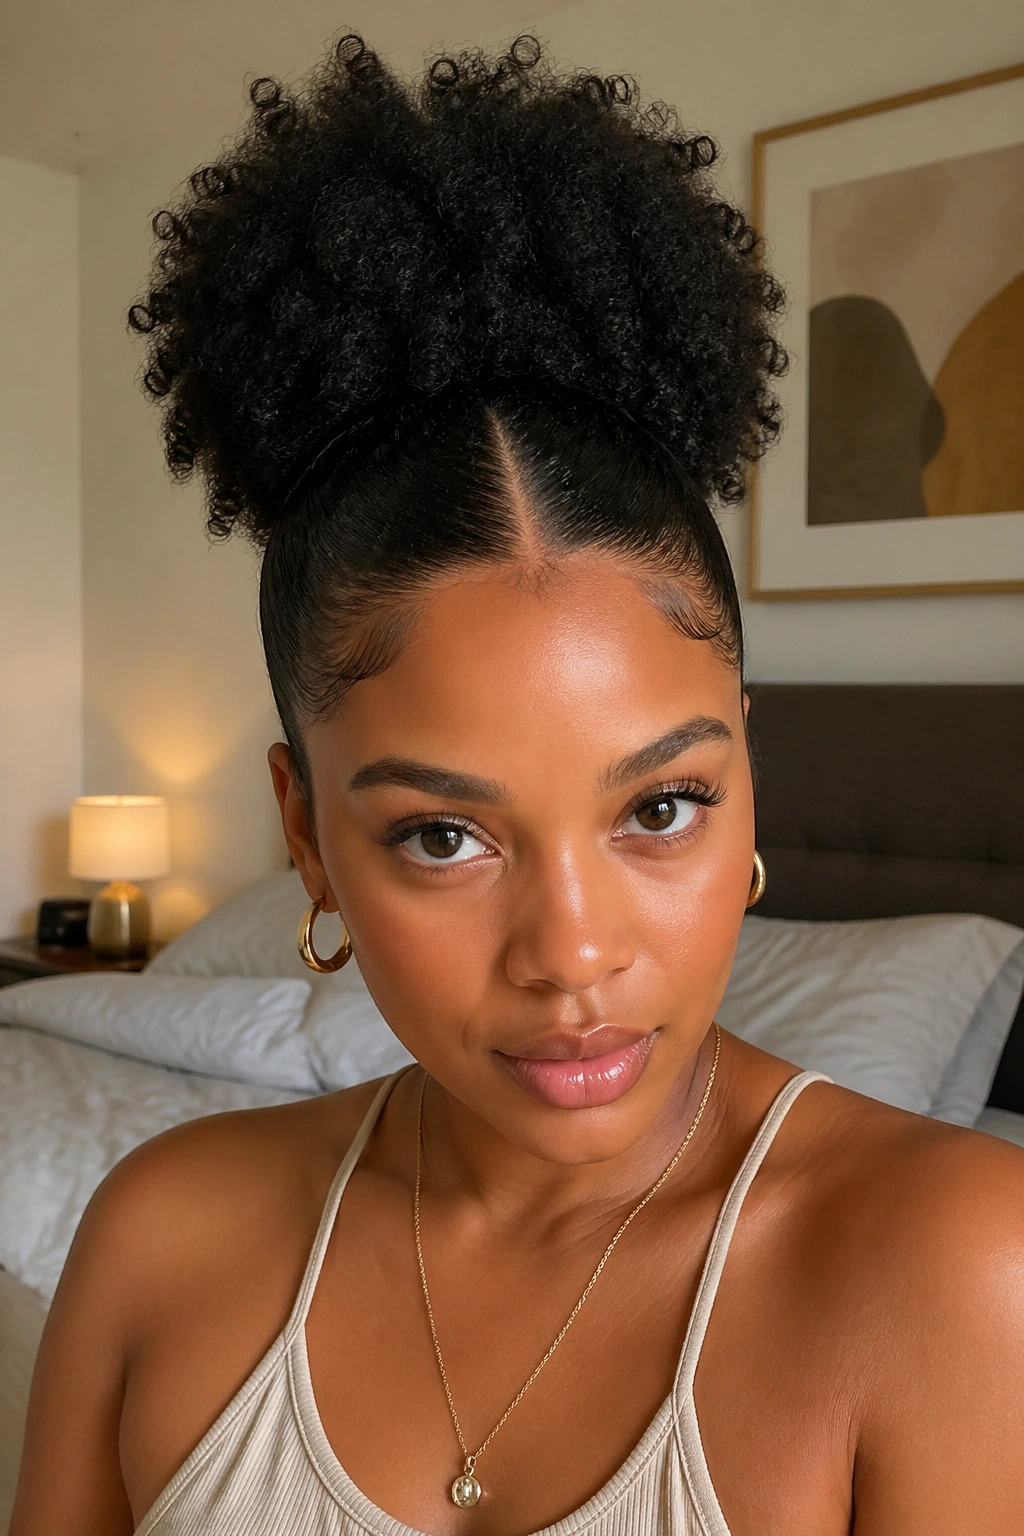
A high puff can still read as a middle-part style if you leave the front split clean and let the puff sit high enough to show shape at the crown. The part is what grounds it. Without that line, the style can drift into a generic updo. With it, the puff gets a little more structure.
This works well for dense curls that need lift. The hair at the front gets smoothed back just enough to keep the part visible, then the length is gathered at the top. The puff itself can be rounded and full, or stretched higher for more height. The important part is that the front stays tidy and the puff stays soft.
A high puff can be kind to the face because it clears the forehead and raises the eye line. It also gives you a lot of presence without a lot of effort. That’s a nice trade.
If your roots are dry, add a little leave-in before brushing them up. If they are slick already, a tiny amount of gel is enough. Too much product near the line makes the style feel heavy, and a heavy puff loses the lift that makes it work.
12. Halo Braid With Loose Curly Length
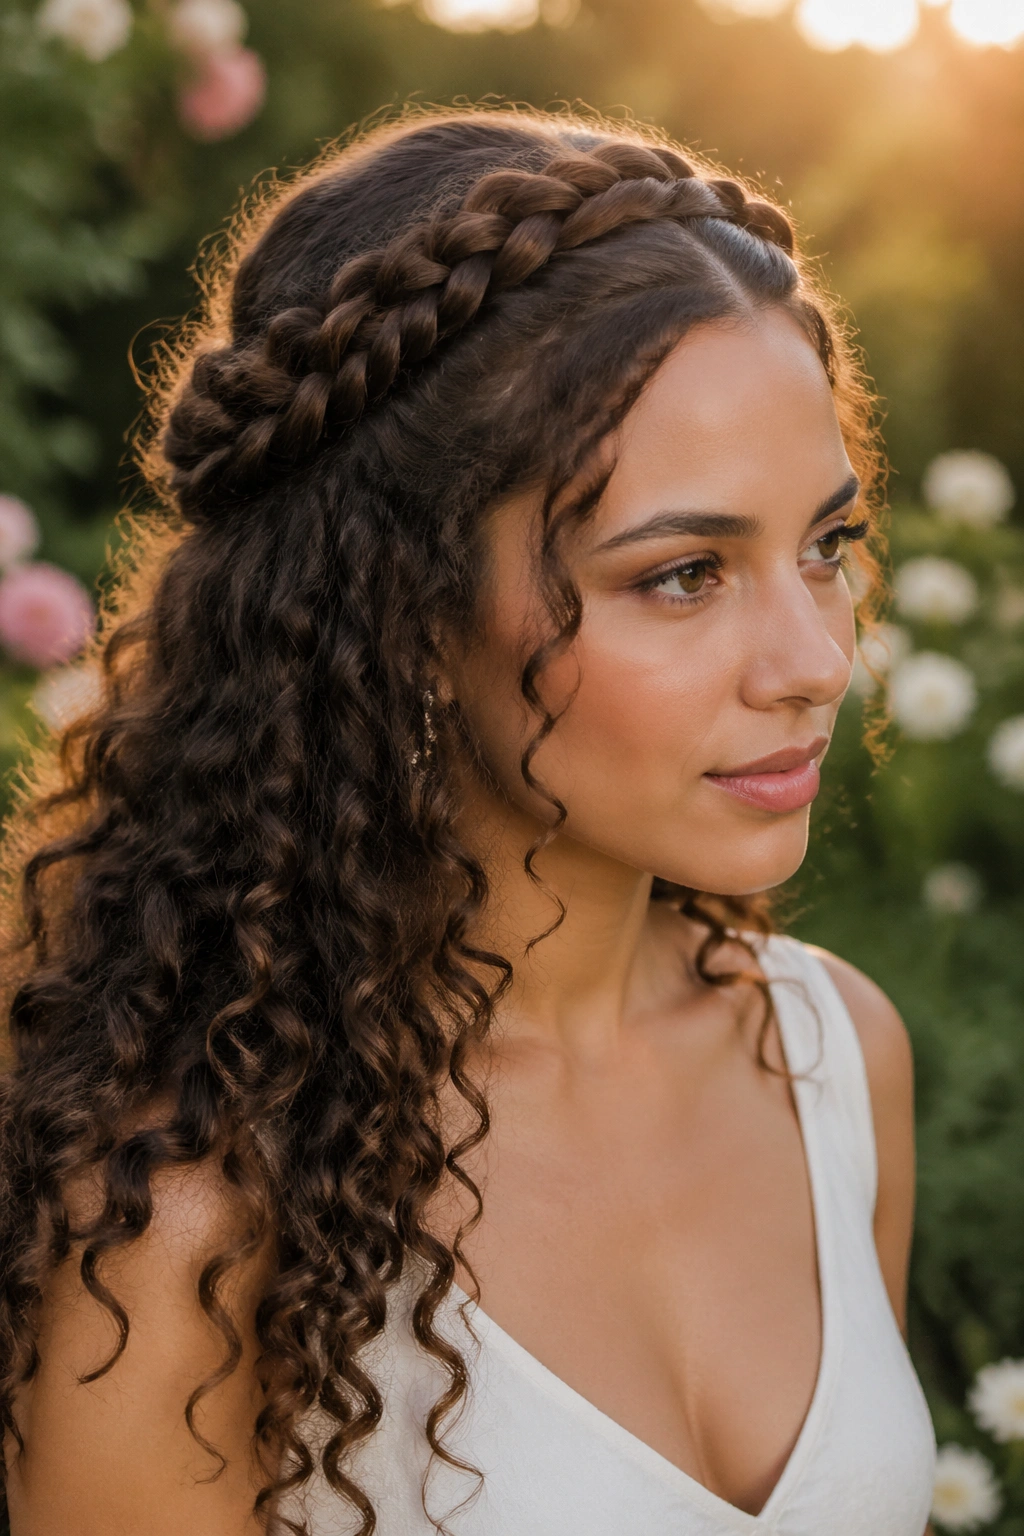
A halo braid gives curly hair a frame. The braid travels around the hairline or just inside it, while the rest of the hair stays loose and visible. With a middle part, the style feels balanced instead of overly romantic or fussy. It is neat, but not precious.
I like this one on longer curls because the braid keeps the front controlled while the rest of the length still moves. It also keeps the hair off the face without hiding the texture. That combination is hard to beat when you want something polished for an event but do not want to pin every curl out of sight.
What helps the braid hold
A halo braid stays cleaner when the hair has a little stretch. Air-dried curls can work, but slightly elongated curls usually braid more smoothly and frizz less at the seams. If the hair is too slippery, use a touch of texturizing spray or a light mousse near the roots before braiding.
Best details to watch
- Keep the part line straight before braiding
- Anchor the braid close to the hairline
- Tuck the ends discreetly at the back
- Leave the loose curls defined, not brushed out
It is a style that looks more complicated than it is. That is one of the reasons it keeps showing up for weddings, dinners, and any day that calls for a little more effort.
13. Mini Twists With a Middle Part
Mini twists are one of the most useful middle-part styles for curly hair because they protect the ends, stretch the length, and keep the part line visible for days. The look is neat, but not stiff. The twists move, the part stays clean, and the scalp gets a break from constant restyling.
Smaller twists give a smoother finish and usually last longer before the roots puff out. Bigger twists feel softer right away, but they loosen faster. If you want the part to stay crisp, keep the first row of twists neat and parallel to the line. That front section does a lot of visual work.
What to know before you start
Mini twists work best on hair that has been thoroughly detangled and lightly moisturized. Too much cream can cause buildup at the roots, and that makes the part look dull. Too little, and the twists dry out fast.
A few practical notes
- Part first, then twist
- Use even sections so both sides match
- Seal the ends if your hair frays easily
- Sleep with a satin bonnet or scarf
If you wear mini twists for a few days, the style usually settles in nicely after the first night. The part looks cleaner, the sections lie flatter, and the whole head starts to look more intentional. That is one of the nice things about this style: it gets better after you stop touching it.
14. Wet-Look Center-Part Curls
Wet-look curls with a middle part are glossy, defined, and a little dramatic in the best way. The hair looks freshly styled because, well, it is. The center part stays sharp, the curls clump together, and the surface reflects light in a way that makes the whole style feel sleek without flattening the pattern.
This one is a strong choice for nights out, humid weather, or any time you want curls to look intentionally sculpted. The catch is drying time. If you pile on too much product, the outside may look done while the middle stays damp for hours. That is not fun. It is also avoidable.
How to get the finish right
Start on soaking-wet hair. Apply leave-in first if your hair needs moisture, then layer gel in small sections. Smooth the hair down the shaft with your hands, then scrunch gently at the ends to encourage the curl clumps. The part should be set before the gel starts to dry.
A diffuser on low heat can help if you want to keep the gloss without waiting forever. If you air-dry, avoid touching the curls until the cast forms. Once the hair is fully dry, you can break the cast lightly with a drop of oil or serum.
Watch out for flakes. Heavy creams under strong gel can flake fast, and that ruins the whole point of the style.
15. Double Low Puffs With a Clean Split
Double low puffs are playful, practical, and a little underrated. With a middle part, they give curly hair symmetry without forcing the length into a single bun or ponytail. The shape works especially well on thick hair because each puff gets its own space instead of competing in one lump at the back.
The style starts with a straight part and two low sections gathered near the nape. The puffs can sit close to the ears for a softer shape or a little lower for a neater finish. Keep the front smooth, but do not overwork it. The curls should still look like curls once the puffs are in place.
This is one of the easiest styles to adjust for density. If your hair is very full, leave the puffs large and rounded. If your hair is finer, keep them smaller and let the texture at the ends do the work. Either way, the center part keeps the look grounded.
A tiny detail makes a big difference here: tie both sides at the same height, then check the shape in a mirror before you leave the house. One side sitting even half an inch higher can throw the whole style off.
If you want a middle-part style that feels friendly instead of strict, this one earns its place. It has shape, it has movement, and it does not pretend curly hair should be anything other than curly hair.