Curly styles that work for any hair texture are usually the ones that stop fighting the curl pattern and start cooperating with it. That sounds obvious, but so much bad hair advice still comes from the idea that curls need to be tamed, stretched, flattened, or coached into some polite shape. They don’t.
A loose wave, a springy ringlet, and a tight coil will never behave the same way. Still, the same style can look good on all three if you change the placement, the tension, or the amount of product by a small margin. That’s the part people miss. A style isn’t “for” one curl type just because the internet says so; it becomes usable when you know where the volume should sit, how much of the hair should stay free, and when to stop messing with it.
I’ve always liked curly hairstyles that look better after a few hours instead of worse. Those are the keepers. A style that starts perfect in the mirror and collapses by lunch is not a good style. A style that survives wind, humidity, a headrest, and a long day of moving around? That’s the one you reach for again.
The 15 looks below all have that in common. Some are casual, some are polished, some are old reliables you can throw together with dry shampoo and a good scrunchie, but all of them can be adjusted for loose waves, dense curls, or coily hair without turning into a fight.
1. Wash-and-Go Curls That Work on Any Texture

A wash-and-go gets dismissed as “the easy option,” which is usually said by someone who has never done it well. Done right, it’s not lazy at all. It’s a style with a clear shape, clean curl clumps, and enough hold that your hair still looks good after it dries.
The trick is water. Start on soaking-wet hair, not damp hair, and work your leave-in or curl cream through in small sections so the product actually reaches the strands instead of sitting on top. Then add gel or mousse while the hair is still wet enough to clump. If you wait too long, you get frizz and a lot of half-defined pieces that do not know what they want to be.
Why It Works So Well
A wash-and-go flatters almost any texture because it keeps the curl pattern honest. Fine waves get a lighter mousse and a soft finish. Dense curls and coils usually need a cream under a gel so the shape stays together once the water leaves the hair.
My favorite part is that you can change the finish without changing the whole style. Want more volume? Scrunch less and diffuse upside down. Want more definition? Smooth the products down the shaft and leave your hands out of it.
- Use a wide-tooth comb or your fingers only while the hair is wet.
- Microplop with a T-shirt if your hair holds too much water.
- Diffuse on low heat and low airflow until the roots feel dry to the touch.
- Stop touching the curls once the cast forms. Seriously.
Tip: If your hair is very fine, skip heavy cream at the root. It weighs the style down fast.
2. The High Pineapple That Saves Day-Two Hair
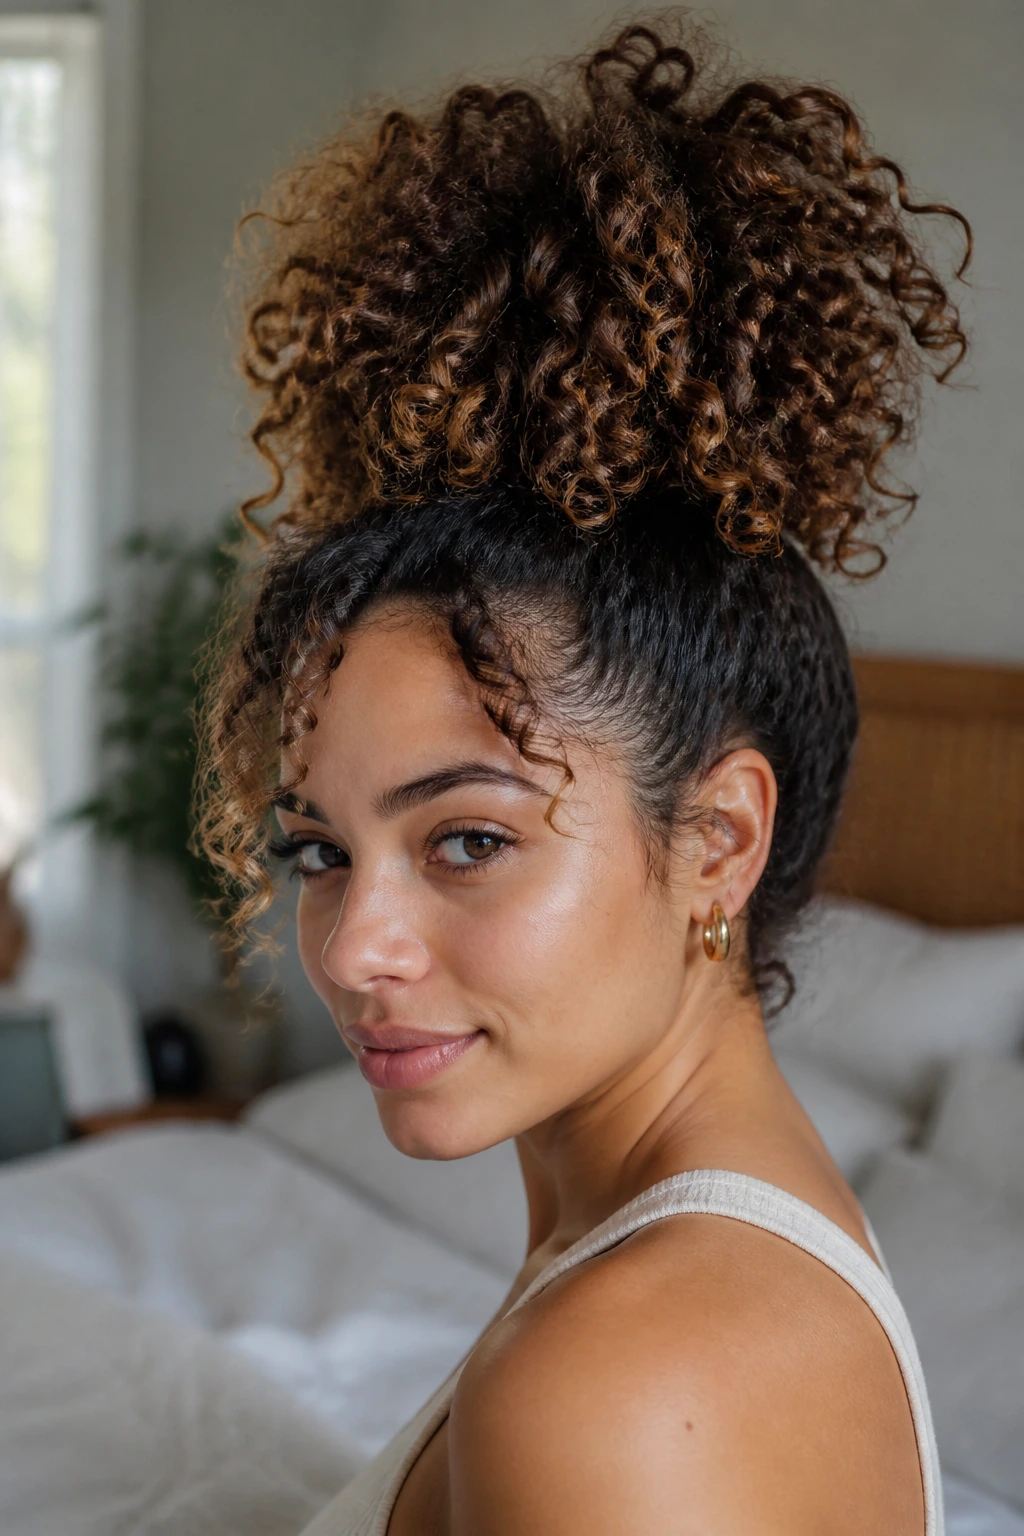
A high pineapple hides a rough curl day better than almost anything else. It’s especially good when the back of your hair has lost its bounce but the crown still has some life left. Put the curl pile at the top of your head, let the ends spill forward, and suddenly the whole look feels deliberate.
The placement matters more than people think. Too low, and you crush the curls at the back. Too tight, and the style turns into a headache with a scrunchie attached. I like to gather it at the highest point that still feels comfortable, then use a soft satin scrunchie and wrap it only once or twice. If your hair is very long, don’t force every strand into a perfect loop. Let some ends hang out. That loose shape is part of the point.
This style is a gift for anyone who wakes up with flat roots and decent length. It also works well when you want to preserve curls overnight and wear the same shape the next day without starting over. Pineapples are practical. They just happen to look nice too.
And yes, they work on short curly hair. The version is smaller, but the idea stays the same. Lift, gather, soften the edges, move on.
3. Half-Up, Half-Down with Lift at the Crown
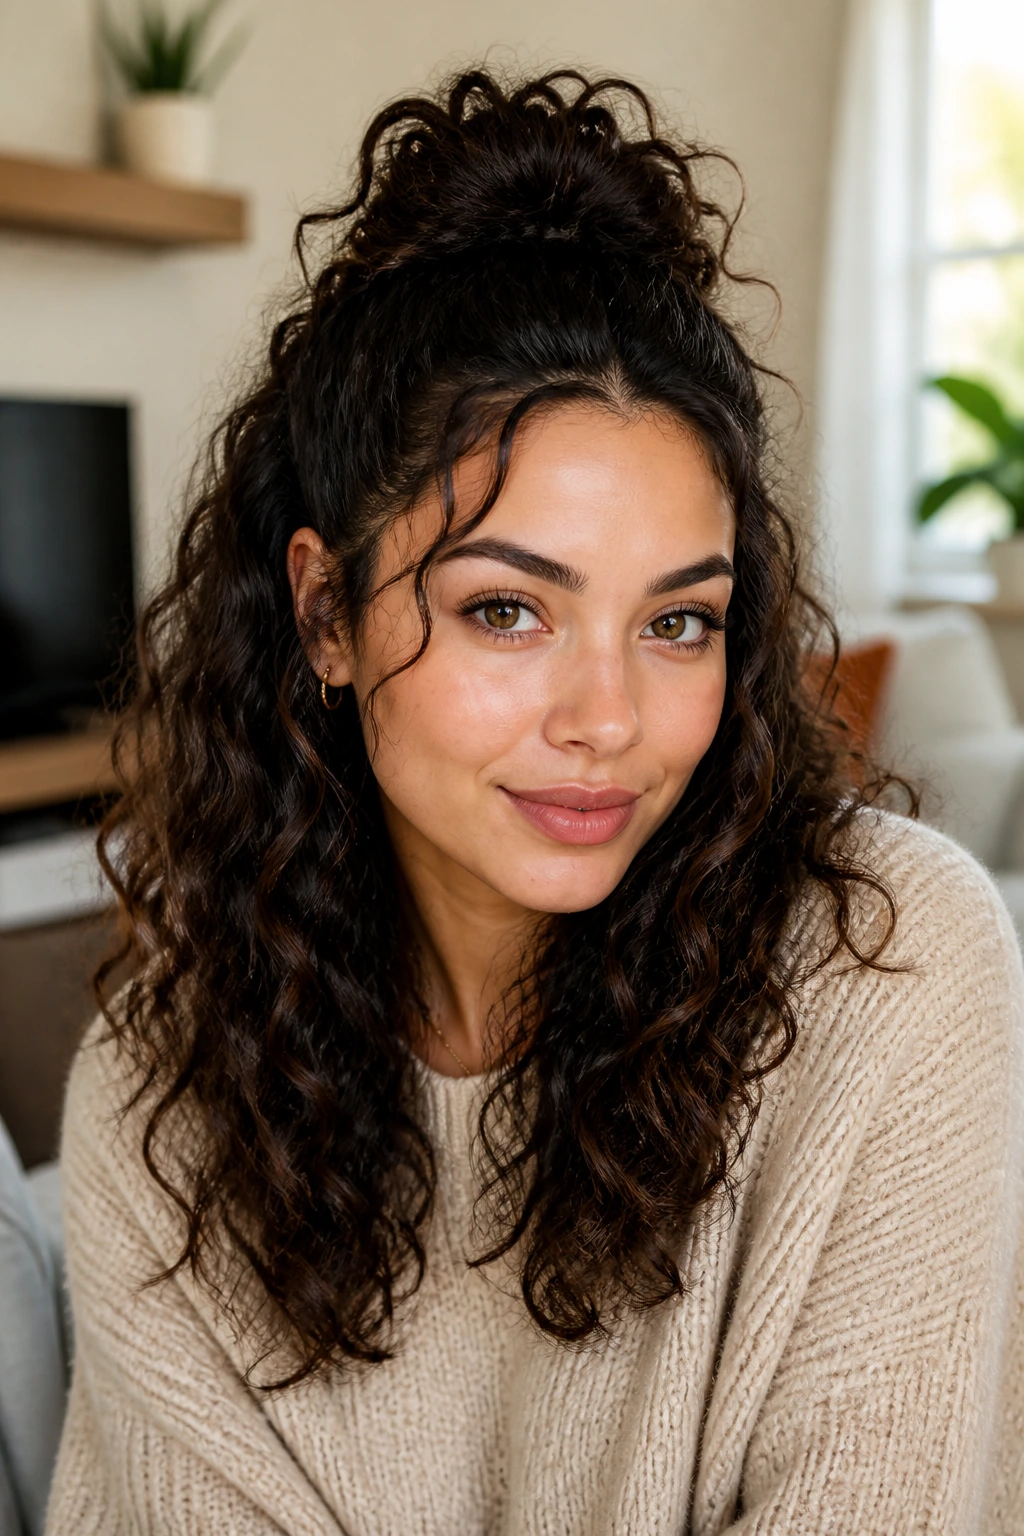
Why does half-up, half-down work on so many curl patterns? Because it gives the top section somewhere to go. The crown gets height, the face gets a little frame, and the lower curls still do their thing without being crushed into submission.
It’s one of those styles that can lean casual or polished depending on how much you fuss with it. Twist the top section into a tiny bun and it feels playful. Pull it into a mini ponytail and it looks cleaner. Pin it back with a barrette and you get a softer, more lived-in shape. The lower curls stay free, which is the part most people actually want.
How to Wear It
Take the hair from the temples back to the crown, then secure it with a small elastic or claw clip. If your curl pattern is looser, you can leave the front section smooth and glossy. If your hair is coily or very dense, a quick two-strand twist on each side gives the top section more grip and keeps it from puffing out in strange places.
A good half-up style should never look like the top half is trying to escape. If the top is sagging, make the section slightly smaller and place the elastic a little higher.
- Use a 1 to 2 inch section from each side for a simple lift.
- Leave the lower curls loose and separate them with oiled fingers only if they’re clumping too hard.
- A tiny claw clip often holds better than a stretchy elastic on textured hair.
- If the crown is flat, mist the roots lightly and finger-lift before clipping.
4. Curly Ponytail with a Wrapped Base
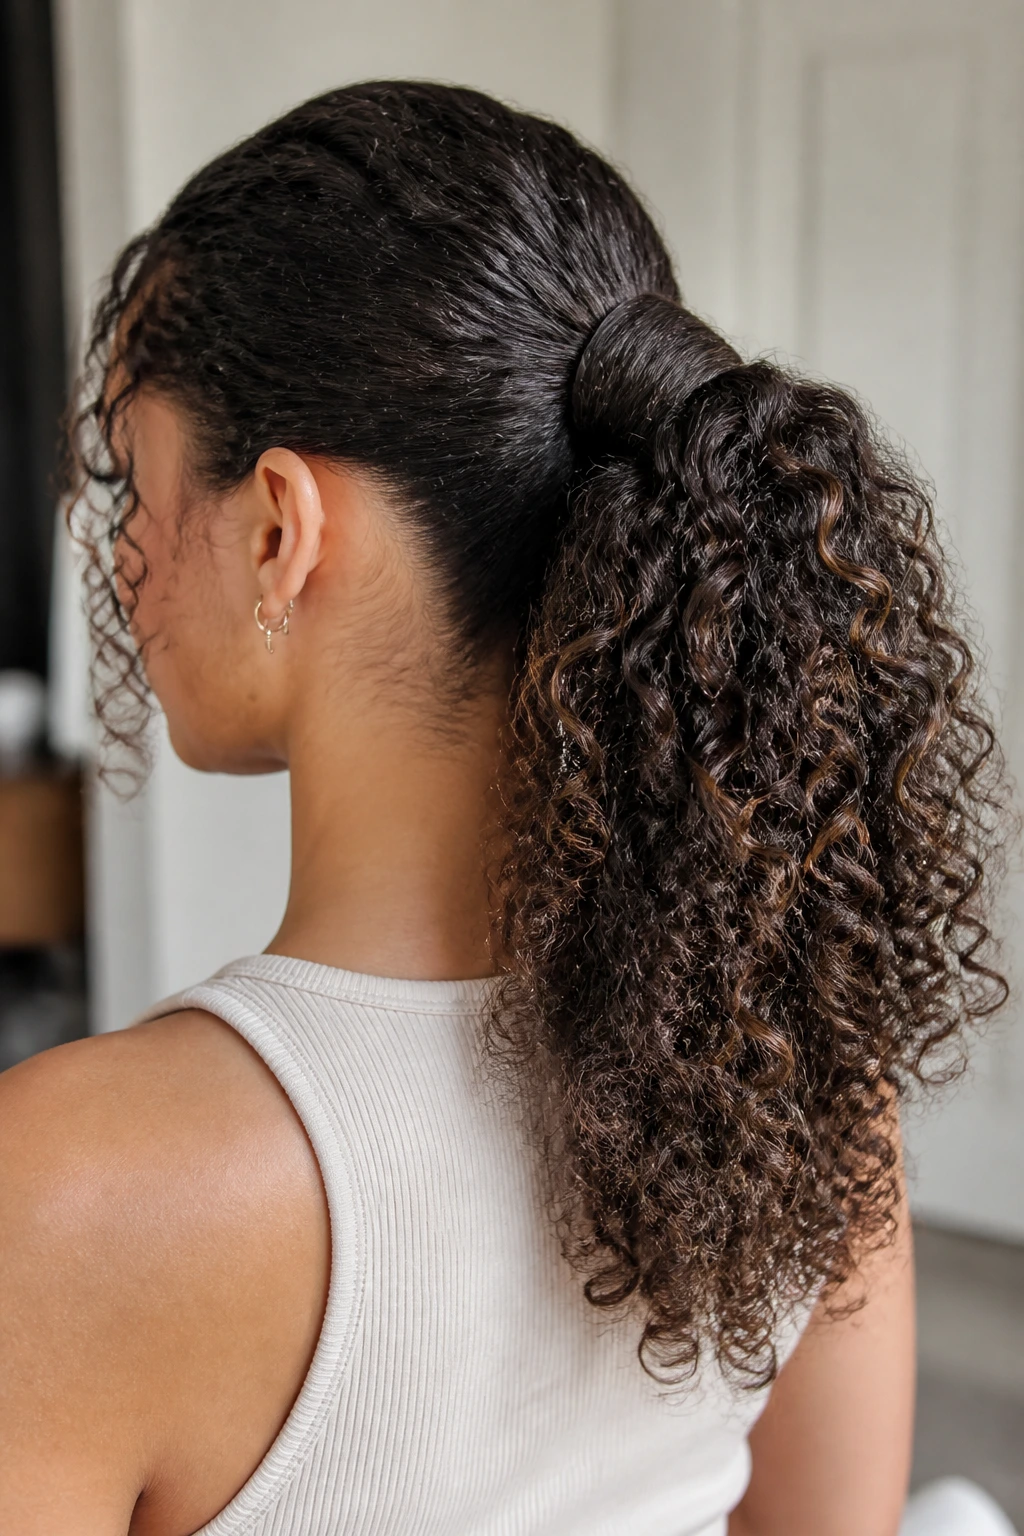
If your curls collapse by the end of the day, a wrapped ponytail gives you structure without flattening everything. It’s cleaner than a messy bun and more forgiving than a sleek ponytail, which can pull too hard at the front and leave the curls looking unhappy.
Start by gathering the hair at the nape, mid-height, or crown depending on how much volume you want. Then leave out a small section, about the width of two fingers, and wrap it around the elastic. Pin the tail underneath with one or two bobby pins. That one move makes the style look finished instead of improvised.
The base is where this style lives or dies. Too much tension at the roots and the whole look gets stiff. Too little and the ponytail slips. I like a satin or fabric-covered tie because it grips without chewing up the cuticle. If your hair is thick, use two elastics stacked together instead of yanking one tie tighter than it wants to go.
Key details to watch:
- Low ponytail: softer, more relaxed, easier on tight coils.
- Mid ponytail: balances volume and length.
- High ponytail: gives more lift, especially on finer curls.
- Wrapped base: hides the elastic and smooths the finish.
A curly ponytail is one of those styles that works for errands, dinner, or a lazy office day without pretending to be fussy.
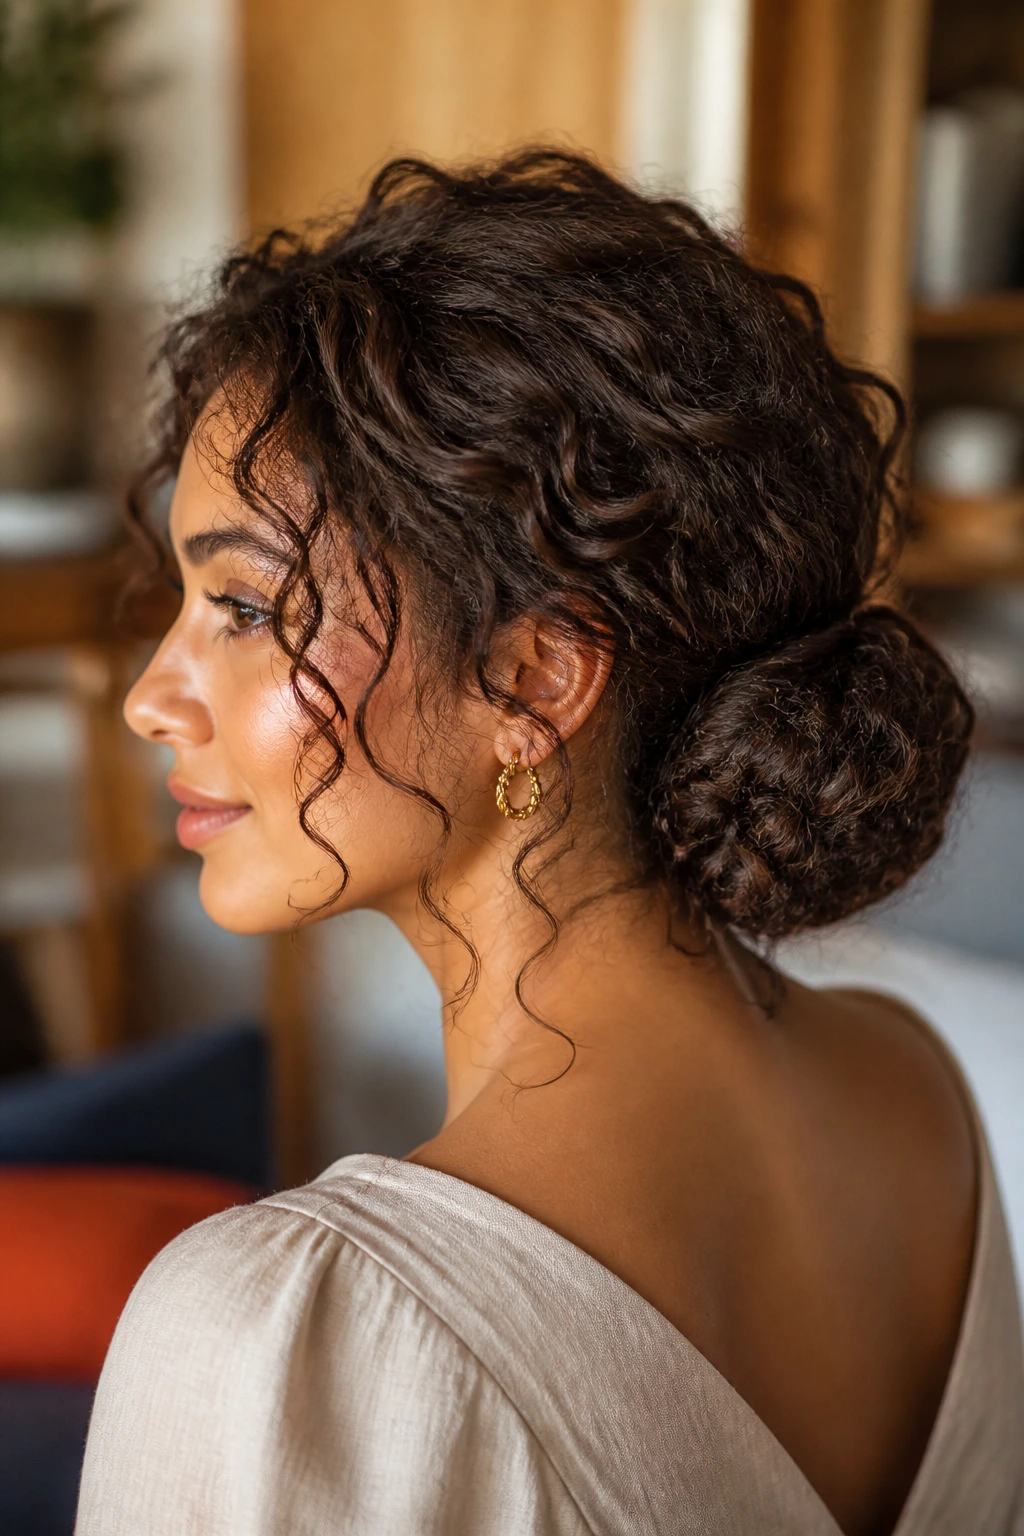
5. The Low Bun with Face-Framing Pieces
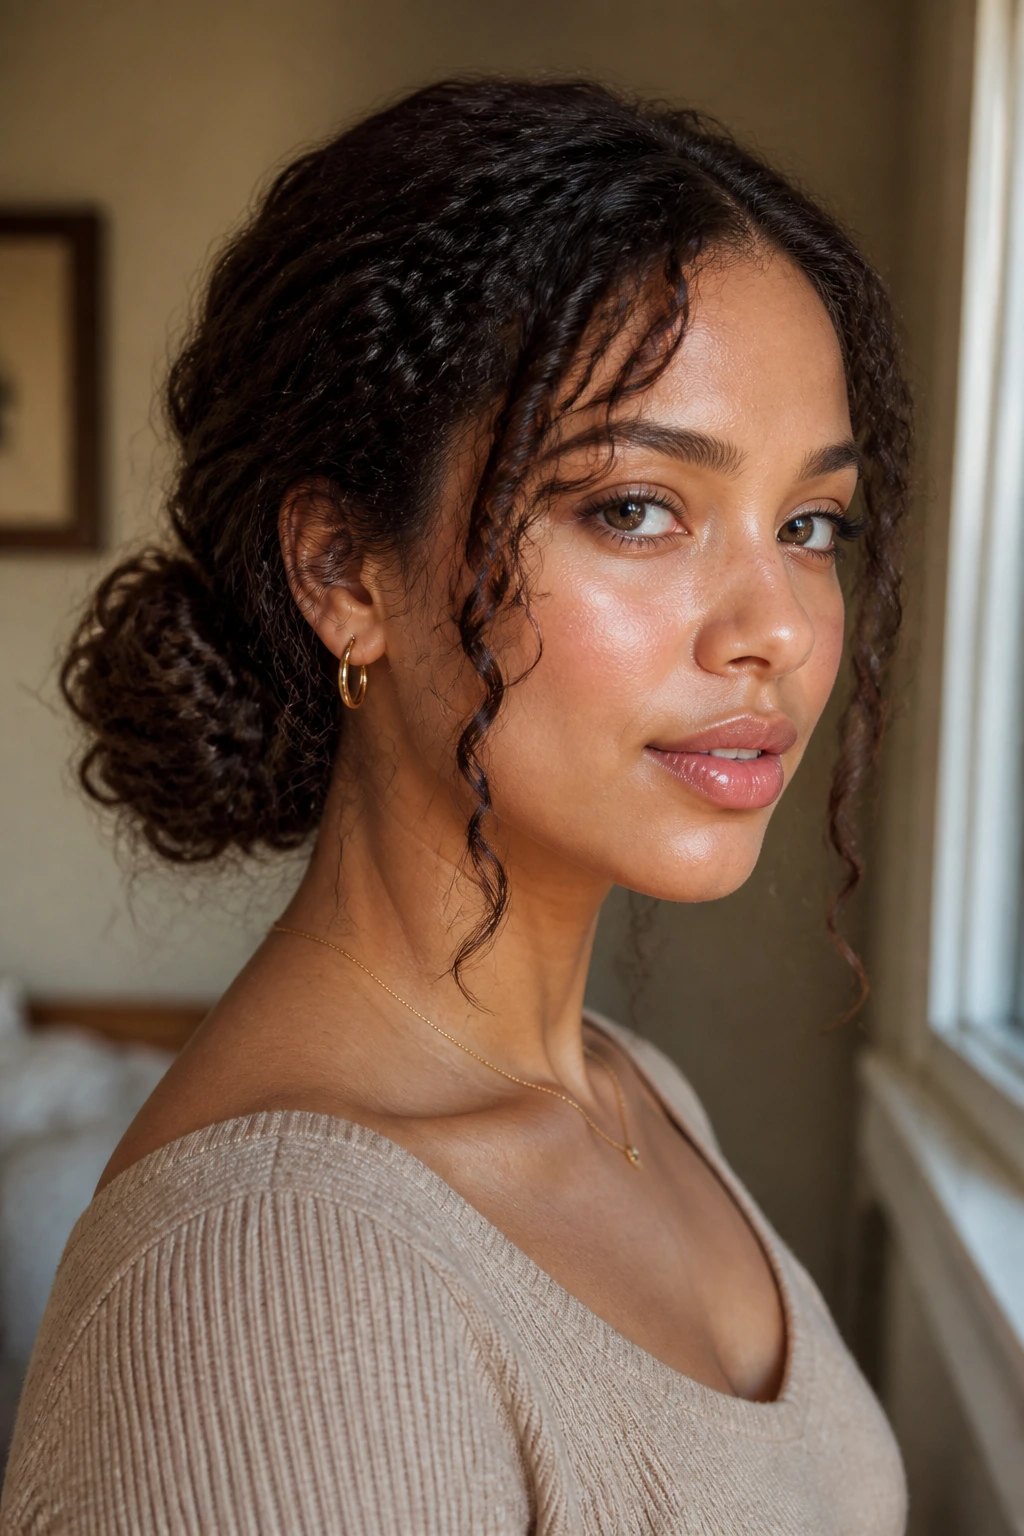
A low bun is the sort of style people call “simple,” which is rude, because simple does not mean boring. With curls, a low bun can be sleek at the crown and soft at the edges, and that contrast is what makes it work. It gives shape without making the whole head look overdone.
I like this style when the hair is day-two or day-three and the ends need a reset. First gather the hair low, then twist the length loosely instead of brushing it into a smooth rope. Twisting keeps the curl pattern from turning into a frizzed-out puff before it’s pinned. Then coil the twist into a bun and secure it with U-pins or a small clip, not just one elastic trying to do all the work.
Leave out a few pieces around the face. Not too many. Two soft tendrils are usually enough. They should feel like an accident, but a controlled one.
This is also one of the rare curly styles that gets better when it isn’t perfect. A bun that looks too neat on textured hair often means the curls were brushed too hard or pinned too flat. Let the bun have a little width. Let the pieces at the front breathe.
A good low bun can carry hoop earrings, a bold lip, a turtleneck, or nothing at all. It doesn’t need much help.
6. Deep Side Part with One Side Pinned Back for Any Curl Texture
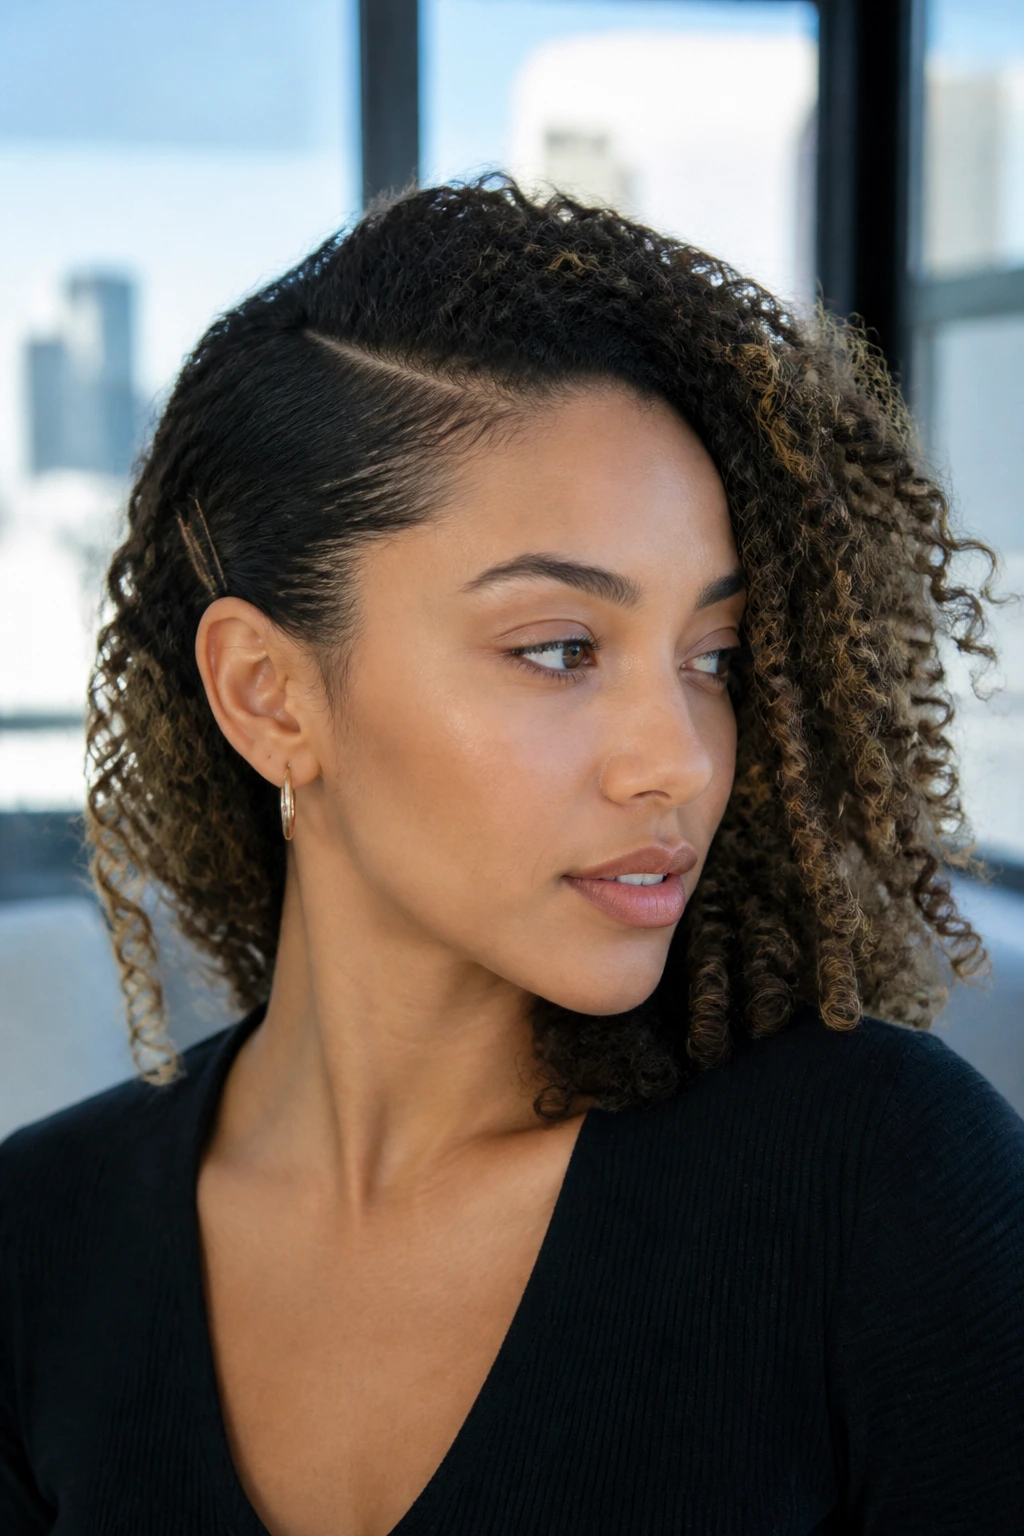
Unlike a center part, a deep side part gives the curls a direction to fall in. That sounds minor, but on textured hair it can change the whole mood. The style works because it shifts the weight, creates a little lift at the roots, and keeps one side from feeling swallowed by the rest.
A rat-tail comb makes the part cleaner, but don’t force a razor-straight line if your hair is very coily or dry. On those textures, a part that follows the natural fall of the hair usually looks better than a perfect line drawn like you’re measuring a floorboard. Pin one side behind the ear with two crossed bobby pins or a flat clip, then let the heavier side sit forward.
What Makes It Different
This style is useful when one side of the hair looks flatter than the other. The deep part gives the fuller side room to show off, and the pinned side keeps the whole shape from feeling wide at the cheeks. It is especially good on second-day curls that still have some definition but need a new shape.
- Part the hair about 2 to 3 inches off center for a dramatic look.
- Pin the smaller side back while the hair is slightly damp, if possible.
- Use a touch of mousse at the roots for lift, not a heavy cream.
- Tuck a small curl behind the ear instead of pinning every strand.
If you want a style that looks intentional without much work, this one is hard to beat.
7. Braided Halo with Loose Ends
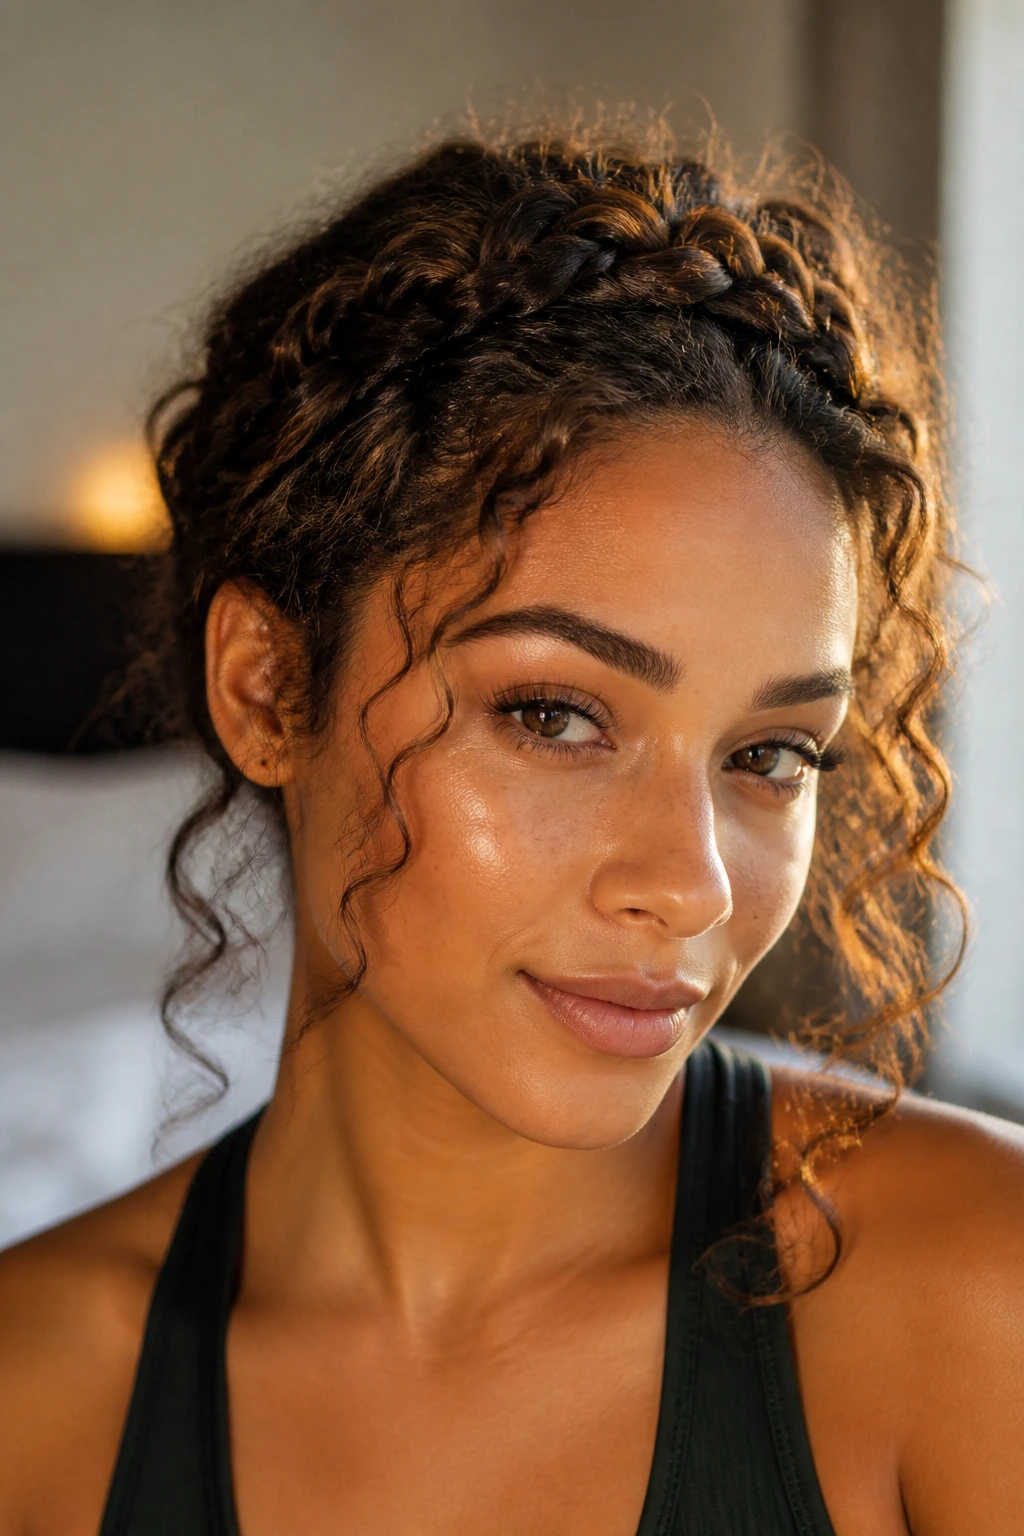
A braid at the hairline calms the whole style down fast. That’s the real reason the braided halo keeps showing up in curly styling. It gives you a built-in frame, holds the front pieces away from the face, and still leaves the rest of the curls free to do their thing.
You do not need to braid the entire head. A narrow section from one temple across the crown is enough. Keep the braid loose so it doesn’t flatten the roots, then pin it in place every few inches as it crosses the top. Let the rest of the curls hang loose, or tuck the braid ends under the hair at the opposite side for a cleaner finish.
If braiding is annoying on your texture, a two-strand twist can do the same job with less drama. I actually prefer twists on very slippery or very dense hair because they grip better and don’t shred the front pieces as much.
Use this style when:
- you want the front off your face,
- your curls need a bit more structure,
- you’re dealing with humidity and want less frizz around the hairline,
- you want something that feels dressed up without heat styling.
The halo braid looks especially good with earrings or a high neckline, but it doesn’t need a fancy outfit to make sense. It just needs enough length at the front to hold the shape.
8. Temple Twists with Clips at the Hairline
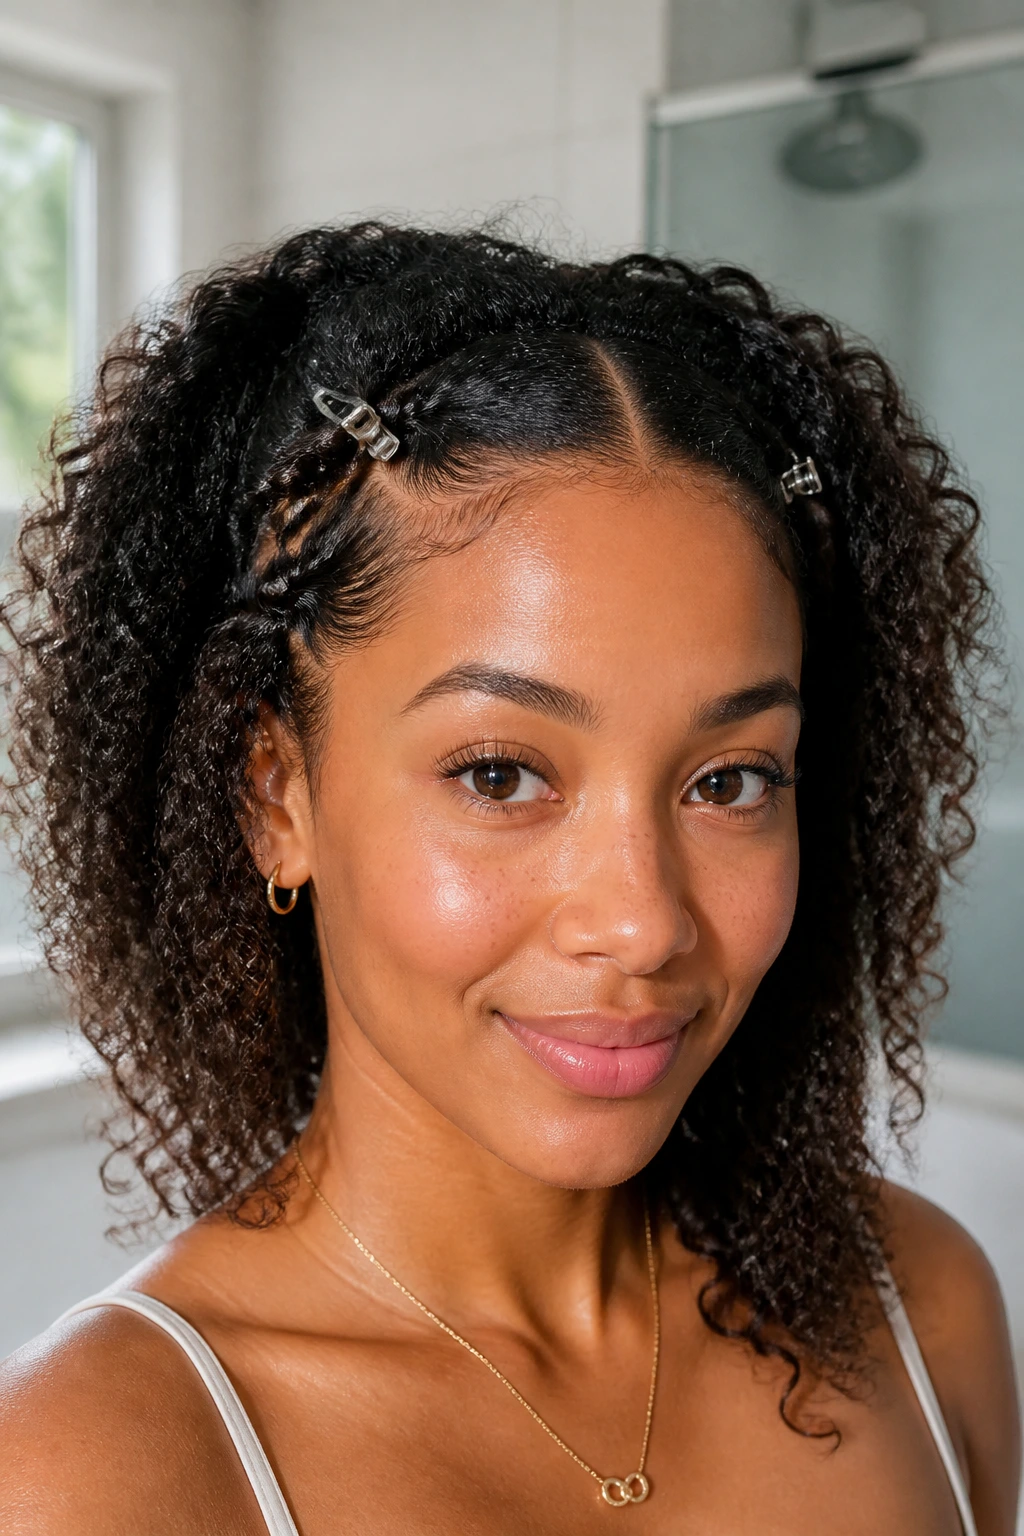
Only have five minutes? Temple twists are one of the easiest ways to make curly hair look handled. The style uses two small twists at the front, clipped back just enough to open the face, while the rest of the hair stays loose and textured.
Take a 1-inch section from each temple, twist it backward toward the ear, and secure it with a flat clip, a snap barrette, or a small bobby pin crossed under the twist. That’s it. You can keep both sides even, or pin only one side if you want a softer angle across the forehead. Short curls can do this too. The twists may be tiny, but they still change the shape.
How to Keep the Clips from Slipping
Spray a little water or lightly mist with leave-in on the section before twisting. Not too much. You want grip, not a wet forehead. If the hair is very smooth, a touch of mousse on the section helps the twist hold. I also like to pinch the ends of the twist before clipping so they don’t spring apart.
This style is nice on mornings when you don’t want to commit to a full updo. It clears the front, shows off the curl pattern in the rest of the hair, and takes almost no time. Small effort. Good payoff.
9. Space Buns That Still Let the Curls Show

Space buns can look childish if they’re too small and too tight. Give them a little height, though, and they become one of the most useful curly styles in the whole bunch. They keep the length off your neck, show off the texture, and leave enough shape around the face to avoid that harsh, pulled-back look.
Part the hair from the center of the forehead straight back to the nape. Then divide it into two equal sections and place each bun where it makes sense for your face shape: high on the head for a playful lift, lower and wider for a softer result. If your hair is very dense, use one elastic to anchor the base and a second tie to hold the bun itself. That keeps the weight from dragging everything down.
Not every space bun has to be tidy. A curly version works best when some ends stay visible. Let the curls loop out, puff a little, or tuck only part of the length in. The shape should look like curls made it, not like you glued two little circles to your head.
A few practical notes:
- A middle part keeps the buns balanced.
- A rat-tail comb helps, but fingers work fine on dry hair.
- Dense textures often need a little extra pinning at the base.
- If the buns sit too close to the ears, the style starts to look heavy.
Space buns are one of the few styles that can feel fun without becoming high-maintenance. That’s rare.
10. Silk Scarf Wrap with Curls Left Out
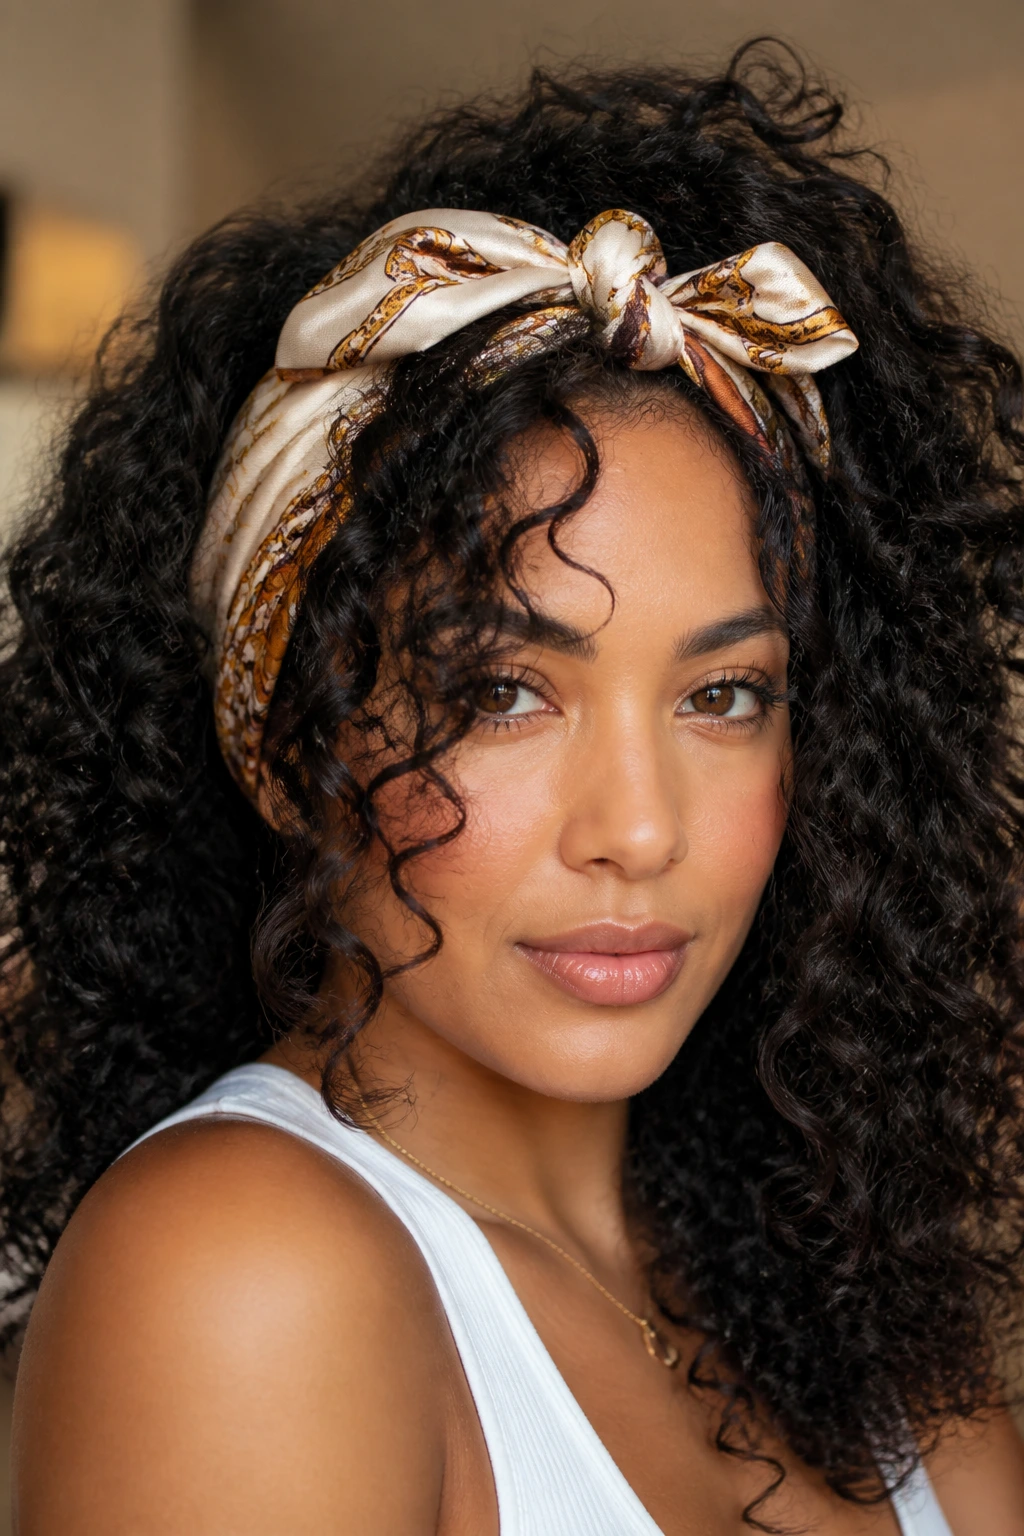
A silk scarf does more than make curly hair look pretty, and I mean that in the least fluffy way possible. It protects the hairline, calms frizz, and gives the style a clear frame even when the rest of the curls are doing their own thing. It’s the kind of style that looks planned but never stiff.
Fold the scarf into a band about 2 inches wide. Wrap it around the hairline, tie it above the forehead or slightly off to one side, and let the curls spill out underneath. If your hair is thick, push the scarf back just enough to keep the edges smooth without squeezing the curls at the temples. If your hair is finer, the scarf can sit a little lower and take up more visual space.
This style is especially useful on days when the roots are frizzier than the ends. The scarf covers what needs covering and lets the good part of the curl pattern stay visible. I also like it on hot days, because the scarf keeps the front of the hair from puffing up every time you step outside.
Try a printed scarf if you want the style to do more of the talking. Or keep it plain and let the curls be the point. Both work.
11. Bubble Ponytail on Curly Lengths
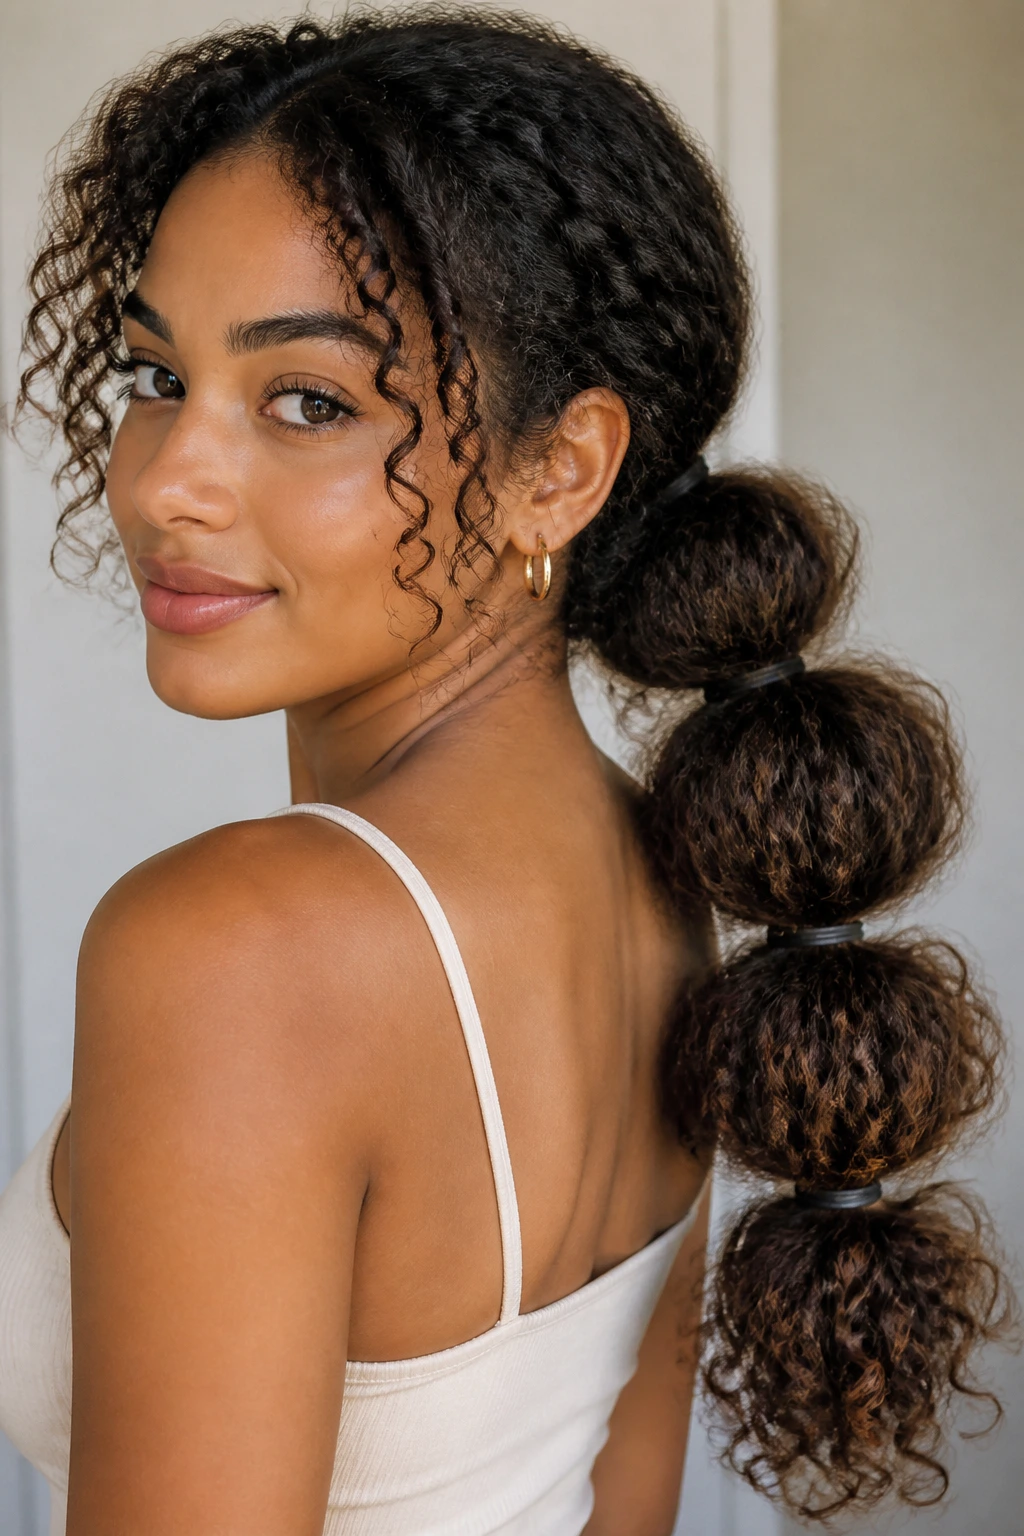
A bubble ponytail is one of the few styles that makes shrinkage look intentional instead of annoying. The look is built around sections of hair puffed between elastics, which means your curl pattern doesn’t have to sit perfectly smooth to make sense. In fact, a little irregularity helps.
Gather the hair into a low or mid ponytail and secure it with a satin tie. Then add clear elastics every 2 to 3 inches down the length. Gently pull each section outward with your fingers until it rounds into a bubble. Don’t yank. You want fullness, not tension.
Where to Place Each Bubble
The spacing changes the whole vibe. Larger gaps give a softer shape. Smaller gaps look more structured and hold better on shorter lengths. If your hair is thick, four or five bubbles usually make more sense than trying to cram eight tiny ones into the tail.
This style is especially nice on medium to long curls, because it keeps the length from getting lost in a single ponytail. It also works if the ends are a little dry. The bubbles distract from that and make the whole style look purposeful.
- Use clear elastics or tiny satin ties.
- Smooth the top section only; leave the tail itself natural.
- Adjust each bubble with your fingertips, not a brush.
- If the ponytail slips, anchor the base with a second tie before adding bubbles.
It’s a good one for windy days, long errands, or any time you want some structure without flattening the curl pattern.
12. Faux Hawk with Pinned Sides
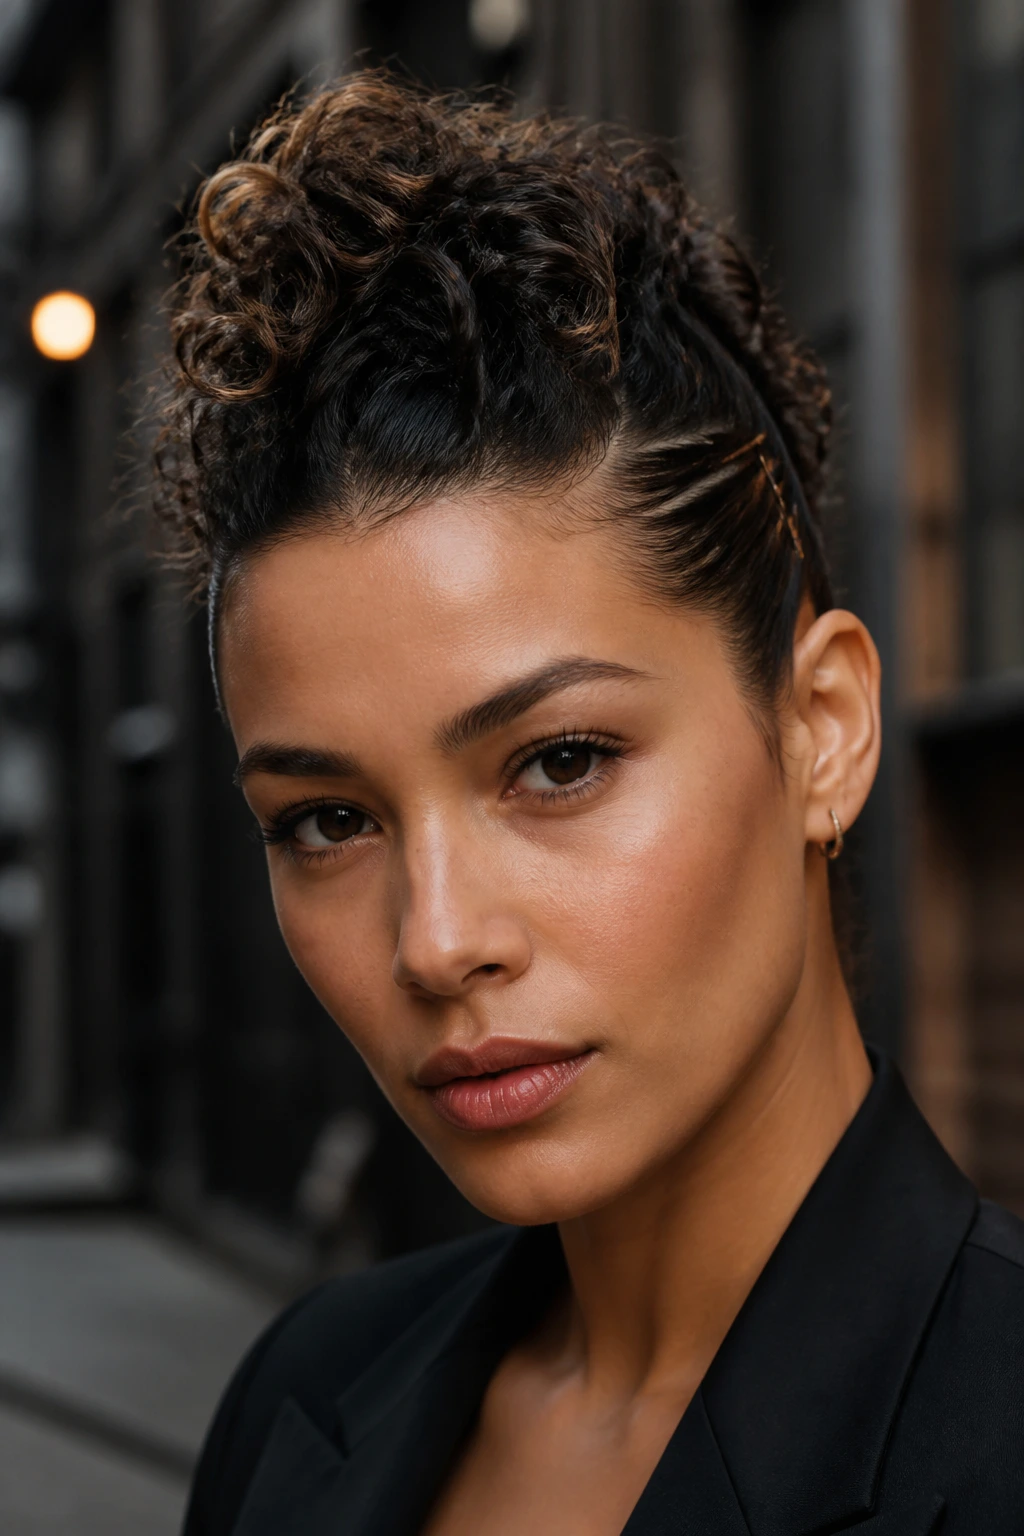
The faux hawk is what happens when curly hair decides it wants a little attitude. Pin the sides tight enough to keep the shape narrow, leave the center strip full and lifted, and the curls suddenly look sharper without being turned into a helmet.
Section the hair from temple to behind the ear on both sides, then smooth or twist each side back and pin it flat against the head. The center should stay soft and vertical. Not rigid. Soft. That matters. A faux hawk that’s too stiff loses the whole point, which is movement and contrast.
This style works especially well on dense curls and coils because the center strip already has natural volume. Fine curls can wear it too, but they usually need a little root lift at the top and maybe a bit of dry texture spray or mousse to keep the center from collapsing.
I like the faux hawk for nights out, concerts, or any day when a normal ponytail feels boring. It has a little edge, but not the kind that takes a lot of skill. If the sides keep springing out, use more pins than you think you need. Three on each side is often not enough. Five is more honest.
The best faux hawks look deliberate from the front and loose from the back. That contrast does the work.
13. High Puff with Stretched Roots for Every Curl Pattern
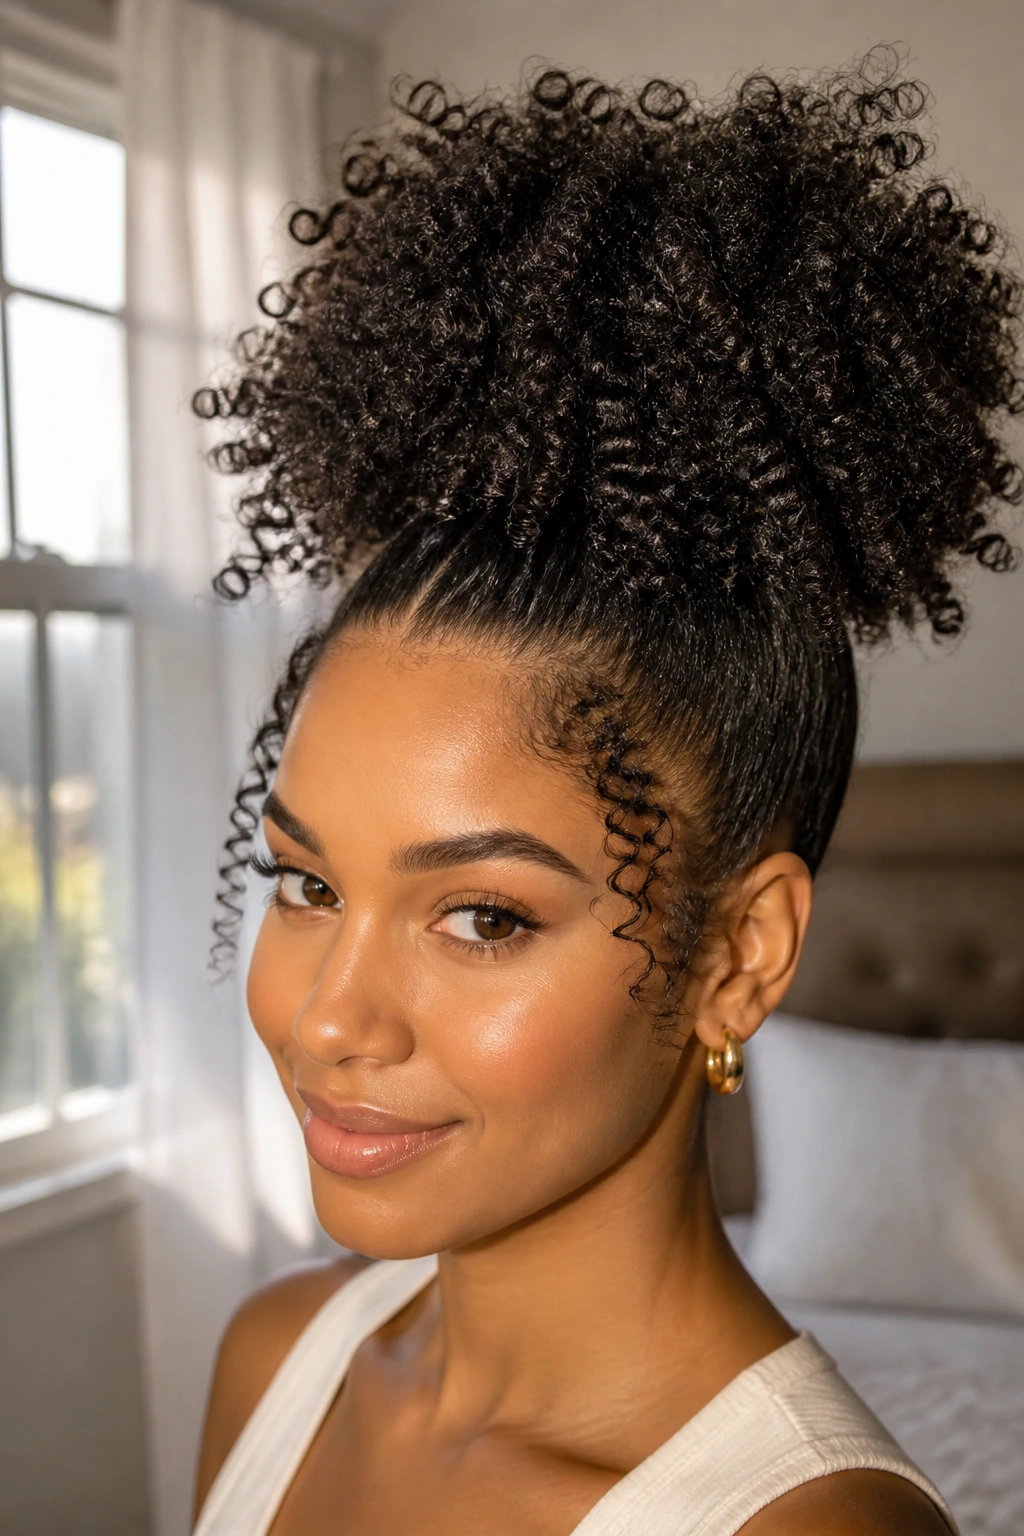
Unlike a tight ponytail, a high puff lets the roots stay cushioned while the crown gets the lift. That makes it one of the friendliest styles for curlier textures, especially when shrinkage is strong and the hair naturally wants to stand up instead of hang down.
The shape comes from gathering the hair high on the head with a satin scrunchie, puff cuff, or soft elastic, then gently smoothing only the perimeter. Don’t brush the whole head into submission. You want the puff to feel full, not slicked to the scalp. If the hair is very thick, split it into two gathered sections first and then bring them together. That keeps the tension more even.
For looser curls, the puff can sit closer to the crown and look rounded. For coils and tighter textures, a higher placement usually gives the best shape because it shows off the fullness without making the sides balloon in awkward places. A little edge control can clean up the hairline, but use it lightly. Too much and the style starts to look hard.
- Best on: coils, dense curls, or anyone who wants height.
- Works with: a puff cuff, satin scrunchie, or wide elastic.
- Avoid: stretching the front so much that the roots ache by noon.
- Try this: lift the hair with your fingertips before securing the tie, then fan the puff once it’s in place.
If there is one style that proves curly hair does not need to be “tamed” to look polished, it’s this one.
14. Tucked Low Roll for Long Curly Hair
Need something neater than a bun but less formal than a chignon? The tucked low roll sits in that middle space nicely. It works because it follows the natural fold of curly hair instead of forcing the ends into a shape they don’t want.
Start with a low ponytail, but don’t pull it tight. Leave a little give at the crown so the roots still move. Then split the ponytail into two sections, tuck the ends upward, and roll them toward the nape. Secure the roll with U-pins or a couple of strong bobby pins placed vertically, not sideways. Vertical pins hold the fold better on textured hair.
This style is best for shoulder-length to long curls, though shorter lengths can fake it with a smaller tucked roll. If the layers are short and springy, let a few ends peek out. Trying to hide every piece usually makes the roll look overworked.
A tucked roll is good for dinners, events, or any time you want your hair off your neck without losing texture. It has a quiet polish that a plain bun doesn’t always manage. Not because it’s fancy. Because it respects the curl shape.
One small thing: if the hair is freshly washed and very slippery, let it air-dry until it has a bit of grip before pinning. That saves you from redoing the whole thing later.
15. Claw-Clip Twist with Soft Ends
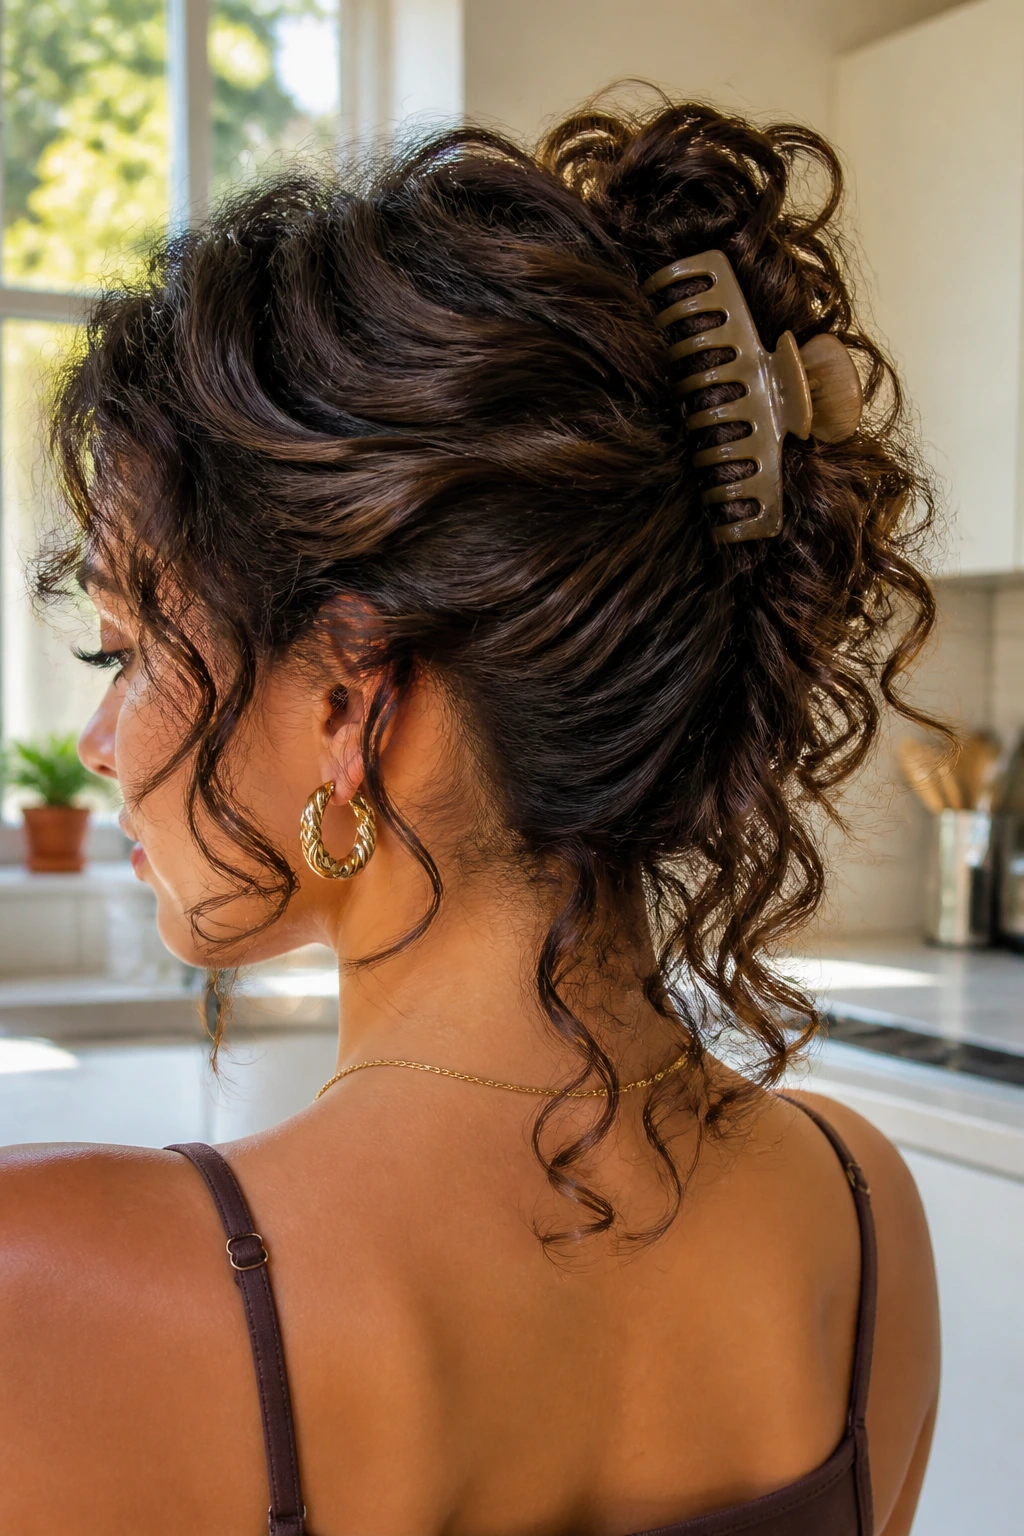
You know the look. Hair twisted up, clip in place, a few curls spilling out where they want to. It’s one of the most useful curly styles because it gives you shape fast and doesn’t demand a perfect part, a hot tool, or a long mirror session.
Gather the hair at the back of the head, twist it upward once or twice, and clamp a large claw clip over the twist. Leave the ends loose if they naturally escape. That’s not a mistake. That’s the appeal. A 3.5- to 4-inch clip usually handles medium to thick curls better than the tiny ones that slide out by lunch.
The style is forgiving on almost every texture because it works with the hair’s bulk instead of against it. Fine curls can use a smaller clip and a looser twist so the style doesn’t go flat. Dense coils usually need a deeper twist and a stronger clip with a little tooth to it. If the clip keeps slipping, section the hair into two loose twists and stack them under one larger clip or use two clips crossed at an angle.
This is the style I reach for when I want my hair out of the way but still like the way it looks if I catch my reflection. No drama. No precision. Just enough shape to feel finished, which, honestly, is what most curly styles are trying to do anyway.