Article: 15 Half Up Half Down With Butterfly Clips for Locs
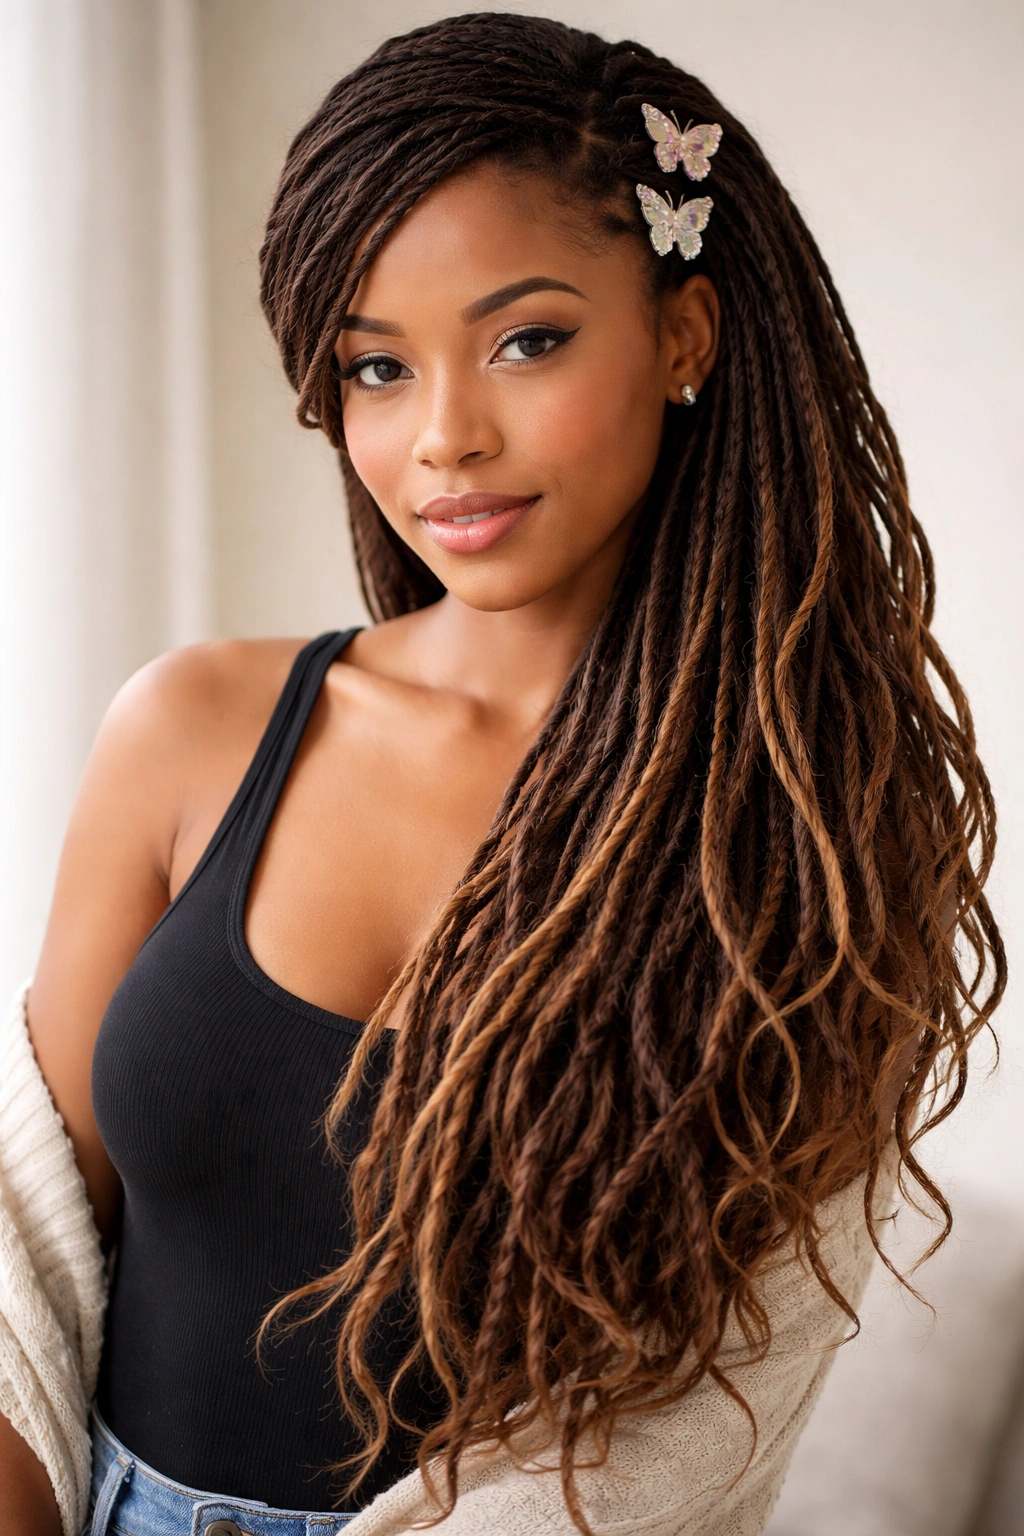
If you’ve been wearing locs for any length of time, you already know that styling them opens up a world of creative possibilities. Half up half down styles have become a go-to choice for people with locs—they’re versatile enough for everyday wear, polished enough for events, and easy enough to execute once you get the hang of them. What makes these styles even more interesting is how butterfly clips elevate a basic half up look into something with real visual impact and personality.
Butterfly clips are the unsung heroes of loc styling. Unlike traditional hair clips that can be clunky or difficult to secure through densely textured hair, butterfly clips grip effectively, stay put throughout the day, and add a decorative element that transforms the entire aesthetic. They come in metallic finishes, jeweled designs, minimalist styles, and bold colors—meaning there’s a butterfly clip for every mood, outfit, and occasion. When you combine the structural simplicity of a half up half down style with the visual pop of butterfly clips, you get something that feels both effortless and intentional.
The real magic happens when you understand that butterfly clips aren’t just decorative afterthoughts—they’re design tools. The placement, size, and number of clips you choose completely change how a style reads. A single delicate clip creates understated elegance. Multiple clips arranged in a pattern add architectural interest. Metallic clips catch the light and draw the eye to specific sections of your locs. This is why butterfly clips deserve their own spotlight in your styling toolkit.
Whether you’re looking for a casual style that takes five minutes or something more elaborate for a special occasion, half up half down with butterfly clips offers endless variations. Here are fifteen distinct approaches to this versatile styling technique, each with its own character and charm.
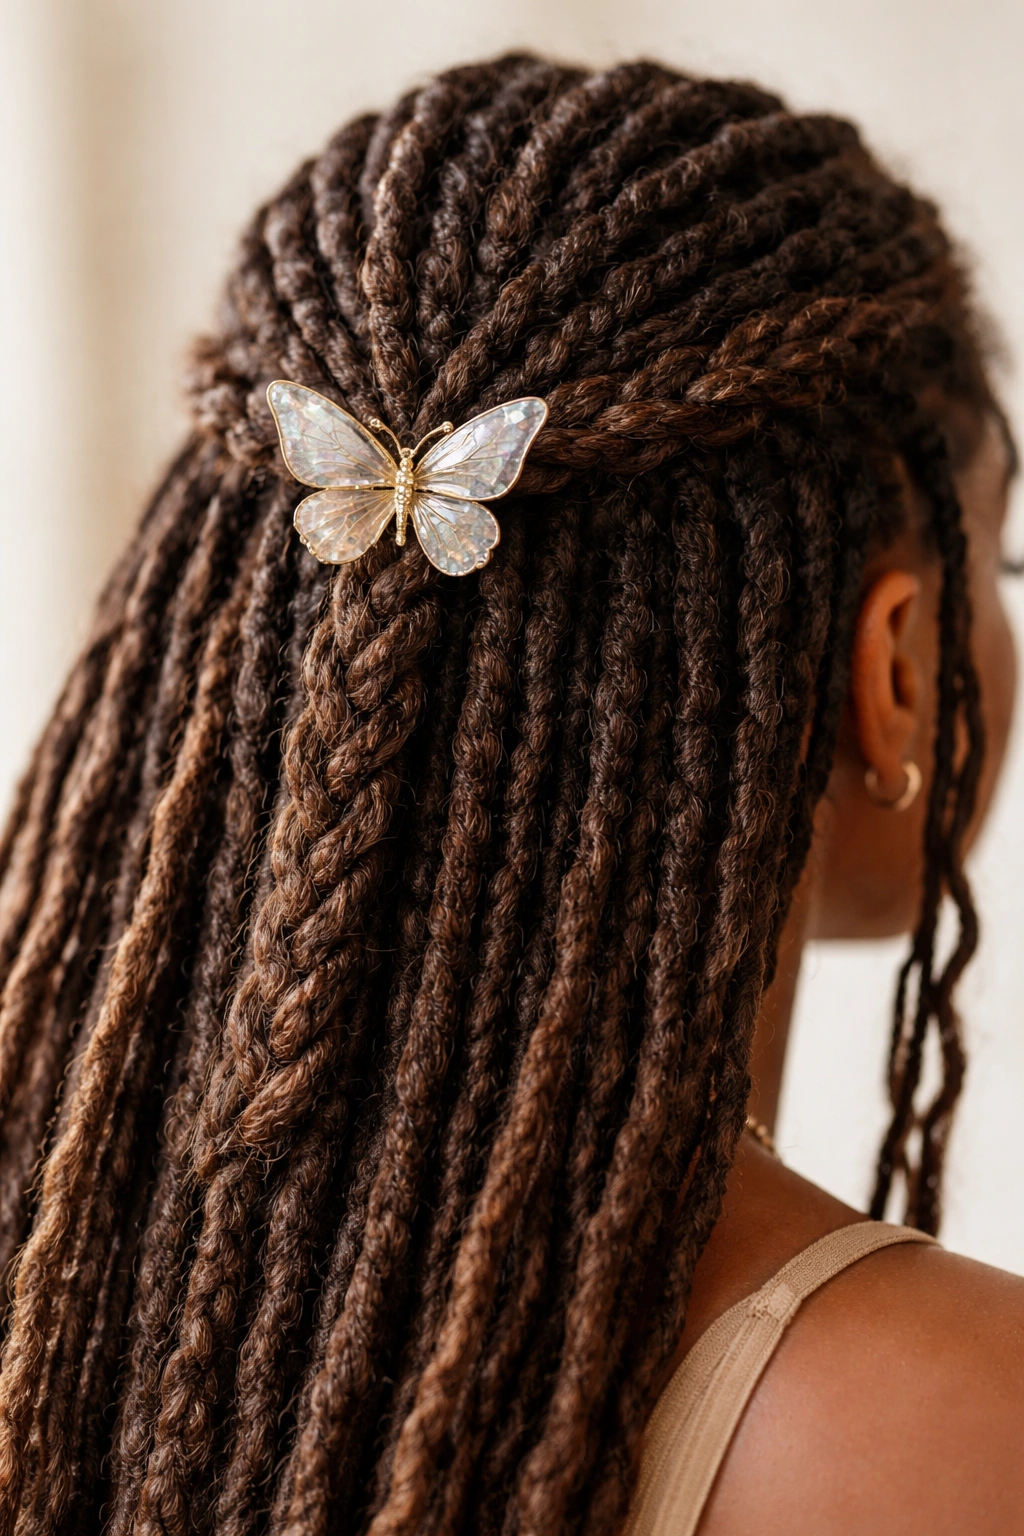
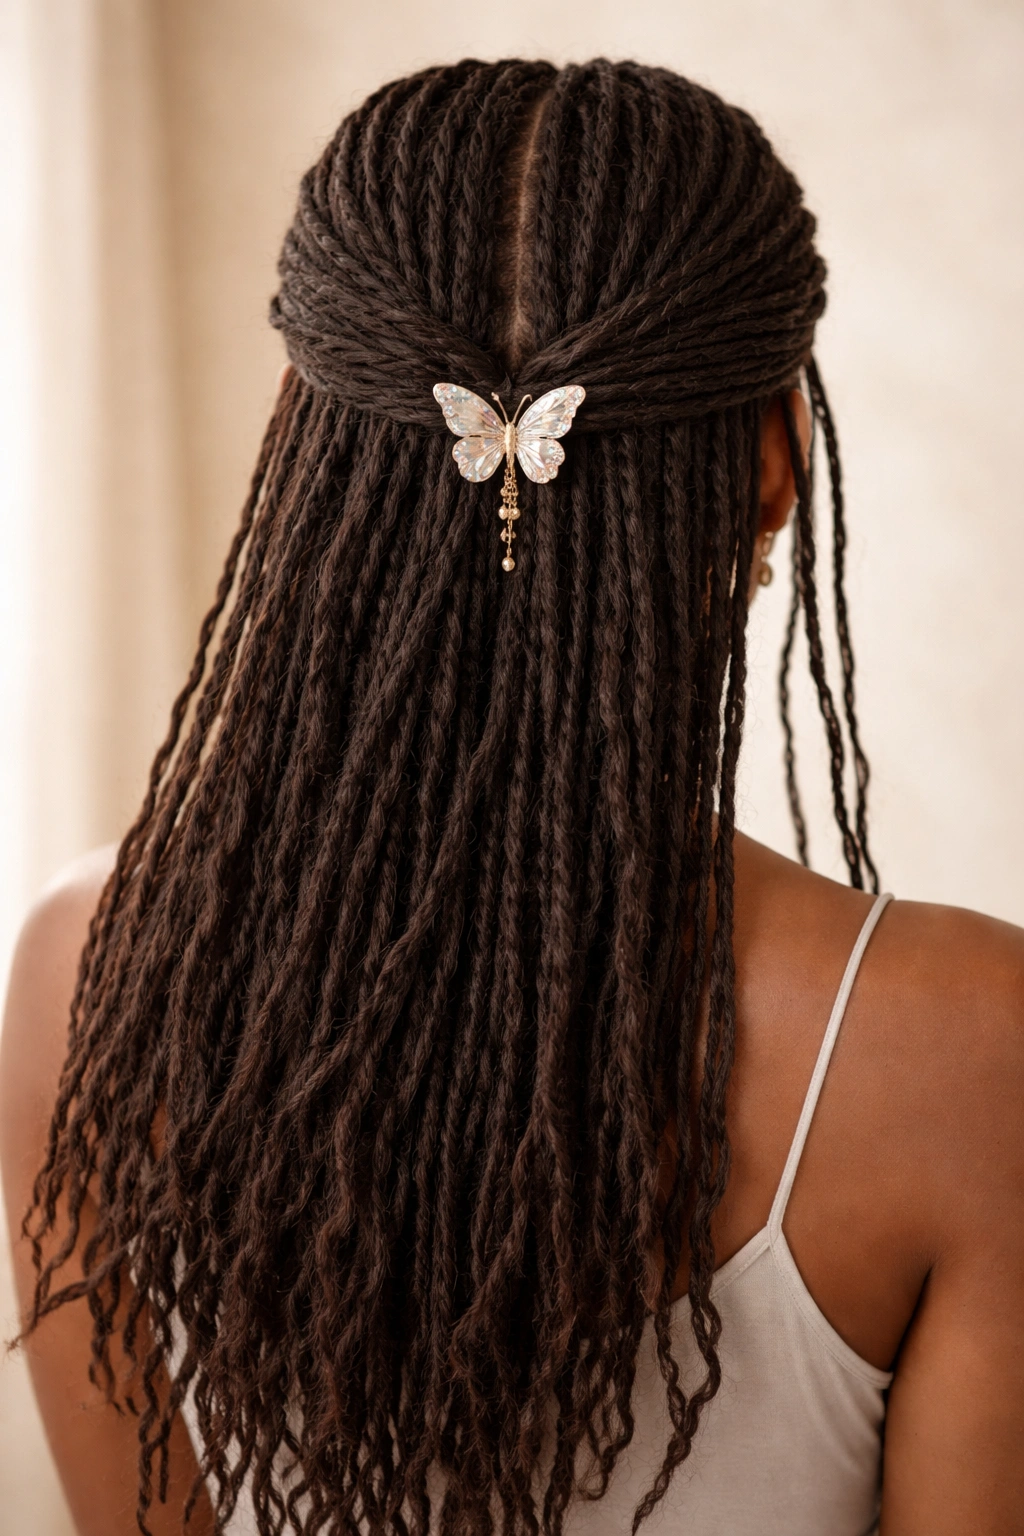
1. Classic Butterfly Clip Crown
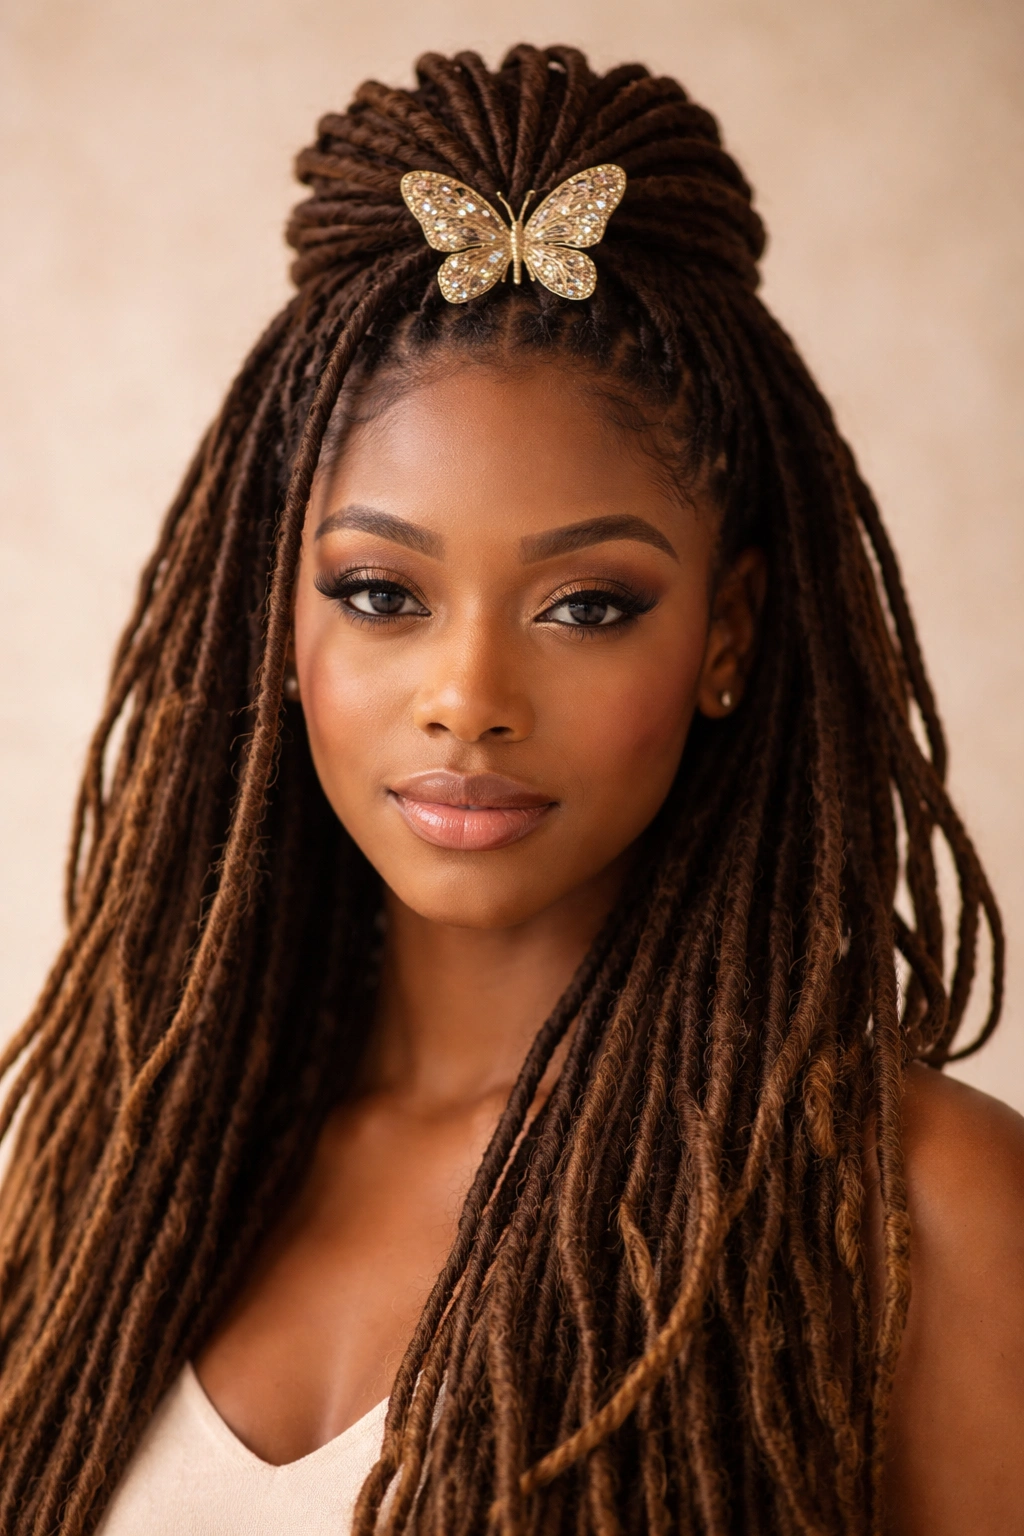
This timeless style uses a single, statement-making butterfly clip positioned at the crown of your head where the half-up section meets the half-down section. The look is clean, refined, and works beautifully whether your locs are waist-length or shoulder-length.
How to Achieve This Elegant Look
Start by gathering the upper half of your locs—think the section that would naturally sit above your ears when parted horizontally. Use your fingers to smooth this section back gently, creating a neat line. The key is not making it too tight; a slightly voluminous gathered section looks more intentional and interesting than a severe pull. Once you’ve got your section, simply clip it with a medium-to-large butterfly clip right where the two halves meet at the back of your head.
What Makes This Style Special
- The clip becomes the focal point, so choosing one with visual interest makes all the difference
- Works with any clip size, but larger clips (1.5 to 2 inches) tend to look more sophisticated
- The simplicity means you can change your clip to match your outfit or mood without adjusting the style
- Perfect for work settings, casual hangouts, or any time you want polished without overdone
- Takes approximately three to five minutes to execute
Pro tip: If your locs are fine or slender, use a larger clip to ensure it grips securely and doesn’t slip throughout the day. If your locs are thick and sturdy, even delicate clips will hold beautifully.
2. Twisted Strand Butterfly Accent
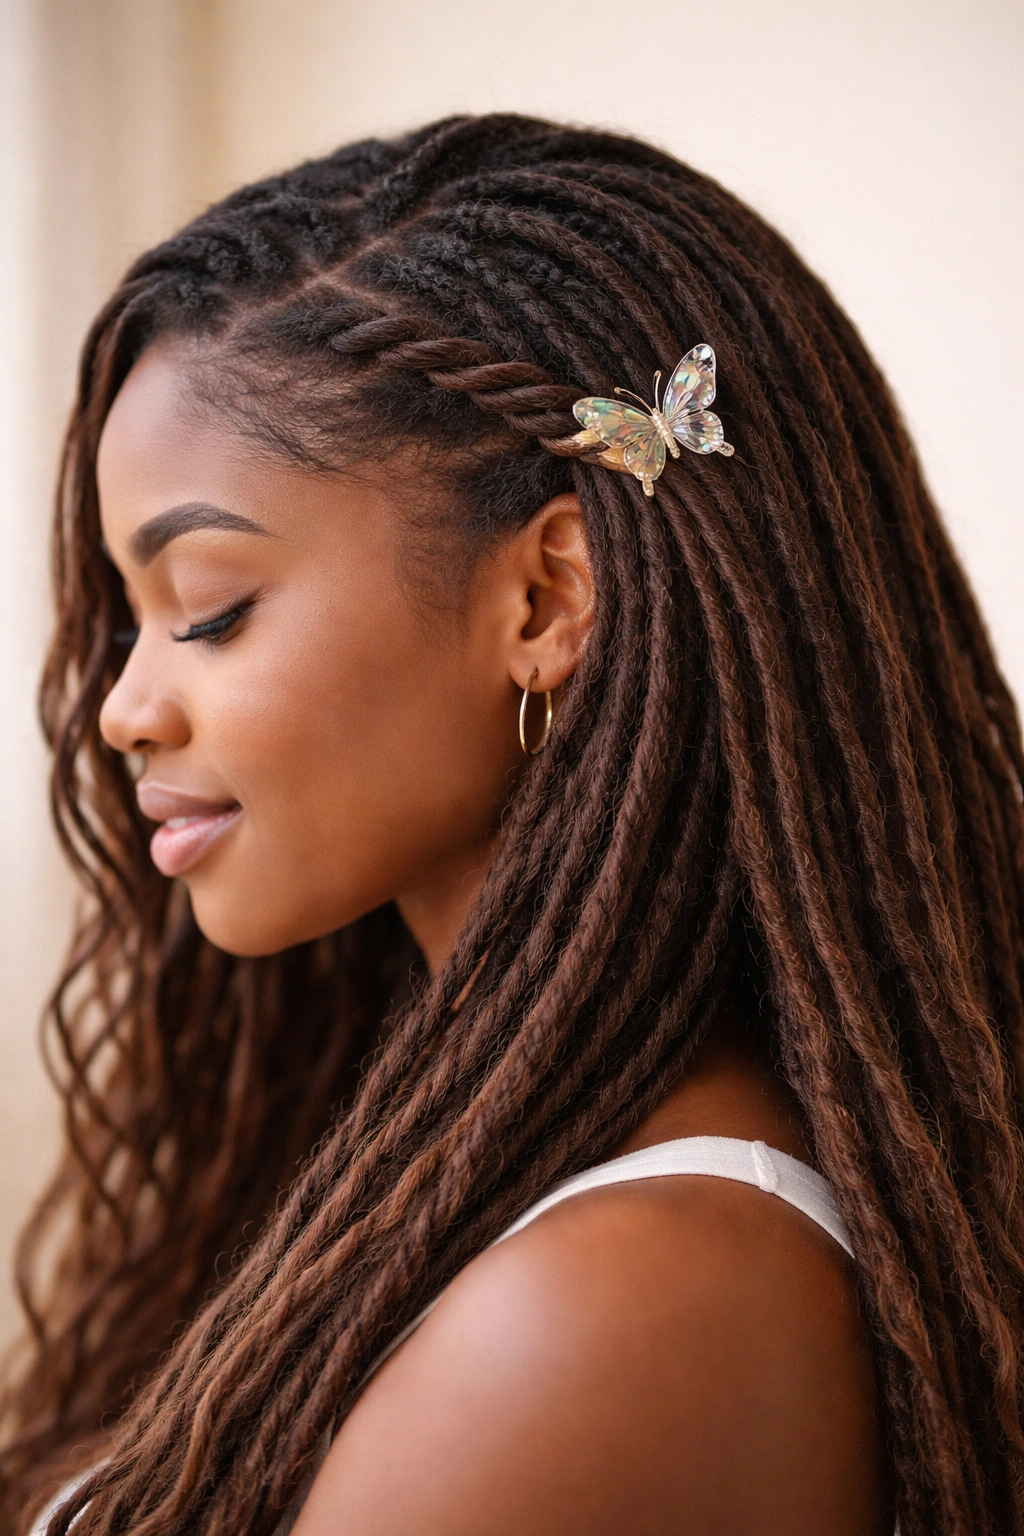
Rather than gathering a blunt section, this style uses a single strand or thin section of locs twisted from one side of your head toward the center, then secured with a butterfly clip. It creates a graceful, less geometric appearance than a straight gathered style.
The Art of the Twisted Section
Select a small to medium section of locs from one side of your head, starting near your temple. Twist this section gently—the twist doesn’t need to be super tight, just enough to create a defined spiral. Guide the twisted section diagonally across the back of your head toward the opposite side, then secure it with a butterfly clip. The clip holds both the twisted section and the hair beneath it, anchoring the entire effect.
Why Twisted Styles Read as More Romantic
- The diagonal line creates visual movement and draws the eye across the head
- A twisted strand feels more intentional and styled than a simple gathered section
- This approach works beautifully with delicate, smaller butterfly clips
- The style reads as effortless elegance rather than formal polish
- You can add more twisted sections for increased visual interest without making the style look busy
Worth knowing: This style holds best when your locs have a little texture or grip to them. Freshly twisted locs might slip a bit, so you might want to do this style a few days after re-twisting.
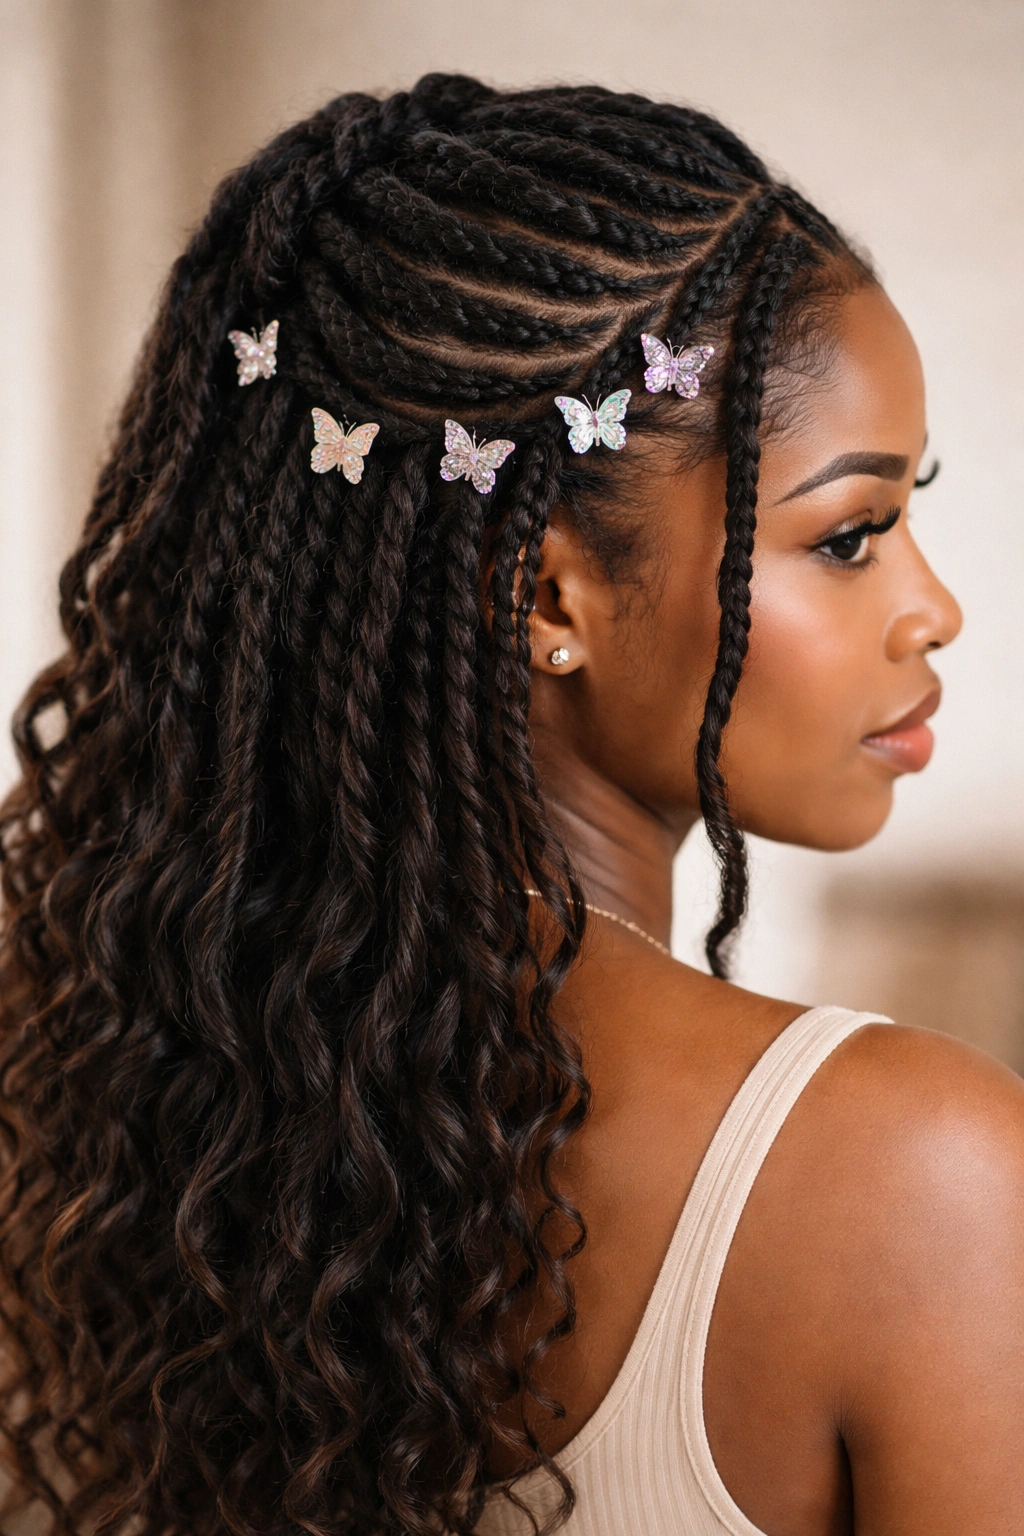
3. Zigzag Parting Half Up Style
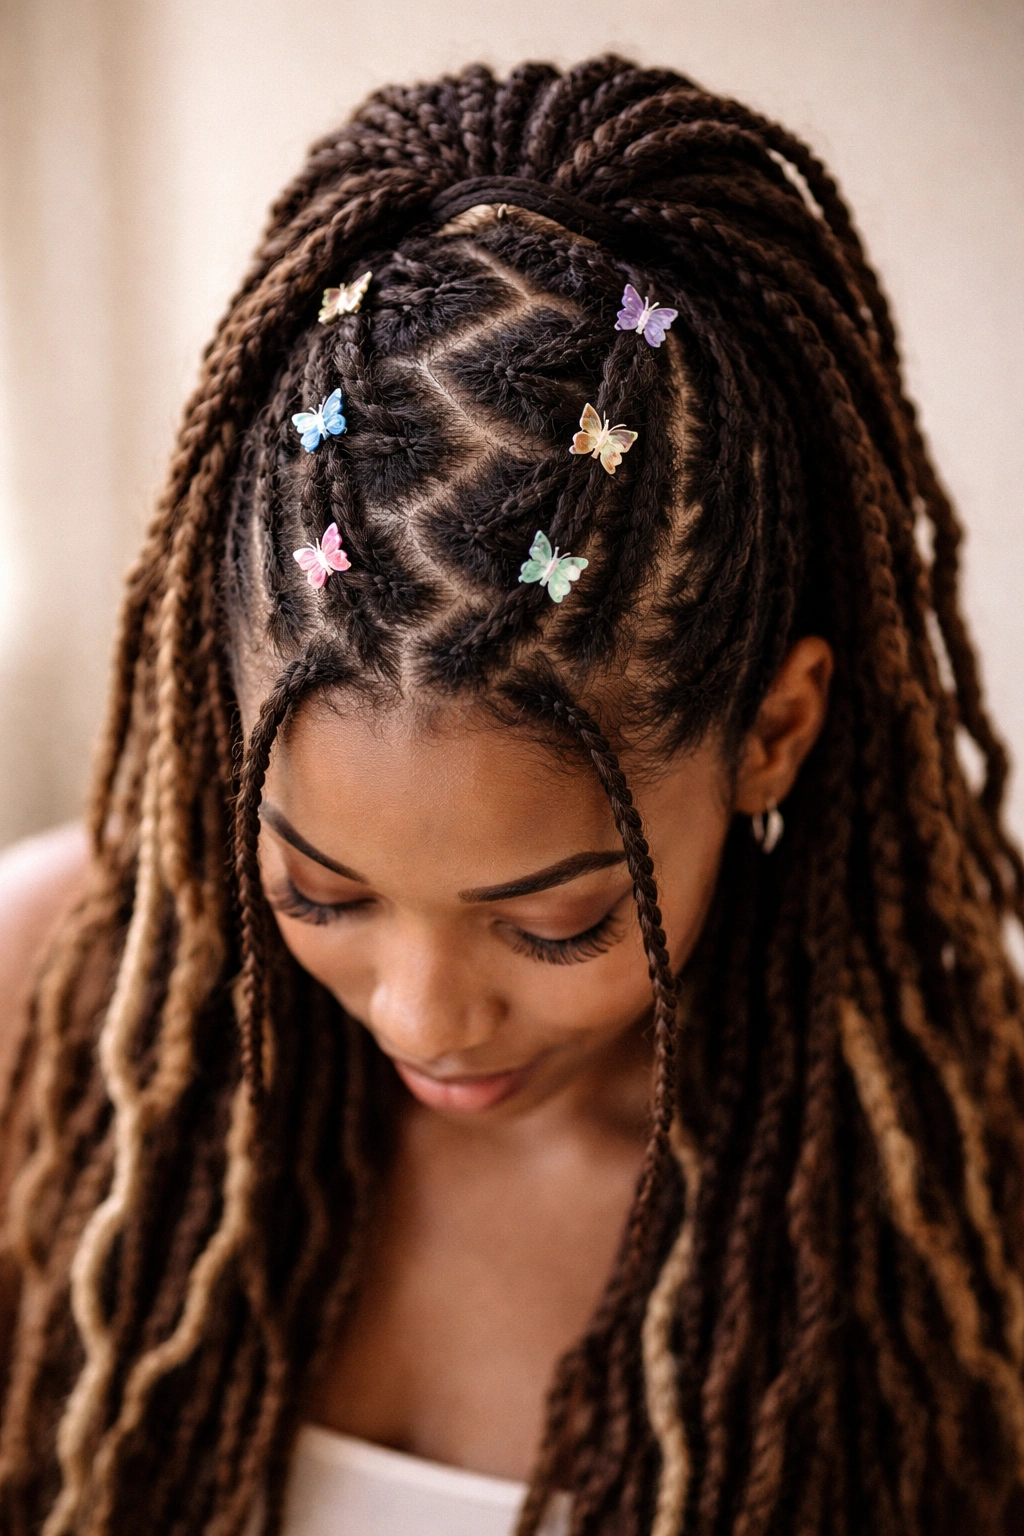
This creative approach uses a zigzag part to divide the upper section of your hair from the lower section, then secures the top half with butterfly clips positioned along the zigzag line. It’s eye-catching and gives a geometric, deliberately styled vibe.
Creating a Zigzag Parting
Using the handle end of a rattail comb, create a parting that zigzags from one side of your head to the other, roughly at or slightly above ear level. It doesn’t have to be perfectly symmetrical—sometimes an organic zigzag looks more interesting than a mathematically perfect one. Once your parting is established, gather the hair above the zigzag and secure it into a half-up style. Now comes the fun part: instead of using one clip at the center back, place smaller butterfly clips at strategic points along your zigzag line.
How This Creates Visual Interest
- The zigzag catches and holds visual attention more than a straight parting
- Multiple clips create a patterned, intentional look
- This style is photogenic and stands out from standard half-up styles
- Works particularly well with metallic or jeweled clips that catch the light
- The geometric nature means it photographs beautifully from above or at an angle
Quick facts:
- Typically requires 3 to 5 butterfly clips depending on the length of your zigzag
- Takes about 10 minutes to execute properly
- Works best with medium to thick locs that hold shape well
- Holds throughout the day once the clips are secured
4. Chunky Butterfly Clip Trio
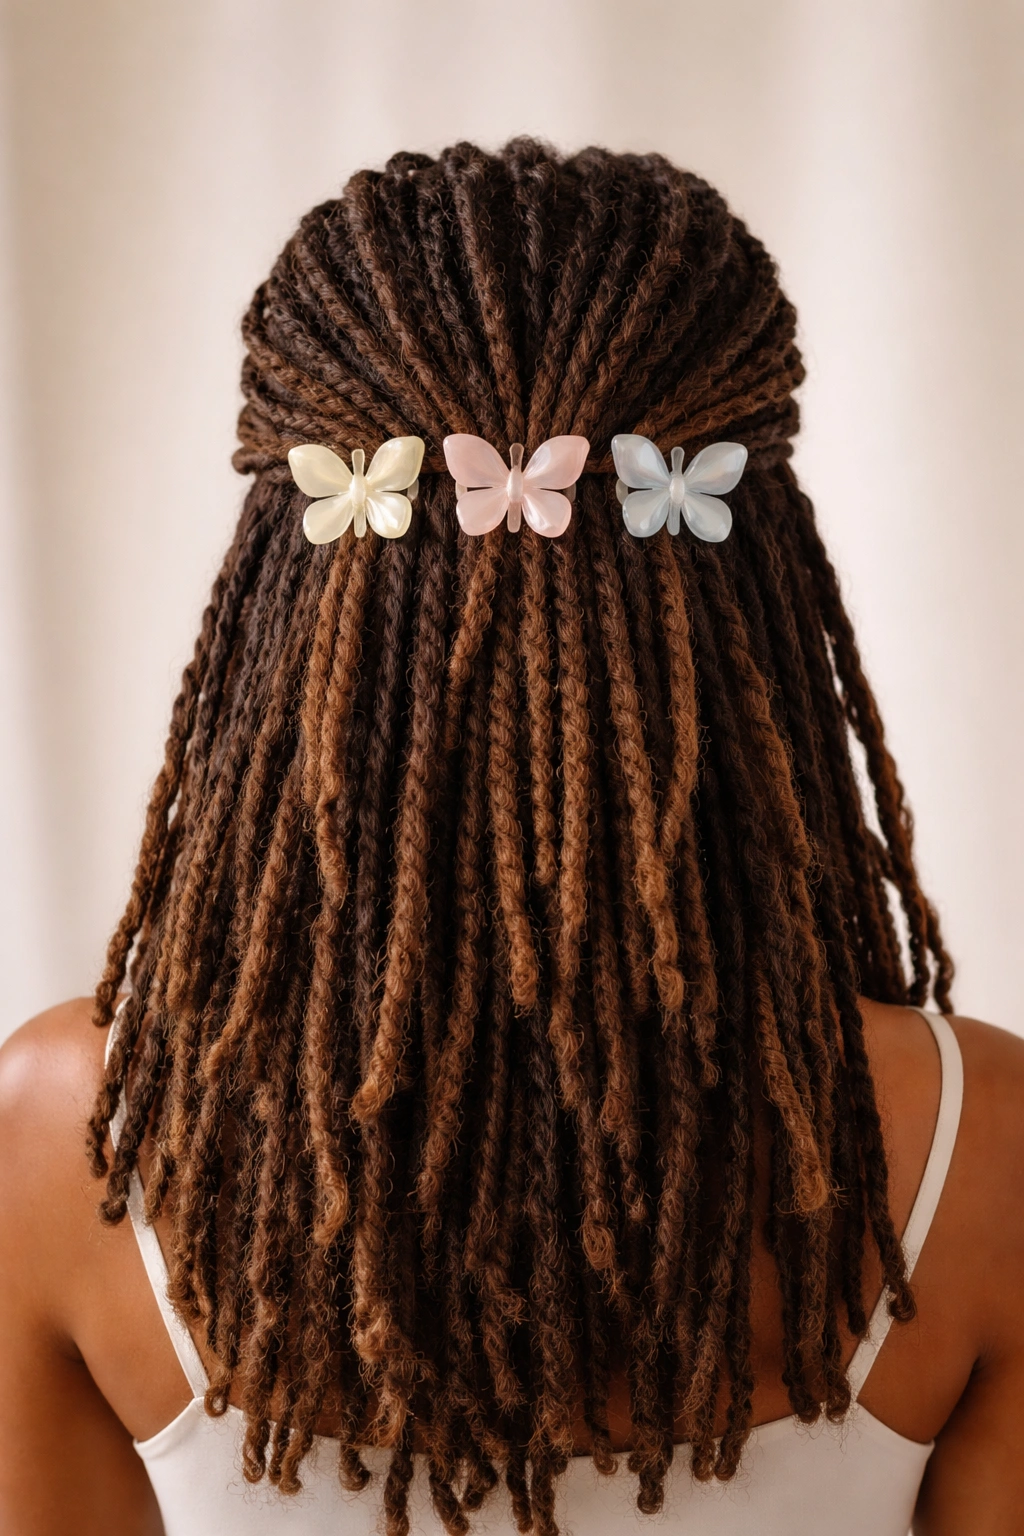
This is a maximalist approach where three substantial butterfly clips are positioned across the back of your head in a horizontal line, each holding a distinct section of your half-up style. It’s bold, modern, and says you’re not afraid of making a statement.
Building the Clip Arrangement
Divide your gathered half-up section into three distinct sections. Starting at one side of your head near the temple area, place your first butterfly clip. Then position the second clip at the center-back where the crown meets the nape, and the third clip on the opposite temple area. The result is a balanced, triangular arrangement of clips that feels architectural and intentional.
The Power of Three in Hair Design
- Three clips create visual balance without feeling overdone
- The stacked effect creates texture and dimension from behind
- Using clips in the same color, finish, or coordinating styles creates cohesion
- This approach works especially well with larger or chunkier clip designs
- The style reads as confident and fashion-forward
Pro tip: Choose clips in varying sizes—a medium center clip flanked by two slightly smaller ones—for a more refined appearance. Or go full drama with three matching oversized clips for maximum impact.
5. Asymmetrical Side-Swept Style
This style gathers your half-up section and sweeps it to one side of your head, securing it with one or two butterfly clips positioned off-center. It’s flattering, slightly edgy, and creates a completely different silhouette than centered styles.
Achieving the Off-Center Sweep
Gather your upper-half section and smoothly sweep it toward one side of your head, as if you’re directing all of that hair to flow over one shoulder. Secure the swept section with a butterfly clip (or two, positioned slightly apart) on the side you’ve swept toward. The remaining gathered section hangs and flows down that side of your back, creating an asymmetrical silhouette.
Why Asymmetrical Styles Feel More Modern
- The off-center placement breaks from traditional, symmetrical styling
- Works beautifully to frame or emphasize one side of your face
- The sweeping motion adds an element of movement and flow
- Particularly flattering if you’re trying to draw attention to one feature (like your profile or jawline)
- Feels intentional without being overly formal
What to know:
- This style can make thick locs look slightly less voluminous, which works well if you prefer a sleeker aesthetic
- Works with any clip style, from delicate to bold
- Takes about five minutes to execute
- Holds particularly well throughout the day because gravity naturally keeps the swept section in place
6. Double Butterfly Clip Crossover
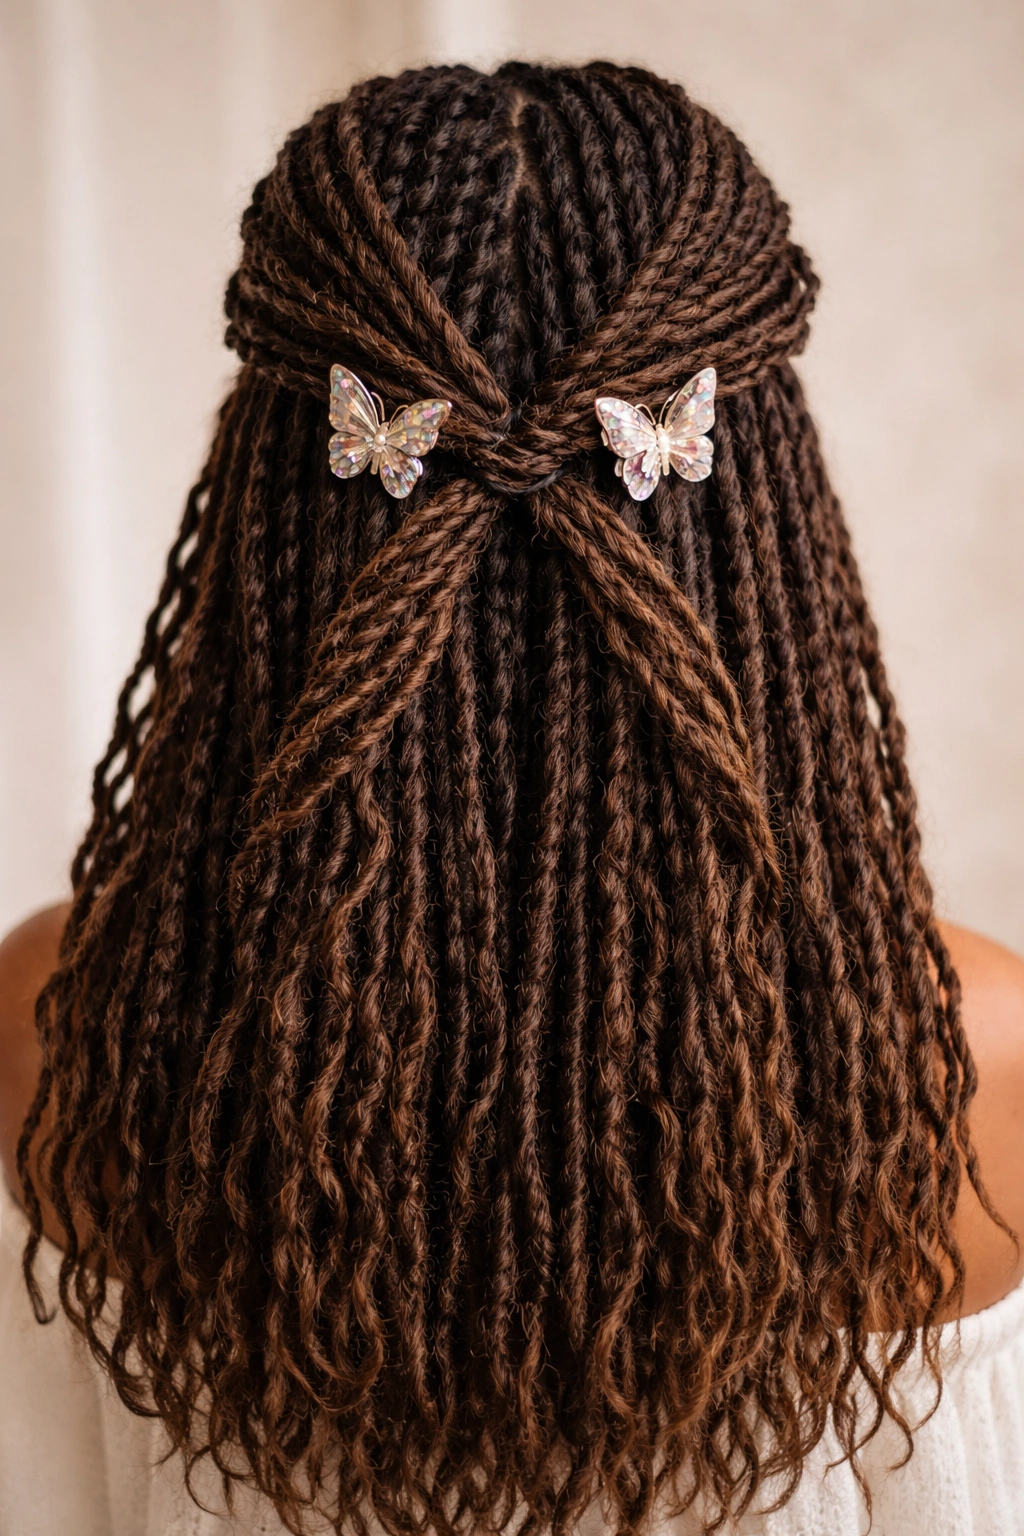
This intricate-looking style uses two twisted or braided sections that cross over each other at the center back, each secured with its own butterfly clip. It’s more complex than it appears and looks absolutely stunning from behind.
The Crossover Technique
Create two twisted or loosely braided sections by starting one from each side of your head near the temples. Twist each section as you guide it toward the center back of your head, crossing one section over the other at the midpoint (like an X shape viewed from the back). Secure each section independently with a butterfly clip at or slightly below the crossing point. The effect is two distinct lines intersecting, with clips anchoring both sides.
What Makes This Style Visually Powerful
- The crossing creates an optical illusion of complexity, even though it’s relatively straightforward
- Two clips create more visual interest than one without overwhelming the style
- Works beautifully in metallic finishes that catch and reflect light along the twisted sections
- The style is forgiving; it doesn’t need to be perfectly symmetrical to look intentional
- Reads as more editorial or styled than basic half-up styles
Quick facts:
- Requires two medium butterfly clips
- Takes 10 to 15 minutes depending on how tight and neat you want your twists
- Holds exceptionally well throughout the day
- Looks particularly striking with coordinating or contrasting clip colors
7. Triangular Section Half Up
This geometric approach gathers a triangular section of locs from the crown area, creating a distinct shape that’s then secured with a butterfly clip (or multiple clips along the edges). It’s modern, clean, and absolutely intentional in its design.
Creating a Defined Triangle
Using a rattail comb, create a parting that outlines a triangle, with the base of the triangle running horizontally across the back of your head (roughly at ear level) and the point of the triangle at your crown. Gather the locs within this triangular section and secure them with one clip at the point, or use multiple smaller clips along the triangular outline for added visual interest. The three-sided geometry creates a shape that’s pleasing to the eye and reads as deliberately styled.
Why Geometric Partings Stand Out
- Geometric shapes are inherently eye-catching and create visual interest
- The defined edges make the style look more intentional and editorial
- Works beautifully with metallic clips that emphasize the geometric lines
- This approach works well for locs of any thickness or length
- The style photographs exceptionally well because the shape reads clearly in images
Worth knowing:
- You can use a clip at the apex of the triangle and additional clips at the base, or just clips along the outline
- This style is particularly striking on longer locs where the gathered triangular section has real volume
- Takes about 10 minutes to create clean, defined partings
- Holds throughout the day with no maintenance
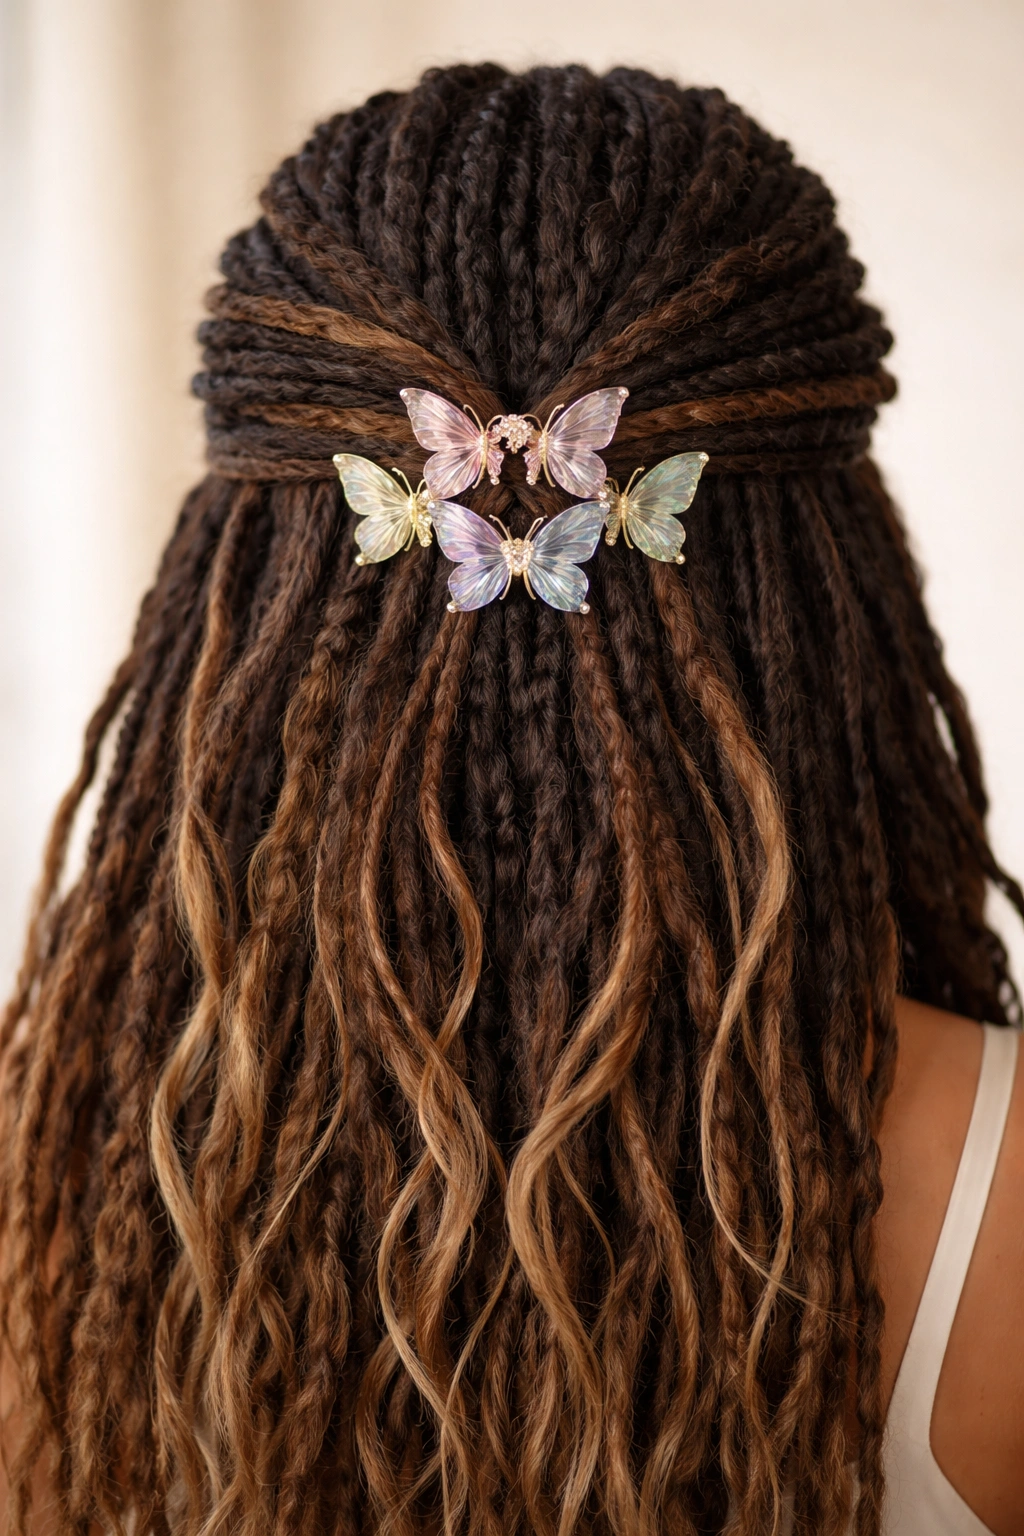
8. Stacked Butterfly Clips Effect
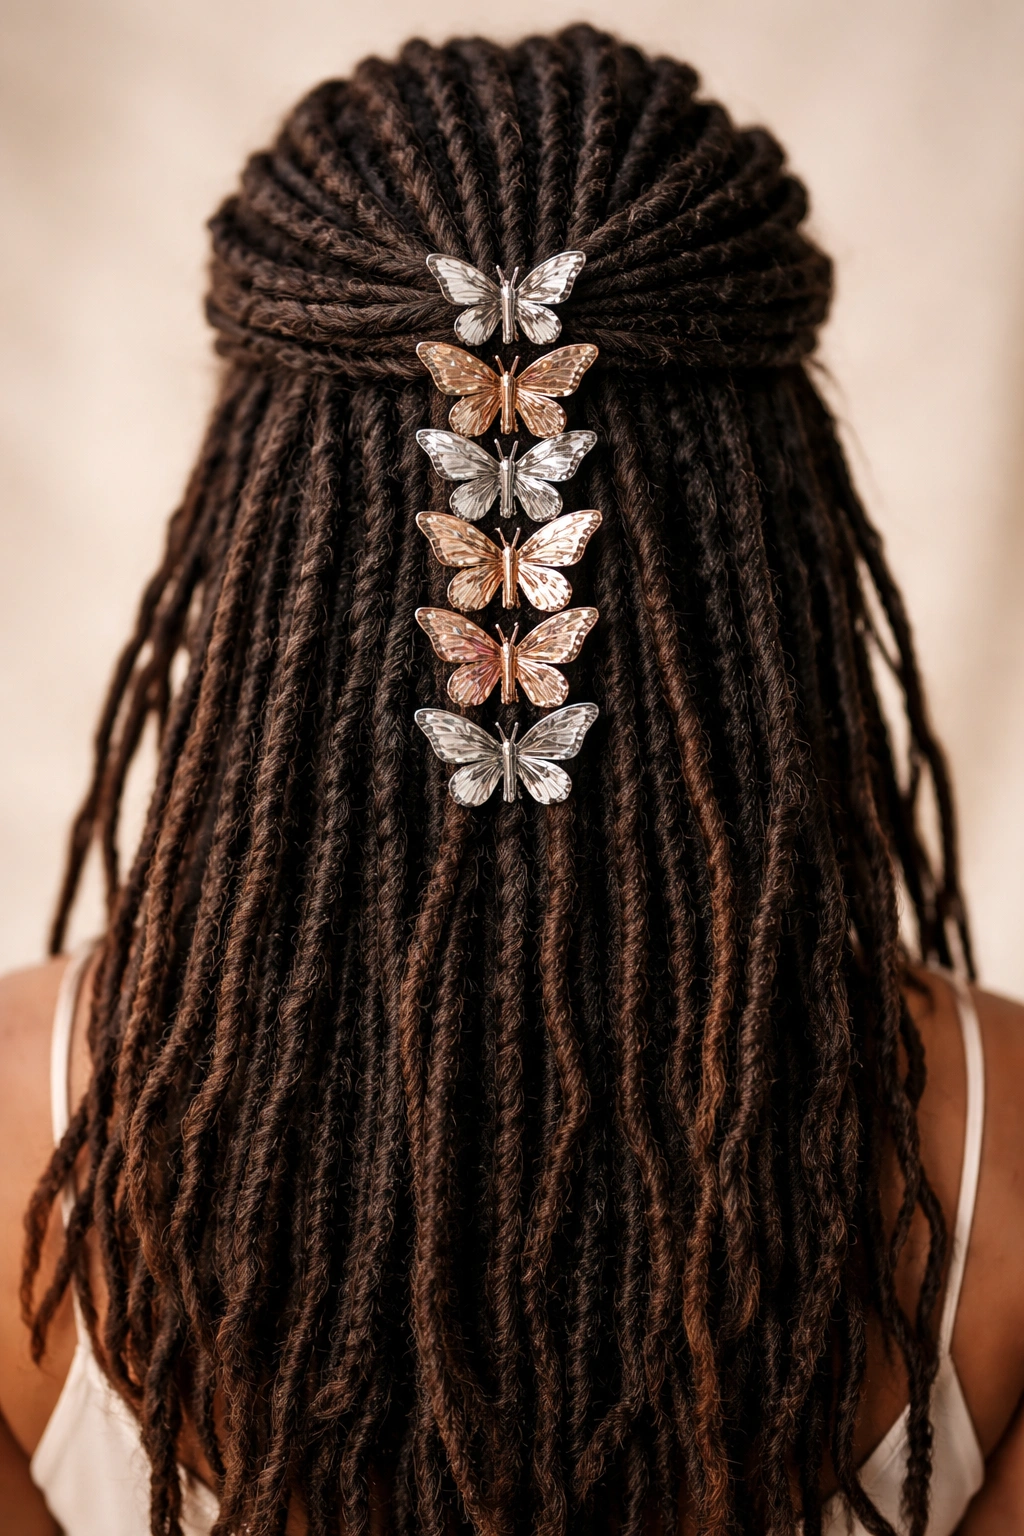
Instead of spreading clips across your half-up section, this style uses multiple clips stacked closely together in the center back area, creating a densely clustered, decorative focal point. It’s bold, it’s attention-getting, and it’s absolutely on-trend.
Building Your Clip Stack
Gather your half-up section and position your clips in a tight vertical or diagonal cluster at the center back, overlapping them slightly so they nest together. Start with your largest or most statement clip as the foundation, then layer progressively smaller clips around it. The stacked effect creates dimension, catches the light, and makes even a simple gathered section feel complex and carefully designed.
The Drama of Stacking
- Multiple clips create visual texture and density
- Stacking allows you to showcase different clip styles, colors, or finishes in one area
- The concentrated focal point draws the eye and commands attention
- Works particularly well with decorative, jeweled, or colorful clips
- The effect is modern, artistic, and fashion-forward
Pro tip: Choose clips in a coordinated color palette (all gold, all silver, or mixed metallics) rather than random colors, so the stack reads as cohesive rather than chaotic.
9. Braided Section with Butterfly Clip
This style takes a section of your locs and braids them together before securing with a butterfly clip. The braided section adds texture, refinement, and visual interest that a simple gathered or twisted section can’t match.
Executing a Loc Braid Half Up
Gather your upper-half section and divide it into three distinct sub-sections. Braid these sections together—not tightly, but with enough structure that the braid holds its shape. The braid doesn’t need to be perfect; slight irregularities actually add to the handmade, artisanal feel. Once you’ve braided your section, coil the braid slightly and secure it with a butterfly clip at the base of the braid where it meets the rest of your half-up section.
Why Braiding Elevates the Style
- Braiding creates visible texture and complexity that reads as more intentional
- The raised lines of a braid catch the light differently than smooth, twisted sections
- Braided sections feel more secure and tend to hold better throughout the day
- This approach works beautifully with minimalist clip designs because the braid itself is decorative
- The style feels handcrafted and artisanal rather than mass-produced
What to know:
- Three-strand braids are most common, but you can also do two-strand twists braided together
- This style takes about 10 to 15 minutes depending on your braid skill level
- Works best with locs that are long enough to have real length (at least 6 inches) within the gathered section
- Holds exceptionally well throughout the day
10. Multi-Clip Geometric Pattern
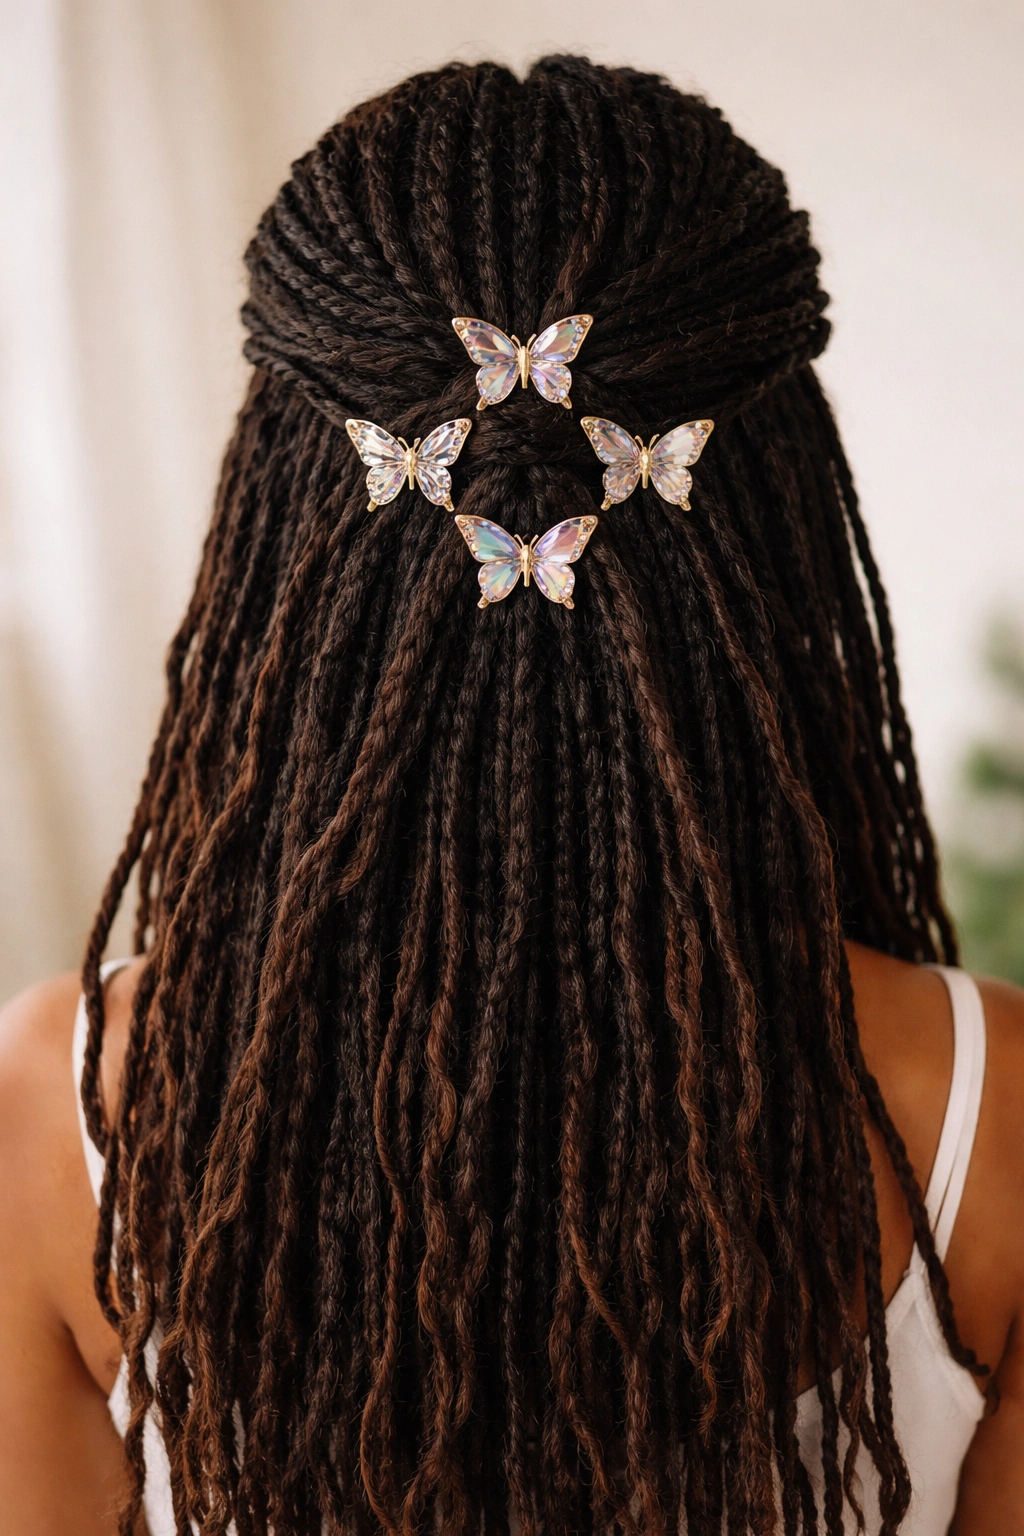
This ambitious style uses four or more butterfly clips positioned in a deliberate geometric pattern—a diamond shape, a square, a line, or any shape you can imagine. It’s artistic, statement-making, and absolutely Instagram-worthy.
Designing Your Pattern
Before you touch your hair, envision your pattern. Do you want clips in a vertical line up the center back? A diamond with one clip at each point? A square outline? Once you’ve visualized it, gather your half-up section and position your clips according to your pattern. The clips themselves become the design; the hair they hold is secondary to the visual pattern they create.
The Art of Clip Placement as Design
- Geometric patterns are inherently pleasing to the eye and create visual harmony
- Multiple clips allow you to showcase a coordinated color or style palette
- This approach is particularly striking with metallic or jeweled clips
- The pattern reads clearly in photographs and videos
- This style announces confidence and fashion consciousness
Quick facts:
- Typically requires 4 to 6 clips depending on your chosen pattern
- Works best with locs long enough to have visible gathered section behind the clips
- Takes 15 to 20 minutes to plan and execute properly
- The impact is well worth the time investment
11. Curved Crown Butterfly Style
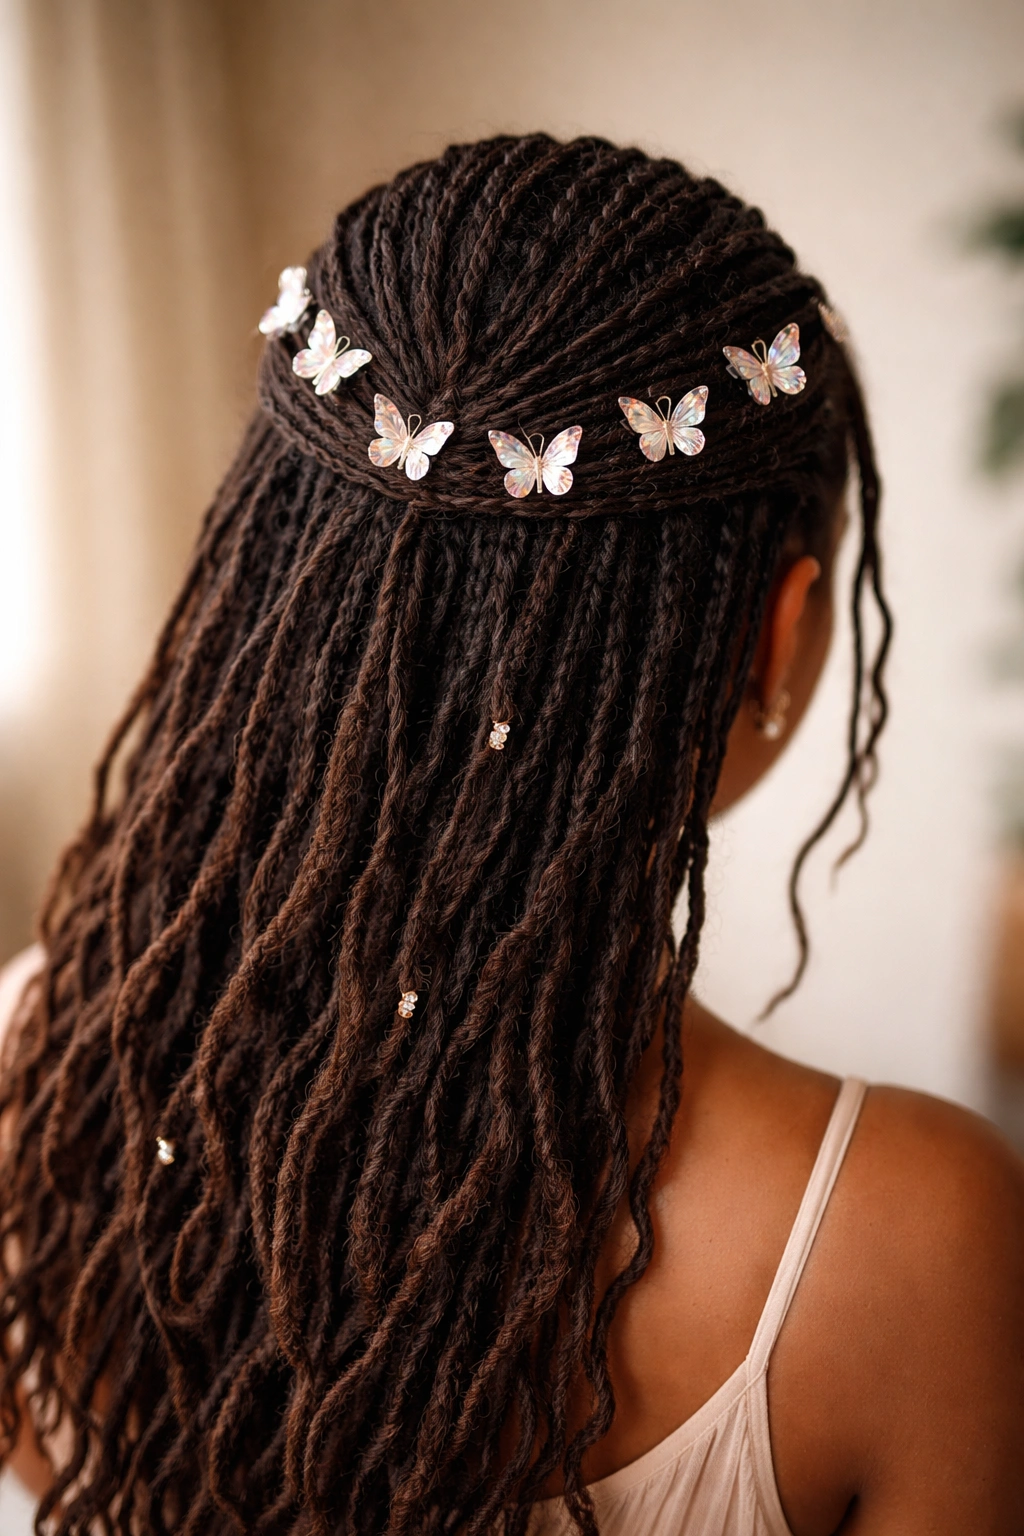
Rather than positioning clips in a straight line or angular arrangement, this style follows the natural curve of your head, with clips placed along a gentle, curved path from one side of your head to the other. It’s elegant, it’s organic, and it follows the natural architecture of your skull.
Following the Head’s Natural Curve
Imagine a line that curves gently from your temple on one side, over the crown of your head, and down to your temple on the opposite side. Gather your half-up section and position butterfly clips along this curved path at regular intervals. The result is a flowing, graceful arrangement that feels more organic than angular clip placements.
Why Curves Feel More Elegant
- Curved lines are naturally more flattering than straight lines
- Following the head’s natural contours creates visual harmony
- This approach softens the overall aesthetic compared to geometric placements
- The curve creates a gentle, refined look suitable for both casual and formal occasions
- Multiple clips along a curve feel balanced and intentional rather than scattered
Worth knowing:
- Typically requires 3 to 5 clips depending on the width of your head and the size of your clips
- Works with any clip style but looks particularly elegant with delicate or minimalist designs
- Takes about 10 minutes to execute
- Holds beautifully because clips along the crown are naturally supported by the head’s shape
12. Flat Twist Half Up Design
This style uses flat twists (instead of regular round twists) incorporated into your half-up section, with butterfly clips securing the twists. Flat twists create a raised, dimensional look that’s more prominent than round twists and reads as more styled.
Creating Flat Twists in Your Locs
To create a flat twist, divide a section of your locs into two parts and twist them around each other while keeping the twist flat against your scalp (rather than round). The twist should stay flattened as you work, creating a band of twisted hair that stands out from your head. Once your flat twist is complete, secure it with a butterfly clip at the endpoint or along its length.
What Flat Twists Add to a Half-Up Style
- Flat twists create raised lines that catch the light and add dimension
- The raised structure of a flat twist is more visible and graphic than a regular twist
- Flat twists feel more intentional and styled than simple gathered sections
- They work beautifully with any clip style, from delicate to bold
- The combination of flat twists and clips creates a cohesive, accessorized look
Pro tip: You can create one flat twist down the center of your gathered section, or multiple flat twists that feed into your half-up gathering. Multiple flat twists create more visual interest and texture.
13. Center Part Butterfly Drop
This simple but elegant style uses a center part, gathers the upper half neatly, and secures it with a butterfly clip positioned low on the back of your head, just above the nape. The “drop” refers to the position of the clip, which hangs lower than traditional crown placements.
The Appeal of the Lower Clip Position
A center part creates perfect symmetry and balance. Gathering the upper half evenly on both sides and securing with a clip positioned lower (at the nape rather than the crown) creates an elongated, elegant silhouette. The lower clip position also takes advantage of the nape area, which is often overlooked in styling.
Why This Simple Approach Works
- Center parts are inherently balanced and flattering
- The lower clip position elongates the back of the head and neck
- This style works beautifully with any clip style or color
- The simplicity means the clip becomes the focal point, so choose one with visual interest
- Takes just five minutes to execute, making it perfect for everyday styling
Quick facts:
- Works best with a medium to large butterfly clip that’s visible and statement-making
- Holds exceptionally well because gravity naturally keeps the gathered section in place
- Looks equally polished with a sleek, tight gathering or a slightly voluminous, loose gathering
- Flatters most face shapes and head types
14. Interlocking Butterfly Clip Pattern
This intricate-looking style uses two or three butterfly clips that interlock or overlap in the center back area, creating a complex, interwoven appearance. It looks like it requires serious technical skill, but it’s actually quite straightforward to execute.
How to Create the Interlocking Effect
Gather your half-up section and create two or three distinct sub-sections within it (by creating thin partings with your fingers). Position your first butterfly clip to hold one section. Position your second clip slightly overlapping the first, holding a different sub-section. The overlapping creates an interlocking visual effect, as if the clips are woven together. If you’re using three clips, repeat this overlapping process with the third.
Why Interlocking Patterns Feel Sophisticated
- The overlapped arrangement creates visual complexity without actual structural complexity
- Multiple clips create movement and dimension across your back
- The interlocking effect reads as more editorial and design-conscious
- This approach showcases multiple clips beautifully, allowing for color or style variation
- The overlapping creates visual harmony and cohesion
Worth knowing:
- Requires 2 to 4 butterfly clips in similar or coordinating sizes
- Takes about 10 minutes to position clips precisely
- Holds beautifully once clips are secured, as each clip independently anchors its own section
- Photographs exceptionally well due to the layered, dimensional appearance
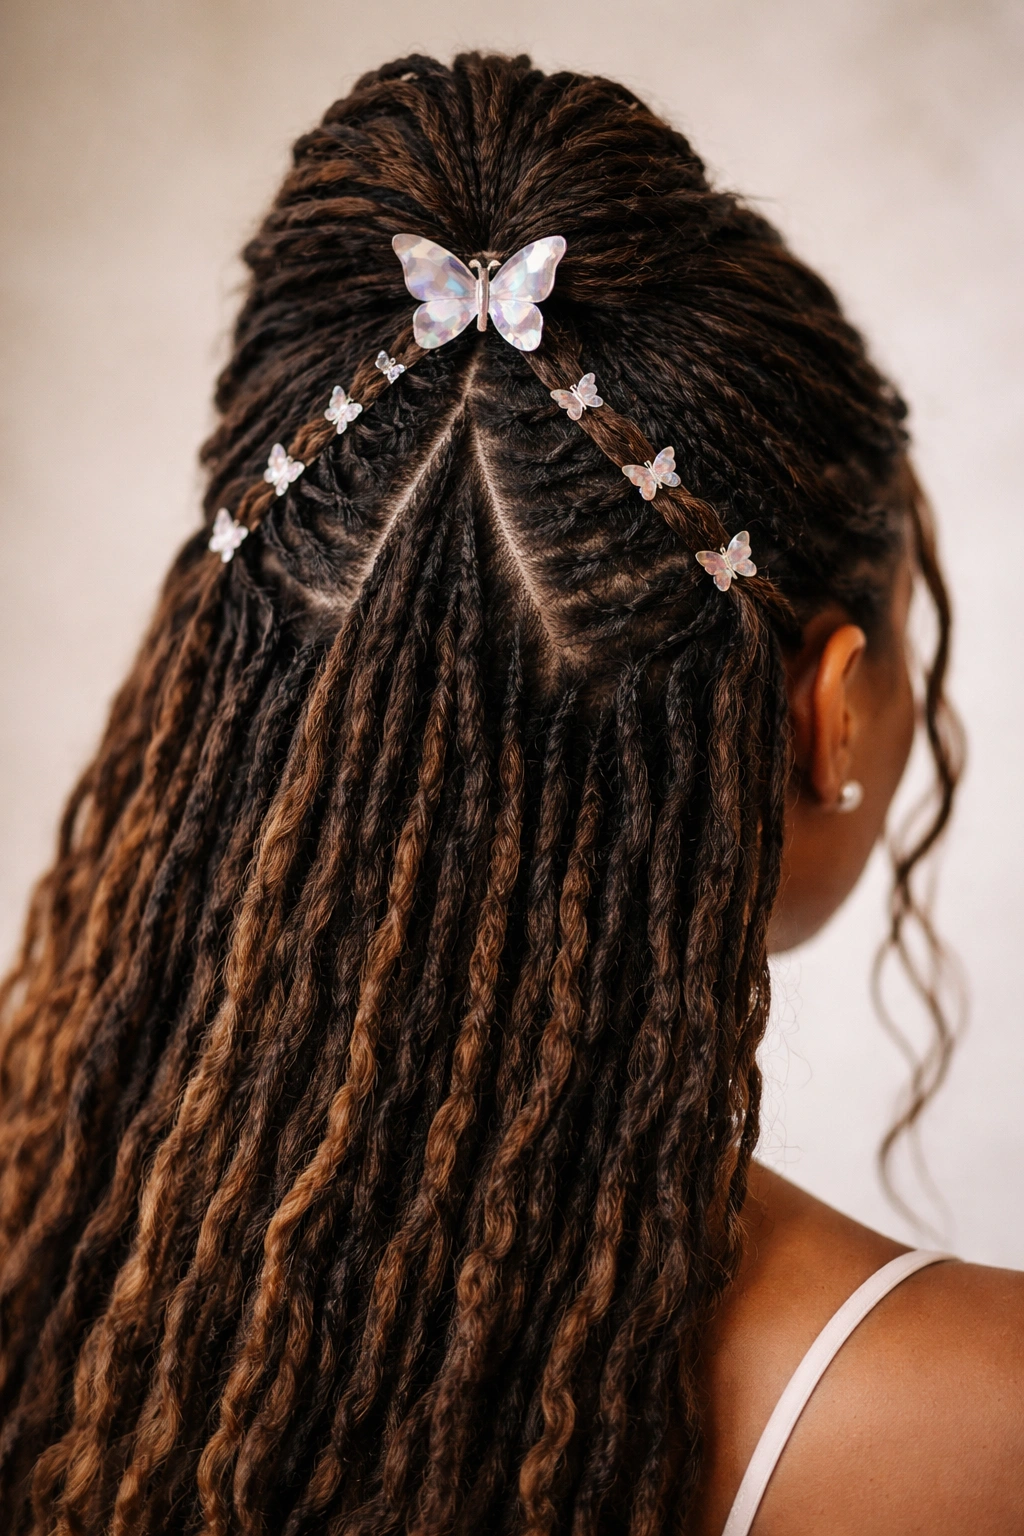
15. Festival Inspired Butterfly Cascade
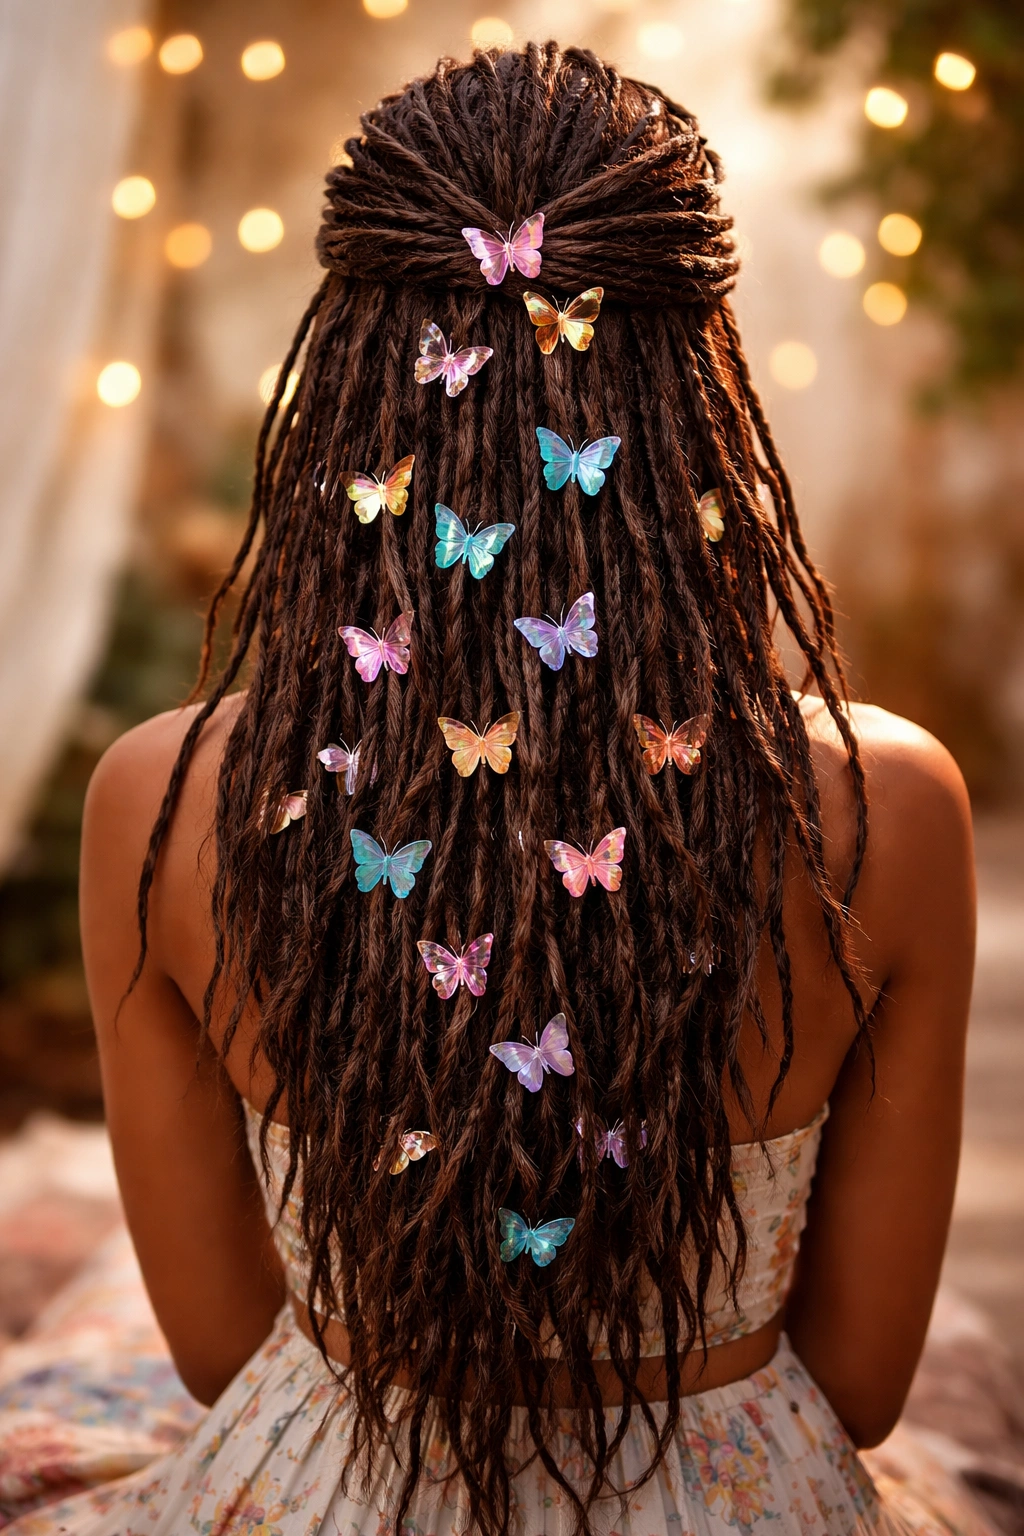
This vibrant, playful style uses multiple butterfly clips cascading down the back of your head in a loose, organic pattern. It’s inspired by music festival and event styling, and it’s all about having fun and making a statement.
Building Your Cascade
Start with a gathered half-up section and position your first butterfly clip at the crown. Moving downward, position subsequent clips along the back of your head in a loose, cascading pattern. The clips don’t need to follow a geometric arrangement or strict line; they just need to flow downward. The effect is playful, dimensional, and absolutely eye-catching. You can use matching clips for cohesion or mix colors, sizes, and finishes for an eclectic, festive vibe.
The Freedom of Playful Styling
- Cascading arrangements feel fun and youthful rather than formal or rigid
- Multiple clips create tons of visual interest and movement
- This approach is perfect for festivals, parties, vacation, or any time you want to make a bold statement
- You can use as many or as few clips as you want depending on the effect you’re going for
- The style is forgiving; there’s no “correct” arrangement, just your personal preference
Pro tip: Use clips in varying sizes and finishes—metallics, pastels, jeweled, matte—to create visual richness and texture. The more varied your clips, the more dynamic and interesting the cascade becomes.
Quick facts:
- Typically requires 4 to 7 clips depending on desired fullness and impact
- Takes 15 to 20 minutes to position multiple clips precisely
- This style is perfect for days when you want to express your personality and creativity
- Holds all day with no maintenance once clips are secured
Final Thoughts

Half up half down styles with butterfly clips offer endless possibilities for creativity, self-expression, and practical styling. Whether you’re drawn to the simplicity of a single statement clip, the sophistication of geometric patterns, or the playful exuberance of a festive cascade, there’s an approach here that matches your style and your mood.
The beauty of these styles is their flexibility. A style that takes five minutes on a rushed morning can become more elaborate for a night out. You can switch between styles without actually changing your locs’ structure—just moving clips or adding new ones. Your butterfly clip collection becomes a styling toolkit, and your half-up half-down base becomes a canvas for creative expression.
What makes these styles work for locs specifically is how the texture and density of locs naturally holds clips without slipping. You don’t need fancy products, heat, or complicated techniques. All you need is your locs, your clips, and the confidence to play with placement and arrangement. Experiment, try combinations, take photos, and discover which arrangements make you feel most like yourself. That’s where the real magic of loc styling lives.